Embed Size (px)
Citation preview

Alessandro Pozone
Ingegneria Informatica @ PoliMi
Worldwide Finals finalist ImagineCup 2014
Microsoft Student Partner
Xamarin Student Ambassador
chi sono
Before UGUI
Canvas
Rect Transform & Anchors
Pivot
Slice Scaling & Animation
UIManager
Demo
agenda

public class ExampleClass : MonoBehaviour { public Texture btnTexture; void OnGUI() { if (!btnTexture) { Debug.LogError("Please assign a texture on the inspector"); return; } if (GUI.Button(new Rect(10, 10, 50, 50), btnTexture)) Debug.Log("Clicked the button with an image"); if (GUI.Button(new Rect(10, 70, 50, 30), "Click")) Debug.Log("Clicked the button with text"); }}
OnGui vs UGUI
The Canvas is a Game Object with a Canvas component on it, and all UI elements must be children of a Canvas.
UI elements in the Canvas are drawn in the same order they appear in the Hierarchy.
Canvas
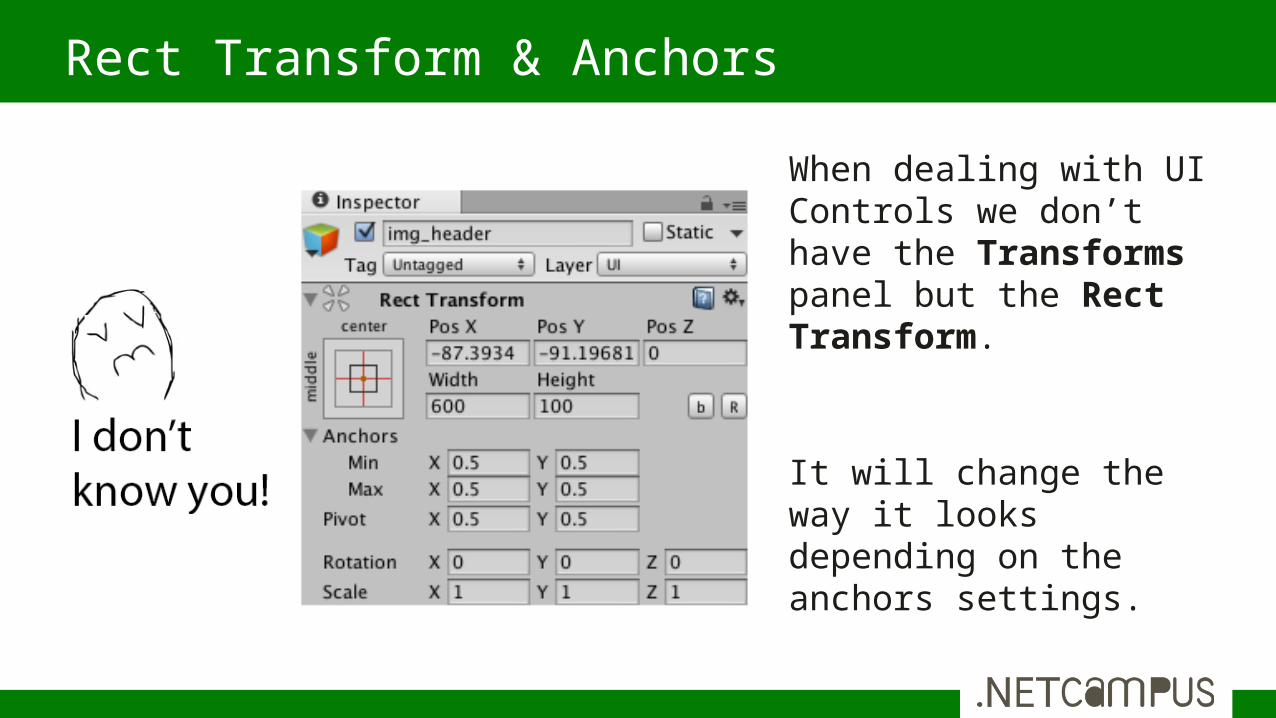
When dealing with UI Controls we don’t have the Transforms panel but the Rect Transform.
It will change the way it looks depending on the anchors settings.
Rect Transform & Anchors
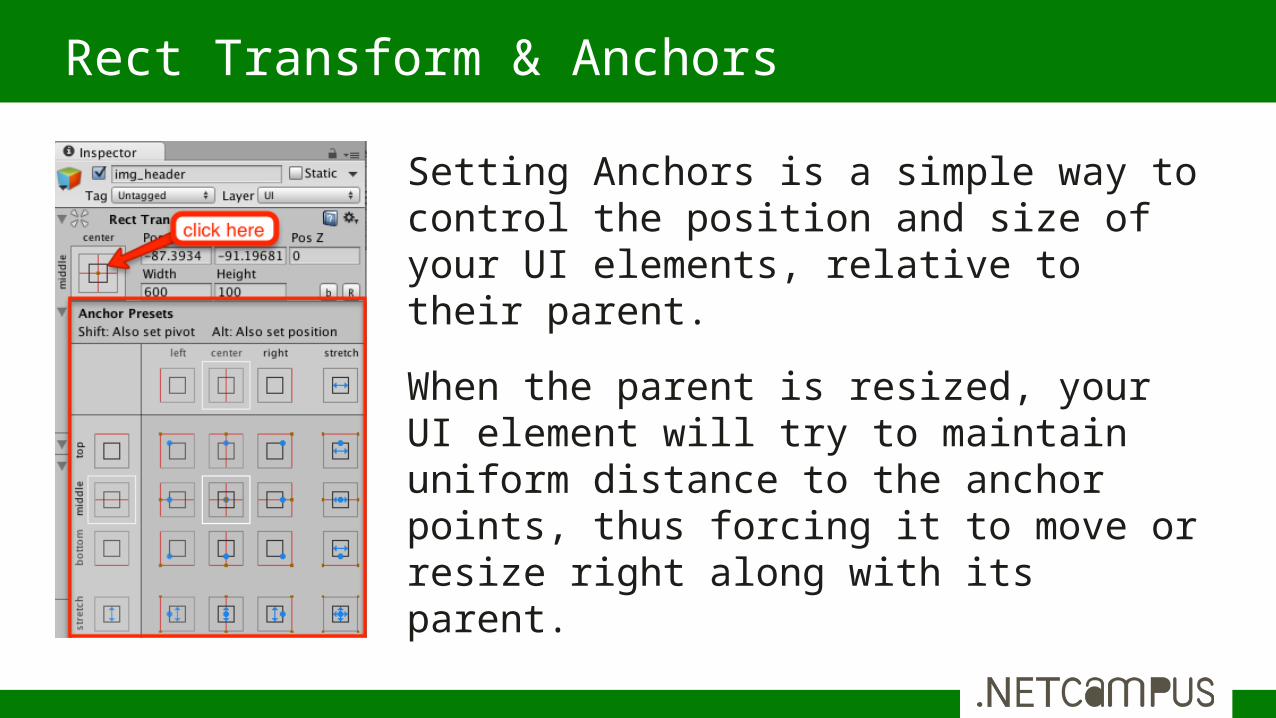
Setting Anchors is a simple way to control the position and size of your UI elements, relative to their parent.
When the parent is resized, your UI element will try to maintain uniform distance to the anchor points, thus forcing it to move or resize right along with its parent.
Rect Transform & Anchors
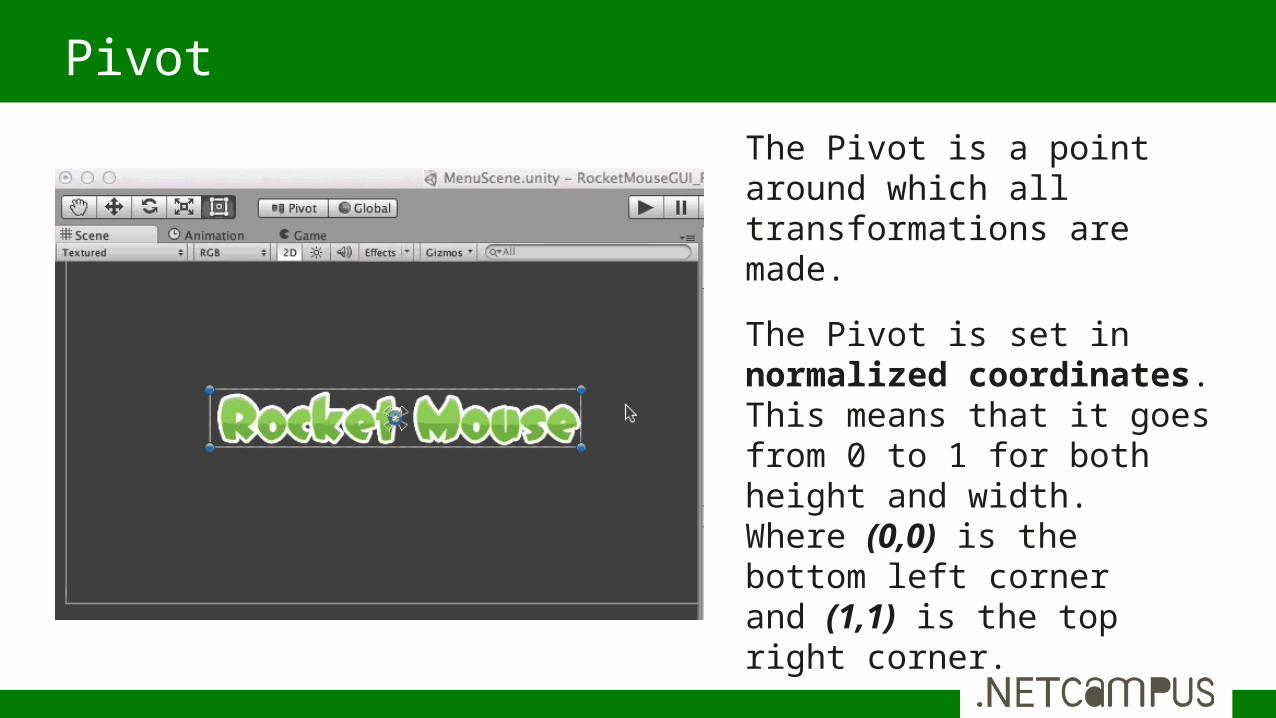
The Pivot is a point around which all transformations are made.
The Pivot is set in normalized coordinates. This means that it goes from 0 to 1 for both height and width. Where (0,0) is the bottom left corner and (1,1) is the top right corner.
Pivot
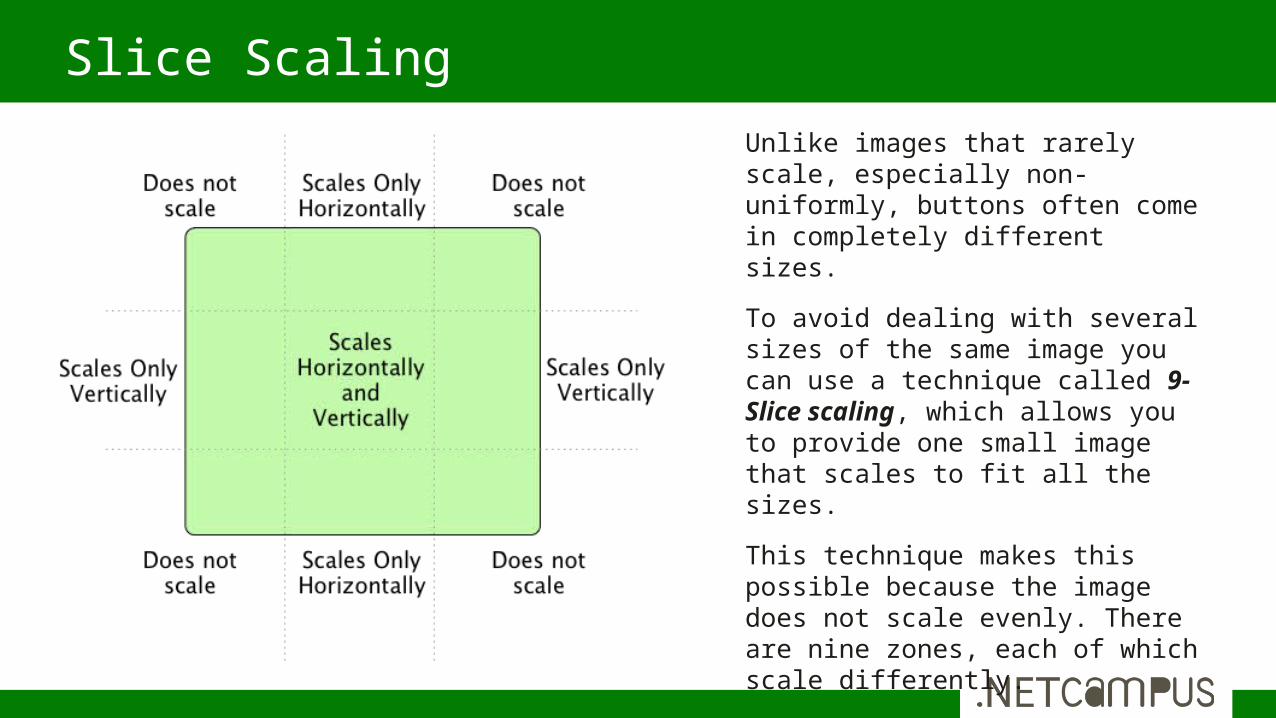
Unlike images that rarely scale, especially non-uniformly, buttons often come in completely different sizes.
To avoid dealing with several sizes of the same image you can use a technique called 9-Slice scaling, which allows you to provide one small image that scales to fit all the sizes.
This technique makes this possible because the image does not scale evenly. There are nine zones, each of which scale differently.
Slice Scaling
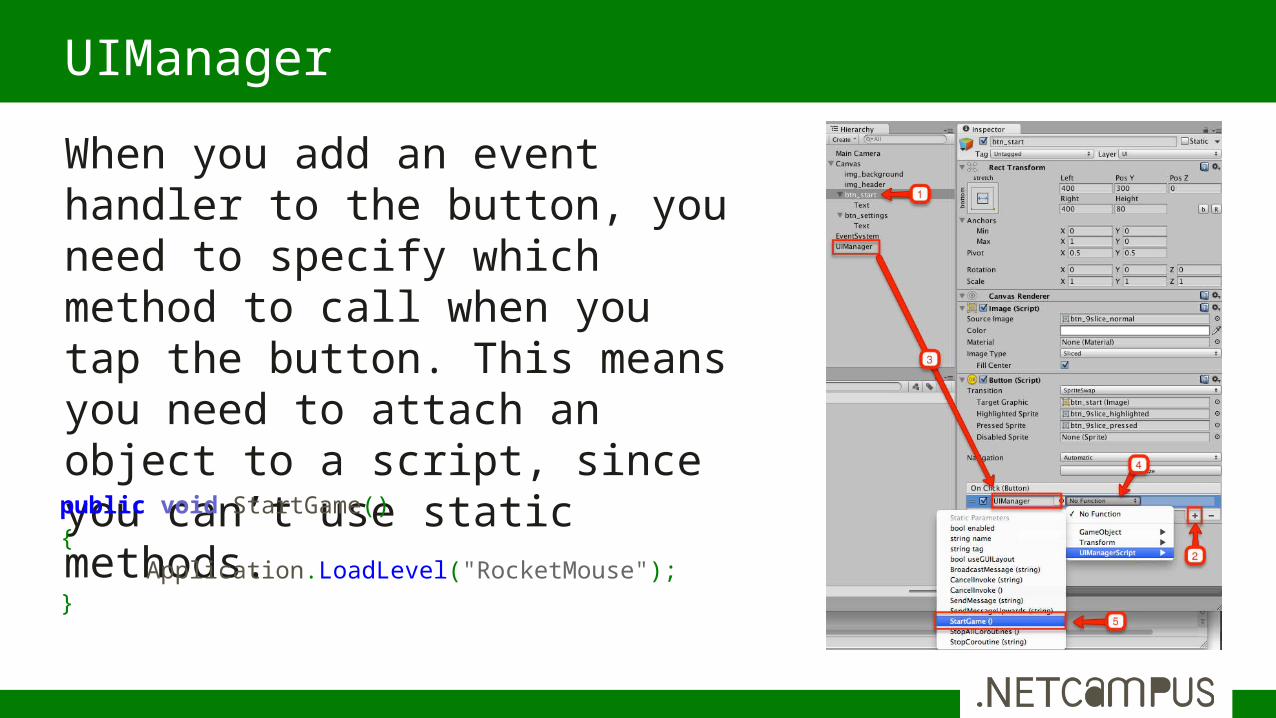
When you add an event handler to the button, you need to specify which method to call when you tap the button. This means you need to attach an object to a script, since you can’t use static methods.
UIManager
public void StartGame() { Application.LoadLevel("RocketMouse"); }
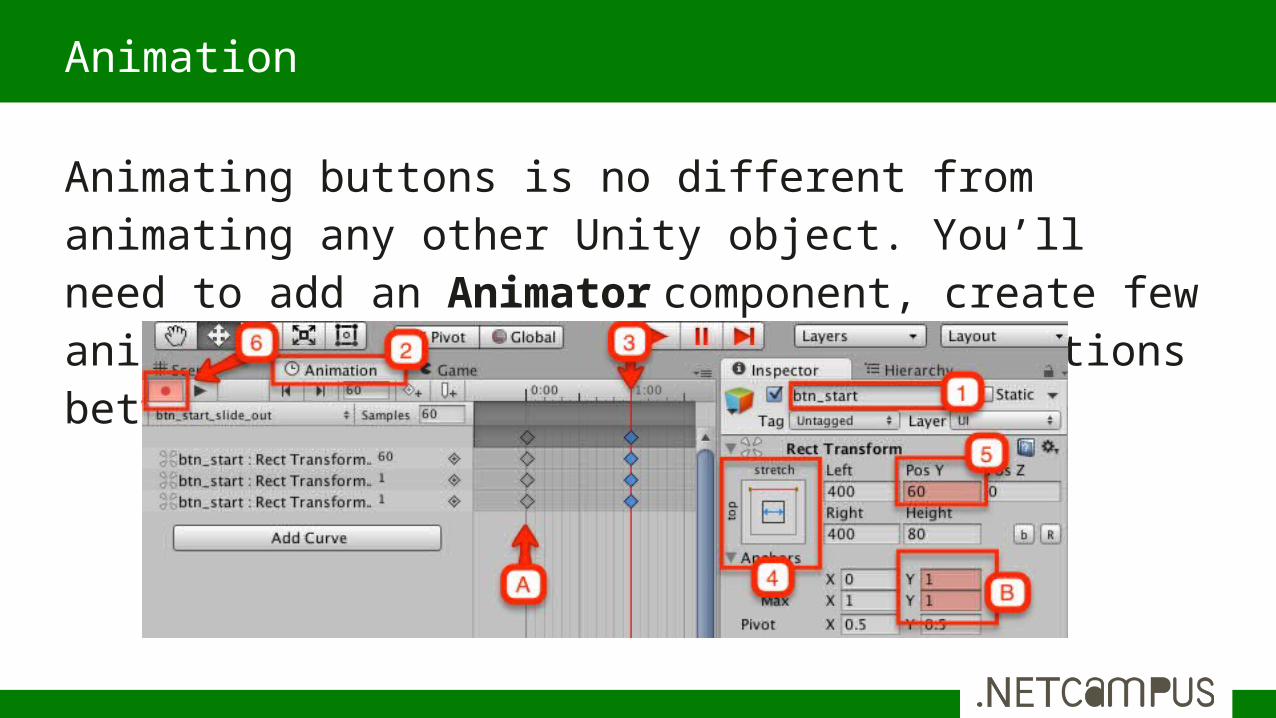
Animating buttons is no different from animating any other Unity object. You’ll need to add an Animator component, create few animations and set up states and transitions between them.
Animation
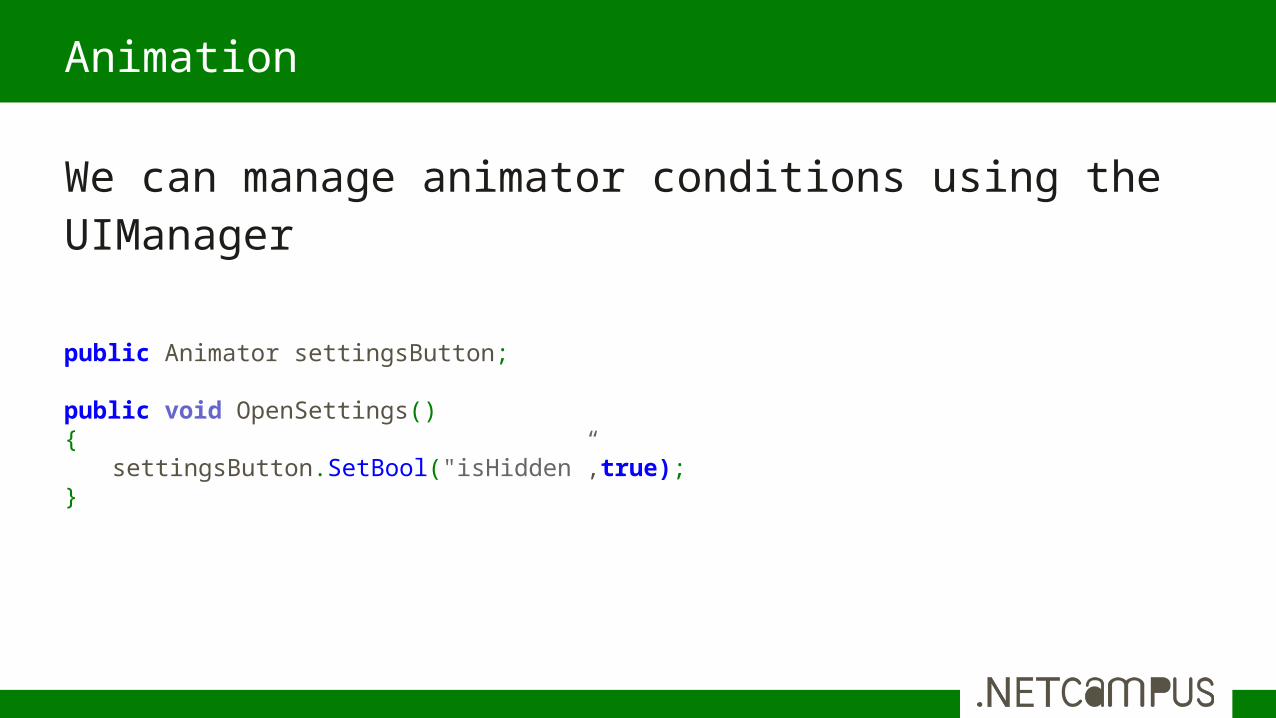
We can manage animator conditions using the UIManager
Animation
public Animator settingsButton;
public void OpenSettings() {
settingsButton.SetBool("isHidden”,true); }
demoUnity3D :]
Grazie a tutti per la partecipazione
Riceverete il link per il download a slide e demo via email nei prossimi giorni
Per contattarmi
Grazie