Embed Size (px)
Citation preview
11111
2014-15
PREPARED BY-
DUBEY VIJAY B
N.S.I.T COLLEGE
AHMEDABAD
DATE- 17/12/2014 TO 04/01/2014
2014-15
[TRAINING REPORT]
SARKHEJ AHMEDABAD
Page | 2
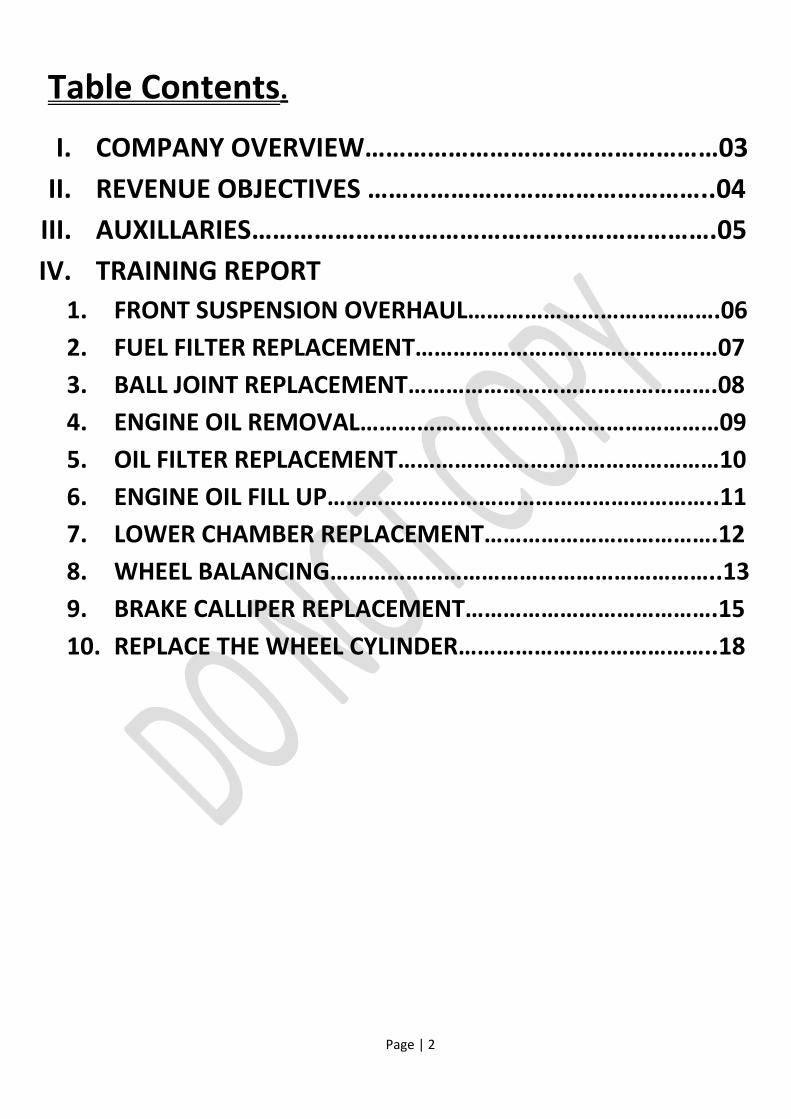
Table Contents.
I. COMPANY OVERVIEW……………………………………………03
II. REVENUE OBJECTIVES …………………………………………..04
III. AUXILLARIES………………………………………………………….05
IV. TRAINING REPORT
1. FRONT SUSPENSION OVERHAUL………………………………….06
2. FUEL FILTER REPLACEMENT…………………………………………07
3. BALL JOINT REPLACEMENT………………………………………….08
4. ENGINE OIL REMOVAL…………………………………………………09
5. OIL FILTER REPLACEMENT……………………………………………10
6. ENGINE OIL FILL UP……………………………………………………..11
7. LOWER CHAMBER REPLACEMENT……………………………….12
8. WHEEL BALANCING……………………………………………………..13
9. BRAKE CALLIPER REPLACEMENT………………………………….15
10. REPLACE THE WHEEL CYLINDER…………………………………..18
Page | 3
Company overview
Gallops Motors Pvt Ltd, started operations in 2004 and is the
Authorized dealer of General Motors selling the Chevrolet range of
vehicles. Gallops Motors has 13 showrooms and 9 workshops in
Gujarat. They are located in Ahmedabad, Gandhinagar, Mehsana,
Palanpur, Himmatnagar, Surendranagar, Rajkot, Jamnagar and Morbi.
Gallops Motors is the No.1 Chevrolet Dealer in India with annual sales
of 5000+ and a car park of 22000+ vehicles. Gallops Motors has an
annual turnover of 300 crores.
Gallops Motors has won the Grandmasters Awards by General Motors
6 times in a row for its all round excellent performance. All this
success is attributed to the outstanding performance by all the
Gallops team members.
Gallops has a team of 850 trained and dedicated employees who
contribute to the organizations success. With a combination of the
best salary packages and incentive schemes, Gallops is one of the
best employers in the Automobile dealer business.
Due to the continuous growth of the company, we always need fresh
and experienced people to join us and contribute to the growth of the
organization. If you are self motivated and a dynamic person, then we
have a lot of challenges for you at Gallops.
Page | 4
REVENUE OBJECTIVES OF THE COMPANY
Service is a major revenue generator of the company.
Most of the service stations are managed on franchise
basis, where Chevrolet Motors trains the local staff.
Other automobile companies have not been able to
match this benchmark set by Chevrolet Motors. The
Express Service stations help many stranded vehicles on
the highways by sending across their repair man to the
vehicle.
1) Generation of incremental Revenue
2) Reduction in Cost
3) Simple and clear evaluation
The types of services offered by Gallops
Motors Ltd are as follows
Free services
Page | 5
AUXILLARIES
Free services- are offered to new cars which have run 10000 km or age less than
one year. The first free service is done at 1000 km or 1 month, whichever comes
first. The second free service is done at 5000 km or 6 months and third free service
is done at 10000 km or 12 months. The labor charges are not added in the free
services. The other charges like Engine oil, Gear oil are imposed on the customer.
The average oil charges come around Rs.750 per service. The average time taken for
the free service is 1 hour.
Paid services are offered to cars which have run more than 10000 km or age more
than 1 year. The average labor charge for a paid service is Rs.700. The spare part
charge for the paid service varies with the km run. The Average spare part charges
for the cars between 10000 km and 20000 km is Rs.1500 and for the cars greater
than 20000 km is Rs.2500. The oil charges are also included in the paid services.
The average time taken for paid service is 1.5 hours.
Running repairs are done on the cars which come with any faults in the Engine,
Gear box, AC, or any other major repairs. The charges for repairs vary for each and
every car repaired. The average charge for running repairs comes around Rs.9000
per car. The labor charges are added but there won’t be any oil charges for running
repairs. There are 10 bays in the service station which we have visited. These bays
are divided into 4 types
. Express Bay: The free services and quick services are done in this bay. A maximum
of 10 vehicles can be serviced in this bay per day.
Two-Tech Bay: The paid services are done on the Two-Tech bay. It has the name
‘Two-Tech’ since there are 2 technicians allocated to that bay. A maximum of 8
vehicles can be serviced in this bay per day.
Normal Bay: The cars with general repair or break down are serviced in this bay. A
maximum of 2 vehicles can be serviced in this bay per day.
Support Bay: Wheel alignment and AC services are done in the support bays. It is
also used as Express, Two- Tech or Normal Bays in case of an emergency. 2 bays
are allocated for support.
Page | 6
TRAINING REPORT DATE- 17/12/2014
JOBS PERFORMED –
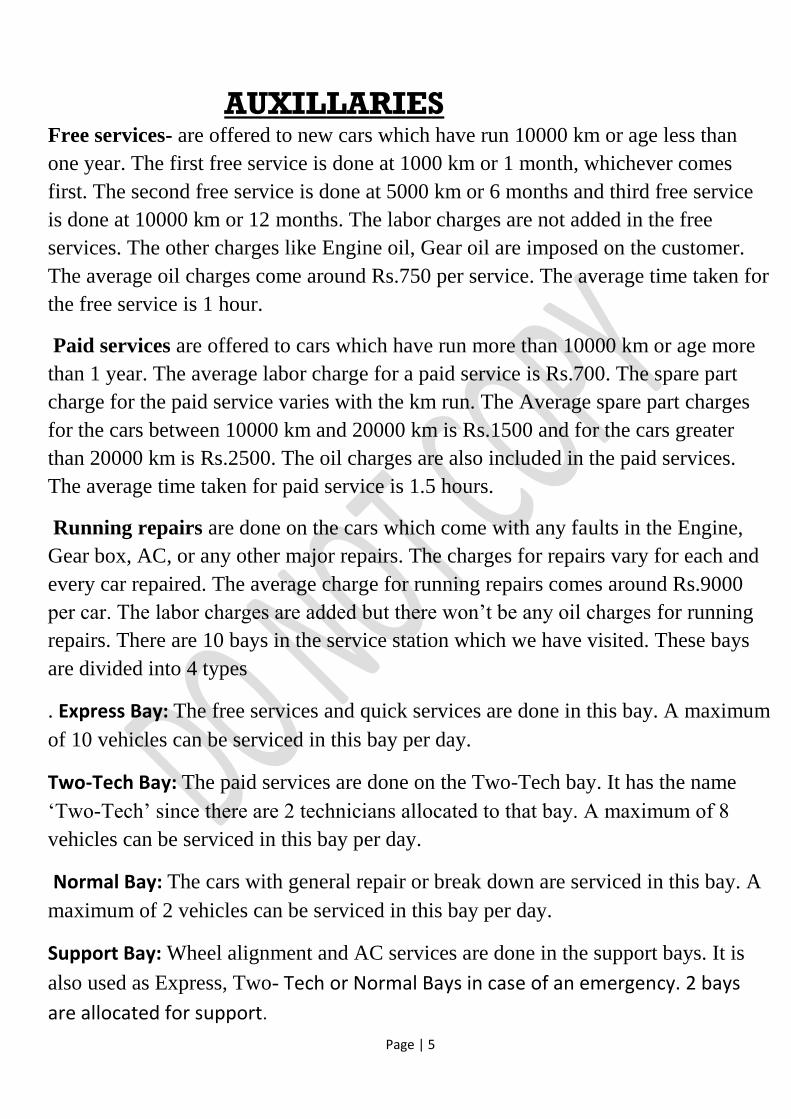
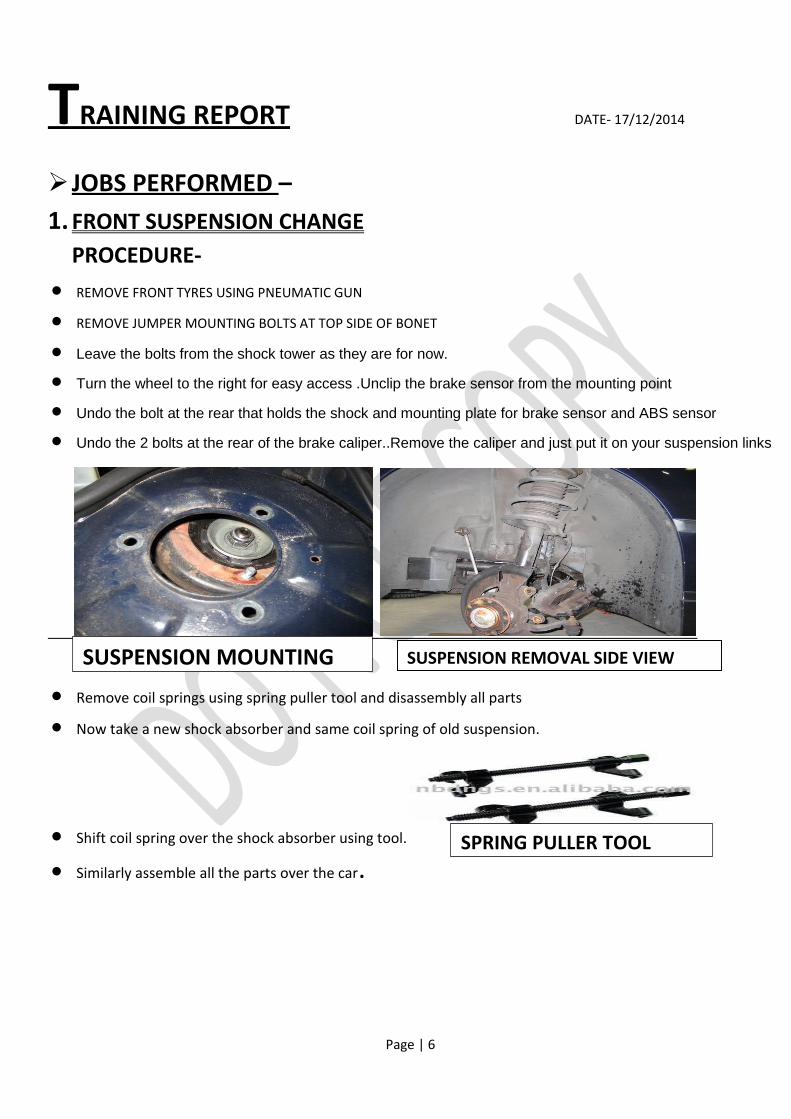
1. FRONT SUSPENSION CHANGE
PROCEDURE-
REMOVE FRONT TYRES USING PNEUMATIC GUN
REMOVE JUMPER MOUNTING BOLTS AT TOP SIDE OF BONET
Leave the bolts from the shock tower as they are for now. Turn the wheel to the right for easy access .Unclip the brake sensor from the mounting point Undo the bolt at the rear that holds the shock and mounting plate for brake sensor and ABS sensor Undo the 2 bolts at the rear of the brake caliper..Remove the caliper and just put it on your suspension links
Remove coil springs using spring puller tool and disassembly all parts
Now take a new shock absorber and same coil spring of old suspension.
Shift coil spring over the shock absorber using tool.
Similarly assemble all the parts over the car.
SUSPENSION MOUNTING SUSPENSION REMOVAL SIDE VIEW
SPRING PULLER TOOL
Page | 7
2 FUEL FILTER CHANGE
PROCEDURE
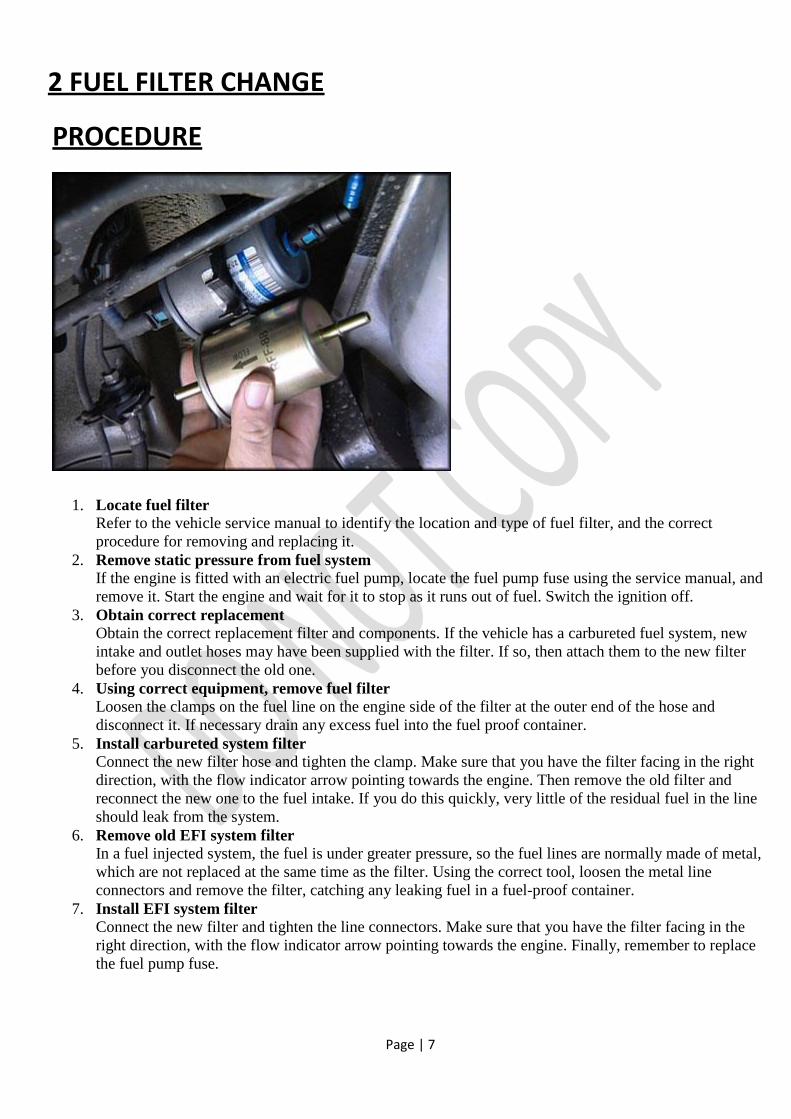
1. Locate fuel filter Refer to the vehicle service manual to identify the location and type of fuel filter, and the correct
procedure for removing and replacing it.
2. Remove static pressure from fuel system If the engine is fitted with an electric fuel pump, locate the fuel pump fuse using the service manual, and
remove it. Start the engine and wait for it to stop as it runs out of fuel. Switch the ignition off.
3. Obtain correct replacement Obtain the correct replacement filter and components. If the vehicle has a carbureted fuel system, new
intake and outlet hoses may have been supplied with the filter. If so, then attach them to the new filter
before you disconnect the old one.
4. Using correct equipment, remove fuel filter Loosen the clamps on the fuel line on the engine side of the filter at the outer end of the hose and
disconnect it. If necessary drain any excess fuel into the fuel proof container.
5. Install carbureted system filter Connect the new filter hose and tighten the clamp. Make sure that you have the filter facing in the right
direction, with the flow indicator arrow pointing towards the engine. Then remove the old filter and
reconnect the new one to the fuel intake. If you do this quickly, very little of the residual fuel in the line
should leak from the system.
6. Remove old EFI system filter In a fuel injected system, the fuel is under greater pressure, so the fuel lines are normally made of metal,
which are not replaced at the same time as the filter. Using the correct tool, loosen the metal line
connectors and remove the filter, catching any leaking fuel in a fuel-proof container.
7. Install EFI system filter Connect the new filter and tighten the line connectors. Make sure that you have the filter facing in the
right direction, with the flow indicator arrow pointing towards the engine. Finally, remember to replace
the fuel pump fuse.
Page | 8
3]Lower arm ball joint replace
PROCEDURE
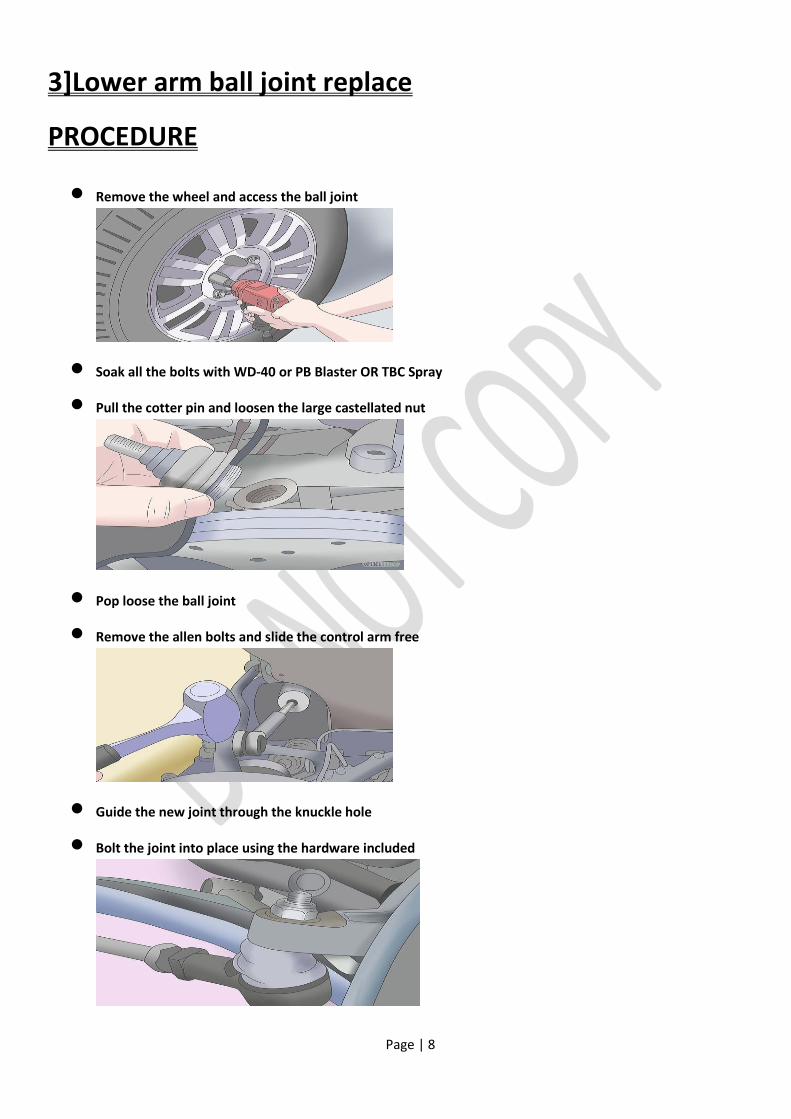
Remove the wheel and access the ball joint
Soak all the bolts with WD-40 or PB Blaster OR TBC Spray Pull the cotter pin and loosen the large castellated nut
Pop loose the ball joint Remove the allen bolts and slide the control arm free
Guide the new joint through the knuckle hole Bolt the joint into place using the hardware included
Page | 9
4] ENGINE OIL CHANGE
PROCEDURE
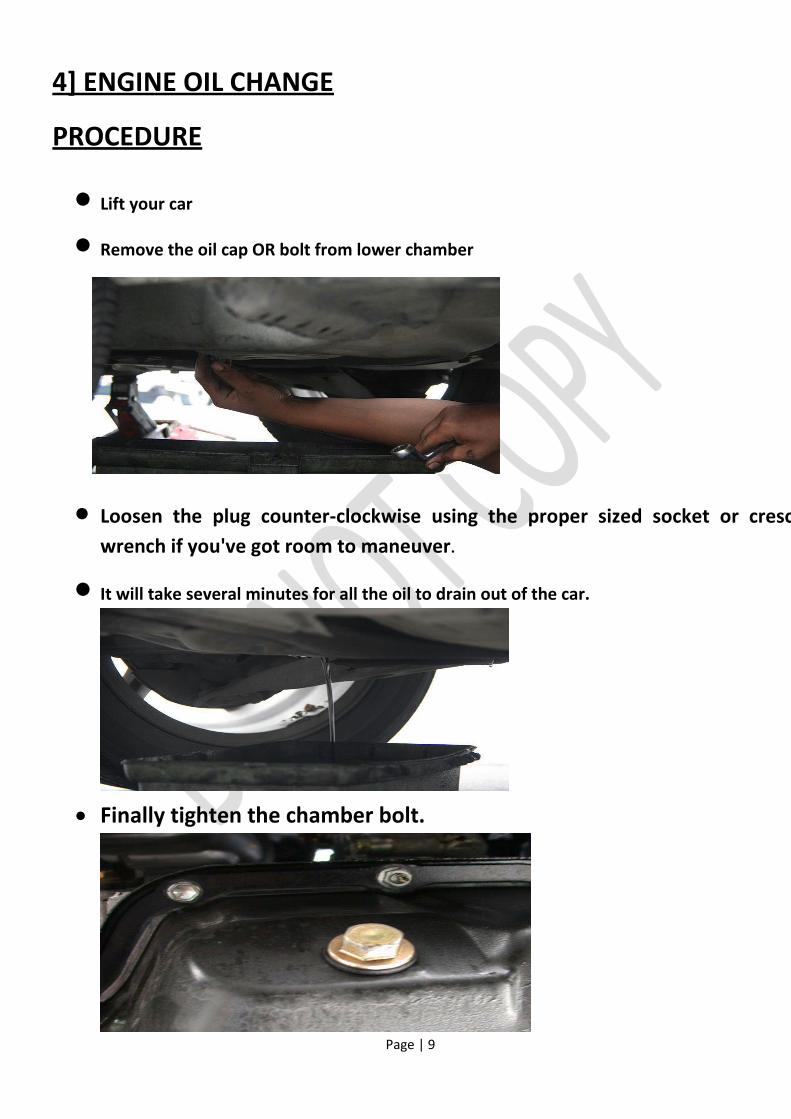
Lift your car Remove the oil cap OR bolt from lower chamber
Loosen the plug counter-clockwise using the proper sized socket or crescent
wrench if you've got room to maneuver.
It will take several minutes for all the oil to drain out of the car.
Finally tighten the chamber bolt.
Page | 10
5] OIL FILTER CHANGE
PROCEDURE
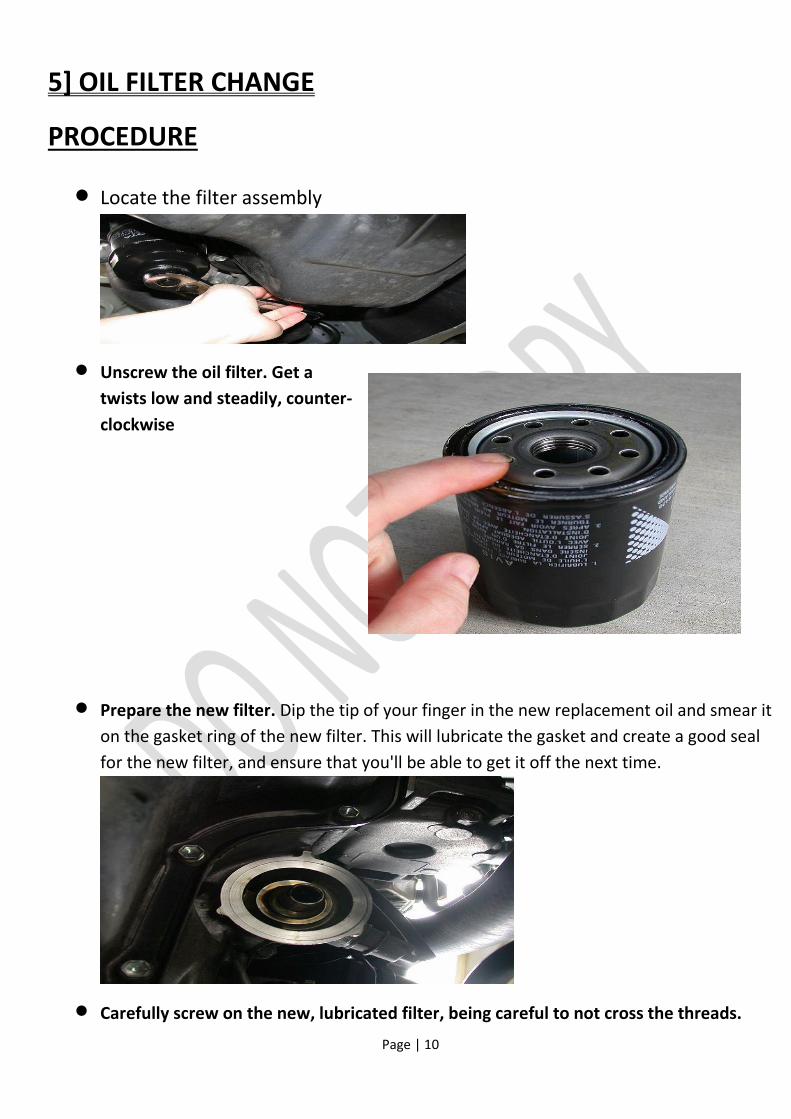
Locate the filter assembly
Unscrew the oil filter. Get a
twists low and steadily, counter-
clockwise
Prepare the new filter. Dip the tip of your finger in the new replacement oil and smear it
on the gasket ring of the new filter. This will lubricate the gasket and create a good seal
for the new filter, and ensure that you'll be able to get it off the next time.
Carefully screw on the new, lubricated filter, being careful to not cross the threads.
Page | 11
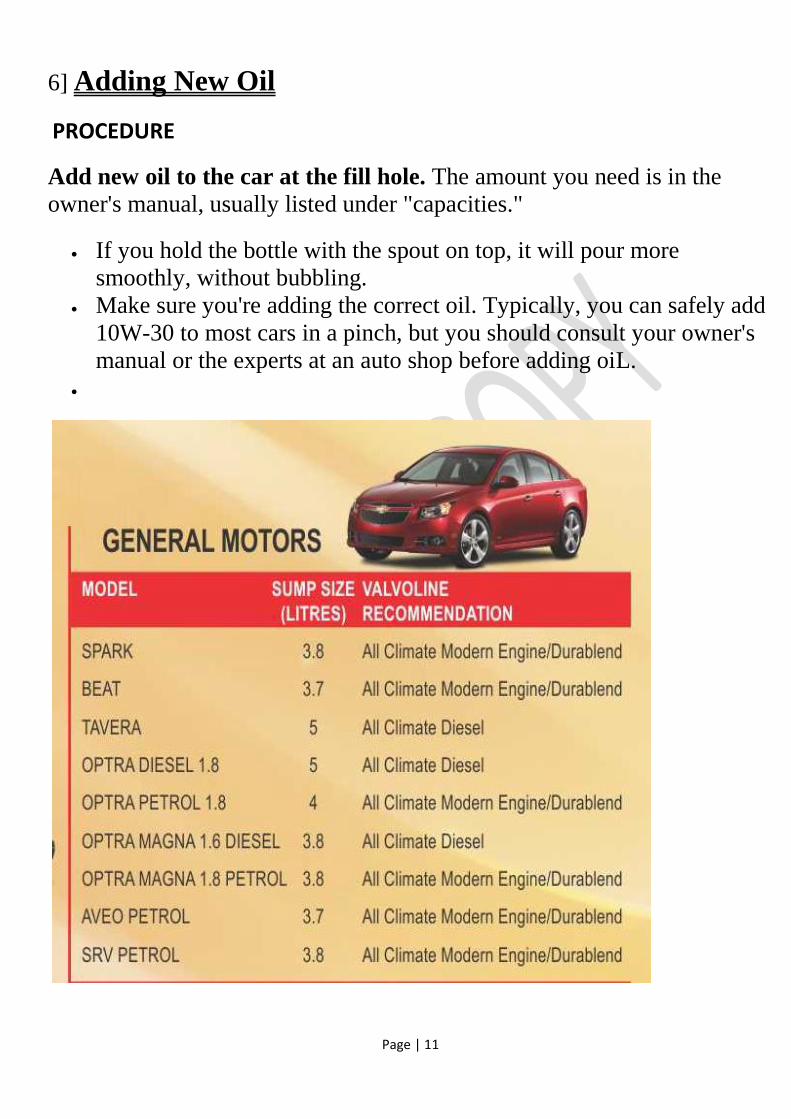
6] Adding New Oil
PROCEDURE
Add new oil to the car at the fill hole. The amount you need is in the
owner's manual, usually listed under "capacities."
If you hold the bottle with the spout on top, it will pour more
smoothly, without bubbling.
Make sure you're adding the correct oil. Typically, you can safely add
10W-30 to most cars in a pinch, but you should consult your owner's
manual or the experts at an auto shop before adding oiL.
Page | 12
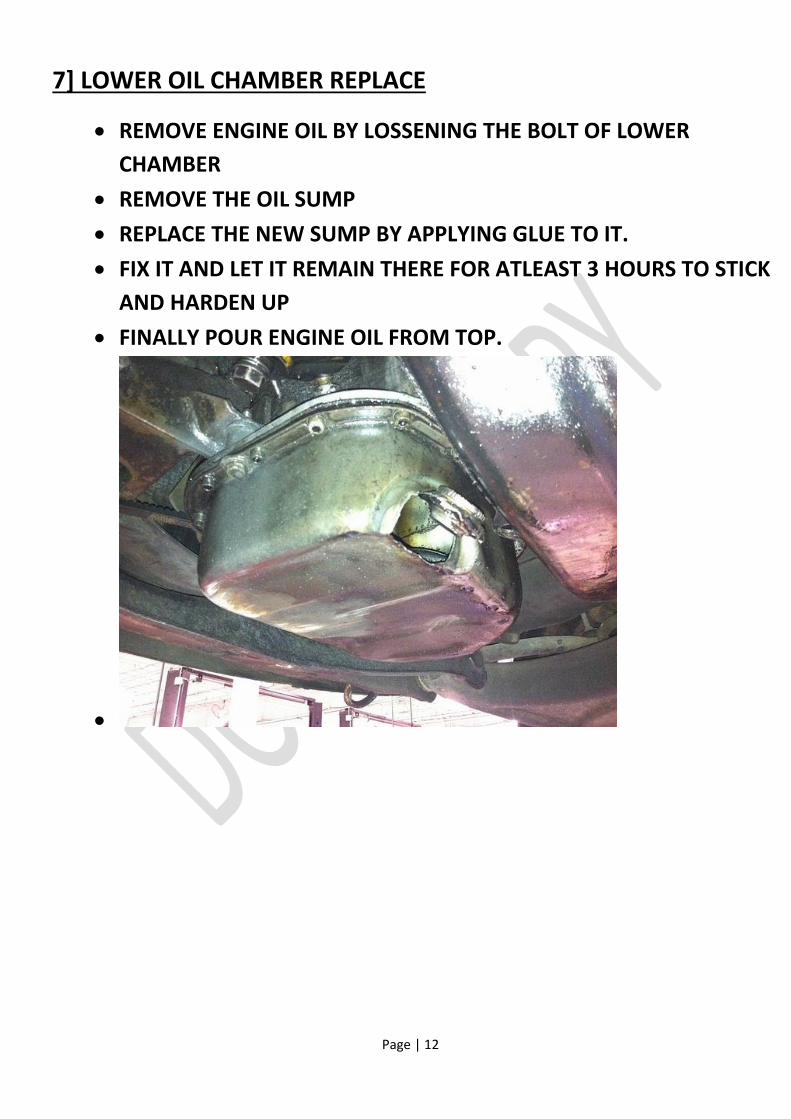
7] LOWER OIL CHAMBER REPLACE
REMOVE ENGINE OIL BY LOSSENING THE BOLT OF LOWER
CHAMBER
REMOVE THE OIL SUMP
REPLACE THE NEW SUMP BY APPLYING GLUE TO IT.
FIX IT AND LET IT REMAIN THERE FOR ATLEAST 3 HOURS TO STICK
AND HARDEN UP
FINALLY POUR ENGINE OIL FROM TOP.
Page | 13
8] WHEEL BALANCING
PROCEDURE
1. Turn your machine OFF then ON, which resets the balancer. The
machine wakes up using standard clip-on wheel weight locations.
2. Remove stones/rocks or other debris from tread and any weights
already attached to the wheel. During this process you also should
remove any mud, dirt or snow on the inside of the wheel and make
sure that the mounting surface of the wheel is completely 3Mount a tire/wheel assembly on a balancer that will use standard
clip-on wheel weights. Use the most appropriate mounting meth -
od. Technicians should be careful to avoid back injury and should
seek assistance when lifting a heavy tire/wheel assembly onto a
balancing shaft.
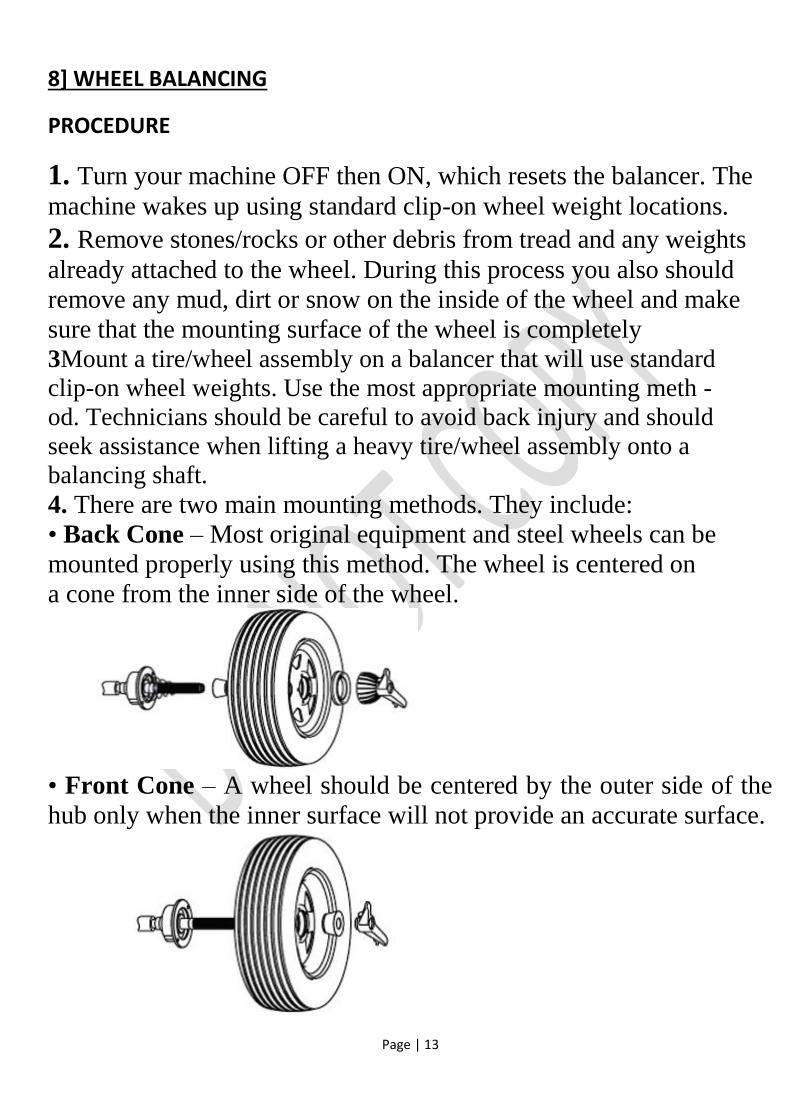
4. There are two main mounting methods. They include:
• Back Cone – Most original equipment and steel wheels can be
mounted properly using this method. The wheel is centered on
a cone from the inner side of the wheel.
• Front Cone – A wheel should be centered by the outer side of the
hub only when the inner surface will not provide an accurate surface.
Page | 14
5.For automatic measurement,pull the offset arm out to the wheel,
hold it still at clip-on weight position against the wheel
flange and wait for a “beep.” Return the arm to home position.
6.Lower the hood. The wheel will spin and unbalances are
measured and displayed. The corrective weight amount appears in
the weight display window for inboard and outboard weight
locations.
7.Raise the hood after the tire stops rotating. Make sure that the
wheel has stopped before raising the hood.
8. Inboard center bar blinks. If an inboard corrective weight is
not required, the wheel will stop at the outboard corrective weight
location and you can go to Step 11.
9. Attach inboard corrective weight. Attach specified weight
amount at top-dead-center on the inside flange of the wheel.
10. Press NEXT, causing the wheel to rotate.
11. The outboard center bar will blink.
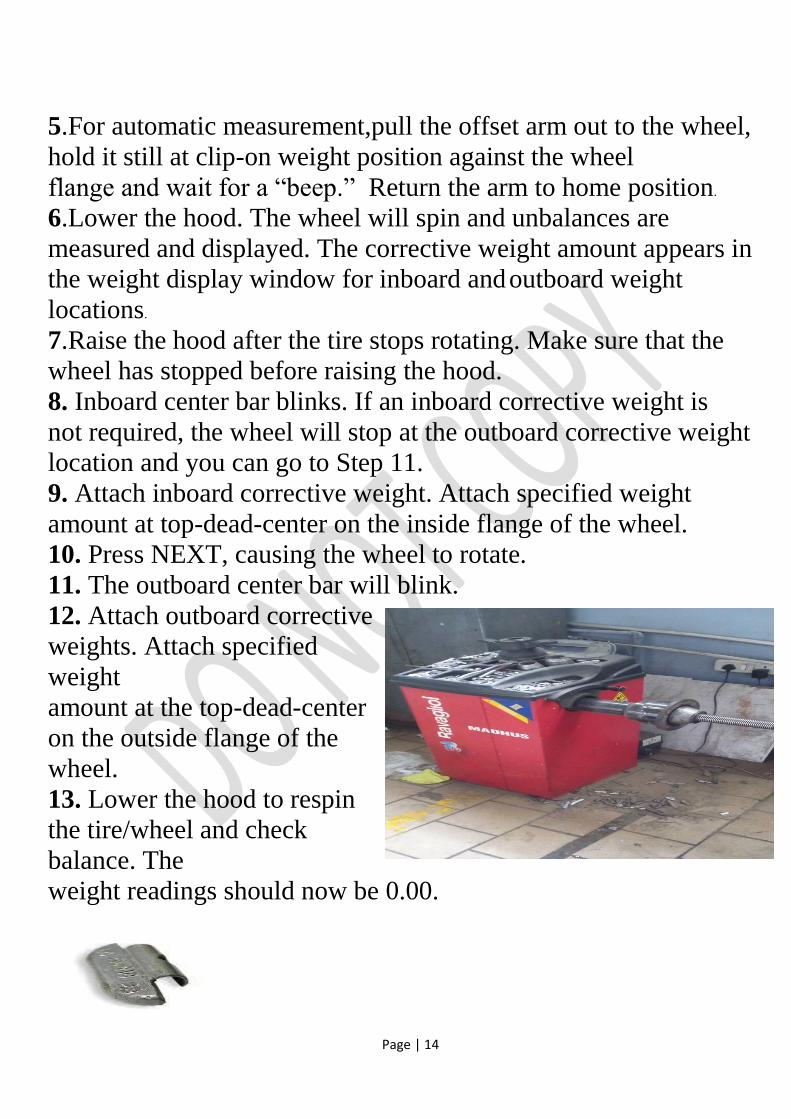
12. Attach outboard corrective
weights. Attach specified
weight
amount at the top-dead-center
on the outside flange of the
wheel.
13. Lower the hood to respin
the tire/wheel and check
balance. The
weight readings should now be 0.00.
Page | 15
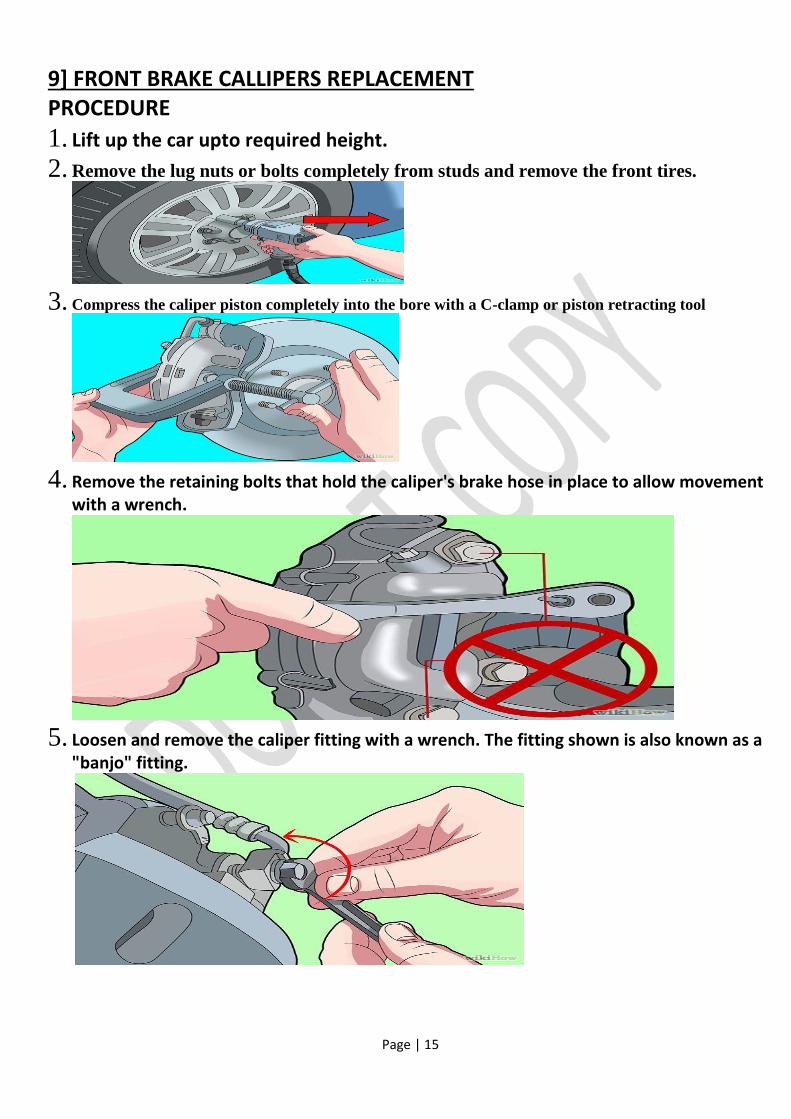
9] FRONT BRAKE CALLIPERS REPLACEMENT PROCEDURE
1. Lift up the car upto required height.
2. Remove the lug nuts or bolts completely from studs and remove the front tires.
3. Compress the caliper piston completely into the bore with a C-clamp or piston retracting tool
4. Remove the retaining bolts that hold the caliper's brake hose in place to allow movement
with a wrench.
5. Loosen and remove the caliper fitting with a wrench. The fitting shown is also known as a
"banjo" fitting.
Page | 16
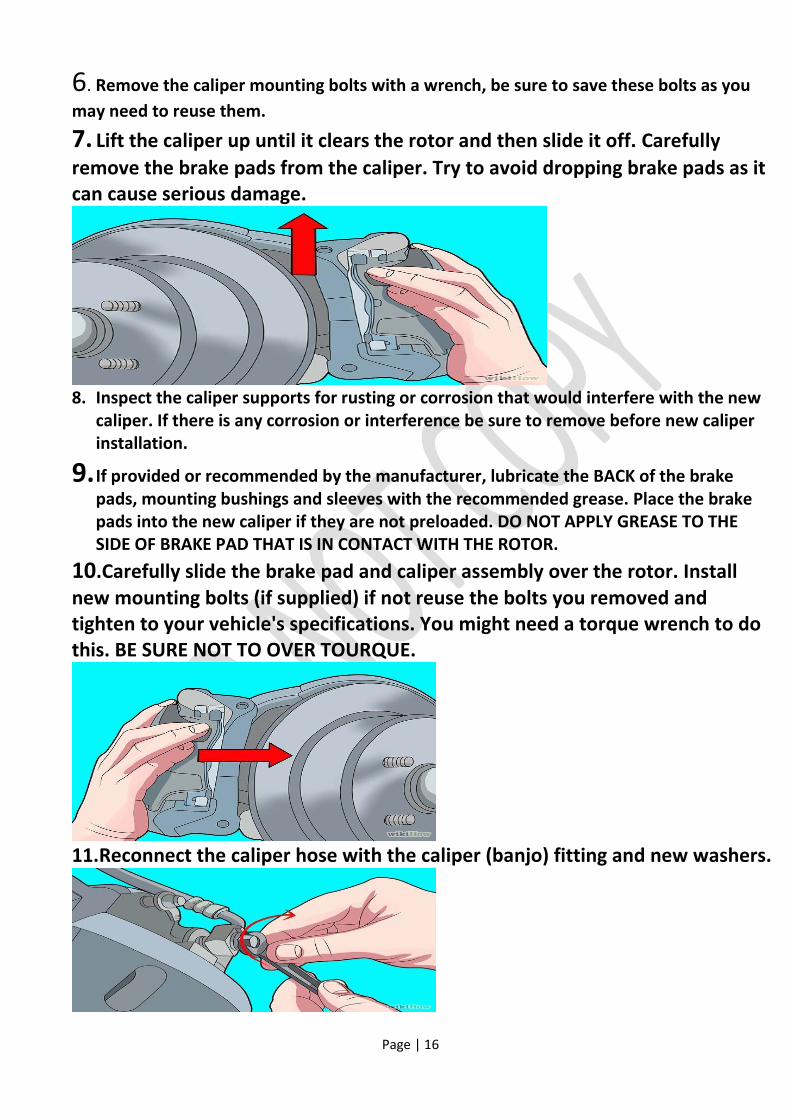
6. Remove the caliper mounting bolts with a wrench, be sure to save these bolts as you
may need to reuse them.
7. Lift the caliper up until it clears the rotor and then slide it off. Carefully
remove the brake pads from the caliper. Try to avoid dropping brake pads as it can cause serious damage.
8. Inspect the caliper supports for rusting or corrosion that would interfere with the new
caliper. If there is any corrosion or interference be sure to remove before new caliper installation.
9. If provided or recommended by the manufacturer, lubricate the BACK of the brake pads, mounting bushings and sleeves with the recommended grease. Place the brake pads into the new caliper if they are not preloaded. DO NOT APPLY GREASE TO THE SIDE OF BRAKE PAD THAT IS IN CONTACT WITH THE ROTOR.
10.Carefully slide the brake pad and caliper assembly over the rotor. Install new mounting bolts (if supplied) if not reuse the bolts you removed and tighten to your vehicle's specifications. You might need a torque wrench to do this. BE SURE NOT TO OVER TOURQUE.
11.Reconnect the caliper hose with the caliper (banjo) fitting and new washers.
Page | 17
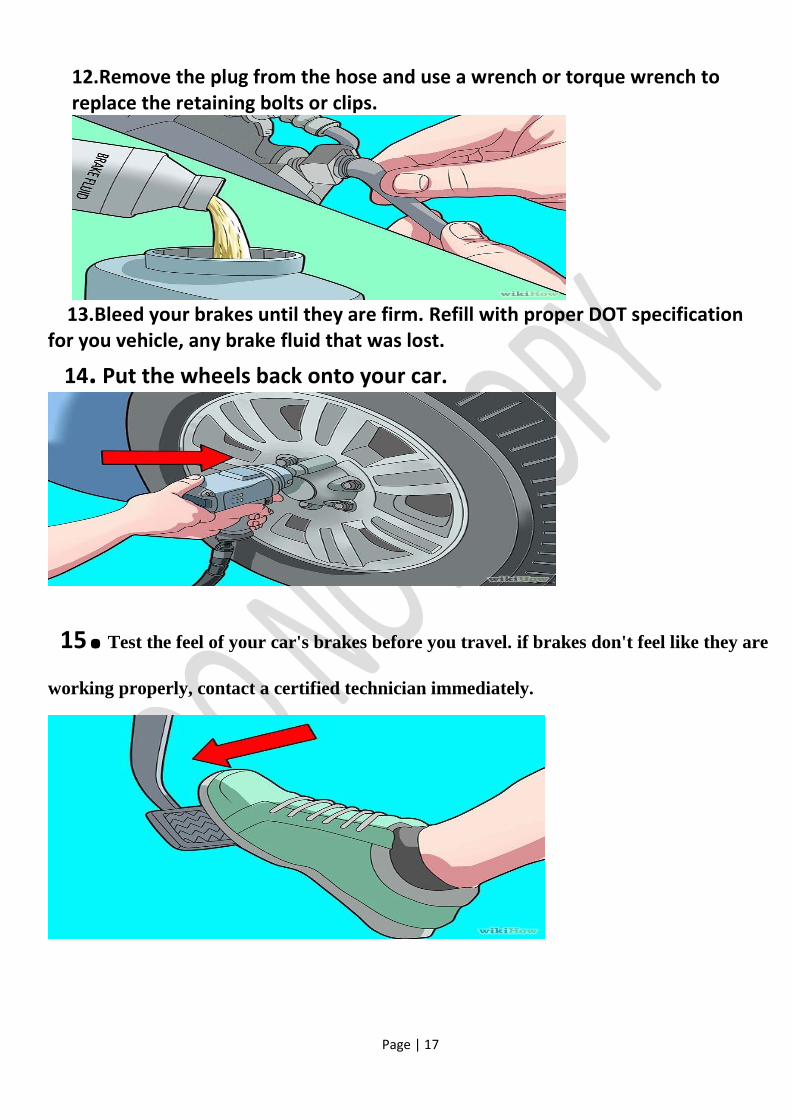
12.Remove the plug from the hose and use a wrench or torque wrench to replace the retaining bolts or clips.
13.Bleed your brakes until they are firm. Refill with proper DOT specification for you vehicle, any brake fluid that was lost.
14. Put the wheels back onto your car.
15. Test the feel of your car's brakes before you travel. if brakes don't feel like they are
working properly, contact a certified technician immediately.

Page | 18
10] Replace the Wheel Cylinder in a Drum Brake
PROCEDURE