Embed Size (px)
Citation preview
Trapped:A St. Louis Room Escape
Volume 5 Walkthrough
© 2016 Enigma Productions, LLC. All Rights Reserved.
Puzzle #1
© 2016 Enigma Productions, LLC. All Rights Reserved.
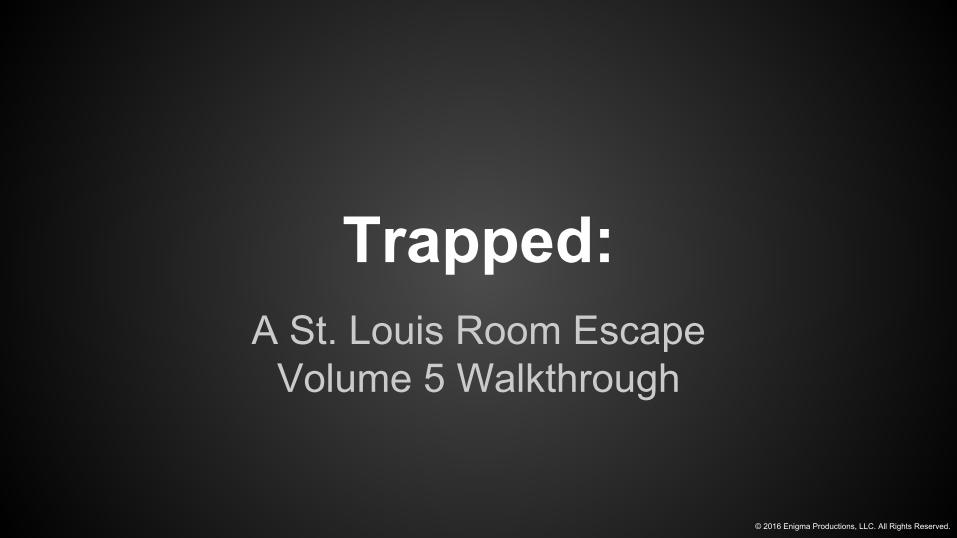
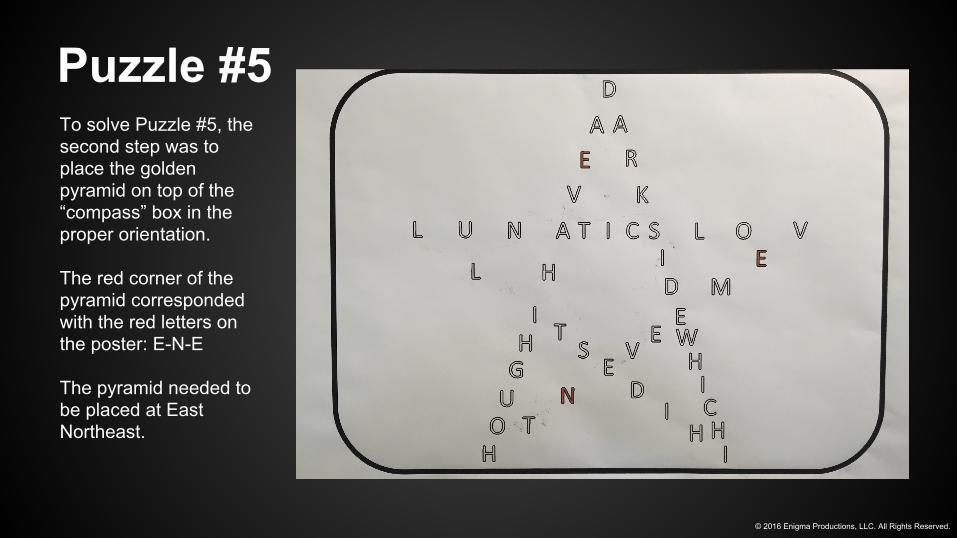
Starting with LUN and reading in a star pattern, the following riddle can be read:
LUNATICS LOVE ME EVEN THOUGH I HAVE A DARK SIDE WHICH I HIDE STILL
Puzzle #2
© 2016 Enigma Productions, LLC. All Rights Reserved.
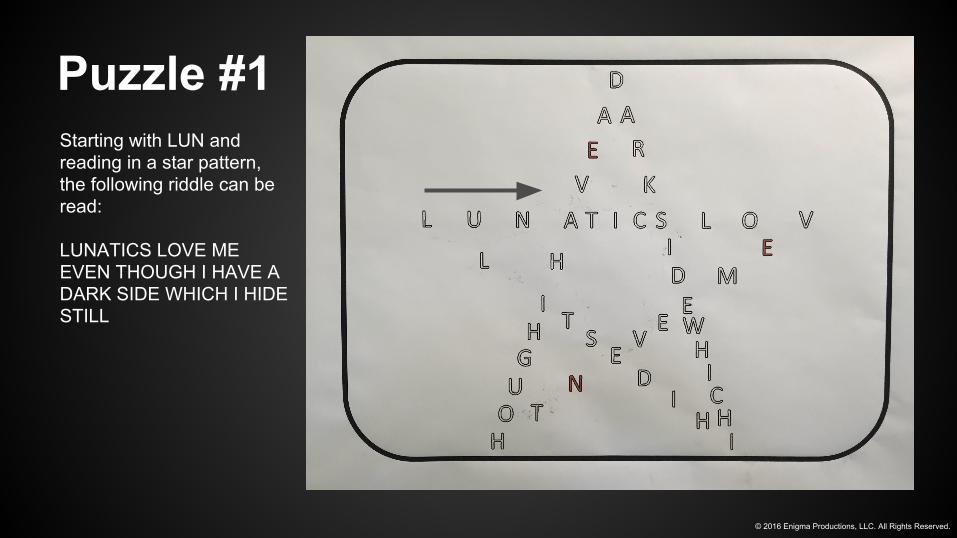
LUNATICS LOVE ME EVEN THOUGH I HAVE A DARK SIDE WHICH I HIDE STILL
Answer: M-O-O-N (used to open the top drawer of the cabinet)
Puzzle #3
© 2016 Enigma Productions, LLC. All Rights Reserved.
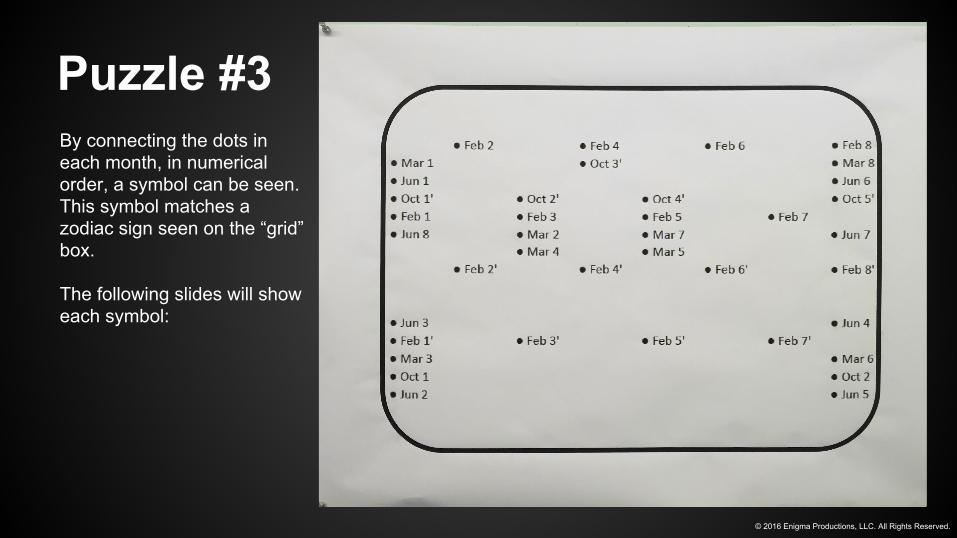
By connecting the dots in each month, in numerical order, a symbol can be seen. This symbol matches a zodiac sign seen on the “grid” box.
The following slides will show each symbol:
Puzzle #3
© 2016 Enigma Productions, LLC. All Rights Reserved.
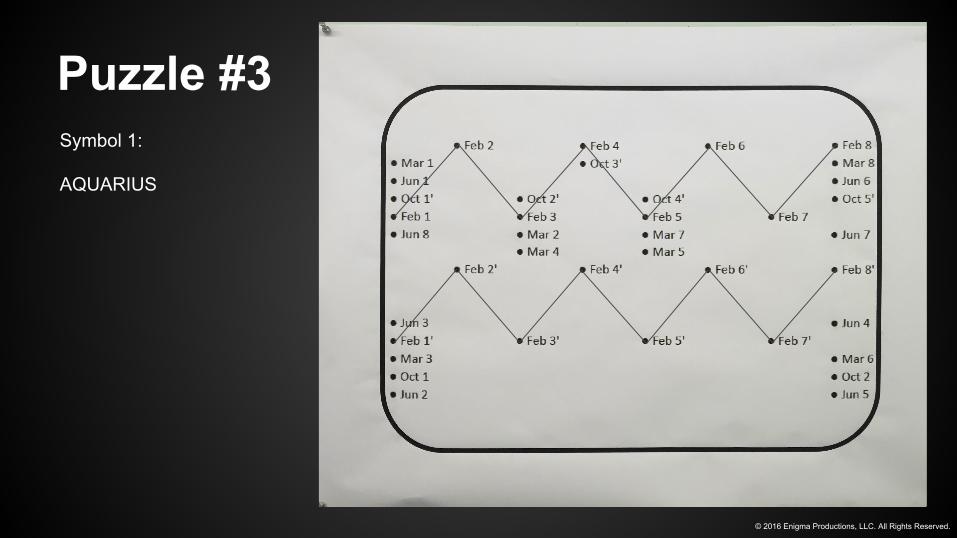
Symbol 1:
AQUARIUS
Puzzle #3
© 2016 Enigma Productions, LLC. All Rights Reserved.
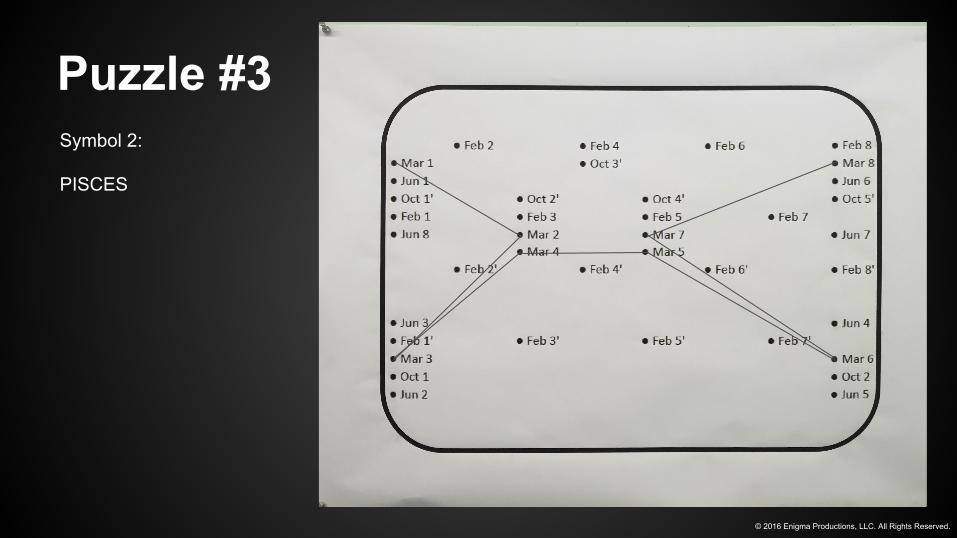
Symbol 2:
PISCES

Puzzle #3
© 2016 Enigma Productions, LLC. All Rights Reserved.
Symbol 3:
GEMINI

Puzzle #3
© 2016 Enigma Productions, LLC. All Rights Reserved.
Symbol 4:
LIBRA
Puzzle #3
© 2016 Enigma Productions, LLC. All Rights Reserved.
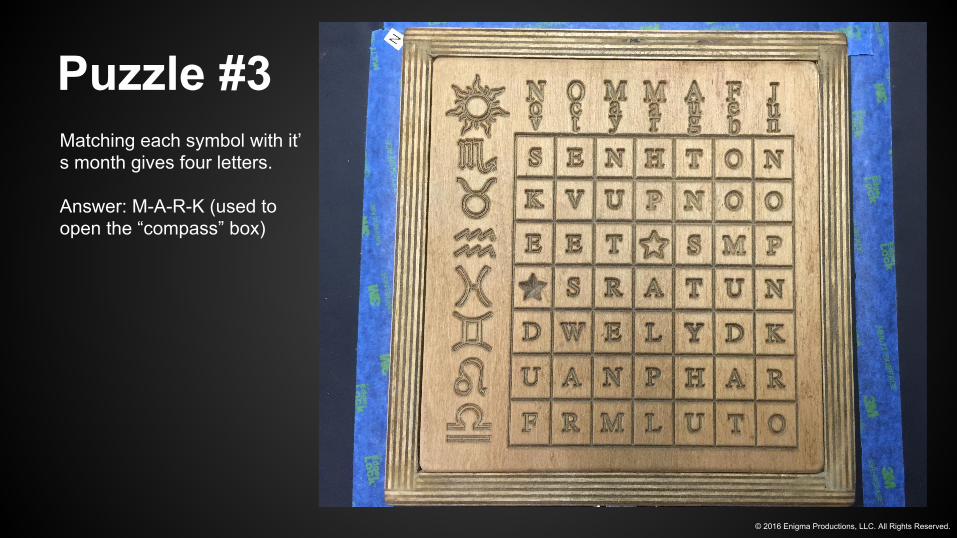
Matching each symbol with it’s month gives four letters.
Answer: M-A-R-K (used to open the “compass” box)
Puzzle #4
© 2016 Enigma Productions, LLC. All Rights Reserved.
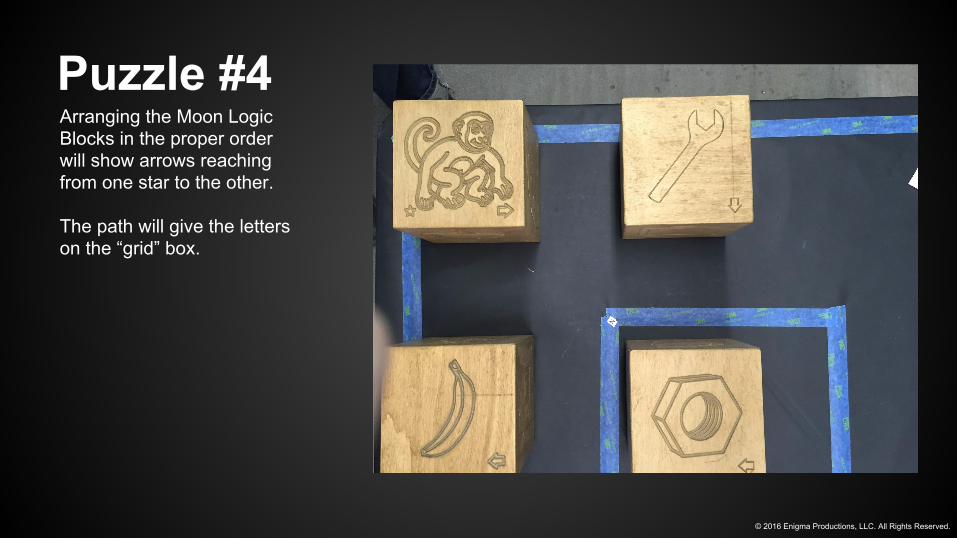
Arranging the Moon Logic Blocks in the proper order will show arrows reaching from one star to the other.
The path will give the letters on the “grid” box.
Puzzle #4
© 2016 Enigma Productions, LLC. All Rights Reserved.
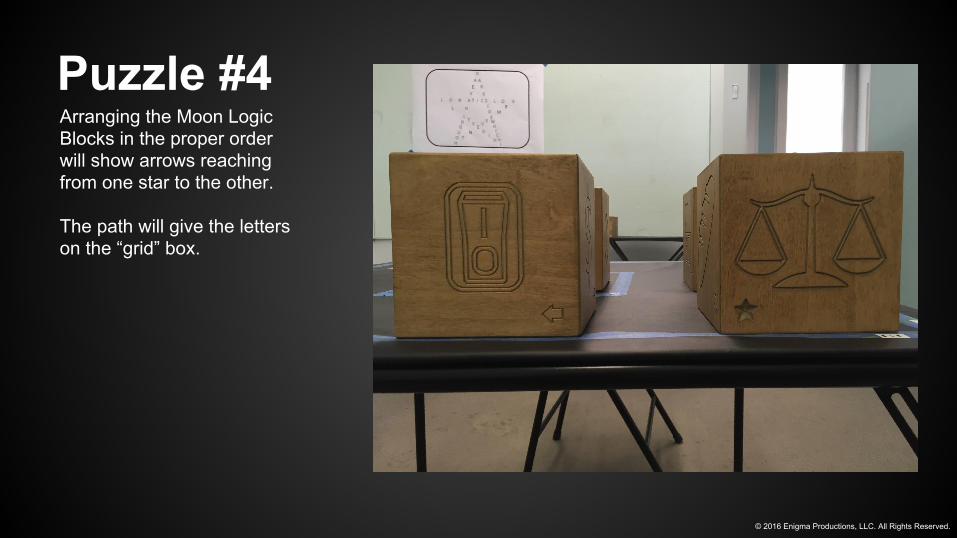
Arranging the Moon Logic Blocks in the proper order will show arrows reaching from one star to the other.
The path will give the letters on the “grid” box.
Puzzle #4
© 2016 Enigma Productions, LLC. All Rights Reserved.
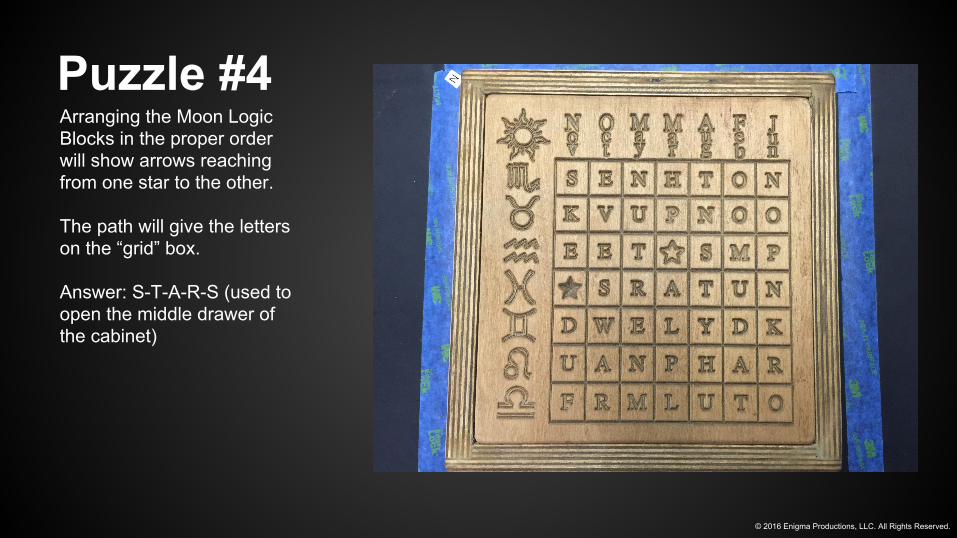
Arranging the Moon Logic Blocks in the proper order will show arrows reaching from one star to the other.
The path will give the letters on the “grid” box.
Answer: S-T-A-R-S (used to open the middle drawer of the cabinet)
Puzzle #5
© 2016 Enigma Productions, LLC. All Rights Reserved.
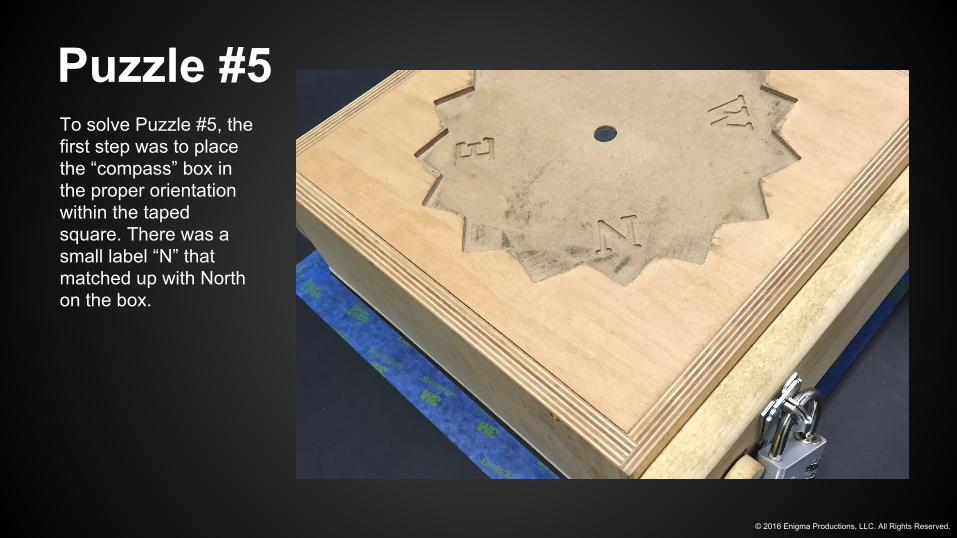
To solve Puzzle #5, the first step was to place the “compass” box in the proper orientation within the taped square. There was a small label “N” that matched up with North on the box.
Puzzle #5
© 2016 Enigma Productions, LLC. All Rights Reserved.
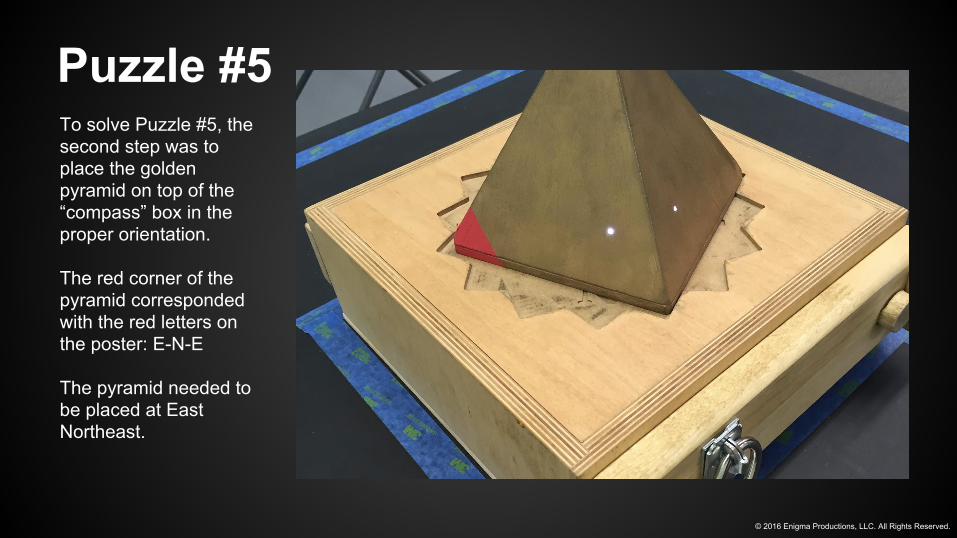
To solve Puzzle #5, the second step was to place the golden pyramid on top of the “compass” box in the proper orientation.
The red corner of the pyramid corresponded with the red letters on the poster: E-N-E
The pyramid needed to be placed at East Northeast.
Puzzle #5
© 2016 Enigma Productions, LLC. All Rights Reserved.
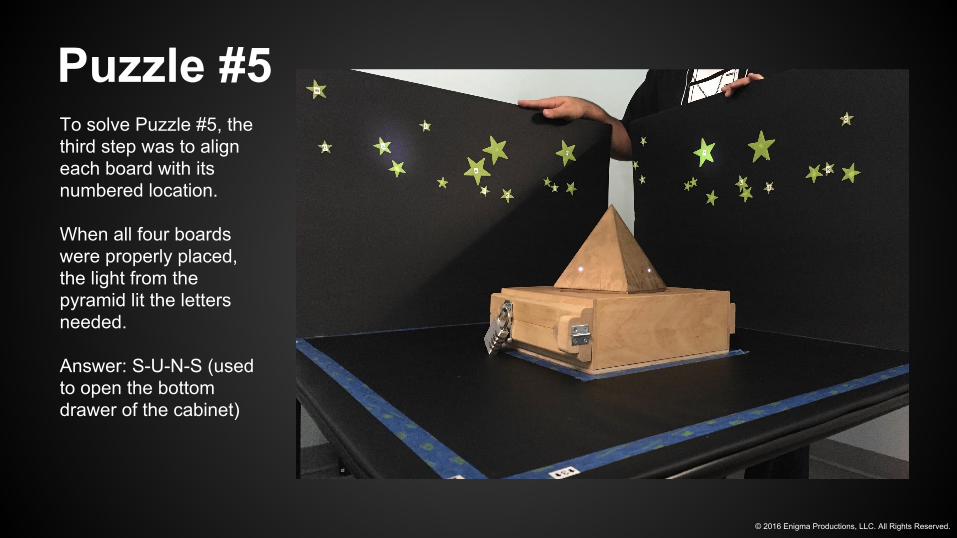
To solve Puzzle #5, the third step was to align each board with its numbered location.
When all four boards were properly placed, the light from the pyramid lit the letters needed.
Answer: S-U-N-S (used to open the bottom drawer of the cabinet)
Puzzle #6
© 2016 Enigma Productions, LLC. All Rights Reserved.
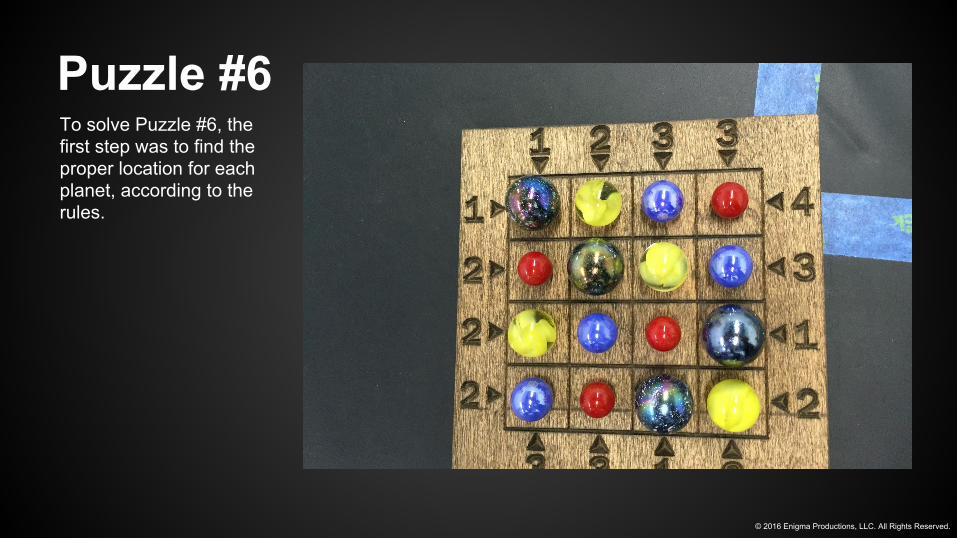
To solve Puzzle #6, the first step was to find the proper location for each planet, according to the rules.
Puzzle #6
© 2016 Enigma Productions, LLC. All Rights Reserved.
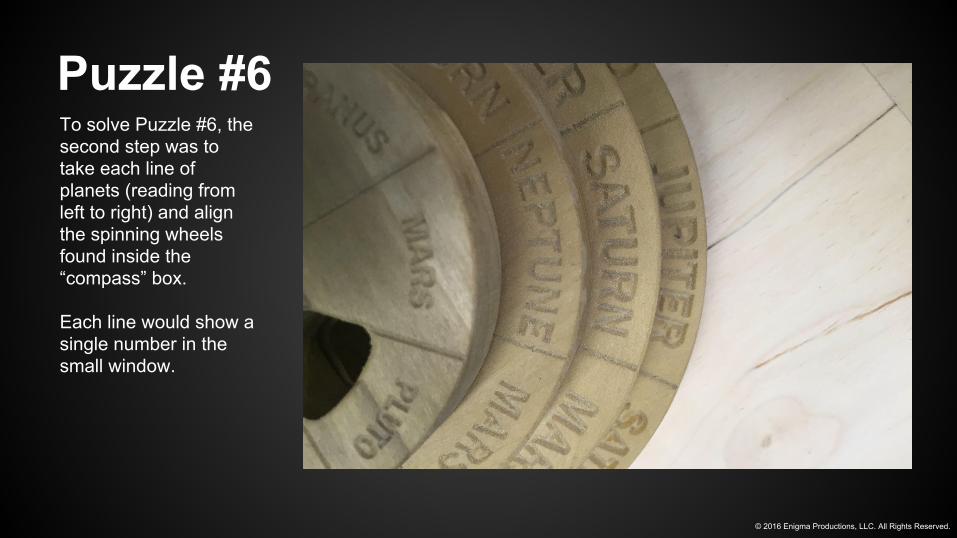
To solve Puzzle #6, the second step was to take each line of planets (reading from left to right) and align the spinning wheels found inside the “compass” box.
Each line would show a single number in the small window.
Puzzle #6
© 2016 Enigma Productions, LLC. All Rights Reserved.
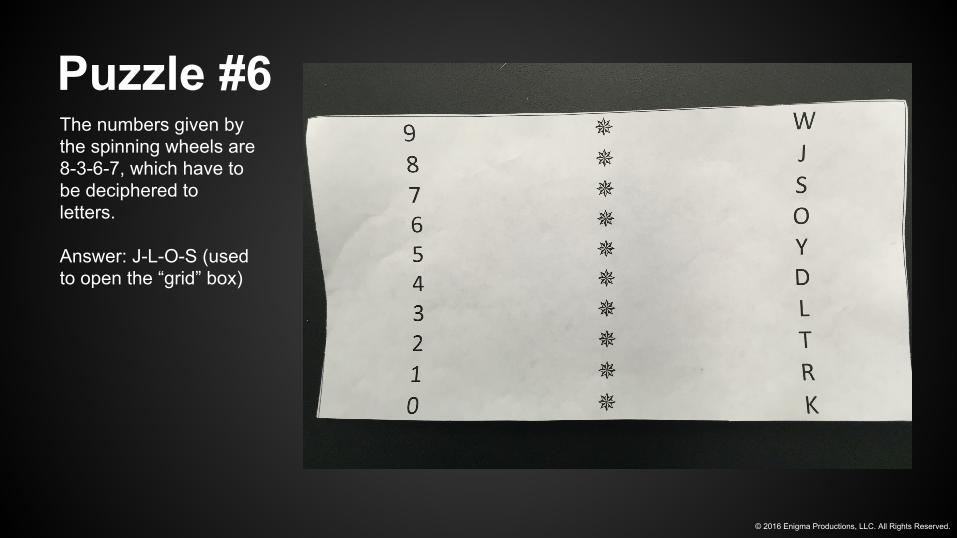
The numbers given by the spinning wheels are 8-3-6-7, which have to be deciphered to letters.
Answer: J-L-O-S (used to open the “grid” box)
© 2016 Enigma Productions, LLC. All Rights Reserved.
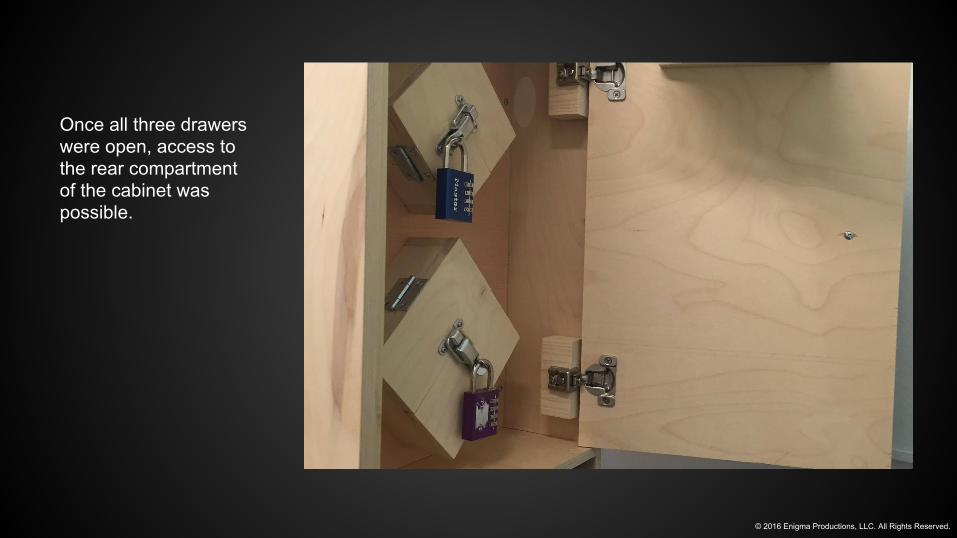
Once all three drawers were open, access to the rear compartment of the cabinet was possible.
Puzzle #7
© 2016 Enigma Productions, LLC. All Rights Reserved.
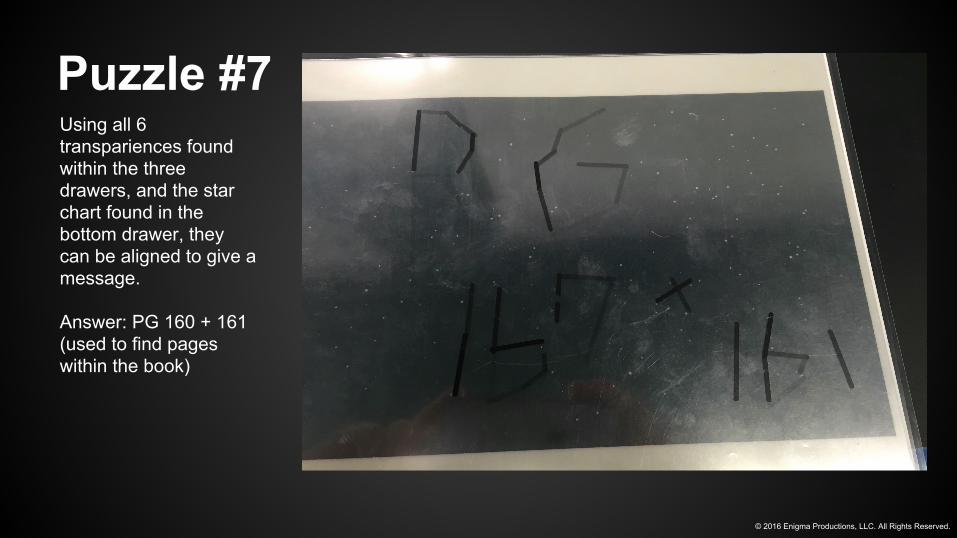
Using all 6 transpariences found within the three drawers, and the star chart found in the bottom drawer, they can be aligned to give a message.
Answer: PG 160 + 161 (used to find pages within the book)
Puzzle #8
© 2016 Enigma Productions, LLC. All Rights Reserved.
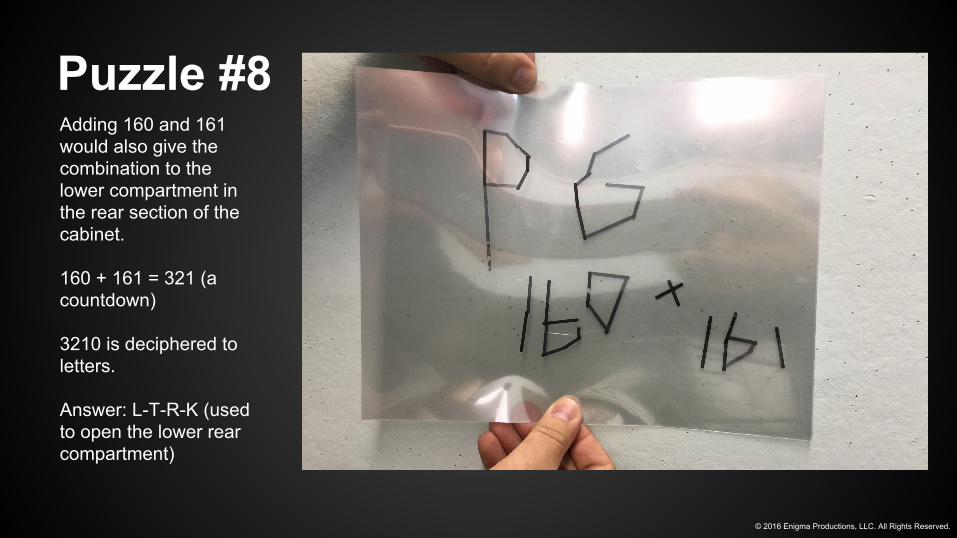
Adding 160 and 161 would also give the combination to the lower compartment in the rear section of the cabinet.
160 + 161 = 321 (a countdown)
3210 is deciphered to letters.
Answer: L-T-R-K (used to open the lower rear compartment)
Puzzle #9
© 2016 Enigma Productions, LLC. All Rights Reserved.
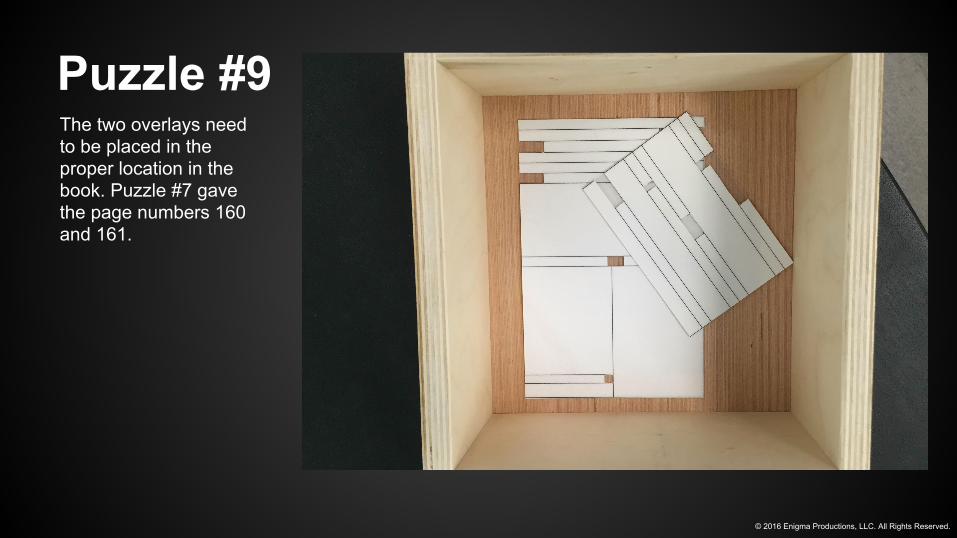
The two overlays need to be placed in the proper location in the book. Puzzle #7 gave the page numbers 160 and 161.
Puzzle #9
© 2016 Enigma Productions, LLC. All Rights Reserved.
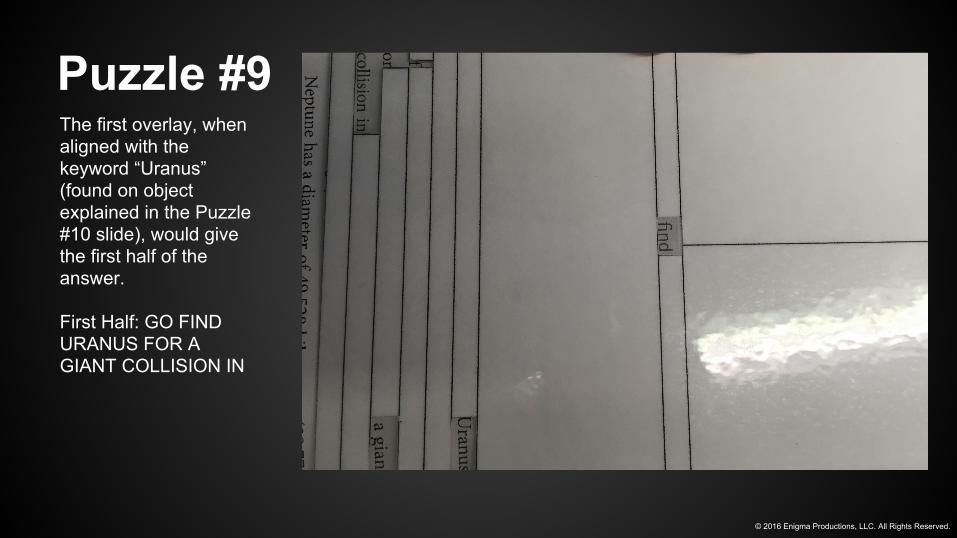
The first overlay, when aligned with the keyword “Uranus” (found on object explained in the Puzzle #10 slide), would give the first half of the answer.
First Half: GO FIND URANUS FOR A GIANT COLLISION IN
Puzzle #9
© 2016 Enigma Productions, LLC. All Rights Reserved.
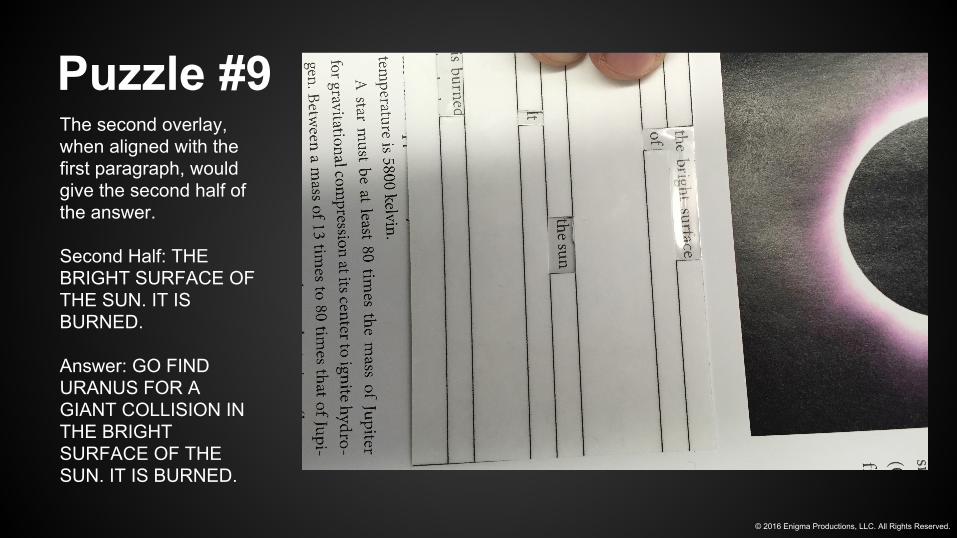
The second overlay, when aligned with the first paragraph, would give the second half of the answer.
Second Half: THE BRIGHT SURFACE OF THE SUN. IT IS BURNED.
Answer: GO FIND URANUS FOR A GIANT COLLISION IN THE BRIGHT SURFACE OF THE SUN. IT IS BURNED.
Puzzle #10
© 2016 Enigma Productions, LLC. All Rights Reserved.
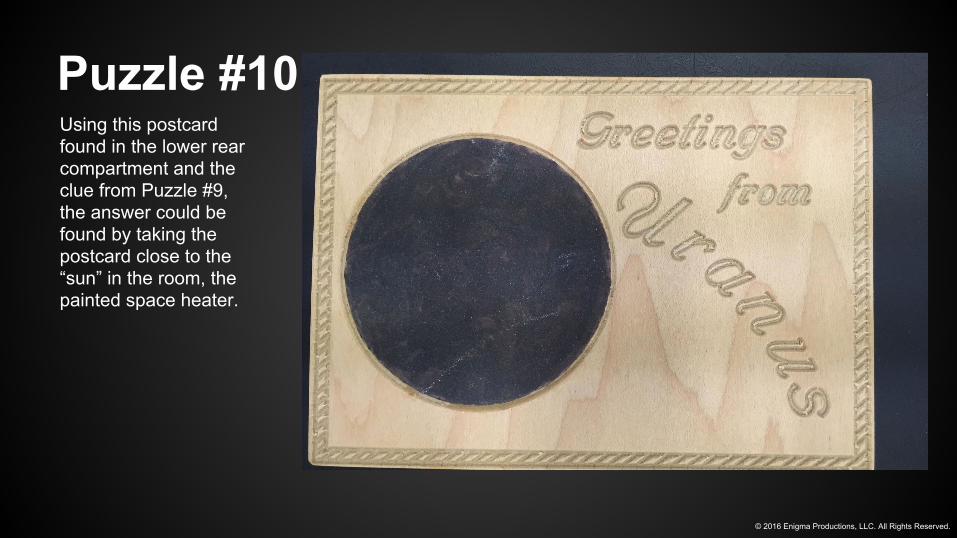
Using this postcard found in the lower rear compartment and the clue from Puzzle #9, the answer could be found by taking the postcard close to the “sun” in the room, the painted space heater.
Puzzle #10
© 2016 Enigma Productions, LLC. All Rights Reserved.
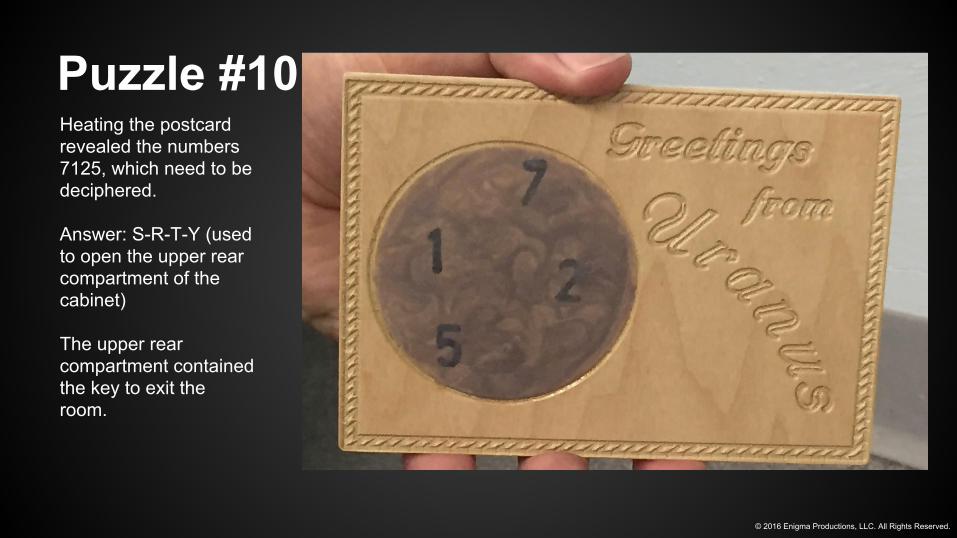
Heating the postcard revealed the numbers 7125, which need to be deciphered.
Answer: S-R-T-Y (used to open the upper rear compartment of the cabinet)
The upper rear compartment contained the key to exit the room.

We are working on something brand new
Coming soon
Sign-up for our mailing list to hear the news
© 2015 Enigma Productions, LLC. All Rights Reserved.