A
TERM PAPER
ON
AUTOMATIC COMPUTER-AIDED DESIGN
(AUTOCAD)
PREPARED BY
OLORUNGBOHUN O. EMMANUEL
H/BT/13/0411
SUBMITTED TO
MR. A.V. ADARADOHUN

FEBRUARY 2014
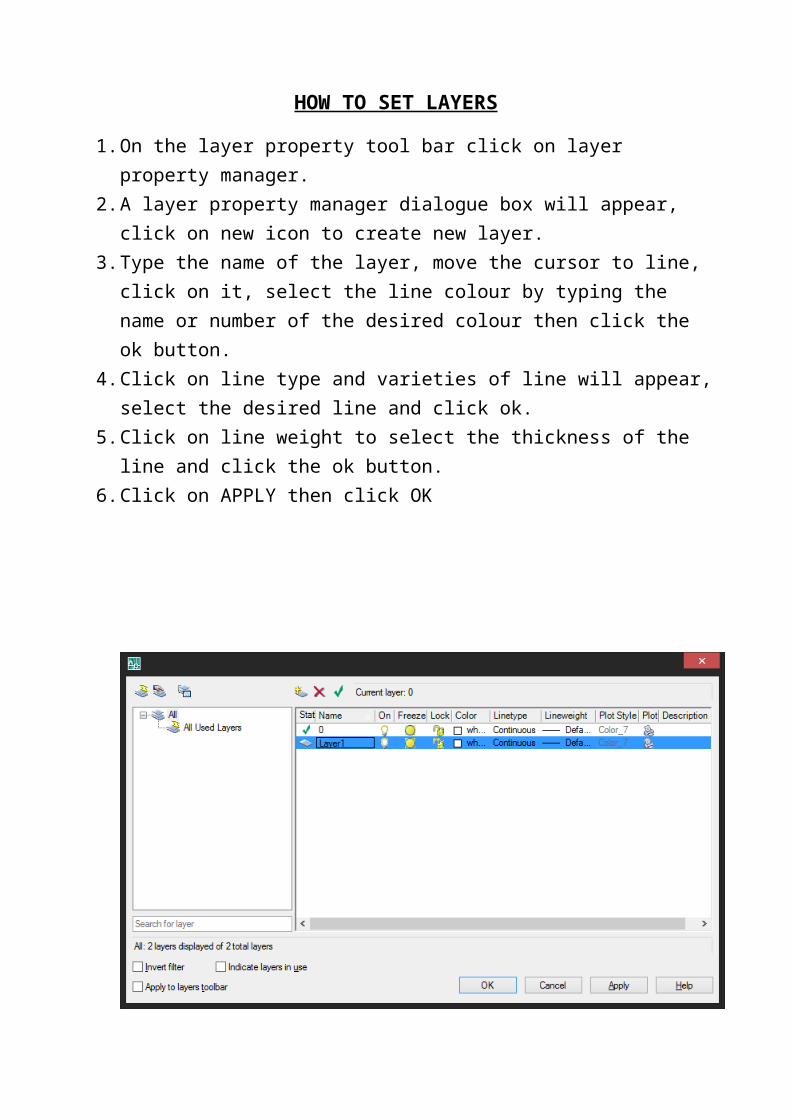
HOW TO SET LAYERS
1.On the layer property tool bar click on layer property manager.
2.A layer property manager dialogue box will appear, click on new icon to create new layer.
3.Type the name of the layer, move the cursor to line, click on it, select the line colour by typing the name or number of the desired colour then click the ok button.
4.Click on line type and varieties of line will appear,select the desired line and click ok.
5.Click on line weight to select the thickness of the line and click the ok button.
6.Click on APPLY then click OK
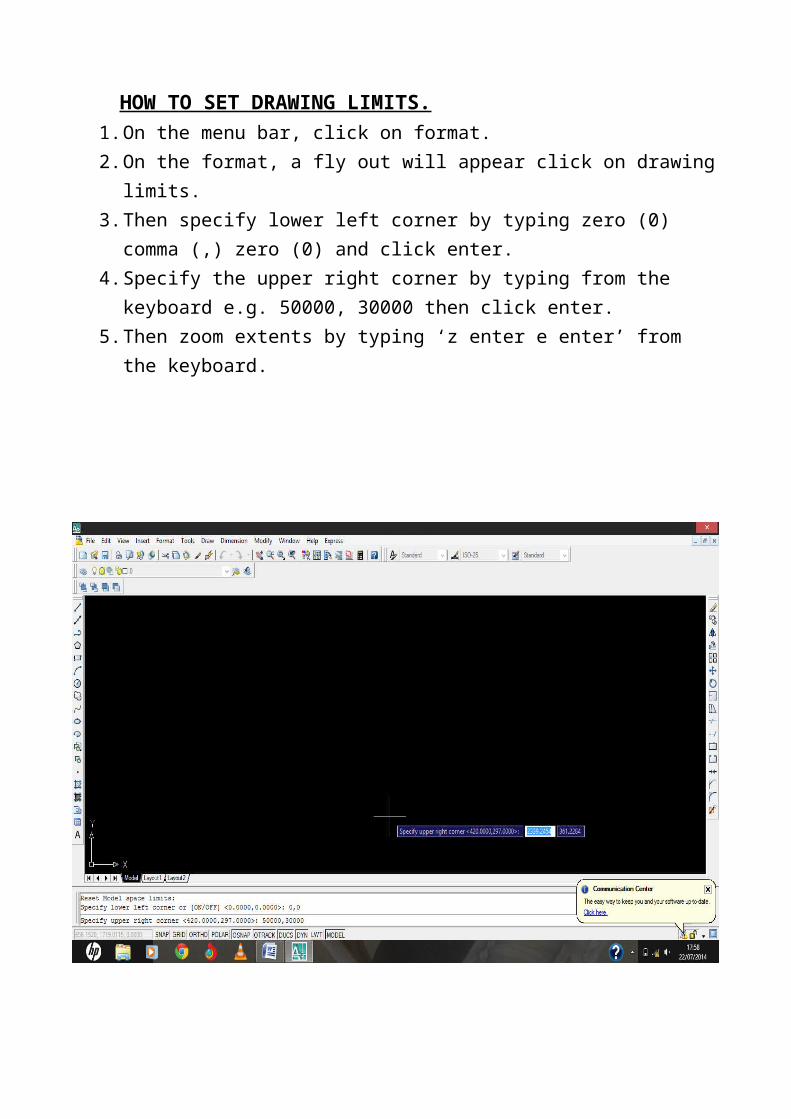
HOW TO SET DRAWING LIMITS.1.On the menu bar, click on format.2.On the format, a fly out will appear click on drawing
limits.3.Then specify lower left corner by typing zero (0)
comma (,) zero (0) and click enter.4.Specify the upper right corner by typing from the
keyboard e.g. 50000, 30000 then click enter.5.Then zoom extents by typing ‘z enter e enter’ from
the keyboard.
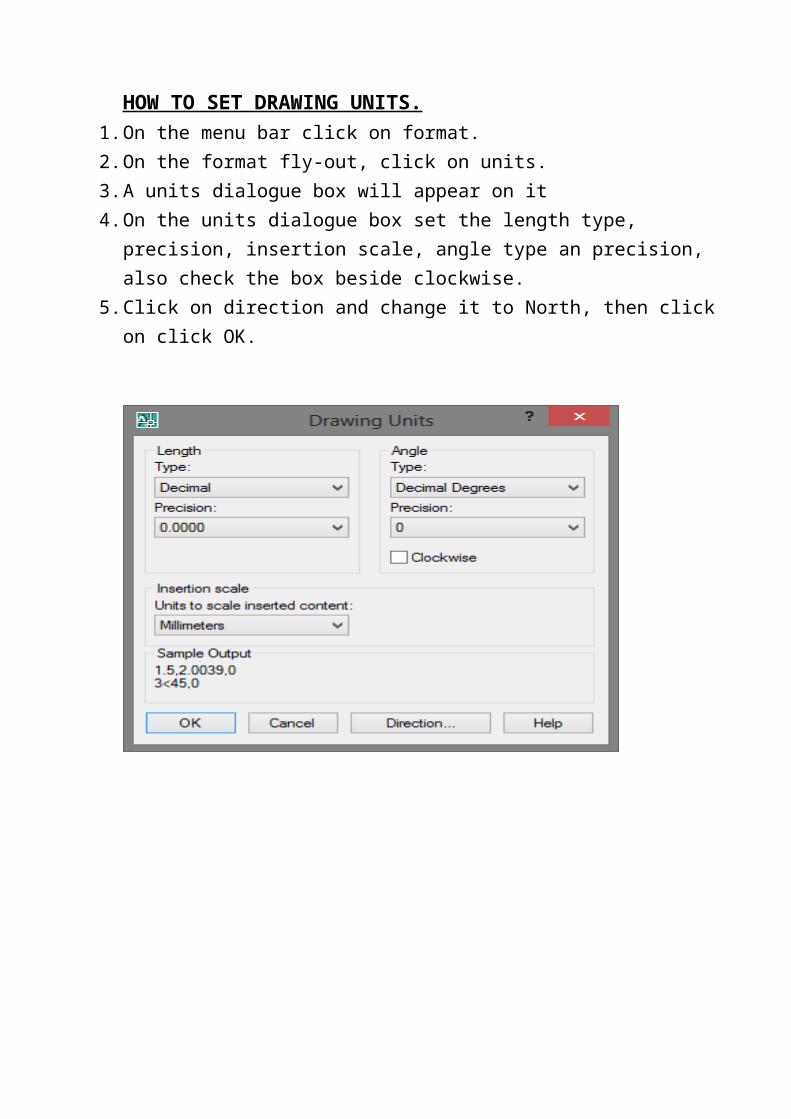
HOW TO SET DRAWING UNITS.1.On the menu bar click on format.2.On the format fly-out, click on units.3.A units dialogue box will appear on it4.On the units dialogue box set the length type,
precision, insertion scale, angle type an precision, also check the box beside clockwise.
5.Click on direction and change it to North, then clickon click OK.
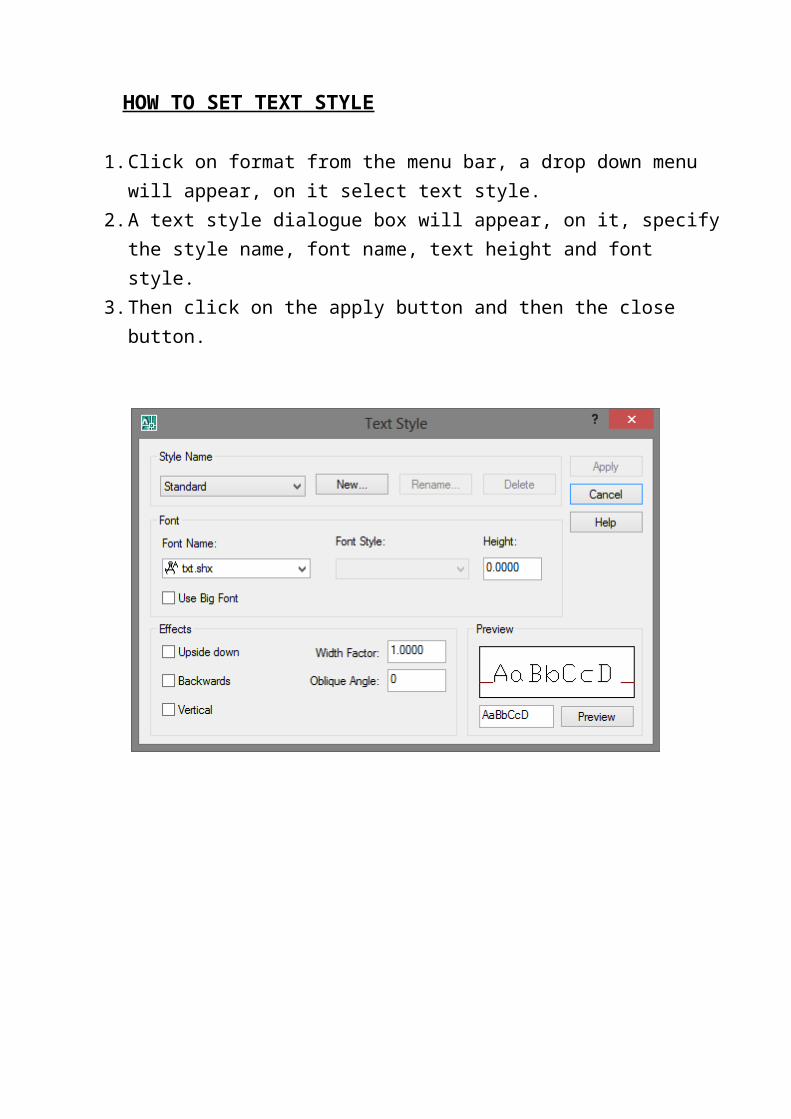
HOW TO SET TEXT STYLE
1.Click on format from the menu bar, a drop down menu will appear, on it select text style.
2.A text style dialogue box will appear, on it, specifythe style name, font name, text height and font style.
3.Then click on the apply button and then the close button.
HOW TO SET DIMENSION STYLE.
1.Click on format from the menu bar, fly out box will appear click on dimension style.
2.Dimension style dialogue box will appear, select new.3.Create new dimension style, a box will appear. On it,
set new style and click continue.4.A new dimension style dialogue box will appear.5.On the dialogue box there are four important settings
to do which are LINE, SYMBOLS AND ARROWS, TEXT AND PRIMARY UNITS.
6.Under line set all the parameters in it, by setting line weight to by layers and line type then click ok,and move to the next.
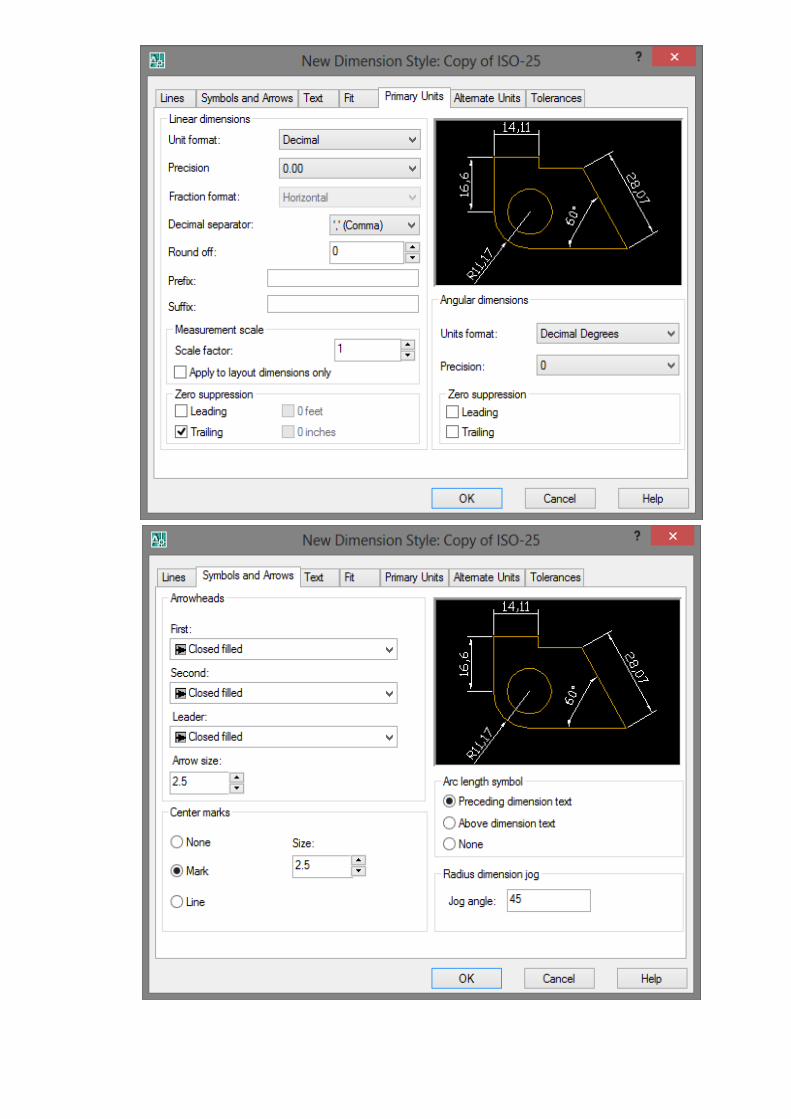
7.Under symbols and arrows set the arrow heads, arrow size, centre mark, arc length symbols and radius dimension, jog angle and click ok and move to the next.
8.Under TEXT set the text style, type the text style name, font name, text height and effect. Click the apply button and cancel. After that set the text colour, text height, text placement, offset from dim line and text alignment then click ok.
9.Under primary unit set the linear dimension which is the unit format, precision, fractional format, decimal separator, round off, prefix, suffix, and measurement scale. In angular dimension you set the unit format and also the precision, and then click ok.
10. The dimension style manager dialogue box will reappear, click on set current to set the newly
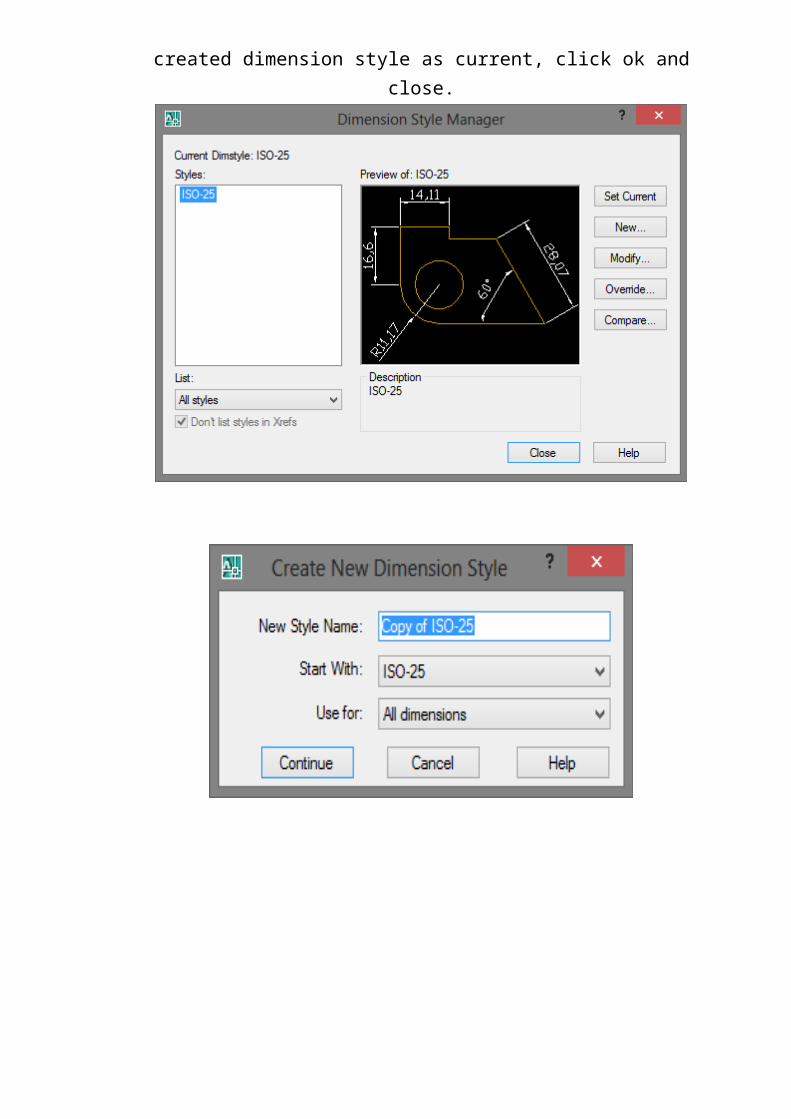
created dimension style as current, click ok andclose.
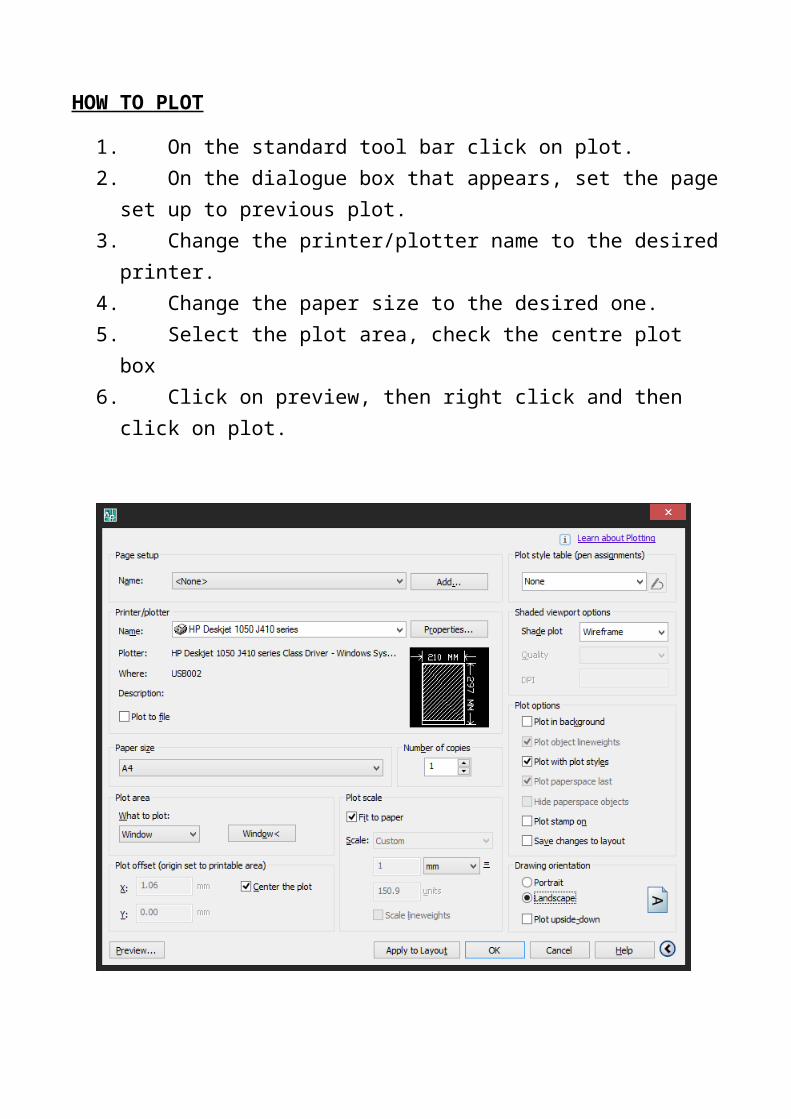
HOW TO PLOT
1. On the standard tool bar click on plot.2. On the dialogue box that appears, set the pageset up to previous plot.
3. Change the printer/plotter name to the desiredprinter.
4. Change the paper size to the desired one.5. Select the plot area, check the centre plot box
6. Click on preview, then right click and then click on plot.
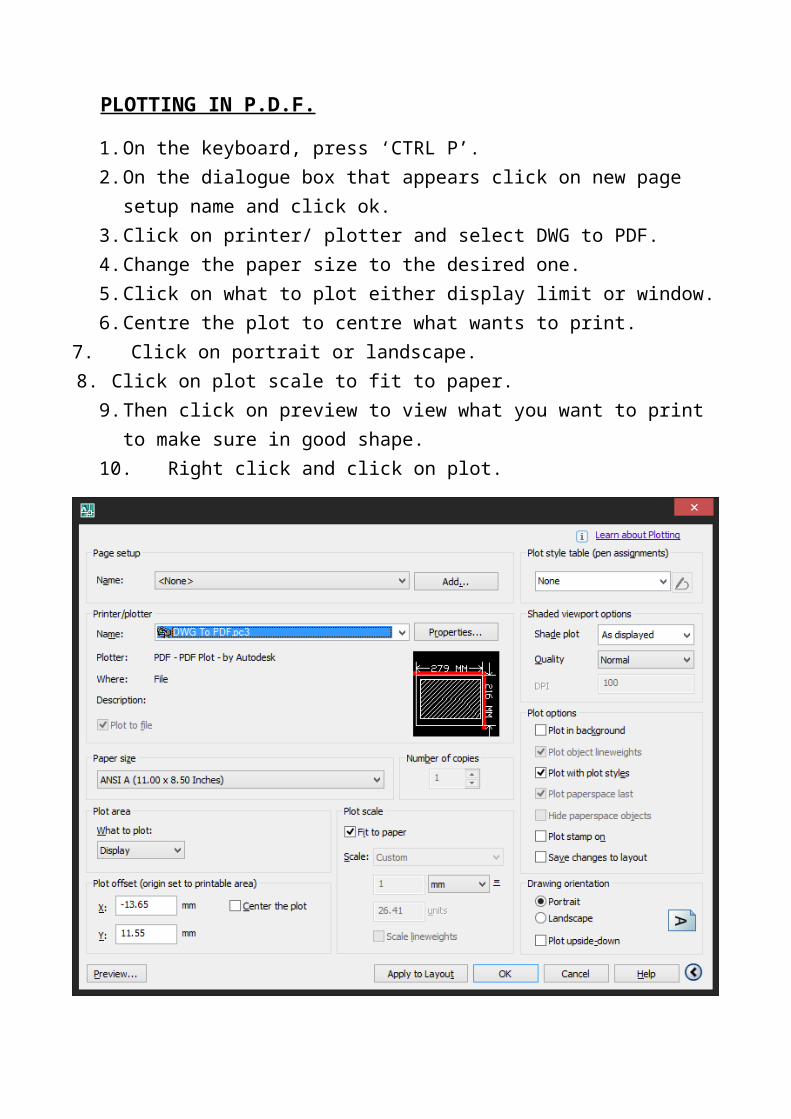
PLOTTING IN P.D.F.
1.On the keyboard, press ‘CTRL P’.2.On the dialogue box that appears click on new page
setup name and click ok.3.Click on printer/ plotter and select DWG to PDF.4.Change the paper size to the desired one.5.Click on what to plot either display limit or window.6.Centre the plot to centre what wants to print.
7. Click on portrait or landscape.8. Click on plot scale to fit to paper.
9.Then click on preview to view what you want to print to make sure in good shape.
10. Right click and click on plot.
Recommended


