Embed Size (px)
Citation preview

LACTO-FERMENTATION from Cultures for Health
2 | P a g e
a Where Healthy Food Starts guide
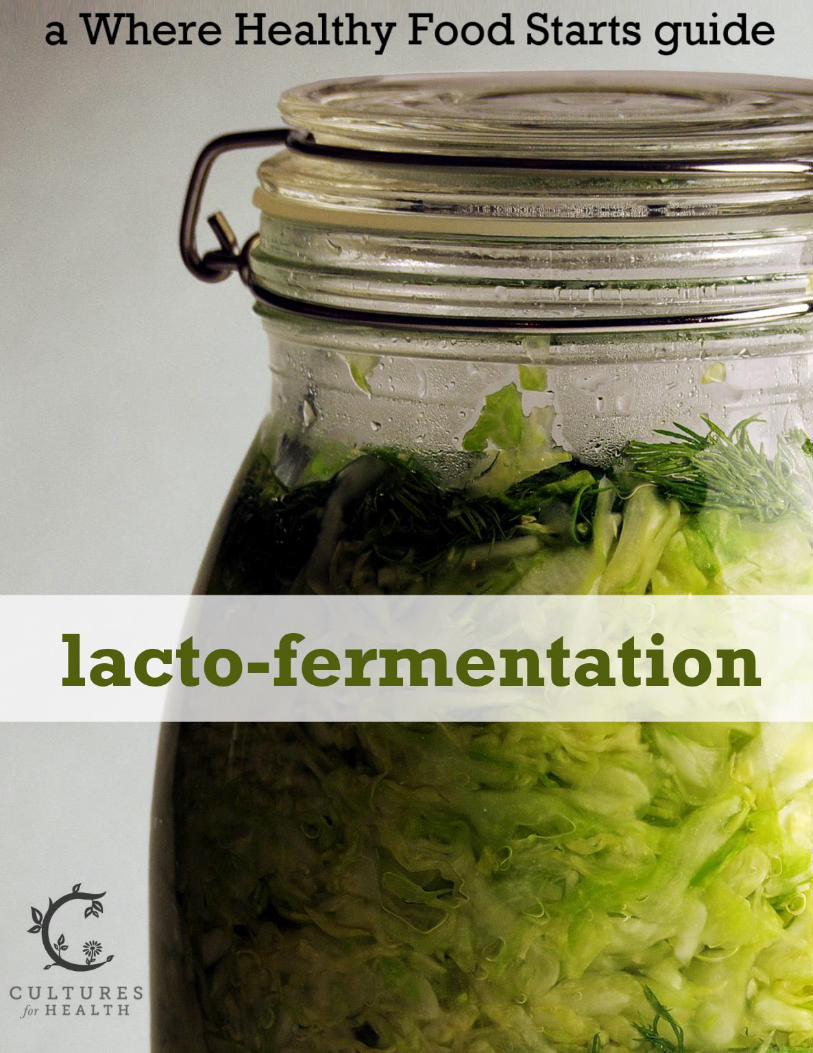
Lacto-Fermentation
© 2013 Cultures for Health

LACTO-FERMENTATION from Cultures for Health
3 | P a g e
Disclaimer
The ideas, concepts, and opinions expressed in this book are intended to be used for
educational purposes only. This book is provided with the understanding that authors and
publisher are not rendering medical advice of any kind, nor is this book intended to replace
medical advice, nor to diagnose, prescribe, or treat any disease, condition, illness, or injury.
It is imperative to use good judgment when consuming fermented food and to never
consume any fermented food that looks, tastes, or smells unpleasant. Further, before
consuming lacto-fermented or any other fermented or cultured food, you should receive full
medical clearance from a licensed physician. Author and publisher claim no responsibility
to any person or entity for any liability, loss, or damage caused or alleged to be caused
directly or indirectly as a result of the use, application, or interpretation of the material in
this book.
Copyright
Copyright © 2013 by Cultures for Health. All rights reserved.
Except as permitted under the United States Copyright Act of 1976, reproduction or
utilization of this work in any form or by any electronic, mechanical, or other means, now
known or hereafter invented, including xerography, photocopying, and recording, and in
any information storage and retrieval system, is forbidden without written permission of
Cultures for Health.
Publisher:
Cultures for Health
807 N. Helen Avenue
Sioux Falls, SD 57104
800-962-1959
605-231-4239 (fax)
www.culturesforhealth.com
For more information on lacto-fermentation or other cultured and fermented foods, please
visit culturesforhealth.com.
1205-13294
LACTO-FERMENTATION from Cultures for Health
4 | P a g e
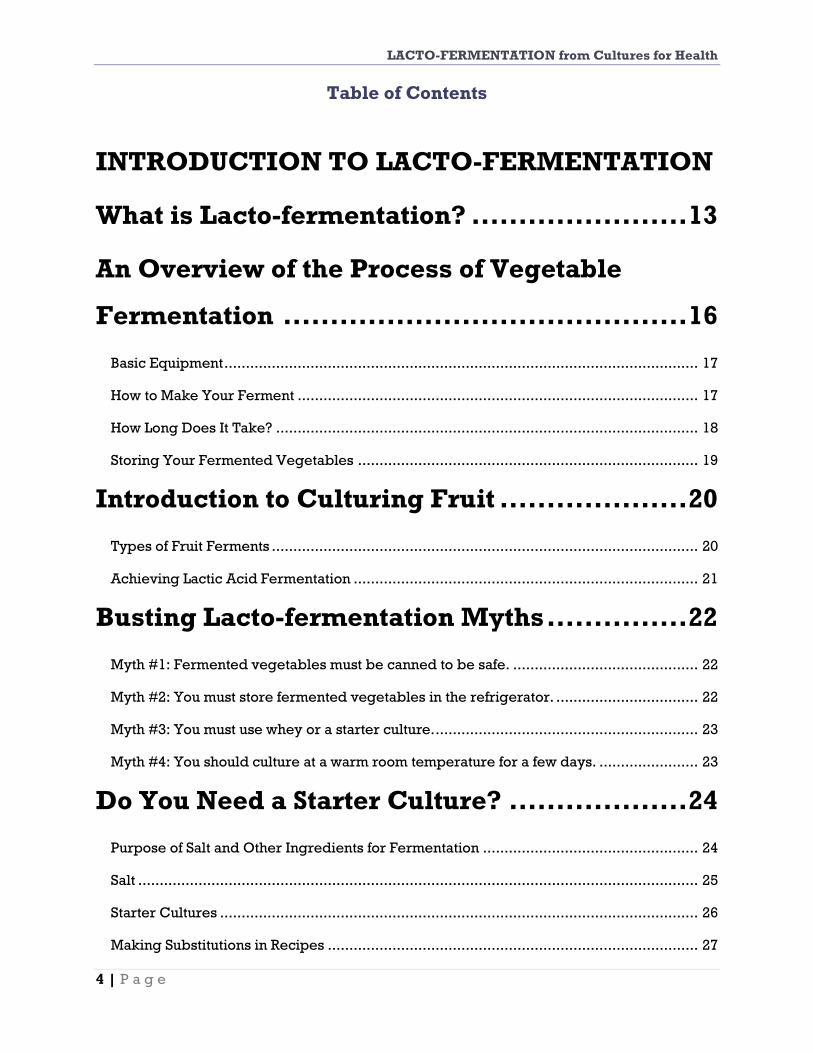
Table of Contents
INTRODUCTION TO LACTO-FERMENTATION
What is Lacto-fermentation? ....................... 13
An Overview of the Process of Vegetable
Fermentation ........................................... 16
Basic Equipment .............................................................................................................. 17
How to Make Your Ferment ............................................................................................. 17
How Long Does It Take? .................................................................................................. 18
Storing Your Fermented Vegetables ............................................................................... 19
Introduction to Culturing Fruit .................... 20
Types of Fruit Ferments ................................................................................................... 20
Achieving Lactic Acid Fermentation ................................................................................ 21
Busting Lacto-fermentation Myths ............... 22
Myth #1: Fermented vegetables must be canned to be safe. ........................................... 22
Myth #2: You must store fermented vegetables in the refrigerator. ................................. 22
Myth #3: You must use whey or a starter culture. ............................................................. 23
Myth #4: You should culture at a warm room temperature for a few days. ....................... 23
Do You Need a Starter Culture? ................... 24
Purpose of Salt and Other Ingredients for Fermentation .................................................. 24
Salt .................................................................................................................................. 25
Starter Cultures ............................................................................................................... 26
Making Substitutions in Recipes ...................................................................................... 27
LACTO-FERMENTATION from Cultures for Health
5 | P a g e
PROPER EQUIPMENT AND INGREDIENTS
Fermentation Equipment: Choosing the Right
Supplies .................................................. 31
Choosing a Fermenting Vessel ........................................................................................ 32
How to Keep Your Fermented Vegetables
Submerged When Fermenting in a Glass Jar . 35
Here’s How ...................................................................................................................... 35
Choosing Salt for Fermenting ...................... 37
Choosing a Water Source ............................ 39
Where Your Water Comes From ...................................................................................... 40
Common Contaminants ................................................................................................... 42
Treatment Methods ......................................................................................................... 43
What Kind of Water Do You Need? .................................................................................. 45
GETTING STARTED
A Basic Formula for Fermenting Vegetables .. 47
The Basics of Fermented Vegetables ............................................................................... 47
Self-brined Fermented Vegetables ................................................................................. 48
Added-brine Fermented Vegetables ............................................................................... 48
Grate, Slice, or Chop: How to Prepare Your
Vegetables for Fermentation ....................... 50
Grating ............................................................................................................................ 50
LACTO-FERMENTATION from Cultures for Health
6 | P a g e
Chopping ........................................................................................................................ 51
Slicing ............................................................................................................................. 52
How to Know When Your Fermented Vegetables
Are Ready for Cold Storage ......................... 54
Bubbling ......................................................................................................................... 55
Smell ............................................................................................................................... 56
Flavor .............................................................................................................................. 56
Three Methods for Making Sauerkraut ......... 58
Different Methods ............................................................................................................ 59
Why Your Vegetable Ferment Grew Mold, What
to Do with It, and How to Prevent It .............. 61
Recognizing Mold ............................................................................................................ 61
What to Do with a Moldy Ferment .................................................................................... 62
Factors That May Contribute to Mold Growth .................................................................. 62
Fermentation Temperature .............................................................................................. 63
Vegetable Submersion .................................................................................................... 63
Salt Content ..................................................................................................................... 63
Introduction of Starter Culture ......................................................................................... 64
Bad Microorganisms Present on Your Vegetables ........................................................... 64
How to Make Fermented Vegetable Juice ...... 65
Basic Fermented Vegetable Juice .................................................................................... 66
Using the Juice of Fermented Vegetables ........................................................................ 67

LACTO-FERMENTATION from Cultures for Health
7 | P a g e
SEASONAL FERMENTATION
Lacto-Fermentation as a Method of Food
Preservation ............................................. 69
How Fermentation Preserves Food .................................................................................. 69
The Benefits of Lacto-fermentation ................................................................................... 70
Fermented Vegetables Troubleshooting Guide
.............................................................. 72
White Layer on the Surface .............................................................................................. 72
Colorful Layer of Mold on the Surface .............................................................................. 73
Brine is Foamy ................................................................................................................. 73
Ferment Has a Pungent Odor ........................................................................................... 73
Brine is Slimy ................................................................................................................... 74
Finished Product is Too Salty ........................................................................................... 74
Finished Product is Soft and Mushy .................................................................................. 74
Culture Has Crawly Things in It ....................................................................................... 75
Non-pink Vegetables Turn Pink ....................................................................................... 75
Ferment Bubbles Out of the Jar ........................................................................................ 76
There is White Sediment in the Jars ................................................................................. 76
Brine Becomes Cloudy .................................................................................................... 76
Vegetables Become Dull or Faded .................................................................................. 76
Vegetables Turn Dark While Fermenting ........................................................................ 77
Garlic Turns Blue or Green While Fermenting ................................................................. 77
Vegetables Don’t Seem to Be Doing Anything ................................................................. 77
Ferment Your Garden ................................ 78
LACTO-FERMENTATION from Cultures for Health
8 | P a g e
Beets ............................................................................................................................... 78
Berries ............................................................................................................................. 79
Cabbage ......................................................................................................................... 79
Carrots ............................................................................................................................ 79
Cauliflower ...................................................................................................................... 79
Cucumbers ...................................................................................................................... 79
Eggplant .......................................................................................................................... 79
Green Beans .................................................................................................................... 80
Kale & Collards ................................................................................................................ 80
Peppers ........................................................................................................................... 80
Tomatoes ......................................................................................................................... 80
Turnips ............................................................................................................................ 81
Radishes .......................................................................................................................... 81
Zucchini and Summer Squash .......................................................................................... 81
Lacto-fermenting Squash, Pumpkin, and Other
Winter Vegetables ..................................... 82
Pumpkin & Squash ........................................................................................................... 82
Three Tips for Making Crunchy Lacto-
Fermented Dill Pickles .............................. 83
Why Lacto-fermented Pickles Are Superior ..................................................................... 84
........................................................................................................................................ 86
RECIPES
VEGETABLES ........................................... 87
Sauerkraut ....................................................................................................................... 87
LACTO-FERMENTATION from Cultures for Health
9 | P a g e
Lacto-fermented Lettuce (or any delicate green) ............................................................. 89
Lacto-fermented Dilly Beans ............................................................................................ 91
Lacto-fermented Green Beans with Cayenne Peppers and Garlic .................................... 93
Lacto-fermented Green Tomato Pickles ........................................................................... 95
Lacto-fermented Whole Cherry Tomatoes ....................................................................... 97
Naturally Fermented Carrot Sticks ................................................................................... 98
Naturally Cultured Carrot Relish ..................................................................................... 99
Lacto-fermented Grated Ginger Carrots ......................................................................... 101
Southwestern Lacto-fermented Carrot Sticks .................................................................. 103
Fermented Moroccan-spiced Carrots ............................................................................. 105
Lacto-fermented Carrot and Parsnip Pickles ................................................................... 107
Naturally Cultured Pickles .............................................................................................. 109
Lacto-fermented “Kosher” Dill Pickles ........................................................................... 111
Lacto-fermented Radishes .............................................................................................. 113
Lacto-fermented Daikon Radish Pickles with Garlic ........................................................ 115
Super Simple Lacto-fermented Peppers ......................................................................... 117
Lacto-fermented Anaheim Peppers ................................................................................ 119
Lacto-fermented Sliced Jalepeños .................................................................................. 121
Lacto-fermented Garlic Cloves ....................................................................................... 122
Preservation and Fermentation of Garlic in Apple Cider Vinegar ................................... 124
How to Ferment Garlic Scapes ........................................................................................ 126
Pickled Onions ............................................................................................................... 128
Simple Grated Zucchini Kraut ......................................................................................... 129
Lacto-fermented Squash and Zucchini Cubes with Red Pepper and Dill ......................... 131
Cortido (Latin-American Sauerkraut) .............................................................................. 133
Simple Kimchi ................................................................................................................ 135
Hearty Leafy Green Kraut ............................................................................................... 137
LACTO-FERMENTATION from Cultures for Health
10 | P a g e
Lacto-fermented Summer Squash ................................................................................... 139
Lacto-fermented Beets and Turnips ................................................................................ 141
Lacto-fermented Turnips ................................................................................................ 143
Lacto-fermented Eggplant .............................................................................................. 146
Curried Lacto-fermented Cauliflower ............................................................................. 148
Southern Pickled Nopalitos ............................................................................................. 150
Okra Pickles ................................................................................................................... 152
Lacto-fermented Sweet Potatoes ..................................................................................... 154
Lacto-fermented Raw Sweet Potatoes ............................................................................. 156
Lacto-fermented Kohlrabi Kraut ...................................................................................... 158
Lacto-fermented Kohlrabi Pickles with Dill and Mustard ................................................. 160
Fruits and Sweets .................................... 162
Lacto-fermented Blueberry Jam ...................................................................................... 162
Lacto-fermented Lemons ................................................................................................ 164
Lacto-fermented Watermelon Rind Pickles ..................................................................... 165
Lacto-fermented Rhubarb Chutney................................................................................. 167
Lacto-fermented Applesauce Recipe .............................................................................. 169
Cultured Fruit Leather .................................................................................................... 171
Fermented Apple-Cranberry Chutney ........................................................................... 173
Condiments ........................................... 175
Naturally Fermented Salsa .............................................................................................. 175
Lacto-fermented Green Tomato Salsa ............................................................................. 177
End-of-Summer Lacto-fermented Garden Salsa .............................................................. 179
Easy Lacto-fermented Ketchup ....................................................................................... 181
Lacto-fermented Olive Oil Mayonnaise .......................................................................... 183
Lacto-fermented Habañero Garlic Hot Sauce .................................................................. 185

LACTO-FERMENTATION from Cultures for Health
11 | P a g e
Lacto-fermented Onion Relish ........................................................................................ 187
Lacto-fermented Corn and Onion Relish ......................................................................... 189
Lacto-fermented Zucchini-Cucumber Relish ................................................................... 191
Lacto-fermented Chilero ................................................................................................ 193
Probiotic Guacamole and Bean Dip ................................................................................ 195
Guacamole ..................................................................................................................... 196
Hummus or Bean Dip ...................................................................................................... 196
Lacto-fermented Pear Chutney ....................................................................................... 197
Fermenting Honey .......................................................................................................... 199
Beverages .............................................. 201
Beet Kvass ...................................................................................................................... 201

LACTO-FERMENTATION from Cultures for Health
12 | P a g e
Sweet Potato Fly ............................................................................................................. 202
I N T R O D U C T I O N t o L A C T O -
F E R M E N T A T I O N
what to know about th is form of fermentat ion

LACTO-FERMENTATION from Cultures for Health
13 | P a g e
What is Lacto-fermentation?
istorically, fermented foods have played an important role in the diets of
most every society throughout the world. But beyond just the culinary
choices and preservation advantages of fermented foods is the natural
phenomenon of fermentation performed by the cells within our bodies that helps to keep us
healthy. With fermentation becoming quite popular in modern culture, it is good to
understand some of the basic science regarding fermentation and lacto-fermentation in
particular.
Most people think about beer or wine when they hear the term fermentation. While certain
yeasts are used to convert the sugars in grape juice or grains into alcohol, it is bacteria that
are responsible for lacto-fermentation. The “lacto” portion of the term refers to a specific
species of bacteria, namely Lactobacillus. Various strains of these bacteria are present on
the surface of all plants, especially those growing close to the ground, and are also common
to the gastrointestinal tracts, mouths, and vaginas of humans and other animal species. Many
of us may be familiar with Lactobacillus acidophilus, the acid-loving bacterium commonly
included in the process of making yogurt, but there are many others.
Lactobacillus bacteria have the ability to convert sugars into lactic acid through a naturally
occurring fermentation process. The Lactobacillus strain is so named because it can readily
use lactose, the sugar in milk, and convert it quickly and easily to lactic acid. So lacto-
fermentation does not necessarily need to involve dairy products.
H

LACTO-FERMENTATION from Cultures for Health
14 | P a g e
Lactic acid is a natural preservative that inhibits the growth of harmful, or putrefying,
bacteria. This phenomenon allowed people to preserve foods for extended periods of time
before the advent of refrigeration or canning. Lactic acid also promotes the growth of
healthy bacteria in the intestinal tract. That is why lacto-fermented foods are considered
probiotic foods. (Probiotic means “for life.”)
Beyond preservation advantages, lacto-fermentation also increases the vitamin and enzyme
levels, as well as digestibility, of the fermented food. In addition, lactobacillus organisms
produce antibiotic and anticarcinogenic substances that may contribute to good health. That
is yet another reason to have an abundant amount of lactobacilli residing in our intestinal
tracts.
The diets of every traditional society have included some kind of lacto-fermented food. In
Europe they have been primarily dairy, sauerkraut, grape leaves, herbs, and root
vegetables. The Alaskan Inuit ferment fish and sea mammals. The Orient is known for
pickled vegetables and kimchi in particular.
Pickles and relishes are a part of the American food tradition. But the kind of pickles and
sauerkraut that can be purchased in most grocery stores today are not at all the same
products our ancestors knew. Since the advent of industrialization, most pickling is done
with vinegar, which offers more predictable results, but no lactic acid. However, with just a
little patience, instruction, and minimal supplies, it is possible to learn the time-honored art
of lacto-fermentation.
Lacto-fermentation really is more art than science. The science part is simple: lactobacillus
(from a prepared culture, fresh whey, or just naturally occurring) plus sugar (naturally

LACTO-FERMENTATION from Cultures for Health
15 | P a g e
present in vegetables and fruits), plus a little salt, minus oxygen (anaerobic process), plus
time, equal lactic-acid fermentation. The length of fermentation can vary from a few hours to
two months or more. The temperature of the room where fermentation occurs will determine
the length of time. The ideal temperature is around 72°F, but warmer or cooler temperature
will still work. (Some strains of bacteria require specific temperature ranges.) The length of
time is dependent more on the flavor you prefer than anything else and since the flavor level
of lacto-fermented vegetables increases with time you will want to sample often until you are
experienced enough to know what works for your tastes. Just keep in mind that you don’t
want to introduce a lot of oxygen to the fermentation process as this increases the chance of
spoilage. Lacto-fermentation is generally done in an airtight container or a crock with a
water seal that prevents air from contaminating the culture. If you have a reliable recipe to
follow, you can make minor adjustments as you see fit.
The important thing is not to be intimidated by lacto-fermentation. You are not going to
make your family sick by giving them home-fermented foods. Unless it smells unmistakably
putrid (in which case common sense says throw it away), fermented foods are some of the
safest foods you can eat. They are easy for even a beginner to prepare and it doesn’t take
long to gain enough confidence to venture beyond basic yogurt or sauerkraut to an endless
variety of vegetable and/or fruit combinations.

LACTO-FERMENTATION from Cultures for Health
16 | P a g e
An Overview of the Process of Vegetable
Fermentation
Fermenting not only preserves food but also enhances the nutrient content. The action of the
culture organisms makes the minerals in cultured foods more readily available to the body.
During the fermenting process the bacteria also produce B vitamins and enzymes that are
beneficial for digestion.
Culturing or fermenting a food involves the chemical process of breaking a complicated
substance down into simpler parts, usually with the help of bacteria, yeasts, or fungi.
Fermented food is considered a live food and the culturing process continues during
storage to enhance the food’s nutrient content. All cultured vegetables have a natural tart
flavor as the sugars and carbohydrates have been broken down and used up in the process.
The lactic acid also contributes to the tartness of fermented foods. Cultured vegetables are a
great option for low-carbohydrate diets.
Almost any vegetable can be fermented. Fermenting local, farm-fresh produce is a great
way to provide good nutrition year-round. You can ferment just one vegetable or a mix of
many different kinds. A tantalizing mixture is beets with carrots, ginger, garlic, leeks,
onions, dulse (seaweed), and jalapeños. Kimchi recipes include cabbage, red chili peppers,
garlic, ginger, and onion. Pickles can be spiced with dill and garlic; sauerkrauts can include
juniper berries, caraway seeds, and more!

LACTO-FERMENTATION from Cultures for Health
17 | P a g e
Basic Equipment
Vegetable chopper such as a knife, mandolin slicer, or food processor
Chopping board
In the case of cabbage, shredded carrots, or similar vegetables, a blunt meat
pounder or potato masher to pound juices out of the vegetables, or a kraut pounder
Large container to hold vegetables for pounding
Unrefined sea salt or pickling salt
Starter cultures such as whey, kefir grains, freeze-dried culture, etc. (optional: click
here for more information)
Filtered water to wash vegetables
Fermenting vessel such as a crock or glass jar and a weight and cover system (click
here for more information)
How to Make Your Ferment
Wash your vegetables in filtered water. Do not sterilize them or cook them as that will
destroy the natural bacteria necessary for the fermentation process.
Cut up all the vegetables except hot peppers (if you use hot peppers).
Place the vegetables in a big bowl and squeeze with your hands or pound with a
meat hammer or kraut pounder to release the juices.
Add salt to taste or celery juice for a salt-free alternative (click here for more
information).

LACTO-FERMENTATION from Cultures for Health
18 | P a g e
Mix in a starter culture such as whey, kefir grains, or a freeze-dried culture if desired
(click here for more information).
At the very end, chop up any hot peppers (after removing the seeds) and mix in with
the other vegetables, being careful not to get it on your hands. (It will temporarily
make the skin burn.)
Put ingredients in a glass mason jar or other vessel leaving at least 3 inches at the
top.
Push the vegetables down until their juices rise to the top.
Weight the vegetables down under the liquid (click here for more information).
Cover with a lid that keeps bugs out, allows the gas to escape, and limits the amount
of oxygen reaching the vegetables (click here for more information).
Place the jar with the vegetables in your kitchen or other warm area. Taste the ferment
every day and keep it submerged under the liquid (if you are not using special equipment).
When it starts to taste tart or tangy, you can move it to the refrigerator or ferment the batch
in a cooler spot for a longer period of time.
How Long Does It Take?
The length of time for the ferment to be considered “done” depends on several factors and
can generally range from 2 to 21 days.
Using a starter culture such as whey, kefir grains, or a freeze-dried starter will speed
the culturing process. Please note: if you are using a freeze-dried culture we do
recommend adhering to the instructions that come with the culture to determine the
appropriate length of time to allow the vegetables to ferment. This helps to ensure
optimal bacteria development.
Using greater amounts of salt will slow the fermentation process.
Cooler room temperatures will slow the process. A warmer room temperature will
speed the process. Please note: it is important not to ferment vegetables in a very
warm room. Ideally the room should be no warmer than standard room temperature.

LACTO-FERMENTATION from Cultures for Health
19 | P a g e
In general, once your ferment tastes tart and tangy, it is ready to eat. This can vary
depending on personal taste preferences. Pickles are a great example. Some people
prefer the taste of pickles after just a week, while others prefer a more tart and tangy
pickle, which can take 2 to 3 weeks. It can be helpful to start tasting your fermented
food after the first few days to help determine when to stop the process.
Storing Your Fermented Vegetables
If you decide to store them, many people find that putting their fermented vegetables in a
root cellar or refrigerator for 4 to 6 weeks really improves the flavor. In storage, the
ferments continue to culture at a very slow rate.
A ferment with 1% to 2% salt should keep well for at least 4 to 9 months, respectively, in a
refrigerator. A 2% salted version should keep well in a dark cool area for at least 3 months if
the vegetables are kept submerged under liquid.

LACTO-FERMENTATION from Cultures for Health
20 | P a g e
Introduction to Culturing Fruit
Most people who have dabbled in fermentation have at least practiced culturing vegetables
and probably dairy as well. But when it comes to culturing fruit things start to get a little
more complicated.
Fruit contains a lot more sugar than vegetables. These sugars are exactly what the
microorganisms feast on to produce bacteria, acids, and yeasts in a cultured food product.
Because the sugars are so prevalent in fruit you have to closely monitor and control the
fermentation process. Instead of simply salting some cabbage and allowing it to do its thing,
you have to be more involved in order to produce a lacto-fermented fruit culture.
Types of Fruit Ferments
There are basically three kinds of fruit ferments:
Lactic Acid Ferment. This is the type of ferment that produces the first
stage of the fruit fermentation process.
Alcohol Ferment. There are many types of fruit alcohol ferments. Wine is
the most well-known. This stage of fermentation is fairly easy to achieve due
to all of the sugars in the fruit.

LACTO-FERMENTATION from Cultures for Health
21 | P a g e
Vinegar Ferment. This is the final stage of fermentation after alcohol. At this stage acetic
acid is formed and we get things like apple cider vinegar.
Achieving Lactic Acid Fermentation
Lactic acid fermentation is of interest to many who are familiar with lacto-fermented
vegetables like sauerkraut and all of their health benefits.
Lacto-fermented fruit jams and chutneys can be achieved in much the same way as the lacto-
fermented vegetables we are used to. You simply need to keep a few things in mind...
1. Fruits ferment faster and will go bad or turn to alcohol quickly so they are not suited
for long-term storage. Make fruit ferments in small batches and expect them to last
no longer than a few weeks in the refrigerator.
2. Fruit ferments need some assistance to go the direction of lactic acid fermentation
rather than alcohol fermentation. For this reason we recommend you cut back a bit
on salt (who wants a salty fruit ferment anyway?) and use either a culture starter or a
water kefir culture.
3. Combining fruits with vegetables is helpful in lowering the overall sugar content and
slowing down the fermentation process. Fruit chutneys in which vegetables are
added is a great starting point.
So, don’t be too intimidated by the challenge of fermenting fruit. Give it a shot, have fun with
it, and keep in mind a few of the considerations above when delving into fruit fermentation.

LACTO-FERMENTATION from Cultures for Health
22 | P a g e
Busting Lacto-fermentation Myths
There are some common misconceptions about lacto-fermented vegetables. First of all, it is
new territory for a lot of people, so it just sounds foreign to begin with. But once you are
brave enough to prepare your first jar of sauerkraut or crock of kimchi, you are over the
biggest hurdle. After that, you might struggle with some of the common misconceptions
about lacto-fermented vegetables that may have been pushing you away from the practice.
Here are some facts to bust some of those myths so that you can get in the kitchen and create
these ferments without fear.
Myth #1: Fermented vegetables must be canned to be safe.
This myth is perpetuated by cookbooks and preserving books that call for the jars of
ferments you have cultured to be water- or pressure-canned for “safety.”
The truth is, fermented vegetables contain a natural preservative called lactic acid. This
acidity, much like the vinegar in canned pickles, preserves the vegetables. In a very acidic
environment, such as is present in fermented vegetables, harmful bacteria cannot exist. So,
fermented vegetables preserve themselves. And, if you’re ever wondering whether a
particular batch has gone bad, your nose will let you know.
Myth #2: You must store fermented vegetables in the
refrigerator.
This myth is made possible by a lack of understanding of history. Fermented vegetables
were actually born as a method of food preservation in the absence of refrigeration.
LACTO-FERMENTATION from Cultures for Health
23 | P a g e
You only need a cool place when a recipe refers to moving your ferments to cold storage.
This could be a basement, a root cellar, or anything you can keep relatively cool.
Fermentation continues even under refrigeration, so the cooler you can keep it the better.
Myth #3: You must use whey or a starter culture.
Many who are dairy-intolerant or do not wish to purchase starter cultures are turned off by
recipes that call for these ingredients. However, the recipes that call for either of these often
say that they are optional, which they are, and entirely unnecessary.
A whey or starter culture addition is simply there to give the “good” bacteria a head start,
and ensure that they proliferate over the bad. So, while those boosts are good for beginners
who wish to be more comfortable with the process, they are not necessary. Fresh
vegetables should have friendly bacteria all over them from the soil. The fermentation
process will multiply these and inoculate your ferment with friendly bacteria.
Myth #4: You should culture at a warm room temperature
for a few days.
Many, many recipes tell you to “let it ferment for three days and then transfer to cold
storage.” This will allow the vegetables to culture and then halt the culturing process, but it
doesn’t paint a full picture.
Most traditionally made sauerkraut and other ferments were cultured at cool
temperatures in a cellar or buried vessel. So from day one they would be
below 70°F. This allows for a slower fermentation process which can also help
develop flavors, retain crunch, and perhaps even change the friendly bacterial
count of your cultured vegetables.
So if these myths have been holding you back, don’t worry, they’re now
busted!

LACTO-FERMENTATION from Cultures for Health
24 | P a g e
Do You Need a Starter Culture?
When making naturally cultured vegetables, fruits, or condiments, you will often find
recipes that call for a variety of ingredients including salt, whey and salt, or even just a
freeze-dried culture. How do you choose the best culturing medium for your project? Can
one be substituted for another? What if you are dairy-free but your recipe calls for using
whey (a dairy by-product)? Is purchasing a starter culture really necessary? Do you actually
need to use them?
Purpose of Salt and Other Ingredients for Fermentation
Salt and starter cultures such as whey, kefir grains, and freeze-dried cultures can promote
the fermenting process by inhibiting the growth of undesirable microorganisms, favoring
the growth of desired Lactobacilli, and in some cases even adding desirable bacteria to the
culturing process. Which combination you chose is dependent on your particular project
and any dietary limitations you may have.
The skins of fruits and vegetables will generally come complete with natural bacteria
accumulated during the farming and transportation process. These bacteria, if allowed to
grow, will ferment your fruits or vegetables. Unfortunately, not all bacteria are created equal
and some of the present bacteria as well as bacteria in the surrounding air may not lead to a
tasty finished product. Assisting ingredients such as salt can inhibit the growth of
undesirable microorganisms while favoring the growth of desired strains of bacteria. The
natural culturing process can be further encouraged and sped up by adding beneficial
LACTO-FERMENTATION from Cultures for Health
25 | P a g e
bacteria through the use of whey, a starter culture, kefir grains, etc. While we do strongly
encourage the use of assisting ingredients, particularly salt, to improve outcomes and avoid
the growth of undesirable bacteria, the use of salt, whey, or freeze-dried cultures is not
strictly necessary.
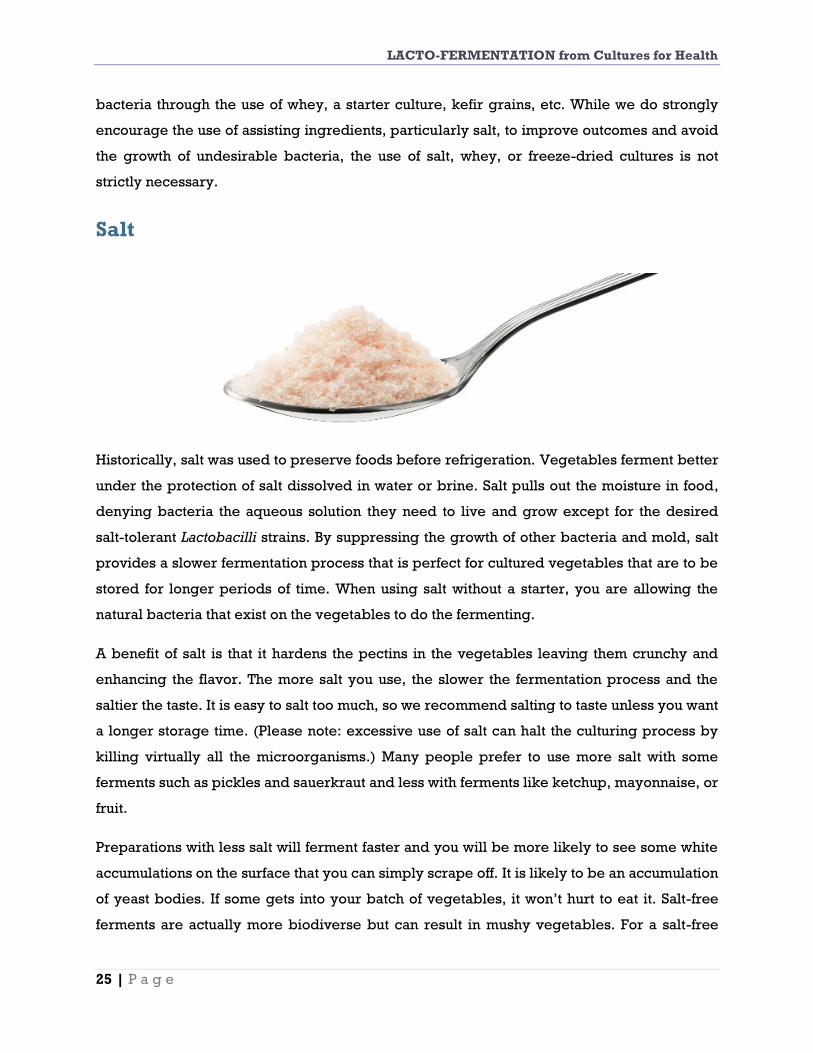
Salt
Historically, salt was used to preserve foods before refrigeration. Vegetables ferment better
under the protection of salt dissolved in water or brine. Salt pulls out the moisture in food,
denying bacteria the aqueous solution they need to live and grow except for the desired
salt-tolerant Lactobacilli strains. By suppressing the growth of other bacteria and mold, salt
provides a slower fermentation process that is perfect for cultured vegetables that are to be
stored for longer periods of time. When using salt without a starter, you are allowing the
natural bacteria that exist on the vegetables to do the fermenting.
A benefit of salt is that it hardens the pectins in the vegetables leaving them crunchy and
enhancing the flavor. The more salt you use, the slower the fermentation process and the
saltier the taste. It is easy to salt too much, so we recommend salting to taste unless you want
a longer storage time. (Please note: excessive use of salt can halt the culturing process by
killing virtually all the microorganisms.) Many people prefer to use more salt with some
ferments such as pickles and sauerkraut and less with ferments like ketchup, mayonnaise, or
fruit.
Preparations with less salt will ferment faster and you will be more likely to see some white
accumulations on the surface that you can simply scrape off. It is likely to be an accumulation
of yeast bodies. If some gets into your batch of vegetables, it won’t hurt to eat it. Salt-free
ferments are actually more biodiverse but can result in mushy vegetables. For a salt-free
LACTO-FERMENTATION from Cultures for Health
26 | P a g e
ferment you can substitute celery juice or seaweed, but they will not prevent the mushy
texture. A celery-juice brine should be about half celery juice, half water.
Starter Cultures
Using some form of bacterial starter can speed up the fermentation process. Below are
various starters that you might like to try. Many people find that the type of starter they use
affects the flavor so try various types to see which ones your taste buds prefer.
Whey. Whey infuses the vegetables with good bacteria but is dairy-based so not
recommended for those who are dairy intolerant. Make sure the whey is properly strained
and fresh-tasting as it will lend its flavor to the batch. You can add salt along with the whey
for flavor and to keep the vegetables crunchy. Using whey without any salt will make the
ferment go faster but the end product will have a mushy texture and be more susceptible to
mold. You can make whey by straining yogurt, kefir, or buttermilk or by clabbering raw
milk.
Kefir Grains. You can add milk or water kefir grains to your vegetable ferments. Just mix
them into the vegetables. Once your vegetables are fermented you can eat the grains along
with your ferment or fish them out. Once milk kefir grains or water kefir grains have been
used in a vegetable ferment, they normally won't work again in a milk or sugar-based
beverage. It is recommended to use new grains for each batch of fermented vegetables. Salt
in these ferments is optional, and will slow the process but enhance flavor and crunch while
offering some protection from mold.
Dried Starter Cultures. Vegetable Starter Cultures are dried bacteria, packaged in foil
envelopes, that you can mix into your ferment. You can store them in your refrigerator or
freezer and use as you need. This is a very simple and easy way to speed up your
fermentation process.
With a starter culture you're adding a known set of bacteria. While it is not necessary to
purchase a dried culture, this option does offer the most consistent results in terms of taste
and bacteria contained in the finished product. Dried cultures are also compatible with salt
for taste, crunch, and some mold protection.
LACTO-FERMENTATION from Cultures for Health
27 | P a g e
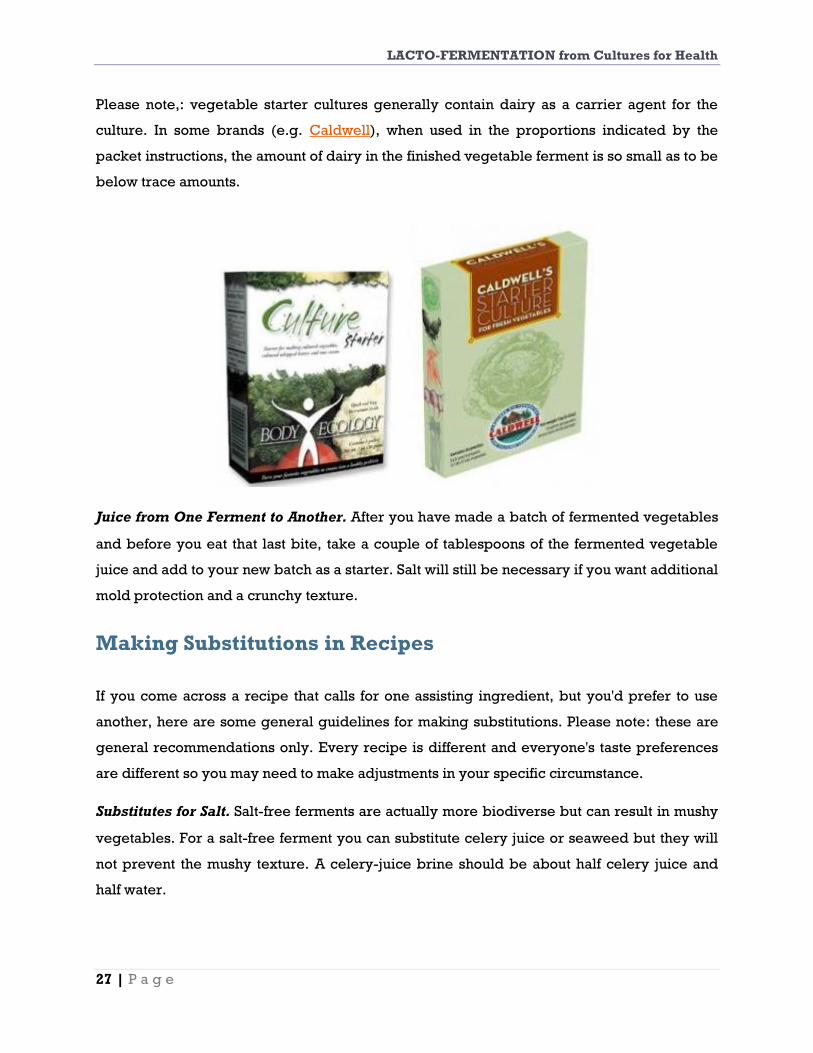
Please note,: vegetable starter cultures generally contain dairy as a carrier agent for the
culture. In some brands (e.g. Caldwell), when used in the proportions indicated by the
packet instructions, the amount of dairy in the finished vegetable ferment is so small as to be
below trace amounts.
Juice from One Ferment to Another. After you have made a batch of fermented vegetables
and before you eat that last bite, take a couple of tablespoons of the fermented vegetable
juice and add to your new batch as a starter. Salt will still be necessary if you want additional
mold protection and a crunchy texture.
Making Substitutions in Recipes
If you come across a recipe that calls for one assisting ingredient, but you'd prefer to use
another, here are some general guidelines for making substitutions. Please note: these are
general recommendations only. Every recipe is different and everyone's taste preferences
are different so you may need to make adjustments in your specific circumstance.
Substitutes for Salt. Salt-free ferments are actually more biodiverse but can result in mushy
vegetables. For a salt-free ferment you can substitute celery juice or seaweed but they will
not prevent the mushy texture. A celery-juice brine should be about half celery juice and
half water.

LACTO-FERMENTATION from Cultures for Health
28 | P a g e
Substitutes for Whey. Many recipes call for using whey as the starter culture but there are
several options for substitution. One option is to slightly increase the amount of salt in the
recipe and not directly replace the whey with an alternative starter culture.*
A second option is to use one of the other starter cultures such as kefir grains (water kefir
grains if you are dairy-free), a dried starter culture, or juice from a previously successful
fermentation batch. If using a dried culture, follow the instructions that came with the culture
to determine the amount of the packet you will want to use with the specific amount of
vegetables in your recipe. (For example, if a packet will culture 4 to 5 pounds, you may be
able to use less if your recipe is 2 pounds.) If using juices from a previous fermentation
batch, use at least as much juice as the amount of whey called for in the recipe and ideally
more.
Substitutes for Dried Starter Cultures. If your recipe calls for a pre-packaged starter
culture, you can normally substitute either just salt* or a combination of salt and an
alternative starter culture such as whey, kefir grains, or juice from a previous batch.
Generally speaking, each quart of fermented food will require 1 to 3 teaspoons of salt and
1/4 cup or whey or 1/4 to 1/2 cup of juices from a previous batch.
*Most vegetable recipes are salt-friendly and adding a bit more salt in place of whey or a
freeze-dried culture isn't normally detrimental to the taste. But fruits, salsa, dips,
condiments, etc. tend to be more salt-sensitive and it is best to use whey, kefir grains, or a
dried culture rather than additional salt.

LACTO-FERMENTATION from Cultures for Health
29 | P a g e

LACTO-FERMENTATION from Cultures for Health
30 | P a g e
P R O P E R E Q U I P M E N T A N D
I N G R E D I E N T S
what i t takes to get going
LACTO-FERMENTATION from Cultures for Health
31 | P a g e
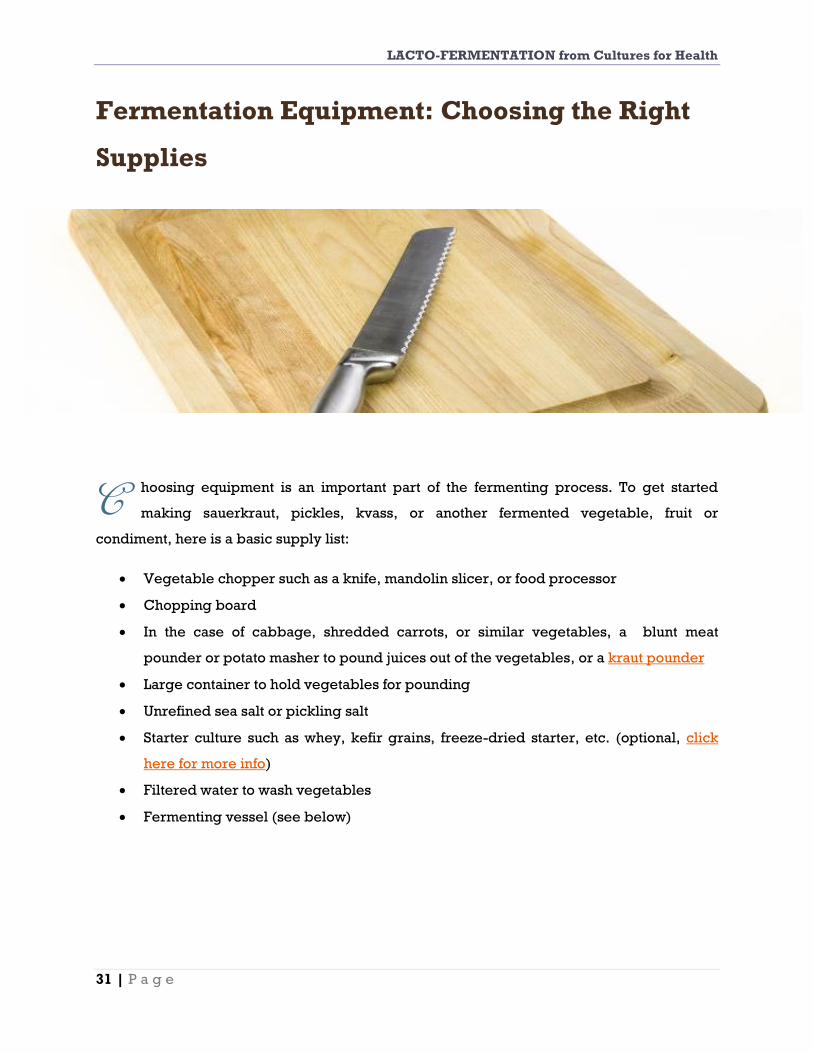
Fermentation Equipment: Choosing the Right
Supplies
hoosing equipment is an important part of the fermenting process. To get started
making sauerkraut, pickles, kvass, or another fermented vegetable, fruit or
condiment, here is a basic supply list:
Vegetable chopper such as a knife, mandolin slicer, or food processor
Chopping board
In the case of cabbage, shredded carrots, or similar vegetables, a blunt meat
pounder or potato masher to pound juices out of the vegetables, or a kraut pounder
Large container to hold vegetables for pounding
Unrefined sea salt or pickling salt
Starter culture such as whey, kefir grains, freeze-dried starter, etc. (optional, click
here for more info)
Filtered water to wash vegetables
Fermenting vessel (see below)
C

LACTO-FERMENTATION from Cultures for Health
32 | P a g e
Choosing a Fermenting Vessel
There is no shortage of options when it comes to choosing a container for fermenting your
vegetables, fruits or condiments. Fermenting vessels range from wide-mouth glass jars to
ceramic crocks.
Basic Vessel Requirements. A cylindrical shape is recommended and better facilitates the
fermentation process over using a container with hard corners. In terms of materials, we
strongly recommend using a glass or ceramic container. It is possible to use a plastic
container but plastic can leach chemicals and is more prone to scratches and damage that
can harbor harmful bacteria. If you do choose a plastic container, be sure it is food-grade
plastic and has not previously held non-food substances. Do not ferment in metallic
containers as they react with salt and the acids produced during fermentation.
Vessel Options. While a wide range of fermenting container options exist, here is a
summary of the most popular.
Canning Jars or Similar-style Glass Jars. Canning jars are inexpensive and readily available
fermenting containers. They also come in a variety of sizes, which can be useful for making
smaller batches of condiments, salsa, etc. A separate weight and covering system is needed
if using canning jars (see below).
Ceramic Crock. Ceramic crocks can often be found at estate sales or thrift shops and make
beautiful decorations as well as practical fermenting vessels. Make sure your crock is made
of lead-free clay. If you use a ceramic crock, be sure to examine it for any cracks that can

LACTO-FERMENTATION from Cultures for Health
33 | P a g e
harbor harmful bacteria. Most crocks will require a separate weight and covering system
(see below).
Slow Cooker Insert. Ceramic inserts for old slow cookers can often be found at thrift stores
and can make wonderful fermenting vessels. The round-shaped inserts are generally easier
to work with as a weighting and cover system is required (see below) but the oval-shaped
inserts can be used if necessary.
Glass or Ceramic Bowl. Glass and ceramic bowls are also an economical and readily
available option. A separate weight and covering system will be necessary (see below).
Specialty Ceramic Fermenting Crock. Ceramic fermenting crocks come complete with the
pot, lid, and internal weighing stones to keep the vegetables submerged under the brine.
The lids are designed using a water-trough-airlock system to allow the natural gases to
escape while sealing out oxygen thereby reducing or eliminating the threat of mold during
the culturing process. They come in several sizes. When choosing the best size crock for
your family, keep in mind that the crocks can only be filled to 80% capacity. Crocks should
be checked regularly for cracks as cracks can harbor harmful bacteria. Specialty crocks are
more expensive but are one of the best types of fermenting vessels.
Glass Jar with Airlock System. An alternative to specialty crocks are the more inexpensive
glass jars equipped with an airlock system. These jars come equipped with a standard
airlock system that allows gas from the vegetables to escape while sealing oxygen out
thereby reducing or even eliminating the threat of mold during the culturing process. While
a weight is not strictly necessary (see below), it will prevent the top layer of vegetables from
changing color or drying out. The airlock-equipped jars come in several sizes.
LACTO-FERMENTATION from Cultures for Health
34 | P a g e
Weighting and Covering Methods. The type of weighting and covering method used will
depend on the type of food you are fermenting and your specific fermenting vessel.
Non-brine Fruits, Vegetables and Condiments. If you are culturing non-brine fruits,
vegetables, condiments, etc. many recipes will call for simply placing a lid on the container
and allowing the food to ferment for several days. A small amount of gas will be created
during the 2- to 3-day period so use caution when removing the lid.
Vegetables in Brine. If you are culturing vegetables in a brine solution, a weight-and-cover
system is a necessary component. Once you fill your vessel with vegetables, you will need
to find a weighting mechanism that fits inside. Vegetables in brine will eventually float to the
top during the fermentation process and exposure to air will make them grow mold so to
keep them submerged under the protection of their juices and brine requires a weight
system.
Options for weighting vegetables include:
A plate that fits snugly inside the vessel. A clean rock or similar weight object can be
placed on top of the plate to weigh the plate down and keep the vegetables
submerged.
A smaller jar that fits snugly inside the vessel. The jar can be filled with water to
weigh it down.
A heavy glass or ceramic coaster.
You can use other objects as a weight as long as they are clean and free of glues, etc.
Once your vegetables are weighed down, we recommend covering the top of the vessel
with a lid, plastic or a tight-weave tea towel to keep bugs out and odors in. Be sure to secure
towels with a very tight rubber band to keep bugs out. Please note, as the vegetables
ferment, gases will be created that will need to escape. An ideal cover will allow the gas to
escape while keeping the amount of oxygen reaching the vegetables to a minimum. The
more oxygen that reaches the vegetables, the greater the chances are for the development
of scum and mold.
If you forgo a cover and a weight and decide to submerge your vegetables by hand daily, a
white film may appear on the surface of the vegetables. If it does, just scrape it off daily. It is
most likely an accumulation of yeast bodies. If some gets into your batch, it’s not harmful.

LACTO-FERMENTATION from Cultures for Health
35 | P a g e
How to Keep Your Fermented Vegetables
Submerged When Fermenting in a Glass Jar
There are a lot of different kinds of vessels that people use for fermenting vegetables, and
everyone has a favorite. The ideal vessel allows you to keep your vegetables submerged
underneath the ever important brine.
One vessel that is very popular is the old-school crock. These crocks are beautiful, helpful,
and usually very expensive. Some varieties even come with a heavy weight that will keep
the vegetables under the brine.
Another vessel often used is the affordable and versatile mason or canning jar. These jars
can be found easily at hardware stores and big box stores alike; and quite inexpensively.
The only problem is that it can be difficult to mimic the submerging abilities of the weighted
crock lids.
To solve this problem many people use what are called airlock lids. These are very similar
to what is used in the fermentation process for alcoholic beverages like wine. They allow
gases to escape the jars while preventing outside air from penetrating the brine.
This helps to create an anaerobic environment while not having to keep the vegetables
underneath the brine 100% of the time. While this may eliminate some worry, it can also get
very costly. If you’d like to ferment vegetables inexpensively and maintain a high-quality
end product, then you need a way to weight down your vegetables so that they remain
under the brine at all times.
Here’s How
First, use a fermenting vessel with a wide enough mouth to allow you to insert a weight into it
and get the weight out easily. With a convenient opening, you can choose a variety of
methods of submerging or weighting the vegetables inside the vessel.
A cabbage leaf or other large firm piece of vegetable. Tuck a cabbage leaf over the top of
your cut-up vegetables. Often this leaf alone will be enough to keep the vegetables in place

LACTO-FERMENTATION from Cultures for Health
36 | P a g e
under the brine. Another option is to make thin wide strips from zucchini or carrot and place
these over the vegetables as a mat.
A small ceramic dish. You can do this with or without a cabbage leaf. You can often find
the right size dish at an Asian market, where they are sold as condiment dishes. Or, small
dessert ramekins may work. When you are shopping for one, take a mason jar with you to
make sure you can get the dish in and out of the jar easily.
To use the dish as a weight, cover the vegetables in brine up to about 1-1/2 inches from the
rim. Then, either with or without a cabbage leaf covering the vegetables, insert the small
dish and push it gently so that the brine comes up over the top. This acts as a weight to keep
your floating vegetables submerged.
A small dish + an additional weight. Another option is to take the small dish and add it to
the vegetables and brine in the wide-mouth jar. Then place a very clean heavy object like a
rock on top of the dish, making sure it is heavy enough to weight down the dish and keep
the vegetables submerged.
Glass stones. You can use glass stones of the type that are used in floral arrangements or
aquariums to rest on top of the vegetables. These come in sizes from about the size of a dime
to about 2 inches in diameter. The larger ones are easier to work with. Put three or four of
them in the jar on top of the vegetables and spread them out to cover the surface. Make sure
the brine comes up over the top of the stones.
Make sure the stones you use are clear glass, and food grade. Stones with an iridescence to
them are not food grade.
Ferment in a large bowl then move to a jar. If you do your fermentation in a large vessel,
like a big mixing bowl, and weight it down with a plate and other clean heavy objects, you
can easily keep the vegetables submerged during the crucial beginning fermentation
process. Then, once the vegetables are fermented, you can transfer them and their brine to
jars, still attempting to keep the brine over the veggies. This way you can still use those
mason jars and get that mixing bowl back in the kitchen for other purposes.
So, once again, fermentation proves simple enough for every budget!

LACTO-FERMENTATION from Cultures for Health
37 | P a g e
Choosing Salt for Fermenting
There are often only three ingredients necessary in a vegetable ferment: vegetable, salt,
and water (if making a brine). Because the ingredient list is so short, it is important that each
ingredient be of the highest quality.
Obviously, finding fresh organic produce should be at the top of your priority list. Once this
is accomplished you need to decide what type of salt you’re going to use.
Iodized Salt. This is the basic table salt that you can buy inexpensively from any grocery
store. Most table salt is iodized meaning it has iodine added to it to increase its mineral
count. The problem with this is that iodine tends to inhibit the beneficial bacteria in a
cultured vegetable. Because of this we do not recommend using iodized salt for vegetable
fermentation.
Kosher Salt. This is the second most popular salt found in most grocery stores. Kosher salt is
not “kosher” itself, but is used to make meats kosher and is commonly called “koshering”
salt. It has a larger crystal than the granular table salt and does not contain as many
additives as table salt.
It does, however, sometimes contain sodium ferrocyanide to prevent caking, something you
might not want in your ferments.

LACTO-FERMENTATION from Cultures for Health
38 | P a g e
Pickling Salt. This is much like iodized table salt, but without the iodine and anti-caking
agents. For this reason it can be used for fermenting vegetables. It is highly refined though,
so it may not be the optimal choice if you are looking for an unrefined, natural salt.
Sea Salt. Sea salts are derived from sea water. They can be refined or unrefined, but are
generally safer than iodized salts. When looking for an unrefined sea salt look for specks of
color: gray, black, pink, or red. These colors indicate that the minerals have not been
refined out of the salt. Some natural salts may also have some moisture to them as they have
not been fully dried or further refined after being extracted from the sea water. This is
definitely a type of salt to explore using if you are fermenting vegetables.
Think of salt as you would any other food you would put on the table, or in your ferments. An
ideal salt for fermenting is whole, unrefined, and full of natural vitamins and minerals.

LACTO-FERMENTATION from Cultures for Health
39 | P a g e
Choosing a Water Source
Many fermented foods make use of water in the culturing process. The water can do a
variety of important things:
Water is a carrier for trace minerals that are sometimes important in culturing.
Sometimes moisture is necessary to the culturing process, and the moisture is
provided by water.
Bacteria, swimming in water, are able to contact the material being fermented.
Water with other ingredients (sugar, tea) can become the liquid that is fermented to
make the final product.
The material being fermented is protected from oxygen by staying underwater,
which prevents the development of pathogenic bacteria or molds.
No matter what you are culturing, it is vitally important that the water you use be clean and
free of pathogens or toxins. Beyond that, certain types of cultures have different
requirements for water that you should be aware of to get the best results.
Municipal water quality varies around the country, and so does the quality of spring water
and well water. Most cultures are pretty forgiving of water quality as long as the water is
drinkable.
LACTO-FERMENTATION from Cultures for Health
40 | P a g e
Where Your Water Comes From
The water you use for culturing will most likely come from one of four sources:
Well Water. Water that comes from your own well, or a well you share with some neighbors.
Some municipalities also get their water from wells.
If your water is from a municipal well, there is chlorine, and possibly fluoride, in the water,
as well as any other treatment chemicals the utility chooses to add. Private wells are
required to be tested for microbial contamination at the time the well is installed, but not
thereafter. Well owners should test their water annually for microbial contamination and
chemical contamination from nitrates/nitrites, arsenic, petroleum byproducts, radon, or
pesticides.
Well water is typically high in minerals, which is good for water kefir, not so good for
kombucha, and really hard on your laundry. If the water is particularly acid (pH 7.0 or
lower), it can cause leaching of metals from plumbing. If well water is discolored or has an
odor, there may be an overly high mineral content from ground contamination or from
decayed vegetation.
Spring Water. Similar to well water, spring water comes out of the ground and is used close
to the source, or bottled for commercial sale. The main difference between spring water and
well water is that spring water is collected at the surface of the earth, while well water is
collected considerably below the surface. A natural spring is the result of water in an
underground source seeping through the ground or rock and bubbling out through the
surface.
Spring water is also typically high in minerals.
As a result of having been filtered through earth or rock, spring water is usually considered
relatively free of contaminants. However, if the ground it’s being filtered through is
contaminated, the water itself can be contaminated too. It can also become contaminated in
its journey from the spring, through plumbing, to your faucet. Most people do not have
springs as a local source of drinking water.
LACTO-FERMENTATION from Cultures for Health
41 | P a g e
Tap Water. Water that comes from a municipal water source. This could be glacier water,
well water, river water, or water collected in a variety of ways.
Tap water may be hard (contains minerals including calcium and magnesium), or soft
(relatively free of minerals). Since hard water leaves deposits on tile and fixtures, and
doesn’t do a great job with laundry, many home owners choose to run their water through a
water softener that adds salts to remove the “hard” minerals. To find out what is in your tap
water, check with your water utility and they can provide you with a water quality report.
Tap water is inexpensive and plentiful, and is almost always of a quality good enough to
drink and cook with. It can usually be used “as is” for many culturing projects.
Water that is too “hard” can be a problem for some cultures, while water that is too “soft”
can require remineralization for some other cultures. Tap water also usually contains
chlorine, chloramines, or fluoride that must be removed for some cultures to work well.
Bottled Water. You can buy water in plastic bottles almost anywhere these days. Check the
labels: it can be spring water bottled at the source, or water collected from rivers or
streams, or even municipal tap water.
Bottled water may have fluoride added to it.
Distilled water is a type of bottled water that has been completely purified and contains no
minerals or chemicals of any sort. Water that is sold in fountain machines at supermarkets is
usually distilled or purified in other ways, and is free of chlorine, fluoride, minerals, or
bacterial contaminants.
LACTO-FERMENTATION from Cultures for Health
42 | P a g e
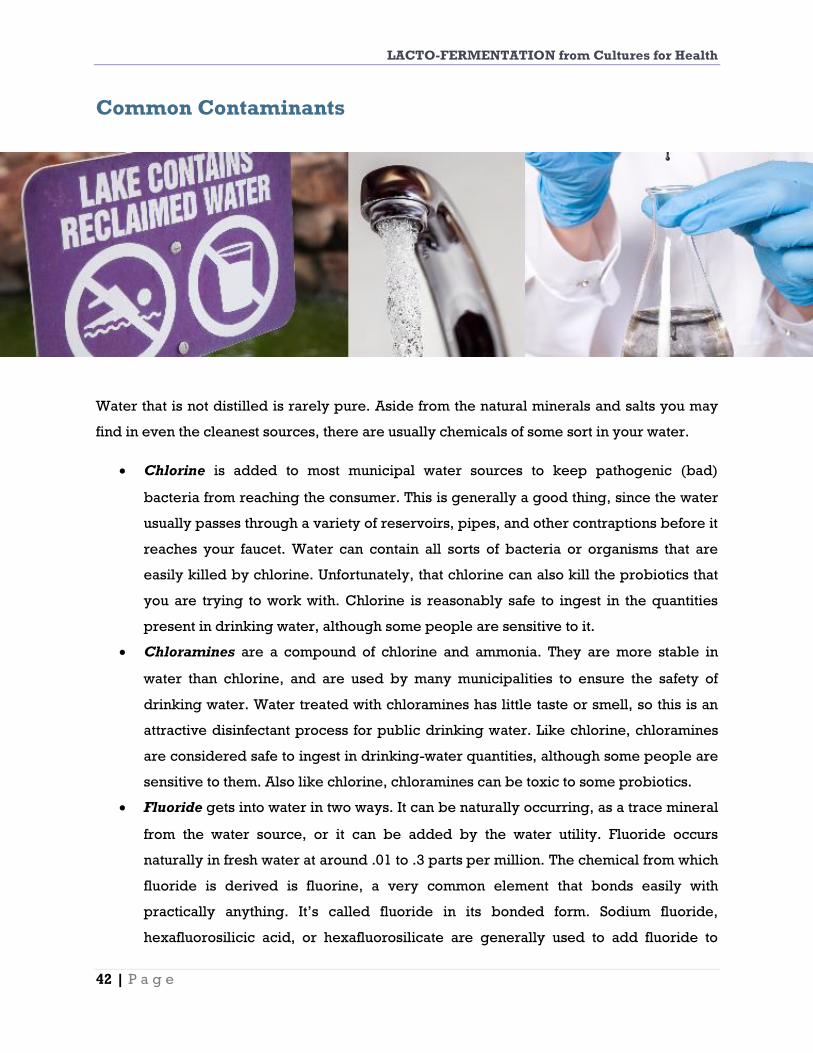
Common Contaminants
Water that is not distilled is rarely pure. Aside from the natural minerals and salts you may
find in even the cleanest sources, there are usually chemicals of some sort in your water.
Chlorine is added to most municipal water sources to keep pathogenic (bad)
bacteria from reaching the consumer. This is generally a good thing, since the water
usually passes through a variety of reservoirs, pipes, and other contraptions before it
reaches your faucet. Water can contain all sorts of bacteria or organisms that are
easily killed by chlorine. Unfortunately, that chlorine can also kill the probiotics that
you are trying to work with. Chlorine is reasonably safe to ingest in the quantities
present in drinking water, although some people are sensitive to it.
Chloramines are a compound of chlorine and ammonia. They are more stable in
water than chlorine, and are used by many municipalities to ensure the safety of
drinking water. Water treated with chloramines has little taste or smell, so this is an
attractive disinfectant process for public drinking water. Like chlorine, chloramines
are considered safe to ingest in drinking-water quantities, although some people are
sensitive to them. Also like chlorine, chloramines can be toxic to some probiotics.
Fluoride gets into water in two ways. It can be naturally occurring, as a trace mineral
from the water source, or it can be added by the water utility. Fluoride occurs
naturally in fresh water at around .01 to .3 parts per million. The chemical from which
fluoride is derived is fluorine, a very common element that bonds easily with
practically anything. It’s called fluoride in its bonded form. Sodium fluoride,
hexafluorosilicic acid, or hexafluorosilicate are generally used to add fluoride to

LACTO-FERMENTATION from Cultures for Health
43 | P a g e
drinking water, at a concentration of about 1 part per million. There is a tremendous
amount of controversy over whether this practice is helpful or harmful. Many
municipal water utilities add fluoride to the water. Some do not. Naturally occurring
fluoride is rarely a problem in culturing. Added fluoride is generally toxic to young
plants, and can also be toxic to certain probiotics.
Chemical Waste can appear in drinking water from a variety of sources. Any
chemical waste that is disposed of in drains or on the ground ultimately finds its way
into the municipal water supply. Some of it is removed through standard waste
treatment, and some shows up in public drinking water. Even well water and spring
water can be contaminated if the chemicals are leached into the soil near the water
sources. Common chemical contaminants include fertilizers, animal waste,
detergents, industrial solvents, pesticides and herbicides, radon, heavy metals,
prescription medication, and even decayed plant matter.
Treatment Methods
If you are getting your water from a faucet, you may or may not need to treat it before using
it for culturing. Some probiotics are very sensitive to the type of water you’re using, while
other probiotics are very resilient and can use almost any sort of water. However, if your
water is not of drinking quality, you will definitely need to treat it before using it for
culturing.
Aeration is a suitable treatment method if all you want to do is eliminate chlorine
from the water. Chlorine is very unstable in water, and if you boil the water or put it
in a blender for about 20 minutes, the chlorine will percolate out. Or, you can leave
water to stand for 24 hours to accomplish the same thing. Aeration will not remove
chloramines.
Boiling will take care of most common pathogens that might get into drinking water
supplies. It does not eliminate fluoride, chloramines, or other heavy metals or
chemicals.
Simple Charcoal Filtration is what you get with a standard countertop or faucet filter
system. Charcoal is made of carbon, which bonds with organic materials to remove
them from the water it is filtering. Activated charcoal is charcoal that has been
processed to open up many tiny pores in the material making more surface area
LACTO-FERMENTATION from Cultures for Health
44 | P a g e
available. Filtering water through activated charcoal is one of the easiest and least
expensive ways to remove common contaminants such as bacteria, chlorine,
chloramines, etc. Charcoal filtration does not eliminate fluoride.
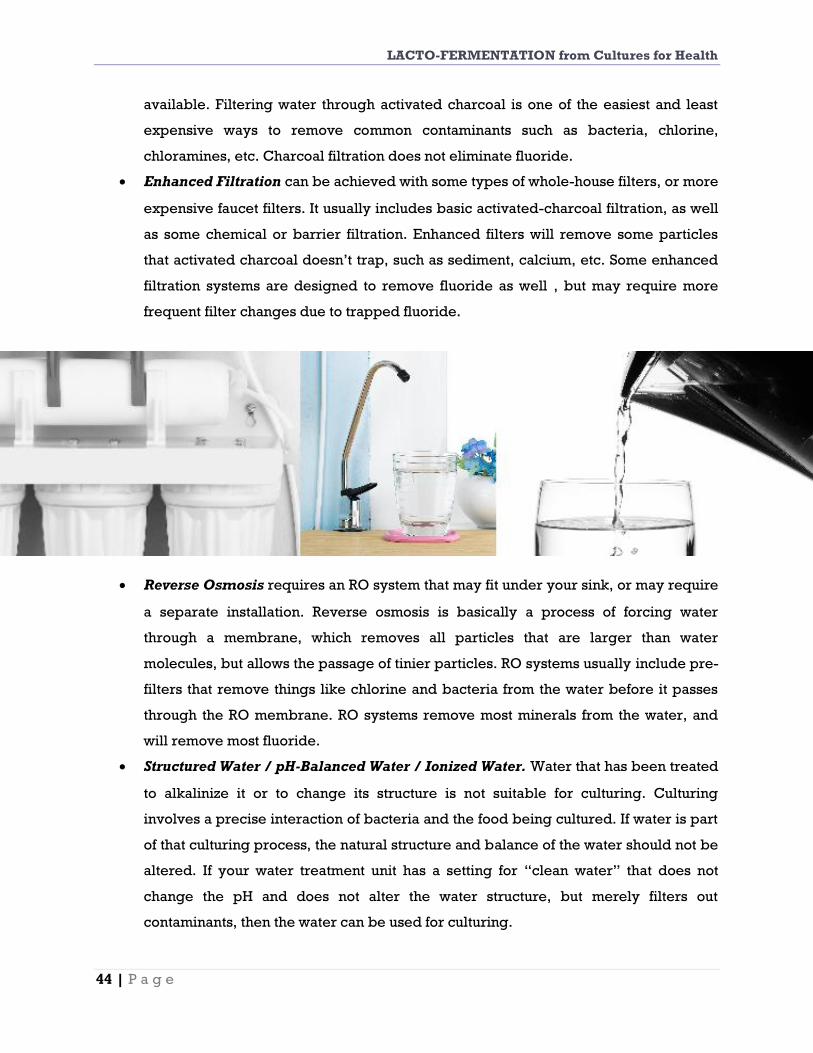
Enhanced Filtration can be achieved with some types of whole-house filters, or more
expensive faucet filters. It usually includes basic activated-charcoal filtration, as well
as some chemical or barrier filtration. Enhanced filters will remove some particles
that activated charcoal doesn’t trap, such as sediment, calcium, etc. Some enhanced
filtration systems are designed to remove fluoride as well , but may require more
frequent filter changes due to trapped fluoride.
Reverse Osmosis requires an RO system that may fit under your sink, or may require
a separate installation. Reverse osmosis is basically a process of forcing water
through a membrane, which removes all particles that are larger than water
molecules, but allows the passage of tinier particles. RO systems usually include pre-
filters that remove things like chlorine and bacteria from the water before it passes
through the RO membrane. RO systems remove most minerals from the water, and
will remove most fluoride.
Structured Water / pH-Balanced Water / Ionized Water. Water that has been treated
to alkalinize it or to change its structure is not suitable for culturing. Culturing
involves a precise interaction of bacteria and the food being cultured. If water is part
of that culturing process, the natural structure and balance of the water should not be
altered. If your water treatment unit has a setting for “clean water” that does not
change the pH and does not alter the water structure, but merely filters out
contaminants, then the water can be used for culturing.

LACTO-FERMENTATION from Cultures for Health
45 | P a g e
What Kind of Water Do You Need?
Most cultures, such as sourdough, cheese, and fermented vegetables, are pretty resilient,
and will safely use any water that is suitable for drinking. The water can be rich in minerals,
or completely pure. Many people prefer to use water that is free of chlorine and fluoride,
and there is no harm in removing those things from the water before you culture.
LACTO-FERMENTATION from Cultures for Health
46 | P a g e
G E T S T A R T E D W I T H B A S I C
L A C T O - F E R M E N T A T I O N
start fermenting today

LACTO-FERMENTATION from Cultures for Health
47 | P a g e
A Basic Formula for Fermenting Vegetables
any people find that the hardest part of fermenting vegetables is getting
started. Because we have spent decades in the mindset that organisms are
bad and pasteurization is good, wrapping our head around the concept of
fermentation in the first place is half the battle.
At its very basic level, fermentation is controlled decomposition. Instead of allowing food to
go straight to spoilage we introduce a preservation element such as salt, whey, or a starter
culture. This directs food towards fermentation rather than rot.
The Basics of Fermented Vegetables
Vegetable fermentation happens through an anaerobic system in which the naturally
occurring lactobacilli of the food create lactic acid. This acid then preserves the food
because what is known as “bad bacteria” cannot exist in an acidic environment.
With that in mind, these are the conditions you must create in order for your vegetables to
lacto-ferment:
Submerged Vegetables. Whether your vegetables are self-brining or not, you must
keep them under the level of the brine in order to prevent mold and encourage lactic
acid production.
Introduction of a Preservation Agent. Most ferments should include at least a little
bit of salt. Salt is a preservative, but it also improves flavor and texture. Adding the
M

LACTO-FERMENTATION from Cultures for Health
48 | P a g e
whey from a cultured dairy product such as yogurt can also ensure the proliferation
of lactic acid bacteria.
A Reasonable Temperature. In traditional cultures foods were fermented and
stored in moderate temperatures. This was done via a root cellar, fermentation
during a cooler season, or sinking the fermenting vessel into a hole in the ground. A
temperature range of 60° to 80°F is ideal.
If you understand the conditions necessary to produce lacto-fermentation, you can ferment
any number of vegetables through two techniques: self-brine or added brine.
Self-brined Fermented Vegetables
Vegetables that are fresh and have not been dried out can actually create their own brine
when salt is introduced. The salt naturally draws the water out of vegetables, thereby
creating a natural brine.
The main thing to keep in mind when making a self-brined
fermented vegetable is that the vegetables have to be
shredded into very fine pieces. The increased surface area
that is created by grating or very finely slicing vegetables
allows the salt to penetrate the vegetable and draw out large
amounts of liquid.
Examples of this type of fermented vegetable include
sauerkraut, grated carrots and ginger, or a grated zucchini
relish.
Added-brine Fermented Vegetables
Not every vegetable shines when it is finely diced or shredded. Many vegetables, like
cucumbers, cry out to be left whole or in larger chunks. That is where added brine comes in.
You can take a vegetable like a cucumber, carrot, or zucchini and cut it into large chunks. If
you simply added salt to these large pieces of vegetables there is no way they could
produce enough liquid to keep them submerged underneath the brine.
LACTO-FERMENTATION from Cultures for Health
49 | P a g e
So you must create a separate salt brine that you can pour over these larger vegetable
chunks in order to keep the anaerobic environment necessary for the lactic acid to
proliferate.
A good rule of thumb for a brine is 3 tablespoons of sea salt to 1 quart of water. This brine can
be used to cover any number of vegetables: cucumbers, peppers, tomato chunks, celery,
carrots, garlic, onions, and just about anything else you are picking from the garden or
buying from the market.
This method is often preferred because the preparation of the vegetables tends to go a lot
faster. Shredding vegetables can seem tedious when you can simply prepare a brine and
pour it over quickly chopped vegetables.
Which type of fermented vegetable you choose to make is entirely up to your personal taste.
Even cabbage, which forms the ubiquitous sauerkraut, can be left in large wedges if
preferred.
By making a bit of both types of fermented vegetables you can experience a wide variety of
textures and flavors. This can keep things exciting for those you serve them to and flexible
for the home cook who desires to ferment whatever it is she happens to have on hand.
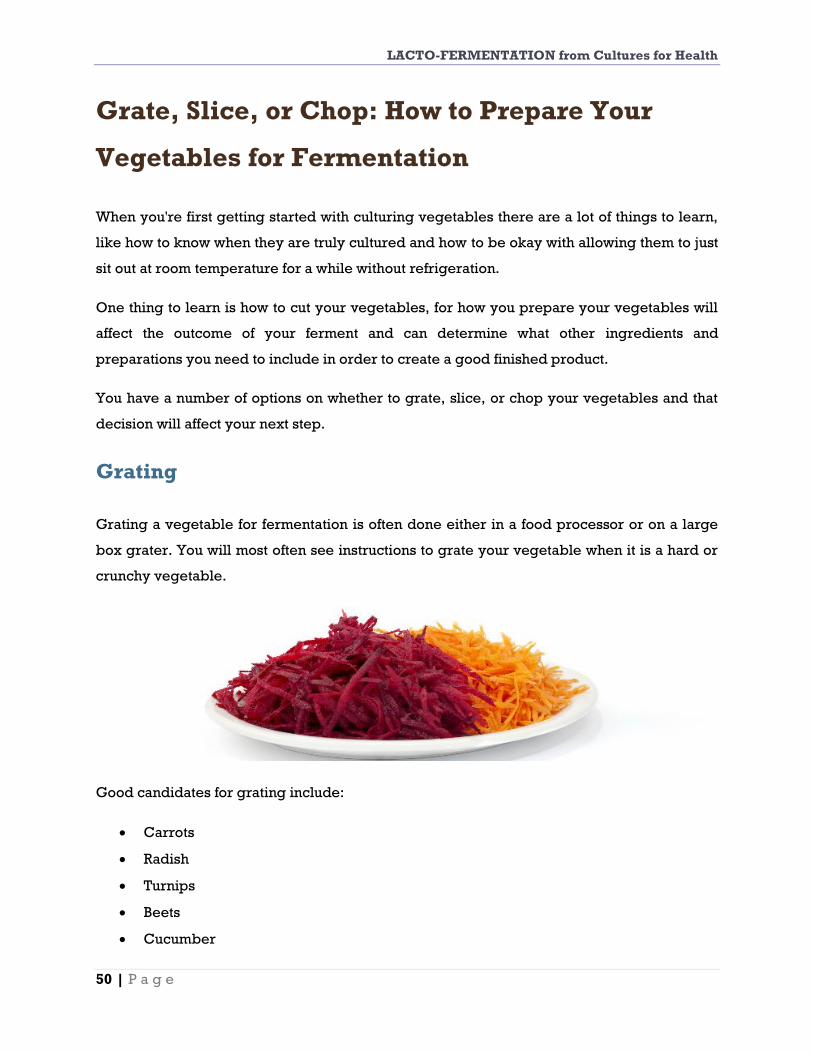
LACTO-FERMENTATION from Cultures for Health
50 | P a g e
Grate, Slice, or Chop: How to Prepare Your
Vegetables for Fermentation
When you're first getting started with culturing vegetables there are a lot of things to learn,
like how to know when they are truly cultured and how to be okay with allowing them to just
sit out at room temperature for a while without refrigeration.
One thing to learn is how to cut your vegetables, for how you prepare your vegetables will
affect the outcome of your ferment and can determine what other ingredients and
preparations you need to include in order to create a good finished product.
You have a number of options on whether to grate, slice, or chop your vegetables and that
decision will affect your next step.
Grating
Grating a vegetable for fermentation is often done either in a food processor or on a large
box grater. You will most often see instructions to grate your vegetable when it is a hard or
crunchy vegetable.
Good candidates for grating include:
Carrots
Radish
Turnips
Beets
Cucumber

LACTO-FERMENTATION from Cultures for Health
51 | P a g e
Zucchini
Cabbage
Grating your vegetables for fermentation creates the most surface area of any of the
preparation techniques. This increased surface area allows salt to penetrate the vegetable
more quickly, which draws out the moisture and thus creates a brine for the vegetable.
This means that when grating you are preparing a self-brining cultured vegetable. These
often have the texture of a relish when finished.
Some people make sauerkraut by grating the cabbage in a food processor. While this does
facilitate the drawing out of the brine, it isn’t necessary to achieve a self-brining sauerkraut
or other ferment.
Grated vegetables are generally the quickest to culture because of their increased surface
area.
Chopping
A chopped vegetable is simply one that has been cut to small bite-size pieces. When you
cook vegetables and are told to “chop” an onion and then sauté it you most likely end up
with a piece of vegetable that is small enough to have several bits in each mouthful.
When you chop a vegetable for fermentation it can be that small or much larger, as in the
case with a carrot stick. Most often, if the ferment requires something other than a 1-inch or
smaller chop, the recipe will specifically tell you.
LACTO-FERMENTATION from Cultures for Health
52 | P a g e
Chopped vegetables almost always require a brine of salt and water.
Chopping requires much less time than grating (or slicing). You can very roughly chop up
chunks of summer squash, cucumber, or carrot and throw some salt in water and you will
have a very quickly prepared cultured vegetable.
Good candidates for chopping include:
Peppers
Cucumbers
Summer Squash
Carrots
Eggplant
Asparagus
Green beans
The main consideration for what size to chop your vegetables is the length of time it will take
for the vegetable to culture. A hard carrot stick will take about twice as long to culture as a
grated carrot because the brine has to completely penetrate the hard carrot.
Chopped vegetables, depending on their size, usually take much longer to culture than
grated or thinly sliced vegetables.
Slicing
Slicing thinly is much like grating in that it increases the surface area. Long, thinly sliced
vegetables — like sauerkraut — may create their own brine but other vegetables may have
a cellular structure that still requires you to create a brine.
So while you might simply throw together thinly sliced cabbage, sea salt, and some juniper
berries to create a simple sauerkraut, a thick cucumber slice would need a brine in order to
culture properly and maintain its crunch.

LACTO-FERMENTATION from Cultures for Health
53 | P a g e
Good candidates for slicing include:
Cabbage
Cucumbers
Zucchini
Peppers
Celery
Because most recipes call for grating or chopping vegetables, you will have to take into
account the nature of the vegetable when deciding whether or not to create a brine.
Sliced vegetables are generally right in the middle in terms of a culturing time. This may
give you a wider window of culturing time in case you need to get your ferment in cold
storage when you are leaving town, or accidentally leave it to culture one too many days.

LACTO-FERMENTATION from Cultures for Health
54 | P a g e
How to Know When Your Fermented Vegetables
Are Ready for Cold Storage
To the new fermenter every step of the fermentation process can be a bit intimidating. From
trusting that the fermentation will in fact keep your vegetables from spoiling without a
boiling water bath to braving the first bite, everyone needs a little help in the kitchen when
tackling this traditional way of preserving food.
One of the biggest questions people have is “How do
I know when my fermented vegetables are done?” By
this they mean “How do I know that my vegetables
are fermented?”
This is a complicated question to answer because the
process of fermentation never really ceases unless
you either freeze it (which almost completely halts
the process) or cook it (which kills the bacteria that are performing the fermentation
process).
Historically, vegetable fermentation often took place in root cellars or buried vessels which
meant the whole process was slowed down in comparison to many of today’s fermentation
recipes which call for “3 to 10 days of fermentation and then move to your refrigerator.”
So where the old method of vegetable fermentation relied on underground storage for both
the fermentation period and the storage period, the new method usually recommends a fast
fermentation at warmer temperatures followed by a possibly overly cold storage period.
So to answer this question we must clarify that this is in reference to the latter practice in
which a short fermentation period is done at warmer (room) temperature followed by a
colder (refrigerated) storage.
Please note, however, that in either case the fermentation process is continual and flavors
will change over time. Generally your cultured vegetables will taste different when first
placed into cold storage than they do after several months of storage. This is because the

LACTO-FERMENTATION from Cultures for Health
55 | P a g e
microorganisms continue to do their work on the sugars and other carbohydrates found in
the vegetables.
There are three obvious signs that the fermentation process has at least commenced enough
that you can now move your fermenting vegetables to cold storage.
Bubbling
The lactic acid fermentation process produces lactic acid bacteria that create gases when
they feast on the vegetables you are fermenting. These bubbles are often visible after a few
days at room temperature and are a good sign.
In largely chopped vegetables like chunks of zucchini, the brine will contain bubbles and
the vegetables themselves will only have a slightly “bubbly” flavor. Other ferments that use
vegetables with more surface area, like a salsa, will have an almost carbonated flavor
throughout.
This is normal and good and quite tasty as well once you realize carbonation is an indication
that the lactic acid bacteria are doing their job, producing acids that will preserve the food.
If you see those bubbles you have at least one indication that your vegetable fermentation is
well underway.

LACTO-FERMENTATION from Cultures for Health
56 | P a g e
Smell
“The nose knows” is very true when it comes to fermentation. If you open your fermentation
vessel after a few days wondering whether your sauerkraut has begun to sour you will be
bombarded with interesting odors one way or another.
If your sauerkraut smells sour and fermented; then you’re in business. If, on the other hand,
your sauerkraut smells downright rotten, nasty, or putrid then you will want to throw it on the
compost heap and begin again.
Once there is a definite fermentation odor about your vegetable ferment you will know it is
on its way to cold storage status.
Flavor
Finally, once you know the vegetable ferment appears gaseous or bubbly and does not
smell rotten, you will want to give it a taste. Depending on the type of vegetable ferment you
have performed you may find varying ranges of fermented flavors.
A large vegetable that has been placed in a brine, like a cucumber pickle, will take a much
longer time to fully take on that fermented tangy flavor so typical of fermented vegetables. A
mashup of small vegetable pieces that create their own brine through weighting and salt,
like sauerkraut, will most likely take on a fermented flavor more quickly.
Temperature also plays a role in how quickly you will notice bubbles, smells, and flavors of
fermented vegetables. The higher the temperature, the quicker the fermentation process
LACTO-FERMENTATION from Cultures for Health
57 | P a g e
will go. So in a warmer climate you may very well want just a couple of days at room
temperature before moving the vegetables into cold storage. In cooler climates, however, it
could take a week or longer to produce obvious signs of fermentation.
There will be a sweet spot in between the “just began fermenting” stage and the “oops now
my vegetables are mush” stage. Based on the above three signs and the temperature of
your fermentation area, give your ferments 2 to 3 days beyond the starting stages of
fermentation for a cooler climate and 1 to 2 days in a warmer climate before moving the
ferment to cold storage.
So trust your instincts, let your nose do the telling, and be confident that you will know when
fermentation is taking place and when you have lost your vegetables to bad bacteria.

LACTO-FERMENTATION from Cultures for Health
58 | P a g e
Three Methods for Making Sauerkraut
Sauerkraut is probably the most well-known lacto-fermented vegetable. It has a long, rich
history starting most likely in Europe, and extending into America.
Like any traditionally homemade food, sauerkraut is made in a variety of ways and each
mother, father, grandmother,or grandfather will tell you that their way is the best way. And
they are probably all right.
There are a few basics you need to remember, though, in order to make a good fermented
sauerkraut:
1. Use fresh cabbage. The better your ingredients, the better your food will be. This is
universal and especially important when fermenting vegetables. Fermentation is a
preservation process so you won’t get the best results with cabbage heads that are
past their prime.
2. Use at least some salt. If you are concerned about salt then first of all realize that salt
has been eaten by man for thousands of years because it is necessary for normal
functioning. Additionally, it is better to be concerned with the type of salt you are
taking in rather than the amount. Finally, know that salt is a traditional ingredient in
sauerkraut because it increases shelf life, texture, and flavor.
3. Create an anaerobic environment. This is an absolute essential in the sauerkraut-
making process. You must submerge the thinly sliced cabbage underneath a brine in
order for the lactic acid bacteria to proliferate and preserve your sauerkraut.
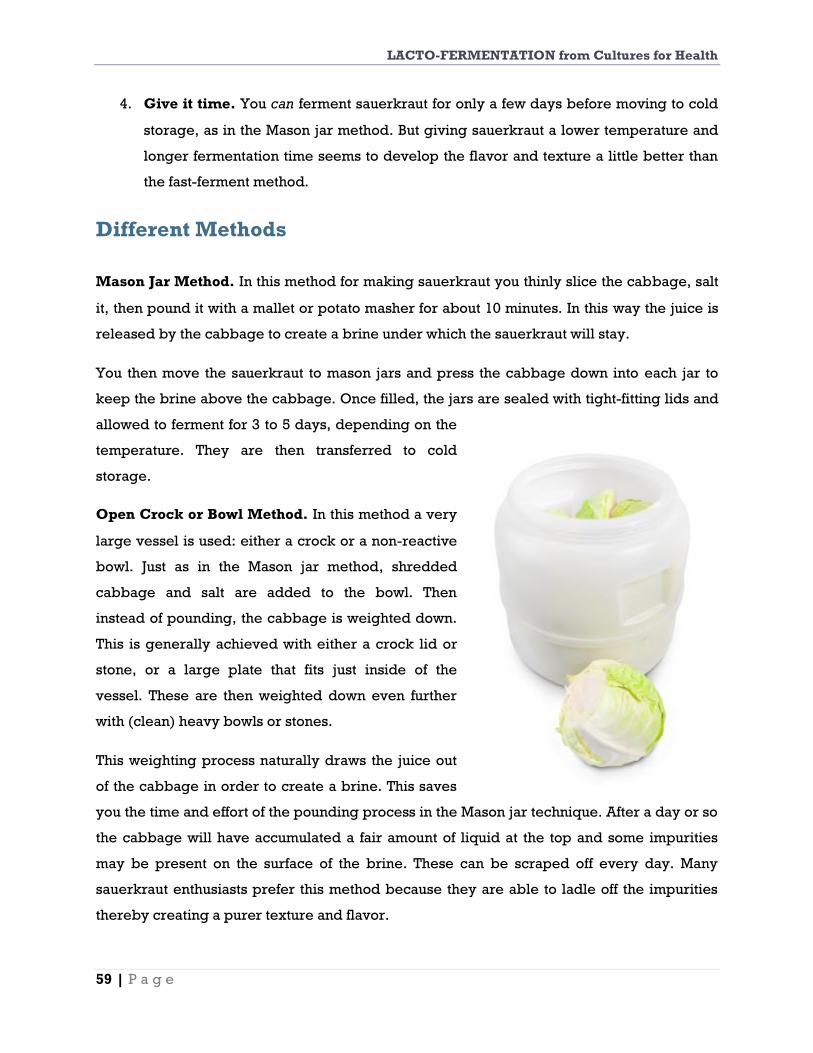
LACTO-FERMENTATION from Cultures for Health
59 | P a g e
4. Give it time. You can ferment sauerkraut for only a few days before moving to cold
storage, as in the Mason jar method. But giving sauerkraut a lower temperature and
longer fermentation time seems to develop the flavor and texture a little better than
the fast-ferment method.
Different Methods
Mason Jar Method. In this method for making sauerkraut you thinly slice the cabbage, salt
it, then pound it with a mallet or potato masher for about 10 minutes. In this way the juice is
released by the cabbage to create a brine under which the sauerkraut will stay.
You then move the sauerkraut to mason jars and press the cabbage down into each jar to
keep the brine above the cabbage. Once filled, the jars are sealed with tight-fitting lids and
allowed to ferment for 3 to 5 days, depending on the
temperature. They are then transferred to cold
storage.
Open Crock or Bowl Method. In this method a very
large vessel is used: either a crock or a non-reactive
bowl. Just as in the Mason jar method, shredded
cabbage and salt are added to the bowl. Then
instead of pounding, the cabbage is weighted down.
This is generally achieved with either a crock lid or
stone, or a large plate that fits just inside of the
vessel. These are then weighted down even further
with (clean) heavy bowls or stones.
This weighting process naturally draws the juice out
of the cabbage in order to create a brine. This saves
you the time and effort of the pounding process in the Mason jar technique. After a day or so
the cabbage will have accumulated a fair amount of liquid at the top and some impurities
may be present on the surface of the brine. These can be scraped off every day. Many
sauerkraut enthusiasts prefer this method because they are able to ladle off the impurities
thereby creating a purer texture and flavor.
LACTO-FERMENTATION from Cultures for Health
60 | P a g e
Whole Cabbage Method. This is a variation of the crock method in that instead of
shredding the cabbage you take whole or halved cabbage heads and ferment them as is. A
brine is generally used as whole cabbage heads cannot form their own brine fast enough to
protect them from mold and unwanted yeasts.
Obviously with this method you will need a very large vessel such as a crock or a bucket.
This may be the easiest method for making sauerkraut as it does not involve all of the labor-
intensive chopping or slicing that other methods utilize. However, this method also takes
much longer to ferment during that first stage. Four weeks or more are necessary before
moving to cold storage because of the size of the cabbage heads.
Whichever method you choose be sure to adhere to the four necessities for good sauerkraut
as listed above.
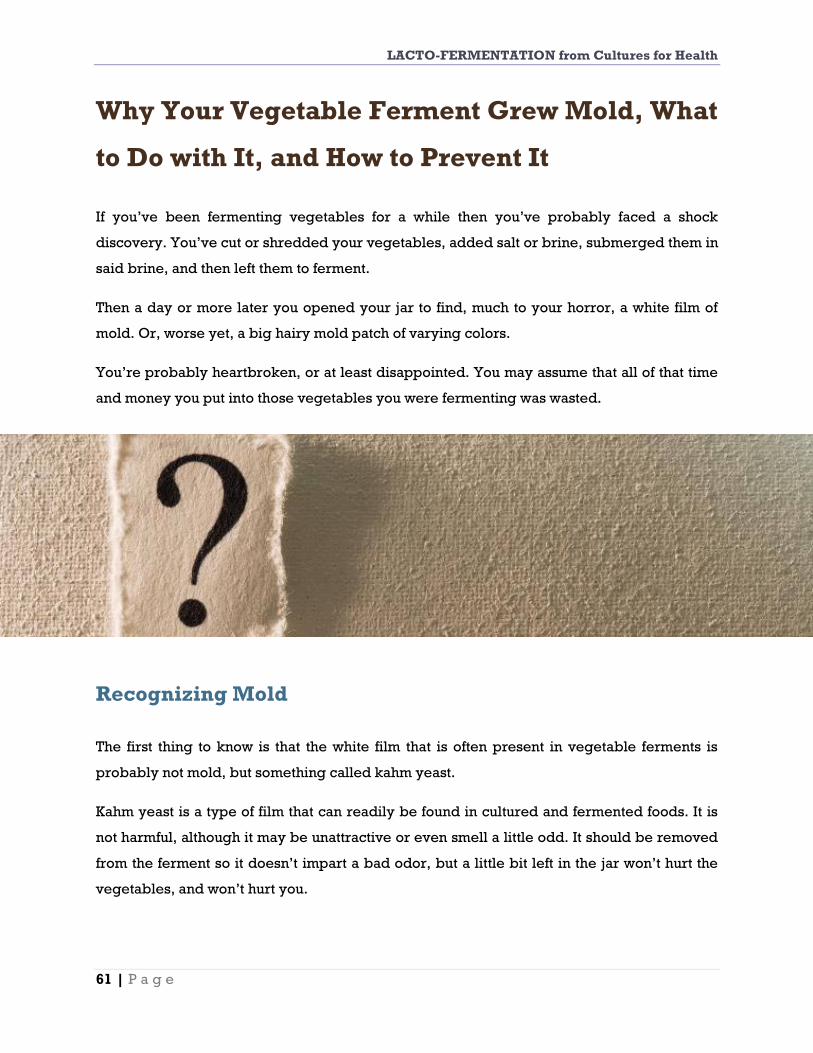
LACTO-FERMENTATION from Cultures for Health
61 | P a g e
Why Your Vegetable Ferment Grew Mold, What
to Do with It, and How to Prevent It
If you’ve been fermenting vegetables for a while then you’ve probably faced a shock
discovery. You’ve cut or shredded your vegetables, added salt or brine, submerged them in
said brine, and then left them to ferment.
Then a day or more later you opened your jar to find, much to your horror, a white film of
mold. Or, worse yet, a big hairy mold patch of varying colors.
You’re probably heartbroken, or at least disappointed. You may assume that all of that time
and money you put into those vegetables you were fermenting was wasted.
Recognizing Mold
The first thing to know is that the white film that is often present in vegetable ferments is
probably not mold, but something called kahm yeast.
Kahm yeast is a type of film that can readily be found in cultured and fermented foods. It is
not harmful, although it may be unattractive or even smell a little odd. It should be removed
from the ferment so it doesn’t impart a bad odor, but a little bit left in the jar won’t hurt the
vegetables, and won’t hurt you.

LACTO-FERMENTATION from Cultures for Health
62 | P a g e
Kahm yeast is likely to develop if a fermentation solution is insufficiently acid, especially
when you start it, or if there is not enough salt in the brine. Kahm can also develop if the
culturing temperature is too warm, or if the brew is over-exposed to oxygen. Poor hygiene
can be another cause.
If kahm yeast develops in your ferment, skim it off the surface of the liquid. Discard any solid
matter that has it. As usual, your senses are the test: if it smells and tastes okay, it probably
is.
True molds are usually colorful and the deposits are round and often fuzzy or fluffy. They
might even be white, but there is a distinctive difference between the smooth film that is
kahm, and the puffy growth that is mold.
What to Do with a Moldy Ferment
If you opened up your jar or vessel up to find a layer of mold on top, don’t panic. You may
be able to easily dispose of this and have perfectly good fermented vegetables below the
brine.
Lacto-fermentation is an anaerobic process meaning it must be in an oxygen-free
environment for it to happen properly and fully. Any oxygen put into the mix can cause
unwelcome microorganisms such as mold or yeasts.
So while your vegetables may be happily fermenting under the brine, the surface of the
brine is still exposed to oxygen if you are using a jar or open-crock method of fermentation.
This is common, though, and it was very common in times past to simply go to the cellar to
check on the ferments, scrape any growth off the surface, and retrieve the fermented
vegetables below.
Factors That May Contribute to Mold Growth
If you are experiencing a mold epidemic of sorts in your ferments then there may be
something more at play. You may want to investigate the following possibilities:
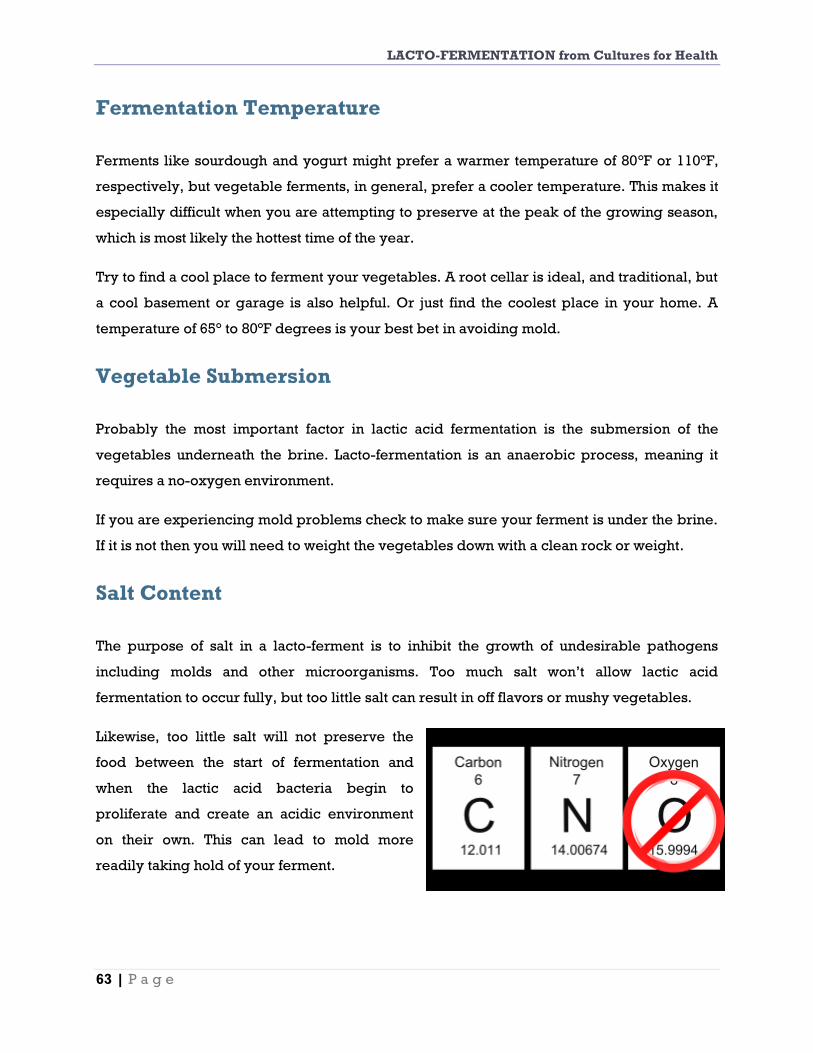
LACTO-FERMENTATION from Cultures for Health
63 | P a g e
Fermentation Temperature
Ferments like sourdough and yogurt might prefer a warmer temperature of 80°F or 110°F,
respectively, but vegetable ferments, in general, prefer a cooler temperature. This makes it
especially difficult when you are attempting to preserve at the peak of the growing season,
which is most likely the hottest time of the year.
Try to find a cool place to ferment your vegetables. A root cellar is ideal, and traditional, but
a cool basement or garage is also helpful. Or just find the coolest place in your home. A
temperature of 65° to 80°F degrees is your best bet in avoiding mold.
Vegetable Submersion
Probably the most important factor in lactic acid fermentation is the submersion of the
vegetables underneath the brine. Lacto-fermentation is an anaerobic process, meaning it
requires a no-oxygen environment.
If you are experiencing mold problems check to make sure your ferment is under the brine.
If it is not then you will need to weight the vegetables down with a clean rock or weight.
Salt Content
The purpose of salt in a lacto-ferment is to inhibit the growth of undesirable pathogens
including molds and other microorganisms. Too much salt won’t allow lactic acid
fermentation to occur fully, but too little salt can result in off flavors or mushy vegetables.
Likewise, too little salt will not preserve the
food between the start of fermentation and
when the lactic acid bacteria begin to
proliferate and create an acidic environment
on their own. This can lead to mold more
readily taking hold of your ferment.

LACTO-FERMENTATION from Cultures for Health
64 | P a g e
Introduction of Starter Culture
The introduction of an already established starter culture can help prevent unwelcome
pathogens from taking hold of your ferment before the lactic acid bacteria have a chance to
form.
You can use whey or a starter culture in these circumstances for a little extra insurance.
Bad Microorganisms Present on Your Vegetables
Finally, consider the vegetables themselves. Are they in a state of decay? Did you wait too
long to get them fermented? Were they sprayed with chemicals that could interfere with the
natural fermentation process?
If any of these are a factor then you may want to consider using only fresh, organic produce
in your ferments if you have access to them.
Mold occurring above the brine is a fairly normal part of fermentation, but anything out of
the ordinary may be caused by a number of non-ideal situations for your ferments.
While some variations in your cultured vegetables are safe, other variations indicate serious
problems and the vegetables must be thrown out. Click here to find out more about what to
look for and what to do about different situations with your vegetables.
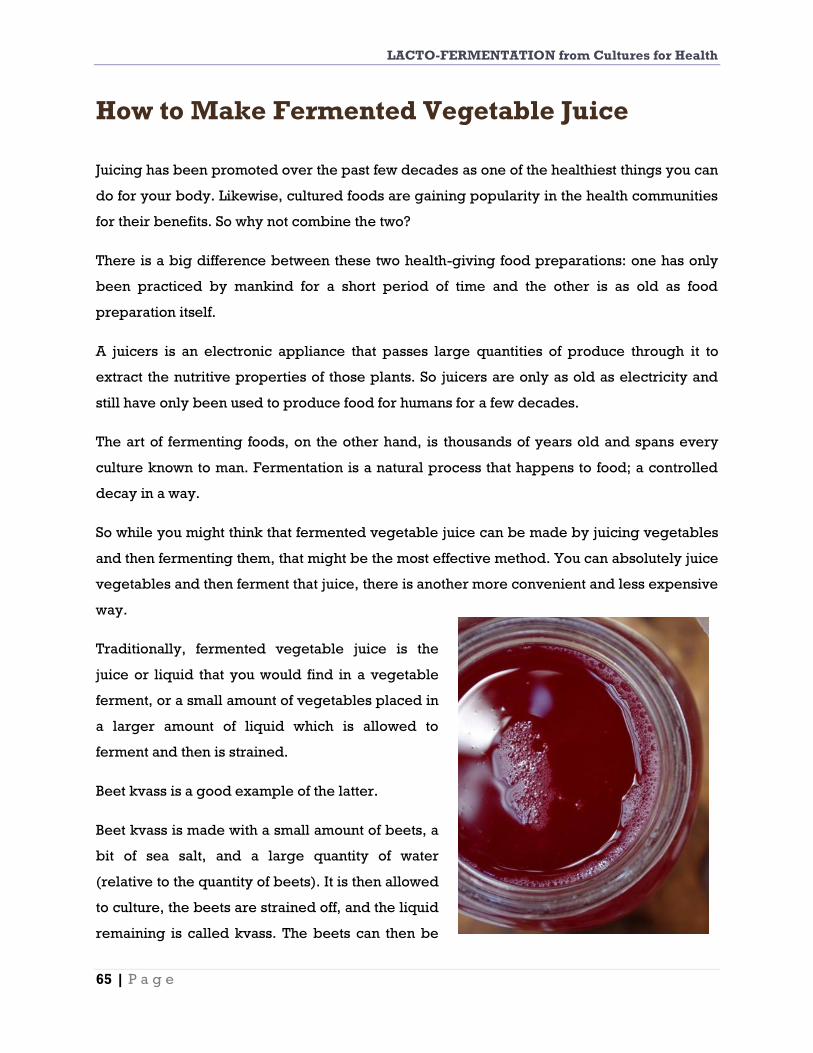
LACTO-FERMENTATION from Cultures for Health
65 | P a g e
How to Make Fermented Vegetable Juice
Juicing has been promoted over the past few decades as one of the healthiest things you can
do for your body. Likewise, cultured foods are gaining popularity in the health communities
for their benefits. So why not combine the two?
There is a big difference between these two health-giving food preparations: one has only
been practiced by mankind for a short period of time and the other is as old as food
preparation itself.
A juicers is an electronic appliance that passes large quantities of produce through it to
extract the nutritive properties of those plants. So juicers are only as old as electricity and
still have only been used to produce food for humans for a few decades.
The art of fermenting foods, on the other hand, is thousands of years old and spans every
culture known to man. Fermentation is a natural process that happens to food; a controlled
decay in a way.
So while you might think that fermented vegetable juice can be made by juicing vegetables
and then fermenting them, that might be the most effective method. You can absolutely juice
vegetables and then ferment that juice, there is another more convenient and less expensive
way.
Traditionally, fermented vegetable juice is the
juice or liquid that you would find in a vegetable
ferment, or a small amount of vegetables placed in
a larger amount of liquid which is allowed to
ferment and then is strained.
Beet kvass is a good example of the latter.
Beet kvass is made with a small amount of beets, a
bit of sea salt, and a large quantity of water
(relative to the quantity of beets). It is then allowed
to culture, the beets are strained off, and the liquid
remaining is called kvass. The beets can then be

LACTO-FERMENTATION from Cultures for Health
66 | P a g e
reused to make a second, weaker batch of kvass.
In the same way you can use vegetables to create fermented vegetable juices. Instead of
setting out to make brined pickles you can set out to make brined pickle juice. Rather than
cram a jar full of cucumbers for the former, use only a few cucumbers with some seasonings
and a large quantity of water for the latter.
They are different food products used differently. This fermented vegetable juice can be
made with whatever you have on hand, but your juice will take on those flavors so be wary
of strong flavors that you do not care for such as brassicas or alliums.
Basic Fermented Vegetable Juice
Fill a quart or half-gallon jar loosely with any vegetables you like. Some good candidates
include:
beets
celery
cucumbers
garlic
ginger
small quantities of cabbage, broccoli, or cauliflower
LACTO-FERMENTATION from Cultures for Health
67 | P a g e
To Make the Juice:
1. Make a brine of 2 to 3 teaspoons of sea salt to every quart of water and pour it over
your vegetables. Cover with a towel or coffee filter and secure with a rubber band or
other device that will keep fruit flies out.
2. Allow to culture for 3 to 4 days. It should smell fermented but not rotten. A small
amount of gray foam may come to the top. This should be removed but does not
indicate spoilage.
3. Strain the vegetables off and set aside for a second, weaker batch which can be made
with another dose of salt brine and a slightly longer fermentation time; 6 to 7 days
perhaps.
4. The liquid can then be placed in a sealed jar and should either be consumed right
away or kept in the refrigerator for about a week.
Using the Juice of Fermented Vegetables
The other source of fermented vegetable juice, as mentioned above, is the juice right off of a
vegetable ferment. You might have some juice atop your sauerkraut that you can decant. Or,
once your pickles are eaten up, you might have the juice from that available for drinking.
These juices are going to be a bit stronger in flavor than if you make the vegetable juice
from the above recipe. They will also be harder to come by as ferments like sauerkraut are
made more for their vegetable fermentation than the juice fermentation.
Therefore, if you require a large amount of vegetable juice, say a daily glass, then consider
making the fermented vegetable juice as mentioned above.

LACTO-FERMENTATION from Cultures for Health
68 | P a g e
S E A S O N A L F E R M E N T A T I O N
A S F O O D P R E S E R V A T I O N
how to make your food last
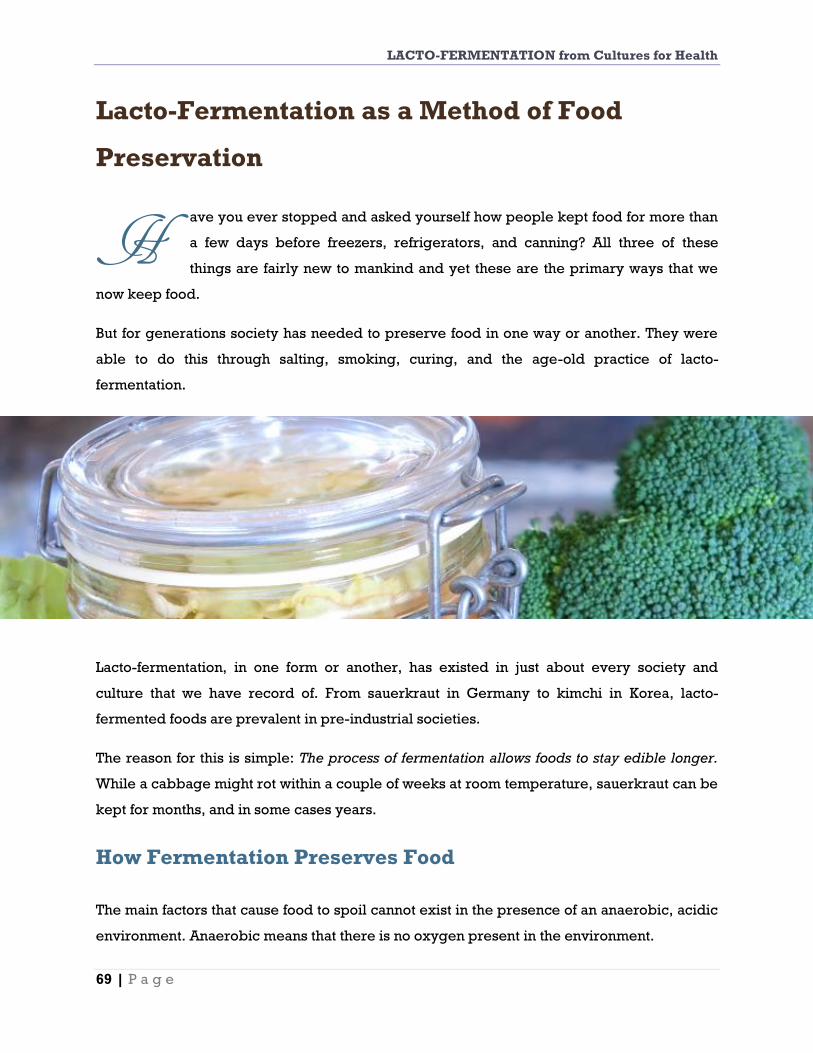
LACTO-FERMENTATION from Cultures for Health
69 | P a g e
Lacto-Fermentation as a Method of Food
Preservation
ave you ever stopped and asked yourself how people kept food for more than
a few days before freezers, refrigerators, and canning? All three of these
things are fairly new to mankind and yet these are the primary ways that we
now keep food.
But for generations society has needed to preserve food in one way or another. They were
able to do this through salting, smoking, curing, and the age-old practice of lacto-
fermentation.
Lacto-fermentation, in one form or another, has existed in just about every society and
culture that we have record of. From sauerkraut in Germany to kimchi in Korea, lacto-
fermented foods are prevalent in pre-industrial societies.
The reason for this is simple: The process of fermentation allows foods to stay edible longer.
While a cabbage might rot within a couple of weeks at room temperature, sauerkraut can be
kept for months, and in some cases years.
How Fermentation Preserves Food
The main factors that cause food to spoil cannot exist in the presence of an anaerobic, acidic
environment. Anaerobic means that there is no oxygen present in the environment.
H
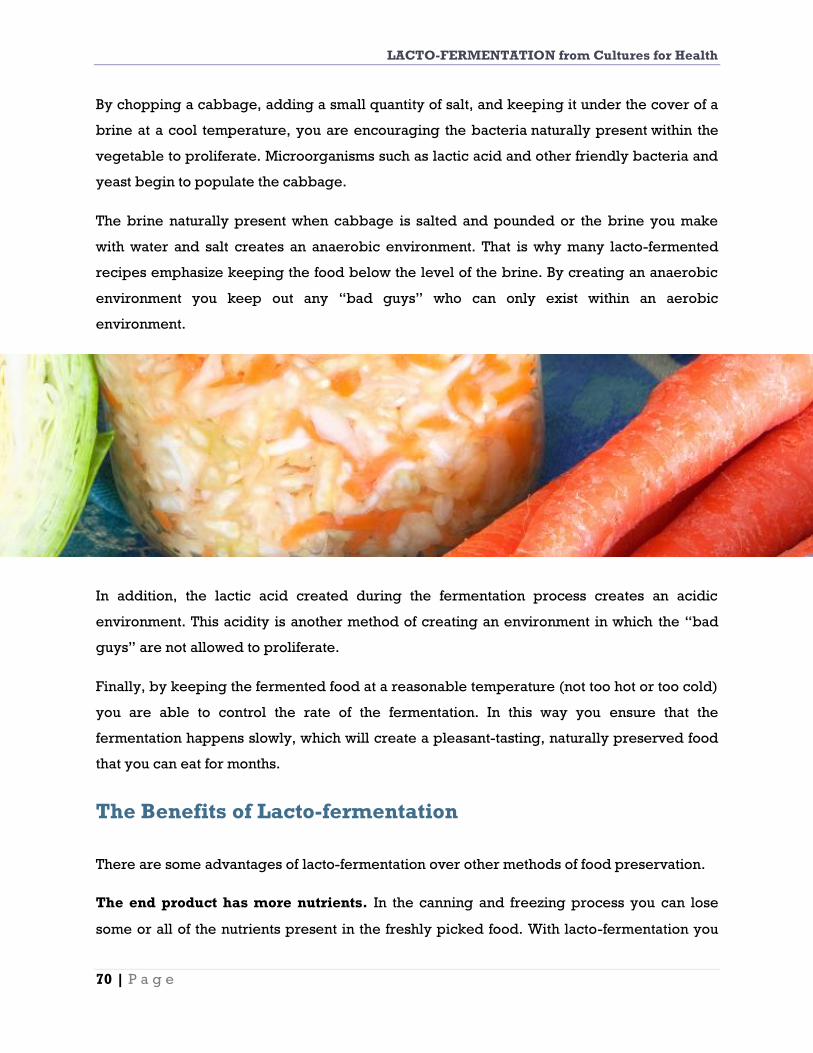
LACTO-FERMENTATION from Cultures for Health
70 | P a g e
By chopping a cabbage, adding a small quantity of salt, and keeping it under the cover of a
brine at a cool temperature, you are encouraging the bacteria naturally present within the
vegetable to proliferate. Microorganisms such as lactic acid and other friendly bacteria and
yeast begin to populate the cabbage.
The brine naturally present when cabbage is salted and pounded or the brine you make
with water and salt creates an anaerobic environment. That is why many lacto-fermented
recipes emphasize keeping the food below the level of the brine. By creating an anaerobic
environment you keep out any “bad guys” who can only exist within an aerobic
environment.
In addition, the lactic acid created during the fermentation process creates an acidic
environment. This acidity is another method of creating an environment in which the “bad
guys” are not allowed to proliferate.
Finally, by keeping the fermented food at a reasonable temperature (not too hot or too cold)
you are able to control the rate of the fermentation. In this way you ensure that the
fermentation happens slowly, which will create a pleasant-tasting, naturally preserved food
that you can eat for months.
The Benefits of Lacto-fermentation
There are some advantages of lacto-fermentation over other methods of food preservation.
The end product has more nutrients. In the canning and freezing process you can lose
some or all of the nutrients present in the freshly picked food. With lacto-fermentation you

LACTO-FERMENTATION from Cultures for Health
71 | P a g e
actually increase the nutritive value of the food in most cases, and there are many enzymes
and probiotics naturally present in fermented foods that are killed off when you can
something using heat.
The process is easier. Canning food is a lot of work. You must sterilize and pack jars,
carefully seal them, can them in a heat-creating canner (usually in the middle of summer),
then allow them to cool. Lacto-fermentation is as simple as chopping up some vegetables,
mixing them with a bit of salt and maybe water, and allowing them to ferment. That’s it!
It is sustainable. Where freezing and
canning require a lot of energy in the
form of gas or electricity, lacto-
fermentation can be done easily with
neither of these things. If you are
looking to be self-sufficient or less
dependent on fuels in general, then
lacto-fermentation is definitely the way
to go.
Lacto-fermentation is easy, healthy,
and economical. You can keep gallons
of lacto-fermented vegetables in cold
storage for months and have enzyme-
rich foods during the darkest periods
of the year when fresh produce is
scarce.
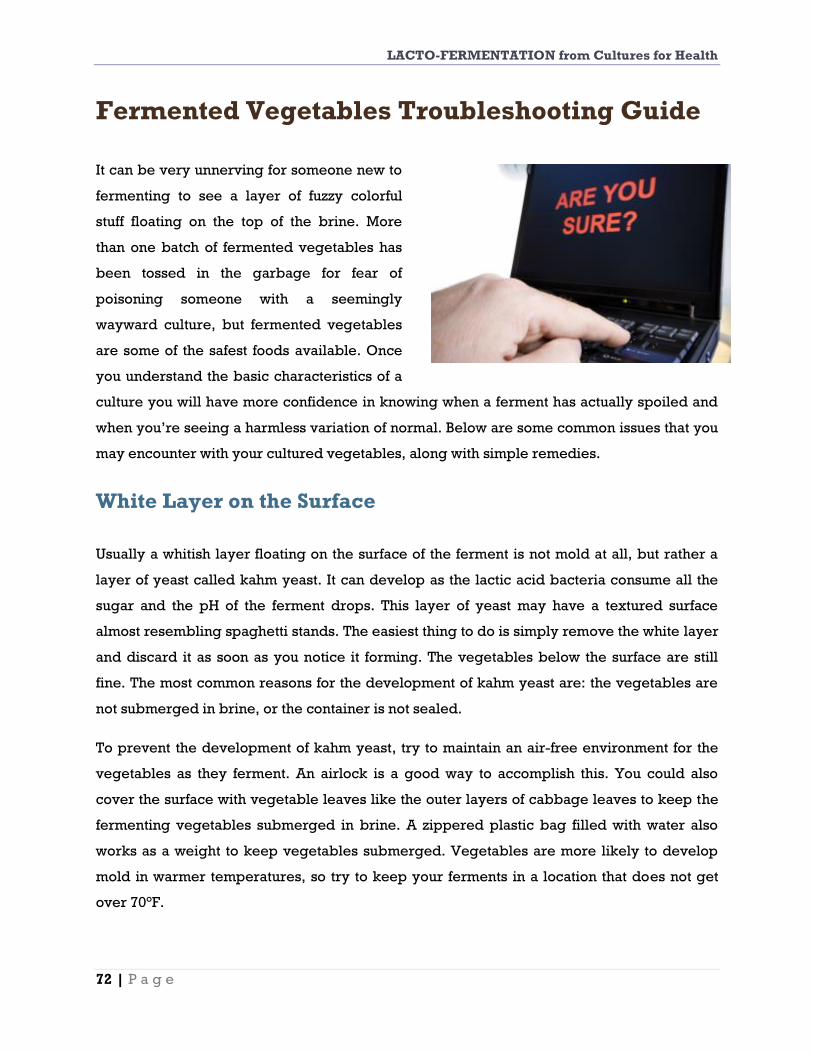
LACTO-FERMENTATION from Cultures for Health
72 | P a g e
Fermented Vegetables Troubleshooting Guide
It can be very unnerving for someone new to
fermenting to see a layer of fuzzy colorful
stuff floating on the top of the brine. More
than one batch of fermented vegetables has
been tossed in the garbage for fear of
poisoning someone with a seemingly
wayward culture, but fermented vegetables
are some of the safest foods available. Once
you understand the basic characteristics of a
culture you will have more confidence in knowing when a ferment has actually spoiled and
when you’re seeing a harmless variation of normal. Below are some common issues that you
may encounter with your cultured vegetables, along with simple remedies.
White Layer on the Surface
Usually a whitish layer floating on the surface of the ferment is not mold at all, but rather a
layer of yeast called kahm yeast. It can develop as the lactic acid bacteria consume all the
sugar and the pH of the ferment drops. This layer of yeast may have a textured surface
almost resembling spaghetti stands. The easiest thing to do is simply remove the white layer
and discard it as soon as you notice it forming. The vegetables below the surface are still
fine. The most common reasons for the development of kahm yeast are: the vegetables are
not submerged in brine, or the container is not sealed.
To prevent the development of kahm yeast, try to maintain an air-free environment for the
vegetables as they ferment. An airlock is a good way to accomplish this. You could also
cover the surface with vegetable leaves like the outer layers of cabbage leaves to keep the
fermenting vegetables submerged in brine. A zippered plastic bag filled with water also
works as a weight to keep vegetables submerged. Vegetables are more likely to develop
mold in warmer temperatures, so try to keep your ferments in a location that does not get
over 70°F.

LACTO-FERMENTATION from Cultures for Health
73 | P a g e
Colorful Layer of Mold on the Surface
A colorful layer of lumpy or fuzzy material is most certainly mold. The most common reasons
for mold are: culturing temperature is too warm, the vegetables are not fully submerged,
there is not enough salt in the brine allowing mad microorganisms to proliferate, or too
much salt was used, not allowing adequate lactic acid production. Other causes include bad
organisms on vegetables before you culture them, or unclean equipment or covering cloths.
Moldy vegetables are unsafe, and should be discarded.
Brine is Foamy
Some vegetables foam more than others. It is not uncommon to see some foaming on
vegetables that have higher sugar contents, such as beets or carrots. The foaming is
completely harmless and generally disappears after a few days. You may also notice some
bubbling in the jar as gases are formed by the fermentation process. Again, this is normal.
Ferment Has a Pungent Odor
There is a difference between a putrid odor and just a strong fermenting odor. Let your nose
be your guide here. If the ferment smells just downright rotten and has a layer of mold on
top, try removing the top layer and see if the entire batch has the same odor. Some ferments
won’t appeal to all noses, so if you can’t stand the smell, you may not want to eat it even if it
isn’t something that would harm you. Truly putrid ferments could be a result of unclean

LACTO-FERMENTATION from Cultures for Health
74 | P a g e
equipment, or not enough salt, or vegetables that were too old to culture successfully. If the
ferment is just plain nasty-smelling, it is safest to discard it.
Brine is Slimy
Slimy brine or vegetables is an indication that slime-producing microorganisms are present.
This can be from a too-weak brine, which
allows the growth of such microorganisms,
or it can be from too warm a culturing
environment. Other possibilities include
not enough brine (not covering the
vegetables), an uneven distribution of salt
in the ferment, or air bubbles left in the jar
when you pack the vegetables. (Make sure
you push them down tightly!) You can also
get slimy vegetables if you don’t remove scum from the surface of the brine regularly. If you
are fermenting pickles, and don’t remove the blossom stem, enzymes from the blossom can
cause softening of the pickles. If the brine or vegetables are not slimy, they are still safe to
eat, but slimy vegetables should be discarded.
Finished Product is Too Salty
You can rinse off excess salt, but in doing so you lose the healthful probiotics as well. Overly
salty sauerkraut is a great addition to a bland soup, though. If you taste the ferment before
fermentation is complete and discover it is too salty, you can dilute the brine with additional
water as long as you leave adequate space in the fermentation vessel. If necessary, pour off
some of the salty brine before diluting. Overly salty ferments are entirely safe to eat, if
unappetizing.
Finished Product is Soft and Mushy
It’s heartbreaking to ferment a large crock of cucumbers only to have them turn out mushy
and unappetizing. Surface molds that have not been removed can contribute to mushy
vegetables, but most often, the reason for mushiness is too much heat. The temperature of

LACTO-FERMENTATION from Cultures for Health
75 | P a g e
the room where you are fermenting should stay around 70°F or below. In the summertime,
when cucumbers are at their peak, temperatures can climb into the triple digits, so this can
be a challenge. If you don’t cut off the blossom or blossom stem from cucumbers, enzymes
may cause softening of the pickles. Another reason for mushiness, especially in cucumbers,
is not enough tannin in the brine. An easy fix is to place an organic black tea bag in each jar
of ferment. Some people use an oak leaf or grape leaf, but a tea bag will work just as well,
and is often more convenient. Mushy sauerkraut can be used in soups or other dishes where
texture isn’t important.
Culture Has Crawly Things in It
The ultimate YUK factor, but not as dangerous as you might think. This comes from leaving
the fermenting vessel open so flies can get in. They lay their eggs on the surface, and the
flies then hatch into maggots. You can remove the surface layer (the maggots will usually be
close to the surface) until you reach clean vegetables or you can compost the entire batch.
It’s up to you. To prevent this from happening in the future always cover the fermenting
vessel with some kind of lid. A clean cotton cloth or coffee filter secured with a rubber band
is enough to keep flies out. A covered crock or an airlock completely eliminates this
problem.
Non-pink Vegetables Turn Pink
Red cabbage mixed with white turnips will yield lovely pink sauerkraut, but if your green
cabbage turns pink there is a problem, and indicates that microorganisms are growing
improperly. The most likely reasons are: too much salt was used, the salt was unevenly
distributed in the ferment, or the ferment was improperly covered or weighted during
fermentation. Pink ferments of non-pink vegetables should be discarded.
LACTO-FERMENTATION from Cultures for Health
76 | P a g e
Ferment Bubbles Out of the Jar
This is messy, but not harmful. If there is not adequate space left in the fermentation vessel
to accommodate expansion due to the gases produced, the liquid will have no place to go
but out the top of the jar, even if it has a lid on it. A plastic lid has enough space for the liquid
to seep out, but a metal lid and band combination will keep building up pressure until the
lid bends or the jar explodes. If you are using a metal lid and cannot depress it, gently
loosen the ring around it very slightly. You will hear gases escaping as bubbles rise to the
surface. If you open the lid too quickly you are likely to get drenched or at the very least
have a mess to clean off your work surface. Never fill your fermentation vessel more than
80% full. If you are fermenting fruit or a high-sugar vegetable, try not to fill it more than half
full. Check the lid on your ferment daily and release pressure if necessary.
There is White Sediment in the Jars
A small amount of sediment in fermenting jars is normal, and a result of yeasts settling to the
bottom of the ferment. You can also get this if you use table salt with anti-caking ingredients
instead of pickling salt or sea salt. Ordinarily, the ferment is safe to eat, but if the vegetables
have become slippery or slimy, it indicates an improper growth of microorganisms and you
should discard the ferment.
Brine Becomes Cloudy
Some amount of cloudy brine is normal as the lactic acid is created in the ferment. If you are
fermenting for more than a couple of weeks, it will usually settle. Sometimes brine will
become cloudy when white sediment is disturbed. This is safe to eat.
Vegetables Become Dull or Faded
Vegetables that are originally somewhat pale, or vegetables that are overly ripe when
fermented, can become dull. They can also fade if exposed to excessive sunlight. They are
perfectly safe to eat, however.
LACTO-FERMENTATION from Cultures for Health
77 | P a g e
Vegetables Turn Dark While Fermenting
If you are using hard water, minerals in the water can react with pigments in the vegetables
to turn them dark. Iron is the worst offender for darkening, but is harmless to eat. If the water
or your utensils contain copper, brass, or lead, there could be some leaching of these
minerals into the vegetables, which is not good. If you suspect mineral overload in your
water, you can consult with your water district or have your water tested.
Other reasons for darkening include: ground spices used in the ferment, vegetables
unevenly salted, too warm a culturing temperature, brown sugar added to the ferment, or
oxidization due to exposure to the air.
Garlic Turns Blue or Green While Fermenting
This reaction may be due to iron, tin, or aluminum in your utensils, water, or water pipes
reacting with the pigments in the garlic. Or, the garlic may naturally have more bluish
pigment, and it is more evident after pickling. Immature bulbs should be cured two to four
weeks at 70°F. The ferment is safe to eat.
Vegetables Don’t Seem to Be Doing Anything
Fermentation needs a moderately warm temperature (around 70°F). If it is much cooler than
this, fermentation will be greatly slowed, but not necessarily stopped. If the temperatures in
your house are on the cool side, consider moving the vegetables to a warm location like a
cupboard above the refrigerator. Also, using whey or a vegetable starter culture will speed
up fermentation by ensuring there are plenty of the right kinds of bacteria necessary for
culturing.

LACTO-FERMENTATION from Cultures for Health
78 | P a g e
Ferment Your Garden
All year we look forward to the goodness of summer. Tomatoes fall heavily from their vines.
Berries glisten and plump on their bushes. Cucumbers crunch and cool us on those hot days.
Summer is the time to put food by, and for those of us who love to ferment our vegetables, it
is the height of fermentation season.
But fermentation isn’t just for summer. There are delicious recipes that you can use all year
round. Root vegetables are available through the fall and winter, and make delicious
condiments.
From tomatoes to carrots, you can ferment just about anything coming out of your garden or
your produce bag. So harvest your vegetables, ferment them to tangy perfection, and enjoy
living foods straight from your garden all year long.
Beets
Beets, with their earthy sweetness, are delicious when fermented. With their high sugar the
culturing process can quickly slide through lacto-fermentation and into alcohol
fermentation. For that reason, it is often recommended that you ferment beets along with
another vegetable, make kvass out of them, or be sure to leave them in chunks rather than
shreds as the increased surface area can make your ferment an alcohol one rather than the
desired lactic acid ferment. Try some beet kvass for a delicious probiotic drink, or chunk
some up for lacto-fermented beets.
LACTO-FERMENTATION from Cultures for Health
79 | P a g e
Berries
Want some yummy preserves with the added benefits that fermentation can bring? Try this
recipe for lacto-fermented blueberry jam.
Cabbage
Make everyone’s favorite, old-fashioned sauerkraut.
If you’re looking for an Asian flair, try making some spicy kimchi.
For a Latin-inspired cabbage ferment, try spicy cortido.
Carrots
If you prefer a faster-fermenting carrot with the lovely accent of ginger, try these shredded
ginger carrots.
These super simple dilly carrot sticks are easy to make and versatile. Just use whatever
herbs or seasonings (garlic, onions, etc.) you have coming up in the garden.
Cauliflower
Try this delicious recipe for curried lacto-fermented cauliflower.
Cucumbers
Bring some tang and probiotics to everyone’s favorite dill pickles by fermenting them
instead of canning them.
Or try these for a traditional favorite, kosher-style dills that will delight your friends and
family.
Eggplant
Looking for something a little different? Try this lacto-fermented eggplant recipe.
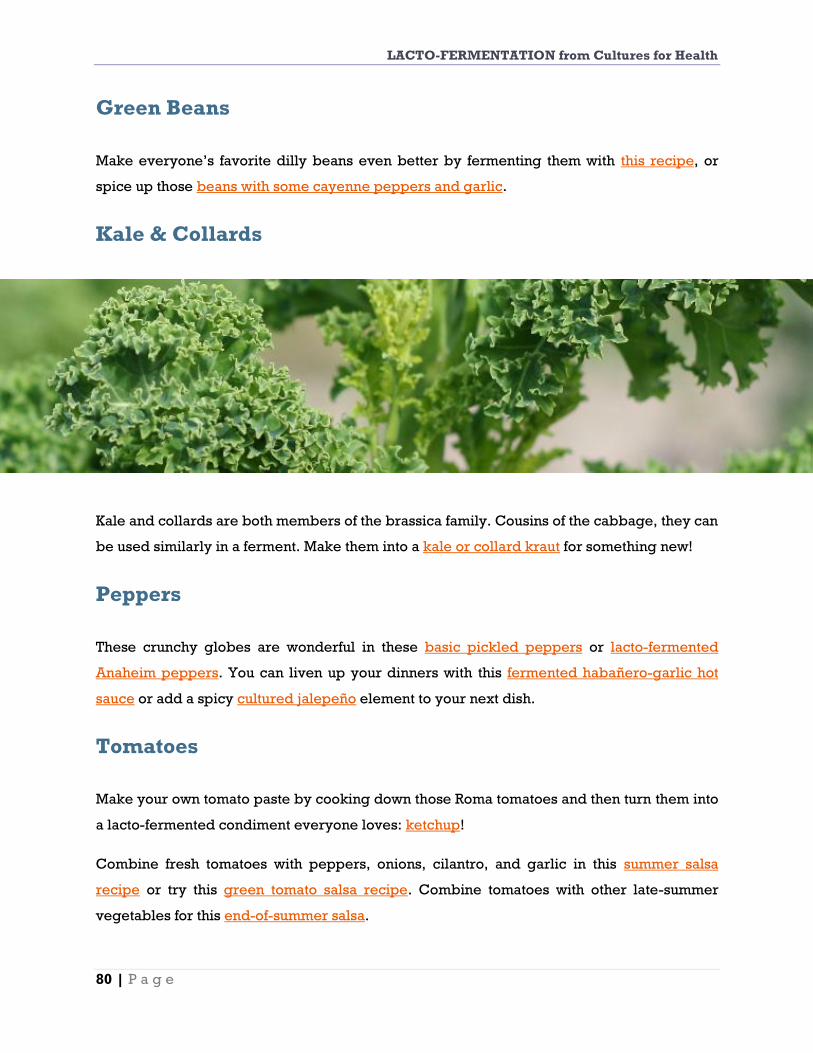
LACTO-FERMENTATION from Cultures for Health
80 | P a g e
Green Beans
Make everyone’s favorite dilly beans even better by fermenting them with this recipe, or
spice up those beans with some cayenne peppers and garlic.
Kale & Collards
Kale and collards are both members of the brassica family. Cousins of the cabbage, they can
be used similarly in a ferment. Make them into a kale or collard kraut for something new!
Peppers
These crunchy globes are wonderful in these basic pickled peppers or lacto-fermented
Anaheim peppers. You can liven up your dinners with this fermented habañero-garlic hot
sauce or add a spicy cultured jalepeño element to your next dish.
Tomatoes
Make your own tomato paste by cooking down those Roma tomatoes and then turn them into
a lacto-fermented condiment everyone loves: ketchup!
Combine fresh tomatoes with peppers, onions, cilantro, and garlic in this summer salsa
recipe or try this green tomato salsa recipe. Combine tomatoes with other late-summer
vegetables for this end-of-summer salsa.
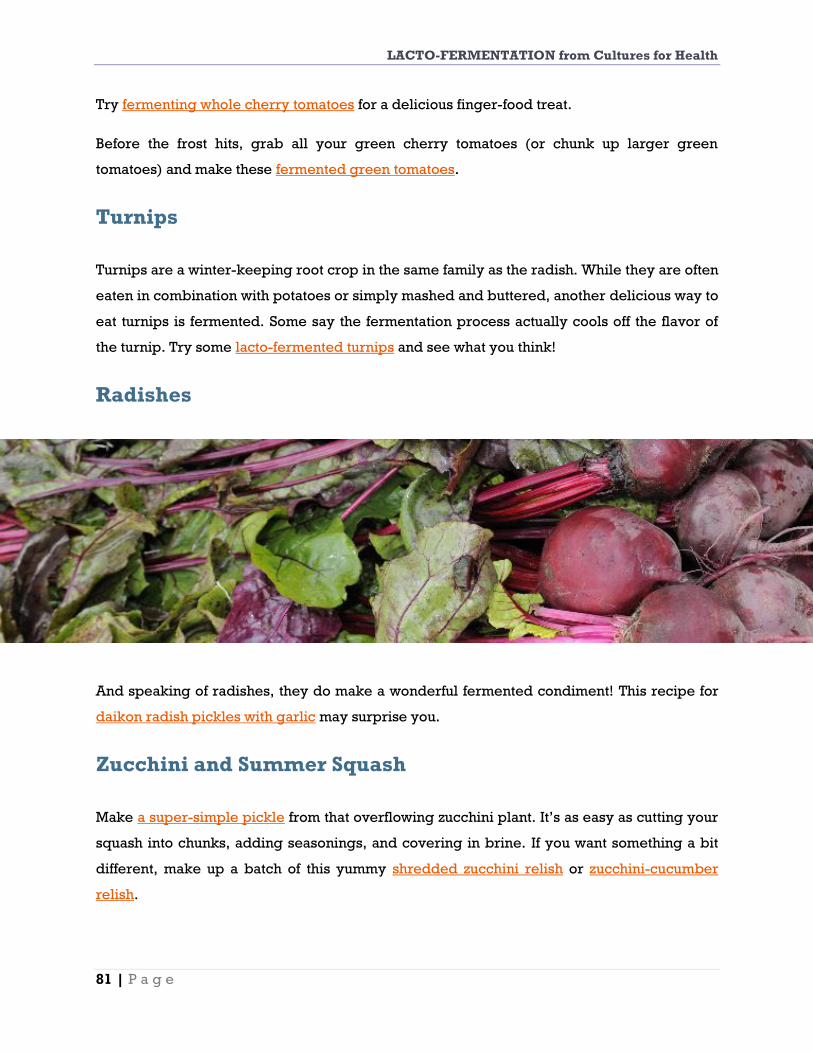
LACTO-FERMENTATION from Cultures for Health
81 | P a g e
Try fermenting whole cherry tomatoes for a delicious finger-food treat.
Before the frost hits, grab all your green cherry tomatoes (or chunk up larger green
tomatoes) and make these fermented green tomatoes.
Turnips
Turnips are a winter-keeping root crop in the same family as the radish. While they are often
eaten in combination with potatoes or simply mashed and buttered, another delicious way to
eat turnips is fermented. Some say the fermentation process actually cools off the flavor of
the turnip. Try some lacto-fermented turnips and see what you think!
Radishes
And speaking of radishes, they do make a wonderful fermented condiment! This recipe for
daikon radish pickles with garlic may surprise you.
Zucchini and Summer Squash
Make a super-simple pickle from that overflowing zucchini plant. It’s as easy as cutting your
squash into chunks, adding seasonings, and covering in brine. If you want something a bit
different, make up a batch of this yummy shredded zucchini relish or zucchini-cucumber
relish.

LACTO-FERMENTATION from Cultures for Health
82 | P a g e
Lacto-fermenting Squash, Pumpkin, and Other
Winter Vegetables
After a long, hot summer of tomatoes, zucchini, peppers, and cucumbers you might be
looking forward to fall. And if you are a lacto-fermenting enthusiast then you may be
thinking the fall vegetable ferments aren’t quite as familiar to you as the summer vegetable
ferments were.
Pumpkin & Squash
Unless you want to add probiotics to all of your vegetables, pumpkin and winter squash will
generally keep without fermentation. Their thick rinds allow them to be stored for months in
the cooler weather of fall and winter.
One thing to keep in mind, though, is that you will most likely be peeling the squash in order
to ferment the flesh. Because the outer rind will naturally contain the organisms naturally
occurring from the soil to create the friendly bacteria in a lacto-ferment, you may want to
include just a hunk of the peeled rind in your fermenting vessel.

LACTO-FERMENTATION from Cultures for Health
83 | P a g e
Three Tips for Making Crunchy Lacto-
Fermented Dill Pickles
Vinegar-brined pickles are one of the most popular and well-known preserved vegetables.
They are super acidic, tangy, sometimes spicy, and definitely crunchy.
If you’ve grown up eating vinegar pickles and then begin making and eating fermented
pickles, you might be a bit disappointed with mushy pickles. In fact, is a mushy pickle is not
a fun pickle, despite how good the flavors are or how healthy the pickle is for you.
So if you are interested in making delicious crunchy lacto-fermented dill pickles full of
yummy flavor, try these tips:
Add a tannin-containing agent to your pickling jars. This is the most important
step in achieving a crunchy pickle so don’t skip it. You could use some black tea, oak
leaves, grape leaves, or horseradish leaves. Just add a few of the larger leaves or a
good teaspoon or so of loose leaf tea or a tea bag to a half-gallon jar.
Ferment at the coolest temperature you can achieve. A fast, hot fermentation can
result in a less-than-stellar crunch to a pickle. Try to achieve the coolest temperature
you can, even when you are making pickles in the heat of summer. A basement, cool
garage, root cellar, or dark cool corner of your home should suffice. The refrigerator
is too cool though.
Try small whole cucumbers first. These little pickling cucumbers tend to retain
their crunch better than a chopped-up larger cucumber. This is probably due to the
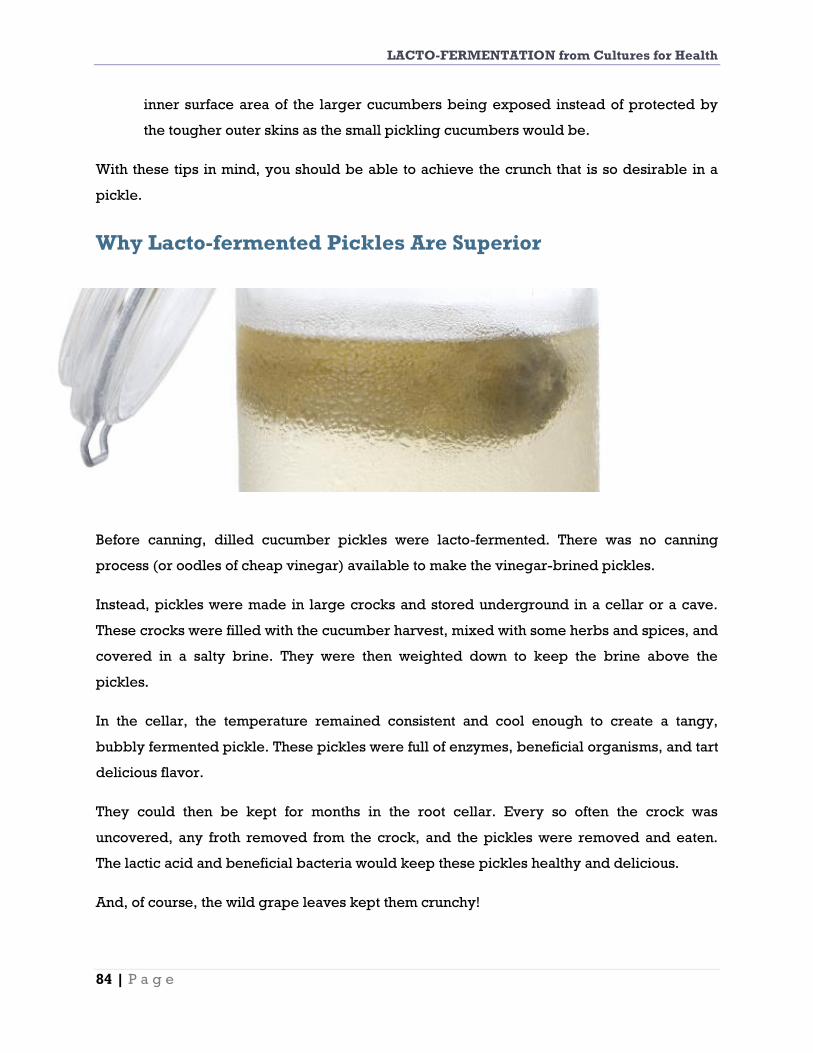
LACTO-FERMENTATION from Cultures for Health
84 | P a g e
inner surface area of the larger cucumbers being exposed instead of protected by
the tougher outer skins as the small pickling cucumbers would be.
With these tips in mind, you should be able to achieve the crunch that is so desirable in a
pickle.
Why Lacto-fermented Pickles Are Superior
Before canning, dilled cucumber pickles were lacto-fermented. There was no canning
process (or oodles of cheap vinegar) available to make the vinegar-brined pickles.
Instead, pickles were made in large crocks and stored underground in a cellar or a cave.
These crocks were filled with the cucumber harvest, mixed with some herbs and spices, and
covered in a salty brine. They were then weighted down to keep the brine above the
pickles.
In the cellar, the temperature remained consistent and cool enough to create a tangy,
bubbly fermented pickle. These pickles were full of enzymes, beneficial organisms, and tart
delicious flavor.
They could then be kept for months in the root cellar. Every so often the crock was
uncovered, any froth removed from the crock, and the pickles were removed and eaten.
The lactic acid and beneficial bacteria would keep these pickles healthy and delicious.
And, of course, the wild grape leaves kept them crunchy!

LACTO-FERMENTATION from Cultures for Health
85 | P a g e

LACTO-FERMENTATION from Cultures for Health
86 | P a g e
R E C I P E S over 40 ways to lacto -ferment today
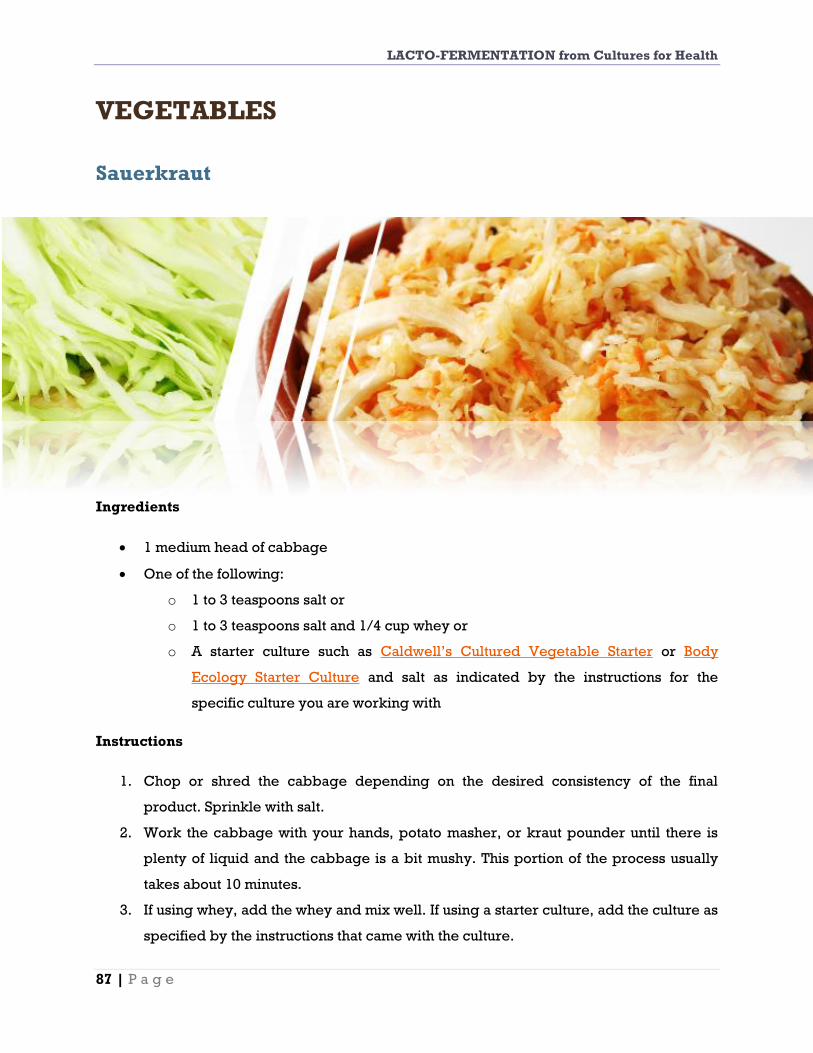
LACTO-FERMENTATION from Cultures for Health
87 | P a g e
VEGETABLES
Sauerkraut
Ingredients
1 medium head of cabbage
One of the following:
o 1 to 3 teaspoons salt or
o 1 to 3 teaspoons salt and 1/4 cup whey or
o A starter culture such as Caldwell’s Cultured Vegetable Starter or Body
Ecology Starter Culture and salt as indicated by the instructions for the
specific culture you are working with
Instructions
1. Chop or shred the cabbage depending on the desired consistency of the final
product. Sprinkle with salt.
2. Work the cabbage with your hands, potato masher, or kraut pounder until there is
plenty of liquid and the cabbage is a bit mushy. This portion of the process usually
takes about 10 minutes.
3. If using whey, add the whey and mix well. If using a starter culture, add the culture as
specified by the instructions that came with the culture.

LACTO-FERMENTATION from Cultures for Health
88 | P a g e
4. Stuff the cabbage into the fermenting container, pressing the cabbage underneath
the liquid. (If necessary, add a bit of water to ensure sufficient liquid.) Ideally all the
cabbage should be submerged under the liquid.
5. Allow the sauerkraut to culture for 3 to 10 days at room temperature. A longer
fermentation period can be used if desired. Please note: if using a starter culture, be
sure to allow the sauerkraut to culture for the specified number of days indicated by
the instructions that came with the culture to ensure full bacteria development.
6. Once the sauerkraut is finished, move to a new storage container if desired. Store the
sauerkraut in the refrigerator or in a root cellar after the culturing process. Many
people find that aging the sauerkraut in the refrigerator or root cellar for 4 to 6 weeks
improves the flavor.
Makes approximately 1 quart.
Variation: Prior to culturing, mix 1 part shredded carrots, apple, or other vegetable to 5
parts cabbage for a more complex flavor. Add caraway seeds if desired.

LACTO-FERMENTATION from Cultures for Health
89 | P a g e
Lacto-fermented Lettuce (or any delicate green)
Lettuce is not something you would normally can or freeze, as this water-heavy vegetable
does not stand up well to such methods.
Fermenting it, however, is a good way to preserve that bumper lettuce crop coming into the
garden. Lettuce has a very high water content, so it is a good candidate for dry-salt
fermentation.
You can add any flavorings you want – minced garlic to fresh herbs to spices – but the pure
lettuce-salt combination makes a bright lettuce ferment that is a great addition to those
summer salads of peppers, tomatoes, and cucumbers.
Ingredients
Lettuce (as many heads or leaves as need preserving)
Sea salt
Water, as needed
Instructions
1. Wash lettuce and remove any brown or questionable leaves. Depending on the type
of lettuce, you have a few preparation options. For a crunchier lettuce like a romaine
or a sturdy leaf or iceberg lettuce, you could shred it as you would cabbage for

LACTO-FERMENTATION from Cultures for Health
90 | P a g e
sauerkraut. For a softer-leafed lettuce, you can cut into pieces as wide and long as
the diameter of your fermentation vessel.
2. Because lettuce wilts down, releases a lot of moisture, and reduces in volume as it
ferments, an open-crock (or large bowl) method works well. Once it has fermented
for a few days it can be transferred to jars.
3. Put a layer of the lettuce in a large vessel, sprinkle lightly with salt, and repeat. For
every quart of packed-down lettuce use 1-1/2 to 2 tablespoons of salt. Mix the lettuce
and salt layers all up, taste, and add more salt if there is no noticeable saltiness to the
lettuce.
4. Once that is completed, weigh down the vegetables in the large bowl or crock. This
can be done with a large cabbage leaf or lettuce leaf topped with a heavy plate that
fits just inside the vessel, plus anything that can be put atop the plate to weight it
down further.
5. The brine will begin to form and by 24 hours after the initial salting and weighting the
lettuce should be covered in brine. If not, add some brine with a ratio of 1 quart water
to 2 tablespoons salt. The lettuce should be at least 2 inches below the brine.
6. Allow this to ferment for several days, transfer to glass jars if desired, and move the
jars to cold storage.
Delicious as an addition to salads.
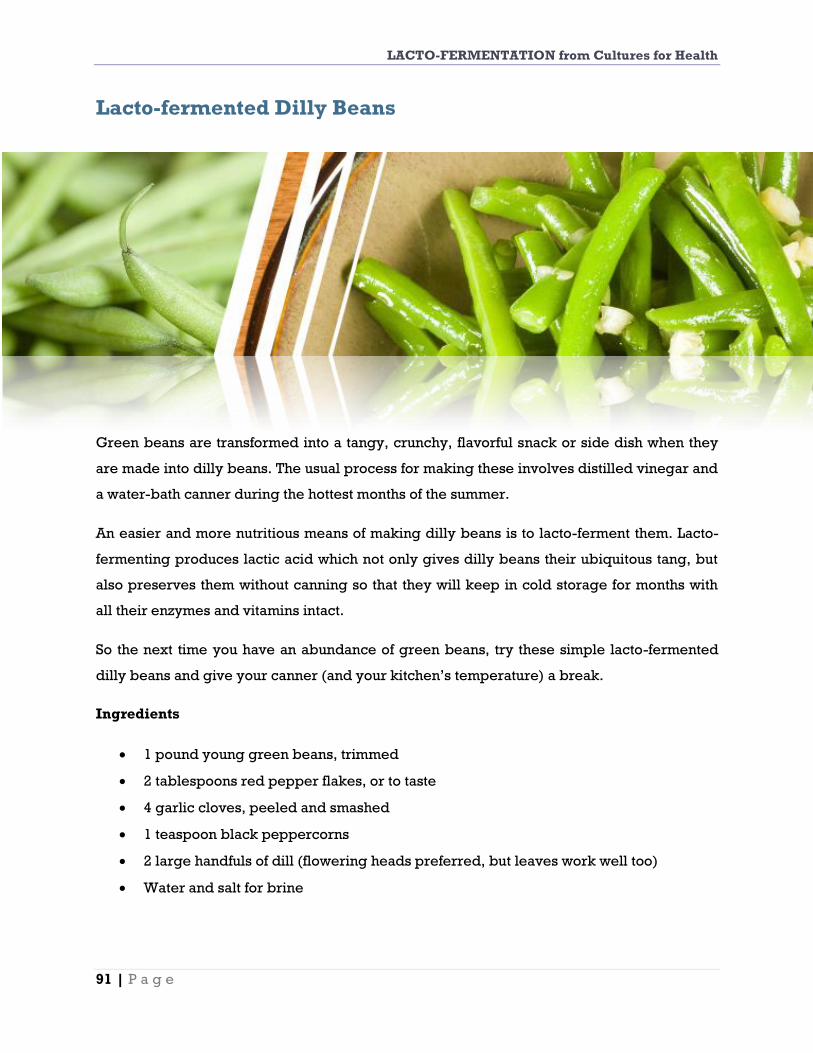
LACTO-FERMENTATION from Cultures for Health
91 | P a g e
Lacto-fermented Dilly Beans
Green beans are transformed into a tangy, crunchy, flavorful snack or side dish when they
are made into dilly beans. The usual process for making these involves distilled vinegar and
a water-bath canner during the hottest months of the summer.
An easier and more nutritious means of making dilly beans is to lacto-ferment them. Lacto-
fermenting produces lactic acid which not only gives dilly beans their ubiquitous tang, but
also preserves them without canning so that they will keep in cold storage for months with
all their enzymes and vitamins intact.
So the next time you have an abundance of green beans, try these simple lacto-fermented
dilly beans and give your canner (and your kitchen’s temperature) a break.
Ingredients
1 pound young green beans, trimmed
2 tablespoons red pepper flakes, or to taste
4 garlic cloves, peeled and smashed
1 teaspoon black peppercorns
2 large handfuls of dill (flowering heads preferred, but leaves work well too)
Water and salt for brine
LACTO-FERMENTATION from Cultures for Health
92 | P a g e
Instructions
1. Make a brine with a ratio of 2 to 3 tablespoons of sea salt to every 1 quart of water.
Set aside.
2. In each of the quart jars divide up the red pepper flakes, garlic cloves, peppercorns,
and dill.
3. Place the green beans on top of the seasonings, straight up if they are long and thin
or sideways if thicker and cut into chunks. Cover with your brine solution up to 1 inch
from top of jar.
4. Seal tightly with a lid and allow to ferment at 60° to 80°F degrees for 3 to 10 days,
tasting to determine when it has fermented to your taste. (It will get tangier as it
ferments.)
5. Transfer to cold storage.
Makes 2 quarts

LACTO-FERMENTATION from Cultures for Health
93 | P a g e
Lacto-fermented Green Beans with Cayenne Peppers and
Garlic
Ingredients
2 pounds fresh green beans, washed
8 cloves fresh garlic, peeled and quartered
1 gallon fresh light brine, chilled (1/2 cup salt to 1 gallon water)
8 to 12 cayenne peppers, washed and tops removed
Raw apple cider vinegar
1/2 cup black peppercorns, crushed coarse
Grape or mesquite leaves (to help retain crunchiness )
10 to 12 sprigs fresh dill
Instructions
1. Sterilize 12 pint jars or 6 quart jars with lids and rings.
2. Go through the green beans, pulling out any rotting or blemished ones. Cut the ends
off the good green beans. Measure them by the jars you will be using, and cut them
so they will fit in lengthwise coming up an inch below the rim of the jars.
3. Place half of one grape leaf or a few mesquite leaves into the bottom of each jar. Lay
the jars on their sides and stack the green beans in so that when you stand the jars
up, they stand tightly up and down in the jar.
LACTO-FERMENTATION from Cultures for Health
94 | P a g e
4. Once you have filled the jars this way, use a butter knife to gently slide in one
cayenne pepper, up against the glass of the jar. Do the same for the dill sprigs, one
per jar. Place one teaspoon of the crushed peppercorns atop the green beans,
followed by 2 or 3 of the garlic pieces.
5. Pour in 2 tablespoons of apple cider vinegar, then fill the jar up to 1 inch away from
the rim with the brine solution. (This will be just to the top of the green beans.) Wipe
the rims of all of the jars, then screw the lids on tightly.
6. Place in a cool, dark place away from drafts and direct sunlight. Burp the jars once a
day for the first week, then once every other day for the second and third weeks.
7. After 3 weeks, or when you have tasted them and you think they are ready, move
them to the cellar or to your refrigerator until you are ready to eat them.

LACTO-FERMENTATION from Cultures for Health
95 | P a g e
Lacto-fermented Green Tomato Pickles
Green tomatoes can seem like a nuisance, either at the beginning of the growing season
when you can’t wait for red ripe tomatoes, or at the end of the season when you’ve got to get
them all in before a frost.
But green tomatoes are great for making pickles. The sugars haven’t fully developed yet in
these little green gems, making them perfect for a tangy, flavorful lacto-fermented pickle.
Ingredients
2 pounds of small green tomatoes (around cherry tomato size)
1 tablespoon coriander or dill seed
4 garlic cloves, peeled and smashed
1 jalapeño, or other hot pepper, halved
2 tablespoons sea salt
Approximately 3 cups water, more if necessary.
Instructions
1. Prepare brine by warming up 2 cups of water, adding salt and stirring to dissolve,
then adding 1 cup of cold water to bring brine to room temperature.

LACTO-FERMENTATION from Cultures for Health
96 | P a g e
2. In a quart jar add coriander or dill seed, garlic cloves, and hot pepper. Fill jar with
green tomatoes, leaving about 1-1/2 inches of headspace. Pour brine over all, just
covering the tomatoes and leaving the headspace.
3. Cover jar with lid and airlock, if using. Allow to ferment in a room temperature space
for 3 to 12 days. If you are not using an airlock, be sure to burp your jar regularly for
the first few days of fermentation.
Once tomatoes are fermented, move them to cold storage.

LACTO-FERMENTATION from Cultures for Health
97 | P a g e
Lacto-fermented Whole Cherry Tomatoes
You may have used chopped cherry tomatoes in a lacto-fermented salsa or relish, but if you
haven’t tried fermenting whole cherry tomatoes then you are in for a real treat.
When whole cherry tomatoes are fermented they take on a fizz that many fermented foods
are known for. After plucking one of these fermented tomatoes from a jar and putting it into
your mouth you will experience a fizzy popping sensation!
Ingredients
Enough cherry tomatoes to fill a quart jar
2 tablespoons of whey
1 tablespoon sea salt
Filtered water to cover
Instructions
7. Fill a clean quart jar with your washed cherry tomatoes up to 1-1/2 inches from the
rim. Add the whey and salt then cover with water up to 1-1/2 inches from top. Swirl to
combine and cover tightly.
8. Allow to ferment at room temperature for 3 to 4 days, burping daily to release gases.
Transfer to cold storage until ready to eat.

LACTO-FERMENTATION from Cultures for Health
98 | P a g e
Naturally Fermented Carrot Sticks
Ingredients
2 to 3 pounds carrots, cut into sticks
Water
One of the following:
o 1 tablespoon salt
o 2 to 3 teaspoons salt and 1/4 cup whey
o A starter culture such as Caldwell’s Cultured Vegetable Starter or Body
Ecology Starter Culture and salt as indicated by the instructions for the
specific culture you are working with
Instructions
1. If using just salt or salt and whey, dissolve the salt in water and then add the whey. If
using a starter culture, prepare the liquid according the package instructions.
2. Place the carrot sticks in the jar and pour the liquid over the carrots. Ideally the
carrots should be submerged under the liquid. Ferment for two weeks or longer at
room temperature.
3. Once the fermentation period is complete, the carrots can be removed to a storage
container if desired. Store cultured carrots in the refrigerator or root cellar.
Makes approximately 2 quarts.
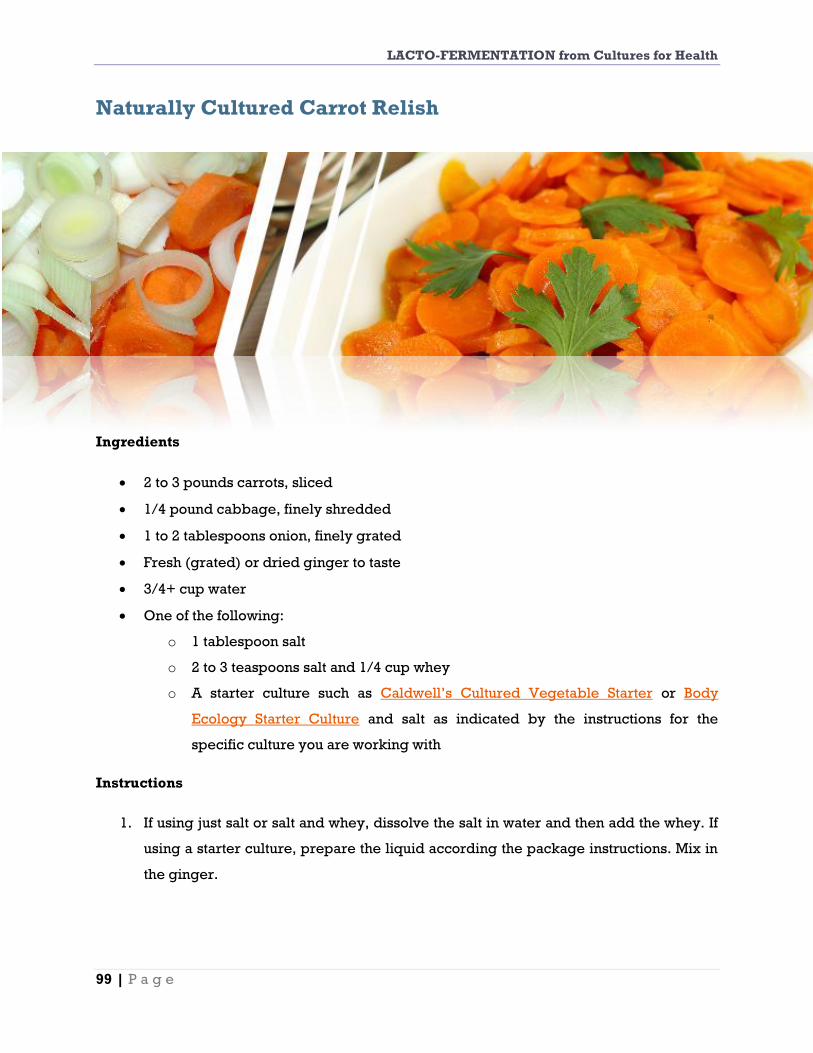
LACTO-FERMENTATION from Cultures for Health
99 | P a g e
Naturally Cultured Carrot Relish
Ingredients
2 to 3 pounds carrots, sliced
1/4 pound cabbage, finely shredded
1 to 2 tablespoons onion, finely grated
Fresh (grated) or dried ginger to taste
3/4+ cup water
One of the following:
o 1 tablespoon salt
o 2 to 3 teaspoons salt and 1/4 cup whey
o A starter culture such as Caldwell’s Cultured Vegetable Starter or Body
Ecology Starter Culture and salt as indicated by the instructions for the
specific culture you are working with
Instructions
1. If using just salt or salt and whey, dissolve the salt in water and then add the whey. If
using a starter culture, prepare the liquid according the package instructions. Mix in
the ginger.

LACTO-FERMENTATION from Cultures for Health
100 | P a g e
2. Mix the carrot slices, cabbage, and onion together and place in a fermentation
container. Pour the liquid over the vegetables. Ideally the vegetables should be
submerged under the liquid.
3. Ferment for 3 to 14 days or longer at room temperature. (If using a starter culture,
follow the instructions that came with the culture to ensure adequate time for full
bacteria development.)
4. Once the fermentation period is complete, the carrots can be removed to a storage
container if desired. Store cultured carrots in the refrigerator or root cellar.
Makes approximately 1 quart.

LACTO-FERMENTATION from Cultures for Health
101 | P a g e
Lacto-fermented Grated Ginger Carrots
With their sweetness carrots are a great vegetable to ferment. They seem to take on the tang
produced by lactic acid bacteria quite well and balance it out.
Carrots are also popular with children and grating them brings out the “fun” side since it
looks a bit like coleslaw. The ginger in this recipe is wonderfully reminiscent of a carrot and
ginger soup, and with its refreshing tang this serves up well as a condiment to your favorite
protein or as an addition to a salad.
With just a few simple ingredients, this ferment couldn’t get much easier.
Ingredients
4 cups grated carrots
1 tablespoon fresh grated ginger root
1 tablespoon sea salt (or 2 if not using whey)
4 tablespoons whey (optional)
Instructions
1. Grate carrots using the larger hole setting on either a box grater or your food
processor.

LACTO-FERMENTATION from Cultures for Health
102 | P a g e
2. In a medium-size bowl mix grated carrots, grated ginger, sea salt, and whey (if
using). Once all ingredients are evenly distributed move them to a quart-size
canning jar or other non-reactive fermenting vessel.
3. Press mixture down tightly into vessel with either a wooden utensil or your fist. Be
sure to pack them down tightly enough that the liquid (brine) covers the shredded
carrots.
4. Seal with a lid and allow to ferment at a cool room temperature (60° to 75°F degrees
being optimal) for 5 to 10 days or until bubbly and tangy to your liking.
5. Move jar to cold storage.

LACTO-FERMENTATION from Cultures for Health
103 | P a g e
Southwestern Lacto-fermented Carrot Sticks
Sometimes you’ve just got to switch things up a bit in the kitchen. The table your family sits
around can be full of critics when they get bored!
This is especially true of cultured foods. If you’re still in that phase where you are trying to
convince your family to love cultured food as much as you do then keeping it interesting is
imperative.
So why not spice up your cultured vegetables a bit? If you’ve ever made lacto-fermented
carrot sticks then you know how easy and yummy they can be. In this recipe you’ll get the
same quick and easy vegetable ferment with a lovely southwestern twist.
Ingredients
1 to 1-1/2 pounds carrots, cleaned
Water
1 tablespoon sea salt
3 garlic cloves, peeled
Two handfuls of fresh cilantro leaves
1/2 teaspoon cumin seeds

LACTO-FERMENTATION from Cultures for Health
104 | P a g e
Instructions
1. Make a brine from 1 tablespoon of salt combined with 1 quart of fresh water. Set
aside.
2. Cut carrots into sticks that will fit into your quart jar. If they are large cut them in half
horizontally and then into quarters vertically (to create long, thin sticks). If they are
smaller you can simply cut them in half vertically.
3. Place garlic cloves, cumin seeds, and a handful of cilantro into the bottom of the jar.
Place carrot sticks on top vertically so they all fit. Add second handful of cilantro.
4. Pour the brine over the carrot sticks and cilantro, leaving 1 inch of headspace. Place
a lid on the jar, tighten, and place in a cool spot to ferment for 1 to 2 weeks. You will
need to burp the jar every day for the first few days to release any pent-up gases.
Once the vegetables are cultured you can eat and/or transfer to cold storage.
Makes 1 quart.
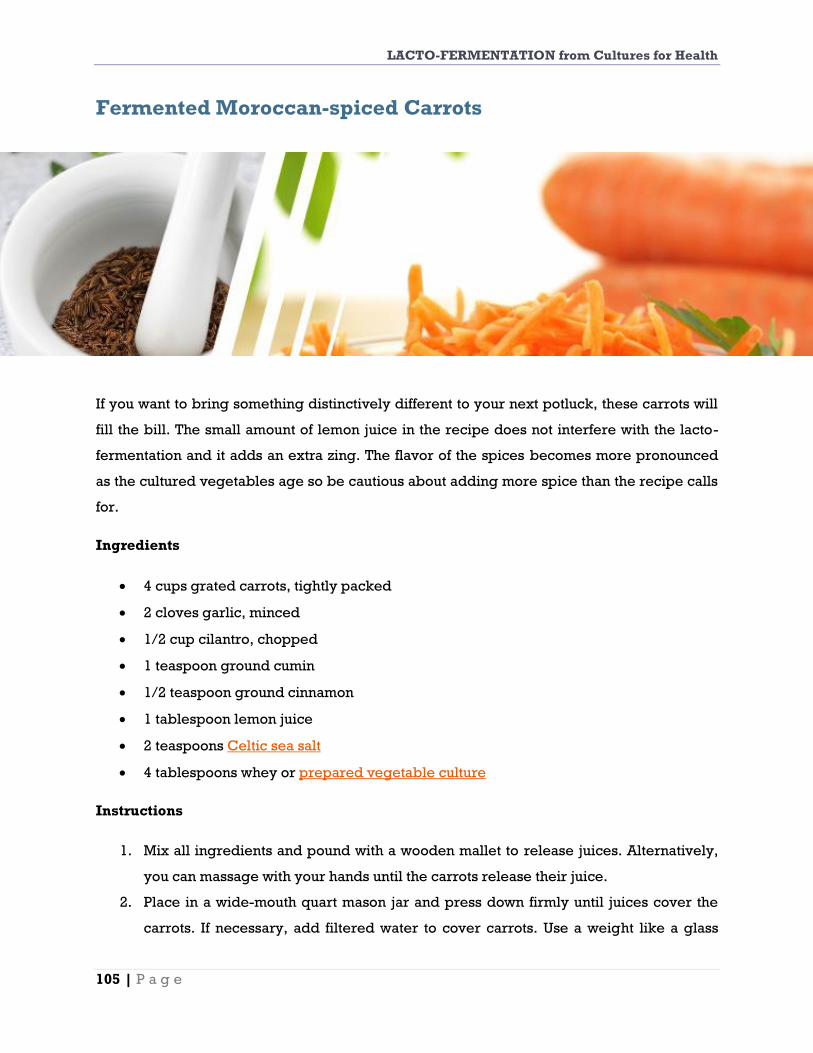
LACTO-FERMENTATION from Cultures for Health
105 | P a g e
Fermented Moroccan-spiced Carrots
If you want to bring something distinctively different to your next potluck, these carrots will
fill the bill. The small amount of lemon juice in the recipe does not interfere with the lacto-
fermentation and it adds an extra zing. The flavor of the spices becomes more pronounced
as the cultured vegetables age so be cautious about adding more spice than the recipe calls
for.
Ingredients
4 cups grated carrots, tightly packed
2 cloves garlic, minced
1/2 cup cilantro, chopped
1 teaspoon ground cumin
1/2 teaspoon ground cinnamon
1 tablespoon lemon juice
2 teaspoons Celtic sea salt
4 tablespoons whey or prepared vegetable culture
Instructions
1. Mix all ingredients and pound with a wooden mallet to release juices. Alternatively,
you can massage with your hands until the carrots release their juice.
2. Place in a wide-mouth quart mason jar and press down firmly until juices cover the
carrots. If necessary, add filtered water to cover carrots. Use a weight like a glass

LACTO-FERMENTATION from Cultures for Health
106 | P a g e
disk or a clean rock to keep carrots submerged in the liquid. Carrots should be at
least 1 inch from top of jar to allow for expansion of the fermenting liquid. Fill a
second jar if necessary, so as to not overfill.
3. Cover tightly and leave at room temperature for 3 days before transferring to the
refrigerator.

LACTO-FERMENTATION from Cultures for Health
107 | P a g e
Lacto-fermented Carrot and Parsnip Pickles
Many people are not familiar with the wonderful parsnip. This root vegetable is similar in
flavor to a carrot, but with a stronger flavor, and often a woodier texture. It has a bright,
almost lemony tang to it, making it a good addition to stews.
Parsnips are great in winter dishes, but also make a tasty fermented pickle. When combined
with carrots and ginger, as in this recipe, their sweetness plays off the lactic acid tang of the
fermented brine and they are quite refreshing.
Ingredients
About 1 pound parsnips
About 1 pound carrots
1 teaspoon fresh grated ginger
1/4 teaspoon red pepper flakes
2 tablespoons sea salt
Water, as needed
Instructions
1. Wash parsnips and carrots well. Remove tops and cut lengthwise into small sticks.
Cutting the sticks tall enough to fill jar 1-1/2 inches below the rim is helpful for even
packing.

LACTO-FERMENTATION from Cultures for Health
108 | P a g e
2. Place grated ginger and red pepper flakes in the bottom of a quart jar. Place parsnip
and carrot sticks atop ginger and red pepper flakes, trying to line them up and pack
them in as evenly as possible. Leave 1 inch of headspace at the top of the jar.
3. Make a brine of 2 cups water to 2 tablespoons sea salt. Stir to dissolve salt as well as
possible and pour over vegetables, leaving 1 inch of headspace. Add more water, as
needed. There is no need to add more salt.
4. Place the lid on the jar and add the airlock, if using. Allow to ferment at room
temperature for 5 to 10 days. If you are not using an airlock, be sure to burp the jars
daily to release pent-up gases.
Once the initial fermentation period is over, and the carrots and parsnips are tangy enough
to your taste, move them to cold storage.

LACTO-FERMENTATION from Cultures for Health
109 | P a g e
Naturally Cultured Pickles
Ingredients
Pickling-style cucumbers, sliced
Fresh garlic, chopped or minced
Fresh or dried dill weed
3/4+ cup water
One of the following:
o 1-1/2 tablespoons salt
o 1 tablespoon salt and 1/4 cup whey
o A starter culture such as Caldwell’s Cultured Vegetable Starter or Body
Ecology Starter Culture and salt as indicated by the instructions for the
specific culture you are working with
Instructions
If using just salt or salt and whey, dissolve the salt in water then add the whey. If
using a starter culture, prepare the liquid according the package instructions.
Mix the cucumber slices, garlic, and dill together and place in a fermentation
container. Pour the liquid over the vegetables. Ideally the vegetables should be
submerged under the liquid.

LACTO-FERMENTATION from Cultures for Health
110 | P a g e
Ferment for 7 to 14 days or longer at room temperature (if using a starter culture,
follow the instructions that came with the culture to ensure adequate time for full
bacteria development).
Once the fermentation period is complete, the vegetables can be removed to a storage
container if desired. Store cultured pickles in the refrigerator or root cellar.
Makes approximately 1 quart.

LACTO-FERMENTATION from Cultures for Health
111 | P a g e
Lacto-fermented “Kosher” Dill Pickles
Many of us grew up eating spicy, garlic-studded “kosher” dill pickles. These pickles are
crisp, crunchy, sour, and delicious: everything a pickled cucumber should be.
The so-called “kosher” pickle is not necessarily kosher in the sense that it complies with
Jewish food laws. It is called kosher because of its flavor profile made popular by New
York’s Jewish pickle makers, who made the pickles using the same kind of salt used to
prepare meat in the kosher style.
These pickle makers were known for their natural salt-brined pickles heavily seasoned with
dill and garlic. So any pickle that is seasoned in the same fashion is referred to as a kosher
dill.
You may notice an unusual ingredient in the recipe below: grape, oak, or horseradish
leaves. These leaves are not for eating: they are put in the brine because the tannins in them
help the pickles stay crunchy, a vital characteristic of every good pickle.
Ingredients
5 tablespoons sea salt
2 quarts of chlorine-free water
4 to 6 grape, oak, or horseradish leaves
6 to 9 cloves of peeled garlic

LACTO-FERMENTATION from Cultures for Health
112 | P a g e
2 large heads of dill
Spices to taste: black peppercorns, red pepper flakes, mustard seeds, etc. (Secret
ingredient: for an extra bite, add a few strips of fresh horseradish to the spice mix!)
Enough pickling cucumbers to fill a half-gallon jar
Instructions
1. Make a brine with 2 quarts of chlorine-free water and 5 tablespoons sea salt. Mix
well, cover, and allow to cool to room temperature. This brine can be kept for days
before using.
2. In a half-gallon jar add a couple of the tannin-containing leaves, a few cloves of
garlic, the heads of dill, and 1/3 of the spices you plan to use.
3. Pack half of your cucumbers tightly on top of these spices. (The longest ones work
best at the bottom.) Repeat a layer of leaves, garlic, and spices. Add another tightly
packed layer of cucumbers and top them off with more garlic and spices.
4. Pour the brine over the pickles, leaving 1 to 2 inches of headspace. Place another
tannin-containing leaf on top of the pickles as a cover between the pickles and the
surface of the brine.
5. Tightly cap the jar and place in a safe place at room temperature for 3 to 5 days.
Alternatively, place in a root cellar or cool basement for up to two weeks.
6. You will know your pickles have fermented when the brine is cloudy, the brine is
bubbling, and the pickles have a bubbly sourness to them. The warmerthe
fermenting temperature, the shorter the fermentation time, though a cooler
fermentation temperature is desirable (less than 80°F).
7. Eat right away, or store in a refrigerator or root cellar for months and enjoy them all
winter long.
Makes one half-gallon jar of pickles.

LACTO-FERMENTATION from Cultures for Health
113 | P a g e
Lacto-fermented Radishes
When spring comes full-on you may be wondering what you can do with all of those spicy
radishes besides eating them in salads or dipping them in ranch dressing.
Radishes just aren’t that versatile, due to their intense spiciness, but they flourish when
fermented in this cultured vegetable recipe.
Ingredients
4 cups water
2 to 3 tablespoons fine-grained sea salt
2 bunches of radishes
Seasoning seeds such as dill, mustard, caraway, etc.
Instructions
1. Prepare the brine by heating 4 cups of water and dissolving the salt in the water. Let
cool before pouring over vegetables. Any leftover brine can be stored in the
refrigerator for a week for fermenting vegetables.
2. Wash radishes well and remove tops and tails. Cut small radishes into quarters and
larger ones into sixths.
3. Place any spices or seasonings such as garlic, mustard, bay, etc. into the bottom of a
quart jar. Pack the radishes on top of any seasonings and cover with the cooled brine,

LACTO-FERMENTATION from Cultures for Health
114 | P a g e
leaving about 1 inch of headspace. If the radishes tend to float above the water line
then either take a very clean jam jar lid and place it on top of the radishes to weight
them down or devise another way to keep the vegetables below the level of the
water.
4. Cover tightly and leave at room temperature for 2 to 3 days or until bubbly and
fermented.
5. Move to cold storage.

LACTO-FERMENTATION from Cultures for Health
115 | P a g e
Lacto-fermented Daikon Radish Pickles with Garlic
The daikon radish is ubiquitous in some Asian cuisines. This deep root can get fairly long,
unlike the common globe radishes most westerners are used to.
It does contain the usual pungency of the radish, although usually a bit milder, and when
combined with garlic and a decent fermentation time, the naturally fermented daikon is full
of fresh crunch and flavor.
Ingredients
Enough daikon radishes, washed and cut into quarters lengthwise, to fill a quart jar
4 garlic cloves, peeled
2 tablespoons sea salt
Water as needed
Instructions
1. Prepare daikon radishes by removing the tops, washing, and cutting lengthwise into
long pickles.
2. Add garlic cloves to the bottom of a quart jar. Place daikon on top of the garlic, going
upwards, lengthwise.
3. Combine salt with 2 cups of water and pour over radishes, leaving 1-1/2 inches of
headspace.

LACTO-FERMENTATION from Cultures for Health
116 | P a g e
4. Cover tightly with lid and place at a cool room temperature to ferment for 1 to 2
weeks.
5. Move to cold storage.

LACTO-FERMENTATION from Cultures for Health
117 | P a g e
Super Simple Lacto-fermented Peppers
Peppers are the sweethearts of summer. They love the heat, and add yummy flavor (and
nutrition) to summer favorites like gazpacho, salsa, and stuffed peppers. They’re also full of
vitamin C.
But you can only eat so many of them fresh! Preserve them and make them even more
nutritious (and delicious) through the process of lacto-fermentation.
The process for fermenting peppers is simple. You can add all sorts of fun spices like cumin
and cayenne to give it a southwestern flair, but they are also great plain, in just a salt brine.
How to Use Them
Once they are fermented you can add them plain to all sorts of dishes. Any raw salad that
you might add bell peppers to would welcome these simple lacto-fermented sweet peppers.
Add them to a taco salad. Use them in a fresh salsa. Whip them up in an extra tangy
gazpacho. Add them to a grain or bean salad. Top a bowl of beans with them along with
cultured cream. Use them to top cooked Italian or other sausages.
Or enjoy them straight from the jar if you’re a real pepper lover.

LACTO-FERMENTATION from Cultures for Health
118 | P a g e
Recipe
Use whatever amount of peppers you have coming in from the garden or piled up from the
farmer’s market. So long as you always use the same ratio of salt to water in the brine, you
can make this recipe in any amount and with whatever additions you like.
Ingredients
Sweet peppers
Sea salt
Filtered water
Seasonings: spices like cumin or cayenne, peeled garlic, sliced onion; herbs like
cilantro or parsley, etc.
Quart, half-gallon, or gallon jars
Instructions
1. Make a brine from 3 tablespoons of fine-grained sea salt and 1 quart of filtered water.
(If you are using a larger vessel, double or triple the brine amount.) Stir well to
dissolve the salt in water.
2. Rinse the peppers with water and remove stems and cores. Cut them into thin strips
or 1/2- to 1-inch squares.
3. Place a bit of seasonings, if using, at the bottom of your vessel. Fill the jar about
halfway with peppers. Add in a bit more seasonings, if using. Fill the rest of your
vessel with the chopped peppers, leaving 1 to 2 inches of headspace.
4. Pour brine over peppers and seasonings until covered. Weight down your peppers
using a smaller lid, clean rock, or plastic bag filled with water. Be sure that the
peppers remain under the brine.
5. Allow to ferment at room temperature (65° to 80°F) for several days, burping jars
daily as necessary to release pent-up gases. Move the jars to cold storage when
finished. Should keep for several months.

LACTO-FERMENTATION from Cultures for Health
119 | P a g e
Lacto-fermented Anaheim Peppers
Ingredients
1 pound whole Anaheim peppers, rinsed well, tops cut off (or banana peppers, hot or
mild)
4 to 5 clean quart or pint jars, (depending on the length of your peppers) with lids
and bands, sterilized
1 gallon purified water (room temperature)
Sea salt
Kombucha or raw apple cider vinegar
Directions
1. Wash the jars in hot, soapy water and rinse them well. Place the peppers into the jars
in an up-and-down fashion like pickles, wedging the last one in to make it a tight fit.
Wipe the rims of all the jars with a paper towel.
2. Pour 1 tablespoon of the kombucha or vinegar into each jar, swilling it around at the
bottom. Scoop in 1 teaspoon of salt per quart jar, 1/2 teaspoon per pint. Fill the
remaining space in the jars with purified water, coming up to 1 inch away from the
rims.
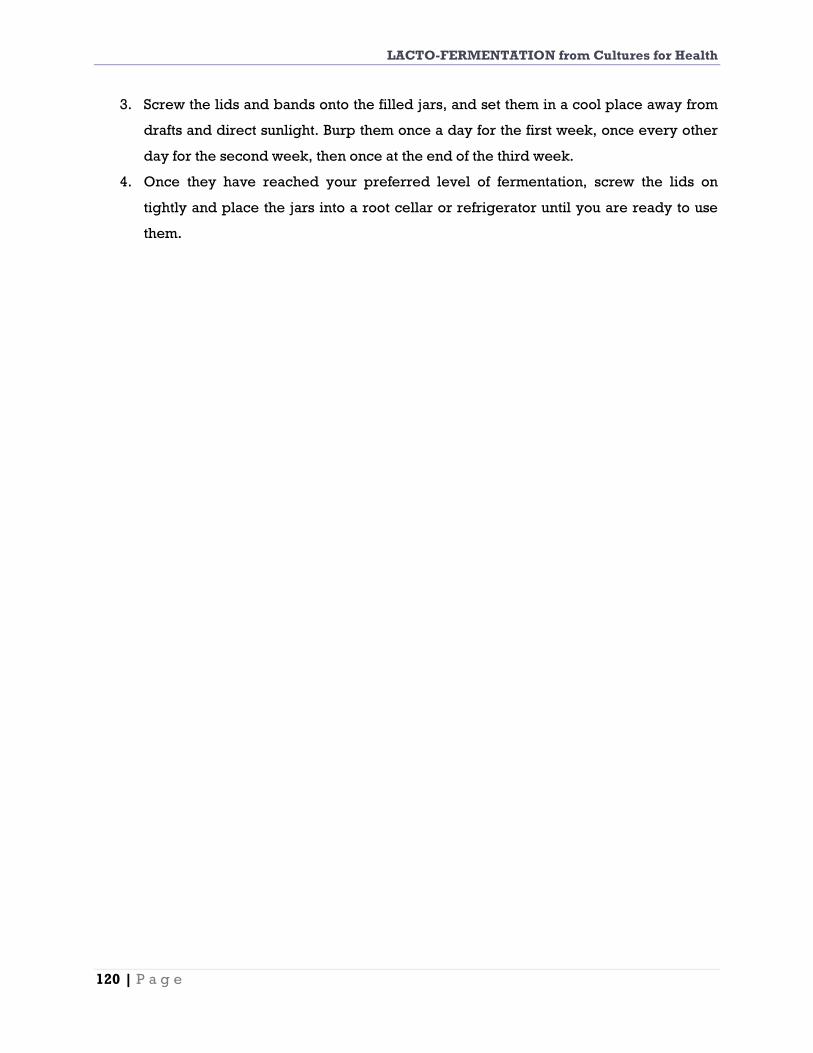
LACTO-FERMENTATION from Cultures for Health
120 | P a g e
3. Screw the lids and bands onto the filled jars, and set them in a cool place away from
drafts and direct sunlight. Burp them once a day for the first week, once every other
day for the second week, then once at the end of the third week.
4. Once they have reached your preferred level of fermentation, screw the lids on
tightly and place the jars into a root cellar or refrigerator until you are ready to use
them.
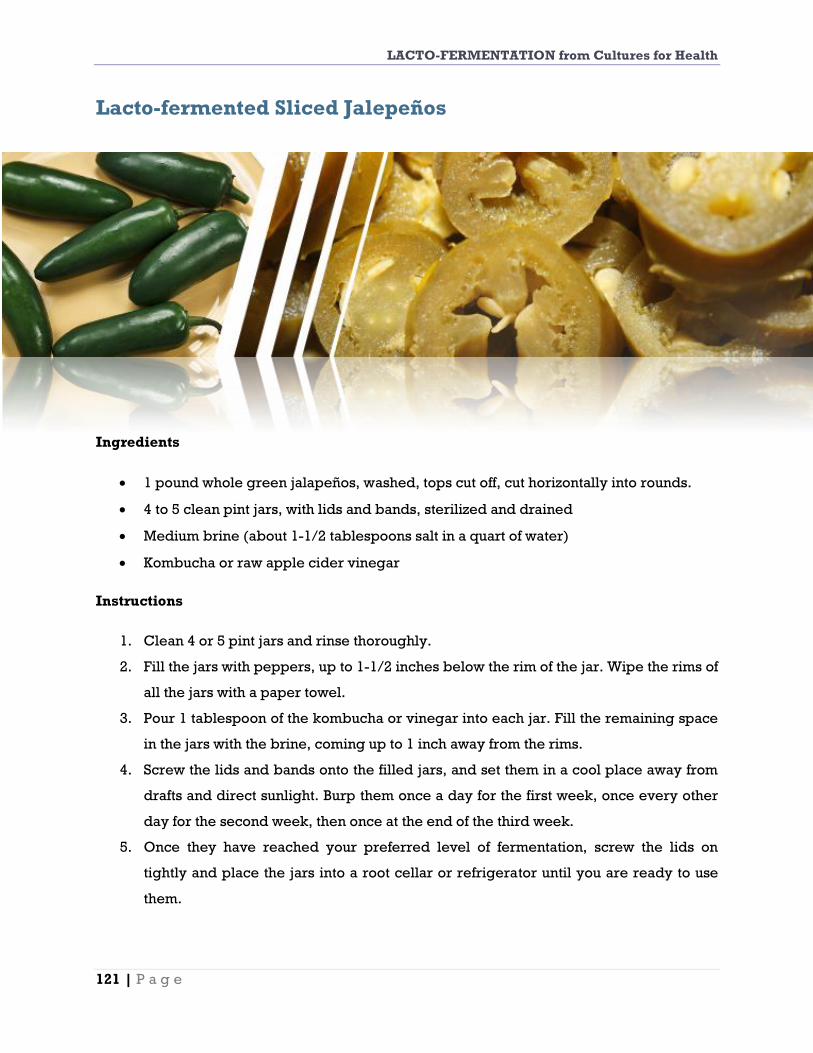
LACTO-FERMENTATION from Cultures for Health
121 | P a g e
Lacto-fermented Sliced Jalepeños
Ingredients
1 pound whole green jalapeños, washed, tops cut off, cut horizontally into rounds.
4 to 5 clean pint jars, with lids and bands, sterilized and drained
Medium brine (about 1-1/2 tablespoons salt in a quart of water)
Kombucha or raw apple cider vinegar
Instructions
1. Clean 4 or 5 pint jars and rinse thoroughly.
2. Fill the jars with peppers, up to 1-1/2 inches below the rim of the jar. Wipe the rims of
all the jars with a paper towel.
3. Pour 1 tablespoon of the kombucha or vinegar into each jar. Fill the remaining space
in the jars with the brine, coming up to 1 inch away from the rims.
4. Screw the lids and bands onto the filled jars, and set them in a cool place away from
drafts and direct sunlight. Burp them once a day for the first week, once every other
day for the second week, then once at the end of the third week.
5. Once they have reached your preferred level of fermentation, screw the lids on
tightly and place the jars into a root cellar or refrigerator until you are ready to use
them.
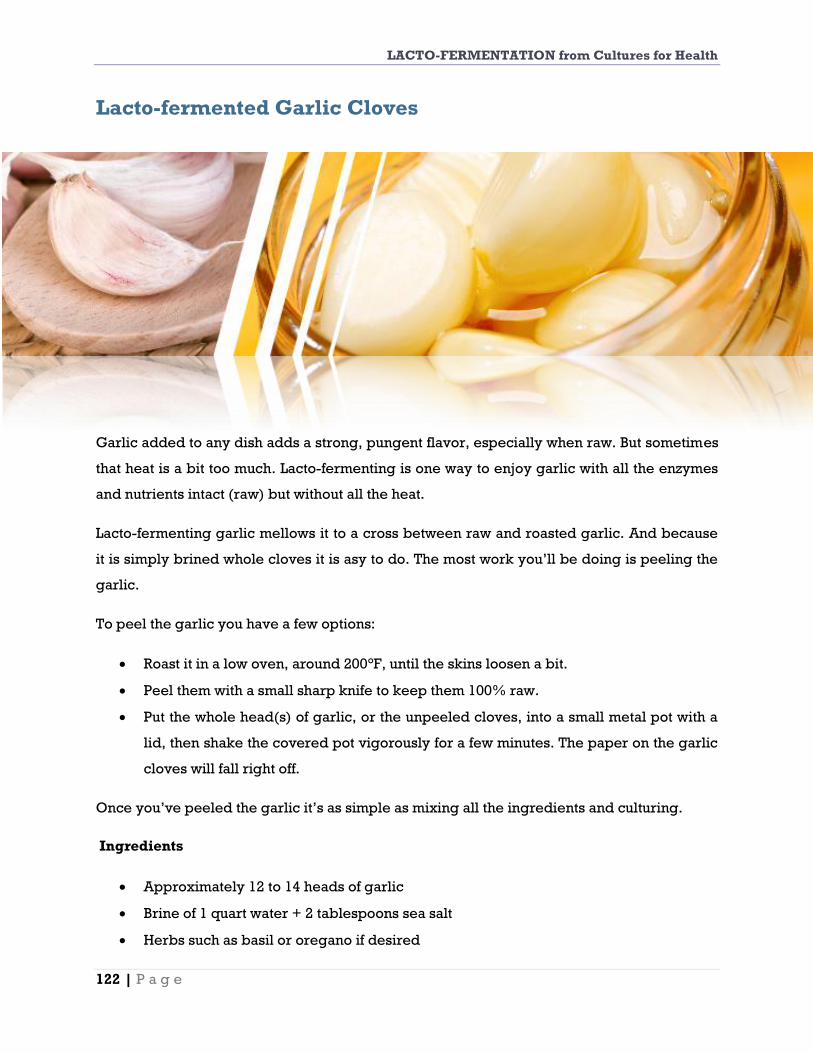
LACTO-FERMENTATION from Cultures for Health
122 | P a g e
Lacto-fermented Garlic Cloves
Garlic added to any dish adds a strong, pungent flavor, especially when raw. But sometimes
that heat is a bit too much. Lacto-fermenting is one way to enjoy garlic with all the enzymes
and nutrients intact (raw) but without all the heat.
Lacto-fermenting garlic mellows it to a cross between raw and roasted garlic. And because
it is simply brined whole cloves it is asy to do. The most work you’ll be doing is peeling the
garlic.
To peel the garlic you have a few options:
Roast it in a low oven, around 200°F, until the skins loosen a bit.
Peel them with a small sharp knife to keep them 100% raw.
Put the whole head(s) of garlic, or the unpeeled cloves, into a small metal pot with a
lid, then shake the covered pot vigorously for a few minutes. The paper on the garlic
cloves will fall right off.
Once you’ve peeled the garlic it’s as simple as mixing all the ingredients and culturing.
Ingredients
Approximately 12 to 14 heads of garlic
Brine of 1 quart water + 2 tablespoons sea salt
Herbs such as basil or oregano if desired

LACTO-FERMENTATION from Cultures for Health
123 | P a g e
Instructions
1. Peel garlic as indicated above. Fill a quart jar within 1 inch of the top with the garlic
cloves.
2. Pour brine and herbs over garlic cloves.
3. Allow to ferment for 3 to 4 weeks before moving to cold storage. The longer these sit
in cold storage the more delicious they get!

LACTO-FERMENTATION from Cultures for Health
124 | P a g e
Preservation and Fermentation of Garlic in
Apple Cider Vinegar
For thousands of years raw garlic has been recognized and utilized not only for its
wonderful, savory taste, but for its purported health benefits as well. However, eating raw
garlic can also provide social difficulties from breath odors, and side effects such a burning
sensation in the mouth or stomach, heartburn, body odor, or digestive upsets.
Fermenting in apple cider vinegar not only preserves the garlic but is said to help eliminate
most of the complications of eating the garlic raw. It also opens up a whole new world of
delicious ways to eat garlic. Apple cider vinegar is a prebiotic and naturally fermented food
that supports and feeds the probiotics existing in the gut, contributing to a healthier
environment in the body.
Preserving garlic in apple cider vinegar is extremely easy, requiring very few steps.
1. Purchase or take from your garden 5 or 6 garlic bulbs, to fill approximately 1 pint jar
with garlic cloves.
2. Separate all the cloves from the bulbs and peel. In order to retain the full health
benefits of garlic you should leave them whole and not cut or crush them when
preparing for preservation. There is a component in garlic called allicin that
provides its health benefits, and the allicin is released when the clove is crushed or
cut open. So leave the clove whole until eaten if possible.

LACTO-FERMENTATION from Cultures for Health
125 | P a g e
3. Place the peeled, whole cloves in pint or quart canning jars. (Or you can use any
glass jar with a closeable lid, such as a mayonnaise or peanut butter jar.) Leave 1
inch space from the top.
4. Pour apple cider vinegar to cover the cloves. Raw, organic apple cider vinegar is
ideal; however, a less expensive, generic apple cider vinegar will work well also.
You may prefer to experiment by adding a little honey or other herbs and spices to
customize the flavor.
5. Close the lid and leave the garlic at room temperature for 1 to 2 weeks, then move it
to a cellar or other cold storage. You may need to burp the lids a few times over the
first couple of days to release any built-up pressure in the jars.
There is a process of interaction between the garlic and vinegar that will turn the cloves a
green color over the course of the first several days. This is a normal part of the process.
Eventually the cloves will turn back towards their original color.
The longer the garlic is left to ferment, the more mellow the taste will be. You can wait at
least 2 to 3 weeks before eating, or you can experiment with time and ingredients in order
to discover your personal preferred taste. The length of the process may vary depending
upon the climate and season.
The taste of garlic preserved in apple cider vinegar is tangy, yet mellow and delicious. You
might like to eat it raw by itself, or you can add it to a variety of hot or cold dishes.

LACTO-FERMENTATION from Cultures for Health
126 | P a g e
Lacto-fermented Garlic Scapes
If you’ve planted a fall garlic crop, in the spring your garlic will come up, and off some
varieties of garlic will come little flower-containing shoots, known as garlic scapes.
These scapes can be cut to be eaten in early spring. It is actually better to cut them than to
leave them on the plant as cutting allows the plant to put all its energy into the bulbs that you
will be harvesting later in the year.
Garlic scapes are pungent, just like garlic cloves, but have a brighter, fresher, and lighter
flavor. They are delicious in salads or any dish requiring garlic, and get an extra tangy boost
from lacto-fermentation.
Three Ways to Ferment
Garlic scapes can be lacto-fermented to preserve them, boost their nutrition, and add great
flavor. These can then be eaten for months, adding flavor and probiotics to whatever dish
you choose to make.
The shape of the garlic scape allows for three fermentation options:
Whole. This is the simplest way to brine pickle garlic scapes. Simply bend and twist these
long fellows into your fermenting vessel, pour brine over, cover, and allow to ferment. You
don’t even need to break out the knife or cutting board for this version.

LACTO-FERMENTATION from Cultures for Health
127 | P a g e
For a dramatic touch to a meal, serve these as part of a fermented food plate alongside
cured sausages, cheese, crackers, and fruit. Or simply remove and dice them as needed for
whatever dish you are making.
Diced in Brine. This is a bit more work up front, but allows you to simply scoop them out
later on and add to your salads or other dishes. Simply chop them up into bite-size pieces,
cover in brine, weight down, and allow to ferment.
Relish. For something a bit different use garlic scapes as part of a pungent, spicy relish.
Dice finely along with other vegetables such as cucumbers or celery, add dill or other
herbs, and salt, throw in a couple of tablespoons of whey or liquid from a previous ferment,
weight down, and allow to ferment until bubbly.
Serve on top of your favorite protein, in a sandwich, on burgers, or atop cheese and
crackers.
A note on the flower buds and spoilage: The flower buds of the garlic scape are quite
tender and fragile, while the rest of the stalk is sturdy. These flower buds tend to deteriorate
a bit faster in storage than the stalks.
If you plan to store your garlic scape ferment long-term it’s best to separate off the flower
buds, ferment them by themselves, and consume them within a few weeks of fermentation.
The stalks should last quite a bit longer in storage on their own.

LACTO-FERMENTATION from Cultures for Health
128 | P a g e
Pickled Onions
Pickled onions are one of those foods that was once preserved (or pickled) using the
traditional method of lacto-fermentation. The natural lactic acid produced in the
fermentation process produces that acidic pickled effect.
Pickled onions are more commonly preserved in vinegar today. Instead of being full of raw
enzymatic action as they are when they are truly cultured, the vinegar-preserved onions do
not contain live enzymes or probiotics.
So if you’re going to preserve onions give these cultured pickled onions a shot. You can use
pearl onions or full-size onions that have been sliced.
Ingredients
3 to 4 cups pearl onions (that have been peeled) or 2 to 3 onions thinly sliced
Brine made of 3 cups water and 2 tablespoons sea salt
2 tablespoons brine from previous vegetable ferment (optional)
Instructions
1. Combine all ingredients in a quart-size jar. Try to push onions beneath the level of
the brine. Cover tightly and culture at room temperature for 3 to 7 days, burping
daily as needed to release gas pressure.
2. Move the jar to cold storage.

LACTO-FERMENTATION from Cultures for Health
129 | P a g e
Simple Grated Zucchini Kraut
A wonderful way to use oversized zucchinis!
Of all the vegetables that seem to overrun the garden, zucchini seems to be the most
prolific. What to do with these green beasts becomes the butt of every summer gardening
joke. Drop a basket of zucchini off at a fellow-gardening neighbor’s home and you’re bound
to be laughed at.
You can only eat so much sautéed zucchini and zucchini bread in the height of the growing
season. However, traditionally-canned zucchini tends to end up fairly mushy and
unappetizing. Additionally, the canning process kills any of the good enzymes and bacteria
that exist in the zucchini as it comes from the garden.
But if you’ve got too much zucchini then you must figure out a way to use it. One great option
is fermenting it. You can make zucchini pickles similar to lacto-fermented cucumber pickles.
Or, if you want something a little different, try this recipe for grated zucchini “kraut”.
It is a great addition to salads, makes a perfect condiment, and is the simplest of ferments to
make. Get your children involved in shredding the zucchini and all you’ve got to do is salt it
and pack it.

LACTO-FERMENTATION from Cultures for Health
130 | P a g e
Ingredients
Large zucchinis (the oversized ones are fine; just grate around the most seeded
areas)
Sea salt
Instructions
1. Grate the zucchini with a box grater or the grating attachment on a food processor.
Pack about 1/2 cup into a quart jar. Sprinkle lightly with salt. Repeat the 1/2 cup
grated zucchini and sea salt until you reach 1-1/2 inches from the top of the jar.
2. Place a lid on the jar and allow to ferment for 2 to 5 days, depending on the
temperature. Be sure to burp your jar every day by simply unscrewing the lid
slightly and allowing the gas to escape.

LACTO-FERMENTATION from Cultures for Health
131 | P a g e
Lacto-fermented Squash and Zucchini Cubes with
Red Pepper and Dill
Ingredients
3 medium-size squash, rinsed lightly
2 medium-size zucchini, rinsed lightly
6 fresh or dried cayenne peppers or chilies
6 to 8 sprigs fresh dill, rinsed
1-1/2 quarts medium brine (about 2 to 3 tablespoons of salt)
1/2 cup starter (liquid from your last batch of sauerkraut or pickles would be the
best)
Instructions
1. Sterilize and cool about 6 pint jars with rings. Place a sprig of dill at the bottom of
each jar.
2. Cut the squash and zucchini into 1-inch cubes, packing them in equal amounts into
the clean jars, on top of the dill.
3. If you are using fresh peppers, wash them, slice them lengthwise but not all the way
through, and remove the seeds and tops. You may want to wear gloves. Slide them
into the jars between the squash and zucchini and the side of the jars.

LACTO-FERMENTATION from Cultures for Health
132 | P a g e
4. Pour 1 tablespoon of starter into each filled jar, then fill the jar with the brine, leaving
1 inch of headspace.
5. Place coffee filters atop each jar, and screw the rings on over them, or you can use
specialized fermenting airlock lids. Leave the vegetables to ferment for about 2
weeks in a dark, cool place away from drafts and/or direct sunlight. You can ferment
them for a longer or shorter period depending on your own preferences.

LACTO-FERMENTATION from Cultures for Health
133 | P a g e
Cortido (Latin-American Sauerkraut)
Sauerkraut, because of its European heritage, is a popular fermented vegetable in North
America. Cortido is similar to sauerkraut in that it is a lacto-fermented cabbage but it is
spiced up with flavors from Latin America.
How you make this really depends on what you have on hand. You could omit the carrots
and up the cabbage, or cut back on the onions, and you can throw some garlic in the mix, as
noted in the ingredients.
Whichever way you make it be sure it includes cabbage, oregano, onion, and red pepper
flakes for that Latin-American flavor. This is excellent served alongside grilled meat or as
part of a spread of taco fixings.
Ingredients
1 large cabbage, cored and shredded
1 cup grated carrots
2 medium onions, quartered lengthwise and very finely sliced
2 garlic cloves, minced (optional)
1 tablespoon dried oregano
1/4 to 1/2 teaspoon red pepper flakes
4 tablespoons sea salt
1 tablespoon whey
LACTO-FERMENTATION from Cultures for Health
134 | P a g e
Instructions
1. In a large bowl mix cabbage with carrots, onions, garlic (if using), oregano, red
pepper flakes, sea salt, and whey.
2. Pound with a wooden pounder or a meat hammer for about 10 minutes to release
juices.
3. Place in two quart-size, wide-mouth mason jars and press down firmly with a pounder
or meat hammer until juices come to the top of the cabbage. The top of the cabbage
mixture should be at least 1 inch below the top of the jars.
4. Cover tightly and keep at room temperature for about 3 to 10 days, depending on
temperature, before transferring to cold storage.
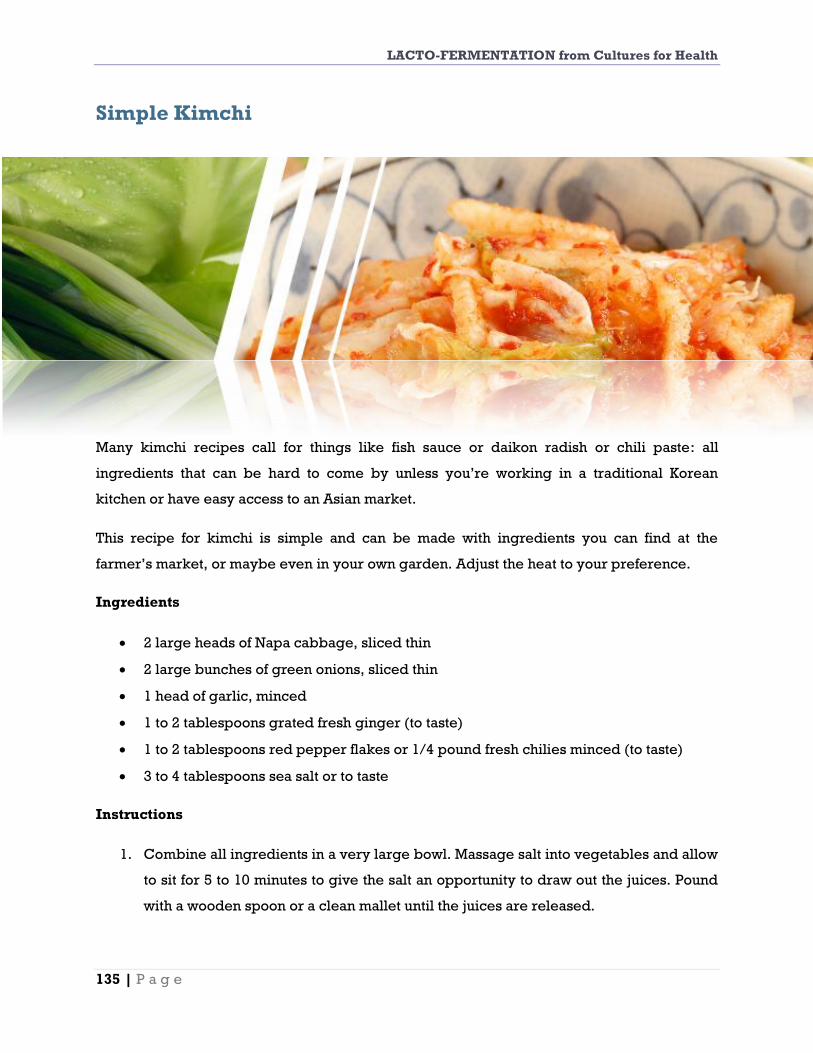
LACTO-FERMENTATION from Cultures for Health
135 | P a g e
Simple Kimchi
Many kimchi recipes call for things like fish sauce or daikon radish or chili paste: all
ingredients that can be hard to come by unless you’re working in a traditional Korean
kitchen or have easy access to an Asian market.
This recipe for kimchi is simple and can be made with ingredients you can find at the
farmer’s market, or maybe even in your own garden. Adjust the heat to your preference.
Ingredients
2 large heads of Napa cabbage, sliced thin
2 large bunches of green onions, sliced thin
1 head of garlic, minced
1 to 2 tablespoons grated fresh ginger (to taste)
1 to 2 tablespoons red pepper flakes or 1/4 pound fresh chilies minced (to taste)
3 to 4 tablespoons sea salt or to taste
Instructions
1. Combine all ingredients in a very large bowl. Massage salt into vegetables and allow
to sit for 5 to 10 minutes to give the salt an opportunity to draw out the juices. Pound
with a wooden spoon or a clean mallet until the juices are released.

LACTO-FERMENTATION from Cultures for Health
136 | P a g e
2. Move to fermentation vessel and pack down until vegetables are covered in brine.
Allow to ferment for 3 to 5 days at room temperature, longer if you can find a cooler
location. Transfer to cold storage where it should keep for months.
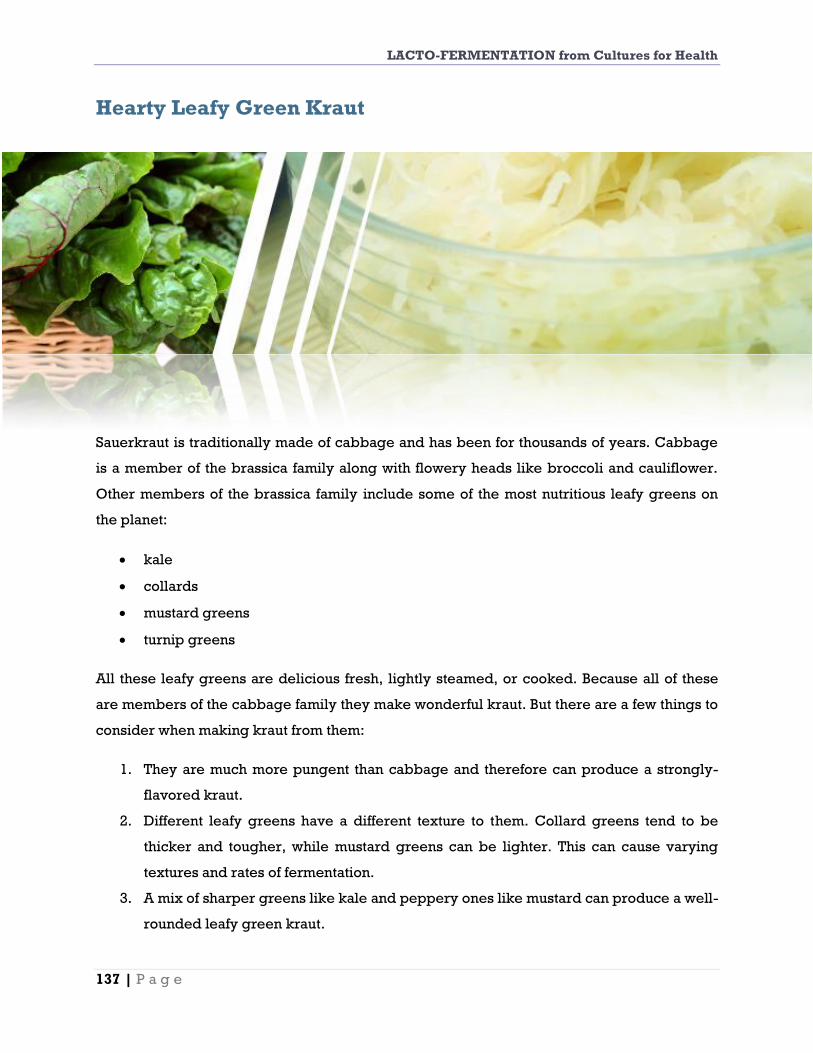
LACTO-FERMENTATION from Cultures for Health
137 | P a g e
Hearty Leafy Green Kraut
Sauerkraut is traditionally made of cabbage and has been for thousands of years. Cabbage
is a member of the brassica family along with flowery heads like broccoli and cauliflower.
Other members of the brassica family include some of the most nutritious leafy greens on
the planet:
kale
collards
mustard greens
turnip greens
All these leafy greens are delicious fresh, lightly steamed, or cooked. Because all of these
are members of the cabbage family they make wonderful kraut. But there are a few things to
consider when making kraut from them:
1. They are much more pungent than cabbage and therefore can produce a strongly-
flavored kraut.
2. Different leafy greens have a different texture to them. Collard greens tend to be
thicker and tougher, while mustard greens can be lighter. This can cause varying
textures and rates of fermentation.
3. A mix of sharper greens like kale and peppery ones like mustard can produce a well-
rounded leafy green kraut.

LACTO-FERMENTATION from Cultures for Health
138 | P a g e
Ingredients
Enough shredded leafy greens to fill a quart jar: 2 or more bunches
2 tablespoons sea salt
3 garlic cloves, peeled and smashed
Instructions
1. In a large bowl combine greens and salt. Massage the leaves with the salt and allow
to stand for 10 minutes so that the juices come out of them.
2. Add half of the greens to a quart jar. Throw in the garlic cloves and pack the rest of
the greens tightly on top, pushing them down so that the juices cover them.
3. Cover tightly and allow to ferment 3 days or until they are bubbly and tangy to your
liking. Transfer to cold storage.

LACTO-FERMENTATION from Cultures for Health
139 | P a g e
Lacto-fermented Summer Squash
When summer rolls into full gear you can bet your zucchini or summer squash plants will
kick into full gear as well. Fermenting these vegetables not only improves flavor and
digestibility, it also prepares them to keep for months in cold storage.
This recipe is versatile in that you can use whatever herbs you have hanging out in your
garden. Flowering cilantro heads are tasty, a bit different from the usual dill, and go well
with the garlic.
Ingredients
1 to 2 medium-size summer squash, cut into 1/2-inch chunks (just enough to fit in a
quart jar)
3 cloves garlic, peeled and smashed
A few sprigs of flowering cilantro.
A couple of mesquite, oak, or grape leaves (to keep them crunchy)
1 quart of filtered water
2 tablespoons sea salt
Instructions
1. Combine water and sea salt, stir well, and set aside.

LACTO-FERMENTATION from Cultures for Health
140 | P a g e
2. Add the crushed garlic and one sprig of flowering cilantro to the bottom of a quart
jar. Fill jar halfway up with chunks of summer squash. Add a bit more garlic and
cilantro and fill the jar with squash chunks up to 1 to 2 inches below rim.
3. Pour salt water brine over the squash. At this point weigh the squash down in order
for it to remain below the level of the brine and ferment evenly.
4. Cover tightly with a canning lid and ring. Allow to sit out at somewhere near room
temperature, ideally 60° to 75°F. Check the jars and burp them every 12 hours or so
by loosening the lid and allowing some gas to escape.
5. Let ferment 2 to 5 days, depending on temperature, then transfer to cold storage
(refrigerator, root cellar, etc.).
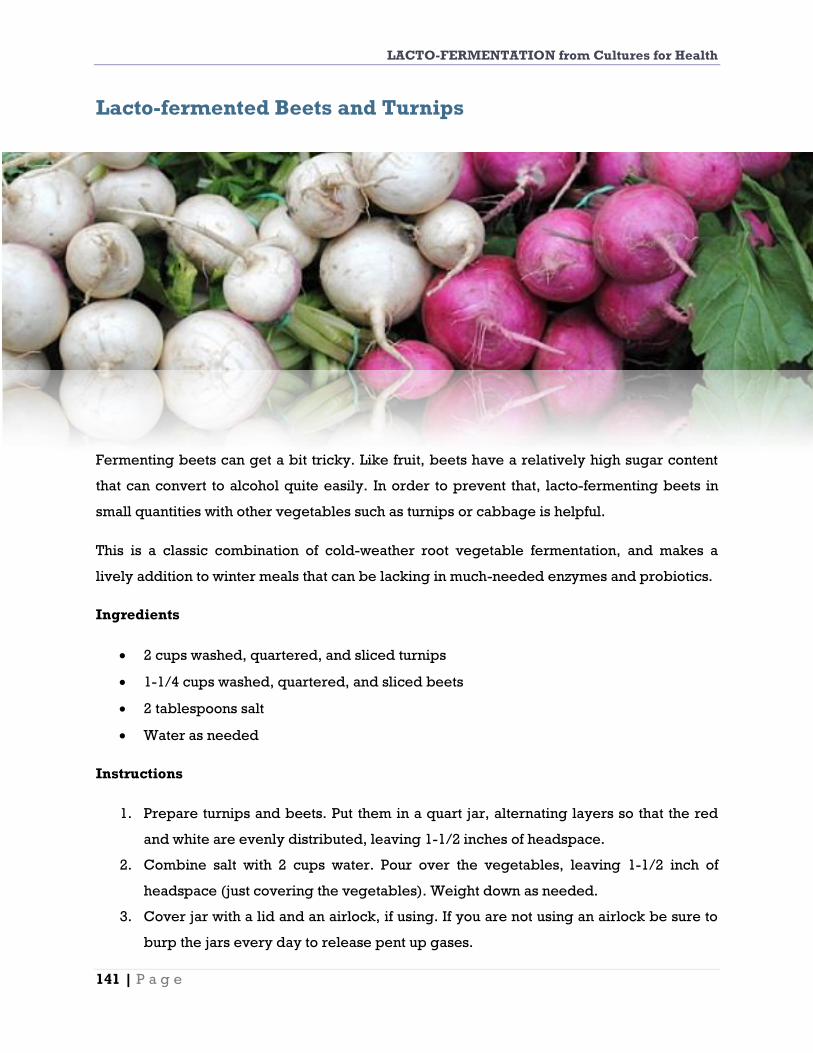
LACTO-FERMENTATION from Cultures for Health
141 | P a g e
Lacto-fermented Beets and Turnips
Fermenting beets can get a bit tricky. Like fruit, beets have a relatively high sugar content
that can convert to alcohol quite easily. In order to prevent that, lacto-fermenting beets in
small quantities with other vegetables such as turnips or cabbage is helpful.
This is a classic combination of cold-weather root vegetable fermentation, and makes a
lively addition to winter meals that can be lacking in much-needed enzymes and probiotics.
Ingredients
2 cups washed, quartered, and sliced turnips
1-1/4 cups washed, quartered, and sliced beets
2 tablespoons salt
Water as needed
Instructions
1. Prepare turnips and beets. Put them in a quart jar, alternating layers so that the red
and white are evenly distributed, leaving 1-1/2 inches of headspace.
2. Combine salt with 2 cups water. Pour over the vegetables, leaving 1-1/2 inch of
headspace (just covering the vegetables). Weight down as needed.
3. Cover jar with a lid and an airlock, if using. If you are not using an airlock be sure to
burp the jars every day to release pent up gases.

LACTO-FERMENTATION from Cultures for Health
142 | P a g e
4. Allow to ferment at a cool room temperature for 3 to 12 days, depending on
preference. Longer is usually better, especially for tough root vegetables.
5. Transfer to cold storage.
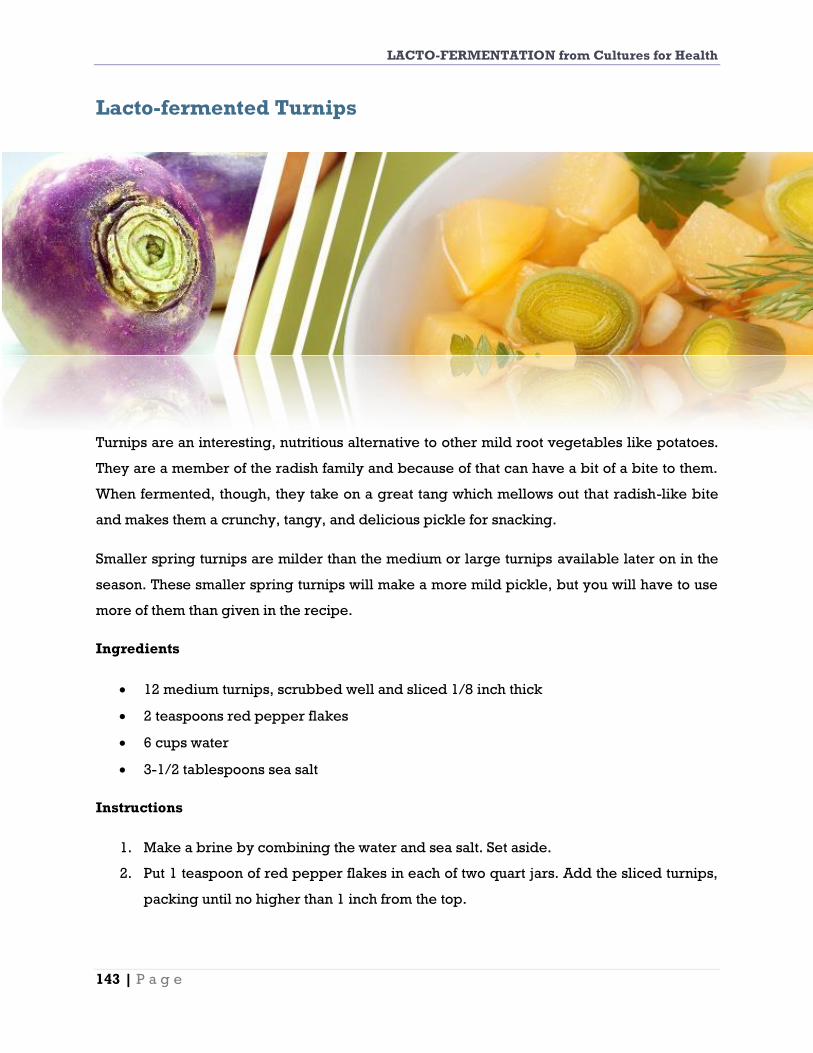
LACTO-FERMENTATION from Cultures for Health
143 | P a g e
Lacto-fermented Turnips
Turnips are an interesting, nutritious alternative to other mild root vegetables like potatoes.
They are a member of the radish family and because of that can have a bit of a bite to them.
When fermented, though, they take on a great tang which mellows out that radish-like bite
and makes them a crunchy, tangy, and delicious pickle for snacking.
Smaller spring turnips are milder than the medium or large turnips available later on in the
season. These smaller spring turnips will make a more mild pickle, but you will have to use
more of them than given in the recipe.
Ingredients
12 medium turnips, scrubbed well and sliced 1/8 inch thick
2 teaspoons red pepper flakes
6 cups water
3-1/2 tablespoons sea salt
Instructions
1. Make a brine by combining the water and sea salt. Set aside.
2. Put 1 teaspoon of red pepper flakes in each of two quart jars. Add the sliced turnips,
packing until no higher than 1 inch from the top.
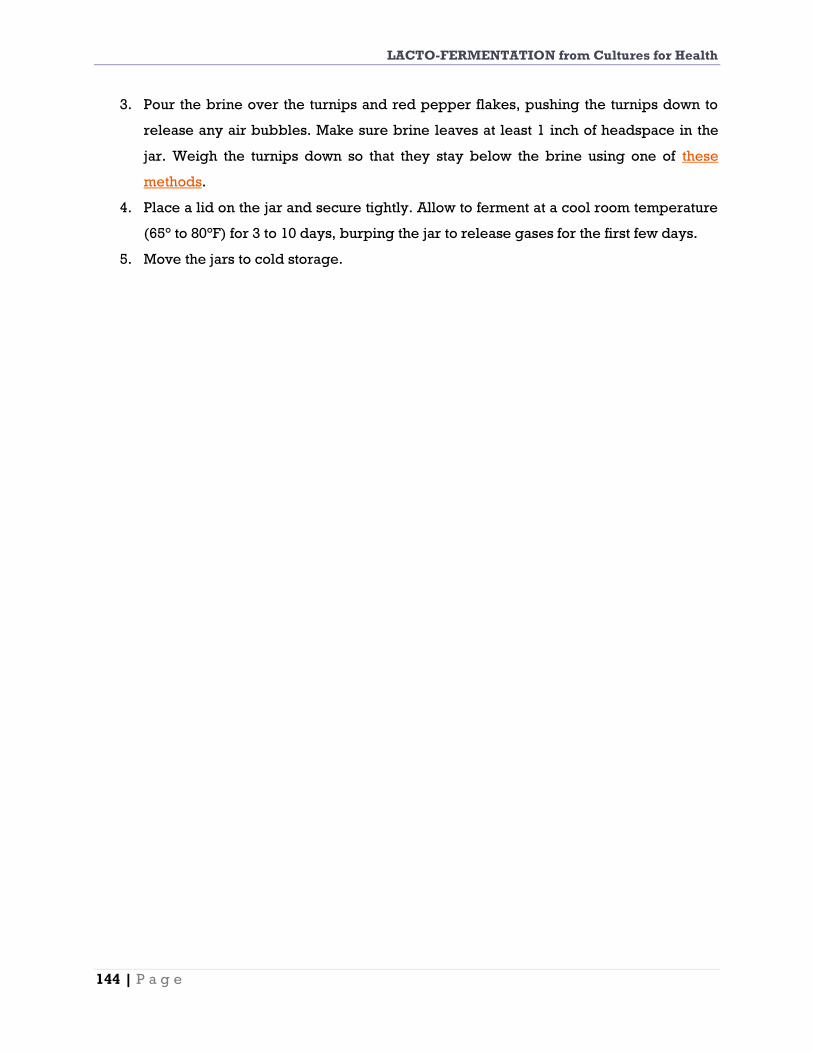
LACTO-FERMENTATION from Cultures for Health
144 | P a g e
3. Pour the brine over the turnips and red pepper flakes, pushing the turnips down to
release any air bubbles. Make sure brine leaves at least 1 inch of headspace in the
jar. Weigh the turnips down so that they stay below the brine using one of these
methods.
4. Place a lid on the jar and secure tightly. Allow to ferment at a cool room temperature
(65° to 80°F) for 3 to 10 days, burping the jar to release gases for the first few days.
5. Move the jars to cold storage.
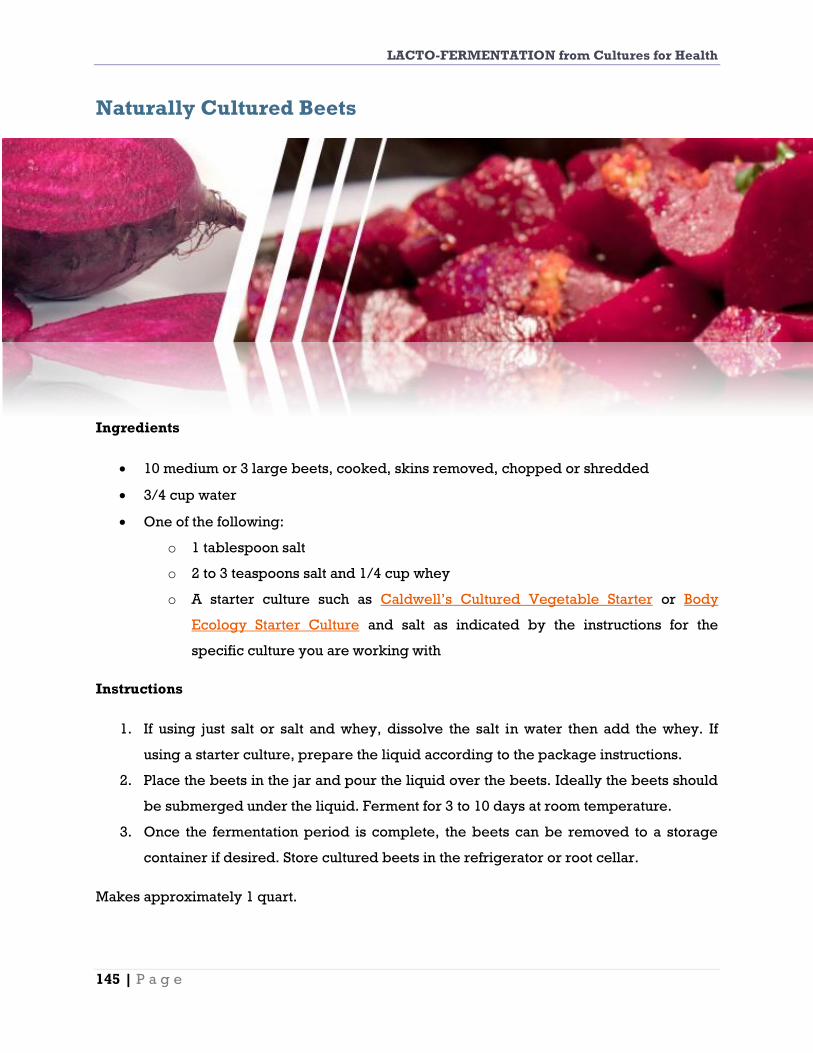
LACTO-FERMENTATION from Cultures for Health
145 | P a g e
Naturally Cultured Beets
Ingredients
10 medium or 3 large beets, cooked, skins removed, chopped or shredded
3/4 cup water
One of the following:
o 1 tablespoon salt
o 2 to 3 teaspoons salt and 1/4 cup whey
o A starter culture such as Caldwell’s Cultured Vegetable Starter or Body
Ecology Starter Culture and salt as indicated by the instructions for the
specific culture you are working with
Instructions
1. If using just salt or salt and whey, dissolve the salt in water then add the whey. If
using a starter culture, prepare the liquid according to the package instructions.
2. Place the beets in the jar and pour the liquid over the beets. Ideally the beets should
be submerged under the liquid. Ferment for 3 to 10 days at room temperature.
3. Once the fermentation period is complete, the beets can be removed to a storage
container if desired. Store cultured beets in the refrigerator or root cellar.
Makes approximately 1 quart.
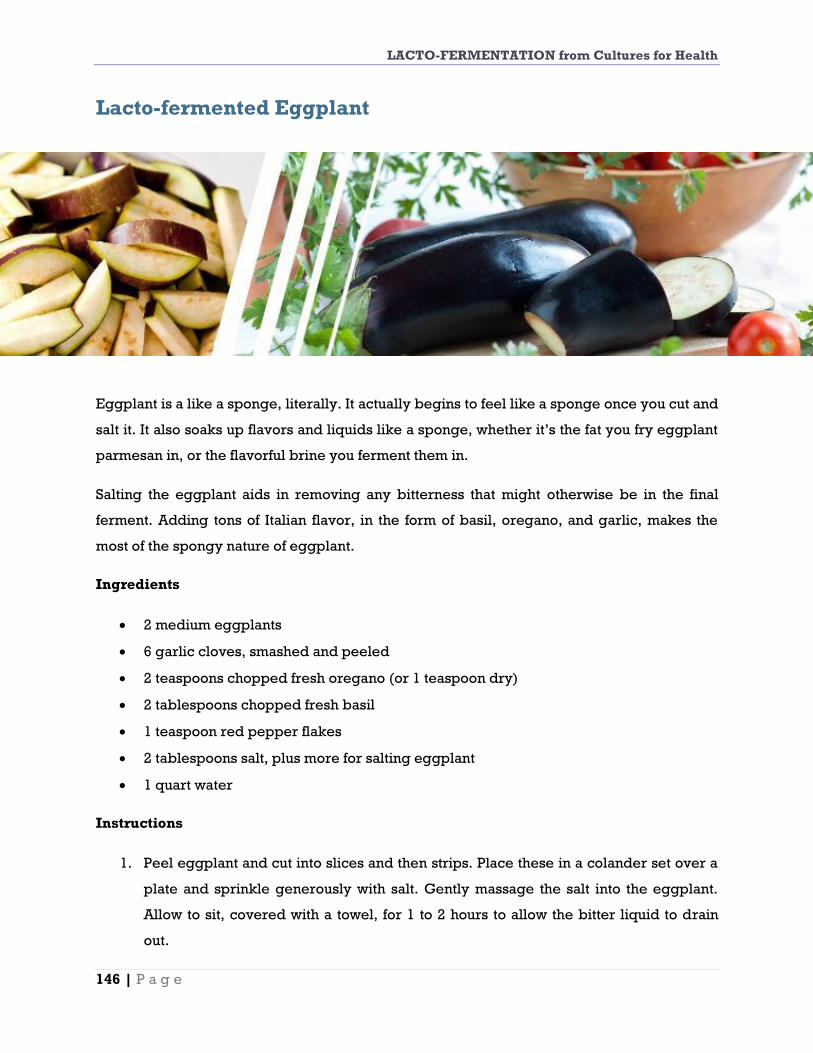
LACTO-FERMENTATION from Cultures for Health
146 | P a g e
Lacto-fermented Eggplant
Eggplant is a like a sponge, literally. It actually begins to feel like a sponge once you cut and
salt it. It also soaks up flavors and liquids like a sponge, whether it’s the fat you fry eggplant
parmesan in, or the flavorful brine you ferment them in.
Salting the eggplant aids in removing any bitterness that might otherwise be in the final
ferment. Adding tons of Italian flavor, in the form of basil, oregano, and garlic, makes the
most of the spongy nature of eggplant.
Ingredients
2 medium eggplants
6 garlic cloves, smashed and peeled
2 teaspoons chopped fresh oregano (or 1 teaspoon dry)
2 tablespoons chopped fresh basil
1 teaspoon red pepper flakes
2 tablespoons salt, plus more for salting eggplant
1 quart water
Instructions
1. Peel eggplant and cut into slices and then strips. Place these in a colander set over a
plate and sprinkle generously with salt. Gently massage the salt into the eggplant.
Allow to sit, covered with a towel, for 1 to 2 hours to allow the bitter liquid to drain
out.

LACTO-FERMENTATION from Cultures for Health
147 | P a g e
2. Meanwhile, prepare brine by heating water, adding salt, and stirring to dissolve.
Allow to cool to room temperature.
3. After 1 to 2 hours have passed rinse the salted eggplant under water to remove some
of the salt. Place garlic, red pepper flakes, and herbs in a quart jar. Add eggplant
strips, squishing them in as you go. Cover all with brine, leaving 1-1/2 inches of
headspace.
4. Cover jar with lid and set in an undisturbed room temperature space for 3 to 7 days
to ferment. During this time, if you are not using an airlock, you may have to burp the
jar every day to release gases. To do this, simply loosen the lid until gases are
released, then immediately tighten lid.
Once the eggplant is fully fermented you can move it to cold storage.
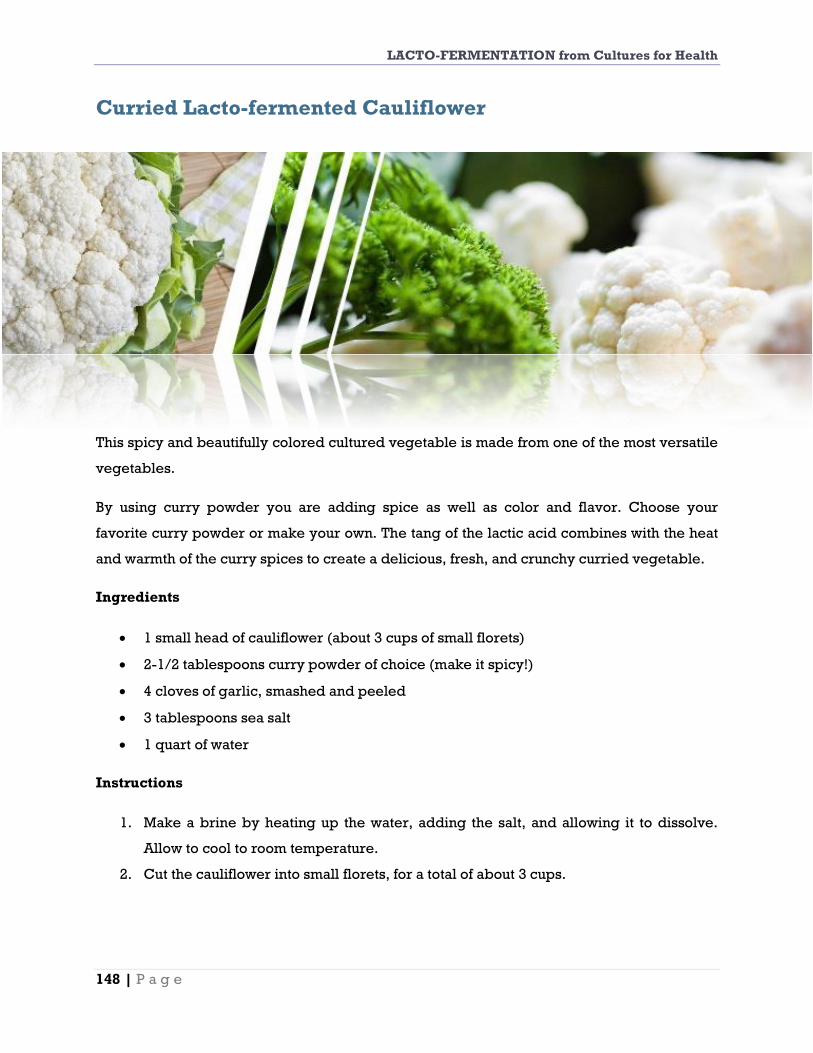
LACTO-FERMENTATION from Cultures for Health
148 | P a g e
Curried Lacto-fermented Cauliflower
This spicy and beautifully colored cultured vegetable is made from one of the most versatile
vegetables.
By using curry powder you are adding spice as well as color and flavor. Choose your
favorite curry powder or make your own. The tang of the lactic acid combines with the heat
and warmth of the curry spices to create a delicious, fresh, and crunchy curried vegetable.
Ingredients
1 small head of cauliflower (about 3 cups of small florets)
2-1/2 tablespoons curry powder of choice (make it spicy!)
4 cloves of garlic, smashed and peeled
3 tablespoons sea salt
1 quart of water
Instructions
1. Make a brine by heating up the water, adding the salt, and allowing it to dissolve.
Allow to cool to room temperature.
2. Cut the cauliflower into small florets, for a total of about 3 cups.

LACTO-FERMENTATION from Cultures for Health
149 | P a g e
3. Place the garlic cloves in the bottom of the jar. Add the curry powder followed by the
cauliflower. Pour the brine over the vegetables until they are covered, leaving 1-1/2
inches of headspace. Place a lid on and shake well to dissolve curry .
4. Place cover on jar and allow to sit out at room temperature for 3 to 7 days until
fermented. You may have to burp the jar for the first few days to release pent-up
gases. To do this simply open the jar until any pressure is released and immediately
retighten.
Once you are satisfied that your cauliflower is fermented you can move it to cold storage.

LACTO-FERMENTATION from Cultures for Health
150 | P a g e
Southern Pickled Nopalitos
All quantities approximate.
Ingredients
4 pounds de-spined fresh nopales, sliced into 1/2-inch wide strips (nopalitos)
2 tablespoons dill seed or 5 to 6 large sprigs of fresh dill, crushed slightly
8 to 10 garlic cloves, halved
A few hot red peppers, seeded and sliced lengthwise (you can also use red pepper
flakes)
4 cups raw apple cider vinegar
Water
1/2 cup sea salt
5 or 6 thoroughly rinsed small grape leaves, or 15 to 20 mesquite leaves
5 or 6 quart canning jars, or 10 to 12 pint jars
Instructions
1. Rinse the sliced nopalitos in cold water, removing some of the oozy slime. Begin
packing them into sanitized pint or quart jars, cutting them to size as you go.
2. For each quart jar, add 1 small grape leaf or a few mesquite leaves, 1 teaspoon dill
seed or 1 largish sprig of dill, 3 garlic clove halves, and 1 slice of fresh red pepper or
1/2 teaspoon red pepper flakes. Halve the measurements for pints.

LACTO-FERMENTATION from Cultures for Health
151 | P a g e
3. In a clean gallon jar or jug with a lid combine the salt, vinegar, and water, adding the
vinegar and salt first, then filling the rest up with water. Shake until the salt has
dissolved.
4. Fill the packed and seasoned jars with the salt/vinegar/water brine up to 1 inch
below the rim of the jars. Wipe the rims with a clean, dry cloth.
5. Screw on airlock lids or band and rings, and place the jars somewhere away from
drafts and direct sunlight. Allow to ferment for 2 or more weeks, burping and
checking on the jars regularly. Once they are ready, chill the pickled nopalitos
before serving.
These keep well in a cellar for up to 1 year, after which they will begin to get mushy.

LACTO-FERMENTATION from Cultures for Health
152 | P a g e
Okra Pickles
All quantities approximate.
Ingredients
1 pound fresh okra pods, 3-1/2 to 4 inches long
3/4 teaspoons mustard seed
3/4 teaspoons dill seed
6 garlic cloves, peeled
1/2 to 1 teaspoon hot red pepper flakes
3/4 cup raw apple cider vinegar
4 to 5 pints filtered water
5 teaspoons sea salt
Instructions
1. Sanitize 5 pint jars with bands and lids.
2. Remove the stem tops of the okra, cutting them off with a sharp knife. You can also
chop off the pointy ends if it helps to fit them into the jars.
3. Pack the jars with the trimmed okra, up-and-down like pickles.
4. To each pint jar, add a pinch of hot red pepper flakes, 1/8 teaspoon mustard seed
and 1/8 teaspoon dill seed.

LACTO-FERMENTATION from Cultures for Health
153 | P a g e
5. Chop the garlic cloves in half lengthwise, crush them a bit, and add 3 of these halves
to each pint jar.
6. Add 1 teaspoon of salt and 3 tablespoons of cider vinegar to each pint jar. Fill the jars
the rest of the way up with filtered water.
7. Screw the lids on tightly and place them in a cool place away from drafts and direct
sunlight for 2 to 3 weeks or until they are ready. Burp the jars often.
Once your okra pickles are done, store them in a cellar or some other cool, dark place until
you are ready to eat them. Store opened jars in the refrigerator.

LACTO-FERMENTATION from Cultures for Health
154 | P a g e
Lacto-fermented Sweet Potatoes
This recipe is a great food for infants. It is mashed potatoes kicked up a notch with the
addition of beneficial bacteria through the fermentation process.
Because these sweet potatoes are peeled and cooked, a starter is necessary to inoculate the
sweet potatoes as their natural beneficial bacteria will be killed off in the heating process.
Ingredients
2 to 2-1/2 pounds sweet potatoes, peeled
1-1/2 tablespoons sea salt
1/4 cup whey from kefir or yogurt or 1 packet vegetable starter culture, dissolved in
1/4 cup water
Instructions
1. Cut peeled sweet potatoes into chunks and place on a baking tray. Bake for 1 to 2
hours at 325°F, or until tender.
2. Move cooked sweet potatoes to a bowl, add salt, and mash while warm. Allow to cool
to room temperature all the way through before proceeding.
3. Once the mash is cooled you can mix in the whey as a culture starter. Transfer the
mixture to a quart jar, cover with a towel or cheesecloth, and allow to ferment for 24
to 48 hours.

LACTO-FERMENTATION from Cultures for Health
155 | P a g e
4. Transfer to cold storage.
Can be eaten as a dip, spread, or side dish.
Note that there is no brine in this recipe to keep the sweet potatoes submerged. Because of
that you may want to eat up the sweet potatoes quickly to avoid any mold problems.

LACTO-FERMENTATION from Cultures for Health
156 | P a g e
Lacto-fermented Raw Sweet Potatoes
Many lacto-fermented sweet potato recipes are made with cooked and mashed sweet
potatoes. When they are cooked the beneficial bacteria on the skins are killed through the
heating process. Fermenting cooked potatoes then requires the addition of a culture starter:
either powder, whey, or the brine from a previous ferment.
This raw recipe, on the other hand, leaves the skin intact and encourages natural
fermentation to happen with the addition of only flavorings and salt.
Ingredients
5 pounds sweet potatoes, with any surface dirt rinsed off, sliced very thinly
1-1/2 inch piece of fresh ginger, peeled and grated
1 large onion, diced
1 teaspoon cayenne powder
3 to 4 tablespoons of salt
Instructions
9. In a large bowl combine sweet potato slices with ginger, onion, and cayenne
powder. Sprinkle with 3 tablespoons of salt. Taste, and if not salty enough add one
more tablespoon of salt.

LACTO-FERMENTATION from Cultures for Health
157 | P a g e
10. You can pound the sweet potatoes a bit with a potato masher to encourage the
release of the juices. This will help the brine to develop faster.
11. Once the brine begins to form, transfer to a half-gallon jar, or two quart jars, and
weigh down with weights. Push down with a clean hand, if necessary, until the brine
goes above the vegetables.
12. Cover and place in a cool place to ferment for 5 to 10 days. It is important to keep this
in a cool place as a quick fermentation could result in a large amount of alcohol being
produced.
13. If you are not using an airlock, be sure to burp your jars regularly to avoid a gas
buildup.
Once the potatoes are pleasantly fermented you can move them to cold storage.
Makes 1/2 gallon.
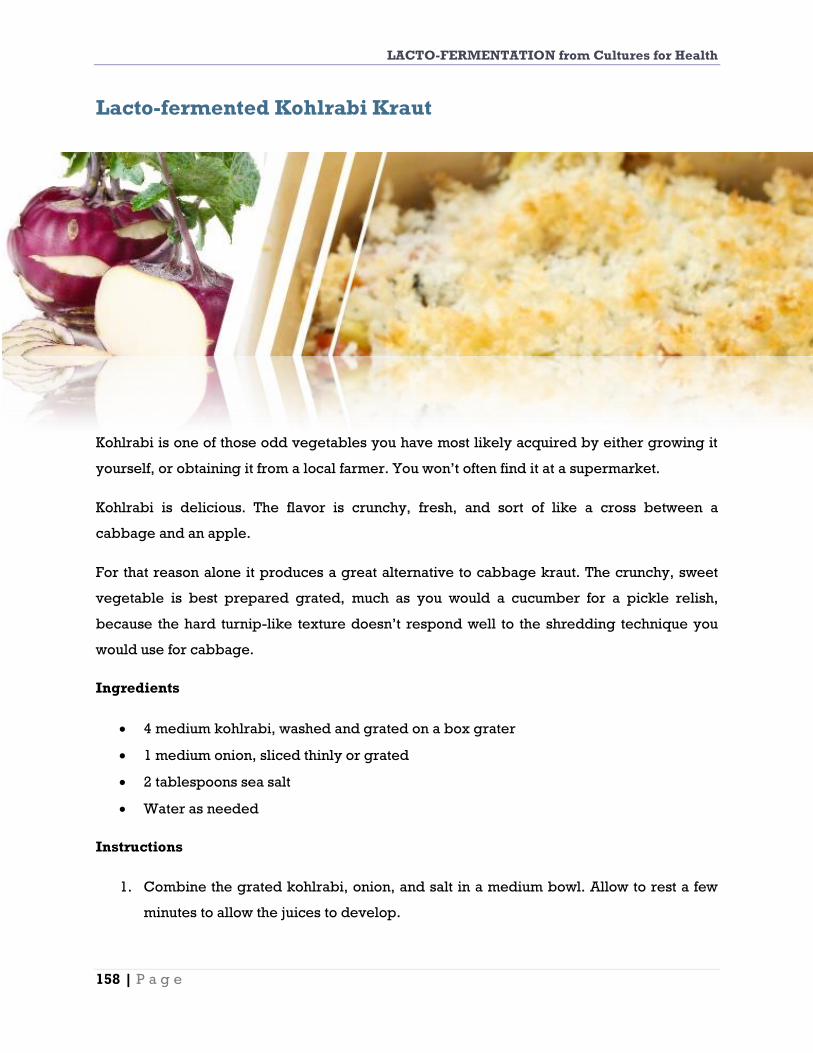
LACTO-FERMENTATION from Cultures for Health
158 | P a g e
Lacto-fermented Kohlrabi Kraut
Kohlrabi is one of those odd vegetables you have most likely acquired by either growing it
yourself, or obtaining it from a local farmer. You won’t often find it at a supermarket.
Kohlrabi is delicious. The flavor is crunchy, fresh, and sort of like a cross between a
cabbage and an apple.
For that reason alone it produces a great alternative to cabbage kraut. The crunchy, sweet
vegetable is best prepared grated, much as you would a cucumber for a pickle relish,
because the hard turnip-like texture doesn’t respond well to the shredding technique you
would use for cabbage.
Ingredients
4 medium kohlrabi, washed and grated on a box grater
1 medium onion, sliced thinly or grated
2 tablespoons sea salt
Water as needed
Instructions
1. Combine the grated kohlrabi, onion, and salt in a medium bowl. Allow to rest a few
minutes to allow the juices to develop.
LACTO-FERMENTATION from Cultures for Health
159 | P a g e
2. Transfer mixture to a quart-size jar and pack down so that brine covers vegetables.
Add water, if needed, to create at least 2 inches of brine over the vegetables, but
leave a 1-inch headspace in the jar. Weight down the vegetables using glass weights
or a clean rock.
3. Cover jar tightly with lid and attach airlock, if using. Put in a cool place, from 50° to
70°F degrees if possible, and allow to ferment for 1 to 3 weeks.
4. If you are not using an airlock, be sure to burp your jars daily for at least the first
week, or until the gases stop developing, in order to release the pent-up gases.
5. Once bubbles have stopped and your kraut tastes tangy and delicious, move the jar
to cold storage.

LACTO-FERMENTATION from Cultures for Health
160 | P a g e
Lacto-fermented Kohlrabi Pickles with Dill and Mustard
The slightly cabbage flavor of kohlrabi blends well with the familiar flavors of mustard and
dill in this crunchy pickle.
Ingredients
3 medium heads of kohlrabi, peeled and cut into spears
1 handful of fresh dill
1-1/2 teaspoons of mustard seed
2 tablespoons salt
1-1/2 to 2 cups of water, as needed
Instructions
1. Place fresh dill and mustard seed in the bottom of a quart-size jar. Combine 1-1/2
cups of water and the salt and stir to dissolve.
2. Pack kohlrabi spears on top of the herbs and spices, leaving 1-1/2 inches of
headspace. Cover vegetables with brine, adding more water as needed to cover, but
leaving 1 inch of headspace.
3. Cover jar tightly with lid and add airlock, if using. Place at a cool room temperature
for 1 to 3 weeks to ferment. If you are not using an airlock system be sure to burp the
jars daily until the gases stop building up.

LACTO-FERMENTATION from Cultures for Health
161 | P a g e
4. Once the bubbles have stopped forming and the pickles are to your desired
sourness, move the jar to cold storage.
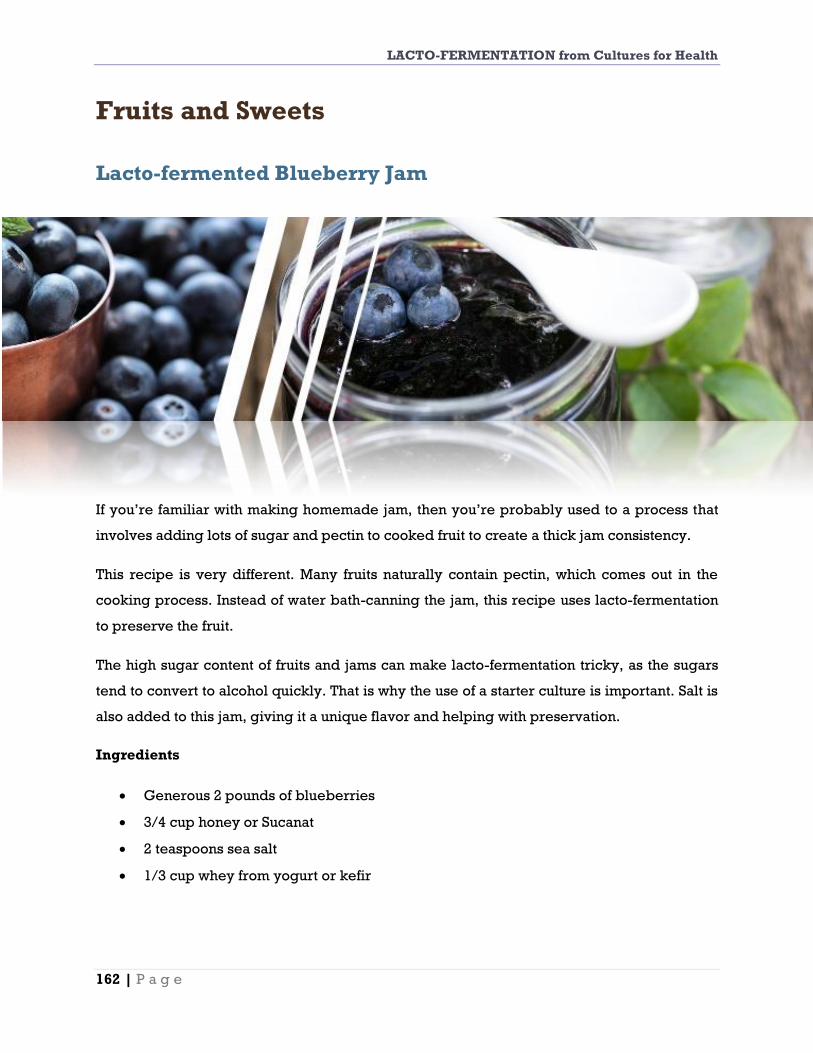
LACTO-FERMENTATION from Cultures for Health
162 | P a g e
Fruits and Sweets
Lacto-fermented Blueberry Jam
If you’re familiar with making homemade jam, then you’re probably used to a process that
involves adding lots of sugar and pectin to cooked fruit to create a thick jam consistency.
This recipe is very different. Many fruits naturally contain pectin, which comes out in the
cooking process. Instead of water bath-canning the jam, this recipe uses lacto-fermentation
to preserve the fruit.
The high sugar content of fruits and jams can make lacto-fermentation tricky, as the sugars
tend to convert to alcohol quickly. That is why the use of a starter culture is important. Salt is
also added to this jam, giving it a unique flavor and helping with preservation.
Ingredients
Generous 2 pounds of blueberries
3/4 cup honey or Sucanat
2 teaspoons sea salt
1/3 cup whey from yogurt or kefir

LACTO-FERMENTATION from Cultures for Health
163 | P a g e
Instructions
1. Combine blueberries, sweetener, and salt in a small saucepan. Cook for five minutes
at a simmer, smashing the blueberries as they cook to allow juices to release.
2. Remove from heat and allow to cool to room temperature.
3. Once blueberry mixture has cooled, mix in the whey. Transfer to very clean jam jars
and seal tightly. Allow to ferment at room temperature for about 2 days. Burp jars if
you notice excess gases building up.
4. Move the jam to cold storage where it should keep for a couple of months.

LACTO-FERMENTATION from Cultures for Health
164 | P a g e
Lacto-fermented Lemons
Ingredients
5 lemons (thin-skinned lemons work very well)
3 tablespoons sea salt
2 tablespoons kombucha or apple cider vinegar (with the mother)
1/2 cup lemon juice
Instructions
1. Wash lemons. Slice thin, turn, and cut the slices again, lengthwise.
2. Place lemon strips in a clean quart jar, and compress slightly with the back of your
hand. Mix kombucha or vinegar with lemon juice in a bowl. Add salt.
3. Pour the lemon juice mixture into the jar. Release any air bubbles. Top off with room-
temperature filtered water to 1 inch below the rim of the jar. Swirl to mix.
4. Cover tightly with airlock lid, or use a standard band and lid and burp every 4 hours.
5. Leave in a cool, dark place for about 2 weeks, burping in gradually longer intervals,
and turning the jar every day or so.
6. Place in cold storage. When you are ready to use your lemons, scoop the pulp away
and cut skin into a julienne. Or use both the pulp and skin according to your taste.
You can also add cloves or cinnamon sticks to this recipe to spice it up!
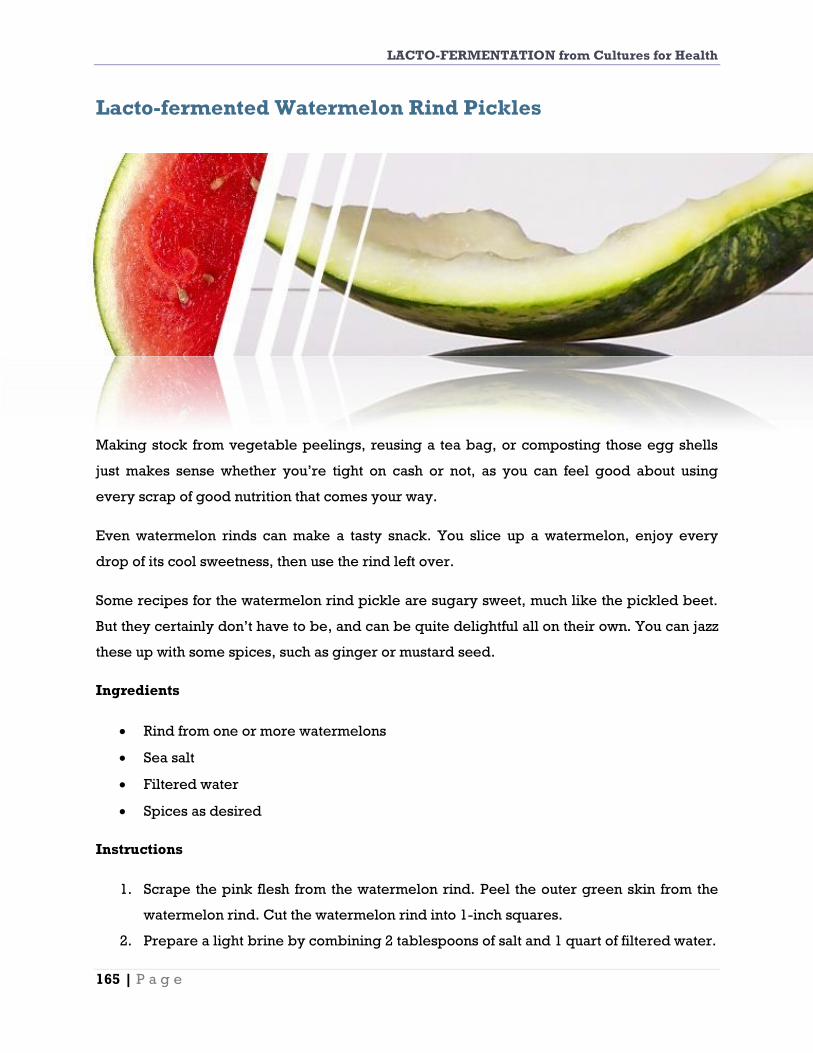
LACTO-FERMENTATION from Cultures for Health
165 | P a g e
Lacto-fermented Watermelon Rind Pickles
Making stock from vegetable peelings, reusing a tea bag, or composting those egg shells
just makes sense whether you’re tight on cash or not, as you can feel good about using
every scrap of good nutrition that comes your way.
Even watermelon rinds can make a tasty snack. You slice up a watermelon, enjoy every
drop of its cool sweetness, then use the rind left over.
Some recipes for the watermelon rind pickle are sugary sweet, much like the pickled beet.
But they certainly don’t have to be, and can be quite delightful all on their own. You can jazz
these up with some spices, such as ginger or mustard seed.
Ingredients
Rind from one or more watermelons
Sea salt
Filtered water
Spices as desired
Instructions
1. Scrape the pink flesh from the watermelon rind. Peel the outer green skin from the
watermelon rind. Cut the watermelon rind into 1-inch squares.
2. Prepare a light brine by combining 2 tablespoons of salt and 1 quart of filtered water.
LACTO-FERMENTATION from Cultures for Health
166 | P a g e
3. Place watermelon rind squares and any spices you desire into a fermentation vessel:
crock or jar. Cover to within an inch of the top with the brine. Cover and allow to
ferment 1 to 3 days at room temperature. During this time you may have to burp the
jars to allow gases to escape. To do this simply loosen the canning ring, listen for the
gas to escape, and tighten the lid again.
Transfer to cold storage where it should keep for months.

LACTO-FERMENTATION from Cultures for Health
167 | P a g e
Lacto-fermented Rhubarb Chutney
When rhubarb comes as the harbinger of spring it is hard to know what to do with all that
bounty beyond the usual pie and sauce. This lacto-fermented chutney will help preserve it,
at least for a little while. Because of the sugars from the dried fruit, it can turn boozy quickly,
so eat it up before then or enjoy it as an exciting accompaniment to your yogurt, ice cream,
or main dish.
Ingredients
3 stalks rhubarb
1/2 cup dried fruit (raisins or cherries work well)
1/4 cup chopped pistachios
1/2 teaspoon sea salt
1/4 cup whey from kefir or yogurt
1/2 teaspoon ground cinnamon
3/4 cup water
Instructions
1. Chop rhubarb finely and add to small bowl. Run a sharp knife through the dried fruit
and pistachios until they are broken up well. Add these to the rhubarb along with all
other ingredients.
2. Transfer to a quart jar and press mixture down until it is below the level of the liquid.

LACTO-FERMENTATION from Cultures for Health
168 | P a g e
3. Cover and let sit at room temperature for 2 to 4 days, checking every day to check
the culturing progress. It is done when the mixture is slightly bubbly, smells
fermented, and has some extra zip to it when tasted.
Use as a condiment with yogurt or kefir, or with savory dishes such as cooked meats or
grilled vegetables.
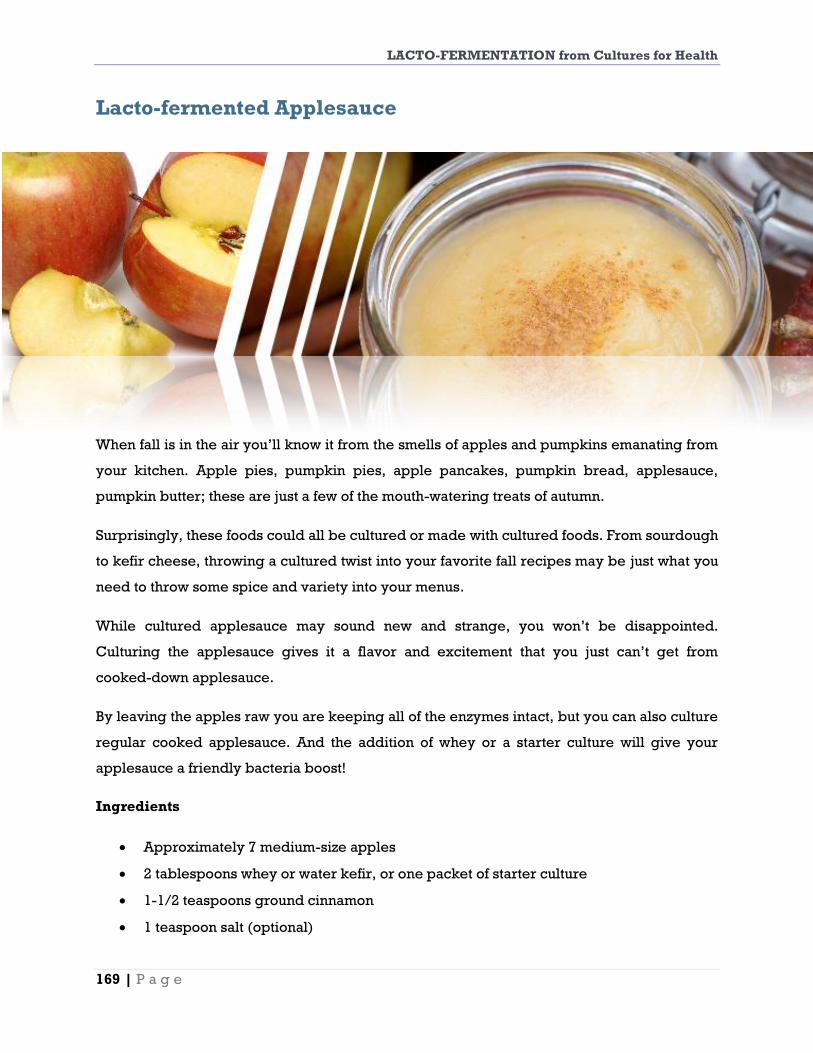
LACTO-FERMENTATION from Cultures for Health
169 | P a g e
Lacto-fermented Applesauce
When fall is in the air you’ll know it from the smells of apples and pumpkins emanating from
your kitchen. Apple pies, pumpkin pies, apple pancakes, pumpkin bread, applesauce,
pumpkin butter; these are just a few of the mouth-watering treats of autumn.
Surprisingly, these foods could all be cultured or made with cultured foods. From sourdough
to kefir cheese, throwing a cultured twist into your favorite fall recipes may be just what you
need to throw some spice and variety into your menus.
While cultured applesauce may sound new and strange, you won’t be disappointed.
Culturing the applesauce gives it a flavor and excitement that you just can’t get from
cooked-down applesauce.
By leaving the apples raw you are keeping all of the enzymes intact, but you can also culture
regular cooked applesauce. And the addition of whey or a starter culture will give your
applesauce a friendly bacteria boost!
Ingredients
Approximately 7 medium-size apples
2 tablespoons whey or water kefir, or one packet of starter culture
1-1/2 teaspoons ground cinnamon
1 teaspoon salt (optional)

LACTO-FERMENTATION from Cultures for Health
170 | P a g e
Instructions
1. Peel apples if desired and chop into chunks. Process in a food processor until you
achieve the texture you desire.
2. Mix in whey, cinnamon, and salt if using.
3. Transfer to a quart jar, leaving at least an inch of headspace. Seal and culture at room
temperature for 1 to 3 days, depending on the temperature.
4. Transfer to cold storage. Should keep for 1 to 2 months.
Please note that you must check this ferment frequently because it is made with fruit. The
lactic acid bacteria can quickly convert to an alcohol ferment so be careful that you only
culture for a short period of time, especially if the temperature is warmer.
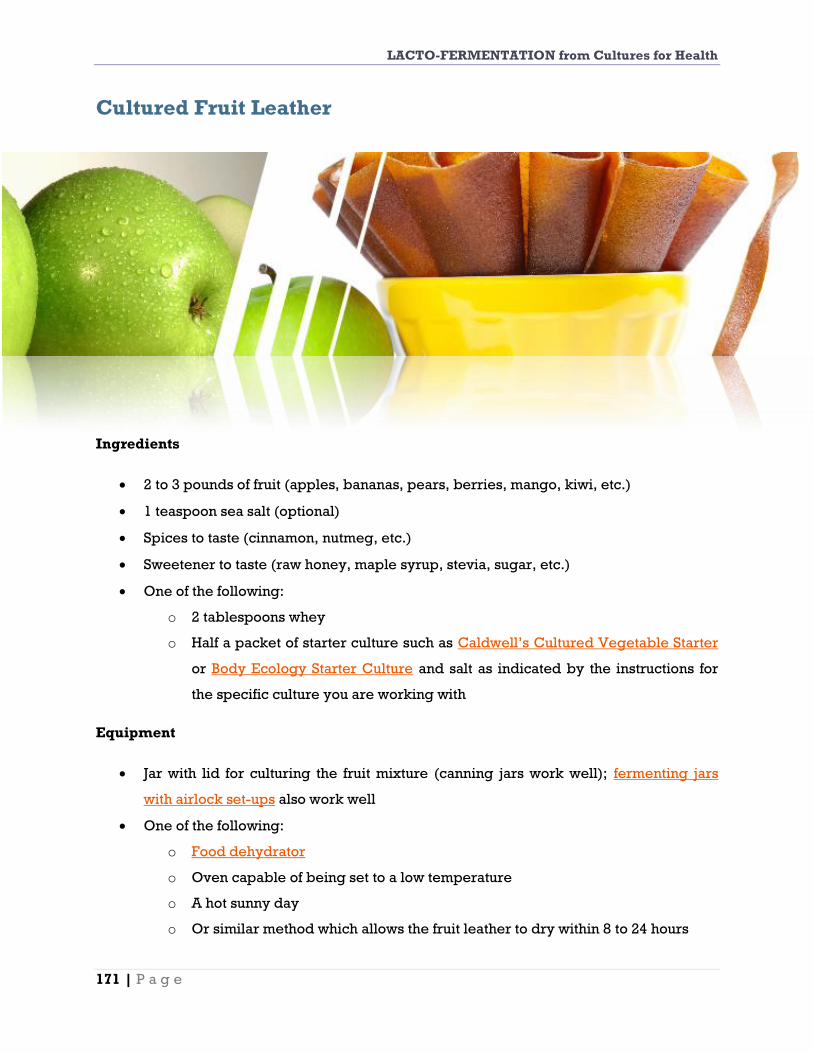
LACTO-FERMENTATION from Cultures for Health
171 | P a g e
Cultured Fruit Leather
Ingredients
2 to 3 pounds of fruit (apples, bananas, pears, berries, mango, kiwi, etc.)
1 teaspoon sea salt (optional)
Spices to taste (cinnamon, nutmeg, etc.)
Sweetener to taste (raw honey, maple syrup, stevia, sugar, etc.)
One of the following:
o 2 tablespoons whey
o Half a packet of starter culture such as Caldwell’s Cultured Vegetable Starter
or Body Ecology Starter Culture and salt as indicated by the instructions for
the specific culture you are working with
Equipment
Jar with lid for culturing the fruit mixture (canning jars work well); fermenting jars
with airlock set-ups also work well
One of the following:
o Food dehydrator
o Oven capable of being set to a low temperature
o A hot sunny day
o Or similar method which allows the fruit leather to dry within 8 to 24 hours

LACTO-FERMENTATION from Cultures for Health
172 | P a g e
Step One: Culture the Fruit Mixture
1. Prepare the fruit (core apples, remove unwanted seeds from other fruits, etc.) and cut
up the fruit into manageable pieces.
2. Process the fruit in a blender, food processor, or food mill until the mixture is
relatively smooth.
3. Mix in the salt, spices, and sweetener. If using whey add it at this time. If using a
starter culture, prepare the culture according the instructions that came with the
culture prior to mixing it into the fruit.
4. Place the mixture in a canning jar (leaving 1 to 2 inches of headroom) and place a lid
on the jar. Allow the jar to sit in a warm spot (70° to 80°F) for 2 to 10 days. (2 to 3 days
is generally sufficient if using whey; starter culture instructions often recommend 7 to
10 days).
5. When the culturing process has completed, use caution when removing the jar lid as
pressure may have built up.
Step Two: Dry the Fruit Leather
1. Spread the fruit mixture on sheets of unbleached parchment paper or a silicon plastic
sheet that fits inside your food dehydrator, or on a baking sheet if using your oven. If
the mixture is very watery, try straining the mixture through a tea towel or tight-
weave cheesecloth to thicken it up a bit. The strained juice is delicious to drink and
contains beneficial bacteria from the culturing process.
2. Allow the fruit leather to dry overnight or for 8 to 24 hours. The exact length of time
will depend on the temperature used and the thickness of the mixture. We
recommend setting your oven or food dehydrator to 110°F or less to preserve the
beneficial bacteria.
3. The fruit leather is done when it is smooth and no longer sticky.
Store the finished fruit leather in an airtight container.

LACTO-FERMENTATION from Cultures for Health
173 | P a g e
Fermented Apple-Cranberry Chutney
Delicious with turkey, ham, or chicken! You’ll want this all year long, not just during the
holidays, so be sure to freeze some extra cranberries.
Ingredients
3 cups cranberries (fresh or frozen)
1 cup Granny Smith or Fuji apple (about one large apple) peeled and chopped
1 cup organic raisins
1 cup dates, pitted and sliced
1/4 cup honey (optional)
1 cup onion, chopped
3/4 cup celery, chopped
1 cup water
1/2 cup apple cider vinegar
2 teaspoons ground cinnamon
1-1/2 teaspoons ground ginger
1/4 teaspoon ground cloves
1 packet Caldwell's Vegetable Starter Culture dissolved in 1/4 cup unchlorinated
water
LACTO-FERMENTATION from Cultures for Health
174 | P a g e
Instructions
1. Combine all ingredients in a medium-size saucepan. Bring to a boil over medium-
high heat. Reduce heat and simmer, uncovered, about 30 minutes, until slightly thick.
2. Remove from heat and cool to room temperature. Meanwhile, sterilize four 8-ounce
jars.
3. When chutney is cool, divide among jars, leaving 1 to 2 inches headroom.
4. Stir 1 tablespoon of prepared starter culture into each jar and cap securely. Let sit at
room temperature for 2 days before refrigerating.
Use within 2 months.

LACTO-FERMENTATION from Cultures for Health
175 | P a g e
Condiments
Naturally Fermented Salsa
Ingredients
1 medium onion, diced
2 large tomatoes, diced
1 medium green pepper, diced
1 or 2 jalepeños, diced
Clove of garlic, minced
Handful of fresh cilantro
Lemon and lime juice to taste
One of the following:
o 2 teaspoons salt
o 1 to 2 teaspoons salt and 1/4 cup whey
o 1 to 2 teaspoons salt and 1/4 cup water kefir
o A packet of starter culture such as Caldwell’s Cultured Vegetable Starter or
Body Ecology Starter Culture and salt as indicated by the instructions for the
specific culture you are working with

LACTO-FERMENTATION from Cultures for Health
176 | P a g e
Instructions
1. If using a starter culture, prepare the culture according the package instructions.
2. Mix all the ingredients together including the salt, whey, or starter culture.
3. Place the salsa in a fermentation container pressing down to release some liquid.
Ideally the vegetables should be submerged under the liquid. (Add a bit of extra
water if needed.)
4. Ferment for 2+ days at room temperature.
Once the fermentation period is complete, the salsa can be removed to a storage container
if desired. Store salsa in the refrigerator or root cellar.
Makes approximately 1 quart.

LACTO-FERMENTATION from Cultures for Health
177 | P a g e
Lacto-fermented Green Tomato Salsa
Ingredients
6 medium-size green tomatoes, chopped fine
1 small red tomato, chopped fine
5 red jalapeños, minced
2 green banana peppers, minced
1 small onion, chopped fine
1/2 cup chopped fresh cilantro
3 tablespoons lemon juice
4 cloves garlic, minced
Garlic salt and white pepper to taste
2 tablespoons kombucha or apple cider vinegar (with the mother)
Instructions
1. Clean and sterilize 2 quart-size jars with airlock fermentation lids or normal rings and
bands.
2. Place all ingredients in food processor and pulse or process until it is the desired
thickness. You can cook the salsa down in a saucepot over low heat to remove any
undesired liquid, or just keep it fresh and alive.
LACTO-FERMENTATION from Cultures for Health
178 | P a g e
3. Add kombucha or vinegar, and stir well. Use a canning funnel and pour the salsa into
the sterile jars. Cover with airlocks or rings and bands. If using the latter, be sure to
burp the jars at least twice a day during the fermentation period. Set in a cool place
away from direct sunlight, and leave for up to 2 weeks, burping regularly.
4. When your salsa is ready, you can water-bath process it for 30 minutes, or just
tighten the lids and put it into cold storage. Not canning the salsa keeps it alive and
healthier, so it is the recommended way to store it.
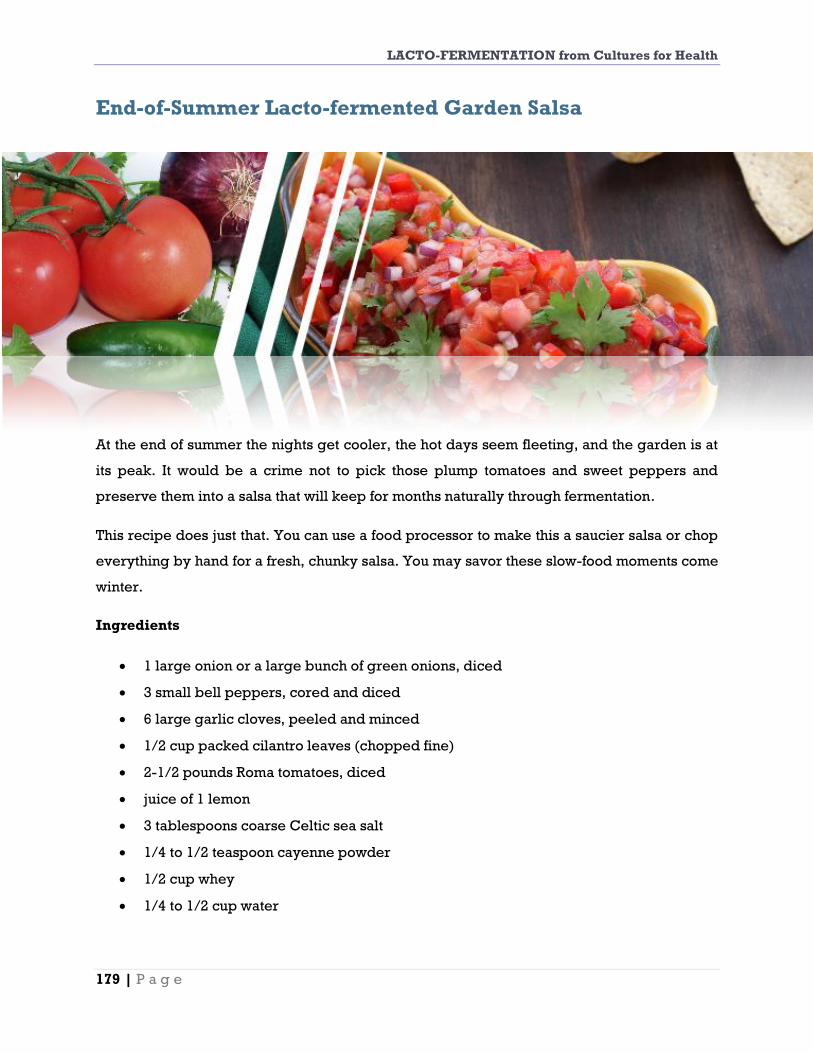
LACTO-FERMENTATION from Cultures for Health
179 | P a g e
End-of-Summer Lacto-fermented Garden Salsa
At the end of summer the nights get cooler, the hot days seem fleeting, and the garden is at
its peak. It would be a crime not to pick those plump tomatoes and sweet peppers and
preserve them into a salsa that will keep for months naturally through fermentation.
This recipe does just that. You can use a food processor to make this a saucier salsa or chop
everything by hand for a fresh, chunky salsa. You may savor these slow-food moments come
winter.
Ingredients
1 large onion or a large bunch of green onions, diced
3 small bell peppers, cored and diced
6 large garlic cloves, peeled and minced
1/2 cup packed cilantro leaves (chopped fine)
2-1/2 pounds Roma tomatoes, diced
juice of 1 lemon
3 tablespoons coarse Celtic sea salt
1/4 to 1/2 teaspoon cayenne powder
1/2 cup whey
1/4 to 1/2 cup water
LACTO-FERMENTATION from Cultures for Health
180 | P a g e
Instructions
1. Combine onion, bell peppers, garlic, and cilantro in food processor. Pulse 3 to 5
times until coarsely chopped. Add one third of the tomatoes and pulse 2 to 3 times
until room is made for additional tomatoes. Repeat with another one third of
tomatoes. Finally, add the last of the tomatoes and pulse an additional 3 to 5 times.
2. Pour contents of food processor into large bowl. Add the lemon juice, sea salt,
cayenne powder, and whey. Stir well and allow to sit a few minutes while you prep
your containers.
3. Wash two quart jars or one half-gallon jar well with soap and hot water. Do the same
for a food funnel and jar lids. Ladle the salsa into jars, leaving 2 to 3 inches of
headspace. Add water to submerge the salsa.
4. Close lid tightly and leave at room temperature for a few days, until bubbly and
fermented. During this process the solid vegetables may separate from the liquid.
Simply stir with a wooden or plastic spoon until redistributed and submerged under
the liquid.
5. Transfer to cold storage.
Should keep for months.

LACTO-FERMENTATION from Cultures for Health
181 | P a g e
Easy Lacto-fermented Ketchup
If you’ve grown up in America you have, most likely, grown up eating ketchup. This tangy,
slightly sweet, and salty condiment adorns our burgers and hot dogs and is the fried
potato’s number one dip.
Unfortunately, today’s bottles of ketchup are loaded with high fructose corn syrup, chemical
flavorings, and a host of other ingredients you’re not likely to find in your kitchen.
Ketchup wasn’t always like this, though. It was once a homemade food, prepared and
preserved simply. Like most traditional foods that have lost their way, today’s ketchup is a
shadow of its former self, both in flavor and nutrition.
However, ketchup can still be made inexpensively and easily at home. And with this lacto-
fermented recipe, you can serve it up knowing it will nourish.
Ingredients
2 6-ounce cans of tomato paste
1/3 cup water
2 tablespoons raw apple cider vinegar
2 tablespoons whey (optional)
1/8 teaspoon cinnamon
1/8 teaspoon cloves

LACTO-FERMENTATION from Cultures for Health
182 | P a g e
1/8 teaspoon cayenne
1/8 teaspoon black pepper
Sea salt, to taste
1/4 cup Sucanat
Instructions
1. In a small saucepan combine the Sucanat and water. Cook over medium heat, stirring
frequently, until Sucanat is dissolved.
2. Mix the water and Sucanat with all other ingredients in a bowl.
3. Transfer to a quart jar, cover with a lid, and allow to ferment for 2 to 5 days,
depending on the temperature, until bubbly and fermented.

LACTO-FERMENTATION from Cultures for Health
183 | P a g e
Lacto-fermented Olive Oil Mayonnaise
Many people love mayonnaise on sandwiches, in salads, and as a delicious condiment to
freshly steamed vegetables. But most commercial mayonnaise is made with processed
vegetable oils.
Using an unrefined olive oil is a great alternative. To preserve the mayonnaise for better
keeping and add enzymes, try this lacto-fermented recipe.
Ingredients
2 egg yolks
2 tablespoons lemon juice
1 cup olive oil
Sea salt and pepper to taste
1/4 teaspoon of mustard powder
1 tablespoon whey
Instructions
1. Fill a small metal or glass bowl with warm water.
2. Let sit for a few minutes while you prepare the rest of the ingredients. After a few
minutes dump out the warm water and dry the bowl thoroughly.
3. Combine egg yolks and lemon juice in the warmed bowl and whisk thoroughly.
LACTO-FERMENTATION from Cultures for Health
184 | P a g e
4. Place olive oil in a measuring cup with a spout. You are now going to drizzle the olive
oil in one drop at a time while whisking. It sounds tedious, but it doesn’t take long.
Just go very slowly so that the egg yolk can emulsify the lemon juice and oil. Once
you are about halfway through the olive oil you can start drizzling a little faster. Just
keep whisking and stop the oil every so often, whisking to be sure it emulsifies.
5. Once all the oil is incorporated you should have a thick, creamy texture. Whisk in the
salt, whey, and mustard powder. Taste and add more salt and pepper if desired. It
thickens more once refrigerated.
Refrigerate immediately if not using. Keeps for a few days.
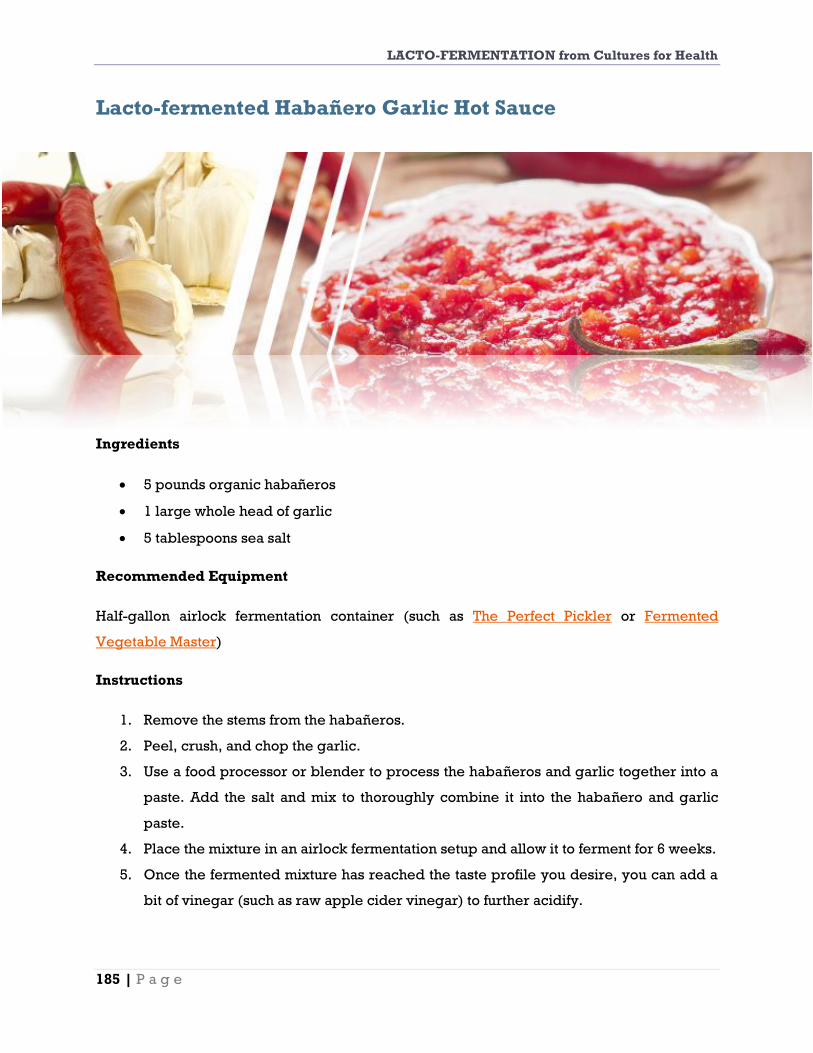
LACTO-FERMENTATION from Cultures for Health
185 | P a g e
Lacto-fermented Habañero Garlic Hot Sauce
Ingredients
5 pounds organic habañeros
1 large whole head of garlic
5 tablespoons sea salt
Recommended Equipment
Half-gallon airlock fermentation container (such as The Perfect Pickler or Fermented
Vegetable Master)
Instructions
1. Remove the stems from the habañeros.
2. Peel, crush, and chop the garlic.
3. Use a food processor or blender to process the habañeros and garlic together into a
paste. Add the salt and mix to thoroughly combine it into the habañero and garlic
paste.
4. Place the mixture in an airlock fermentation setup and allow it to ferment for 6 weeks.
5. Once the fermented mixture has reached the taste profile you desire, you can add a
bit of vinegar (such as raw apple cider vinegar) to further acidify.

LACTO-FERMENTATION from Cultures for Health
186 | P a g e
Tips
Be sure to wear gloves and eye protection when working with habañero peppers.
Keep in mind that the flavors of hot peppers and garlic can be absorbed by plastic
appliance parts. If you plan to work with hot peppers regularly consider purchasing a
blender from a thrift store to use for that purpose.
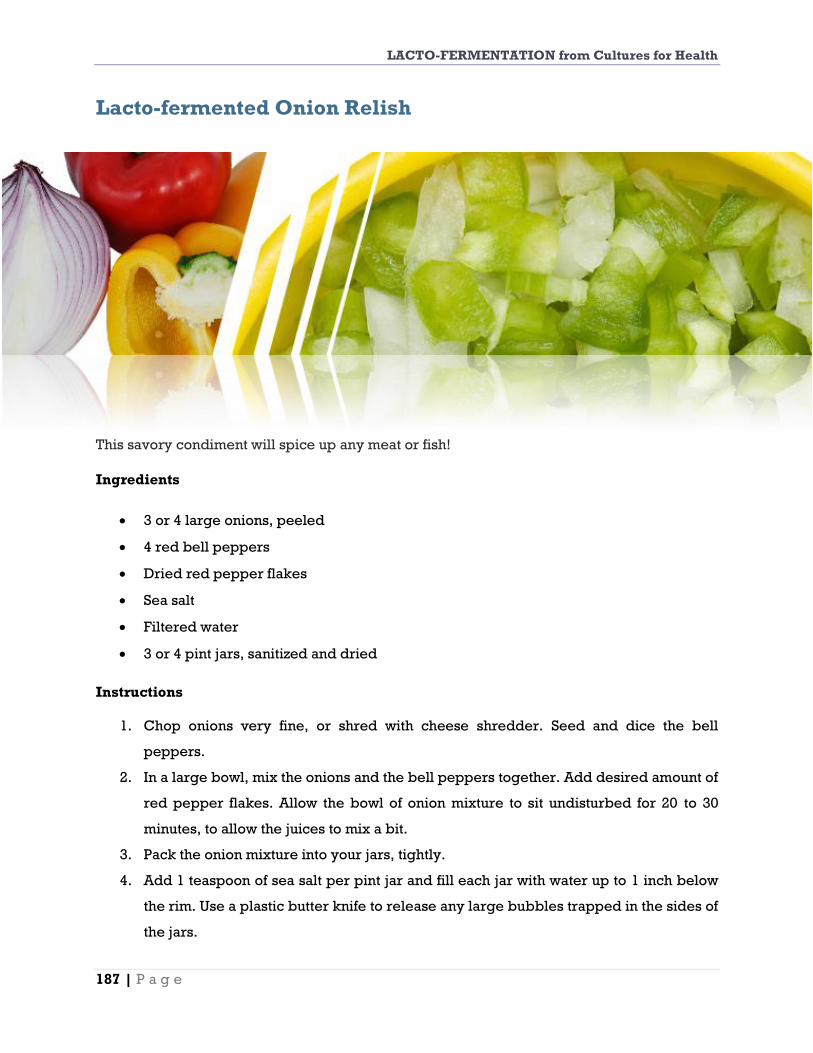
LACTO-FERMENTATION from Cultures for Health
187 | P a g e
Lacto-fermented Onion Relish
This savory condiment will spice up any meat or fish!
Ingredients
3 or 4 large onions, peeled
4 red bell peppers
Dried red pepper flakes
Sea salt
Filtered water
3 or 4 pint jars, sanitized and dried
Instructions
1. Chop onions very fine, or shred with cheese shredder. Seed and dice the bell
peppers.
2. In a large bowl, mix the onions and the bell peppers together. Add desired amount of
red pepper flakes. Allow the bowl of onion mixture to sit undisturbed for 20 to 30
minutes, to allow the juices to mix a bit.
3. Pack the onion mixture into your jars, tightly.
4. Add 1 teaspoon of sea salt per pint jar and fill each jar with water up to 1 inch below
the rim. Use a plastic butter knife to release any large bubbles trapped in the sides of
the jars.

LACTO-FERMENTATION from Cultures for Health
188 | P a g e
5. Cover with airlock lids or standard disc-and-band lids. Burp the jars regularly if
using disc-and-band lids.
6. Allow to sit at room temperature for 3 to 4 days, or until the mixture is bubbly and
fragrant.
Eat immediately or store with a tight lid in the refrigerator or cold storage.

LACTO-FERMENTATION from Cultures for Health
189 | P a g e
Lacto-fermented Corn and Onion Relish
Ingredients
3 cups fresh, washed corn kernels
1 medium tomato
1 small onion
2 cloves fresh garlic
3 or 4 sprigs fresh cilantro
1 red bell pepper
1/4 teaspoon hot pepper flakes
1 tablespoon salt
Filtered room-temperature water
Instructions
1. Clean and sanitize a quart jar.
2. Blanch tomatoes to remove peels, then cut into cubes. Dice the onion finely with the
garlic and cilantro.
3. Mix all ingredients (not including water) in a medium-size bowl. Use a wooden spoon
or small pounder to lightly press the ingredients together in order to allow for the
release of the juices.

LACTO-FERMENTATION from Cultures for Health
190 | P a g e
4. Using a canning funnel, pour all the ingredients into the quart jar, pressing them
slightly to pack and fill the jar to 1 inch below the rim. Pour in the water until it is flush
with the relish ingredients within the jar.
5. Cover with an airlock lid or a regular ring and band lid, screwing them down tightly.
Allow to sit at room temperature for 4 to 5 days or until the desired level of sourness
is reached. If not using an airlock, burp the jar as needed during this time.
Once the relish is ready, keep covered and in cold storage when not in use.
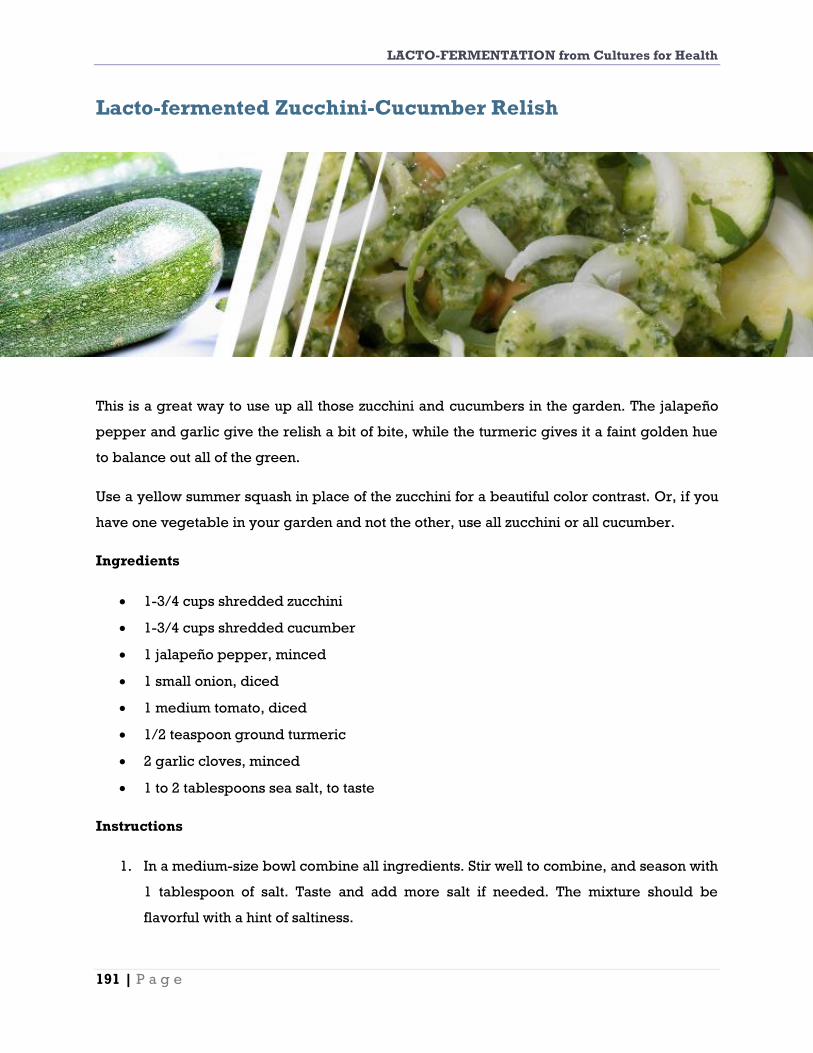
LACTO-FERMENTATION from Cultures for Health
191 | P a g e
Lacto-fermented Zucchini-Cucumber Relish
This is a great way to use up all those zucchini and cucumbers in the garden. The jalapeño
pepper and garlic give the relish a bit of bite, while the turmeric gives it a faint golden hue
to balance out all of the green.
Use a yellow summer squash in place of the zucchini for a beautiful color contrast. Or, if you
have one vegetable in your garden and not the other, use all zucchini or all cucumber.
Ingredients
1-3/4 cups shredded zucchini
1-3/4 cups shredded cucumber
1 jalapeño pepper, minced
1 small onion, diced
1 medium tomato, diced
1/2 teaspoon ground turmeric
2 garlic cloves, minced
1 to 2 tablespoons sea salt, to taste
Instructions
1. In a medium-size bowl combine all ingredients. Stir well to combine, and season with
1 tablespoon of salt. Taste and add more salt if needed. The mixture should be
flavorful with a hint of saltiness.

LACTO-FERMENTATION from Cultures for Health
192 | P a g e
2. Transfer relish to one quart jar or two pint jars, pouring any liquid that remains at the
bottom of the bowl over the vegetables. Leave a 1-1/2 inch headspace.
3. Pack vegetables down to allow brine to come above level of vegetables. If there is
not enough brine to cover the vegetables by at least 1 inch, add just enough water to
do so.
4. Cover jars with lids and rings and airlock, if using. Allow to ferment at room
temperature for 3 to 7 days, or longer, depending on how tangy you like it.
5. If you are not using an airlock, burp the jars carefully ever day during the initial
fermentation.
6. After 3 to 7 days taste the relish. If it is to your liking you can transfer to cold storage.

LACTO-FERMENTATION from Cultures for Health
193 | P a g e
Lacto-fermented Chilero
Sweet from the carrots, spicy from the hot pepper, this Costa Rican-inspired condiment isn’t
quite the spicy hot sauce brand from Costa Rica that goes by the same name. But it’s got its
own kick and tang that make it a perfect accompaniment to vegetables and meats.
Ingredients
3 cups grated carrots
1 red onion, sliced thinly
1 green bell pepper, minced
1 jalapeño pepper, minced
3 garlic cloves, minced
2 tablespoons sea salt
Water, as needed
Instructions
1. Combine the grated carrots, onion, bell pepper, jalapeño, and garlic in a medium
bowl. Sprinkle over salt and mix into vegetables. You can pound them a bit with a
wooden spoon or potato masher to encourage the liquid to come out of the
vegetables.
LACTO-FERMENTATION from Cultures for Health
194 | P a g e
2. Move vegetables to a quart jar and push down firmly. Note the level of the brine
above the vegetables. If it isn’t at least 2 inches, add water as needed. There should
be enough salt in the vegetables to not necessitate any additional salt.
3. Weigh vegetables down so that they remain under the brine. Place lid on tightly and
add airlock, if using. If not using an airlock be sure to burp the jar daily in order to
release pent-up gases.
4. Ferment at room temperature for 3 to 12 days, depending on preference.
5. Transfer to cold storage.

LACTO-FERMENTATION from Cultures for Health
195 | P a g e
Probiotic Guacamole or Bean Dip
When it comes to appetizers many people believe that dips must be junk food, nutritionally
speaking. However, dips like guacamole, bean dips, and cultured dairy-based dips, like
ranch, contribute satiating fats, important vitamins, and delicious flavor.
To boost these dips even more you can add probiotics to them. The double punch of healthy
fats and beneficial bacteria will make dip the nutritional focal point of your snack or meal.
How to Add Probiotics to Your Dip
Almost all dips have an acidic component to them. This might come in the form of lime juice
in a guacamole, lemon juice in a white bean dip, or the naturally occurring lactic acid in
cultured dairy products.
If you’d like to instantly add probiotics to your dip you can use whey from cultured dairy
products as your acidic component. Whey contains vitamins, minerals, and probiotics. It
isn’t quite as tangy as vinegar or citrus juices so you may want to use a bit more and always
add to taste.
You can further increase the probiotic count by allowing your dip to sit at room temperature
for 8 to 12 hours, depending on the temperature of your kitchen, to allow the whey to culture
the naturally occurring sugars in your dip.

LACTO-FERMENTATION from Cultures for Health
196 | P a g e
This is especially helpful in a bean dip as beans contain a complicated and hard-to-break-
down sugar called oligosaccharide. These sugars are what can often cause digestive
discomfort and distress after eating beans. The fermentation action provided by the whey
can minimize the sometimes embarrassing after-effects of eating bean dips.
Obviously, cultured dairy-based recipes already contain whey and probiotics. You could
also replace a bit of the acidic component with whey for an extra dose of probiotics.
Guacamole
Ingredients
2 large Hass avocados, pitted and mashed
2 to 3 tablespoons of whey, or to taste
2 large garlic cloves, minced
Sea salt to taste
Instructions
Combine all ingredients in a small bowl and cover with a lid. Eat straight away or allow to
culture for 8 to 12 hours. The guacamole will oxidize and produce a brown color on the
surface. This is still perfectly edible and can be eaten as is, stirred in, or scraped off.
Hummus or Bean Dip
Ingredients
3 cups of your favorite hummus or bean dip recipe
1/4 cup whey
Instructions
Mix up your favorite hummus or bean dip recipe and either replace half of the lemon juice
with whey or add whey to the existing recipe. Allow to culture at room temperature for 12
hours to 3 days, depending on temperature. Taste every 24 hours and adjust fermentation
time to your liking.

LACTO-FERMENTATION from Cultures for Health
197 | P a g e
Lacto-fermented Pear Chutney
Ingredients
3 to 4 pears, cored and chopped (with or without the skin, as you prefer)
1/2 cup sun-dried raisins
1/2 pecans, chopped
2 teaspoons sea salt
Juice of 1 or 2 lemons
1 onion, finely chopped
1 tablespoon grated ginger
1/2 cup (or more) filtered water
1 quart glass jar with lid, sanitized
14.
15. Instructions
1. Mix chopped fruit and nuts together in a large metal bowl.
2. Add salt, lemon juice, onion, and spices, and mix well with a wooden spoon. Allow
the mixture to set undisturbed for 20 to 30 minutes. This is a good time to get your jar
sanitized.
3. Using a wooden spoon, pack the pear mixture tightly into the jar. Pound down lightly
so that the chutney is compressed and the liquid rises.

LACTO-FERMENTATION from Cultures for Health
198 | P a g e
4. Add room-temperature filtered water as necessary to bring liquid level with the fruit
mixture, having it all come to about 1 inch below the top of the jar.
5. Cover with an airlock or standard disc-and-band lid. Burp standard lids regularly.
Place in a location away from direct sunlight.
6. Keep at room temperature 2 to 4 days before moving the chutney to cold storage or
to the refrigerator.
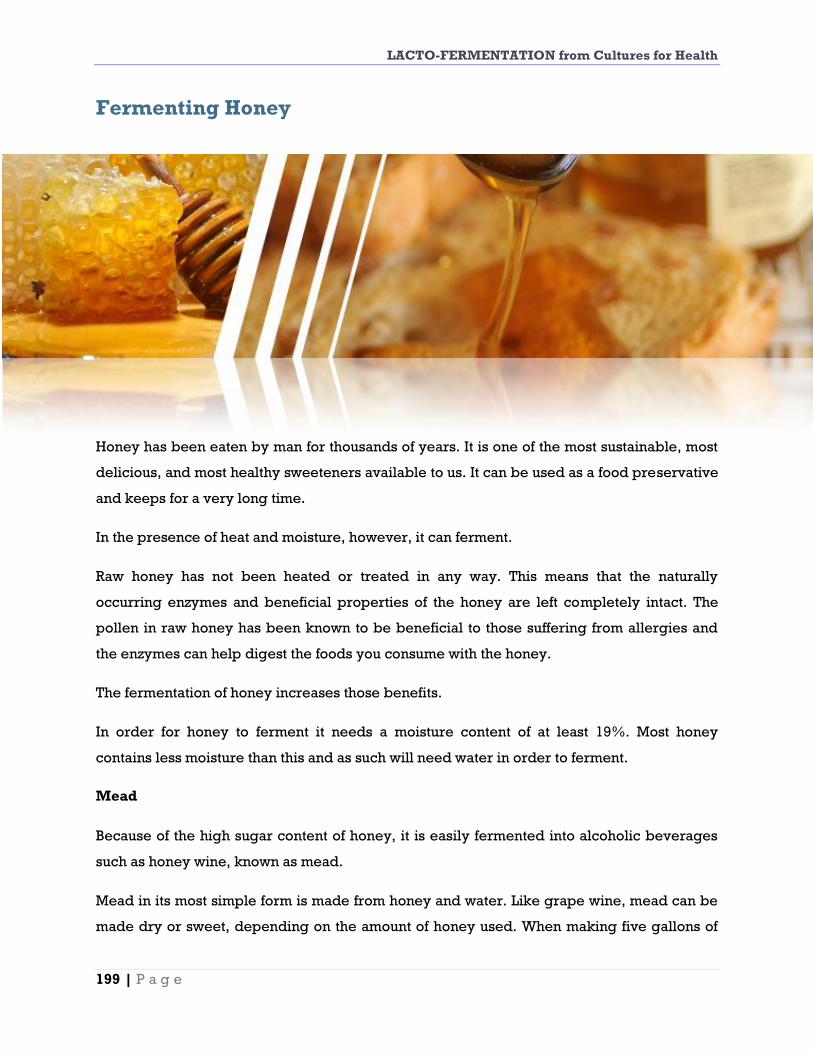
LACTO-FERMENTATION from Cultures for Health
199 | P a g e
Fermenting Honey
Honey has been eaten by man for thousands of years. It is one of the most sustainable, most
delicious, and most healthy sweeteners available to us. It can be used as a food preservative
and keeps for a very long time.
In the presence of heat and moisture, however, it can ferment.
Raw honey has not been heated or treated in any way. This means that the naturally
occurring enzymes and beneficial properties of the honey are left completely intact. The
pollen in raw honey has been known to be beneficial to those suffering from allergies and
the enzymes can help digest the foods you consume with the honey.
The fermentation of honey increases those benefits.
In order for honey to ferment it needs a moisture content of at least 19%. Most honey
contains less moisture than this and as such will need water in order to ferment.
Mead
Because of the high sugar content of honey, it is easily fermented into alcoholic beverages
such as honey wine, known as mead.
Mead in its most simple form is made from honey and water. Like grape wine, mead can be
made dry or sweet, depending on the amount of honey used. When making five gallons of
LACTO-FERMENTATION from Cultures for Health
200 | P a g e
mead at a time, dry mead would contain 9 to 12 pounds of honey whereas sweet mead
would contain more like 16 to 22 pounds of honey, with the remainder of the volume
consisting of water.
Lacto-fermented Honey
You can also ferment honey into a lactic acid bacteria-containing beverage or condiment.
This can be done in a number of ways. For example, you can use honey as the sweetener in
kombucha.
Won’t Raw Honey Kill the Beneficial Organisms?
Many people argue that you cannot use raw honey in the fermentation process because raw
honey is known to have anti-bacterial agents. Their concern is that it would kill the mother
culture such as kombucha.
Honey is anti-microbial in nature, but it kills microbes primarily by suffocation, so mixed
with water, its antimicrobial properties are somewhat diminished and it becomes a happy
home and food source for airborne yeasts and organisms to feast on and produce a
traditional fermented product.
So, find yourself a source for high-quality local raw honey and enjoy your fermentation
experiments.
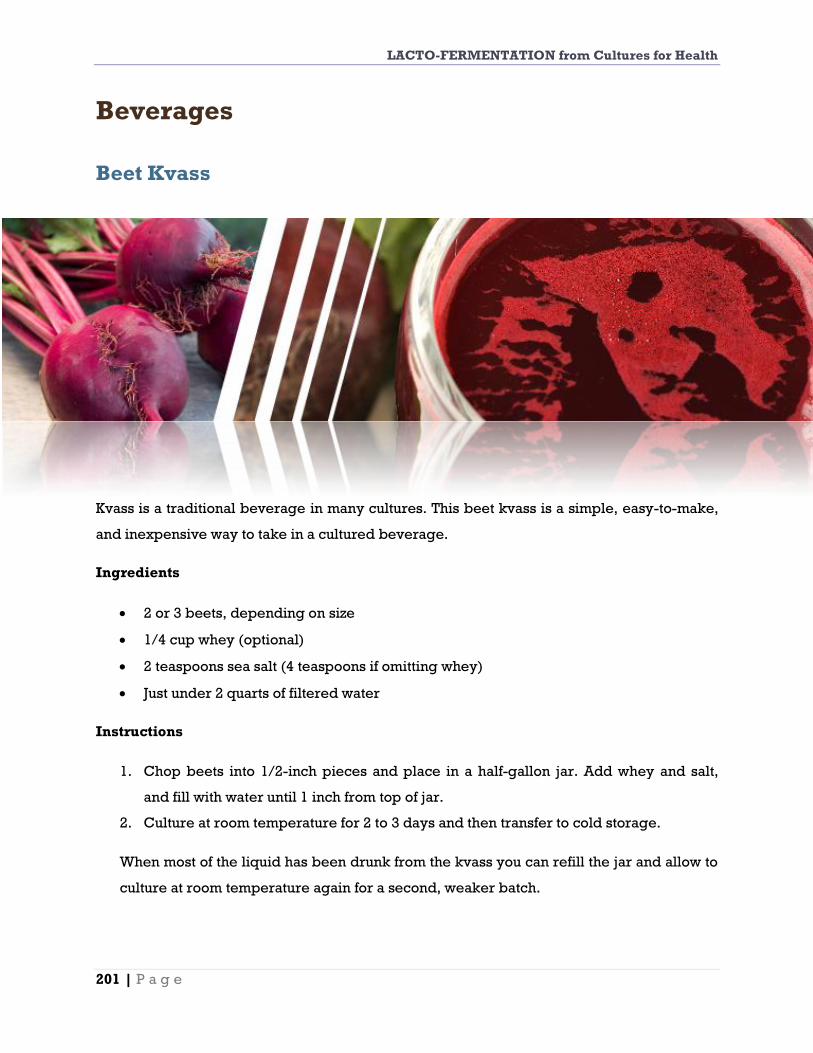
LACTO-FERMENTATION from Cultures for Health
201 | P a g e
Beverages
Beet Kvass
Kvass is a traditional beverage in many cultures. This beet kvass is a simple, easy-to-make,
and inexpensive way to take in a cultured beverage.
Ingredients
2 or 3 beets, depending on size
1/4 cup whey (optional)
2 teaspoons sea salt (4 teaspoons if omitting whey)
Just under 2 quarts of filtered water
Instructions
1. Chop beets into 1/2-inch pieces and place in a half-gallon jar. Add whey and salt,
and fill with water until 1 inch from top of jar.
2. Culture at room temperature for 2 to 3 days and then transfer to cold storage.
When most of the liquid has been drunk from the kvass you can refill the jar and allow to
culture at room temperature again for a second, weaker batch.

LACTO-FERMENTATION from Cultures for Health
202 | P a g e
Sweet Potato Fly
You may be surprised to discover that sweet potatoes aren’t just a holiday dish covered in
marshmallows. They can be used in a lot of ways and eaten roasted with butter just like
white potatoes.
One reason you see them everywhere is that they actually thrive in climates where it is more
difficult to grow other crops.
In addition to roasting them whole or using them in a variety of recipes, you can use them to
make this surprisingly delicious lacto-fermented sweet potato beverage. Spiced with
whatever you please it is reminiscent of a ginger ale or other spicy, bubbly beverage. Like
many lacto-fermented foods, it may take some getting used to, but once you acquire a taste
you’ll find its sweet, tangy, spicy flavor quite refreshing!
Ingredients
2 large sweet potatoes
1 gallon water
2 cups sugar
1/2 cup whey, from cultured dairy
2 lemons, zested and juiced
2 teaspoons cinnamon
1 teaspoon nutmeg
LACTO-FERMENTATION from Cultures for Health
203 | P a g e
1/2 teaspoon ginger
1 eggshell, cleaned and crushed
Instructions
1. Grate sweet potatoes using the coarse side of a box grater. Rinse in a sieve under
cold water to remove starch.
2. In a large non-reactive container combine grated sweet potatoes, water, sugar,
whey, juice and zest from the lemons, cinnamon, nutmeg, ginger, and crushed
eggshell. Stir, cover, and allow to ferment at room temperature for around 3 days, or
until fermented.
3. Strain through a fine sieve lined with cheesecloth and bottle into airtight bottles.
Refrigerate and serve.