Embed Size (px)
Citation preview
November, 2008
Mobile Teledermatology Training
for Healthcare Workers
http://ClickDiagnostics.com
Carrie Kovarik, M.D., University of Pennsylvania
Kathleen Tran, M.Sc., University of Pennsylvania
Ting Shih, Director of Services, ClickDiagnostics
© ClickDiagnostics, Inc. 2008
© ClickDiagnostics, Inc. 2008
OutlineOutline Introduction to ClickDoc Mobile Teledermatology Service Objectives and Tasks of the Healthcare Worker
1. Capture and submit information for a teledermatology consult2. Retrieve the reply to your consultation request3. Follow up with patients
Exercise Appendix
o Physical Examinationo Common Skin Diseases in Egypto How to Take Good Dermatologic Photographs
© ClickDiagnostics, Inc. 2008
Introduction to Introduction to ClickDocClickDoc Mobile Teledermatology ServiceMobile Teledermatology Service
© ClickDiagnostics, Inc. 2008
The The ClickDocClickDoc Mobile Teledermatology Service Mobile Teledermatology Service Mobile Teledermatology is the use of a mobile phone with
customized software and built-in camera to provide dermatologic services at a distance.
ClickDoc is a mobile-phone application that enables mobile teledermatology.
ClickDoc is developed by ClickDiagnostics, Inc. (http://www.clickdiagnostics.com), a social enterprise aimed at providing accessible, affordable healthcare worldwide.
© ClickDiagnostics, Inc. 2008
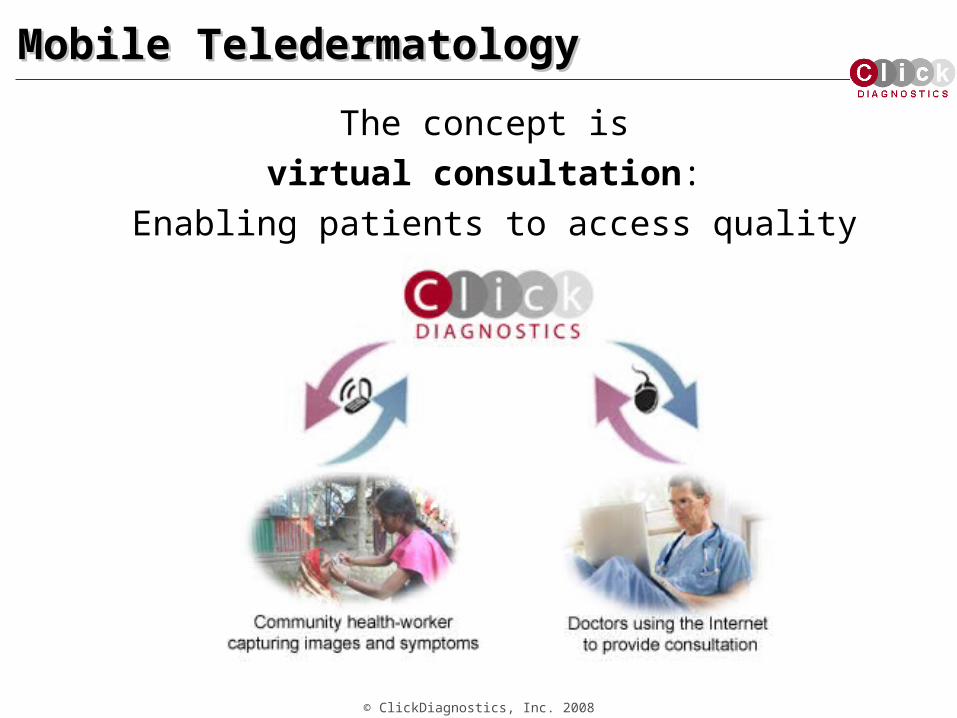
The concept is virtual consultation:
Enabling patients to access quality doctors from anywhere!
Mobile TeledermatologyMobile Teledermatology
© ClickDiagnostics, Inc. 2008
Mobile Teledermatology: The BenefitsMobile Teledermatology: The Benefits Enables fast, anywhere exchange of clinical information
between healthcare workers and dermatologists
Eliminates the need for an interposing computer and internet where technologic resources are scarce
Helps combat shortages of dermatologists
Cost Savingso Teledermatology will reduce the number of patients
needing dermatology referrals by 80-90%*o Minimal overhead—no support staff needed
© ClickDiagnostics, Inc. 2008
Mobile Teledermatology: The Benefits
For the PATIENT: Improves access to health careo Patients prefer to be evaluated via telemedicine versus waiting to
be seen by a provider face-to-face
For the PROVIDER: Empowers with knowledgeo Arms the healthcare provider with medical expertiseo Improves quality of care
For the health care ORGANIZATION: o More efficient utilization of dermatologic resourceso Helps triage patients effectively
© ClickDiagnostics, Inc. 2008
Is Teledermatology Effective? Is Teledermatology Effective?
A 2006 study of 508 patients showed that clinical outcomes using teledermatology are nearly identical to those using standard, face-to-face dermatology.1
A study showed that 90% of dermatologic conditions can be adequately managed through teledermatology
A study showed that diagnoses from teledermatologic and face-to-face consultations are highly concordant
1. Pak H, Triplett C, et al. “Store-and-forward teledermatology results in similar clinical outcomes to conventional clinic-based care.” Journal of Telemedicine and Telecare. 2007; 13:26-30.

© ClickDiagnostics, Inc. 2008
Objectives and Tasks Objectives and Tasks of a Healthcare Workerof a Healthcare Worker
© ClickDiagnostics, Inc. 2008
Objectives and Tasks of a Healthcare WorkerObjectives and Tasks of a Healthcare Worker Objectives
1. Capture sufficient information for evaluation of skin conditions by a remote dermatologist
2. Provide diagnosis and treatment plan to patients Tasks
1. Record patient information following instructions from ClickDoc mobile application
2. Submit consultation by choosing “sync” option when mobile network is in range and Obtain case ID
3. Take dermatologic photographs using Macro model on phone: press “send”, choose [email protected], and type case ID in text field to submit
4. Check results by entering case ID5. Communicate consultation results and follow up with patient
© ClickDiagnostics, Inc. 2008
1. Record Patient Information1. Record Patient Information
© ClickDiagnostics, Inc. 2008
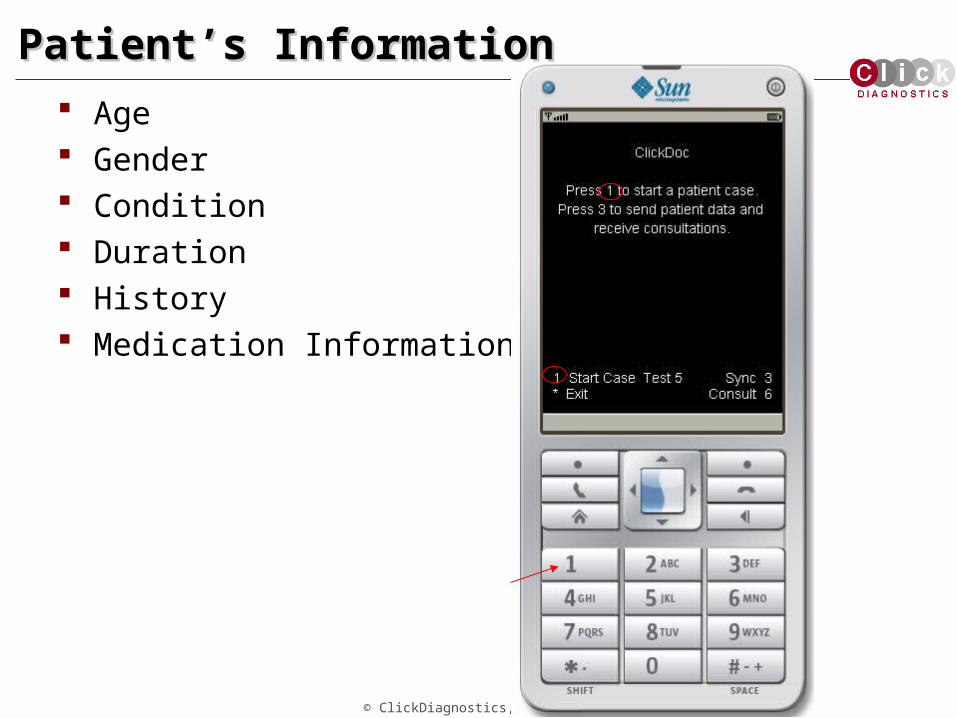
Patient’s InformationPatient’s Information Age Gender Condition Duration History Medication Information
© ClickDiagnostics, Inc. 2008
Patient’s InformationPatient’s Information
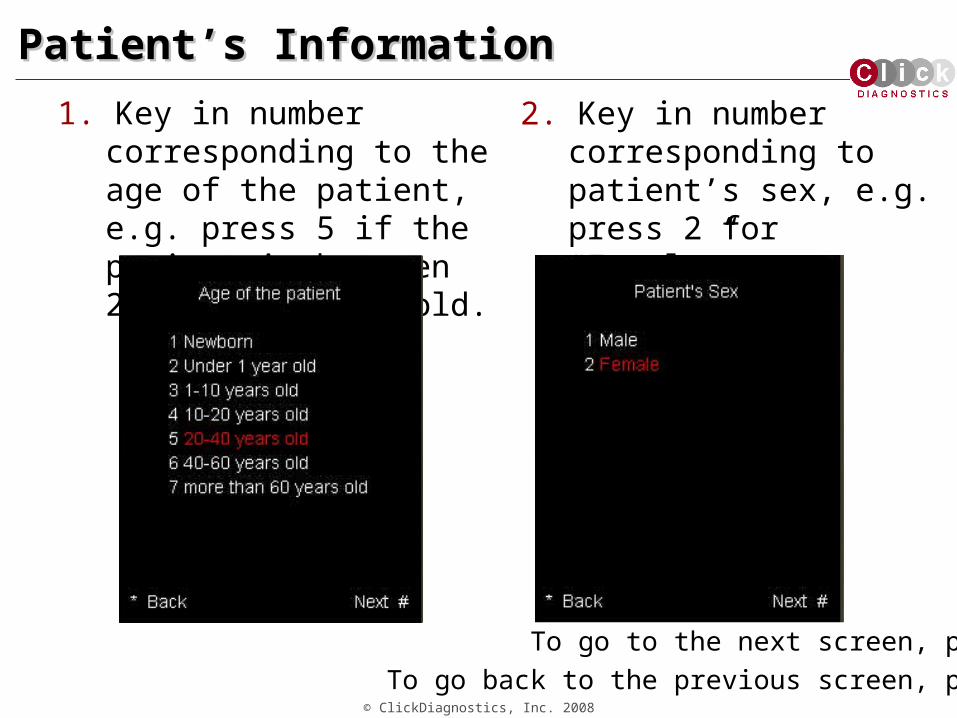
1. Key in number corresponding to the age of the patient, e.g. press 5 if the patient is between 20 and 40 years old.
2. Key in number corresponding to patient’s sex, e.g. press 2 for “Female”
To go to the next screen, press #To go back to the previous screen, press *
© ClickDiagnostics, Inc. 2008
Patient’s ConditionPatient’s Condition
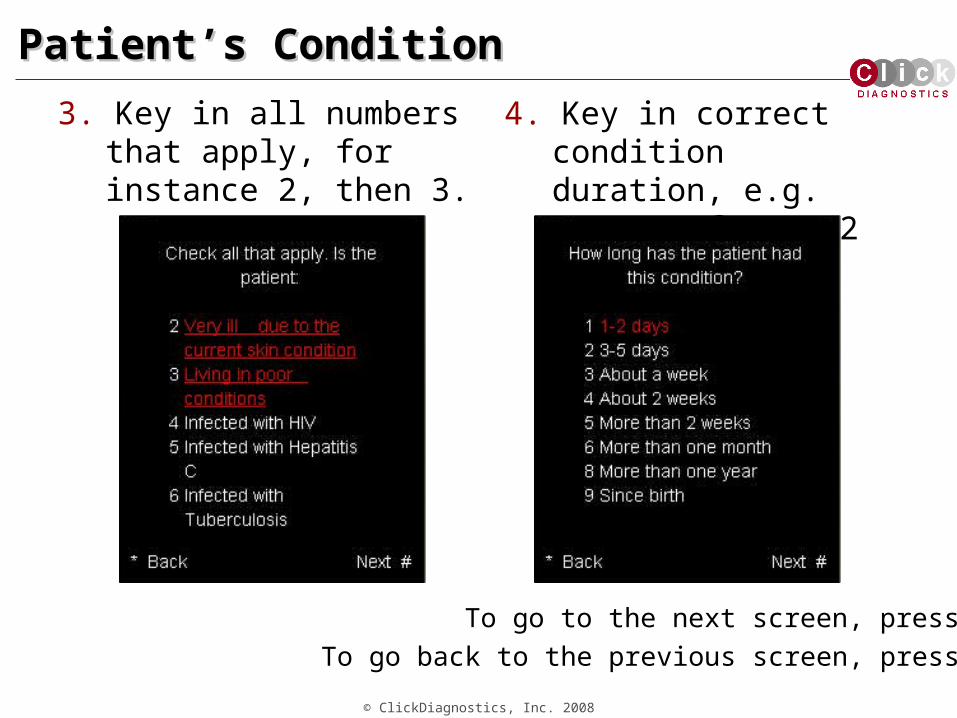
3. Key in all numbers that apply, for instance 2, then 3.
4. Key in correct condition duration, e.g. press 1 for “1-2 days.”
To go to the next screen, press #To go back to the previous screen, press *
© ClickDiagnostics, Inc. 2008
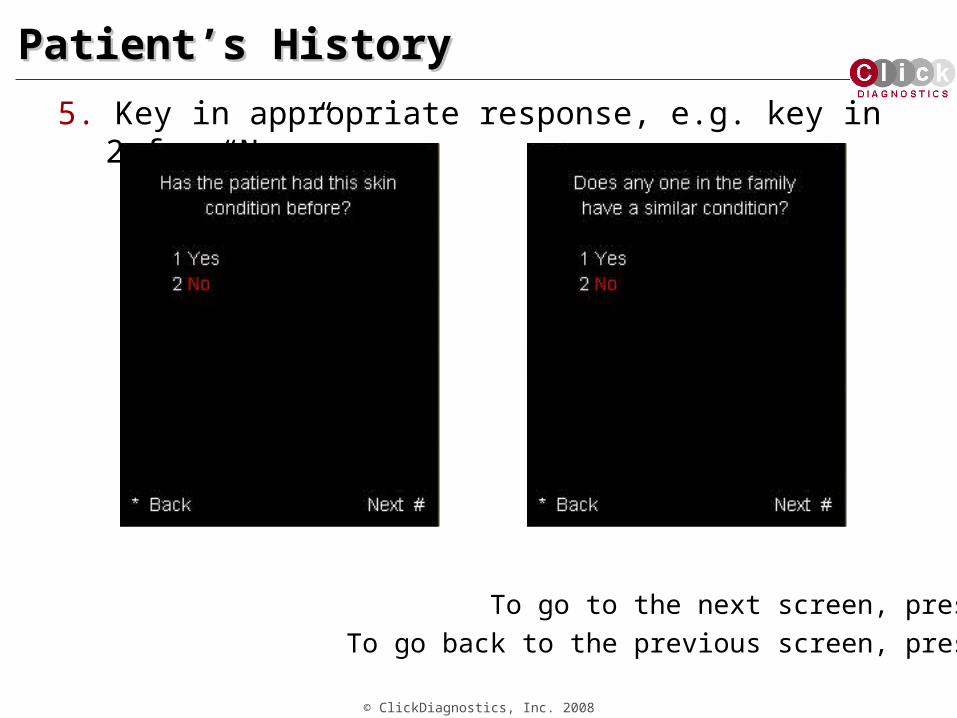
Patient’s HistoryPatient’s History
5. Key in appropriate response, e.g. key in 2 for “No.”
To go to the next screen, press #To go back to the previous screen, press *
© ClickDiagnostics, Inc. 2008
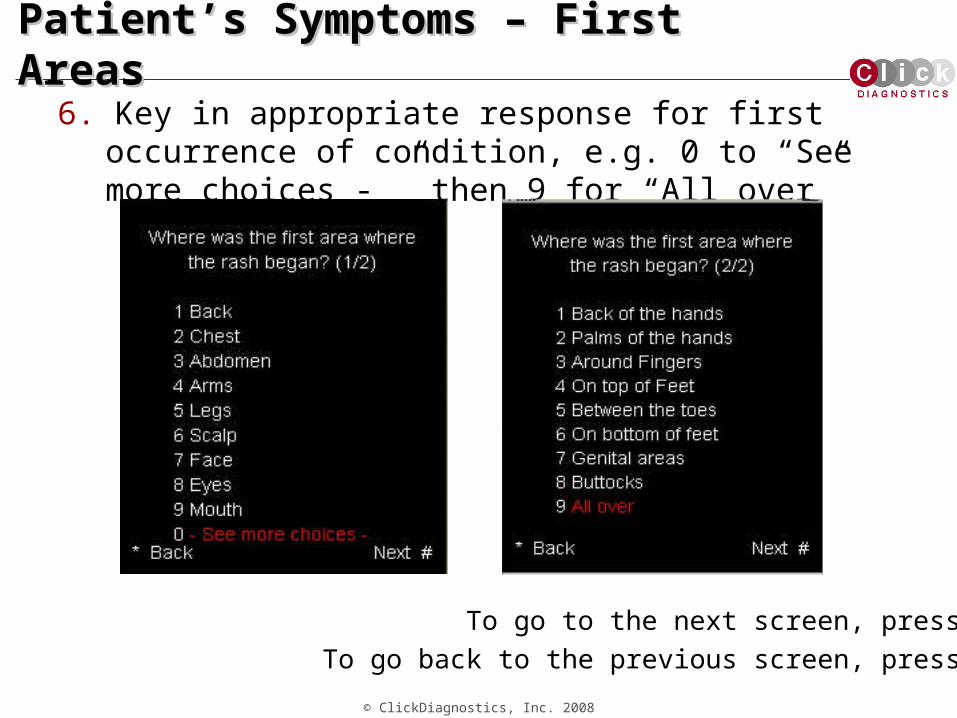
Patient’s Symptoms – First AreasPatient’s Symptoms – First Areas
6. Key in appropriate response for first occurrence of condition, e.g. 0 to “See more choices - ” then 9 for “All over”
To go to the next screen, press #To go back to the previous screen, press *

© ClickDiagnostics, Inc. 2008
Patient’s Symptoms – Current AreasPatient’s Symptoms – Current Areas
7. Key in all numbers that apply, e.g. key in 1 for “Back”, 2 for “Chest”, 5 for “Legs.”
To go to the next screen, press #To go back to the previous screen, press *
© ClickDiagnostics, Inc. 2008
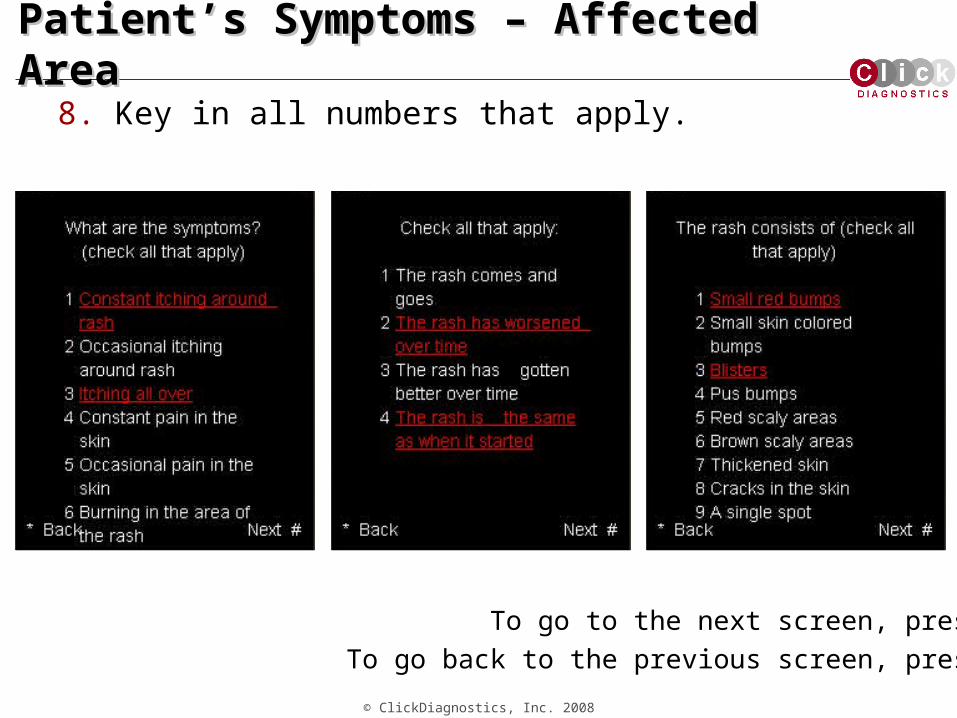
Patient’s Symptoms – Affected AreaPatient’s Symptoms – Affected Area
8. Key in all numbers that apply.
To go to the next screen, press #To go back to the previous screen, press *
© ClickDiagnostics, Inc. 2008
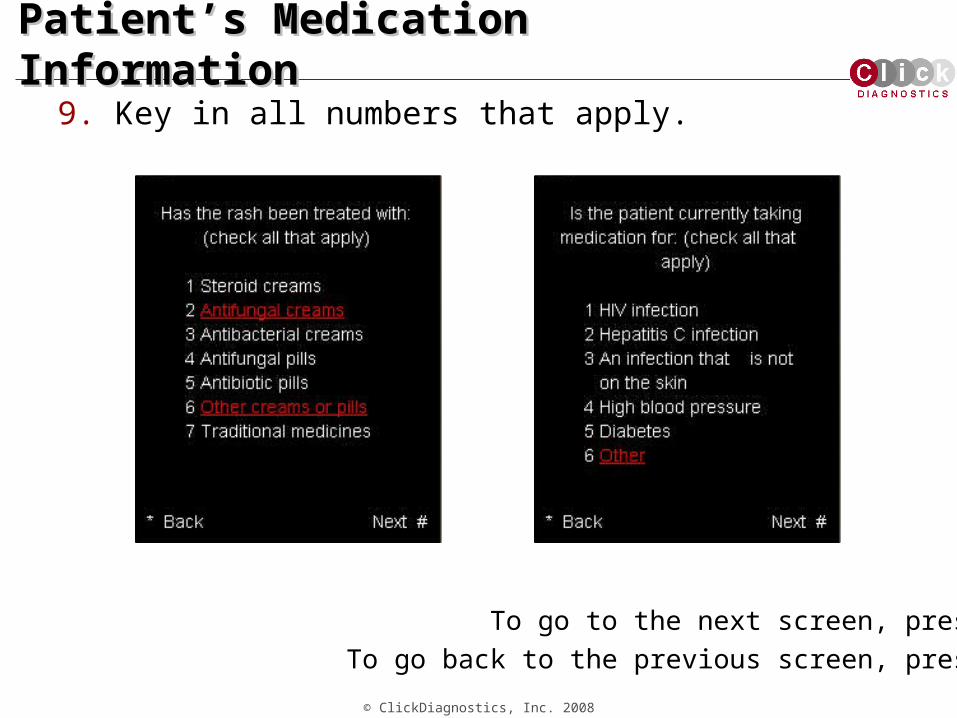
Patient’s Medication InformationPatient’s Medication Information
9. Key in all numbers that apply.
To go to the next screen, press #To go back to the previous screen, press *
© ClickDiagnostics, Inc. 2008
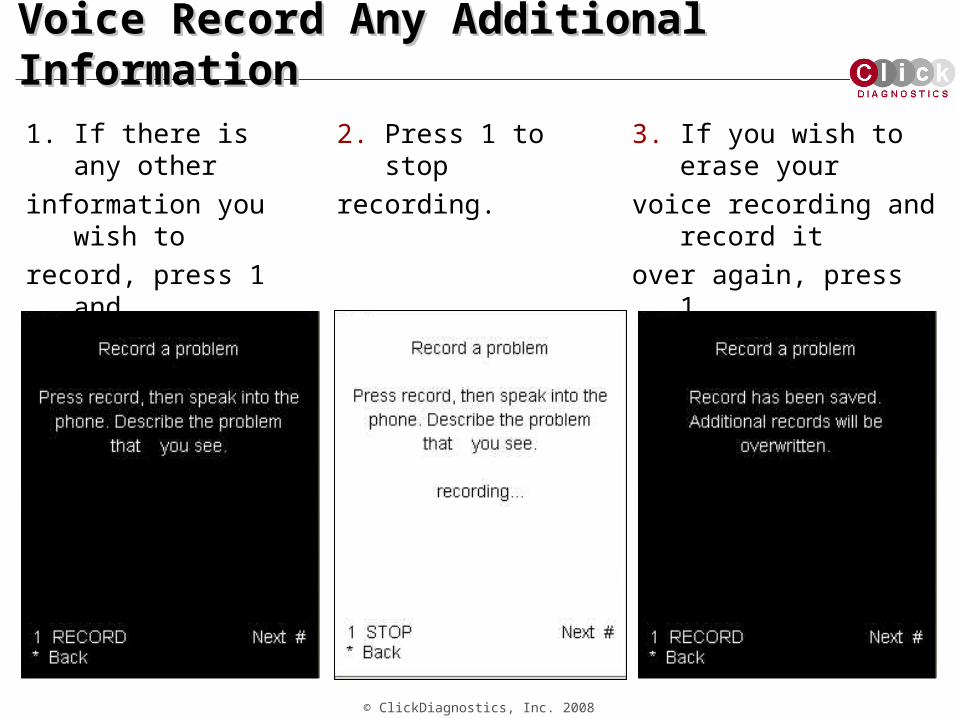
Voice Record Any Additional InformationVoice Record Any Additional Information
1. If there is any other information you wish to record, press 1 and speak into the phone.
2. Press 1 to stop recording.
3. If you wish to erase your voice recording and record it over again, press 1.
© ClickDiagnostics, Inc. 2008
2. Submit Consultation2. Submit Consultation
© ClickDiagnostics, Inc. 2008
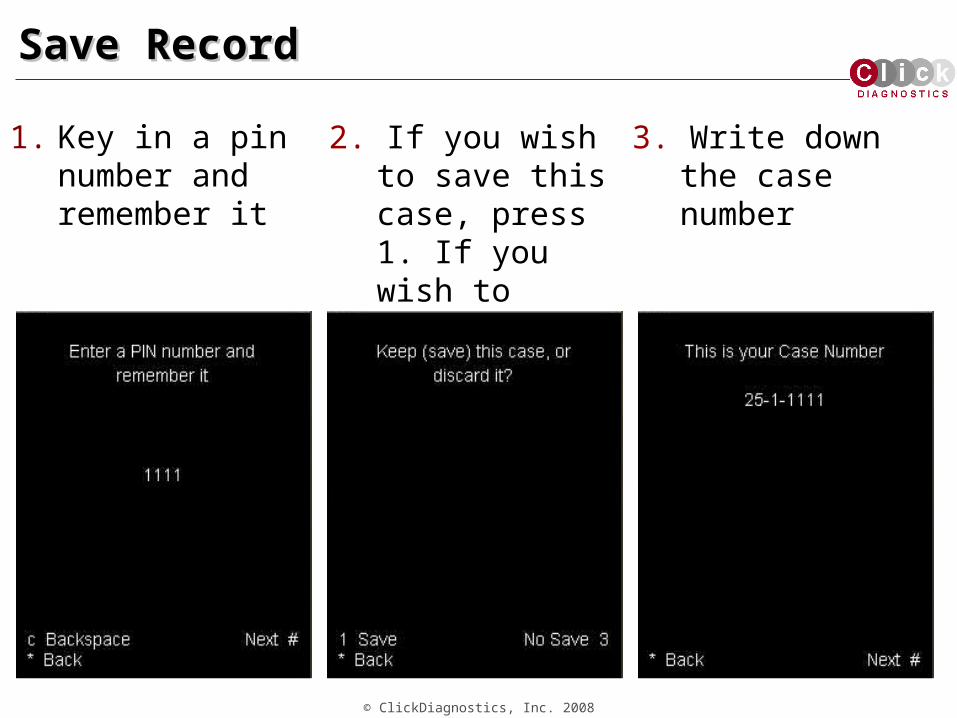
Save RecordSave Record
1. Key in a pin number and remember it
2. If you wish to save this case, press 1. If you wish to discard it, press 3.
3. Write down the case number
© ClickDiagnostics, Inc. 2008
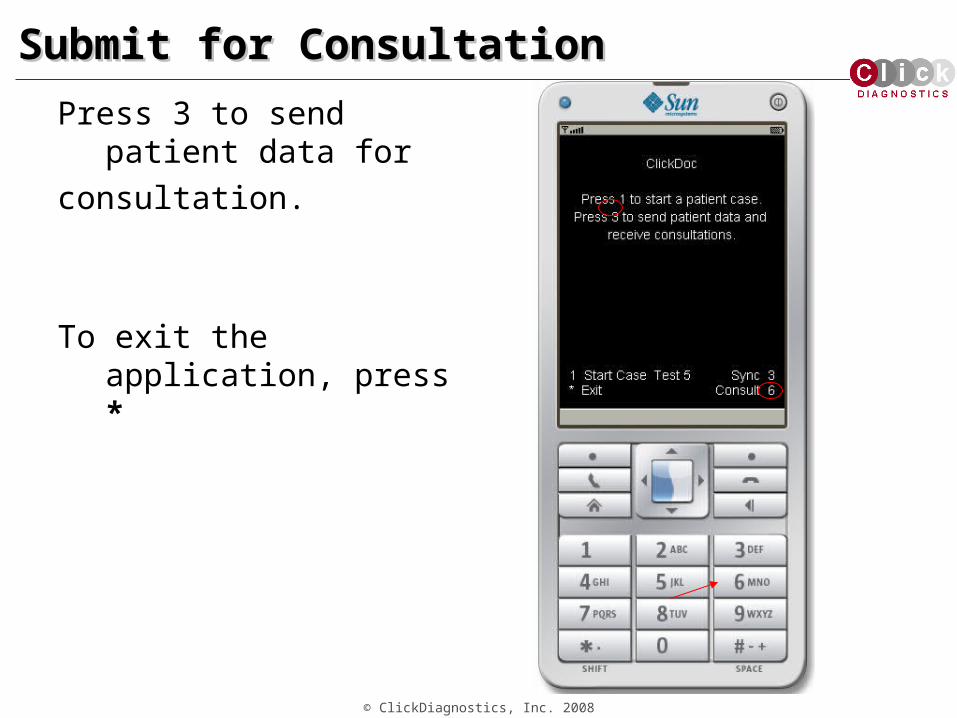
Submit for ConsultationSubmit for Consultation
Press 3 to send patient data for
consultation.
To exit the application, press *
© ClickDiagnostics, Inc. 2008
3. Take Dermatologic Photographs3. Take Dermatologic Photographs
© ClickDiagnostics, Inc. 2008
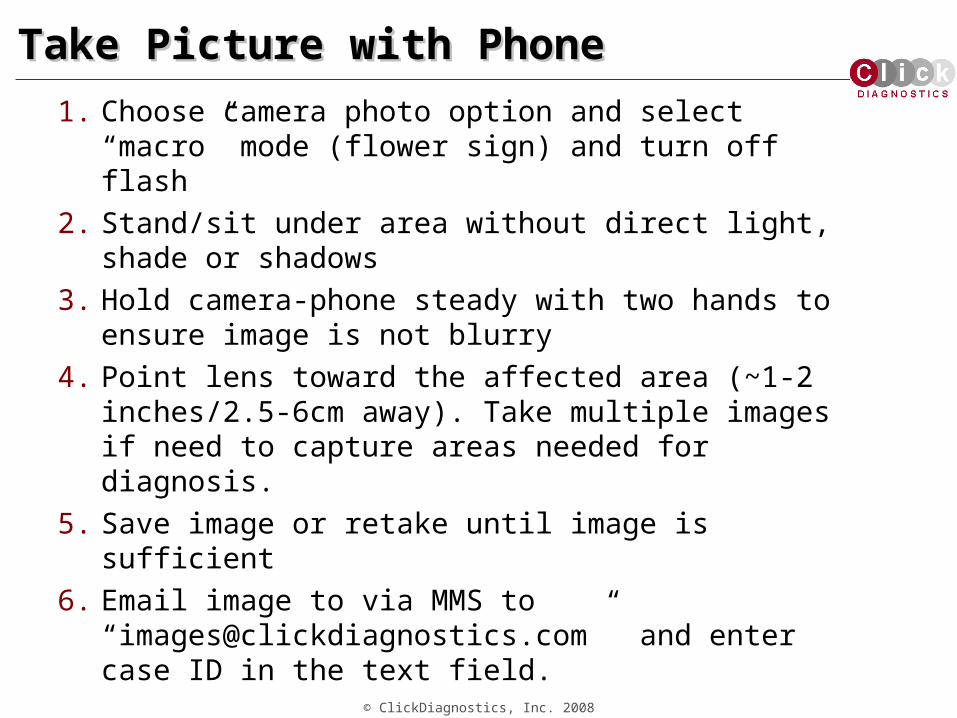
Take Picture with PhoneTake Picture with Phone
1. Choose camera photo option and select “macro” mode (flower sign) and turn off flash
2. Stand/sit under area without direct light, shade or shadows
3. Hold camera-phone steady with two hands to ensure image is not blurry
4. Point lens toward the affected area (~1-2 inches/2.5-6cm away). Take multiple images if need to capture areas needed for diagnosis.
5. Save image or retake until image is sufficient6. Email image to via MMS to
“[email protected]” and enter case ID in the text field.
© ClickDiagnostics, Inc. 2008
4. Check Results4. Check Results
© ClickDiagnostics, Inc. 2008
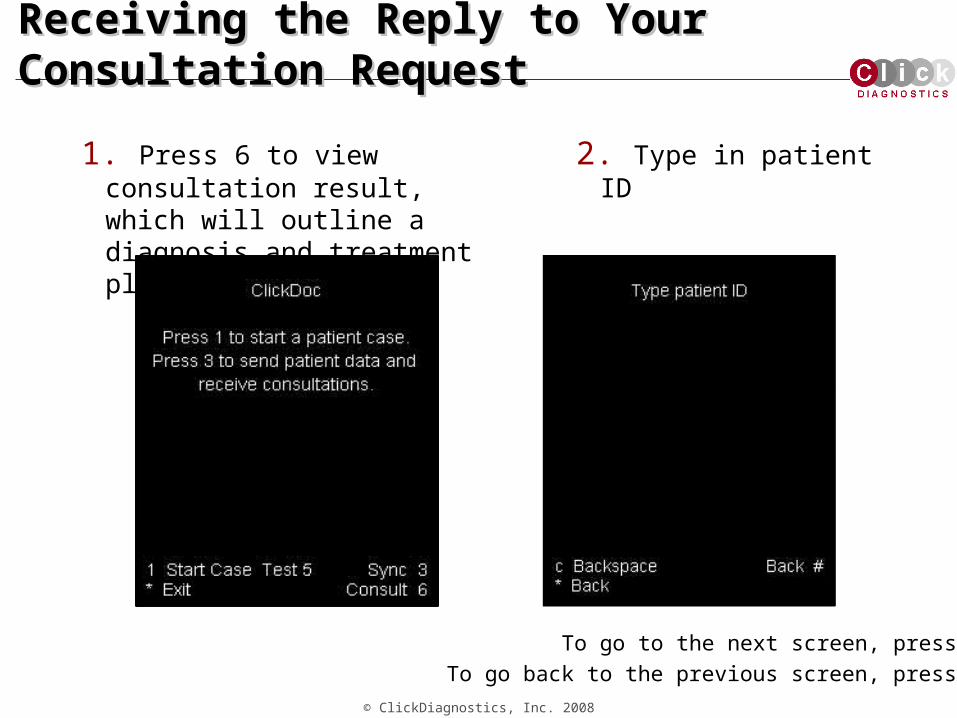
Receiving the Reply to Your Consultation RequestReceiving the Reply to Your Consultation Request
1. Press 6 to view consultation result, which will outline a diagnosis and treatment plan
2. Type in patient ID
To go to the next screen, press #To go back to the previous screen, press *
© ClickDiagnostics, Inc. 2008
5. Communicate and Follow Up 5. Communicate and Follow Up with Patientwith Patient
© ClickDiagnostics, Inc. 2008
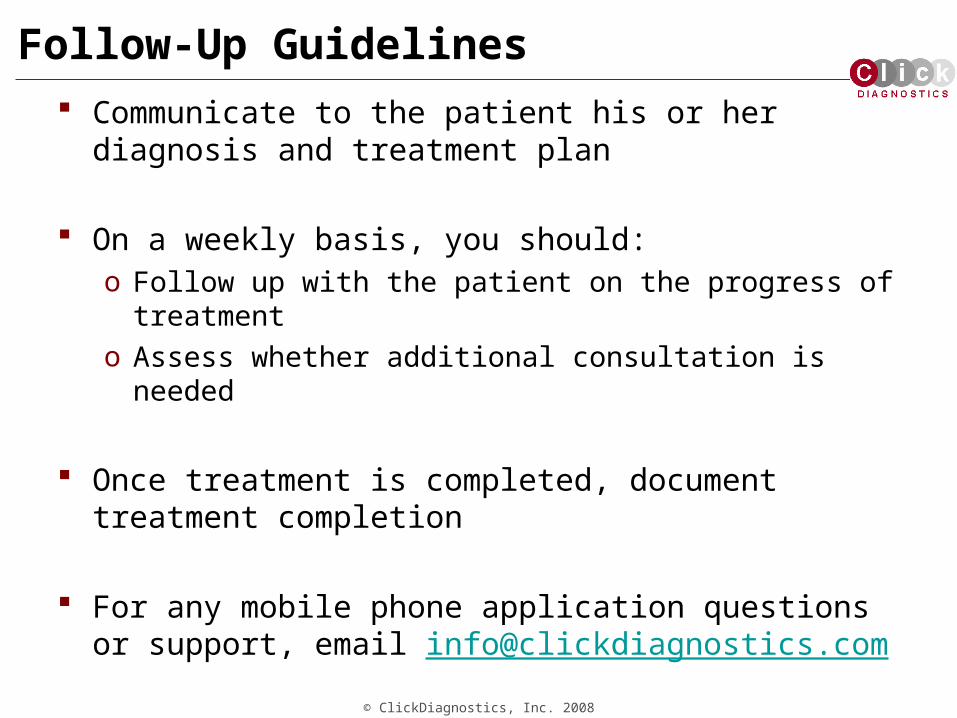
Follow-Up Guidelines Communicate to the patient his or her diagnosis and
treatment plan
On a weekly basis, you should:o Follow up with the patient on the progress of treatmento Assess whether additional consultation is needed
Once treatment is completed, document treatment completion
For any mobile phone application questions or support, email [email protected]
© ClickDiagnostics, Inc. 2008
ExerciseExercise
© ClickDiagnostics, Inc. 2008
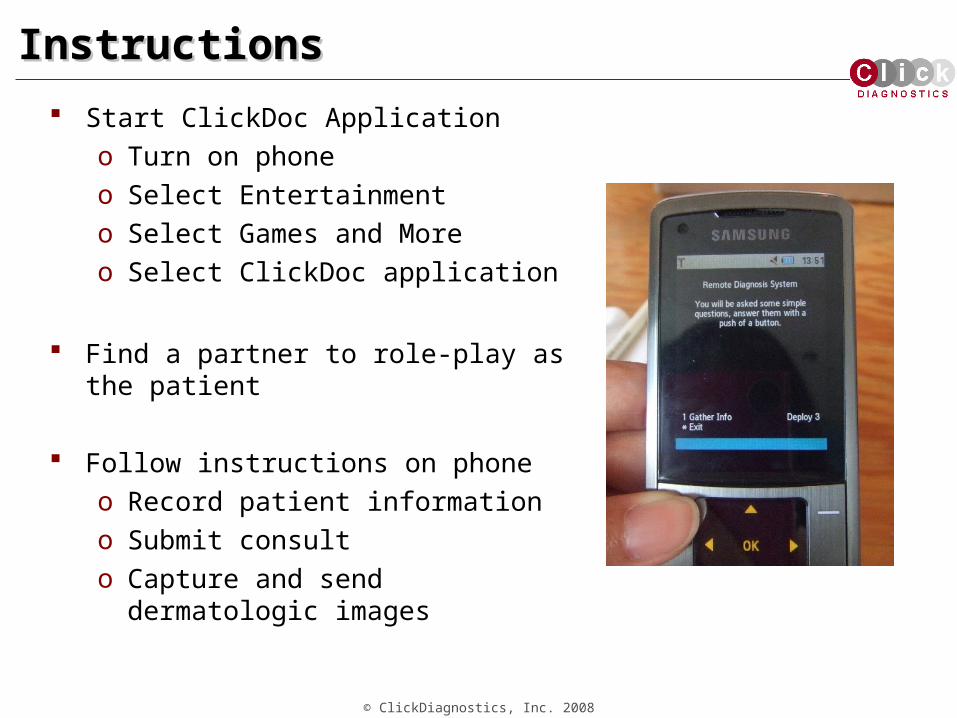
InstructionsInstructions Start ClickDoc Application
o Turn on phoneo Select Entertainmento Select Games and Moreo Select ClickDoc application
Find a partner to role-play as the patient
Follow instructions on phoneo Record patient informationo Submit consulto Capture and send dermatologic images
© ClickDiagnostics, Inc. 2008
APPENDIX Gathering the Patient’s History
The Dermatologic Physical Exam
Common Skin Diseases in Egypt
How to Take Dermatologic Photographso Standard Setso Other Factors to Consider
© ClickDiagnostics, Inc. 2008
Gathering the History: The Chief ComplaintGathering the History: The Chief Complaint
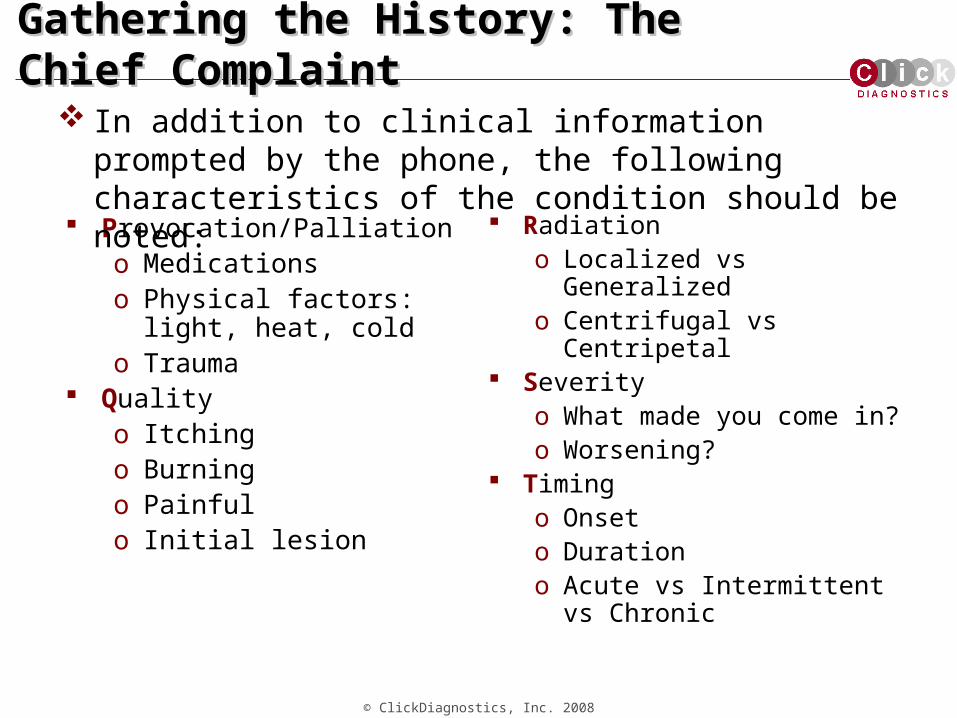
Provocation/Palliationo Medicationso Physical factors: light, heat,
coldo Trauma
Qualityo Itchingo Burningo Painfulo Initial lesion
Radiationo Localized vs Generalizedo Centrifugal vs Centripetal
Severityo What made you come in?o Worsening?
Timingo Onseto Durationo Acute vs Intermittent vs Chronic
In addition to clinical information prompted by the phone, the following characteristics of the condition should be noted:

© ClickDiagnostics, Inc. 2008
Physical ExaminationPhysical Examination
© ClickDiagnostics, Inc. 2008
The Dermatologic Physical ExamThe Dermatologic Physical Exam Consists of inspection and palpation
o Inspection: Visual examination to characterize the morphology (form or structure) and appearance of each skin lesion
o Palpation: Allows one to assess the texture, consistency (softness, firmness, fluctuance), and tenderness of a lesion. This also reassures the patient that you are not afraid of their skin lesions.
© ClickDiagnostics, Inc. 2008
The Physical Exam: What to Look for? Primary LesionsPrimary Lesions – examples: papules (bumps), vesicles – examples: papules (bumps), vesicles
(blisters), plaques (raised areas)(blisters), plaques (raised areas) Secondary ChangesSecondary Changes – examples: scale, ulcers, scarring – examples: scale, ulcers, scarring SizeSize of the lesions of the lesions ColorColor of the lesions of the lesions ConfigurationConfiguration – examples: circular, unilateral, well- – examples: circular, unilateral, well-
demarcateddemarcated Distribution Distribution – examples: generalized, grouped, localized– examples: generalized, grouped, localized
© ClickDiagnostics, Inc. 2008
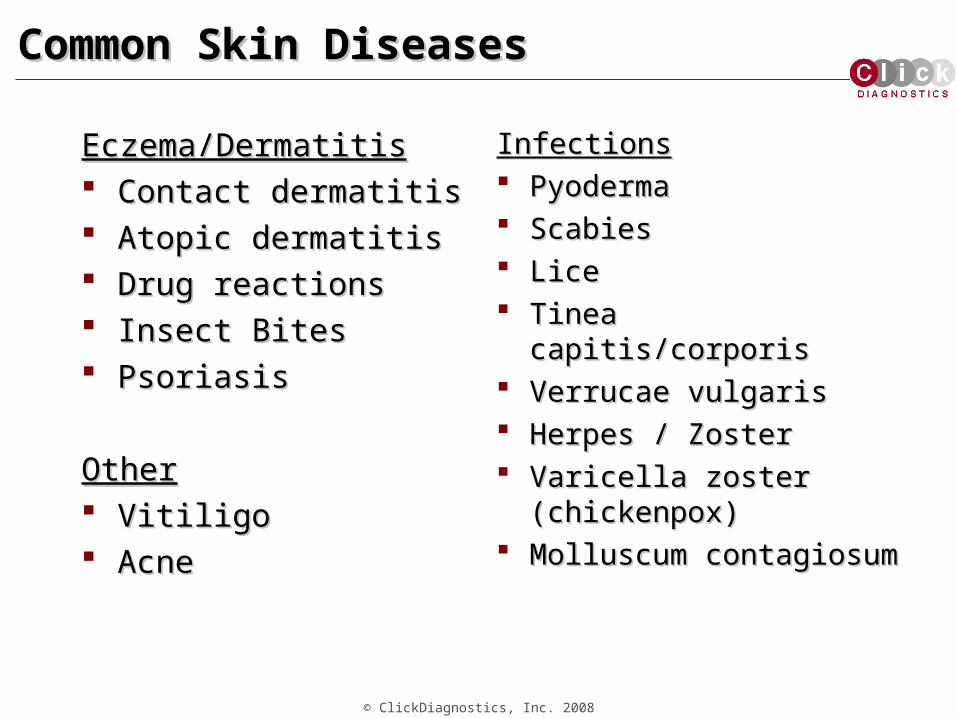
Common Skin DiseasesCommon Skin Diseases
Eczema/DermatitisEczema/Dermatitis Contact dermatitisContact dermatitis Atopic dermatitisAtopic dermatitis Drug reactionsDrug reactions Insect BitesInsect Bites PsoriasisPsoriasis
OtherOther VitiligoVitiligo AcneAcne
InfectionsInfections PyodermaPyoderma ScabiesScabies LiceLice Tinea capitis/corporisTinea capitis/corporis Verrucae vulgarisVerrucae vulgaris Herpes / ZosterHerpes / Zoster Varicella zoster Varicella zoster
(chickenpox)(chickenpox) Molluscum contagiosumMolluscum contagiosum
© ClickDiagnostics, Inc. 2008
How to TakeHow to TakeDermatologic PhotographsDermatologic Photographs
(Images/information provided in this section are (Images/information provided in this section are courtesy of Dr. Hon Pak, LTC MC)courtesy of Dr. Hon Pak, LTC MC)
© ClickDiagnostics, Inc. 2008
Standard Views Standard ViewsStandard Views
o Human body can be separated into anatomic unitsHuman body can be separated into anatomic unitso Each anatomic units will have standard image setsEach anatomic units will have standard image sets
Standard views/framing should be used for most if not all Standard views/framing should be used for most if not all conditions. conditions. o Show entire anatomic unit (e.g. trunk) if a lesion or rash is Show entire anatomic unit (e.g. trunk) if a lesion or rash is
within this unitwithin this unit
© ClickDiagnostics, Inc. 2008
Anatomic Regions or Units (Standard Sets)Anatomic Regions or Units (Standard Sets) Hands/feet/ NailsHands/feet/ Nails Face/ ScalpFace/ Scalp GenitalsGenitals ArmsArms TrunkTrunk LegsLegs
© ClickDiagnostics, Inc. 2008
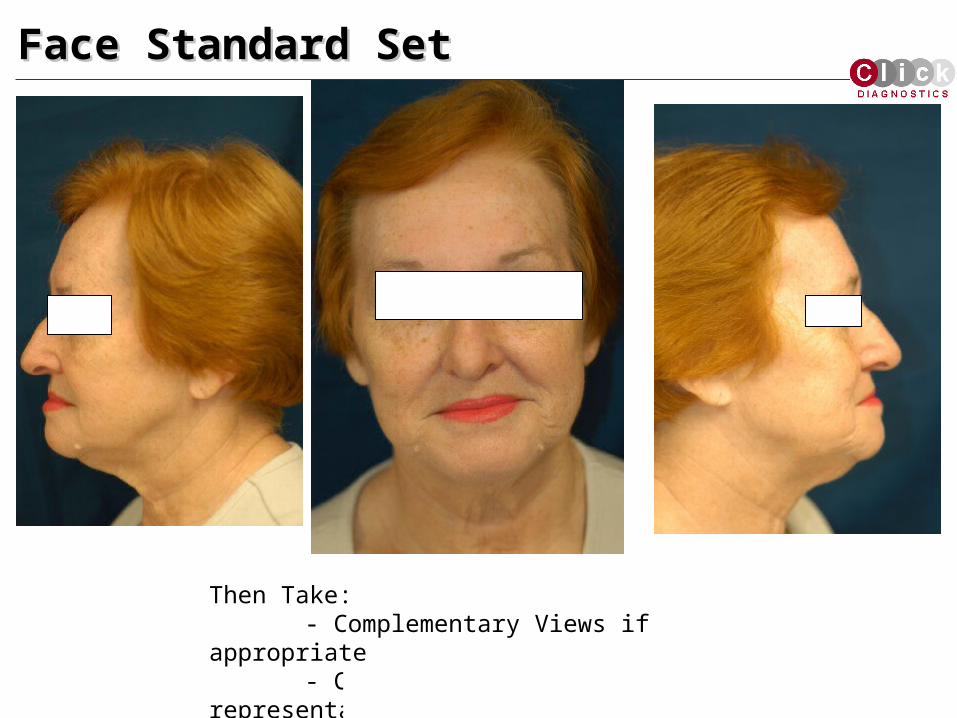
Face Standard SetFace Standard Set
Then Take:- Complementary Views if
appropriate- Close ups (of representative
lesions)
© ClickDiagnostics, Inc. 2008
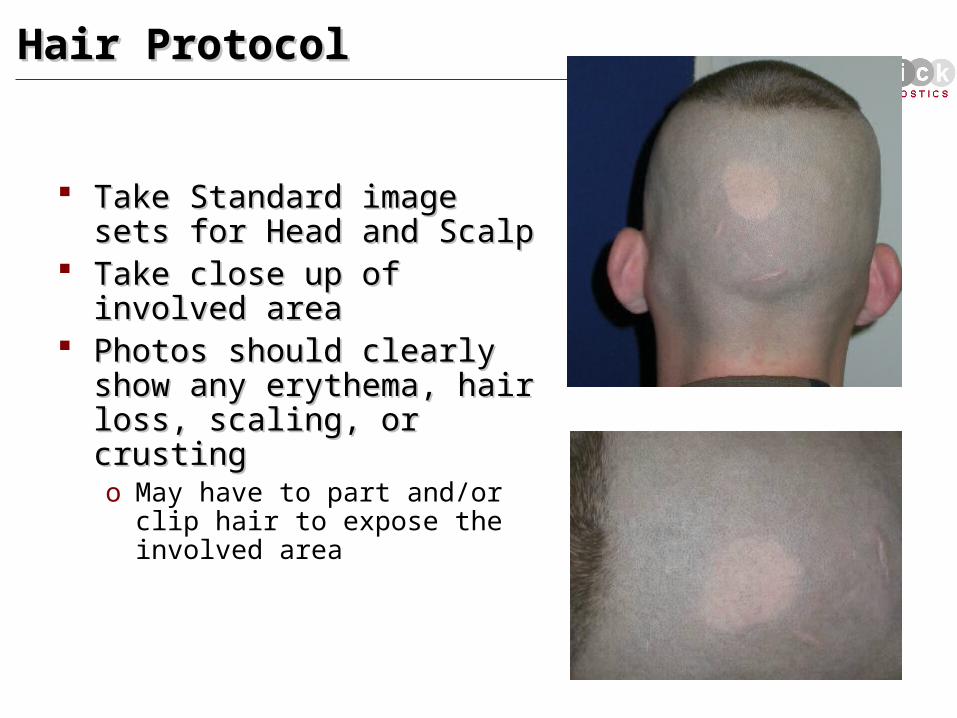
Hair ProtocolHair Protocol
Take Standard image sets for Head Take Standard image sets for Head and Scalpand Scalp
Take close up of involved areaTake close up of involved area Photos should clearly show any Photos should clearly show any
erythema, hair loss, scaling, or erythema, hair loss, scaling, or crustingcrustingo May have to part and/or clip hair to
expose the involved area
© ClickDiagnostics, Inc. 2008
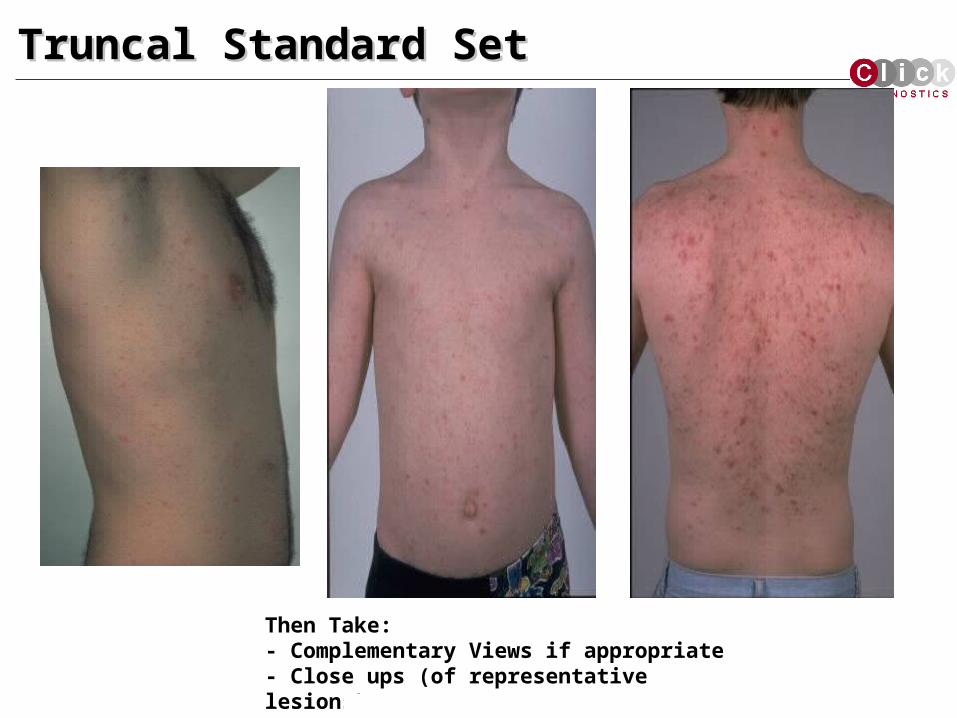
Truncal Standard SetTruncal Standard Set
Then Take: - Complementary Views if appropriate- Close ups (of representative lesions)
© ClickDiagnostics, Inc. 2008
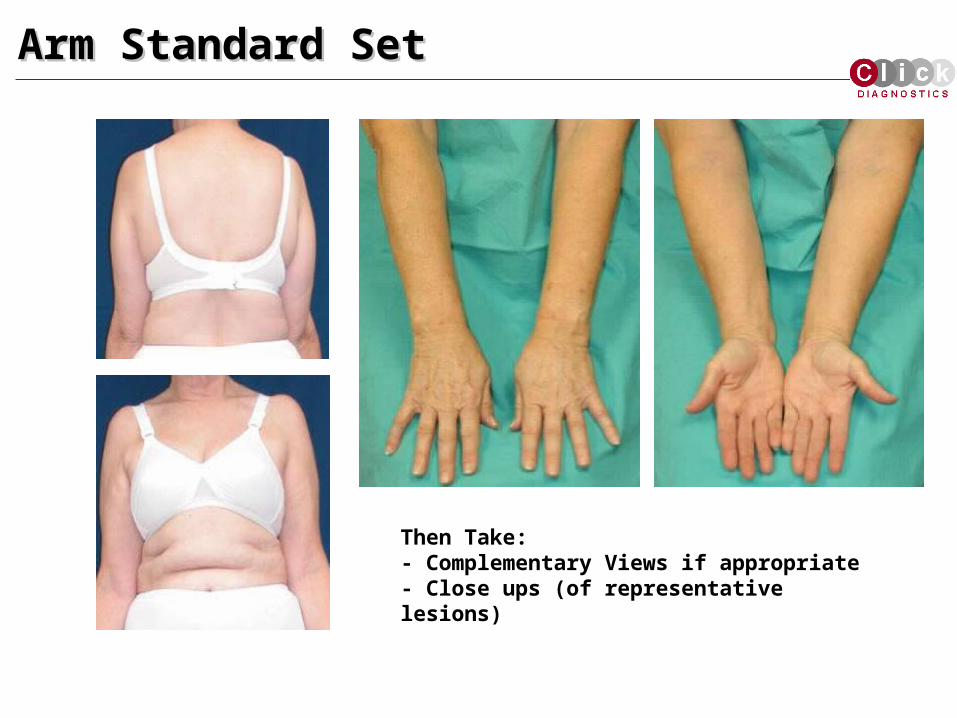
Arm Standard SetArm Standard Set
Then Take: - Complementary Views if appropriate- Close ups (of representative lesions)
© ClickDiagnostics, Inc. 2008
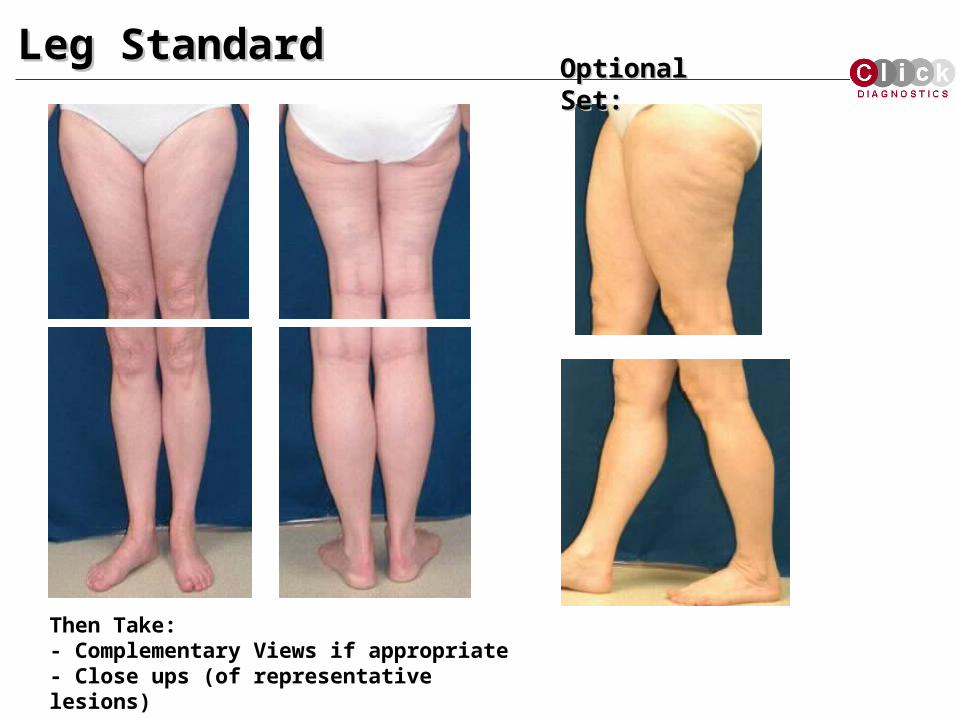
Leg StandardLeg StandardOptional Set:Optional Set:
Then Take: - Complementary Views if appropriate- Close ups (of representative lesions)
© ClickDiagnostics, Inc. 2008
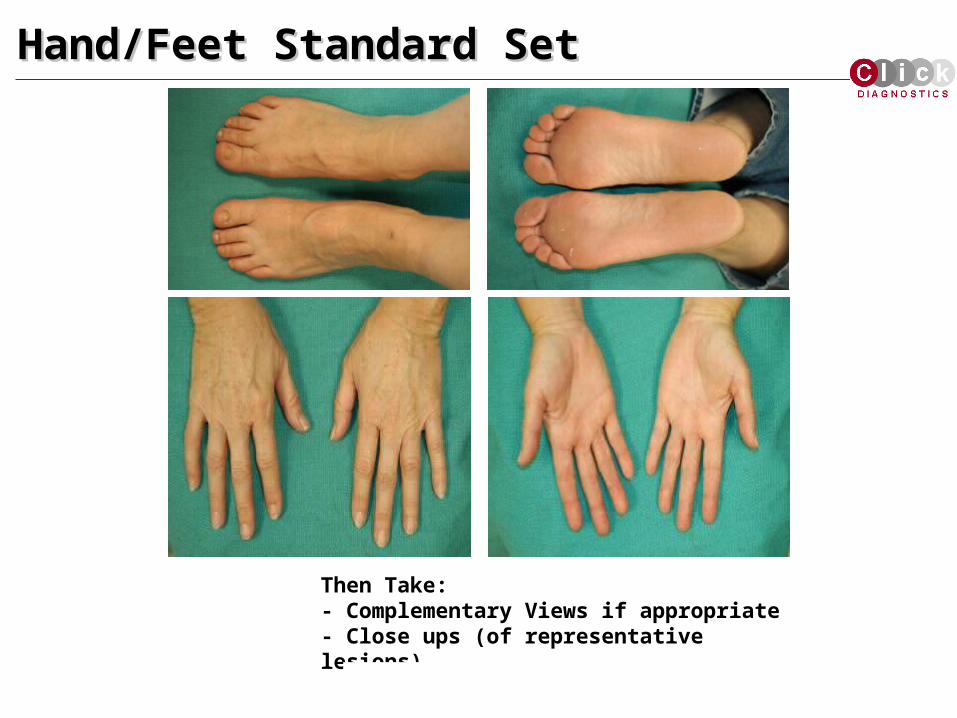
Hand/Feet Standard SetHand/Feet Standard Set
Then Take:- Complementary Views if appropriate- Close ups (of representative lesions)
© ClickDiagnostics, Inc. 2008
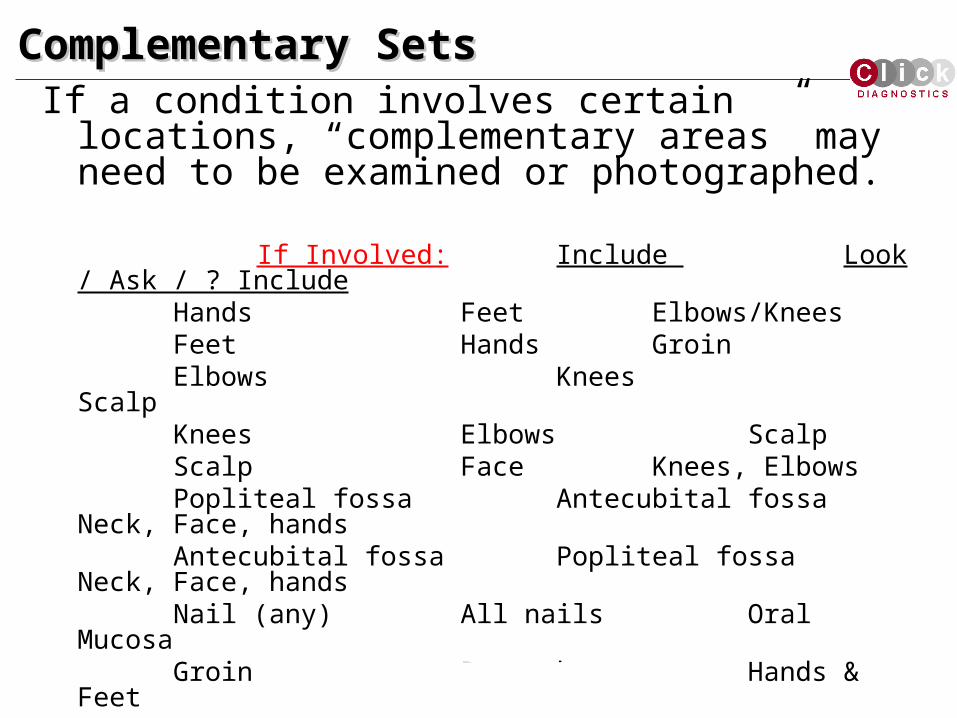
Complementary SetsComplementary SetsIf a condition involves certain locations,
“complementary areas” may need to be examined or photographed.
If Involved: Include Look / Ask / ? Include
Hands Feet Elbows/KneesFeet Hands GroinElbows Knees ScalpKnees Elbows ScalpScalp Face Knees, ElbowsPopliteal fossa Antecubital fossa
Neck, Face, handsAntecubital fossa Popliteal fossa
Neck, Face, handsNail (any) All nails Oral
MucosaGroin Buttocks Hands &
FeetFace (Eyebrows, NLF) ScalpOral Mucosa Genitals
© ClickDiagnostics, Inc. 2008
Dermatologic Photography: Factors to Dermatologic Photography: Factors to ConsiderConsider
Orientation Framing Leveling & centering Close up & location Symmetry Background Marking lesions Preparation of room Preparation of patient
© ClickDiagnostics, Inc. 2008
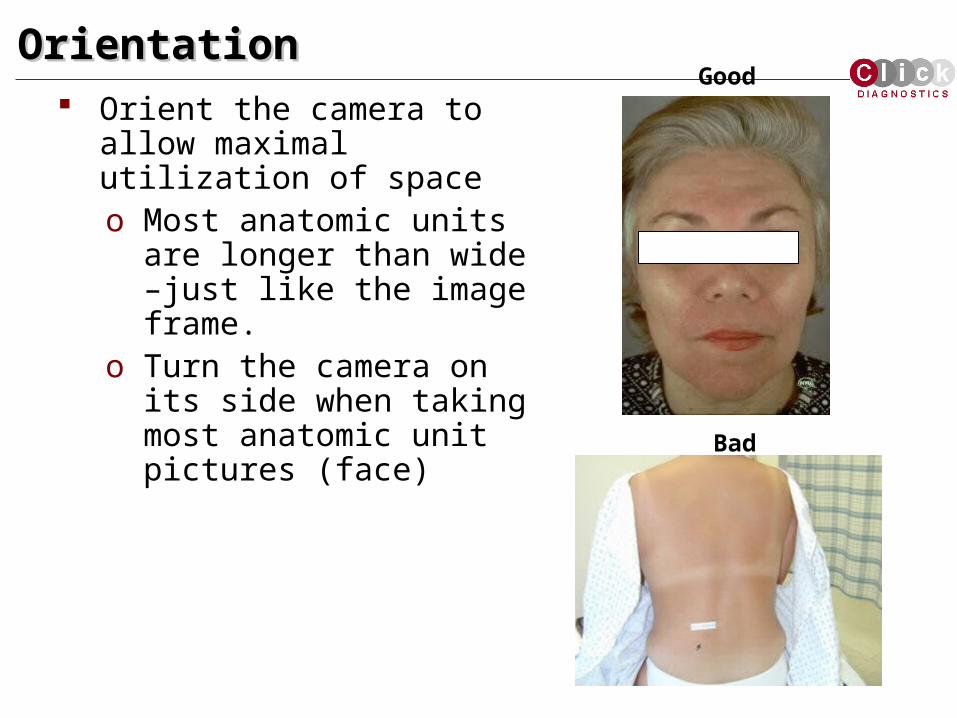
OrientationOrientation Orient the camera to allow
maximal utilization of spaceo Most anatomic units are
longer than wide –just like the image frame.
o Turn the camera on its side when taking most anatomic unit pictures (face)
Good
Bad
© ClickDiagnostics, Inc. 2008
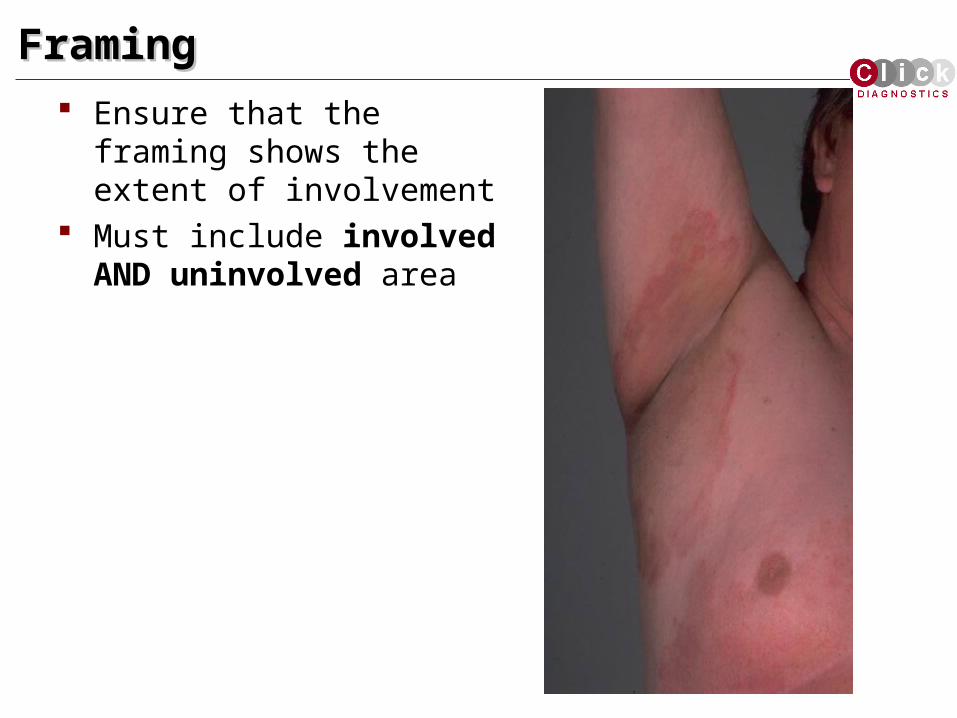
FramingFraming Ensure that the framing shows
the extent of involvement Must include involved AND
uninvolved area
© ClickDiagnostics, Inc. 2008
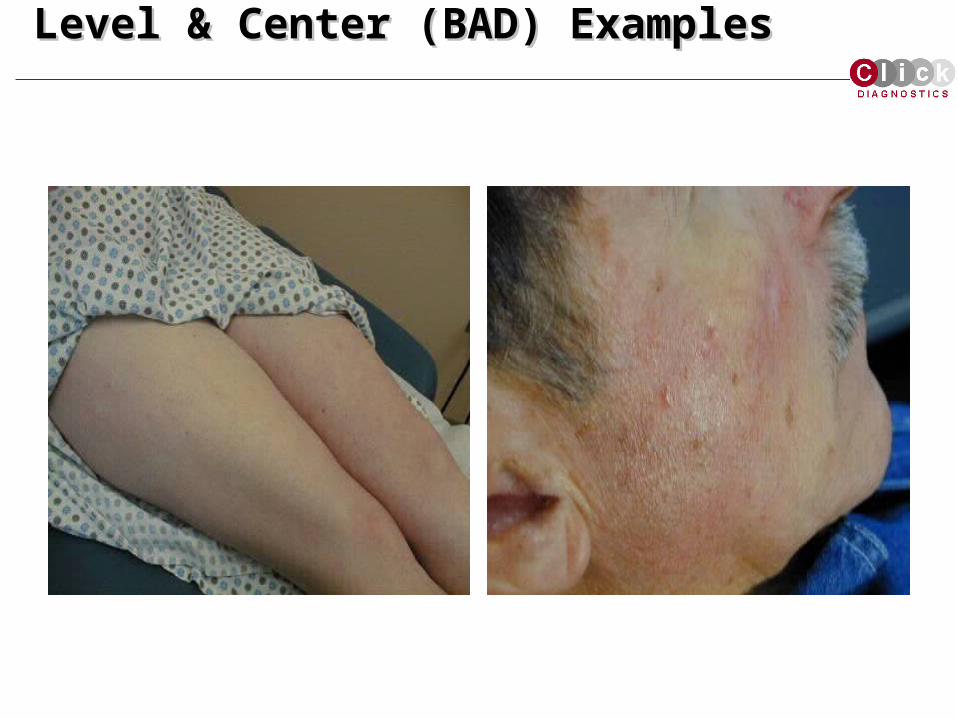
Level & Center (BAD) ExamplesLevel & Center (BAD) Examples
© ClickDiagnostics, Inc. 2008
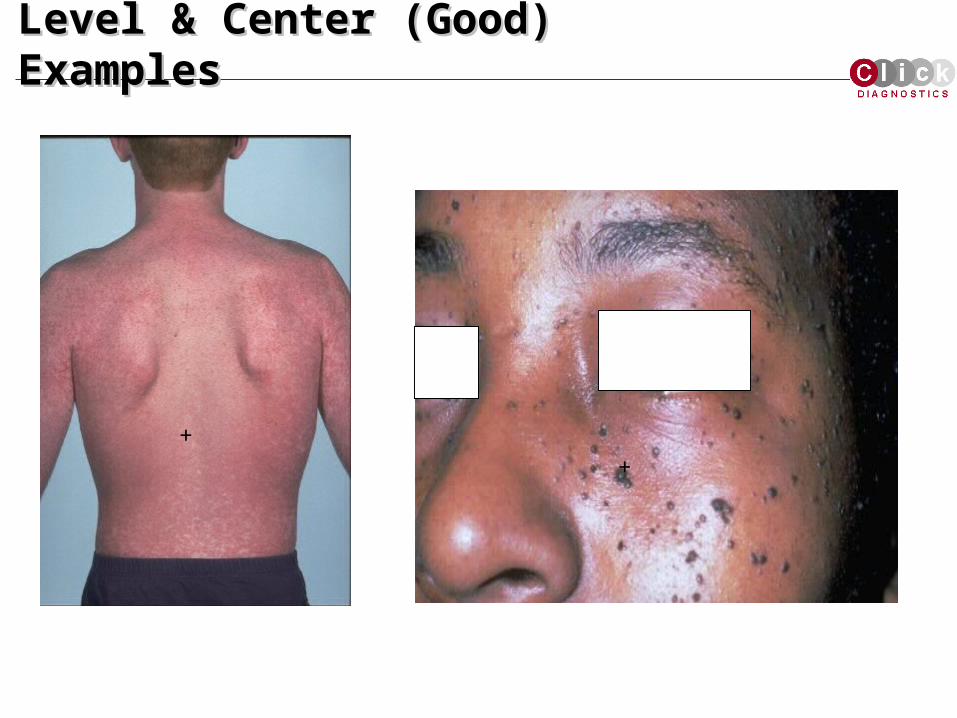
Level & Center (Good) ExamplesLevel & Center (Good) Examples
++
© ClickDiagnostics, Inc. 2008
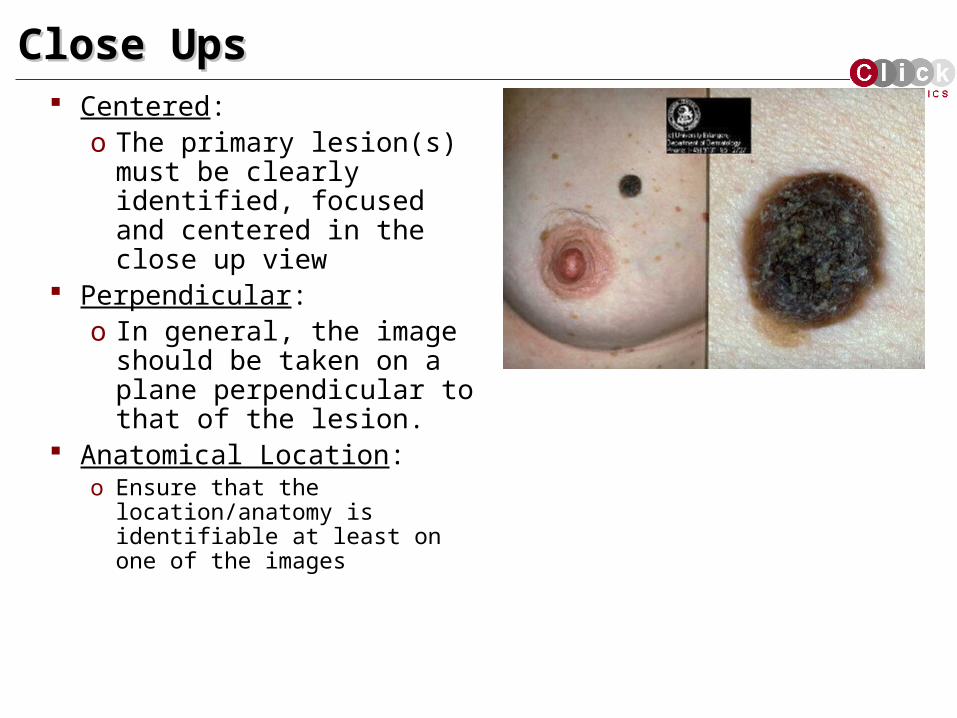
Close UpsClose Ups Centered:
o The primary lesion(s) must be clearly identified, focused and centered in the close up view
Perpendicular: o In general, the image
should be taken on a plane perpendicular to that of the lesion.
Anatomical Location: o Ensure that the
location/anatomy is identifiable at least on one of the images
© ClickDiagnostics, Inc. 2008
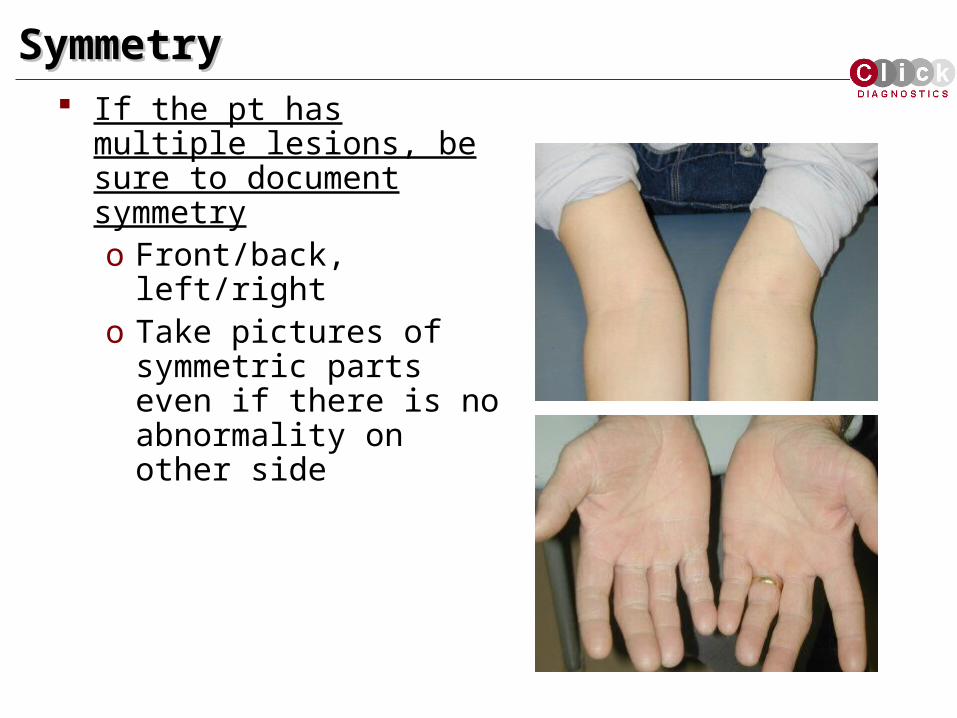
SymmetrySymmetry If the pt has multiple lesions, be
sure to document symmetryo Front/back, left/righto Take pictures of symmetric
parts even if there is no abnormality on other side
© ClickDiagnostics, Inc. 2008
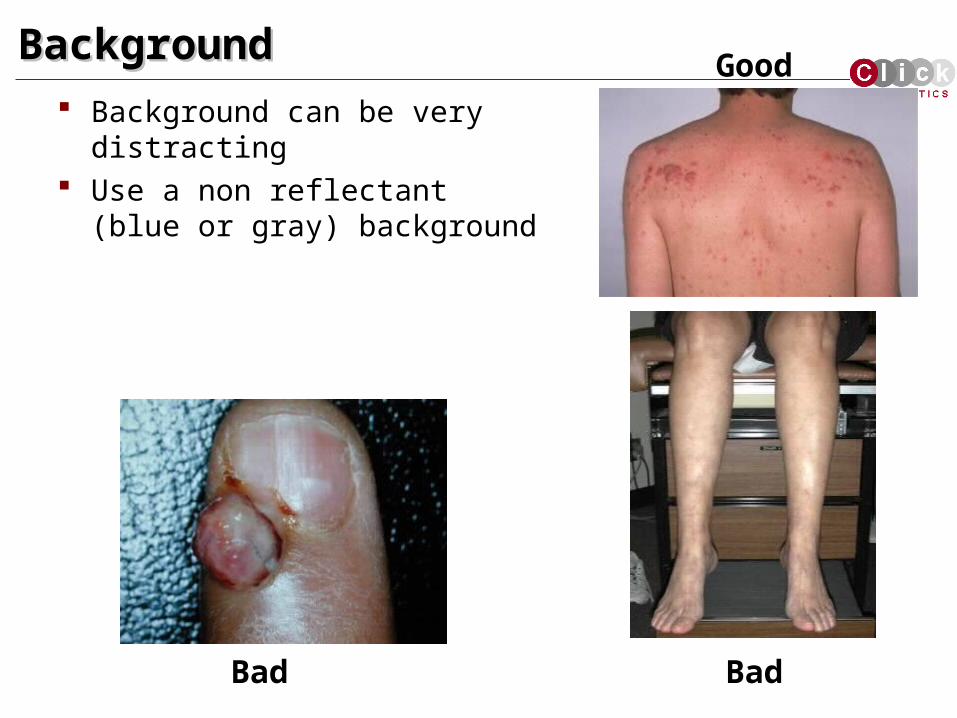
BackgroundBackground Background can be very
distracting Use a non reflectant (blue or gray)
background
Good
BadBad
© ClickDiagnostics, Inc. 2008
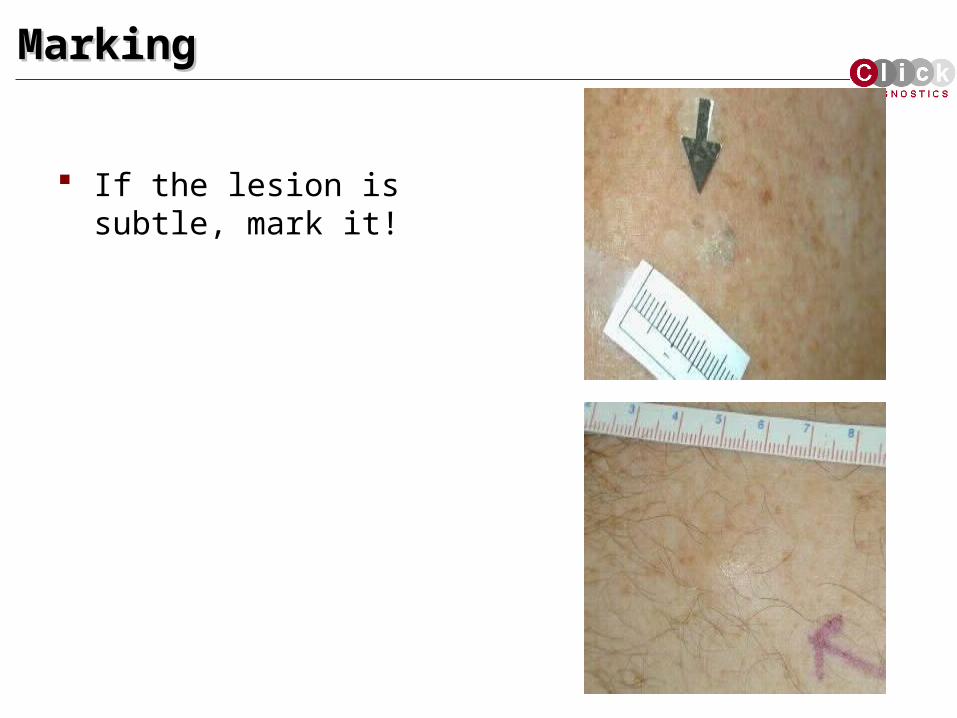
MarkingMarking
If the lesion is subtle, mark it!
© ClickDiagnostics, Inc. 2008
Preparation of room/patientPreparation of room/patient Room size 10’ minimum
o Full length photo Dark blue/ Green non-reflectant cloth
o Background (Wall)o Portable drape
Well lit roomo Avoid direct light (window)
Stools/ Exam Table
© ClickDiagnostics, Inc. 2008
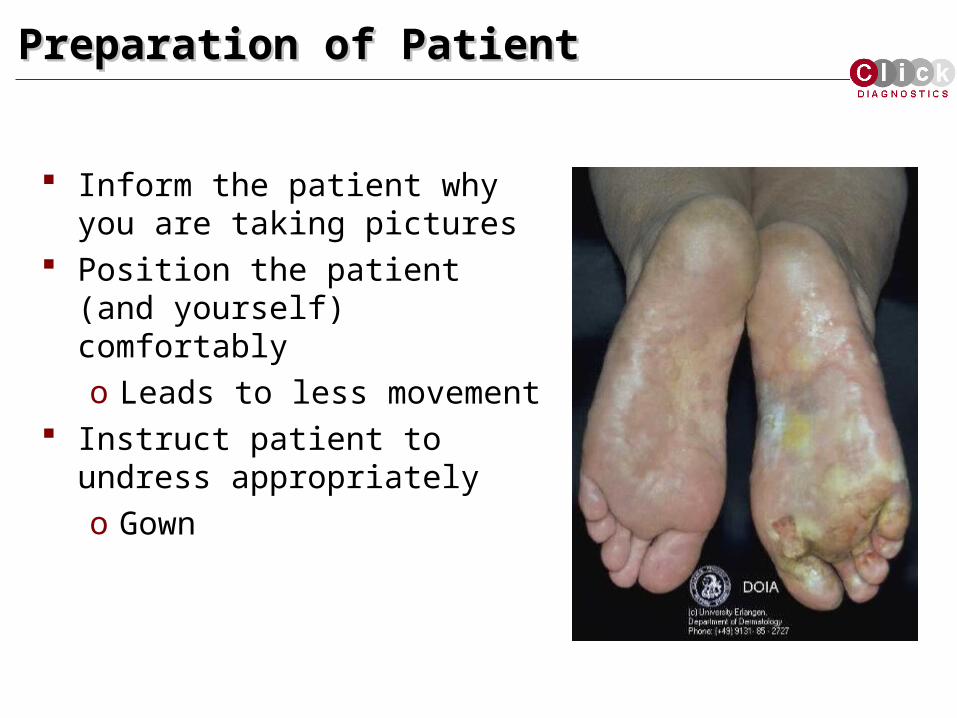
Preparation of PatientPreparation of Patient
Inform the patient why you are taking pictures
Position the patient (and yourself) comfortably o Leads to less movement
Instruct patient to undress appropriatelyo Gown

© ClickDiagnostics, Inc. 2008
Acknowledgements Dr. Hon Pak