Embed Size (px)
Citation preview
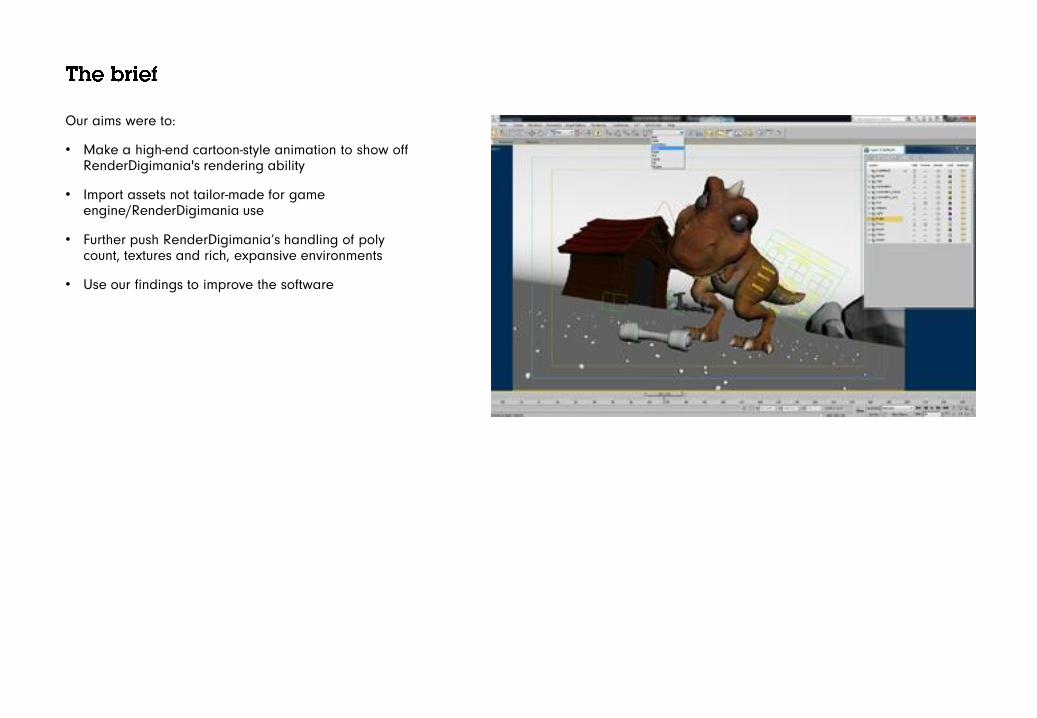
Our aims were to:
• Make a high-end cartoon-style animation to show off RenderDigimania's rendering ability
• Import assets not tailor-made for game engine/RenderDigimania use
• Further push RenderDigimania’s handling of poly count, textures and rich, expansive environments
• Use our findings to improve the software
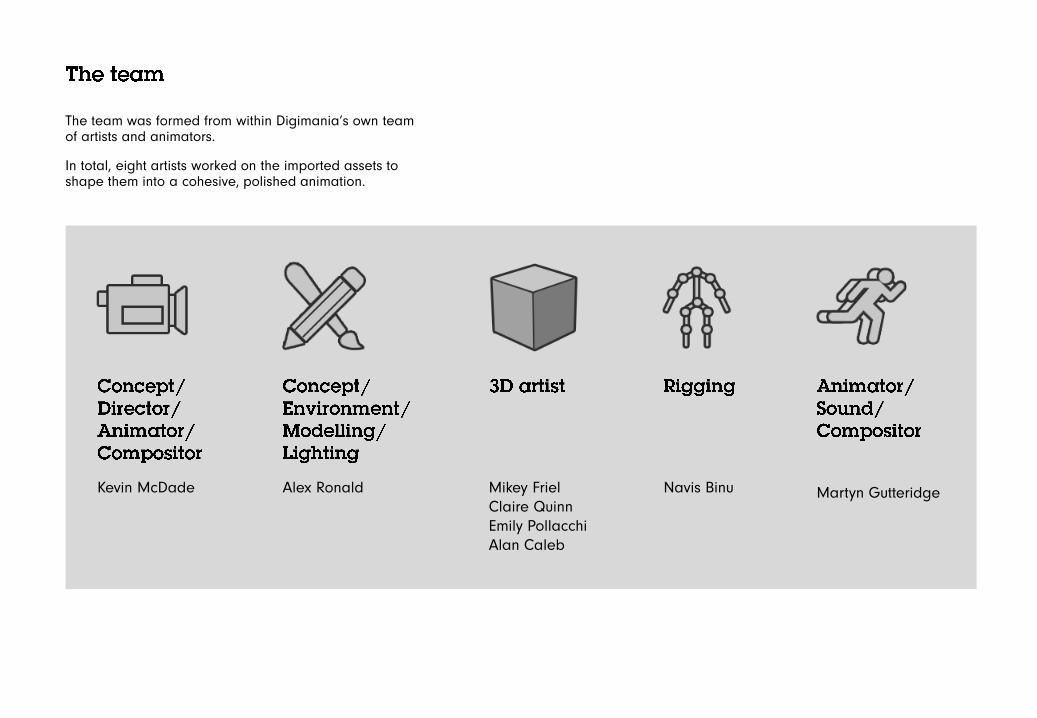
The team was formed from within Digimania’s own team of artists and animators.
In total, eight artists worked on the imported assets to shape them into a cohesive, polished animation.
Kevin McDade Alex Ronald Mikey Friel Claire Quinn Emily Pollacchi Alan Caleb
Navis Binu Martyn Gutteridge
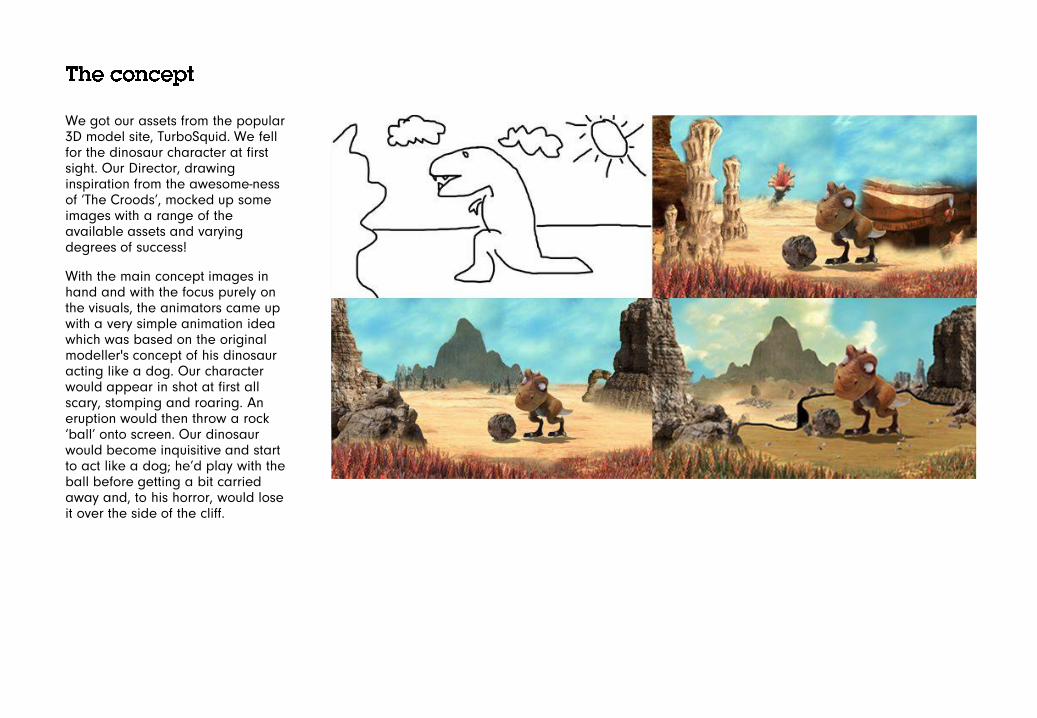
We got our assets from the popular 3D model site, TurboSquid. We fell for the dinosaur character at first sight. Our Director, drawing inspiration from the awesome-ness of ‘The Croods’, mocked up some images with a range of the available assets and varying degrees of success!
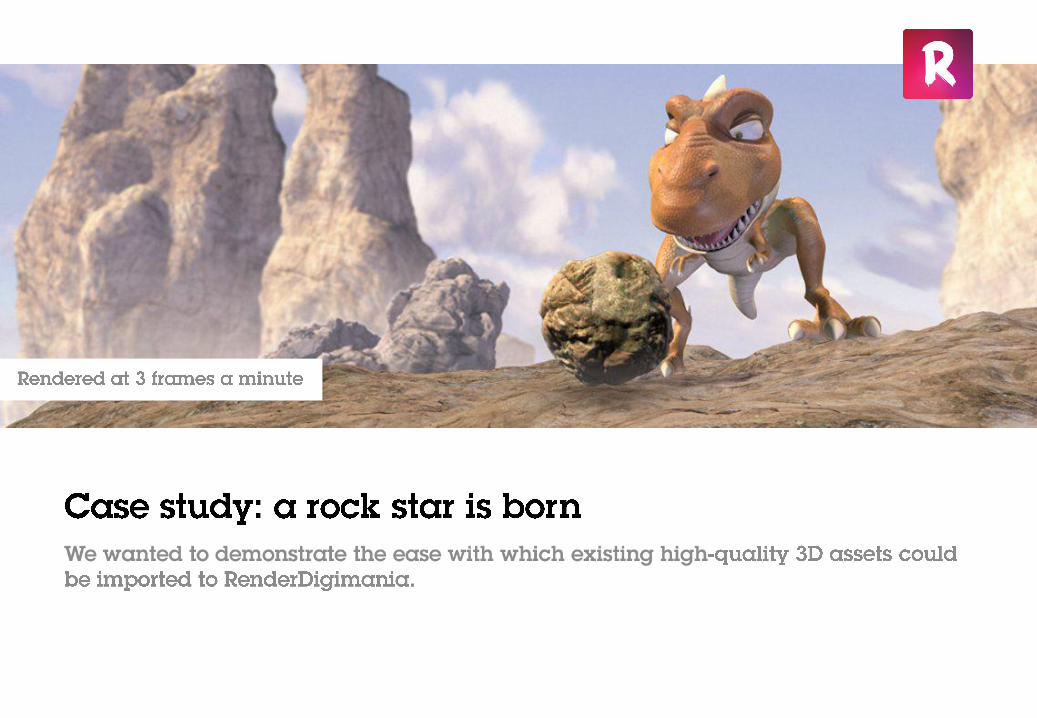
With the main concept images in hand and with the focus purely on the visuals, the animators came up with a very simple animation idea which was based on the original modeller's concept of his dinosaur acting like a dog. Our character would appear in shot at first all scary, stomping and roaring. An eruption would then throw a rock ‘ball’ onto screen. Our dinosaur would become inquisitive and start to act like a dog; he’d play with the ball before getting a bit carried away and, to his horror, would lose it over the side of the cliff.
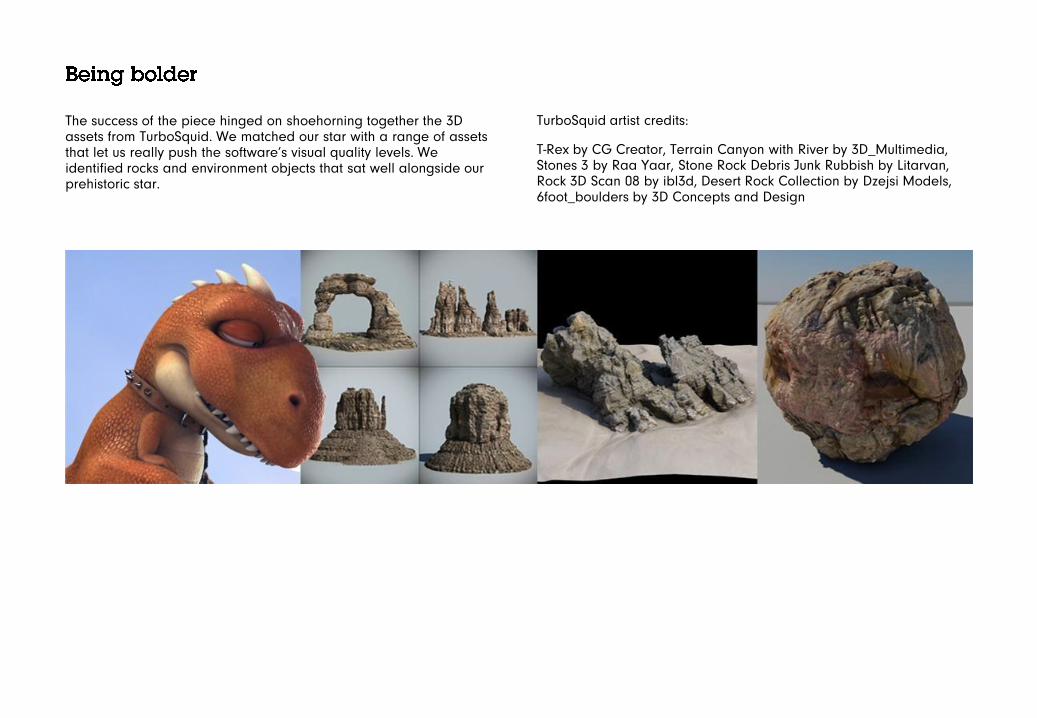
The success of the piece hinged on shoehorning together the 3D assets from TurboSquid. We matched our star with a range of assets that let us really push the software’s visual quality levels. We identified rocks and environment objects that sat well alongside our prehistoric star.
TurboSquid artist credits:
T-Rex by CG Creator, Terrain Canyon with River by 3D_Multimedia, Stones 3 by Raa Yaar, Stone Rock Debris Junk Rubbish by Litarvan, Rock 3D Scan 08 by ibl3d, Desert Rock Collection by Dzejsi Models, 6foot_boulders by 3D Concepts and Design
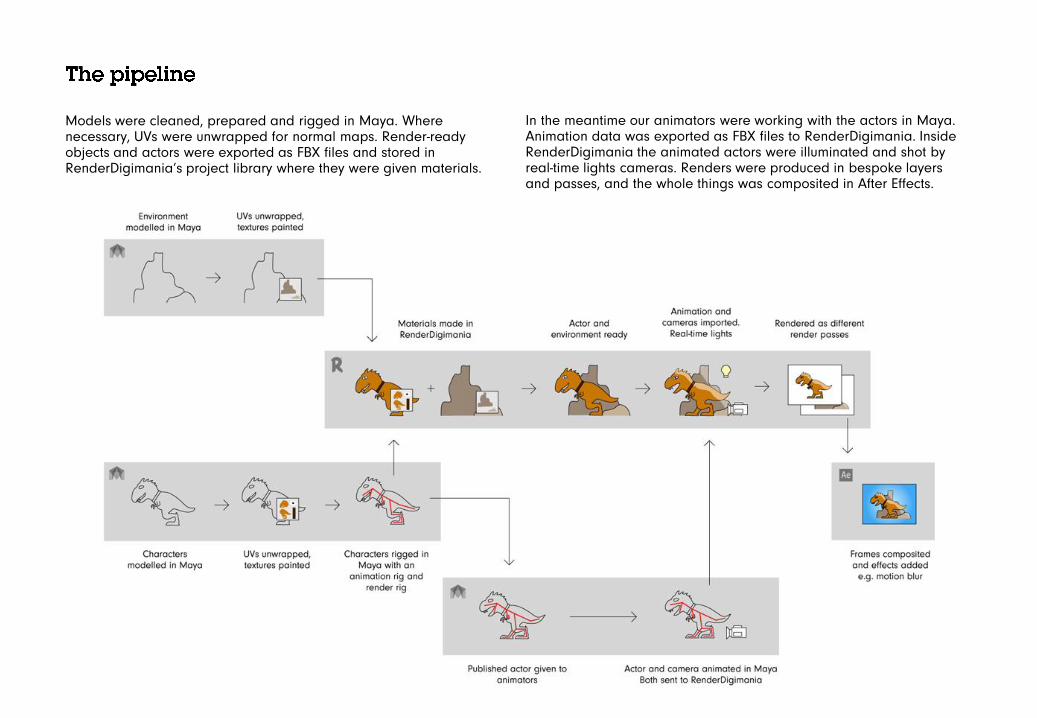
Models were cleaned, prepared and rigged in Maya. Where necessary, UVs were unwrapped for normal maps. Render-ready objects and actors were exported as FBX files and stored in RenderDigimania’s project library where they were given materials.
In the meantime our animators were working with the actors in Maya. Animation data was exported as FBX files to RenderDigimania. Inside RenderDigimania the animated actors were illuminated and shot by real-time lights cameras. Renders were produced in bespoke layers and passes, and the whole things was composited in After Effects.

• Rigid – maximum of 65 thousand vertices • Skeletal – each material applied to the
mesh can support 65 thousand vertices
When models were imported it was important to consider what role each asset had. An environment asset was best imported as a rigid mesh. A character model, which required animation, was imported as a skeletal mesh. Skeletal meshes could have as many materials assigned to them as needed.
Each material could support 65 thousand vertices which in turn allowed artists to create incredibly high-detail models. Rigid meshes lacked a skeleton hierarchy so their role in the production pipeline was different. Rigid meshes could have up to 65 thousand vertices and were generally used as environment building blocks.
It is important to understand which mesh type is best suited to your modelling needs

Some of the other steps we worked through to get the best from the TurboSquid assets in RenderDigimania were:
• Some objects were ported from 3DS Max to Maya
• UV sets were cleaned to remove overlaps
• Surface normals were conformed
• Holes or gaps in the geometry were fixed
• The background models were sometime retopologised to lower the polycounts. Detail was retained in normal maps
• Some material nodes were converted to phong
Cleaning the imported assets and working around the poly limits were the only deviations from the conventional RenderDigimania processes.
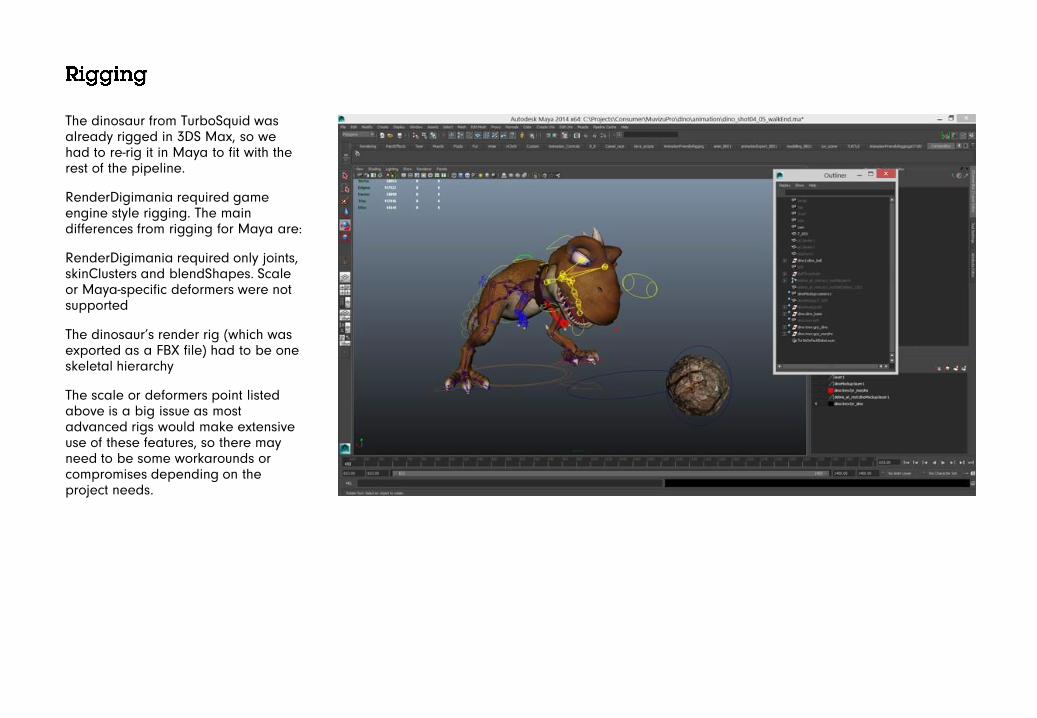
The dinosaur from TurboSquid was already rigged in 3DS Max, so we had to re-rig it in Maya to fit with the rest of the pipeline.
RenderDigimania required game engine style rigging. The main differences from rigging for Maya are:
RenderDigimania required only joints, skinClusters and blendShapes. Scale or Maya-specific deformers were not supported
The dinosaur’s render rig (which was exported as a FBX file) had to be one skeletal hierarchy
The scale or deformers point listed above is a big issue as most advanced rigs would make extensive use of these features, so there may need to be some workarounds or compromises depending on the project needs.
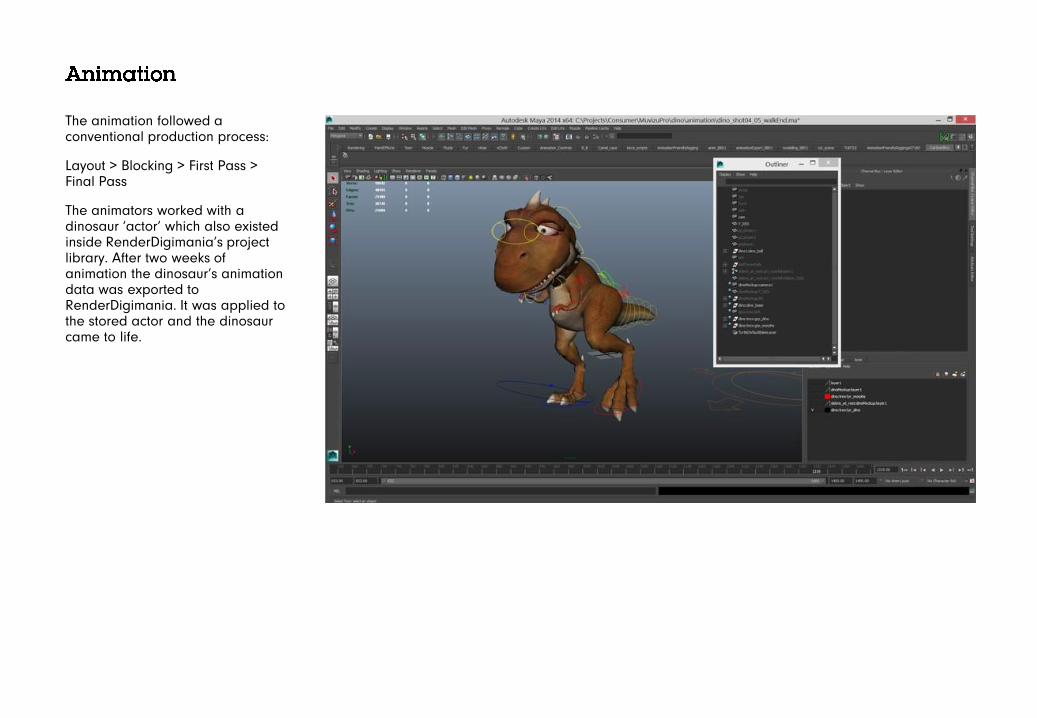
The animation followed a conventional production process:
Layout > Blocking > First Pass > Final Pass
The animators worked with a dinosaur ‘actor’ which also existed inside RenderDigimania’s project library. After two weeks of animation the dinosaur’s animation data was exported to RenderDigimania. It was applied to the stored actor and the dinosaur came to life.
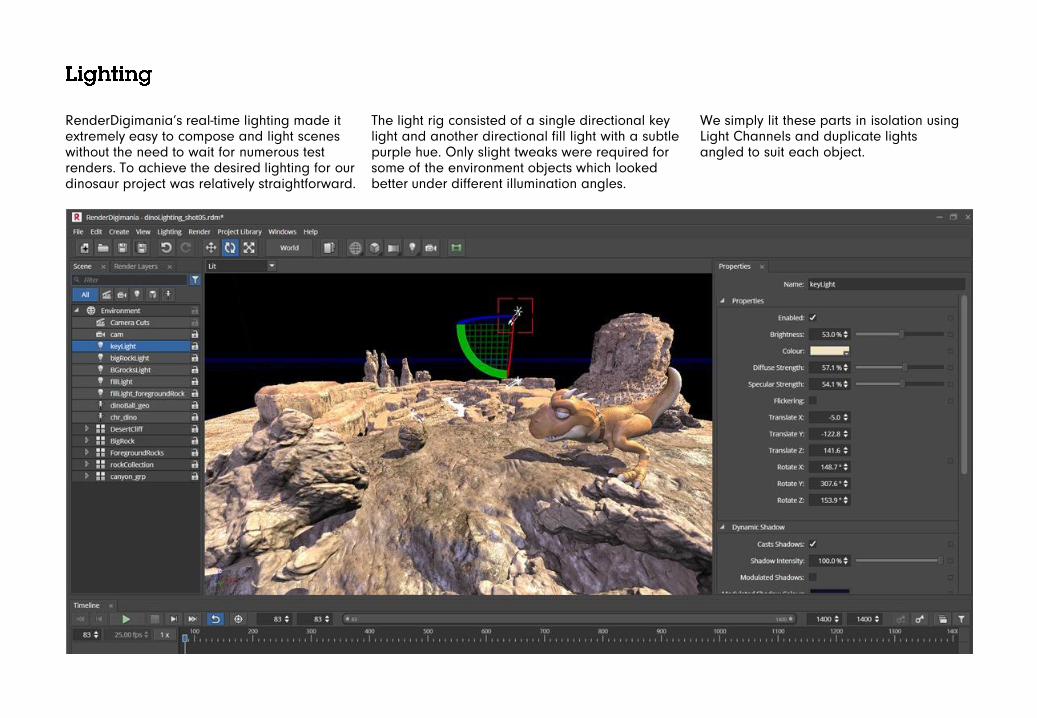
We simply lit these parts in isolation using Light Channels and duplicate lights angled to suit each object.
RenderDigimania’s real-time lighting made it extremely easy to compose and light scenes without the need to wait for numerous test renders. To achieve the desired lighting for our dinosaur project was relatively straightforward.
The light rig consisted of a single directional key light and another directional fill light with a subtle purple hue. Only slight tweaks were required for some of the environment objects which looked better under different illumination angles.

No. of PCs: 1 CPU: Intel i7-3770, 3.4 GHz RAM: 8 Gb Graphics card: GeForce GTX 660
No. of rigid meshes: 78 No. of skeletal meshes: 4 No. of triangles: 4,647,113
Size: 1920 x 1080 For each frame: 8 Render layers 5 Render passes 33 HD files created Preview render rate: 7 Frames per minute (231 HD files per minute) Final render rate: 3 Frames per minute (99 HD files per minute)
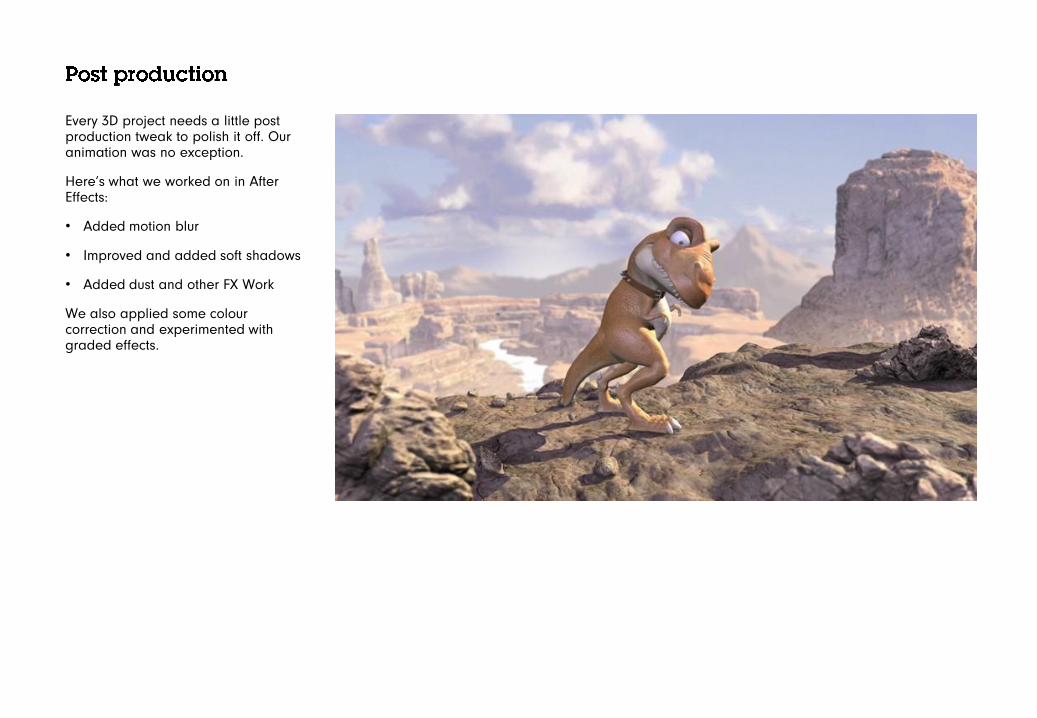
Every 3D project needs a little post production tweak to polish it off. Our animation was no exception.
Here’s what we worked on in After Effects:
• Added motion blur
• Improved and added soft shadows
• Added dust and other FX Work
We also applied some colour correction and experimented with graded effects.

We were extremely pleased with our Dinosaur animation. The process to bring someone else’s TurboSquid models into RenderDigimania was relatively smooth; only a little tinkering was required. The current version of the software was improved by lessons that were learned from this project.
Traditional rendering takes time. It’s painful. It’s expensive. It eats budget. We think it’s time to bite back.