Embed Size (px)
Citation preview

Free Sample
In this package, you will find: • The authors biography • A preview chapter from the book, Chapter 2 'HTTP and Working with
the Web' • A synopsis of the book’s content • More information on Learning Python Network Programming

About the Authors
Dr. M. O. Faruque Sarker is a software architect based in London, UK, where he has been shaping various Linux and open source software solutions, mainly on cloud computing platforms, for commercial companies, educational institutions, and multinational consultancies. Over the past 10 years, he has been leading a number of Python software development and cloud infrastructure automation projects. In 2009, he started using Python, where he was responsible for shepherding a fl eet of miniature E-puck robots at the University of South Wales, Newport, UK. Later, he honed his Python skills, and he was invited to work on the Google Summer of Code (2009/2010) programs for contributing to the BlueZ and Tahoe-LAFS open source projects. He is the author of Python Network Programming Cookbook, Packt Publishing.
He received his PhD in multirobot systems from the University of South Wales. He is currently working at University College London. He takes an active interest in cloud computing, software security, intelligent systems, and child-centric education. He lives in East London with his wife, Shahinur, and daughter, Ayesha.
Sam Washington currently works at University College London as a member of its Learning and Teaching Applications team, developing and supporting the University's Moodle virtual learning environment, its wikis and blogs, and its online media services. Prior to this, he was a system administrator for UCL's several museums. He has working experience of managing the demands of varied web applications, and deploying and supporting Windows, Linux, and TCP/IP networks. He has been using Python for professional and personal projects for over 7 years.
PrefaceWelcome to the world of network programming with Python. Python is a full-featured object-oriented programming language with a standard library that includes everything needed to rapidly build powerful network applications. In addition, it has a multitude of third-party libraries and packages that extend Python to every sphere of network programming. Combined with the fun of using Python, with this book, we hope to get you started on your journey so that you master these tools and produce some great networking code.
In this book, we are squarely targeting Python 3. Although Python 3 is still establishing itself as the successor to Python 2, version 3 is the future of the language, and we want to demonstrate that it is ready for network programming prime time. It offers many improvements over the previous version, many of which improve the network programming experience, with enhanced standard library modules and new additions.
We hope you enjoy this introduction to network programming with Python.
What this book coversChapter 1, Network Programming and Python, introduces core networking concepts for readers that are new to networking, and also covers how network programming is approached in Python.
Chapter 2, HTTP and Working with the Web, introduces you to the HTTP protocol and covers how we can retrieve and manipulate web content using Python as an HTTP client. We also take a look at the standard library urllib and third-party Requests modules.
Preface
Chapter 3, APIs in Action, introduces you to working with web APIs using HTTP. We also cover the XML and JSON data formats, and walk you through developing applications using the Amazon Web Services Simple Storage Service (S3) and Twitter APIs.
Chapter 4, Engaging with E-mails, covers the principle protocols used in sending and receiving e-mails, such as SMTP, POP3, and IMAP, and how to work with them in Python 3.
Chapter 5, Interacting with Remote Systems, guides you through the ways of using Python to connect to servers and performing common administrative tasks, including the execution of shell commands through SSH, fi le transfers with FTP and SMB, authentication with LDAP, and to monitor systems with SNMP.
Chapter 6, IP and DNS, discusses the details of the Internet Protocol (IP), ways of working with IP in Python, and how to use DNS to resolve hostnames.
Chapter 7, Programming with Sockets, covers using TCP and UDP sockets from Python for writing low-level network applications. We also cover HTTPS and TLS for secure data transport.
Chapter 8, Client and Server Applications, looks at writing client and server programs for socket-based communication. By writing an echo application and a chat application we look at developing basic protocols, framing network data, and compare the multithreading and event-based server architectures.
Chapter 9, Applications for the Web, introduces you to writing web applications in Python. We cover the main approaches, methods of hosting Python web applications, and develop an example application in the Flask microframework.
Appendix, Working with Wireshark, covers packet sniffers, the installation of Wireshark, and how to capture and fi lter packets using the Wireshark application.
[ 29 ]
HTTP and Working with the Web
The Hypertext Transfer Protocol (HTTP) is probably the most widely-used application layer protocol. It was originally developed to allow academics to share HTML documents. Nowadays, it is used as the core protocol of innumerable applications across the Internet, and it is the principle protocol of the World Wide Web.
In this chapter, we will cover the following topics:
• The HTTP protocol structure• Using Python for talking to services through HTTP• Downloading files• HTTP capabilities, such as compression and cookies• Handling errors• URLs• The Python standard library urllib package• Kenneth Reitz's third-party Requests package
The urllib package is the recommended Python standard library package for HTTP tasks. The standard library also has a low-level module called http. Although this offers access to almost all aspects of the protocol, it has not been designed for everyday use. The urllib package has a simpler interface, and it deals with everything that we are going to cover in this chapter.
HTTP and Working with the Web
[ 30 ]
The third-party Requests package is a very popular alternative to urllib. It has an elegant interface and a powerful featureset, and it is a great tool for streamlining HTTP workfl ows. We'll be discussing how it can be used in place of urllib at the end of the chapter.
Request and responseHTTP is an application layer protocol, and it is almost always used on top of TCP. The HTTP protocol has been deliberately defi ned to use a human-readable message format, but it can still be used for transporting arbitrary bytes data.
An HTTP exchange consists of two elements. A request made by the client, which asks the server for a particular resource specifi ed by a URL, and a response, sent by the server, which supplies the resource that the client has asked for. If the server can't provide the resource that the client has requested, then the response will contain information about the failure.
This order of events is fi xed in HTTP. All interactions are initiated by the client. The server never sends anything to the client without the client explicitly asking for it.
This chapter will teach you how to use Python as an HTTP client. We will learn how to make requests to servers and then interpret their responses. We will look at writing server-side applications in Chapter 9, Applications for the Web.
By far, the most widely used version of HTTP is 1.1, defi ned in RFCs 7230 to 7235. HTTP 2 is the latest version, which was offi cially ratifi ed just as this book was going to press. Most of the semantics and syntax remain the same between versions 1.1 and 2, the main changes are in how the TCP connections are utilised. As of now, HTTP 2 isn't widely supported, so we will focus on version 1.1 in this book. If you do want to know more, HTTP 2 is documented in RFCs 7540 and 7541.
HTTP version 1.0, documented in RFC 1945, is still used by some older softwares. Version 1.1 is backwards-compatible with 1.0 though, and the urllib package and Requests both support HTTP 1.1, so when we're writing a client with Python we don't need to worry about whether we're connecting to an HTTP 1.0 server. It's just that some more advanced features are not available. Almost all services nowadays use version 1.1, so we won't go into the differences here. The stack overfl ow question is, a good starting point, if you need further information: http://stackoverflow.com/questions/246859/http-1-0-vs-1-1.
Chapter 2
[ 31 ]
Requests with urllibWe have already seen some examples of HTTP exchanges while discussing the RFC downloaders in Chapter 1, Network Programming and Python. The urllib package is broken into several submodules for dealing with the different tasks that we may need to perform when working with HTTP. For making requests and receiving responses, we employ the urllib.request module.
Retrieving the contents of a URL is a straightforward process when done using urllib. Load your Python interpreter and do the following:
>>> from urllib.request import urlopen
>>> response = urlopen('http://www.debian.org')
>>> response
<http.client.HTTPResponse object at 0x7fa3c53059b0>
>>> response.readline()
b'<!DOCTYPE HTML PUBLIC "-//W3C//DTD HTML 4.01//EN" "http://www.w3.org/TR/html4/strict.dtd">\n'
We use the urllib.request.urlopen() function for sending a request and receiving a response for the resource at http://www.debian.org, in this case an HTML page. We will then print out the fi rst line of the HTML we receive.
Response objectsLet's take a closer look at our response object. We can see from the preceding example that urlopen() returns an http.client.HTTPResponse instance. The response object gives us access to the data of the requested resource, and the properties and the metadata of the response. To view the URL for the response that we received in the previous section, do this:
>>> response.url
'http://www.debian.org'
We get the data of the requested resource through a fi le-like interface using the readline() and read() methods. We saw the readline() method in the previous section. This is how we use the read() method:
>>> response = urlopen('http://www.debian.org')
>>> response.read(50)
b'g="en">\n<head>\n <meta http-equiv="Content-Type" c'
HTTP and Working with the Web
[ 32 ]
The read() method returns the specifi ed number of bytes from the data. Here it's the fi rst 50 bytes. A call to the read() method with no argument will return all the data in one go.
The fi le-like interface is limited. Once the data has been read, it's not possible to go back and re-read it by using either of the aforementioned functions. To demonstrate this, try doing the following:
>>> response = urlopen('http://www.debian.org')
>>> response.read()
b'<!DOCTYPE HTML PUBLIC "-//W3C//DTD HTML 4.01//EN" "http://www.w3.org/TR/html4/strict.dtd">\n<html lang="en">\n<head>\n <meta http-equiv
...
>>> response.read()
b''
We can see that when we call the read() function a second time it returns an empty string. There are no seek() or rewind() methods, so we cannot reset the position. Hence, it's best to capture the read() output in a variable.
Both readline() and read() functions return bytes objects, and neither http nor urllib will make any effort to decode the data that they receive to Unicode. Later on in the chapter, we'll be looking at a way in which we can handle this with the help of the Requests library.
Status codesWhat if we wanted to know whether anything unexpected had happened to our request? Or what if we wanted to know whether our response contained any data before we read the data out? Maybe we're expecting a large response, and we want to quickly see if our request has been successful without reading the whole response.
HTTP responses provide a means for us to do this through status codes. We can read the status code of a response by using its status attribute.
>>> response.status
200
Status codes are integers that tell us how the request went. The 200 code informs us that everything went fi ne.
Chapter 2
[ 33 ]
There are a number of codes, and each one conveys a different meaning. According to their fi rst digit, status codes are classifi ed into the following groups:
• 100: Informational• 200: Success• 300: Redirection• 400: Client error• 500: Server error
A few of the more frequently encountered codes and their messages are as follows:
• 200: OK• 404: Not Found• 500: Internal Server Error
The offi cial list of status codes is maintained by IANA and it can be found at https://www.iana.org/assignments/http-status-codes. We'll be looking at various codes in this chapter.
Handling problemsStatus codes help us to see whether our response was successful or not. Any code in the 200 range indicates a success, whereas any code in either the 400 range or the 500 range indicates failure.
Status codes should always be checked so that our program can respond appropriately if something goes wrong. The urllib package helps us in checking the status codes by raising an exception if it encounters a problem.
Let's go through how to catch these and handle them usefully. For this try the following command block:
>>> import urllib.error
>>> from urllib.request import urlopen
>>> try:
... urlopen('http://www.ietf.org/rfc/rfc0.txt')
... except urllib.error.HTTPError as e:
... print('status', e.code)
HTTP and Working with the Web
[ 34 ]
... print('reason', e.reason)
... print('url', e.url)
...
status: 404
reason: Not Found
url: http://www.ietf.org/rfc/rfc0.txt
Here we've requested RFC 0, which doesn't exist. So the server has returned a 404 status code, and urllib has spotted this and raised an HTTPError.
You can see that HTTPError provide useful attributes regarding the request. In the preceding example, we used the status, reason, and url attributes to get some information about the response.
If something goes wrong lower in the network stack, then the appropriate module will raise an exception. The urllib package catches these exceptions and then wraps them as URLErrors. For example, we might have specifi ed a host or an IP address that doesn't exist, as shown here:
>>> urlopen('http://192.0.2.1/index.html')
...
urllib.error.URLError: <urlopen error [Errno 110] Connection timed out>
In this instance, we have asked for index.html from the 192.0.2.1. host. The 192.0.2.0/24 IP address range is reserved to be used by documentation only, so you will never encounter a host using the preceding IP address. Hence the TCP connection times out and socket raises a timeout exception, which urllib catches, re-wraps, and re-raises for us. We can catch these exceptions in the same way as we did in the preceding example.
HTTP headersRequests, and responses are made up of two main parts, headers and a body. We briefl y saw some HTTP headers when we used our TCP RFC downloader in Chapter 1, Network Programming and Python. Headers are the lines of protocol-specifi c information that appear at the beginning of the raw message that is sent over the TCP connection. The body is the rest of the message. It is separated from the headers by a blank line. The body is optional, its presence depends on the type of request or response. Here's an example of an HTTP request:
GET / HTTP/1.1Accept-Encoding: identity
Chapter 2
[ 35 ]
Host: www.debian.comConnection: closeUser-Agent: Python-urllib/3.4
The fi rst line is called the request line. It is comprised of the request method, which is GET in this case, the path to the resource, which is / here, and the HTTP version, 1.1. The rest of the lines are request headers. Each line is comprised of a header name followed by a colon and a header value. The request in the preceding output only contains headers, it does not have a body.
Headers are used for several purposes. In a request they can be used for passing extra data, such as cookies and authorization credentials, and for asking the server for preferred formats of resources.
For example, an important header is the Host header. Many web server applications provide the ability to host more than one website on the same server using the same IP address. DNS aliases are set up for the various website domain names, so they all point to the same IP address. Effectively, the web server is given multiple hostnames, one for each website it hosts. IP and TCP (which HTTP runs on), can't be used to tell the server which hostname the client wants to connect to because both of them operate solely on IP addresses. The HTTP protocol allows the client to supply the hostname in the HTTP request by including a Host header.
We'll look at some more request headers in the following section.
Here's an example of a response:
HTTP/1.1 200 OKDate: Sun, 07 Sep 2014 19:58:48 GMTContent-Type: text/htmlContent-Length: 4729Server: ApacheContent-Language: en
<!DOCTYPE HTML PUBLIC "-//W3C//DTD HTML 4.01//EN" "http://www.w3.org/TR/html4/strict.dtd">\n...
The fi rst line contains the protocol version, the status code, and the status message. Subsequent lines contain the headers, a blank line, and then the body. In the response, the server can use headers to inform the client about things such as the length of the body, the type of content the response body contains, and the cookie data that the client should store.
HTTP and Working with the Web
[ 36 ]
Do the following to view a response object's headers:
>>> response = urlopen('http://www.debian.org)
>>> response.getheaders()
[('Date', 'Sun, 07 Sep 2014 19:58:48 GMT'), ('Server', 'Apache'), ('Content-Location', 'index.en.html'), ('Vary', 'negotiate,accept- language,Accept-Encoding')...
The getheaders() method returns the headers as a list of tuples of the form (header name, header value). A complete list of HTTP 1.1 headers and their meanings can be found in RFC 7231. Let's look at how to use some headers in requests and responses.
Customizing requestsTo make use of the functionality that headers provide, we add headers to a request before sending it. To do this, we can't just use urlopen(). We need to follow these steps:
• Create a Request object• Add headers to the request object• Use urlopen() to send the request object
We're going to learn how to customize a request for retrieving a Swedish version of the Debian home page. We will use the Accept-Language header, which tells the server our preferred language for the resource it returns. Note that not all servers hold versions of resources in multiple languages, so not all servers will respond to Accept-LanguageLinux home page.
First, we create a Request object:
>>> from urllib.request import Request
>>> req = Request('http://www.debian.org')
Next we add the header:
>>> req.add_header('Accept-Language', 'sv')
The add_header() method takes the name of the header and the contents of the header as arguments. The Accept-Language header takes two-letter ISO 639-1 language codes. The code for Swedish is sv.
Lastly, we submit the customized request with urlopen():
>>> response = urlopen(req)
Chapter 2
[ 37 ]
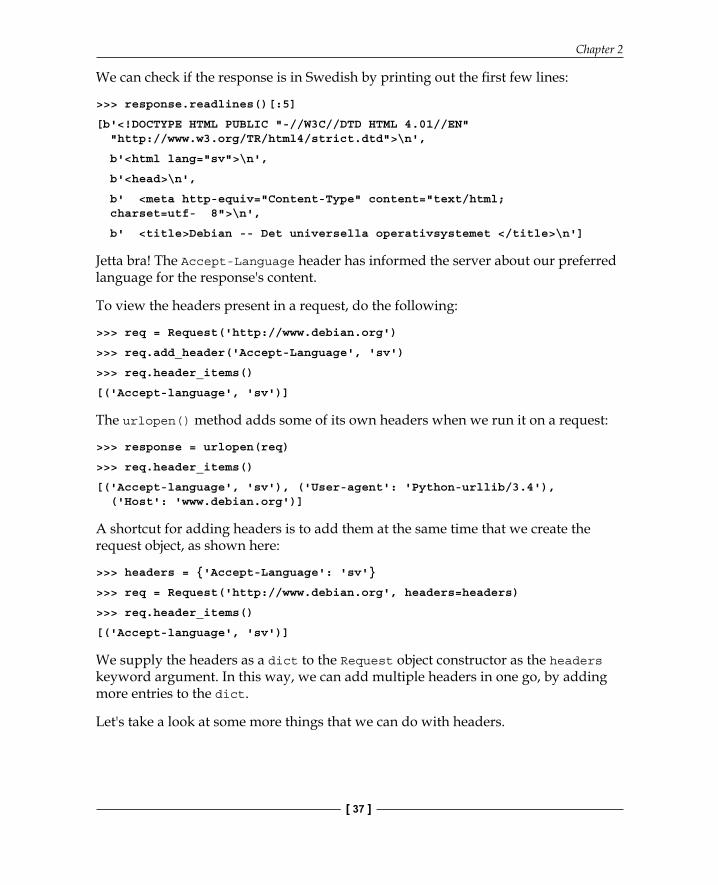
We can check if the response is in Swedish by printing out the fi rst few lines:
>>> response.readlines()[:5]
[b'<!DOCTYPE HTML PUBLIC "-//W3C//DTD HTML 4.01//EN" "http://www.w3.org/TR/html4/strict.dtd">\n',
b'<html lang="sv">\n',
b'<head>\n',
b' <meta http-equiv="Content-Type" content="text/html; charset=utf- 8">\n',
b' <title>Debian -- Det universella operativsystemet </title>\n']
Jetta bra! The Accept-Language header has informed the server about our preferred language for the response's content.
To view the headers present in a request, do the following:
>>> req = Request('http://www.debian.org')
>>> req.add_header('Accept-Language', 'sv')
>>> req.header_items()
[('Accept-language', 'sv')]
The urlopen() method adds some of its own headers when we run it on a request:
>>> response = urlopen(req)
>>> req.header_items()
[('Accept-language', 'sv'), ('User-agent': 'Python-urllib/3.4'), ('Host': 'www.debian.org')]
A shortcut for adding headers is to add them at the same time that we create the request object, as shown here:
>>> headers = {'Accept-Language': 'sv'}
>>> req = Request('http://www.debian.org', headers=headers)
>>> req.header_items()
[('Accept-language', 'sv')]
We supply the headers as a dict to the Request object constructor as the headers keyword argument. In this way, we can add multiple headers in one go, by adding more entries to the dict.
Let's take a look at some more things that we can do with headers.
HTTP and Working with the Web
[ 38 ]
Content compressionThe Accept-Encoding request header and the Content-Encoding response header can work together to allow us to temporarily encode the body of a response for transmission over the network. This is typically used for compressing the response and reducing the amount of data that needs to be transferred.
This process follows these steps:
• The client sends a request with acceptable encodings listed in an Accept-Encoding header
• The server picks an encoding method that it supports• The server encodes the body using this encoding method• The server sends the response, specifying the encoding it has used in a
Content-Encoding header• The client decodes the response body using the specified encoding method
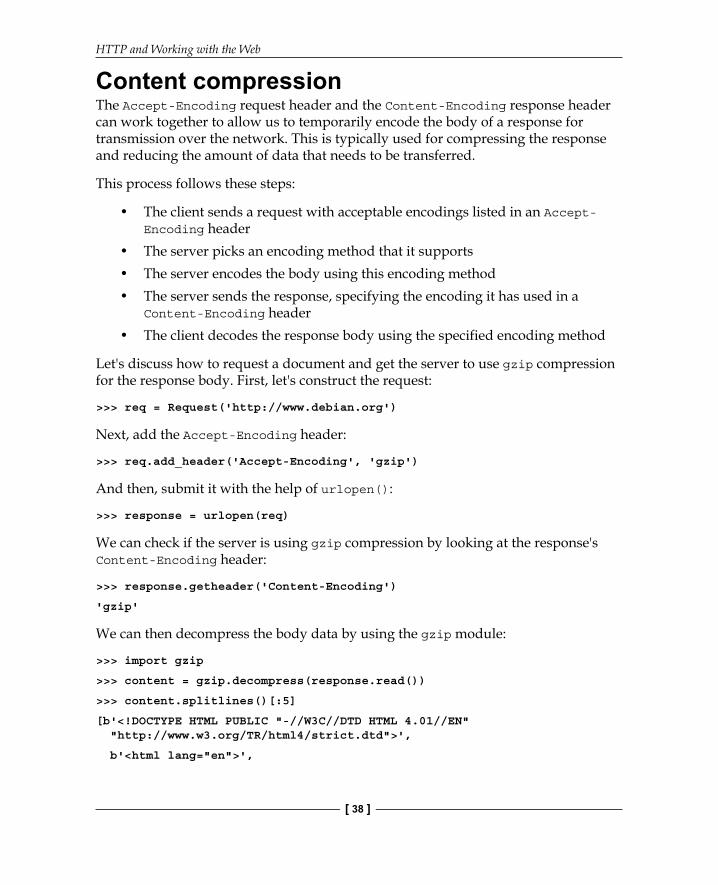
Let's discuss how to request a document and get the server to use gzip compression for the response body. First, let's construct the request:
>>> req = Request('http://www.debian.org')
Next, add the Accept-Encoding header:
>>> req.add_header('Accept-Encoding', 'gzip')
And then, submit it with the help of urlopen():
>>> response = urlopen(req)
We can check if the server is using gzip compression by looking at the response's Content-Encoding header:
>>> response.getheader('Content-Encoding')
'gzip'
We can then decompress the body data by using the gzip module:
>>> import gzip
>>> content = gzip.decompress(response.read())
>>> content.splitlines()[:5]
[b'<!DOCTYPE HTML PUBLIC "-//W3C//DTD HTML 4.01//EN" "http://www.w3.org/TR/html4/strict.dtd">',
b'<html lang="en">',
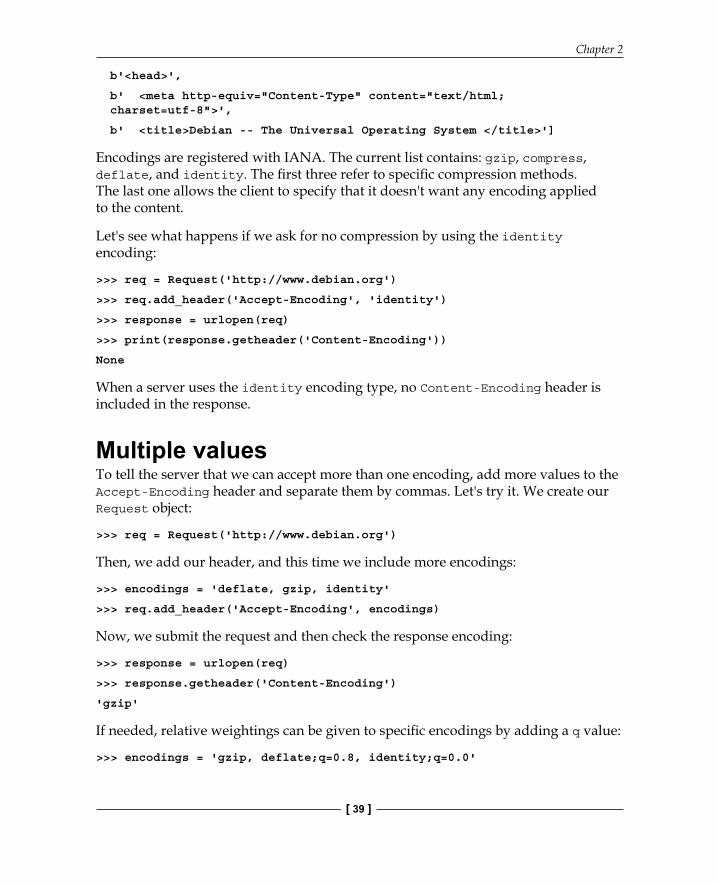
Chapter 2
[ 39 ]
b'<head>',
b' <meta http-equiv="Content-Type" content="text/html; charset=utf-8">',
b' <title>Debian -- The Universal Operating System </title>']
Encodings are registered with IANA. The current list contains: gzip, compress, deflate, and identity. The fi rst three refer to specifi c compression methods. The last one allows the client to specify that it doesn't want any encoding applied to the content.
Let's see what happens if we ask for no compression by using the identity encoding:
>>> req = Request('http://www.debian.org')
>>> req.add_header('Accept-Encoding', 'identity')
>>> response = urlopen(req)
>>> print(response.getheader('Content-Encoding'))
None
When a server uses the identity encoding type, no Content-Encoding header is included in the response.
Multiple valuesTo tell the server that we can accept more than one encoding, add more values to the Accept-Encoding header and separate them by commas. Let's try it. We create our Request object:
>>> req = Request('http://www.debian.org')
Then, we add our header, and this time we include more encodings:
>>> encodings = 'deflate, gzip, identity'
>>> req.add_header('Accept-Encoding', encodings)
Now, we submit the request and then check the response encoding:
>>> response = urlopen(req)
>>> response.getheader('Content-Encoding')
'gzip'
If needed, relative weightings can be given to specifi c encodings by adding a q value:
>>> encodings = 'gzip, deflate;q=0.8, identity;q=0.0'
HTTP and Working with the Web
[ 40 ]
The q value follows the encoding name, and it is separated by a semicolon. The maximum q value is 1.0, and this is also the default if no q value is given. So, the preceding line should be interpreted as my fi rst preference for encoding is gzip, my second preference is deflate, and my third preference is identity, if nothing else is available.
Content negotiationContent compression with the Accept-Encoding header and language selection with the Accept-Language header are examples of content negotiation, where the client specifi es its preferences regarding the format and the content of the requested resource. The following headers can also be used for this:
• Accept: For requesting a preferred file format• Accept-Charset: For requesting the resource in a preferred character set
There are additional aspects to the content negotiation mechanism, but because it's inconsistently supported and it can become quite involved, we won't be covering it in this chapter. RFC 7231 contain all the details that you need. Take a look at sections such as 3.4, 5.3, 6.4.1, and 6.5.6, if you fi nd that your application requires this.
Content typesHTTP can be used as a transport for any type of fi le or data. The server can use the Content-Type header in a response to inform the client about the type of data that it has sent in the body. This is the primary means an HTTP client determines how it should handle the body data that the server returns to it.
To view the content type, we inspect the value of the response header, as shown here:
>>> response = urlopen('http://www.debian.org')
>>> response.getheader('Content-Type')
'text/html'
The values in this header are taken from a list which is maintained by IANA. These values are variously called content types, Internet media types, or MIME types (MIME stands for Multipurpose Internet Mail Extensions, the specifi cation in which the convention was fi rst established). The full list can be found at http://www.iana.org/assignments/media-types.
Chapter 2
[ 41 ]
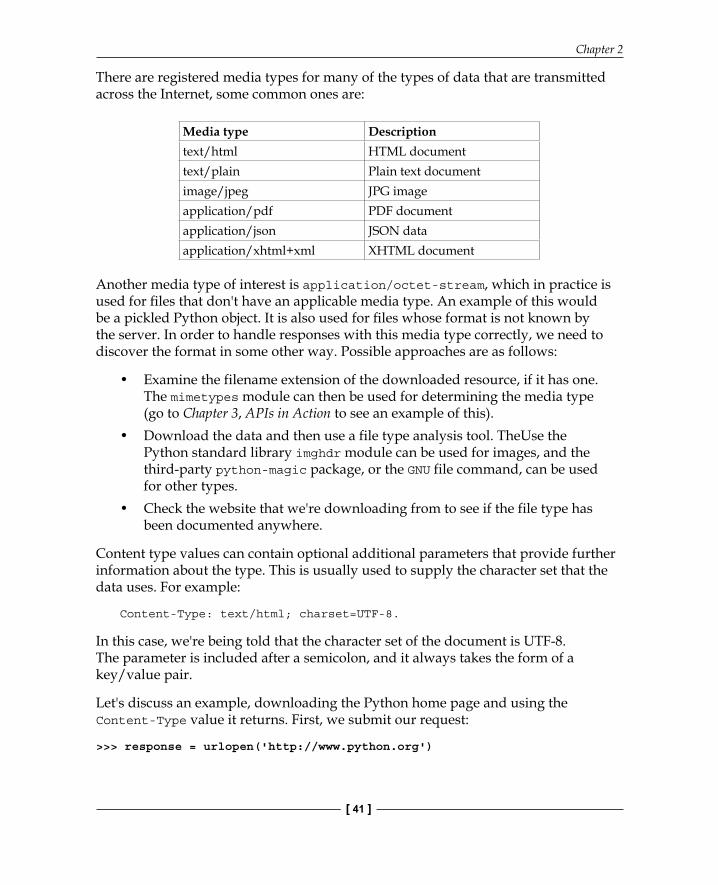
There are registered media types for many of the types of data that are transmitted across the Internet, some common ones are:
Media type Descriptiontext/html HTML documenttext/plain Plain text documentimage/jpeg JPG imageapplication/pdf PDF documentapplication/json JSON dataapplication/xhtml+xml XHTML document
Another media type of interest is application/octet-stream, which in practice is used for fi les that don't have an applicable media type. An example of this would be a pickled Python object. It is also used for fi les whose format is not known by the server. In order to handle responses with this media type correctly, we need to discover the format in some other way. Possible approaches are as follows:
• Examine the filename extension of the downloaded resource, if it has one. The mimetypes module can then be used for determining the media type (go to Chapter 3, APIs in Action to see an example of this).
• Download the data and then use a file type analysis tool. TheUse the Python standard library imghdr module can be used for images, and the third-party python-magic package, or the GNU file command, can be used for other types.
• Check the website that we're downloading from to see if the file type has been documented anywhere.
Content type values can contain optional additional parameters that provide further information about the type. This is usually used to supply the character set that the data uses. For example:
Content-Type: text/html; charset=UTF-8.
In this case, we're being told that the character set of the document is UTF-8. The parameter is included after a semicolon, and it always takes the form of a key/value pair.
Let's discuss an example, downloading the Python home page and using the Content-Type value it returns. First, we submit our request:
>>> response = urlopen('http://www.python.org')
HTTP and Working with the Web
[ 42 ]
Then, we check the Content-Type value of our response, and extract the character set:
>>> format, params = response.getheader('Content-Type').split(';')>>> params' charset=utf-8'>>> charset = params.split('=')[1]>>> charset'utf-8'
Lastly, we decode our response content by using the supplied character set:
>>> content = response.read().decode(charset)
Note that quite often, the server either doesn't supply a charset in the Content-Type header, or it supplies the wrong charset. So, this value should be taken as a suggestion. This is one of the reasons that we look at the Requests library later in this chapter. It will automatically gather all the hints that it can fi nd about what character set should be used for decoding a response body and make a best guess for us.
User agentsAnother request header worth knowing about is the User-Agent header. Any client that communicates using HTTP can be referred to as a user agent. RFC 7231 suggests that user agents should use the User-Agent header to identify themselves in every request. What goes in there is up to the software that makes the request, though it usually comprises a string that identifi es the program and version, and possibly the operating system and the hardware that it's running on. For example, the user agent for my current version of Firefox is shown here:
Mozilla/5.0 (X11; Linux x86_64; rv:24.0) Gecko/20140722 Firefox/24.0 Iceweasel/24.7.0
Although it has been broken over two lines here, it is a single long string. As you can probably decipher, I'm running Iceweasel (Debian's version of Firefox) version 24 on a 64-bit Linux system. User agent strings aren't intended for identifying individual users. They only identify the product that was used for making the request.
We can view the user agent that urllib uses. Perform the following steps:
>>> req = Request('http://www.python.org')>>> urlopen(req)>>> req.get_header('User-agent')'Python-urllib/3.4'
Chapter 2
[ 43 ]
Here, we have created a request and submitted it using urlopen, and urlopen added the user agent header to the request. We can examine this header by using the get_header() method. This header and its value are included in every request made by urllib, so every server we make a request to can see that we are using Python 3.4 and the urllib library.
Webmasters can inspect the user agents of requests and then use the information for various things, including the following:
• Classifying visits for their website statistics• Blocking clients with certain user agent strings• Sending alternative versions of resources for user agents with known
problems, such as bugs when interpreting certain languages like CSS, or not supporting some languages at all, such as JavaScript
The last two can cause problems for us because they can stop or interfere with us accessing the content that we're after. To work around this, we can try and set our user agent so that it mimics a well known browser. This is known as spoofi ng, as shown here:
>>> req = Request('http://www.debian.org')
>>> req.add_header('User-Agent', 'Mozilla/5.0 (X11; Linux x86_64; rv:24.0) Gecko/20140722 Firefox/24.0 Iceweasel/24.7.0')
>>> response = urlopen(req)
The server will respond as if our application is a regular Firefox client. User agent strings for different browsers are available on the web. I'm yet to come across a comprehensive resource for them, but Googling for a browser and version number will usually turn something up. Alternatively you can use Wireshark to capture an HTTP request made by the browser you want to emulate and look at the captured request's user agent header.
CookiesA cookie is a small piece of data that the server sends in a Set-Cookie header as a part of the response. The client stores cookies locally and includes them in any future requests that are sent to the server.
Servers use cookies in various ways. They can add a unique ID to them, which enables them to track a client as it accesses different areas of a site. They can store a login token, which will automatically log the client in, even if the client leaves the site and then accesses it later. They can also be used for storing the client's user preferences or snippets of personalizing information, and so on.
HTTP and Working with the Web
[ 44 ]
Cookies are necessary because the server has no other way of tracking a client between requests. HTTP is called a stateless protocol. It doesn't contain an explicit mechanism for a server to know for sure that two requests have come from the same client. Without cookies to allow the server to add some uniquely identifying information to the requests, things such as shopping carts (which were the original problem that cookies were developed to solve) would become impossible to build, because the server would not be able to determine which basket goes with which request.
We may need to handle cookies in Python because without them, some sites don't behave as expected. When using Python, we may also want to access the parts of a site which require a login, and the login sessions are usually maintained through cookies.
Cookie handlingWe're going to discuss how to handle cookies with urllib. First, we need to create a place for storing the cookies that the server will send us:
>>> from http.cookiejar import CookieJar
>>> cookie_jar = CookieJar()
Next, we build something called an urllib opener. This will automatically extract the cookies from the responses that we receive and then store them in our cookie jar:
>>> from urllib.request import build_opener, HTTPCookieProcessor
>>> opener = build_opener(HTTPCookieProcessor(cookie_jar))
Then, we can use our opener to make an HTTP request:
>>> opener.open('http://www.github.com')
Lastly, we can check that the server has sent us some cookies:
>>> len(cookie_jar)
2
Whenever we use opener to make further requests, the HTTPCookieProcessor functionality will check our cookie_jar to see if it contains any cookies for that site and then it will automatically add them to our requests. It will also add any further cookies that are received to the cookie jar.
The http.cookiejar module also contains a FileCookieJar class, that works in the same way as CookieJar, but it provides an additional function for easily saving the cookies to a fi le. This allows persistence of cookies across Python sessions.
Chapter 2
[ 45 ]
Know your cookiesIt's worth looking at the properties of cookies in more detail. Let's examine the cookies that GitHub sent us in the preceding section.
To do this, we need to pull the cookies out of the cookie jar. The CookieJar module doesn't let us access them directly, but it supports the iterator protocol. So, a quick way of getting them is to create a list from it:
>>> cookies = list(cookie_jar)
>>> cookies
[Cookie(version=0, name='logged_in', value='no', ...),
Cookie(version=0, name='_gh_sess', value='eyJzZxNzaW9uX...', ...)
]
You can see that we have two Cookie objects. Now, let's pull out some information from the fi rst one:
>>> cookies[0].name'logged_in'>>> cookies[0].value'no'
The cookie's name allows the server to quickly reference it. This cookie is clearly a part of the mechanism that GitHub uses for fi nding out whether we've logged in yet. Next, let's do the following:
>>> cookies[0].domain'.github.com'>>> cookies[0].path'/'
The domain and the path are the areas for which this cookie is valid, so our urllib opener will include this cookie in any request that it sends to www.github.com and its sub-domains, where the path is anywhere below the root.
Now, let's look at the cookie's lifetime:
>>> cookies[0].expires2060882017
This is a Unix timestamp; we can convert it to datetime:
>>> import datetime>>> datetime.datetime.fromtimestamp(cookies[0].expires)datetime.datetime(2035, 4, 22, 20, 13, 37)
HTTP and Working with the Web
[ 46 ]
So, our cookie will expire on 22nd of April, 2035. An expiry date is the amount of time that the server would like the client to hold on to the cookie for. Once the expiry date has passed, the client can throw the cookie away and the server will send a new one with the next request. Of course, there's nothing to stop a client from immediately throwing the cookie away, though on some sites this may break functionality that depends on the cookie.
Let's discuss two common cookie fl ags:
>>> print(cookies[0].get_nonstandard_attr('HttpOnly'))
None
Cookies that are stored on a client can be accessed in a number of ways:
• By the client as part of an HTTP request and response sequence• By scripts running in the client, such as JavaScript• By other processes running in the client, such as Flash
The HttpOnly fl ag indicates that the client should only allow access to a cookie when the access is part of an HTTP request or response. The other methods should be denied access. This will protect the client against Cross-site scripting attacks (see Chapter 9, Applications for the Web, for more information on these). This is an important security feature, and when the server sets it, our application should behaves accordingly.
There is also a secure fl ag:
>>> cookies[0].secure
True
If the value is true, the Secure fl ag indicates that the cookie should only ever be sent over a secure connection, such as HTTPS. Again, we should honor this if the fl ag has been set such that when our application send requests containing this cookie, it only sends them to HTTPS URLs.
You may have spotted an inconsistency here. Our URL has requested a response over HTTP, yet the server has sent us a cookie, which it's requesting to be sent only over secure connections. Surely the site designers didn't overlook a security loophole like that? Rest assured; they didn't. The response was actually sent over HTTPS. But, how did that happen? Well, the answer lies with redirects.
Chapter 2
[ 47 ]
RedirectsSometimes servers move their content around. They also make some content obsolete and put up new stuff in a different location. Sometimes they'd like us to use the more secure HTTPS protocol instead of HTTP. In all these cases, they may get traffi c that asks for the old URLs, and in all these cases they'd probably prefer to be able to automatically send visitors to the new ones.
The 300 range of HTTP status codes is designed for this purpose. These codes indicate to the client that further action is required on their part to complete the request. The most commonly encountered action is to retry the request at a different URL. This is called a redirect.
We'll learn how this works when using urllib. Let's make a request:
>>> req = Request('http://www.gmail.com')
>>> response = urlopen(req)
Simple enough, but now, look at the URL of the response:
>>> response.url
'https://accounts.google.com/ServiceLogin?service=mail&passive=true&r m=false...'
This is not the URL that we requested! If we open this new URL in a browser, then we'll see that it's actually the Google login page (you may need to clear your browser cookies to see this if you already have a cached Google login session). Google redirected us from http://www.gmail.com to its login page, and urllib automatically followed the redirect. Moreover, we may have been redirected more than once. Look at the redirect_dict attribute of our request object:
>>> req.redirect_dict
{'https://accounts.google.com/ServiceLogin?service=...': 1, 'https://mail.google.com/mail/': 1}
The urllib package adds every URL that we were redirected through to this dict. We can see that we have actually been redirected twice, fi rst to https://mail.google.com, and second to the login page.
When we send our fi rst request, the server sends a response with a redirect status code, one of 301, 302, 303, or 307. All of these indicate a redirect. This response includes a Location header, which contains the new URL. The urllib package will submit a new request to that URL, and in the aforementioned case, it will receive yet another redirect, which will lead it to the Google login page.
HTTP and Working with the Web
[ 48 ]
Since urllib follows redirects for us, they generally don't affect us, but it's worth knowing that a response urllib returns may be for a URL different from what we had requested. Also, if we hit too many redirects for a single request (more than 10 for urllib), then urllib will give up and raise an urllib.error.HTTPError exception.
URLsUniform Resource Locators, or URLs are fundamental to the way in which the web operates, and they have been formally described in RFC 3986. A URL represents a resource on a given host. How URLs map to the resources on the remote system is entirely at the discretion of the system admin. URLs can point to fi les on the server, or the resources may be dynamically generated when a request is received. What the URL maps to though doesn't matter as long as the URLs work when we request them.
URLs are comprised of several sections. Python uses the urllib.parse module for working with URLs. Let's use Python to break a URL into its component parts:
>>> from urllib.parse import urlparse
>>> result = urlparse('http://www.python.org/dev/peps')
>>> result
ParseResult(scheme='http', netloc='www.python.org', path='/dev/peps', params='', query='', fragment='')
The urllib.parse.urlparse() function interprets our URL and recognizes http as the scheme, www.python.org as the network location, and /dev/peps as the path. We can access these components as attributes of the ParseResult:
>>> result.netloc
'www.python.org'
>>> result.path
'/dev/peps'
For almost all resources on the web, we'll be using the http or https schemes. In these schemes, to locate a specifi c resource, we need to know the host that it resides on and the TCP port that we should connect to (together these are the netloc component), and we also need to know the path to the resource on the host (the path component).

Chapter 2
[ 49 ]
Port numbers can be specifi ed explicitly in a URL by appending them to the host. They are separated from the host by a colon. Let's see what happens when we try this with urlparse.
>>> urlparse('http://www.python.org:8080/')
ParseResult(scheme='http', netloc='www.python.org:8080', path='/', params='', query='', fragment='')
The urlparse method just interprets it as a part of the netloc. This is fi ne because this is how handlers such as urllib.request.urlopen() expect it to be formatted.
If we don't supply a port (as is usually the case), then the default port 80 is used for http, and the default port 443 is used for https. This is usually what we want, as these are the standard ports for the HTTP and HTTPS protocols respectively.
Paths and relative URLsThe path in a URL is anything that comes after the host and the port. Paths always start with a forward-slash (/), and when just a slash appears on its own, it's called the root. We can see this by performing the following:
>>> urlparse('http://www.python.org/')
ParseResult(scheme='http', netloc='www.python.org', path='/', params='', query='', fragment='')
If no path is supplied in a request, then by default urllib will send a request for the root.
When a scheme and a host are included in a URL (as in the previous example), the URL is called an absolute URL. Conversely, it's possible to have relative URLs, which contain just a path component, as shown here:
>>> urlparse('../images/tux.png')
ParseResult(scheme='', netloc='', path='../images/tux.png', params='', query='', fragment='')
We can see that ParseResult only contains a path. If we want to use a relative URL to request a resource, then we need to supply the missing scheme, the host, and the base path.
Usually, we encounter relative URLs in a resource that we've already retrieved from a URL. So, we can just use this resource's URL to fi ll in the missing components. Let's look at an example.
HTTP and Working with the Web
[ 50 ]
Suppose that we've retrieved the http://www.debian.org URL, and within the webpage source code we found the relative URL for the 'About' page. We found that it's a relative URL for intro/about.
We can create an absolute URL by using the URL for the original page and the urllib.parse.urljoin() function. Let's see how we can do this:
>>> from urllib.parse import urljoin
>>> urljoin('http://www.debian.org', 'intro/about')
'http://www.debian.org/intro/about'
By supplying urljoin with a base URL, and a relative URL, we've created a new absolute URL.
Here, notice how urljoin has fi lled in the slash between the host and the path. The only time that urljoin will fi ll in a slash for us is when the base URL does not have a path, as shown in the preceding example. Let's see what happens if the base URL does have a path.
>>> urljoin('http://www.debian.org/intro/', 'about')
'http://www.debian.org/intro/about'
>>> urljoin('http://www.debian.org/intro', 'about')
'http://www.debian.org/about'
This will give us varying results. Notice how urljoin appends to the path if the base URL ends in a slash, but it replaces the last path element in the base URL if the base URL doesn't end in a slash.
We can force a path to replace all the elements of a base URL by prefi xing it with a slash. Do the following:
>>> urljoin('http://www.debian.org/intro/about', '/News')
'http://www.debian.org/News'
How about navigating to parent directories? Let's try the standard dot syntax, as shown here:
>>> urljoin('http://www.debian.org/intro/about/', '../News')
'http://www.debian.org/intro/News'
>>> urljoin('http://www.debian.org/intro/about/', '../../News')
'http://www.debian.org/News'
>>> urljoin('http://www.debian.org/intro/about', '../News')
'http://www.debian.org/News'
Chapter 2
[ 51 ]
It work as we'd expect it to. Note the difference between the base URL having and not having a trailing slash.
Lastly, what if the 'relative' URL is actually an absolute URL:
>>> urljoin('http://www.debian.org/about', 'http://www.python.org')
'http://www.python.org'
The relative URL completely replaces the base URL. This is handy, as it means that we don't need to worry about testing whether a URL is relative or not before using it with urljoin.
Query stringsRFC 3986 defi nes another property of URLs. They can contain additional parameters in the form of key/value pairs that appear after the path. They are separated from the path by a question mark, as shown here:
http://docs.python.org/3/search.html?q=urlparse&area=default
This string of parameters is called a query string. Multiple parameters are separated by ampersands (&). Let's see how urlparse handles it:
>>> urlparse('http://docs.python.org/3/search.html? q=urlparse&area=default')
ParseResult(scheme='http', netloc='docs.python.org', path='/3/search.html', params='', query='q=urlparse&area=default', fragment='')
So, urlparse recognizes the query string as the query component.
Query strings are used for supplying parameters to the resource that we wish to retrieve, and this usually customizes the resource in some way. In the aforementioned example, our query string tells the Python docs search page that we want to run a search for the term urlparse.
The urllib.parse module has a function that helps us turn the query component returned by urlparse into something more useful:
>>> from urllib.parse import parse_qs
>>> result = urlparse ('http://docs.python.org/3/search.html?q=urlparse&area=default')
>>> parse_qs(result.query)
{'area': ['default'], 'q': ['urlparse']}
HTTP and Working with the Web
[ 52 ]
The parse_qs() method reads the query string and then converts it into a dictionary. See how the dictionary values are actually in the form of lists? This is because parameters can appear more than once in a query string. Try it with a repeated parameter:
>>> result = urlparse ('http://docs.python.org/3/search.html?q=urlparse&q=urljoin')
>>> parse_qs(result.query)
{'q': ['urlparse', 'urljoin']}
See how both of the values have been added to the list? It's up to the server to decide how it interprets this. If we send this query string, then it may just pick one of the values and use that, while ignoring the repeat. You can only try it, and see what happens.
You can usually fi gure out what you need to put in a query string for a given page by submitting a query through the web interface using your web browser, and inspecting the URL of the results page. You should be able to spot the text of your search and consequently deduce the corresponding key for the search text. Quite often, many of the other parameters in the query string aren't actually needed for getting a basic result. Try requesting the page using only the search text parameter and see what happens. Then, add the other parameters, if it does not work as expected.
If you submit a form to a page and the resulting page's URL doesn't have a query string, then the page would have used a different method for sending the form data. We'll look at this in the HTTP methods section in the following, while discussing the POST method.
URL encodingURLs are restricted to the ASCII characters and within this set, a number of characters are reserved and need to be escaped in different components of a URL. We escape them by using something called URL encoding. It is often called percent encoding, because it uses the percent sign as an escape character. Let's URL-encode a string:
>>> from urllib.parse import quote
>>> quote('A duck?')
'A%20duck%3F'
The special characters ' ' and ? have been replaced by escape sequences. The numbers in the escape sequences are the characters' ASCII codes in hexadecimal.

Chapter 2
[ 53 ]
The full rules for where the reserved characters need to be escaped are given in RFC 3986, however urllib provides us with a couple of methods for helping us construct URLs. This means that we don't need to memorize all of these!
We just need to:
• URL-encode the path• URL-encode the query string• Combine them by using the urllib.parse.urlunparse() function
Let's see how to use the aforementioned steps in code. First, we encode the path:
>>> path = 'pypi'>>> path_enc = quote(path)
Then, we encode the query string:
>>> from urllib.parse import urlencode>>> query_dict = {':action': 'search', 'term': 'Are you quite sure this is a cheese shop?'}>>> query_enc = urlencode(query_dict)>>> query_enc'%3Aaction=search&term=Are+you+quite+sure+this+is+a+cheese+shop%3F'
Lastly, we compose everything into a URL:
>>> from urllib.parse import urlunparse>>> netloc = 'pypi.python.org'>>> urlunparse(('http', netloc, path_enc, '', query_enc, ''))'http://pypi.python.org/pypi?%3Aaction=search&term=Are+you+quite+sure +this+is+a+cheese+shop%3F'
The quote() function has been setup for specifi cally encoding paths. By default, it ignores slash characters and it doesn't encode them. This isn't obvious in the preceding example, try the following to see how this works:
>>> from urllib.parse import quote>>> path = '/images/users/+Zoot+/'>>> quote(path)'/images/users/%2BZoot%2B/'
Notice that it ignores the slashes, but it escapes the +. That is perfect for paths.
The urlencode() function is similarly intended for encoding query strings directly from dicts. Notice how it correctly percent encodes our values and then joins them with &, so as to construct the query string.
Lastly, the urlunparse() method expects a 6-tuple containing the elements matching those of the result of urlparse(), hence the two empty strings.
HTTP and Working with the Web
[ 54 ]
There is a caveat for path encoding. If the elements of a path themselves contain slashes, then we may run into problems. The example is shown in the following commands:
>>> username = '+Zoot/Dingo+'
>>> path = 'images/users/{}'.format(username)
>>> quote(path)
'images/user/%2BZoot/Dingo%2B'
Notice how the slash in the username doesn't get escaped? This will be incorrectly interpreted as an extra level of directory structure, which is not what we want. In order to get around this, fi rst we need to individually escape any path elements that may contain slashes, and then join them manually:
>>> username = '+Zoot/Dingo+'
>>> user_encoded = quote(username, safe='')
>>> path = '/'.join(('', 'images', 'users', username))
'/images/users/%2BZoot%2FDingo%2B'
Notice how the username slash is now percent-encoded? We encode the username separately, telling quote not to ignore slashes by supplying the safe='' argument, which overwrites its default ignore list of /. Then, we combine the path elements by using a simple join() function.
Here, it's worth mentioning that hostnames sent over the wire must be strictly ASCII, however the socket and http modules support transparent encoding of Unicode hostnames to an ASCII-compatible encoding, so in practice we don't need to worry about encoding hostnames. There are more details about this process in the encodings.idna section of the codecs module documentation.
URLs in summaryThere are quite a few functions that we've used in the preceding sections. Let's just review what we have used each function for. All of these functions can be found in the urllib.parse module. They are as follows:
• Splitting a URL into its components: urlparse• Combining an absolute URL with a relative URL: urljoin• Parsing a query string into a dict: parse_qs• URL-encoding a path: quote• Creating a URL-encoded query string from a dict: urlencode• Creating a URL from components (reverse of urlparse): urlunparse
Chapter 2
[ 55 ]
HTTP methodsSo far, we've been using requests for asking servers to send web resources to us, but HTTP provides more actions that we can perform. The GET in our request lines is an HTTP method, and there are several methods, such as HEAD, POST, OPTION, PUT, DELETE, TRACE, CONNECT, and PATCH.
We'll be looking at several of these in some detail in the next chapter, but there are two methods, we're going to take a quick look at now.
The HEAD methodThe HEAD method is the same as the GET method. The only difference is that the server will never include a body in the response, even if there is a valid resource at the requested URL. The HEAD method is used for checking if a resource exists or if it has changed. Note that some servers don't implement this method, but when they do, it can prove to be a huge bandwidth saver.
We use alternative methods with urllib by supplying the method name to a Request object when we create it:
>>> req = Request('http://www.google.com', method='HEAD')
>>> response = urlopen(req)
>>> response.status
200
>>> response.read()
b''
Here the server has returned a 200 OK response, yet the body is empty, as expected.
The POST methodThe POST method is in some senses the opposite of the GET method. We use the POST method for sending data to the server. However, in return the server can still send us a full response. The POST method is used for submitting user input from HTML forms and for uploading fi les to a server.
When using POST, the data that we wish to send will go in the body of the request. We can put any bytes data in there and declare its type by adding a Content-Type header to our request with an appropriate MIME type.

HTTP and Working with the Web
[ 56 ]
Let's look at an example for sending some HTML form data to a server by using a POST request, just as browsers do when we submitt a form on a website. The form data always consists of key/value pairs; urllib lets us work with regular dictionaries for supplying this (we'll look at where this data comes from in the following section):
>>> data_dict = {'P': 'Python'}
When posting the HTML form data, the form values must be formatted in the same way as querystrings are formatted in a URL, and must be URL-encoded. A Content-Type header must also be set to the special MIME type of application/x-www-form-urlencoded.
Since this format is identical to querystrings, we can just use the urlencode() function on our dict for preparing the data:
>>> data = urlencode(data_dict).encode('utf-8')
Here, we also additionally encode the result to bytes, as it's to be sent as the body of the request. In this case, we use the UTF-8 character set.
Next, we will construct our request:
>>> req = Request('http://search.debian.org/cgi-bin/omega', data=data)
By adding our data as the data keyword argument, we are telling urllib that we want our data to be sent as the body of the request. This will make the request use the POST method rather than the GET method.
Next, we add the Content-Type header:
>>> req.add_header('Content-Type', 'application/x-www-form-urlencode; charset=UTF-8')
Lastly, we submit the request:
>>> response = urlopen(req)
If we save the response data to a fi le and open it in a web browser, then we should see some Debian website search results related to Python.
Formal inspectionIn the previous section we used the URL http://search.debian.org/cgibin/omega, and the dictionary data_dict = {'P': 'Python'}. But where did these come from?

Chapter 2
[ 57 ]
We get these by visiting the web page containing the form we would submit to get the results manually. We then inspect the HTML source code of the web page. If we were carrying out the aforementioned search in a web browser, then we would most likely be on the http://www.debian.org page, and we would be running a search by typing our search term into the search box at the top right corner and then clicking on Search.
Most modern browsers allow you to directly inspect the source for any element on a page. To do this right-click on the element, which in this case is the search box, then select the Inspect Element option, as shown in the screenshot here:
HTTP and Working with the Web
[ 58 ]
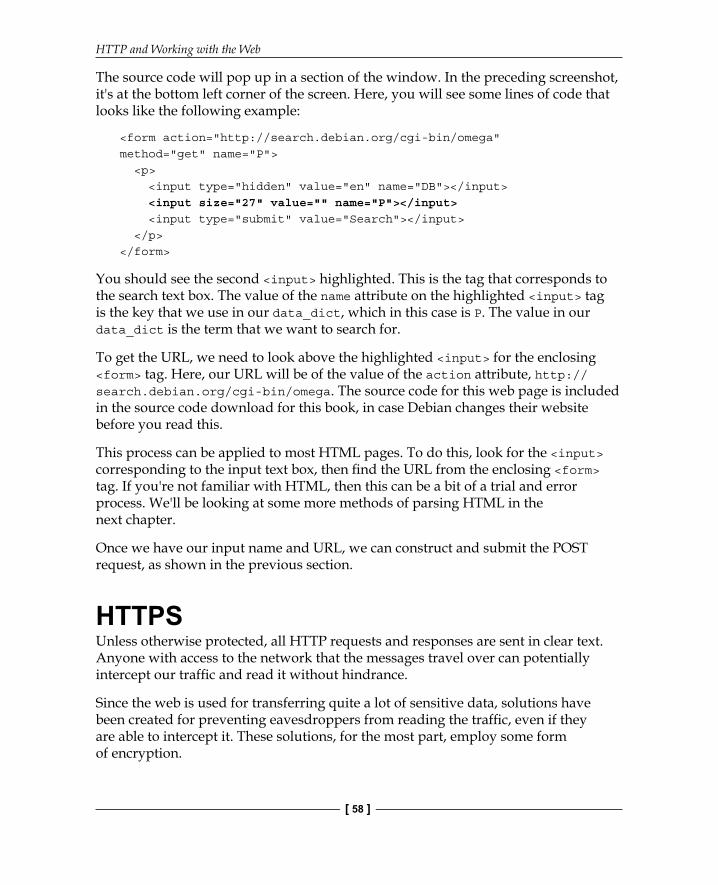
The source code will pop up in a section of the window. In the preceding screenshot, it's at the bottom left corner of the screen. Here, you will see some lines of code that looks like the following example:
<form action="http://search.debian.org/cgi-bin/omega"method="get" name="P"> <p> <input type="hidden" value="en" name="DB"></input> <input size="27" value="" name="P"></input> <input type="submit" value="Search"></input> </p></form>
You should see the second <input> highlighted. This is the tag that corresponds to the search text box. The value of the name attribute on the highlighted <input> tag is the key that we use in our data_dict, which in this case is P. The value in our data_dict is the term that we want to search for.
To get the URL, we need to look above the highlighted <input> for the enclosing <form> tag. Here, our URL will be of the value of the action attribute, http://search.debian.org/cgi-bin/omega. The source code for this web page is included in the source code download for this book, in case Debian changes their website before you read this.
This process can be applied to most HTML pages. To do this, look for the <input> corresponding to the input text box, then fi nd the URL from the enclosing <form> tag. If you're not familiar with HTML, then this can be a bit of a trial and error process. We'll be looking at some more methods of parsing HTML in the next chapter.
Once we have our input name and URL, we can construct and submit the POST request, as shown in the previous section.
HTTPSUnless otherwise protected, all HTTP requests and responses are sent in clear text. Anyone with access to the network that the messages travel over can potentially intercept our traffi c and read it without hindrance.
Since the web is used for transferring quite a lot of sensitive data, solutions have been created for preventing eavesdroppers from reading the traffi c, even if they are able to intercept it. These solutions, for the most part, employ some form of encryption.
Chapter 2
[ 59 ]
The standard method for encrypting HTTP traffi c is called HTTP Secure, or HTTPS. It uses an encryption mechanism called TLS/SSL, and it is applied to the TCP connection on which the HTTP traffi c travels. HTTPS typically uses TCP port 443, as opposed to the default HTTP port 80.
To most users, this process is almost transparent. In principle, we only need to change the http in a URL to an https. Since urllib supports HTTPS, the same is true for our Python clients.
Note that not all servers support HTTPS, so simply changing the URL scheme to https: isn't guaranteed to work for all sites. If this is the case, then the connection attempt may fail in a number of ways, including a socket timeout, a connection reset error, or possibly even an HTTP error, such as a 400 range error or a 500 range error. An increasing number of sites are enabling HTTPS however. Many others are switching to it and using it as their default protocol, so it's worth investigating whether it's available so you can give your application's users extra security.
The Requests librarySo that's it for the urllib package. As you can see, access to the standard library is more than adequate for most HTTP tasks. We haven't touched upon all of its capabilities. There are numerous handler classes which we haven't discussed, plus the opener interface is extensible.
However, the API isn't the most elegant, and there have been several attempts made to improve it. One of these is the very popular third-party library called Requests. It's available as the requests package on PyPi. It can either be installed through Pip or be downloaded from http://docs.python-requests.org, which hosts the documentation.
The Requests library automates and simplifi es many of the tasks that we've been looking at. The quickest way of illustrating this is by trying some examples.
The commands for retrieving a URL with Requests are similar to retrieving a URL with the urllib package, as shown here:
>>> import requests
>>> response = requests.get('http://www.debian.org')
HTTP and Working with the Web
[ 60 ]
And we can look at properties of the response object. Try:
>>> response.status_code
200
>>> response.reason
'OK'
>>> response.url
'http://www.debian.org/'
>>> response.headers['content-type']
'text/html'
Note that the header name in the preceding command is in lowercase. The keys in the headers attribute of Requests response objects are case insensitive.
There are some convenience attributes that have been added to the response object:
>>> response.ok
True
The ok attribute indicates whether the request was successful. That is, the request contained a status code in the 200 range. Also:
>>> response.is_redirect
False
The is_redirect attribute indicates whether the request was redirected. We can also access the request properties through the response object:
>>> response.request.headers
{'User-Agent': 'python-requests/2.3.0 CPython/3.4.1 Linux/3.2.0-4- amd64', 'Accept-Encoding': 'gzip, deflate', 'Accept': '*/*'}
Notice that Requests is automatically handling compression for us. It's including gzip and deflate in an Accept-Encoding header. If we look at the Content-Encoding response, then we will see that the response was in fact gzip compressed, and Requests transparently decompressed it for us:
>>> response.headers['content-encoding']
'gzip'
We can look at the response content in many more ways. To get the same bytes object as we got from an HTTPResponse object, perform the following:
>>> response.content
b'<!DOCTYPE HTML PUBLIC "-//W3C//DTD HTML 4.01//EN" "http://www.w3.org/TR/html4/strict.dtd">\n<html lang="en">...
Chapter 2
[ 61 ]
But Requests also performs automatic decoding for us. To get the decoded content, do this:
>>> response.text
'<!DOCTYPE HTML PUBLIC "-//W3C//DTD HTML 4.01//EN" "http://www.w3.org/TR/html4/strict.dtd">\n<html lang="en">\n<head>\n
...
Notice that this is now str rather than bytes. The Requests library uses values in the headers for choosing a character set and decoding the content to Unicode for us. If it can't get a character set from the headers, then it uses the chardet library (http://pypi.python.org/pypi/chardet) to make an estimate from the content itself. We can see what encoding Requests has chosen here:
>>> response.encoding
'ISO-8859-1'
We can even ask it to change the encoding that it has used:
>>> response.encoding = 'utf-8'
After changing the encoding, subsequent references to the text attribute for this response will return the content decoded by using the new encoding setting.
The Requests library automatically handles cookies. Give the following a try:
>>> response = requests.get('http://www.github.com')
>>> print(response.cookies)
<<class 'requests.cookies.RequestsCookieJar'>
[<Cookie logged_in=no for .github.com/>,
<Cookie _gh_sess=eyJzZxNz... for ..github.com/>]>
The Requests library also has a Session class, which allows the reuse of cookies, and this is similar to using the http module's CookieJar and the urllib module's HTTPCookieHandler objects. Do the following to reuse the cookies in subsequent requests:
>>> s = requests.Session()
>>> s.get('http://www.google.com')
>>> response = s.get('http://google.com/preferences')
HTTP and Working with the Web
[ 62 ]
The Session object has the same interface as the requests module, so we use its get() method in the same way as we use the requests.get()method. Now, any cookies encountered are stored in the Session object, and they will be sent with corresponding requests when we use the get() method in the future.
Redirects are also automatically followed, in the same way as when using urllib, and any redirected requests are captured in the history attribute.
The different HTTP methods are easily accessible, they have their own functions:
>>> response = requests.head('http://www.google.com')
>>> response.status_code
200
>>> response.text
''
Custom headers are added to to requests in a similar way as they are when using urllib:
>>> headers = {'User-Agent': 'Mozilla/5.0 Firefox 24'}
>>> response = requests.get('http://www.debian.org', headers=headers)
Making requests with query strings is a straightforward process:
>>> params = {':action': 'search', 'term': 'Are you quite sure this is a cheese shop?'}
>>> response = requests.get('http://pypi.python.org/pypi', params=params)
>>> response.url
'https://pypi.python.org/pypi?%3Aaction=search&term=Are+you+quite+sur e+this+is+a+cheese+shop%3F'
The Requests library takes care of all the encoding and formatting for us.
Posting is similarly simplifi ed, although we use the data keyword argument here:
>>> data = {'P', 'Python'}
>>> response = requests.post('http://search.debian.org/cgi- bin/omega', data=data)

Chapter 2
[ 63 ]
Handling errors with RequestsErrors in Requests are handled slightly differently from how they are handled with urllib. Let's work through some error conditions and see how it works. Generate a 404 error by doing the following:
>>> response = requests.get('http://www.google.com/notawebpage')
>>> response.status_code
404
In this situation, urllib would have raised an exception, but notice that Requests doesn't. The Requests library can check the status code and raise a corresponding exception, but we have to ask it to do so:
>>> response.raise_for_status()
...
requests.exceptions.HTTPError: 404 Client Error
Now, try it on a successful request:
>>> r = requests.get('http://www.google.com')
>>> r.status_code
200
>>> r.raise_for_status()
None
It doesn't do anything, which in most situations would let our program exit a try/except block and then continue as we would want it to.
What happens if we get an error that is lower in the protocol stack? Try the following:
>>> r = requests.get('http://192.0.2.1')
...
requests.exceptions.ConnectionError: HTTPConnectionPool(...
We have made a request for a host that doesn't exist and once it has timed out, we get a ConnectionError exception.
The Requests library simply reduces the workload that is involved in using HTTP in Python as compared to urllib. Unless you have a requirement for using urllib, I would always recommend using Requests for your projects.
HTTP and Working with the Web
[ 64 ]
SummaryWe looked at the principles of the HTTP protocol. We saw how to perform numerous fundamental tasks with the standard library urllib and the third-party Requests packages.
We looked at the structure of HTTP messages, HTTP status codes, the different headers that we may encounter in requests and responses, and how to interpret them and use them for customizing our requests. We looked at how URLs are formed, and how to manipulate and construct them.
We saw how to handle cookies and redirects, how to handle errors that might occur, and how to use secure HTTP connections.
We also covered how to submit data to websites in the manner of submitting a form on a web page, and how to extract the parameters that we need from a page's source code.
Finally, we looked at the third-party Requests package. We saw that as compared to the urllib package, Requests, automates and simplifi es many of the tasks that we may routinely need to carry out with HTTP. This makes it a great choice for day-to-day HTTP work.
In the next chapter, we'll be employing what we've learned here to carry out detailed interactions with different web services, querying APIs for data, and uploading our own objects to the web.

Where to buy this book You can buy Learning Python Network Programming from the Packt Publishing website. Alternatively, you can buy the book from Amazon, BN.com, Computer Manuals and most internet book retailers.
Click here for ordering and shipping details.
www.PacktPub.com
Stay Connected:
Get more information Learning Python Network Programming