Embed Size (px)
Citation preview
@2013 TecVis LP
Using AIRS to record your life
@2013 TecVis LP
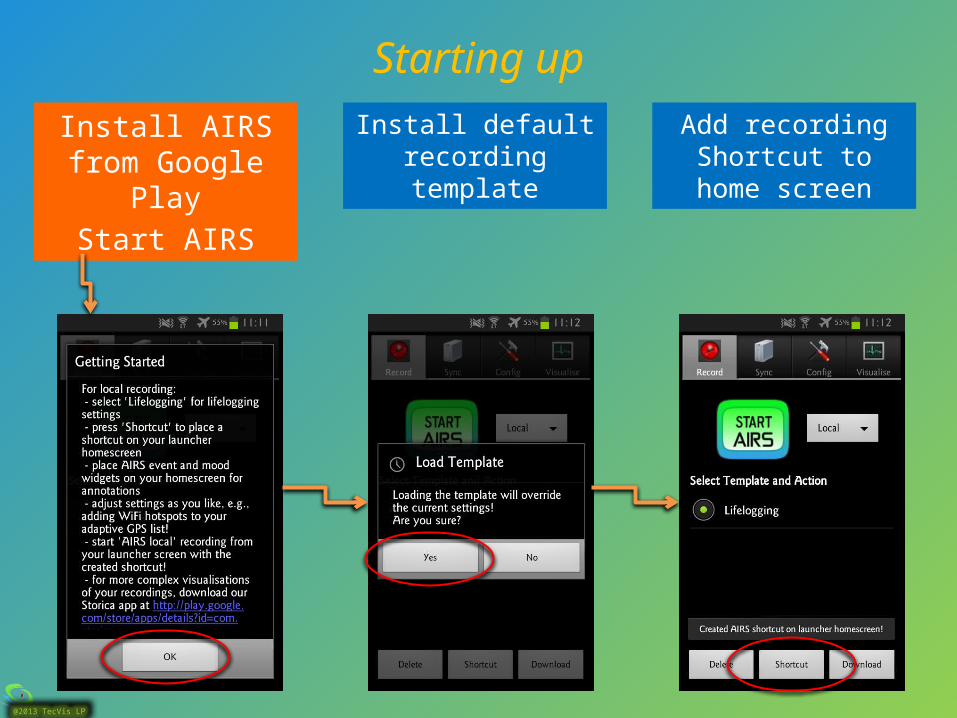
Starting up
Install AIRS from Google
PlayStart AIRS
Install default recording template
Add recording Shortcut to home
screen

@2013 TecVis LP
Starting up
Add home screen widgets
for manual annotations
Start recordingFrom shortcut
From AIRS app
@2013 TecVis LP
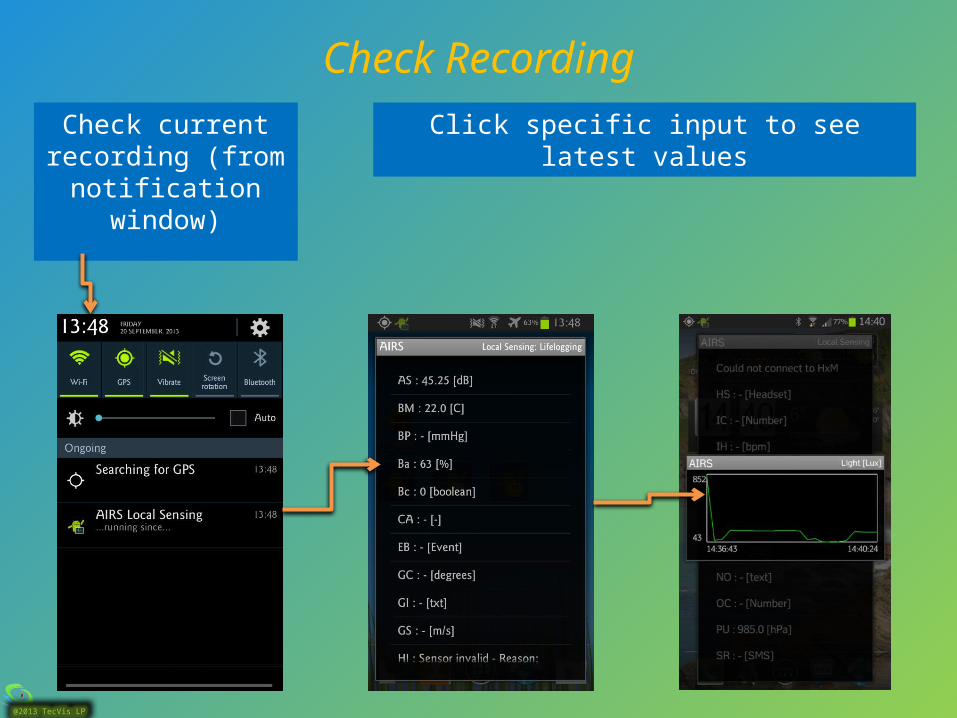
Check Recording
Check current recording (from
notification window)
Click specific input to see latest values
@2013 TecVis LP
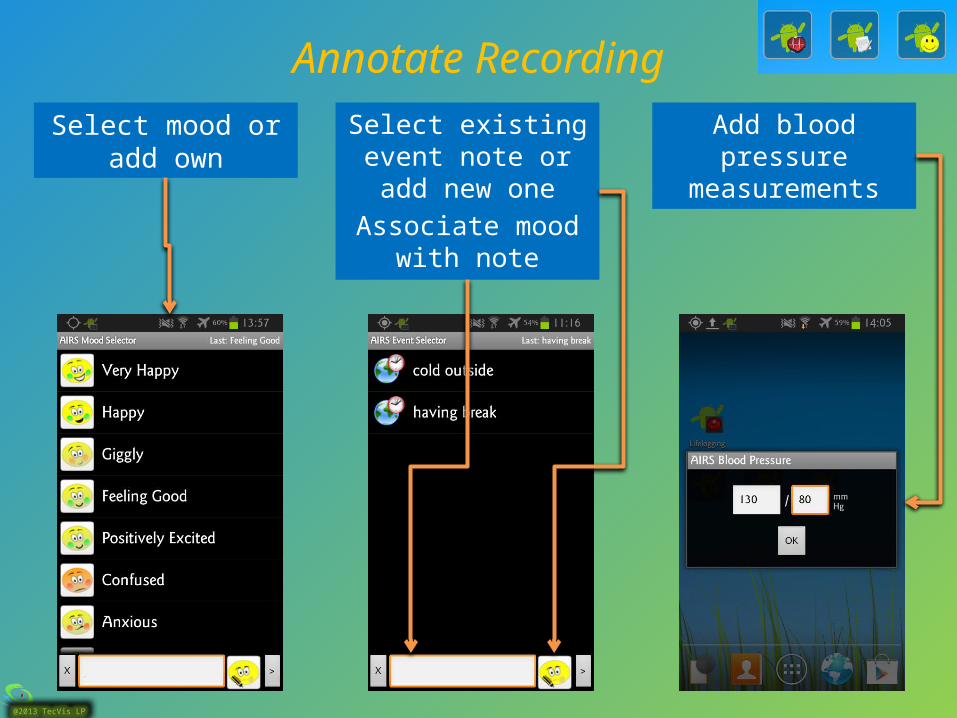
Annotate Recording
Select mood or add own
Select existing event note or add
new oneAssociate mood
with note
Add blood pressure
measurements
@2013 TecVis LP
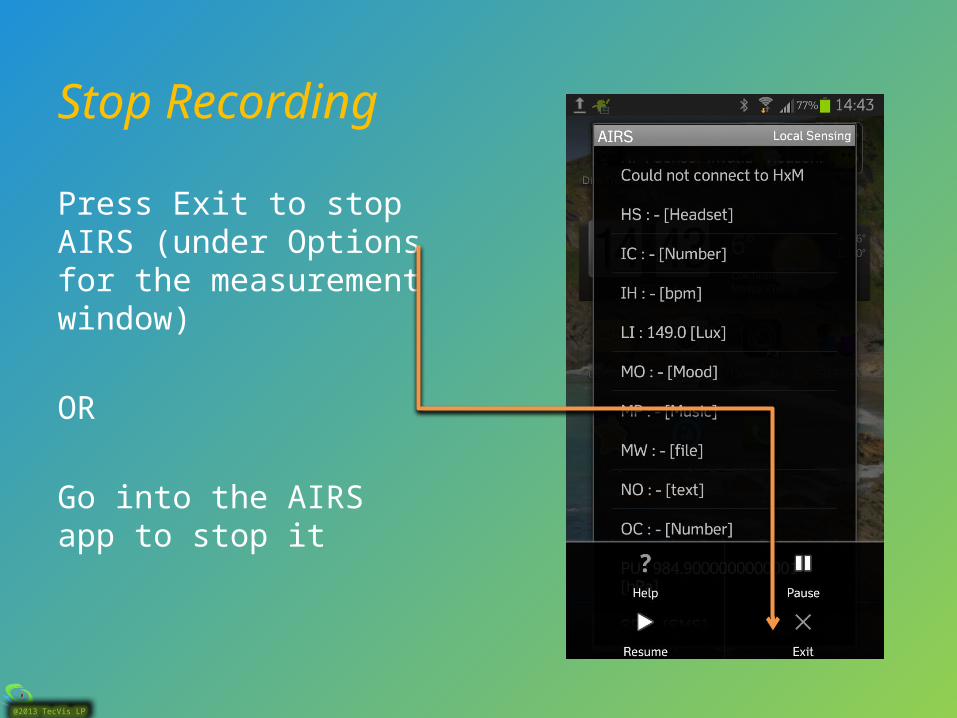
Stop Recording
Press Exit to stop AIRS (under Options for the measurement window)
OR
Go into the AIRS app to stop it
@2013 TecVis LP
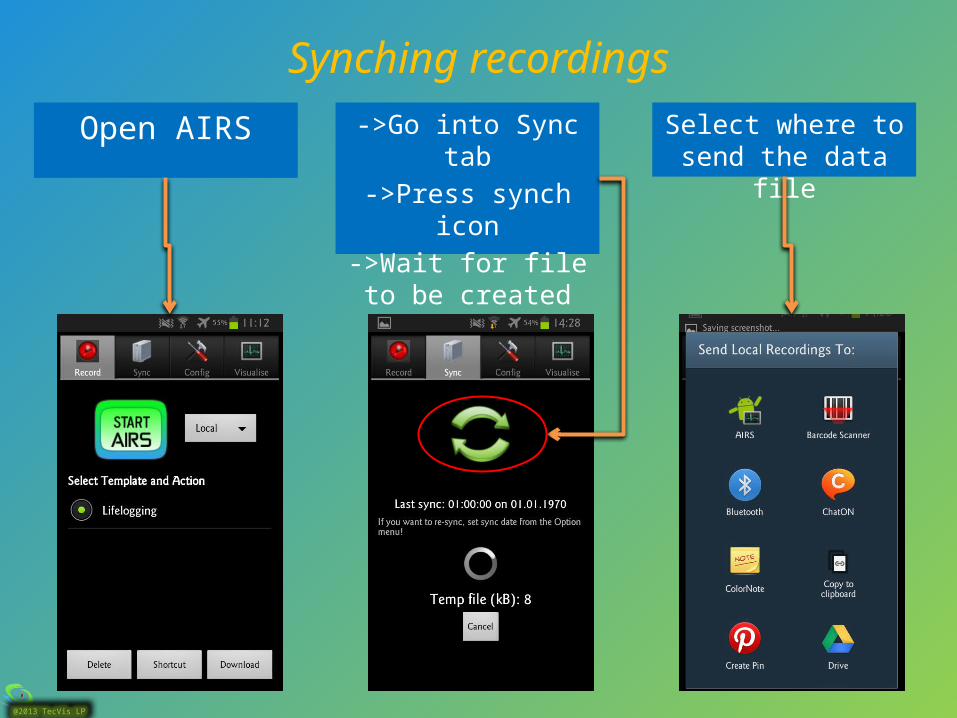
Synching recordings
Open AIRS ->Go into Sync tab
->Press synch icon
->Wait for file to be created
Select where to send the data file

@2013 TecVis LP
ADVANCED OPTIONS

@2013 TecVis LP
Configure AIRS
Select what sensors to be recorded
Change recording intervals for certain types of sensors
Connect heart rate monitor
Change size of annotations listAnd more...
@2013 TecVis LP
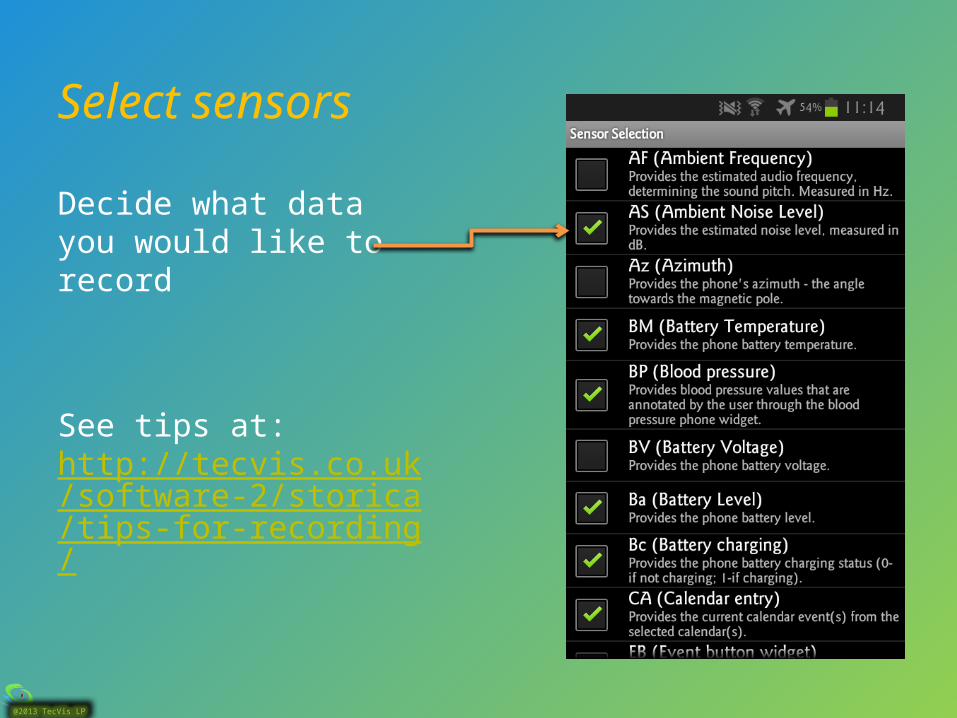
Select sensors
Decide what data you would like to record
See tips at: http://tecvis.co.uk/software-2/storica/tips-for-recording/

@2013 TecVis LP
Using AIRS templatesSave all current
settings as template (open Options menu)
Name templateGet back to Record tab
Select template
@2013 TecVis LP
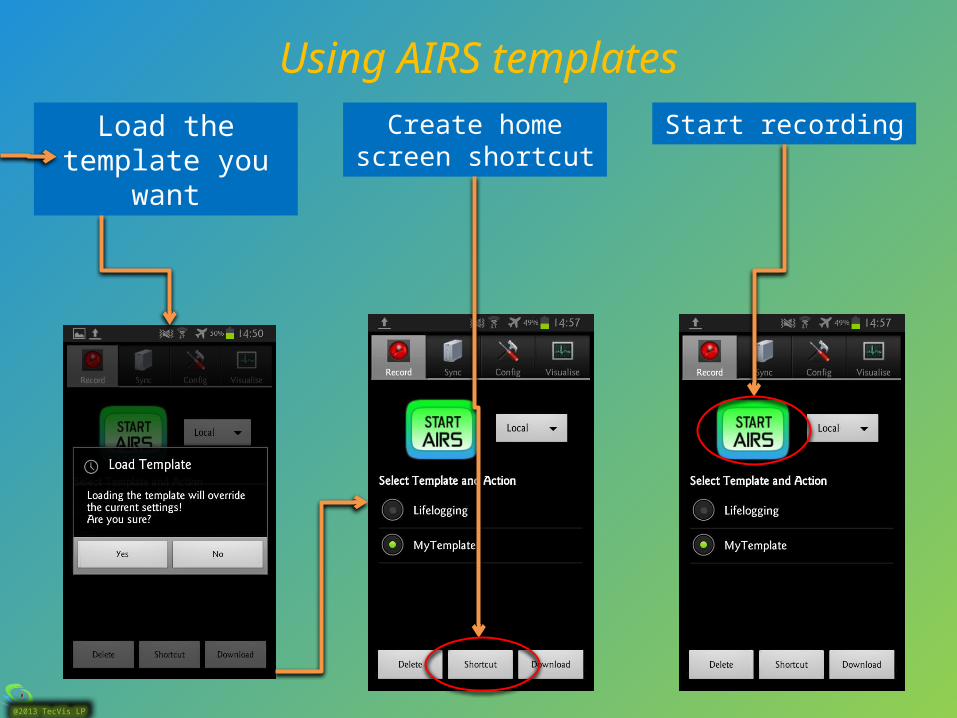
Using AIRS templates
Load the template you
want
Create home screen shortcut
Start recording

@2013 TecVis LP
Want to visualize your data?
Get Storica!Have anything to say?Find us at [email protected]