Embed Size (px)
Citation preview
Bachelor Thesis: The Director’s Cut
The Nut Shell – A Framework forCreating Interactive Command Line
Tutorials
Sebastian Morr
2013–11–03
Institute for Programming and Reactive SystemsProf. Dr. Ursula Goltz
Advisor: Dr. Werner Struckmann
Abstract
Command line interfaces provide powerful, expressive means to interact withcomputers, but compared to graphical user interfaces, they have a steep learningcurve. Inspired by text adventures, this thesis introduces a new interface conceptfor teaching command line programs: An interactive, terminal-based tutorialenvironment, where the documentation reacts to the user’s commands, to thecommand line’s response and its internal state.The thesis covers design, implementation, application and evaluation of the
Nut Shell, a software framework for creating such tutorials.An abstraction layer is devised that gives the framework uniform access to
the different parts of interaction within arbitrary command line programs, whileretaining all their built-in editing features. The framework is compatible withsystem shells and many interpreted programming languages, but can also be usedto teach subtopics, like specific command line tools or concepts.The Nut Shell introduces a new domain specific language, that can be used to
describe tutorial lessons. The language’s syntactic structures are tailored for thispurpose and allow for fast and easy content creation. A built-in testing facilityenables authors to check their tutorials for proper function automatically.In a two-week evaluation study with about 120 participants, a tutorial created
with the Nut Shell proved superior to a teaching method based on static text: Usersof the Nut Shell showed a much higher motivation to attend to the course, saidthey had more fun and learned more, and were able to work more autonomously.
AcknowledgmentsI would like to thank the following people for their support in the creation of thisthesis: Werner Struckmann patiently answered every question I had. Hendrik Frey-tag provided the list of test questions for the evaluation. Arne Brüsch and MarkusReschke helped making the evaluation a lot of fun and contributed interesting ideas.Heike Laschin, Moritz Mühlhausen and Leslie Wöhler did some early beta-testingand influenced the style of the final tutorial. Jan Steiner helped proof-reading thefinal document. My family gave me a great amount of support and motivation.And finally, I want to thank the 120 students who bravely participated in the firstevaluation of the Nut Shell and gave helpful and encouraging feedback.
ColophonThis document was created using LATEX2ε by Leslie Lamport and contributors, andKOMA-Script by Frank Neukam, Markus Kohm, and Axel Kielhorn. The figureswere created using PGFPlots by Christian Feuersänger and TikZ by Till Tantau,the key combinations were produced with menukeys by Tobias Weh. The text is setin the Latin Modern font family by Bogusław Jackowski, Janusz M. Nowacki andMarcin Woliński, the monospaced font is Bera Mono, based on Bitstream Vera.
3
Contents1 Introduction 6
1.1 Prior work . . . . . . . . . . . . . . . . . . . . . . . . . . . . . . . . 71.2 Overview and organization . . . . . . . . . . . . . . . . . . . . . . . 81.3 Notation . . . . . . . . . . . . . . . . . . . . . . . . . . . . . . . . . 9
2 Preliminaries 102.1 Command line interfaces . . . . . . . . . . . . . . . . . . . . . . . . 102.2 Terminal . . . . . . . . . . . . . . . . . . . . . . . . . . . . . . . . . 112.3 Escape sequences and control characters . . . . . . . . . . . . . . . 112.4 Readline . . . . . . . . . . . . . . . . . . . . . . . . . . . . . . . . . 12
3 The CLI Abstraction Layer 133.1 Targets . . . . . . . . . . . . . . . . . . . . . . . . . . . . . . . . . . 133.2 High-level architecture . . . . . . . . . . . . . . . . . . . . . . . . . 143.3 Recognizing the prompt . . . . . . . . . . . . . . . . . . . . . . . . 153.4 Recognizing the command . . . . . . . . . . . . . . . . . . . . . . . 163.5 Command line operations . . . . . . . . . . . . . . . . . . . . . . . 19
4 The nutsh Language 204.1 Design goals . . . . . . . . . . . . . . . . . . . . . . . . . . . . . . . 204.2 Lexical elements . . . . . . . . . . . . . . . . . . . . . . . . . . . . . 204.3 Syntax and semantics . . . . . . . . . . . . . . . . . . . . . . . . . . 21
4.3.1 Expressions . . . . . . . . . . . . . . . . . . . . . . . . . . . 214.3.2 Built-in functions . . . . . . . . . . . . . . . . . . . . . . . . 224.3.3 Statements . . . . . . . . . . . . . . . . . . . . . . . . . . . 234.3.4 Top level structure . . . . . . . . . . . . . . . . . . . . . . . 25
4.4 Parsing and interpretation . . . . . . . . . . . . . . . . . . . . . . . 264.5 Automated testing . . . . . . . . . . . . . . . . . . . . . . . . . . . 26
5 Implementation 28
6 Application and Evaluation 296.1 Setting . . . . . . . . . . . . . . . . . . . . . . . . . . . . . . . . . . 296.2 Style . . . . . . . . . . . . . . . . . . . . . . . . . . . . . . . . . . . 30
4

6.3 Survey . . . . . . . . . . . . . . . . . . . . . . . . . . . . . . . . . . 306.4 Results . . . . . . . . . . . . . . . . . . . . . . . . . . . . . . . . . . 326.5 Discussion . . . . . . . . . . . . . . . . . . . . . . . . . . . . . . . . 32
7 Conclusions and Future Work 36
A Example nutsh Lesson 38
B List of Lessons Used in the Evaluation 45
Bibliography 46
5
1 IntroductionThese days, the most common method for humans to operate computers is via agraphical user interface. It provides buttons and other visual elements the user caninteract with using a mouse. Before this interaction method was invented, however,computers had a text-only interface. The user would type a text command, and themachine would execute it. These command line interfaces (CLIs) provide powerful,efficient means to interact with computers, which is why many people still canbenefit from learning how to use them. But CLIs often have a steep learning curve:Unlike graphical user interfaces, they are not self-evident—users have to knowwhich commands they can enter, which is why novice users definitely need someform of guidance.Most approaches to teach command line interfaces involve static text: There
are books and manuals, online tutorials and exercise sheets. These approacheshave several drawbacks: The users have to shift their attention back and forthbetween the explaining text and the system they want to learn, which slows downthe learning process. The text might set tasks and goals, but has no possibility tocheck and confirm when the user reaches them. Finally, when the user makes asyntactical or semantical mistake, the text remains static and cannot provide anyhelp or correction.This thesis describes a system that provides a much more direct, interactive
teaching approach. The core idea is to interweave the tutorial text and the outputof the command line system and to make the tutorial watch the user’s commands,in addition to the command line system’s state and output, to allow direct responseto the user’s actions.
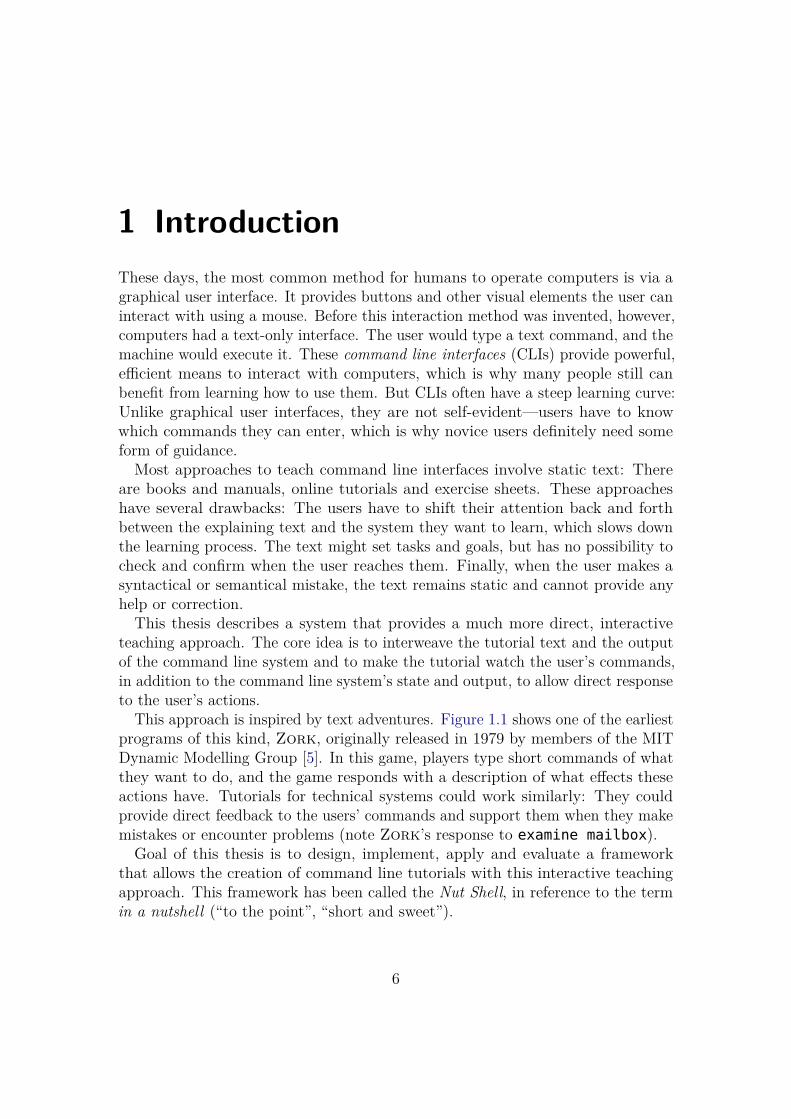
This approach is inspired by text adventures. Figure 1.1 shows one of the earliestprograms of this kind, Zork, originally released in 1979 by members of the MITDynamic Modelling Group [5]. In this game, players type short commands of whatthey want to do, and the game responds with a description of what effects theseactions have. Tutorials for technical systems could work similarly: They couldprovide direct feedback to the users’ commands and support them when they makemistakes or encounter problems (note Zork’s response to examine mailbox).Goal of this thesis is to design, implement, apply and evaluate a framework
that allows the creation of command line tutorials with this interactive teachingapproach. This framework has been called the Nut Shell, in reference to the termin a nutshell (“to the point”, “short and sweet”).
6
West of HouseYou are standing in an open field west of a white house, with aboarded front door.There is a small mailbox here.
> examine mailboxThe small mailbox is closed.
> open mailboxOpening the small mailbox reveals a leaflet.
> take leafletTaken.
> read leaflet"WELCOME TO ZORK!
ZORK is a game of adventure, danger, and low cunning. In it youwill explore some of the most amazing territory ever seen bymortals. No computer should be without one!"
Figure 1.1: The beginning of a Zork session.
1.1 Prior workTry Ruby was an interactive online tutorial that would provide an introduction tothe Ruby scripting language in the web browser. A notable anonymous programmercalled “_why” first published it at the end of 2005. To the author’s knowledge,this was the first attempt to create interactive command line tutorials [12]. Theinterface consisted of two sections: One side contained the current task, the otherside held an interactive Ruby prompt. The user would then type in commands,and the application would check whether either the command or the interpreter’soutput matched a regular expression. In this case, the current exercise would besolved and the tutorial would advance to the next one. The site went offline inearly 2009, but some members of the Ruby community continue development.
A web site called Codecademy1 deploys several interactive tutorials, which focuson teaching programming in Ruby, Python, JavaScript and PHP. The tutorialsconsist of multiple exercises, in each of which users get a piece of unfinished code
1http://www.codecademy.com
7
in addition to a task. They are then supposed to fix or complete the code so thatit satisfies a number of conditions, which can be quite complex. Every time thecode is saved, the conditions are checked. On success, the tutorial advances to thenext exercise.The site Code School2 follows a similar approach: It offers courses about Ruby,
JavaScript, HTML/CSS, R and Git, which are designed similarly to Codecademy’s.The company behind Code School is also responsible for Try Git3 and the currentTry Ruby implementation4, which work similarly to the original Try Ruby.
Although these implementations of interactive tutorials are dramatic improve-ments over classical, static tutorials, they still have several problems: The coursesare linear—each task has to be solved to get to the next one, which is inflexibleand allows no adaptation to the individual user.Furthermore, they do not offer the level of persistence that normal interaction
with the command line has: Every entered line is run separately, the system hasno internal state. For example, when the user defines a variable, it is lost whenentering the next line, because the interpreter is restarted. Try Ruby tries tocircumvent this restriction by re-executing each command that was entered so far,which slows down the system’s response speed over time.
Although the applications provide some command editing capabilities, it is notpossible to use comfort functions like searching the command history or using tab-completion. As these techniques are essential for efficient usage of these interfaces,this is a big drawback.
To present the tutorials in a web browser ensures easy, universal access withoutany setup at all. However, there is no way to incorporate local files or programsinto the tutorials, and the later change away from the online tutorial toward the“real” command line environment will make a dramatic difference to the user.
The Nut Shell addresses all these shortcomings: Tutorials can be highly nonlinear,the command line program’s state is persistent during a lesson, all editing facilitiesare kept available and the tutorial is presented in the same environment where it iscommonly used—in the terminal.
1.2 Overview and organizationThe chapter’s structure follows a bottom-up fashion:
Chapter 2 introduces and defines some of the framework’s central topics andterms: Command line interfaces, Terminals, and related technologies.
2http://www.codeschool.com3http://try.github.io4http://tryruby.org
8
Chapter 3 describes the low-level abstraction layer that communicates withthe command line process at the core of each Nut Shell tutorial. It explains anddemonstrates techniques for adapting to many different command line interfacesand names the requirements the CLIs need to fulfill.Chapter 4 specifies details of the domain specific language nutsh, which builds
upon the command line abstraction layer to allow simple, fast creation of newNut Shell tutorials. It describes the language’s lexical elements, its syntax andsemantics and explains how the language is interpreted and tested.
Chapter 6 describes application and evaluation of the Nut Shell in a study thatcompared the new teaching approach with tutorials based on static text, and triedto find out whether the former offered any benefits.Chapter 7 provides an outlook and suggests ideas for future work.Appendix A, starting on page 38, shows an example session of a tutorial created
for the evaluation, followed by its nutsh source code. To get an impression of theinteraction style employed by the Nut Shell, it may be beneficial to look at thisexample before continuing to read.
1.3 NotationIn this thesis, grammars are specified using the Extended Backus-Naur Form(EBNF) as used in [13]. As a convention, capitalized names represent nonterminalsymbols, whereas lowercase names represent terminal symbols. Unless mentionedotherwise, the name of a grammar’s first production is its starting symbol.Vertical bars (|) separate alternatives, square brackets ([ ]) denote optional
parts and curly brackets ({ }) denote an arbitrary number of repetitions. Tokensare enclosed in double quotes or back quotes.
Grammars are displayed in the following style—this is also a specification of theEBNF flavour as used in this thesis, given in EBNF itself:
Grammar = { Production } .Production = production_name "=" [ Expression ] "." .Expression = Alternative { "|" Alternative } .Alternative = Term { Term } .Term = production_name | token | Group | Option | Repetition .Group = "(" Expression ")" .Option = "[" Expression "]" .Repetition = "{" Expression "}" .
9
2 Preliminaries
2.1 Command line interfacesA command line interface (CLI) allows a user to communicate with a computerprogram by entering lines of text, the command lines.Commonly, interaction with a CLI consists of three phases:
1. The program writes a prompt, a special character sequence that signals tothe user that the program now expects a command.
2. The user composes a command line. Often, the CLI offers several editingcapabilities that make this process more comfortable, like a command historyor completion of nonambiguous terms when pressing Tab . To tell the programto execute the command, the user usually sends a line feed character bypressing the Return key.
3. The program interprets and executes the command, and displays a response.Sometimes, the execution is interactive and requires further input. After thecommand has finished, the first phase starts again.
In this thesis, the examples will use IRB, the Interactive Ruby Shell. Rubyis an object-oriented scripting language, and, at the basic level, can be used toevaluate arithmetic expressions. Figure 2.1 shows a few iterations of the threephases mentioned earlier: The characters >> constitute the prompt; the followingcharacters, set in a bold typeface, are the commands the user typed; and thesubsequent lines are the program’s output.
Another very common command line program is Bash, the default system shell onLinux and Mac OS X, which can be used to manipulate the file system. It supportssome convenient functions like tab-completion of filenames or advanced access tothe command history and offers many syntactic structures for manipulating streamsof text.
Further examples of command line programs include interpreters of the program-ming languages Python, Haskell or Perl, SQL consoles or mathematics softwarelike gnuplot or Sage.
10
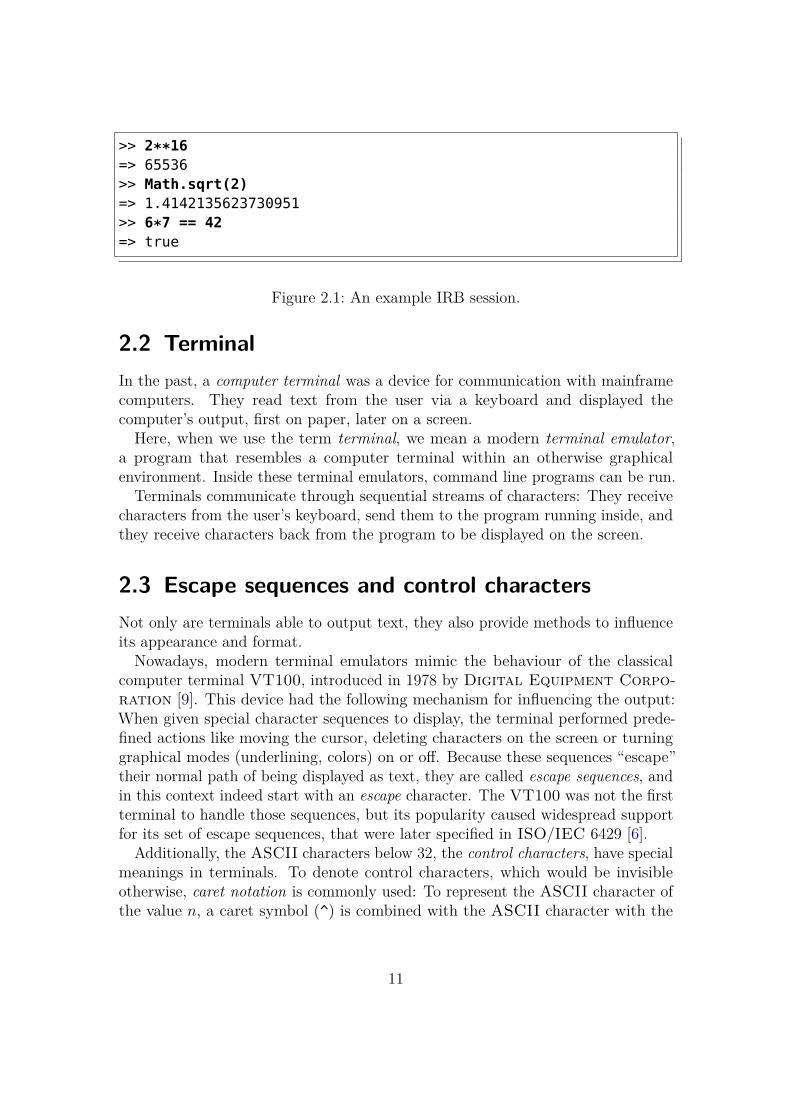
>> 2**16=> 65536>> Math.sqrt(2)=> 1.4142135623730951>> 6*7 == 42=> true
Figure 2.1: An example IRB session.
2.2 TerminalIn the past, a computer terminal was a device for communication with mainframecomputers. They read text from the user via a keyboard and displayed thecomputer’s output, first on paper, later on a screen.Here, when we use the term terminal, we mean a modern terminal emulator,
a program that resembles a computer terminal within an otherwise graphicalenvironment. Inside these terminal emulators, command line programs can be run.
Terminals communicate through sequential streams of characters: They receivecharacters from the user’s keyboard, send them to the program running inside, andthey receive characters back from the program to be displayed on the screen.
2.3 Escape sequences and control charactersNot only are terminals able to output text, they also provide methods to influenceits appearance and format.Nowadays, modern terminal emulators mimic the behaviour of the classical
computer terminal VT100, introduced in 1978 by Digital Equipment Corpo-ration [9]. This device had the following mechanism for influencing the output:When given special character sequences to display, the terminal performed prede-fined actions like moving the cursor, deleting characters on the screen or turninggraphical modes (underlining, colors) on or off. Because these sequences “escape”their normal path of being displayed as text, they are called escape sequences, andin this context indeed start with an escape character. The VT100 was not the firstterminal to handle those sequences, but its popularity caused widespread supportfor its set of escape sequences, that were later specified in ISO/IEC 6429 [6].
Additionally, the ASCII characters below 32, the control characters, have specialmeanings in terminals. To denote control characters, which would be invisibleotherwise, caret notation is commonly used: To represent the ASCII character ofthe value n, a caret symbol (^) is combined with the ASCII character with the
11
value n + 64. For example, the backspace character has the ASCII value 8; theASCII character with the value 72 is H, so the caret notation for a backspace is ^H.This notation originates from the fact that in old terminals, the control characterscould be entered by pressing Ctrl and the respective letter key. For some charactersthis is still true today: For example, Ctrl + D produces end of file, Ctrl + Hproduces backspace, and Ctrl + J produces a line feed character.
2.4 ReadlineTo make text input more comfortable, many CLIs offer a wide range of editingcapabilities. They support key combinations for deleting characters, words or wholelines, and often maintain a history of entered commands, so that the user canaccess them later if necessary.To avoid having to implement these features themselves, many command line
programs use a library called GNU Readline [10]. This library has some defaultkeybindings for deleting parts of the current command and moving the cursor, whichoriginate from the Emacs text editor. Even if a program does not use Readlinedirectly, many of its bindings have become a de-facto standard for command lineediting and thus can be expected to work in a command line environment.
12
3 The CLI Abstraction LayerThe CLI abstraction layer is the framework’s lowest-level component, which wrapsaround the command line process that is to be taught. It has the goal of recognizingthe different parts of the command line interaction, creating a layer of abstractionthat enables the framework to treat all supported CLIs identically. The interestingparts in this context are the following three, which correspond to the phasesdescribed in section 2.1:
1. Which prompt is displayed to the user?
2. Which command does the user enter?
3. What is the output of this command?
The abstraction layer is needed for two further reasons: First, the Nut Shellneeds to check conditions on the user’s commands or the output. Second, it allowsthe Nut Shell to run commands itself, hidden to the user, while having access tothe same state of the command line system. The sophisticated methods describedin this chapter are necessary to keep all editing features intact, including tabcompletion and usage of the command line history.
This thesis treats the targeted command line process as a black box having inputand output streams of Unicode characters. The CLI abstraction layer watches andmodifies these streams as described in the following sections.The main idea here is to use two special markers, unique character sequences
that are unlikely to appear in normal command line interaction, to annotate theoutput of the process. A suitable choice for those markers are Unicode code pointsfrom the Private Use Area, which are guaranteed not to be assigned any meaning[11, p. 558], for example U+E100 and U+E101. We call these marker1 and marker2.
3.1 TargetsThe Nut Shell is designed to support as many different command line interfaces aspossible; examples of command line programs can be found in section 2.1. Whenwe talk about one of these programs, we call it the Nut Shell’s current target.
13
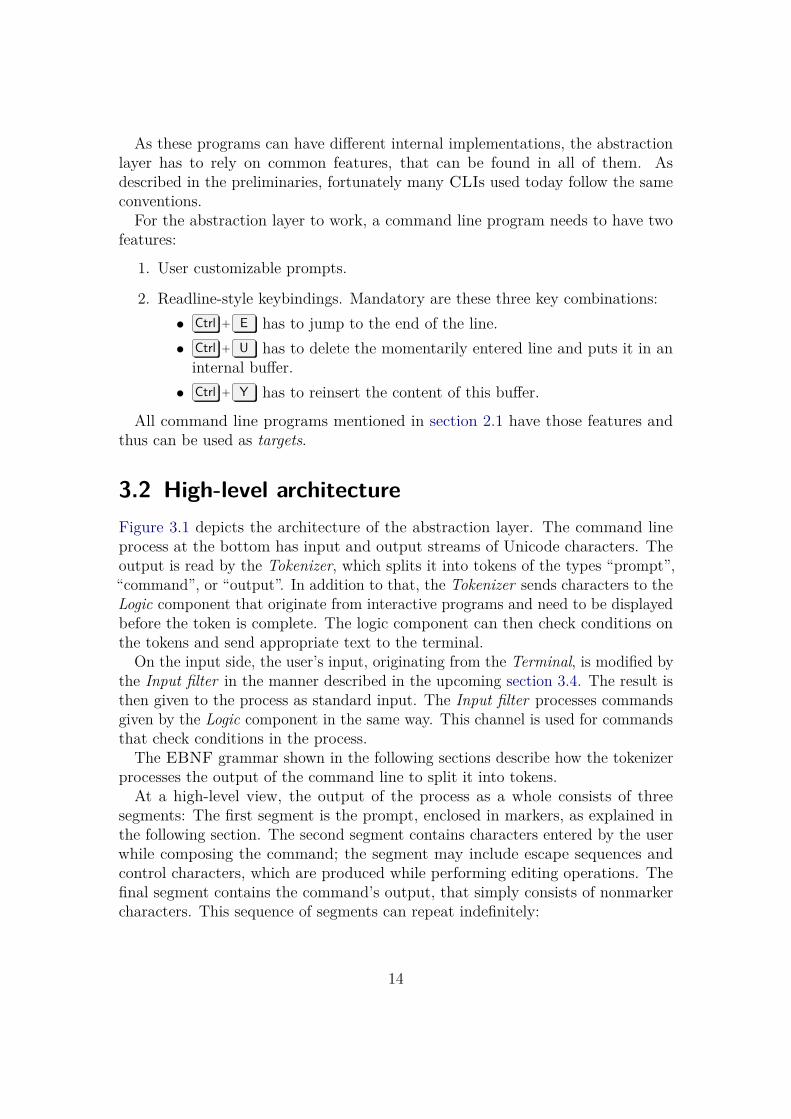
As these programs can have different internal implementations, the abstractionlayer has to rely on common features, that can be found in all of them. Asdescribed in the preliminaries, fortunately many CLIs used today follow the sameconventions.For the abstraction layer to work, a command line program needs to have two
features:
1. User customizable prompts.
2. Readline-style keybindings. Mandatory are these three key combinations:• Ctrl + E has to jump to the end of the line.• Ctrl + U has to delete the momentarily entered line and puts it in an
internal buffer.• Ctrl + Y has to reinsert the content of this buffer.
All command line programs mentioned in section 2.1 have those features andthus can be used as targets.
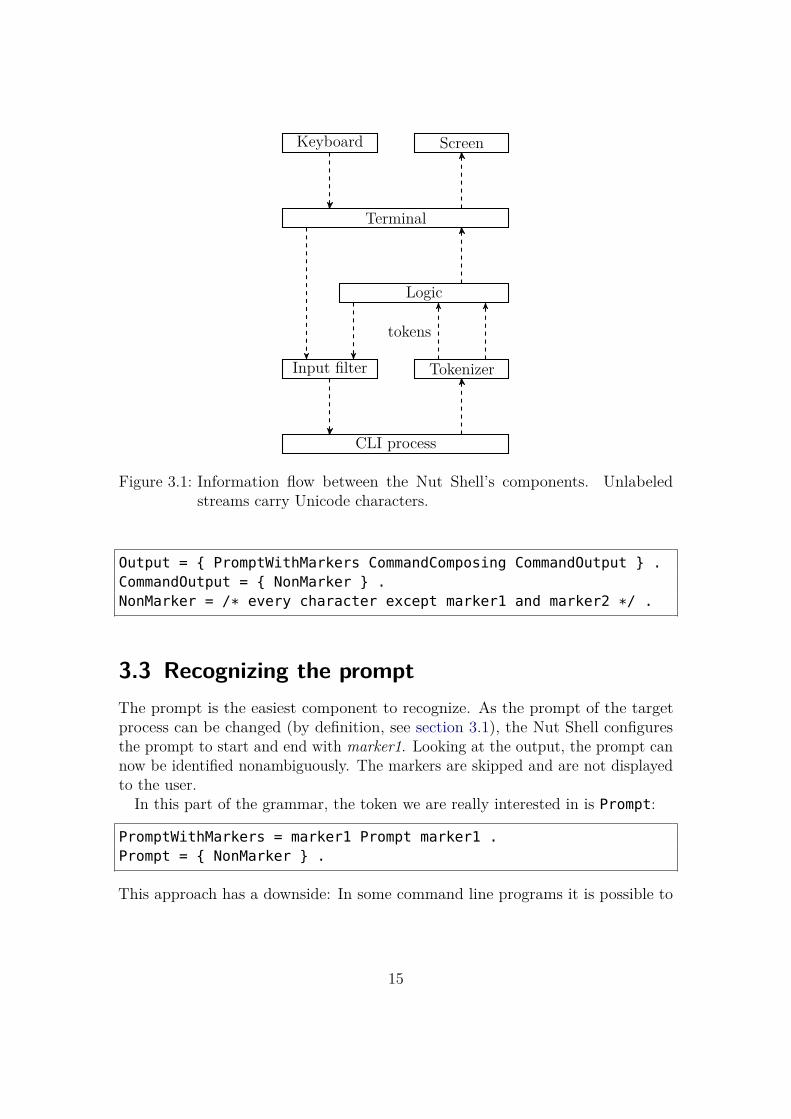
3.2 High-level architectureFigure 3.1 depicts the architecture of the abstraction layer. The command lineprocess at the bottom has input and output streams of Unicode characters. Theoutput is read by the Tokenizer, which splits it into tokens of the types “prompt”,“command”, or “output”. In addition to that, the Tokenizer sends characters to theLogic component that originate from interactive programs and need to be displayedbefore the token is complete. The logic component can then check conditions onthe tokens and send appropriate text to the terminal.
On the input side, the user’s input, originating from the Terminal, is modified bythe Input filter in the manner described in the upcoming section 3.4. The result isthen given to the process as standard input. The Input filter processes commandsgiven by the Logic component in the same way. This channel is used for commandsthat check conditions in the process.
The EBNF grammar shown in the following sections describe how the tokenizerprocesses the output of the command line to split it into tokens.At a high-level view, the output of the process as a whole consists of three
segments: The first segment is the prompt, enclosed in markers, as explained inthe following section. The second segment contains characters entered by the userwhile composing the command; the segment may include escape sequences andcontrol characters, which are produced while performing editing operations. Thefinal segment contains the command’s output, that simply consists of nonmarkercharacters. This sequence of segments can repeat indefinitely:
14
CLI process
Input filter Tokenizer
Logic
Terminal
Keyboard Screen
tokens
Figure 3.1: Information flow between the Nut Shell’s components. Unlabeledstreams carry Unicode characters.
Output = { PromptWithMarkers CommandComposing CommandOutput } .CommandOutput = { NonMarker } .NonMarker = /* every character except marker1 and marker2 */ .
3.3 Recognizing the promptThe prompt is the easiest component to recognize. As the prompt of the targetprocess can be changed (by definition, see section 3.1), the Nut Shell configuresthe prompt to start and end with marker1. Looking at the output, the prompt cannow be identified nonambiguously. The markers are skipped and are not displayedto the user.In this part of the grammar, the token we are really interested in is Prompt:
PromptWithMarkers = marker1 Prompt marker1 .Prompt = { NonMarker } .
This approach has a downside: In some command line programs it is possible to
15
change the prompt from within the program. If the user tries to change the prompthimself, the tokenizer will probably break.To add support for a new command line program to the Nut Shell, one has
to create a profile that specifies which options and commands are necessary toconfigure the prompt so it begins and ends with markers.
3.4 Recognizing the commandWhen the user enters characters with the keyboard, normally, these characters areimmediately displayed on the screen. This means that in the phase of entering acommand, the input of the underlying process is equal to its output.
Unfortunately, this is only true for visible characters. While editing the commandline, a user may use Readline’s key bindings or other shell built-in key combinationsthat modify the currently entered command in unusual ways. These make it hardfor the framework to recognize which command the user entered, as parts of theentered characters could have been deleted, otherwise have been changed, or—evenworse—have been generated by the program and never have been entered by theuser, as it happens with tab completion. To solve this problem, the Input filtercomponent deploys a mechanism to repeat the entered line before it is sent.
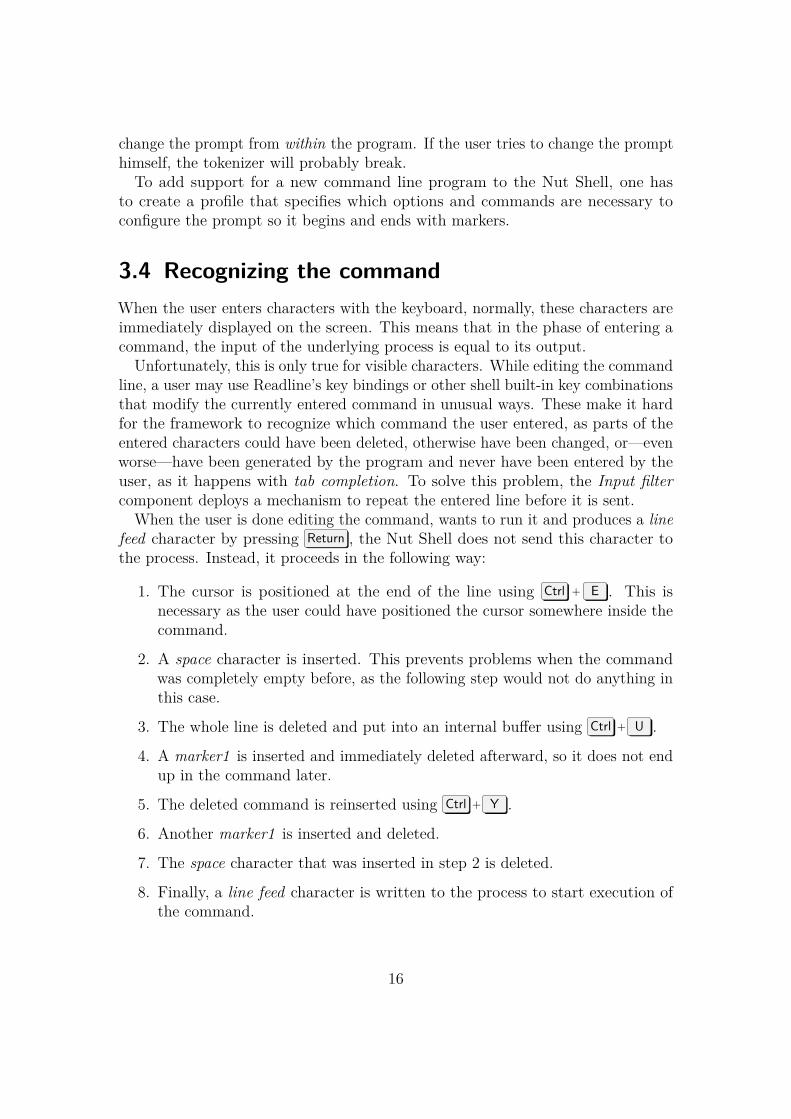
When the user is done editing the command, wants to run it and produces a linefeed character by pressing Return , the Nut Shell does not send this character tothe process. Instead, it proceeds in the following way:
1. The cursor is positioned at the end of the line using Ctrl + E . This isnecessary as the user could have positioned the cursor somewhere inside thecommand.
2. A space character is inserted. This prevents problems when the commandwas completely empty before, as the following step would not do anything inthis case.
3. The whole line is deleted and put into an internal buffer using Ctrl + U .
4. A marker1 is inserted and immediately deleted afterward, so it does not endup in the command later.
5. The deleted command is reinserted using Ctrl + Y .
6. Another marker1 is inserted and deleted.
7. The space character that was inserted in step 2 is deleted.
8. Finally, a line feed character is written to the process to start execution ofthe command.
16
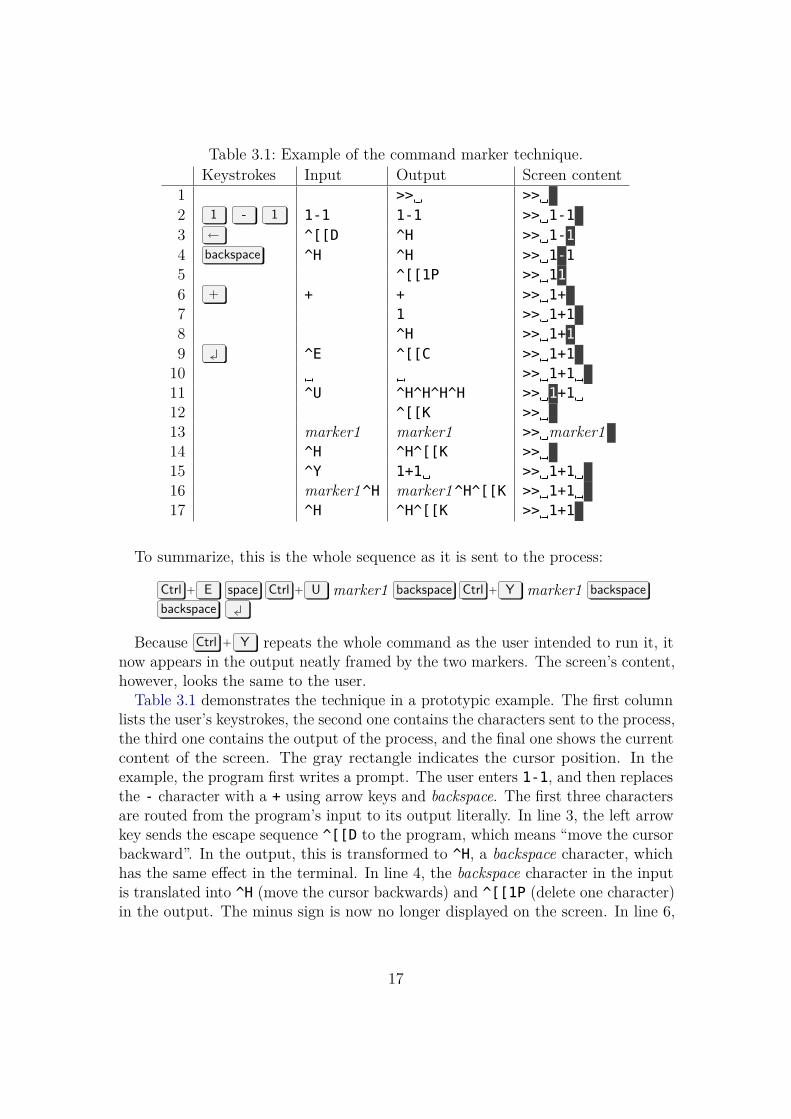
Table 3.1: Example of the command marker technique.Keystrokes Input Output Screen content
1 >> >>2 1 - 1 1-1 1-1 >> 1-13 ^[[D ^H >> 1-14 backspace ^H ^H >> 1-15 ^[[1P >> 116 + + + >> 1+7 1 >> 1+18 ^H >> 1+19 ^E ^[[C >> 1+110 >> 1+111 ^U ^H^H^H^H >> 1+112 ^[[K >>13 marker1 marker1 >> marker114 ^H ^H^[[K >>15 ^Y 1+1 >> 1+116 marker1^H marker1^H^[[K >> 1+117 ^H ^H^[[K >> 1+1
To summarize, this is the whole sequence as it is sent to the process:
Ctrl + E space Ctrl + U marker1 backspace Ctrl + Y marker1 backspacebackspace
Because Ctrl + Y repeats the whole command as the user intended to run it, itnow appears in the output neatly framed by the two markers. The screen’s content,however, looks the same to the user.
Table 3.1 demonstrates the technique in a prototypic example. The first columnlists the user’s keystrokes, the second one contains the characters sent to the process,the third one contains the output of the process, and the final one shows the currentcontent of the screen. The gray rectangle indicates the cursor position. In theexample, the program first writes a prompt. The user enters 1-1, and then replacesthe - character with a + using arrow keys and backspace. The first three charactersare routed from the program’s input to its output literally. In line 3, the left arrowkey sends the escape sequence ^[[D to the program, which means “move the cursorbackward”. In the output, this is transformed to ^H, a backspace character, whichhas the same effect in the terminal. In line 4, the backspace character in the inputis translated into ^H (move the cursor backwards) and ^[[1P (delete one character)in the output. The minus sign is now no longer displayed on the screen. In line 6,
17
the insertion of the + character has the following effect: The + and the text afterthe cursor (a 1) is rewritten, and the cursor is then moved back to its positioninside the command using ^H.From the content of the “Output” column up to line 9, it is hard to recognize
the actual command 1+1 (which is displayed on the screen) because of the insertedescape sequences and control characters. When the user presses return, it is notforwarded, but the previously described sequence is sent to the process instead.In line 9, the cursor is moved to the end of the line using ^[[C (move the cursorforward). In line 11, the command is deleted by moving the cursor to the beginningof the line with ^H and clearing the terminal’s current line from the cursor tothe right with ^[[K. After that, no new escape sequences appear: The marker isinserted and deleted, the command is repeated, another marker is inserted anddeleted, and finally the space character is removed.When reading the “Output” column, the correct command 1+1 now appears
neatly between the two markers. The first marker is followed by a deletion sequence,and the command is always followed by a space character. By removing both, theexact command the user wanted to enter can be extracted.
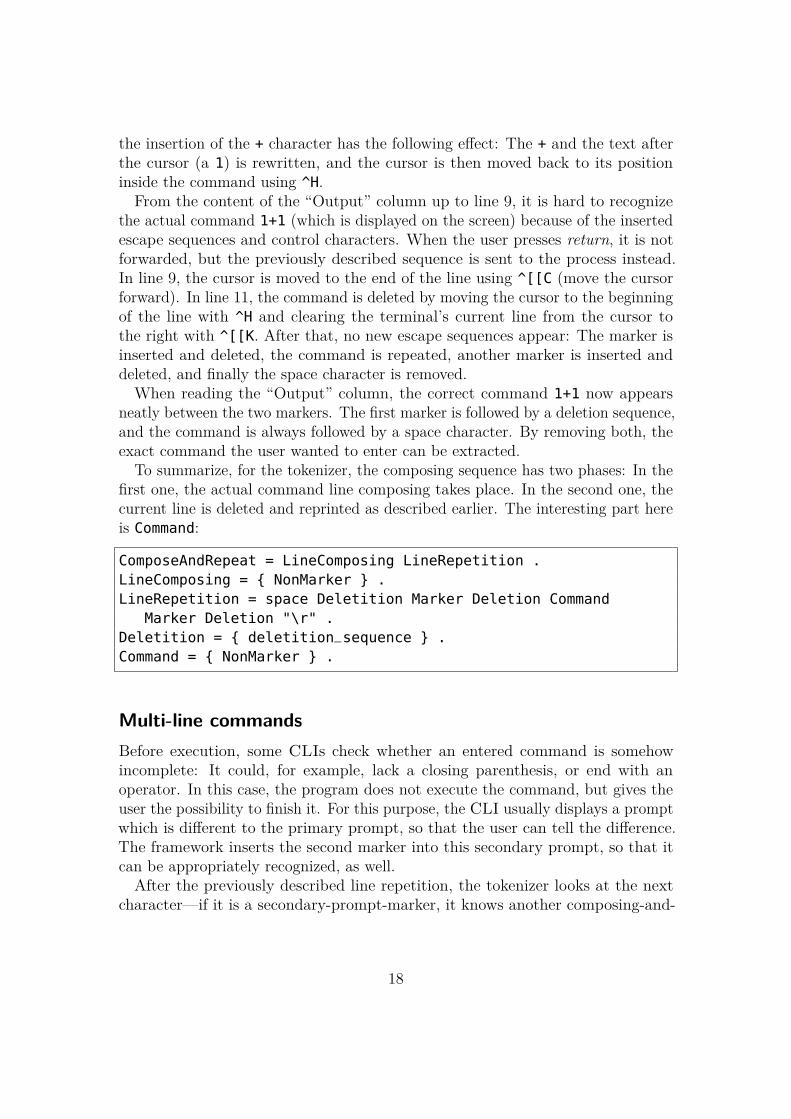
To summarize, for the tokenizer, the composing sequence has two phases: In thefirst one, the actual command line composing takes place. In the second one, thecurrent line is deleted and reprinted as described earlier. The interesting part hereis Command:
ComposeAndRepeat = LineComposing LineRepetition .LineComposing = { NonMarker } .LineRepetition = space Deletition Marker Deletion Command
Marker Deletion "\r" .Deletition = { deletition_sequence } .Command = { NonMarker } .
Multi-line commandsBefore execution, some CLIs check whether an entered command is somehowincomplete: It could, for example, lack a closing parenthesis, or end with anoperator. In this case, the program does not execute the command, but gives theuser the possibility to finish it. For this purpose, the CLI usually displays a promptwhich is different to the primary prompt, so that the user can tell the difference.The framework inserts the second marker into this secondary prompt, so that itcan be appropriately recognized, as well.After the previously described line repetition, the tokenizer looks at the next
character—if it is a secondary-prompt-marker, it knows another composing-and-
18
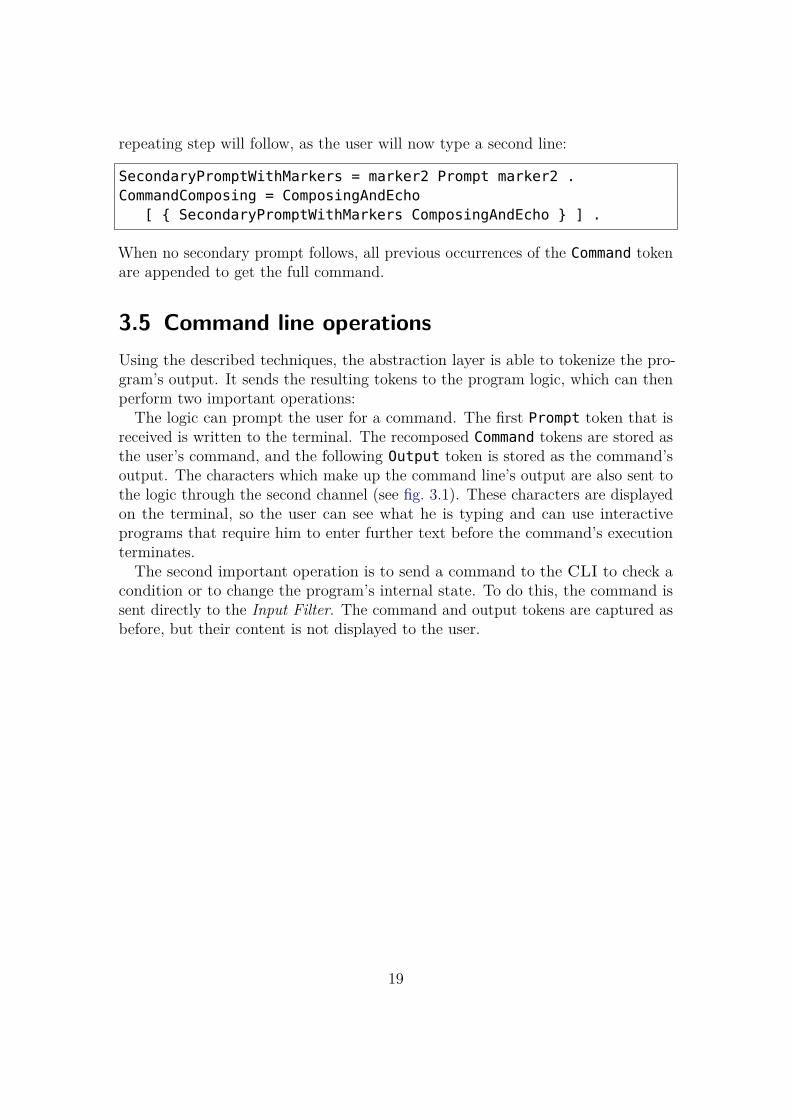
repeating step will follow, as the user will now type a second line:
SecondaryPromptWithMarkers = marker2 Prompt marker2 .CommandComposing = ComposingAndEcho
[ { SecondaryPromptWithMarkers ComposingAndEcho } ] .
When no secondary prompt follows, all previous occurrences of the Command tokenare appended to get the full command.
3.5 Command line operationsUsing the described techniques, the abstraction layer is able to tokenize the pro-gram’s output. It sends the resulting tokens to the program logic, which can thenperform two important operations:The logic can prompt the user for a command. The first Prompt token that is
received is written to the terminal. The recomposed Command tokens are stored asthe user’s command, and the following Output token is stored as the command’soutput. The characters which make up the command line’s output are also sent tothe logic through the second channel (see fig. 3.1). These characters are displayedon the terminal, so the user can see what he is typing and can use interactiveprograms that require him to enter further text before the command’s executionterminates.The second important operation is to send a command to the CLI to check a
condition or to change the program’s internal state. To do this, the command issent directly to the Input Filter. The command and output tokens are captured asbefore, but their content is not displayed to the user.
19
4 The nutsh LanguageTo enable authors to write tutorials for the Nut Shell quickly, the frameworkincludes a new imperative domain-specific programming language (DSL). Thislanguage is called nutsh, a contraction of “Nut Shell”. Files written in the nutshlanguage represent “lessons”, self-contained teaching units.
4.1 Design goalsThe lesson’s source code should be as easy to read and write as possible. To achievethis, nutsh uses a syntax that in large parts resembles languages that potentialusers already may know. In this case, it resembles the syntax of C, with someinfluences of Google Go [3], for example in the definition of string literals and thesyntax of conditional clauses. It also uses regular expressions and a few elementsof the markup language Markdown.
Another design goal was to keep the language as small as possible, while makingit powerful enough for the intended purpose. For this reason, its only data type isa string of Unicode characters. Variables also proved unnecessary.The language contains syntactic structures that allow efficient expression of
often-used semantical constellations. It also allows basic function definitions toreuse code snippets and minimize redundancy.The following sections specify the language’s lexical and syntactical elements
and describe their semantics.
4.2 Lexical elementsCommentsnutsh has two types of comments, as they exist in C-like languages: Line commentsstart with // and stop at the end of the line, block comments start with /* andend with */. Comments act as white space and are ignored otherwise.
White spaceWhites space consists of line feeds, carriage returns, tab and space characters. Itseparates tokens but has no further meaning.
20
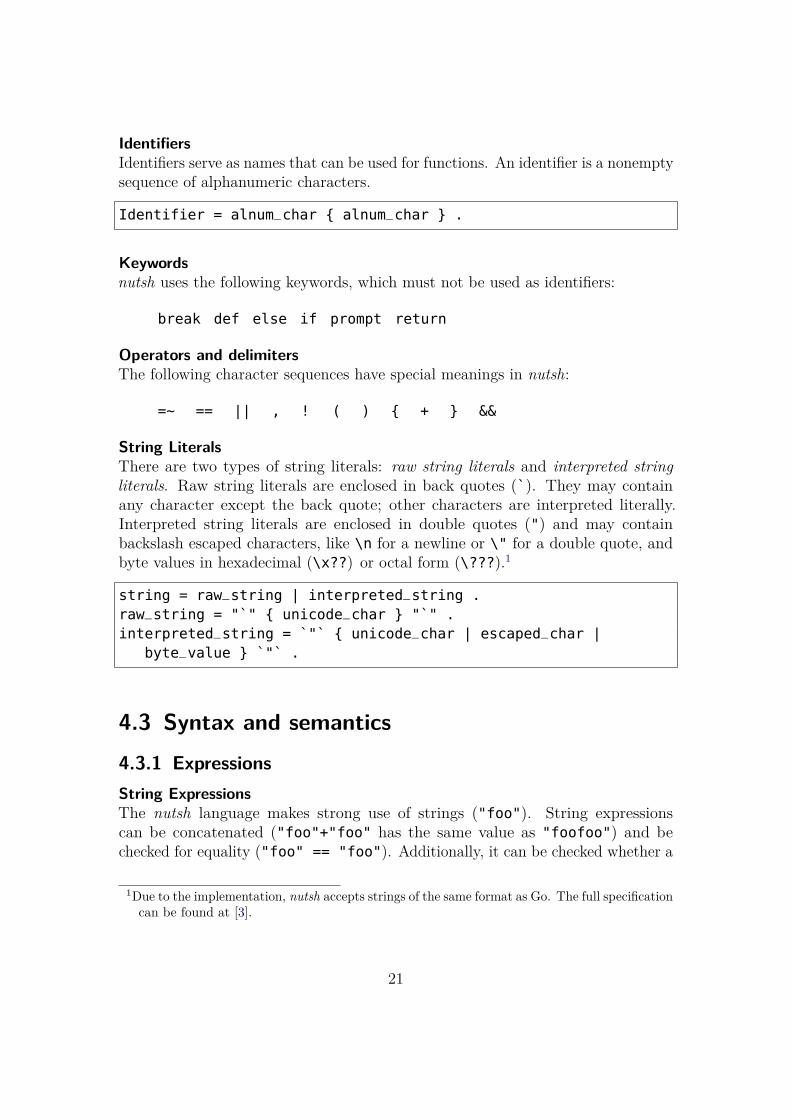
IdentifiersIdentifiers serve as names that can be used for functions. An identifier is a nonemptysequence of alphanumeric characters.
Identifier = alnum_char { alnum_char } .
Keywordsnutsh uses the following keywords, which must not be used as identifiers:
break def else if prompt return
Operators and delimitersThe following character sequences have special meanings in nutsh:
=~ == || , ! ( ) { + } &&
String LiteralsThere are two types of string literals: raw string literals and interpreted stringliterals. Raw string literals are enclosed in back quotes (`). They may containany character except the back quote; other characters are interpreted literally.Interpreted string literals are enclosed in double quotes (") and may containbackslash escaped characters, like \n for a newline or \" for a double quote, andbyte values in hexadecimal (\x??) or octal form (\???).1
string = raw_string | interpreted_string .raw_string = "`" { unicode_char } "`" .interpreted_string = `"` { unicode_char | escaped_char |
byte_value } `"` .
4.3 Syntax and semantics4.3.1 ExpressionsString ExpressionsThe nutsh language makes strong use of strings ("foo"). String expressionscan be concatenated ("foo"+"foo" has the same value as "foofoo") and bechecked for equality ("foo" == "foo"). Additionally, it can be checked whether a
1Due to the implementation, nutsh accepts strings of the same format as Go. The full specificationcan be found at [3].
21
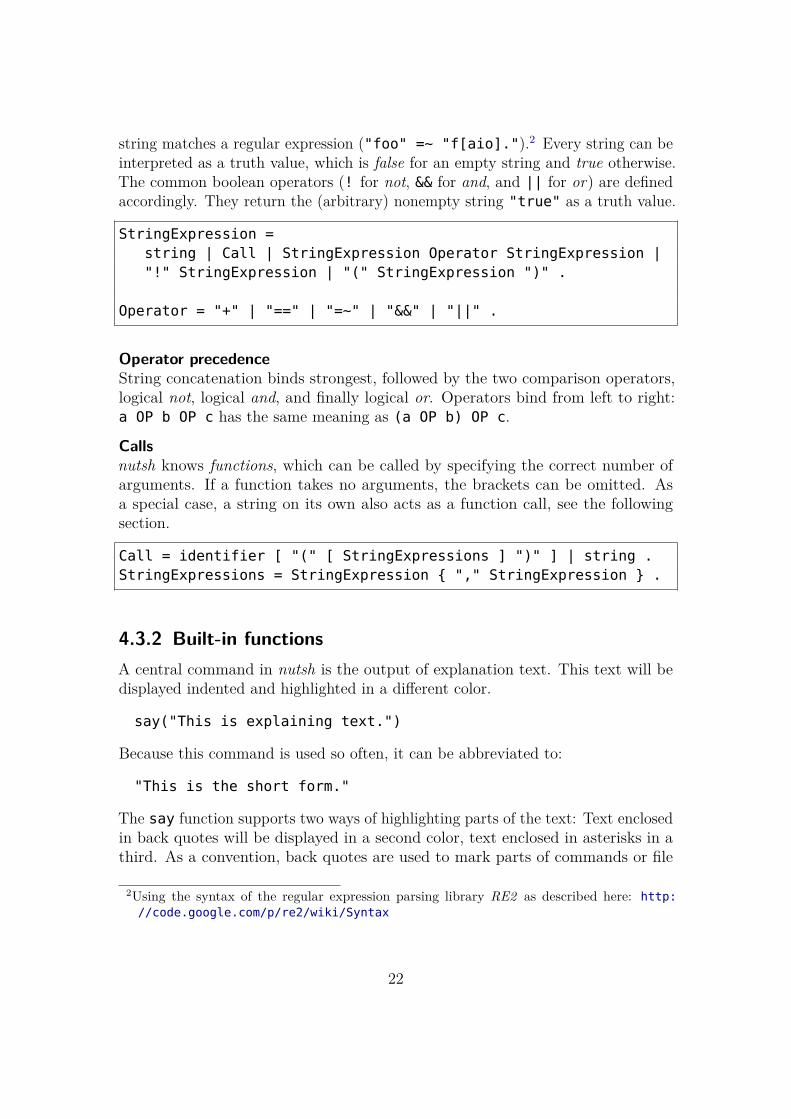
string matches a regular expression ("foo" =~ "f[aio].").2 Every string can beinterpreted as a truth value, which is false for an empty string and true otherwise.The common boolean operators (! for not, && for and, and || for or) are definedaccordingly. They return the (arbitrary) nonempty string "true" as a truth value.
StringExpression =string | Call | StringExpression Operator StringExpression |"!" StringExpression | "(" StringExpression ")" .
Operator = "+" | "==" | "=~" | "&&" | "||" .
Operator precedenceString concatenation binds strongest, followed by the two comparison operators,logical not, logical and, and finally logical or. Operators bind from left to right:a OP b OP c has the same meaning as (a OP b) OP c.
Callsnutsh knows functions, which can be called by specifying the correct number ofarguments. If a function takes no arguments, the brackets can be omitted. Asa special case, a string on its own also acts as a function call, see the followingsection.
Call = identifier [ "(" [ StringExpressions ] ")" ] | string .StringExpressions = StringExpression { "," StringExpression } .
4.3.2 Built-in functionsA central command in nutsh is the output of explanation text. This text will bedisplayed indented and highlighted in a different color.
say("This is explaining text.")
Because this command is used so often, it can be abbreviated to:
"This is the short form."
The say function supports two ways of highlighting parts of the text: Text enclosedin back quotes will be displayed in a second color, text enclosed in asterisks in athird. As a convention, back quotes are used to mark parts of commands or file
2Using the syntax of the regular expression parsing library RE2 as described here: http://code.google.com/p/re2/wiki/Syntax
22
names, and asterisks are used to emphazise parts of a sentence. These conventionshave been adopted from John Gruber’s Markdown.3
The run function executes a command in the target process, it takes a commandline in the target language as an argument. The return value of this function isthe command’s output. The function can be used to check for conditions in thecommand line environment.
run("1+1")
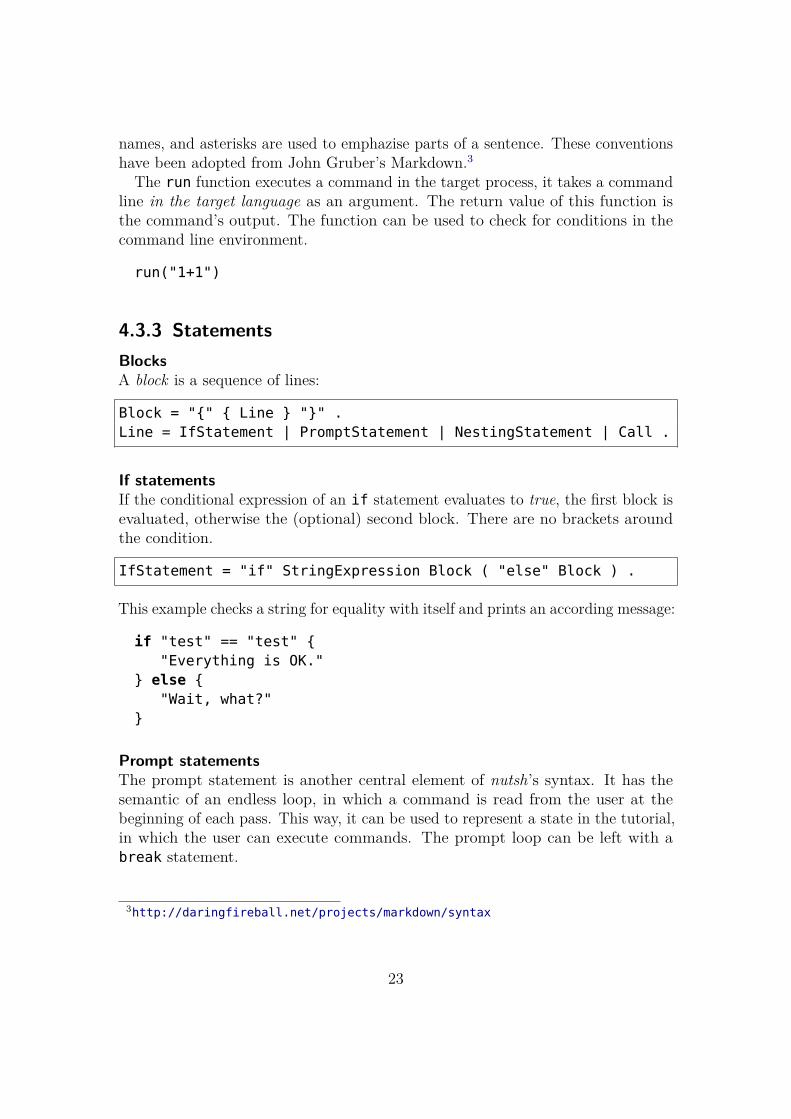
4.3.3 StatementsBlocksA block is a sequence of lines:
Block = "{" { Line } "}" .Line = IfStatement | PromptStatement | NestingStatement | Call .
If statementsIf the conditional expression of an if statement evaluates to true, the first block isevaluated, otherwise the (optional) second block. There are no brackets aroundthe condition.
IfStatement = "if" StringExpression Block ( "else" Block ) .
This example checks a string for equality with itself and prints an according message:
if "test" == "test" {"Everything is OK."
} else {"Wait, what?"
}
Prompt statementsThe prompt statement is another central element of nutsh’s syntax. It has thesemantic of an endless loop, in which a command is read from the user at thebeginning of each pass. This way, it can be used to represent a state in the tutorial,in which the user can execute commands. The prompt loop can be left with abreak statement.
3http://daringfireball.net/projects/markdown/syntax
23
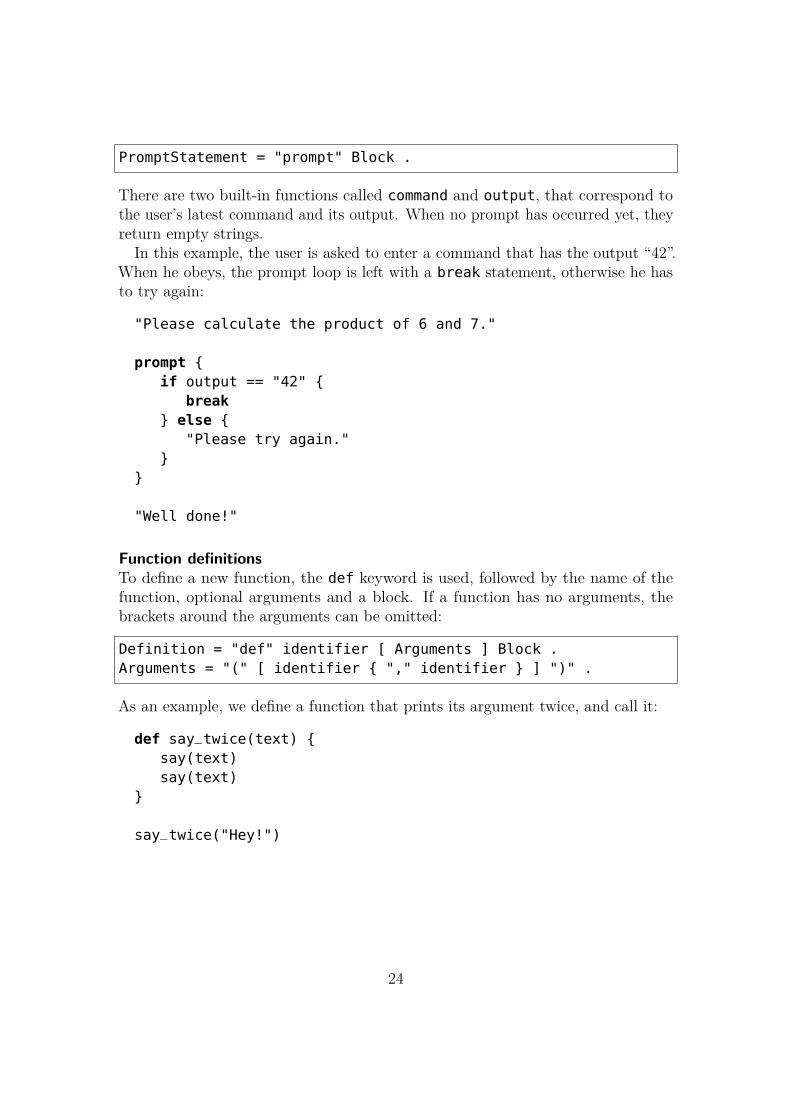
PromptStatement = "prompt" Block .
There are two built-in functions called command and output, that correspond tothe user’s latest command and its output. When no prompt has occurred yet, theyreturn empty strings.
In this example, the user is asked to enter a command that has the output “42”.When he obeys, the prompt loop is left with a break statement, otherwise he hasto try again:
"Please calculate the product of 6 and 7."
prompt {if output == "42" {
break} else {
"Please try again."}
}
"Well done!"
Function definitionsTo define a new function, the def keyword is used, followed by the name of thefunction, optional arguments and a block. If a function has no arguments, thebrackets around the arguments can be omitted:
Definition = "def" identifier [ Arguments ] Block .Arguments = "(" [ identifier { "," identifier } ] ")" .
As an example, we define a function that prints its argument twice, and call it:
def say_twice(text) {say(text)say(text)
}
say_twice("Hey!")
24
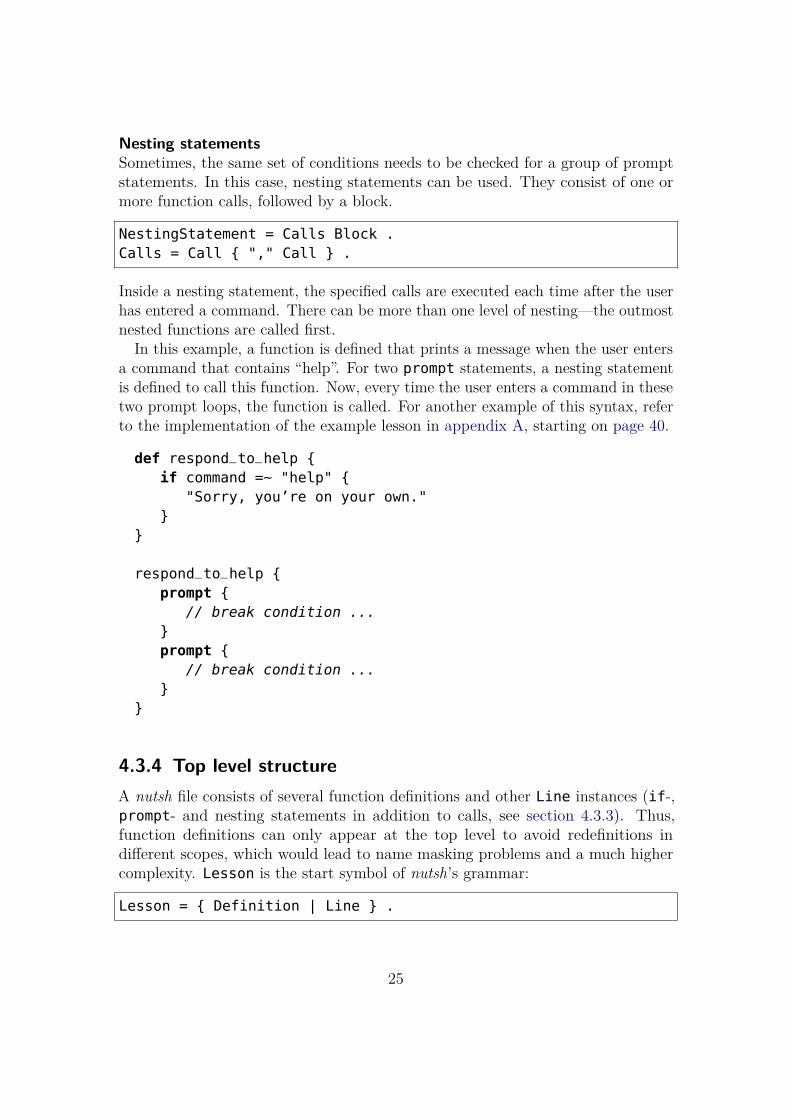
Nesting statementsSometimes, the same set of conditions needs to be checked for a group of promptstatements. In this case, nesting statements can be used. They consist of one ormore function calls, followed by a block.
NestingStatement = Calls Block .Calls = Call { "," Call } .
Inside a nesting statement, the specified calls are executed each time after the userhas entered a command. There can be more than one level of nesting—the outmostnested functions are called first.
In this example, a function is defined that prints a message when the user entersa command that contains “help”. For two prompt statements, a nesting statementis defined to call this function. Now, every time the user enters a command in thesetwo prompt loops, the function is called. For another example of this syntax, referto the implementation of the example lesson in appendix A, starting on page 40.
def respond_to_help {if command =~ "help" {
"Sorry, you’re on your own."}
}
respond_to_help {prompt {
// break condition ...}prompt {
// break condition ...}
}
4.3.4 Top level structureA nutsh file consists of several function definitions and other Line instances (if-,prompt- and nesting statements in addition to calls, see section 4.3.3). Thus,function definitions can only appear at the top level to avoid redefinitions indifferent scopes, which would lead to name masking problems and a much highercomplexity. Lesson is the start symbol of nutsh’s grammar:
Lesson = { Definition | Line } .
25
4.4 Parsing and interpretationnutsh has a LR(1) grammar, which means that it can be parsed by a bottom-upparser reading from left to right in a single pass, creating a rightmost derivation.For parsing, nutsh uses a standard LALR(1) parser generator, more details canbe found in chapter 5. The parser creates a syntax tree whose nodes have a stringvalue and an arbitrary number of child nodes. For leaf nodes, the string valuerepresents the lexical value, for inner nodes, it represents the node’s type.When a function definition is encountered, the definition node along with its
children is added to the symbol table. After it has been defined, the function canbe called until the end of the source file. As functions can only be defined at thetop level, no dedicated scoping is necessary.When evaluating a string expression, a node’s value can be calculated from its
children’s values, the attribute is synthesized. This makes an evaluation of thesyntax tree especially easy, as the interpreter can now travel through the tree in abottom-up manner. nutsh uses lazy evaluation: An expression is only evaluatedwhen it is needed.
The arguments to a function, however, are always evaluated, the resulting valueis bound to the corresponding argument name in the function (pass-by-value),implicitly defining new functions for each argument, which simply return theargument’s value.
While traversing the syntax tree, the interpreter keeps track of the encounterednesting statement’s function calls, which are pushed on a stack when entering thenesting statement and which are removed when leaving it. When a prompt node isencountered, the CLI abstraction layer is used to prompt the user for a command.The command and its output are saved so they can be accessed when the inputand output functions are called. After that, the calls in the nesting stack areexecuted from bottom to top. Finally, the block inside the prompt statement isevaluated.
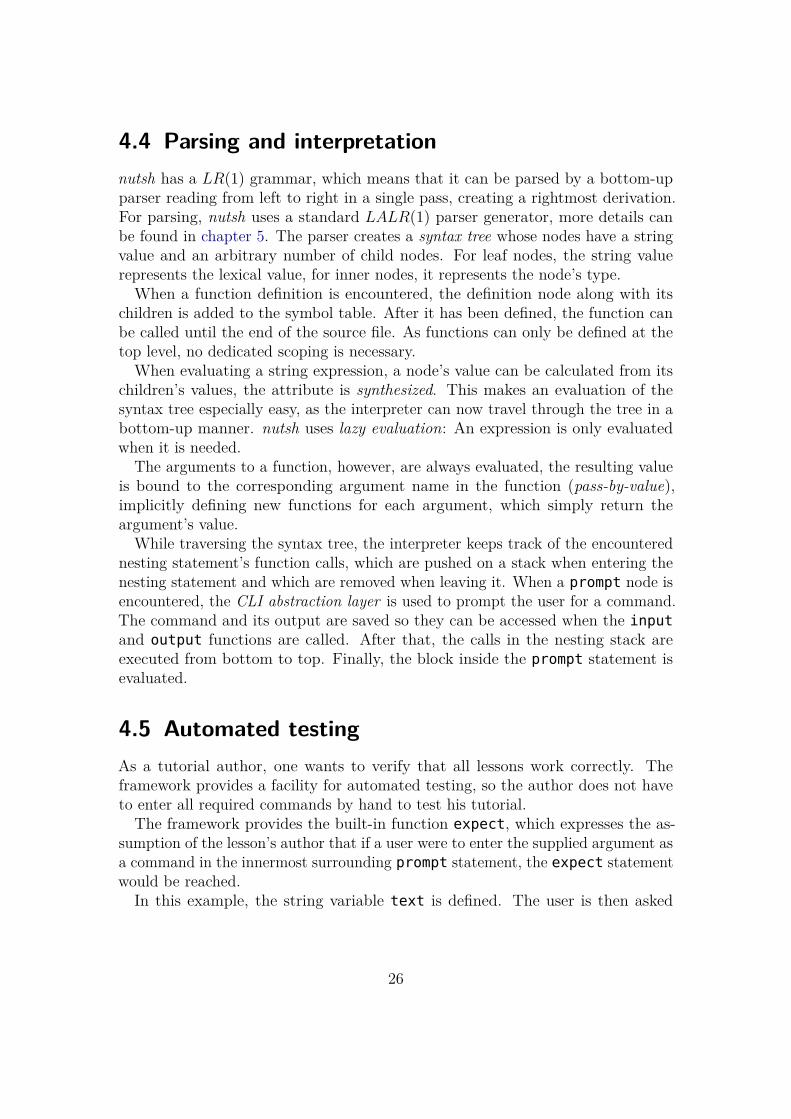
4.5 Automated testingAs a tutorial author, one wants to verify that all lessons work correctly. Theframework provides a facility for automated testing, so the author does not haveto enter all required commands by hand to test his tutorial.The framework provides the built-in function expect, which expresses the as-
sumption of the lesson’s author that if a user were to enter the supplied argument asa command in the innermost surrounding prompt statement, the expect statementwould be reached.
In this example, the string variable text is defined. The user is then asked
26
to reverse it. The expect statements give two different ways to achieve that—both should work. There’s also an expect statement that should not lead to anevaluation of the first block:
run("text = ’stressed’")"Reverse the content of `text` and save it in `text2`!"prompt {
if test("text2 == ’desserts’") {"You did it!"expect("text2 = text.reverse")expect("text.reverse!; text2 = text")break
} else {expect("text2 = ’somethingdifferent’")
}}
The testing algorithm first collects all expect statements and creates a referencefor each of them in the nearest surrounding prompt statement. Each is marked as“unreached”.
It then starts interpreting the file like normally, but when a prompt statementis encountered, instead of querying the user for a command, one of the unreachedassociated expect commands is used. When the respective expect statementindeed is reached, the statement is marked as “reached”. When the end of theprompt loop is encountered, and the expect has not been reached, an error isprinted and the test is aborted. At the end of the file, if there are any unreachedexpect statements left, the lesson is restarted.
By convention, when a prompt is encountered whose expect statements all arereached, the first one is used. Thus, the first expect in each prompt should beone that leads to a break statement to ensure the testing algorithm terminates. Amore flexible approach would be to create a control flow graph for the lesson andensure that every branch is considered while testing by choosing expect statementsthat lead to not yet tested parts of the lesson.
27
5 ImplementationThe framework has been implemented in Go [3], a young, compiled, statically typedlanguage, which is seen by many as a modern successor to C. This language was agood fit for the Nut Shell as it is fast, was created with low-level programming inmind, and has a big standard library with built-in support for Unicode and UTF-8.In total, the implementation consists of 2576 source lines of code.
The implementation uses folders to represent tutorials, which can contain severallesson files written in the nutsh language. A configuration file named info.yamlspecifies the tutorial’s name and the target command line program that is to beused. A file called common.nutsh can be used to define functions that are includedin every lesson.
The source code is organized in four subpackages: The cli package implementsthe command line abstraction layer as described in chapter 3. It uses the ptypackage1 to emulate a terminal, and starts a thread for each component in fig. 3.1.Go’s built-in support for concurrency and synchronized communication betweenthreads came in handy here.The dsl package uses the abstraction layer to provide an internal API that
allows easy access to important operations, like starting and destroying commandline processes, prompting the user for a command or sending a hidden query to thecommand line, as described in section 3.5.The model package understands the directory structure described earlier, and
provides operations like initializing a tutorial, presenting a list of lessons to the userto choose from, or saving the current progress. The progress simply consists of a listof finished lessons, so they can be displayed as “done”. The goyaml package2 wasused to read and write configuration files written in the YAML markup language.Finally, the parser package is responsible for lexing, parsing, interpreting and
testing single nutsh files as described in chapter 4. For parsing, this package usesYACC, a widely used LALR(1) parser generator that takes a list of token types, agrammar description and an operator precedence declaration and then generates afunction that receives tokens from the lexer and parses them. Go comes with itsown YACC implementation.3
1http://github.com/kr/pty2http://launchpad.net/goyaml3http://golang.org/cmd/yacc/
28

6 Application and EvaluationTo find out whether the tutorials created with the Nut Shell has any advantagescompared to traditional teaching methods, we created an example tutorial andconducted a two-week course with a subsequent survey.
6.1 SettingThe Institute for Programming and Reactive Systems at the BraunschweigUniversity of Technology has been organizing preparatory computer sciencecourses for freshman students since 2003. This course teaches how to use UNIX-likeoperating systems and accompaning tools for program creation.Until now, these topics were tought by handing out exercises on paper, which
the students could work on in computer pools. For support, student assistantswere provided, with about one assistant per 40 students.
In the fall semester 2013–2014, 150 students enrolled in the course. For thisstudy, the students were split into two groups: Two thirds of the students wererandomly selected to use the Nut Shell, the remaining one third worked with thepreviously used exercises on paper. The groups worked in two separate rooms.Each day, there were three time slots of 75 minutes each, to which the studentswere assigned in equal parts. The course spanned over eight days, not including aweekend and a day off.
The course roughly covered the following topics: The UNIX file system andhow to manipulate it; various text editors like Vim, Emacs, and Gedit; processmanagement; command line tools for text manupulation like grep, sort, or patch;various shell mechanism like output redirection and the command history; shellscripts; automatition with Makefiles; accessing remote servers with SSH; typesettingdocuments with LATEX; understanding and repairing programs written in Java; andversion control with Git.
The newly created Nut Shell tutorial kept these topics and their order. Thematerial was divided into 30 invidiual lessons, each of which covered one specifictopic. Each day, new lessons were made available. In total, the tutorial contained2875 lines of nutsh code. It took about 30 hours to write and test the lessons.Refer to appendix A for an example lesson. Appendix B gives a complete list ofthe created lessons.
29
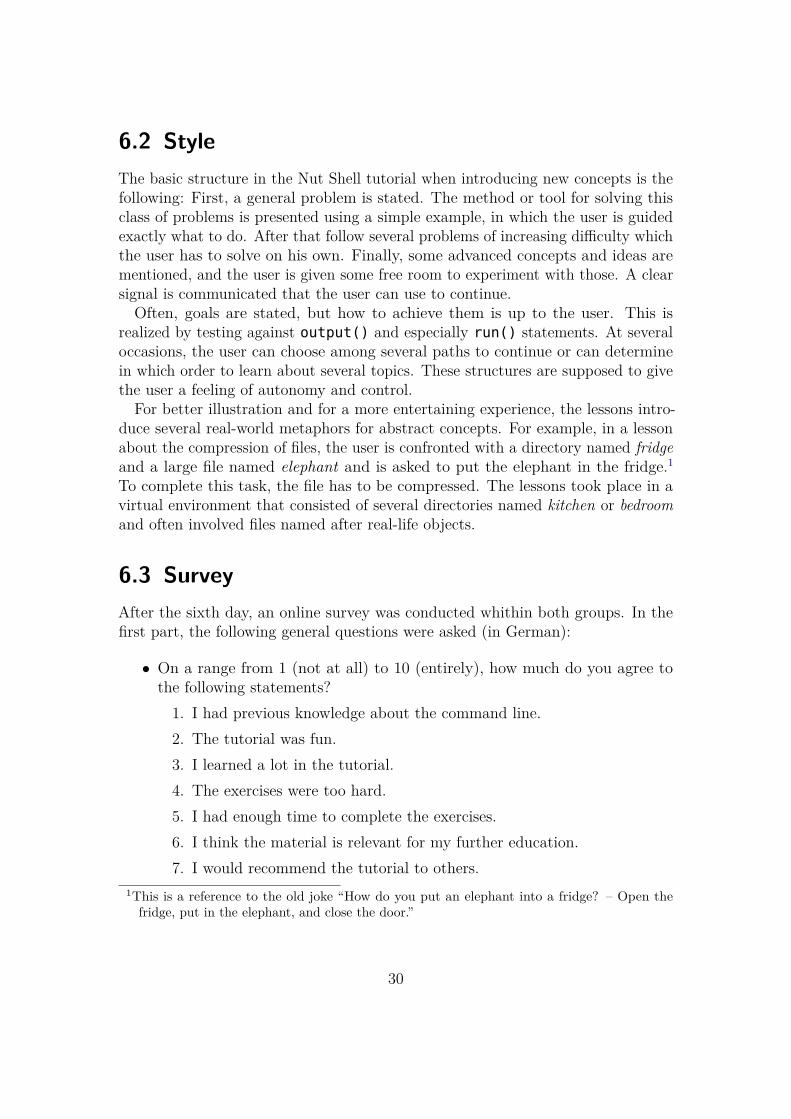
6.2 StyleThe basic structure in the Nut Shell tutorial when introducing new concepts is thefollowing: First, a general problem is stated. The method or tool for solving thisclass of problems is presented using a simple example, in which the user is guidedexactly what to do. After that follow several problems of increasing difficulty whichthe user has to solve on his own. Finally, some advanced concepts and ideas arementioned, and the user is given some free room to experiment with those. A clearsignal is communicated that the user can use to continue.Often, goals are stated, but how to achieve them is up to the user. This is
realized by testing against output() and especially run() statements. At severaloccasions, the user can choose among several paths to continue or can determinein which order to learn about several topics. These structures are supposed to givethe user a feeling of autonomy and control.
For better illustration and for a more entertaining experience, the lessons intro-duce several real-world metaphors for abstract concepts. For example, in a lessonabout the compression of files, the user is confronted with a directory named fridgeand a large file named elephant and is asked to put the elephant in the fridge.1To complete this task, the file has to be compressed. The lessons took place in avirtual environment that consisted of several directories named kitchen or bedroomand often involved files named after real-life objects.
6.3 SurveyAfter the sixth day, an online survey was conducted whithin both groups. In thefirst part, the following general questions were asked (in German):
• On a range from 1 (not at all) to 10 (entirely), how much do you agree tothe following statements?1. I had previous knowledge about the command line.2. The tutorial was fun.3. I learned a lot in the tutorial.4. The exercises were too hard.5. I had enough time to complete the exercises.6. I think the material is relevant for my further education.7. I would recommend the tutorial to others.
1This is a reference to the old joke “How do you put an elephant into a fridge? – Open thefridge, put in the elephant, and close the door.”
30
• How many times did you have to ask for help per day?
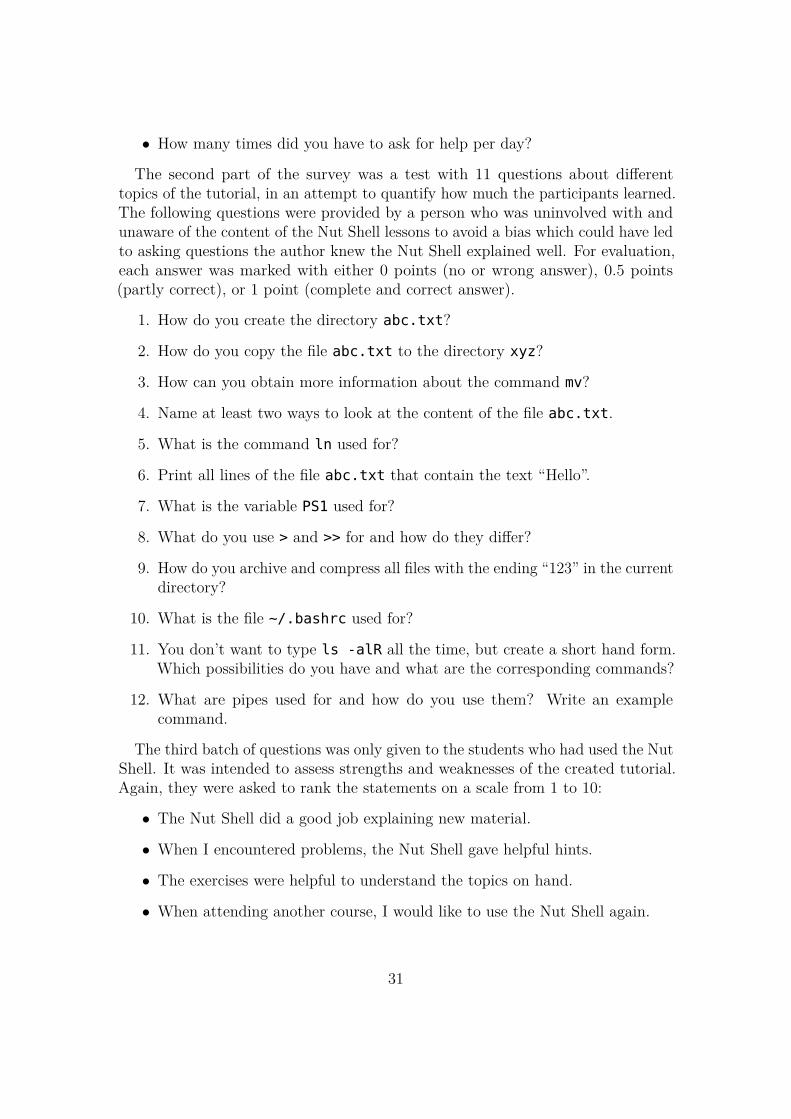
The second part of the survey was a test with 11 questions about differenttopics of the tutorial, in an attempt to quantify how much the participants learned.The following questions were provided by a person who was uninvolved with andunaware of the content of the Nut Shell lessons to avoid a bias which could have ledto asking questions the author knew the Nut Shell explained well. For evaluation,each answer was marked with either 0 points (no or wrong answer), 0.5 points(partly correct), or 1 point (complete and correct answer).
1. How do you create the directory abc.txt?
2. How do you copy the file abc.txt to the directory xyz?
3. How can you obtain more information about the command mv?
4. Name at least two ways to look at the content of the file abc.txt.
5. What is the command ln used for?
6. Print all lines of the file abc.txt that contain the text “Hello”.
7. What is the variable PS1 used for?
8. What do you use > and >> for and how do they differ?
9. How do you archive and compress all files with the ending “123” in the currentdirectory?
10. What is the file ~/.bashrc used for?
11. You don’t want to type ls -alR all the time, but create a short hand form.Which possibilities do you have and what are the corresponding commands?
12. What are pipes used for and how do you use them? Write an examplecommand.
The third batch of questions was only given to the students who had used the NutShell. It was intended to assess strengths and weaknesses of the created tutorial.Again, they were asked to rank the statements on a scale from 1 to 10:
• The Nut Shell did a good job explaining new material.
• When I encountered problems, the Nut Shell gave helpful hints.
• The exercises were helpful to understand the topics on hand.
• When attending another course, I would like to use the Nut Shell again.
31
6.4 ResultsFor the survey’s first part, there were 64 answers in total. 53 of the participantsspecified they had used the Nut Shell, 11 of them had used the exercise sheets.Figure 6.1 juxtaposes the answers to the general questions in both groups in theform of a box plot: The circle marks the median of the answers to each question,the box contains 50% of the answers, the whiskers reach from the minimum to themaximum answer. The Nut Shell users had more fun and had the impression ofhaving learned more than the exercise users. The unpaired two-sample t-test [4]yields p-values of 0.054 respectively 0.060, which means that there is a chance of5–6% that this difference is accountable to random. While there is slight evidencethat the Nut Shell users found the course easier, had less time, and thought of thetopics to be more relevant, these differences are not statistically significant.
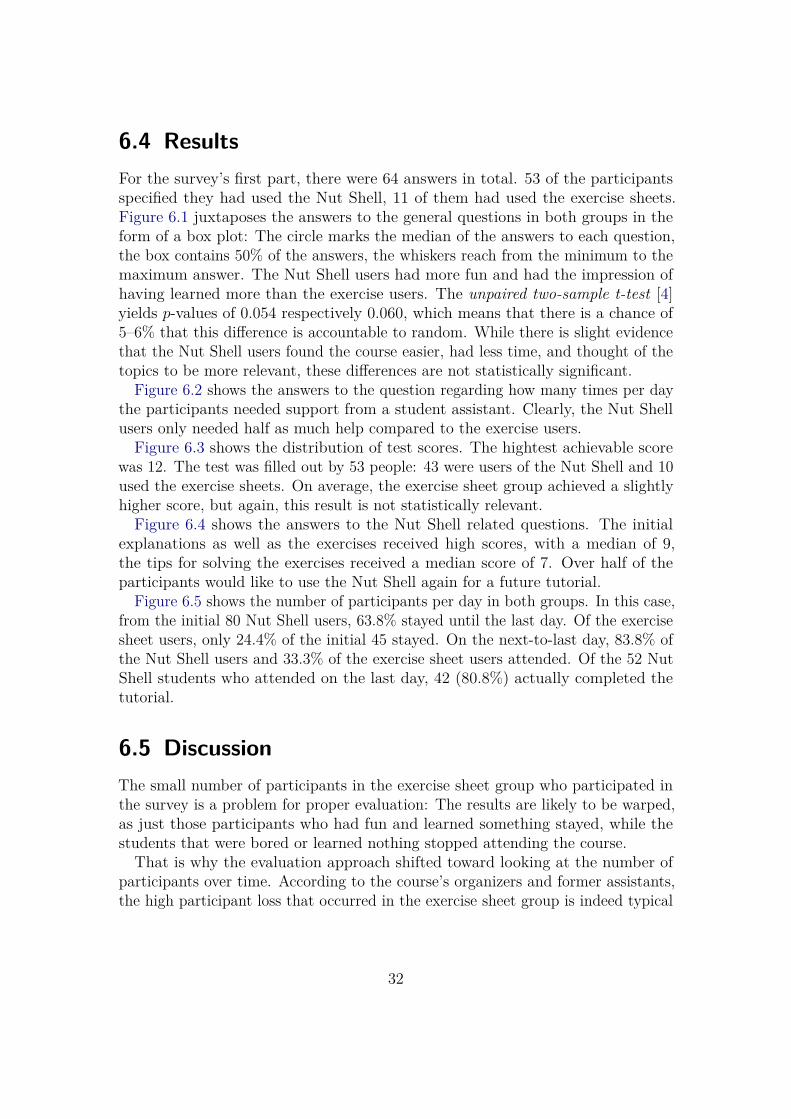
Figure 6.2 shows the answers to the question regarding how many times per daythe participants needed support from a student assistant. Clearly, the Nut Shellusers only needed half as much help compared to the exercise users.Figure 6.3 shows the distribution of test scores. The hightest achievable score
was 12. The test was filled out by 53 people: 43 were users of the Nut Shell and 10used the exercise sheets. On average, the exercise sheet group achieved a slightlyhigher score, but again, this result is not statistically relevant.Figure 6.4 shows the answers to the Nut Shell related questions. The initial
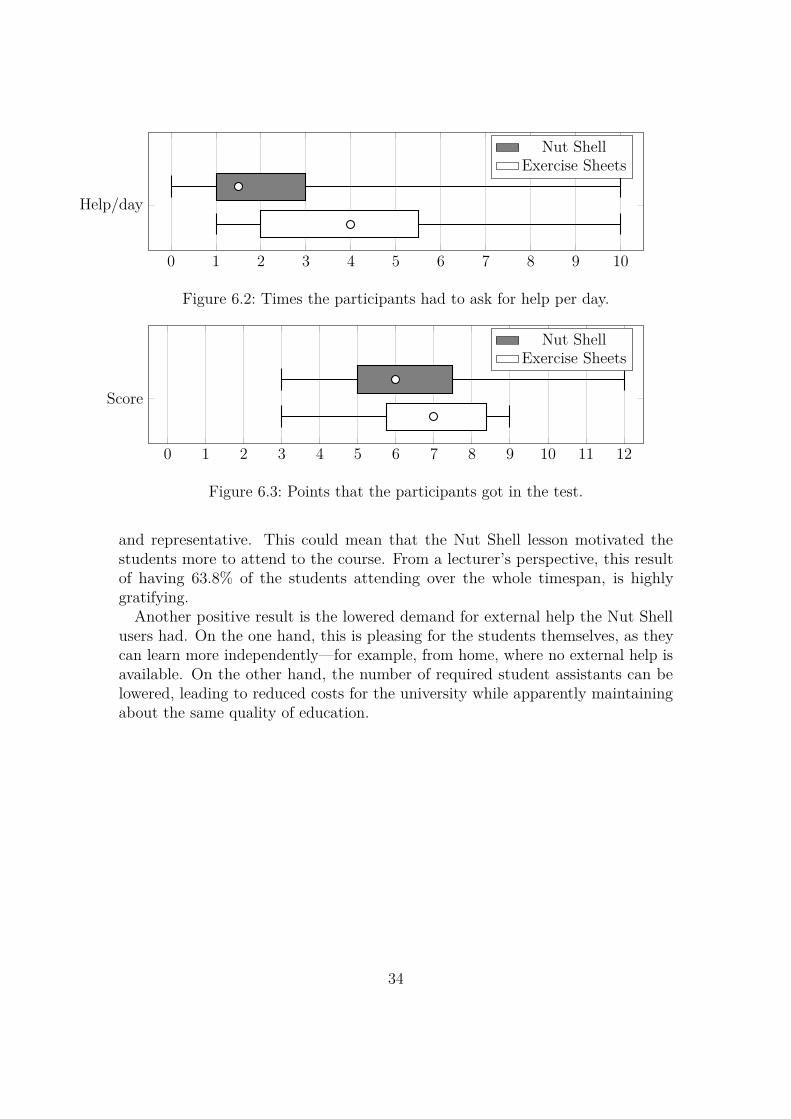
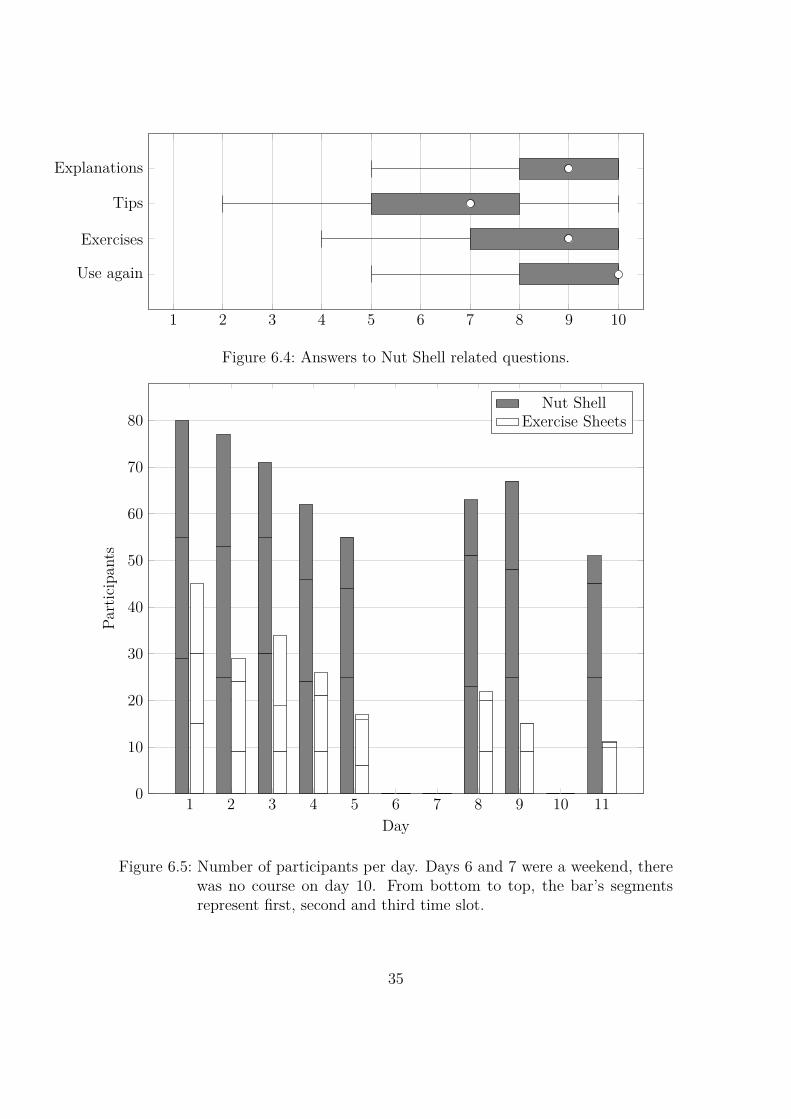
explanations as well as the exercises received high scores, with a median of 9,the tips for solving the exercises received a median score of 7. Over half of theparticipants would like to use the Nut Shell again for a future tutorial.
Figure 6.5 shows the number of participants per day in both groups. In this case,from the initial 80 Nut Shell users, 63.8% stayed until the last day. Of the exercisesheet users, only 24.4% of the initial 45 stayed. On the next-to-last day, 83.8% ofthe Nut Shell users and 33.3% of the exercise sheet users attended. Of the 52 NutShell students who attended on the last day, 42 (80.8%) actually completed thetutorial.
6.5 DiscussionThe small number of participants in the exercise sheet group who participated inthe survey is a problem for proper evaluation: The results are likely to be warped,as just those participants who had fun and learned something stayed, while thestudents that were bored or learned nothing stopped attending the course.That is why the evaluation approach shifted toward looking at the number of
participants over time. According to the course’s organizers and former assistants,the high participant loss that occurred in the exercise sheet group is indeed typical
32

1 2 3 4 5 6 7 8 9 10
Prior knowl.
Fun
Learned a lot
Too hard
Enough time
Relevant
Recommend
Nut ShellExercise Sheets
Figure 6.1: Answers to general questions.
33
0 1 2 3 4 5 6 7 8 9 10
Help/day
Nut ShellExercise Sheets
Figure 6.2: Times the participants had to ask for help per day.
0 1 2 3 4 5 6 7 8 9 10 11 12
Score
Nut ShellExercise Sheets
Figure 6.3: Points that the participants got in the test.
and representative. This could mean that the Nut Shell lesson motivated thestudents more to attend to the course. From a lecturer’s perspective, this resultof having 63.8% of the students attending over the whole timespan, is highlygratifying.Another positive result is the lowered demand for external help the Nut Shell
users had. On the one hand, this is pleasing for the students themselves, as theycan learn more independently—for example, from home, where no external help isavailable. On the other hand, the number of required student assistants can belowered, leading to reduced costs for the university while apparently maintainingabout the same quality of education.
34
1 2 3 4 5 6 7 8 9 10
Explanations
Tips
Exercises
Use again
Figure 6.4: Answers to Nut Shell related questions.
1 2 3 4 5 6 7 8 9 10 110
10
20
30
40
50
60
70
80
Day
Participan
ts
Nut ShellExercise Sheets
Figure 6.5: Number of participants per day. Days 6 and 7 were a weekend, therewas no course on day 10. From bottom to top, the bar’s segmentsrepresent first, second and third time slot.
35
7 Conclusions and Future WorkBecause of the evaluation’s positive outcome, the Nut Shell will be used for theupcoming preparatory courses exclusively. Another institute has already showninterest to use the Nut Shell for a more in-depth course on the version controlsoftware Git. During the preparatory course, a participating student told us hewould like to use the Nut Shell to teach command line concepts to pupils at his oldschool.The student’s general feedback during the evaluation was very positive. Some
were eager to install Linux on their own computers so they could continue to usethe tutorial. Some requested that the Nut Shell should be made available in allthe university’s Linux computer rooms. Another path was chosen: Because theprogram is a terminal application, it can be used remotely via an SSH connection.It is now possible to use the Nut Shell on the university’s shell server from virtuallyeverywhere.Development of the Nut Shell will continue. The software and the tutorial will
be released under a free, open source license to allow everyone to use them and tocreate new tutorials using the nutsh language.
Future workThere is a lot of potential for further development. Right now, typing errors canonly be catched by defining appropriate command checks by hand. The expect-statements could be used to automate the detection of these errors by measuringthe edit distance1 between the entered and the expected commands. When thedistance falls below a certain threshold, the correct command could be suggestedto the user.
Although the syntax of the prompt statement clearly communicates its semanticstructure, in practical use it seems cumbersome, as it is repeated so often. Thesyntax could be simplified here, so that blocks of if clauses imply a promptstatement around them. Another language element for preventing this automationwould have to be added as well.
Right now, the lessons of a tutorial follow a linear order. It would make sense tostructure them as a dependency graph, in which the tutorial’s author can specify
1For example, the Levenshtein distance, that detects insertions, deletions and substitutions [7].
36

for each lesson, which other lessons have to be finished before. This would give theuser more freedom to navigate through the tutorial autonomously.The users’ feedback while using the tutorial can be very valuable to improve it.
This feedback collection could be automated by recording the user’s interactionand tracking their progress over time. For example, when users do not reach newprompt statements for a longer time period, or enter disproportionately manycommands in one prompt loop, this could indicate that this section is too hardand should contain more hints. Misspelled or unhelpful commands could also beautomatically collected, analyzed, and be presented to the author so that he canadd appropriate hints to the lesson.
37
Appendix A
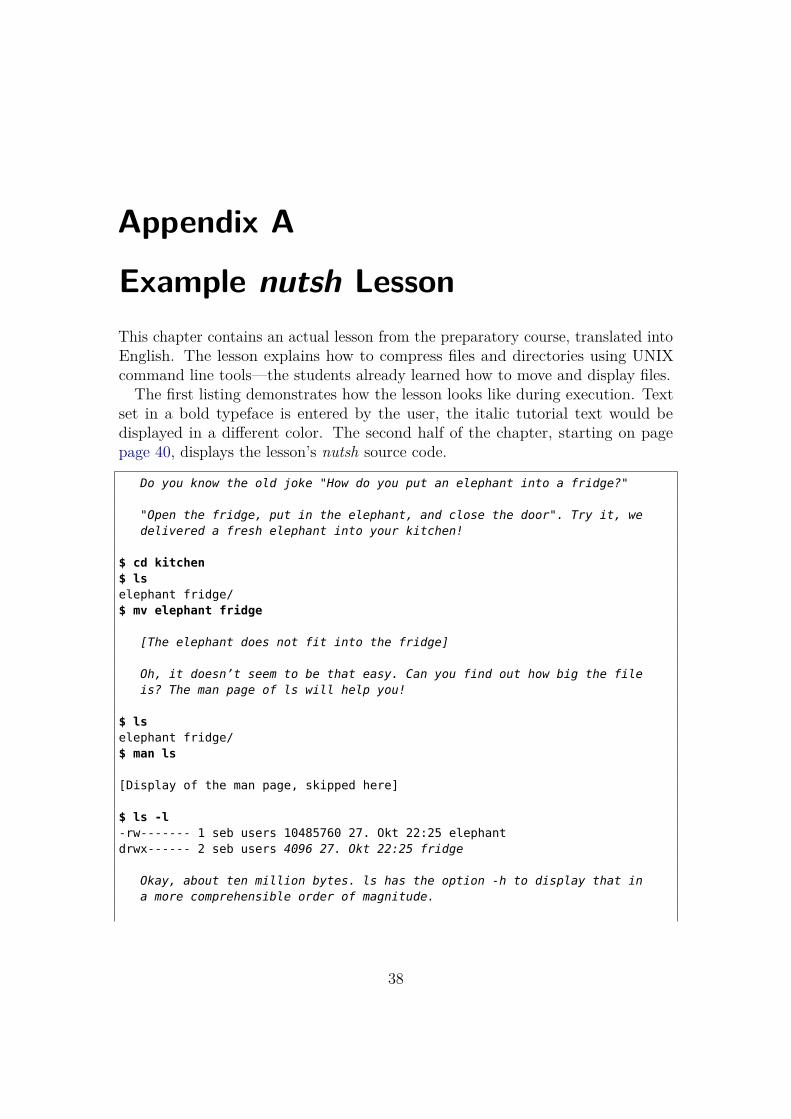
Example nutsh LessonThis chapter contains an actual lesson from the preparatory course, translated intoEnglish. The lesson explains how to compress files and directories using UNIXcommand line tools—the students already learned how to move and display files.The first listing demonstrates how the lesson looks like during execution. Text
set in a bold typeface is entered by the user, the italic tutorial text would bedisplayed in a different color. The second half of the chapter, starting on pagepage 40, displays the lesson’s nutsh source code.
Do you know the old joke "How do you put an elephant into a fridge?"
"Open the fridge, put in the elephant, and close the door". Try it, wedelivered a fresh elephant into your kitchen!
$ cd kitchen$ lselephant fridge/$ mv elephant fridge
[The elephant does not fit into the fridge]
Oh, it doesn’t seem to be that easy. Can you find out how big the fileis? The man page of ls will help you!
$ lselephant fridge/$ man ls
[Display of the man page, skipped here]
$ ls -l-rw------- 1 seb users 10485760 27. Okt 22:25 elephantdrwx------ 2 seb users 4096 27. Okt 22:25 fridge
Okay, about ten million bytes. ls has the option -h to display that ina more comprehensible order of magnitude.
38
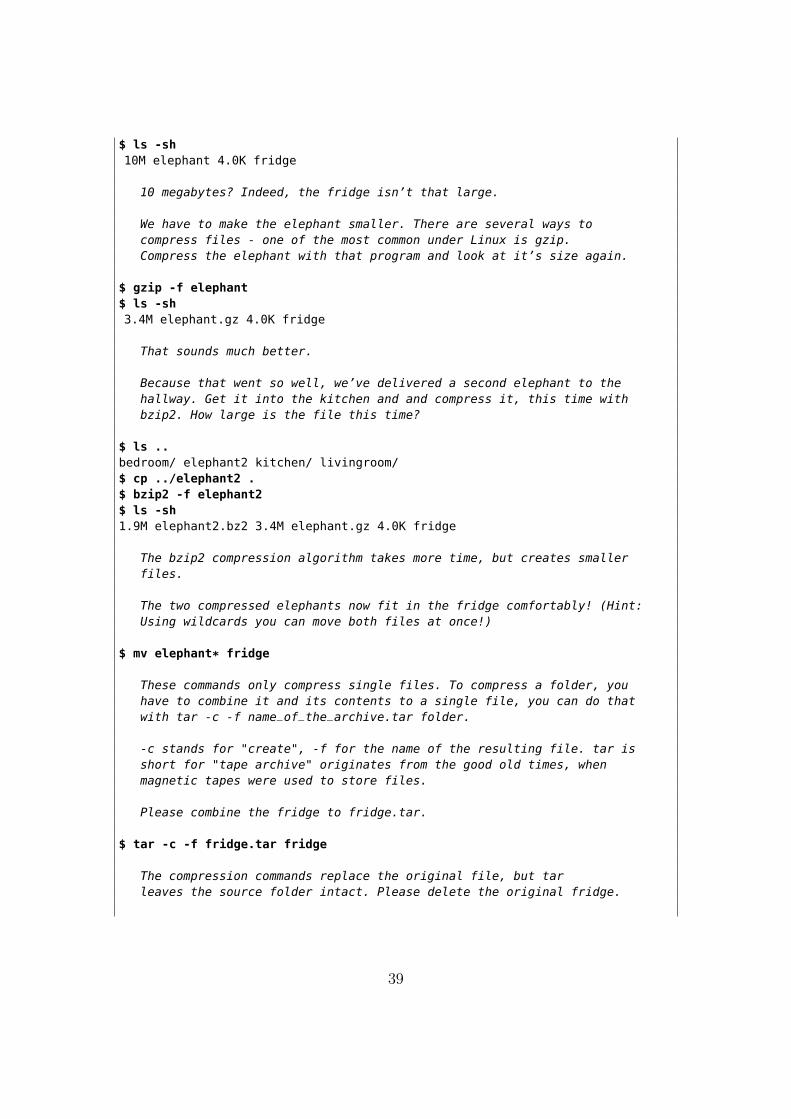
$ ls -sh10M elephant 4.0K fridge
10 megabytes? Indeed, the fridge isn’t that large.
We have to make the elephant smaller. There are several ways tocompress files - one of the most common under Linux is gzip.Compress the elephant with that program and look at it’s size again.
$ gzip -f elephant$ ls -sh3.4M elephant.gz 4.0K fridge
That sounds much better.
Because that went so well, we’ve delivered a second elephant to thehallway. Get it into the kitchen and and compress it, this time withbzip2. How large is the file this time?
$ ls ..bedroom/ elephant2 kitchen/ livingroom/$ cp ../elephant2 .$ bzip2 -f elephant2$ ls -sh1.9M elephant2.bz2 3.4M elephant.gz 4.0K fridge
The bzip2 compression algorithm takes more time, but creates smallerfiles.
The two compressed elephants now fit in the fridge comfortably! (Hint:Using wildcards you can move both files at once!)
$ mv elephant* fridge
These commands only compress single files. To compress a folder, youhave to combine it and its contents to a single file, you can do thatwith tar -c -f name_of_the_archive.tar folder.
-c stands for "create", -f for the name of the resulting file. tar isshort for "tape archive" originates from the good old times, whenmagnetic tapes were used to store files.
Please combine the fridge to fridge.tar.
$ tar -c -f fridge.tar fridge
The compression commands replace the original file, but tarleaves the source folder intact. Please delete the original fridge.
39
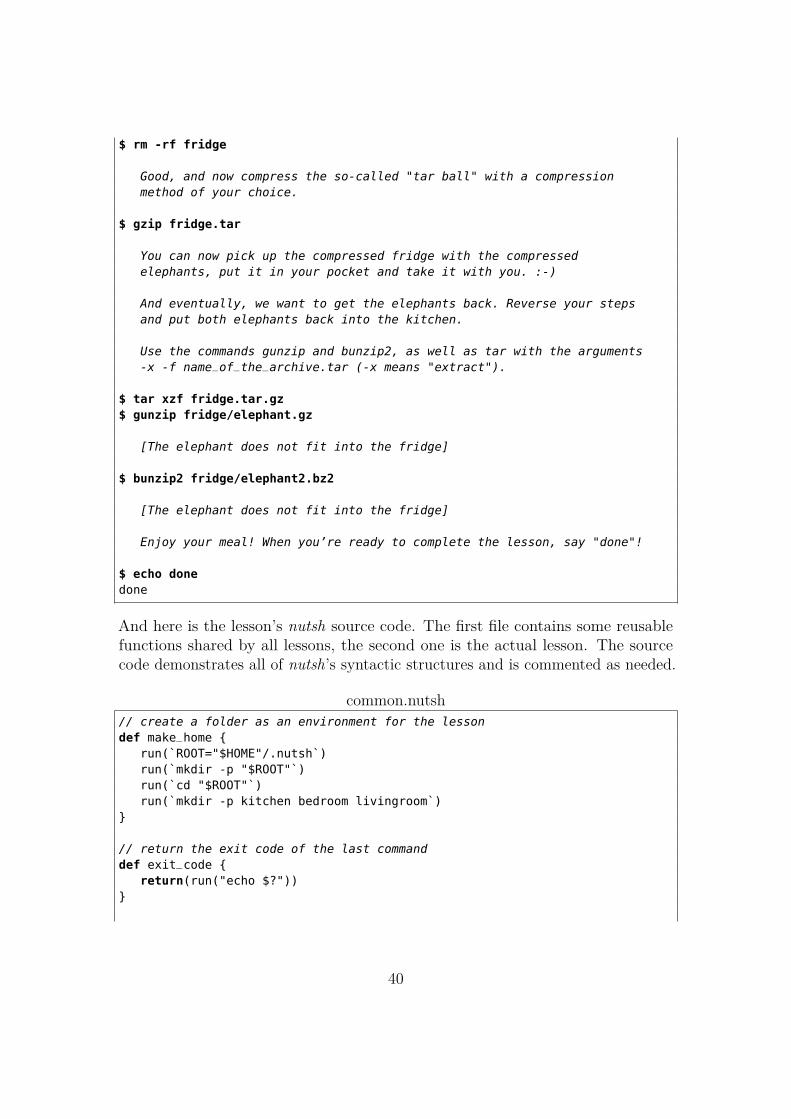
$ rm -rf fridge
Good, and now compress the so-called "tar ball" with a compressionmethod of your choice.
$ gzip fridge.tar
You can now pick up the compressed fridge with the compressedelephants, put it in your pocket and take it with you. :-)
And eventually, we want to get the elephants back. Reverse your stepsand put both elephants back into the kitchen.
Use the commands gunzip and bunzip2, as well as tar with the arguments-x -f name_of_the_archive.tar (-x means "extract").
$ tar xzf fridge.tar.gz$ gunzip fridge/elephant.gz
[The elephant does not fit into the fridge]
$ bunzip2 fridge/elephant2.bz2
[The elephant does not fit into the fridge]
Enjoy your meal! When you’re ready to complete the lesson, say "done"!
$ echo donedone
And here is the lesson’s nutsh source code. The first file contains some reusablefunctions shared by all lessons, the second one is the actual lesson. The sourcecode demonstrates all of nutsh’s syntactic structures and is commented as needed.
common.nutsh// create a folder as an environment for the lessondef make_home {
run(`ROOT="$HOME"/.nutsh`)run(`mkdir -p "$ROOT"`)run(`cd "$ROOT"`)run(`mkdir -p kitchen bedroom livingroom`)
}
// return the exit code of the last commanddef exit_code {
return(run("echo $?"))}
40
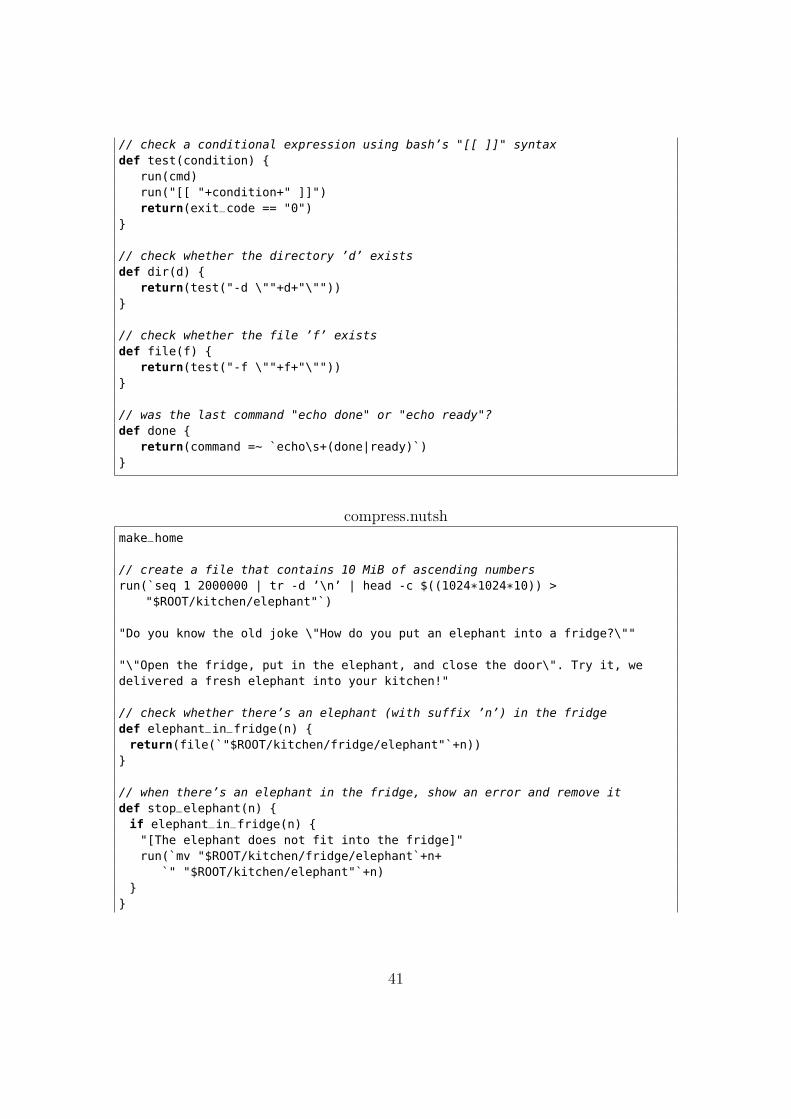
// check a conditional expression using bash’s "[[ ]]" syntaxdef test(condition) {
run(cmd)run("[[ "+condition+" ]]")return(exit_code == "0")
}
// check whether the directory ’d’ existsdef dir(d) {
return(test("-d \""+d+"\""))}
// check whether the file ’f’ existsdef file(f) {
return(test("-f \""+f+"\""))}
// was the last command "echo done" or "echo ready"?def done {
return(command =~ `echo\s+(done|ready)`)}
compress.nutshmake_home
// create a file that contains 10 MiB of ascending numbersrun(`seq 1 2000000 | tr -d ’\n’ | head -c $((1024*1024*10)) >
"$ROOT/kitchen/elephant"`)
"Do you know the old joke \"How do you put an elephant into a fridge?\""
"\"Open the fridge, put in the elephant, and close the door\". Try it, wedelivered a fresh elephant into your kitchen!"
// check whether there’s an elephant (with suffix ’n’) in the fridgedef elephant_in_fridge(n) {return(file(`"$ROOT/kitchen/fridge/elephant"`+n))
}
// when there’s an elephant in the fridge, show an error and remove itdef stop_elephant(n) {if elephant_in_fridge(n) {"[The elephant does not fit into the fridge]"run(`mv "$ROOT/kitchen/fridge/elephant`+n+
`" "$ROOT/kitchen/elephant"`+n)}
}
41
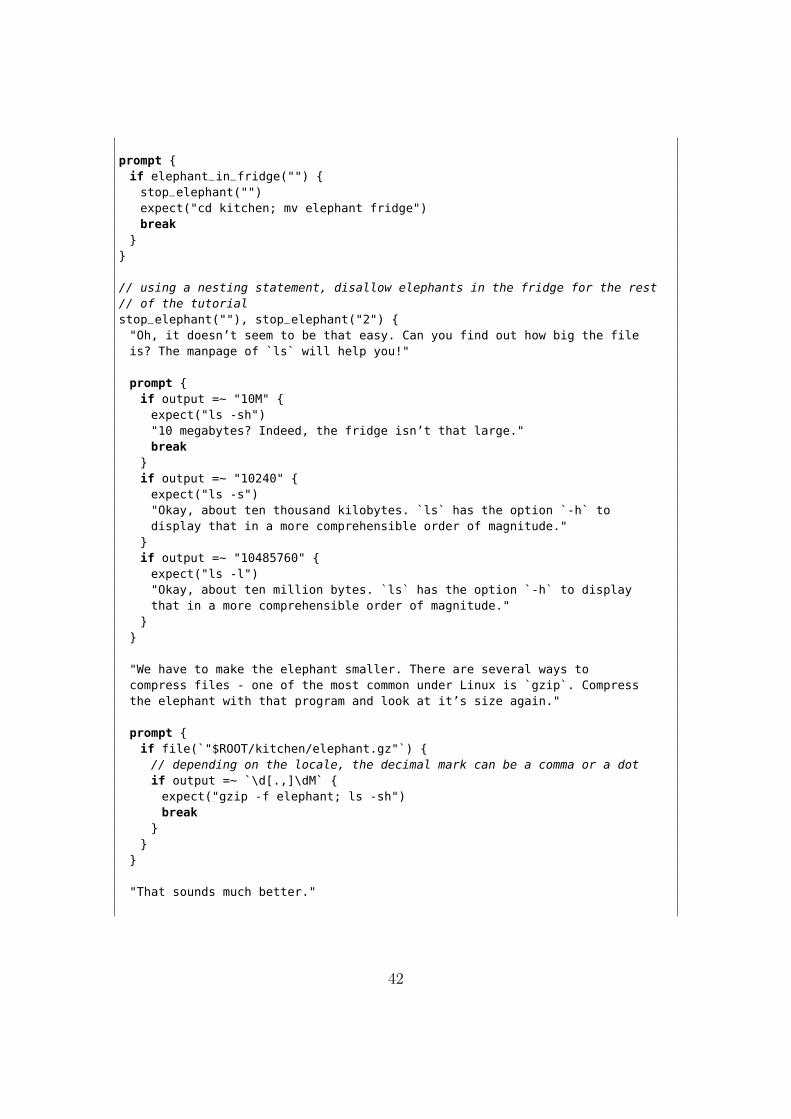
prompt {if elephant_in_fridge("") {stop_elephant("")expect("cd kitchen; mv elephant fridge")break
}}
// using a nesting statement, disallow elephants in the fridge for the rest// of the tutorialstop_elephant(""), stop_elephant("2") {"Oh, it doesn’t seem to be that easy. Can you find out how big the fileis? The manpage of `ls` will help you!"
prompt {if output =~ "10M" {expect("ls -sh")"10 megabytes? Indeed, the fridge isn’t that large."break
}if output =~ "10240" {expect("ls -s")"Okay, about ten thousand kilobytes. `ls` has the option `-h` todisplay that in a more comprehensible order of magnitude."
}if output =~ "10485760" {expect("ls -l")"Okay, about ten million bytes. `ls` has the option `-h` to displaythat in a more comprehensible order of magnitude."
}}
"We have to make the elephant smaller. There are several ways tocompress files - one of the most common under Linux is `gzip`. Compressthe elephant with that program and look at it’s size again."
prompt {if file(`"$ROOT/kitchen/elephant.gz"`) {// depending on the locale, the decimal mark can be a comma or a dotif output =~ `\d[.,]\dM` {expect("gzip -f elephant; ls -sh")break
}}
}
"That sounds much better."
42
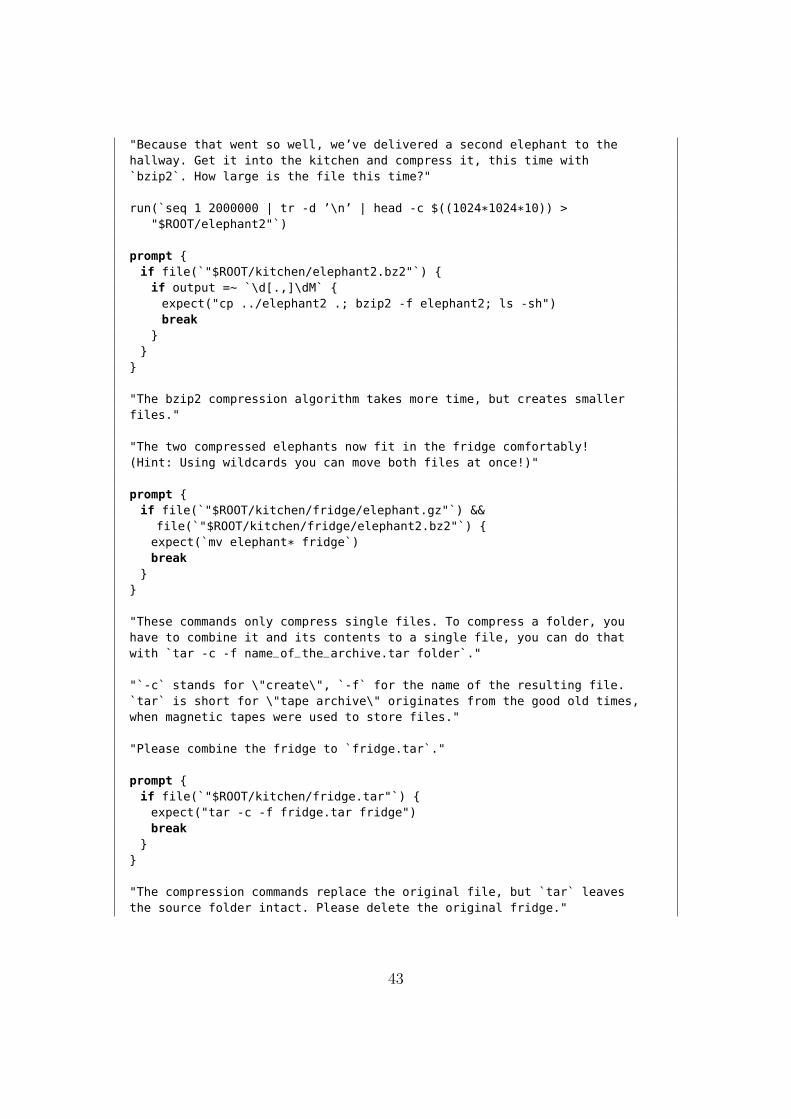
"Because that went so well, we’ve delivered a second elephant to thehallway. Get it into the kitchen and compress it, this time with`bzip2`. How large is the file this time?"
run(`seq 1 2000000 | tr -d ’\n’ | head -c $((1024*1024*10)) >"$ROOT/elephant2"`)
prompt {if file(`"$ROOT/kitchen/elephant2.bz2"`) {if output =~ `\d[.,]\dM` {expect("cp ../elephant2 .; bzip2 -f elephant2; ls -sh")break
}}
}
"The bzip2 compression algorithm takes more time, but creates smallerfiles."
"The two compressed elephants now fit in the fridge comfortably!(Hint: Using wildcards you can move both files at once!)"
prompt {if file(`"$ROOT/kitchen/fridge/elephant.gz"`) &&
file(`"$ROOT/kitchen/fridge/elephant2.bz2"`) {expect(`mv elephant* fridge`)break
}}
"These commands only compress single files. To compress a folder, youhave to combine it and its contents to a single file, you can do thatwith `tar -c -f name_of_the_archive.tar folder`."
"`-c` stands for \"create\", `-f` for the name of the resulting file.`tar` is short for \"tape archive\" originates from the good old times,when magnetic tapes were used to store files."
"Please combine the fridge to `fridge.tar`."
prompt {if file(`"$ROOT/kitchen/fridge.tar"`) {expect("tar -c -f fridge.tar fridge")break
}}
"The compression commands replace the original file, but `tar` leavesthe source folder intact. Please delete the original fridge."
43
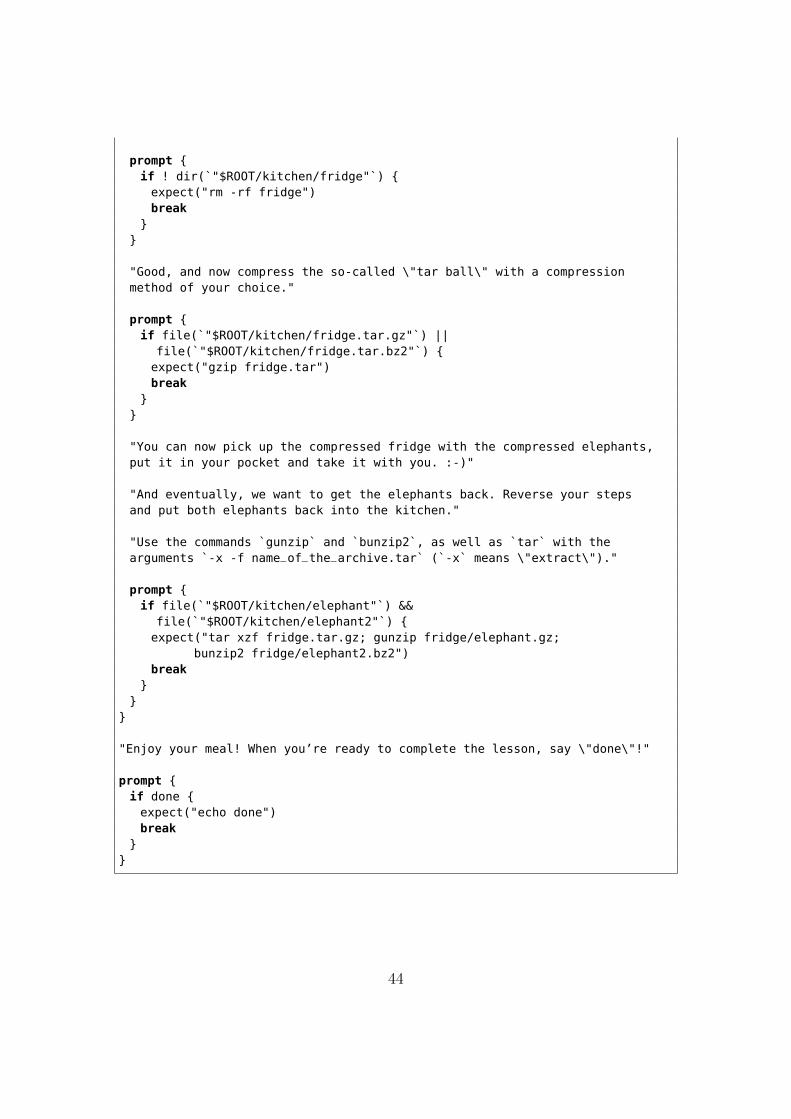
prompt {if ! dir(`"$ROOT/kitchen/fridge"`) {expect("rm -rf fridge")break
}}
"Good, and now compress the so-called \"tar ball\" with a compressionmethod of your choice."
prompt {if file(`"$ROOT/kitchen/fridge.tar.gz"`) ||
file(`"$ROOT/kitchen/fridge.tar.bz2"`) {expect("gzip fridge.tar")break
}}
"You can now pick up the compressed fridge with the compressed elephants,put it in your pocket and take it with you. :-)"
"And eventually, we want to get the elephants back. Reverse your stepsand put both elephants back into the kitchen."
"Use the commands `gunzip` and `bunzip2`, as well as `tar` with thearguments `-x -f name_of_the_archive.tar` (`-x` means \"extract\")."
prompt {if file(`"$ROOT/kitchen/elephant"`) &&
file(`"$ROOT/kitchen/elephant2"`) {expect("tar xzf fridge.tar.gz; gunzip fridge/elephant.gz;
bunzip2 fridge/elephant2.bz2")break
}}
}
"Enjoy your meal! When you’re ready to complete the lesson, say \"done\"!"
prompt {if done {expect("echo done")break
}}
44
Appendix B
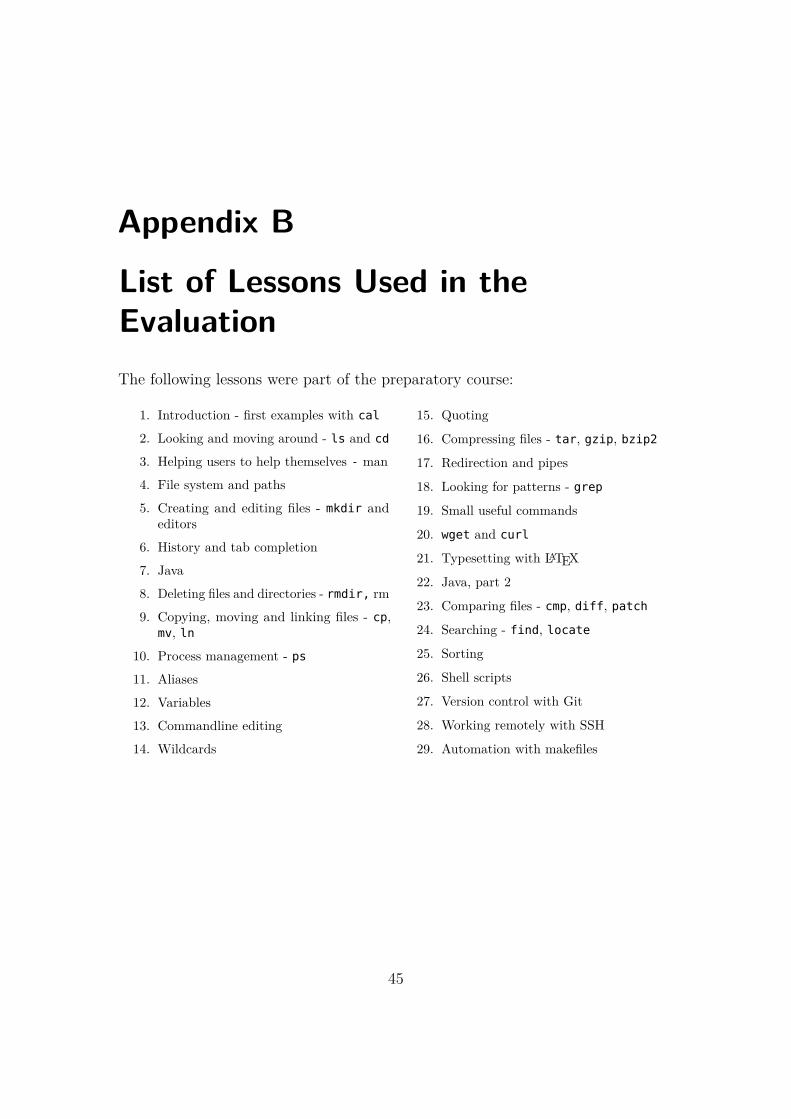
List of Lessons Used in theEvaluationThe following lessons were part of the preparatory course:
1. Introduction - first examples with cal
2. Looking and moving around - ls and cd
3. Helping users to help themselves - man
4. File system and paths
5. Creating and editing files - mkdir andeditors
6. History and tab completion
7. Java
8. Deleting files and directories - rmdir, rm
9. Copying, moving and linking files - cp,mv, ln
10. Process management - ps
11. Aliases
12. Variables
13. Commandline editing
14. Wildcards
15. Quoting
16. Compressing files - tar, gzip, bzip2
17. Redirection and pipes
18. Looking for patterns - grep
19. Small useful commands
20. wget and curl
21. Typesetting with LATEX
22. Java, part 2
23. Comparing files - cmp, diff, patch
24. Searching - find, locate
25. Sorting
26. Shell scripts
27. Version control with Git
28. Working remotely with SSH
29. Automation with makefiles
45
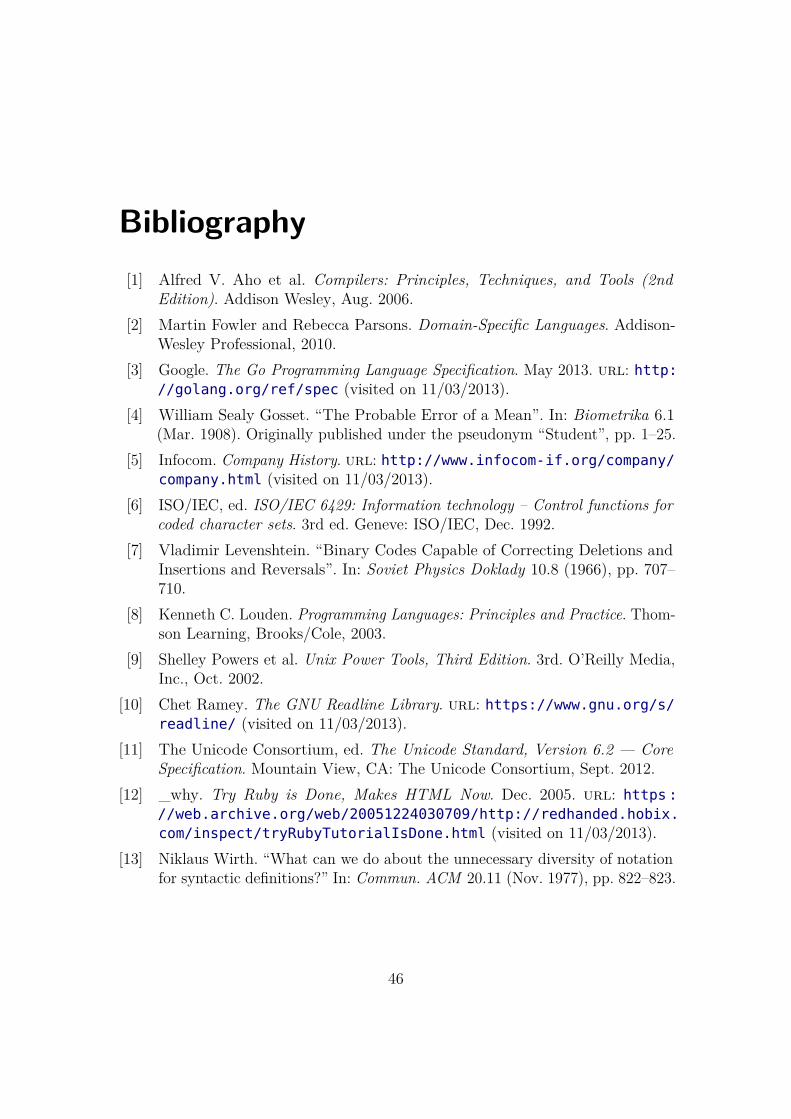
Bibliography[1] Alfred V. Aho et al. Compilers: Principles, Techniques, and Tools (2nd
Edition). Addison Wesley, Aug. 2006.[2] Martin Fowler and Rebecca Parsons. Domain-Specific Languages. Addison-
Wesley Professional, 2010.[3] Google. The Go Programming Language Specification. May 2013. url: http:
//golang.org/ref/spec (visited on 11/03/2013).[4] William Sealy Gosset. “The Probable Error of a Mean”. In: Biometrika 6.1
(Mar. 1908). Originally published under the pseudonym “Student”, pp. 1–25.[5] Infocom. Company History. url: http://www.infocom-if.org/company/
company.html (visited on 11/03/2013).[6] ISO/IEC, ed. ISO/IEC 6429: Information technology – Control functions for
coded character sets. 3rd ed. Geneve: ISO/IEC, Dec. 1992.[7] Vladimir Levenshtein. “Binary Codes Capable of Correcting Deletions and
Insertions and Reversals”. In: Soviet Physics Doklady 10.8 (1966), pp. 707–710.
[8] Kenneth C. Louden. Programming Languages: Principles and Practice. Thom-son Learning, Brooks/Cole, 2003.
[9] Shelley Powers et al. Unix Power Tools, Third Edition. 3rd. O’Reilly Media,Inc., Oct. 2002.
[10] Chet Ramey. The GNU Readline Library. url: https://www.gnu.org/s/readline/ (visited on 11/03/2013).
[11] The Unicode Consortium, ed. The Unicode Standard, Version 6.2 — CoreSpecification. Mountain View, CA: The Unicode Consortium, Sept. 2012.
[12] _why. Try Ruby is Done, Makes HTML Now. Dec. 2005. url: https://web.archive.org/web/20051224030709/http://redhanded.hobix.com/inspect/tryRubyTutorialIsDone.html (visited on 11/03/2013).
[13] Niklaus Wirth. “What can we do about the unnecessary diversity of notationfor syntactic definitions?” In: Commun. ACM 20.11 (Nov. 1977), pp. 822–823.
46


