Embed Size (px)
Citation preview
Autodesk InventorTips and Tricks
Carsten John Jacobsen
Tips and Tricks Summary
• If you are new to the Autodesk collection or you have been using the
application for a decade you will learn something from this short quick paced
presentation of tips and tricks
• We will outline tips and tricks in the Autodesk applications that are most
familiar to you
• These tips and tricks will outline some of the less obvious commands or
features that may be used in your daily design tasks

Inventor
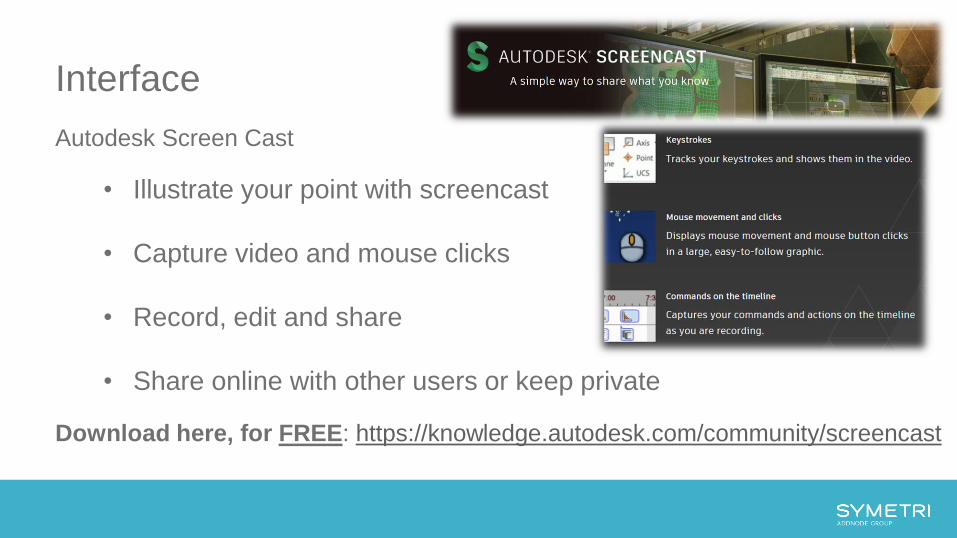
Interface
Autodesk Screen Cast
• Illustrate your point with screencast
• Capture video and mouse clicks
• Record, edit and share
• Share online with other users or keep private
Download here, for FREE: https://knowledge.autodesk.com/community/screencast
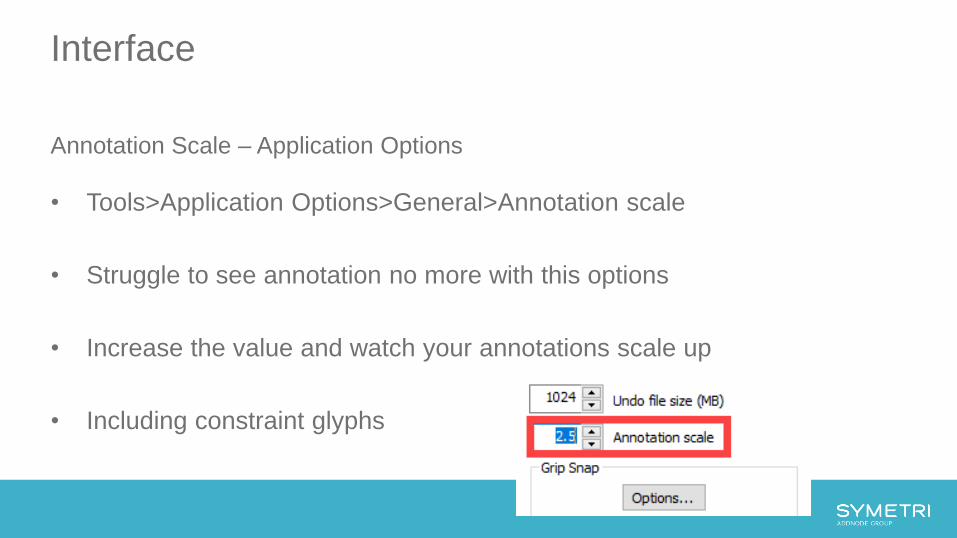
Interface
Annotation Scale – Application Options
• Tools>Application Options>General>Annotation scale
• Struggle to see annotation no more with this options
• Increase the value and watch your annotations scale up
• Including constraint glyphs
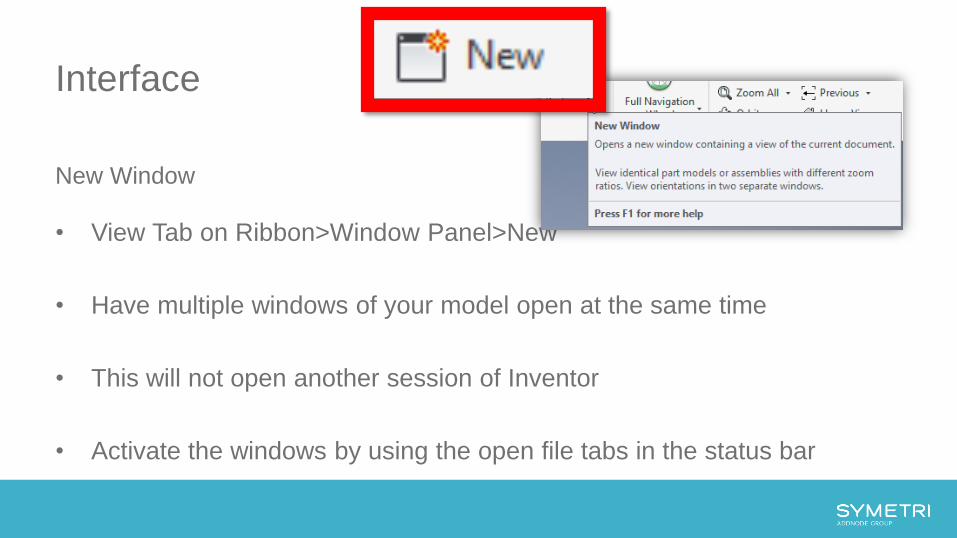
Interface
New Window
• View Tab on Ribbon>Window Panel>New
• Have multiple windows of your model open at the same time
• This will not open another session of Inventor
• Activate the windows by using the open file tabs in the status bar
Interface
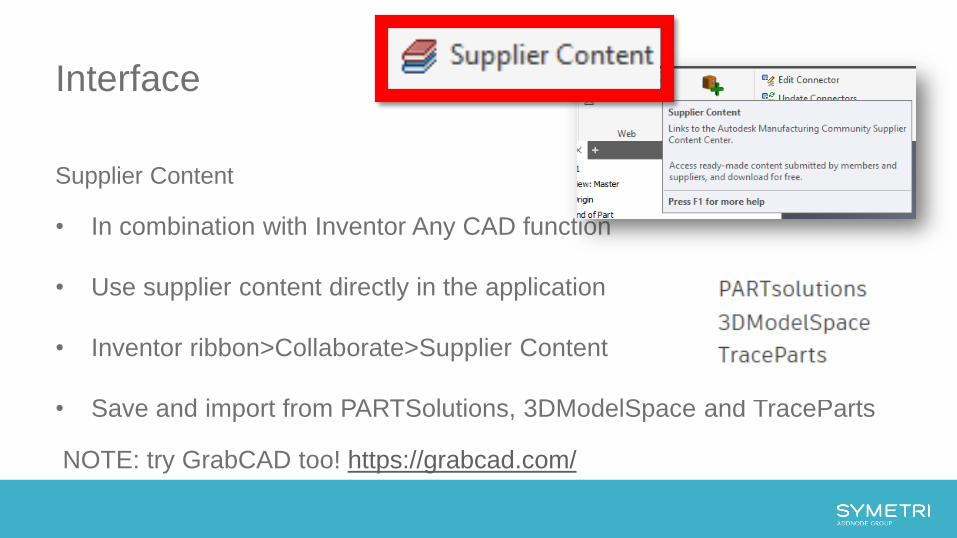
Supplier Content
• In combination with Inventor Any CAD function
• Use supplier content directly in the application
• Inventor ribbon>Collaborate>Supplier Content
• Save and import from PARTSolutions, 3DModelSpace and TraceParts
NOTE: try GrabCAD too! https://grabcad.com/

Interface
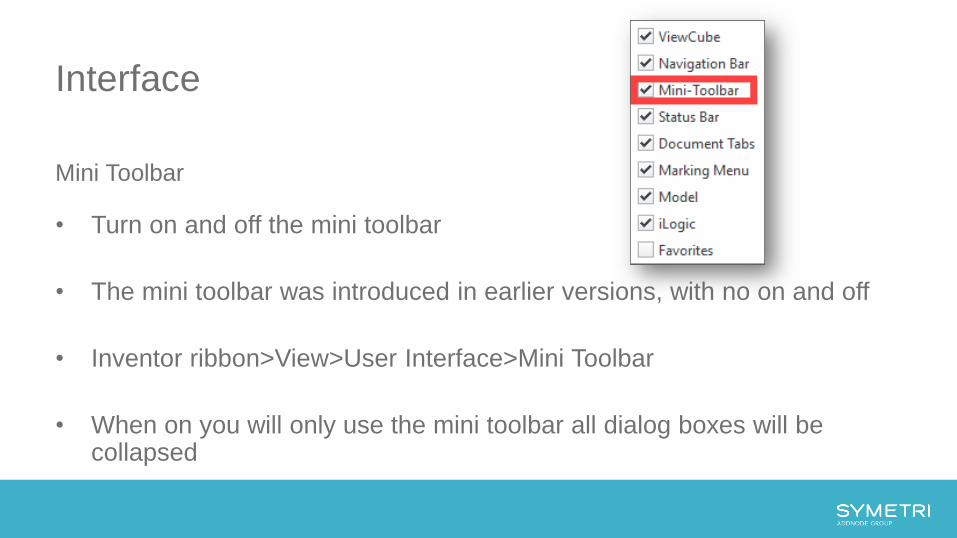
Mini Toolbar
• Turn on and off the mini toolbar
• The mini toolbar was introduced in earlier versions, with no on and off
• Inventor ribbon>View>User Interface>Mini Toolbar
• When on you will only use the mini toolbar all dialog boxes will be collapsed
Sketch
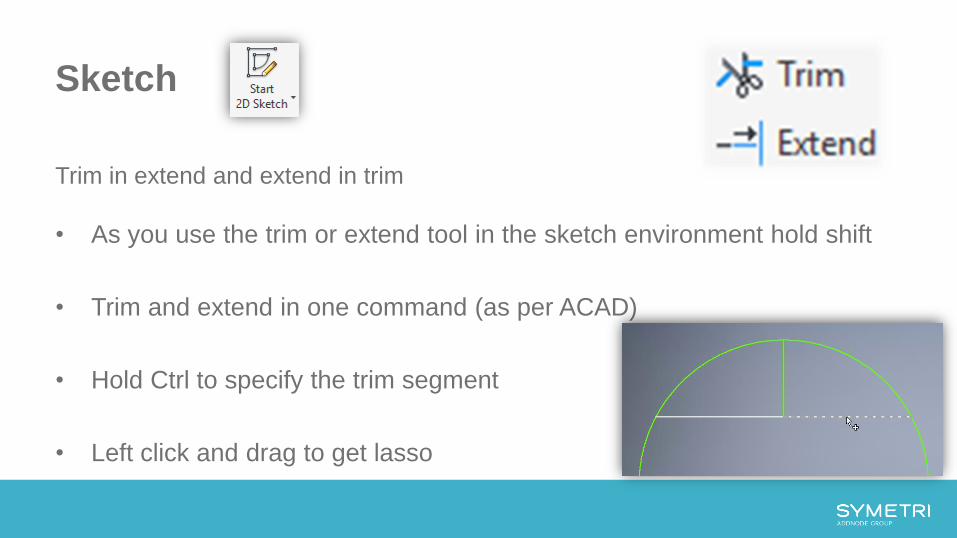
Trim in extend and extend in trim
• As you use the trim or extend tool in the sketch environment hold shift
• Trim and extend in one command (as per ACAD)
• Hold Ctrl to specify the trim segment
• Left click and drag to get lasso

Sketch
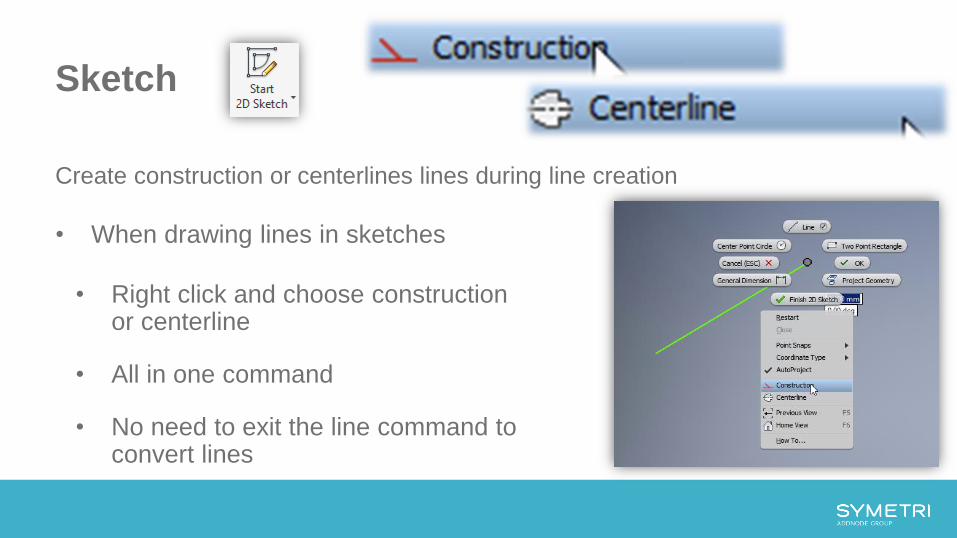
Create construction or centerlines lines during line creation
• When drawing lines in sketches
• Right click and choose construction or centerline
• All in one command
• No need to exit the line command to convert lines
Sketch
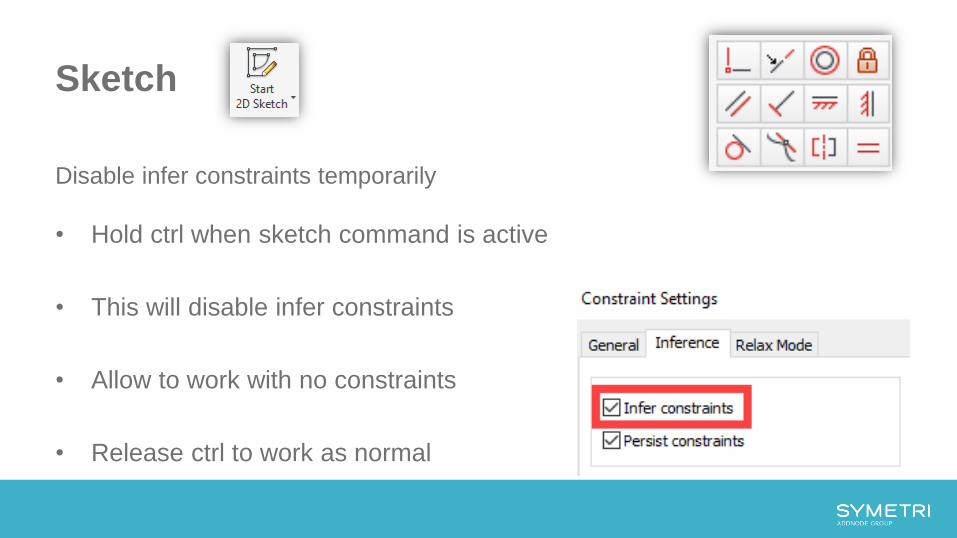
Disable infer constraints temporarily
• Hold ctrl when sketch command is active
• This will disable infer constraints
• Allow to work with no constraints
• Release ctrl to work as normal

Sketch
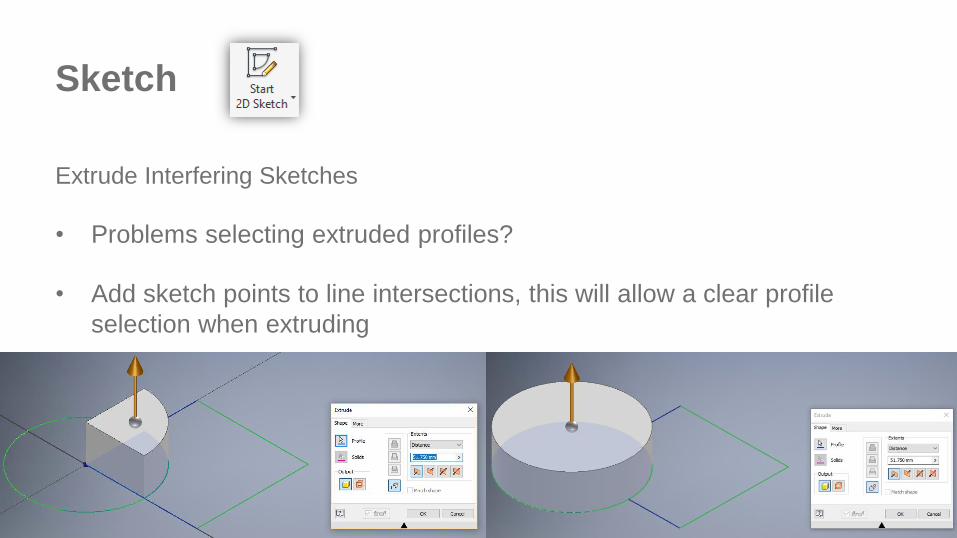
Extrude Interfering Sketches
• Problems selecting extruded profiles?
• Add sketch points to line intersections, this will allow a clear profile
selection when extruding

Sketch
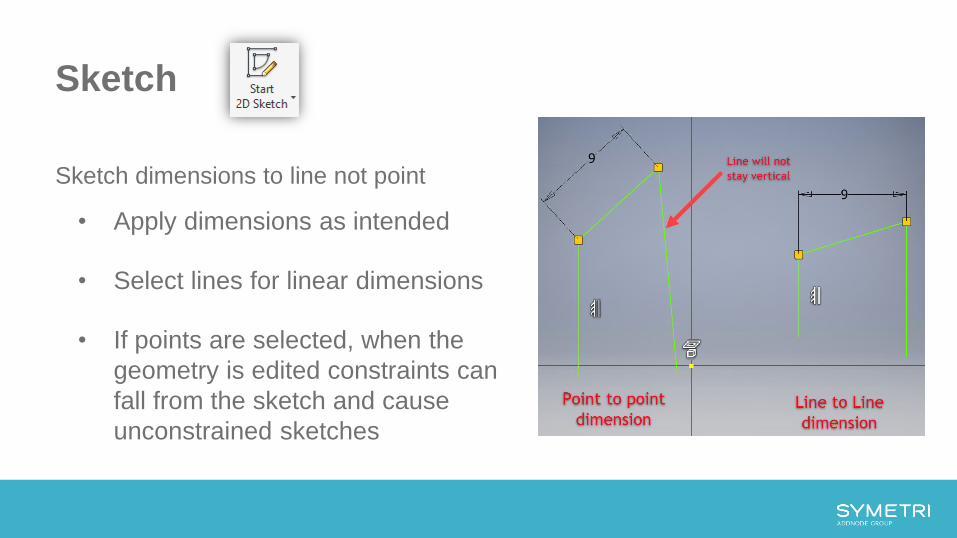
Sketch dimensions to line not point
• Apply dimensions as intended
• Select lines for linear dimensions
• If points are selected, when the
geometry is edited constraints can
fall from the sketch and cause
unconstrained sketches

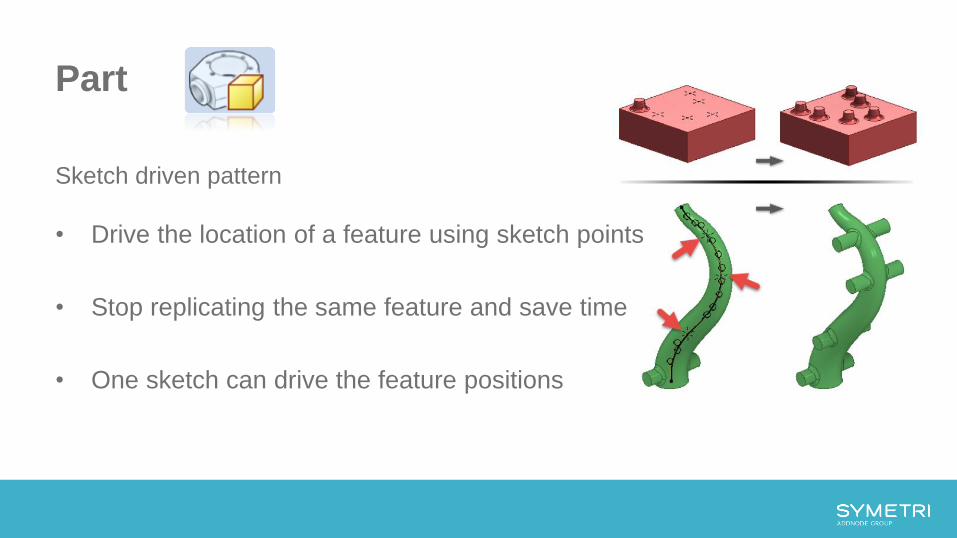
Part
Sketch driven pattern
• Drive the location of a feature using sketch points
• Stop replicating the same feature and save time
• One sketch can drive the feature positions

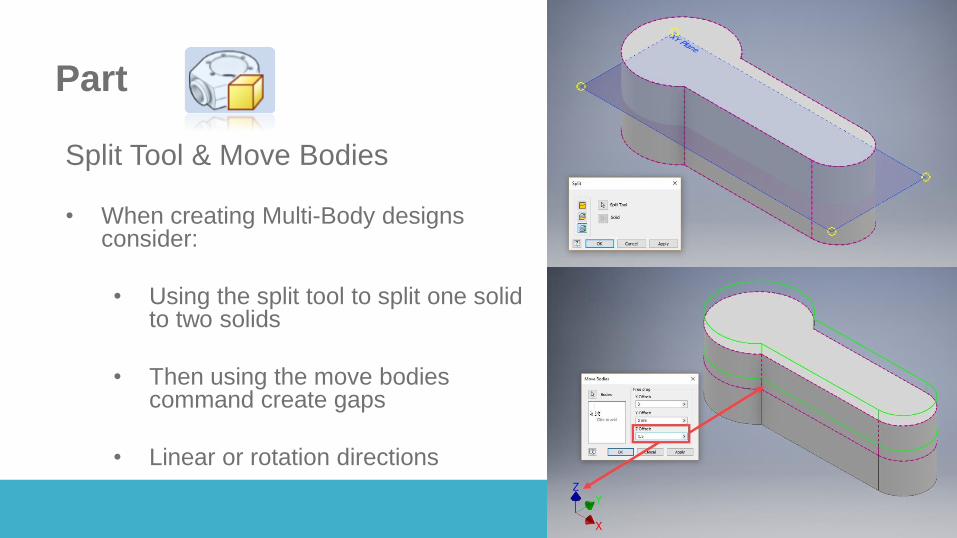
Part
Split Tool & Move Bodies
• When creating Multi-Body designs consider:
• Using the split tool to split one solid to two solids
• Then using the move bodies command create gaps
• Linear or rotation directions

Part
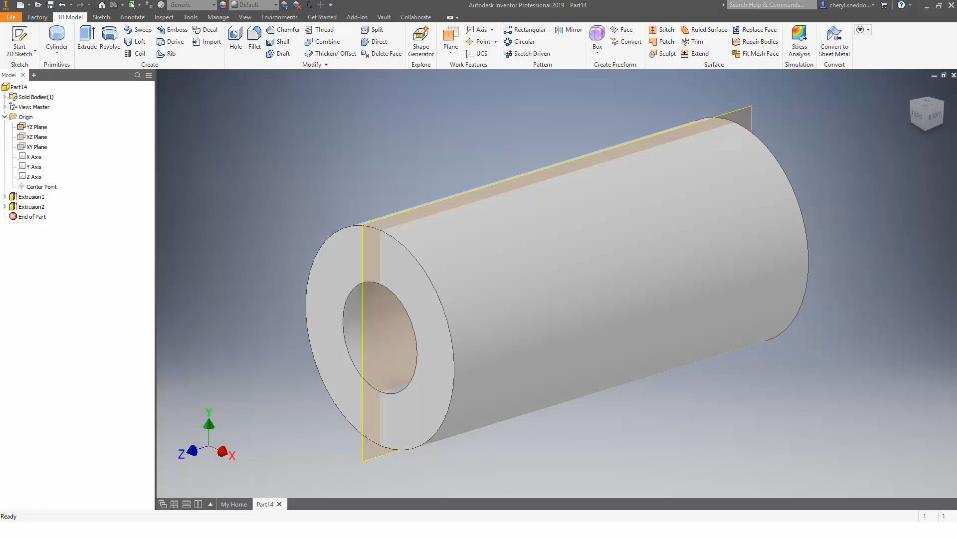
Extend start – hole creation
• When using the hole command tick the box for extend start
• This will extend the start face of the hole
• The new option removes the fragment that used to be left after certain holes where created
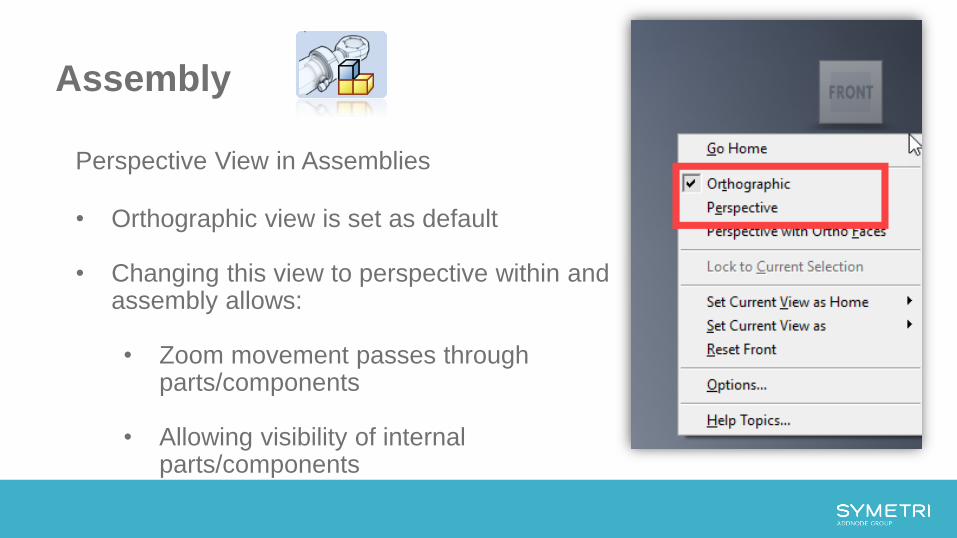
Assembly
Perspective View in Assemblies
• Orthographic view is set as default
• Changing this view to perspective within and assembly allows:
• Zoom movement passes through parts/components
• Allowing visibility of internal parts/components
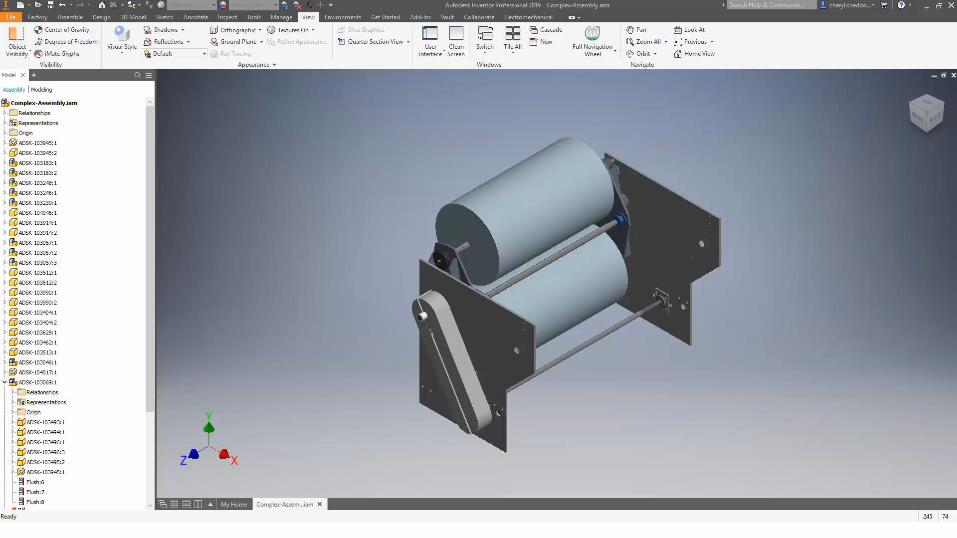

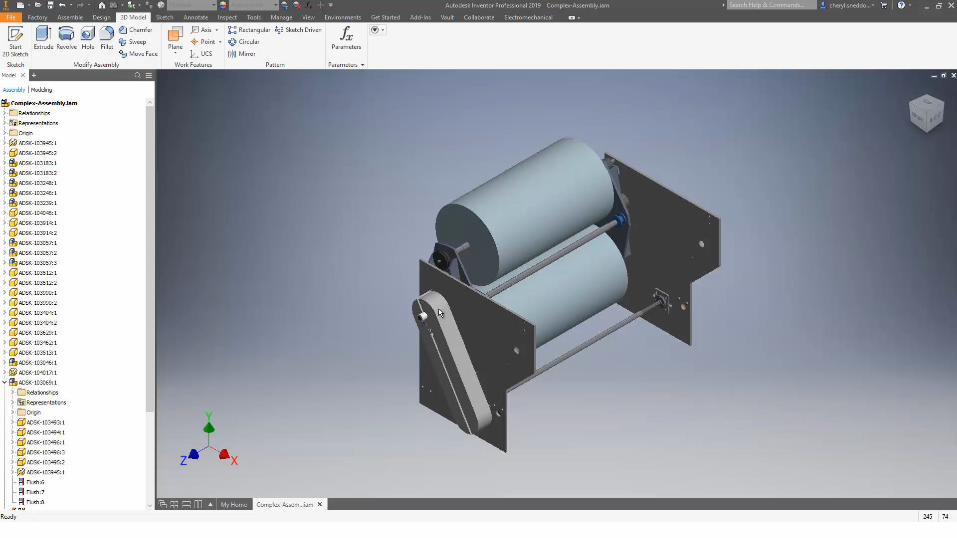
Assembly
Move faces in Assembly
– Move faces command within the assembly environment:
• Move faces parametrically within assemblies
• Changes can be made to reflect future variations (concept)
Assembly
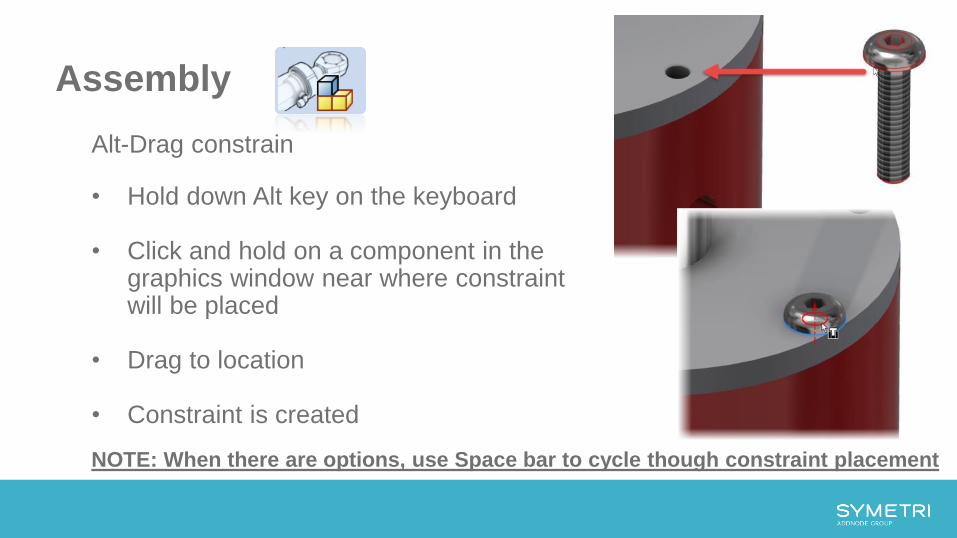
Alt-Drag constrain
• Hold down Alt key on the keyboard
• Click and hold on a component in the graphics window near where constraint will be placed
• Drag to location
• Constraint is created
NOTE: When there are options, use Space bar to cycle though constraint placement
Assembly
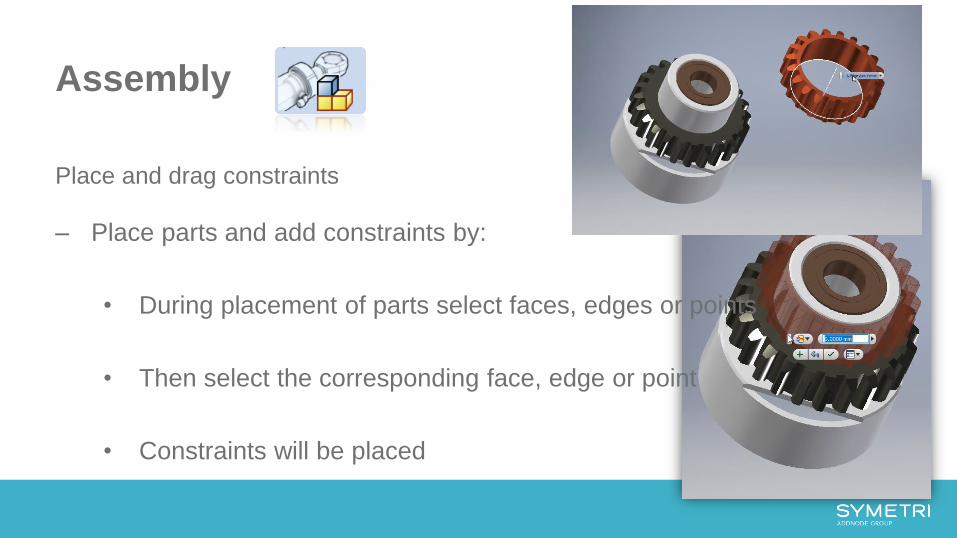
Place and drag constraints
– Place parts and add constraints by:
• During placement of parts select faces, edges or points
• Then select the corresponding face, edge or point
• Constraints will be placed
Assembly
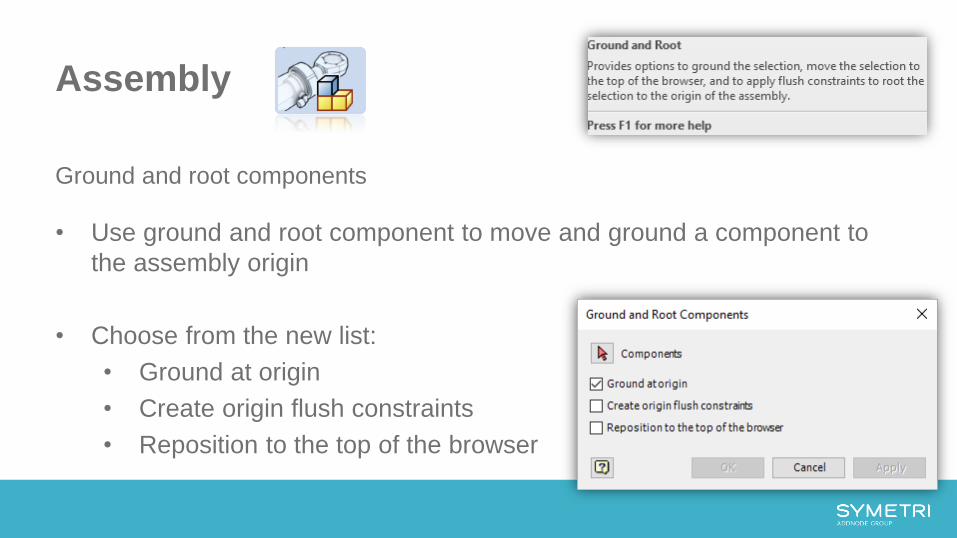
Ground and root components
• Use ground and root component to move and ground a component to
the assembly origin
• Choose from the new list:
• Ground at origin
• Create origin flush constraints
• Reposition to the top of the browser
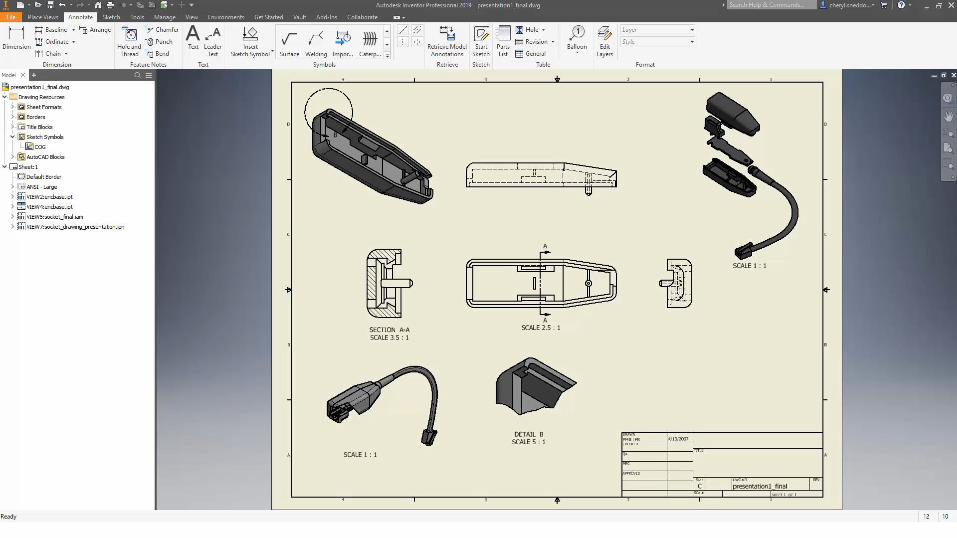
Drawings
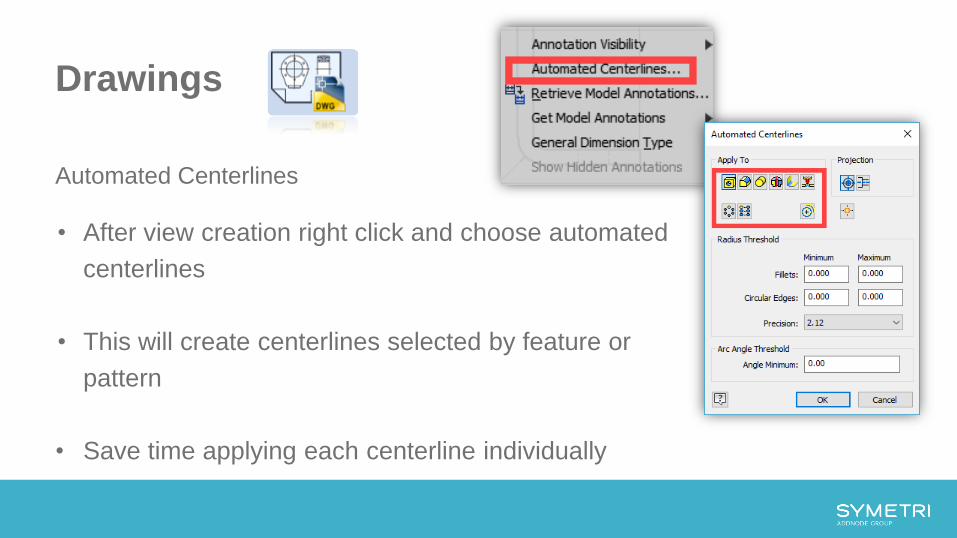
Automated Centerlines
• After view creation right click and choose automated
centerlines
• This will create centerlines selected by feature or
pattern
• Save time applying each centerline individually

Drawings
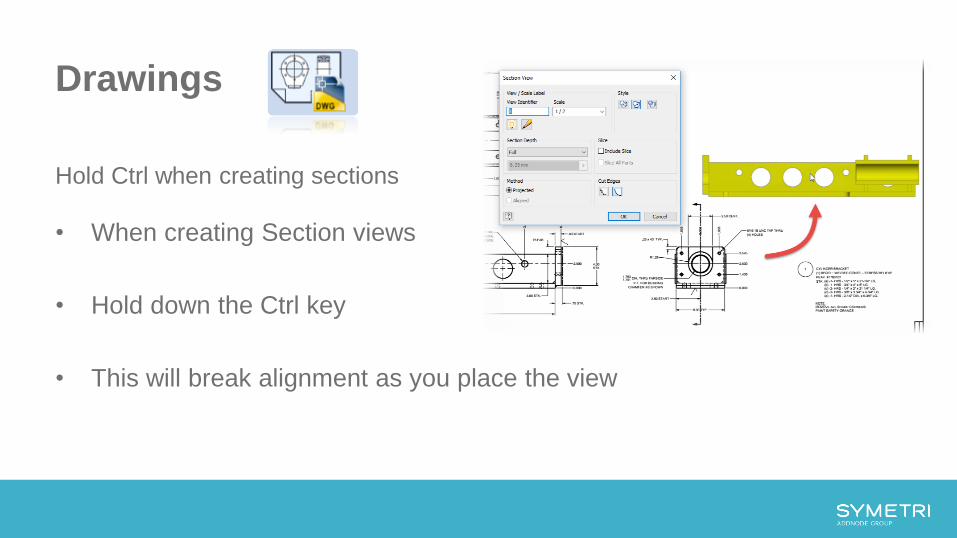
Hold Ctrl when creating sections
• When creating Section views
• Hold down the Ctrl key
• This will break alignment as you place the view
Drawings
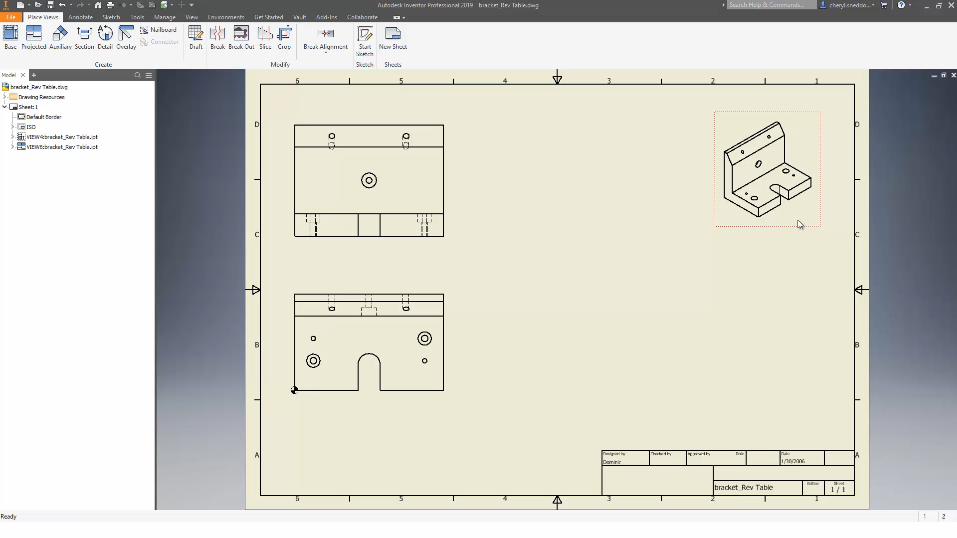
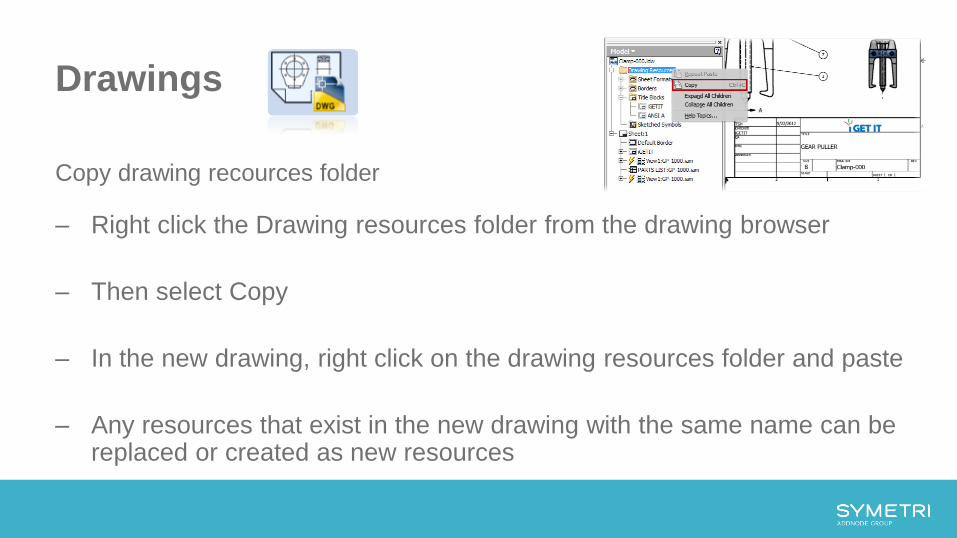
Copy drawing recources folder
– Right click the Drawing resources folder from the drawing browser
– Then select Copy
– In the new drawing, right click on the drawing resources folder and paste
– Any resources that exist in the new drawing with the same name can be replaced or created as new resources
Drawings
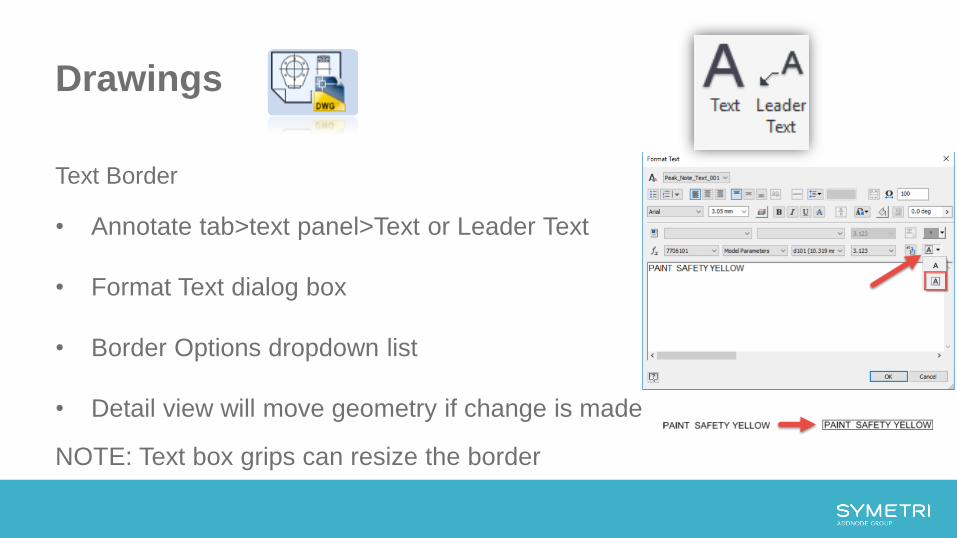
Text Border
• Annotate tab>text panel>Text or Leader Text
• Format Text dialog box
• Border Options dropdown list
• Detail view will move geometry if change is made
NOTE: Text box grips can resize the border

Q & A


![[] Mastering Autodesk Inventor 2009 and Autodesk I(Book ZZ org)](https://img.pdfslide.net/doc/110x75/631af51280cc3e9440059b57/-mastering-autodesk-inventor-2009-and-autodesk-ibook-zz-org.jpg)


