Embed Size (px)
Citation preview
School Transportation Management Section 325 West Gaines Street, Room 834 Tallahassee, Florida 32399-0400
Revised 2021
Rule 6A-3.0141, F.A.C.

Basic School Bus
Operator Curriculum
Acknowledgments
We would like to recognize the Florida Association for Pupil Transportation (FAPT) School Bus Operations and Standards Committee and extend our sincere appreciation for their dedication and cooperation in updating this curriculum. FAPT Operations Standards and Training Committee:
Adam Zubritsky – Orange School District
Cheri Martin – Volusia School District
Corey Norris – Hillsborough School District
Daniel Borden – Orange School district
Daniel Middleton - Duval County PS
Debra Rabideau – Student Transportation of America (Duval)
Derald Sweatt – Clay School District
Don E. Rowls – Osceola School District
Geri Y. Drayton – Flagler School District
Jamie Warrington- Hillsborough School District
Jodi Cummings – Palm Beach School District
Johnnie Douglas – Leon School District
Judy Templeton – Seminole School District
Karen Reese – Brevard School District
Kathy Ann Nelson – Volusia school District
Katie Lewis – Escambia School District
Kelly Butler – Volusia School District
Kembra Shepard – Hillsborough School District
Keyonda Gilmore – Clay School District
Kim Frye – Orange School District
Lisa Stewart – Baker School District
Michelle Giffin – Victory Ridge Charter School
Robert Borsky – Pasco School District
Robin Hein – Florida Department of Education
Stephanie Rickards – Charlotte School District
Tina Hutto – Flagler School District

Course Guide:
Basic School Bus Operator Curriculum
Using the Curriculum
The Florida Department of Education's Basic School Bus Operator Curriculum was developed to
provide a comprehensive course for beginning school bus operators to promote the state's goal
of providing safe, efficient, and dependable student transportation services. This curriculum seeks
to promote uniformity of instruction to provide a standard learning experience across the state. It
is intended to be a framework to teach the 20 hours of classroom instruction required for every
new school bus operator.
This curriculum was designed to be as flexible as possible to accommodate local school district
procedures. Instructors should review the course content and customize the materials to satisfy
the Entry Level Driver Training requirements (49 CFR, Appendix B to Part 380), which become
effective February 7, 2022, and local district policies.
Instructors should use all resources available to get each participant involved in the learning process. The curriculum's content, performance objectives and learning experiences are designed to promote the acquisition of driving skills and the knowledge necessary for safe school bus operations.
Format
The curriculum is divided into 14 units, each dealing with a specific aspect of student
transportation. Each unit has an introductory page containing the unit number, title, and an
overview of the unit, including the following:
Audio-Visual Materials – a list of available audio-visual materials that support the unit.
(Most videos are hyperlinked or may be found online)
Equipment – equipment needed to teach the unit.
References – list of all sources referred to throughout the unit.
Optional Strategies – unique presentation ideas to vary the delivery of instruction.
Objectives – information the operator should understand after the unit has been taught.
The remaining pages of each unit contain the core content presented in a PowerPoint format. At
the top of the page is the PowerPoint slide presented to the participants. The bottom of the page
provides the instructor's content and serves the trainees with unit documentation of the topics and
their contents. There are strategies suggested to encourage participant involvement. Whenever
possible, we encourage the trainers to further illustrate information with examples.
There is a test included for each unit, along with all pertinent transportation rules and laws. At the
end of the course, each trainee should know the answers on a 50-question final exam.
Continued Learning
After completing this course, school bus operators are expected to reinforce and expand their
learning through systematic in-service instruction.
The School Transportation Management Section of the Florida Department of Education is willing
to assist in the required annual in-service instruction for school bus operators, as needed.

Slide 1
UNIT 1
TRANSPORTATION TEAM
ROLES AND RESPONSIBILITIES
EQUIPMENT: • Computer projection system • DVD player, monitor • Whiteboard, markers, eraser REFERENCES: • Rule 6A-3.0141, Florida Administrative Code • Local District School Board Policies OPTIONAL STRATEGIES: • The transportation director may be provided the opportunity to teach this unit. OBJECTIVES: The operator will be able to: • State the basic responsibilities of the student transportation team members; • Explain the requirements for becoming and remaining a school bus operator; • Explain the differences between laws, rules, regulations, policies and recommendations; and • Describe how to gain and maintain professional status.
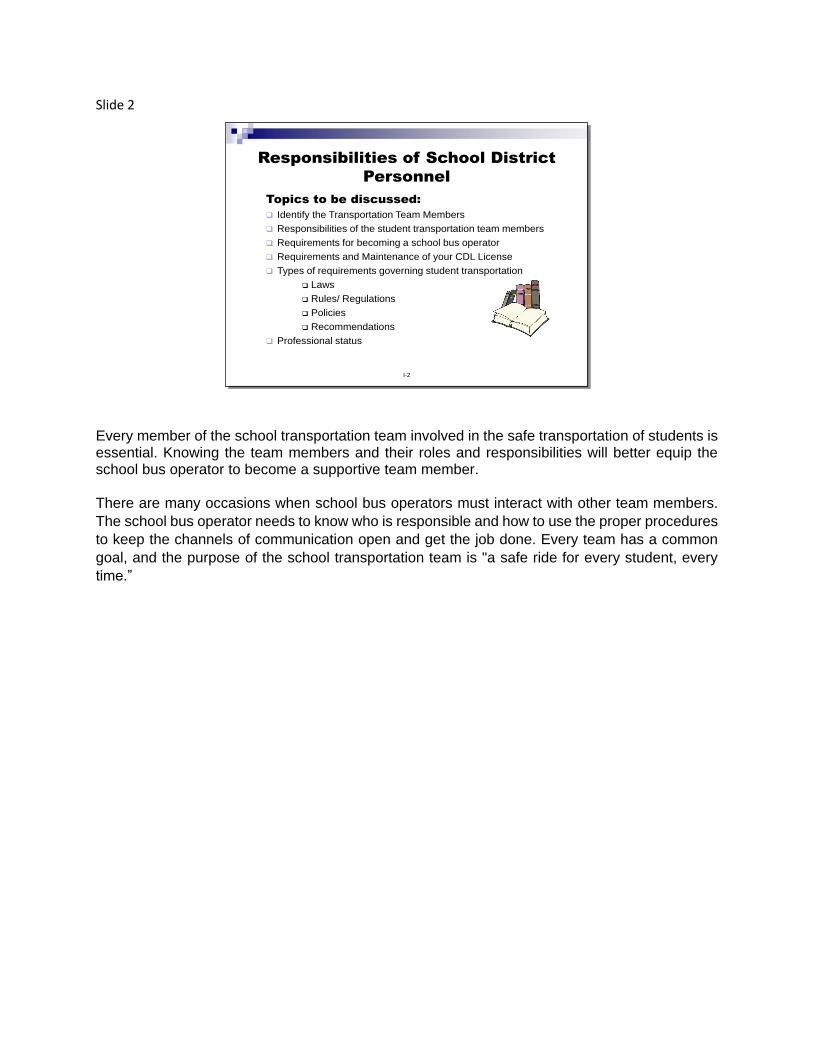
Slide 2
Every member of the school transportation team involved in the safe transportation of students is essential. Knowing the team members and their roles and responsibilities will better equip the school bus operator to become a supportive team member. There are many occasions when school bus operators must interact with other team members.
The school bus operator needs to know who is responsible and how to use the proper procedures
to keep the channels of communication open and get the job done. Every team has a common
goal, and the purpose of the school transportation team is "a safe ride for every student, every
time.”
I-2
Responsibilities of School District
Personnel
Topics to be discussed:
Identify the Transportation Team Members
Responsibilities of the student transportation team members
Requirements for becoming a school bus operator
Requirements and Maintenance of your CDL License
Types of requirements governing student transportation
Laws
Rules/ Regulations
Policies
Recommendations
Professional status
Slide 3
Governing AgenciesU.S. Department of
Transportation
Federal Motor Carrier Safety
Administration(FMCSA)
Florida Department of Highway /safety and Motor
Vehicles (DHSMV)
Florida Legistration
Florida State Board of Education
Florida Department of Education (STMS)
Local School District
School Board
I-3
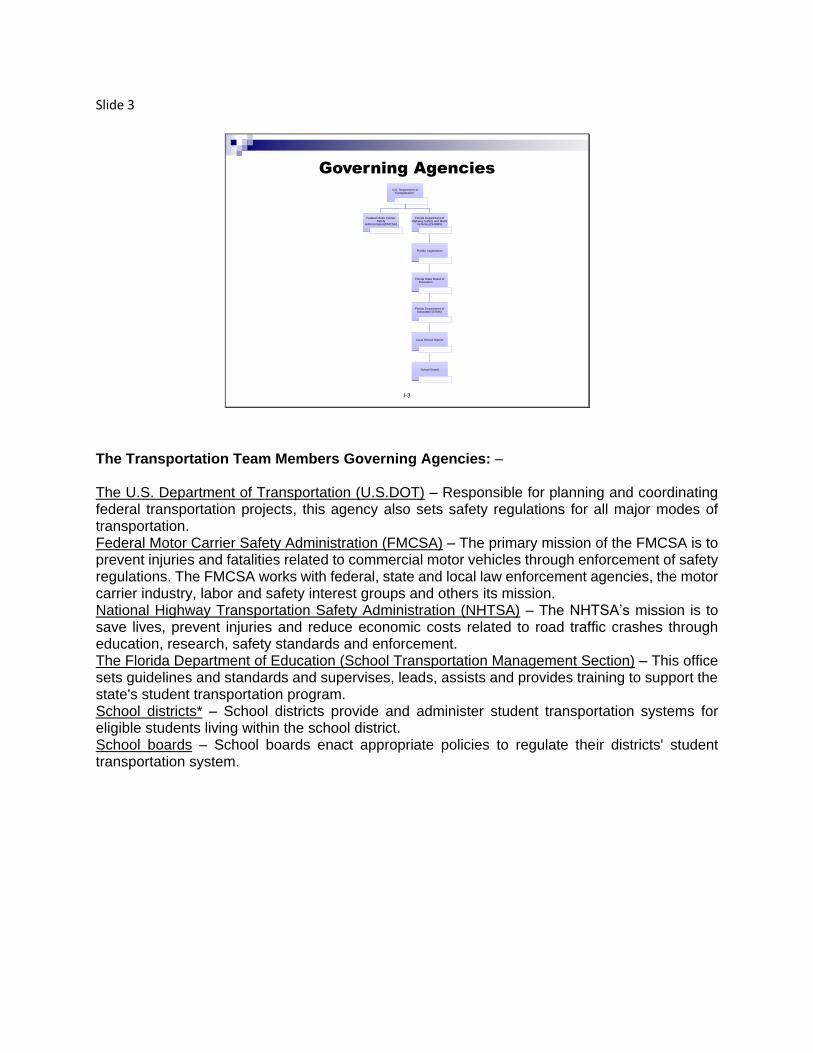
The Transportation Team Members Governing Agencies: – The U.S. Department of Transportation (U.S.DOT) – Responsible for planning and coordinating federal transportation projects, this agency also sets safety regulations for all major modes of transportation. Federal Motor Carrier Safety Administration (FMCSA) – The primary mission of the FMCSA is to prevent injuries and fatalities related to commercial motor vehicles through enforcement of safety regulations. The FMCSA works with federal, state and local law enforcement agencies, the motor carrier industry, labor and safety interest groups and others its mission. National Highway Transportation Safety Administration (NHTSA) – The NHTSA’s mission is to save lives, prevent injuries and reduce economic costs related to road traffic crashes through education, research, safety standards and enforcement. The Florida Department of Education (School Transportation Management Section) – This office sets guidelines and standards and supervises, leads, assists and provides training to support the state's student transportation program. School districts* – School districts provide and administer student transportation systems for eligible students living within the school district. School boards – School boards enact appropriate policies to regulate their districts' student transportation system.
Slide 4
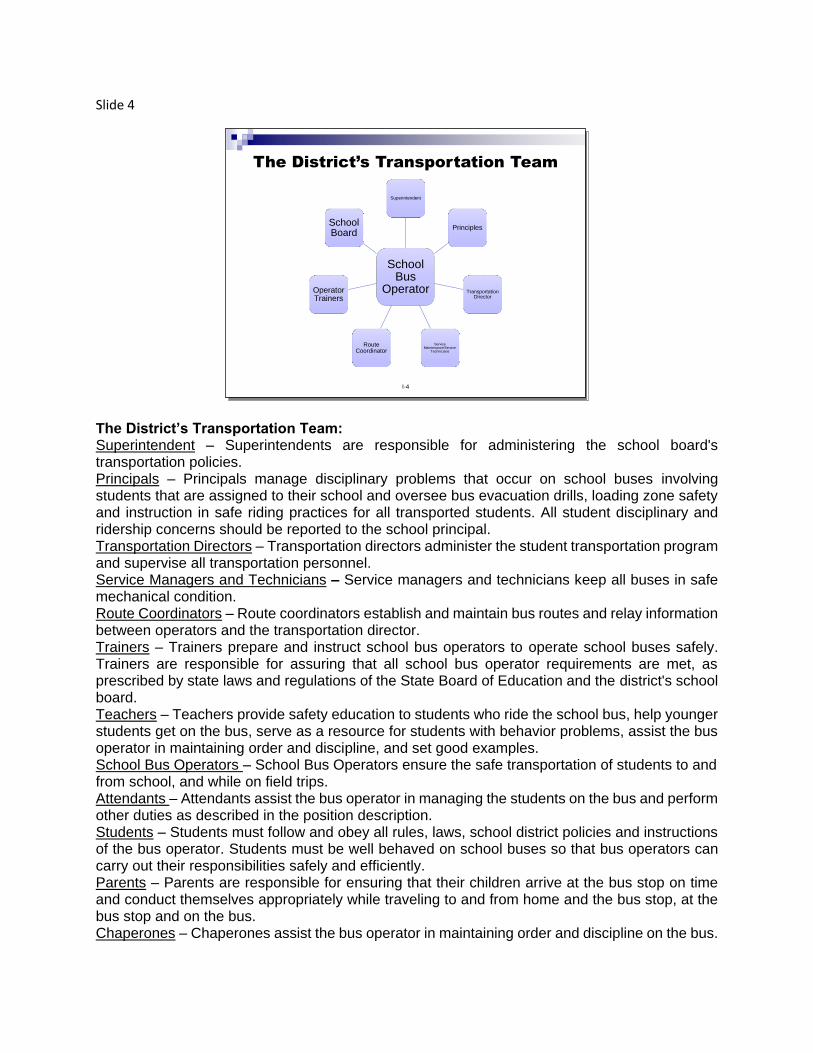
The District’s Transportation Team: Superintendent – Superintendents are responsible for administering the school board's transportation policies. Principals – Principals manage disciplinary problems that occur on school buses involving students that are assigned to their school and oversee bus evacuation drills, loading zone safety and instruction in safe riding practices for all transported students. All student disciplinary and ridership concerns should be reported to the school principal. Transportation Directors – Transportation directors administer the student transportation program and supervise all transportation personnel. Service Managers and Technicians – Service managers and technicians keep all buses in safe mechanical condition. Route Coordinators – Route coordinators establish and maintain bus routes and relay information between operators and the transportation director. Trainers – Trainers prepare and instruct school bus operators to operate school buses safely. Trainers are responsible for assuring that all school bus operator requirements are met, as prescribed by state laws and regulations of the State Board of Education and the district's school board. Teachers – Teachers provide safety education to students who ride the school bus, help younger students get on the bus, serve as a resource for students with behavior problems, assist the bus operator in maintaining order and discipline, and set good examples. School Bus Operators – School Bus Operators ensure the safe transportation of students to and from school, and while on field trips. Attendants – Attendants assist the bus operator in managing the students on the bus and perform other duties as described in the position description. Students – Students must follow and obey all rules, laws, school district policies and instructions of the bus operator. Students must be well behaved on school buses so that bus operators can carry out their responsibilities safely and efficiently. Parents – Parents are responsible for ensuring that their children arrive at the bus stop on time and conduct themselves appropriately while traveling to and from home and the bus stop, at the bus stop and on the bus. Chaperones – Chaperones assist the bus operator in maintaining order and discipline on the bus.
I-4
The District’s Transportation Team
School Bus
Operator
Superintendent
Principles
Transportation Director
Service Maintenance/Service
Technicians
Route Coordinator
Operator Trainers
School Board
I-4
The District’s Transportation Team
School Bus
Operator
Superintendent
Principles
Transportation Director
Service Maintenance/Service
Technicians
Route Coordinator
Operator Trainers
School Board
Slide 5
I-6
Requirements for Becoming a
School Bus OperatorA school bus operator must:
Have at least five years of licensed driving experience.
Undergo a criminal background check.
Hold a valid Commercial Drivers License with a Passenger and School Bus endorsement.
Complete 40 hours of preservice training with at least 20 hours in a classroom and at least eight hours behind the wheel (including certified cardiopulmonary resuscitation [CPR] and first aid training).
Be capable of completing written forms and reports.
Pass the DOE dexterity test.
Pass a U.S. DOT physical exam that demonstrates that he/she is both physically and mentally healthy.
[Rule 6A-3.0141, FAC, Employment of School Bus Operators]
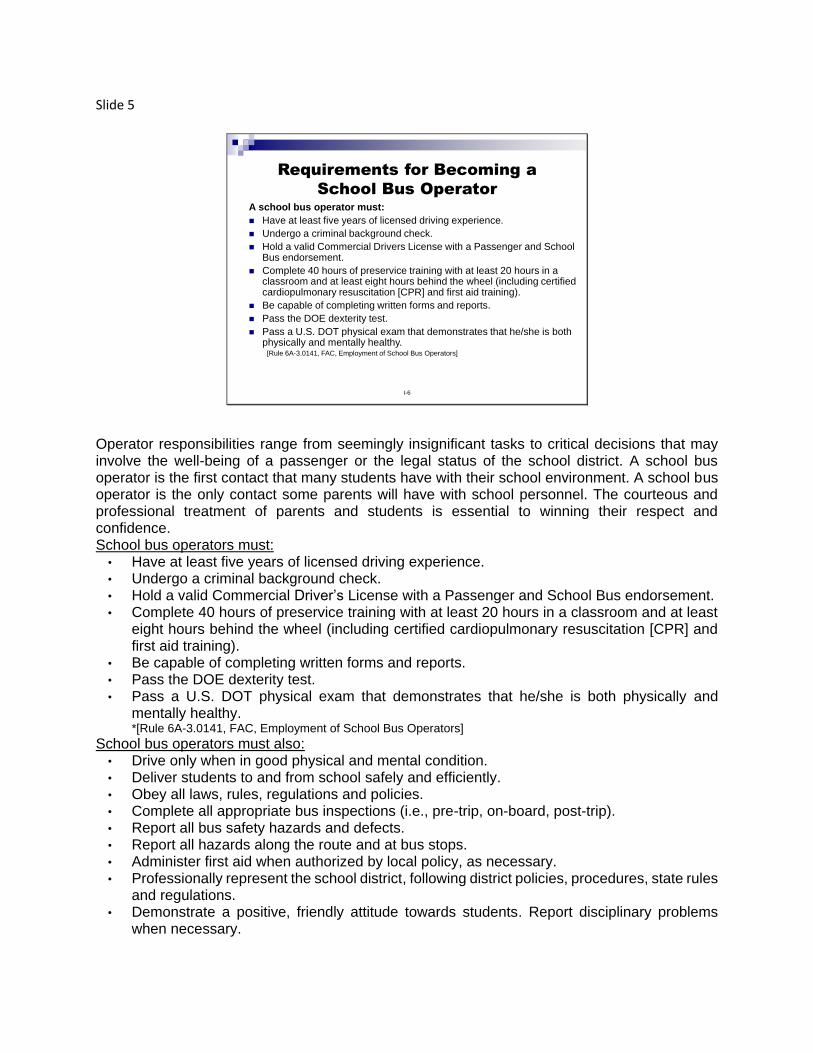
Operator responsibilities range from seemingly insignificant tasks to critical decisions that may involve the well-being of a passenger or the legal status of the school district. A school bus operator is the first contact that many students have with their school environment. A school bus operator is the only contact some parents will have with school personnel. The courteous and professional treatment of parents and students is essential to winning their respect and confidence. School bus operators must:
• Have at least five years of licensed driving experience. • Undergo a criminal background check. • Hold a valid Commercial Driver’s License with a Passenger and School Bus endorsement. • Complete 40 hours of preservice training with at least 20 hours in a classroom and at least
eight hours behind the wheel (including certified cardiopulmonary resuscitation [CPR] and first aid training).
• Be capable of completing written forms and reports. • Pass the DOE dexterity test. • Pass a U.S. DOT physical exam that demonstrates that he/she is both physically and
mentally healthy. *[Rule 6A-3.0141, FAC, Employment of School Bus Operators]
School bus operators must also: • Drive only when in good physical and mental condition. • Deliver students to and from school safely and efficiently. • Obey all laws, rules, regulations and policies. • Complete all appropriate bus inspections (i.e., pre-trip, on-board, post-trip). • Report all bus safety hazards and defects. • Report all hazards along the route and at bus stops. • Administer first aid when authorized by local policy, as necessary. • Professionally represent the school district, following district policies, procedures, state rules
and regulations. • Demonstrate a positive, friendly attitude towards students. Report disciplinary problems
when necessary.
Slide 6
I-7
Requirements for Becoming a
School Bus Operator (continued)
Possess a Certificate of Training issued by the district.
Submit to the required drug testing program conducted for all employees who hold a Commercial Drivers License, including:
Pre-employment testing,
Random testing,
Post-accident testing,
Reasonable suspicion testing, and
Return-to-duty testing.
Remain registered in Clearinghouse Services and authorize queries.
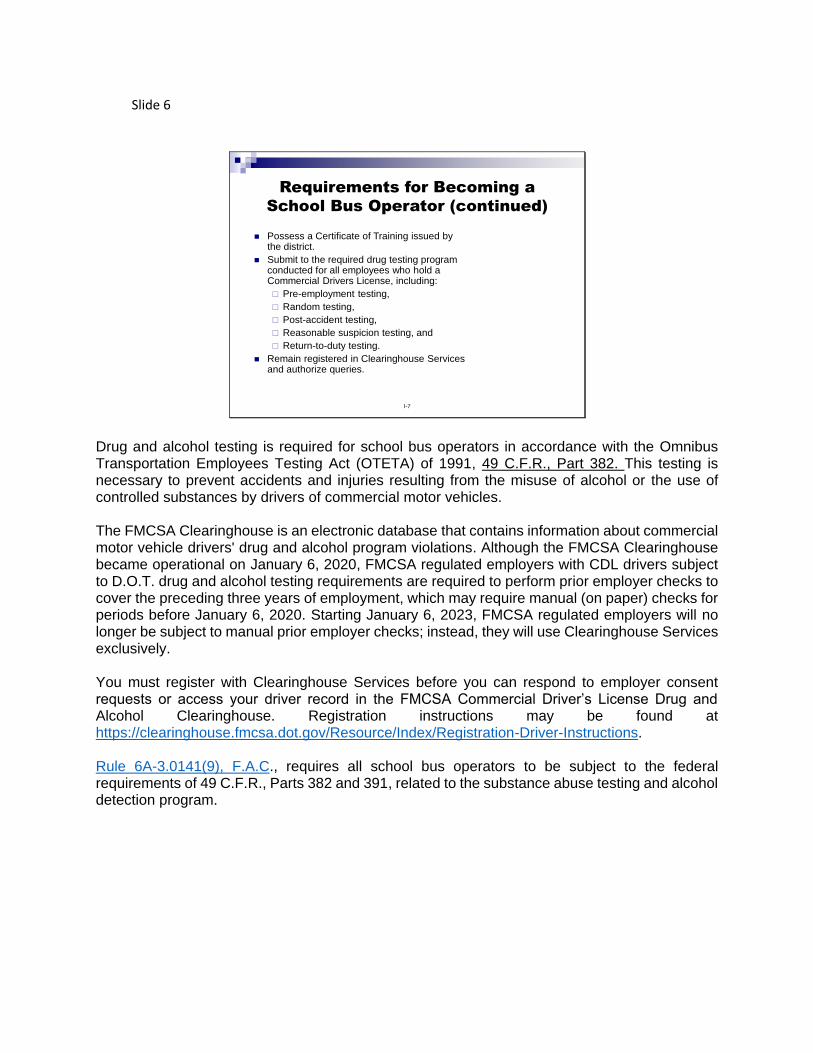
Drug and alcohol testing is required for school bus operators in accordance with the Omnibus Transportation Employees Testing Act (OTETA) of 1991, 49 C.F.R., Part 382. This testing is necessary to prevent accidents and injuries resulting from the misuse of alcohol or the use of controlled substances by drivers of commercial motor vehicles. The FMCSA Clearinghouse is an electronic database that contains information about commercial motor vehicle drivers' drug and alcohol program violations. Although the FMCSA Clearinghouse became operational on January 6, 2020, FMCSA regulated employers with CDL drivers subject to D.O.T. drug and alcohol testing requirements are required to perform prior employer checks to cover the preceding three years of employment, which may require manual (on paper) checks for periods before January 6, 2020. Starting January 6, 2023, FMCSA regulated employers will no longer be subject to manual prior employer checks; instead, they will use Clearinghouse Services exclusively. You must register with Clearinghouse Services before you can respond to employer consent requests or access your driver record in the FMCSA Commercial Driver’s License Drug and Alcohol Clearinghouse. Registration instructions may be found at https://clearinghouse.fmcsa.dot.gov/Resource/Index/Registration-Driver-Instructions. Rule 6A-3.0141(9), F.A.C., requires all school bus operators to be subject to the federal requirements of 49 C.F.R., Parts 382 and 391, related to the substance abuse testing and alcohol detection program.
Slide 7
Additional Required Training
Certified Cardiopulmonary
Resuscitation (CPR) and First
Aid Training
Helps to preserve the brain
function of an individual in
cardiac arrest.
Training can alleviate a
person’s condition and
prevent death.
Can reduce recovery time
after an emergency.
Increased chances of
survival by keeping the
victim’s blood flowing.
Busing On The Lookout
(Truckers Against Trafficking)
Human trafficking training
developed by Truckers
Against Trafficking for school
bus operators.
Operators are frontline
employees who may come in
contact with victims of human
trafficking.
Mission is to combat human
trafficking through awareness
and education.
BOTL Training (click)
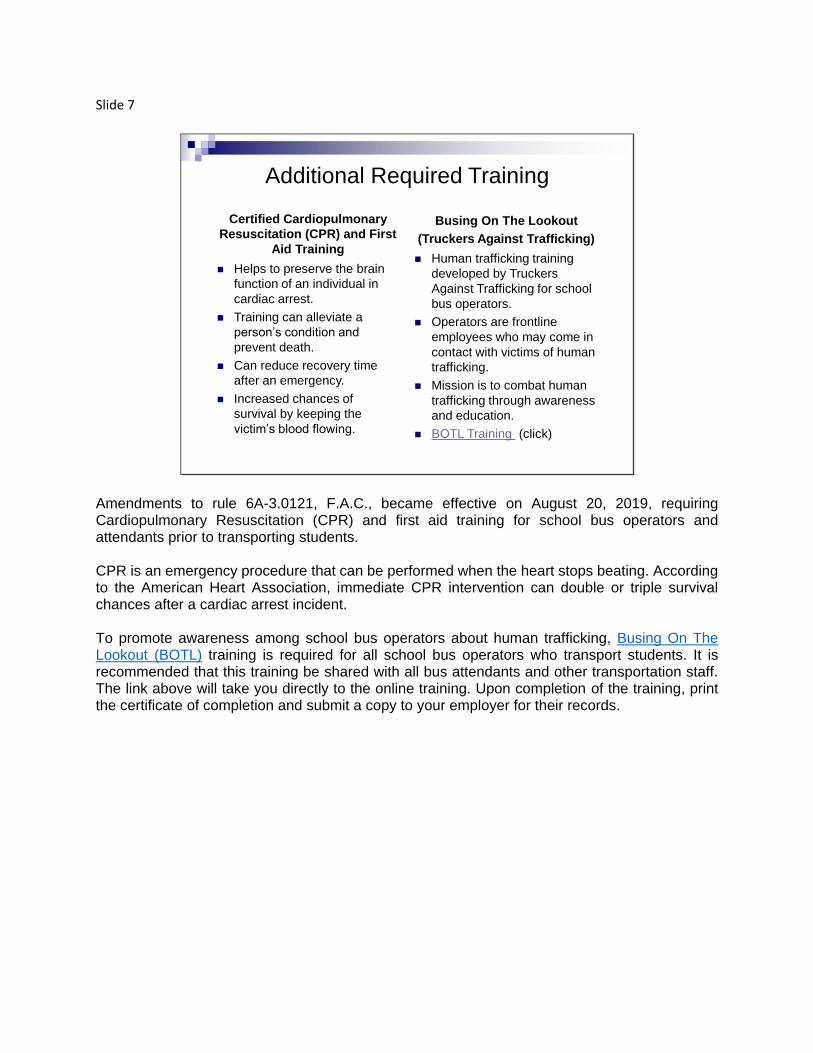
Amendments to rule 6A-3.0121, F.A.C., became effective on August 20, 2019, requiring Cardiopulmonary Resuscitation (CPR) and first aid training for school bus operators and attendants prior to transporting students. CPR is an emergency procedure that can be performed when the heart stops beating. According to the American Heart Association, immediate CPR intervention can double or triple survival chances after a cardiac arrest incident. To promote awareness among school bus operators about human trafficking, Busing On The Lookout (BOTL) training is required for all school bus operators who transport students. It is recommended that this training be shared with all bus attendants and other transportation staff. The link above will take you directly to the online training. Upon completion of the training, print the certificate of completion and submit a copy to your employer for their records.
Slide 8
Training Provider RegistryNew Requirements
Effective February 7, 2022, each
driver trainer will be required to
issue a certificate of completion in
the Training Provider Registry
(TPR), verifying the trainee has
completed the required entry–level
driver training described in 49
CFR Part 380.
The certificate of training will be
verified by the Department of
Highway Safety and Motor
Vehicles (DHSMV) before a skills
test can be scheduled and
administered by a CDL third-party
tester.
This certification must be
submitted by midnight of the
second day after the trainee
completes his/her training.
The certification will include the
driver’s name, number of driver’s
license/commercial learner’s
permit/commercial driver’s license
and state of licensure.
Commercial driver’s license class
and any endorsements, with the
type of training the trainee
completed and number of clock
hours spent, must be included.
The training provider must include
his/her information and date of
completion.
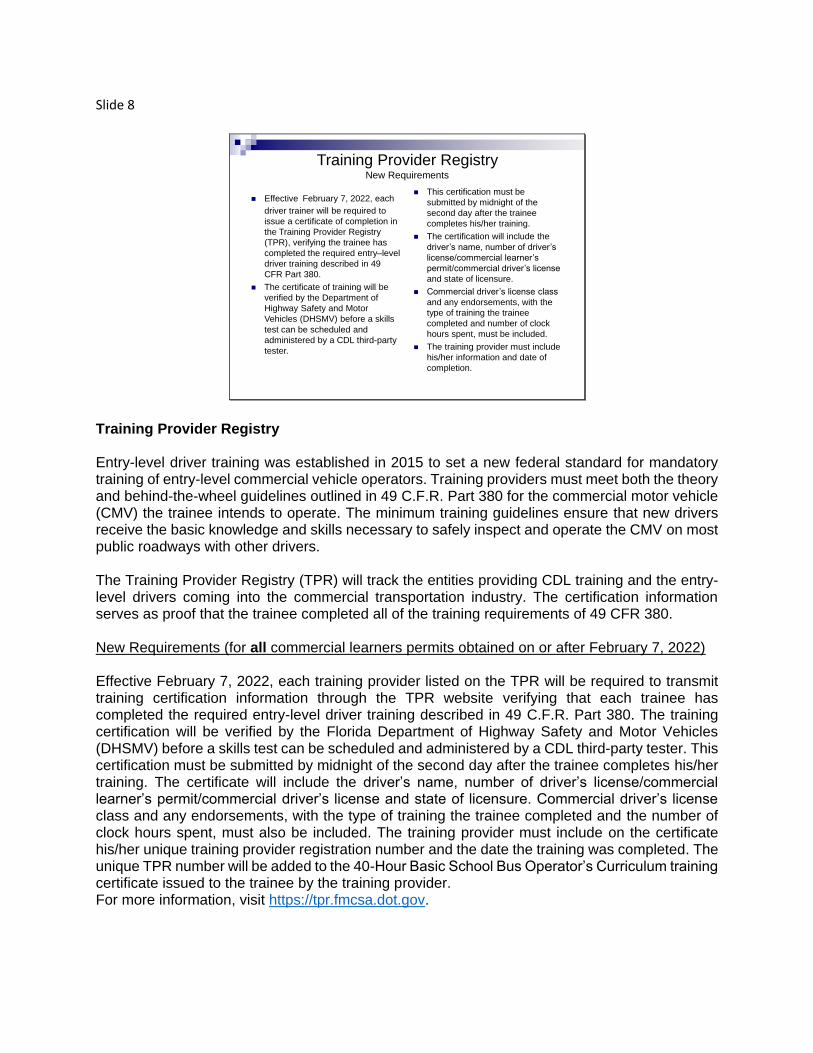
Training Provider Registry Entry-level driver training was established in 2015 to set a new federal standard for mandatory training of entry-level commercial vehicle operators. Training providers must meet both the theory and behind-the-wheel guidelines outlined in 49 C.F.R. Part 380 for the commercial motor vehicle (CMV) the trainee intends to operate. The minimum training guidelines ensure that new drivers receive the basic knowledge and skills necessary to safely inspect and operate the CMV on most public roadways with other drivers. The Training Provider Registry (TPR) will track the entities providing CDL training and the entry-level drivers coming into the commercial transportation industry. The certification information serves as proof that the trainee completed all of the training requirements of 49 CFR 380. New Requirements (for all commercial learners permits obtained on or after February 7, 2022) Effective February 7, 2022, each training provider listed on the TPR will be required to transmit training certification information through the TPR website verifying that each trainee has completed the required entry-level driver training described in 49 C.F.R. Part 380. The training certification will be verified by the Florida Department of Highway Safety and Motor Vehicles (DHSMV) before a skills test can be scheduled and administered by a CDL third-party tester. This certification must be submitted by midnight of the second day after the trainee completes his/her training. The certificate will include the driver’s name, number of driver’s license/commercial learner’s permit/commercial driver’s license and state of licensure. Commercial driver’s license class and any endorsements, with the type of training the trainee completed and the number of clock hours spent, must also be included. The training provider must include on the certificate his/her unique training provider registration number and the date the training was completed. The unique TPR number will be added to the 40-Hour Basic School Bus Operator’s Curriculum training certificate issued to the trainee by the training provider. For more information, visit https://tpr.fmcsa.dot.gov.
Slide 9
CDL Self-Certification
Responsibilities
The school bus operator will be
required to register the new DOT
MEC with the Florida Department
of Highway Safety and Motor
Vehicles (FLHSMV), either in
person or online at
www.flhsmv.gov/ddl/cdlmedicalcert.html
School Bus Operators:
Must certify in category A or C:
A. Non-excepted Interstate
C. Non-excepted Intrastate
Must re-certify each time your
medical card is renewed or
updated.
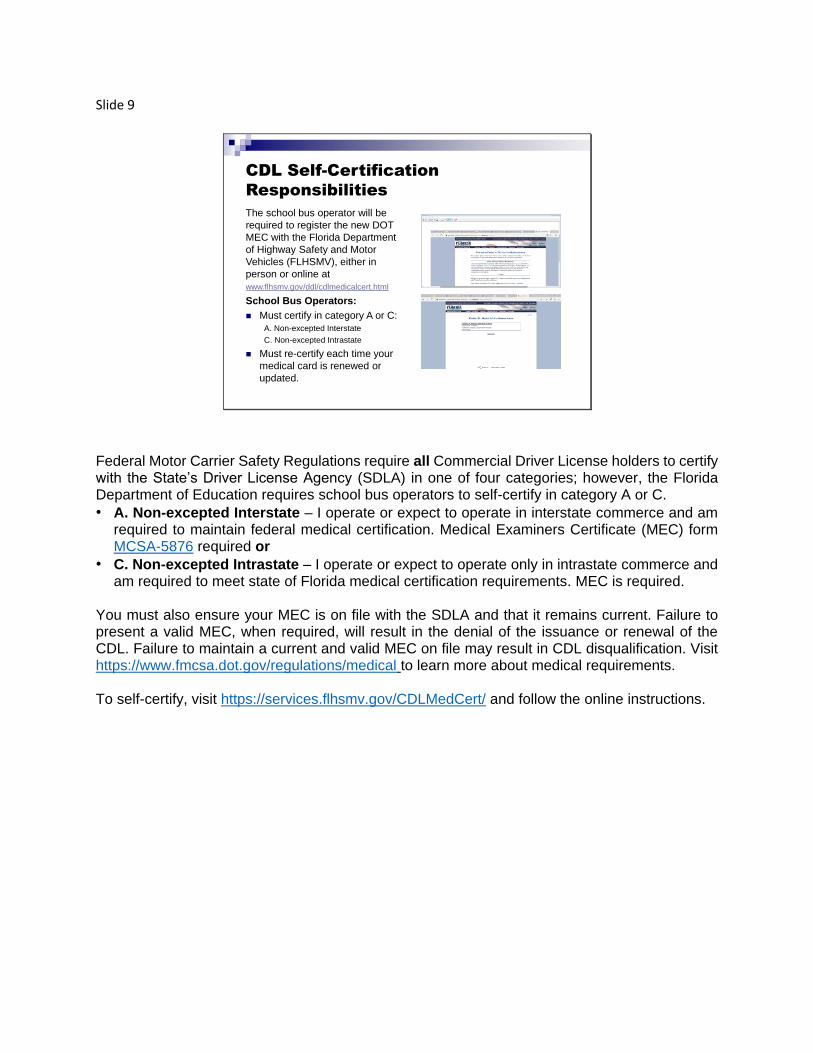
Federal Motor Carrier Safety Regulations require all Commercial Driver License holders to certify with the State’s Driver License Agency (SDLA) in one of four categories; however, the Florida Department of Education requires school bus operators to self-certify in category A or C.
• A. Non-excepted Interstate – I operate or expect to operate in interstate commerce and am required to maintain federal medical certification. Medical Examiners Certificate (MEC) form MCSA-5876 required or
• C. Non-excepted Intrastate – I operate or expect to operate only in intrastate commerce and am required to meet state of Florida medical certification requirements. MEC is required.
You must also ensure your MEC is on file with the SDLA and that it remains current. Failure to present a valid MEC, when required, will result in the denial of the issuance or renewal of the CDL. Failure to maintain a current and valid MEC on file may result in CDL disqualification. Visit https://www.fmcsa.dot.gov/regulations/medical to learn more about medical requirements. To self-certify, visit https://services.flhsmv.gov/CDLMedCert/ and follow the online instructions.
Slide 10
Requirements and Maintenance of your
CDL Operator License
Hold a valid class B CDL with
Passenger and School Bus
endorsements.
Complete at least eight hours
of in-service training related to
operator responsibilities for
transporting students, annually.
Successfully pass the DOE
dexterity test administered by
the school district and maintain
a valid Medical Examiners
Certificate.
Be subject to the federal
requirements of 49 C.F.R.,
Parts 382 and 391, related to
the substance abuse testing
and alcohol detection program.
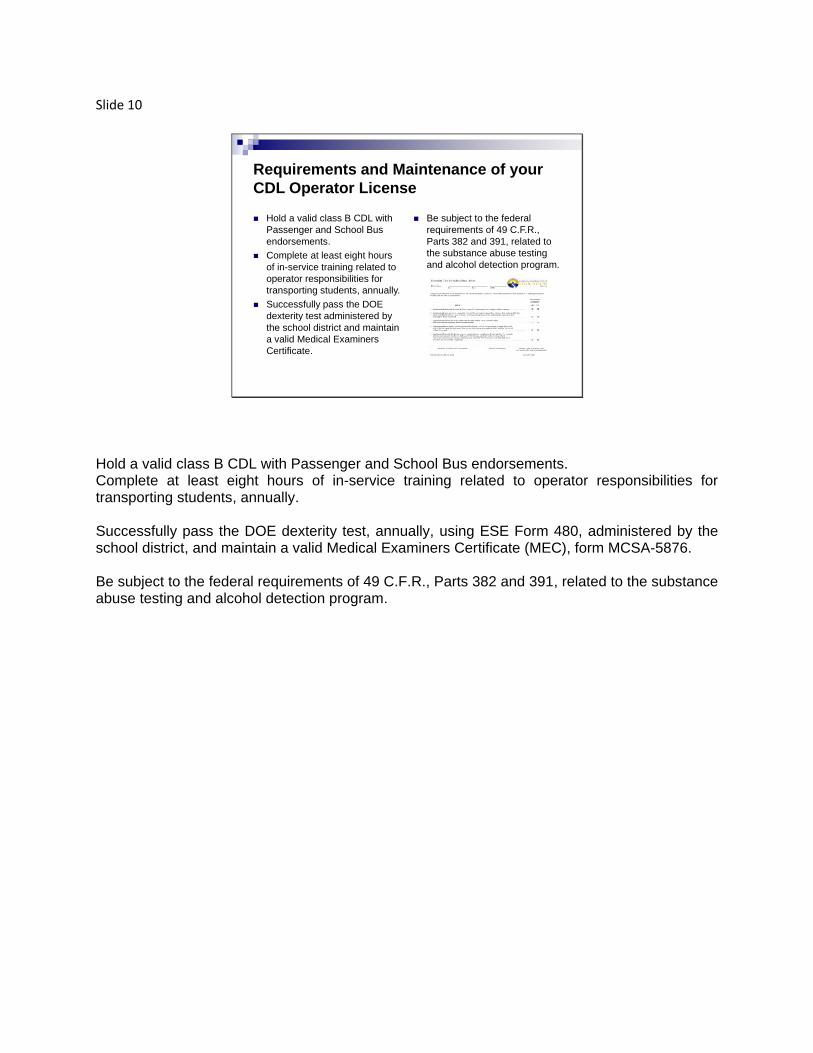
Hold a valid class B CDL with Passenger and School Bus endorsements. Complete at least eight hours of in-service training related to operator responsibilities for transporting students, annually. Successfully pass the DOE dexterity test, annually, using ESE Form 480, administered by the school district, and maintain a valid Medical Examiners Certificate (MEC), form MCSA-5876. Be subject to the federal requirements of 49 C.F.R., Parts 382 and 391, related to the substance abuse testing and alcohol detection program.
Slide 11
I-8
Laws and Rules/Regulations
LAWS:
Requirements established
by a legislative body that
must be followed.
RULES/REGULATIONS:
Requirements established
by an administrative
department that must be
followed.
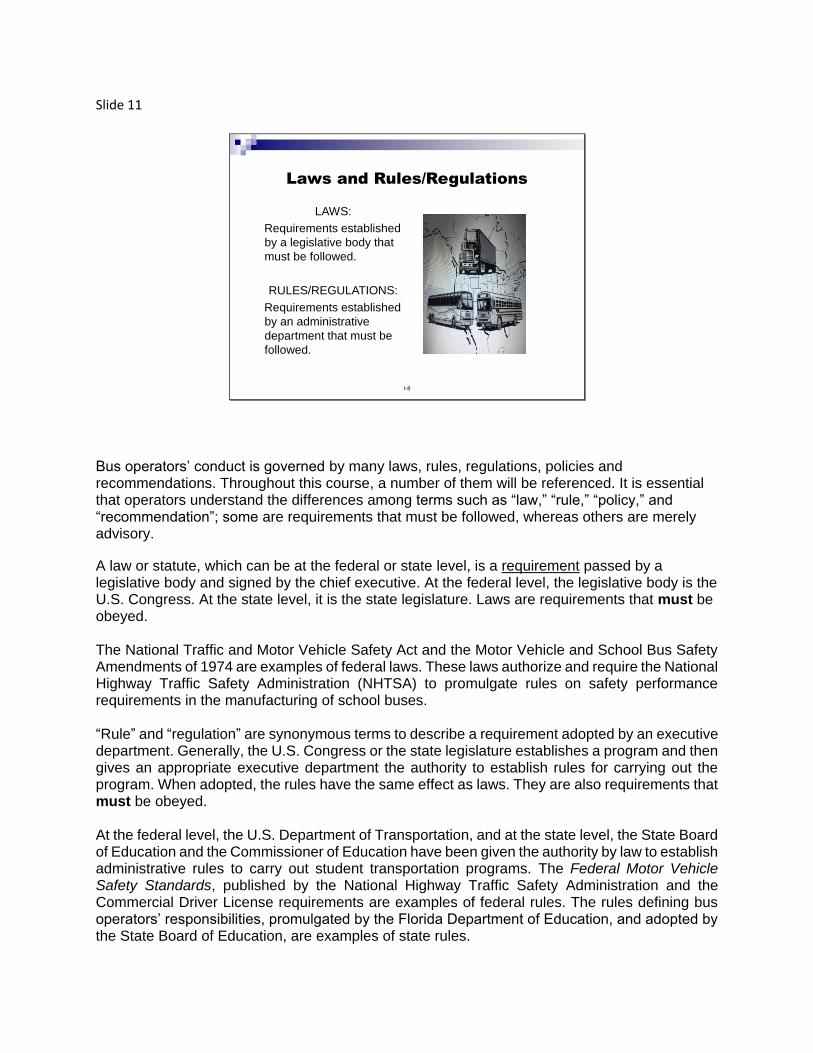
Bus operators’ conduct is governed by many laws, rules, regulations, policies and recommendations. Throughout this course, a number of them will be referenced. It is essential that operators understand the differences among terms such as “law,” “rule,” “policy,” and “recommendation”; some are requirements that must be followed, whereas others are merely advisory.
A law or statute, which can be at the federal or state level, is a requirement passed by a legislative body and signed by the chief executive. At the federal level, the legislative body is the U.S. Congress. At the state level, it is the state legislature. Laws are requirements that must be obeyed. The National Traffic and Motor Vehicle Safety Act and the Motor Vehicle and School Bus Safety Amendments of 1974 are examples of federal laws. These laws authorize and require the National Highway Traffic Safety Administration (NHTSA) to promulgate rules on safety performance requirements in the manufacturing of school buses. “Rule” and “regulation” are synonymous terms to describe a requirement adopted by an executive department. Generally, the U.S. Congress or the state legislature establishes a program and then gives an appropriate executive department the authority to establish rules for carrying out the program. When adopted, the rules have the same effect as laws. They are also requirements that must be obeyed. At the federal level, the U.S. Department of Transportation, and at the state level, the State Board of Education and the Commissioner of Education have been given the authority by law to establish administrative rules to carry out student transportation programs. The Federal Motor Vehicle Safety Standards, published by the National Highway Traffic Safety Administration and the Commercial Driver License requirements are examples of federal rules. The rules defining bus operators’ responsibilities, promulgated by the Florida Department of Education, and adopted by the State Board of Education, are examples of state rules.
Slide 12
I-9
Policies and Recommendations
POLICIES:
Local requirements that
are not enforced by a
federal or state agency.
RECOMMENDATIONS:
Guidelines that should be
followed.
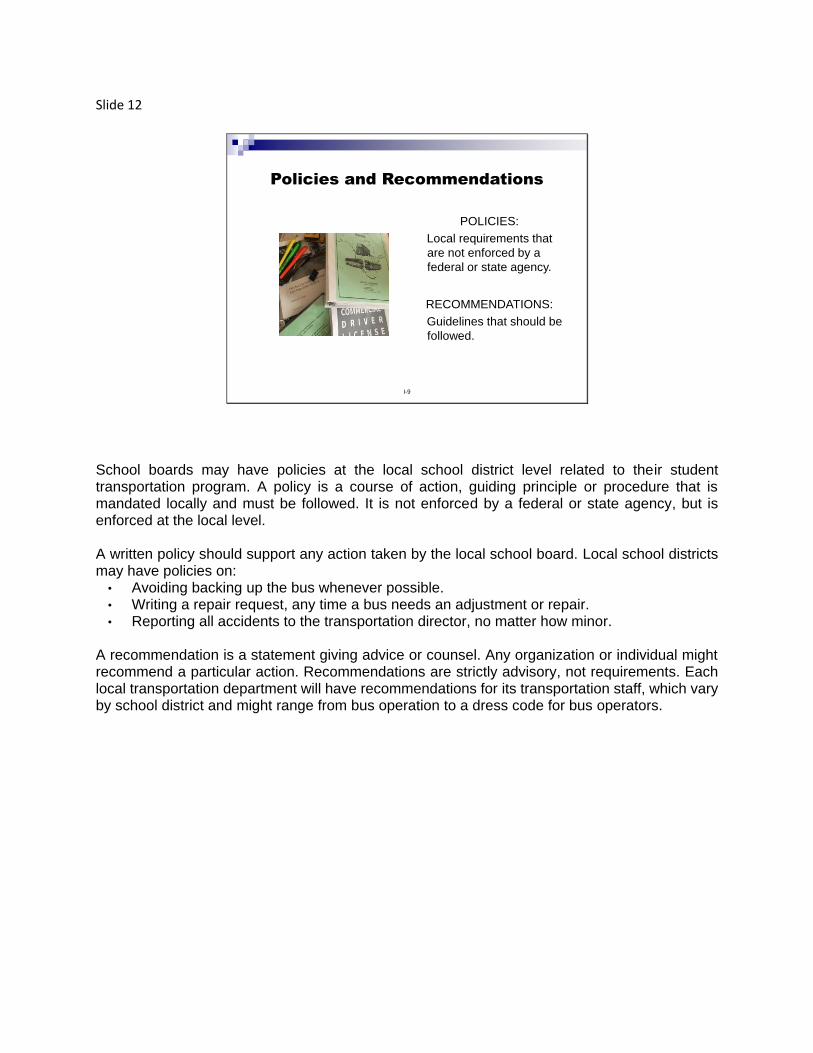
School boards may have policies at the local school district level related to their student transportation program. A policy is a course of action, guiding principle or procedure that is mandated locally and must be followed. It is not enforced by a federal or state agency, but is enforced at the local level. A written policy should support any action taken by the local school board. Local school districts may have policies on:
• Avoiding backing up the bus whenever possible. • Writing a repair request, any time a bus needs an adjustment or repair. • Reporting all accidents to the transportation director, no matter how minor.
A recommendation is a statement giving advice or counsel. Any organization or individual might recommend a particular action. Recommendations are strictly advisory, not requirements. Each local transportation department will have recommendations for its transportation staff, which vary by school district and might range from bus operation to a dress code for bus operators.

Slide 15
I-10
Professionalism
A school bus operator should be professional
at all times.
What does this
picture mean
to you?
A school bus operator is a professional. The professional operator must be clearheaded and allow sufficient time to leave for work to ensure arrival in time to conduct a thorough pre-trip bus inspection. As a professional, an operator should exhibit traits that are characteristic of all professionals, including professional attitude, appearance and actions. School bus operators should at all times be:
• Responsible • Dependable • Consistent • Punctual • Ethical • Empathetic • Mature • Honest • Firm, fair and consistent
They should also:
• Possess common sense • Possess good judgment • Possess leadership qualities • Maintain confidentiality • Have a neat and clean appearance
Slide 16
I-11
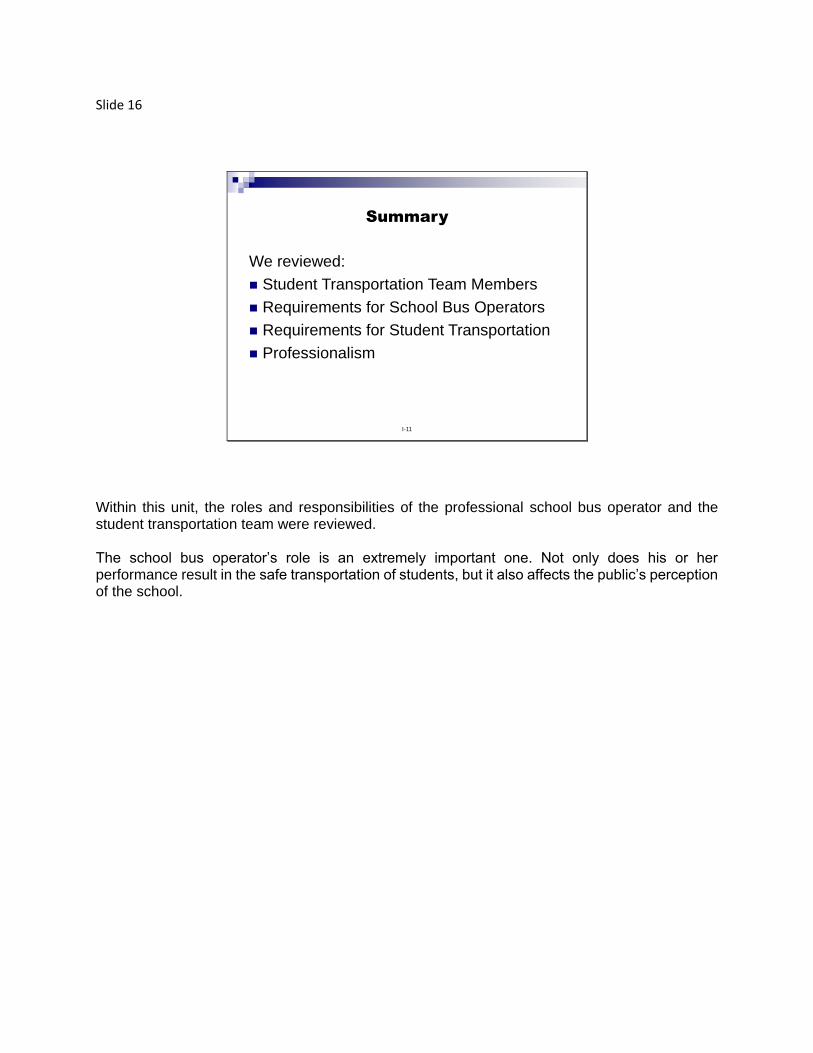
Summary
We reviewed:
Student Transportation Team Members
Requirements for School Bus Operators
Requirements for Student Transportation
Professionalism
Within this unit, the roles and responsibilities of the professional school bus operator and the student transportation team were reviewed. The school bus operator’s role is an extremely important one. Not only does his or her performance result in the safe transportation of students, but it also affects the public’s perception of the school.
Slide 1
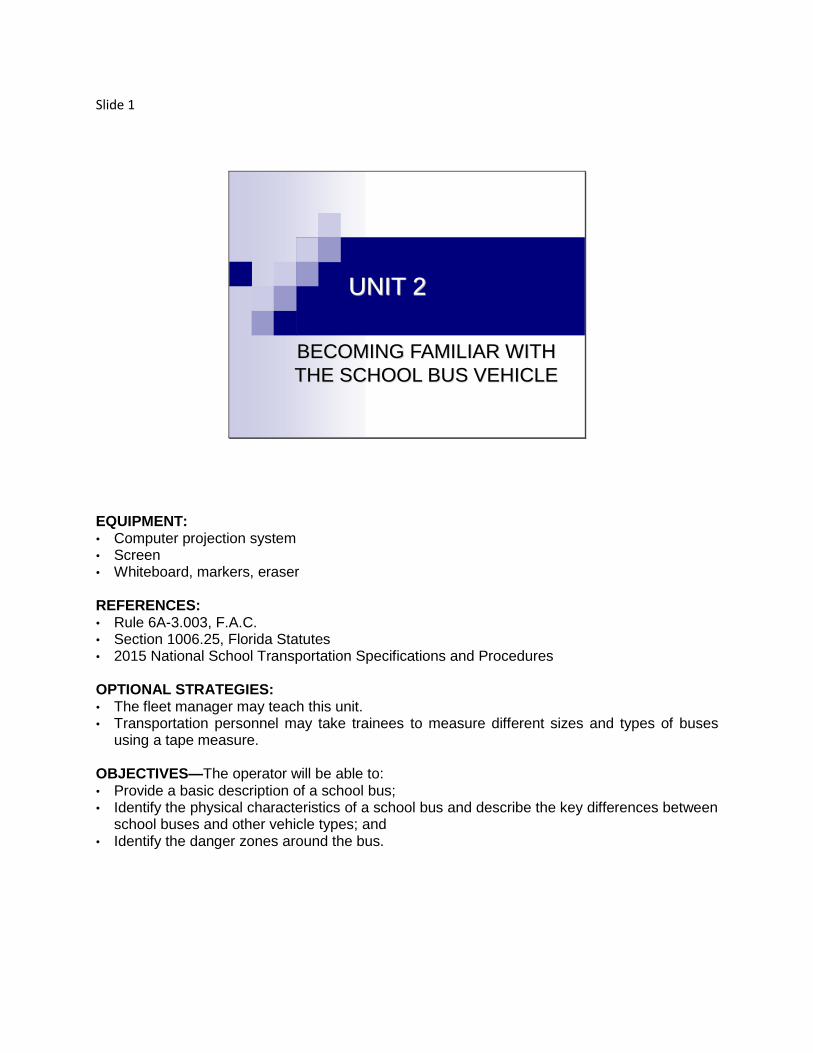
UNIT 2
BECOMING FAMILIAR WITH
THE SCHOOL BUS VEHICLE
EQUIPMENT: • Computer projection system • Screen • Whiteboard, markers, eraser REFERENCES: • Rule 6A-3.003, F.A.C. • Section 1006.25, Florida Statutes • 2015 National School Transportation Specifications and Procedures OPTIONAL STRATEGIES: • The fleet manager may teach this unit. • Transportation personnel may take trainees to measure different sizes and types of buses
using a tape measure. OBJECTIVES—The operator will be able to: • Provide a basic description of a school bus; • Identify the physical characteristics of a school bus and describe the key differences between
school buses and other vehicle types; and • Identify the danger zones around the bus.
Slide 2
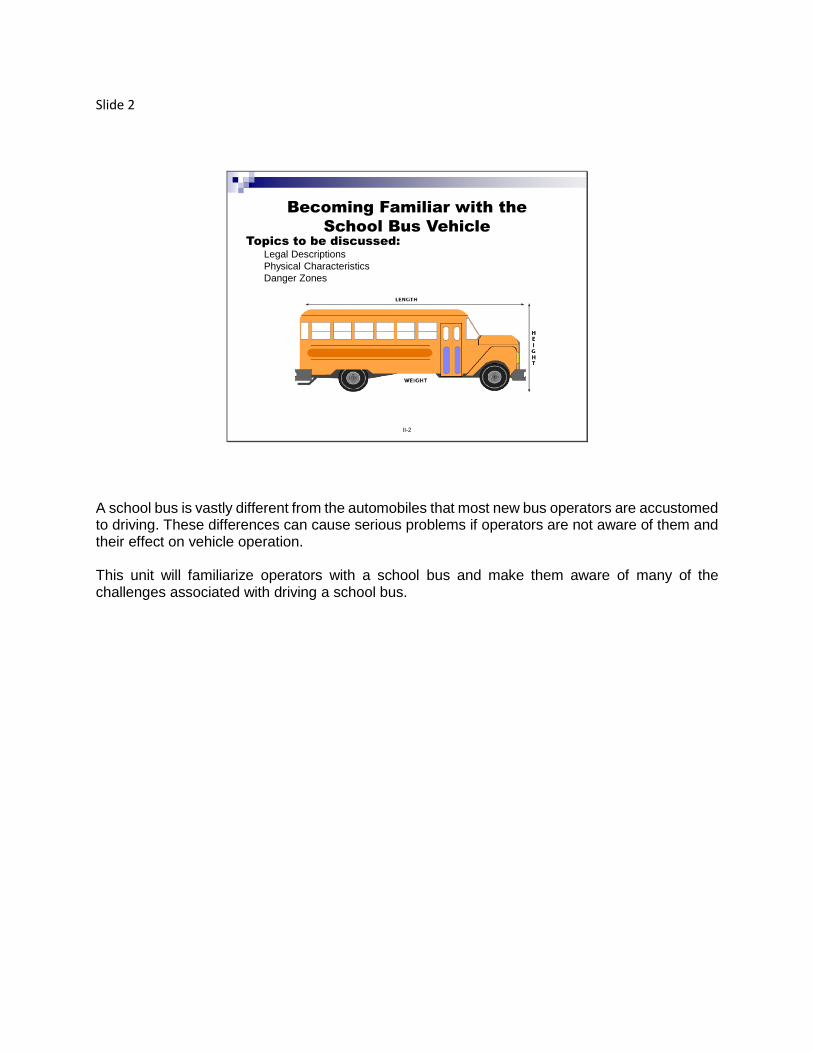
II-2
Becoming Familiar with the
School Bus VehicleTopics to be discussed:
Legal Descriptions
Physical Characteristics
Danger Zones
A school bus is vastly different from the automobiles that most new bus operators are accustomed to driving. These differences can cause serious problems if operators are not aware of them and their effect on vehicle operation. This unit will familiarize operators with a school bus and make them aware of many of the challenges associated with driving a school bus.
Slide 3
II-3
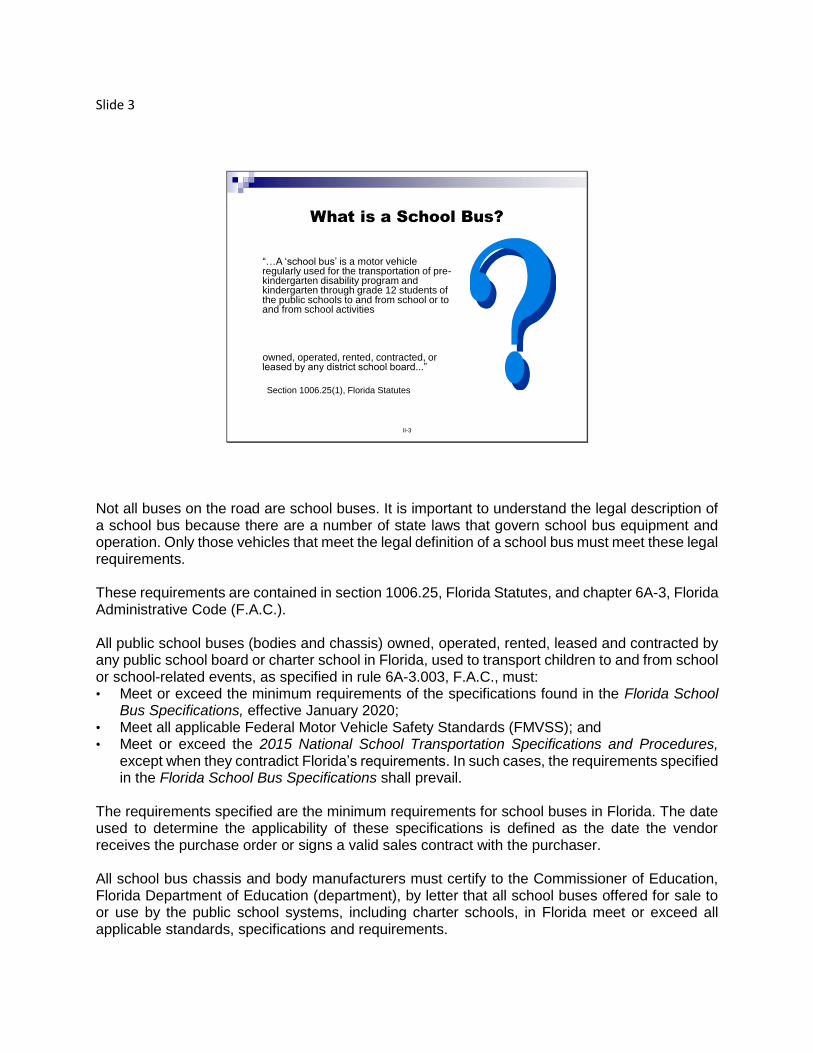
What is a School Bus?
“…A ‘school bus’ is a motor vehicle regularly used for the transportation of pre-kindergarten disability program and kindergarten through grade 12 students of the public schools to and from school or to and from school activities
owned, operated, rented, contracted, or leased by any district school board...”
Section 1006.25(1), Florida Statutes
Not all buses on the road are school buses. It is important to understand the legal description of a school bus because there are a number of state laws that govern school bus equipment and operation. Only those vehicles that meet the legal definition of a school bus must meet these legal requirements. These requirements are contained in section 1006.25, Florida Statutes, and chapter 6A-3, Florida Administrative Code (F.A.C.). All public school buses (bodies and chassis) owned, operated, rented, leased and contracted by any public school board or charter school in Florida, used to transport children to and from school or school-related events, as specified in rule 6A-3.003, F.A.C., must: • Meet or exceed the minimum requirements of the specifications found in the Florida School
Bus Specifications, effective January 2020; • Meet all applicable Federal Motor Vehicle Safety Standards (FMVSS); and • Meet or exceed the 2015 National School Transportation Specifications and Procedures,
except when they contradict Florida’s requirements. In such cases, the requirements specified in the Florida School Bus Specifications shall prevail.
The requirements specified are the minimum requirements for school buses in Florida. The date used to determine the applicability of these specifications is defined as the date the vendor receives the purchase order or signs a valid sales contract with the purchaser. All school bus chassis and body manufacturers must certify to the Commissioner of Education, Florida Department of Education (department), by letter that all school buses offered for sale to or use by the public school systems, including charter schools, in Florida meet or exceed all applicable standards, specifications and requirements.
Used school buses purchased or operated by a public school board or charter school in Florida must meet or exceed all federal and state requirements for public school buses that were in effect on the date the vehicle was manufactured. In accordance with s. 316.615, F.S., certain capacity school buses owned, operated or leased by nonpublic schools in Florida are required to meet the specifications prescribed in this section of statute. DEFINITIONS: • School Bus (State Definition): Section 1006.25, F.S., defines a “school bus” as “a motor
vehicle regularly used for the transportation of prekindergarten disability program and kindergarten through grade 12 students of the public schools to and from school or to and from school activities, and is owned, operated, rented, contracted or leased by any district school board...”
• School Bus (Federal Definition): Title 49 C.F.R. Part 571.3 defines “school bus” as “a bus that is sold or introduced in interstate commerce for purposes that include carrying students to and from school or related events.”
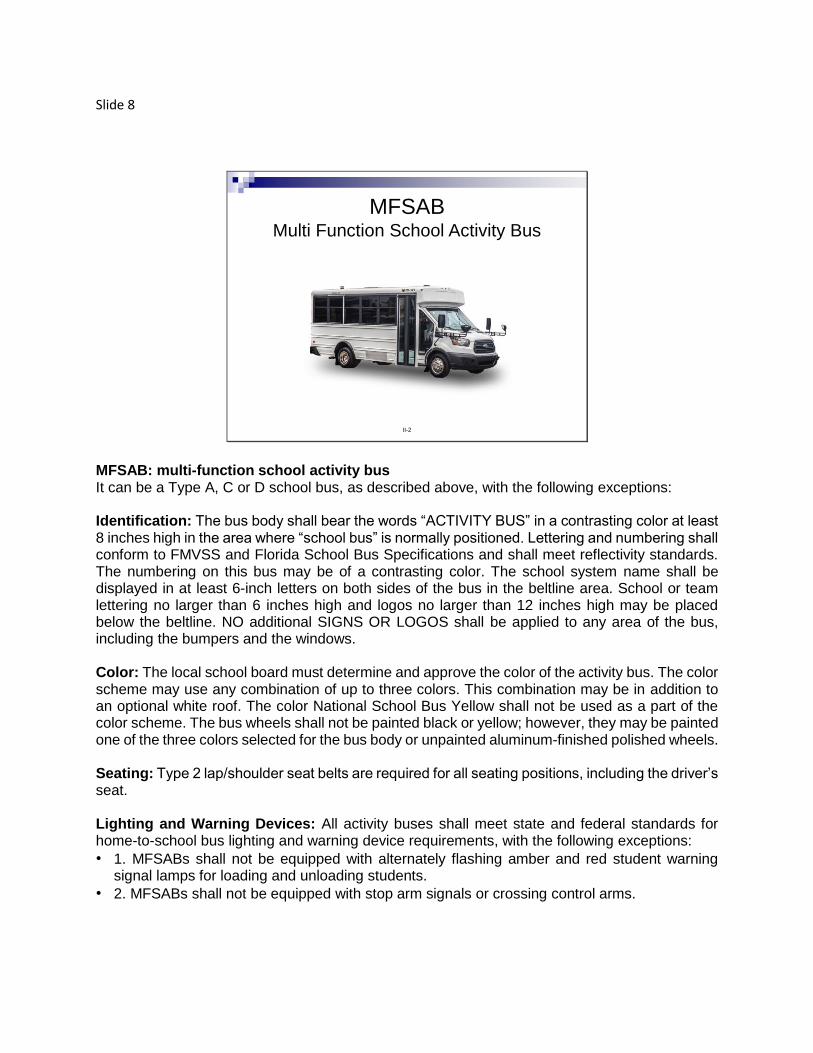
• Multi-Function School Activity Bus (MFSAB): An MFSAB is defined by Florida school bus specifications as a school bus constructed to FMVSS and Florida school bus specifications for school-related activities. MFSABs may not be used to transport students to and from school or between schools for the purpose of attendance. Title 49 C.F.R. Part 571.3 defines MFSAB as a school bus not used to transport students to and from home or school bus stops.
Slide 4
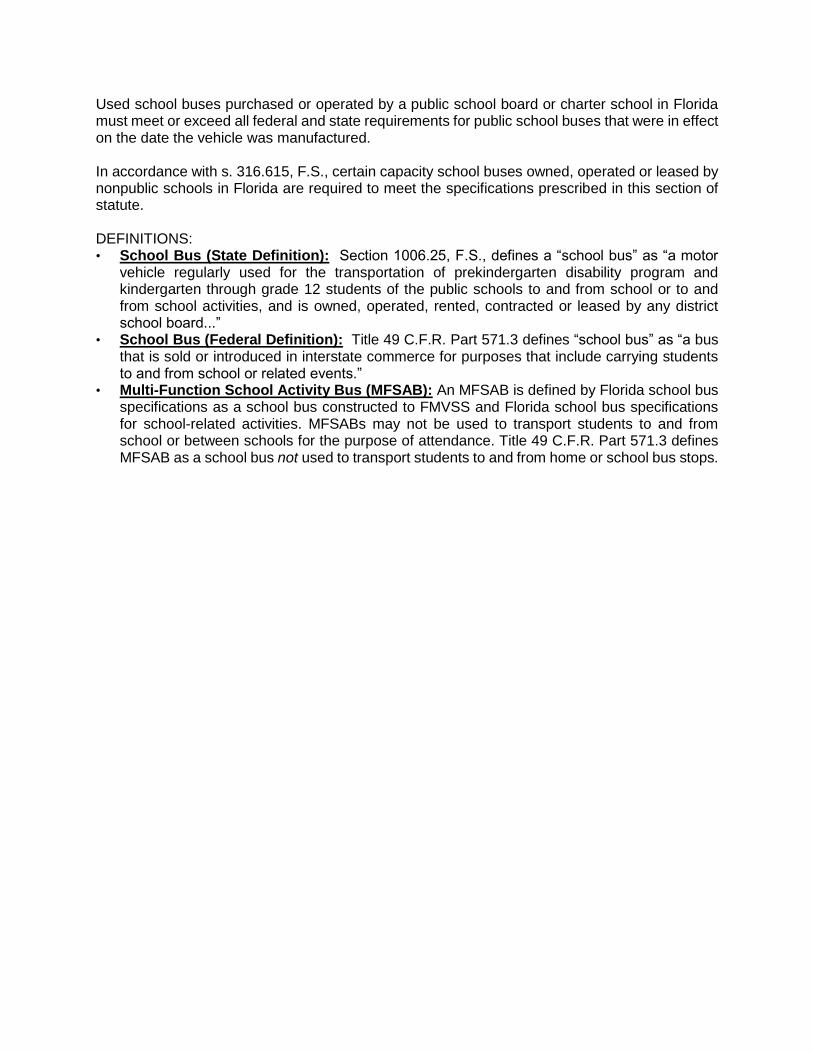
School Bus Types
There are several types of buses that meet the legal definition of a
school bus that school bus operators may be expected to drive.
There are two common body styles:
The conventional style has a hood, and the wheels are in front of
driver.
The transit style is flat-nosed, and the wheels are behind driver.
Buses vary in capacity from 18-passenger to 89-passenger. They
also vary in engine placement. The engine can be in the front or rear of
the bus. Buses vary in the kind of fuel they use. Diesel, gasoline and
various alternate fuels may be used. Also, school buses vary in Gross
Vehicle Weight Rating (GVWR).
II-2
There are four types of school buses produced by manufacturers in the United States. The smallest school bus is called a Type A, based on cutaway van chassis. Large school buses include Type C, bodied on cowled medium-duty truck chassis, and Type D, bodied on bare "forward control" or "pusher" chassis. Type C buses are the most common design, while Type D buses are the largest vehicles. All school buses are of single-deck design with a stepwell entry. In the United States, bus bodies are restricted to a maximum width of 102 inches and a maximum length of 45 feet. Seating capacity is affected by body length and operator specifications, with the largest designs seating up to 90 passengers.
All school bus types are required to be the standard exterior color called “National School Bus Yellow.” To further improve the bus’s visibility, yellow reflective tape marks the school bus’s height, width and length, making it easier to see in low light. Reflective tape assists in making the emergency exit easily identifiable. School buses are equipped with a number of safety devices to prevent accidents and injury: compartmentalization, safety belts, mirror system, emergency exits, and student-warning lights that work in conjunction with student safety and stop arm devices. First aid and body fluid kits, as well as a fire extinguisher and reflective triangles, can also be found onboard. The newest equipment includes video cameras with GPS capability and two-way radios to communicate with the district, which are monitored by local law enforcement and emergency management systems.
Slide 5
II-4
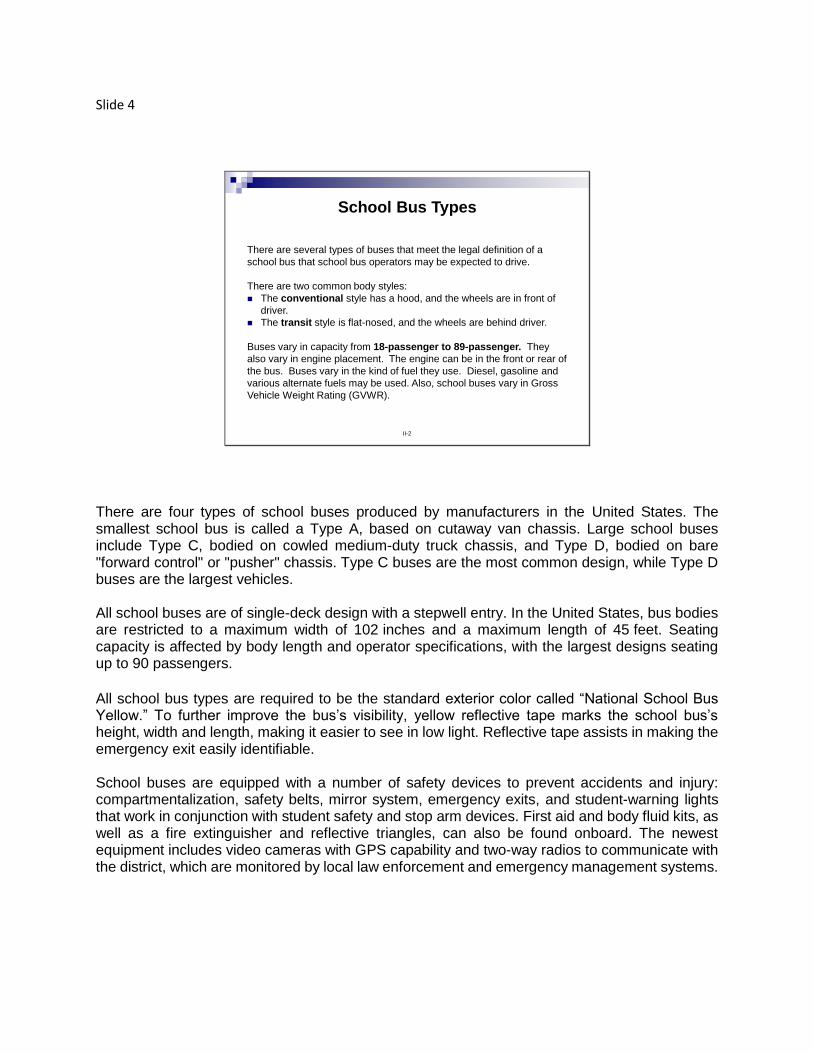
Type A
Type A: A school bus that is constructed using a cutaway front-section vehicle with a left-side driver’s door, with a maximum weight of 14,500 pounds or less, and designed to carry up to 29 passengers.
Slide 6
II-6
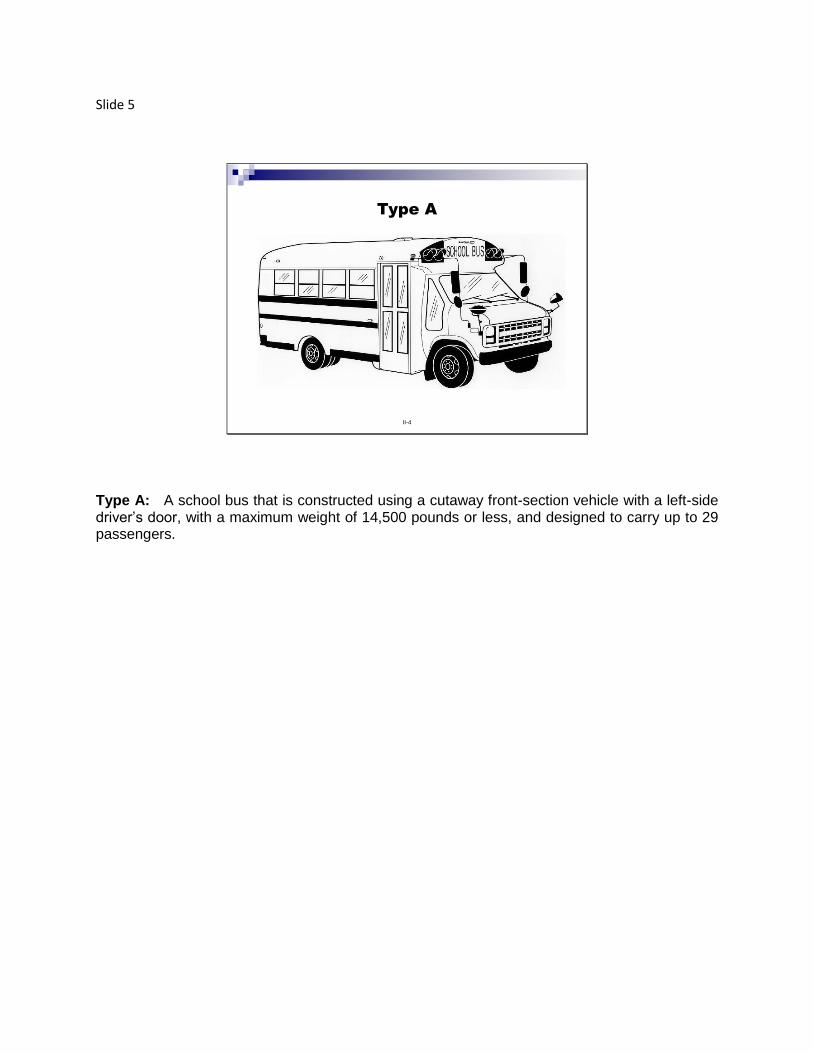
Type C
Type C: A type C school bus is constructed using a chassis with a hood and front fender assembly and is designed to carry up to 77 passengers. The entire engine is in front of the windshield, and the entrance door is behind the front wheels. This type also includes the cutaway truck chassis or truck chassis with a cab, with or without a left side door, and with a GVWR greater than 21,500 pounds, typically between 23,500 to 29,500. This type of school bus is considered traditional because of its conventional style.
Slide 7
II-7
Type D
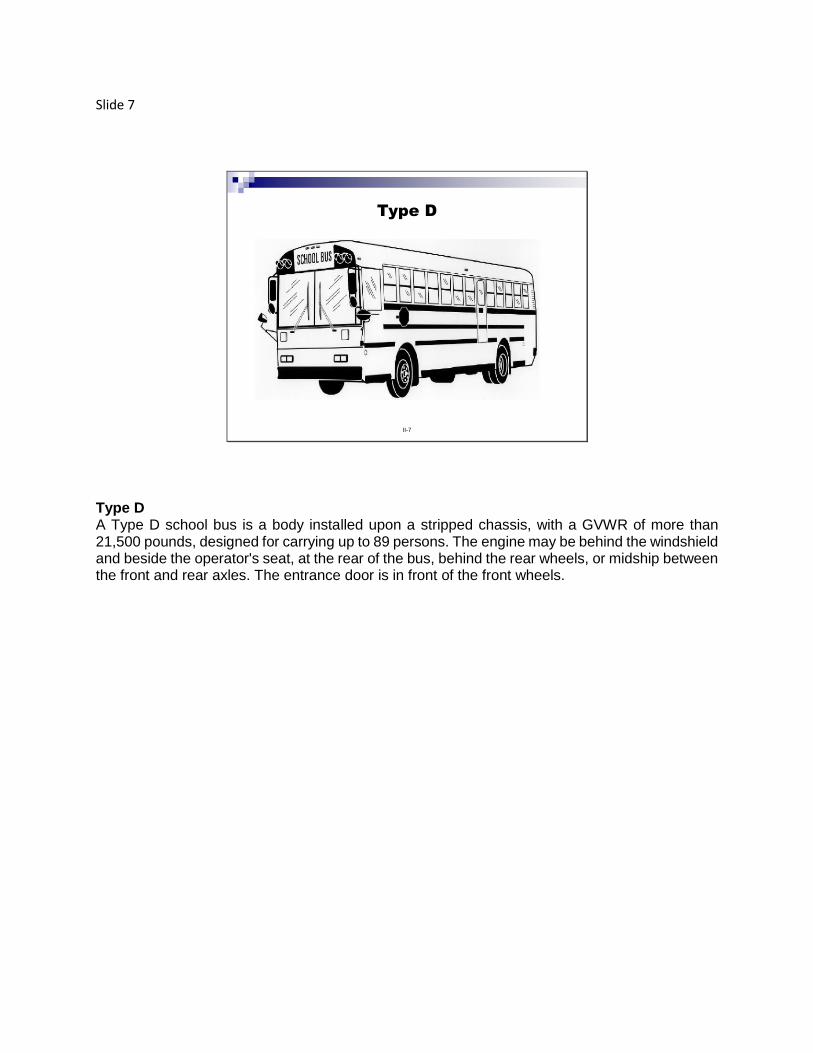
Type D A Type D school bus is a body installed upon a stripped chassis, with a GVWR of more than 21,500 pounds, designed for carrying up to 89 persons. The engine may be behind the windshield and beside the operator's seat, at the rear of the bus, behind the rear wheels, or midship between the front and rear axles. The entrance door is in front of the front wheels.
Slide 8
MFSABMulti Function School Activity Bus
II-2
MFSAB: multi-function school activity bus It can be a Type A, C or D school bus, as described above, with the following exceptions: Identification: The bus body shall bear the words “ACTIVITY BUS” in a contrasting color at least 8 inches high in the area where “school bus” is normally positioned. Lettering and numbering shall conform to FMVSS and Florida School Bus Specifications and shall meet reflectivity standards. The numbering on this bus may be of a contrasting color. The school system name shall be displayed in at least 6-inch letters on both sides of the bus in the beltline area. School or team lettering no larger than 6 inches high and logos no larger than 12 inches high may be placed below the beltline. NO additional SIGNS OR LOGOS shall be applied to any area of the bus, including the bumpers and the windows. Color: The local school board must determine and approve the color of the activity bus. The color scheme may use any combination of up to three colors. This combination may be in addition to an optional white roof. The color National School Bus Yellow shall not be used as a part of the color scheme. The bus wheels shall not be painted black or yellow; however, they may be painted one of the three colors selected for the bus body or unpainted aluminum-finished polished wheels. Seating: Type 2 lap/shoulder seat belts are required for all seating positions, including the driver’s seat. Lighting and Warning Devices: All activity buses shall meet state and federal standards for home-to-school bus lighting and warning device requirements, with the following exceptions:
• 1. MFSABs shall not be equipped with alternately flashing amber and red student warning signal lamps for loading and unloading students.
• 2. MFSABs shall not be equipped with stop arm signals or crossing control arms.
Slide 9
II-8
Challenges caused by length:
Merging
Turning
Bumps
Backing
Parking
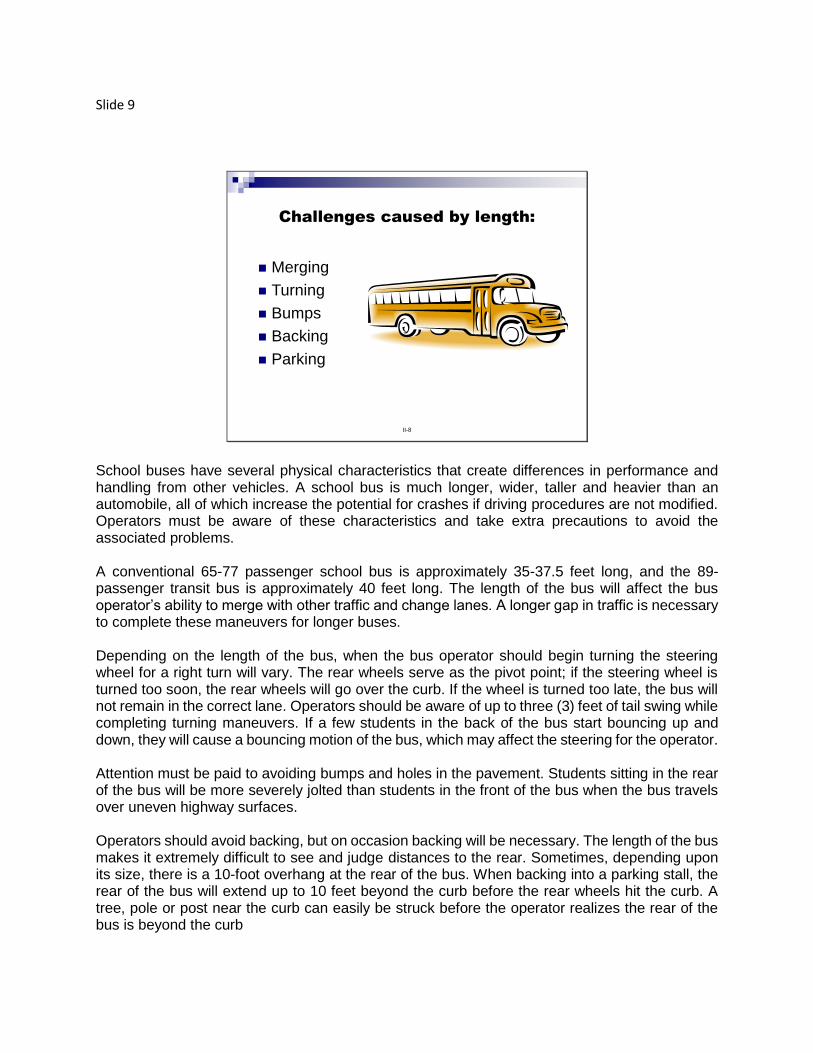
School buses have several physical characteristics that create differences in performance and handling from other vehicles. A school bus is much longer, wider, taller and heavier than an automobile, all of which increase the potential for crashes if driving procedures are not modified. Operators must be aware of these characteristics and take extra precautions to avoid the associated problems. A conventional 65-77 passenger school bus is approximately 35-37.5 feet long, and the 89-passenger transit bus is approximately 40 feet long. The length of the bus will affect the bus operator’s ability to merge with other traffic and change lanes. A longer gap in traffic is necessary to complete these maneuvers for longer buses. Depending on the length of the bus, when the bus operator should begin turning the steering wheel for a right turn will vary. The rear wheels serve as the pivot point; if the steering wheel is turned too soon, the rear wheels will go over the curb. If the wheel is turned too late, the bus will not remain in the correct lane. Operators should be aware of up to three (3) feet of tail swing while completing turning maneuvers. If a few students in the back of the bus start bouncing up and down, they will cause a bouncing motion of the bus, which may affect the steering for the operator. Attention must be paid to avoiding bumps and holes in the pavement. Students sitting in the rear of the bus will be more severely jolted than students in the front of the bus when the bus travels over uneven highway surfaces. Operators should avoid backing, but on occasion backing will be necessary. The length of the bus makes it extremely difficult to see and judge distances to the rear. Sometimes, depending upon its size, there is a 10-foot overhang at the rear of the bus. When backing into a parking stall, the rear of the bus will extend up to 10 feet beyond the curb before the rear wheels hit the curb. A tree, pole or post near the curb can easily be struck before the operator realizes the rear of the bus is beyond the curb
Slide 10
II-9
Challenges caused by width:
Maneuvering in a lane
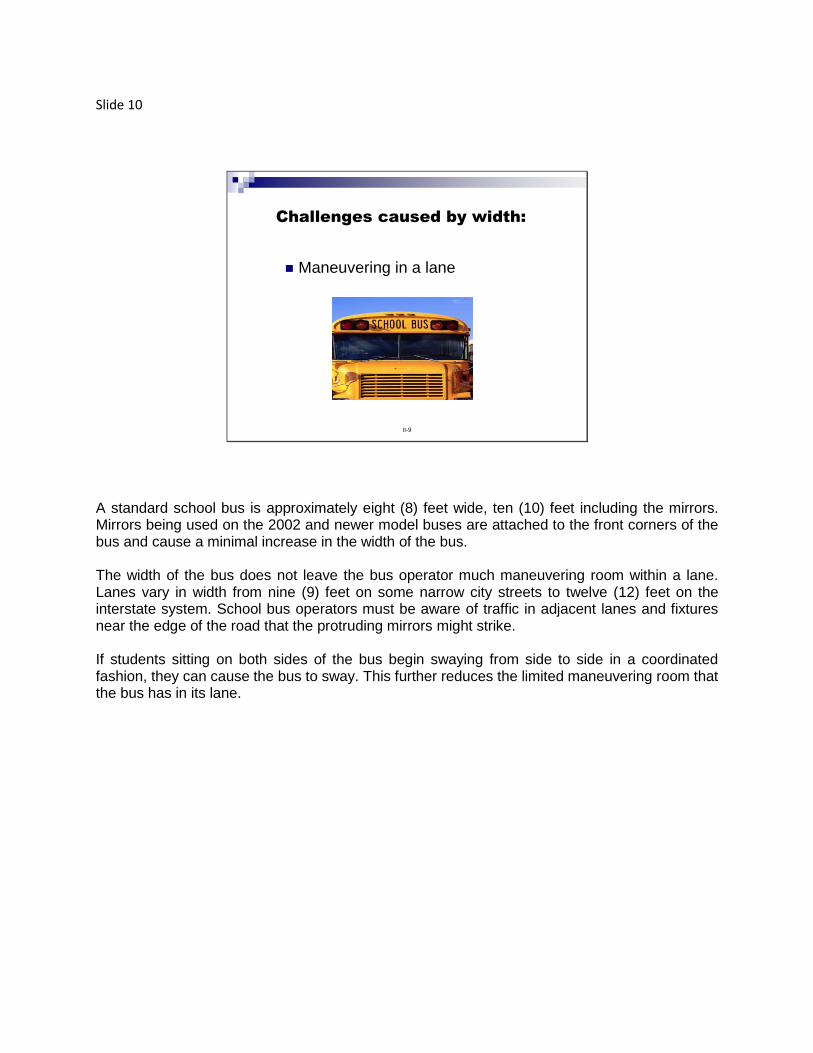
A standard school bus is approximately eight (8) feet wide, ten (10) feet including the mirrors. Mirrors being used on the 2002 and newer model buses are attached to the front corners of the bus and cause a minimal increase in the width of the bus. The width of the bus does not leave the bus operator much maneuvering room within a lane. Lanes vary in width from nine (9) feet on some narrow city streets to twelve (12) feet on the interstate system. School bus operators must be aware of traffic in adjacent lanes and fixtures near the edge of the road that the protruding mirrors might strike. If students sitting on both sides of the bus begin swaying from side to side in a coordinated fashion, they can cause the bus to sway. This further reduces the limited maneuvering room that the bus has in its lane.
Slide 11
II-10
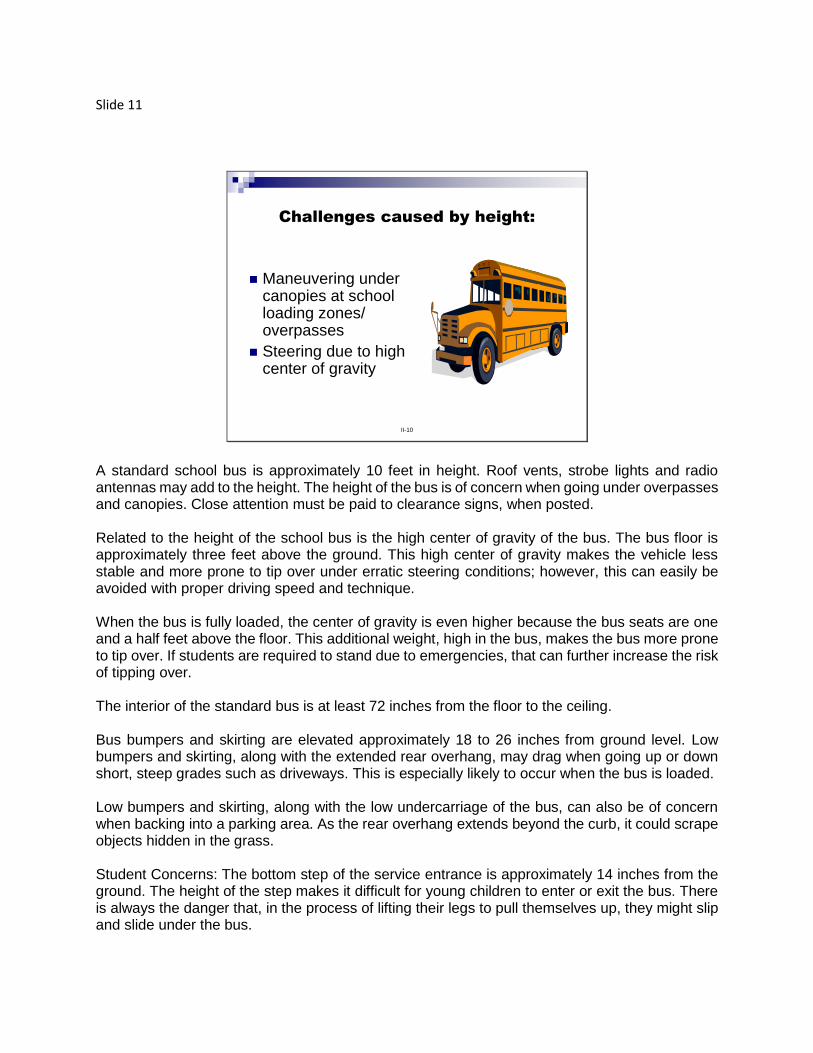
Challenges caused by height:
Maneuvering under canopies at school loading zones/ overpasses
Steering due to high center of gravity
A standard school bus is approximately 10 feet in height. Roof vents, strobe lights and radio antennas may add to the height. The height of the bus is of concern when going under overpasses and canopies. Close attention must be paid to clearance signs, when posted. Related to the height of the school bus is the high center of gravity of the bus. The bus floor is approximately three feet above the ground. This high center of gravity makes the vehicle less stable and more prone to tip over under erratic steering conditions; however, this can easily be avoided with proper driving speed and technique. When the bus is fully loaded, the center of gravity is even higher because the bus seats are one and a half feet above the floor. This additional weight, high in the bus, makes the bus more prone to tip over. If students are required to stand due to emergencies, that can further increase the risk of tipping over. The interior of the standard bus is at least 72 inches from the floor to the ceiling. Bus bumpers and skirting are elevated approximately 18 to 26 inches from ground level. Low bumpers and skirting, along with the extended rear overhang, may drag when going up or down short, steep grades such as driveways. This is especially likely to occur when the bus is loaded. Low bumpers and skirting, along with the low undercarriage of the bus, can also be of concern when backing into a parking area. As the rear overhang extends beyond the curb, it could scrape objects hidden in the grass. Student Concerns: The bottom step of the service entrance is approximately 14 inches from the ground. The height of the step makes it difficult for young children to enter or exit the bus. There is always the danger that, in the process of lifting their legs to pull themselves up, they might slip and slide under the bus.
Slide 12
II-11
Challenges caused by weight:
Crossing bridges
Acceleration
Braking distance
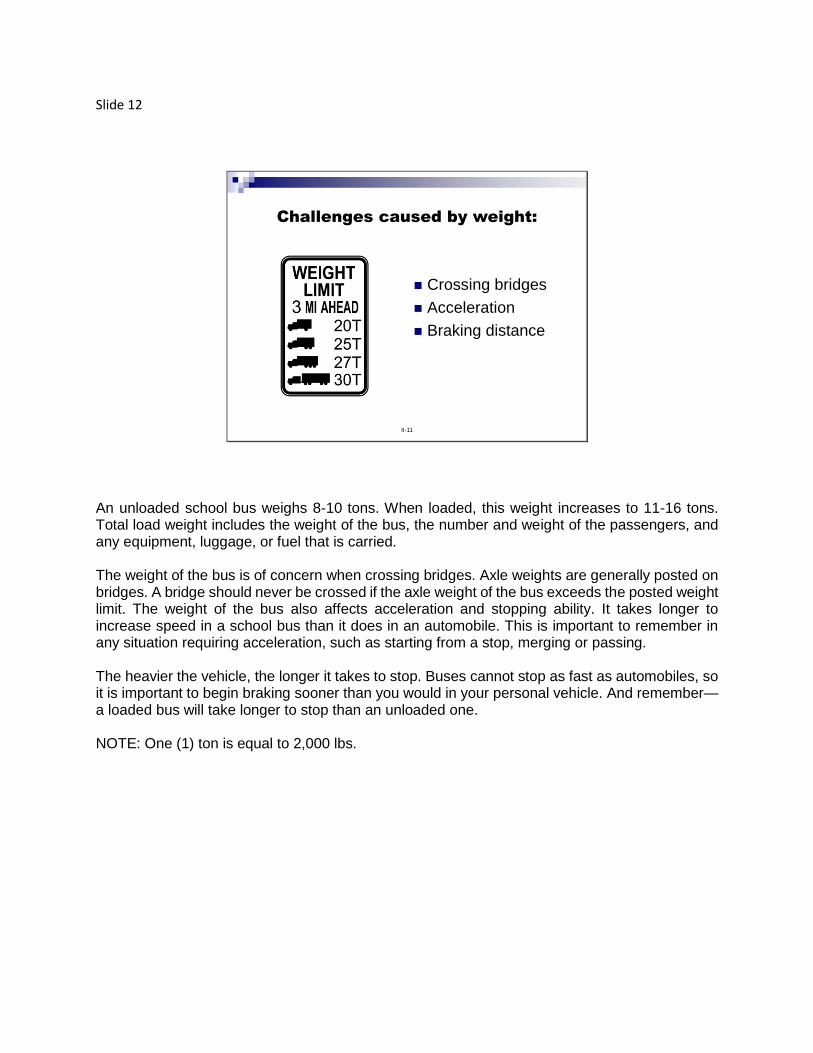
An unloaded school bus weighs 8-10 tons. When loaded, this weight increases to 11-16 tons. Total load weight includes the weight of the bus, the number and weight of the passengers, and any equipment, luggage, or fuel that is carried. The weight of the bus is of concern when crossing bridges. Axle weights are generally posted on bridges. A bridge should never be crossed if the axle weight of the bus exceeds the posted weight limit. The weight of the bus also affects acceleration and stopping ability. It takes longer to increase speed in a school bus than it does in an automobile. This is important to remember in any situation requiring acceleration, such as starting from a stop, merging or passing. The heavier the vehicle, the longer it takes to stop. Buses cannot stop as fast as automobiles, so it is important to begin braking sooner than you would in your personal vehicle. And remember—a loaded bus will take longer to stop than an unloaded one. NOTE: One (1) ton is equal to 2,000 lbs.
Slide 13
II-12
Blind Spot—Left Side Horizontal
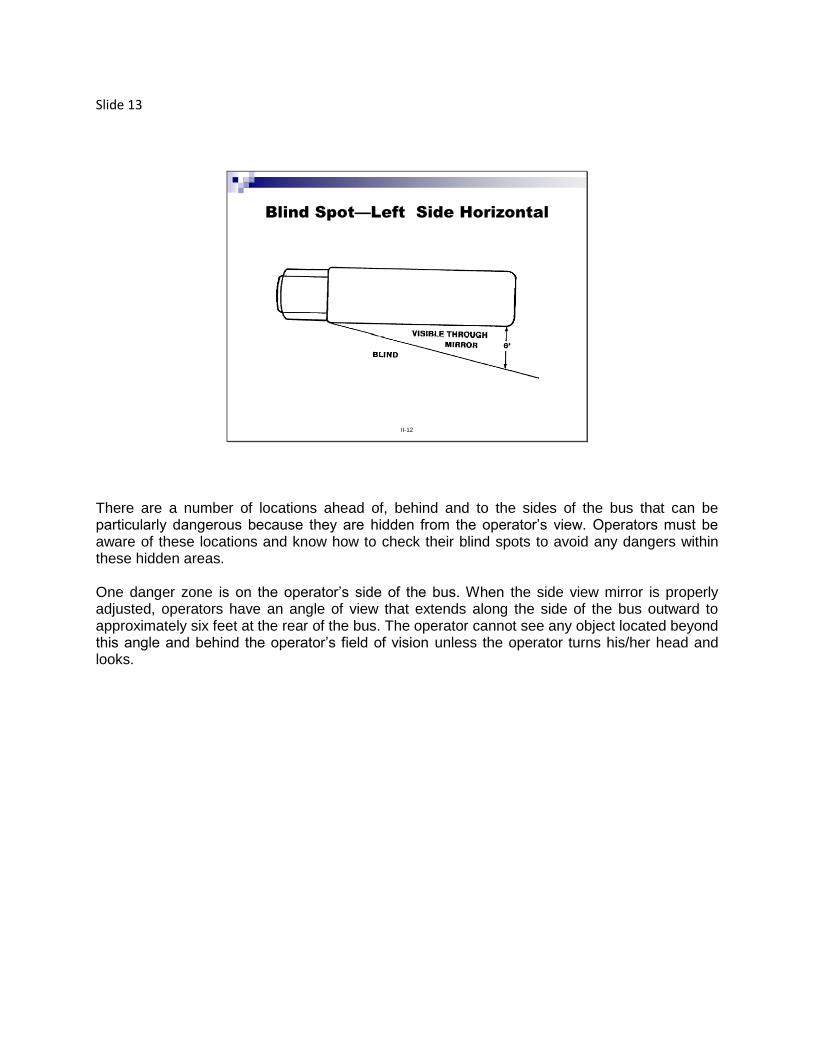
There are a number of locations ahead of, behind and to the sides of the bus that can be particularly dangerous because they are hidden from the operator’s view. Operators must be aware of these locations and know how to check their blind spots to avoid any dangers within these hidden areas. One danger zone is on the operator’s side of the bus. When the side view mirror is properly adjusted, operators have an angle of view that extends along the side of the bus outward to approximately six feet at the rear of the bus. The operator cannot see any object located beyond this angle and behind the operator’s field of vision unless the operator turns his/her head and looks.

Slide 14
II-13
Blind Spot—Left Side Vertical
Even at this six-foot angle, the operator cannot see everything. Another angle extends from the operator’s line of sight in the side view mirror approximately six and a half feet high down to the ground and approximately one foot in front of the rear of the bus. (This angle will vary slightly depending upon the operator’s eye level when sitting in the operator’s seat). Nothing below this angle can be seen in the side view mirror.
Slide 15
II-14
Blind Spot—Right Side Horizontal
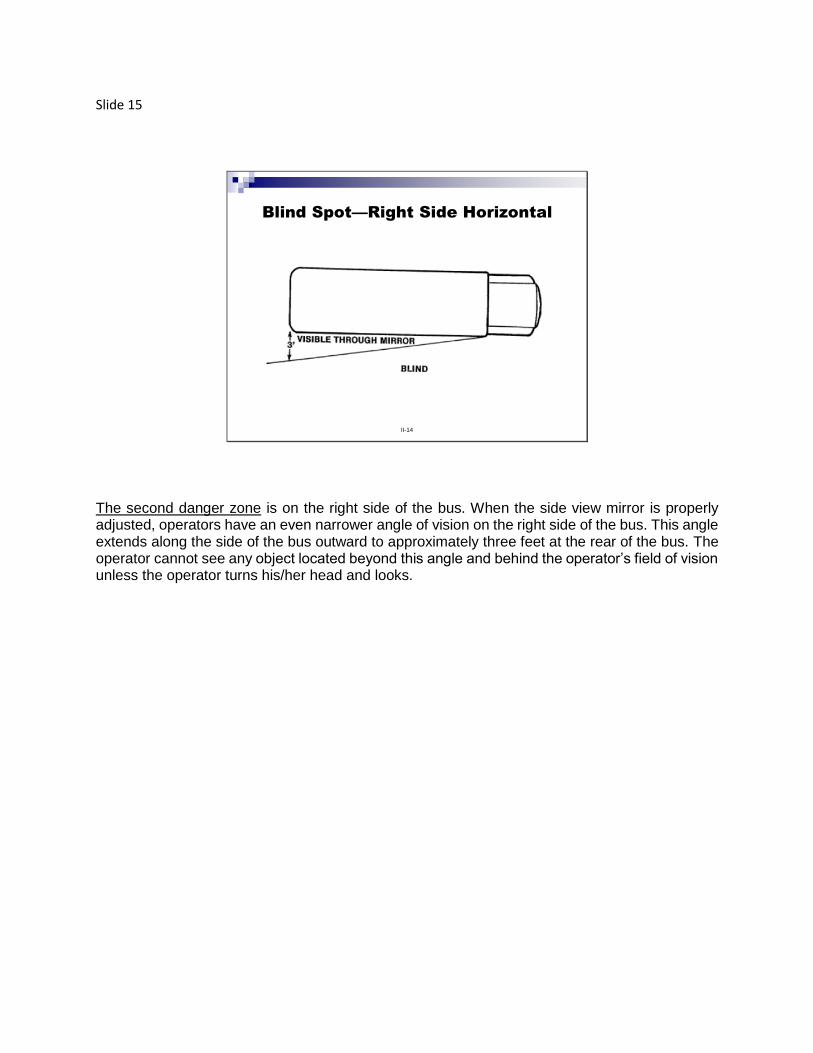
The second danger zone is on the right side of the bus. When the side view mirror is properly adjusted, operators have an even narrower angle of vision on the right side of the bus. This angle extends along the side of the bus outward to approximately three feet at the rear of the bus. The operator cannot see any object located beyond this angle and behind the operator’s field of vision unless the operator turns his/her head and looks.
Slide 16
II-15
Blind Spot—Right Side Vertical
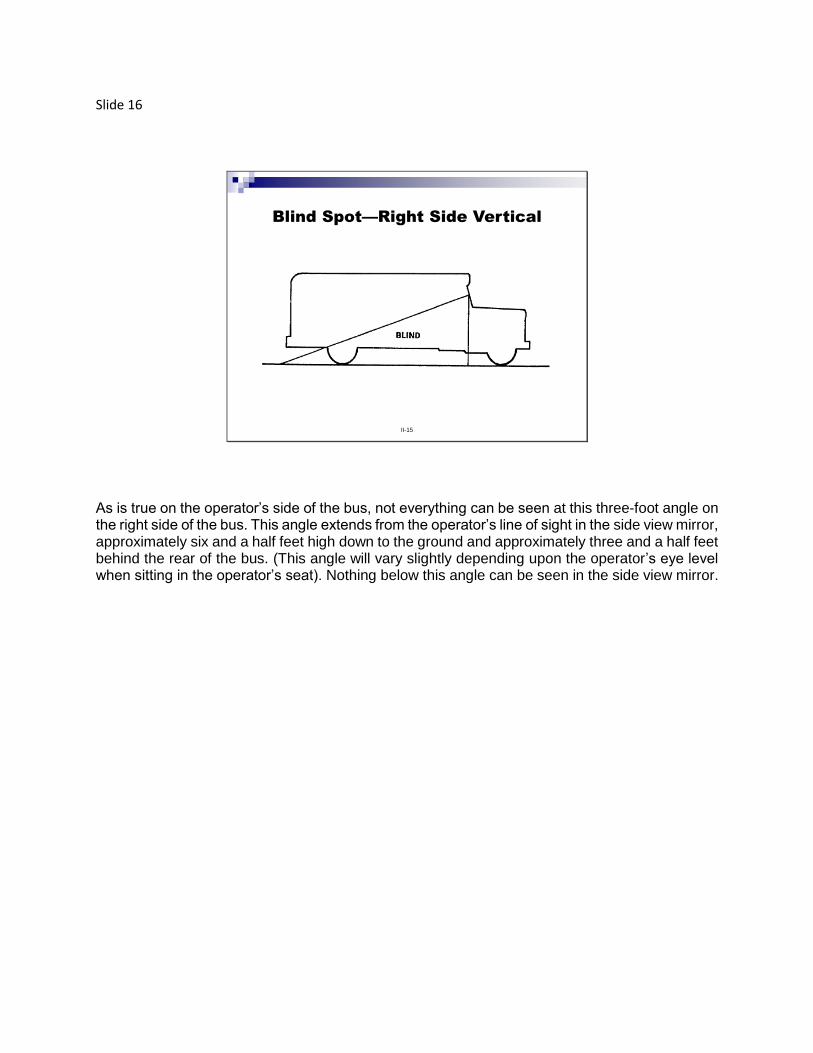
As is true on the operator’s side of the bus, not everything can be seen at this three-foot angle on the right side of the bus. This angle extends from the operator’s line of sight in the side view mirror, approximately six and a half feet high down to the ground and approximately three and a half feet behind the rear of the bus. (This angle will vary slightly depending upon the operator’s eye level when sitting in the operator’s seat). Nothing below this angle can be seen in the side view mirror.
Slide 17
II-16
Blind Spot—Front
BLIND
12’ or more
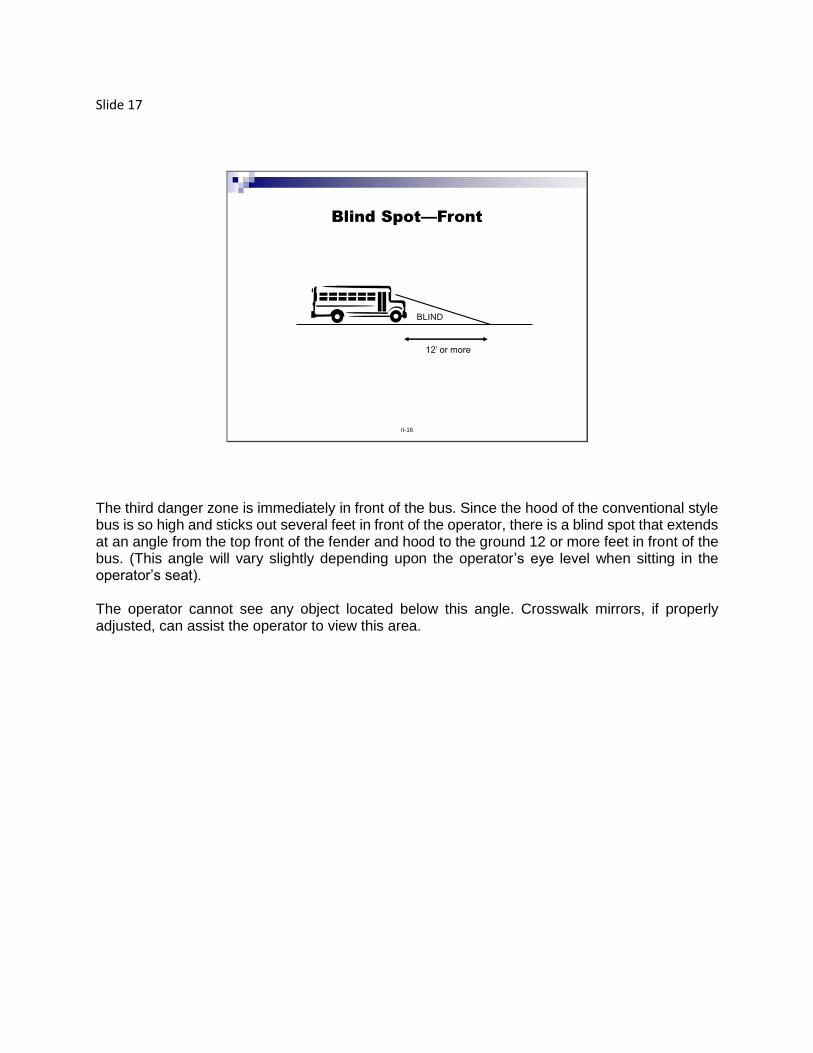
The third danger zone is immediately in front of the bus. Since the hood of the conventional style bus is so high and sticks out several feet in front of the operator, there is a blind spot that extends at an angle from the top front of the fender and hood to the ground 12 or more feet in front of the bus. (This angle will vary slightly depending upon the operator’s eye level when sitting in the operator’s seat). The operator cannot see any object located below this angle. Crosswalk mirrors, if properly adjusted, can assist the operator to view this area.
Slide 18
II-17
Blind Spot—Rear
BLIND
69’ 6”
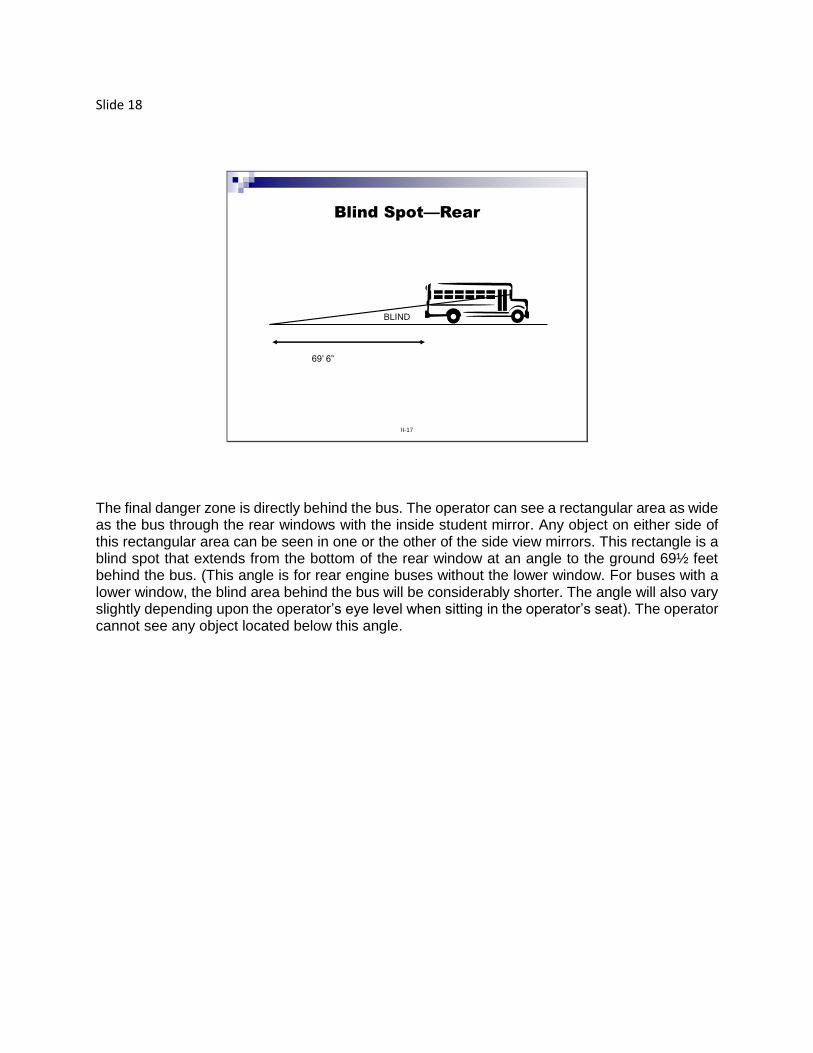
The final danger zone is directly behind the bus. The operator can see a rectangular area as wide as the bus through the rear windows with the inside student mirror. Any object on either side of this rectangular area can be seen in one or the other of the side view mirrors. This rectangle is a blind spot that extends from the bottom of the rear window at an angle to the ground 69½ feet behind the bus. (This angle is for rear engine buses without the lower window. For buses with a lower window, the blind area behind the bus will be considerably shorter. The angle will also vary slightly depending upon the operator’s eye level when sitting in the operator’s seat). The operator cannot see any object located below this angle.
Slide 19
II-18
Summary
We reviewed:
Legal definitions
Physical characteristics
Danger zones
In this unit, physical characteristics of a school bus were reviewed. Knowing the physical limitations of the bus and knowing how to respond or compensate for these limitations is crucial to safe driving. Operators should learn as much as they can about their buses so they can avoid potential hazards associated with driving a school bus.
Slide 1
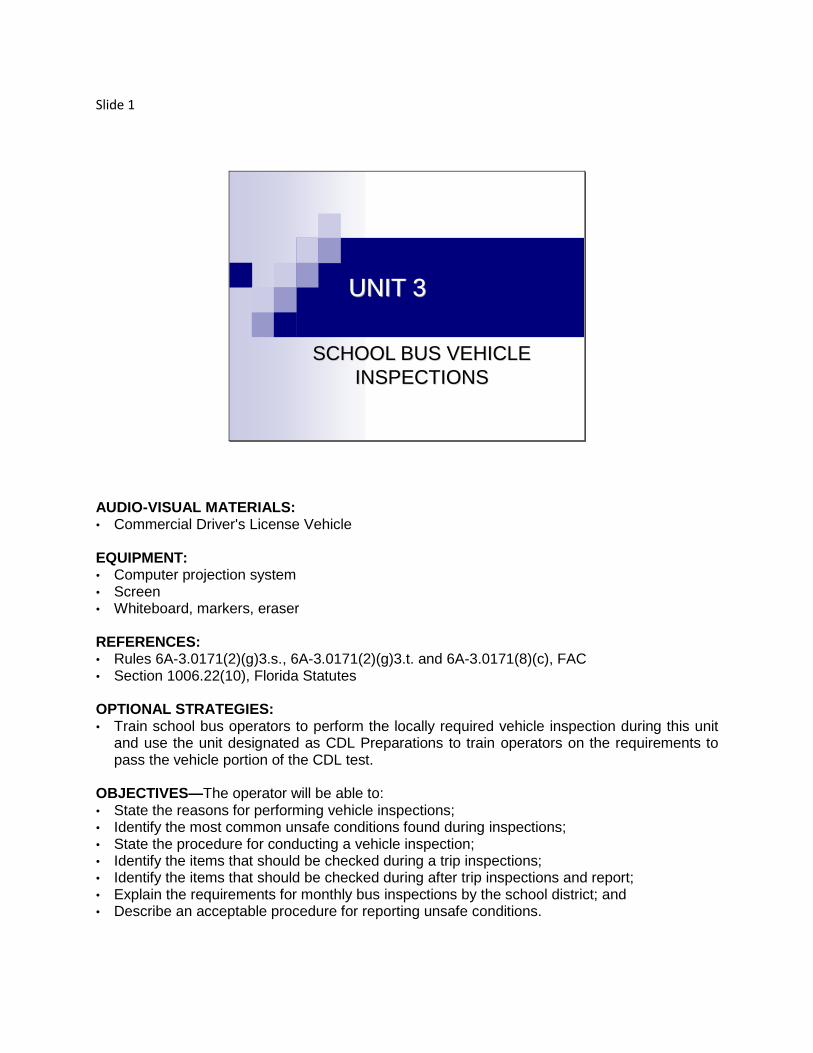
UNIT 3
SCHOOL BUS VEHICLE
INSPECTIONS
AUDIO-VISUAL MATERIALS: • Commercial Driver's License Vehicle EQUIPMENT: • Computer projection system • Screen • Whiteboard, markers, eraser REFERENCES: • Rules 6A-3.0171(2)(g)3.s., 6A-3.0171(2)(g)3.t. and 6A-3.0171(8)(c), FAC • Section 1006.22(10), Florida Statutes OPTIONAL STRATEGIES: • Train school bus operators to perform the locally required vehicle inspection during this unit
and use the unit designated as CDL Preparations to train operators on the requirements to pass the vehicle portion of the CDL test.
OBJECTIVES—The operator will be able to: • State the reasons for performing vehicle inspections; • Identify the most common unsafe conditions found during inspections; • State the procedure for conducting a vehicle inspection; • Identify the items that should be checked during a trip inspections; • Identify the items that should be checked during after trip inspections and report; • Explain the requirements for monthly bus inspections by the school district; and • Describe an acceptable procedure for reporting unsafe conditions.
Slide 2
III-2
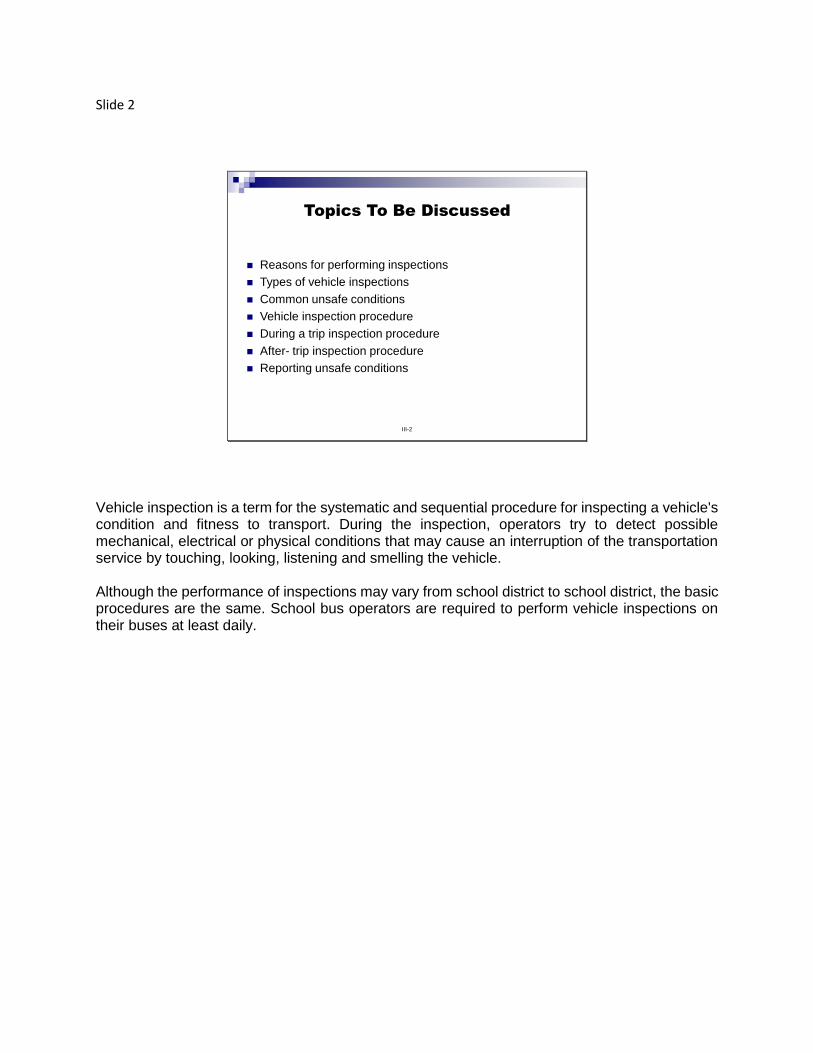
Topics To Be Discussed
Reasons for performing inspections
Types of vehicle inspections
Common unsafe conditions
Vehicle inspection procedure
During a trip inspection procedure
After- trip inspection procedure
Reporting unsafe conditions
Vehicle inspection is a term for the systematic and sequential procedure for inspecting a vehicle's condition and fitness to transport. During the inspection, operators try to detect possible mechanical, electrical or physical conditions that may cause an interruption of the transportation service by touching, looking, listening and smelling the vehicle. Although the performance of inspections may vary from school district to school district, the basic procedures are the same. School bus operators are required to perform vehicle inspections on their buses at least daily.
Slide 3
III-3
Why Should I Conduct Inspections?
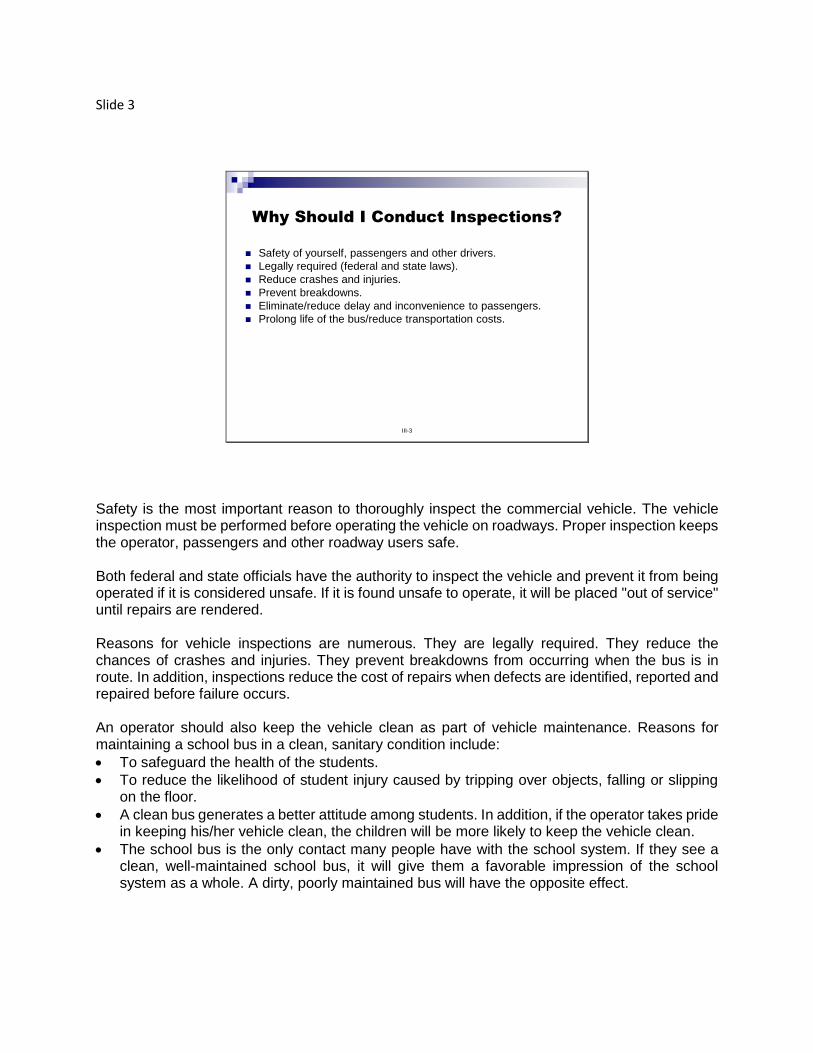
Safety of yourself, passengers and other drivers.
Legally required (federal and state laws).
Reduce crashes and injuries.
Prevent breakdowns.
Eliminate/reduce delay and inconvenience to passengers.
Prolong life of the bus/reduce transportation costs.
Safety is the most important reason to thoroughly inspect the commercial vehicle. The vehicle inspection must be performed before operating the vehicle on roadways. Proper inspection keeps the operator, passengers and other roadway users safe. Both federal and state officials have the authority to inspect the vehicle and prevent it from being operated if it is considered unsafe. If it is found unsafe to operate, it will be placed "out of service" until repairs are rendered. Reasons for vehicle inspections are numerous. They are legally required. They reduce the chances of crashes and injuries. They prevent breakdowns from occurring when the bus is in route. In addition, inspections reduce the cost of repairs when defects are identified, reported and repaired before failure occurs. An operator should also keep the vehicle clean as part of vehicle maintenance. Reasons for maintaining a school bus in a clean, sanitary condition include:
To safeguard the health of the students.
To reduce the likelihood of student injury caused by tripping over objects, falling or slipping on the floor.
A clean bus generates a better attitude among students. In addition, if the operator takes pride in keeping his/her vehicle clean, the children will be more likely to keep the vehicle clean.
The school bus is the only contact many people have with the school system. If they see a clean, well-maintained school bus, it will give them a favorable impression of the school system as a whole. A dirty, poorly maintained bus will have the opposite effect.
Slide 4
III-4
Department of Education
Inspection Requirements
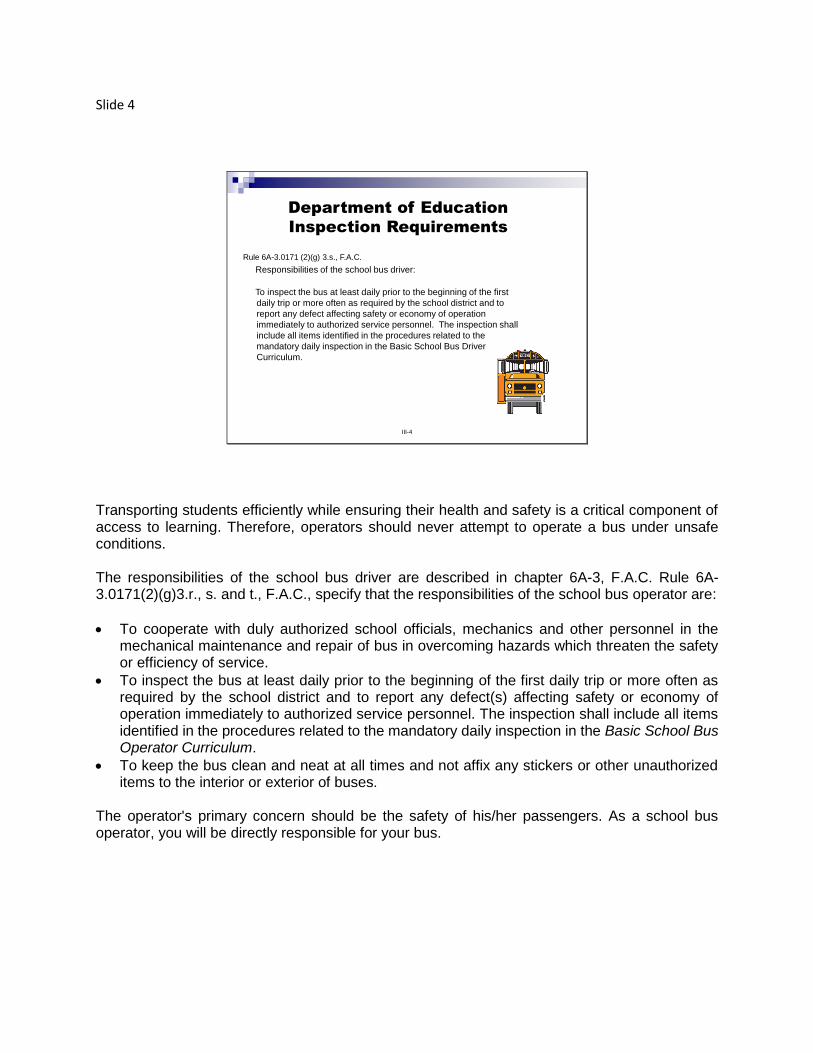
Rule 6A-3.0171 (2)(g) 3.s., F.A.C.
Responsibilities of the school bus driver:
To inspect the bus at least daily prior to the beginning of the first
daily trip or more often as required by the school district and to
report any defect affecting safety or economy of operation
immediately to authorized service personnel. The inspection shall
include all items identified in the procedures related to the
mandatory daily inspection in the Basic School Bus Driver
Curriculum.
Transporting students efficiently while ensuring their health and safety is a critical component of access to learning. Therefore, operators should never attempt to operate a bus under unsafe conditions. The responsibilities of the school bus driver are described in chapter 6A-3, F.A.C. Rule 6A-3.0171(2)(g)3.r., s. and t., F.A.C., specify that the responsibilities of the school bus operator are:
To cooperate with duly authorized school officials, mechanics and other personnel in the mechanical maintenance and repair of bus in overcoming hazards which threaten the safety or efficiency of service.
To inspect the bus at least daily prior to the beginning of the first daily trip or more often as required by the school district and to report any defect(s) affecting safety or economy of operation immediately to authorized service personnel. The inspection shall include all items identified in the procedures related to the mandatory daily inspection in the Basic School Bus Operator Curriculum.
To keep the bus clean and neat at all times and not affix any stickers or other unauthorized items to the interior or exterior of buses.
The operator's primary concern should be the safety of his/her passengers. As a school bus operator, you will be directly responsible for your bus.
Slide 5
III-5
Driving Unsafe Vehicles
An operator shall not drive or move a vehicle that:
Is in such an unsafe condition as to endanger a person;
Does not contain all the required equipment in proper;
condition and
Is equipped in violation of the vehicle specifications.
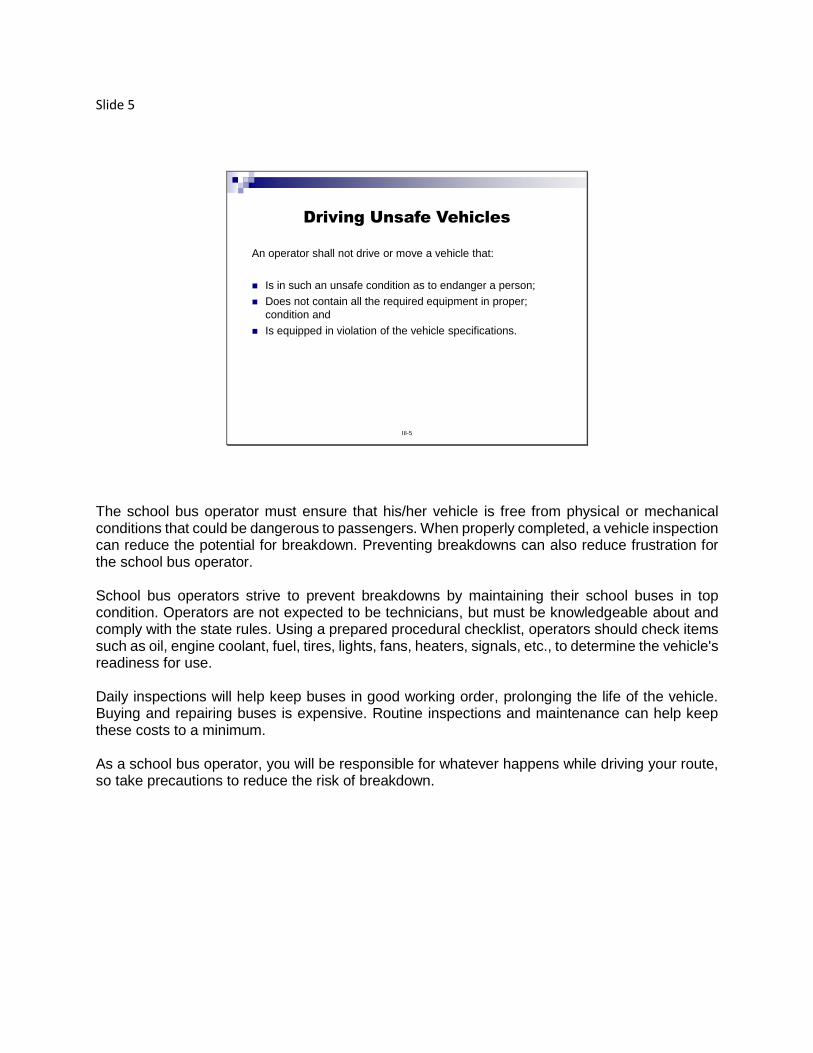
The school bus operator must ensure that his/her vehicle is free from physical or mechanical conditions that could be dangerous to passengers. When properly completed, a vehicle inspection can reduce the potential for breakdown. Preventing breakdowns can also reduce frustration for the school bus operator. School bus operators strive to prevent breakdowns by maintaining their school buses in top condition. Operators are not expected to be technicians, but must be knowledgeable about and comply with the state rules. Using a prepared procedural checklist, operators should check items such as oil, engine coolant, fuel, tires, lights, fans, heaters, signals, etc., to determine the vehicle's readiness for use. Daily inspections will help keep buses in good working order, prolonging the life of the vehicle. Buying and repairing buses is expensive. Routine inspections and maintenance can help keep these costs to a minimum. As a school bus operator, you will be responsible for whatever happens while driving your route, so take precautions to reduce the risk of breakdown.
Slide 6
III-6
Types of Vehicle Inspections:(Florida CDL Driver Manual)
Vehicle Inspection
During a Trip Inspection
After-Trip Inspection and Report
Commercial Drivers License Vehicle
Inspection
Required monthly inspections by
state-certified technicians
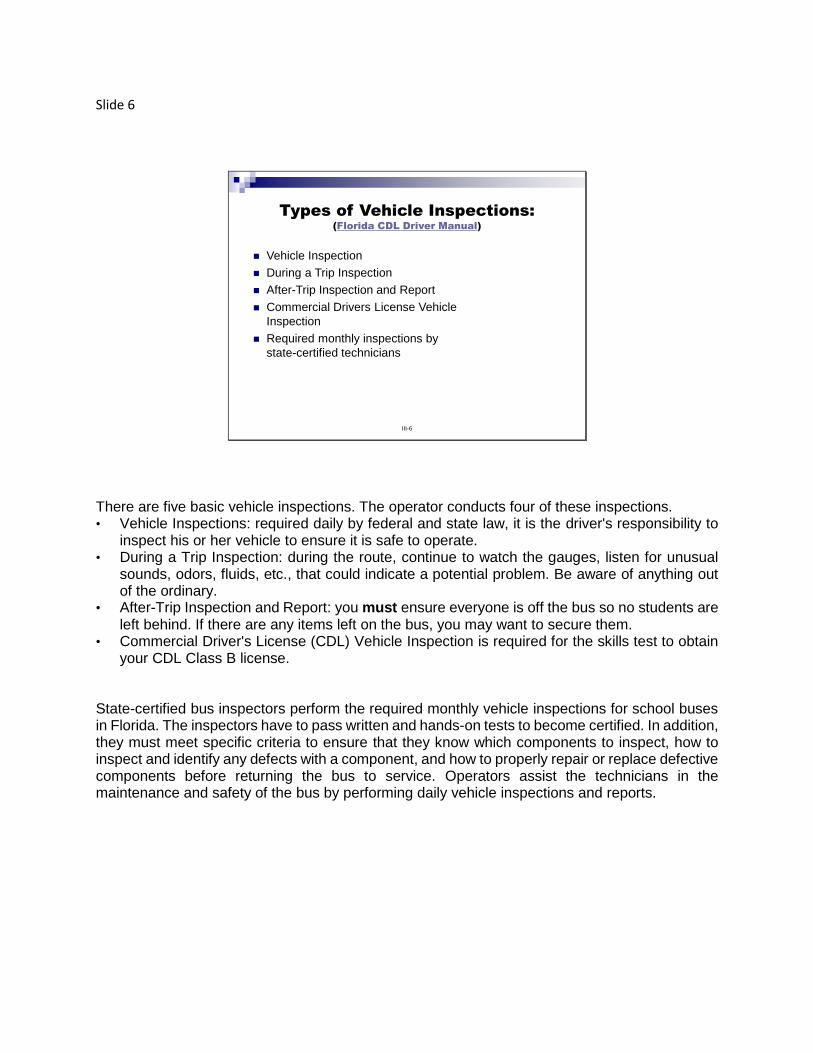
There are five basic vehicle inspections. The operator conducts four of these inspections. • Vehicle Inspections: required daily by federal and state law, it is the driver's responsibility to
inspect his or her vehicle to ensure it is safe to operate. • During a Trip Inspection: during the route, continue to watch the gauges, listen for unusual
sounds, odors, fluids, etc., that could indicate a potential problem. Be aware of anything out of the ordinary.
• After-Trip Inspection and Report: you must ensure everyone is off the bus so no students are left behind. If there are any items left on the bus, you may want to secure them.
• Commercial Driver's License (CDL) Vehicle Inspection is required for the skills test to obtain your CDL Class B license.
State-certified bus inspectors perform the required monthly vehicle inspections for school buses in Florida. The inspectors have to pass written and hands-on tests to become certified. In addition, they must meet specific criteria to ensure that they know which components to inspect, how to inspect and identify any defects with a component, and how to properly repair or replace defective components before returning the bus to service. Operators assist the technicians in the maintenance and safety of the bus by performing daily vehicle inspections and reports.
Slide 7
III-7
Common Safety Concerns
Body condition
First aid kits
Noisy exhaust
Pupil warning lights
Parking brakes
Tire tread
Steps
Steering
Clearance lights
Emergency door
Stop/ tail lights
Defrosters
Service brakes
Wipers
Seats
Service door
Mirrors
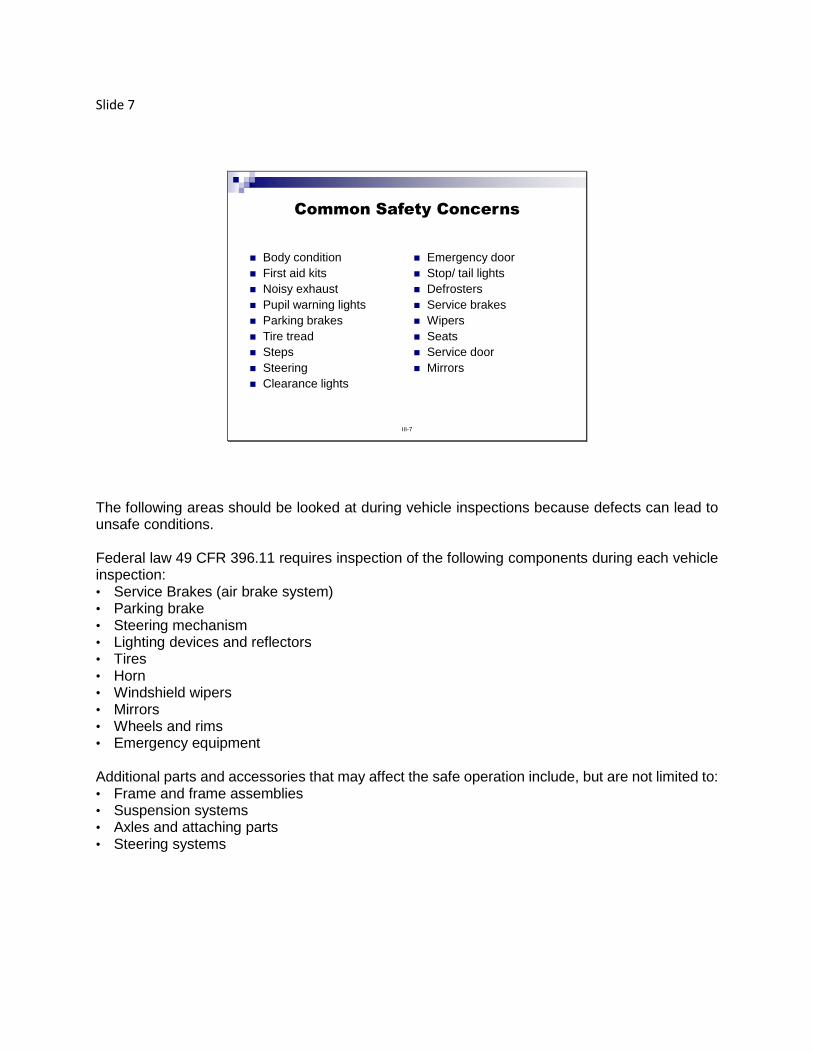
The following areas should be looked at during vehicle inspections because defects can lead to unsafe conditions. Federal law 49 CFR 396.11 requires inspection of the following components during each vehicle inspection: • Service Brakes (air brake system) • Parking brake • Steering mechanism • Lighting devices and reflectors • Tires • Horn • Windshield wipers • Mirrors • Wheels and rims • Emergency equipment Additional parts and accessories that may affect the safe operation include, but are not limited to: • Frame and frame assemblies • Suspension systems • Axles and attaching parts • Steering systems
Slide 8
III-8
Operator Responsibility for
Vehicle Inspection
Follow regular procedures.
Use the district’s approved checklist.
Check inside and outside the bus.
Listen to the engine.
Check the gauges.
Report all defects.
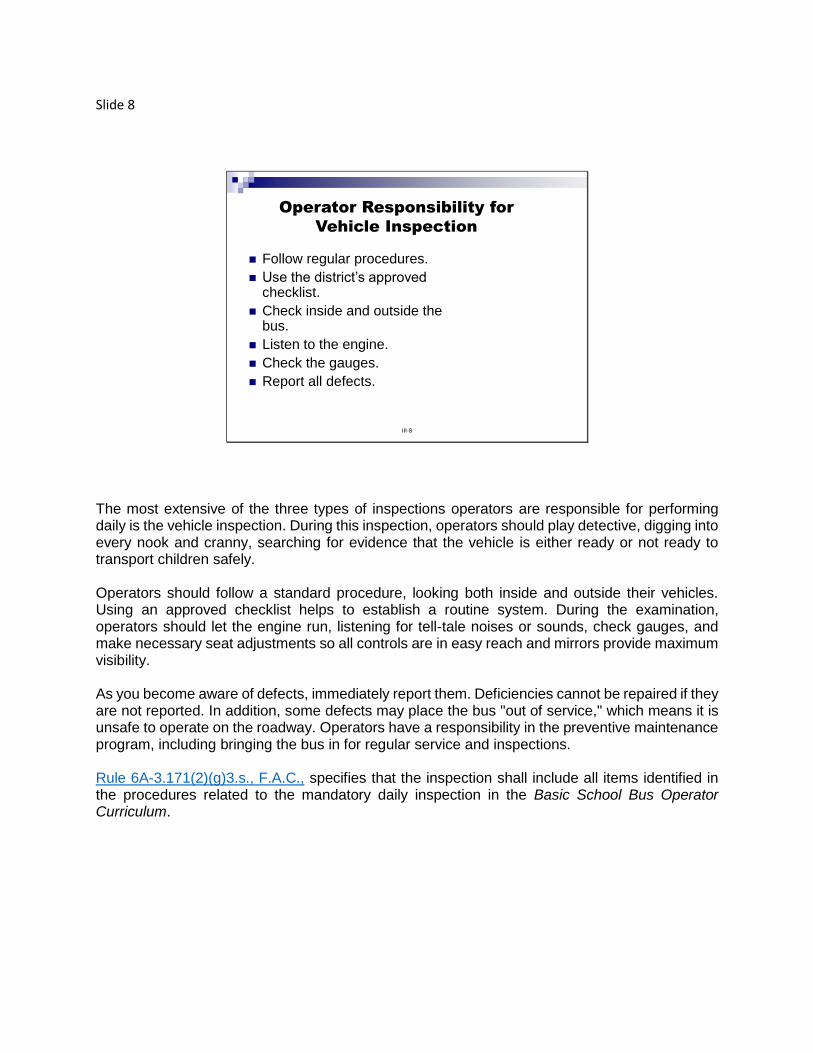
The most extensive of the three types of inspections operators are responsible for performing daily is the vehicle inspection. During this inspection, operators should play detective, digging into every nook and cranny, searching for evidence that the vehicle is either ready or not ready to transport children safely. Operators should follow a standard procedure, looking both inside and outside their vehicles. Using an approved checklist helps to establish a routine system. During the examination, operators should let the engine run, listening for tell-tale noises or sounds, check gauges, and make necessary seat adjustments so all controls are in easy reach and mirrors provide maximum visibility. As you become aware of defects, immediately report them. Deficiencies cannot be repaired if they are not reported. In addition, some defects may place the bus "out of service," which means it is unsafe to operate on the roadway. Operators have a responsibility in the preventive maintenance program, including bringing the bus in for regular service and inspections. Rule 6A-3.171(2)(g)3.s., F.A.C., specifies that the inspection shall include all items identified in the procedures related to the mandatory daily inspection in the Basic School Bus Operator Curriculum.

Slide 9
III-9
Major Components of the
Pre-trip inspection
Approach the vehicle
Engine compartment
Operator’s compartment
External walk-around
Internal check
Final external check
Departure
The vehicle inspection can be divided into six (or seven) major components. The complete inspection should take no more than 5-10 minutes. School districts throughout Florida are required to check the same basic items, but may use varying procedures. Some districts require operators to conduct a full CDL vehicle inspection (covered in a later unit).
Slide 10
III-10
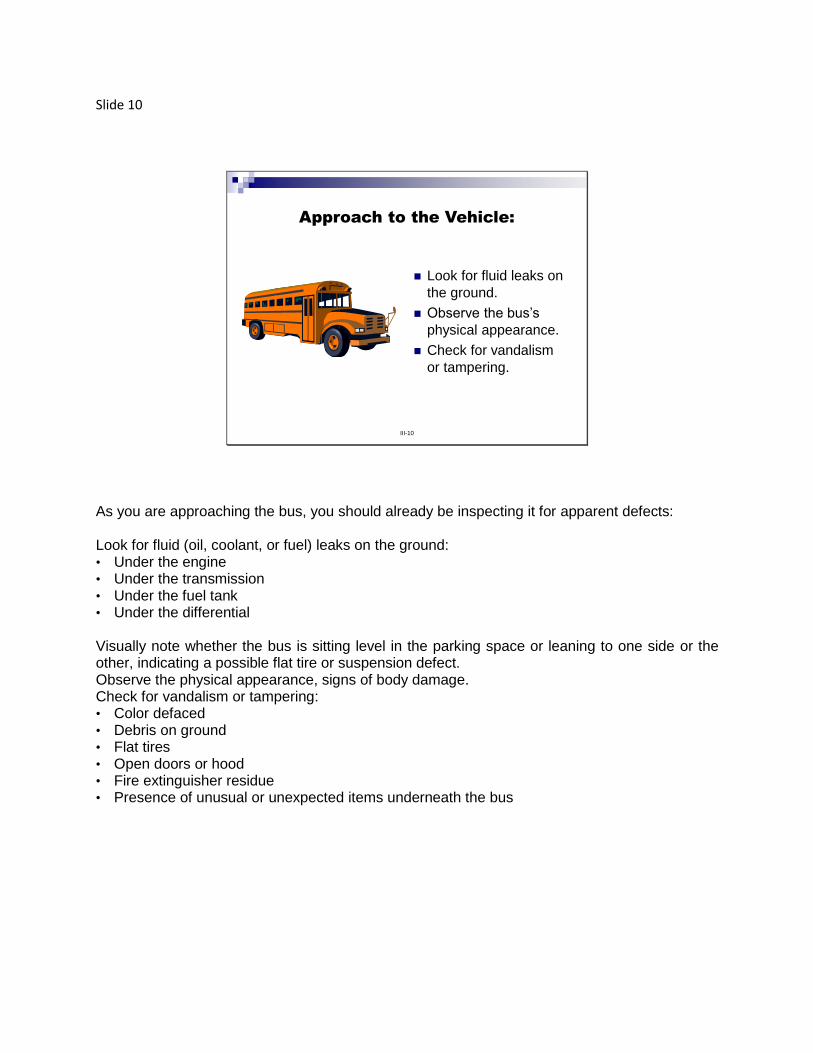
Approach to the Vehicle:
Look for fluid leaks on
the ground.
Observe the bus’s
physical appearance.
Check for vandalism
or tampering.
As you are approaching the bus, you should already be inspecting it for apparent defects: Look for fluid (oil, coolant, or fuel) leaks on the ground: • Under the engine • Under the transmission • Under the fuel tank • Under the differential Visually note whether the bus is sitting level in the parking space or leaning to one side or the other, indicating a possible flat tire or suspension defect. Observe the physical appearance, signs of body damage. Check for vandalism or tampering: • Color defaced • Debris on ground • Flat tires • Open doors or hood • Fire extinguisher residue • Presence of unusual or unexpected items underneath the bus
Slide 11
III-11
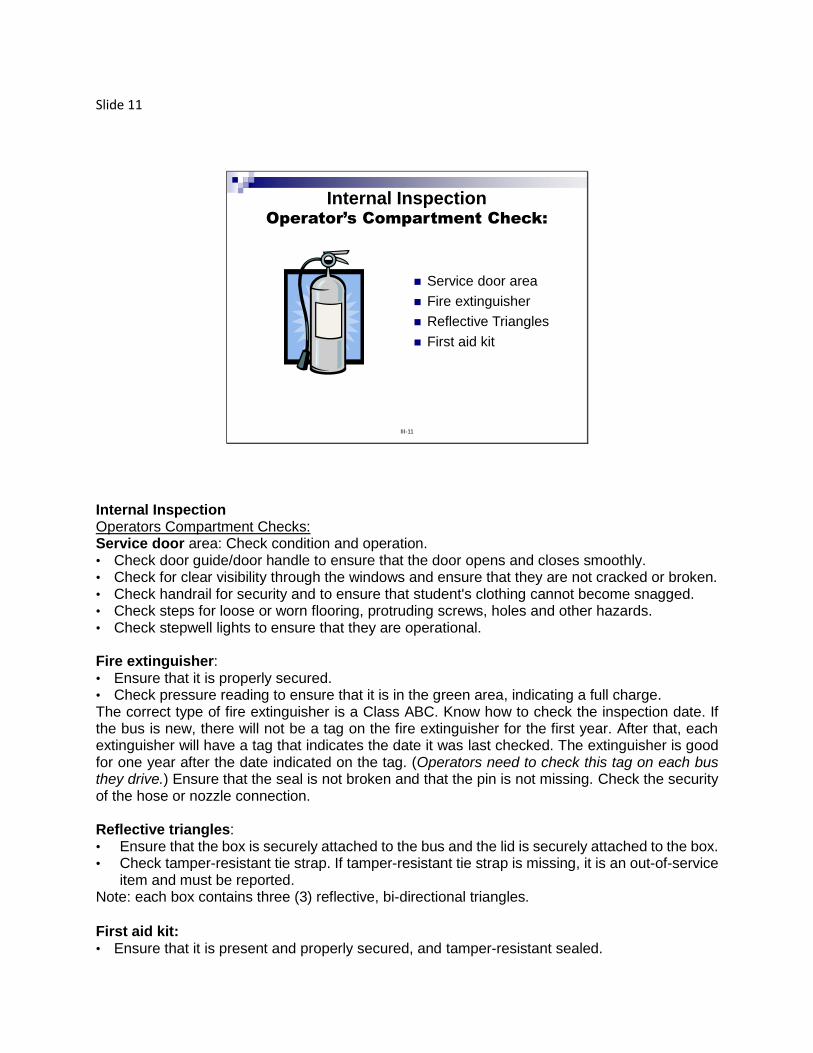
Internal InspectionOperator’s Compartment Check:
Service door area
Fire extinguisher
Reflective Triangles
First aid kit
Internal Inspection Operators Compartment Checks: Service door area: Check condition and operation. • Check door guide/door handle to ensure that the door opens and closes smoothly. • Check for clear visibility through the windows and ensure that they are not cracked or broken. • Check handrail for security and to ensure that student's clothing cannot become snagged. • Check steps for loose or worn flooring, protruding screws, holes and other hazards. • Check stepwell lights to ensure that they are operational. Fire extinguisher: • Ensure that it is properly secured. • Check pressure reading to ensure that it is in the green area, indicating a full charge. The correct type of fire extinguisher is a Class ABC. Know how to check the inspection date. If the bus is new, there will not be a tag on the fire extinguisher for the first year. After that, each extinguisher will have a tag that indicates the date it was last checked. The extinguisher is good for one year after the date indicated on the tag. (Operators need to check this tag on each bus they drive.) Ensure that the seal is not broken and that the pin is not missing. Check the security of the hose or nozzle connection. Reflective triangles: • Ensure that the box is securely attached to the bus and the lid is securely attached to the box. • Check tamper-resistant tie strap. If tamper-resistant tie strap is missing, it is an out-of-service
item and must be reported. Note: each box contains three (3) reflective, bi-directional triangles. First aid kit: • Ensure that it is present and properly secured, and tamper-resistant sealed.
Slide 12
III-12
Operator’s compartment check:
(continued)
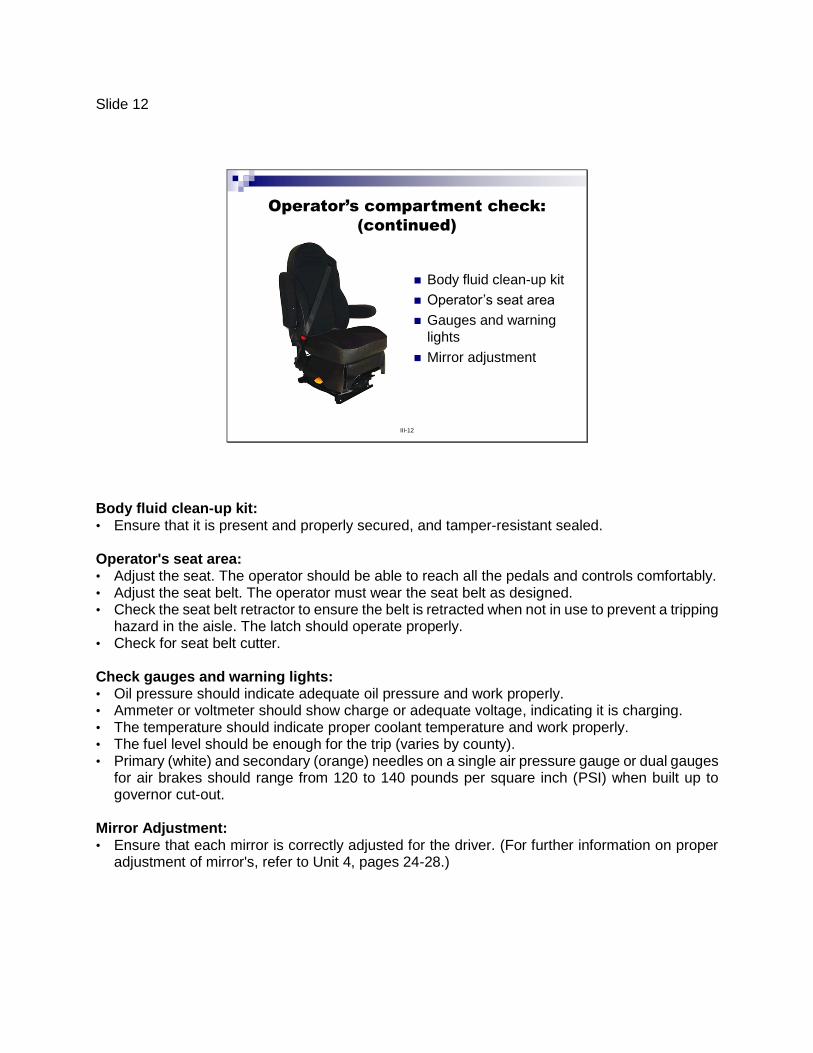
Body fluid clean-up kit
Operator’s seat area
Gauges and warning
lights
Mirror adjustment
Body fluid clean-up kit: • Ensure that it is present and properly secured, and tamper-resistant sealed. Operator's seat area: • Adjust the seat. The operator should be able to reach all the pedals and controls comfortably. • Adjust the seat belt. The operator must wear the seat belt as designed. • Check the seat belt retractor to ensure the belt is retracted when not in use to prevent a tripping
hazard in the aisle. The latch should operate properly. • Check for seat belt cutter. Check gauges and warning lights: • Oil pressure should indicate adequate oil pressure and work properly. • Ammeter or voltmeter should show charge or adequate voltage, indicating it is charging. • The temperature should indicate proper coolant temperature and work properly. • The fuel level should be enough for the trip (varies by county). • Primary (white) and secondary (orange) needles on a single air pressure gauge or dual gauges
for air brakes should range from 120 to 140 pounds per square inch (PSI) when built up to governor cut-out.
Mirror Adjustment: • Ensure that each mirror is correctly adjusted for the driver. (For further information on proper
adjustment of mirror's, refer to Unit 4, pages 24-28.)

Slide 13
III-13
Operator’s compartment check:
(continued)
Warning devices for
the brake system
Remaining
components of the
operator compartment
Light indicators
Check warning devices for brake system: • When turning the key to the on position, the ABS light should come on and go off, indicating
that the system is working properly. • For buses with hydraulic brakes, check the brake failure warning lamp and warning buzzer.
They should be on when the key is moved to the "on" or "start" position and should remain off during normal operation.
• For buses with air brakes, the ignition must be turned to the "on" position. Start the bus after the warm engine light goes off. Build air pressure to governor cut-off, between 120 and 140 psi. Turn the bus off and turn the key back to the run position. 1.) Apply the service brake and release the parking brake at the same time. Start timing for 60 seconds while holding the service brake pedal, then watch the gauge and listen for air leaks. You should not lose more than 3 psi per 60 seconds. 2.) Begin fanning the service brake, ensuring that the low air warning light and buzzer come on before 55 psi. 3.) Continue fanning the service brake until the parking brake button pops out, usually below 40 psi. The vehicle must pass all three stages of this procedure to pass the air brake test and be safe to operate.
If these warning devices are activated when the operator starts the engine because the air pressure is already low, it will be evident that the warning devices are operational. Check the remaining components in the operator compartment: • Tap the horn to ensure that it works. • Check the condition and cleanliness of the windshield and the operator's window. Operate the
windshield washer and wipers. Look through the windshield at the blades and ensure that they are not worn, frayed or damaged.
• Turn on each defroster fan, one at a time, and listen to ensure that each one is operating. • Turn on each heater fan, one at a time, and listen to ensure that each one is operating. • Turn on dome lights.
Check light indicators: • Activate the student warning light system (amber) and make sure the interior light indicator is
operational. Different body companies use different configurations of switches to activate the system.
• Activate the student stoplight system (red) and make sure the interior light indicator is operational. (Do not deactivate at this time.)
• Turn on the headlights and check the high beam indicator. (This will also activate the clearance lights and the roof-mounted white flashing strobe light on some buses, which also should be checked.)
• Turn on the right and left turn signals and check indicators. • Turn on the four-way hazard lights and check the interior indicators. • Prepare to perform the external inspection by turning on the clearance, headlights, left-hand
turn signal and strobe light (the red student stoplights should already be activated). • Turn the steering wheel all the way to the left.

Slide 14
III-15
External Inspection
Front of Bus
Front clearance (amber) should be undamaged, clean, and working.
Check to ensure that the student stoplights (red) are clean and alternately flashing.
Lettering should be legible.
Check both crosswalk mirrors. They should be secure, clean and properly adjusted to the driver.
Headlights should be undamaged, clean, and working.
Left turn signal and reflector should be proper color, undamaged, clean and working.
Student crossing arm should be fully extended.
External Inspection (Outside Walk-around) Front of bus: • Front clearance lights (amber) should be undamaged, clean and working. • Check to ensure that the student stoplights (red) are clean and alternately flashing. • Lettering should be legible. • Check both crosswalk mirrors. They should be secure, clean and properly adjusted to the
driver. • Headlights should be undamaged, clean and working. • Left turn signal and reflector should be proper color, undamaged, clean and working. • Student crossing arm should be fully extended
Slide 15
III-16
Outside Walk-around
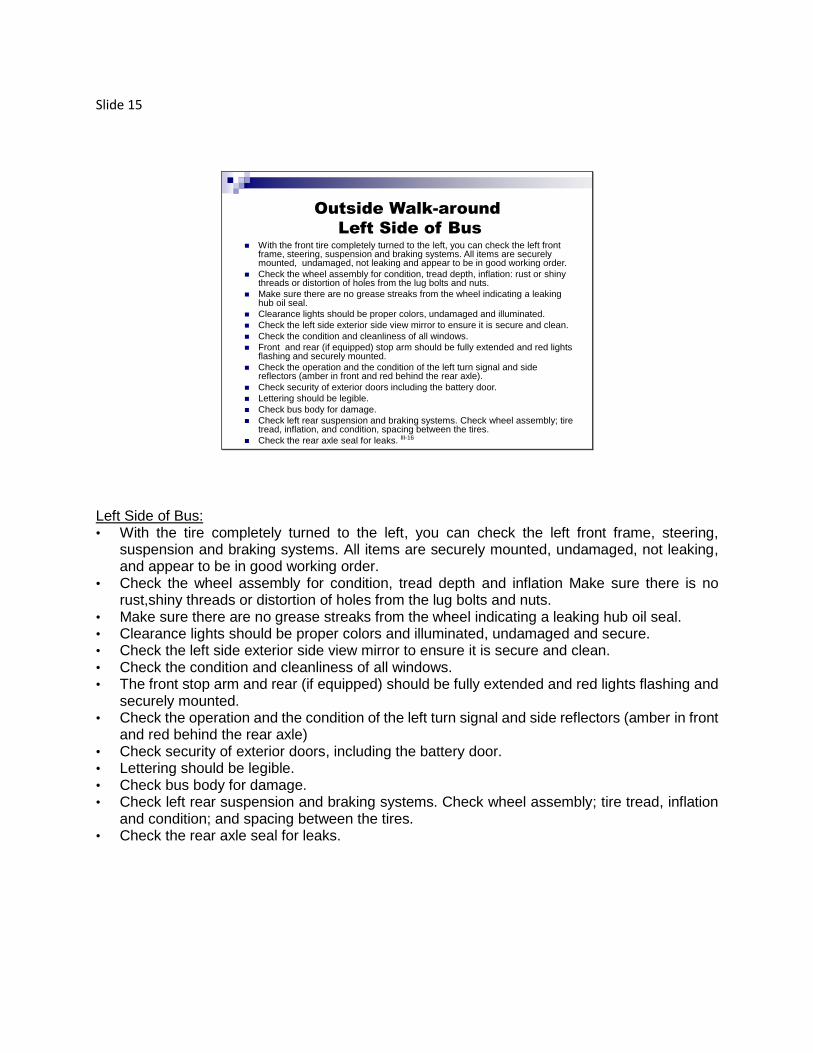
Left Side of Bus With the front tire completely turned to the left, you can check the left front
frame, steering, suspension and braking systems. All items are securely mounted, undamaged, not leaking and appear to be in good working order.
Check the wheel assembly for condition, tread depth, inflation: rust or shiny threads or distortion of holes from the lug bolts and nuts.
Make sure there are no grease streaks from the wheel indicating a leaking hub oil seal.
Clearance lights should be proper colors, undamaged and illuminated.
Check the left side exterior side view mirror to ensure it is secure and clean.
Check the condition and cleanliness of all windows.
Front and rear (if equipped) stop arm should be fully extended and red lights flashing and securely mounted.
Check the operation and the condition of the left turn signal and side reflectors (amber in front and red behind the rear axle).
Check security of exterior doors including the battery door.
Lettering should be legible.
Check bus body for damage.
Check left rear suspension and braking systems. Check wheel assembly; tire tread, inflation, and condition, spacing between the tires.
Check the rear axle seal for leaks.
Left Side of Bus: • With the tire completely turned to the left, you can check the left front frame, steering,
suspension and braking systems. All items are securely mounted, undamaged, not leaking, and appear to be in good working order.
• Check the wheel assembly for condition, tread depth and inflation Make sure there is no rust,shiny threads or distortion of holes from the lug bolts and nuts.
• Make sure there are no grease streaks from the wheel indicating a leaking hub oil seal. • Clearance lights should be proper colors and illuminated, undamaged and secure. • Check the left side exterior side view mirror to ensure it is secure and clean. • Check the condition and cleanliness of all windows. • The front stop arm and rear (if equipped) should be fully extended and red lights flashing and
securely mounted. • Check the operation and the condition of the left turn signal and side reflectors (amber in front
and red behind the rear axle) • Check security of exterior doors, including the battery door. • Lettering should be legible. • Check bus body for damage. • Check left rear suspension and braking systems. Check wheel assembly; tire tread, inflation
and condition; and spacing between the tires. • Check the rear axle seal for leaks.
Slide 16
Outside Walk-around
Under the Bus
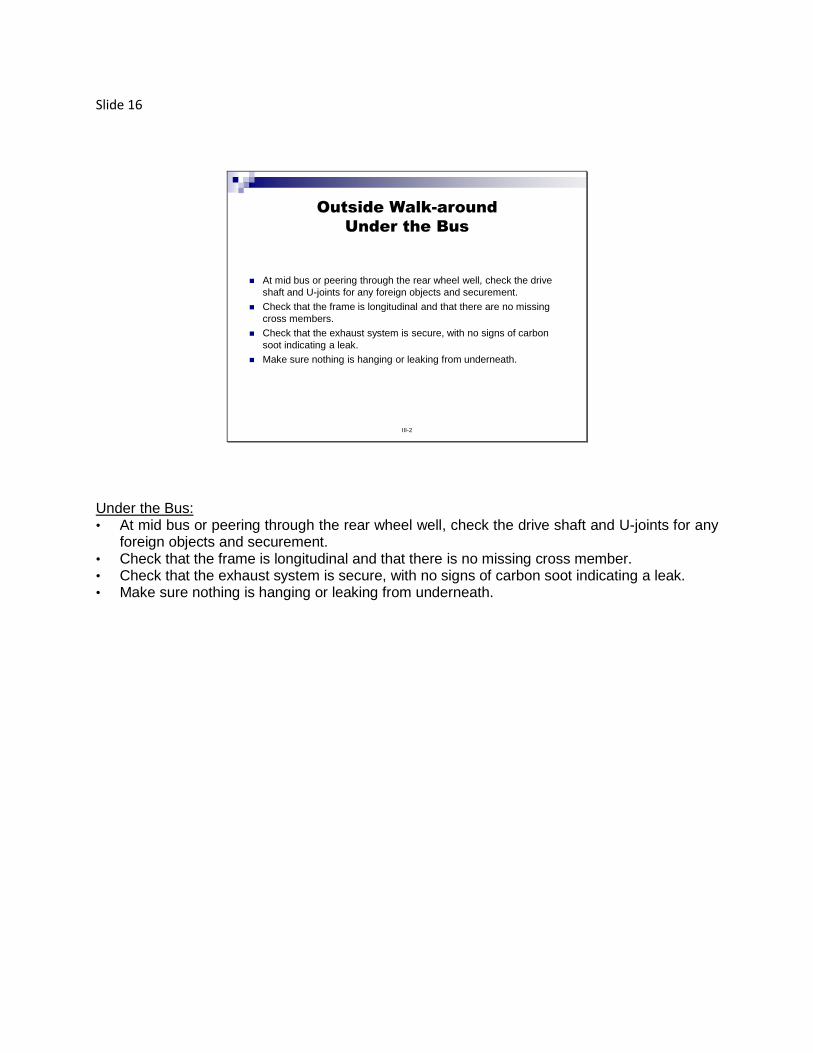
At mid bus or peering through the rear wheel well, check the drive
shaft and U-joints for any foreign objects and securement.
Check that the frame is longitudinal and that there are no missing
cross members.
Check that the exhaust system is secure, with no signs of carbon
soot indicating a leak.
Make sure nothing is hanging or leaking from underneath.
III-2
Under the Bus: • At mid bus or peering through the rear wheel well, check the drive shaft and U-joints for any
foreign objects and securement. • Check that the frame is longitudinal and that there is no missing cross member. • Check that the exhaust system is secure, with no signs of carbon soot indicating a leak. • Make sure nothing is hanging or leaking from underneath.
Slide 17
III-17
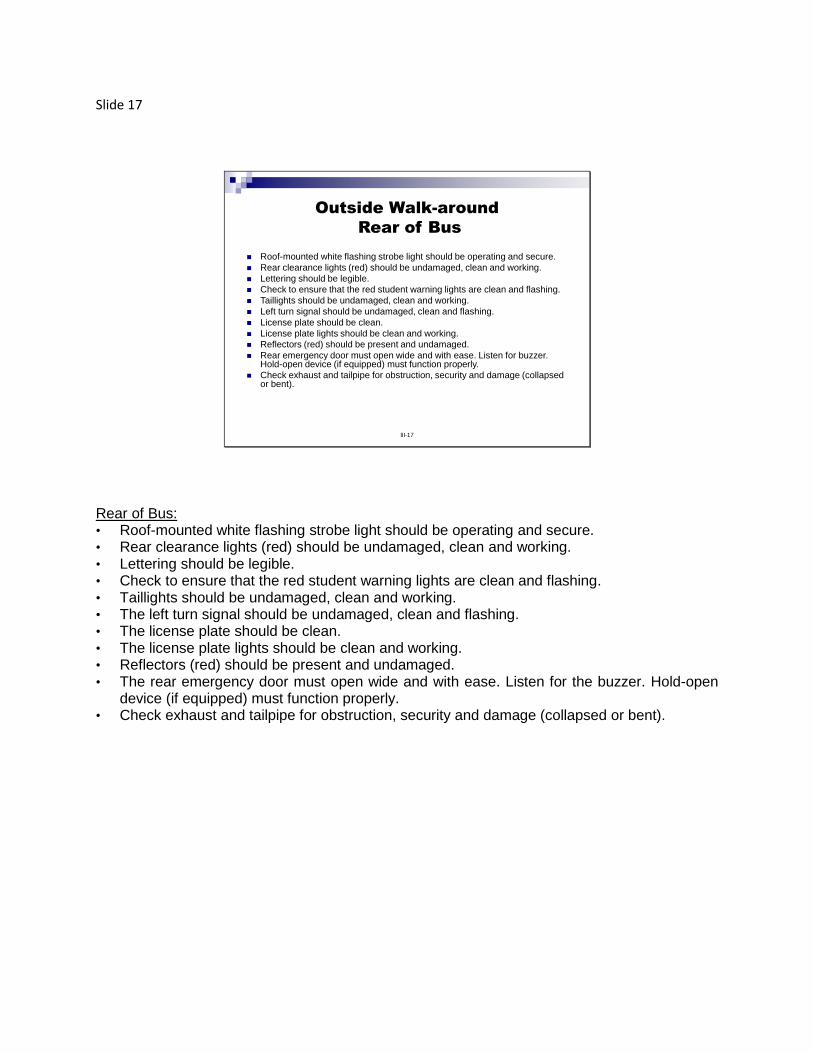
Roof-mounted white flashing strobe light should be operating and secure.
Rear clearance lights (red) should be undamaged, clean and working.
Lettering should be legible.
Check to ensure that the red student warning lights are clean and flashing.
Taillights should be undamaged, clean and working.
Left turn signal should be undamaged, clean and flashing.
License plate should be clean.
License plate lights should be clean and working.
Reflectors (red) should be present and undamaged.
Rear emergency door must open wide and with ease. Listen for buzzer. Hold-open device (if equipped) must function properly.
Check exhaust and tailpipe for obstruction, security and damage (collapsed or bent).
Outside Walk-around
Rear of Bus
Rear of Bus: • Roof-mounted white flashing strobe light should be operating and secure. • Rear clearance lights (red) should be undamaged, clean and working. • Lettering should be legible. • Check to ensure that the red student warning lights are clean and flashing. • Taillights should be undamaged, clean and working. • The left turn signal should be undamaged, clean and flashing. • The license plate should be clean. • The license plate lights should be clean and working. • Reflectors (red) should be present and undamaged. • The rear emergency door must open wide and with ease. Listen for the buzzer. Hold-open
device (if equipped) must function properly. • Check exhaust and tailpipe for obstruction, security and damage (collapsed or bent).
Slide 18
III-14
Outside Walk-around
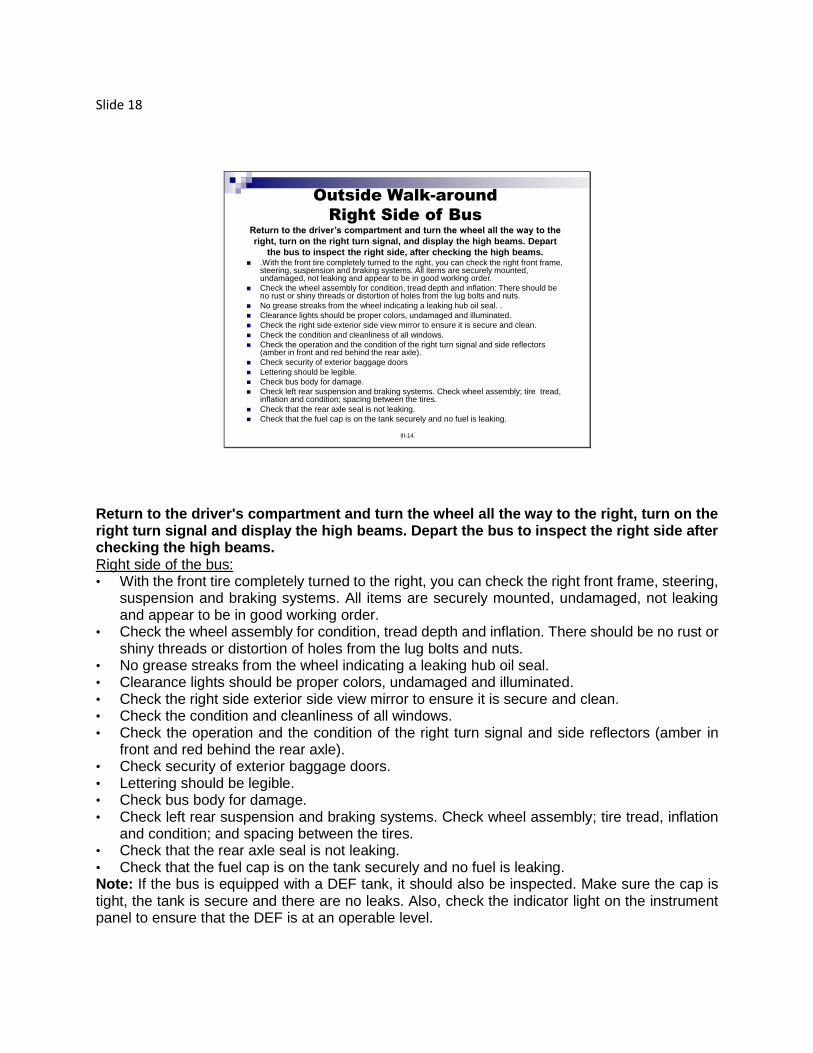
Right Side of BusReturn to the driver’s compartment and turn the wheel all the way to the
right, turn on the right turn signal, and display the high beams. Depart
the bus to inspect the right side, after checking the high beams. .With the front tire completely turned to the right, you can check the right front frame,
steering, suspension and braking systems. All items are securely mounted, undamaged, not leaking and appear to be in good working order.
Check the wheel assembly for condition, tread depth and inflation: There should be no rust or shiny threads or distortion of holes from the lug bolts and nuts.
No grease streaks from the wheel indicating a leaking hub oil seal. .
Clearance lights should be proper colors, undamaged and illuminated.
Check the right side exterior side view mirror to ensure it is secure and clean.
Check the condition and cleanliness of all windows.
Check the operation and the condition of the right turn signal and side reflectors (amber in front and red behind the rear axle).
Check security of exterior baggage doors
Lettering should be legible.
Check bus body for damage.
Check left rear suspension and braking systems. Check wheel assembly; tire tread, inflation and condition; spacing between the tires.
Check that the rear axle seal is not leaking.
Check that the fuel cap is on the tank securely and no fuel is leaking.
Return to the driver's compartment and turn the wheel all the way to the right, turn on the right turn signal and display the high beams. Depart the bus to inspect the right side after checking the high beams. Right side of the bus: • With the front tire completely turned to the right, you can check the right front frame, steering,
suspension and braking systems. All items are securely mounted, undamaged, not leaking and appear to be in good working order.
• Check the wheel assembly for condition, tread depth and inflation. There should be no rust or shiny threads or distortion of holes from the lug bolts and nuts.
• No grease streaks from the wheel indicating a leaking hub oil seal. • Clearance lights should be proper colors, undamaged and illuminated. • Check the right side exterior side view mirror to ensure it is secure and clean. • Check the condition and cleanliness of all windows. • Check the operation and the condition of the right turn signal and side reflectors (amber in
front and red behind the rear axle). • Check security of exterior baggage doors. • Lettering should be legible. • Check bus body for damage. • Check left rear suspension and braking systems. Check wheel assembly; tire tread, inflation
and condition; and spacing between the tires. • Check that the rear axle seal is not leaking. • Check that the fuel cap is on the tank securely and no fuel is leaking. Note: If the bus is equipped with a DEF tank, it should also be inspected. Make sure the cap is tight, the tank is secure and there are no leaks. Also, check the indicator light on the instrument panel to ensure that the DEF is at an operable level.
Slide 19
III-18
Outside Walk-around
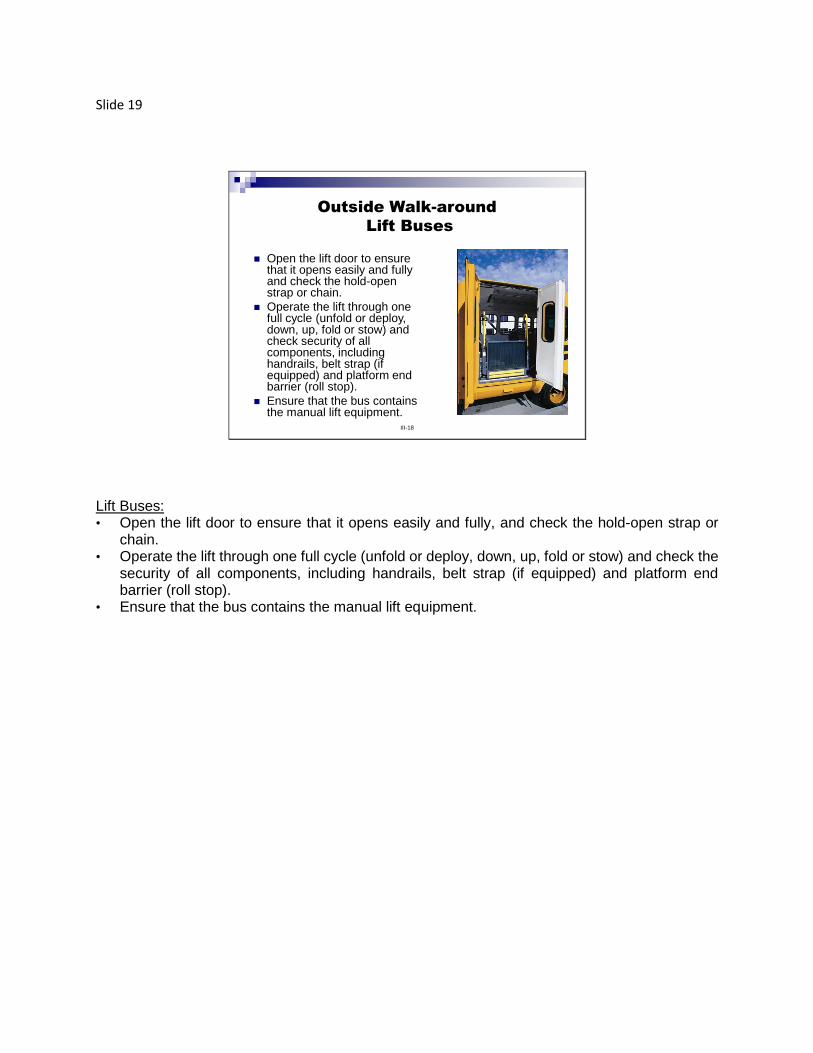
Lift Buses
Open the lift door to ensure that it opens easily and fully and check the hold-open strap or chain.
Operate the lift through one full cycle (unfold or deploy, down, up, fold or stow) and check security of all components, including handrails, belt strap (if equipped) and platform end barrier (roll stop).
Ensure that the bus contains the manual lift equipment.
Lift Buses: • Open the lift door to ensure that it opens easily and fully, and check the hold-open strap or
chain. • Operate the lift through one full cycle (unfold or deploy, down, up, fold or stow) and check the
security of all components, including handrails, belt strap (if equipped) and platform end barrier (roll stop).
• Ensure that the bus contains the manual lift equipment.
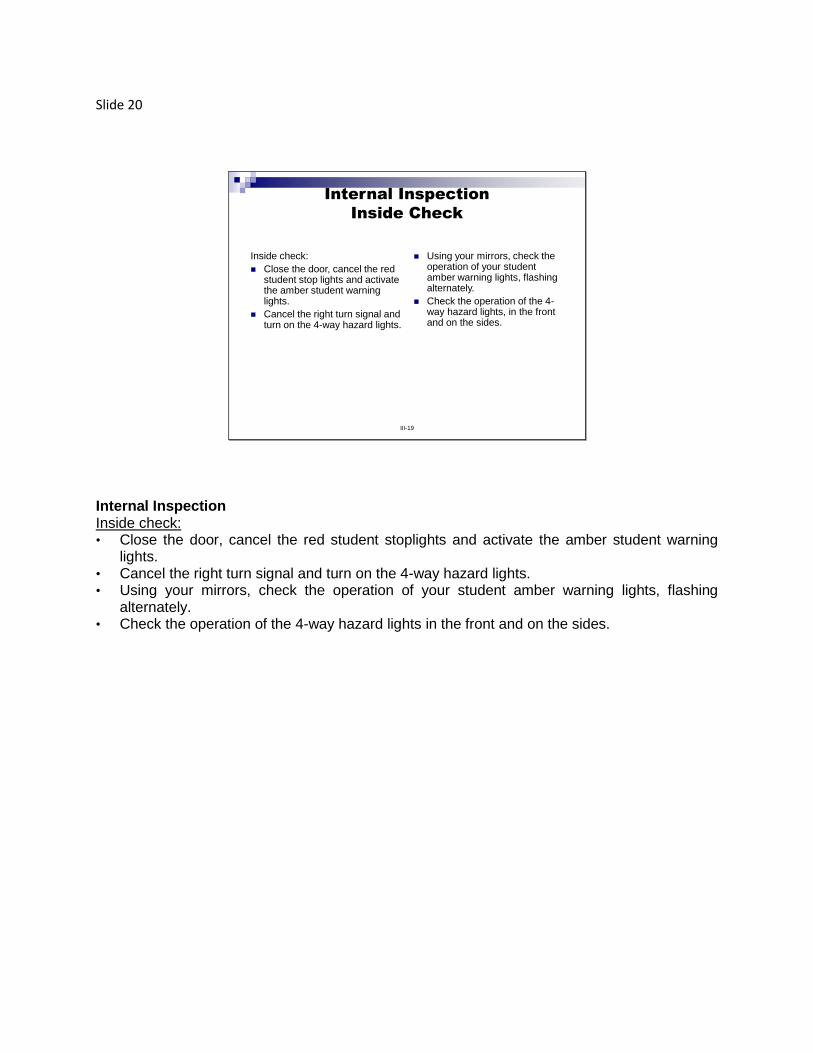
Slide 20
III-19
Internal Inspection
Inside Check
Inside check:
Close the door, cancel the red student stop lights and activate the amber student warning lights.
Cancel the right turn signal and turn on the 4-way hazard lights.
Using your mirrors, check the operation of your student amber warning lights, flashing alternately.
Check the operation of the 4-way hazard lights, in the front and on the sides.
Internal Inspection Inside check: • Close the door, cancel the red student stoplights and activate the amber student warning
lights. • Cancel the right turn signal and turn on the 4-way hazard lights. • Using your mirrors, check the operation of your student amber warning lights, flashing
alternately. • Check the operation of the 4-way hazard lights in the front and on the sides.
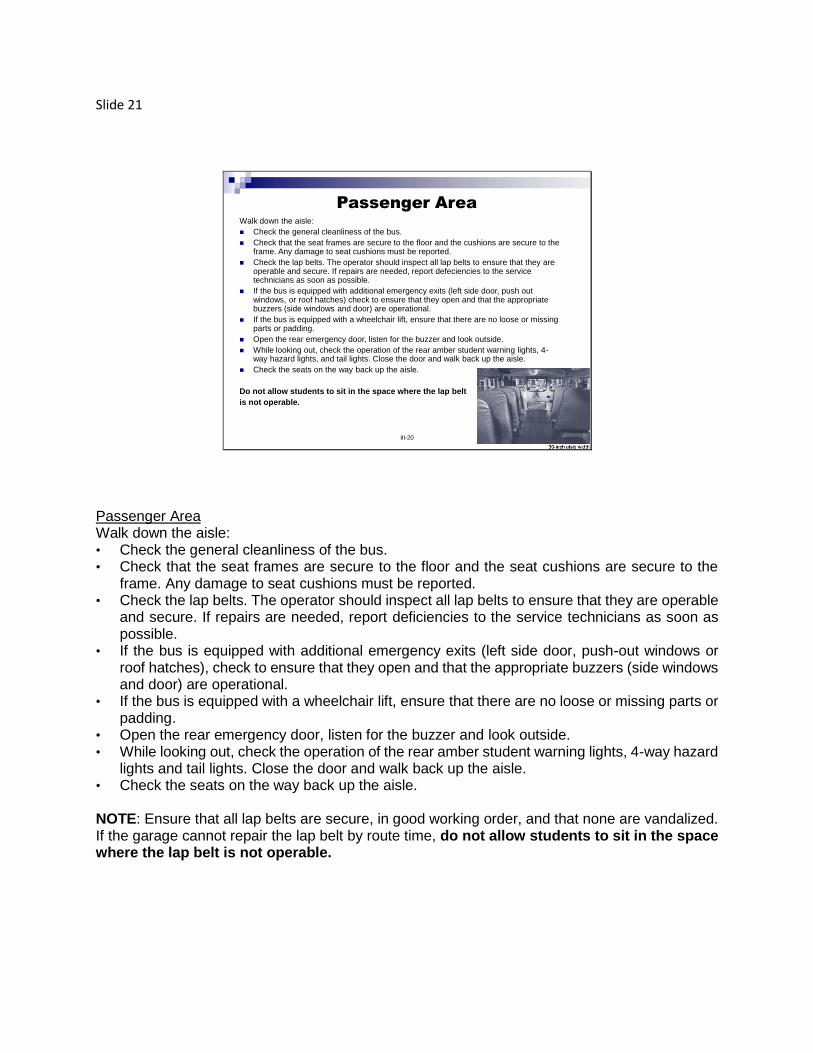
Slide 21
III-20
Passenger AreaWalk down the aisle:
Check the general cleanliness of the bus.
Check that the seat frames are secure to the floor and the cushions are secure to the frame. Any damage to seat cushions must be reported.
Check the lap belts. The operator should inspect all lap belts to ensure that they are operable and secure. If repairs are needed, report defeciencies to the service technicians as soon as possible.
If the bus is equipped with additional emergency exits (left side door, push out windows, or roof hatches) check to ensure that they open and that the appropriate buzzers (side windows and door) are operational.
If the bus is equipped with a wheelchair lift, ensure that there are no loose or missing parts or padding.
Open the rear emergency door, listen for the buzzer and look outside.
While looking out, check the operation of the rear amber student warning lights, 4-way hazard lights, and tail lights. Close the door and walk back up the aisle.
Check the seats on the way back up the aisle.
Do not allow students to sit in the space where the lap belt
is not operable.
Passenger Area Walk down the aisle: • Check the general cleanliness of the bus. • Check that the seat frames are secure to the floor and the seat cushions are secure to the
frame. Any damage to seat cushions must be reported. • Check the lap belts. The operator should inspect all lap belts to ensure that they are operable
and secure. If repairs are needed, report deficiencies to the service technicians as soon as possible.
• If the bus is equipped with additional emergency exits (left side door, push-out windows or roof hatches), check to ensure that they open and that the appropriate buzzers (side windows and door) are operational.
• If the bus is equipped with a wheelchair lift, ensure that there are no loose or missing parts or padding.
• Open the rear emergency door, listen for the buzzer and look outside. • While looking out, check the operation of the rear amber student warning lights, 4-way hazard
lights and tail lights. Close the door and walk back up the aisle. • Check the seats on the way back up the aisle. NOTE: Ensure that all lap belts are secure, in good working order, and that none are vandalized. If the garage cannot repair the lap belt by route time, do not allow students to sit in the space where the lap belt is not operable.
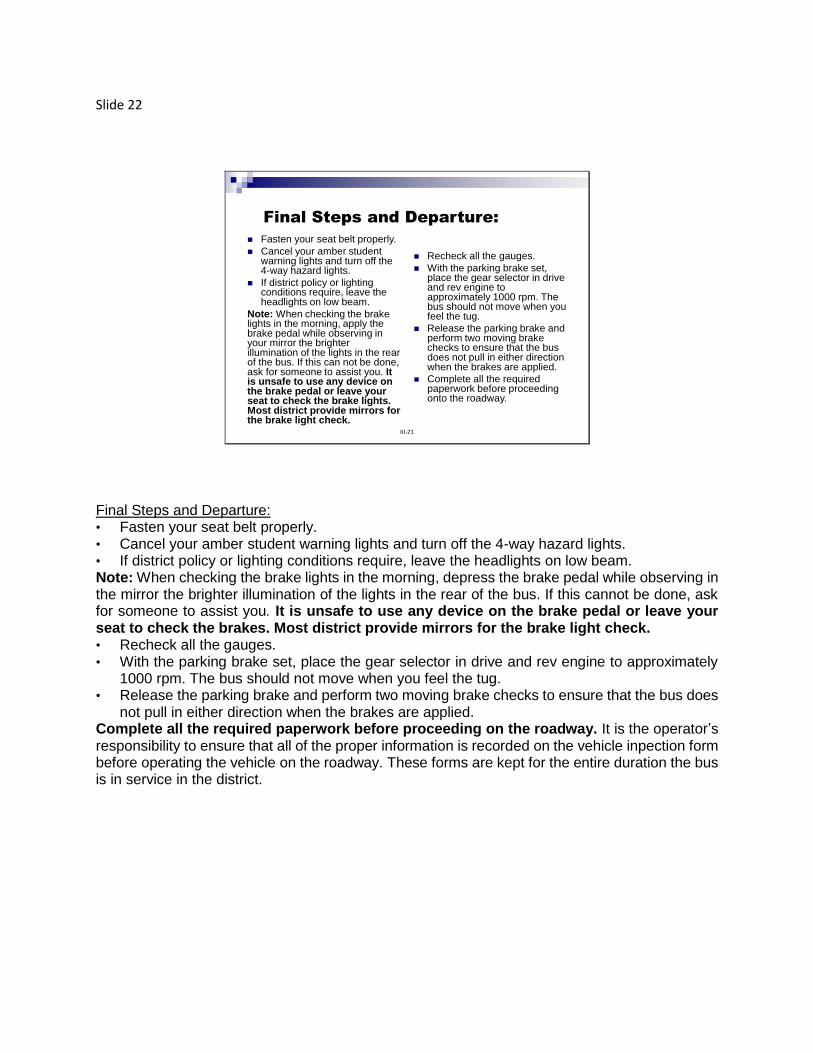
Slide 22
III-21
Final Steps and Departure:
Fasten your seat belt properly.
Cancel your amber student warning lights and turn off the 4-way hazard lights.
If district policy or lighting conditions require, leave the headlights on low beam.
Note: When checking the brake lights in the morning, apply the brake pedal while observing in your mirror the brighter illumination of the lights in the rear of the bus. If this can not be done, ask for someone to assist you. It is unsafe to use any device on the brake pedal or leave your seat to check the brake lights. Most district provide mirrors for the brake light check.
Recheck all the gauges.
With the parking brake set, place the gear selector in drive and rev engine to approximately 1000 rpm. The bus should not move when you feel the tug.
Release the parking brake and perform two moving brake checks to ensure that the bus does not pull in either direction when the brakes are applied.
Complete all the required paperwork before proceeding onto the roadway.
Final Steps and Departure: • Fasten your seat belt properly. • Cancel your amber student warning lights and turn off the 4-way hazard lights. • If district policy or lighting conditions require, leave the headlights on low beam. Note: When checking the brake lights in the morning, depress the brake pedal while observing in the mirror the brighter illumination of the lights in the rear of the bus. If this cannot be done, ask for someone to assist you. It is unsafe to use any device on the brake pedal or leave your seat to check the brakes. Most district provide mirrors for the brake light check. • Recheck all the gauges. • With the parking brake set, place the gear selector in drive and rev engine to approximately
1000 rpm. The bus should not move when you feel the tug. • Release the parking brake and perform two moving brake checks to ensure that the bus does
not pull in either direction when the brakes are applied. Complete all the required paperwork before proceeding on the roadway. It is the operator’s responsibility to ensure that all of the proper information is recorded on the vehicle inpection form before operating the vehicle on the roadway. These forms are kept for the entire duration the bus is in service in the district.
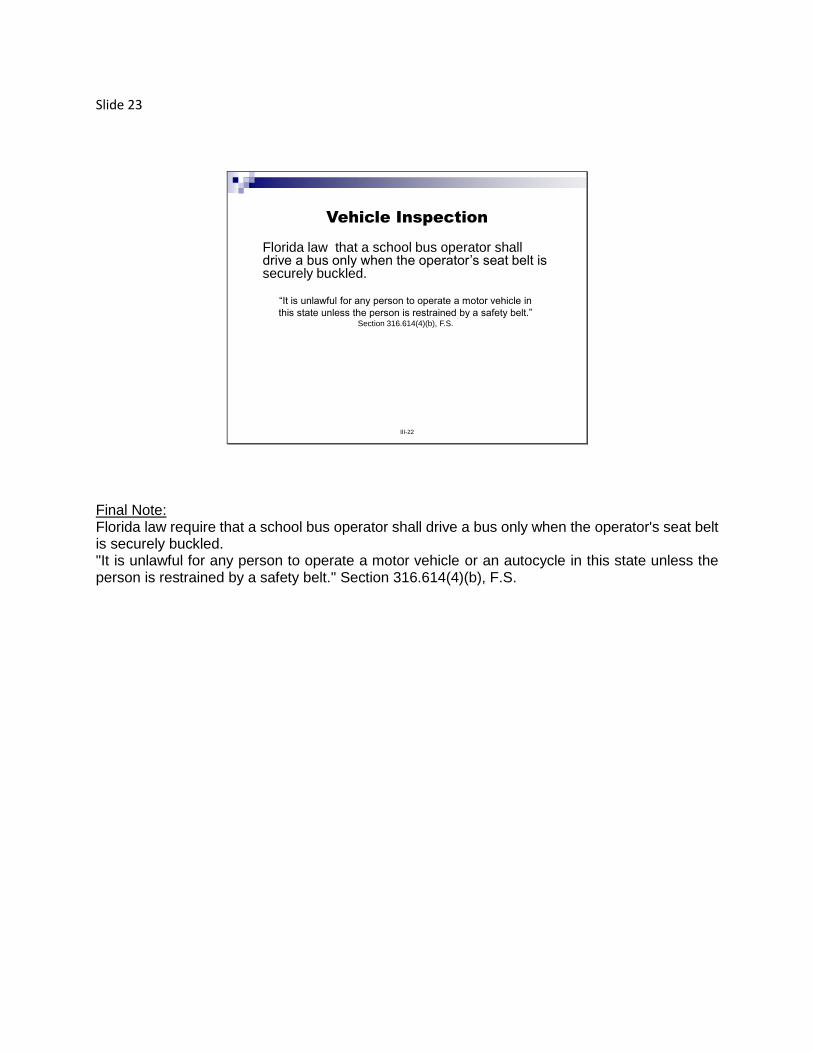
Slide 23
III-22
Vehicle Inspection
Florida law that a school bus operator shall drive a bus only when the operator’s seat belt is securely buckled.
“It is unlawful for any person to operate a motor vehicle in
this state unless the person is restrained by a safety belt.”Section 316.614(4)(b), F.S.
Final Note: Florida law require that a school bus operator shall drive a bus only when the operator's seat belt is securely buckled. "It is unlawful for any person to operate a motor vehicle or an autocycle in this state unless the person is restrained by a safety belt." Section 316.614(4)(b), F.S.
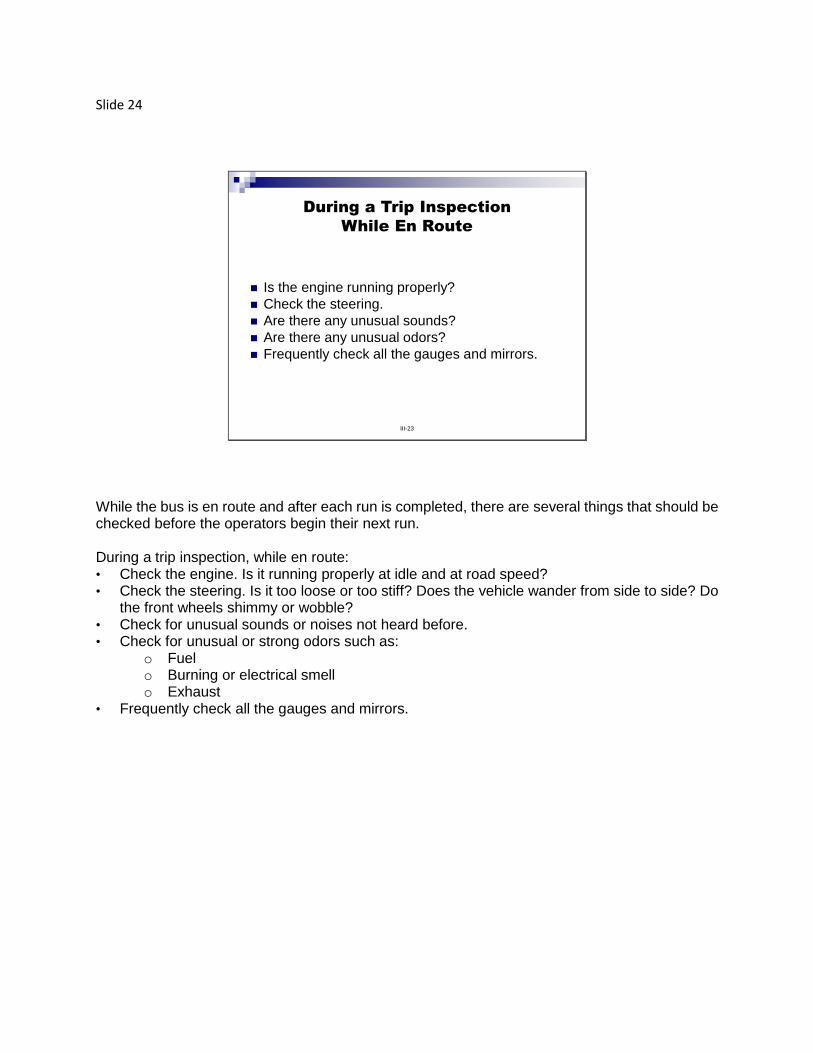
Slide 24
III-23
During a Trip Inspection
While En Route
Is the engine running properly?
Check the steering.
Are there any unusual sounds?
Are there any unusual odors?
Frequently check all the gauges and mirrors.
While the bus is en route and after each run is completed, there are several things that should be checked before the operators begin their next run. During a trip inspection, while en route: • Check the engine. Is it running properly at idle and at road speed? • Check the steering. Is it too loose or too stiff? Does the vehicle wander from side to side? Do
the front wheels shimmy or wobble? • Check for unusual sounds or noises not heard before. • Check for unusual or strong odors such as:
o Fuel o Burning or electrical smell o Exhaust
• Frequently check all the gauges and mirrors.
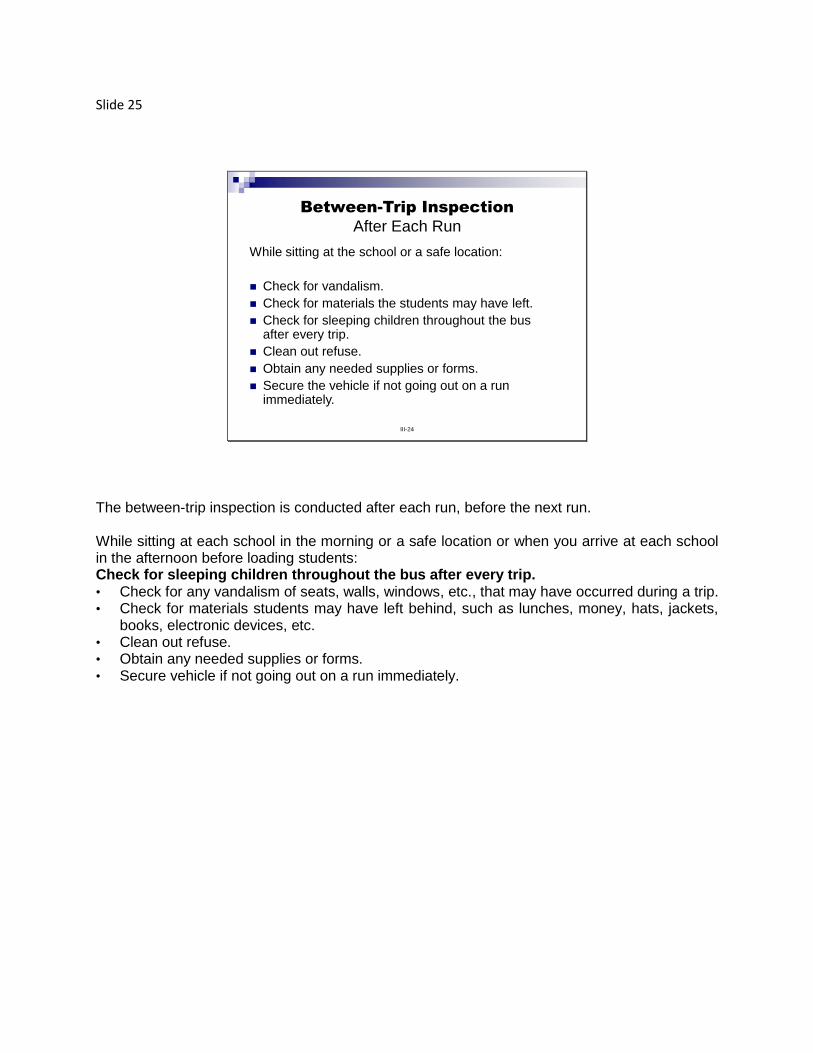
Slide 25
III-24
Between-Trip Inspection
After Each Run
While sitting at the school or a safe location:
Check for vandalism.
Check for materials the students may have left.
Check for sleeping children throughout the bus after every trip.
Clean out refuse.
Obtain any needed supplies or forms.
Secure the vehicle if not going out on a run immediately.
The between-trip inspection is conducted after each run, before the next run. While sitting at each school in the morning or a safe location or when you arrive at each school in the afternoon before loading students: Check for sleeping children throughout the bus after every trip. • Check for any vandalism of seats, walls, windows, etc., that may have occurred during a trip. • Check for materials students may have left behind, such as lunches, money, hats, jackets,
books, electronic devices, etc. • Clean out refuse. • Obtain any needed supplies or forms. • Secure vehicle if not going out on a run immediately.
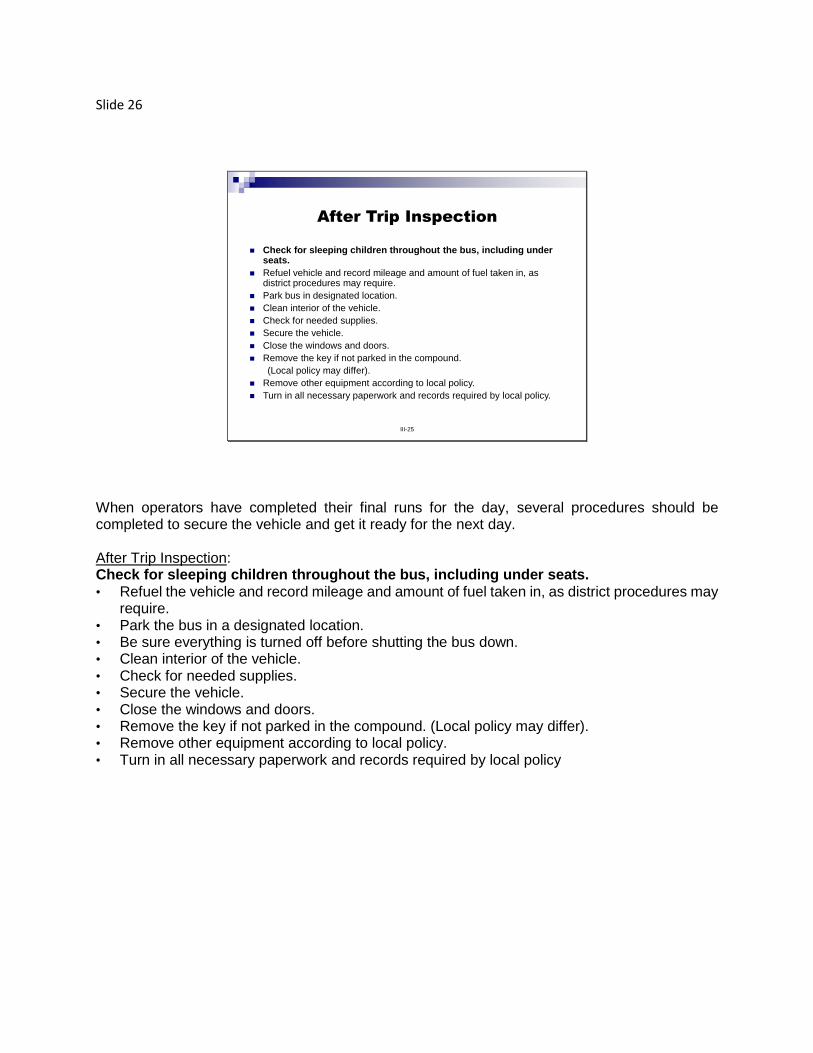
Slide 26
III-25
After Trip Inspection
Check for sleeping children throughout the bus, including under seats.
Refuel vehicle and record mileage and amount of fuel taken in, as district procedures may require.
Park bus in designated location.
Clean interior of the vehicle.
Check for needed supplies.
Secure the vehicle.
Close the windows and doors.
Remove the key if not parked in the compound.
(Local policy may differ).
Remove other equipment according to local policy.
Turn in all necessary paperwork and records required by local policy.
When operators have completed their final runs for the day, several procedures should be completed to secure the vehicle and get it ready for the next day. After Trip Inspection: Check for sleeping children throughout the bus, including under seats. • Refuel the vehicle and record mileage and amount of fuel taken in, as district procedures may
require. • Park the bus in a designated location. • Be sure everything is turned off before shutting the bus down. • Clean interior of the vehicle. • Check for needed supplies. • Secure the vehicle. • Close the windows and doors. • Remove the key if not parked in the compound. (Local policy may differ). • Remove other equipment according to local policy. • Turn in all necessary paperwork and records required by local policy
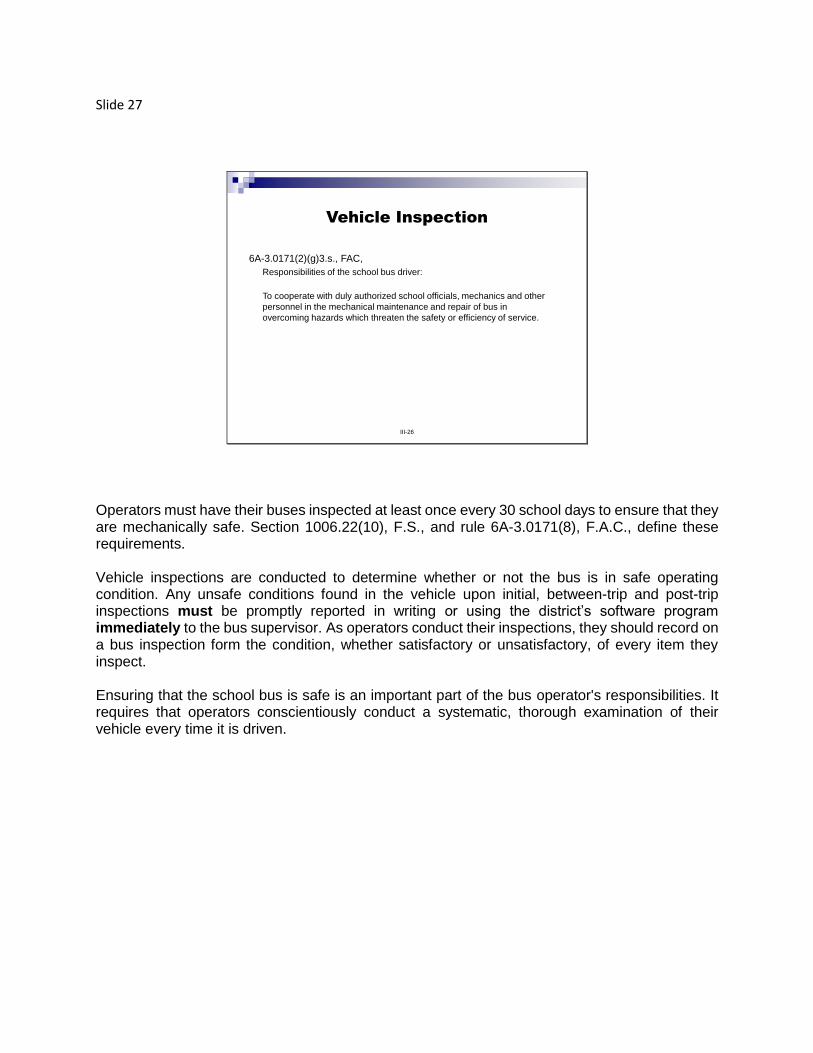
Slide 27
III-26
Vehicle Inspection
6A-3.0171(2)(g)3.s., FAC,
Responsibilities of the school bus driver:
To cooperate with duly authorized school officials, mechanics and other
personnel in the mechanical maintenance and repair of bus in
overcoming hazards which threaten the safety or efficiency of service.
Operators must have their buses inspected at least once every 30 school days to ensure that they are mechanically safe. Section 1006.22(10), F.S., and rule 6A-3.0171(8), F.A.C., define these requirements. Vehicle inspections are conducted to determine whether or not the bus is in safe operating condition. Any unsafe conditions found in the vehicle upon initial, between-trip and post-trip inspections must be promptly reported in writing or using the district’s software program immediately to the bus supervisor. As operators conduct their inspections, they should record on a bus inspection form the condition, whether satisfactory or unsatisfactory, of every item they inspect. Ensuring that the school bus is safe is an important part of the bus operator's responsibilities. It requires that operators conscientiously conduct a systematic, thorough examination of their vehicle every time it is driven.
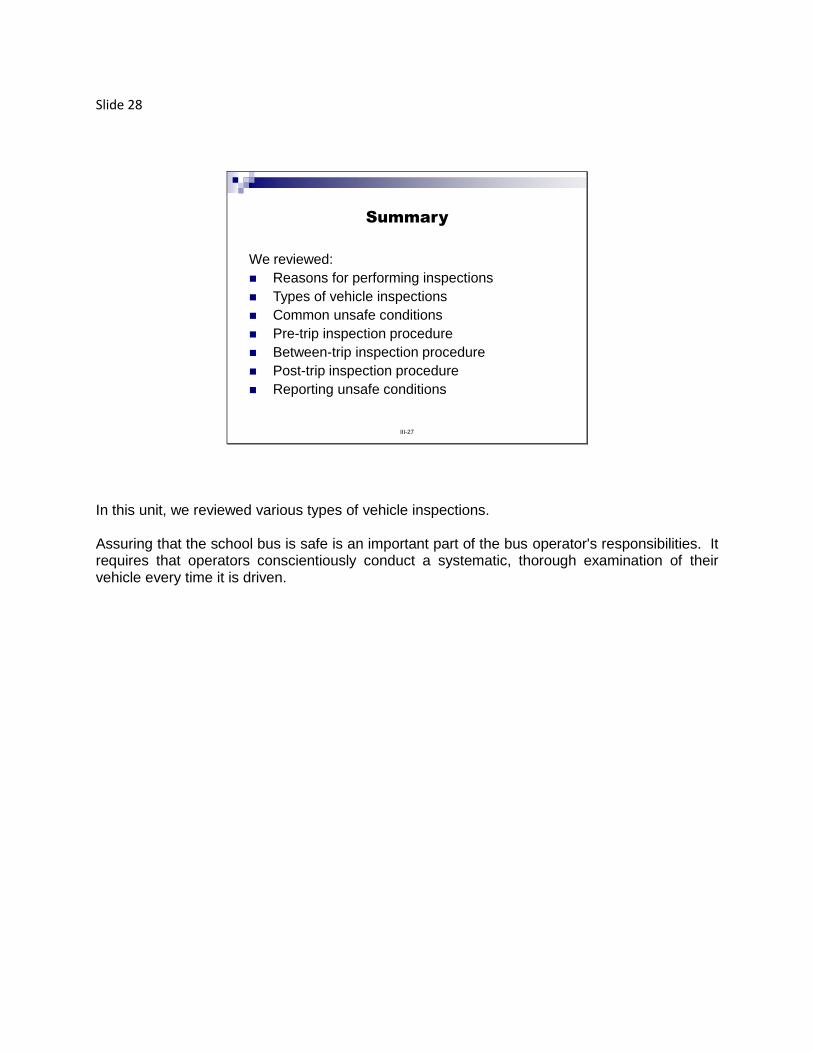
Slide 28
III-27
Summary
We reviewed:
Reasons for performing inspections
Types of vehicle inspections
Common unsafe conditions
Pre-trip inspection procedure
Between-trip inspection procedure
Post-trip inspection procedure
Reporting unsafe conditions
In this unit, we reviewed various types of vehicle inspections. Assuring that the school bus is safe is an important part of the bus operator's responsibilities. It requires that operators conscientiously conduct a systematic, thorough examination of their vehicle every time it is driven.

Slide 1
UNIT 4
SCHOOL BUS
VEHICLE OPERATIONS
AUDIO-VISUAL MATERIALS: • Optional Program: “Operation Lifesaver Railroad Crossing Video” on YouTube EQUIPMENT: • Computer projection system • Screen • Whiteboard, markers, eraser REFERENCES: • Rule 6A-3.0171, F.A.C. • Motor Vehicle Laws of Florida: Sections 316.075, 316.0895, 316.123, 316.126, 316.1575,
316.159, 316.1974, F.S. • School Bus Instructional Program Instructor’s Guide, U.S. Department of Transportation,
National Highway Traffic Safety Administration, 1974, pages E-29 - E31. • Drive Different, Save Lives, Smith System Training Program. See www.drivedifferent.com for
more information. • Operation Lifesaver, Railroad Grade Crossing Safety Campaign. See www.oli.org for more
information. OBJECTIVES—The operator will be able to: • Describe the IDPE process (Identify, Decide, Predict, Execute); • Describe the Smith System; • Explain the guidelines for determining and maintaining safe following distance; • Explain the legal and recommended procedures for approaching and crossing railroad tracks; • Explain the procedure for reporting dangerous railroad crossings; • Explain who is legally required to yield when encountering right-of-way situations; • Explain the correct procedure for turning the bus; and • Identify fuel conservation and air quality improvement driving techniques.
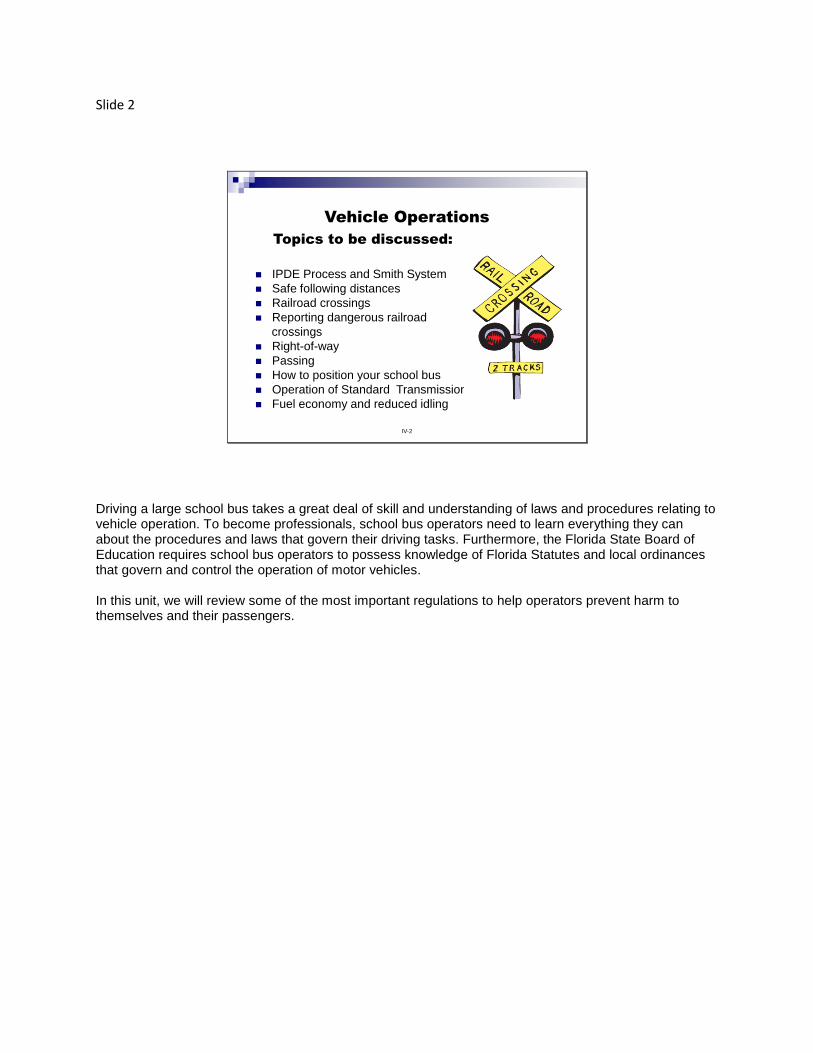
Slide 2
IV-2
Vehicle Operations
Topics to be discussed:
IPDE Process and Smith System
Safe following distances
Railroad crossings
Reporting dangerous railroad
crossings
Right-of-way
Passing
How to position your school bus
Operation of Standard Transmission
Fuel economy and reduced idling
Driving a large school bus takes a great deal of skill and understanding of laws and procedures relating to vehicle operation. To become professionals, school bus operators need to learn everything they can about the procedures and laws that govern their driving tasks. Furthermore, the Florida State Board of Education requires school bus operators to possess knowledge of Florida Statutes and local ordinances that govern and control the operation of motor vehicles. In this unit, we will review some of the most important regulations to help operators prevent harm to themselves and their passengers.
Slide 3
IV-3
IPDE Process
Identify the relevant clues.Locate potential hazards within the driving scene.
The operator identifies a vehicle from an approaching side street
traveling too fast to come to a complete stop, appearing to pull
out right in front of the bus.
Predict their significance.Judge where the possible points of conflict may occur.
The operator predicts the driver are not going to stop and will pull
out in front of the bus.
Operators rely heavily on vision to guide their vehicles along the roadway; however, safe and efficient driving requires more than just seeing. It requires the ability to interpret what one sees and to take the appropriate action once the traffic situation has been correctly interpreted. Operators must develop a systematic method of seeing, interpreting and responding to the ever-changing traffic scene. One system is known as IPDE Process. The “I” stands for “identify.” Operators must be able to identify the relevant clues, which involves seeing and interpreting or giving meaning to what is seen. To identify and interpret relevant clues, operators must know how to look, where to look and what to look for. To identify hazards, operators must constantly search the traffic scene carefully. Quick glances should be taken all around to the front, to the sides and in the mirrors, both near and far. Since the traffic environment changes constantly, these glances must be taken frequently. The “P” stands for “predict.” Operators must be able to predict the significance of the relevant clues. Once a hazard in the driving environment has been identified, operators must predict how the hazard might affect their planned path of travel. Operators must ask themselves questions like: “To avoid the hazard, must I speed up, slow down, turn to the right, or turn to the left?” During this stage of the process, operators interpret the information they have identified and judge where conflicts may occur. According to the Florida CDL Manual, you can almost always turn to miss an obstacle more quickly than you can stop.
Slide 4
The “D” stands for “decide.” Operators must decide what to do once they have identified a hazard and predicted its effect on their path of travel. Nothing is more crucial to safe driving than making a timely, wise decision under these circumstances. The options available include: • Deciding to change speed by slowing down or speeding up. • Deciding to change directions or location by moving into some area of the space cushion
around your vehicle. • Deciding to communicate your location and plans to surrounding traffic. The “E” stands for “execute.” Operators now execute their decision. To carry out a decision or to avoid a conflict, operators must take one or more of the following actions:
Accelerate, Brake, Steer, Communicate
IV-4
IPDE Process
Decide what to do.Determine what action to take and where and when to take it.
The operator decides it is safer for the passengers on board if the
operator reduces his/her speed to allow the vehicle enough time
to pull out in front of the operator without causing an unsafe
condition.
Execute your decision.Act by maneuvering the vehicle to avoid conflicts.
The operator executes removing his/her foot from the throttle and
slowing the bus down to allow the vehicle to pull out and get up
to speed. Thus, the operator prevented a possible collision.
Slide 5
Smith System
The 5
Seeing Habits
of
The Smith System
Aim high in steering.
Keep your eyes moving.
Get the big picture.
Make sure others see you.
Leave yourself an out.
IV-5
One orderly visual search pattern is known as the Smith System. This system involves five seeing habits. Aim high in steering: Look way ahead the distance your vehicle will travel in 10-15 seconds, so you are aware of the complete traffic scene in front of your vehicle. Get the big picture: Put all the information together from all perspectives to have a complete mental picture of the traffic environment around your vehicle. Keep your eyes moving: Use an orderly search pattern that involves glances near and far to the front, sides, in the mirrors and at the instrument panel. Leave yourself an out: Never get boxed in. Always leave yourself an escape path. This means to leave a space cushion all around your vehicle, to the front, rear and on both sides. Make sure others see you: Communicate your intentions to other operators so you are sure they understand your plans. Harold Smith invented the Smith System in 1952 to increase safety of commercial motor operators and dramatically reduce crashes on highways and roads.
Slide 6
IV-6
Following Distances
Maintain legal following distance.
Obey basic speed law.
Allow 300 feet when following other buses outside of the city.
Allow 100 feet between buses when leaving school grounds.
Provide vehicle separation by timed interval.
A number of guidelines and techniques are available to guide drivers in determining and maintaining a safe following distance. Legally, operators are required to maintain certain following distances. Road, weather, and light conditions have a lot to do with a safe following distance. As conditions get worse, allowing more stopping distance is good defensive driving. If someone is tailgating you, you should increase your following distance from the vehicle in front of you. That protects you from having to make a sudden stop and being rammed from the rear. You can make a smoother, longer, more gradual stop with the added time, allowing the tailgater to do the same. While traveling through the bus loops on school property, enough room between buses is essential, should the bus in front of you need to use the rear emergency door exit. In addition, when buses line up at the schools, vehicles should have enough space between them in case rear exits need to be used in an emergency. As a general rule, and as referenced in the Florida CDL Handbook (page 2-16), appropriate following distances can also be determined by looking ahead one (1) second for every 10 feet of the vehicle length, up to 40 mph. Add one (1) additional second for speeds over 40 mph, and when special driving conditions are present (weather, nighttime, etc.)
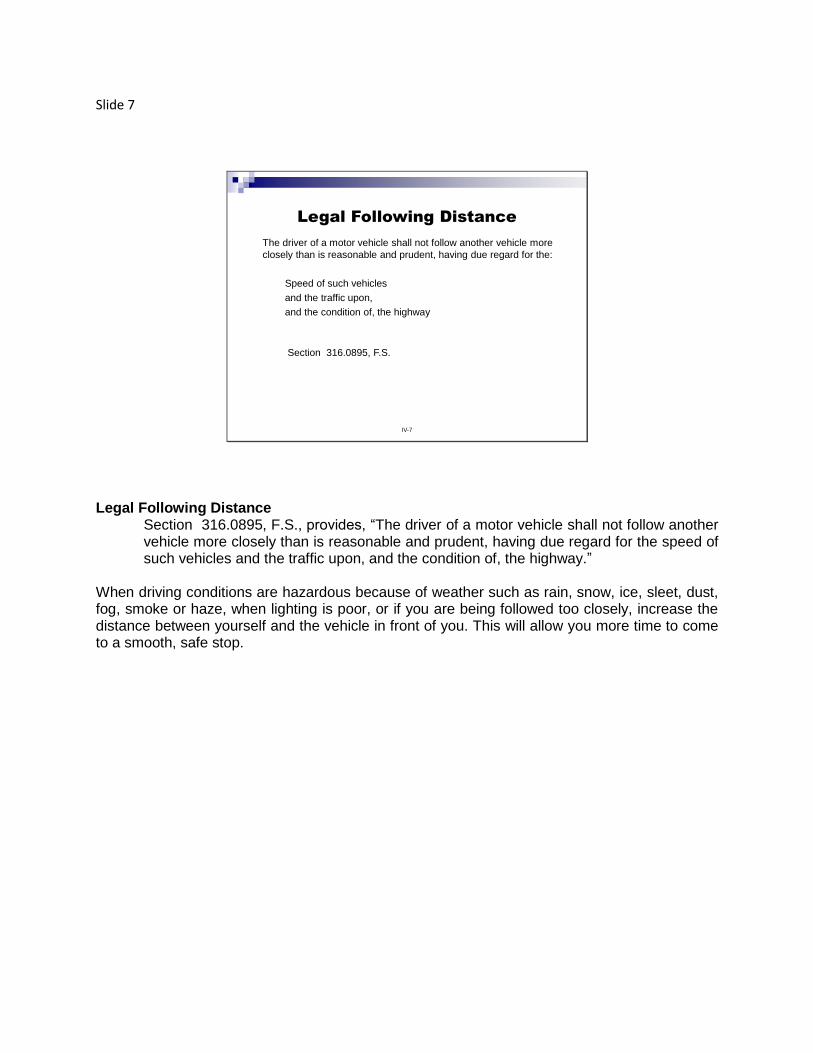
Slide 7
IV-7
Legal Following Distance
The driver of a motor vehicle shall not follow another vehicle more
closely than is reasonable and prudent, having due regard for the:
Speed of such vehicles
and the traffic upon,
and the condition of, the highway
Section 316.0895, F.S.
Legal Following Distance Section 316.0895, F.S., provides, “The driver of a motor vehicle shall not follow another vehicle more closely than is reasonable and prudent, having due regard for the speed of such vehicles and the traffic upon, and the condition of, the highway.”
When driving conditions are hazardous because of weather such as rain, snow, ice, sleet, dust, fog, smoke or haze, when lighting is poor, or if you are being followed too closely, increase the distance between yourself and the vehicle in front of you. This will allow you more time to come to a smooth, safe stop.
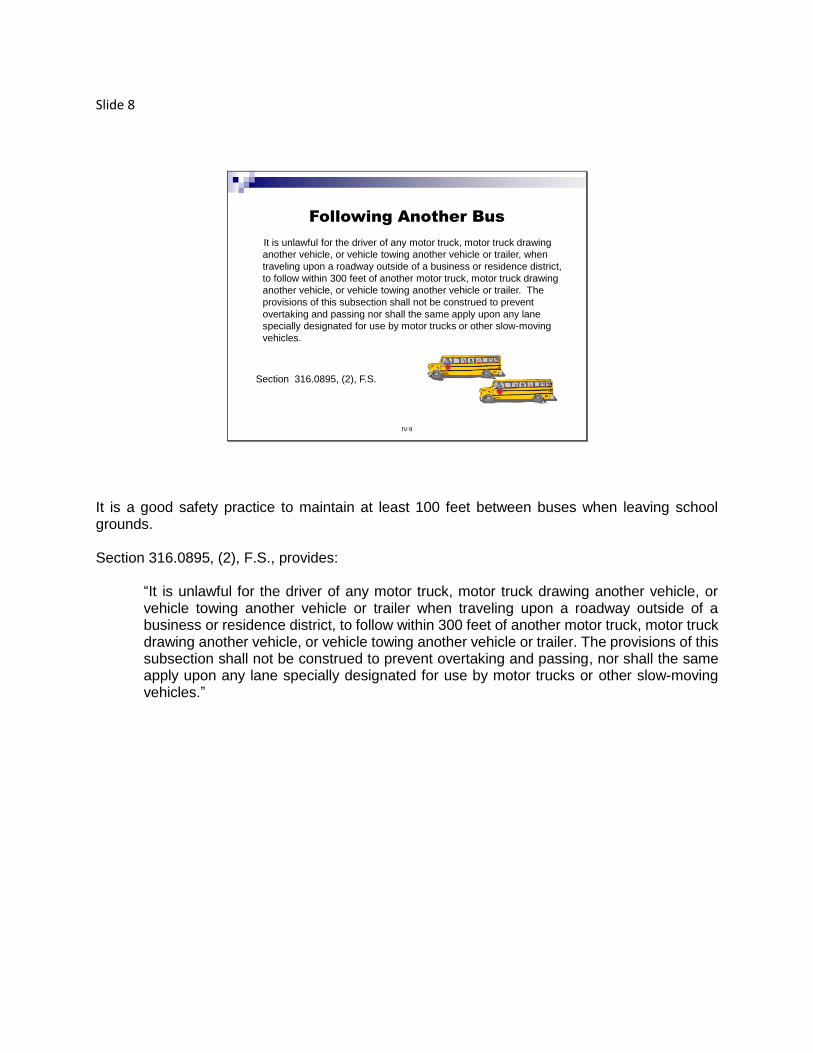
Slide 8
IV-9
Following Another Bus
It is unlawful for the driver of any motor truck, motor truck drawing
another vehicle, or vehicle towing another vehicle or trailer, when
traveling upon a roadway outside of a business or residence district,
to follow within 300 feet of another motor truck, motor truck drawing
another vehicle, or vehicle towing another vehicle or trailer. The
provisions of this subsection shall not be construed to prevent
overtaking and passing nor shall the same apply upon any lane
specially designated for use by motor trucks or other slow-moving
vehicles.
Section 316.0895, (2), F.S.
It is a good safety practice to maintain at least 100 feet between buses when leaving school grounds. Section 316.0895, (2), F.S., provides:
“It is unlawful for the driver of any motor truck, motor truck drawing another vehicle, or vehicle towing another vehicle or trailer when traveling upon a roadway outside of a business or residence district, to follow within 300 feet of another motor truck, motor truck drawing another vehicle, or vehicle towing another vehicle or trailer. The provisions of this subsection shall not be construed to prevent overtaking and passing, nor shall the same apply upon any lane specially designated for use by motor trucks or other slow-moving vehicles.”
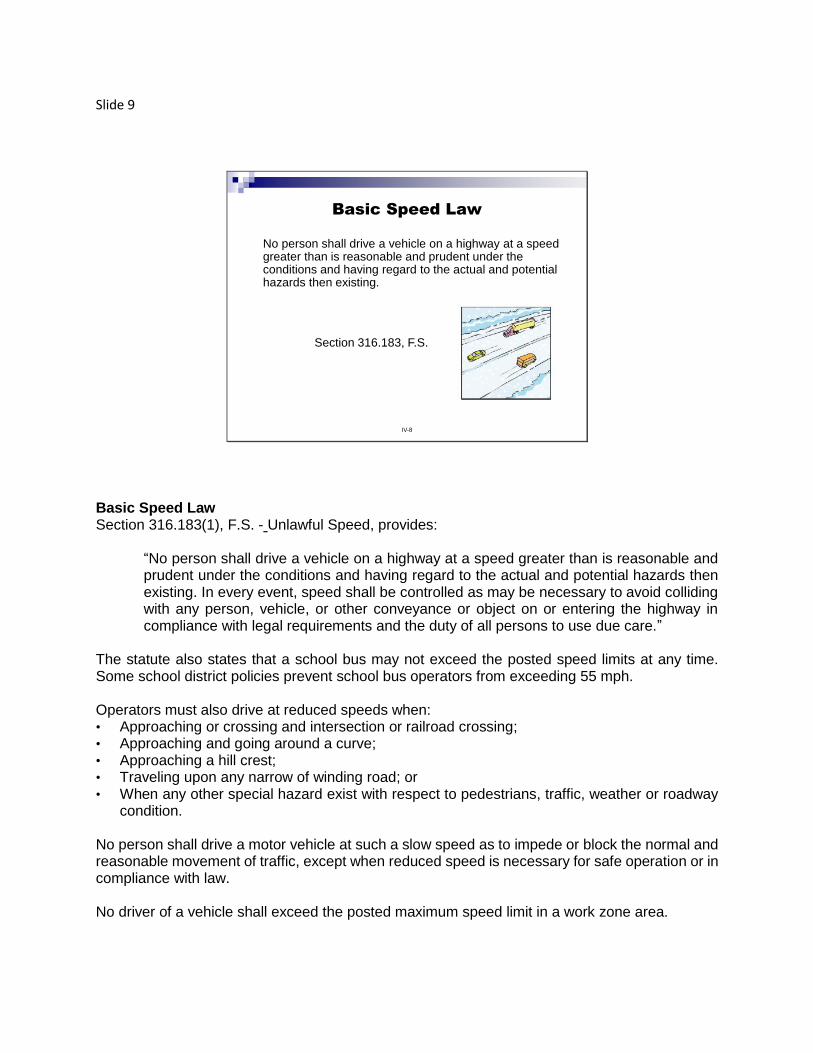
Slide 9
IV-8
Basic Speed Law
No person shall drive a vehicle on a highway at a speed greater than is reasonable and prudent under the conditions and having regard to the actual and potential hazards then existing.
Section 316.183, F.S.
Basic Speed Law Section 316.183(1), F.S. - Unlawful Speed, provides:
“No person shall drive a vehicle on a highway at a speed greater than is reasonable and prudent under the conditions and having regard to the actual and potential hazards then existing. In every event, speed shall be controlled as may be necessary to avoid colliding with any person, vehicle, or other conveyance or object on or entering the highway in compliance with legal requirements and the duty of all persons to use due care.”
The statute also states that a school bus may not exceed the posted speed limits at any time. Some school district policies prevent school bus operators from exceeding 55 mph. Operators must also drive at reduced speeds when: • Approaching or crossing and intersection or railroad crossing; • Approaching and going around a curve; • Approaching a hill crest; • Traveling upon any narrow of winding road; or • When any other special hazard exist with respect to pedestrians, traffic, weather or roadway
condition. No person shall drive a motor vehicle at such a slow speed as to impede or block the normal and reasonable movement of traffic, except when reduced speed is necessary for safe operation or in compliance with law. No driver of a vehicle shall exceed the posted maximum speed limit in a work zone area.
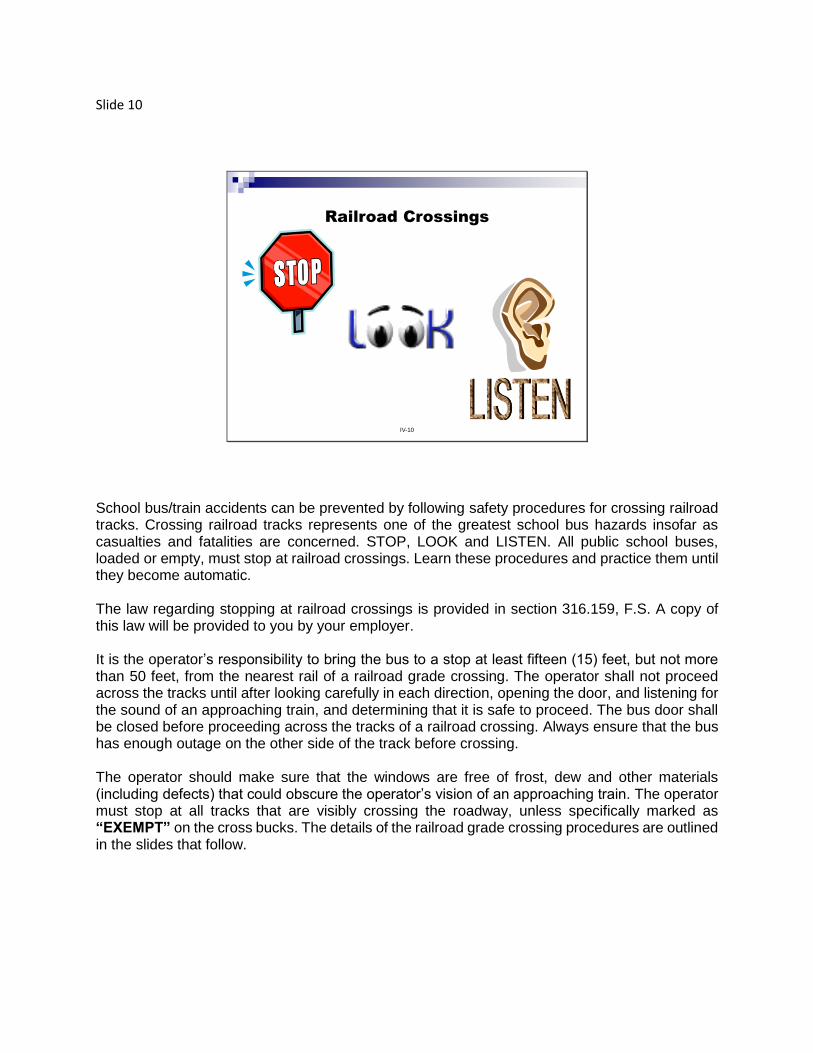
Slide 10
IV-10
Railroad Crossings
School bus/train accidents can be prevented by following safety procedures for crossing railroad tracks. Crossing railroad tracks represents one of the greatest school bus hazards insofar as casualties and fatalities are concerned. STOP, LOOK and LISTEN. All public school buses, loaded or empty, must stop at railroad crossings. Learn these procedures and practice them until they become automatic. The law regarding stopping at railroad crossings is provided in section 316.159, F.S. A copy of this law will be provided to you by your employer. It is the operator’s responsibility to bring the bus to a stop at least fifteen (15) feet, but not more than 50 feet, from the nearest rail of a railroad grade crossing. The operator shall not proceed across the tracks until after looking carefully in each direction, opening the door, and listening for the sound of an approaching train, and determining that it is safe to proceed. The bus door shall be closed before proceeding across the tracks of a railroad crossing. Always ensure that the bus has enough outage on the other side of the track before crossing. The operator should make sure that the windows are free of frost, dew and other materials (including defects) that could obscure the operator’s vision of an approaching train. The operator must stop at all tracks that are visibly crossing the roadway, unless specifically marked as “EXEMPT” on the cross bucks. The details of the railroad grade crossing procedures are outlined in the slides that follow.
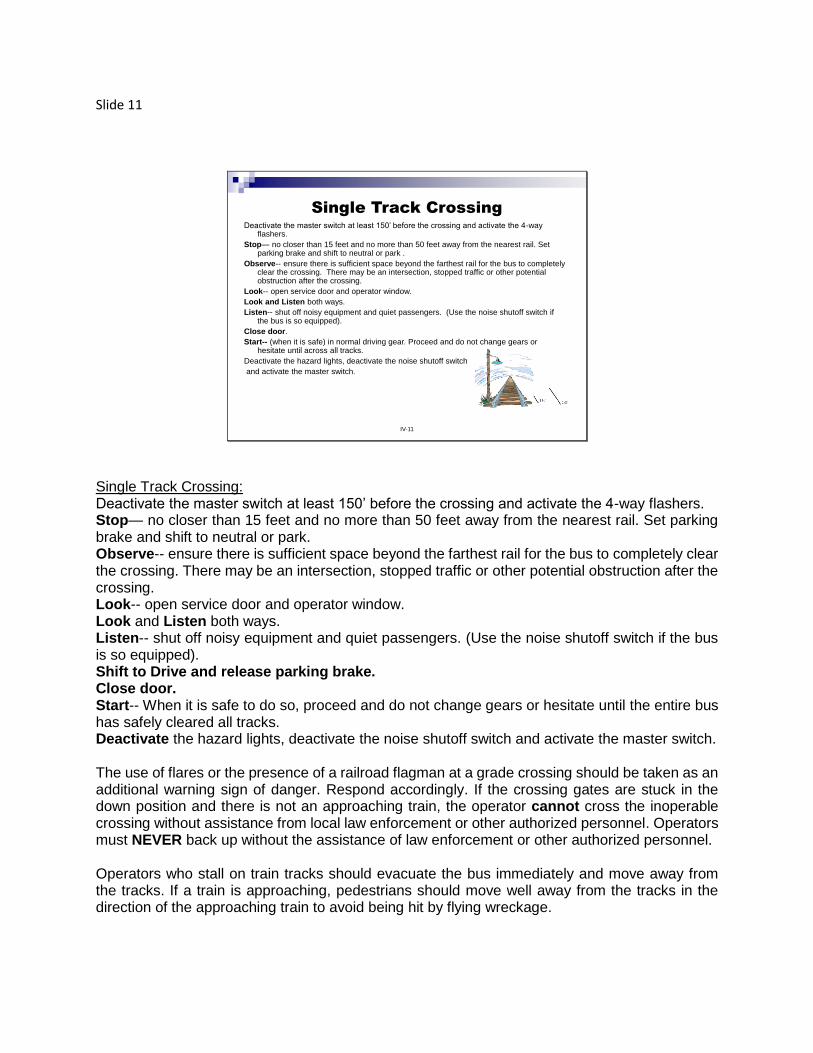
Slide 11
IV-11
Single Track CrossingDeactivate the master switch at least 150’ before the crossing and activate the 4-way
flashers.
Stop— no closer than 15 feet and no more than 50 feet away from the nearest rail. Set parking brake and shift to neutral or park .
Observe-- ensure there is sufficient space beyond the farthest rail for the bus to completely clear the crossing. There may be an intersection, stopped traffic or other potential obstruction after the crossing.
Look-- open service door and operator window.
Look and Listen both ways.
Listen-- shut off noisy equipment and quiet passengers. (Use the noise shutoff switch if the bus is so equipped).
Close door.
Start-- (when it is safe) in normal driving gear. Proceed and do not change gears or hesitate until across all tracks.
Deactivate the hazard lights, deactivate the noise shutoff switch
and activate the master switch.
Single Track Crossing: Deactivate the master switch at least 150’ before the crossing and activate the 4-way flashers. Stop— no closer than 15 feet and no more than 50 feet away from the nearest rail. Set parking brake and shift to neutral or park. Observe-- ensure there is sufficient space beyond the farthest rail for the bus to completely clear the crossing. There may be an intersection, stopped traffic or other potential obstruction after the crossing. Look-- open service door and operator window. Look and Listen both ways. Listen-- shut off noisy equipment and quiet passengers. (Use the noise shutoff switch if the bus is so equipped). Shift to Drive and release parking brake. Close door. Start-- When it is safe to do so, proceed and do not change gears or hesitate until the entire bus has safely cleared all tracks. Deactivate the hazard lights, deactivate the noise shutoff switch and activate the master switch. The use of flares or the presence of a railroad flagman at a grade crossing should be taken as an additional warning sign of danger. Respond accordingly. If the crossing gates are stuck in the down position and there is not an approaching train, the operator cannot cross the inoperable crossing without assistance from local law enforcement or other authorized personnel. Operators must NEVER back up without the assistance of law enforcement or other authorized personnel. Operators who stall on train tracks should evacuate the bus immediately and move away from the tracks. If a train is approaching, pedestrians should move well away from the tracks in the direction of the approaching train to avoid being hit by flying wreckage.
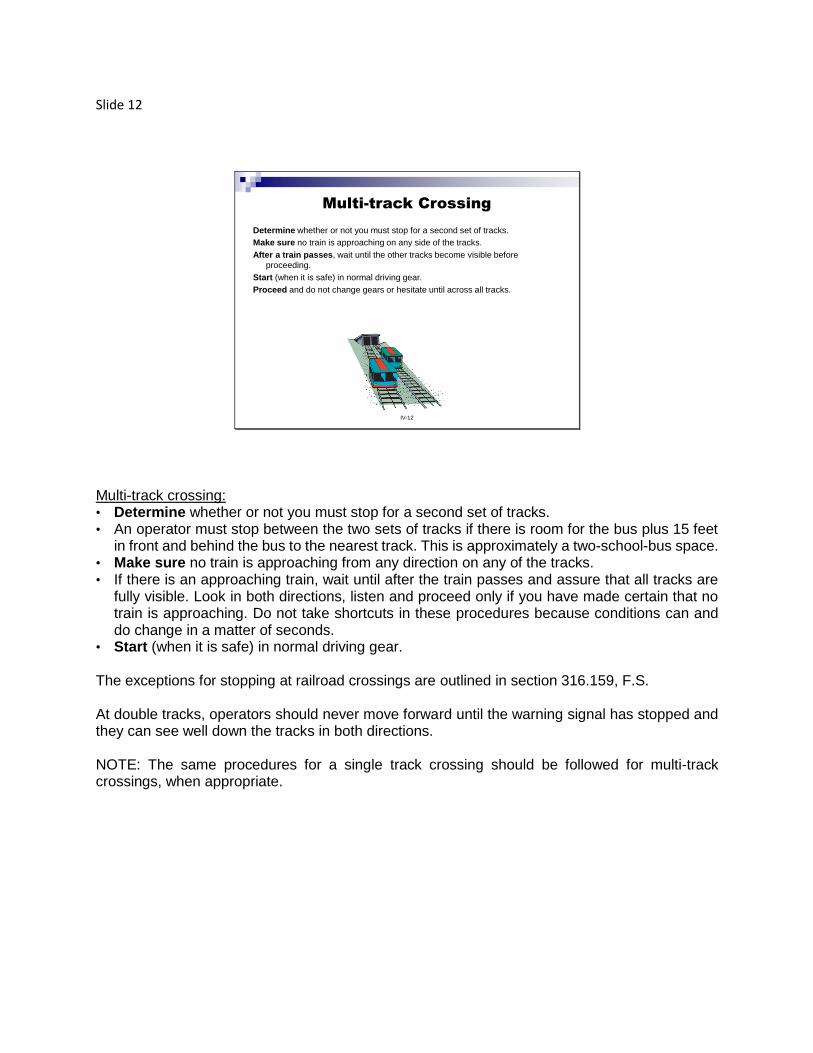
Slide 12
IV-12
Multi-track Crossing
Determine whether or not you must stop for a second set of tracks.
Make sure no train is approaching on any side of the tracks.
After a train passes, wait until the other tracks become visible before
proceeding.
Start (when it is safe) in normal driving gear.
Proceed and do not change gears or hesitate until across all tracks.
Multi-track crossing: • Determine whether or not you must stop for a second set of tracks. • An operator must stop between the two sets of tracks if there is room for the bus plus 15 feet
in front and behind the bus to the nearest track. This is approximately a two-school-bus space. • Make sure no train is approaching from any direction on any of the tracks. • If there is an approaching train, wait until after the train passes and assure that all tracks are
fully visible. Look in both directions, listen and proceed only if you have made certain that no train is approaching. Do not take shortcuts in these procedures because conditions can and do change in a matter of seconds.
• Start (when it is safe) in normal driving gear. The exceptions for stopping at railroad crossings are outlined in section 316.159, F.S. At double tracks, operators should never move forward until the warning signal has stopped and they can see well down the tracks in both directions. NOTE: The same procedures for a single track crossing should be followed for multi-track crossings, when appropriate.
Slide 13
IV-13
Railroad Crossing Gates or Barriers
Operators shall not drive a vehicle:
Through
Around
Under
A crossing gate or barrier at a railroad crossing while gate or barrier is:
Closed
Being opened
Being closed
Railroad Crossing Gates or Barriers Operators shall not drive a vehicle: Through Around Under A crossing gate or barrier at a railroad crossing while gate or barrier is: Closed Being opened Being closed
The penalties for crossing over a railway road crossing without stopping as required by law can cost the operator’s CDL driving privileges to be suspended and/or even revocation of their license as specified in the Commercial Driver License Manual, revised 2019, under section 1.3.5, Railroad-Highway Grade Crossing Violations: • After the first violation, you will lose your CDL for at least 60 days; • After the second violation, you will lose your CDL for at least 120 days; and • After the third violation within a three-year period, you will lose your license for at
least one year.

Slide 14
IV-14
Reporting Dangerous
Railroad Crossings
Report dangerous railroad
crossings to your
supervisor following your
district policy.
The responsibilities of the school bus operator to report dangerous crossings are specified in chapter 6A-3, F.A.C. Operators are responsible for reporting dangerous railroad crossing situations. If they neglect to report problems, they miss the opportunity to help correct them. Operators should take the time to report these extremely hazardous conditions to their supervisors. Reporting Dangerous Railroad Crossings Types of situations that should be identified are: • Visual obstructions such as weeds, brush or trees. (Do not report buildings on railroad right-of-
way or railroad buildings, which cannot be removed.) • Signal malfunctions or signals that are not operational. • Condition of the roadway at the crossing. • Condition of track at the crossing. • Switching operations on the track where crossing is blocked for long periods. • Boxcars parked on track, limiting visibility. • Failure of a train to give a warning with whistle/horn. • Late activation of railroad crossing guards and lights when a train approaches. • Problems with timing of traffic signals or train equipment storage locations at intersections,
which may prevent the bus from proceeding across the tracks.
Slide 15
IV-15
Education Enforcement Engineering
Operation Lifesaver is the largest rail safety organization in the United States. It was founded by the Union Pacific Railroad in the early 1970s. In recent years, statewide safety programs have been conducted to help reduce motor vehicle/train collisions at railroad/highway grade crossings. These programs have been very effective, but accidents continue to occur at an unacceptable rate. In cooperation with several state agencies, the National Safety Council, and the railroads of Florida, school bus operators are encouraged to follow the safety program known as Operation Lifesaver. This is a positive, year-round campaign proven to reduce grade crossing accidents. Operation Lifesaver stresses the three E’s of highway safety: • EDUCATION- to stimulate awareness of crossing dangers. • ENFORCEMENT- of driving safety laws. • ENGINEERING- for improved warning devices and signals.
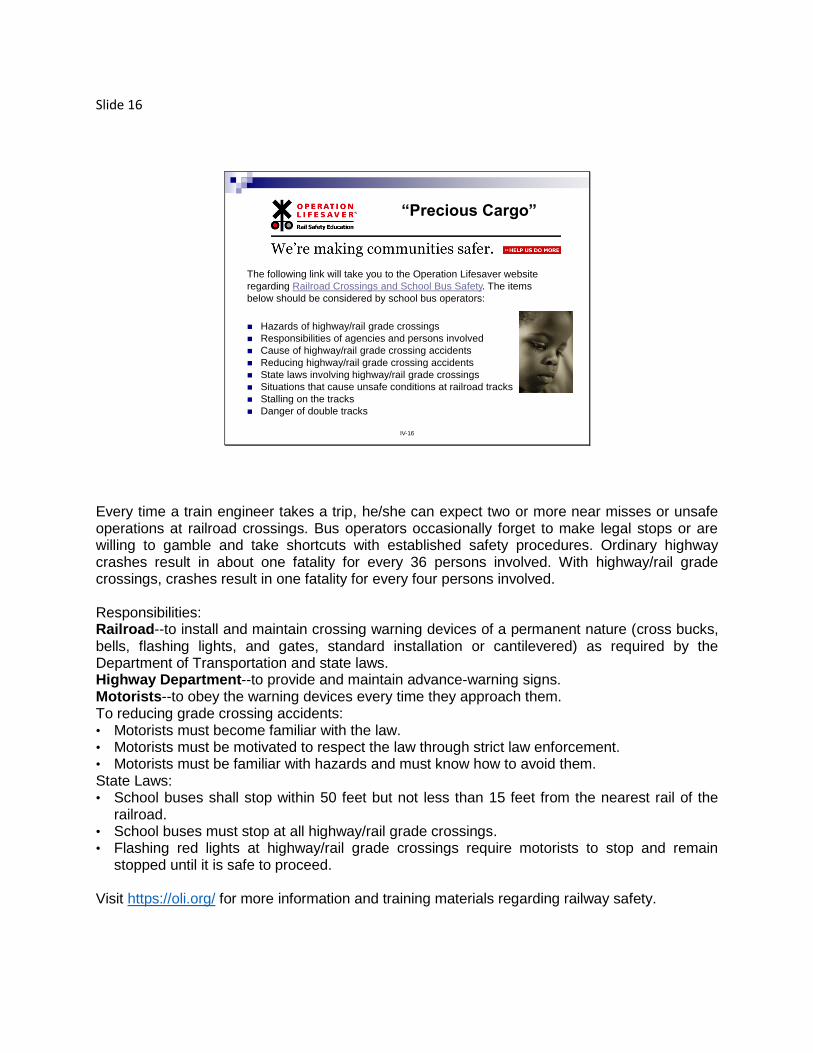
Slide 16
IV-16
“Precious Cargo”
Hazards of highway/rail grade crossings
Responsibilities of agencies and persons involved
Cause of highway/rail grade crossing accidents
Reducing highway/rail grade crossing accidents
State laws involving highway/rail grade crossings
Situations that cause unsafe conditions at railroad tracks
Stalling on the tracks
Danger of double tracks
The following link will take you to the Operation Lifesaver website
regarding Railroad Crossings and School Bus Safety. The items
below should be considered by school bus operators:
Every time a train engineer takes a trip, he/she can expect two or more near misses or unsafe operations at railroad crossings. Bus operators occasionally forget to make legal stops or are willing to gamble and take shortcuts with established safety procedures. Ordinary highway crashes result in about one fatality for every 36 persons involved. With highway/rail grade crossings, crashes result in one fatality for every four persons involved. Responsibilities: Railroad--to install and maintain crossing warning devices of a permanent nature (cross bucks, bells, flashing lights, and gates, standard installation or cantilevered) as required by the Department of Transportation and state laws. Highway Department--to provide and maintain advance-warning signs. Motorists--to obey the warning devices every time they approach them. To reducing grade crossing accidents: • Motorists must become familiar with the law. • Motorists must be motivated to respect the law through strict law enforcement. • Motorists must be familiar with hazards and must know how to avoid them. State Laws: • School buses shall stop within 50 feet but not less than 15 feet from the nearest rail of the
railroad. • School buses must stop at all highway/rail grade crossings. • Flashing red lights at highway/rail grade crossings require motorists to stop and remain
stopped until it is safe to proceed. Visit https://oli.org/ for more information and training materials regarding railway safety.
Slide 17
IV-17
Unsafe Operators at
Railroad Crossings
The operator who has a heavy foot and drives too fast for
conditions.
The daydreamer who does not pay attention. In about one out of
three highway/rail grade crossing accidents, the motorist runs
into the train.
The operator who overdrives his/her headlights (the operator is
traveling at a speed which will not allow adequate reaction time
to objects as they become illuminated by the headlights).
The operator who is overly tired and dozes at the wheel.
The operator who has become complacent and thinks he/she
knows when a train will be coming. Any time is train time.
The impatient operator who drives around the gates.
The follow-the-leader operator who does not look before crossing
train tracks. Operators should never drive onto the tracks unless
they can see for themselves that the track is clear.
Unsafe Operators at Railroad Crossings • The operator who has a heavy foot and drives too fast for conditions. • The daydreamer who does not pay attention. In about one out of three highway/rail grade
crossing accidents, the motorist runs into the train. • The operator who overdrives his/her headlights (the operator travels at a speed that will not
allow adequate reaction time to objects as they become illuminated by the headlights). • The operator who is overly tired and dozes at the wheel. • The operator who has become complacent and thinks he/she knows when a train will be
coming. Any time is train time. • The impatient operator who drives around the gates. • The follow-the-leader operator who does not look before crossing train tracks. Operators
should never drive onto the tracks unless they can see for themselves that the track is clear.
Slide 18
IV-18
Right-of-Way Situations
Intersections
Vehicles already in intersection
Approaching at approximately same time
When facing yield, stop, or merge sign
Emergency vehicles
Funeral processions
Traffic control signals
Turning left
Entering highway from alley, private road or driveway
There are many types of right-of-way situations with which the school bus operator should become familiar because accidents occur when operators fail to react correctly. Knowing and observing these right-of-way rules is critical to helping operators maintain an accident-free driving record and, more importantly, to ensure the safety of their passengers. Florida law does not specify who has the right-of-way. The law specifies who must yield under given circumstances. Section 316.123, F.S., addresses a vehicle entering a stop or yield intersection. The first vehicle to stop at the intersection shall be the first one to proceed. Section 316.126, F.S., addresses the operation of vehicles and the actions of pedestrians on approaching an authorized emergency vehicle. Section 316.1974, F.S., addresses funeral procession right-of-way and liability. School bus operators are to yield the right of way to a funeral procession. An emergency vehicle can pass a stopped school bus when it is displaying its alternating flashing red lights, provided it is in a life-threatening situation and goes by safely. If an emergency vehicle is approaching a stopped school bus (at a bus stop), the operator shall stop the loading/unloading process, close the service door and wait until the emergency vehicle has passed. Operators should follow additional procedures as determined by their local district policy. Students should be instructed about the passing of emergency vehicles if the situation ever arises, operators should keep the students in the bus with the doors closed, if possible.
Slide 19
IV-19
Driving Left of Center Permitted
When overtaking another vehicle
moving in the same direction and safe
to do so
When right lane is closed to traffic—
after yielding to oncoming traffic
When roadways have two or more
lanes moving in the same direction
One-way roadways
Multi-lane, two-way roadways
Passing can be an extremely hazardous maneuver. Laws concerning this maneuver have been designed to minimize the risk to the greatest extent possible. Operators should pay particular attention to these laws and never pass unless they are absolutely certain that the maneuver can be completed safely. Maneuvering a large piece of equipment such as a school bus can present some problems in situations that require skillful maneuvering. Most beginning operators are not aware of the limitations of the bus. It is extremely important that a beginning bus operator master the more difficult maneuvers during the behind the wheel training. Driving Left of Center Permitted • When overtaking another vehicle moving in the same direction and safe to do so; • When a right lane is closed to traffic—after yielding to oncoming traffic; • When roadways have two or more lanes moving in the same direction; • On one-way roadways; and • On multi-lane, two-way roadways.
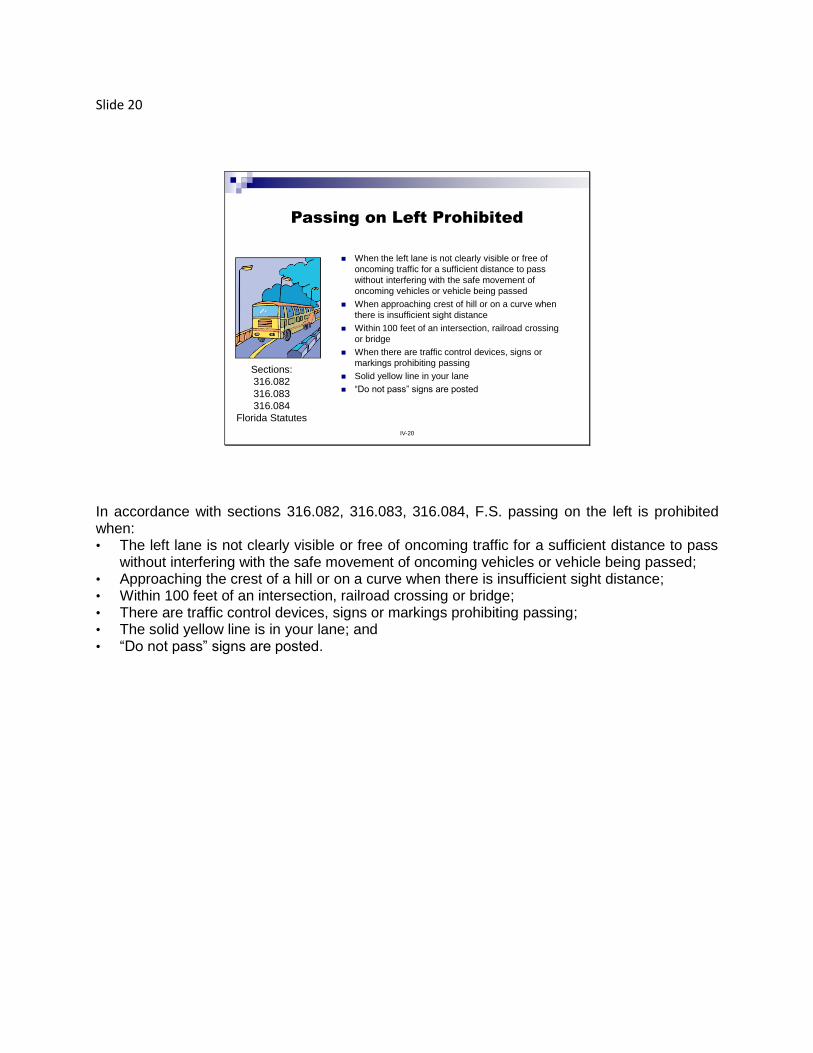
Slide 20
IV-20
Passing on Left Prohibited
When the left lane is not clearly visible or free of
oncoming traffic for a sufficient distance to pass
without interfering with the safe movement of
oncoming vehicles or vehicle being passed
When approaching crest of hill or on a curve when
there is insufficient sight distance
Within 100 feet of an intersection, railroad crossing
or bridge
When there are traffic control devices, signs or
markings prohibiting passing
Solid yellow line in your lane
“Do not pass” signs are posted
Sections:
316.082
316.083
316.084
Florida Statutes
In accordance with sections 316.082, 316.083, 316.084, F.S. passing on the left is prohibited when: • The left lane is not clearly visible or free of oncoming traffic for a sufficient distance to pass
without interfering with the safe movement of oncoming vehicles or vehicle being passed; • Approaching the crest of a hill or on a curve when there is insufficient sight distance; • Within 100 feet of an intersection, railroad crossing or bridge; • There are traffic control devices, signs or markings prohibiting passing; • The solid yellow line is in your lane; and • “Do not pass” signs are posted.
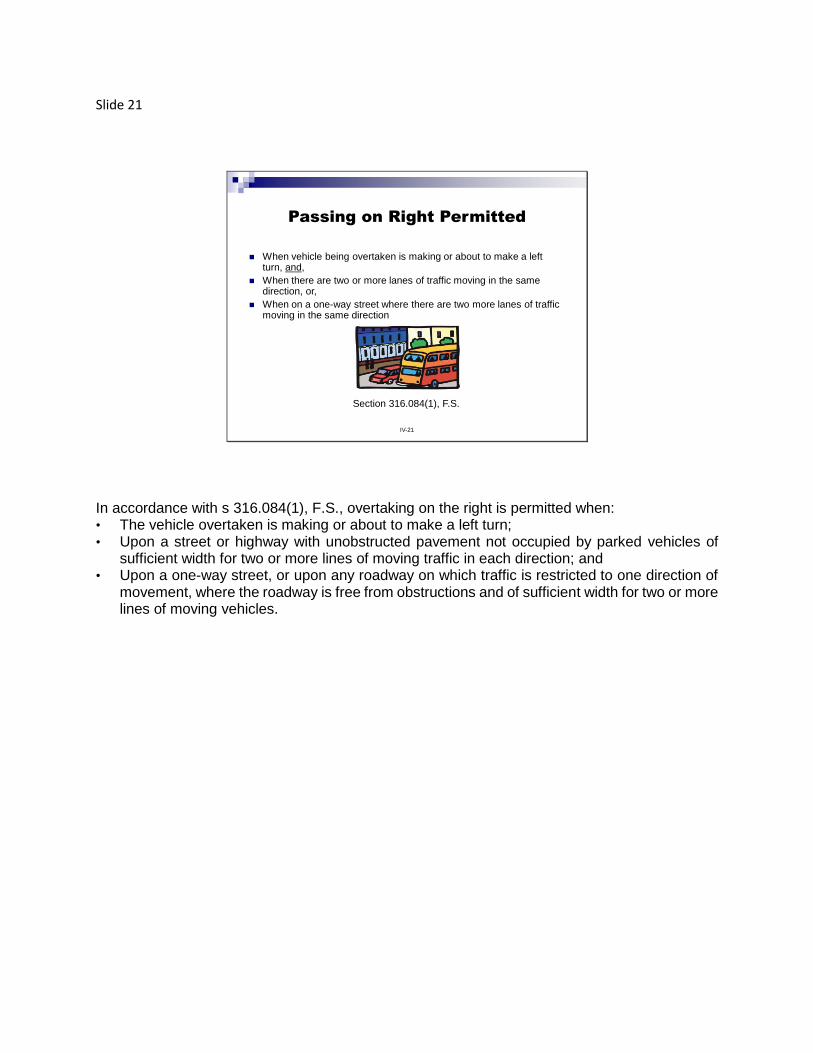
Slide 21
IV-21
Passing on Right Permitted
When vehicle being overtaken is making or about to make a left turn, and,
When there are two or more lanes of traffic moving in the same direction, or,
When on a one-way street where there are two more lanes of traffic moving in the same direction
Section 316.084(1), F.S.
In accordance with s 316.084(1), F.S., overtaking on the right is permitted when: • The vehicle overtaken is making or about to make a left turn; • Upon a street or highway with unobstructed pavement not occupied by parked vehicles of
sufficient width for two or more lines of moving traffic in each direction; and • Upon a one-way street, or upon any roadway on which traffic is restricted to one direction of
movement, where the roadway is free from obstructions and of sufficient width for two or more lines of moving vehicles.
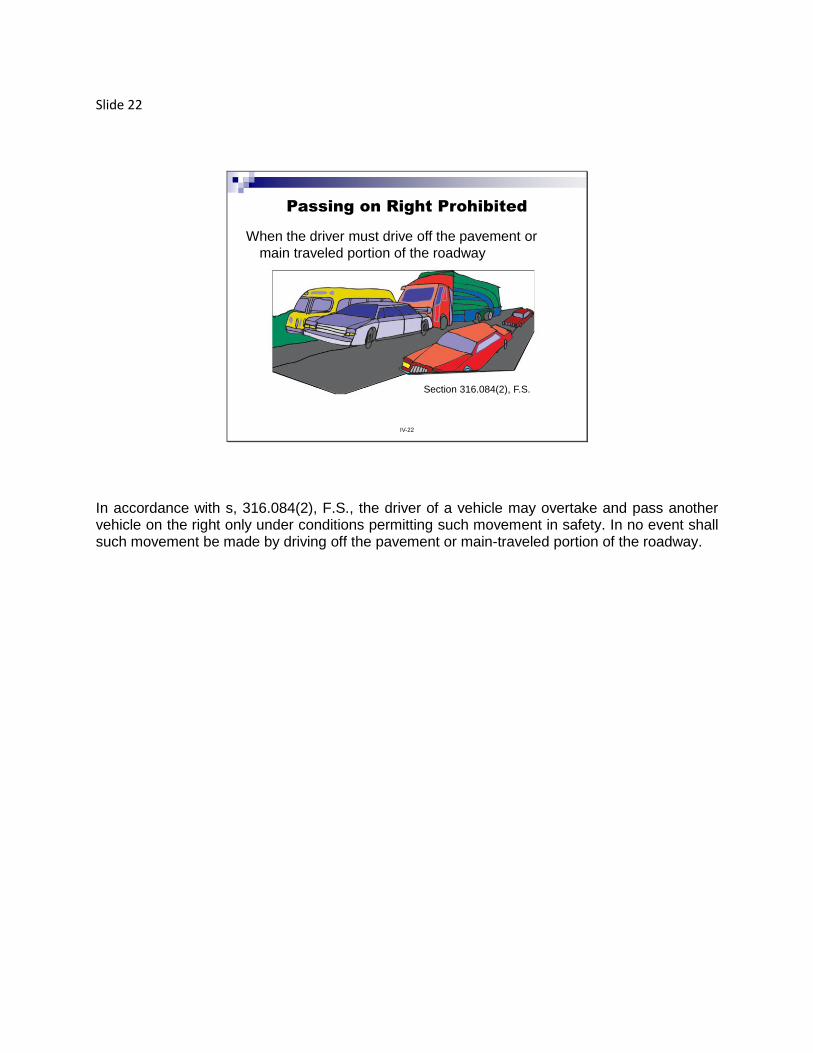
Slide 22
IV-22
Passing on Right Prohibited
When the driver must drive off the pavement or
main traveled portion of the roadway
Section 316.084(2), F.S.
In accordance with s, 316.084(2), F.S., the driver of a vehicle may overtake and pass another vehicle on the right only under conditions permitting such movement in safety. In no event shall such movement be made by driving off the pavement or main-traveled portion of the roadway.
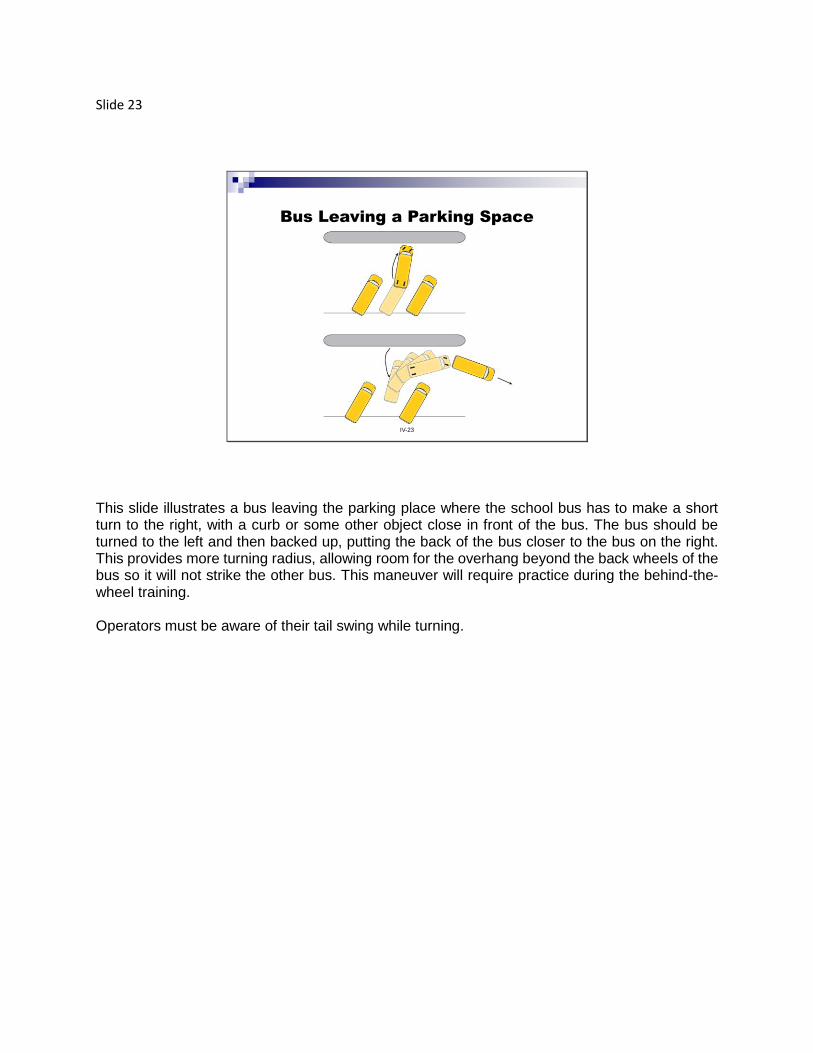
Slide 23
IV-23
Bus Leaving a Parking Space
This slide illustrates a bus leaving the parking place where the school bus has to make a short turn to the right, with a curb or some other object close in front of the bus. The bus should be turned to the left and then backed up, putting the back of the bus closer to the bus on the right. This provides more turning radius, allowing room for the overhang beyond the back wheels of the bus so it will not strike the other bus. This maneuver will require practice during the behind-the-wheel training. Operators must be aware of their tail swing while turning.
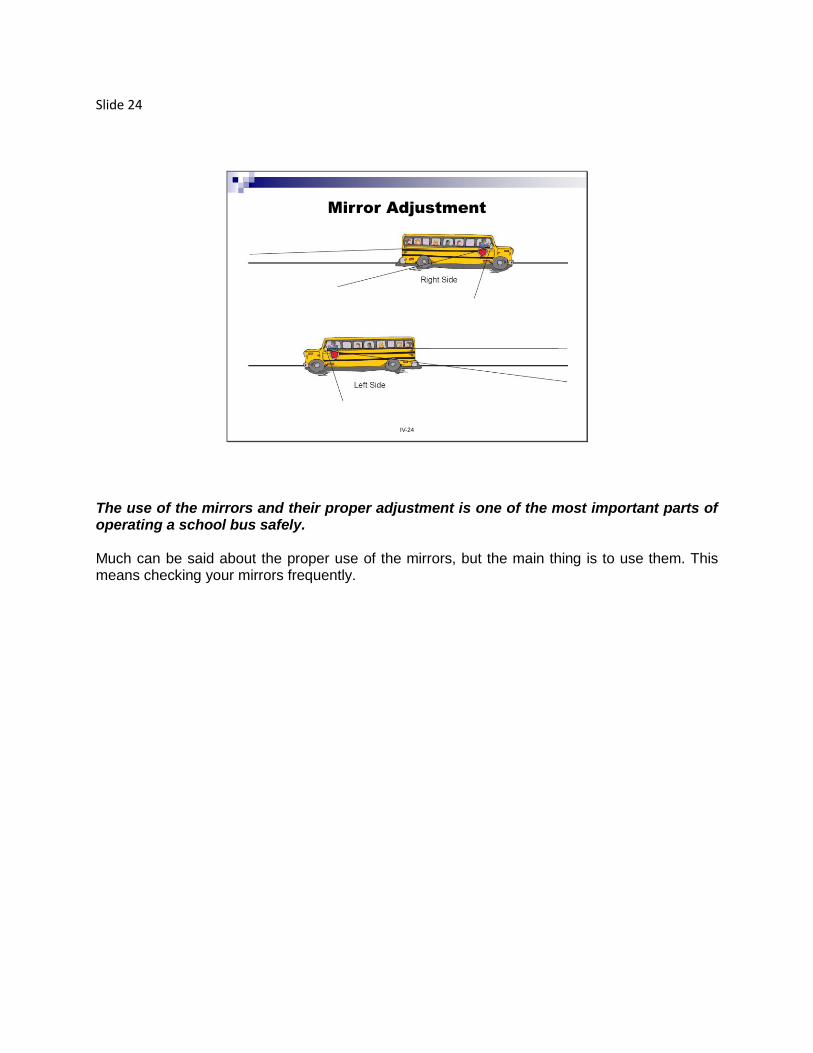
Slide 24
IV-24
Mirror Adjustment
The use of the mirrors and their proper adjustment is one of the most important parts of operating a school bus safely. Much can be said about the proper use of the mirrors, but the main thing is to use them. This means checking your mirrors frequently.
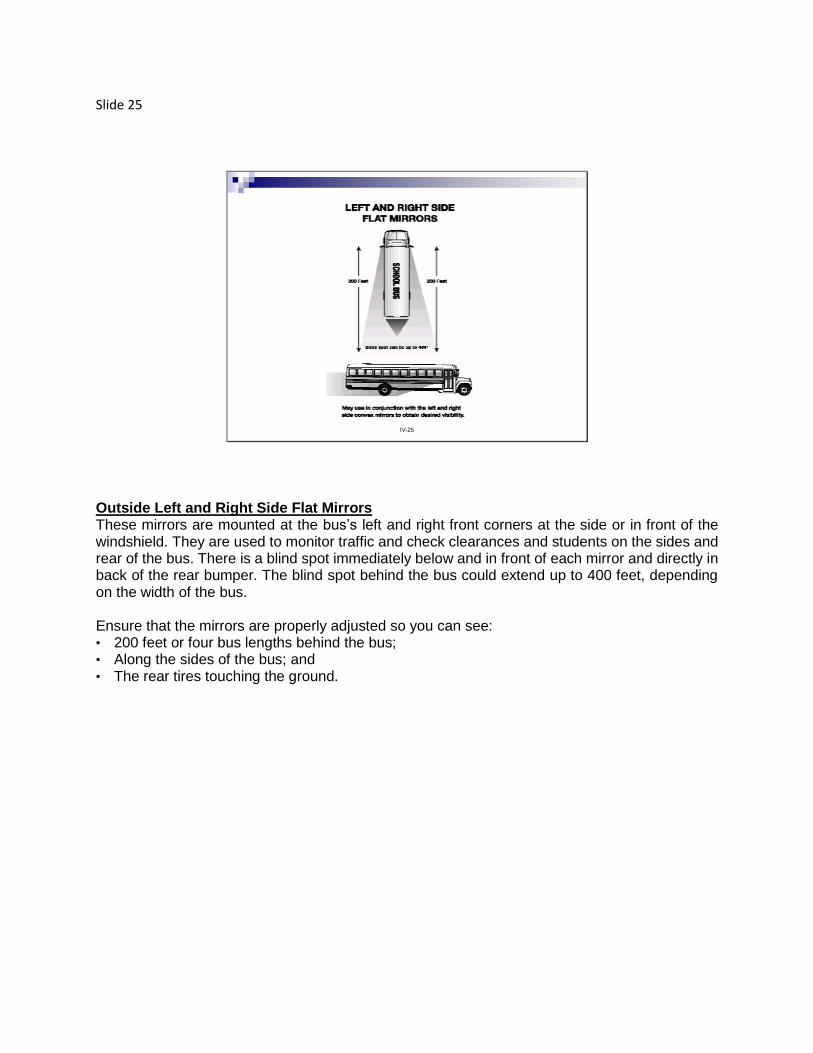
Slide 25
IV-25
Outside Left and Right Side Flat Mirrors These mirrors are mounted at the bus’s left and right front corners at the side or in front of the windshield. They are used to monitor traffic and check clearances and students on the sides and rear of the bus. There is a blind spot immediately below and in front of each mirror and directly in back of the rear bumper. The blind spot behind the bus could extend up to 400 feet, depending on the width of the bus. Ensure that the mirrors are properly adjusted so you can see: • 200 feet or four bus lengths behind the bus; • Along the sides of the bus; and • The rear tires touching the ground.
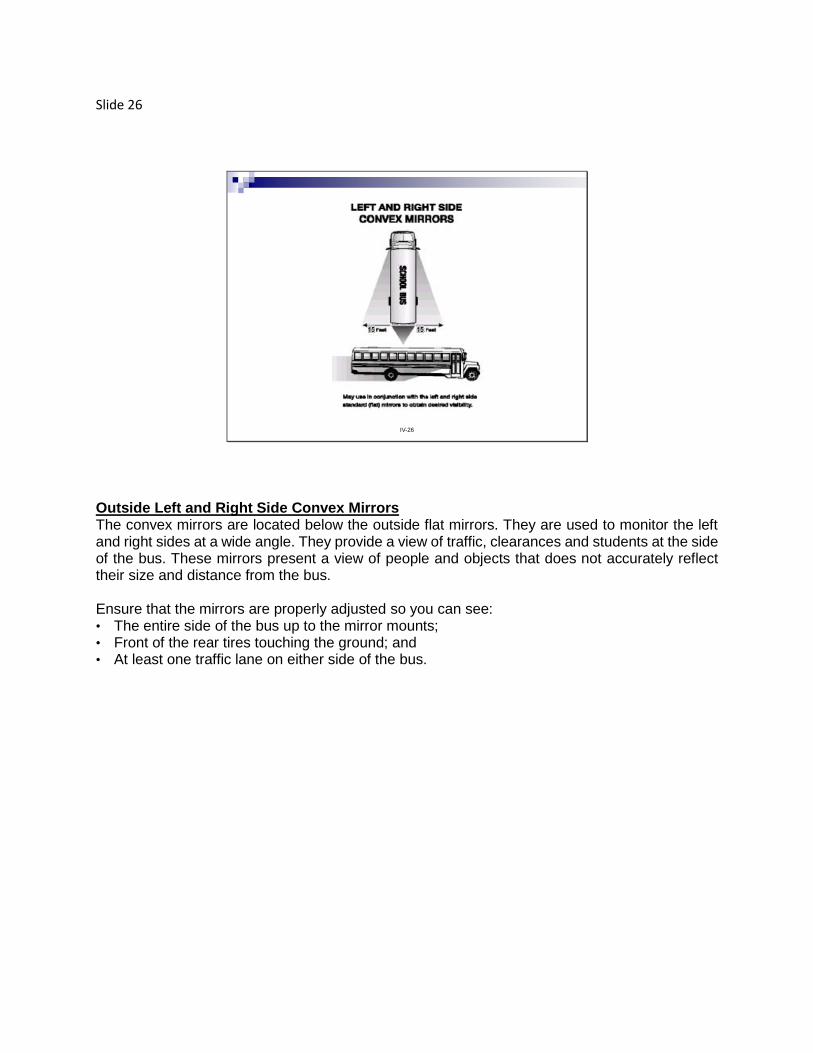
Slide 26
IV-26
Outside Left and Right Side Convex Mirrors The convex mirrors are located below the outside flat mirrors. They are used to monitor the left and right sides at a wide angle. They provide a view of traffic, clearances and students at the side of the bus. These mirrors present a view of people and objects that does not accurately reflect their size and distance from the bus. Ensure that the mirrors are properly adjusted so you can see: • The entire side of the bus up to the mirror mounts; • Front of the rear tires touching the ground; and • At least one traffic lane on either side of the bus.
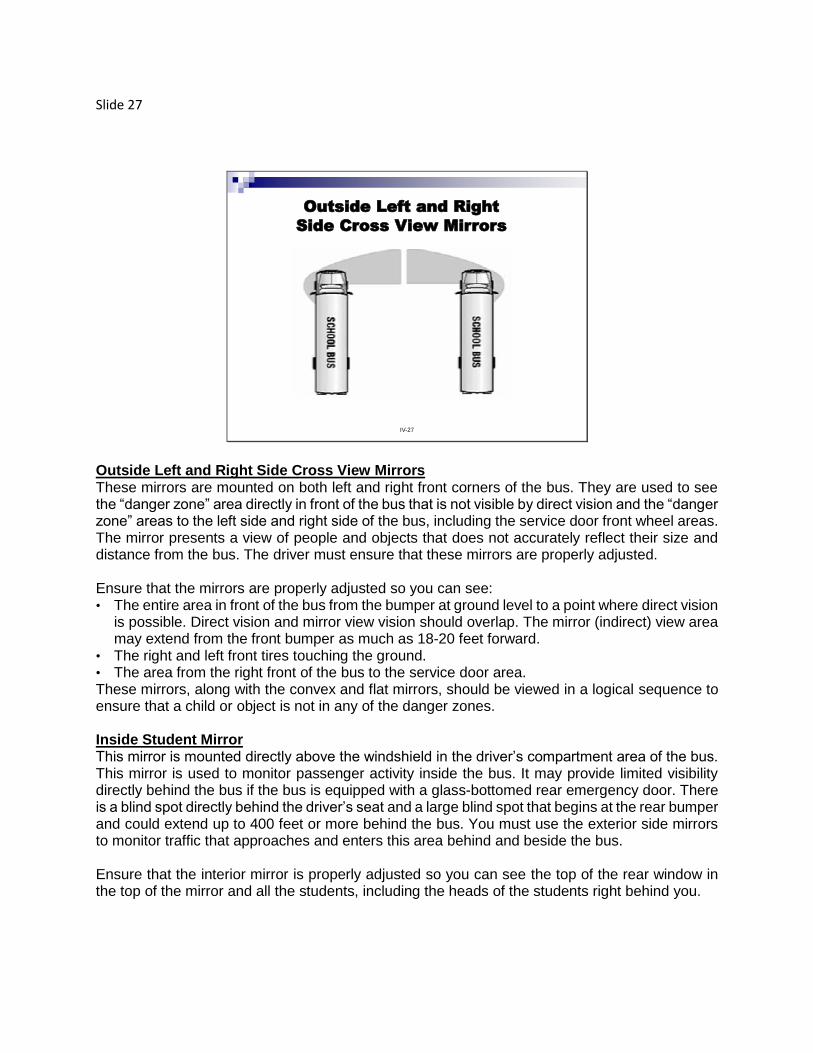
Slide 27
IV-27
Outside Left and Right
Side Cross View Mirrors
Outside Left and Right Side Cross View Mirrors These mirrors are mounted on both left and right front corners of the bus. They are used to see the “danger zone” area directly in front of the bus that is not visible by direct vision and the “danger zone” areas to the left side and right side of the bus, including the service door front wheel areas. The mirror presents a view of people and objects that does not accurately reflect their size and distance from the bus. The driver must ensure that these mirrors are properly adjusted. Ensure that the mirrors are properly adjusted so you can see: • The entire area in front of the bus from the bumper at ground level to a point where direct vision
is possible. Direct vision and mirror view vision should overlap. The mirror (indirect) view area may extend from the front bumper as much as 18-20 feet forward.
• The right and left front tires touching the ground. • The area from the right front of the bus to the service door area. These mirrors, along with the convex and flat mirrors, should be viewed in a logical sequence to ensure that a child or object is not in any of the danger zones.
Inside Student Mirror This mirror is mounted directly above the windshield in the driver’s compartment area of the bus. This mirror is used to monitor passenger activity inside the bus. It may provide limited visibility directly behind the bus if the bus is equipped with a glass-bottomed rear emergency door. There is a blind spot directly behind the driver’s seat and a large blind spot that begins at the rear bumper and could extend up to 400 feet or more behind the bus. You must use the exterior side mirrors to monitor traffic that approaches and enters this area behind and beside the bus. Ensure that the interior mirror is properly adjusted so you can see the top of the rear window in the top of the mirror and all the students, including the heads of the students right behind you.
Slide 28
Mirror Adjustment: The grid and cones pictured in this slide show the area that must be viewed by looking at the various mirrors required on the bus. This area of visibility is required by Federal Motor Vehicle Safety Standard (FMVSS) 111. The operator must be able to see the area along the front bumper, the area by the right front tire and the service door, the area by the left front tire with the crosswalk mirror system on each bus, and the areas along the side of the bus with the large side mirrors. Check adjustment, securement, cleanliness and discoloration of mirror systems. (If necessary, ask for help to adjust these outside mirrors). The large mirror inside of the bus is for viewing students only. Ensure that the bus is in neutral gear and the parking brake is set. Start the engine. Some districts paint the grid shown here on the bus compound, allowing drivers to drive on it and check their mirrors for correct placement before each route. Another exercisess for proper mirror adjustment is to cover all of the mirrors, indicating all of the blind spots in relation to a student. As you uncover each mirror and adjust it to the driver, it drives home the importance of the mirror as well as its adjustment to the driver.
Slide 29
IV-29
View Obstructions
Proper use of mirrors is critical to safe driving.
Operators should also be aware of hazards posed by
objects that can block their view of other motorists,
bicyclists, and pedestrians. View obstructions can include:
The bus mirrors themselves.
Bus corner posts.
Improperly placed bus route signs, brooms, misadjusted visor or other objects.
Signs, vehicles or objects outside bus.
View Obstructions Proper use of mirrors is critical to safe driving. Still, operators should be aware of hazards posed by objects that can block their view of other motorists, bicyclists and pedestrians. View obstructions can include: • The bus mirrors themselves; • Bus corner posts; • Improperly placed bus route signs, brooms, misadjusted visor or other objects; and • Signs, vehicles or objects outside the bus. NOTE: There cannot be any items affixed to the service door windows, windshield or operator’s window, including obstructions on the sun visor, when the bus is in motion. Items laying on the dashboard can also cause visual obstructions.
Slide 30
IV-30
Avoiding View Obstructions
To avoid the hazard of failing to see moving vehicles,
pedestrians, or other hazards due to view obstructions, the
bus operator must:
Ensure there are no unauthorized items blocking the windshield, side windows, or door glass.
Ensure windshield wipers are in good condition and operating properly.
Move forward, backward, and side to side in the seat, as needed to see everything around and approaching the bus, especially at intersections.
Be aware that the greatest hazard posed by view obstruction is not seeing other vehicles or pedestrians approaching the bus from the left or the right.
Avoiding View Obstructions To avoid the hazard of failing to see moving vehicles, pedestrians or other dangers due to view obstructions, the bus operator must: • Ensure that there are no unauthorized items blocking the windshield, side windows or door
glass. • Ensure windshield wipers are in good condition and operating properly. • Move forward, backward, and side to side in the seat, as needed, to see everything around
and approaching the bus, especially at intersections. • Be aware that the greatest hazard posed by view obstruction is not seeing other vehicles or
pedestrians approaching the bus from the left or the right.
Slide 31
IV-31
Right Turn with Yield Sign and
Acceleration Lane
Right Turn with Yield Sign and Acceleration Lane There are two important considerations in approaching a yield sign with an acceleration lane: • Check your mirrors when maneuvering into the proper lane. These lanes are designed to allow
buses to stay within the markings. Do not leave the back of the bus in the lane of traffic. • Where there is an acceleration lane, you DO NOT have to stop. Be careful and proceed only
when the traffic permits. NOTE: IN ALL TURNING SITUATIONS, THE OPERATOR MUST BE AWARE OF THE TAIL SWING FROM THE
SCHOOL BUS!
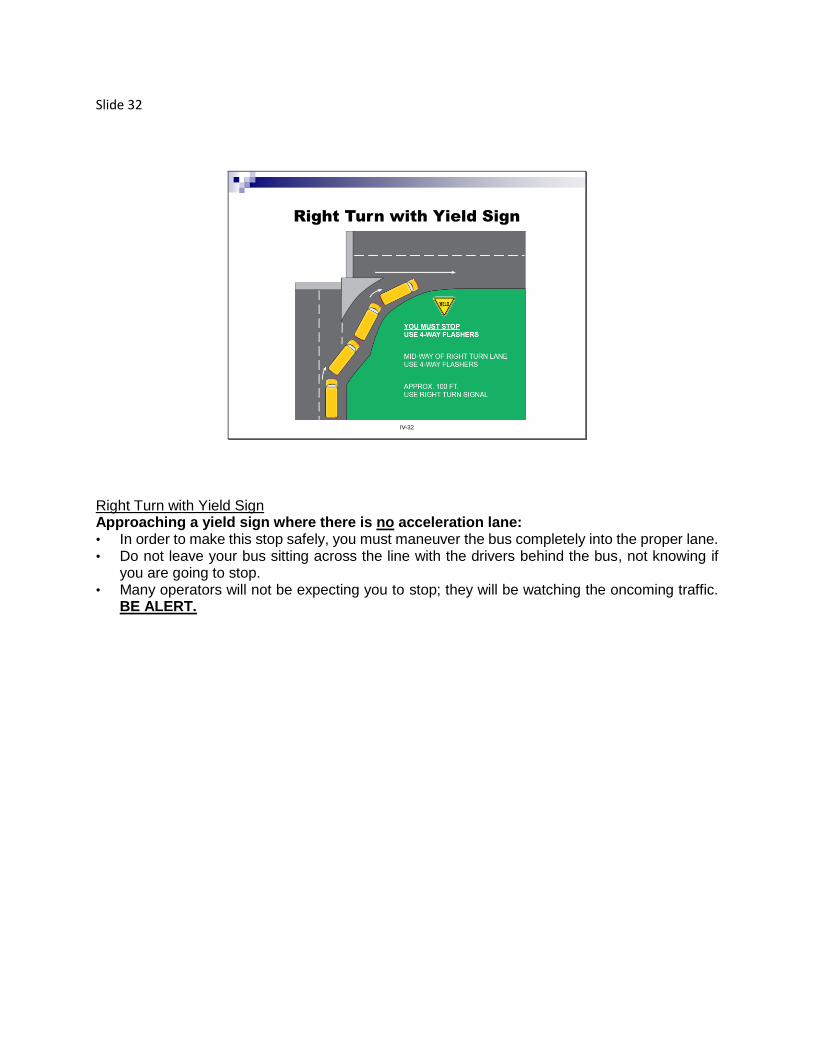
Slide 32
IV-32
Right Turn with Yield Sign
Right Turn with Yield Sign Approaching a yield sign where there is no acceleration lane: • In order to make this stop safely, you must maneuver the bus completely into the proper lane. • Do not leave your bus sitting across the line with the drivers behind the bus, not knowing if
you are going to stop. • Many operators will not be expecting you to stop; they will be watching the oncoming traffic.
BE ALERT.
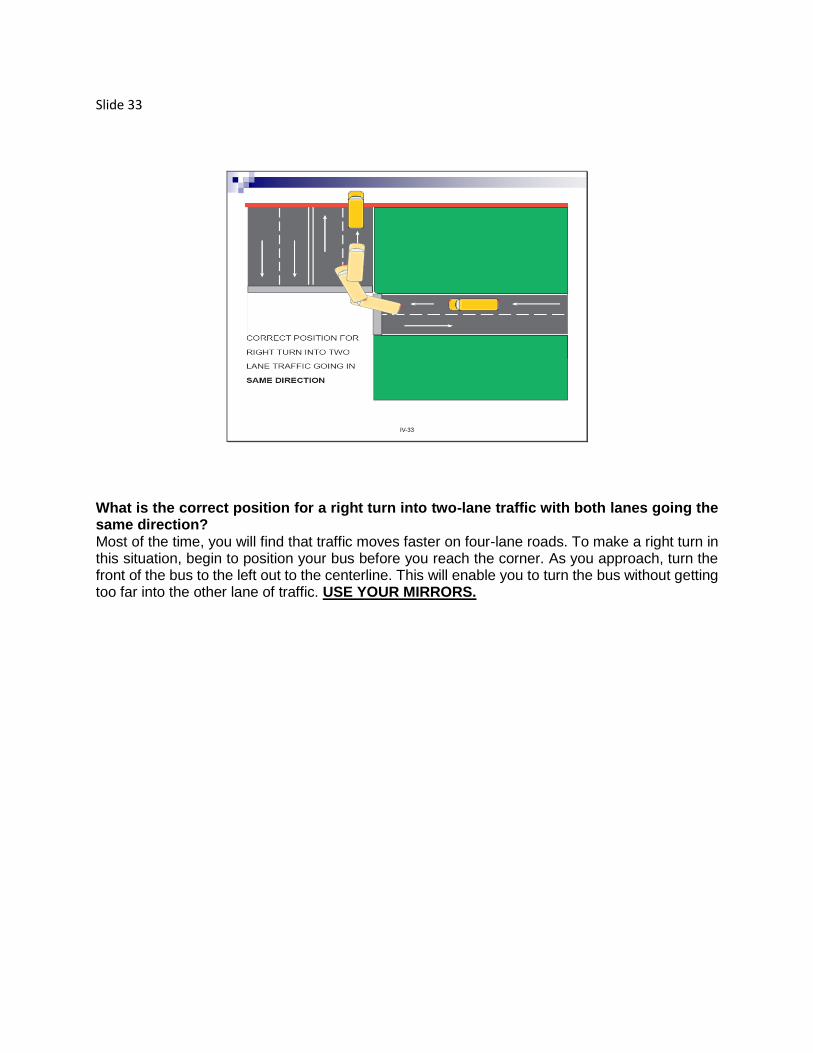
Slide 33
IV-33
What is the correct position for a right turn into two-lane traffic with both lanes going the same direction? Most of the time, you will find that traffic moves faster on four-lane roads. To make a right turn in this situation, begin to position your bus before you reach the corner. As you approach, turn the front of the bus to the left out to the centerline. This will enable you to turn the bus without getting too far into the other lane of traffic. USE YOUR MIRRORS.
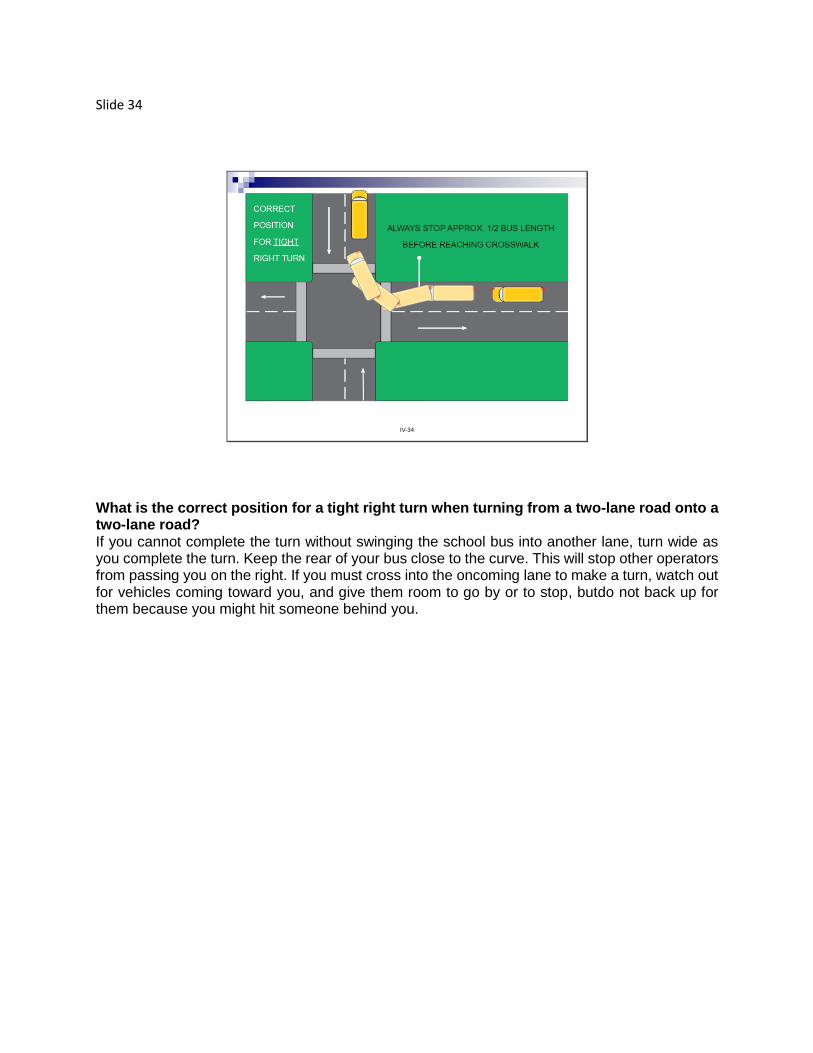
Slide 34
IV-34
What is the correct position for a tight right turn when turning from a two-lane road onto a two-lane road? If you cannot complete the turn without swinging the school bus into another lane, turn wide as you complete the turn. Keep the rear of your bus close to the curve. This will stop other operators from passing you on the right. If you must cross into the oncoming lane to make a turn, watch out for vehicles coming toward you, and give them room to go by or to stop, butdo not back up for them because you might hit someone behind you.
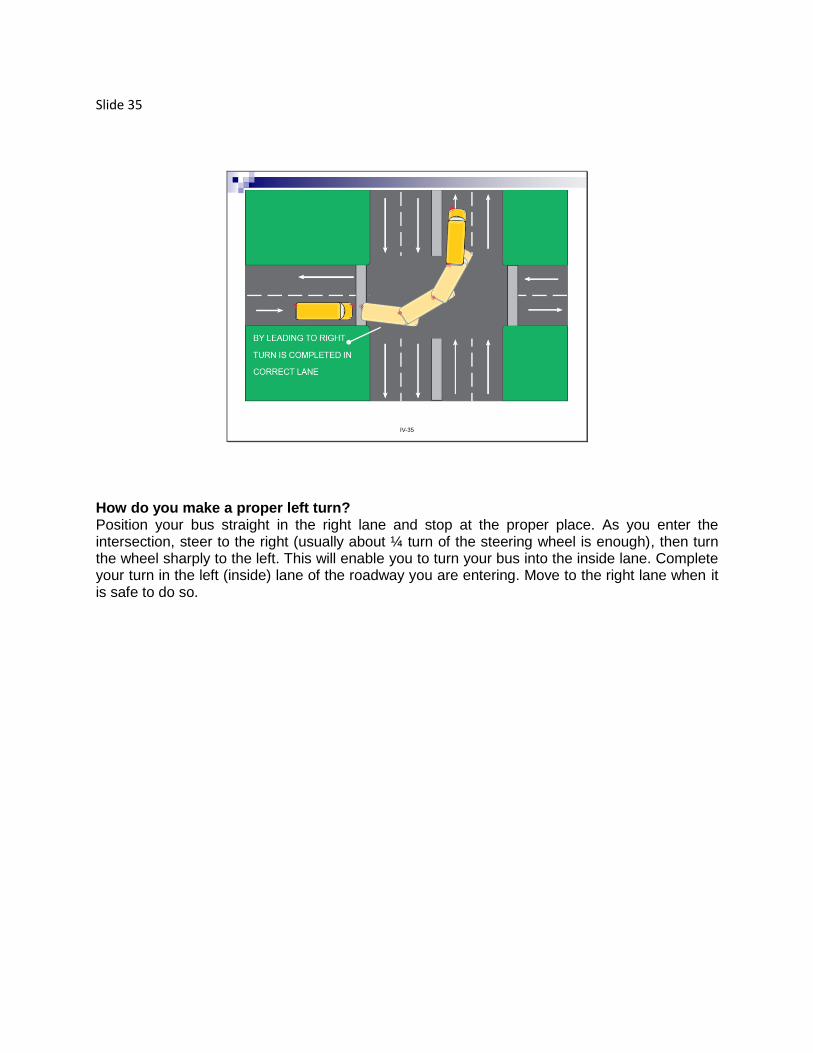
Slide 35
IV-35
How do you make a proper left turn? Position your bus straight in the right lane and stop at the proper place. As you enter the intersection, steer to the right (usually about ¼ turn of the steering wheel is enough), then turn the wheel sharply to the left. This will enable you to turn your bus into the inside lane. Complete your turn in the left (inside) lane of the roadway you are entering. Move to the right lane when it is safe to do so.
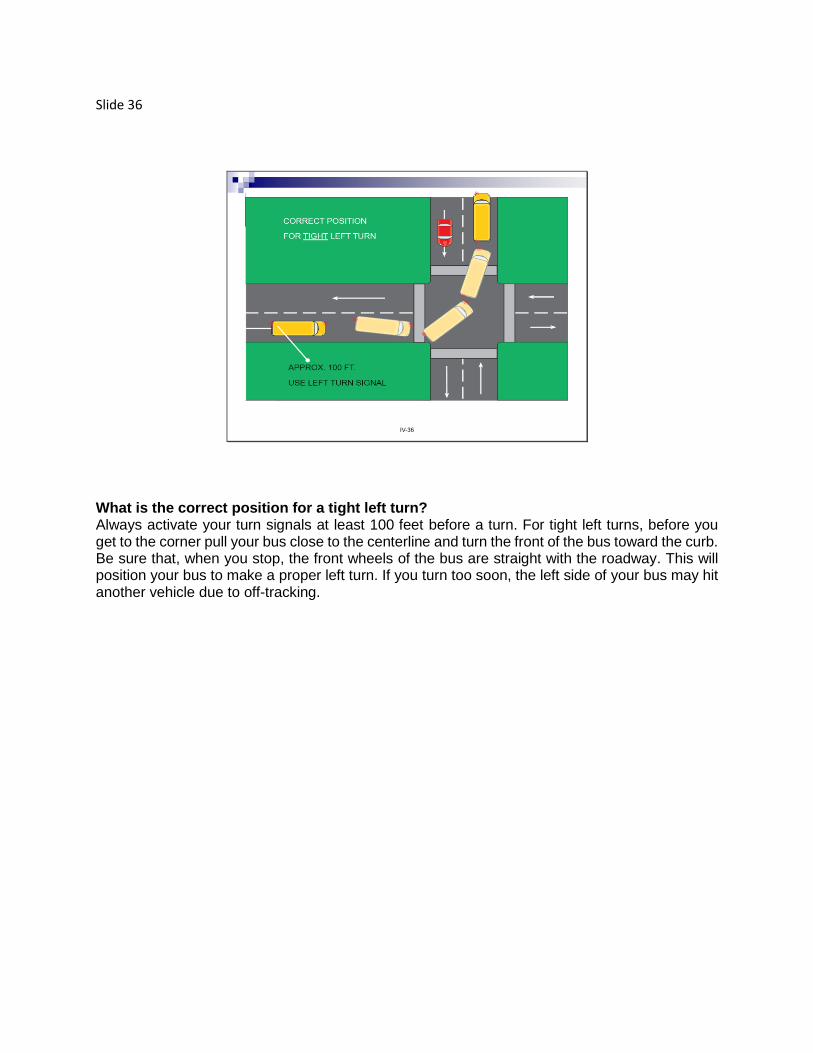
Slide 36
IV-36
What is the correct position for a tight left turn? Always activate your turn signals at least 100 feet before a turn. For tight left turns, before you get to the corner pull your bus close to the centerline and turn the front of the bus toward the curb. Be sure that, when you stop, the front wheels of the bus are straight with the roadway. This will position your bus to make a proper left turn. If you turn too soon, the left side of your bus may hit another vehicle due to off-tracking.
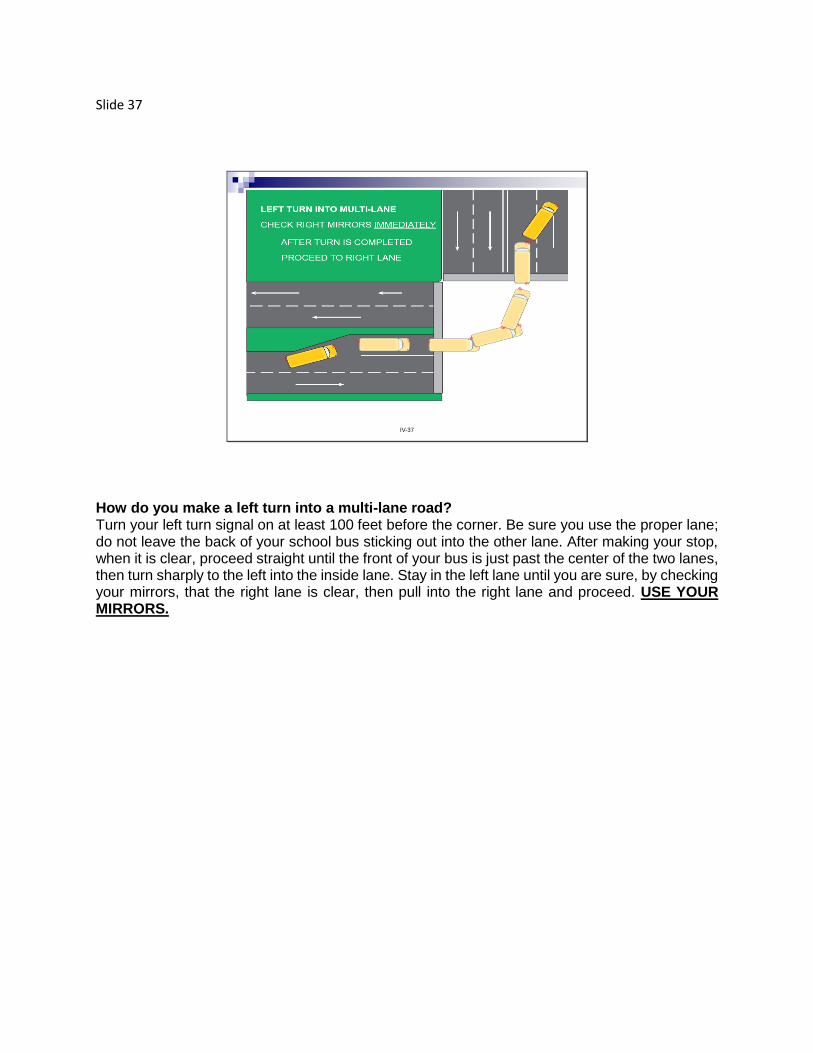
Slide 37
IV-37
How do you make a left turn into a multi-lane road? Turn your left turn signal on at least 100 feet before the corner. Be sure you use the proper lane; do not leave the back of your school bus sticking out into the other lane. After making your stop, when it is clear, proceed straight until the front of your bus is just past the center of the two lanes, then turn sharply to the left into the inside lane. Stay in the left lane until you are sure, by checking your mirrors, that the right lane is clear, then pull into the right lane and proceed. USE YOUR MIRRORS.
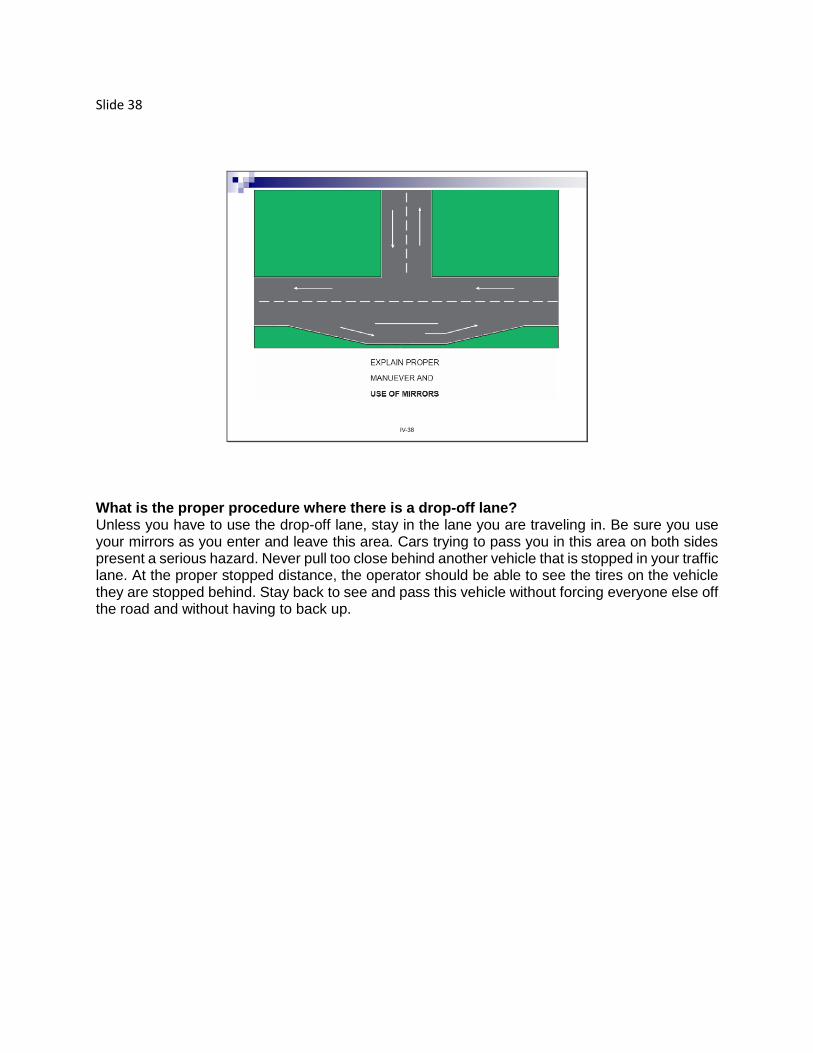
Slide 38
IV-38
What is the proper procedure where there is a drop-off lane? Unless you have to use the drop-off lane, stay in the lane you are traveling in. Be sure you use your mirrors as you enter and leave this area. Cars trying to pass you in this area on both sides present a serious hazard. Never pull too close behind another vehicle that is stopped in your traffic lane. At the proper stopped distance, the operator should be able to see the tires on the vehicle they are stopped behind. Stay back to see and pass this vehicle without forcing everyone else off the road and without having to back up.
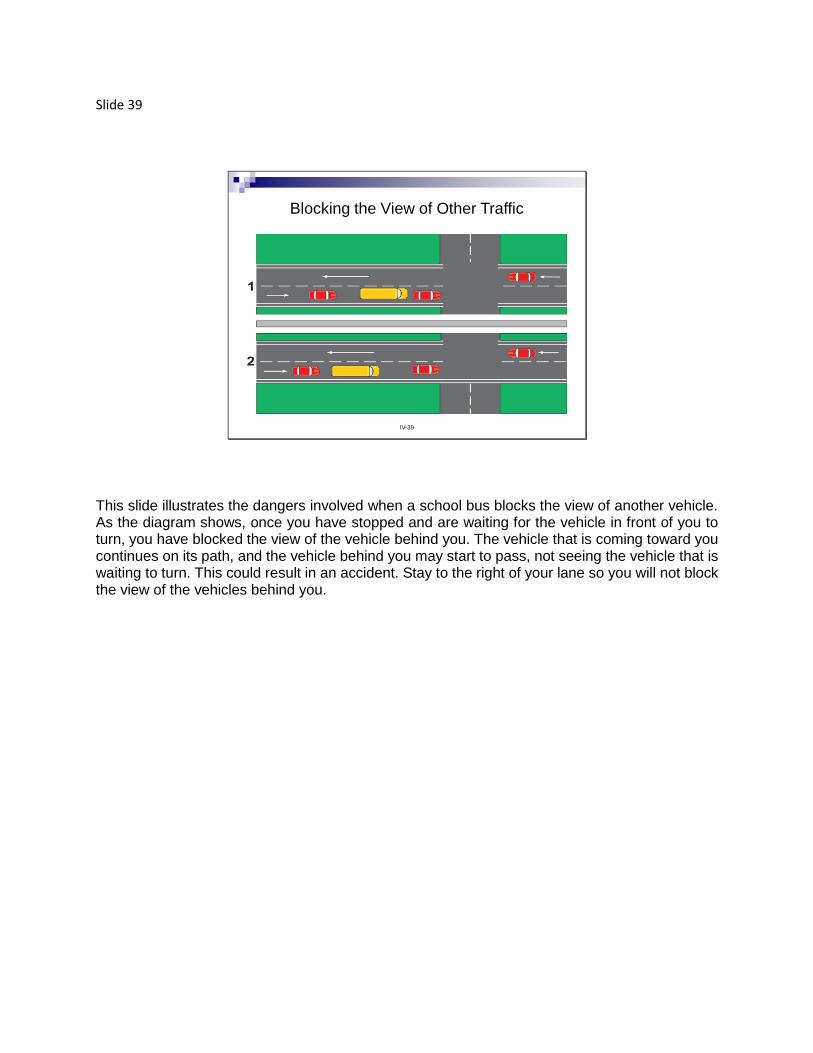
Slide 39
Blocking the View of Other Traffic
IV-39
This slide illustrates the dangers involved when a school bus blocks the view of another vehicle. As the diagram shows, once you have stopped and are waiting for the vehicle in front of you to turn, you have blocked the view of the vehicle behind you. The vehicle that is coming toward you continues on its path, and the vehicle behind you may start to pass, not seeing the vehicle that is waiting to turn. This could result in an accident. Stay to the right of your lane so you will not block the view of the vehicles behind you.
Slide 40
IV-40
THINK USE CAUTION WHEN ENTERING INTERSECTION
WITH TRAFFIC LIGHT
Reduce speed before entering the intersection, even with a green traffic light. Beware of the length of your school bus. Do not cross a divided highway for a left turn until you can cross all lanes safely.
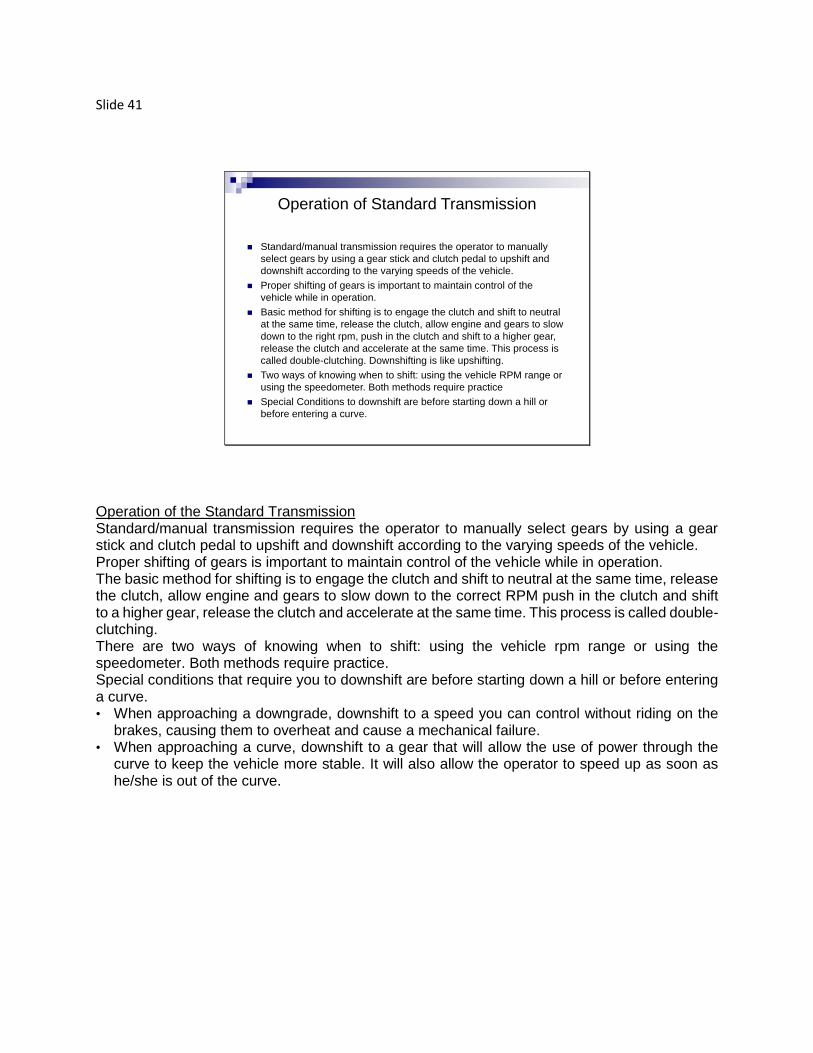
Slide 41
Operation of Standard Transmission
Standard/manual transmission requires the operator to manually
select gears by using a gear stick and clutch pedal to upshift and
downshift according to the varying speeds of the vehicle.
Proper shifting of gears is important to maintain control of the
vehicle while in operation.
Basic method for shifting is to engage the clutch and shift to neutral
at the same time, release the clutch, allow engine and gears to slow
down to the right rpm, push in the clutch and shift to a higher gear,
release the clutch and accelerate at the same time. This process is
called double-clutching. Downshifting is like upshifting.
Two ways of knowing when to shift: using the vehicle RPM range or
using the speedometer. Both methods require practice
Special Conditions to downshift are before starting down a hill or
before entering a curve.
Operation of the Standard Transmission Standard/manual transmission requires the operator to manually select gears by using a gear stick and clutch pedal to upshift and downshift according to the varying speeds of the vehicle. Proper shifting of gears is important to maintain control of the vehicle while in operation. The basic method for shifting is to engage the clutch and shift to neutral at the same time, release the clutch, allow engine and gears to slow down to the correct RPM push in the clutch and shift to a higher gear, release the clutch and accelerate at the same time. This process is called double-clutching. There are two ways of knowing when to shift: using the vehicle rpm range or using the speedometer. Both methods require practice. Special conditions that require you to downshift are before starting down a hill or before entering a curve. • When approaching a downgrade, downshift to a speed you can control without riding on the
brakes, causing them to overheat and cause a mechanical failure. • When approaching a curve, downshift to a gear that will allow the use of power through the
curve to keep the vehicle more stable. It will also allow the operator to speed up as soon as he/she is out of the curve.
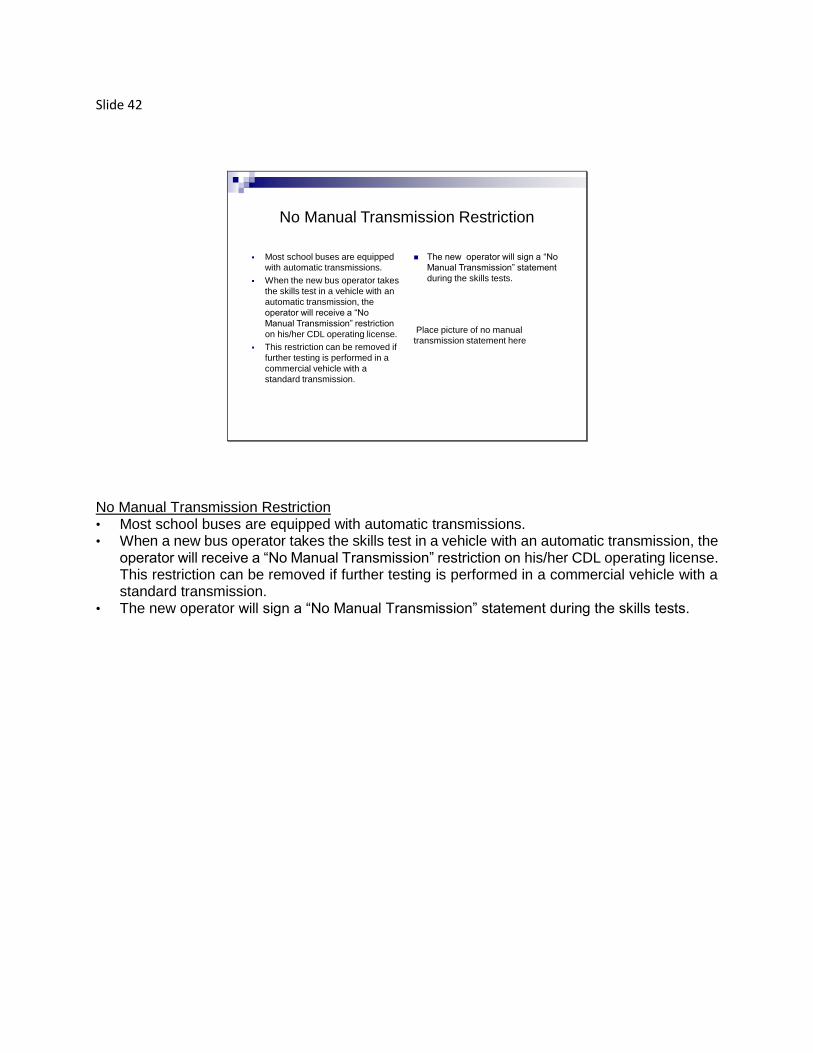
Slide 42
Most school buses are equipped
with automatic transmissions.
When the new bus operator takes
the skills test in a vehicle with an
automatic transmission, the
operator will receive a “No
Manual Transmission” restriction
on his/her CDL operating license.
This restriction can be removed if
further testing is performed in a
commercial vehicle with a
standard transmission.
The new operator will sign a “No
Manual Transmission” statement
during the skills tests.
Place picture of no manual
transmission statement here
No Manual Transmission Restriction
No Manual Transmission Restriction • Most school buses are equipped with automatic transmissions. • When a new bus operator takes the skills test in a vehicle with an automatic transmission, the
operator will receive a “No Manual Transmission” restriction on his/her CDL operating license. This restriction can be removed if further testing is performed in a commercial vehicle with a standard transmission.
• The new operator will sign a “No Manual Transmission” statement during the skills tests.
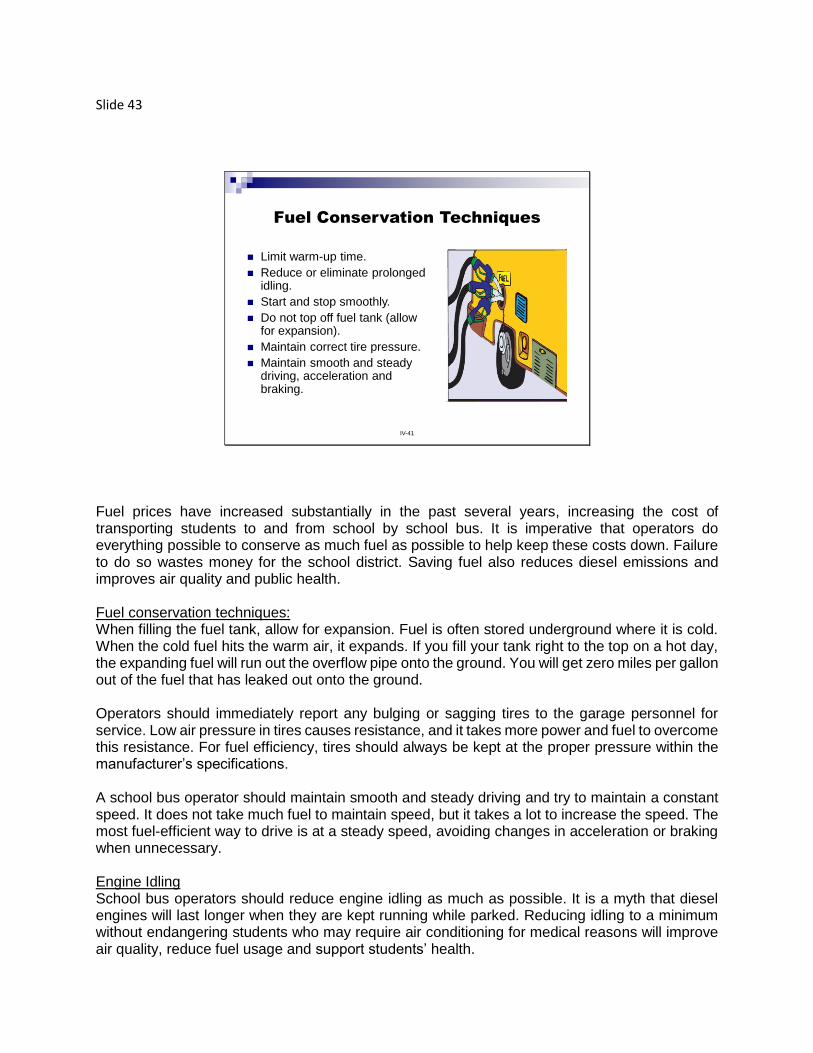
Slide 43
IV-41
Fuel Conservation Techniques
Limit warm-up time.
Reduce or eliminate prolonged idling.
Start and stop smoothly.
Do not top off fuel tank (allow for expansion).
Maintain correct tire pressure.
Maintain smooth and steady driving, acceleration and braking.
Fuel prices have increased substantially in the past several years, increasing the cost of transporting students to and from school by school bus. It is imperative that operators do everything possible to conserve as much fuel as possible to help keep these costs down. Failure to do so wastes money for the school district. Saving fuel also reduces diesel emissions and improves air quality and public health. Fuel conservation techniques: When filling the fuel tank, allow for expansion. Fuel is often stored underground where it is cold. When the cold fuel hits the warm air, it expands. If you fill your tank right to the top on a hot day, the expanding fuel will run out the overflow pipe onto the ground. You will get zero miles per gallon out of the fuel that has leaked out onto the ground. Operators should immediately report any bulging or sagging tires to the garage personnel for service. Low air pressure in tires causes resistance, and it takes more power and fuel to overcome this resistance. For fuel efficiency, tires should always be kept at the proper pressure within the manufacturer’s specifications. A school bus operator should maintain smooth and steady driving and try to maintain a constant speed. It does not take much fuel to maintain speed, but it takes a lot to increase the speed. The most fuel-efficient way to drive is at a steady speed, avoiding changes in acceleration or braking when unnecessary. Engine Idling School bus operators should reduce engine idling as much as possible. It is a myth that diesel engines will last longer when they are kept running while parked. Reducing idling to a minimum without endangering students who may require air conditioning for medical reasons will improve air quality, reduce fuel usage and support students’ health.
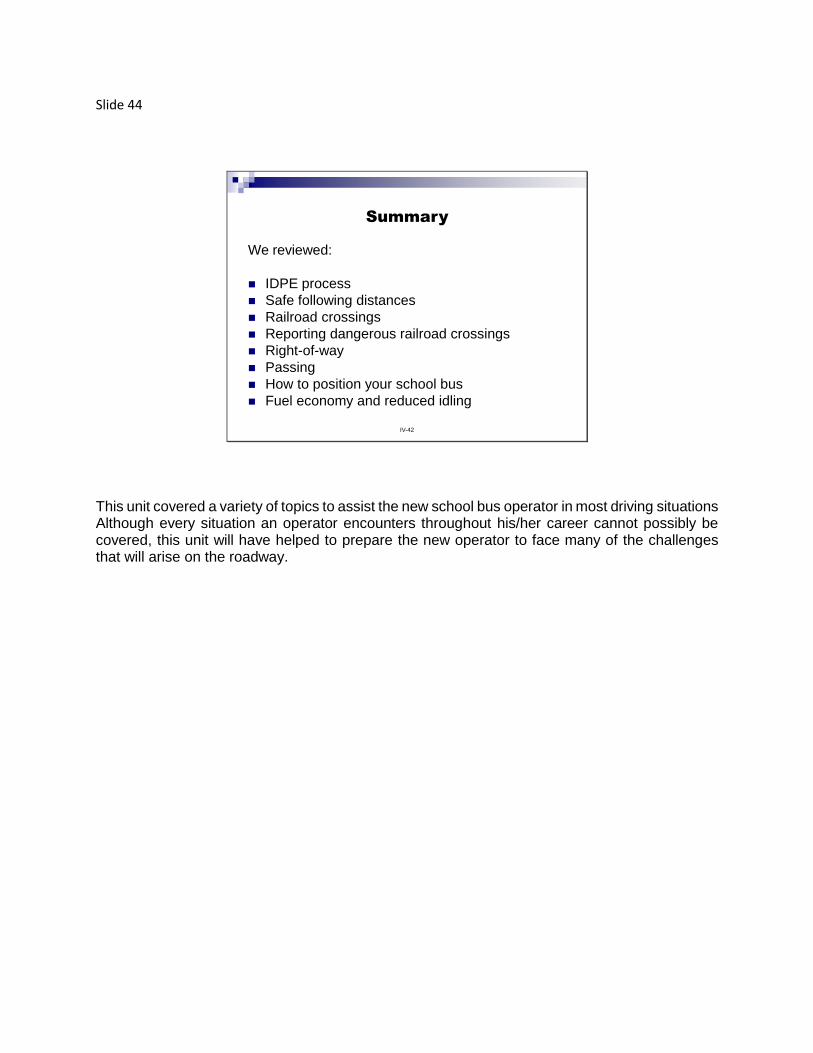
Slide 44
IV-42
Summary
We reviewed:
IDPE process
Safe following distances
Railroad crossings
Reporting dangerous railroad crossings
Right-of-way
Passing
How to position your school bus
Fuel economy and reduced idling
This unit covered a variety of topics to assist the new school bus operator in most driving situations Although every situation an operator encounters throughout his/her career cannot possibly be covered, this unit will have helped to prepare the new operator to face many of the challenges that will arise on the roadway.
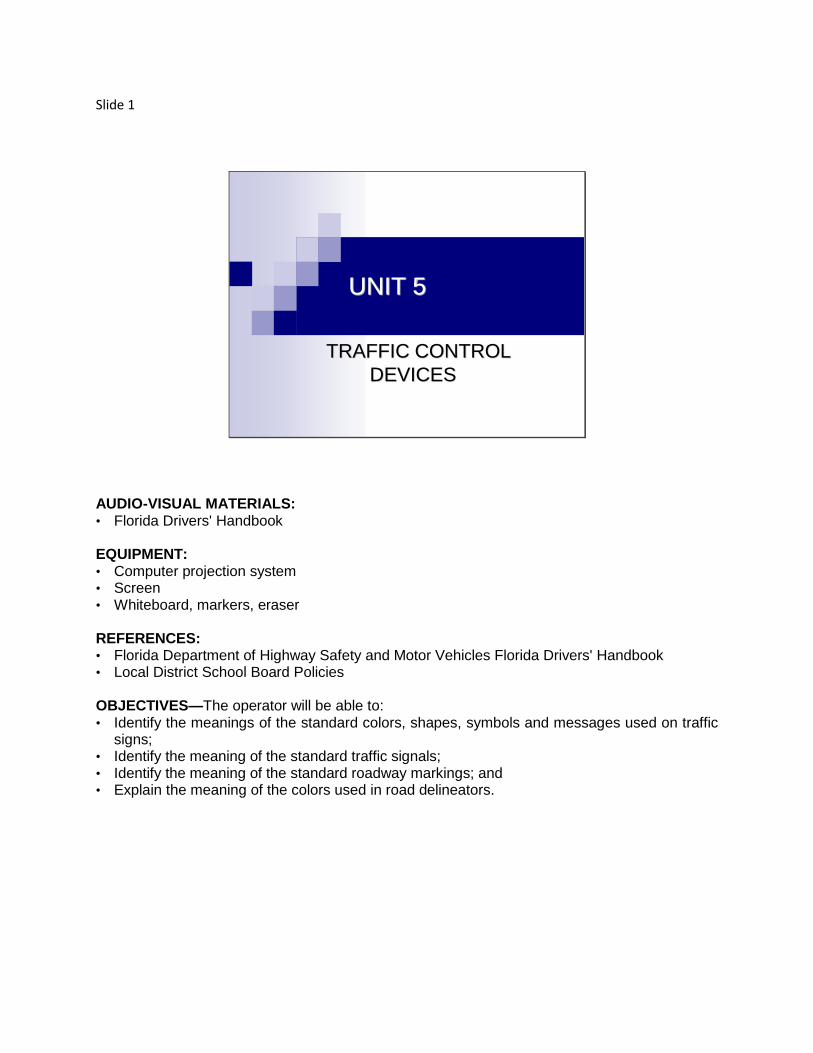
Slide 1
UNIT 5
TRAFFIC CONTROL
DEVICES
AUDIO-VISUAL MATERIALS: • Florida Drivers' Handbook EQUIPMENT: • Computer projection system • Screen • Whiteboard, markers, eraser REFERENCES: • Florida Department of Highway Safety and Motor Vehicles Florida Drivers' Handbook • Local District School Board Policies OBJECTIVES—The operator will be able to: • Identify the meanings of the standard colors, shapes, symbols and messages used on traffic
signs; • Identify the meaning of the standard traffic signals; • Identify the meaning of the standard roadway markings; and • Explain the meaning of the colors used in road delineators.
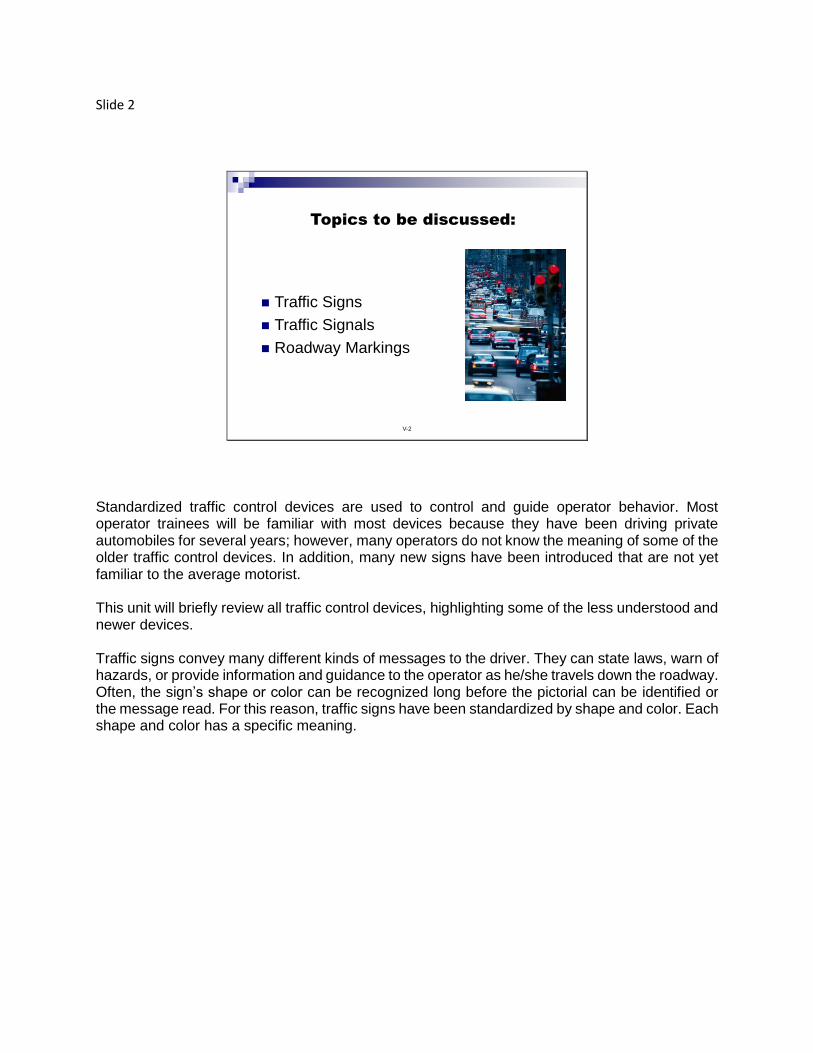
Slide 2
V-2
Topics to be discussed:
Traffic Signs
Traffic Signals
Roadway Markings
Standardized traffic control devices are used to control and guide operator behavior. Most operator trainees will be familiar with most devices because they have been driving private automobiles for several years; however, many operators do not know the meaning of some of the older traffic control devices. In addition, many new signs have been introduced that are not yet familiar to the average motorist. This unit will briefly review all traffic control devices, highlighting some of the less understood and newer devices. Traffic signs convey many different kinds of messages to the driver. They can state laws, warn of hazards, or provide information and guidance to the operator as he/she travels down the roadway. Often, the sign’s shape or color can be recognized long before the pictorial can be identified or the message read. For this reason, traffic signs have been standardized by shape and color. Each shape and color has a specific meaning.
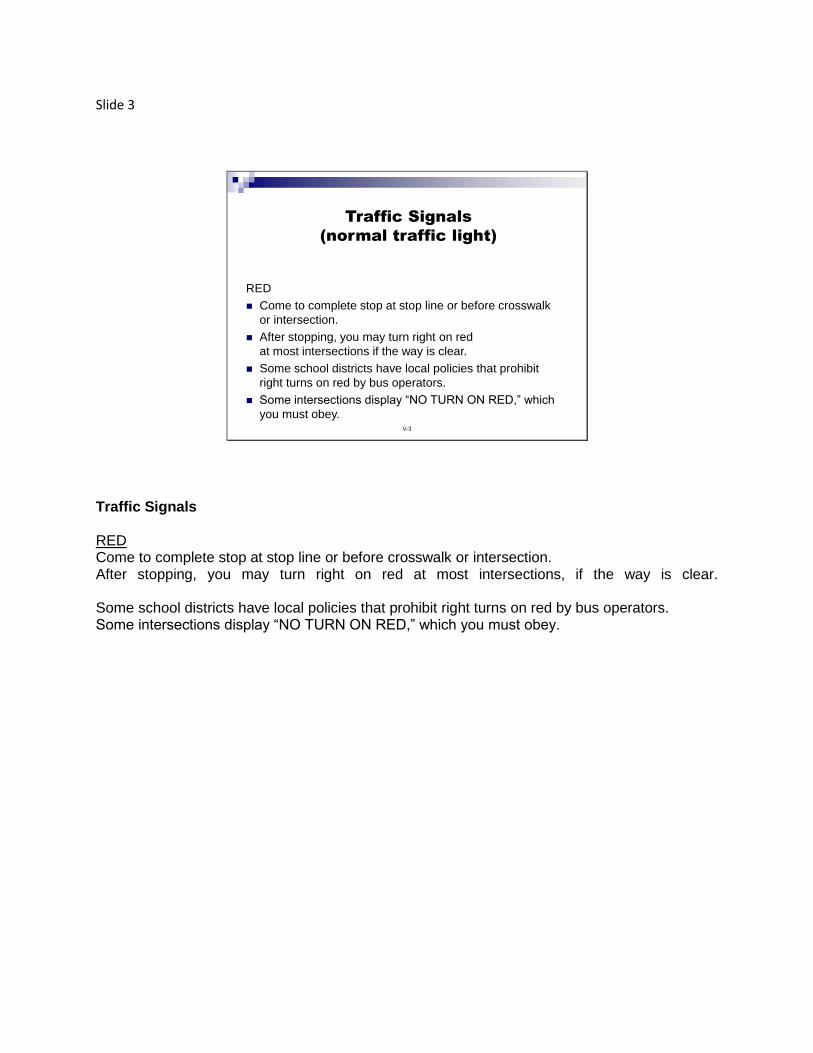
Slide 3
V-3
Traffic Signals
(normal traffic light)
RED
Come to complete stop at stop line or before crosswalk
or intersection.
After stopping, you may turn right on red
at most intersections if the way is clear.
Some school districts have local policies that prohibit
right turns on red by bus operators.
Some intersections display “NO TURN ON RED,” which
you must obey.
Traffic Signals RED Come to complete stop at stop line or before crosswalk or intersection. After stopping, you may turn right on red at most intersections, if the way is clear. Some school districts have local policies that prohibit right turns on red by bus operators. Some intersections display “NO TURN ON RED,” which you must obey.
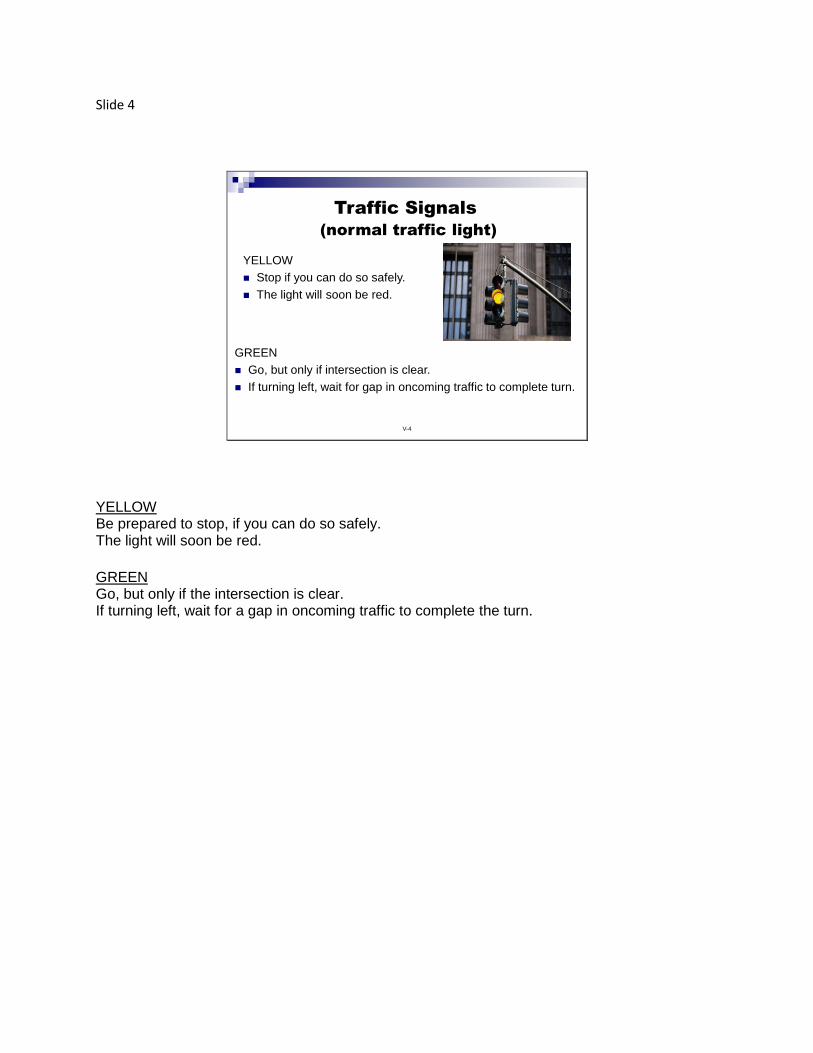
Slide 4
V-4
Traffic Signals
(normal traffic light)
YELLOW
Stop if you can do so safely.
The light will soon be red.
GREEN
Go, but only if intersection is clear.
If turning left, wait for gap in oncoming traffic to complete turn.
YELLOW Be prepared to stop, if you can do so safely. The light will soon be red.
GREEN Go, but only if the intersection is clear. If turning left, wait for a gap in oncoming traffic to complete the turn.
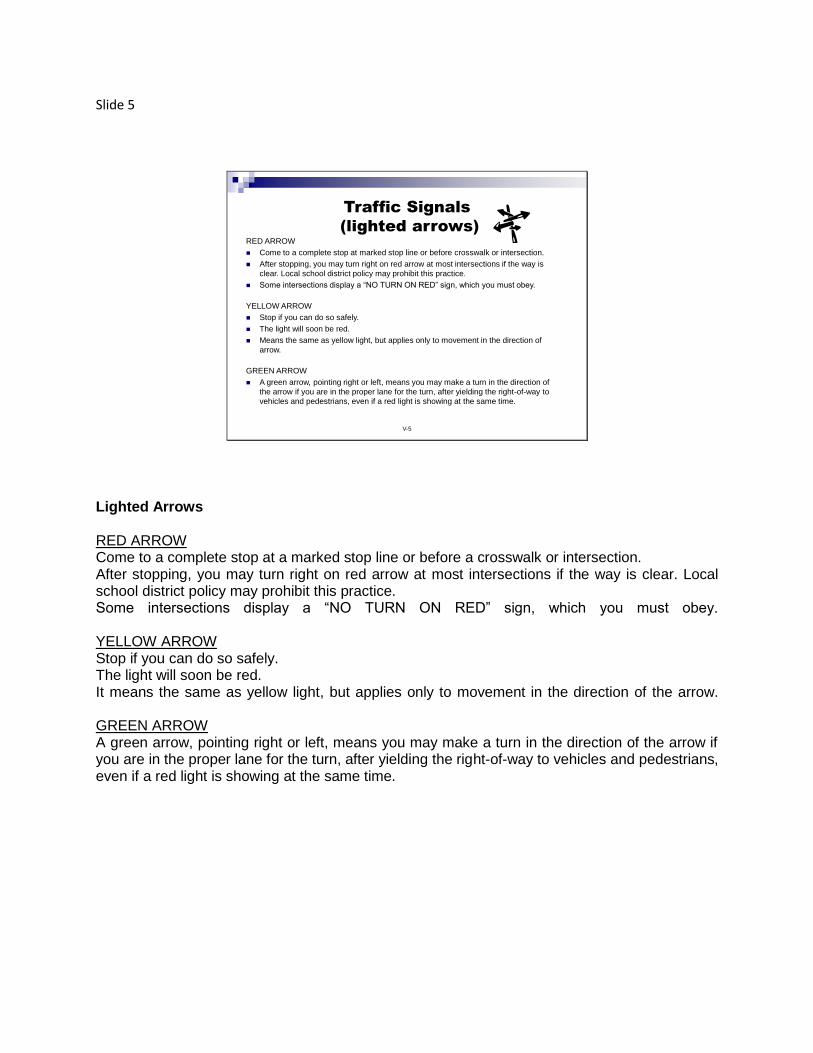
Slide 5
V-5
Traffic Signals
(lighted arrows)RED ARROW
Come to a complete stop at marked stop line or before crosswalk or intersection.
After stopping, you may turn right on red arrow at most intersections if the way is
clear. Local school district policy may prohibit this practice.
Some intersections display a “NO TURN ON RED” sign, which you must obey.
YELLOW ARROW
Stop if you can do so safely.
The light will soon be red.
Means the same as yellow light, but applies only to movement in the direction of
arrow.
GREEN ARROW
A green arrow, pointing right or left, means you may make a turn in the direction of
the arrow if you are in the proper lane for the turn, after yielding the right-of-way to
vehicles and pedestrians, even if a red light is showing at the same time.
Lighted Arrows RED ARROW Come to a complete stop at a marked stop line or before a crosswalk or intersection. After stopping, you may turn right on red arrow at most intersections if the way is clear. Local school district policy may prohibit this practice. Some intersections display a “NO TURN ON RED” sign, which you must obey. YELLOW ARROW Stop if you can do so safely. The light will soon be red. It means the same as yellow light, but applies only to movement in the direction of the arrow. GREEN ARROW A green arrow, pointing right or left, means you may make a turn in the direction of the arrow if you are in the proper lane for the turn, after yielding the right-of-way to vehicles and pedestrians, even if a red light is showing at the same time.
Slide 6
V-6
Traffic Signals
(lane signals)
Lane signals are used:
When the direction of the flow of traffic changes.
To show that a tollbooth is open or closed.
To show which lanes are opened or closed.
You must never drive in a lane under a red X.
A yellow X means that your lane signal is going to change to red.
Prepare to leave the lane safely.
You may drive in lanes beneath a green arrow, but you must also
obey all other signs and signals.
Lane Signals Lane signals are used:
When the direction of the flow of traffic changes.
To show that a tollbooth is open or closed.
To show which lanes are opened or closed.
You must never drive in a lane under a red X. A yellow X means that your lane signal is going to change to red. Prepare to leave the lane safely. You may drive in lanes beneath a green arrow, but you must also obey all other signs and signals
Slide 7
V-7
Traffic Signs-Standard
Shapes & Colors
There are eight shapes and eight colors of traffic signs.
Each shape and each color has an exact meaning, so you
must acquaint yourself with all of them.
Traffic Signs Shapes and Colors There are eight shapes and eight colors of traffic signs. Each shape and color has an exact meaning, so you must acquaint yourself with all of them.
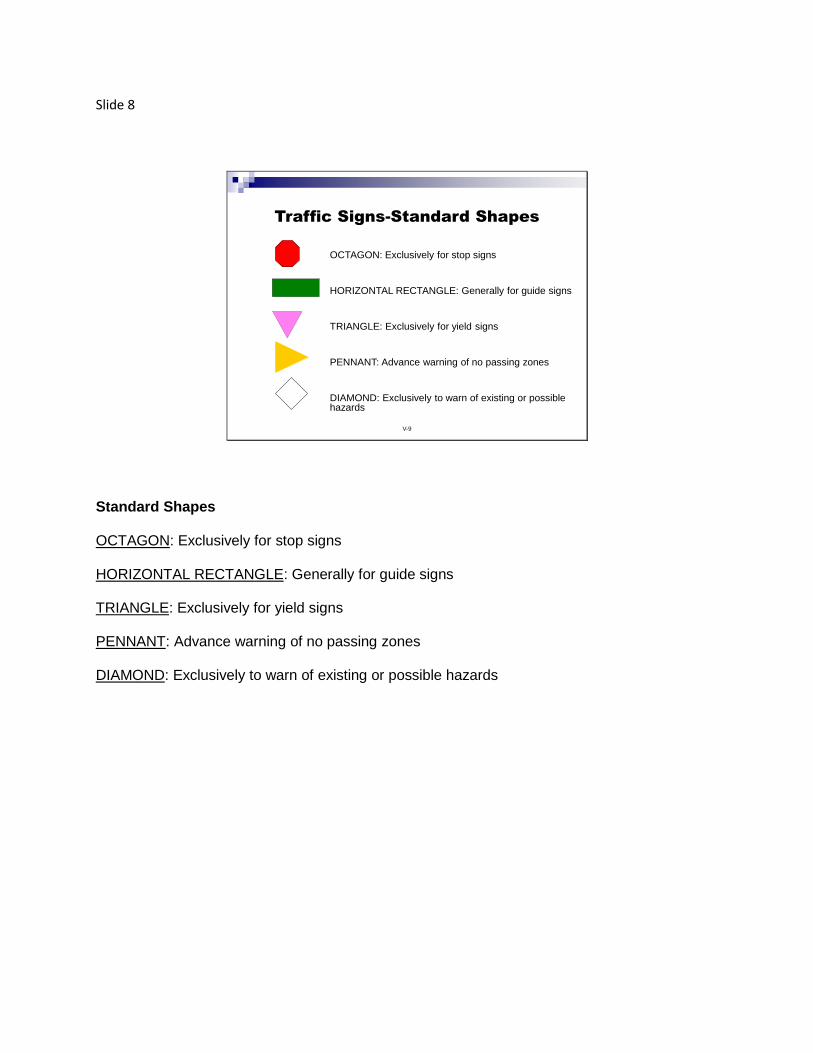
Slide 8
V-9
Traffic Signs-Standard Shapes
OCTAGON: Exclusively for stop signs
HORIZONTAL RECTANGLE: Generally for guide signs
TRIANGLE: Exclusively for yield signs
PENNANT: Advance warning of no passing zones
DIAMOND: Exclusively to warn of existing or possible hazards
Standard Shapes OCTAGON: Exclusively for stop signs HORIZONTAL RECTANGLE: Generally for guide signs TRIANGLE: Exclusively for yield signs PENNANT: Advance warning of no passing zones DIAMOND: Exclusively to warn of existing or possible hazards
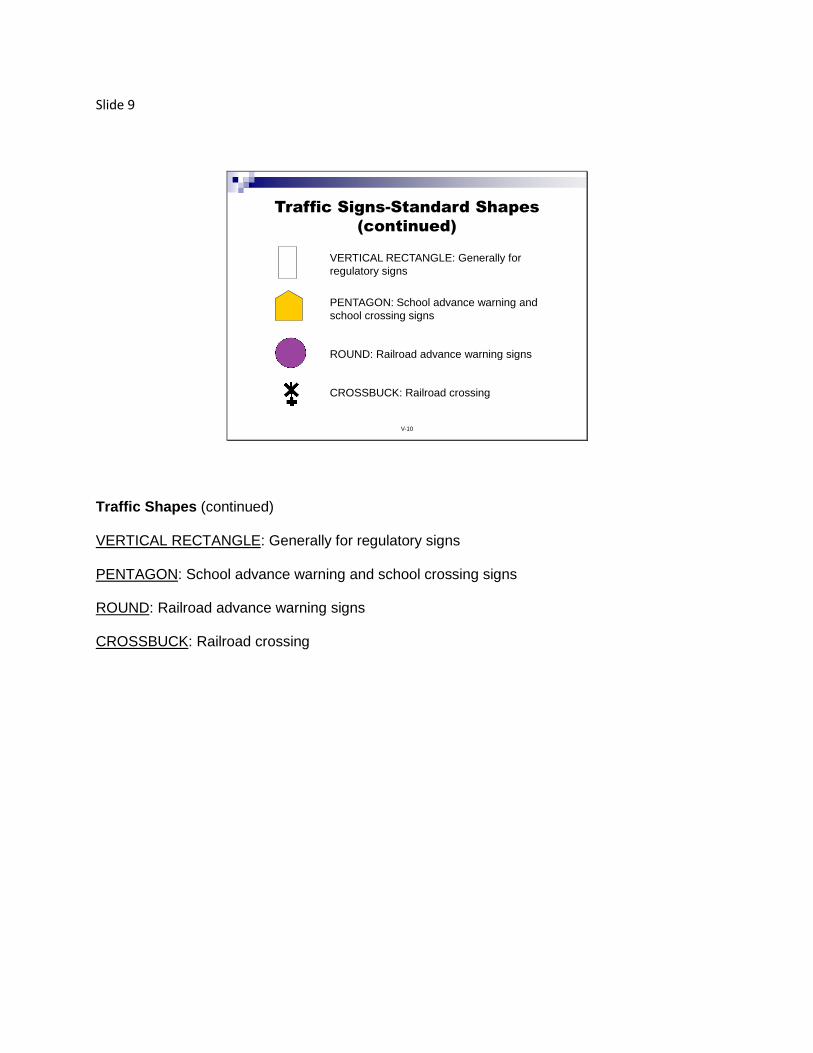
Slide 9
V-10
Traffic Signs-Standard Shapes
(continued)
VERTICAL RECTANGLE: Generally for
regulatory signs
PENTAGON: School advance warning and
school crossing signs
ROUND: Railroad advance warning signs
CROSSBUCK: Railroad crossing
Traffic Shapes (continued) VERTICAL RECTANGLE: Generally for regulatory signs PENTAGON: School advance warning and school crossing signs ROUND: Railroad advance warning signs CROSSBUCK: Railroad crossing
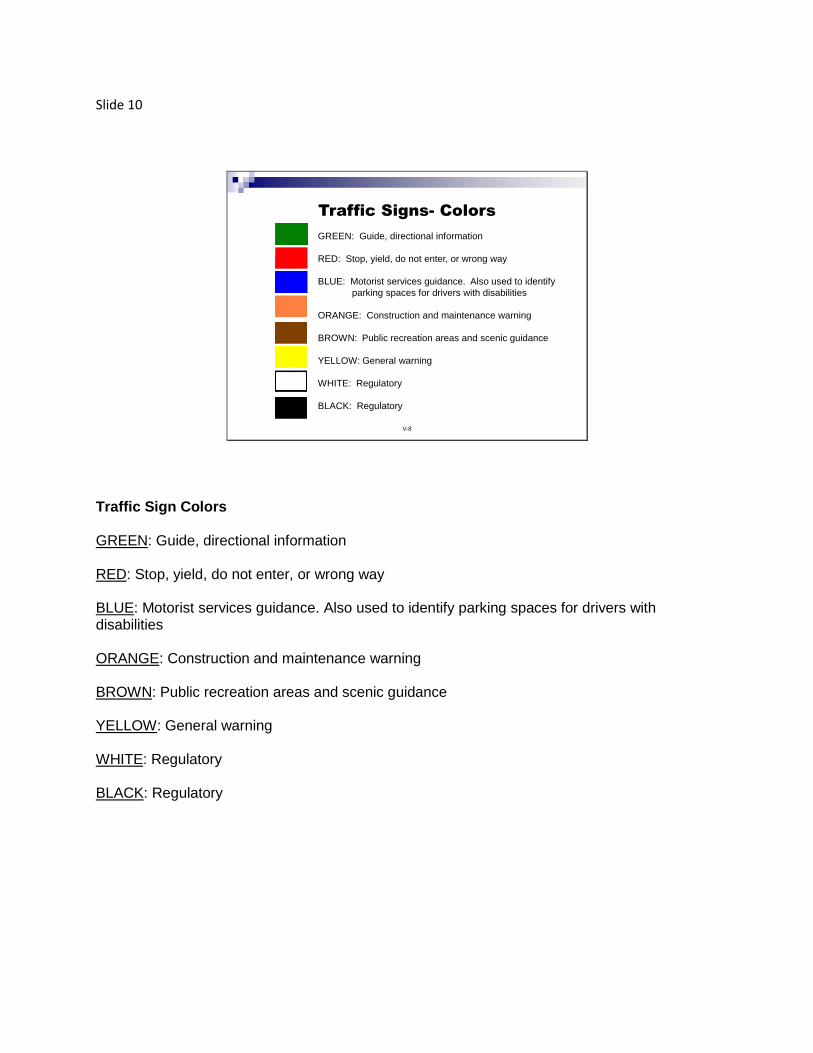
Slide 10
V-8
Traffic Signs- Colors
GREEN: Guide, directional information
RED: Stop, yield, do not enter, or wrong way
BLUE: Motorist services guidance. Also used to identify
parking spaces for drivers with disabilities
ORANGE: Construction and maintenance warning
BROWN: Public recreation areas and scenic guidance
YELLOW: General warning
WHITE: Regulatory
BLACK: Regulatory
Traffic Sign Colors GREEN: Guide, directional information RED: Stop, yield, do not enter, or wrong way BLUE: Motorist services guidance. Also used to identify parking spaces for drivers with disabilities ORANGE: Construction and maintenance warning BROWN: Public recreation areas and scenic guidance YELLOW: General warning WHITE: Regulatory BLACK: Regulatory

Slide 11
V-11
Warning Signs
Narrow Bridge. The bridge is wide enough to accommodate two lanes of
traffic, but with very little clearance.
Dip. There is a low place in the road. Go slowly and be ready to stop if
the dip is filled with water.
Soft shoulder. The dirt on the side of the road is soft. Don’t leave the
pavement except in an emergency.
One lane bridge. The bridge is wide enough for only one vehicle at a time.
Make sure the bridge is clear of oncoming traffic before you cross.
Pavement ends. Road surface ahead changes from a hard surfaced
pavement to a low-type surface or earth road.
The United States is moving toward an international system of traffic signs, which emphasizes pictures and symbols rather than written messages. Symbolic signs are not entirely new, as some have been used in this country for many years. They provide almost instant communication with the operator since they can be understood at a glance without having to be read. Some of the present word signs will remain in use. These are signs that have proven effective in the past and that contain easily understood messages. Using the standard shapes and colors, there are three classifications of traffic signs: warning signs, regulatory signs and guide signs. Warning signs inform the driver of situations ahead that may require extra care. All of the traffic control signs are found in the Official Florida Driver License Handbook under Traffic Control 4.
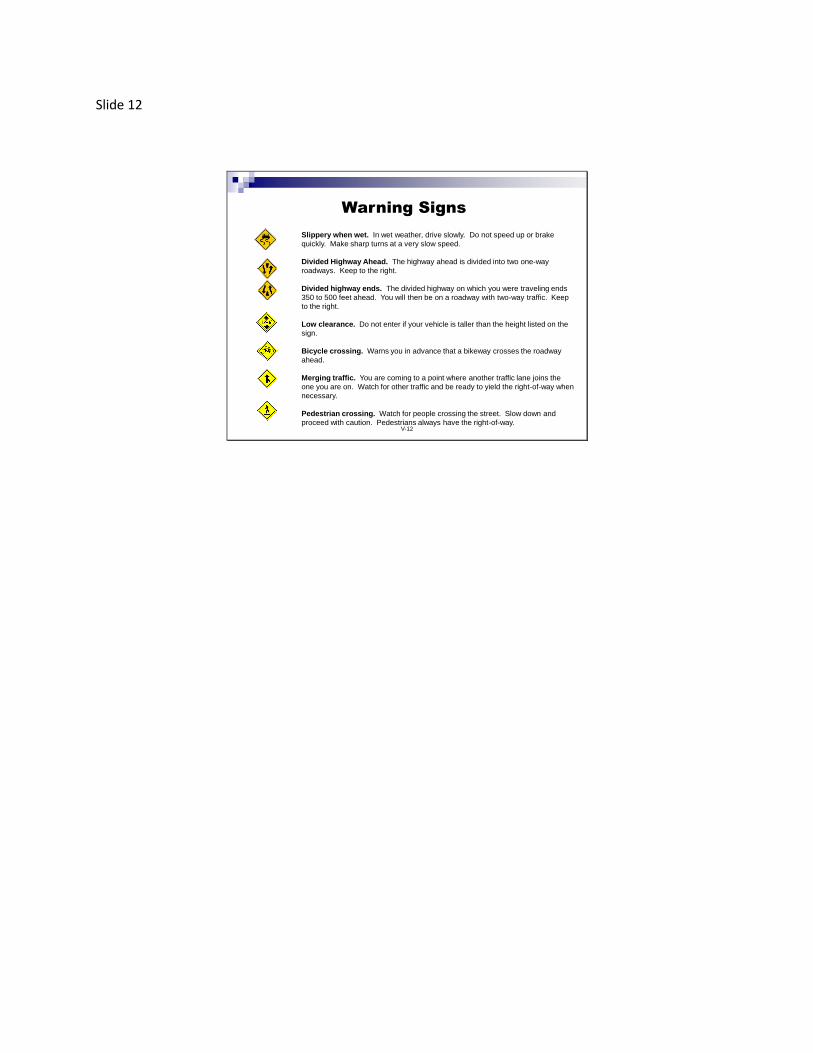
Slide 12
V-12
Warning Signs
Slippery when wet. In wet weather, drive slowly. Do not speed up or brake
quickly. Make sharp turns at a very slow speed.
Divided Highway Ahead. The highway ahead is divided into two one-way
roadways. Keep to the right.
Divided highway ends. The divided highway on which you were traveling ends
350 to 500 feet ahead. You will then be on a roadway with two-way traffic. Keep
to the right.
Low clearance. Do not enter if your vehicle is taller than the height listed on the
sign.
Bicycle crossing. Warns you in advance that a bikeway crosses the roadway
ahead.
Merging traffic. You are coming to a point where another traffic lane joins the
one you are on. Watch for other traffic and be ready to yield the right-of-way when
necessary.
Pedestrian crossing. Watch for people crossing the street. Slow down and
proceed with caution. Pedestrians always have the right-of-way.
Slide 13
V-13
Warning Signs
Stop sign ahead. When you come to this sign, slow down to be ready to stop at
the stop sign.
Right curve. Slow your speed and keep well to the left. The road will curve to
the right.
Double curve. The road will curve to the right, then to the left. Slow your speed,
keep to the right, and do not pass.
Truck Crossing. Watch for trucks entering or crossing the highway.
Winding Road. There are several curves ahead. Drive slowly and carefully.
Side Road. Another road enters the highway from the direction shown. Watch
for traffic from that direction.
Right Turn. The road will make a sharp turn to the right. Slow your speed, keep
to the right, and do not pass other vehicles.
Reduction of lanes. There will be fewer lanes ahead. Traffic must merge left.
Drivers in the left lane should allow others to merge smoothly. Right lane ends.
Slide 14
V-14
Warning Signs
Cross road. A road crosses the main highway ahead. Look to the left
and right for other traffic.
Hill/downgrade. Slow down and be ready to shift to lower gear to control
speed and save brakes.
Yield Ahead. Warning of yield sign ahead. Slow down and be prepared
to stop at yield sign or adjust speed to traffic.
Traffic signal ahead. Warning of traffic signals at intersection ahead.
Slow down; poor visibility is likely.
Two-way traffic ahead. The one-way street or roadway ahead ends.
You will then be facing oncoming traffic.
Animal crossing. The animal pictured on the sign is common in this
area. Watch for this species crossing the road, particularly during twilight
and nighttime hours.
Slide 15
V-15
Regulatory Signs
You cannot make a complete turn to go in the opposite
direction where this sign is displayed.
You must not make a right turn at this intersection.
50 miles per hour is the top speed you can travel in this area.
Rain or other conditions may require you to go slower.
You cannot go straight ahead. You must turn either to the right
or left.
You are going the wrong way on an expressway exit ramp. Do
not drive past this sign. Turn around immediately.
This sign lists the maximum recommended safe speed for an
entrance or exit on an expressway. Slow down to no more
than whatever speed is shown.
Rectangle: Regulatory or Informational These signs tell you the law, so you must follow their instructions. Remember that a red circle with a slash means NO. The sign shows you what is NOT allowed.
Slide 16
V-16
Regulatory Signs
You may not turn right or left during the red light. You
must wait for the signal to turn green.
A diamond-shaped marking shows that a lane is
reserved for certain purposes or certain vehicles. The
lanes are usually reserved for buses or car-pool
vehicles during rush hour traffic. Other diamond signs
are used to designate bicycle lanes.
The center lane is shared for left turns in both
directions of travel. You may not travel a significant
distance in this lane.
A divided highway is ahead. Stay on the right side of
the divider.
Slide 17
V-17
Regulatory Signs
Parking only for vehicles displaying an official permit and
transporting a person with disabilities.
You must not pass any other vehicles going in the same
direction as you, while you are in this area.
When you have passed this sign, you are reminded to pass
other vehicles with care.
Traffic in left lane must turn left at the intersection ahead.
Stopping permitted only for emergencies.
You are approaching an area where a reduced speed zone
has been established.
At the intersection ahead, traffic in left lane must turn left and
traffic in adjoining lane may turn left or continue straight ahead.
Slide 18
V-18
Regulatory Signs
This marks a one-way roadway with traffic coming
toward you. You must not enter the one-way roadway
at this point.
You must not turn either to the right or to the left at the
intersection.
If you park, you must always park off the pavement of
the highway.
When entering a right turn lane, motorists may conflict
with bicycles. Always yield.
Slide 19
V-19
Guide Signs
Rectangular in shape
White messages on green background
Black messages on white backgrounds
Different colors and shapes for special purposes
Guide signs guide operators along streets and highways, informing them of intersecting routes, or directing them to their destination, such as a city, river, park or other destination. Guide signs are generally rectangular and have a white message on a green background. On conventional roads and streets, black messages on white backgrounds are frequently used as an alternative. Also, different colors and shapes are used for special purposes.
Slide 20
V-20
Guide Signs
Route markers (interstate system)
Route turn arrows and directional arrows
Familiar destination
Mileage signs
Recreation areas
Service signs
Locations of airports, bus stations and train stations
One type of special guide sign is the route marker. Each highway system has its own distinctive route marker. These illustrate those used on or in conjunction with the interstate system. These are used for U.S. routes, state routes, county roads and roads in national parks and forests. Guide signs indicate junctions of highways, the cardinal direction of a highway, alternating routes to a particular numbered highway, when a numbered route ends and temporary routes. A variety of advance route turn arrows and directional arrows are common guide signs. Two of the most typical guide signs are the familiar destination and mileage signs. On some of the interchanges, symbolic destination signs are used. A special type of guide sign is used for recreation areas. These signs have a white message on a brown background. Another special guide sign is the service sign. These are white messages on a blue background that may illustrate the location of a phone or hospital or indicate that there are no barriers to the handicapped. Other service signs show gas, food, lodging, hospitals or camping through symbolic or message signs. Mileposts are another form of guide signs. Mileage always increases from south to north or west to east and begins at the state line or at a junction where the route begins. Guide signs are also used to show the locations of airports, bus stations and train stations.
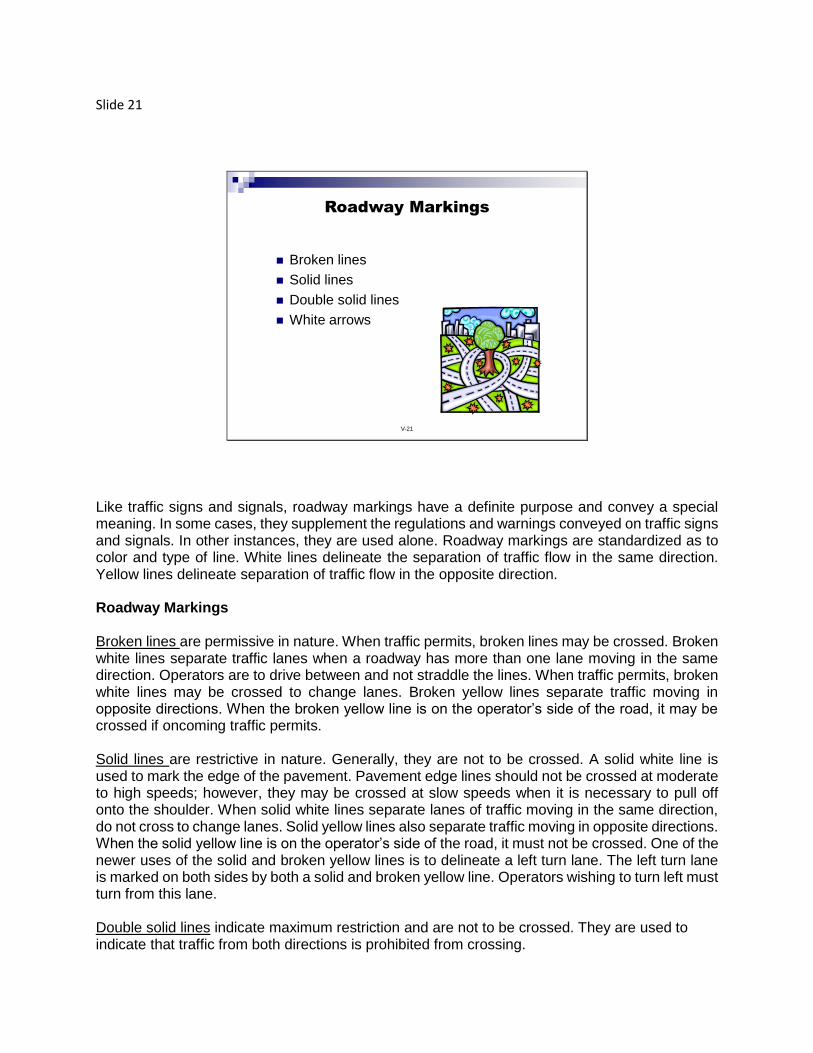
Slide 21
V-21
Roadway Markings
Broken lines
Solid lines
Double solid lines
White arrows
Like traffic signs and signals, roadway markings have a definite purpose and convey a special meaning. In some cases, they supplement the regulations and warnings conveyed on traffic signs and signals. In other instances, they are used alone. Roadway markings are standardized as to color and type of line. White lines delineate the separation of traffic flow in the same direction. Yellow lines delineate separation of traffic flow in the opposite direction. Roadway Markings Broken lines are permissive in nature. When traffic permits, broken lines may be crossed. Broken white lines separate traffic lanes when a roadway has more than one lane moving in the same direction. Operators are to drive between and not straddle the lines. When traffic permits, broken white lines may be crossed to change lanes. Broken yellow lines separate traffic moving in opposite directions. When the broken yellow line is on the operator’s side of the road, it may be crossed if oncoming traffic permits. Solid lines are restrictive in nature. Generally, they are not to be crossed. A solid white line is used to mark the edge of the pavement. Pavement edge lines should not be crossed at moderate to high speeds; however, they may be crossed at slow speeds when it is necessary to pull off onto the shoulder. When solid white lines separate lanes of traffic moving in the same direction, do not cross to change lanes. Solid yellow lines also separate traffic moving in opposite directions. When the solid yellow line is on the operator’s side of the road, it must not be crossed. One of the newer uses of the solid and broken yellow lines is to delineate a left turn lane. The left turn lane is marked on both sides by both a solid and broken yellow line. Operators wishing to turn left must turn from this lane. Double solid lines indicate maximum restriction and are not to be crossed. They are used to indicate that traffic from both directions is prohibited from crossing.

White arrows are used to show the direction of travel for a given lane.
Slide 22
V-22
Roadway Markings
(continued)
Delineators
White
Yellow
Red
Crosswalk Markings
Pavement markings are sometimes used to delineate pedestrian crosswalks. These are marked by solid white lines. When lines are used, they run all the way across the pavement. If a stop is required, operators must stop before crossing the pedestrian crosswalk. Pavement markings are also sometimes used to delineate where an operator is to stop. These stop lines are wide, solid white lines painted across a traffic lane. If used in conjunction with a painted pedestrian crosswalk, the stop line will come before the crosswalk. Operators must stop before the stop line when a stop is required. Delineators are a special kind of guide marking to aid operators at night. These little reflective devices are sometimes used on long, continuous stretches of highway or on short sections where there is a change in the curvature of the road. Delineators are intended to help guide motorists as to the horizontal and vertical alignment of the highway. Delineator colors conform to the edge line colors painted on the highway. Three colors are used: White -- placed on the right side of the roadway. Yellow -- placed on the left side of the roadway. Red -- placed backward on a ramp or roadway to be viewed by a motorist traveling in the wrong direction on that ramp or roadway.
Slide 23
V-23
Construction and Maintenance
Traffic Control Signs
Various traffic control devices are used in road
construction and maintenance work areas to direct
drivers and pedestrians safely through the work site and
to provide for the safety of highway workers.
Be prepared to reduce your speed and use caution
when directed to do so by a sign, flagger and/or police
officer.
Construction and maintenance signs are used to notify
drivers of unusual or potentially dangerous conditions in
or near work areas. Most signs used in highway and
street work areas are diamond shaped.
Slide 24
V-24
Summary
We reviewed:
Traffic signs
Traffic signals
Roadway markings
In this unit, traffic control devices regulating, warning and guiding traffic were reviewed. Traffic control devices are used to assist motorists in performing their driving tasks. Operators should pay particular attention to all signs, signals and markings and adjust their driving behavior accordingly. This will result in a safer, more efficient flow of traffic.

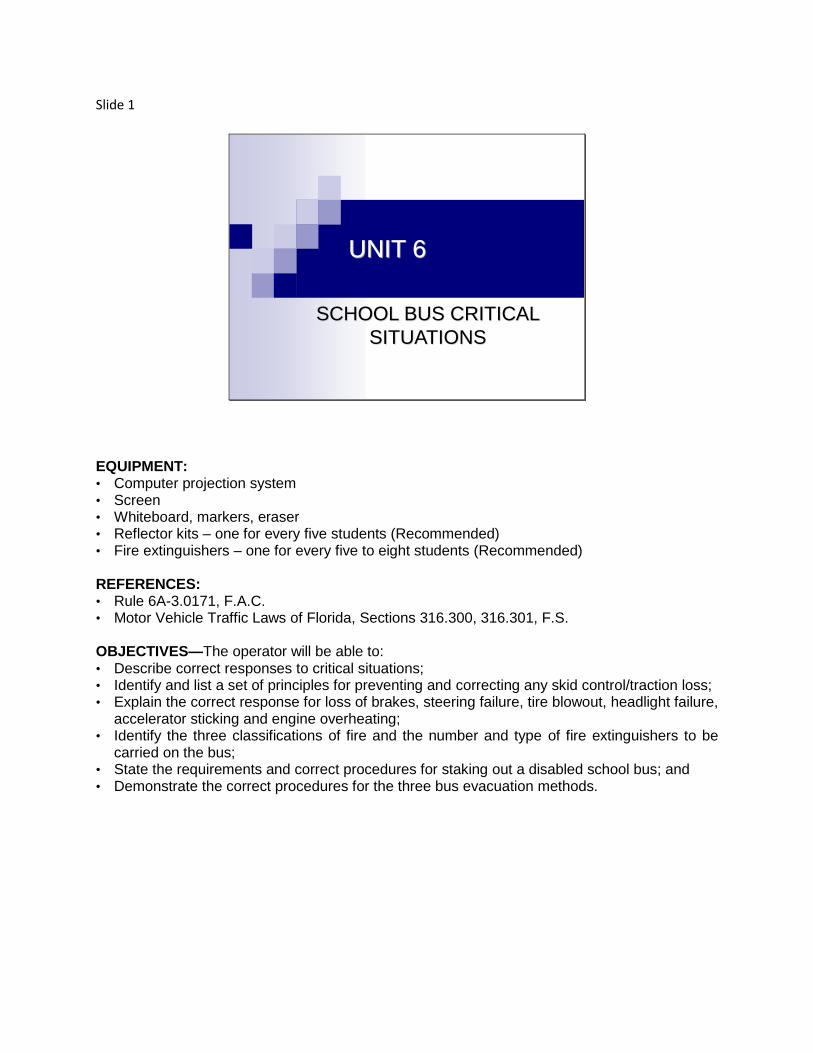
Slide 1
UNIT 6
SCHOOL BUS CRITICAL
SITUATIONS
EQUIPMENT: • Computer projection system • Screen • Whiteboard, markers, eraser • Reflector kits – one for every five students (Recommended) • Fire extinguishers – one for every five to eight students (Recommended) REFERENCES: • Rule 6A-3.0171, F.A.C. • Motor Vehicle Traffic Laws of Florida, Sections 316.300, 316.301, F.S. OBJECTIVES—The operator will be able to: • Describe correct responses to critical situations; • Identify and list a set of principles for preventing and correcting any skid control/traction loss; • Explain the correct response for loss of brakes, steering failure, tire blowout, headlight failure,
accelerator sticking and engine overheating; • Identify the three classifications of fire and the number and type of fire extinguishers to be
carried on the bus; • State the requirements and correct procedures for staking out a disabled school bus; and • Demonstrate the correct procedures for the three bus evacuation methods.
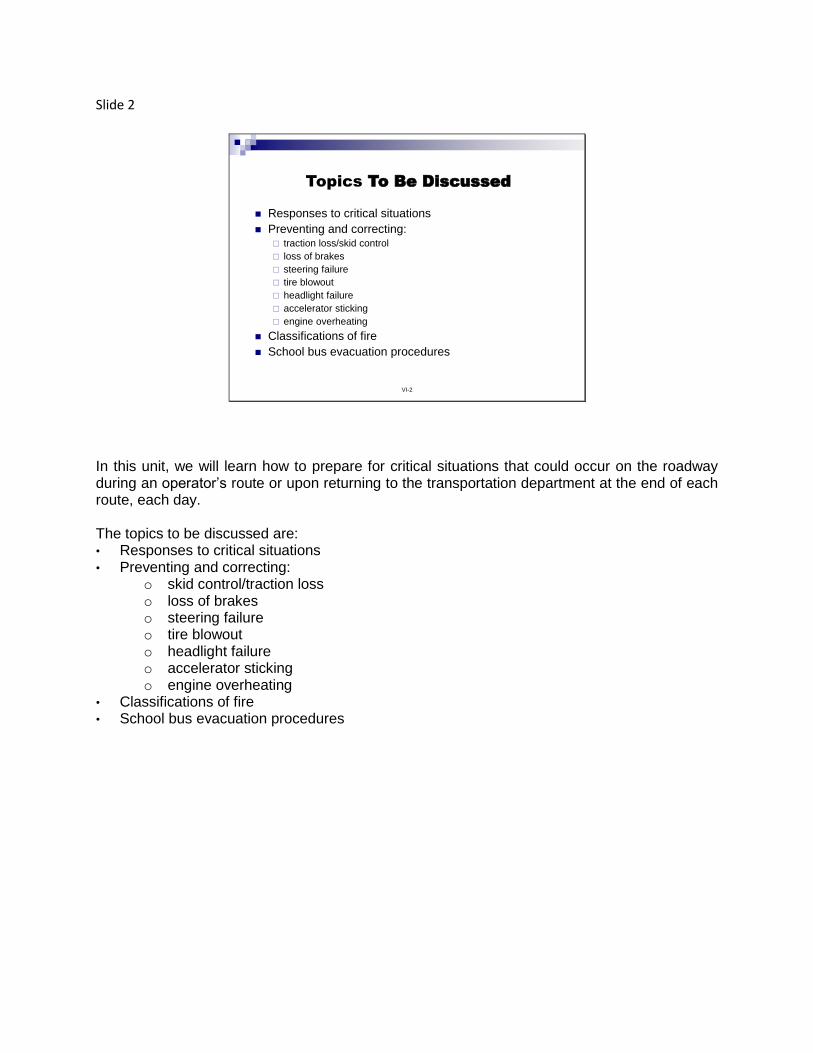
Slide 2
VI-2
Topics To Be Discussed
Responses to critical situations
Preventing and correcting: traction loss/skid control
loss of brakes
steering failure
tire blowout
headlight failure
accelerator sticking
engine overheating
Classifications of fire
School bus evacuation procedures
In this unit, we will learn how to prepare for critical situations that could occur on the roadway during an operator’s route or upon returning to the transportation department at the end of each route, each day. The topics to be discussed are: • Responses to critical situations • Preventing and correcting:
o skid control/traction loss o loss of brakes o steering failure o tire blowout o headlight failure o accelerator sticking o engine overheating
• Classifications of fire • School bus evacuation procedures
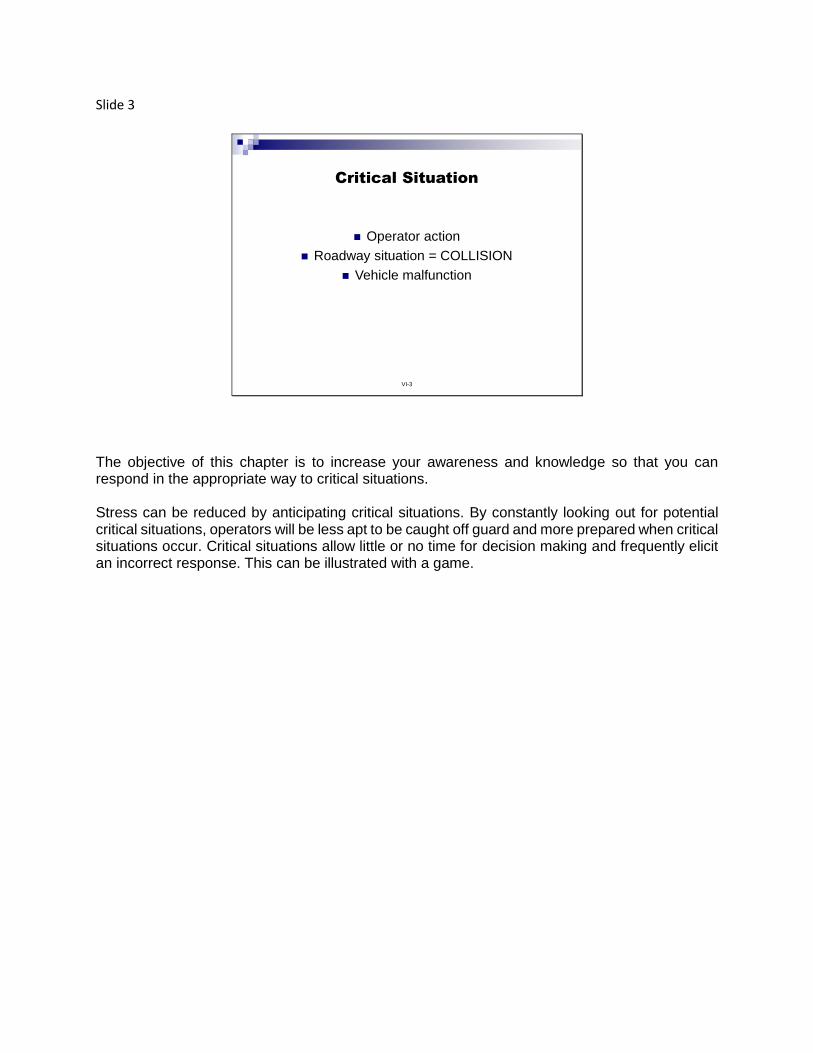
Slide 3
VI-3
Critical Situation
Operator action
Roadway situation = COLLISION
Vehicle malfunction
The objective of this chapter is to increase your awareness and knowledge so that you can respond in the appropriate way to critical situations. Stress can be reduced by anticipating critical situations. By constantly looking out for potential critical situations, operators will be less apt to be caught off guard and more prepared when critical situations occur. Critical situations allow little or no time for decision making and frequently elicit an incorrect response. This can be illustrated with a game.
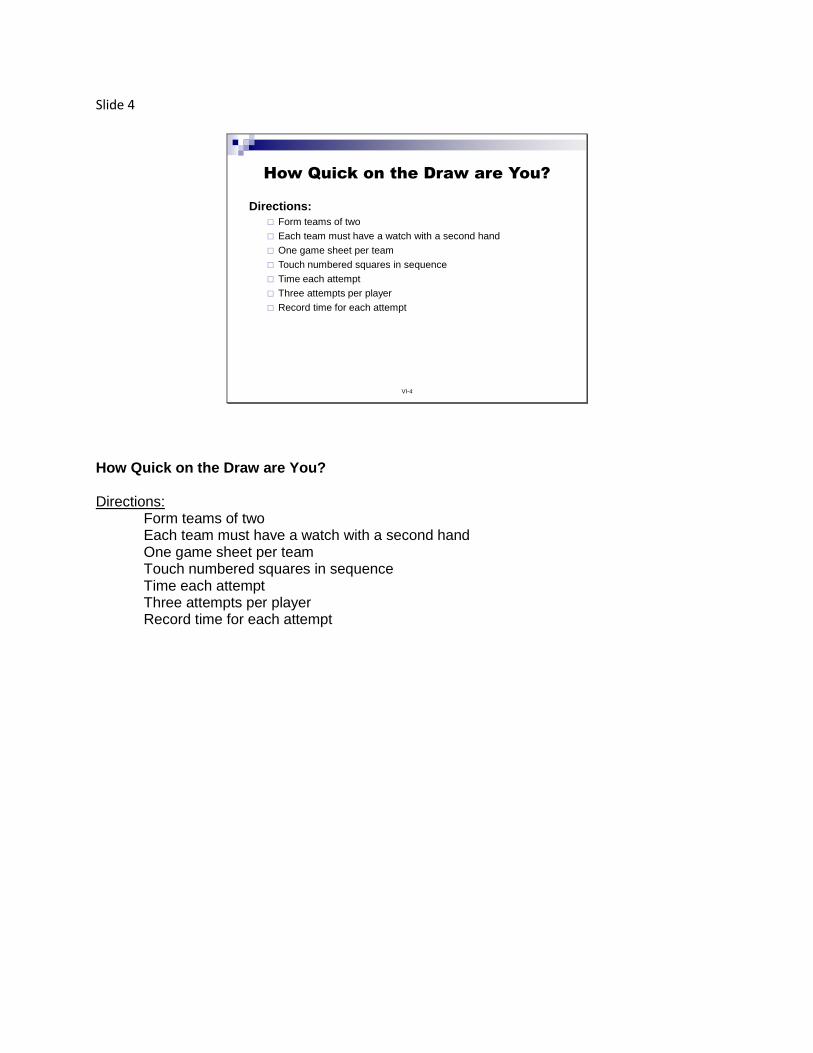
Slide 4
VI-4
How Quick on the Draw are You?
Directions:
Form teams of two
Each team must have a watch with a second hand
One game sheet per team
Touch numbered squares in sequence
Time each attempt
Three attempts per player
Record time for each attempt
How Quick on the Draw are You? Directions:
Form teams of two Each team must have a watch with a second hand One game sheet per team Touch numbered squares in sequence Time each attempt Three attempts per player Record time for each attempt
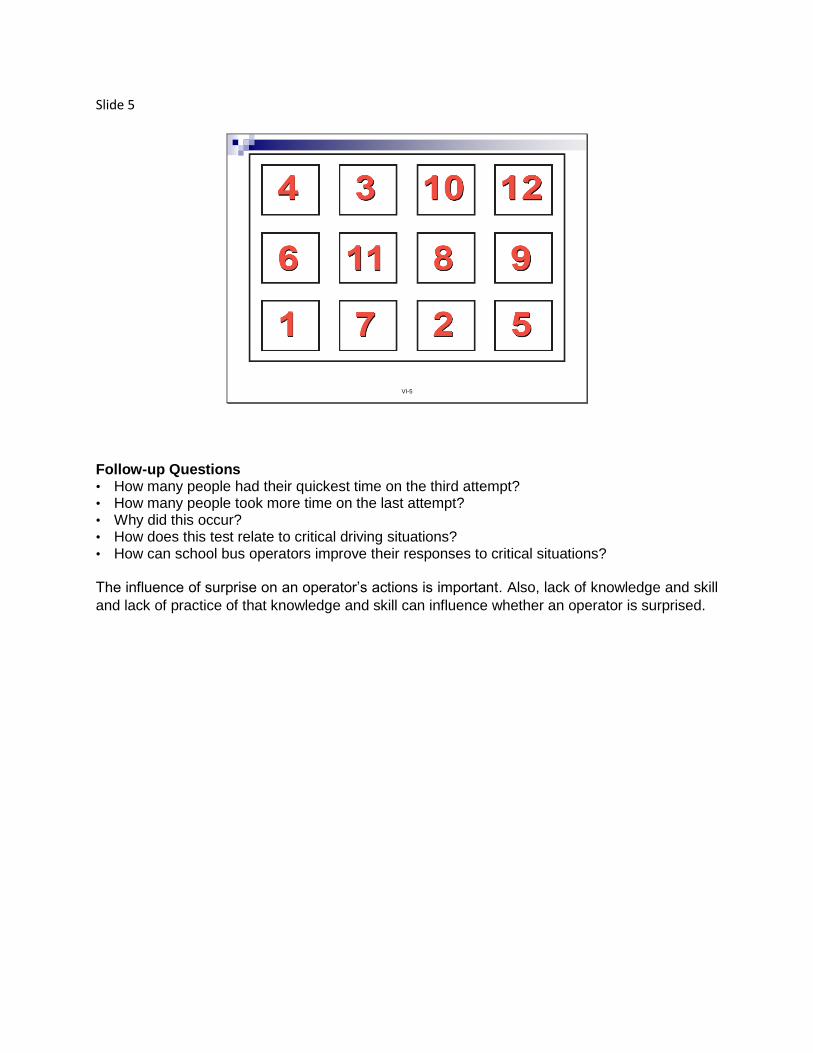
Slide 5
VI-5
Follow-up Questions • How many people had their quickest time on the third attempt? • How many people took more time on the last attempt? • Why did this occur? • How does this test relate to critical driving situations? • How can school bus operators improve their responses to critical situations? The influence of surprise on an operator’s actions is important. Also, lack of knowledge and skill
and lack of practice of that knowledge and skill can influence whether an operator is surprised.
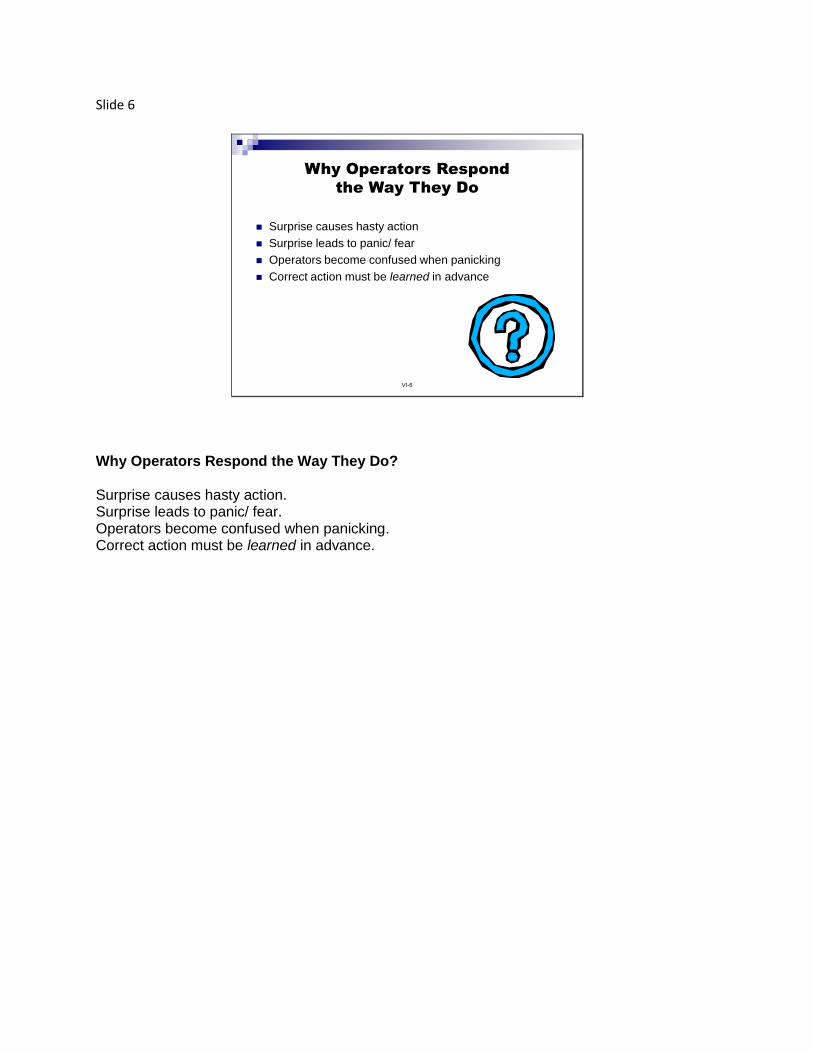
Slide 6
VI-6
Why Operators Respond
the Way They Do
Surprise causes hasty action
Surprise leads to panic/ fear
Operators become confused when panicking
Correct action must be learned in advance
Why Operators Respond the Way They Do? Surprise causes hasty action. Surprise leads to panic/ fear. Operators become confused when panicking. Correct action must be learned in advance.
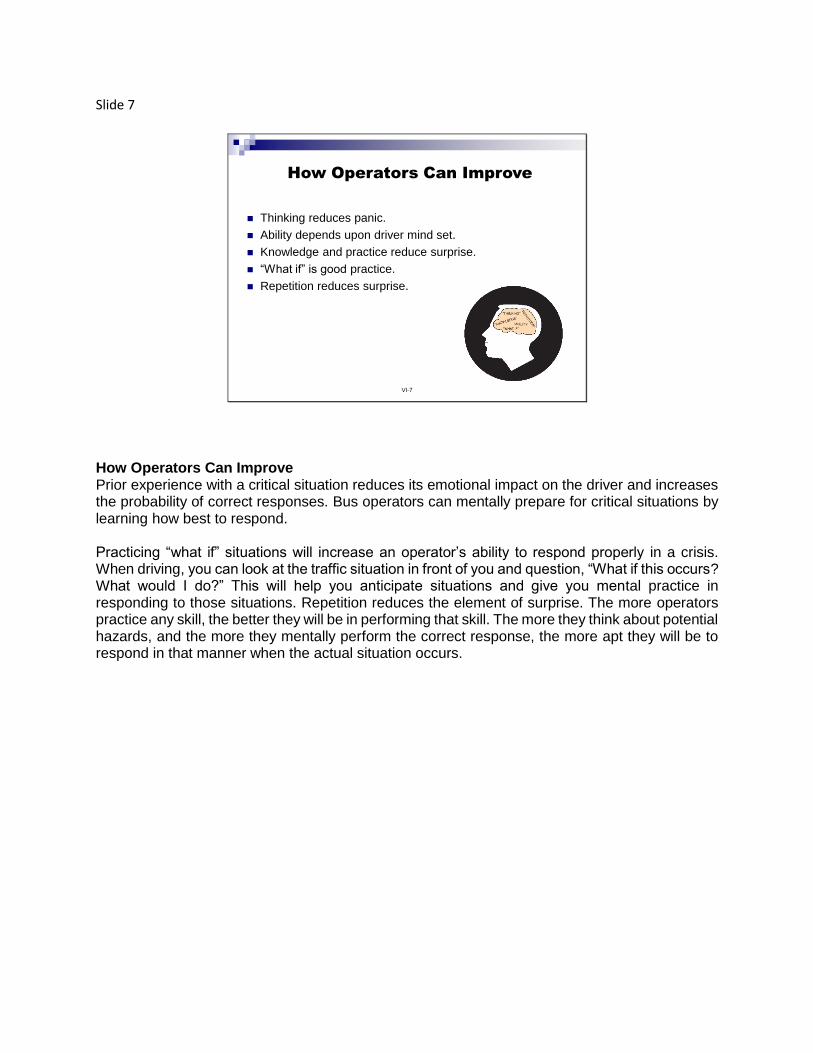
Slide 7
VI-7
How Operators Can Improve
Thinking reduces panic.
Ability depends upon driver mind set.
Knowledge and practice reduce surprise.
“What if” is good practice.
Repetition reduces surprise.
How Operators Can Improve Prior experience with a critical situation reduces its emotional impact on the driver and increases the probability of correct responses. Bus operators can mentally prepare for critical situations by learning how best to respond. Practicing “what if” situations will increase an operator’s ability to respond properly in a crisis. When driving, you can look at the traffic situation in front of you and question, “What if this occurs? What would I do?” This will help you anticipate situations and give you mental practice in responding to those situations. Repetition reduces the element of surprise. The more operators practice any skill, the better they will be in performing that skill. The more they think about potential hazards, and the more they mentally perform the correct response, the more apt they will be to respond in that manner when the actual situation occurs.
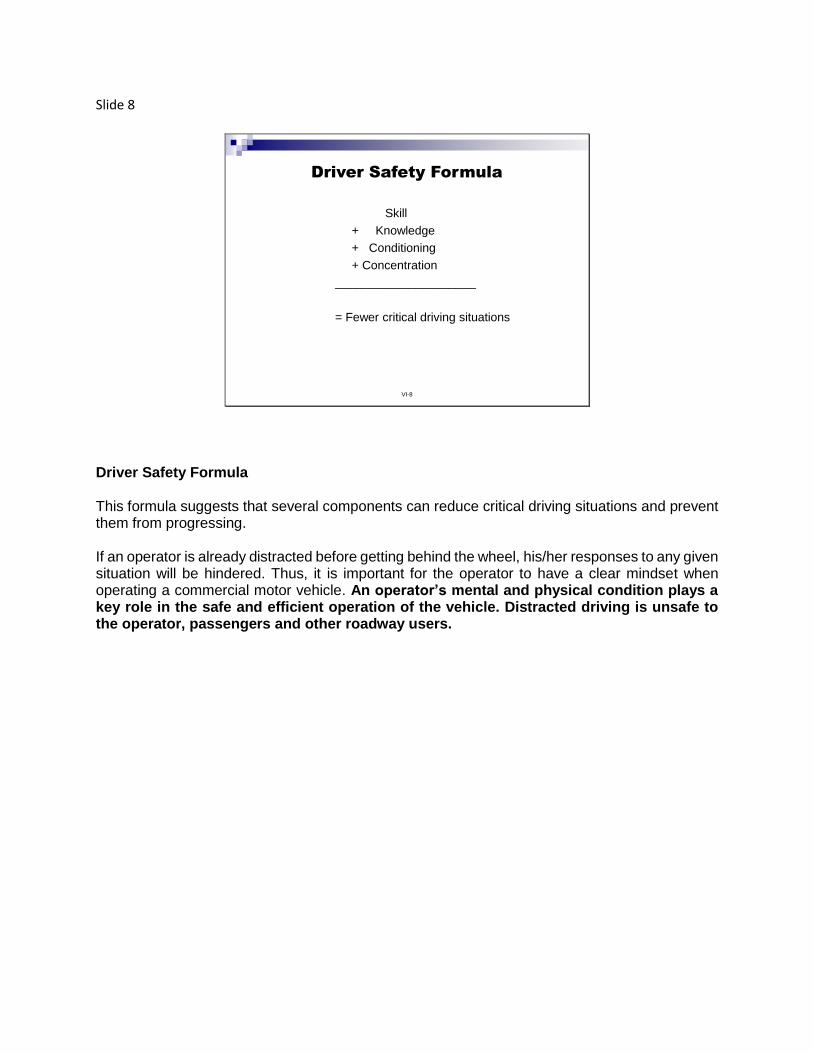
Slide 8
VI-8
Driver Safety Formula
Skill
+ Knowledge
+ Conditioning
+ Concentration
_____________________
= Fewer critical driving situations
Driver Safety Formula This formula suggests that several components can reduce critical driving situations and prevent them from progressing. If an operator is already distracted before getting behind the wheel, his/her responses to any given situation will be hindered. Thus, it is important for the operator to have a clear mindset when operating a commercial motor vehicle. An operator’s mental and physical condition plays a key role in the safe and efficient operation of the vehicle. Distracted driving is unsafe to the operator, passengers and other roadway users.
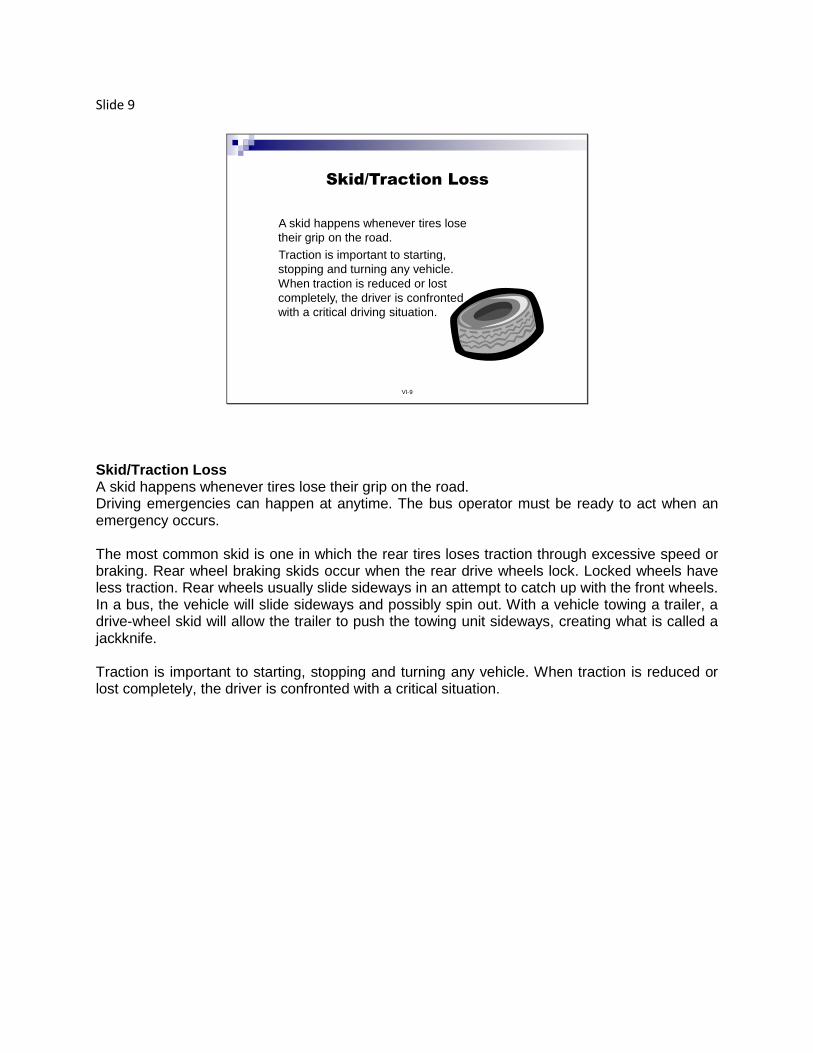
Slide 9
VI-9
Skid/Traction Loss
A skid happens whenever tires lose
their grip on the road.
Traction is important to starting,
stopping and turning any vehicle.
When traction is reduced or lost
completely, the driver is confronted
with a critical driving situation.
Skid/Traction Loss A skid happens whenever tires lose their grip on the road. Driving emergencies can happen at anytime. The bus operator must be ready to act when an emergency occurs. The most common skid is one in which the rear tires loses traction through excessive speed or braking. Rear wheel braking skids occur when the rear drive wheels lock. Locked wheels have less traction. Rear wheels usually slide sideways in an attempt to catch up with the front wheels. In a bus, the vehicle will slide sideways and possibly spin out. With a vehicle towing a trailer, a drive-wheel skid will allow the trailer to push the towing unit sideways, creating what is called a jackknife.
Traction is important to starting, stopping and turning any vehicle. When traction is reduced or lost completely, the driver is confronted with a critical situation.

Slide 10
VI-11
Causes of Traction Loss
Overpowering
Over Braking Steering and speed
Causes of Traction Loss There are several causes of traction loss: Over accelerating - Over accelerating will cause the tires to spin. Over Braking - Braking too hard causes the wheels to lock. Miscalculating turns - Attempting to slow down during rather than before a turning maneuver. Unequal road surfaces - The traction between the wheels is different because they are on different types of surfaces. For example, when one rear wheel drops off the pavement onto a gravel shoulder, an operator can lose traction. Hydroplaning - Front wheels will leave pavement on a wet surface and ride on top of the water.
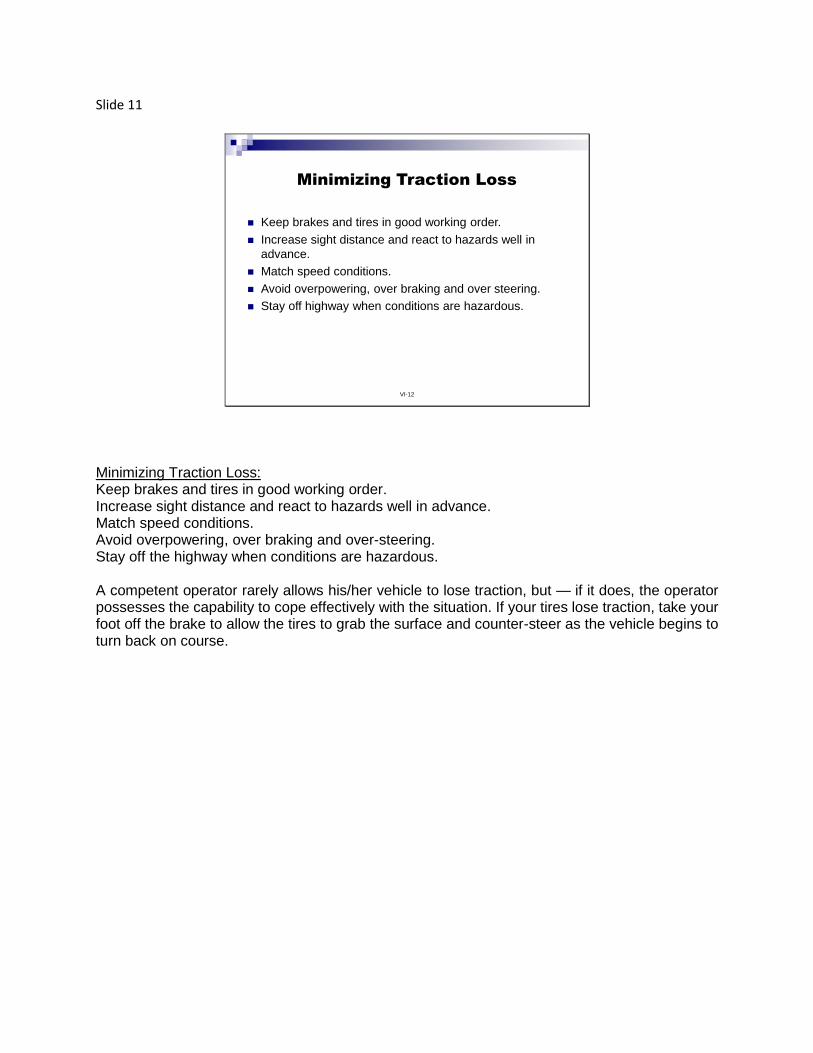
Slide 11
VI-12
Minimizing Traction Loss
Keep brakes and tires in good working order.
Increase sight distance and react to hazards well in
advance.
Match speed conditions.
Avoid overpowering, over braking and over steering.
Stay off highway when conditions are hazardous.
Minimizing Traction Loss: Keep brakes and tires in good working order. Increase sight distance and react to hazards well in advance. Match speed conditions. Avoid overpowering, over braking and over-steering. Stay off the highway when conditions are hazardous. A competent operator rarely allows his/her vehicle to lose traction, but — if it does, the operator possesses the capability to cope effectively with the situation. If your tires lose traction, take your foot off the brake to allow the tires to grab the surface and counter-steer as the vehicle begins to turn back on course.
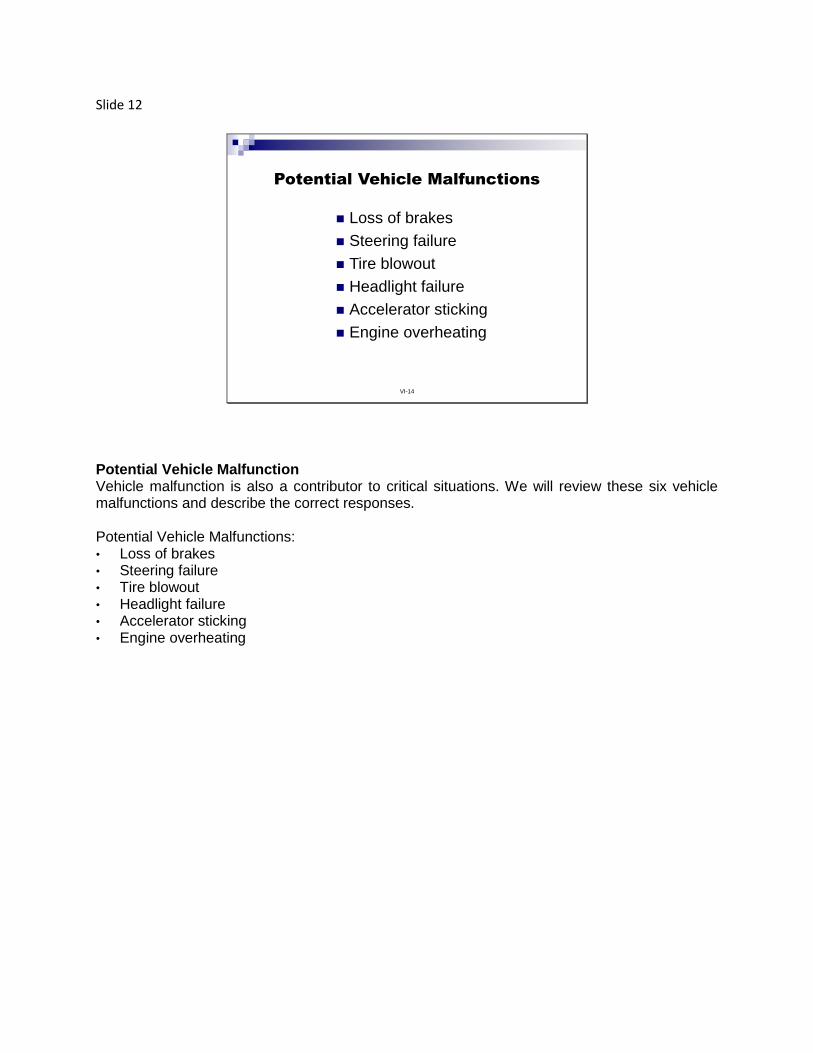
Slide 12
VI-14
Potential Vehicle Malfunctions
Loss of brakes
Steering failure
Tire blowout
Headlight failure
Accelerator sticking
Engine overheating
Potential Vehicle Malfunction Vehicle malfunction is also a contributor to critical situations. We will review these six vehicle malfunctions and describe the correct responses. Potential Vehicle Malfunctions: • Loss of brakes • Steering failure • Tire blowout • Headlight failure • Accelerator sticking • Engine overheating
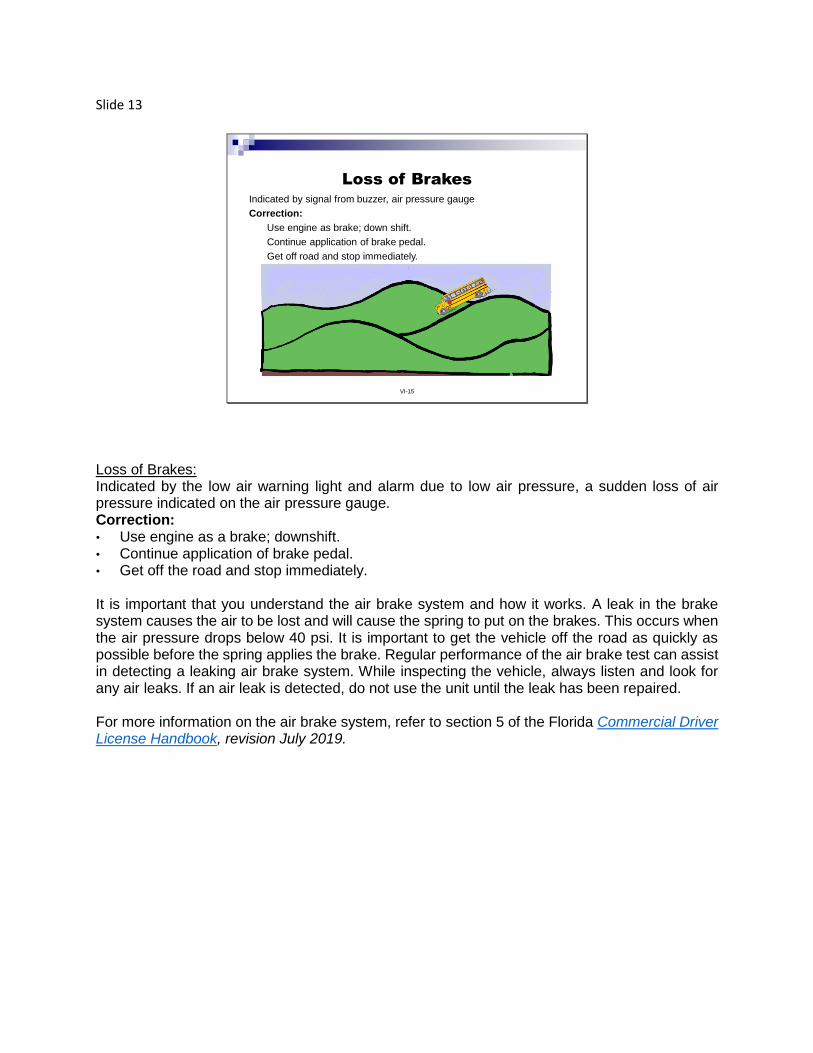
Slide 13
VI-15
Loss of BrakesIndicated by signal from buzzer, air pressure gauge
Correction:
Use engine as brake; down shift.
Continue application of brake pedal.
Get off road and stop immediately.
Loss of Brakes: Indicated by the low air warning light and alarm due to low air pressure, a sudden loss of air pressure indicated on the air pressure gauge. Correction: • Use engine as a brake; downshift. • Continue application of brake pedal. • Get off the road and stop immediately.
It is important that you understand the air brake system and how it works. A leak in the brake system causes the air to be lost and will cause the spring to put on the brakes. This occurs when the air pressure drops below 40 psi. It is important to get the vehicle off the road as quickly as possible before the spring applies the brake. Regular performance of the air brake test can assist in detecting a leaking air brake system. While inspecting the vehicle, always listen and look for any air leaks. If an air leak is detected, do not use the unit until the leak has been repaired. For more information on the air brake system, refer to section 5 of the Florida Commercial Driver License Handbook, revision July 2019.
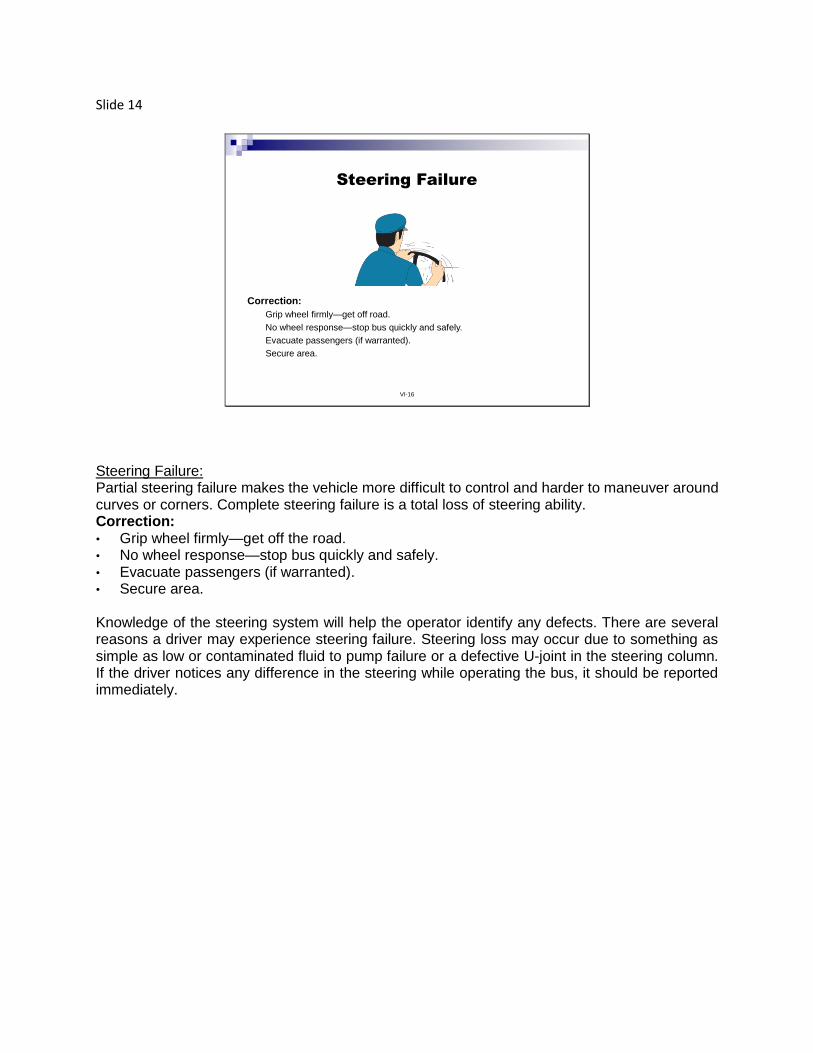
Slide 14
VI-16
Steering Failure
Correction:
Grip wheel firmly—get off road.
No wheel response—stop bus quickly and safely.
Evacuate passengers (if warranted).
Secure area.
Steering Failure: Partial steering failure makes the vehicle more difficult to control and harder to maneuver around curves or corners. Complete steering failure is a total loss of steering ability. Correction: • Grip wheel firmly—get off the road. • No wheel response—stop bus quickly and safely. • Evacuate passengers (if warranted). • Secure area. Knowledge of the steering system will help the operator identify any defects. There are several reasons a driver may experience steering failure. Steering loss may occur due to something as simple as low or contaminated fluid to pump failure or a defective U-joint in the steering column. If the driver notices any difference in the steering while operating the bus, it should be reported immediately.
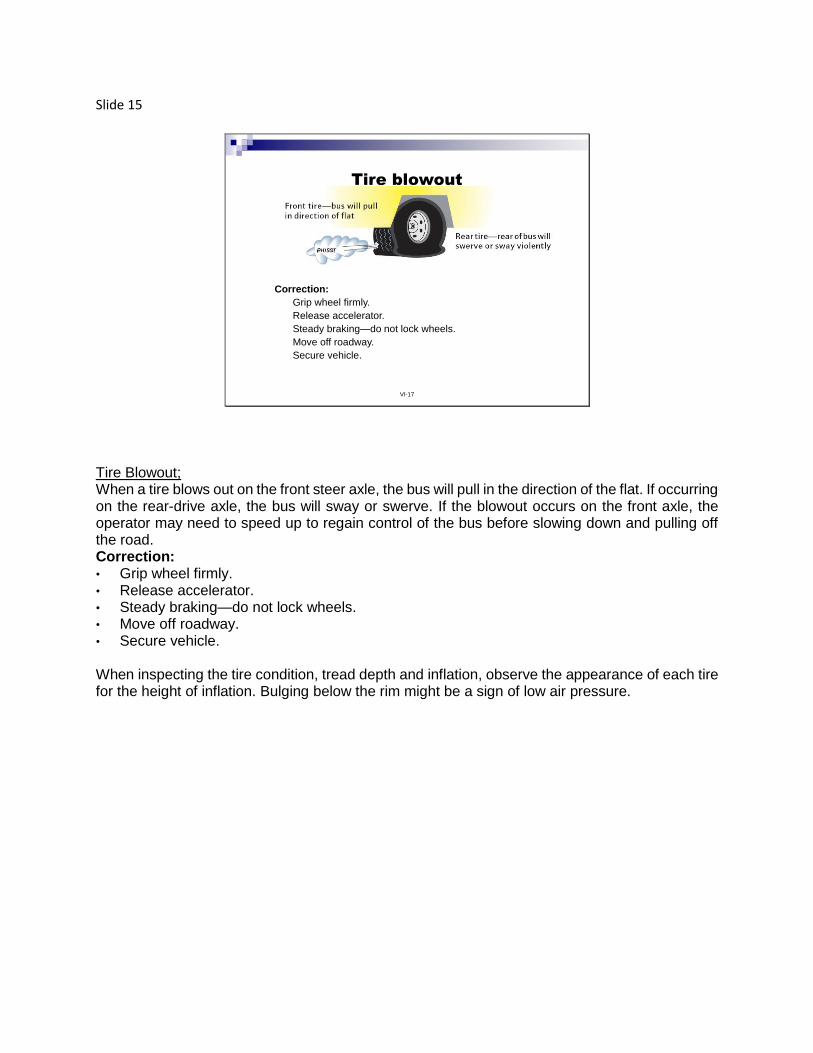
Slide 15
VI-17
Tire blowout
Correction:
Grip wheel firmly.
Release accelerator.
Steady braking—do not lock wheels.
Move off roadway.
Secure vehicle.
Tire Blowout; When a tire blows out on the front steer axle, the bus will pull in the direction of the flat. If occurring on the rear-drive axle, the bus will sway or swerve. If the blowout occurs on the front axle, the operator may need to speed up to regain control of the bus before slowing down and pulling off the road. Correction: • Grip wheel firmly. • Release accelerator. • Steady braking—do not lock wheels. • Move off roadway. • Secure vehicle. When inspecting the tire condition, tread depth and inflation, observe the appearance of each tire for the height of inflation. Bulging below the rim might be a sign of low air pressure.
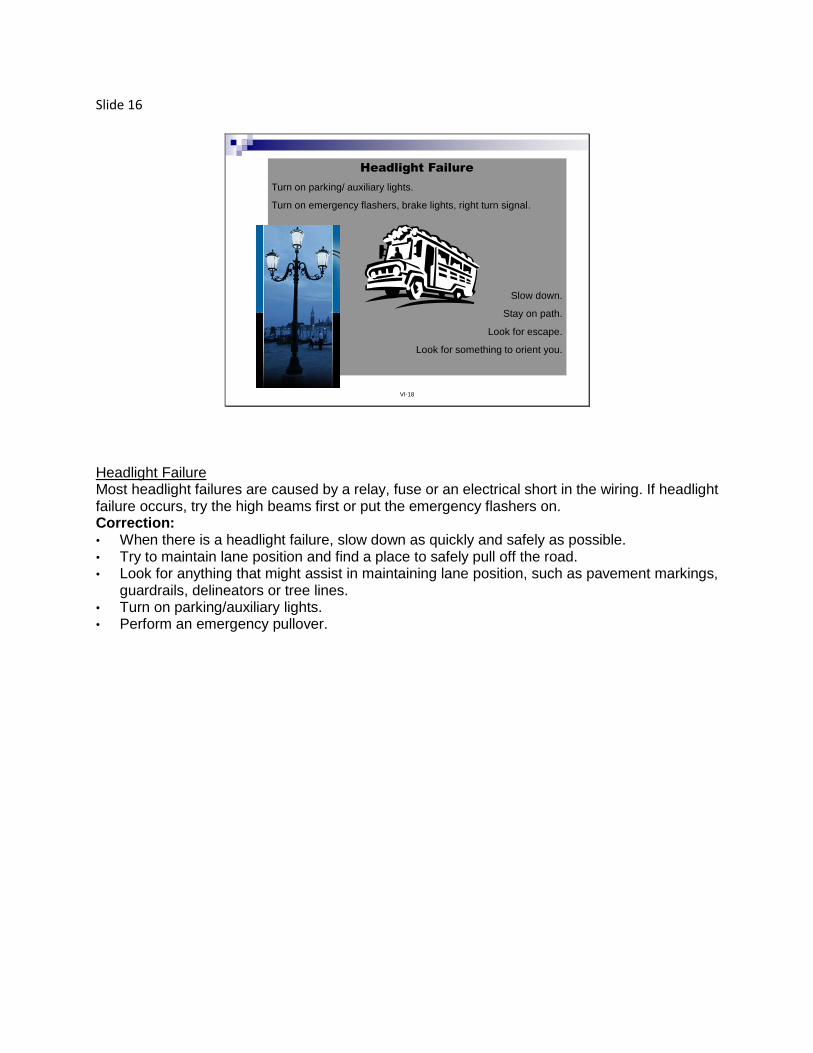
Slide 16
VI-18
Headlight Failure
Turn on parking/ auxiliary lights.
Turn on emergency flashers, brake lights, right turn signal.
Slow down.
Stay on path.
Look for escape.
Look for something to orient you.
Headlight Failure Most headlight failures are caused by a relay, fuse or an electrical short in the wiring. If headlight failure occurs, try the high beams first or put the emergency flashers on. Correction: • When there is a headlight failure, slow down as quickly and safely as possible. • Try to maintain lane position and find a place to safely pull off the road. • Look for anything that might assist in maintaining lane position, such as pavement markings,
guardrails, delineators or tree lines. • Turn on parking/auxiliary lights. • Perform an emergency pullover.
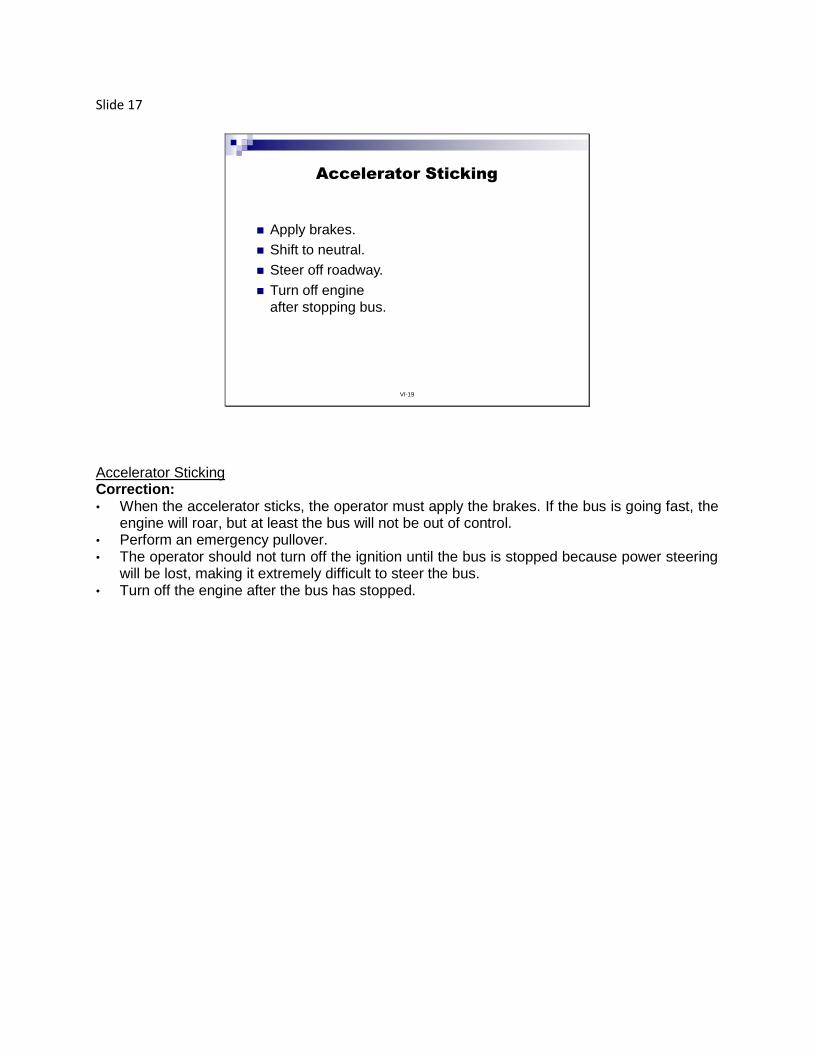
Slide 17
VI-19
Accelerator Sticking
Apply brakes.
Shift to neutral.
Steer off roadway.
Turn off engine
after stopping bus.
Accelerator Sticking Correction: • When the accelerator sticks, the operator must apply the brakes. If the bus is going fast, the
engine will roar, but at least the bus will not be out of control. • Perform an emergency pullover. • The operator should not turn off the ignition until the bus is stopped because power steering
will be lost, making it extremely difficult to steer the bus. • Turn off the engine after the bus has stopped.
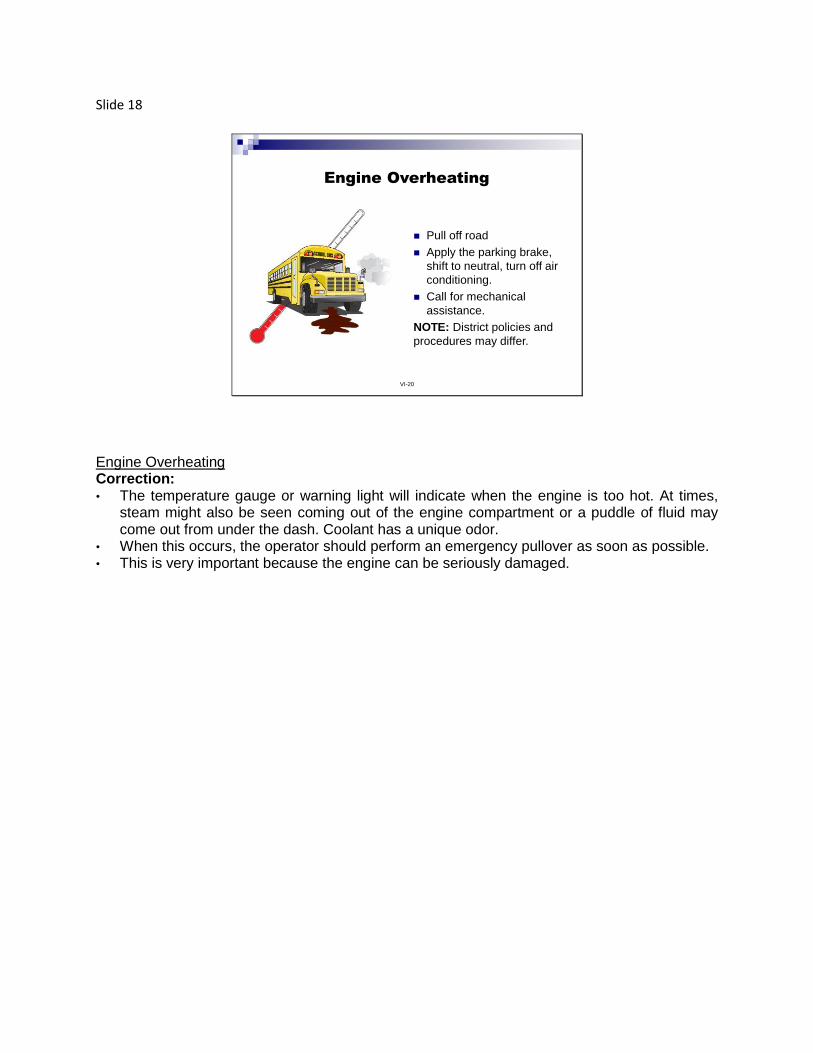
Slide 18
VI-20
Engine Overheating
Pull off road
Apply the parking brake,
shift to neutral, turn off air
conditioning.
Call for mechanical
assistance.
NOTE: District policies and
procedures may differ.
Engine Overheating Correction: • The temperature gauge or warning light will indicate when the engine is too hot. At times,
steam might also be seen coming out of the engine compartment or a puddle of fluid may come out from under the dash. Coolant has a unique odor.
• When this occurs, the operator should perform an emergency pullover as soon as possible. • This is very important because the engine can be seriously damaged.
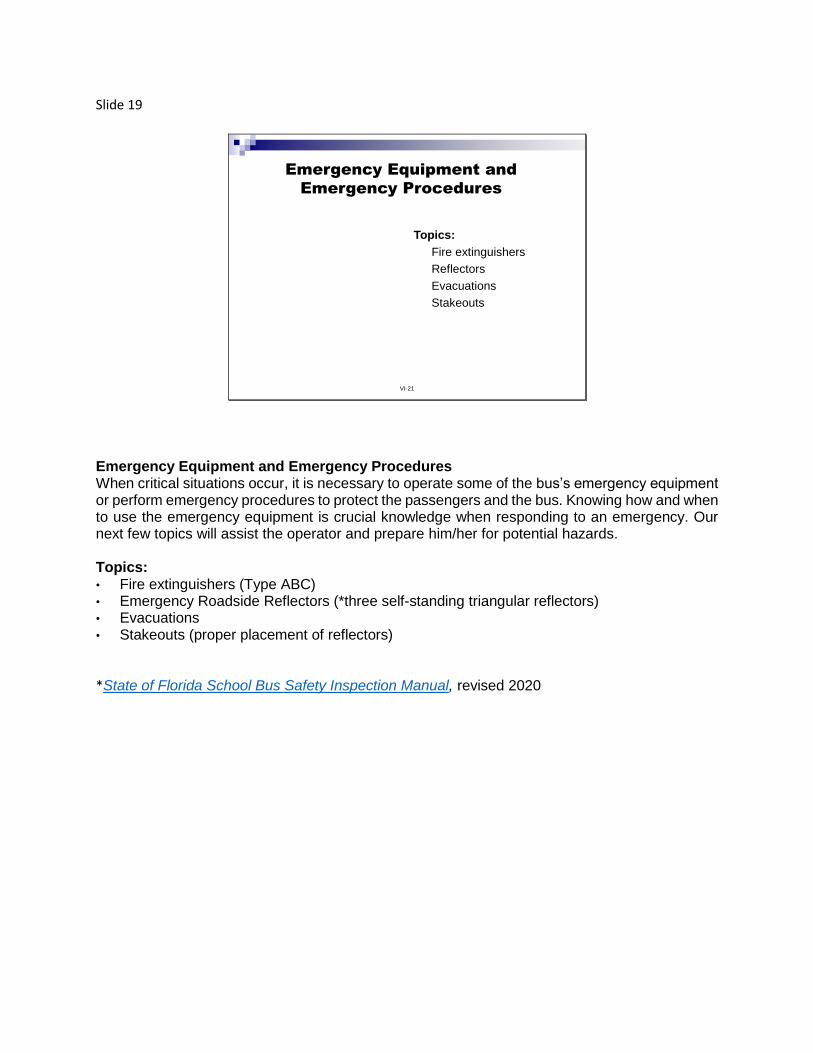
Slide 19
VI-21
Emergency Equipment and
Emergency Procedures
Topics:
Fire extinguishers
Reflectors
Evacuations
Stakeouts
Emergency Equipment and Emergency Procedures When critical situations occur, it is necessary to operate some of the bus’s emergency equipment or perform emergency procedures to protect the passengers and the bus. Knowing how and when to use the emergency equipment is crucial knowledge when responding to an emergency. Our next few topics will assist the operator and prepare him/her for potential hazards. Topics: • Fire extinguishers (Type ABC) • Emergency Roadside Reflectors (*three self-standing triangular reflectors) • Evacuations • Stakeouts (proper placement of reflectors) *State of Florida School Bus Safety Inspection Manual, revised 2020
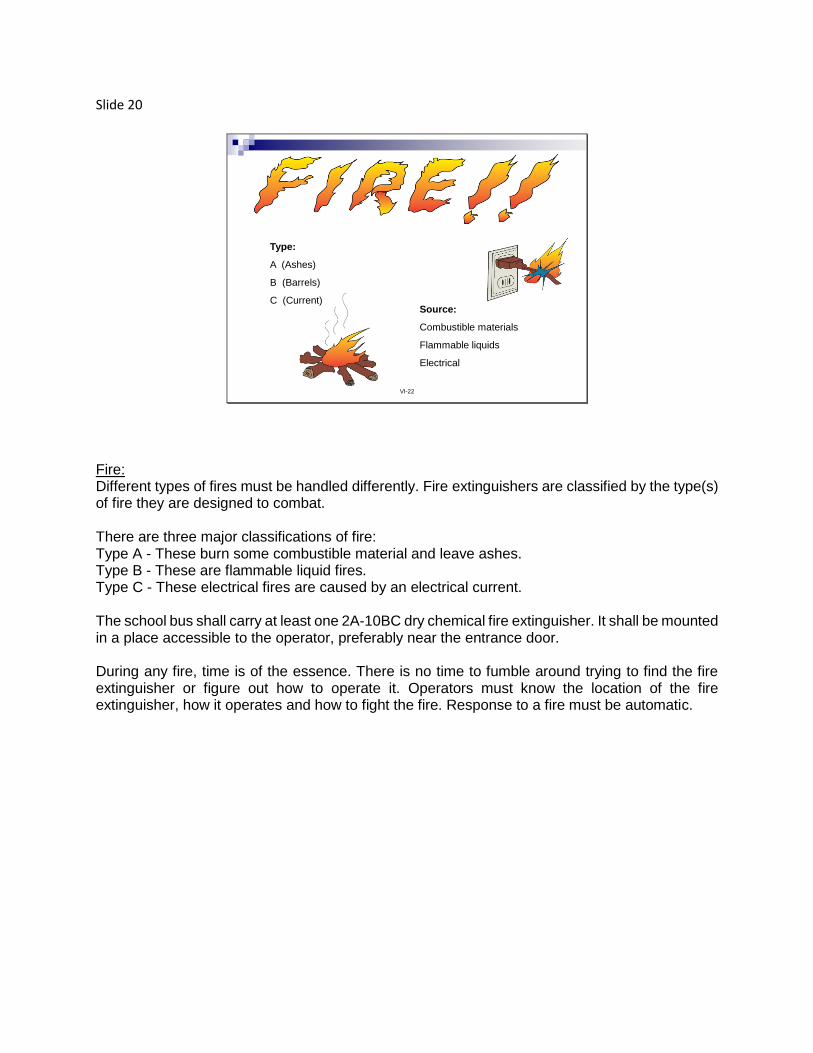
Slide 20
VI-22
Type:
A (Ashes)
B (Barrels)
C (Current)Source:
Combustible materials
Flammable liquids
Electrical
Fire: Different types of fires must be handled differently. Fire extinguishers are classified by the type(s) of fire they are designed to combat. There are three major classifications of fire: Type A - These burn some combustible material and leave ashes. Type B - These are flammable liquid fires. Type C - These electrical fires are caused by an electrical current. The school bus shall carry at least one 2A-10BC dry chemical fire extinguisher. It shall be mounted in a place accessible to the operator, preferably near the entrance door. During any fire, time is of the essence. There is no time to fumble around trying to find the fire extinguisher or figure out how to operate it. Operators must know the location of the fire extinguisher, how it operates and how to fight the fire. Response to a fire must be automatic.
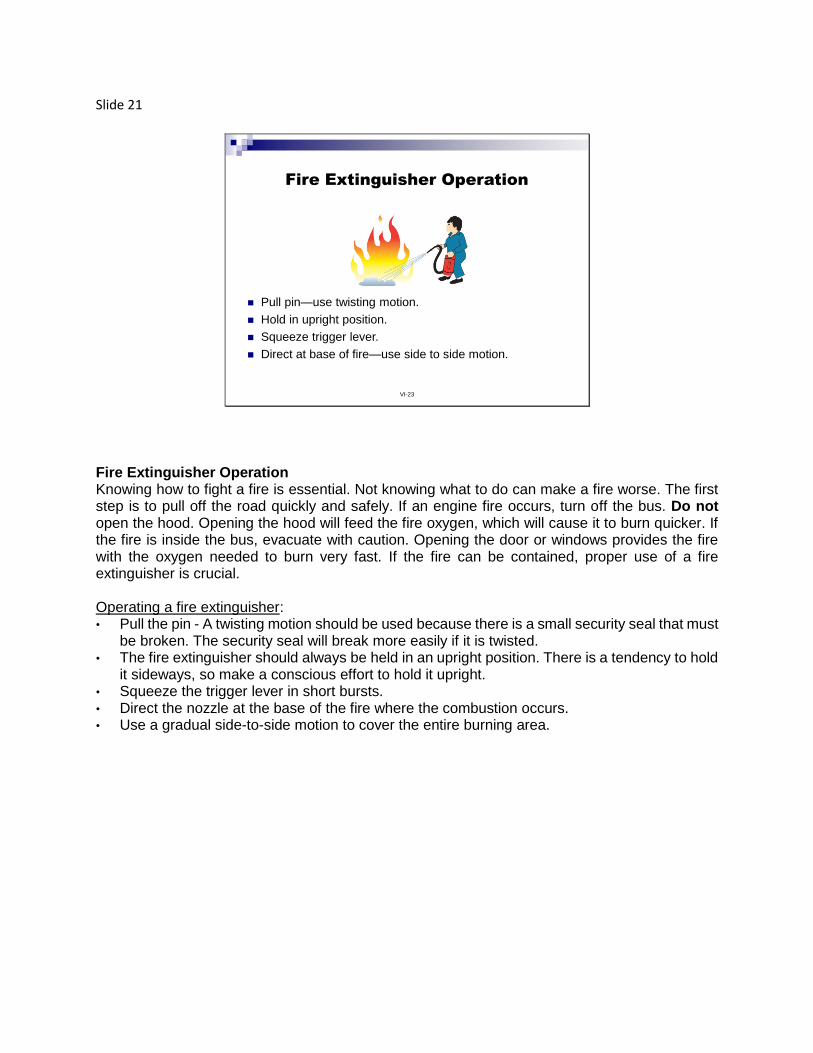
Slide 21
VI-23
Fire Extinguisher Operation
Pull pin—use twisting motion.
Hold in upright position.
Squeeze trigger lever.
Direct at base of fire—use side to side motion.
Fire Extinguisher Operation Knowing how to fight a fire is essential. Not knowing what to do can make a fire worse. The first step is to pull off the road quickly and safely. If an engine fire occurs, turn off the bus. Do not open the hood. Opening the hood will feed the fire oxygen, which will cause it to burn quicker. If the fire is inside the bus, evacuate with caution. Opening the door or windows provides the fire with the oxygen needed to burn very fast. If the fire can be contained, proper use of a fire extinguisher is crucial. Operating a fire extinguisher: • Pull the pin - A twisting motion should be used because there is a small security seal that must
be broken. The security seal will break more easily if it is twisted. • The fire extinguisher should always be held in an upright position. There is a tendency to hold
it sideways, so make a conscious effort to hold it upright. • Squeeze the trigger lever in short bursts. • Direct the nozzle at the base of the fire where the combustion occurs. • Use a gradual side-to-side motion to cover the entire burning area.
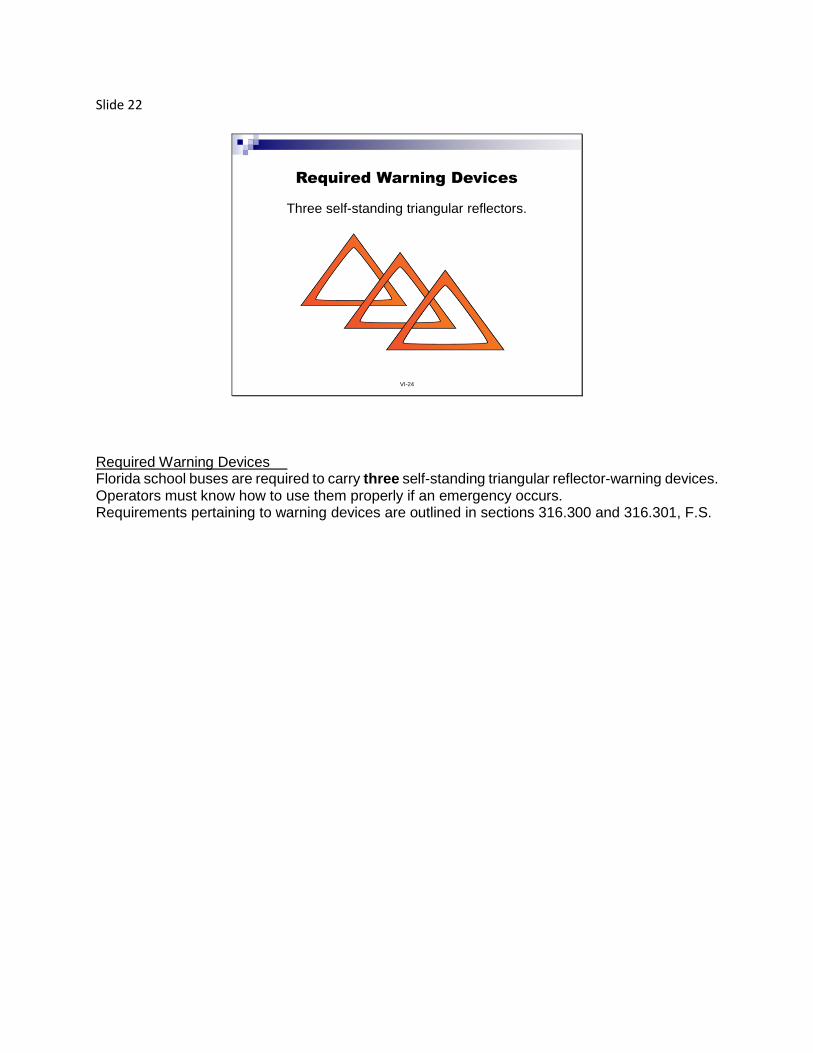
Slide 22
VI-24
Required Warning Devices
Three self-standing triangular reflectors.
Required Warning Devices Florida school buses are required to carry three self-standing triangular reflector-warning devices. Operators must know how to use them properly if an emergency occurs. Requirements pertaining to warning devices are outlined in sections 316.300 and 316.301, F.S.
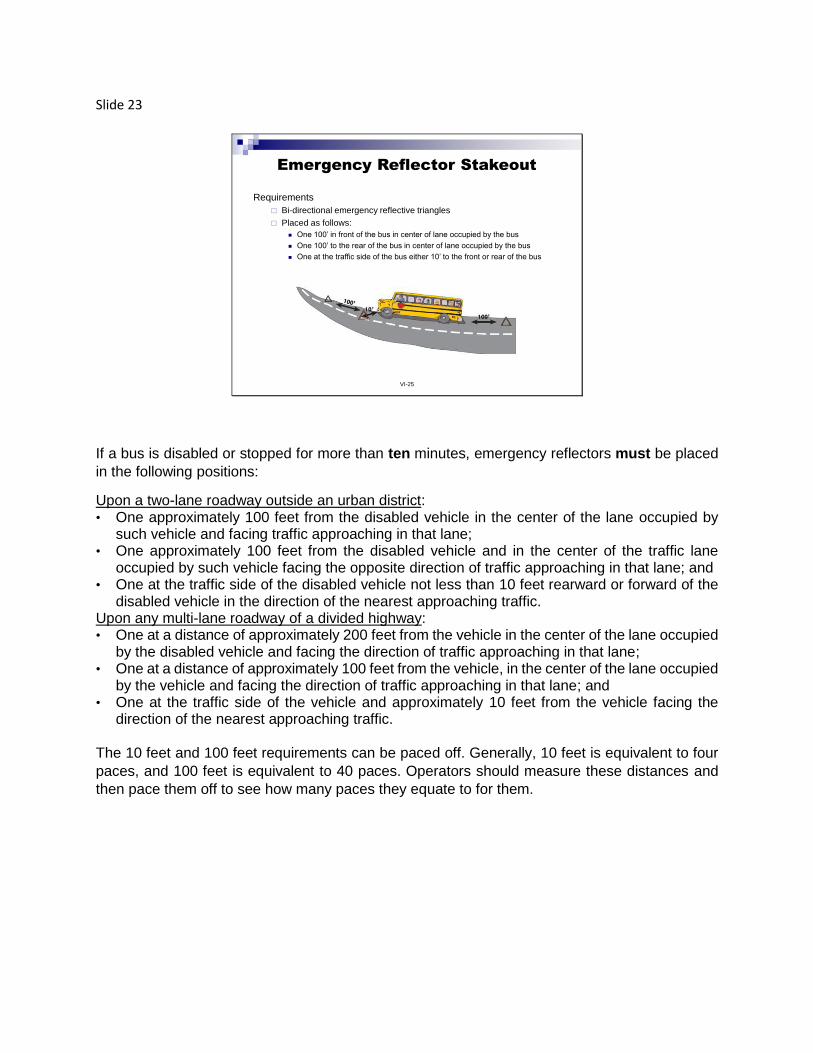
Slide 23
VI-25
Emergency Reflector Stakeout
Requirements
Bi-directional emergency reflective triangles
Placed as follows:
One 100’ in front of the bus in center of lane occupied by the bus
One 100’ to the rear of the bus in center of lane occupied by the bus
One at the traffic side of the bus either 10’ to the front or rear of the bus
If a bus is disabled or stopped for more than ten minutes, emergency reflectors must be placed
in the following positions:
Upon a two-lane roadway outside an urban district: • One approximately 100 feet from the disabled vehicle in the center of the lane occupied by
such vehicle and facing traffic approaching in that lane; • One approximately 100 feet from the disabled vehicle and in the center of the traffic lane
occupied by such vehicle facing the opposite direction of traffic approaching in that lane; and • One at the traffic side of the disabled vehicle not less than 10 feet rearward or forward of the
disabled vehicle in the direction of the nearest approaching traffic. Upon any multi-lane roadway of a divided highway: • One at a distance of approximately 200 feet from the vehicle in the center of the lane occupied
by the disabled vehicle and facing the direction of traffic approaching in that lane; • One at a distance of approximately 100 feet from the vehicle, in the center of the lane occupied
by the vehicle and facing the direction of traffic approaching in that lane; and • One at the traffic side of the vehicle and approximately 10 feet from the vehicle facing the
direction of the nearest approaching traffic.
The 10 feet and 100 feet requirements can be paced off. Generally, 10 feet is equivalent to four
paces, and 100 feet is equivalent to 40 paces. Operators should measure these distances and
then pace them off to see how many paces they equate to for them.
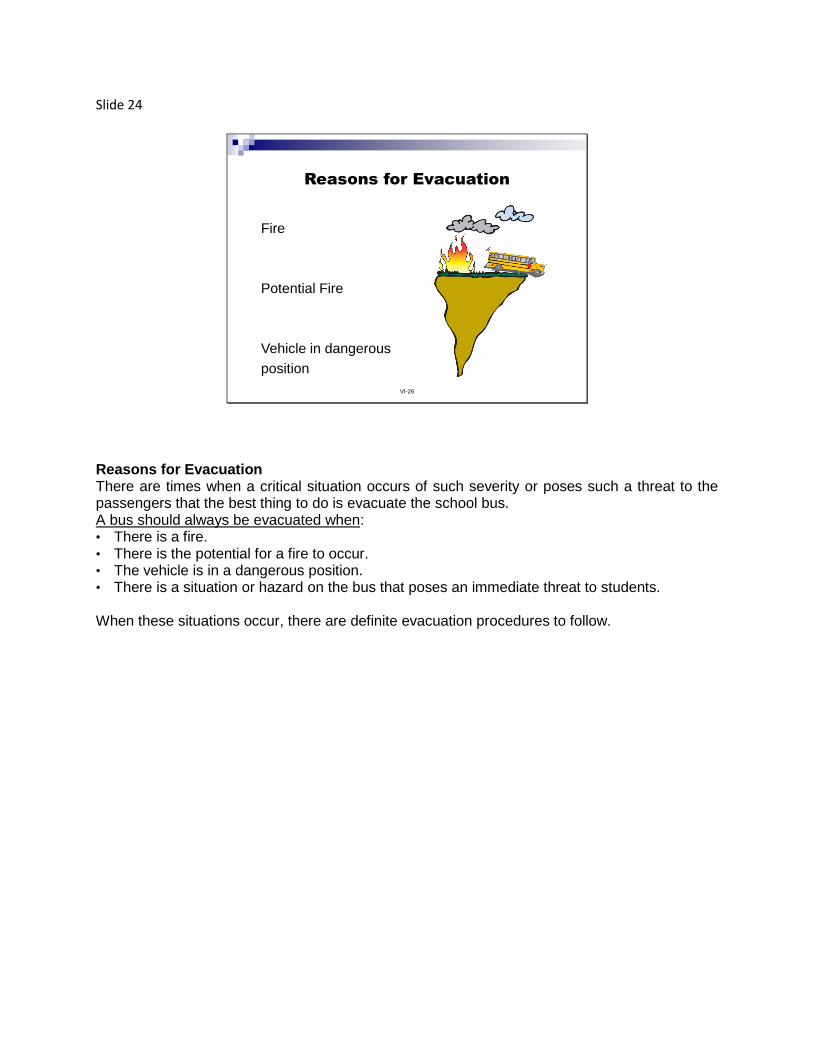
Slide 24
VI-26
Reasons for Evacuation
Fire
Potential Fire
Vehicle in dangerous
position
Reasons for Evacuation There are times when a critical situation occurs of such severity or poses such a threat to the passengers that the best thing to do is evacuate the school bus. A bus should always be evacuated when: • There is a fire. • There is the potential for a fire to occur. • The vehicle is in a dangerous position. • There is a situation or hazard on the bus that poses an immediate threat to students. When these situations occur, there are definite evacuation procedures to follow.
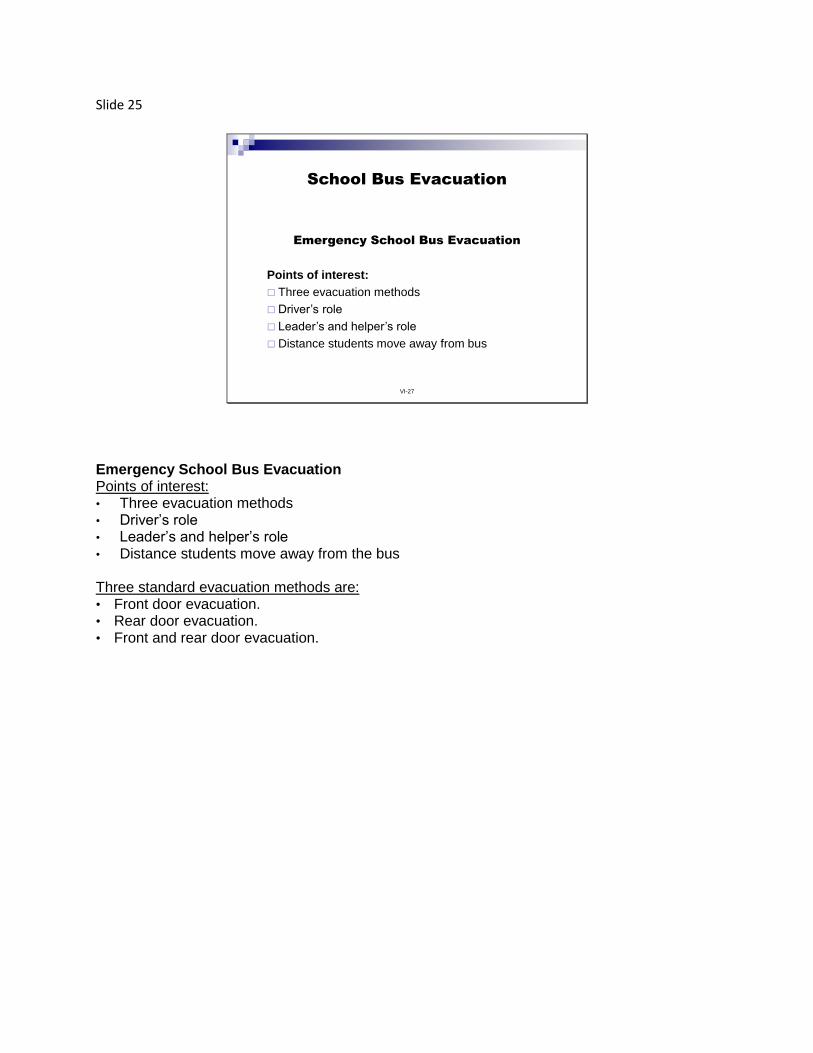
Slide 25
VI-27
School Bus Evacuation
Emergency School Bus Evacuation
Points of interest:
Three evacuation methods
Driver’s role
Leader’s and helper’s role
Distance students move away from bus
Emergency School Bus Evacuation Points of interest: • Three evacuation methods • Driver’s role • Leader’s and helper’s role • Distance students move away from the bus
Three standard evacuation methods are: • Front door evacuation. • Rear door evacuation. • Front and rear door evacuation.

Slide 26
VI-28
Front Door Evacuation
Front door evacuation procedure: • Direct helper to take position outside the front door. • Direct students to evacuate the bus through the front door. • Stand between first occupied seats facing the door. • Starting with the right seat, direct leader to lead students 100 feet from the bus. • Direct students in the left seat to follow students in the right seat. • Continue the procedure for each row, alternating from right to left seats until the bus is empty. • Walk through the bus, checking each seat for any remaining students. • Leave the bus through the front door and have the helper go with you to join the other students.
Slide 27
VI-29
Rear Door Evacuation
Rear door evacuation procedure: • Direct students to evacuate the bus through the rear door. Instruct students to sit and scoot,
never jump, from the back door. • Walk to the rear of bus and face the rear door. • Have helper open the door and take position outside the door. • Have leader stand in the doorway to lead students 100 feet from the bus. • Direct students in the back row on your right to evacuate through the back door. • Continue procedure for each row, alternating from left to right until the bus is empty. • When you reach the front of the bus, return to the back, checking to be sure that all students
have evacuated the bus. • Leave by the back door and join students.

Slide 28
VI-30
Front and Rear Door Evacuation
Front and rear door evacuation procedure: • Direct students to evacuate the bus through the front and rear doors. Rows 1-5 exit out the
front door, and rows 6-11 exit out the back. Instruct students to sit and scoot, never jump, from the back door.
• Walk to the rear of the bus and face the rear door. • Have helpers take positions outside of the front and rear doors. • Have leaders stand in doorway to lead students 100 feet from the bus. • Direct students sitting in the front right seat and right rear seat to follow the appropriate leader. • Direct students sitting in the front left seat and rear left seat to follow other students. • Continue procedure for each row alternating from right to left until the bus is empty. • Walk to the front of the bus, checking all remaining rows to be sure there are no students
remaining. • Leave the bus by the front door and have helpers go with you to join other students.
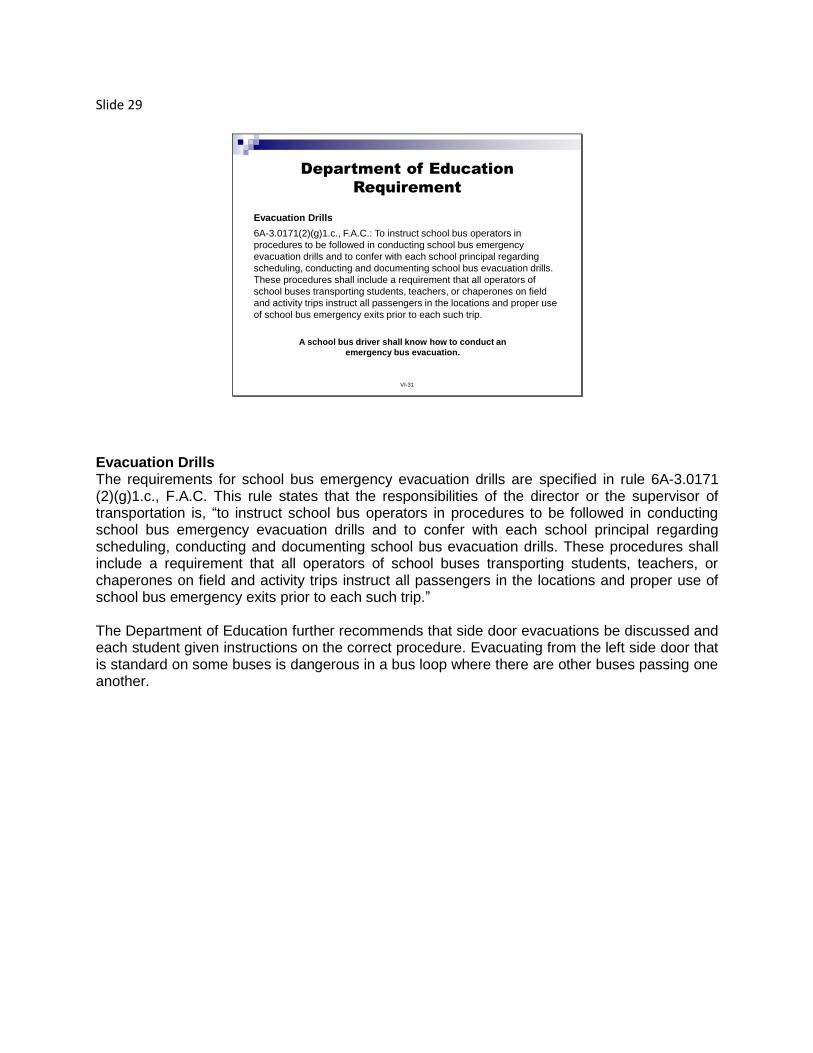
Slide 29
Department of Education
Requirement
Evacuation Drills
6A-3.0171(2)(g)1.c., F.A.C.: To instruct school bus operators in
procedures to be followed in conducting school bus emergency
evacuation drills and to confer with each school principal regarding
scheduling, conducting and documenting school bus evacuation drills.
These procedures shall include a requirement that all operators of
school buses transporting students, teachers, or chaperones on field
and activity trips instruct all passengers in the locations and proper use
of school bus emergency exits prior to each such trip.
VI-31
A school bus driver shall know how to conduct an
emergency bus evacuation.
Evacuation Drills The requirements for school bus emergency evacuation drills are specified in rule 6A-3.0171 (2)(g)1.c., F.A.C. This rule states that the responsibilities of the director or the supervisor of transportation is, “to instruct school bus operators in procedures to be followed in conducting school bus emergency evacuation drills and to confer with each school principal regarding scheduling, conducting and documenting school bus evacuation drills. These procedures shall include a requirement that all operators of school buses transporting students, teachers, or chaperones on field and activity trips instruct all passengers in the locations and proper use of school bus emergency exits prior to each such trip.” The Department of Education further recommends that side door evacuations be discussed and each student given instructions on the correct procedure. Evacuating from the left side door that is standard on some buses is dangerous in a bus loop where there are other buses passing one another.
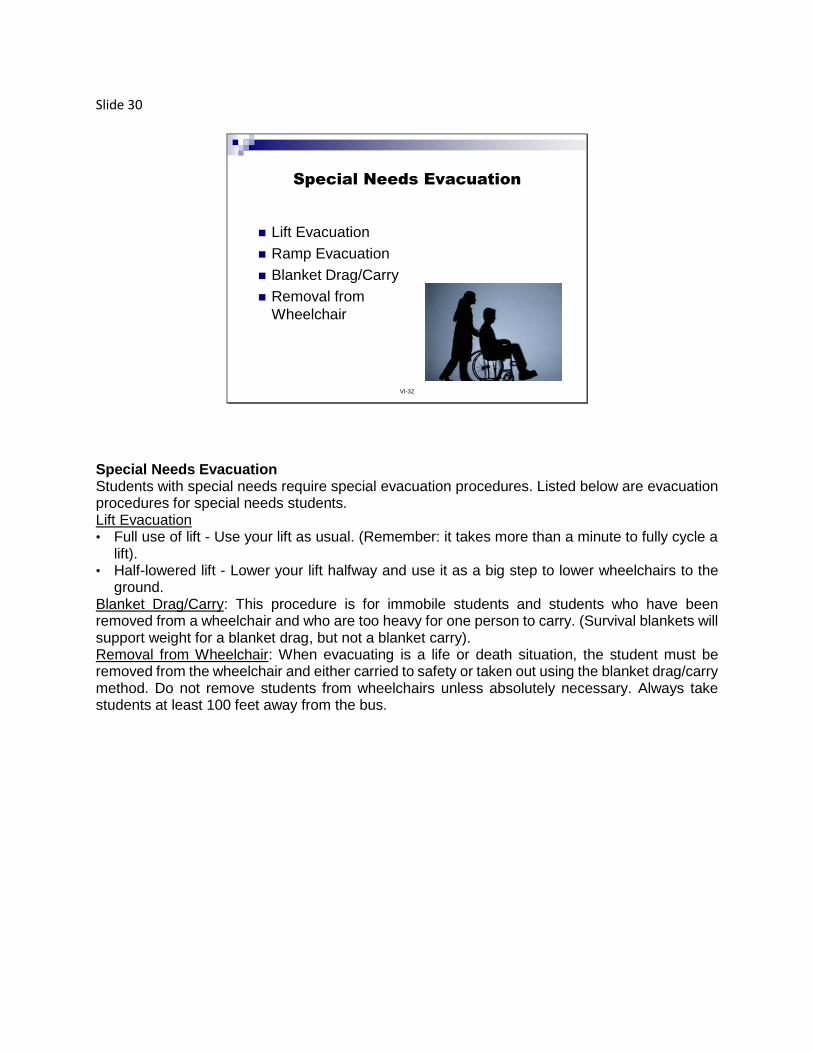
Slide 30
VI-32
Special Needs Evacuation
Lift Evacuation
Ramp Evacuation
Blanket Drag/Carry
Removal from
Wheelchair
Special Needs Evacuation Students with special needs require special evacuation procedures. Listed below are evacuation procedures for special needs students. Lift Evacuation • Full use of lift - Use your lift as usual. (Remember: it takes more than a minute to fully cycle a
lift). • Half-lowered lift - Lower your lift halfway and use it as a big step to lower wheelchairs to the
ground. Blanket Drag/Carry: This procedure is for immobile students and students who have been removed from a wheelchair and who are too heavy for one person to carry. (Survival blankets will support weight for a blanket drag, but not a blanket carry). Removal from Wheelchair: When evacuating is a life or death situation, the student must be removed from the wheelchair and either carried to safety or taken out using the blanket drag/carry method. Do not remove students from wheelchairs unless absolutely necessary. Always take students at least 100 feet away from the bus.
Slide 31
VI-33
Summary
Responses to critical situations
Preventing and correcting: traction loss
loss of brakes
steering failure
tire blowout
headlight failure
accelerator sticking
engine overheating
Classifications of fire
School bus evacuation procedures
In this unit, we reviewed responses to critical situations, preventing and correcting traction loss, loss of brakes, steering failure, tire blowout, headlight failure, accelerator sticking and engine overheating. We discussed the classifications of fire and how to properly use a fire extinguisher in the event of a fire. In addition, we went over the three school bus evacuation procedures.


Slide 1
UNIT 7
SCHOOL BUS CRASH
PROCEDURES
EQUIPMENT: • Computer projection system • Screen • Whiteboard, markers, eraser REFERENCES: • Motor Vehicle Traffic Laws of Florida, Sections 316.027, 316.061, 316.062, 316.063, 316.065,
F.S. • Rule 6A-3.0171, F.A.C. • Good Samaritan Act, Section 768.13, F.S. • District School Board Policies OPTIONAL STRATEGIES: • Local law enforcement officials could be asked to discuss the responsibility of motorists when
involved in a crash. OBJECTIVES—The operator will be able to: • Explain the actions required and the subsequent penalties when involved in a crash with an
attended vehicle or pedestrian; and • Explain the actions required and subsequent penalties when involved in a crash with an
unattended vehicle or fixed object.
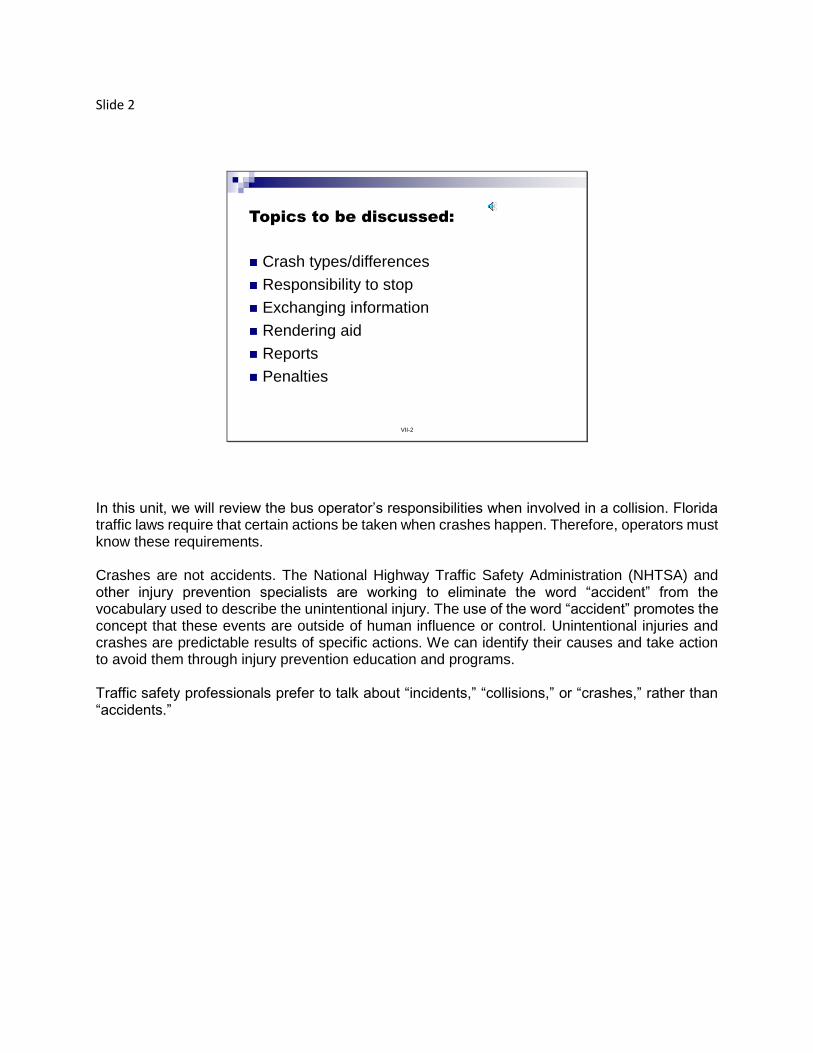
Slide 2
VII-2
Topics to be discussed:
Crash types/differences
Responsibility to stop
Exchanging information
Rendering aid
Reports
Penalties
In this unit, we will review the bus operator’s responsibilities when involved in a collision. Florida traffic laws require that certain actions be taken when crashes happen. Therefore, operators must know these requirements. Crashes are not accidents. The National Highway Traffic Safety Administration (NHTSA) and other injury prevention specialists are working to eliminate the word “accident” from the vocabulary used to describe the unintentional injury. The use of the word “accident” promotes the concept that these events are outside of human influence or control. Unintentional injuries and crashes are predictable results of specific actions. We can identify their causes and take action to avoid them through injury prevention education and programs. Traffic safety professionals prefer to talk about “incidents,” “collisions,” or “crashes,” rather than “accidents.”
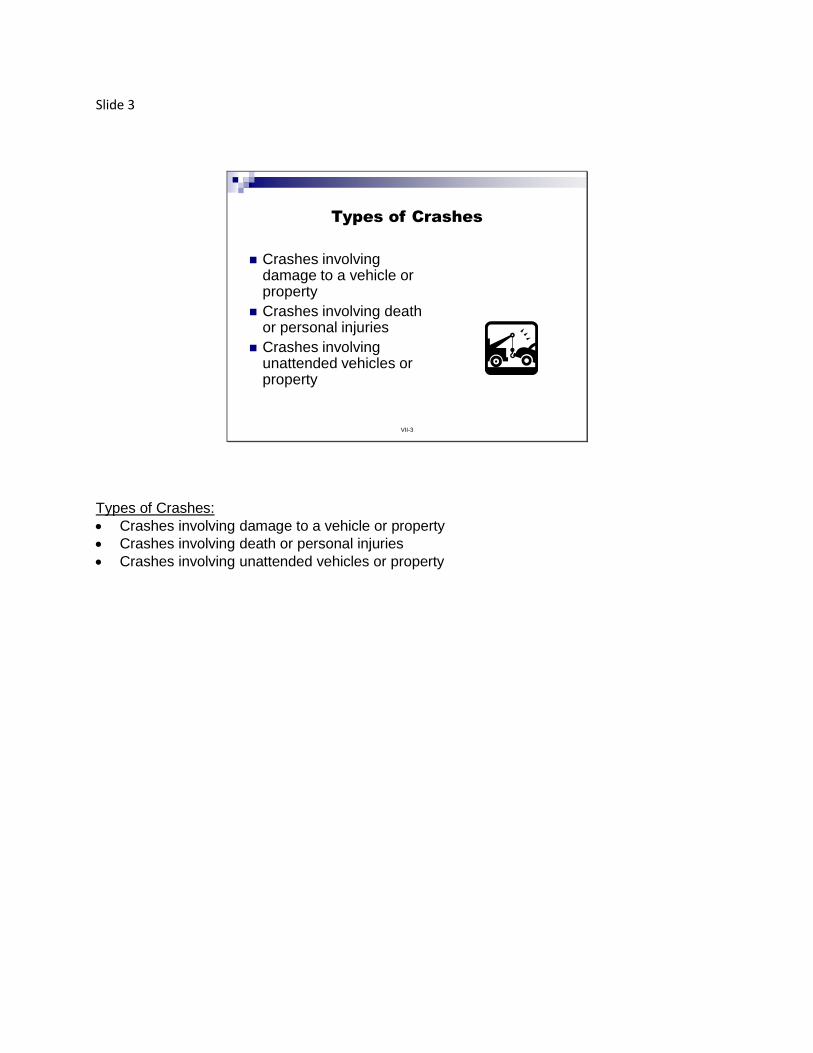
Slide 3
VII-3
Types of Crashes
Crashes involving damage to a vehicle or property
Crashes involving death or personal injuries
Crashes involving unattended vehicles or property
Types of Crashes:
Crashes involving damage to a vehicle or property
Crashes involving death or personal injuries
Crashes involving unattended vehicles or property
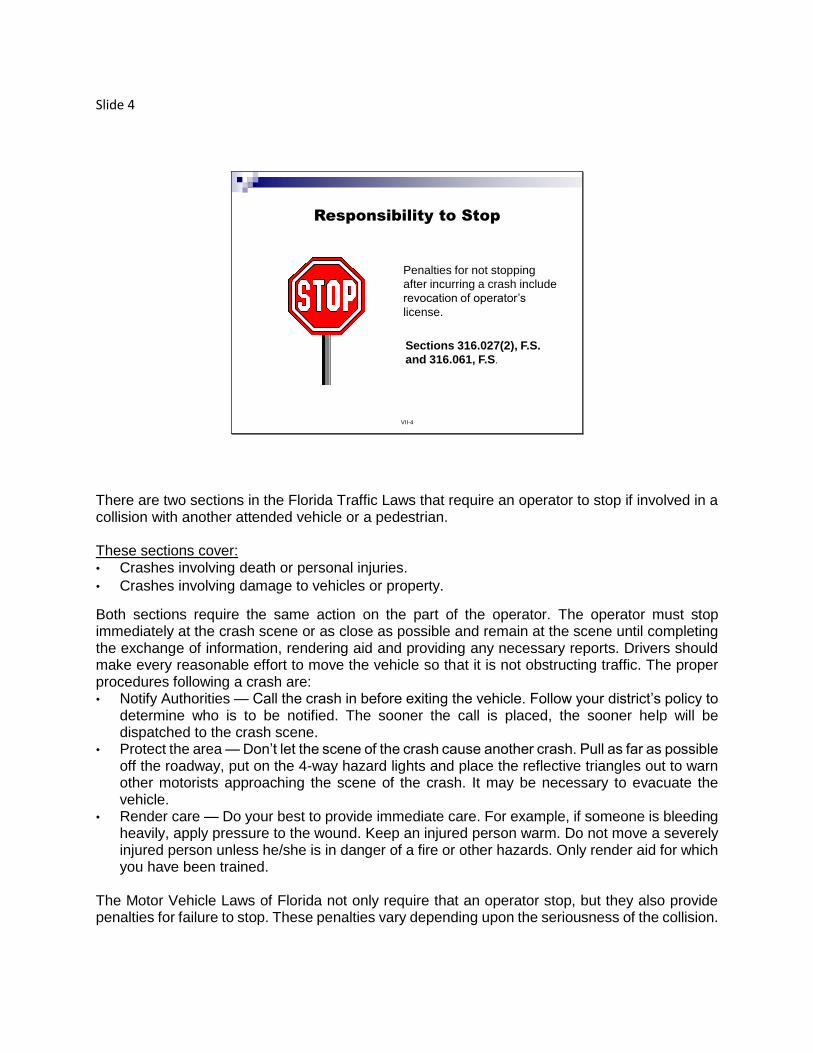
Slide 4
VII-4
Responsibility to Stop
Penalties for not stopping
after incurring a crash include
revocation of operator’s
license.
Sections 316.027(2), F.S.
and 316.061, F.S.
There are two sections in the Florida Traffic Laws that require an operator to stop if involved in a collision with another attended vehicle or a pedestrian. These sections cover: • Crashes involving death or personal injuries.
• Crashes involving damage to vehicles or property.
Both sections require the same action on the part of the operator. The operator must stop immediately at the crash scene or as close as possible and remain at the scene until completing the exchange of information, rendering aid and providing any necessary reports. Drivers should make every reasonable effort to move the vehicle so that it is not obstructing traffic. The proper procedures following a crash are: • Notify Authorities — Call the crash in before exiting the vehicle. Follow your district’s policy to
determine who is to be notified. The sooner the call is placed, the sooner help will be dispatched to the crash scene.
• Protect the area — Don’t let the scene of the crash cause another crash. Pull as far as possible off the roadway, put on the 4-way hazard lights and place the reflective triangles out to warn other motorists approaching the scene of the crash. It may be necessary to evacuate the vehicle.
• Render care — Do your best to provide immediate care. For example, if someone is bleeding heavily, apply pressure to the wound. Keep an injured person warm. Do not move a severely injured person unless he/she is in danger of a fire or other hazards. Only render aid for which you have been trained.
The Motor Vehicle Laws of Florida not only require that an operator stop, but they also provide penalties for failure to stop. These penalties vary depending upon the seriousness of the collision.

Penalties for failure to stop after any crash involving injury or death may include revoking the driver’s license, as provided in s. 316.027(2), F.S.
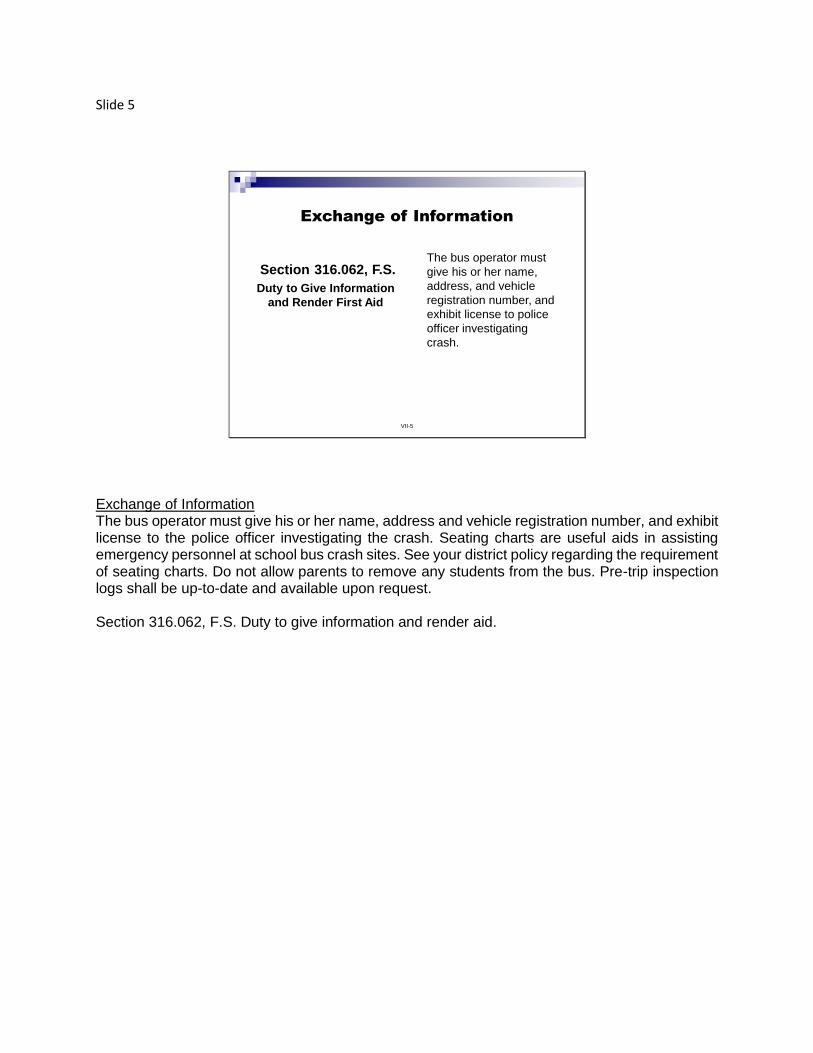
Slide 5
Exchange of Information
Section 316.062, F.S.
Duty to Give Information
and Render First Aid
The bus operator must
give his or her name,
address, and vehicle
registration number, and
exhibit license to police
officer investigating
crash.
VII-5
Exchange of Information The bus operator must give his or her name, address and vehicle registration number, and exhibit license to the police officer investigating the crash. Seating charts are useful aids in assisting emergency personnel at school bus crash sites. See your district policy regarding the requirement of seating charts. Do not allow parents to remove any students from the bus. Pre-trip inspection logs shall be up-to-date and available upon request. Section 316.062, F.S. Duty to give information and render aid.
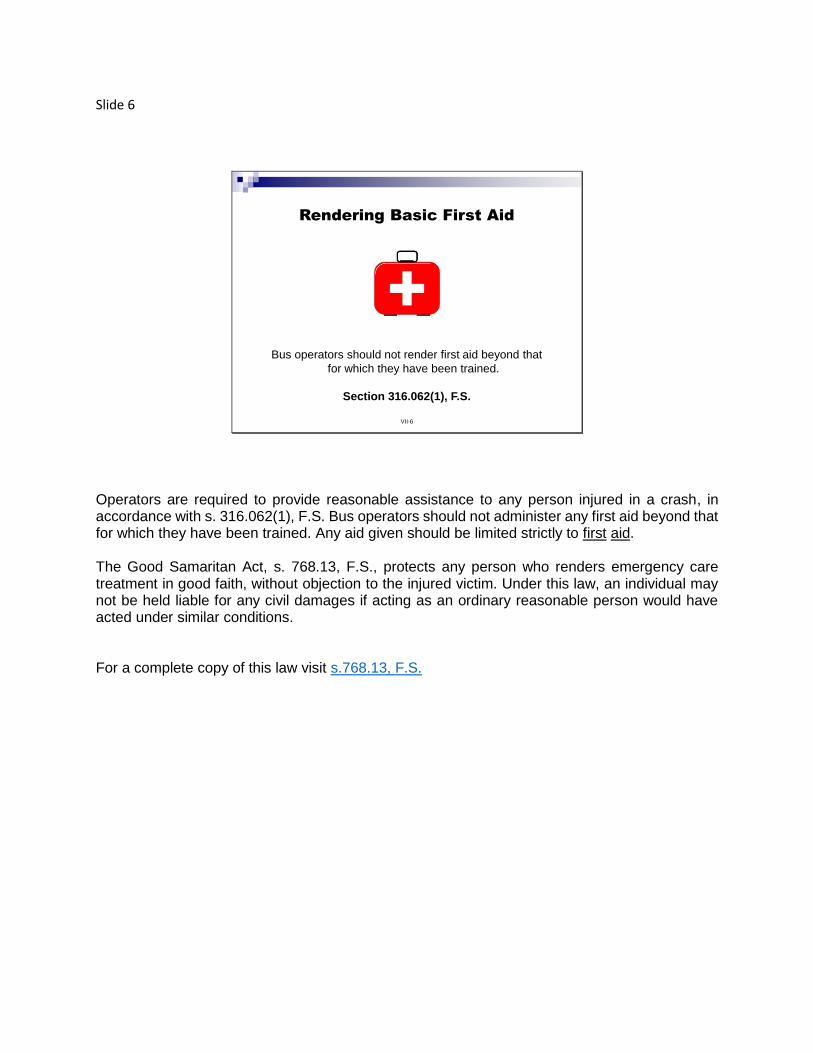
Slide 6
VII-6
Rendering Basic First Aid
Bus operators should not render first aid beyond that
for which they have been trained.
Section 316.062(1), F.S.
Operators are required to provide reasonable assistance to any person injured in a crash, in accordance with s. 316.062(1), F.S. Bus operators should not administer any first aid beyond that for which they have been trained. Any aid given should be limited strictly to first aid. The Good Samaritan Act, s. 768.13, F.S., protects any person who renders emergency care treatment in good faith, without objection to the injured victim. Under this law, an individual may not be held liable for any civil damages if acting as an ordinary reasonable person would have acted under similar conditions. For a complete copy of this law visit s.768.13, F.S.
Slide 7
Reporting Crashes
An operator's final obligation when involved
in a crash is to report it. This is specified in
the Motor Vehicle Laws of Florida.
Florida Traffic Law requires that crashes
be reported to the police.
Section 316.065, F.S.
VII-7
Reporting Crashes: An operator's final obligation when involved in a crash is to report it. This is specified in the Motor Vehicle Laws of Florida. Section 316.065, F.S., requires drivers to immediately notify the local police department (or nearest sheriff or Florida Highway Patrol office) if any crash results in injury or death of any persons or damage to any vehicle or other property of at least $500.
Slide 8
VII-8
Reporting Crashes
(continued)
The Florida Department of Education requires
that all crashes involving personal injury or
property damage, no matter how small, be
reported to the operator's supervisor.
Rule 6A-3.0171, F.A.C.
Reporting Crashes: (continued) The Florida Department of Education requires that all crashes involving personal injury or property damage, no matter how small, be reported to the operator's supervisor. Rule 6A-3.0171, F.A.C., requires an accident report to be filed with the director of transportation immediately after every accident involving a bus or a school bus passenger. TAN-2016-03 from the School Business Services School Transportation Management section reads, “The requirement for school districts and charter schools to report school bus crashes to the FDOE was eliminated. Crash data is already collected by the investigating law enforcement agencies and is available to school districts and other entities via Florida’s Integrated Report Exchange System portal at www.firesportal.com.” However, school districts and charter schools continue to report crashes to the department as a courtesy.
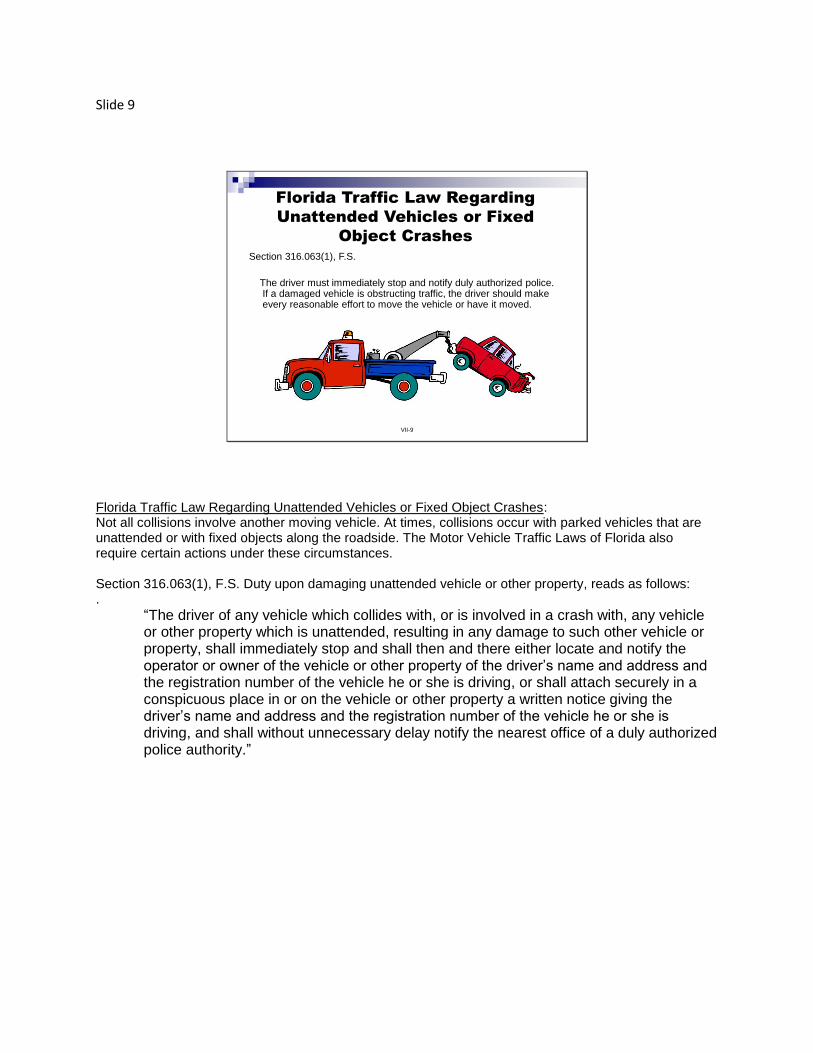
Slide 9
VII-9
Florida Traffic Law Regarding
Unattended Vehicles or Fixed
Object Crashes
Section 316.063(1), F.S.
The driver must immediately stop and notify duly authorized police. If a damaged vehicle is obstructing traffic, the driver should make every reasonable effort to move the vehicle or have it moved.
Florida Traffic Law Regarding Unattended Vehicles or Fixed Object Crashes: Not all collisions involve another moving vehicle. At times, collisions occur with parked vehicles that are unattended or with fixed objects along the roadside. The Motor Vehicle Traffic Laws of Florida also require certain actions under these circumstances. Section 316.063(1), F.S. Duty upon damaging unattended vehicle or other property, reads as follows: .
“The driver of any vehicle which collides with, or is involved in a crash with, any vehicle or other property which is unattended, resulting in any damage to such other vehicle or property, shall immediately stop and shall then and there either locate and notify the operator or owner of the vehicle or other property of the driver’s name and address and the registration number of the vehicle he or she is driving, or shall attach securely in a conspicuous place in or on the vehicle or other property a written notice giving the driver’s name and address and the registration number of the vehicle he or she is driving, and shall without unnecessary delay notify the nearest office of a duly authorized police authority.”
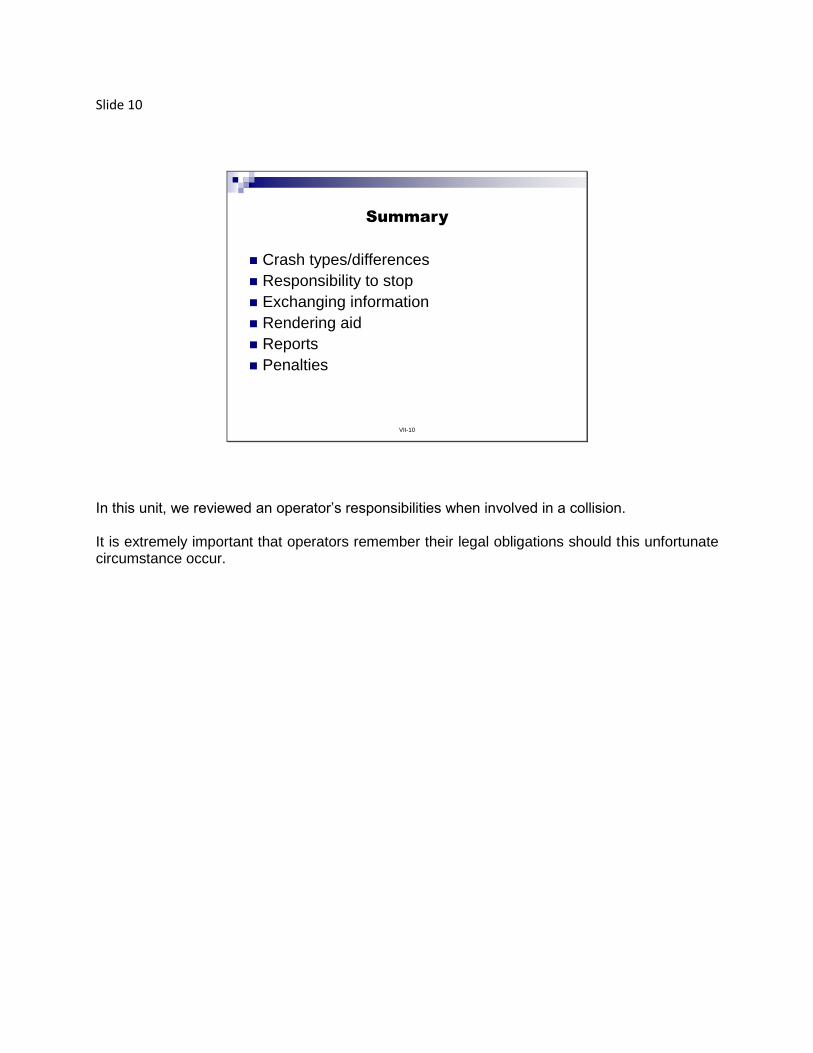
Slide 10
VII-10
Summary
Crash types/differences
Responsibility to stop
Exchanging information
Rendering aid
Reports
Penalties
In this unit, we reviewed an operator’s responsibilities when involved in a collision. It is extremely important that operators remember their legal obligations should this unfortunate circumstance occur.

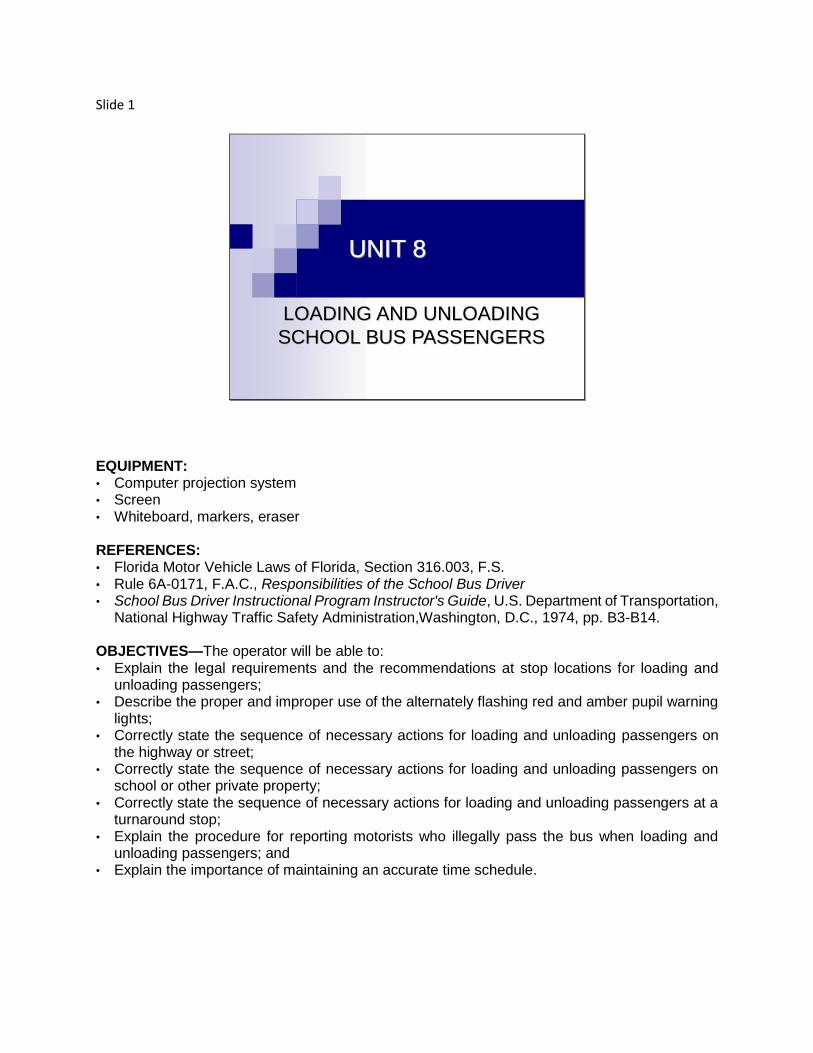
Slide 1
UNIT 8
LOADING AND UNLOADING
SCHOOL BUS PASSENGERS
EQUIPMENT: • Computer projection system • Screen • Whiteboard, markers, eraser REFERENCES: • Florida Motor Vehicle Laws of Florida, Section 316.003, F.S. • Rule 6A-0171, F.A.C., Responsibilities of the School Bus Driver • School Bus Driver Instructional Program Instructor's Guide, U.S. Department of Transportation,
National Highway Traffic Safety Administration,Washington, D.C., 1974, pp. B3-B14. OBJECTIVES—The operator will be able to: • Explain the legal requirements and the recommendations at stop locations for loading and
unloading passengers; • Describe the proper and improper use of the alternately flashing red and amber pupil warning
lights; • Correctly state the sequence of necessary actions for loading and unloading passengers on
the highway or street; • Correctly state the sequence of necessary actions for loading and unloading passengers on
school or other private property; • Correctly state the sequence of necessary actions for loading and unloading passengers at a
turnaround stop; • Explain the procedure for reporting motorists who illegally pass the bus when loading and
unloading passengers; and • Explain the importance of maintaining an accurate time schedule.
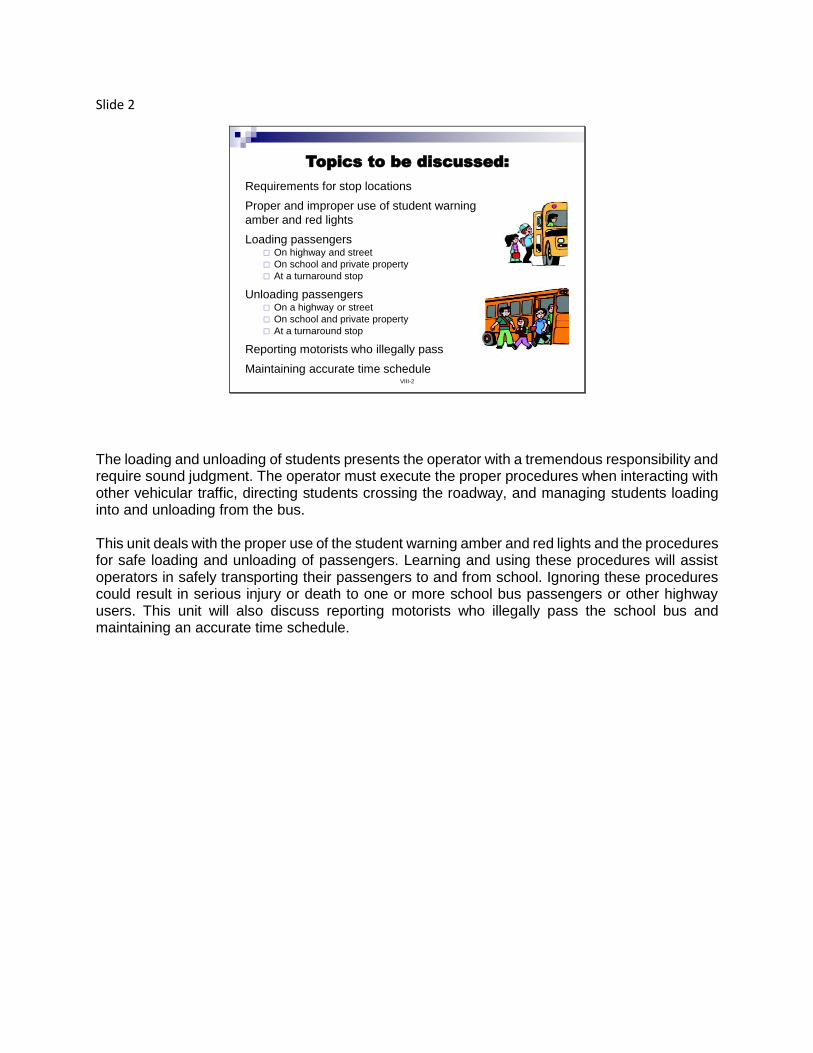
Slide 2
VIII-2
Topics to be discussed:
Requirements for stop locations
Proper and improper use of student warning
amber and red lights
Loading passengers On highway and street
On school and private property
At a turnaround stop
Unloading passengers On a highway or street
On school and private property
At a turnaround stop
Reporting motorists who illegally pass
Maintaining accurate time schedule
The loading and unloading of students presents the operator with a tremendous responsibility and require sound judgment. The operator must execute the proper procedures when interacting with other vehicular traffic, directing students crossing the roadway, and managing students loading into and unloading from the bus. This unit deals with the proper use of the student warning amber and red lights and the procedures for safe loading and unloading of passengers. Learning and using these procedures will assist operators in safely transporting their passengers to and from school. Ignoring these procedures could result in serious injury or death to one or more school bus passengers or other highway users. This unit will also discuss reporting motorists who illegally pass the school bus and maintaining an accurate time schedule.
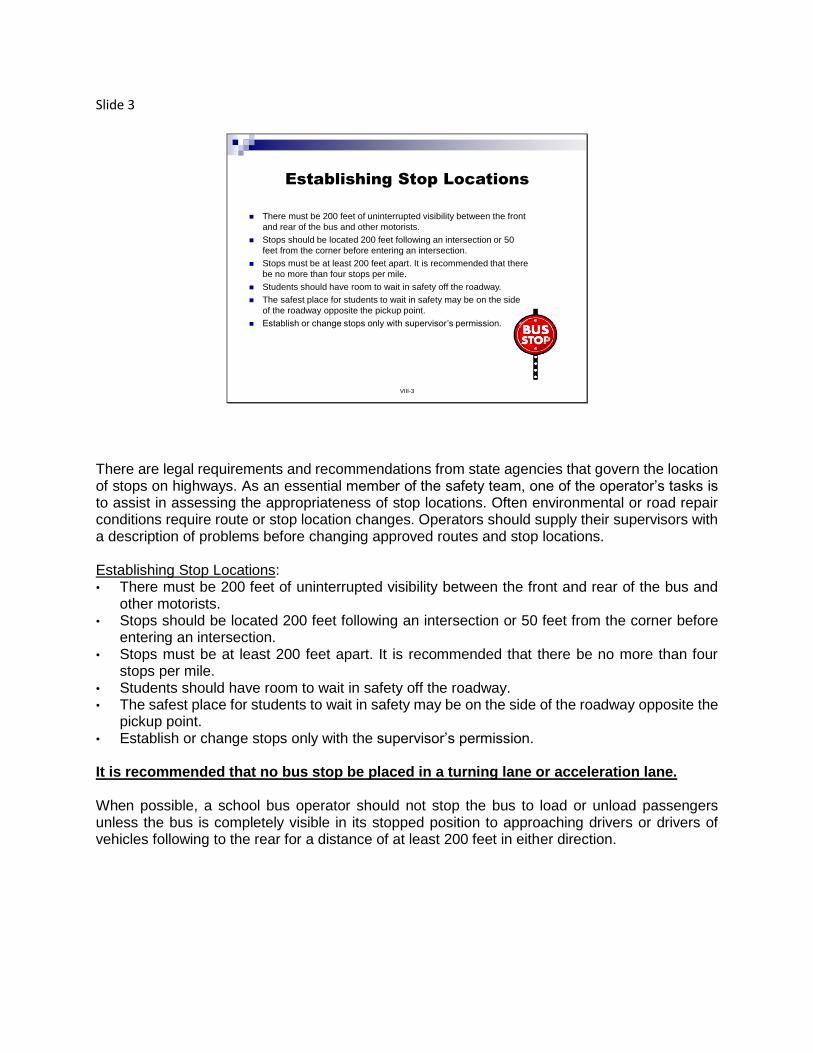
Slide 3
VIII-3
Establishing Stop Locations
There must be 200 feet of uninterrupted visibility between the front
and rear of the bus and other motorists.
Stops should be located 200 feet following an intersection or 50
feet from the corner before entering an intersection.
Stops must be at least 200 feet apart. It is recommended that there
be no more than four stops per mile.
Students should have room to wait in safety off the roadway.
The safest place for students to wait in safety may be on the side
of the roadway opposite the pickup point.
Establish or change stops only with supervisor’s permission.
There are legal requirements and recommendations from state agencies that govern the location of stops on highways. As an essential member of the safety team, one of the operator’s tasks is to assist in assessing the appropriateness of stop locations. Often environmental or road repair conditions require route or stop location changes. Operators should supply their supervisors with a description of problems before changing approved routes and stop locations. Establishing Stop Locations: • There must be 200 feet of uninterrupted visibility between the front and rear of the bus and
other motorists. • Stops should be located 200 feet following an intersection or 50 feet from the corner before
entering an intersection. • Stops must be at least 200 feet apart. It is recommended that there be no more than four
stops per mile. • Students should have room to wait in safety off the roadway. • The safest place for students to wait in safety may be on the side of the roadway opposite the
pickup point. • Establish or change stops only with the supervisor’s permission. It is recommended that no bus stop be placed in a turning lane or acceleration lane. When possible, a school bus operator should not stop the bus to load or unload passengers unless the bus is completely visible in its stopped position to approaching drivers or drivers of vehicles following to the rear for a distance of at least 200 feet in either direction.
Slide 4
VIII-4
Bus stops should be located at least 50 feet before entering an
intersection and at least 200 feet following an intersection,
maintaining 200 feet of uninterrupted visibility between the front and
rear of the bus and other motorists.
200 feet50 feet
Stops Near Intersections
Stops Near Intersections • Bus stops should be located at least 50 feet before entering an intersection and at least 200
feet following an intersection, maintaining 200 feet of uninterrupted visibility between the front and rear of the bus and other motorists.
• Because operators must give 200 feet advanced warning for a stop to load or unload students, stops at controlled intersections should be 200 feet following the intersection.
• Because the student warning amber lights must be activated 200 feet before the stop, stops must be at least 200 feet apart.
• The roadside can have an effect on bus stop locations. The roadside must be sufficiently clear so students have room to wait safely off the roadway.
The district school board is responsible for establishing bus routes, bus stop locations and passenger lists. The superintendent of schools or someone under his/her direction usually handles this responsibility. Operators should establish or change stops only with their supervisor’s permission.
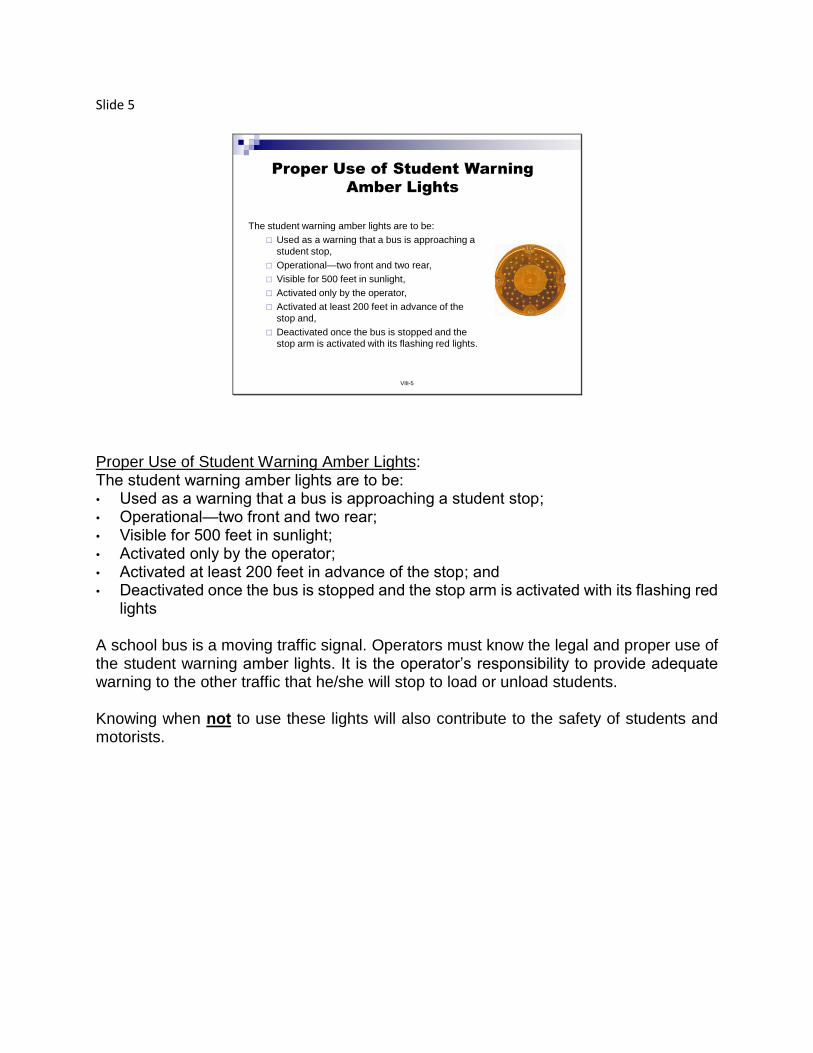
Slide 5
VIII-5
Proper Use of Student Warning
Amber Lights
The student warning amber lights are to be:
Used as a warning that a bus is approaching a
student stop,
Operational—two front and two rear,
Visible for 500 feet in sunlight,
Activated only by the operator,
Activated at least 200 feet in advance of the
stop and,
Deactivated once the bus is stopped and the
stop arm is activated with its flashing red lights.
Proper Use of Student Warning Amber Lights: The student warning amber lights are to be: • Used as a warning that a bus is approaching a student stop; • Operational—two front and two rear; • Visible for 500 feet in sunlight; • Activated only by the operator; • Activated at least 200 feet in advance of the stop; and • Deactivated once the bus is stopped and the stop arm is activated with its flashing red
lights A school bus is a moving traffic signal. Operators must know the legal and proper use of the student warning amber lights. It is the operator’s responsibility to provide adequate warning to the other traffic that he/she will stop to load or unload students. Knowing when not to use these lights will also contribute to the safety of students and motorists.
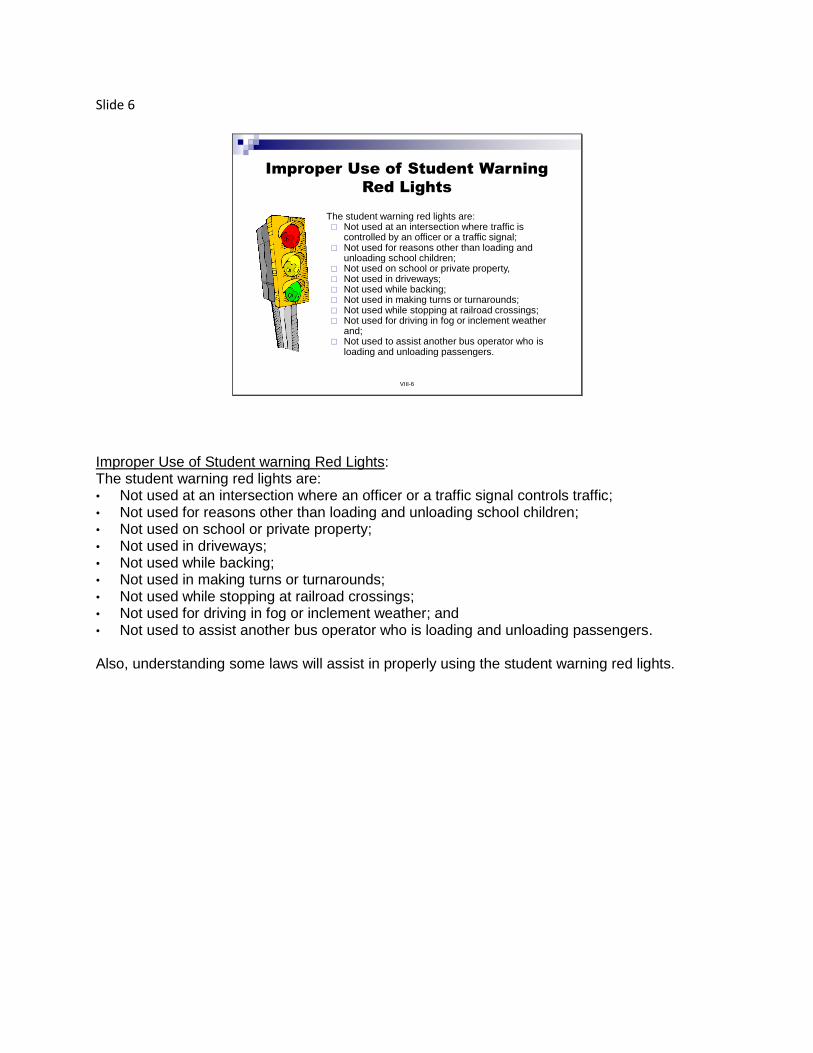
Slide 6
VIII-6
Improper Use of Student Warning
Red Lights
The student warning red lights are: Not used at an intersection where traffic is
controlled by an officer or a traffic signal; Not used for reasons other than loading and
unloading school children; Not used on school or private property, Not used in driveways; Not used while backing; Not used in making turns or turnarounds; Not used while stopping at railroad crossings; Not used for driving in fog or inclement weather
and; Not used to assist another bus operator who is
loading and unloading passengers.
Improper Use of Student warning Red Lights: The student warning red lights are: • Not used at an intersection where an officer or a traffic signal controls traffic; • Not used for reasons other than loading and unloading school children; • Not used on school or private property; • Not used in driveways; • Not used while backing; • Not used in making turns or turnarounds; • Not used while stopping at railroad crossings; • Not used for driving in fog or inclement weather; and • Not used to assist another bus operator who is loading and unloading passengers. Also, understanding some laws will assist in properly using the student warning red lights.
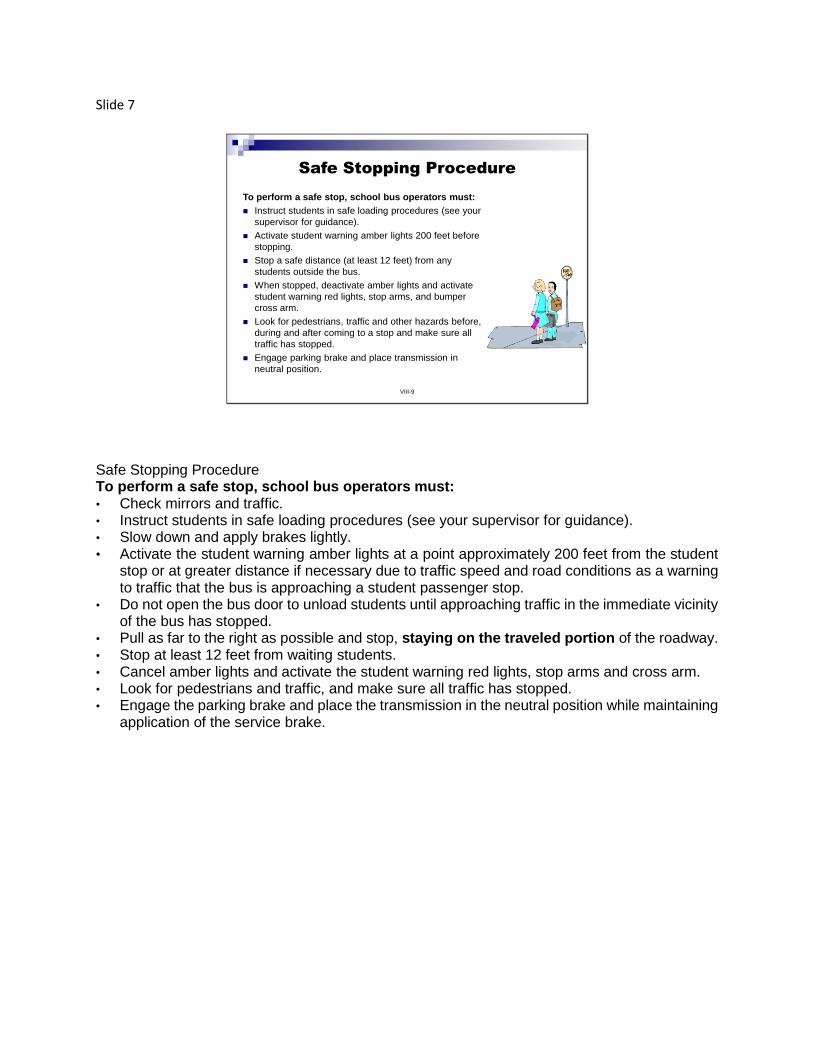
Slide 7
VIII-9
Safe Stopping Procedure
To perform a safe stop, school bus operators must:
Instruct students in safe loading procedures (see your
supervisor for guidance).
Activate student warning amber lights 200 feet before
stopping.
Stop a safe distance (at least 12 feet) from any
students outside the bus.
When stopped, deactivate amber lights and activate
student warning red lights, stop arms, and bumper
cross arm.
Look for pedestrians, traffic and other hazards before,
during and after coming to a stop and make sure all
traffic has stopped.
Engage parking brake and place transmission in
neutral position.
Safe Stopping Procedure To perform a safe stop, school bus operators must: • Check mirrors and traffic. • Instruct students in safe loading procedures (see your supervisor for guidance). • Slow down and apply brakes lightly. • Activate the student warning amber lights at a point approximately 200 feet from the student
stop or at greater distance if necessary due to traffic speed and road conditions as a warning to traffic that the bus is approaching a student passenger stop.
• Do not open the bus door to unload students until approaching traffic in the immediate vicinity of the bus has stopped.
• Pull as far to the right as possible and stop, staying on the traveled portion of the roadway. • Stop at least 12 feet from waiting students. • Cancel amber lights and activate the student warning red lights, stop arms and cross arm. • Look for pedestrians and traffic, and make sure all traffic has stopped. • Engage the parking brake and place the transmission in the neutral position while maintaining
application of the service brake.

Slide 8
VIII-10
Loading Passengers on the
Highway or Street
Raise hand toward students outside the bus (open palm) to indicate "stop."
Make eye contact and count students.
Check mirrors and look for moving traffic and hazards.
When safe, open door and signal students to board. When safe, signal students who must cross road by pointing to them (two fingers extended), then to you and then pointing to where you want them to go. Avoid sweeping motion that may confuse motorists.
In case of danger, use horn or public address (PA) system to signal students to clear roadway.
When all students are on bus, close door, count students, and ensure they are seated.
Check traffic and check all mirrors.
Deactivate student stop lights and proceed on route when safe.
Loading Passengers on the Highway or Street: • Raise hand toward students outside the bus (open palm) to indicate, "Stop." • Make eye contact and count students. • Check mirrors and look for moving traffic and hazards. • When safe, open the door and signal students to board. When safe, signal students who must
cross the road by pointing to them (two fingers extended), then back to you, and then pointing to where you want them to go. Avoid a sweeping motion that may confuse motorists.
• In case of danger, use the horn or public address (PA) system to signal students to clear the roadway.
• When all students are on the bus, close the door, count students and ensure they are seated. • Check traffic and check all mirrors. • Deactivate student stop lights and proceed on route when safe.
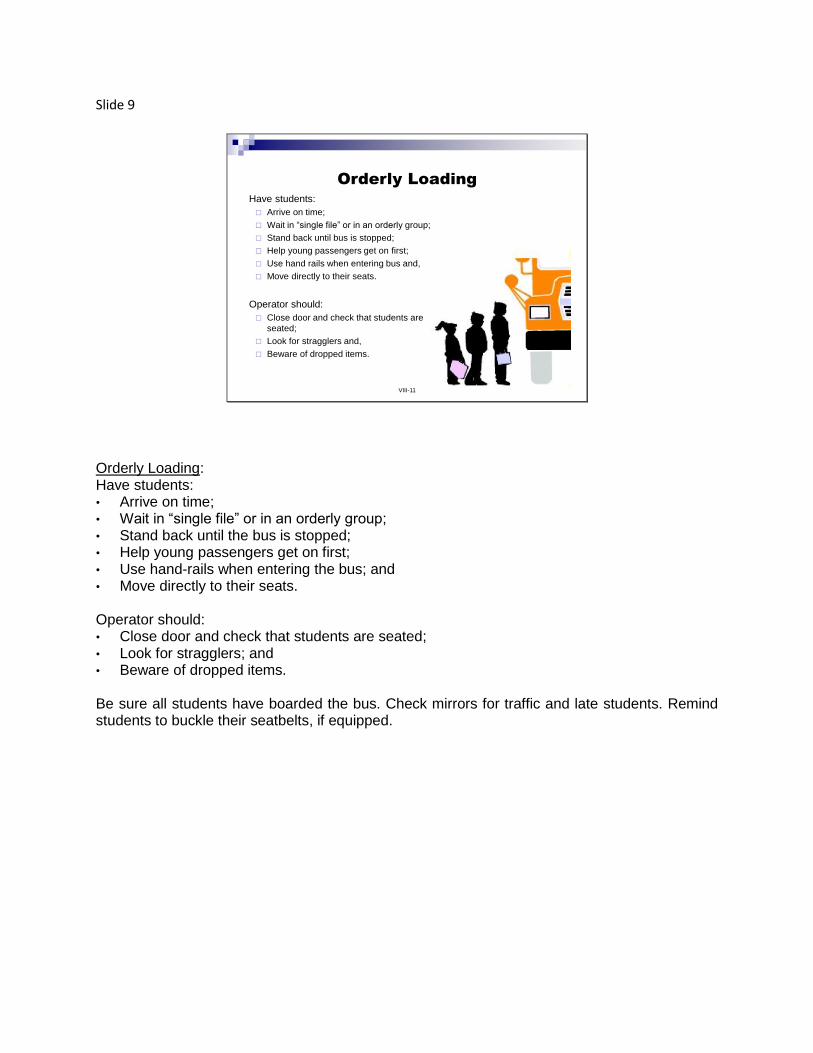
Slide 9
VIII-11
Orderly LoadingHave students:
Arrive on time;
Wait in “single file” or in an orderly group;
Stand back until bus is stopped;
Help young passengers get on first;
Use hand rails when entering bus and,
Move directly to their seats.
Operator should:
Close door and check that students are
seated;
Look for stragglers and,
Beware of dropped items.
Orderly Loading: Have students: • Arrive on time; • Wait in “single file” or in an orderly group; • Stand back until the bus is stopped; • Help young passengers get on first; • Use hand-rails when entering the bus; and • Move directly to their seats. Operator should: • Close door and check that students are seated; • Look for stragglers; and • Beware of dropped items. Be sure all students have boarded the bus. Check mirrors for traffic and late students. Remind students to buckle their seatbelts, if equipped.
Slide 10
Unloading Passengers on the
Highway or Street
Instruct students about the following safety procedures:
Move well away from side of bus after leaving.
Do not get mail from roadside box until bus has left.
Students who cross the road should be instructed in the following additional safety procedures:
take at least 12 steps in front of the bus before starting across the roadway (so operator can see student's feet);
wait for proper signal from operator before crossing;
stop at traffic side of bus and look left, right, and left again; cross only if approaching traffic has stopped;
walk across roadway; and
do not stop or return if an item is dropped. The bus operator will take responsibility for retrieving object if possible (check local policy).
VIII-12
Approximately half of bus rider fatalities involve unloading passengers on the return trip home. Operators are responsible for the safety of all their students, including those who must cross the roadway or street. FACT: Three times more students are killed while getting on or off a school bus each year than are killed as passengers inside the school bus. Passengers crossing the road should cross approximately 12 feet in front of the stopped school bus or, if the bus is equipped with a student-crossing arm, the passengers shall walk in front of the arm. (If available, use an external public address system to train students to cross the street.) It is recommended that you press your brake pedal to dispel the air as a warning that you are pulling away from a stop. Unloading Passengers on the Highway or Street Instruct students about the following safety procedures: • Move well away from the side of the bus after leaving. • Do not get mail from the roadside box until the bus has left. Students who cross the road should be instructed in the following additional safety procedures: • Take at least 12 steps in front of the bus before starting across the roadway (so operator can
see student's feet); • Wait for the proper signal from the operator before crossing; • Stop at the traffic side of the bus and look left, right and left again; cross only if approaching
traffic has stopped; • Walk across roadway; and • Do not stop or return if an item is dropped. The bus operator will take responsibility for
retrieving objects if possible (check local policy).
Slide 11
Unloading Passengers on the
Highway or StreetUnloading Procedure:
Check right and left mirrors and look ahead to be sure all traffic has stopped.
Tell students when it is safe to stand up and proceed toward the door.
Open the door and count children as they exit the bus.
Make sure students move at least 12 feet away from the side of the bus and remain in
your view.
When safe, signal to any students who must cross the road by pointing to them (two
fingers extended) and then pointing to where they should go. Avoid sweeping motion
that may confuse motorists.
In case of danger, use the horn or PA system to signal students to clear roadway.
Count students again and ensure all are at a safe distance from the bus.
Close the door and check all mirrors carefully, especially right-hand mirrors (for
students who do not cross the road), to ensure they are away from the bus.
Deactivate the student stop lights. Proceed when safe and all children are accounted
for and safely away from the bus.
VIII-12
Unloading Procedure: • Check right and left mirrors and look ahead to be sure all traffic has stopped. • Tell students when it is safe to stand up and proceed toward the door. • Open the door and count children as they exit the bus. • Make sure students move at least 12 feet away from the side of the bus and remain in your
view. • When safe, signal to any students who must cross the road by pointing to them (two fingers
extended) and then pointing to where they should go. Avoid sweeping motion that may confuse motorists.
• In case of danger, use the horn or PA system to signal students to clear roadway. • Count students again and ensure all are at a safe distance from the bus. • Close the door and check all mirrors carefully, especially right-hand mirrors (for students who
do not cross the road), to ensure all students are away from the bus. • Deactivate the student stop lights. Proceed when safe and all children are accounted for and
safely away from the bus.
Slide 12
VIII-13
Deactivating Alternating
Flashing Red Lights
Before resuming motion:
Place the transmission in drive, release the
parking brake while applying the service brake.
Check mirrors, students and traffic.
Deactivate student warning red lights.
(allow for the student stop arm and crossing arm to retract)
Proceed safely on the designated route.
Deactivating Student Warning Red Lights The operator of a school bus, before resuming motion, shall deactivate flashing lights and permit oncoming traffic to proceed safely. Pupil warning lights are not to be used for reasons other than loading or unloading schoolchildren. Any vehicle that is stopped on the highway presents a hazard. The busload of young people is exposed to increased risk during this time, as are the students waiting at the stop and the other traffic on the road. The outlined procedures are designed to make stops as safe as possible for everyone. These steps should be practiced in the same sequence, so they become habitual. Before resuming motion: • Place the transmission in drive; release the parking brake while applying the service brake. • Check mirrors, students and traffic. • Deactivate flashing red lights (allow for the student stop arm and crosswalk arm to retract). • Proceed safely on the designated route.
Slide 13
VIII-14
Special Dangers of
Loading and Unloading
As a bus driver, if you are concerned
with a bus stop location or hazardous
condition along your route, it is your
responsibility to advise your supervisor
of the situation as soon as possible.
Always focus on students as they
approach/leave the bus and watch
for any who disappear from sight.
Do not allow yourself to be
distracted.
Students may drop an object near
the bus during loading or unloading.
Stopping to pick up the object or
returning to pick up the object may
cause the student to disappear from
the driver's sight at a very
dangerous moment.
Students should be told to leave
any dropped object and move to a
point of safety out of the danger
zones and attempt to get the
driver's attention to retrieve the
object.
As a bus driver, if you are concerned with a bus stop location or hazardous condition along your route, it is your responsibility to advise your supervisor of the situation as soon as possible. Special Dangers of Loading and Unloading Dropped or Forgotten Objects: • Always focus on students as they approach/leave the bus and watch for any who disappear
from sight.
• DO NOT allow yourself to be distracted.
• Students may drop an object near the bus during loading or unloading. Stopping to pick up the object or returning to pick up the object may cause the student to disappear from the driver's sight at a very dangerous moment.
• Students should be told to leave any dropped object and move to the point of safety out of the danger zones and attempt to get the driver's attention to retrieve the object.
• Operators should be aware of backpack straps, clothing strings, etc., that could become caught on handrails, doors or other objects to prevent the possible dragging of students.
• Operators should always be on the lookout for security threats when approaching a student stop. Unfamiliar vehicles or adults may alert the operator. Follow district policy for reporting anything unusual on the route.
Are We Ther Yet?; Staying Safe Between Home and School will help prepare the new operator with safety tips at and around school bus stops and buildings. Most school district policy requires their employees to attend a safety prevention program as part of the new hire process ensuring safe schools.
Slide 14
VIII-15
Loading on School or
Private Property
Precautions:
Approach loading area cautiously and slowly.
If students run toward the bus, stop as soon as possible.
Stand by the door to assist students if conditions require it.
Students should approach loading area in an orderly manner and form a single file line.
An adult other than the operator should supervise the students at each school loading zone.
Obey speed limits on ALL campus, private and school district property.
Operators need to be especially cautious at the school loading area. When possible, the bus should arrive at the loading area before school is dismissed. If students are present at the loading area before the bus’s arrival, the operator should take additional cautionary steps. Loading on School or Private Property Precautions: • Approach loading area cautiously and slowly. • If students run toward the bus, stop as soon as possible. • Stand by the door to assist students, if conditions require it. • Students should approach the loading area in an orderly manner and form a single file line. • An adult other than the operator should supervise the students at each school loading zone. • Obey speed limits on ALL campus, private and school district property.
Slide 15
Loading on School or Private
Property (continued)
VIII-16
Park in a designated loading area.
Apply brake, set the parking brake and shift to neutral position;.
Turn off ignition switch and remove key if leaving the bus.
Signal for students to enter the bus.
Instruct students to use handrail and be seated immediately.
Check area around the bus to see that it is safe to move the bus.
Check mirrors and prepare to leave.
Once started, do not stop for stragglers.
Stop before entering the roadway from private property.
Regular traffic should have it’s own designated pick-up and drop-off
zones. Regular traffic should not be permitted to use the school bus
loops or loading and unloading zones while they are in use by school
bus operators.
No student should be on board the bus when the operator is not present. Loading on School or Private Property (continued): • Park in a designated loading area.
• Apply brake, set the parking brake and shift to neutral position. • Turn off the ignition switch and remove the key if leaving the bus. • Signal for students to enter the bus. • Instruct students to use the handrail and be seated immediately. • Check the area around the bus to see that it is safe to move the bus. • Check mirrors and prepare to leave. • Once started, do not stop for stragglers. • Stop before entering the roadway from private property. • Follow local policy. The Florida Department of Education recommends that buses refrain from passing other buses loading in a school zone because of the increased risk of a child getting injured in this scenario.
Regular traffic should have its own designated pick-up and drop-off zones. Regular traffic should not be permitted to use the school bus loops or loading and unloading zones while they are in use by school bus operators.
Slide 16
VIII-17
Loading at a Turnaround Stop
Load students before backing up
(Important!)
Check mirrors and secure responsible visual
assistance if possible before backing. Always
remember that there is a blind spot area in
back of your bus that you cannot see.
Back into the street for turnaround.
Loading at a Turnaround Stop Although placing a stop at a turnaround point is not recommended, operators may have some of these stops assigned on their routes. Operators must handle these stops in the safest manner possible. • Load students before backing up. (Important!) • Apply four-way flashers, beep horns and back into the street for a turnaround. • Check mirrors and secure responsible visual assistance, if possible, before backing up. Always
remember that there is a blind spot area in the back of your bus that you cannot see. • Back into the street for a turnaround. Operators should back into a side street so they do not have to back into heavy traffic. By backing into the side street, operators will be able to drive forward onto a busy road.
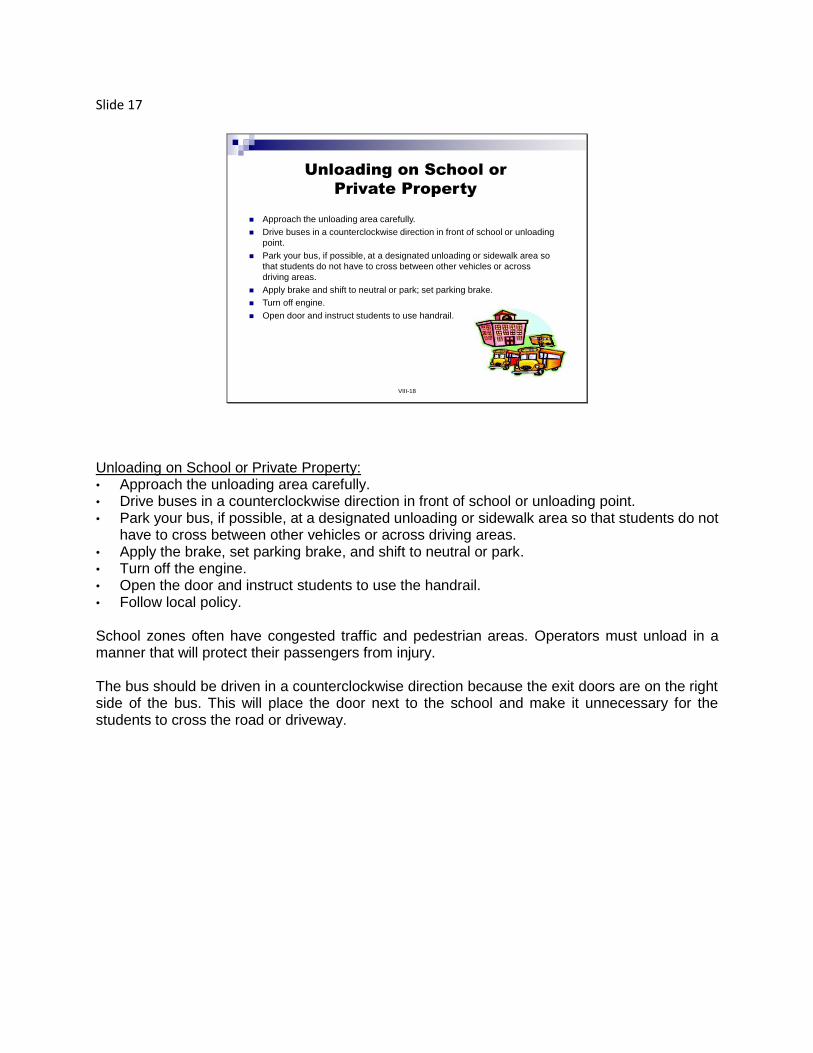
Slide 17
VIII-18
Unloading on School or
Private Property
Approach the unloading area carefully.
Drive buses in a counterclockwise direction in front of school or unloading
point.
Park your bus, if possible, at a designated unloading or sidewalk area so
that students do not have to cross between other vehicles or across
driving areas.
Apply brake and shift to neutral or park; set parking brake.
Turn off engine.
Open door and instruct students to use handrail.
Unloading on School or Private Property: • Approach the unloading area carefully. • Drive buses in a counterclockwise direction in front of school or unloading point. • Park your bus, if possible, at a designated unloading or sidewalk area so that students do not
have to cross between other vehicles or across driving areas. • Apply the brake, set parking brake, and shift to neutral or park. • Turn off the engine. • Open the door and instruct students to use the handrail. • Follow local policy. School zones often have congested traffic and pedestrian areas. Operators must unload in a manner that will protect their passengers from injury. The bus should be driven in a counterclockwise direction because the exit doors are on the right side of the bus. This will place the door next to the school and make it unnecessary for the students to cross the road or driveway.
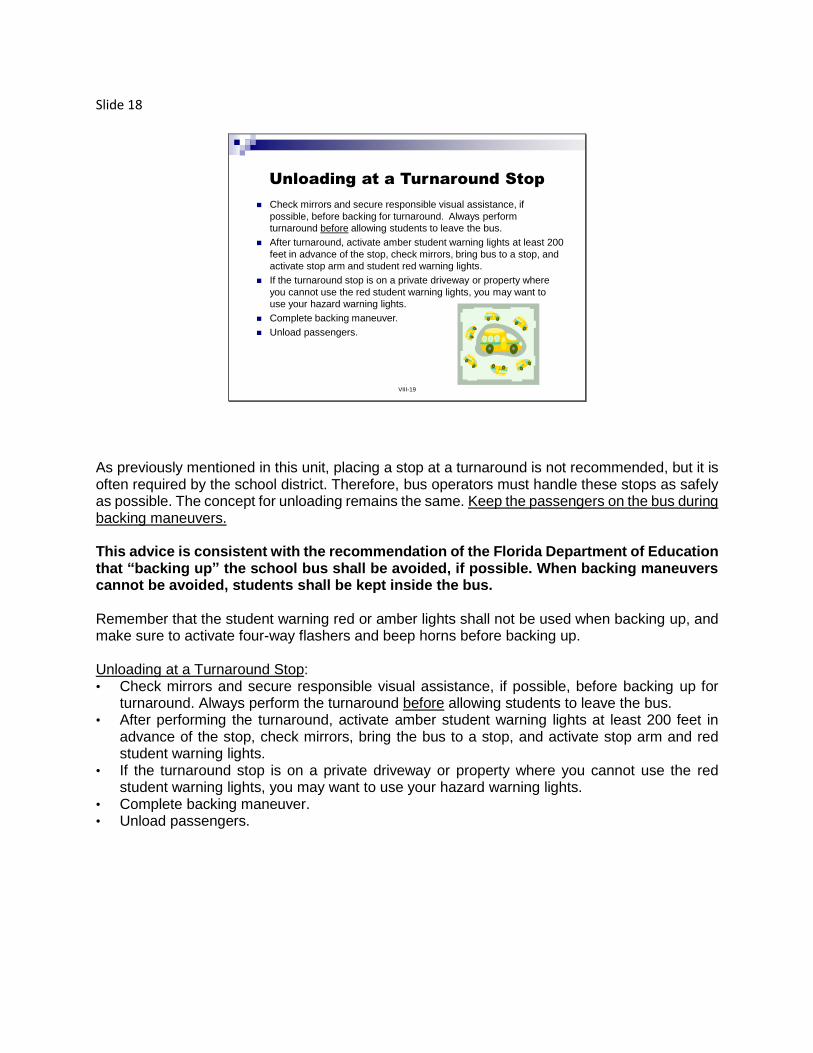
Slide 18
VIII-19
Unloading at a Turnaround Stop
Check mirrors and secure responsible visual assistance, if
possible, before backing for turnaround. Always perform
turnaround before allowing students to leave the bus.
After turnaround, activate amber student warning lights at least 200
feet in advance of the stop, check mirrors, bring bus to a stop, and
activate stop arm and student red warning lights.
If the turnaround stop is on a private driveway or property where
you cannot use the red student warning lights, you may want to
use your hazard warning lights.
Complete backing maneuver.
Unload passengers.
As previously mentioned in this unit, placing a stop at a turnaround is not recommended, but it is often required by the school district. Therefore, bus operators must handle these stops as safely as possible. The concept for unloading remains the same. Keep the passengers on the bus during backing maneuvers. This advice is consistent with the recommendation of the Florida Department of Education that “backing up” the school bus shall be avoided, if possible. When backing maneuvers cannot be avoided, students shall be kept inside the bus. Remember that the student warning red or amber lights shall not be used when backing up, and make sure to activate four-way flashers and beep horns before backing up. Unloading at a Turnaround Stop: • Check mirrors and secure responsible visual assistance, if possible, before backing up for
turnaround. Always perform the turnaround before allowing students to leave the bus. • After performing the turnaround, activate amber student warning lights at least 200 feet in
advance of the stop, check mirrors, bring the bus to a stop, and activate stop arm and red student warning lights.
• If the turnaround stop is on a private driveway or property where you cannot use the red student warning lights, you may want to use your hazard warning lights.
• Complete backing maneuver. • Unload passengers.
Slide 19
VIII-20
Department of Education
Recommendation
Leaving Bus:
If the operator must leave the bus because of an emergency or to
check the exterior of the bus when children are inside, he or she
shall set the parking brake, remove the ignition key, use the
appropriate emergency equipment and assure that disciplined
behavior will be maintained.
The operator shall not leave the immediate vicinity of a bus if there
are student passengers aboard.
Department of Education Recommendation Leaving Bus: • If the operator must leave the bus because of an emergency or to check the exterior of the bus
when children are inside, he or she shall set the parking brake, remove the ignition key, use the appropriate emergency equipment and assure that disciplined behavior will be maintained.
• The operator shall not leave the immediate vicinity of a bus if there are student passengers aboard.
Slide 20
VIII-21
Department of Education
Recommendation
Backing:
Backing up of the school bus shall be avoided (if possible).
When backing maneuvers cannot be avoided, students shall be kept inside the bus.
If there are students outside the bus, no backing up maneuver shall be made unless a competent adult observer is on hand to direct the maneuver.
Department of Education Recommendation Backing: • Backing up of the school bus shall be avoided (if possible). • When backing maneuvers cannot be avoided, students shall be kept inside the bus. • If there are students outside the bus, no backing maneuver shall be made unless a competent
adult observer is on hand to direct the maneuver. It is important to load students before backing up because the operator’s view behind the bus is limited, and it is possible that a student could be hit or run over. Anytime someone is out of sight, the operator should get out and look so a student is not hit or run over by the bus.
Slide 21
VIII-22
Procedures for Reporting
Violations by Motorists
Be sure the motorist has violated the law before reporting an incident.
Record the vehicle license number and other pertinent information.
Identify the motorist and vehicle, if possible.
Personally deliver the information to your supervisor (you are the complaining witness).
File complaint the day an incident occurs or as soon as possible.
Passing a bus stopped to load or unload passengers is a serious violation of the law and is extremely hazardous. In 2019, in a one-day Illegal Passing of Public School Buses Survey, 10,136 school bus operators in Florida participated. The survey reflects 12,749 motorists illegally passed stopped school buses displaying their red student stoplights at a student stop. Many children, either loading or unloading their school bus, have been seriously injured, some of the injuries resulting in a fatality. The laws are continually changing to bring awareness to distracted motorists and impose stiffer fines and/or charges for this violation. As a school bus operator, it is extremely important to safeguard the students while loading or unloading the school bus. It is the responsibility of the operator to ensure the safety of the students first. If the operator can assist in reporting the incident, the procedures for reporting violations by motorists are as follows: • Be sure the motorist has violated the law before reporting an incident. • Record the vehicle license number and other pertinent information. • Identify the motorist and vehicle, if possible, including describing the motorist. • Personally deliver the information to your supervisor (you are the complaining witness). • File a complaint the day an incident occurs or as soon as possible. Operators should be prepared to follow certain district procedures to report violations to the proper law enforcement agency.
Slide 22
VIII-23
Illegal Passing
Illegal passingis defined in s. 316.172, F.S.
Your red student warning lights were activated
at the time the motorist passed and your bus
was completely stopped at the time the
motorist passed.
On a divided roadway, vehicles meeting a
properly stopped school bus, from the opposite
direction, is required to stop if the unpaved
median strip is less than five feet or no physical
barrier is present.
On an undivided roadway, vehicles
approaching the stopped school bus MUST
stop, regardless of the number of lanes or
direction of travel. Section 316.172, F.S.
Remember that school bus operators are required to use proper warning signals. Illegal Passing Illegal passing is defined in s. 316.172, F.S. • A motorist has passed illegally if your red student warning lights were activated at the time the
motorist passed andyour bus was completely stopped at the time the motorist passed. • On a divided roadway, vehicles meeting a properly stopped school bus from the opposite
direction are required to stop if the unpaved median strip is less than five feet or no physical barrier is present.
• On an undivided roadway, vehicles approaching the stopped school bus MUST stop, regardless of the number of lanes or direction of travel.
Slide 23
VIII-24
Reasons for Maintaining Accurate
Time Schedule
Promoting good public relations.
Delivering students to school on time.
Early arrival can cause the students to miss the bus or be exposed
to serious injury while running to catch the bus.
Late arrival can expose the students to pedestrian traffic
accidents.
A time schedule is the backbone of any transportation program. Any deviation from that schedule can cause serious problems. Meeting expectations always promotes good public relations. Operators are expected to deliver their passengers on time. Consistently doing this will promote good relations among operators, the school administration and teaching staff. Failing to do so causes problems for all concerned. Reasons for Maintaining Accurate Time Schedule • Promoting good public relations. • Delivering students to school on time. • Early arrival can cause the students to miss the bus or be exposed to serious injury while
running to catch the bus. • Late arrival can expose the students to pedestrian traffic accidents. The operator should never alter the pickup or drop-off point for a student unless approved by a supervisor. Should an operator notice problems on a route, he/she should report it following district policy. Problems concerning site distance, poor visibility, unsafe stop location, etc., should be reported to a supervisor as soon as possible. Inform the districts transportation department office of roadside and traffic hazards. Keep an accurate and up-to-date route sheet. This helps substitute drivers and allows the actual route to be driven correctly every day. The operator should continually monitor the stopping area for late-arriving students, motorists approaching from the side, gang activity, strangers, etc. Seating charts are required under rule 6A-3.0171, F.A.C. The Florida Department of Education recommends that the school bus operator maintain updated and accurate seating charts. Seating charts will help the operator become acquainted with the students and identify problem areas. The loading and unloading of the school bus will be more orderly when each student has an assigned seat, and a seating

chart is a necessity in the event of an accident. Seating charts have also helped minimize vandalism in some districts.
Slide 24
VIII-25
Summary
Requirements for stop locations
Proper and improper use of alternating flashing red lights
Loading passengers On highway and street
On school and private property
At a turnaround stop
Unloading passengers On a highway or street
On school and private property
At a turnaround stop
Reporting motorists who illegally pass
Maintaining accurate time schedule
In this unit, loading and unloading procedures were reviewed. Stopping a school bus to load or unload students creates a potentially hazardous situation for all concerned. The operator’s role during this maneuver is an extremely important one. Taking the precautions and using the procedures presented in this unit will assist operators in transporting their passengers safely.

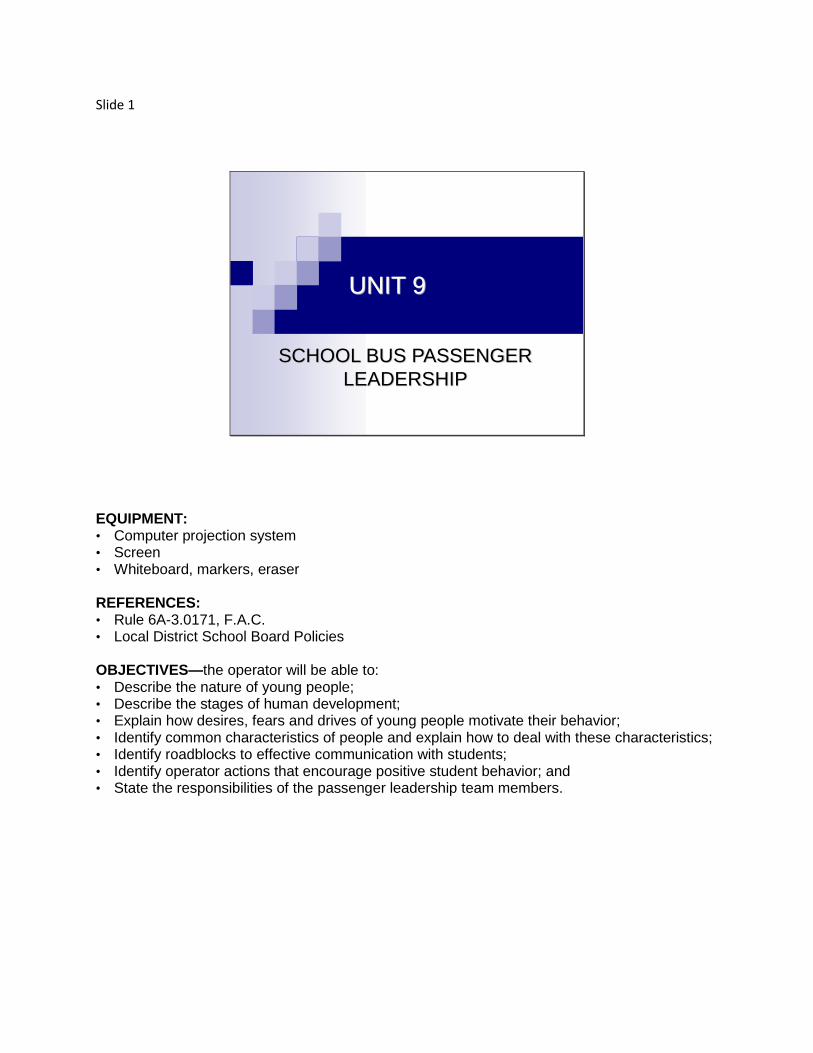
Slide 1
UNIT 9
SCHOOL BUS PASSENGER
LEADERSHIP
EQUIPMENT: • Computer projection system • Screen • Whiteboard, markers, eraser REFERENCES: • Rule 6A-3.0171, F.A.C. • Local District School Board Policies OBJECTIVES—the operator will be able to: • Describe the nature of young people; • Describe the stages of human development; • Explain how desires, fears and drives of young people motivate their behavior; • Identify common characteristics of people and explain how to deal with these characteristics; • Identify roadblocks to effective communication with students; • Identify operator actions that encourage positive student behavior; and • State the responsibilities of the passenger leadership team members.
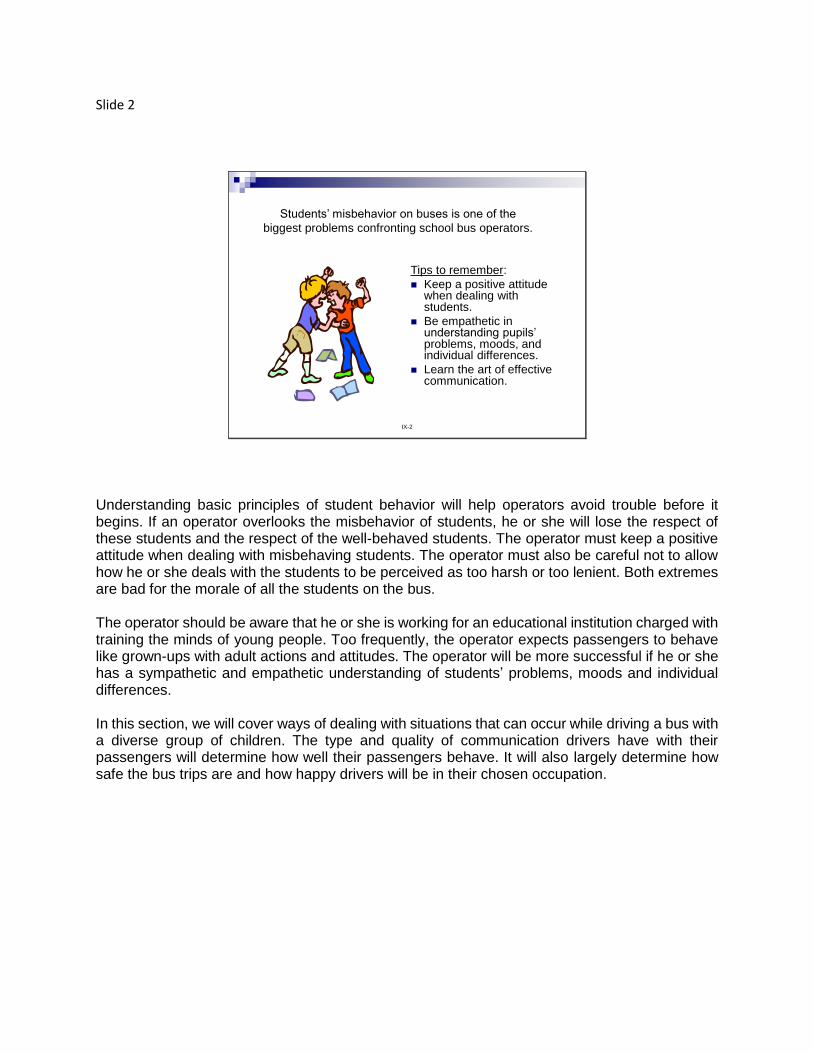
Slide 2
IX-2
Tips to remember:
Keep a positive attitude when dealing with students.
Be empathetic in understanding pupils’ problems, moods, and individual differences.
Learn the art of effective communication.
Students’ misbehavior on buses is one of the
biggest problems confronting school bus operators.
Understanding basic principles of student behavior will help operators avoid trouble before it begins. If an operator overlooks the misbehavior of students, he or she will lose the respect of these students and the respect of the well-behaved students. The operator must keep a positive attitude when dealing with misbehaving students. The operator must also be careful not to allow how he or she deals with the students to be perceived as too harsh or too lenient. Both extremes are bad for the morale of all the students on the bus. The operator should be aware that he or she is working for an educational institution charged with training the minds of young people. Too frequently, the operator expects passengers to behave like grown-ups with adult actions and attitudes. The operator will be more successful if he or she has a sympathetic and empathetic understanding of students’ problems, moods and individual differences. In this section, we will cover ways of dealing with situations that can occur while driving a bus with a diverse group of children. The type and quality of communication drivers have with their passengers will determine how well their passengers behave. It will also largely determine how safe the bus trips are and how happy drivers will be in their chosen occupation.
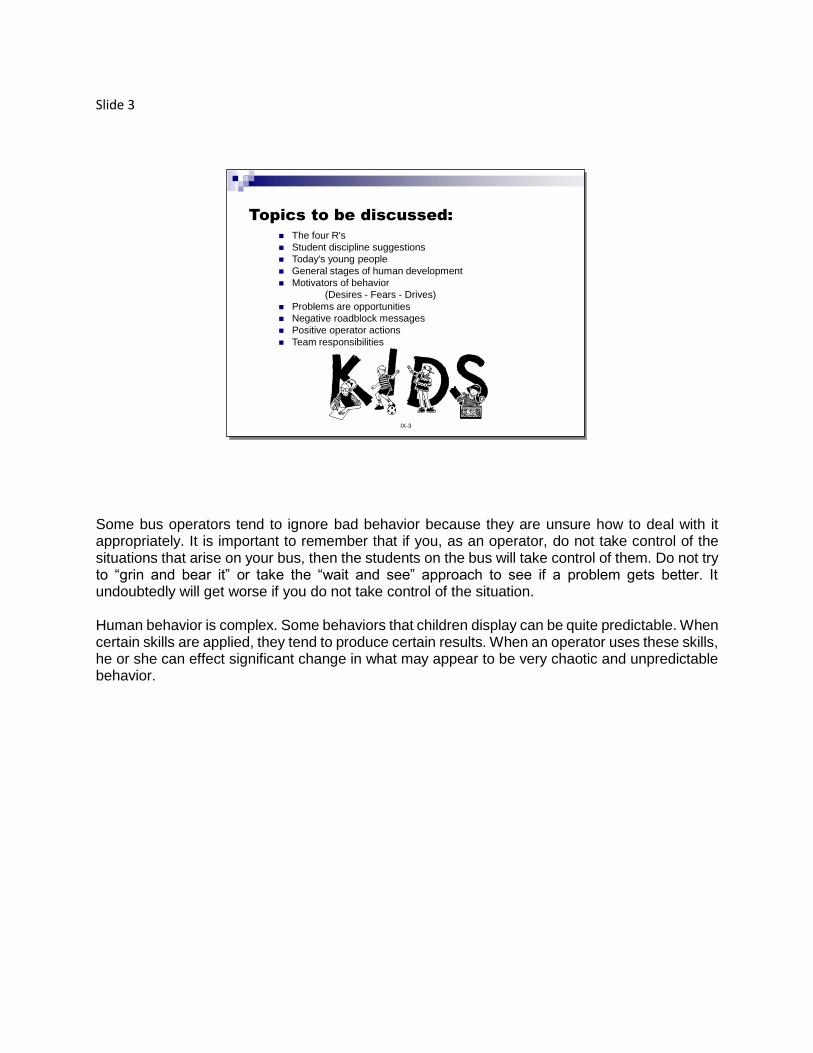
Slide 3
Some bus operators tend to ignore bad behavior because they are unsure how to deal with it appropriately. It is important to remember that if you, as an operator, do not take control of the situations that arise on your bus, then the students on the bus will take control of them. Do not try to “grin and bear it” or take the “wait and see” approach to see if a problem gets better. It undoubtedly will get worse if you do not take control of the situation. Human behavior is complex. Some behaviors that children display can be quite predictable. When certain skills are applied, they tend to produce certain results. When an operator uses these skills, he or she can effect significant change in what may appear to be very chaotic and unpredictable behavior.
IX-3
Topics to be discussed:
The four R's
Student discipline suggestions
Today's young people
General stages of human development
Motivators of behavior
(Desires - Fears - Drives)
Problems are opportunities
Negative roadblock messages
Positive operator actions
Team responsibilities
IX-3
Topics to be discussed:
The four R's
Student discipline suggestions
Today's young people
General stages of human development
Motivators of behavior
(Desires - Fears - Drives)
Problems are opportunities
Negative roadblock messages
Positive operator actions
Team responsibilities
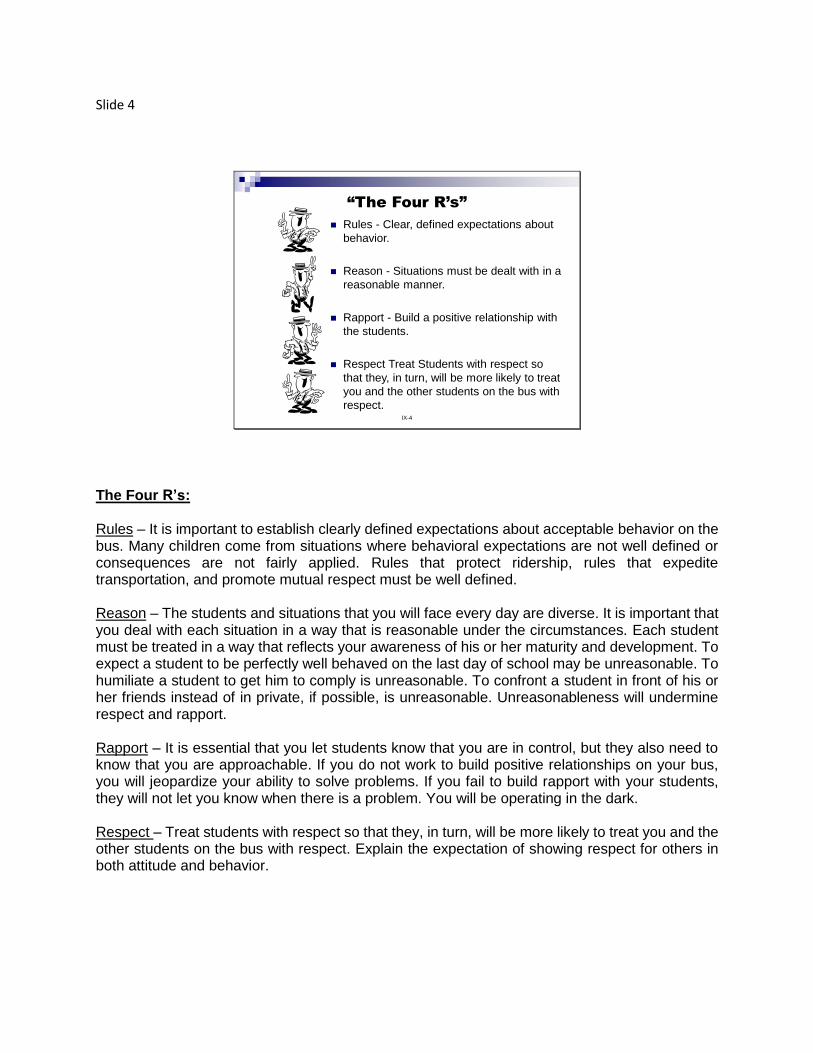
Slide 4
IX-4
“The Four R’s”
Rules - Clear, defined expectations about
behavior.
Reason - Situations must be dealt with in a
reasonable manner.
Rapport - Build a positive relationship with
the students.
Respect Treat Students with respect so
that they, in turn, will be more likely to treat
you and the other students on the bus with
respect.
The Four R’s: Rules – It is important to establish clearly defined expectations about acceptable behavior on the bus. Many children come from situations where behavioral expectations are not well defined or consequences are not fairly applied. Rules that protect ridership, rules that expedite transportation, and promote mutual respect must be well defined. Reason – The students and situations that you will face every day are diverse. It is important that you deal with each situation in a way that is reasonable under the circumstances. Each student must be treated in a way that reflects your awareness of his or her maturity and development. To expect a student to be perfectly well behaved on the last day of school may be unreasonable. To humiliate a student to get him to comply is unreasonable. To confront a student in front of his or her friends instead of in private, if possible, is unreasonable. Unreasonableness will undermine respect and rapport. Rapport – It is essential that you let students know that you are in control, but they also need to know that you are approachable. If you do not work to build positive relationships on your bus, you will jeopardize your ability to solve problems. If you fail to build rapport with your students, they will not let you know when there is a problem. You will be operating in the dark. Respect – Treat students with respect so that they, in turn, will be more likely to treat you and the other students on the bus with respect. Explain the expectation of showing respect for others in both attitude and behavior.

Slide 5
IX-5
Suggestions for Maintaining
Student Discipline1. Never give an order you do not intend to enforce.
2. Give your command to stimulate action, not to check it. Say, “do
this” rather than “don’t do that.”
3. Give the student time to react.
4. Have a reason for asking a student for a specific action and, when
possible, take time to explain the reason. Most rules can be tied to
safety. If possible, justify your rule based on safety.
5. Be honest in what you say and do so students learn that you are
trustworthy.
6. Be fair. Typically it is not punishment but injustice that makes a child
rebel.
7. Be friendly and always show an interest in what students are doing.
8. Commend good qualities and actions.
9. Try to be constructive, not repressive, in all dealings with children.
10. Remember that a sense of humor is extremely valuable.
Greeting With A Purpose As an operator, it is important to acknowledge each student as he or she enters the bus. A smile and eye contact let the student know that you care. Look for the student that may need to be noticed. You can usually tell by the way a student enters the bus. Is the student overly rambunctious? Does the student seem sad, maybe even crying? Has the student been absent for a while? These students need extra attention, and you can help by being attentive. Suggestions for Maintaining Student Discipline: 1. Never give an order you do not intend to enforce. 2. Give your command to stimulate action, not to check it. Say, “do this” rather than “don’t do
that.” 3. Give the student time to react. 4. Have a reason for asking a student for a specific action and, when possible, take time to
explain the reason. Most rules can be tied to safety. If possible, justify your rule based on safety.
5. Be honest in what you say and do so students learn that you are trustworthy. 6. Be fair. Typically it is not punishment but injustice that makes a child rebel. 7. Be friendly and always show an interest in what students are doing. 8. Commend good qualities and actions. Be proactive, not reactive. 9. Try to be constructive, not repressive, in all dealings with children. 10. Remember that a sense of humor is extremely valuable.
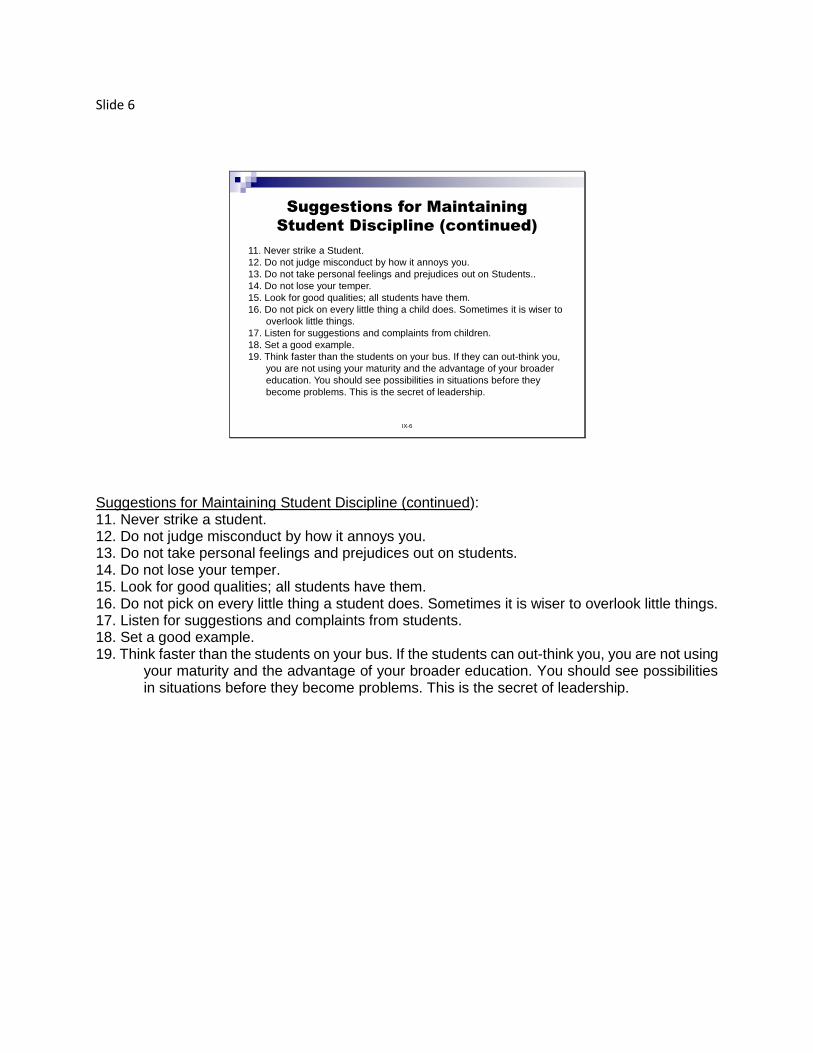
Slide 6
IX-6
Suggestions for Maintaining
Student Discipline (continued)
11. Never strike a Student.
12. Do not judge misconduct by how it annoys you.
13. Do not take personal feelings and prejudices out on Students..
14. Do not lose your temper.
15. Look for good qualities; all students have them.
16. Do not pick on every little thing a child does. Sometimes it is wiser to
overlook little things.
17. Listen for suggestions and complaints from children.
18. Set a good example.
19. Think faster than the students on your bus. If they can out-think you,
you are not using your maturity and the advantage of your broader
education. You should see possibilities in situations before they
become problems. This is the secret of leadership.
Suggestions for Maintaining Student Discipline (continued): 11. Never strike a student. 12. Do not judge misconduct by how it annoys you. 13. Do not take personal feelings and prejudices out on students. 14. Do not lose your temper. 15. Look for good qualities; all students have them. 16. Do not pick on every little thing a student does. Sometimes it is wiser to overlook little things. 17. Listen for suggestions and complaints from students. 18. Set a good example. 19. Think faster than the students on your bus. If the students can out-think you, you are not using
your maturity and the advantage of your broader education. You should see possibilities in situations before they become problems. This is the secret of leadership.

Slide 7
IX-7
Today's Young People
Young people grow rapidly socially, emotionally, physically and intellectually.
Young people may exhibit these behaviors:
impulsiveness
physical activity
intuitiveness
independence
Students are not small adults. Everyone goes through a growth process involving developmental stages. Students on the bus will be at different stages of this process. Consequently, they cannot be expected to be like or act like adults. Nature of young people: • Socially, they are in the process of developing adult socialization skills. At times, young people
are blunt, cruel and painfully truthful. • Emotionally, young people are more sensitive and dependent upon their feelings. They are
easily hurt and may have difficulty handling emotions such as fear, love and joy. • Physically, they are growing but not at a constant rate. They grow in spurts. They do not all
grow at the same time or pace. Physically, they can be quite awkward and clumsy. • Intellectually, young people grow at different times and rates. Most young people will exhibit these behaviors at times: • Young people can be impulsive and react without thinking. • Young people tend to be physical. They are physically active and have to move. They show
feelings through physical communication, touching, hitting or holding. • Young people are often intuitive and extremely sensitive to and dependent on feelings and
emotions. Students may not intellectually understand sarcastic humor or subtle put-downs, but they can intuitively understand them as put-downs and act on them.
• Young people are both independent and dependent. They strive to be independent. They want to control their own lives, but they also need to know there is someone they can depend on, whether it be a parent, friend, teacher or bus operator.
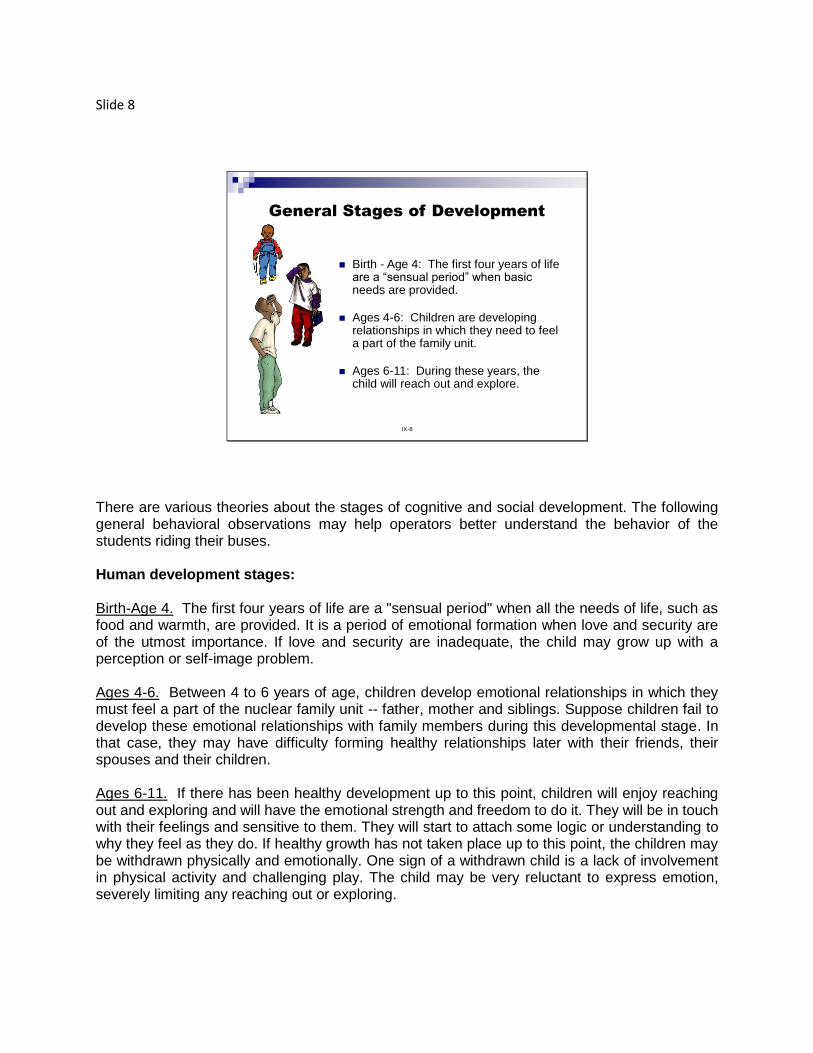
Slide 8
IX-8
General Stages of Development
Birth - Age 4: The first four years of life are a “sensual period” when basic needs are provided.
Ages 4-6: Children are developing relationships in which they need to feel a part of the family unit.
Ages 6-11: During these years, the child will reach out and explore.
There are various theories about the stages of cognitive and social development. The following general behavioral observations may help operators better understand the behavior of the students riding their buses. Human development stages: Birth-Age 4. The first four years of life are a "sensual period" when all the needs of life, such as food and warmth, are provided. It is a period of emotional formation when love and security are of the utmost importance. If love and security are inadequate, the child may grow up with a perception or self-image problem. Ages 4-6. Between 4 to 6 years of age, children develop emotional relationships in which they must feel a part of the nuclear family unit -- father, mother and siblings. Suppose children fail to develop these emotional relationships with family members during this developmental stage. In that case, they may have difficulty forming healthy relationships later with their friends, their spouses and their children. Ages 6-11. If there has been healthy development up to this point, children will enjoy reaching out and exploring and will have the emotional strength and freedom to do it. They will be in touch with their feelings and sensitive to them. They will start to attach some logic or understanding to why they feel as they do. If healthy growth has not taken place up to this point, the children may be withdrawn physically and emotionally. One sign of a withdrawn child is a lack of involvement in physical activity and challenging play. The child may be very reluctant to express emotion, severely limiting any reaching out or exploring.
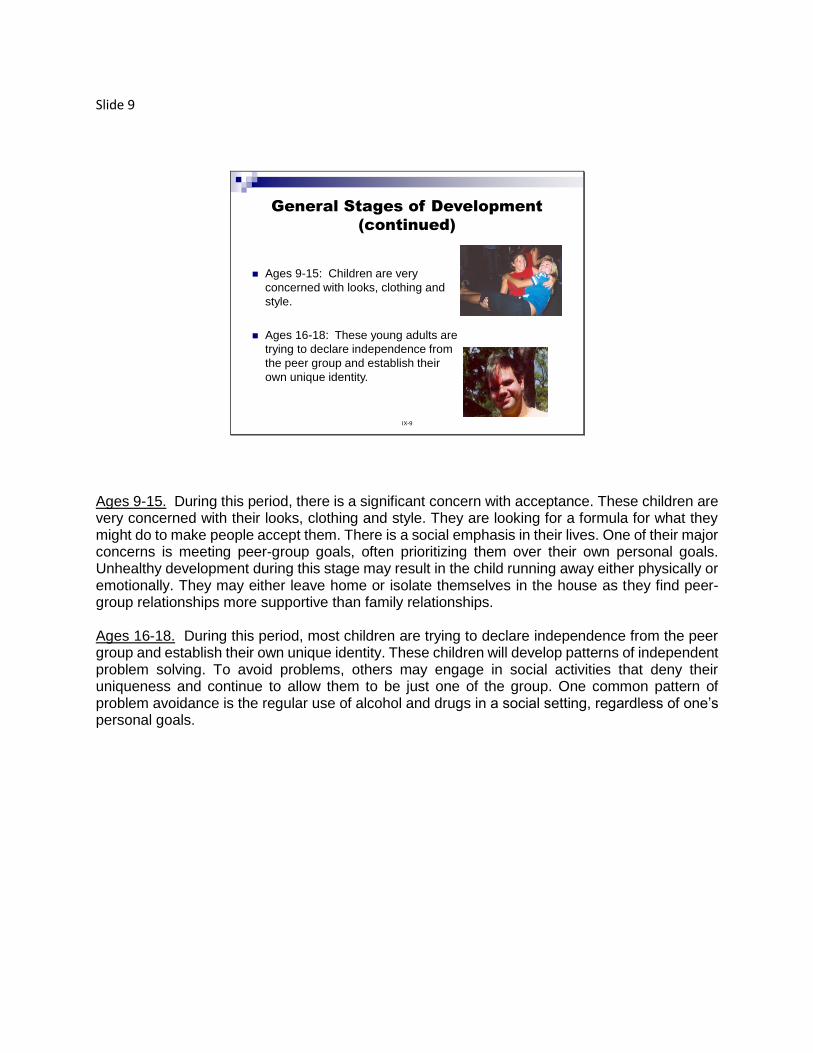
Slide 9
IX-9
General Stages of Development
(continued)
Ages 9-15: Children are very
concerned with looks, clothing and
style.
Ages 16-18: These young adults are
trying to declare independence from
the peer group and establish their
own unique identity.
Ages 9-15. During this period, there is a significant concern with acceptance. These children are very concerned with their looks, clothing and style. They are looking for a formula for what they might do to make people accept them. There is a social emphasis in their lives. One of their major concerns is meeting peer-group goals, often prioritizing them over their own personal goals. Unhealthy development during this stage may result in the child running away either physically or emotionally. They may either leave home or isolate themselves in the house as they find peer-group relationships more supportive than family relationships. Ages 16-18. During this period, most children are trying to declare independence from the peer group and establish their own unique identity. These children will develop patterns of independent problem solving. To avoid problems, others may engage in social activities that deny their uniqueness and continue to allow them to be just one of the group. One common pattern of problem avoidance is the regular use of alcohol and drugs in a social setting, regardless of one’s personal goals.
Slide 10
IX-10
Behavioral Controls
Desires
Fair, consistent
treatment
Admiration
Winning
Acceptance
Respect
Courtesy
Young people, like adults, have particular desires, fears and drives that influence their behavior. Behavior controls -- Desires: • Everyone desires fair, consistent treatment. Unfortunately, society is full of inequities. Not all
young people have the same economic, social and physical opportunities. Young people need
to understand that the world sometimes seems unfair and not to look at these circumstances
as unfavorable. They need to look at the assets within themselves.
• Young people desire admiration. They need to be recognized for their attributes by their
parents and peers. They need to know they are special people and that everyone has special
talents. Everyone is unique and has unique experiences that can be shared. Peer acceptance
is important. Young people should not have to seek admiration. They should be able to feel
that they can be themselves and that is all right. Sometimes parents are much too critical and
do not permit this.
• Winning is important, but it is just as important to learn that playing the game is enjoyable.
Young people must learn that it is acceptable to lose.
• Young people need to feel that they are acceptable as they are. They place unbelievable
pressure on themselves because they are fat, short, have big ears or some other physical
attribute.
• Young people need respect, too. Young people have personal rights and rights to privacy.
• Young people deserve the same level of courtesy as anyone else. In any social situation, they
have a right to be heard and recognized.
Slide 11
IX-11
Behavioral Controls
Fears
Rejection
Being excluded
Public ridicule
Physical abuse
Behavior controls -- Fears: • Young people fear rejection. Sometimes they find themselves lacking, not included, or not
one of the group. This may lead to displaced emotion. Children who have experienced
rejection from a parent, teacher or peer may take out their frustrations on another authority
figure such as a bus operator.
• Young people fear being excluded or left out of a group or activity. This feeling is very strong
between the ages of 7 and 11 years. They need friendships and relationships.
• Public ridicule is a form of social intimidation. Ridicule should never be used as a means of
getting attention or as attempted humor.
• Young people fear physical abuse. In most instances, they are smaller and weaker than
adults are and fear personal injury by adults or their peers.
NOTE: Operators will refrain from any form of retribution toward any student who was previously disciplined.
Slide 12
IX-12
Behavioral Controls
Drives Many young people need to be viewed as leaders.
Young people like to have fun.
Young people like things that stimulate the body or senses.
Young people may go to great lengths to gain security.
Behavior controls -- Drives: • Young people between the ages of 9 and 16 have important experiences in their lives away
from home with non-family members. They get involved in many activities and need to be accepted by their peers.
• Many young people need to be viewed as a leader to gain recognition. Almost everyone likes to be a leader.
• Young people enjoy having fun. Tension can be released through laughter, singing, dancing, running, playing hard and a variety of other activities. Too often, adults forget what fun is and do not take the time or make an effort to engage in activities they enjoyed when they were younger.
• Young people like things that stimulate the senses or body. These include such things as loud music, stylish clothes, and food. They have to feel and be a part of physical stimulation. Young people are very inquisitive and need to explore or try new things and ideas.
• Young people may do anything to gain security. They may set up defense mechanisms so they will not have to face confrontation.
Problems between individuals sometimes occur because of a lack of understanding about people in general or because individuals do not know how to relate to each other. A basic understanding of young people will help drivers communicate effectively with their student passengers.
Slide 13
IX-13
When dealing with people, remember:
All people are special.
Social behavior is learned.
People are not owned.
Students have feelings.
Students can reason.
Problems Are Opportunities!
Understanding and dealing with people: • All people are special and have importance in the world. Everyone has their own unique talents,
abilities and experiences and everyone can make positive contributions. Operators should seek out these distinctive characteristics and use them to promote a good personal relationship with the student.
• Social behavior, good or bad, is learned from a person’s single experiences. If a problem occurs with a student, operators should look beyond their reactions to the cause of the behavior.
• Students have all the human rights that adults have, and these rights should be respected. • Students have feelings. Students feel sorrow, joy, pain, anger and frustration just like everyone
else. Operators should recognize that these feelings govern behavior, and they should be understanding and sympathetic towards students.
• Students can reason. Some behaviors or activities must be prohibited or limited on a bus. If students understand why they are not permitted to eat or drink, etc., they will be more apt to refrain. "Because I said so" is not a good reason and will not be accepted by the students.
Problems are opportunities. Confrontation with students, handled properly, gives operators an opportunity to develop positive relationships of mutual respect with their passengers. The world sometimes seems unfair. Not everyone is born with the same social, economic or physical opportunities; however, everyone does have unique talents, abilities and experiences. Operators should, in their dealings with students, emphasize the positive and not the negative. Help students understand what they have going for them, not against them. Respect for human beings is an expectation. Typically, people expect certain treatment without having to tell others how they want to be treated. People expect to be treated with respect. They expect their physical space to be respected. They expect fair treatment, recognition, affection and understanding. Operators should accord these very basic human rights to their passenger
Slide 14
IX-14
Negative Roadblock Messages
Solution messages
Hidden messages
Put-down messages
Hidden messages
Indirect messages
Hidden messages
Whenever operators must confront students, they give off verbal and non-verbal messages in the way they communicate. The student interprets both what is said and how it is said. Many times, how a message is communicated or its hidden meaning is much more important than the actual words. Three types of messages can be negative roadblocks to effective communication with students. Negative roadblock messages: • Solution messages -- Solution messages order people. They tell people what to do. Threats,
promises, moralizing, logic, teaching, and providing solutions or advice are examples of this type of message.
o Hidden message -- The hidden message in the solution message tells young people, "You are too dumb to figure it out yourself.”
• Put-down messages -- People can be put down or belittled in many ways. Criticizing, blaming or name-calling are obvious ways to put someone down. Less obvious ways are to compliment, reassure, or agree with others negatively or sarcastically. In addition, by questioning, probing, analyzing and diagnosing negatively or degrading, one can block communication with young people.
o Hidden message -- The hidden message in the put-down message is, "There is something wrong with you. You caused me a problem."
• Indirect messages -- Ignoring someone, kidding them or being sarcastic with them are indirect messages.
o Hidden message -- The hidden message in the indirect message is, "If I confront you directly, you may not like me."
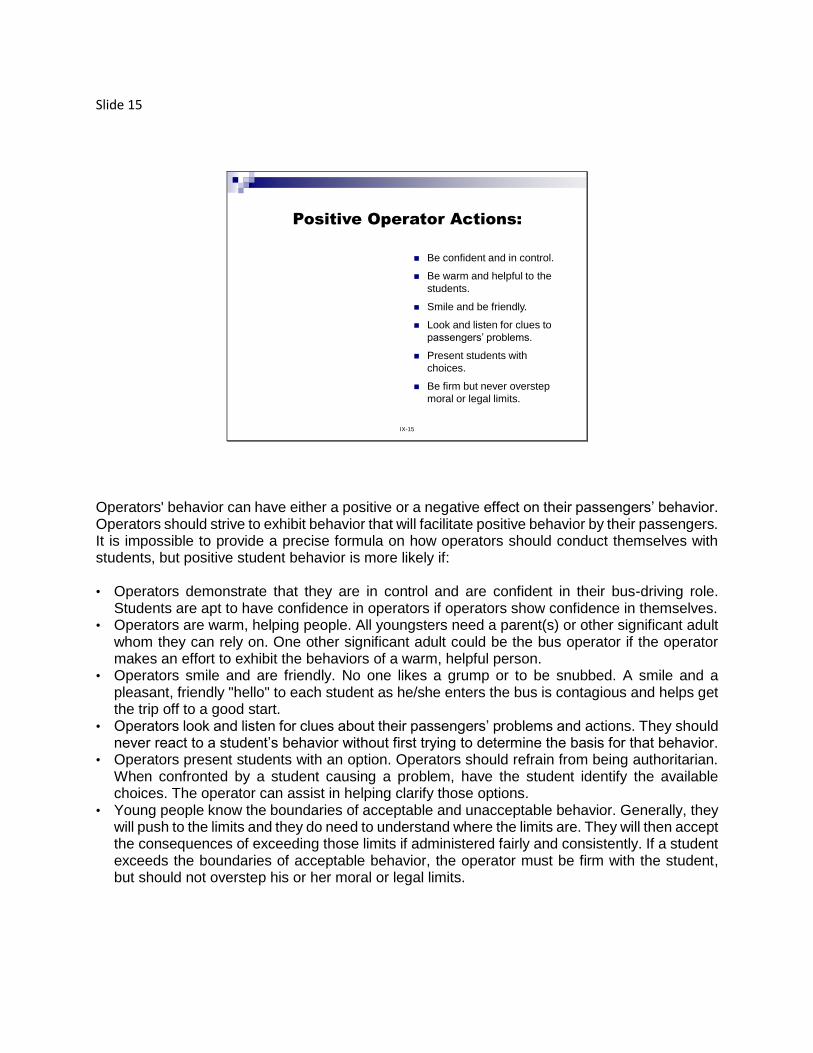
Slide 15
IX-15
Positive Operator Actions:
Be confident and in control.
Be warm and helpful to the
students.
Smile and be friendly.
Look and listen for clues to
passengers’ problems.
Present students with
choices.
Be firm but never overstep
moral or legal limits.
Operators' behavior can have either a positive or a negative effect on their passengers’ behavior. Operators should strive to exhibit behavior that will facilitate positive behavior by their passengers. It is impossible to provide a precise formula on how operators should conduct themselves with students, but positive student behavior is more likely if: • Operators demonstrate that they are in control and are confident in their bus-driving role.
Students are apt to have confidence in operators if operators show confidence in themselves. • Operators are warm, helping people. All youngsters need a parent(s) or other significant adult
whom they can rely on. One other significant adult could be the bus operator if the operator makes an effort to exhibit the behaviors of a warm, helpful person.
• Operators smile and are friendly. No one likes a grump or to be snubbed. A smile and a pleasant, friendly "hello" to each student as he/she enters the bus is contagious and helps get the trip off to a good start.
• Operators look and listen for clues about their passengers’ problems and actions. They should never react to a student’s behavior without first trying to determine the basis for that behavior.
• Operators present students with an option. Operators should refrain from being authoritarian. When confronted by a student causing a problem, have the student identify the available choices. The operator can assist in helping clarify those options.
• Young people know the boundaries of acceptable and unacceptable behavior. Generally, they will push to the limits and they do need to understand where the limits are. They will then accept the consequences of exceeding those limits if administered fairly and consistently. If a student exceeds the boundaries of acceptable behavior, the operator must be firm with the student, but should not overstep his or her moral or legal limits.
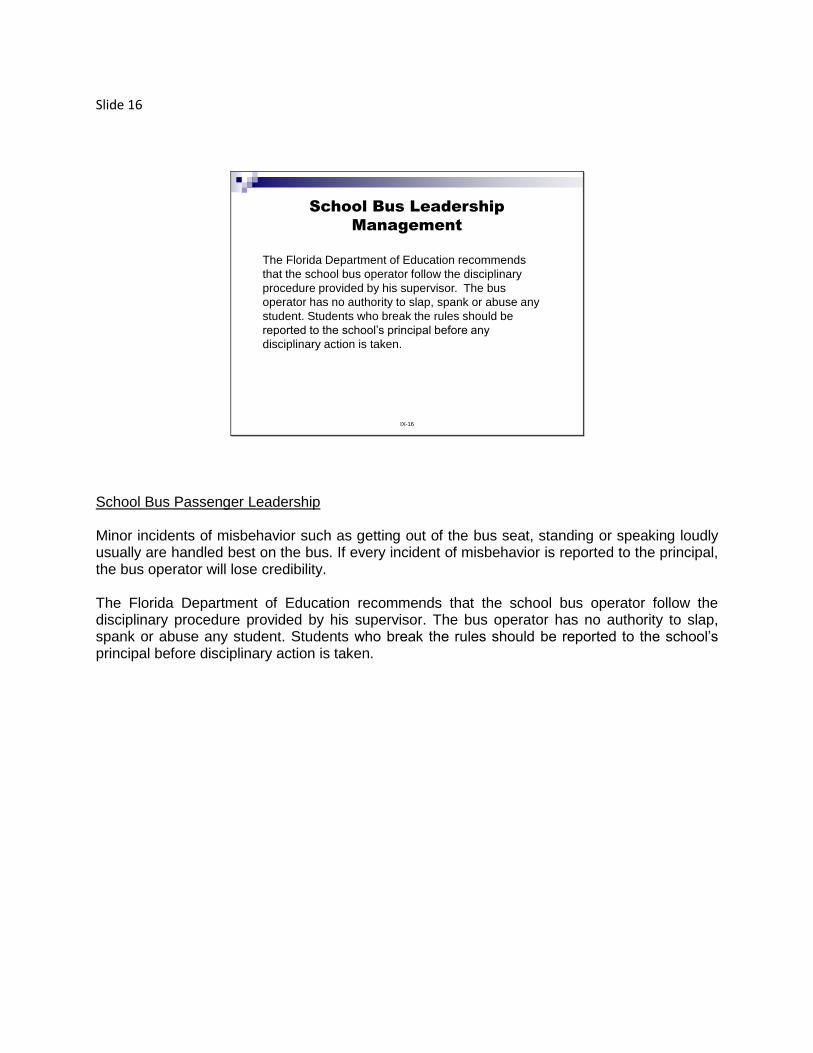
Slide 16
IX-16
School Bus Leadership
Management
The Florida Department of Education recommends
that the school bus operator follow the disciplinary
procedure provided by his supervisor. The bus
operator has no authority to slap, spank or abuse any
student. Students who break the rules should be
reported to the school’s principal before any
disciplinary action is taken.
School Bus Passenger Leadership Minor incidents of misbehavior such as getting out of the bus seat, standing or speaking loudly usually are handled best on the bus. If every incident of misbehavior is reported to the principal, the bus operator will lose credibility. The Florida Department of Education recommends that the school bus operator follow the disciplinary procedure provided by his supervisor. The bus operator has no authority to slap, spank or abuse any student. Students who break the rules should be reported to the school’s principal before disciplinary action is taken.
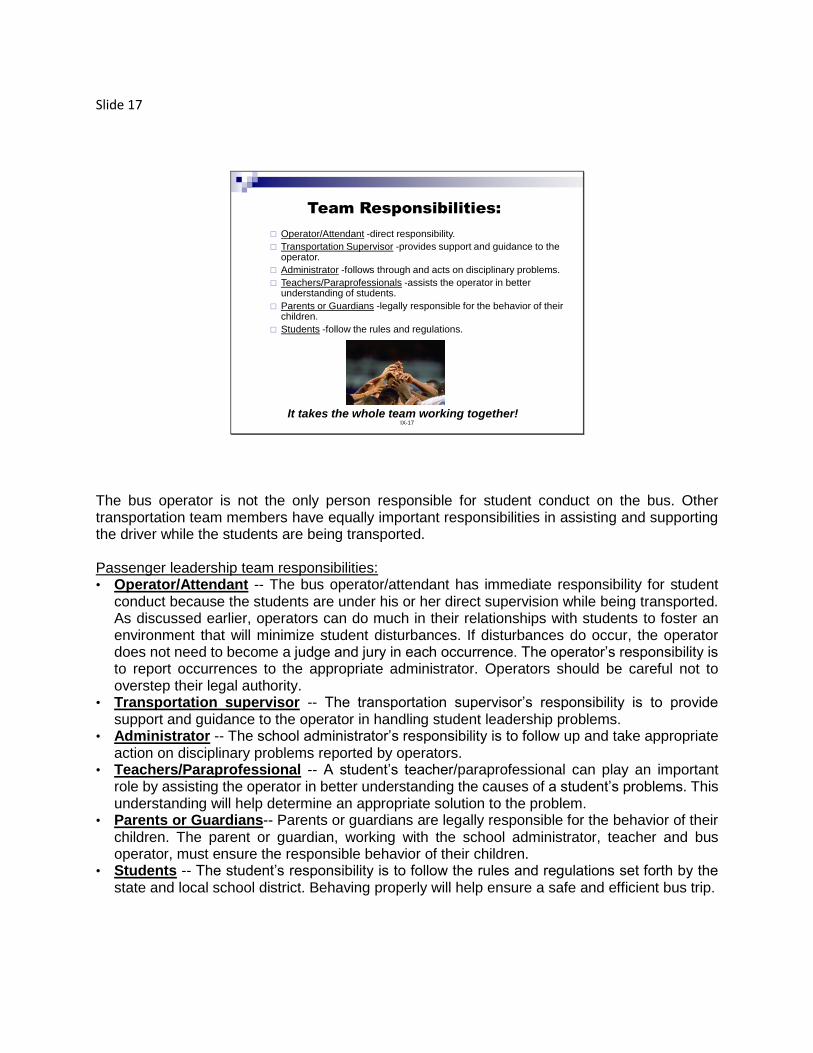
Slide 17
IX-17
Team Responsibilities:
Operator/Attendant -direct responsibility.
Transportation Supervisor -provides support and guidance to the operator.
Administrator -follows through and acts on disciplinary problems.
Teachers/Paraprofessionals -assists the operator in better understanding of students.
Parents or Guardians -legally responsible for the behavior of their children.
Students -follow the rules and regulations.
It takes the whole team working together!
The bus operator is not the only person responsible for student conduct on the bus. Other transportation team members have equally important responsibilities in assisting and supporting the driver while the students are being transported. Passenger leadership team responsibilities: • Operator/Attendant -- The bus operator/attendant has immediate responsibility for student
conduct because the students are under his or her direct supervision while being transported. As discussed earlier, operators can do much in their relationships with students to foster an environment that will minimize student disturbances. If disturbances do occur, the operator does not need to become a judge and jury in each occurrence. The operator’s responsibility is to report occurrences to the appropriate administrator. Operators should be careful not to overstep their legal authority.
• Transportation supervisor -- The transportation supervisor’s responsibility is to provide support and guidance to the operator in handling student leadership problems.
• Administrator -- The school administrator’s responsibility is to follow up and take appropriate action on disciplinary problems reported by operators.
• Teachers/Paraprofessional -- A student’s teacher/paraprofessional can play an important role by assisting the operator in better understanding the causes of a student’s problems. This understanding will help determine an appropriate solution to the problem.
• Parents or Guardians-- Parents or guardians are legally responsible for the behavior of their children. The parent or guardian, working with the school administrator, teacher and bus operator, must ensure the responsible behavior of their children.
• Students -- The student’s responsibility is to follow the rules and regulations set forth by the state and local school district. Behaving properly will help ensure a safe and efficient bus trip.
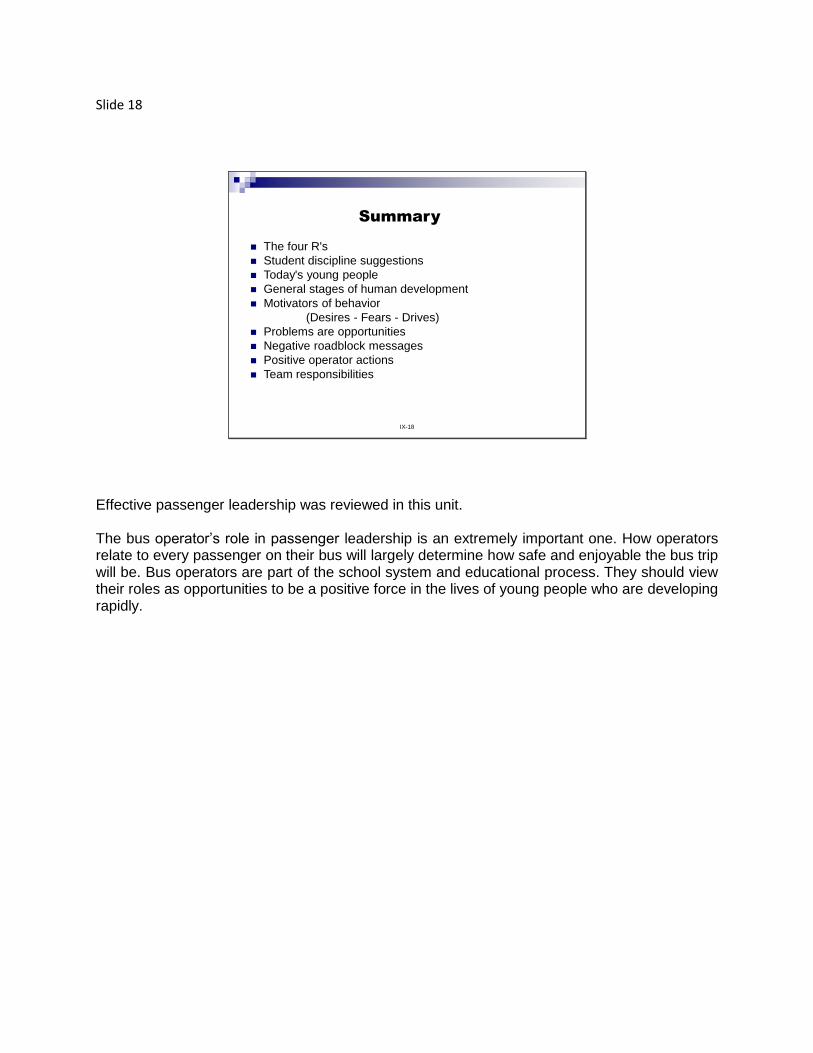
Slide 18
IX-18
Summary
The four R's
Student discipline suggestions
Today's young people
General stages of human development
Motivators of behavior
(Desires - Fears - Drives)
Problems are opportunities
Negative roadblock messages
Positive operator actions
Team responsibilities
Effective passenger leadership was reviewed in this unit. The bus operator’s role in passenger leadership is an extremely important one. How operators relate to every passenger on their bus will largely determine how safe and enjoyable the bus trip will be. Bus operators are part of the school system and educational process. They should view their roles as opportunities to be a positive force in the lives of young people who are developing rapidly.
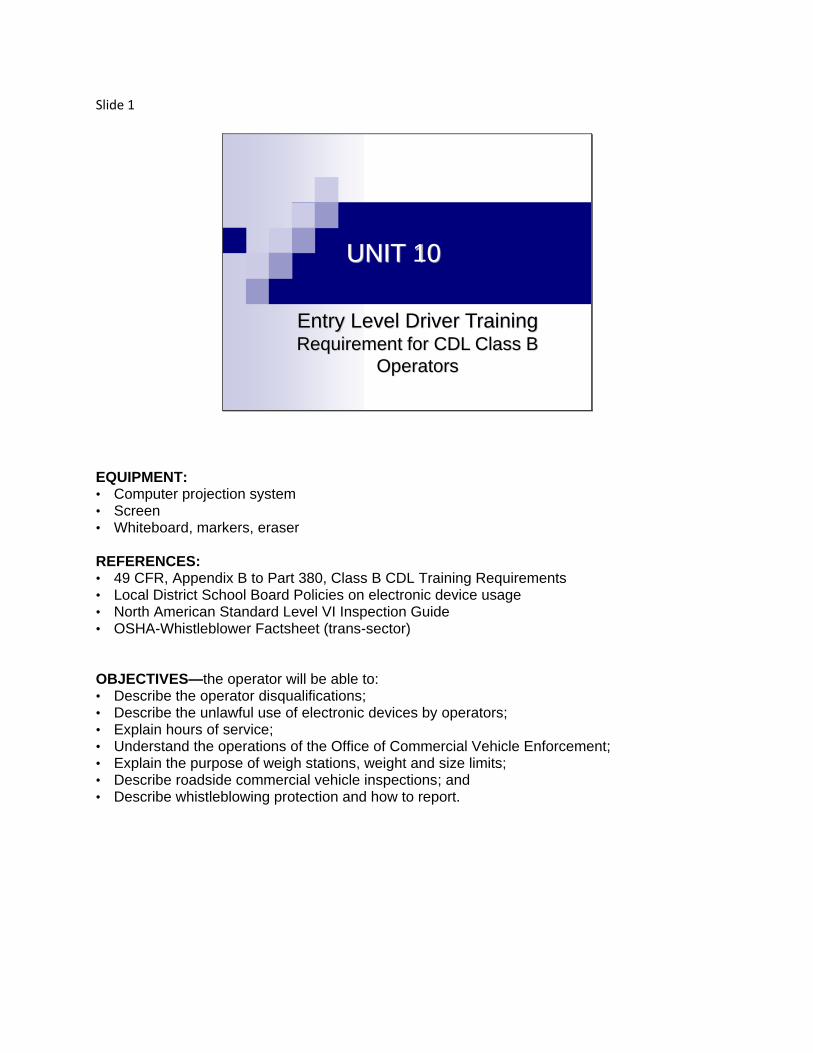
Slide 1
UNIT 10
Entry Level Driver Training Requirement for CDL Class B
Operators
EQUIPMENT: • Computer projection system • Screen • Whiteboard, markers, eraser REFERENCES: • 49 CFR, Appendix B to Part 380, Class B CDL Training Requirements • Local District School Board Policies on electronic device usage • North American Standard Level VI Inspection Guide • OSHA-Whistleblower Factsheet (trans-sector)
OBJECTIVES—the operator will be able to: • Describe the operator disqualifications; • Describe the unlawful use of electronic devices by operators; • Explain hours of service; • Understand the operations of the Office of Commercial Vehicle Enforcement; • Explain the purpose of weigh stations, weight and size limits; • Describe roadside commercial vehicle inspections; and • Describe whistleblowing protection and how to report.
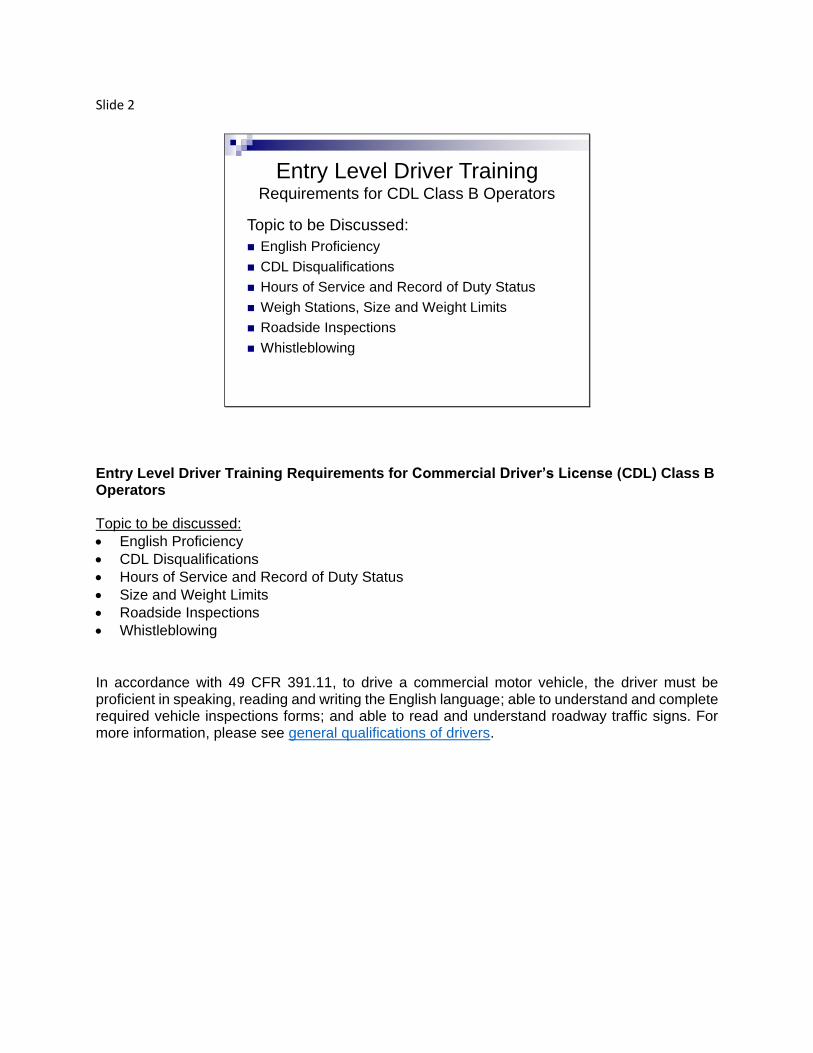
Slide 2
Entry Level Driver Training Requirements for CDL Class B Operators
Topic to be Discussed:
English Proficiency
CDL Disqualifications
Hours of Service and Record of Duty Status
Weigh Stations, Size and Weight Limits
Roadside Inspections
Whistleblowing
Entry Level Driver Training Requirements for Commercial Driver’s License (CDL) Class B Operators Topic to be discussed:
English Proficiency
CDL Disqualifications
Hours of Service and Record of Duty Status
Size and Weight Limits
Roadside Inspections
Whistleblowing
In accordance with 49 CFR 391.11, to drive a commercial motor vehicle, the driver must be proficient in speaking, reading and writing the English language; able to understand and complete required vehicle inspections forms; and able to read and understand roadway traffic signs. For more information, please see general qualifications of drivers.
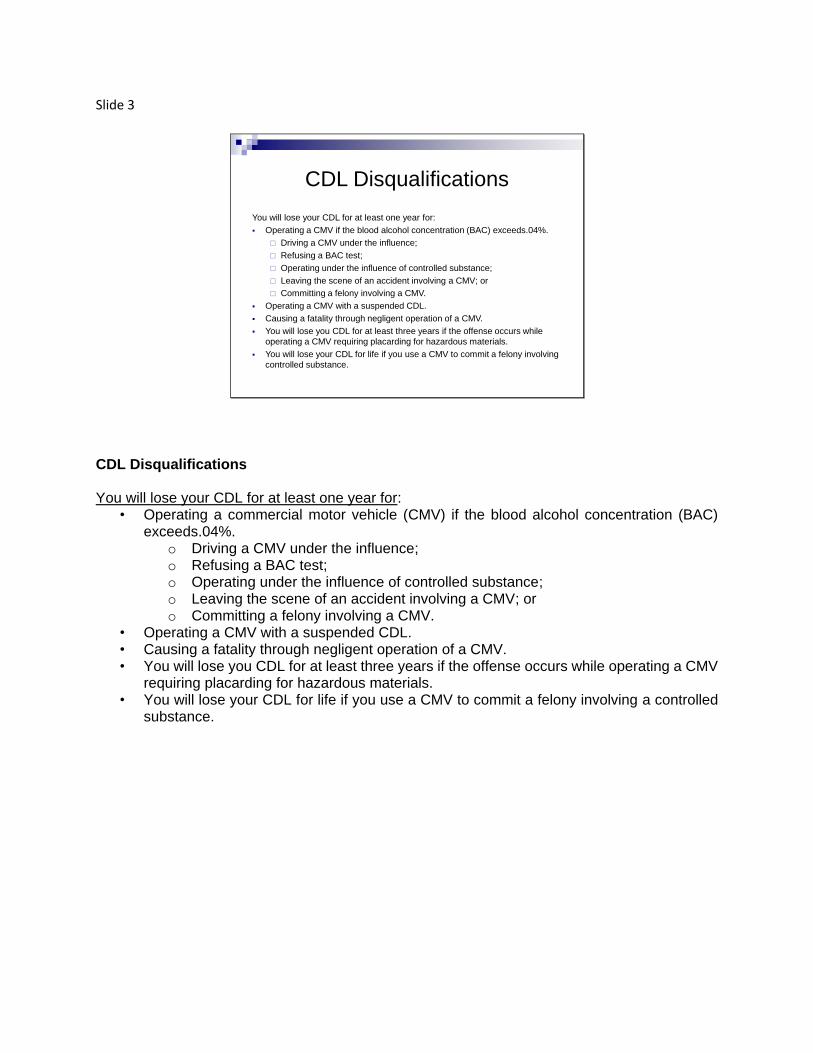
Slide 3
CDL Disqualifications
You will lose your CDL for at least one year for:
Operating a CMV if the blood alcohol concentration (BAC) exceeds.04%.
Driving a CMV under the influence;
Refusing a BAC test;
Operating under the influence of controlled substance;
Leaving the scene of an accident involving a CMV; or
Committing a felony involving a CMV.
Operating a CMV with a suspended CDL.
Causing a fatality through negligent operation of a CMV.
You will lose you CDL for at least three years if the offense occurs while
operating a CMV requiring placarding for hazardous materials.
You will lose your CDL for life if you use a CMV to commit a felony involving
controlled substance.
CDL Disqualifications You will lose your CDL for at least one year for:
• Operating a commercial motor vehicle (CMV) if the blood alcohol concentration (BAC) exceeds.04%.
o Driving a CMV under the influence; o Refusing a BAC test; o Operating under the influence of controlled substance; o Leaving the scene of an accident involving a CMV; or o Committing a felony involving a CMV.
• Operating a CMV with a suspended CDL. • Causing a fatality through negligent operation of a CMV. • You will lose you CDL for at least three years if the offense occurs while operating a CMV
requiring placarding for hazardous materials. • You will lose your CDL for life if you use a CMV to commit a felony involving a controlled
substance.
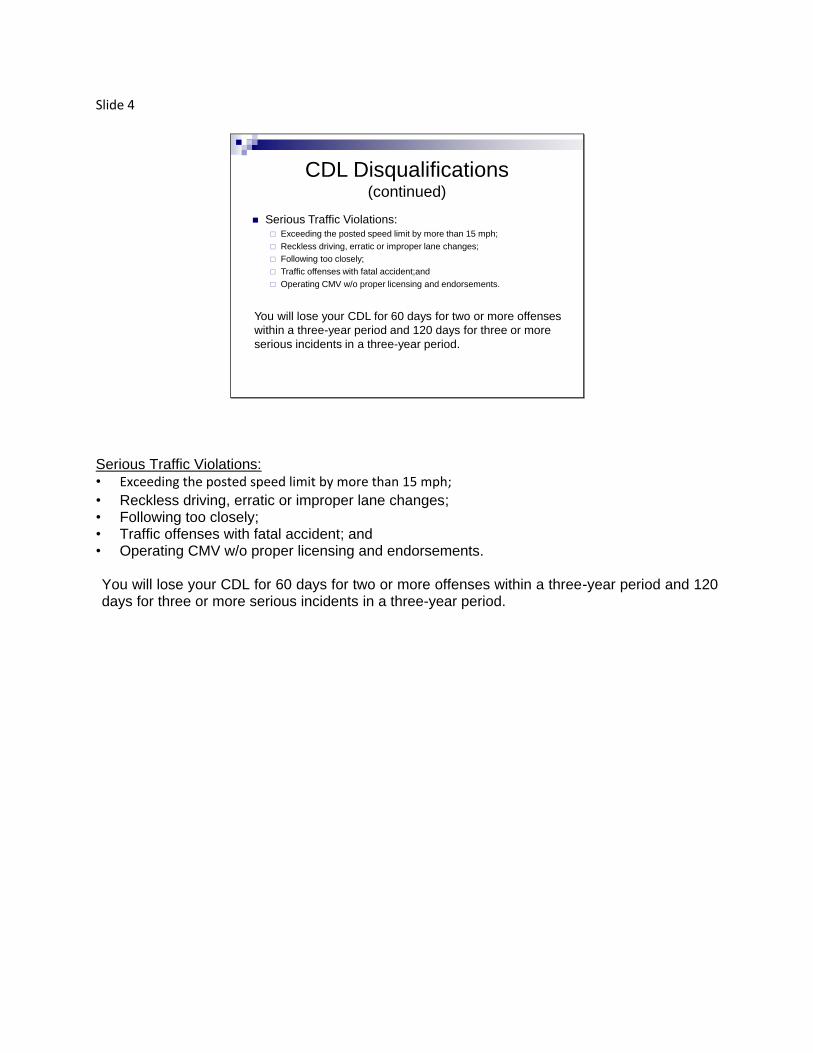
Slide 4
CDL Disqualifications(continued)
Serious Traffic Violations: Exceeding the posted speed limit by more than 15 mph;
Reckless driving, erratic or improper lane changes;
Following too closely;
Traffic offenses with fatal accident;and
Operating CMV w/o proper licensing and endorsements.
You will lose your CDL for 60 days for two or more offenses
within a three-year period and 120 days for three or more
serious incidents in a three-year period.
Serious Traffic Violations:
• Exceeding the posted speed limit by more than 15 mph;
• Reckless driving, erratic or improper lane changes; • Following too closely; • Traffic offenses with fatal accident; and • Operating CMV w/o proper licensing and endorsements. You will lose your CDL for 60 days for two or more offenses within a three-year period and 120 days for three or more serious incidents in a three-year period.
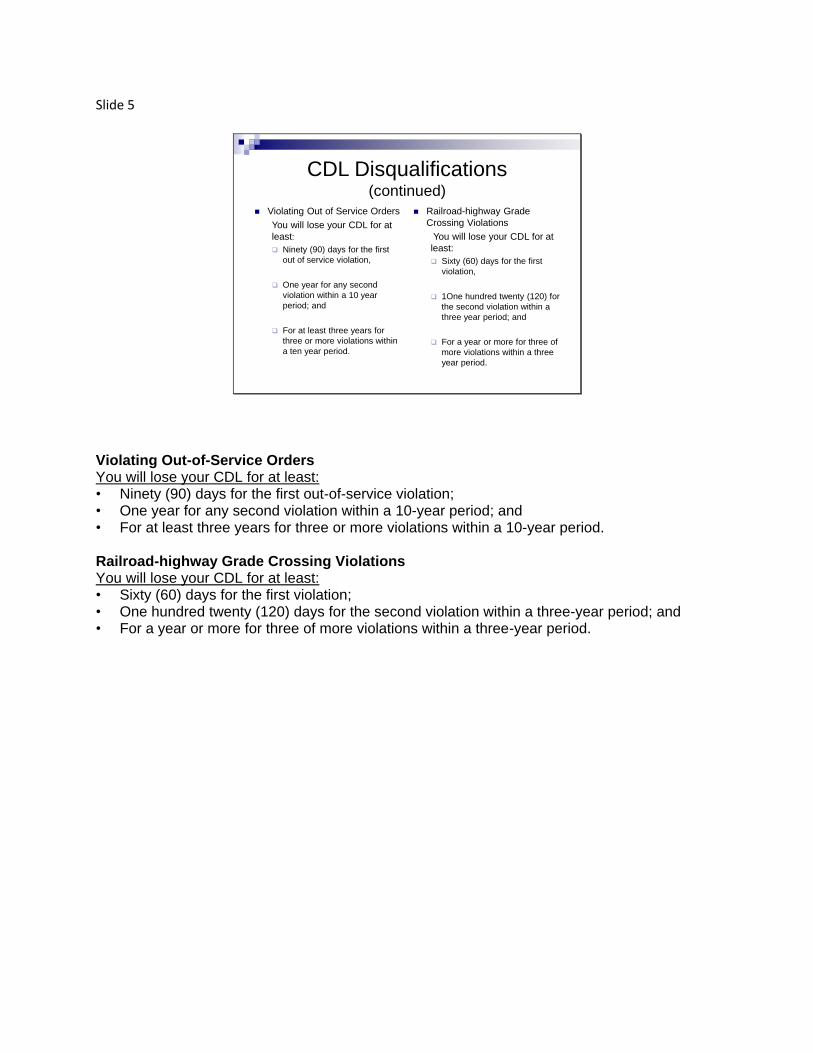
Slide 5
CDL Disqualifications(continued)
Violating Out of Service Orders
You will lose your CDL for at
least:
Ninety (90) days for the first
out of service violation,
One year for any second
violation within a 10 year
period; and
For at least three years for
three or more violations within
a ten year period.
Railroad-highway Grade
Crossing Violations
You will lose your CDL for at
least:
Sixty (60) days for the first
violation,
1One hundred twenty (120) for
the second violation within a
three year period; and
For a year or more for three of
more violations within a three
year period.
Violating Out-of-Service Orders You will lose your CDL for at least: • Ninety (90) days for the first out-of-service violation; • One year for any second violation within a 10-year period; and • For at least three years for three or more violations within a 10-year period. Railroad-highway Grade Crossing Violations You will lose your CDL for at least: • Sixty (60) days for the first violation; • One hundred twenty (120) days for the second violation within a three-year period; and • For a year or more for three of more violations within a three-year period.
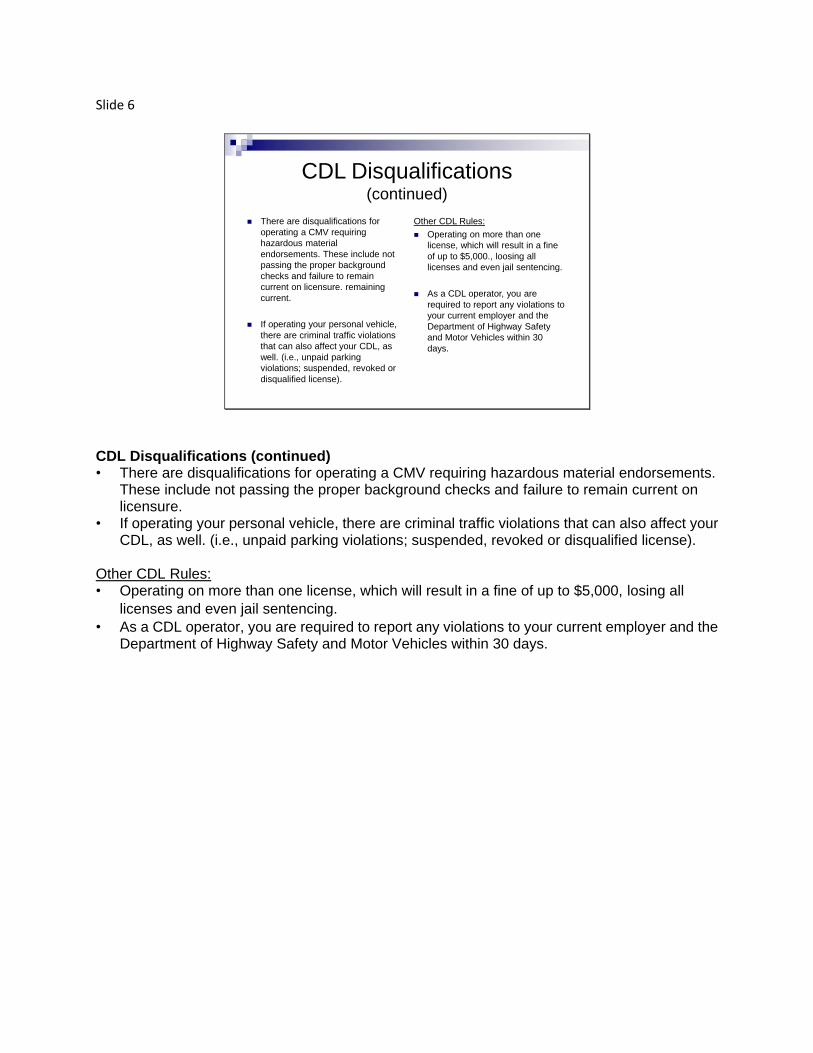
Slide 6
CDL Disqualifications(continued)
There are disqualifications for
operating a CMV requiring
hazardous material
endorsements. These include not
passing the proper background
checks and failure to remain
current on licensure. remaining
current.
If operating your personal vehicle,
there are criminal traffic violations
that can also affect your CDL, as
well. (i.e., unpaid parking
violations; suspended, revoked or
disqualified license).
Other CDL Rules:
Operating on more than one
license, which will result in a fine
of up to $5,000., loosing all
licenses and even jail sentencing.
As a CDL operator, you are
required to report any violations to
your current employer and the
Department of Highway Safety
and Motor Vehicles within 30
days.
CDL Disqualifications (continued) • There are disqualifications for operating a CMV requiring hazardous material endorsements.
These include not passing the proper background checks and failure to remain current on licensure.
• If operating your personal vehicle, there are criminal traffic violations that can also affect your CDL, as well. (i.e., unpaid parking violations; suspended, revoked or disqualified license).
Other CDL Rules: • Operating on more than one license, which will result in a fine of up to $5,000, losing all
licenses and even jail sentencing.
• As a CDL operator, you are required to report any violations to your current employer and the Department of Highway Safety and Motor Vehicles within 30 days.
Slide 7
Electronic Device UsageDisqualifications and Fines
Cell Phone Usage:
Considered both a mental and
physical distraction; and that can
increase the risk of a crash.
Cell phone usage is federally
restricted in accordance with 49
CFR Part 383, 384, 390, 391 and
392.
Six times greater risk of a crash.
Your CDL will be disqualified after
two or more infractions.
Hands-free devices also lead to
distracted driving.
Text Messaging:
Federally prohibited while
operating a commercial motor
vehicle.
Violation will result in suspension
of CDL privileges.
Texting is even riskier than talking:
odds of being involved in a safety-
critical event is 23.2 times greater.
At 55 mph you travel an average
of 371 feet without looking up.
Penalties may be $2750 plus.
Electronic Device Usage, Disqualifications and Fines Electronic devices include, but are not limited to, a cellular telephone; personal digital assistant; pager; computer; and any other device used to enter, write, send, receive or read text. Cell Phone Usage: Using a cell phone while driving is considered both a mental and physical distraction,
increasing the chances of a crash by a factor of six. Cell phone usage while driving is federally restricted, in accordance with 49 CFR Part 383,
384, 390, 391 and 392. Both the Federal Motor Carrier Safety Regulations (FMCSR) and the Hazardous Materials Regulations (HMR) restrict the use of any hand-held mobile telephone device during the operation of a CMV. Motor carriers are also prohibited from requiring or allowing operators of CVMs to use hand-held mobile telephones.
Your CDL will be disqualified after two or more infractions. In addition, you may face civil penalties of up to $2750. Employers may also be fined up to $11,000.
Hands-free devices also lead to distracted driving, requiring the operator to take his/her eyes off of the roadway. Such devices are only permissible if operated by voice-only commands and do not require any other operator action.
Text Messaging: Text messaging is federally prohibited while operating a commercial motor vehicle, in
accordance with 49 CFR 383, 384, 390, 391 and 392, FMSCR. Violation of the above-referenced federal laws will result in of the disqualification of your
CDL privileges, for 60 days for a second offense and 120 days for a third offense. Texting is even riskier than talking. The odds of being involved in a safety-critical event while
texting is 23.2 times greater than while talking on a cell phone. Sending and receiving text messages takes the operator's eyes from the road for an average of 4.6 seconds for each incident.
At 55 mph, you drive an average of 371 feet without looking up. Penalties may be up to $2750. *For more information, visit https://www3.flhsmv.gov/handbooks/englishcdlhandbook.pdf,
section 2.9 – Distracted Driving.
Slide 8
Hours of Service RequirementsClass B CDL Operators
The number of hours a commercial driver can operate a vehicle is regulated to
minimize the possibilities of the operator becoming drowsy or fatigued. A Large
Truck Crash Causation Study (2007) indicates that 13 percent of commercial
motor vehicle drivers were fatigued at the time of their collisions. Therefore, all
commercial operators are required to know and adhere to the Hour of Service
Rules. There are two categories of drivers: property carrying operators and
passenger carrying operators.
The Federal Motor Carrier Safety Administration (FMCSA) regulates the
number of hours operators of commercial motor vehicles can drive and work
per day and week.
Theses rules also mandate rest breaks.
According to the 14-hour rule, a operator may not drive beyond the 14th
consecutive hour after coming on duty unless the operator has taken 10
consecutive hours off-duty. There is a 15-hour limit for passenger-carrying
operators following eight hours of consecutive off-duty hours. The eight
hours may not be included in the 15-hour period.
Hours of Service Requirements Class B CDL Operators The number of hours a commercial driver can operate is regulated to minimize the possibility of the operator becoming drowsy or fatigued. A Large Truck Crash Causation Study (2007) indicates that 13 percent of commercial motor vehicle drivers were fatigued at the time of their collisions. Therefore, all commercial operators are required to know and adhere to the Hour of Service Rules. There are two categories of drivers affected by these rules: property-carrying operators and passenger carrying-operators. The Federal Motor Carrier Safety Administration (FMCSA) regulates the number of hours that operators of commercial motor vehicles can drive and work per day and week. These rules also mandate rest breaks. According to the 14-hour rule, an operator may not drive beyond the 14th consecutive hour after coming on duty unless the operator has taken 10 consecutive hours off-duty. There is a 15-hour limit for passenger-carrying operators following eight hours of consecutive off-duty hours. The eight hours may not be included in the 15-hour period.

Slide 9
Hours of Service (continued)Class B CDL Operators
The 11-hour rule allows for a
maximum of 11 hours after 10
consecutive hours off duty. There
is a 10-hour maximum driving limit
after eight consecutive hours off-
duty for passenger-carrying
operators.
The operator can extend the
driving window by two hours for
adverse driving conditions.
Drivers with a sleeper berth can
split their required 10-hour off-duty
time, provided it is at least 20
hours long and the other driver
sleeps at least seven hours. All
sleeper berth pairing must add up
to 10 hours. Passenger-carrying
drivers must take at least eight
hours off-duty and may split off-
duty time.
Short-Haul Exception
A driver is exempt from the
requirements of §395.8 and
§395.11 if the driver operates
within a 150 air-mile radius of the
normal work reporting location and
does not exceed a maximum duty
period of 14 hours. Drivers using
the short-haul exception in
§395.1(e)(1) must report and
return to the normal work reporting
location within 14 consecutive
hours and stay within a 150 air-
mile radius of the work reporting
location.
For more information, please see
Summary of Hour of Service
Regulations.
Hours of Service Requirements (continued) Class B CDL Operators The 11-hour rule allows for a maximum of 11 hours after 10 consecutive hours off duty. There is a 10-hour maximum driving limit after eight consecutive hours off-duty for passenger-carrying operators. Operators can extend the driving window by two hours for adverse driving conditions. Drivers with access to a sleeper berth can split their required 10-hour off-duty time, provided it is at least 20 hours long and the other driver sleeps for at least seven hours; however, all sleeper berth pairing must add up to 10 hours. Passenger-carrying drivers must take at least eight hours off duty and may split off-duty time. Short-Haul Exception A driver is exempt from the requirements of §395.8 and §395.11 if the driver operates within a 150 air-mile radius of the normal work reporting location and does not exceed a maximum duty period of 14 hours. Drivers using the short-haul exception in §395.1(e)(1) must report and return to the normal work reporting location within 14 consecutive hours and stay within a 150 air-mile radius of the work reporting location. Reference link: Summary of Hour of Service Regulations

Slide 10
Record of Duty ServiceRODS/Logbooks
Records of Duty Status (RODS) regulations require operators to keep a record
of duty status (hours of service) unless they qualify for an exception. School
bus operators qualify under the exception. However, Class B operators
employed in interstate commercial driving operations are required to comply
with the hours of service and logbook keeping regulations.
May be recorded in written or with an electronic logging device (ELD).
Must cover every 24-hours a day, of the last eight days.
Current day must be up-to-date with the last change in duty status.
Must include specific required information; date, miles, vehicle information,
name of carrier company, address, signature, total hours, etc.
Authorized government inspectors may check the logs at any time.
Violations of the hour-of-service regulations can result in fines and/or placed
out of service.
For more information on hours of service and logbooks go to Interstate Truck
Driver’s Guide to Hours of Service.
Record of Duty Service (RODS/Logbook) Records of Duty Status (RODS) regulations require operators to keep a record of duty status (hours of service) unless they qualify for an exception. School bus operators qualify under the exception. However, Class B operators employed in interstate commercial driving operations are required to comply with the hours of service and logbook keeping regulations. Requirements for recording hours of sevice: • May be recorded in written or with an electronic logging device (ELD). • Must cover every 24-hours a day, of the last eight days. • Current day must be up-to-date with the last change in duty status. • Must include specific required information; date, miles, vehicle information, name of carrier
company, address, signature, total hours, etc. • Authorized government inspectors may check the logs at any time. • Violations of the hour-of-service regulations can result in fines and/or placed out of service. For more information on hours of service and logbooks go to Interstate Truck Driver’s Guide to Hours of Service.
Slide 11
Florida Highway PatrolOffice of Commercial Vehicle Enforcement
The Florida Department of
Transportation Motor Carrier
Compliance Office was created in
1980 by merging Florida Highway
Patrol Weight Troop and Safety
Enforcement function of the
Public Service Commission. July
1, 2011, the Office of Motor
Carrier Compliance officially
transitioned from the Florida
Department of Transportation to
the Florida Highway Patrol (FHP)
as a result of Senate Bill 2160.
Office of Commercial Vehicle
Enforcement
Today, the Office Of Commercial
Vehicle Enforcement (CVE)
resides within the Florida
Department of Highway Safety
and Motor Vehicles (DHSMV)
Division of Florida Highway
Patrol.
https://www.flhsmv.gov/florida-
highway-patrol/commercial-
vehicle-enforcement/about/
Florida Highway Patrol Office of Commercial Vehicle Enforcement The Florida Department of Transportation Motor Carrier Compliance Office was created in 1980 by merging the Florida Highway Patrol Weight Troop and Safety Enforcement functions of the Public Service Commission. On July 1, 2011, the Office of Motor Carrier Compliance officially transitioned from the Florida Department of Transportation to the Florida Highway Patrol (FHP) as a result of Senate Bill 2160. Office of Commercial Vehicle Enforcement Today, the Office Of Commercial Vehicle Enforcement (CVE) resides within the Florida Department of Highway Safety and Motor Vehicles (DHSMV) Division of Florida Highway Patrol. https://www.flhsmv.gov/florida-highway-patrol/commercial-vehicle-enforcement/about/
Slide 12
CVE Overview(Office of Commercial Vehicle Enforcement)
Reduces the number and
severity of crashes related
commercial motor vehicle.
Protects the state’s highway
and bridge system from
accelerated damage.
Removes dangerous motor
carriers, drivers and vehicles
from our roadways.
Troopers conduct
operator/vehicle safety
inspections:
Troopers Driver/Vehicle Safety
Inspections:
*Post Crash *Weight *Size
*New Entrant Safety Audits
*Compliance Investigations
*Hazardous Materials
Assessments
*Traffic Enforcement
*Drug Interdiction
*Public Awareness Education
CVE Overview (Office of Commercial Vehicle Enforcement) Reduces the number and severity of crashes related to commercial motor vehicles. Protects the state's highway and bridge system from accelerated damage. Removes dangerous motor carriers, drivers and vehicles from our roadways. Troopers conduct operator/vehicle safety inspections. Trooper Driver/Vehicle Safety Inspections: • Post Crash • Post Weight • Post Size • New Entrant Safety Audits • Compliance Investigations • Hazardous Materials Assessments • Traffic Enforcement • Drug Interdiction • Public Awareness Education
Slide 13
Weigh StationsSize and Weight Limits
The primary purpose of the Office of Commercial Vehicle
Enforcement (CVE) Weight Enforcement program is to protect
highway system pavement and structures (bridges) from excessive
damage due to overweight vehicles. CVE troopers enforce state and
federal laws that regulate the weight of vehicles operating on the
Florida’s highways. The state’s weight limits were established to
prevent heavy trucks from causing unreasonable damage to
highway systems and thereby protect the public’s investment in
these roadways. If your vehicle, or vehicle and load, is determined to
be overweight, Florida law provides for a penalty of $.05 per pound
for all weight over the legal weight for the vehicle. For more
information, please see:
https://www.flhsmv.gov/florida-highway-patrol/commercial-vehicle-
enforcement/safety-enforcement/weight-enforcement/
Size and Weight Limits
The primary purpose of the Office of Commercial Vehicle Enforcement (CVE) Weight Enforcement program is to protect highway system pavement and structures (bridges) from excessive damage due to overweight vehicles. CVE troopers enforce state and federal laws that regulate the weight of vehicles operating on the Florida's highways. The state's weight limits were established to prevent heavy trucks from causing unreasonable damage to highway systems and thereby protect the public's investment in these roadways. If your vehicle, or vehicle and load, is determined to be overweight, Florida law provides for a penalty of $.05 per pound for all weight over the legal weight for the vehicle. For more information, please see: https://www.flhsmv.gov/florida-highway-patrol/commercial-vehicle-enforcement/safety-enforcement/weight-enforcement/ If you decide to operate a Class B vehicle other than a school bus, you must be aware of the proper weights, how they are calculated for each type of class B vehicle and what the additional requirements are.
For more information regarding size and weight, visit: https://www.flhsmv.gov/pdf/cve/2016truckingmanual.pdf
Slide 14
CargoInspecting, Weight, Balance and
Securement
Inspecting Cargo - As part of the vehicle inspection the operator is
responsible for inspecting to ensure the vehicle is not overloaded
and the cargo is balanced and secured properly.
Cargo Weight and Balance - The operator must know the GVWR of
the vehicle being operated and the load disbursement on the axles.
Securing Cargo – The operator has to have proper knowledge to
block, brace, tie-down or cover the cargo.
Cargo Needing Special Attention – Dry bulk knowledge for large
containment containers, hanging meat or livestock and oversized
loads need special attention.
Cargo Inspecting, Weight, Balance and Securement Entry-level driver trainees are required to be knowledgable regarding cargo. School bus operators are trained to safely and efficiently transport students. However, as a licensed Class B operator, you may operate different kinds of type B vehicles, such as a straight truck. To meet the training requirements, we will take a quick look at carrying cargo. Operator Resposibilities:
Inspecting Cargo - As part of the vehicle inspection, the operator is responsible for inspecting to ensure the vehicle is not overloaded and the cargo is balanced and secured properly. Once the inspection is complete, the operator should stop after 50 miles to reinspect and make any necessary adjustments.
Cargo Weight and Balance - The operator must know the GVWR of the vehicle being operated and the load disbursement on the axles. The operator is responsible for keeping the weights within the legal limits. The high center of gravity or “top heaviness” can easily contribute to load shifting and possibly loss of the load, or “tip-over.”
Securing Cargo – The operator has to have proper knowledge to block, brace, tie down or cover the cargo. There should be at least one tie-down for each 10 foot of cargo. Covering the cargo protects people from spilled cargo.
Cargo Needing Special Attention – Dry bulk knowledgefor large containment containers, hanging meat or livestock, and oversized loads require special attention. Particular caution is needed while going around curves or on and off exit ramps. Go slowly.
Oversized loads require special permits and escorts and are generally limited to daylight driving hours.
If the operator is operating any type B vehicle other than a school bus, refer to section 3, Transporting Cargo Safely, 2019-2020 Commercial Drivers License Manual.
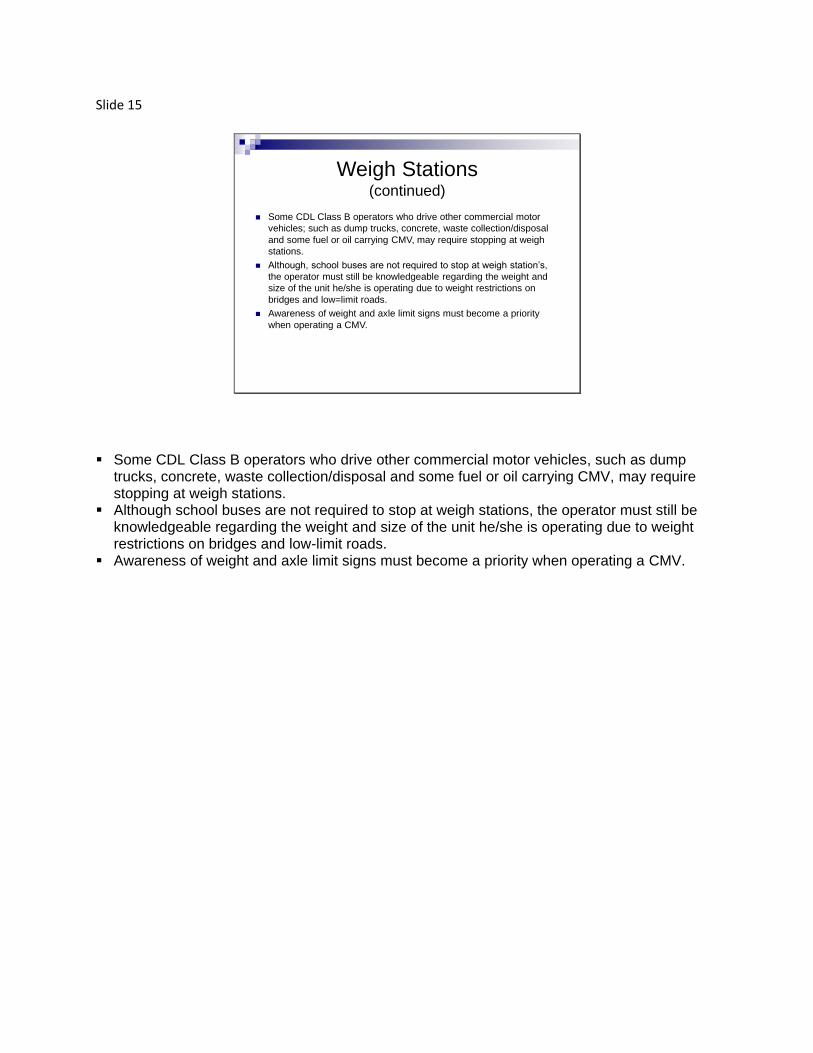
Slide 15
Weigh Stations(continued)
Some CDL Class B operators who drive other commercial motor
vehicles; such as dump trucks, concrete, waste collection/disposal
and some fuel or oil carrying CMV, may require stopping at weigh
stations.
Although, school buses are not required to stop at weigh station’s,
the operator must still be knowledgeable regarding the weight and
size of the unit he/she is operating due to weight restrictions on
bridges and low=limit roads.
Awareness of weight and axle limit signs must become a priority
when operating a CMV.
Some CDL Class B operators who drive other commercial motor vehicles, such as dump trucks, concrete, waste collection/disposal and some fuel or oil carrying CMV, may require stopping at weigh stations.
Although school buses are not required to stop at weigh stations, the operator must still be knowledgeable regarding the weight and size of the unit he/she is operating due to weight restrictions on bridges and low-limit roads.
Awareness of weight and axle limit signs must become a priority when operating a CMV.
Slide 16
FMCSA Roadside Inspections49 CFR 396.9
The FMCSA Roadside Inspection Program is critical to the success of the
Federal Motor Carrier Safety Administration's enforcement program.
A DOT roadside inspection provides an important preventative measure to
protect the operator of a CMV and others traveling on our roadways.
Every special agent is authorized to enter and perform inspections of the
CMV in operation.
Roadside inspections are designed to reduce large CMV
failures/crashes on the road.
FMCSA Roadside Inspections 49 CFR 396.9 The FMCSA Roadside Inspection Program is critical to the success of the Federal Motor Carrier Safety Administration's enforcement program. A DOT roadside inspection provides an important preventive measure to protect the operator of a CMV and others traveling on our roadways. Every special agent is authorized to enter and perform inspections of the CMV in operation. Roadside inspections are designed to reduce large CMV failures/crashes on the road.
Slide 17
CVE Levels of InspectionsEight Levels of Inspections
Level I: The most comprehensive roadside inspection, involving 37 steps that look at
both the operator and the vehicle. Including underneath the chassis and the hood.
This is known as the North American Standard Inspection.
Level II: The inspector can look at the operator, the vehicle or both. The inspection is
causal. Level II is called the Walk-Around Driver and/or Vehicle Inspection.
Level III: Driver Credential Inspection looks at the operator only.
Level IV: This inspection Is called the Special Inspection and is related to a specific
trend or may support a need for a study.
Level V: Vehicle Only Inspection includes all of the steps to inspect the vehicle only.
Level VI: Only applies if you are hauling radioactive waste. It is called the Inspection
for Transuranic Waste and Highway Route Controlled Quantities of Radioactive
Materials.
Level VII: Jurisdictional Mandated Commercial Vehicle Inspection is usually reserved
for commercial vehicles like school buses and shuttles.
Level VIII: The Electronic Inspection is fairly new. Inspectors can carry out their job
without interacting with the vehicle or the operator. It is done wirelessly, even while
the vehicle is in motion.
CVE Levels of Inspections Eight Levels of Inspections • Level I: The most comprehensive roadside inspection, involving 37 steps that look at both the
operator and the vehicle, including underneath the chassis and the hood. This is known as the North American Standard Inspection.
• Level II: The inspector can look at the operator, the vehicle or both. The inspection is causal. Level II is called the Walk-Around Driver and/or Vehicle Inspection.
• Level III: Driver Credential Inspection looks at the operator only. • Level IV: This inspection is called the Special Inspection and is related to a specific trend or
may support the need for a study. • Level V: Vehicle Only Inspection includes all of the steps to inspect the vehicle only. • Level VI: Only applies if you are hauling radioactive waste. It is called the Inspection for
Transuranic Waste and Highway Route Controlled Quantities of Radioactive Materials. • Level VII: Jurisdictional Mandated Commercial Vehicle Inspection is usually reserved for
commercial vehicles like school buses and shuttles. • Level VIII: The Electronic Inspection is fairly new. Inspectors can carry out their job without
interacting with the vehicle or the operator. It is done wirelessly, even while the vehicle is in motion.
Slide 18
CVE InspectionsRoadside Inspection Tips
Know and obey all traffic laws. Pay attention to the road and speed
signs. Don’t speed. Wear your
seatbelt. Do not text and drive. Safety
is essential.
Keep paperwork organized. It is
your responsibility to have the
following paperwork available for any
roadside inspection.
Medical card and waiver, if
applicable
Your Commercial Drivers License,
Completed vehicle inspection
paperwork.
Registration and insurance
information.
Keep your vehicle clean. A clean
vehicle makes it easier for the operator
and the inspector to do their jobs.
Out-of=Service Criteria:
The North American Standard Out-of-
Service Criteria is a pass-fail criteria
for inspections. The purpose of the
criteria is to identify critical violations.
Those violations render the driver,
vehicle and/or cargo out of service
until the condition(s) or defect(s) can
be corrected or fixed.
The North American Standard Out-of-
Service Criteria identifies critical
vehicle inspection items and details
the criteria that can prohibit a motor
carrier or driver from operating a
commercial motor vehicle for a
specified period of time or until the
condition is corrected.
CVE Inspections Roadside Inspection Tips; • Know and obey all traffic laws. Pay attention to the road and speed signs. Don't speed. Wear
your seatbelt. Do not text and drive. Safety is essential. • Keep paperwork organized. It is your responsibility to have the following paperwork available
for any roadside inspection. • Medical card and waiver, if applicable; • Your Commercial Drivers License; • Completed vehicle inspection paperwork; and • Registration and insurance information.
• Keep your vehicle clean. A clean vehicle makes it easier for the operator and the inspector to do their jobs.
Out-of-Service Criteria The North American Standard Out-of-Service Criteria are the pass-fail criteria for inspections. The purpose of the criteria is to identify critical violations. Those violations render the driver, vehicle and/or cargo out-of-service until the condition(s) or defect(s) can be corrected or fixed. The North American Standard Out-of-Service Criteria identify critical vehicle inspection items and detail the criteria that can prohibit a motor carrier or driver from operating a commercial motor vehicle for a specified period of time or until the condition is corrected. *For more information, visit CVSA at https://www.cvsa.org/inspections/out-of-service-criteria/.
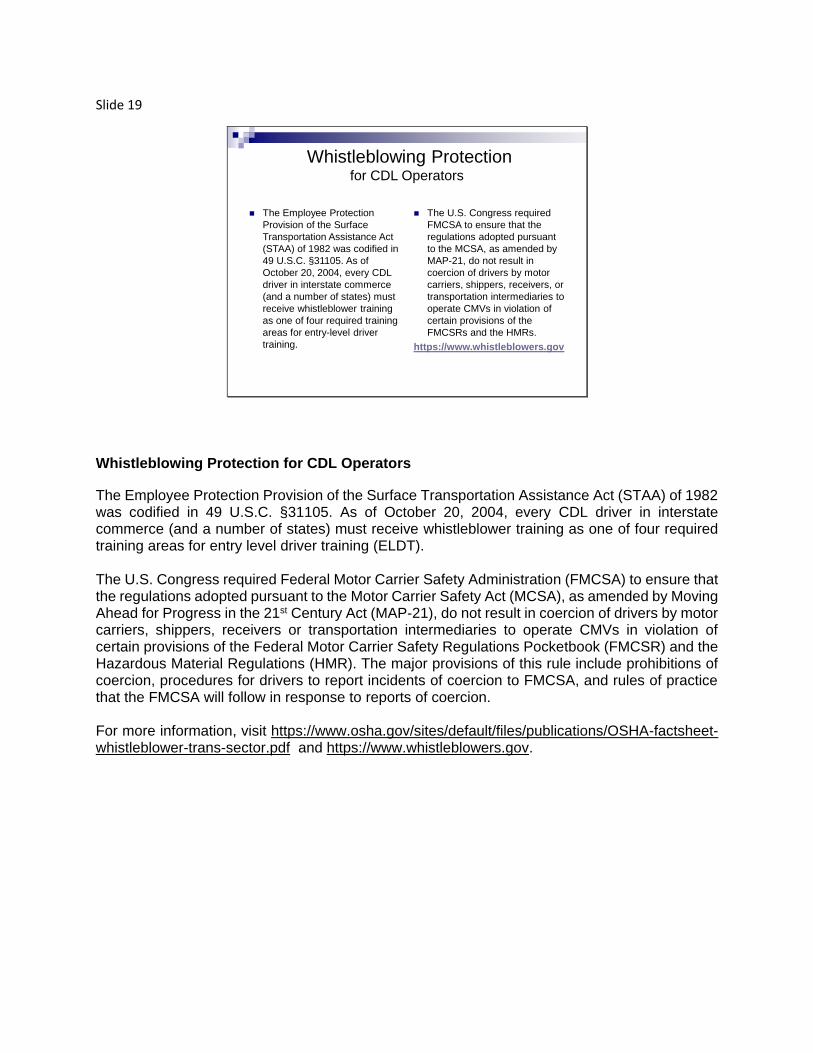
Slide 19
Whistleblowing Protectionfor CDL Operators
The Employee Protection
Provision of the Surface
Transportation Assistance Act
(STAA) of 1982 was codified in
49 U.S.C. §31105. As of
October 20, 2004, every CDL
driver in interstate commerce
(and a number of states) must
receive whistleblower training
as one of four required training
areas for entry-level driver
training.
The U.S. Congress required
FMCSA to ensure that the
regulations adopted pursuant
to the MCSA, as amended by
MAP-21, do not result in
coercion of drivers by motor
carriers, shippers, receivers, or
transportation intermediaries to
operate CMVs in violation of
certain provisions of the
FMCSRs and the HMRs.
https://www.whistleblowers.gov
Whistleblowing Protection for CDL Operators
The Employee Protection Provision of the Surface Transportation Assistance Act (STAA) of 1982 was codified in 49 U.S.C. §31105. As of October 20, 2004, every CDL driver in interstate commerce (and a number of states) must receive whistleblower training as one of four required training areas for entry level driver training (ELDT). The U.S. Congress required Federal Motor Carrier Safety Administration (FMCSA) to ensure that the regulations adopted pursuant to the Motor Carrier Safety Act (MCSA), as amended by Moving Ahead for Progress in the 21st Century Act (MAP-21), do not result in coercion of drivers by motor carriers, shippers, receivers or transportation intermediaries to operate CMVs in violation of certain provisions of the Federal Motor Carrier Safety Regulations Pocketbook (FMCSR) and the Hazardous Material Regulations (HMR). The major provisions of this rule include prohibitions of coercion, procedures for drivers to report incidents of coercion to FMCSA, and rules of practice that the FMCSA will follow in response to reports of coercion. For more information, visit https://www.osha.gov/sites/default/files/publications/OSHA-factsheet-whistleblower-trans-sector.pdf and https://www.whistleblowers.gov.

Slide 20
Understanding Whistleblower Protection
An employee has the right to question the safety practices of his/her
employer under the Whistleblower Protection Act without the risk of
loosing his/her job.
Whistleblower protection regulations are not enforced by the U.S.
Department of Transportation DOT, but are administered and
enforced by the Occupational Safety and Health Administration
(OSHA).
If found in violation of rules, an employer may have to pay fines,
back wages and legal fees: reinstate the operator, plus pay punitive
damages up to $250,000.
If an operator has a concern that directly affects his/her safety or
health, the operator may put the employer on notice without
retaliation.
An unsafe or overloaded commercial vehicle is an example of an unsafe
concern. The operator can refuse to operate such vehicle without fear of loosing
their job.
Understanding Whistleblower Protection • An employee has the right to question the safety practices of his/her employer under the
Whistleblower Protection Act without the risk of losing his/her job. • Whistleblower protection regulations are not enforced by the U.S. Department of
Transportation (DOT), but are administered and enforced by the Occupational Safety and Health Administration (OSHA).
• If found in violation of rules, an employer may have to pay fines, back wages and legal fees; reinstate the operator; and pay punitive damages up to$250,000.
• If an operator has a concern that directly affects his/her safety or health, the operator may put the employer on notice without retaliation.
• An unsafe or overloaded commercial vehicle is an example of an unsafe concern. The operator can refuse to operate such vehicle without fear of losing his/her job.
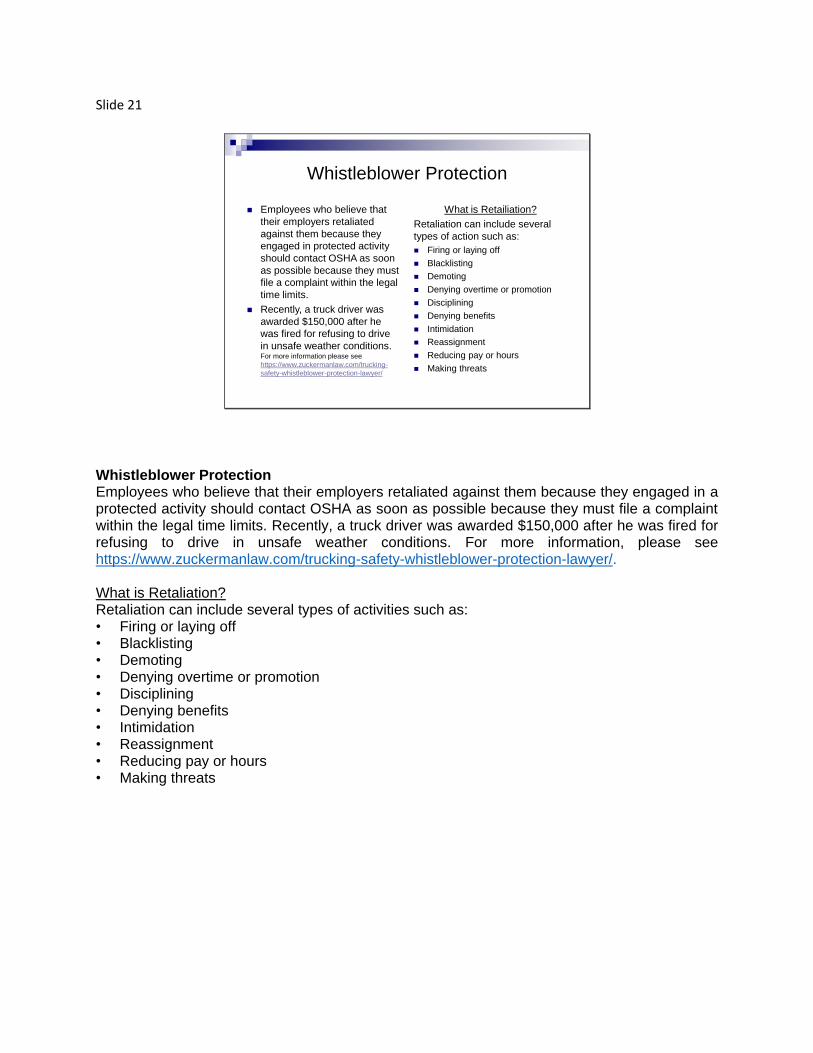
Slide 21
Whistleblower Protection
Employees who believe that
their employers retaliated
against them because they
engaged in protected activity
should contact OSHA as soon
as possible because they must
file a complaint within the legal
time limits.
Recently, a truck driver was
awarded $150,000 after he
was fired for refusing to drive
in unsafe weather conditions. For more information please see
https://www.zuckermanlaw.com/trucking-
safety-whistleblower-protection-lawyer/
What is Retailiation?
Retaliation can include several
types of action such as:
Firing or laying off
Blacklisting
Demoting
Denying overtime or promotion
Disciplining
Denying benefits
Intimidation
Reassignment
Reducing pay or hours
Making threats
Whistleblower Protection Employees who believe that their employers retaliated against them because they engaged in a protected activity should contact OSHA as soon as possible because they must file a complaint within the legal time limits. Recently, a truck driver was awarded $150,000 after he was fired for refusing to drive in unsafe weather conditions. For more information, please see https://www.zuckermanlaw.com/trucking-safety-whistleblower-protection-lawyer/. What is Retaliation? Retaliation can include several types of activities such as: • Firing or laying off • Blacklisting • Demoting • Denying overtime or promotion • Disciplining • Denying benefits • Intimidation • Reassignment • Reducing pay or hours • Making threats
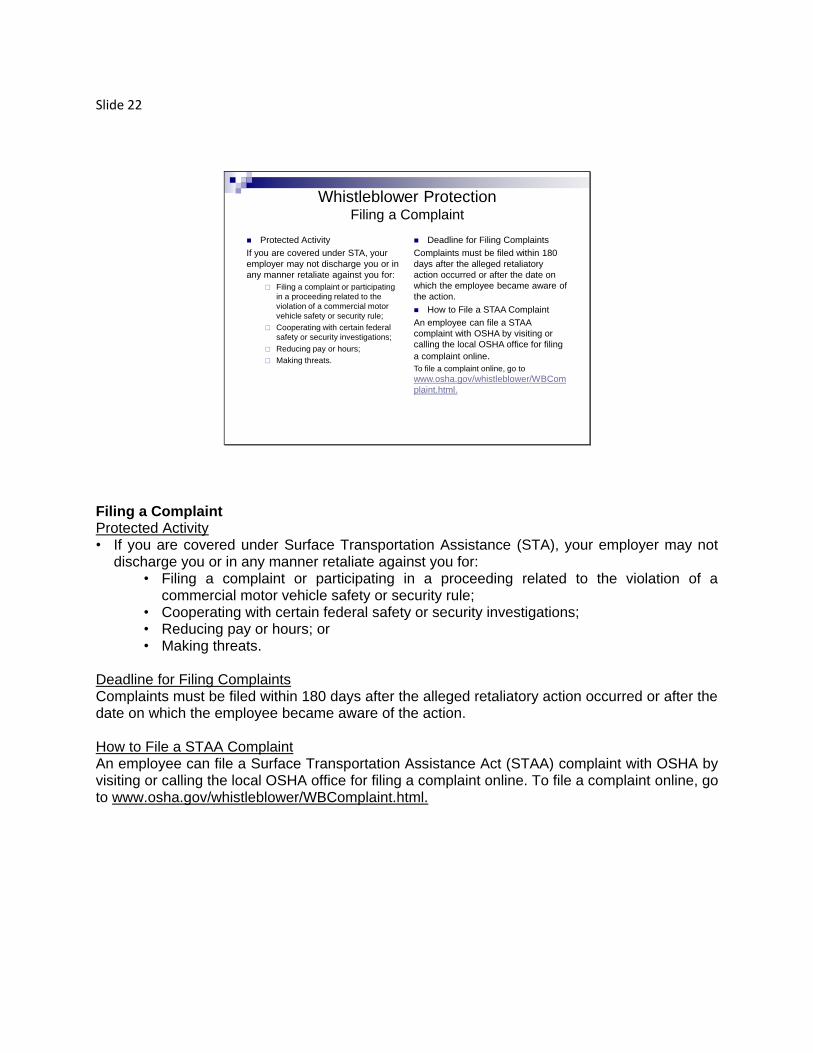
Slide 22
Whistleblower ProtectionFiling a Complaint
Protected Activity
If you are covered under STA, your
employer may not discharge you or in
any manner retaliate against you for:
Filing a complaint or participating
in a proceeding related to the
violation of a commercial motor
vehicle safety or security rule;
Cooperating with certain federal
safety or security investigations;
Reducing pay or hours;
Making threats.
Deadline for Filing Complaints
Complaints must be filed within 180
days after the alleged retaliatory
action occurred or after the date on
which the employee became aware of
the action.
How to File a STAA Complaint
An employee can file a STAA
complaint with OSHA by visiting or
calling the local OSHA office for filing
a complaint online.
To file a complaint online, go to
www.osha.gov/whistleblower/WBCom
plaint.html.
Filing a Complaint Protected Activity • If you are covered under Surface Transportation Assistance (STA), your employer may not
discharge you or in any manner retaliate against you for: • Filing a complaint or participating in a proceeding related to the violation of a
commercial motor vehicle safety or security rule; • Cooperating with certain federal safety or security investigations; • Reducing pay or hours; or • Making threats.
Deadline for Filing Complaints Complaints must be filed within 180 days after the alleged retaliatory action occurred or after the date on which the employee became aware of the action. How to File a STAA Complaint An employee can file a Surface Transportation Assistance Act (STAA) complaint with OSHA by visiting or calling the local OSHA office for filing a complaint online. To file a complaint online, go to www.osha.gov/whistleblower/WBComplaint.html.
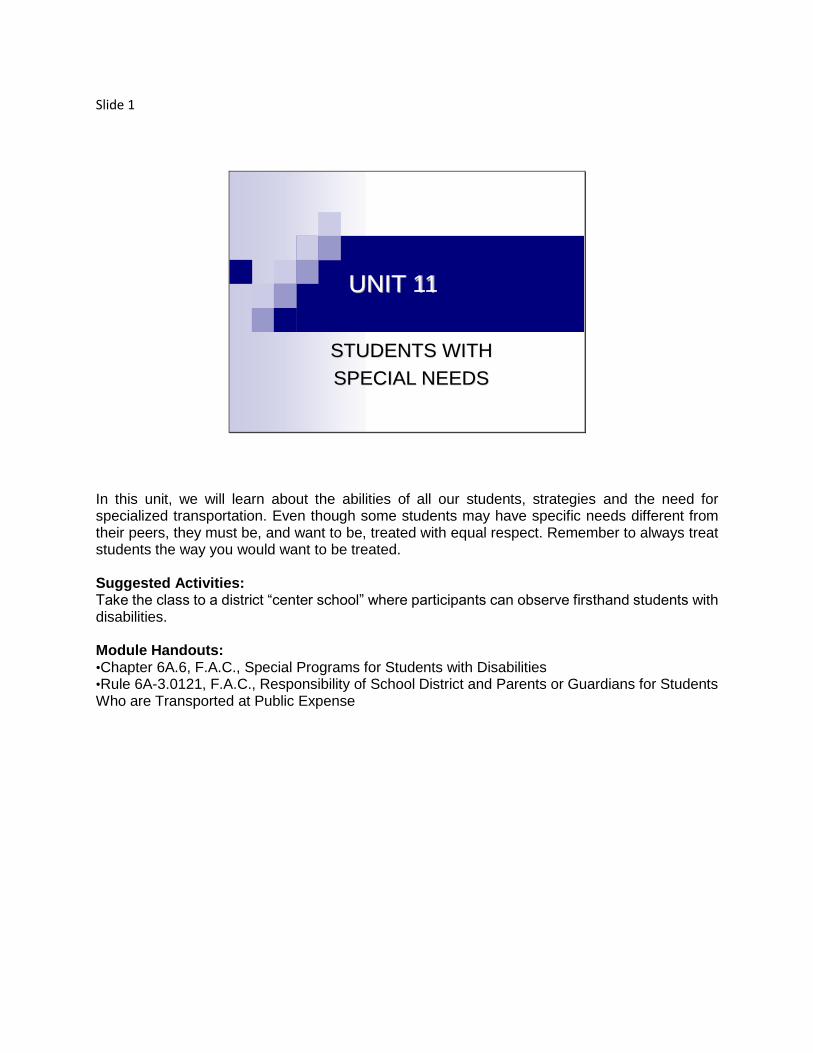
Slide 1
UNIT 11
STUDENTS WITH
SPECIAL NEEDS
In this unit, we will learn about the abilities of all our students, strategies and the need for specialized transportation. Even though some students may have specific needs different from their peers, they must be, and want to be, treated with equal respect. Remember to always treat students the way you would want to be treated. Suggested Activities: Take the class to a district “center school” where participants can observe firsthand students with disabilities. Module Handouts: •Chapter 6A.6, F.A.C., Special Programs for Students with Disabilities •Rule 6A-3.0121, F.A.C., Responsibility of School District and Parents or Guardians for Students Who are Transported at Public Expense
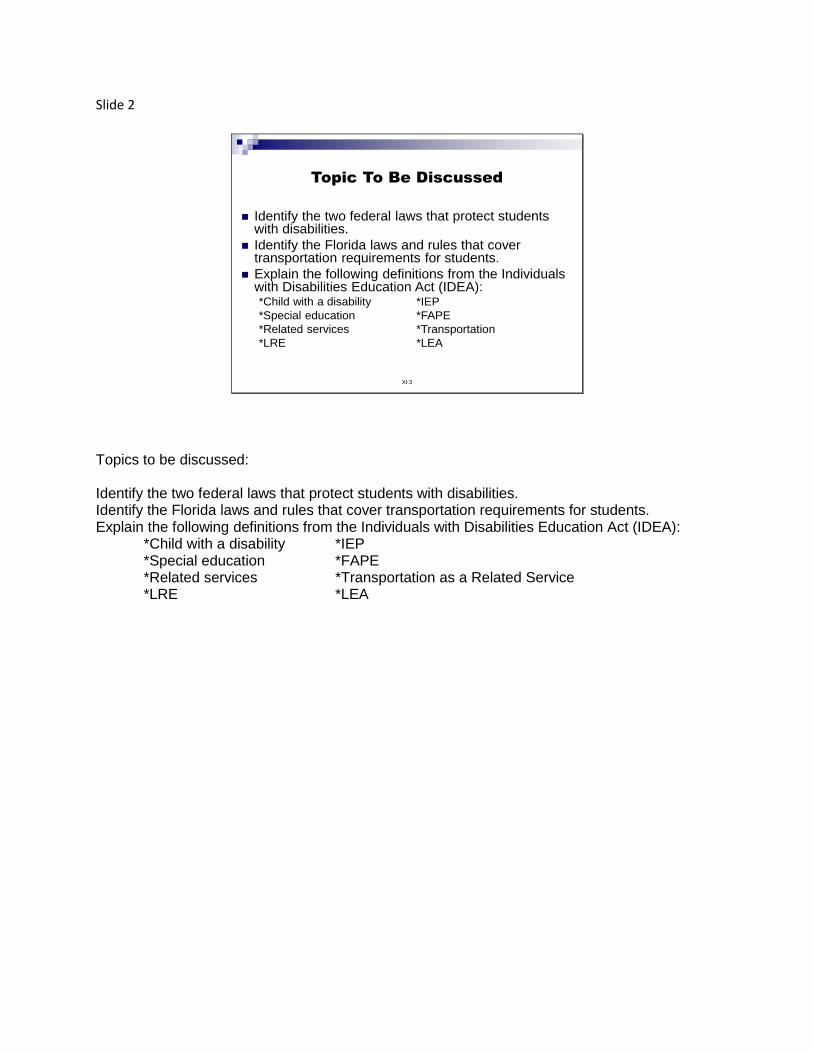
Slide 2
XI-3
Topic To Be Discussed
Identify the two federal laws that protect students with disabilities.
Identify the Florida laws and rules that cover transportation requirements for students.
Explain the following definitions from the Individuals with Disabilities Education Act (IDEA):*Child with a disability *IEP
*Special education *FAPE
*Related services *Transportation
*LRE *LEA
Topics to be discussed: Identify the two federal laws that protect students with disabilities. Identify the Florida laws and rules that cover transportation requirements for students. Explain the following definitions from the Individuals with Disabilities Education Act (IDEA):
*Child with a disability *IEP *Special education *FAPE *Related services *Transportation as a Related Service *LRE *LEA
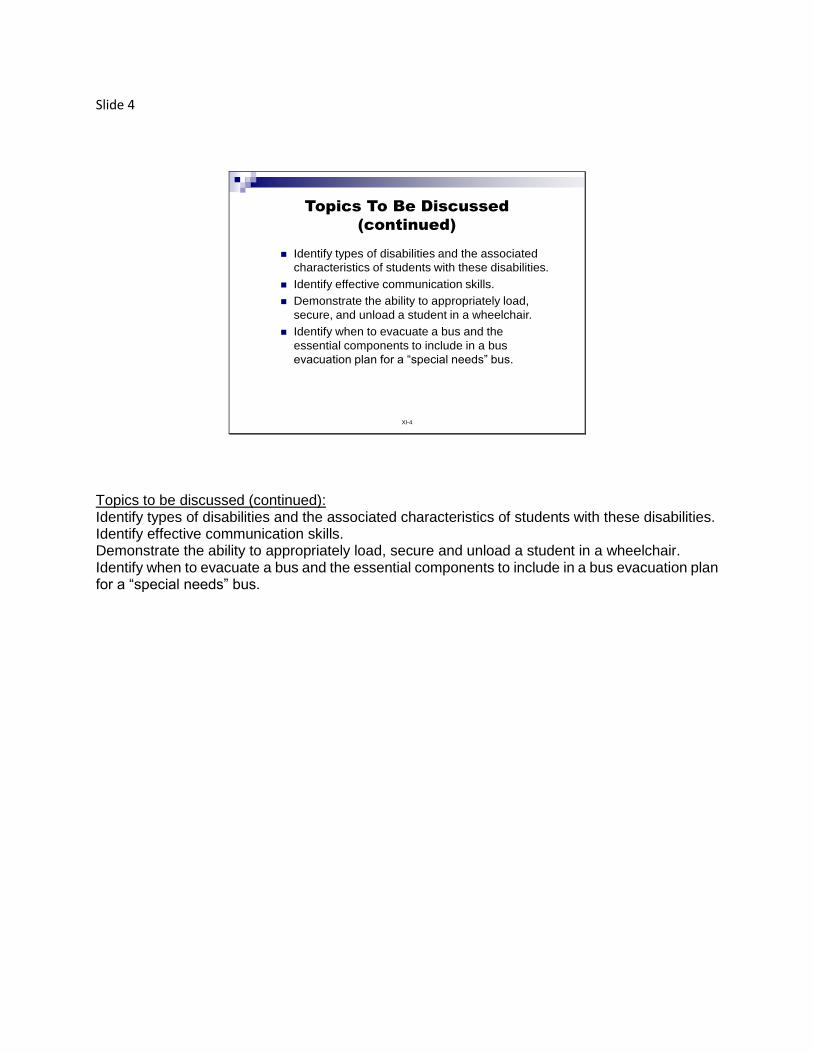
Slide 4
XI-4
Topics To Be Discussed
(continued)
Identify types of disabilities and the associated
characteristics of students with these disabilities.
Identify effective communication skills.
Demonstrate the ability to appropriately load,
secure, and unload a student in a wheelchair.
Identify when to evacuate a bus and the
essential components to include in a bus
evacuation plan for a “special needs” bus.
Topics to be discussed (continued): Identify types of disabilities and the associated characteristics of students with these disabilities. Identify effective communication skills. Demonstrate the ability to appropriately load, secure and unload a student in a wheelchair. Identify when to evacuate a bus and the essential components to include in a bus evacuation plan for a “special needs” bus.
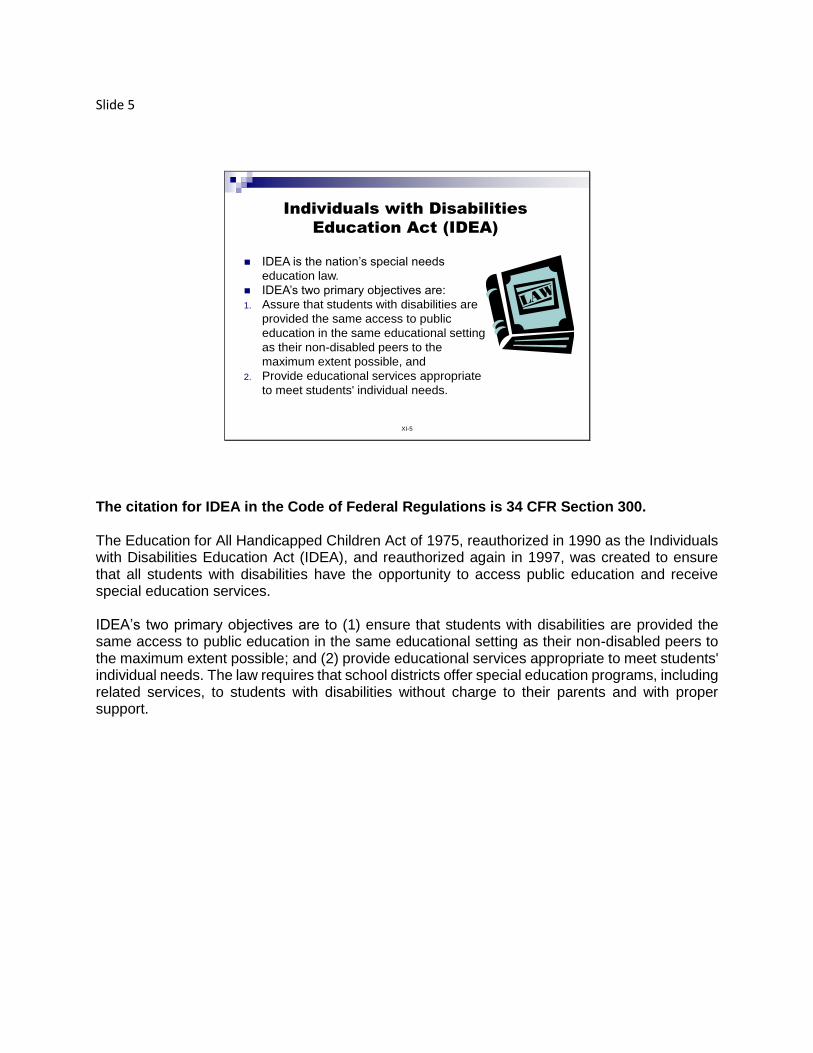
Slide 5
XI-5
Individuals with Disabilities
Education Act (IDEA)
IDEA is the nation’s special needs
education law.
IDEA’s two primary objectives are:
1. Assure that students with disabilities are
provided the same access to public
education in the same educational setting
as their non-disabled peers to the
maximum extent possible, and
2. Provide educational services appropriate
to meet students' individual needs.
The citation for IDEA in the Code of Federal Regulations is 34 CFR Section 300. The Education for All Handicapped Children Act of 1975, reauthorized in 1990 as the Individuals with Disabilities Education Act (IDEA), and reauthorized again in 1997, was created to ensure that all students with disabilities have the opportunity to access public education and receive special education services. IDEA’s two primary objectives are to (1) ensure that students with disabilities are provided the same access to public education in the same educational setting as their non-disabled peers to the maximum extent possible; and (2) provide educational services appropriate to meet students' individual needs. The law requires that school districts offer special education programs, including related services, to students with disabilities without charge to their parents and with proper support.
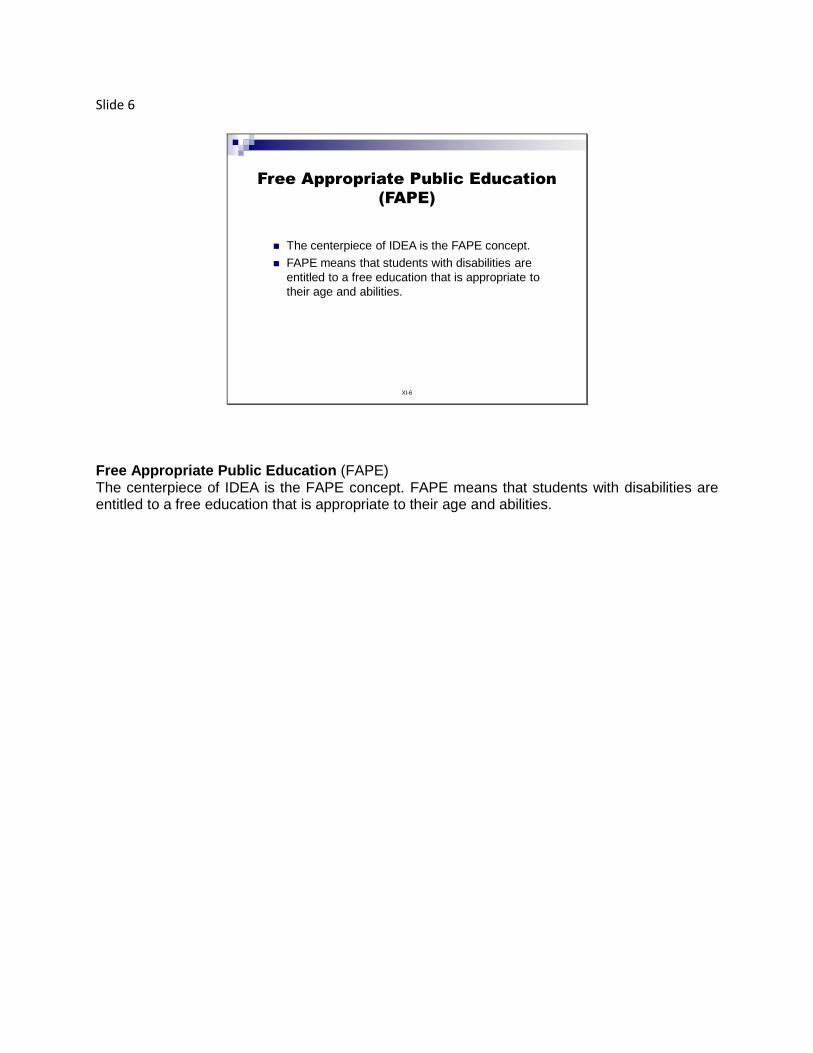
Slide 6
XI-6
Free Appropriate Public Education
(FAPE)
The centerpiece of IDEA is the FAPE concept.
FAPE means that students with disabilities are
entitled to a free education that is appropriate to
their age and abilities.
Free Appropriate Public Education (FAPE) The centerpiece of IDEA is the FAPE concept. FAPE means that students with disabilities are entitled to a free education that is appropriate to their age and abilities.
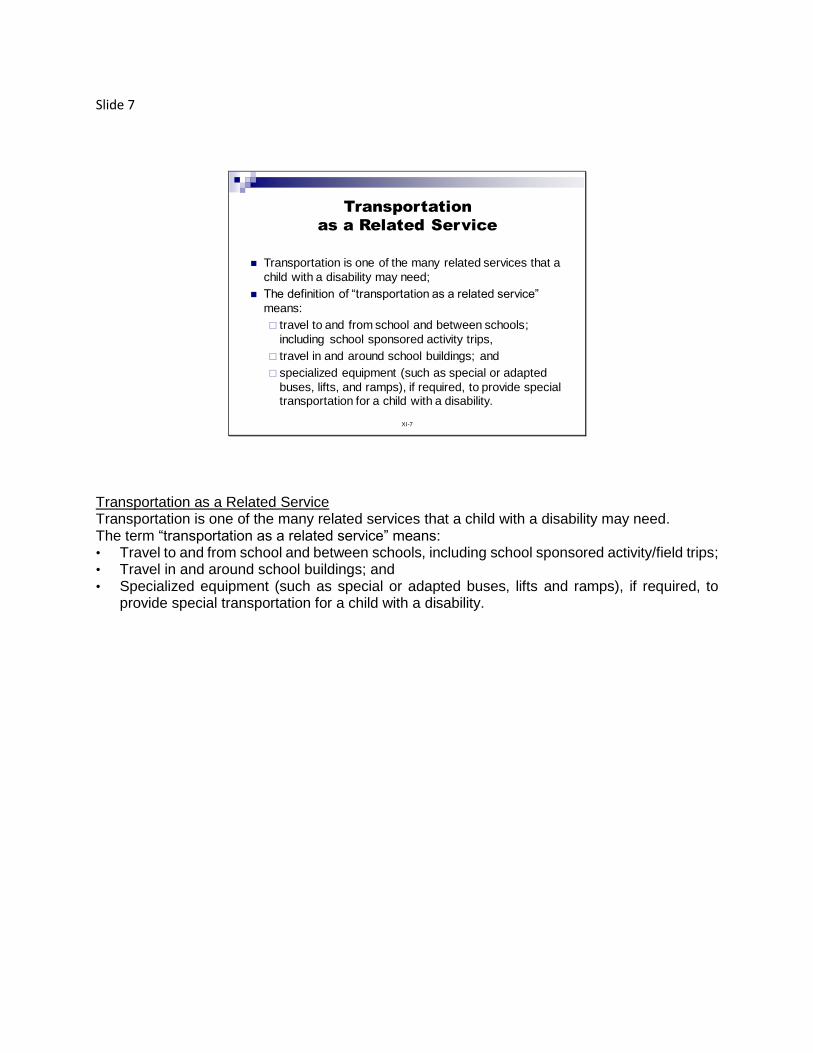
Slide 7
XI-7
Transportation
as a Related Service
Transportation is one of the many related services that a
child with a disability may need;
The definition of “transportation as a related service”
means:
travel to and from school and between schools;
including school sponsored activity trips,
travel in and around school buildings; and
specialized equipment (such as special or adapted
buses, lifts, and ramps), if required, to provide special transportation for a child with a disability.
Transportation as a Related Service Transportation is one of the many related services that a child with a disability may need. The term “transportation as a related service” means: • Travel to and from school and between schools, including school sponsored activity/field trips; • Travel in and around school buildings; and • Specialized equipment (such as special or adapted buses, lifts and ramps), if required, to
provide special transportation for a child with a disability.
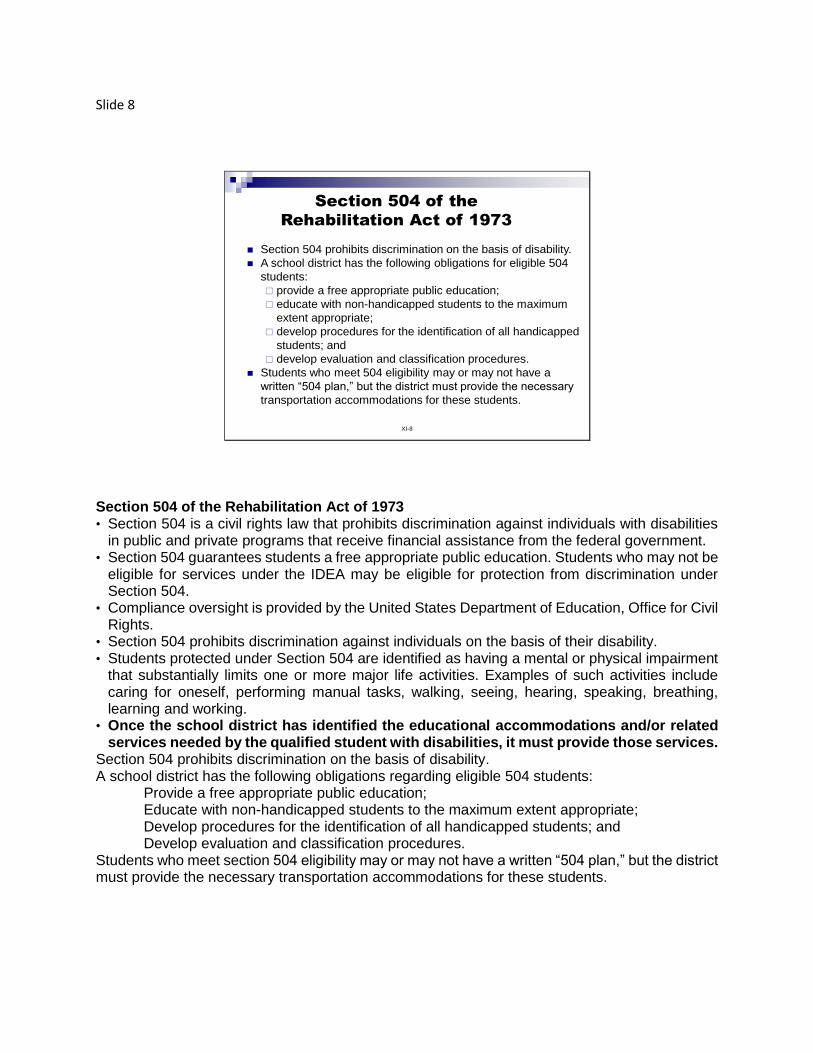
Slide 8
XI-8
Section 504 of the
Rehabilitation Act of 1973
Section 504 prohibits discrimination on the basis of disability.
A school district has the following obligations for eligible 504
students:
provide a free appropriate public education;
educate with non-handicapped students to the maximum
extent appropriate;
develop procedures for the identification of all handicapped
students; and
develop evaluation and classification procedures.
Students who meet 504 eligibility may or may not have a
written “504 plan,” but the district must provide the necessary
transportation accommodations for these students.
Section 504 of the Rehabilitation Act of 1973 • Section 504 is a civil rights law that prohibits discrimination against individuals with disabilities
in public and private programs that receive financial assistance from the federal government. • Section 504 guarantees students a free appropriate public education. Students who may not be
eligible for services under the IDEA may be eligible for protection from discrimination under Section 504.
• Compliance oversight is provided by the United States Department of Education, Office for Civil Rights.
• Section 504 prohibits discrimination against individuals on the basis of their disability. • Students protected under Section 504 are identified as having a mental or physical impairment
that substantially limits one or more major life activities. Examples of such activities include caring for oneself, performing manual tasks, walking, seeing, hearing, speaking, breathing, learning and working.
• Once the school district has identified the educational accommodations and/or related services needed by the qualified student with disabilities, it must provide those services.
Section 504 prohibits discrimination on the basis of disability. A school district has the following obligations regarding eligible 504 students:
Provide a free appropriate public education; Educate with non-handicapped students to the maximum extent appropriate; Develop procedures for the identification of all handicapped students; and Develop evaluation and classification procedures.
Students who meet section 504 eligibility may or may not have a written “504 plan,” but the district must provide the necessary transportation accommodations for these students.
Slide 9
XI-9
U.S. Office for Civil Rights
The Office for Civil Rights is in place to protect the
rights of students and to ensure that school districts
are complying with the law.
The Office for Civil Rights (OCR), within the U.S. Department of Education, enforces five federal statutes that prohibit discrimination in education programs and activities that receive federal financial assistance. Discrimination on the basis of race, color, national origin, sex, disability and age is prohibited. The civil rights laws extend to all state education agencies and include programs and activities such as academic programs, student treatment and services, counseling and guidance, discipline, classroom assignment, grading, recreation, physical education and athletics. Whereas the IDEA does not address some details regarding transportation, the OCR ensures that students with disabilities are not discriminated against in any educational area, including transportation. Districts should ensure that that their transportation policies do not discriminate against students with disabilities. In particular, there should be no discrimination with regard to the length of bus ride; school arrival time and shortened days; inclusion on field trips and extracurricular activities; exposure to inclement weather; interruptions in service due to weather, vehicle malfunction or breakdown; and shortage of resources or personnel. School districts should handle all transportation decisions, whether planning bus routes or managing unexpected interruptions in services, so that all students are affected in the same way. There may be legitimate reasons for longer travel times for a student with a disability. The travel time to appropriate educational placements for these students may be attributable to the distance between the student’s home and the educational placement. Travel times may be longer in rural and sparsely populated areas or districts covering large geographical territories. Travel time may vary due to norms for the region. School districts should be aware that the OCR has suggested that districts may need to respond administratively to reduce travel times if they become excessive for students with a disability.
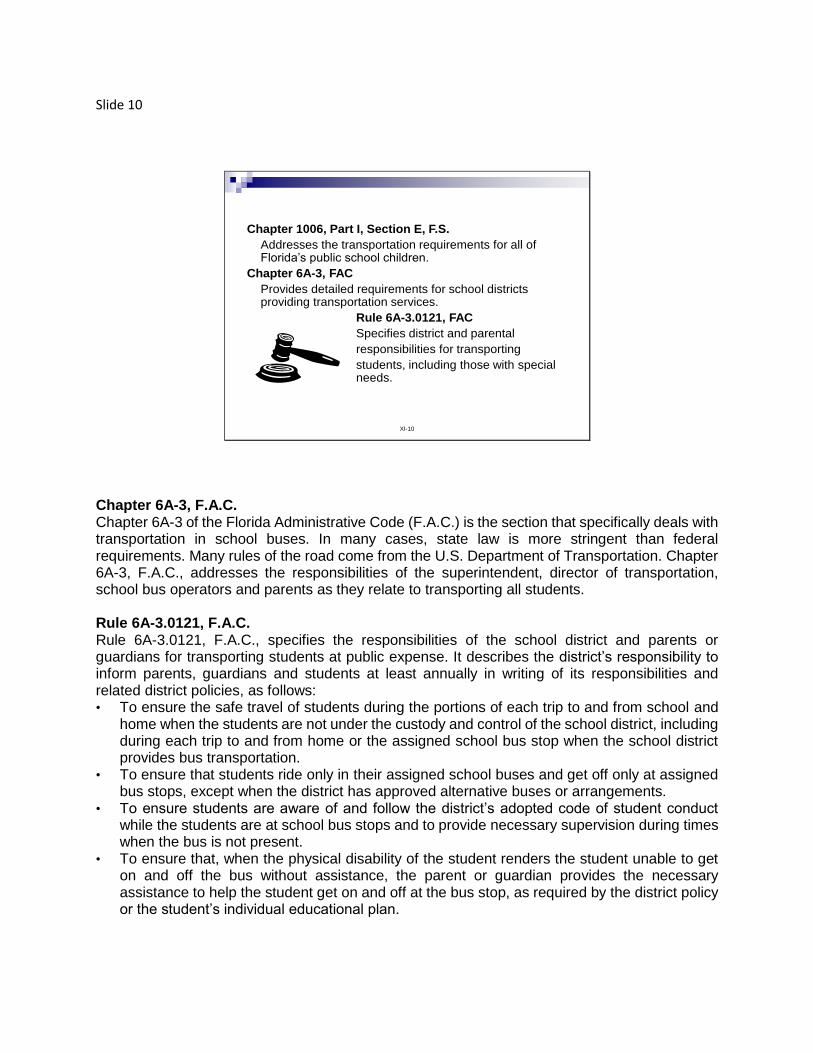
Slide 10
XI-10
Chapter 1006, Part I, Section E, F.S.
Addresses the transportation requirements for all of Florida’s public school children.
Chapter 6A-3, FAC
Provides detailed requirements for school districts providing transportation services.
Rule 6A-3.0121, FAC
Specifies district and parental
responsibilities for transporting
students, including those with special needs.
Chapter 6A-3, F.A.C. Chapter 6A-3 of the Florida Administrative Code (F.A.C.) is the section that specifically deals with transportation in school buses. In many cases, state law is more stringent than federal requirements. Many rules of the road come from the U.S. Department of Transportation. Chapter 6A-3, F.A.C., addresses the responsibilities of the superintendent, director of transportation, school bus operators and parents as they relate to transporting all students. Rule 6A-3.0121, F.A.C. Rule 6A-3.0121, F.A.C., specifies the responsibilities of the school district and parents or guardians for transporting students at public expense. It describes the district’s responsibility to inform parents, guardians and students at least annually in writing of its responsibilities and related district policies, as follows: • To ensure the safe travel of students during the portions of each trip to and from school and
home when the students are not under the custody and control of the school district, including during each trip to and from home or the assigned school bus stop when the school district provides bus transportation.
• To ensure that students ride only in their assigned school buses and get off only at assigned bus stops, except when the district has approved alternative buses or arrangements.
• To ensure students are aware of and follow the district’s adopted code of student conduct while the students are at school bus stops and to provide necessary supervision during times when the bus is not present.
• To ensure that, when the physical disability of the student renders the student unable to get on and off the bus without assistance, the parent or guardian provides the necessary assistance to help the student get on and off at the bus stop, as required by the district policy or the student’s individual educational plan.
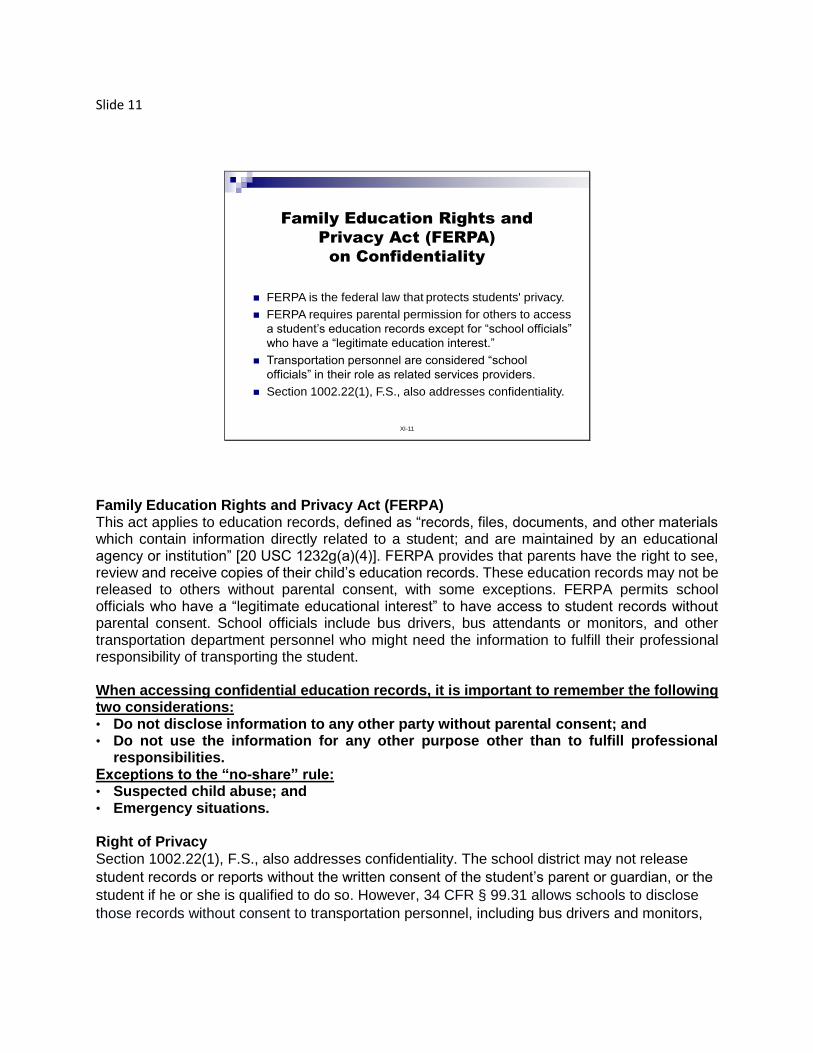
Slide 11
XI-11
Family Education Rights and
Privacy Act (FERPA)
on Confidentiality
FERPA is the federal law that protects students' privacy.
FERPA requires parental permission for others to access
a student’s education records except for “school officials”
who have a “legitimate education interest.”
Transportation personnel are considered “school
officials” in their role as related services providers.
Section 1002.22(1), F.S., also addresses confidentiality.
Family Education Rights and Privacy Act (FERPA) This act applies to education records, defined as “records, files, documents, and other materials which contain information directly related to a student; and are maintained by an educational agency or institution” [20 USC 1232g(a)(4)]. FERPA provides that parents have the right to see, review and receive copies of their child’s education records. These education records may not be released to others without parental consent, with some exceptions. FERPA permits school officials who have a “legitimate educational interest” to have access to student records without parental consent. School officials include bus drivers, bus attendants or monitors, and other transportation department personnel who might need the information to fulfill their professional responsibility of transporting the student. When accessing confidential education records, it is important to remember the following two considerations: • Do not disclose information to any other party without parental consent; and • Do not use the information for any other purpose other than to fulfill professional
responsibilities. Exceptions to the “no-share” rule: • Suspected child abuse; and • Emergency situations. Right of Privacy
Section 1002.22(1), F.S., also addresses confidentiality. The school district may not release
student records or reports without the written consent of the student’s parent or guardian, or the
student if he or she is qualified to do so. However, 34 CFR § 99.31 allows schools to disclose
those records without consent to transportation personnel, including bus drivers and monitors,

when a student with a disability has transportation listed on his or her Individual Education Plan
(IEP).
Slide 12
XI-12
More Definitions under IDEA
Child with a Disability:
A child who has been evaluated by the State as
having an impairment for which the child needs
special education and related services.
Special Education:
“[S]pecially designed instruction,
at no cost to the parents,
to meet the unique needs of
a child with a disability...”
More Definitions under IDEA Child with a Disability: A child whom the state has evaluated as having an impairment for which the child needs special education and related services. Special Education: Special education is defined as “specially designed instruction, at no cost to the parents, to meet the unique needs of a child with a disability...” Sometimes parents believe that their child automatically qualifies as a “child with a disability” in the school setting if the child has been diagnosed with a medical disability. For a child to be eligible for exceptional student education (ESE) in Florida, he or she must be evaluated through the school system and determined eligible under the state’s criteria.
Slide 13
XI-13
Individual Education Plan (IEP)
Written statement for a student with a disability designed to meet his/her unique educational needs.
Local Educational Agency (LEA)
The local educational agency is the school district; each IEP team should have an LEA representative who can determine the district’s available resources and vouch for the district’s implementation of the IEP.
Individual Family Support Plans (IFSPs)
A plan written for a child, birth to three years. Family involvement is required.
Least Restrictive Environment (LRE)
Students with disabilities must be educated with their non-disabled peers to the maximum extent possible. This includes transportation services.
More Definitions under IDEA (continued) Individual Education Plan (IEP) Written statement for a student with a disability designed to meet his/her unique educational needs. Local Educational Agency (LEA) The local educational agency is the school district. Each IEP team should have an LEA representative who can determine the district’s available resources and vouch for the district’s implementation of the IEP. Individual Family Support Plans (IFSPs) A plan written for a child, birth to 3 years. Family involvement is required. Least Restrictive Environment (LRE) Students with disabilities must be educated with their non-disabled peers to the maximum extent possible. This includes transportation services. There are specific requirements as to who must attend or make up the IEP team and criteria for what must be included in the IEP development. We encourage transportation staff to attend IEP meetings for students who need more transportation accommodations than just the standard equipment specifications, such as a lift or child safety restraint system. If a child needs to have a behavior intervention plan (BIP) implemented on the bus, then transportation staff should have input into its development. In addition, if the child has medical concerns, the transportation staff should attend related meetings or, at the least, receive a copy of the child’s health care plan.
Slide 14
XI-14
The IEP team must consider the following
special factors when developing the IEP
for each student:
behavior
English language proficiency
Vision and hearing skills
communication needs
assistive technology needs
Any of these factors could impact transportation services for the student.
Special Factors
Special Factors The IEP team must consider the following special factors when developing the IEP for each student: • A student’s behavior, English language proficiency, vision and hearing skills, communication
needs and assistive technology needs may indicate that he or she will need special accommodations or extra support during the bus ride.
• "Assistive technology device" refers to any item, piece of equipment or product system, whether acquired commercially (bought in a store), modified or customized, that is used to increase, maintain or improve the functional capabilities of a child with a disability.
• Communication devices for students who cannot speak, adaptive computer equipment and wheelchairs may be considered assistive technology devices.
• Each district has an “ATENS” specialist who works to meet the assistive technology needs of students. ATENS specialists often work at the regional FDLRS (Florida Diagnostic Learning Resources System) office.
Any of these factors could impact transportation services for the student.
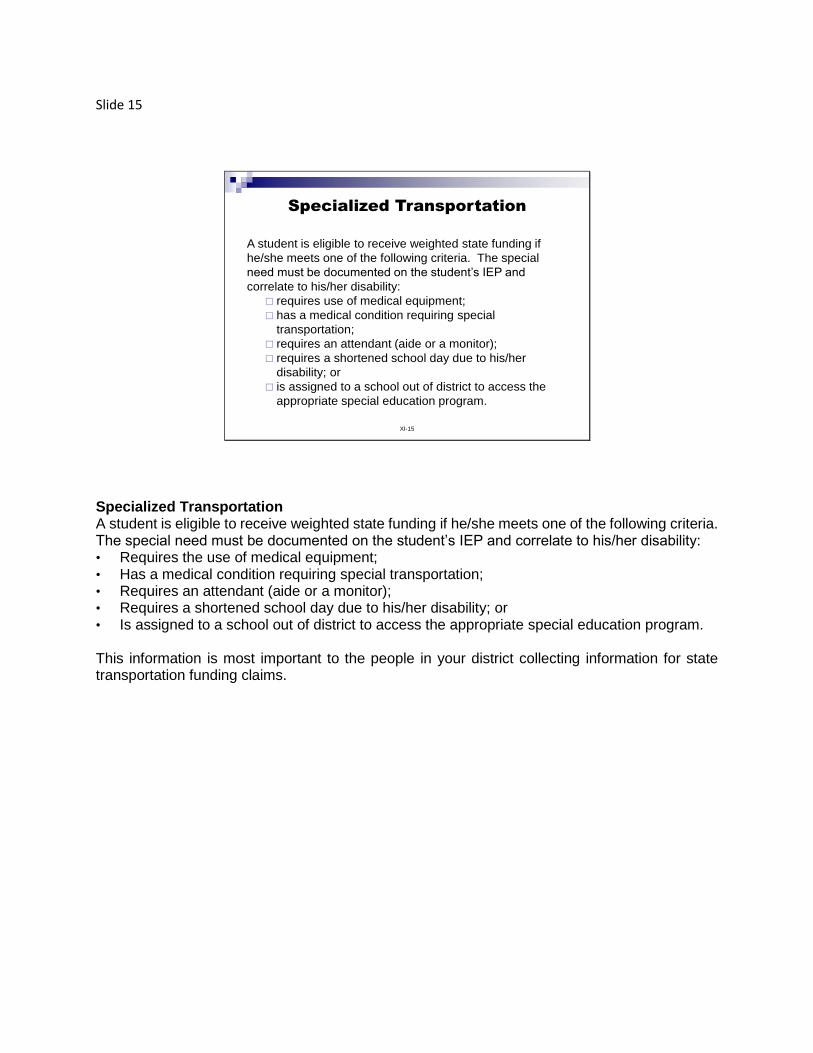
Slide 15
XI-15
A student is eligible to receive weighted state funding if
he/she meets one of the following criteria. The special
need must be documented on the student’s IEP and
correlate to his/her disability:
requires use of medical equipment;
has a medical condition requiring special
transportation;
requires an attendant (aide or a monitor);
requires a shortened school day due to his/her
disability; or
is assigned to a school out of district to access the
appropriate special education program.
Specialized Transportation
Specialized Transportation A student is eligible to receive weighted state funding if he/she meets one of the following criteria. The special need must be documented on the student’s IEP and correlate to his/her disability: • Requires the use of medical equipment; • Has a medical condition requiring special transportation; • Requires an attendant (aide or a monitor); • Requires a shortened school day due to his/her disability; or • Is assigned to a school out of district to access the appropriate special education program. This information is most important to the people in your district collecting information for state transportation funding claims.
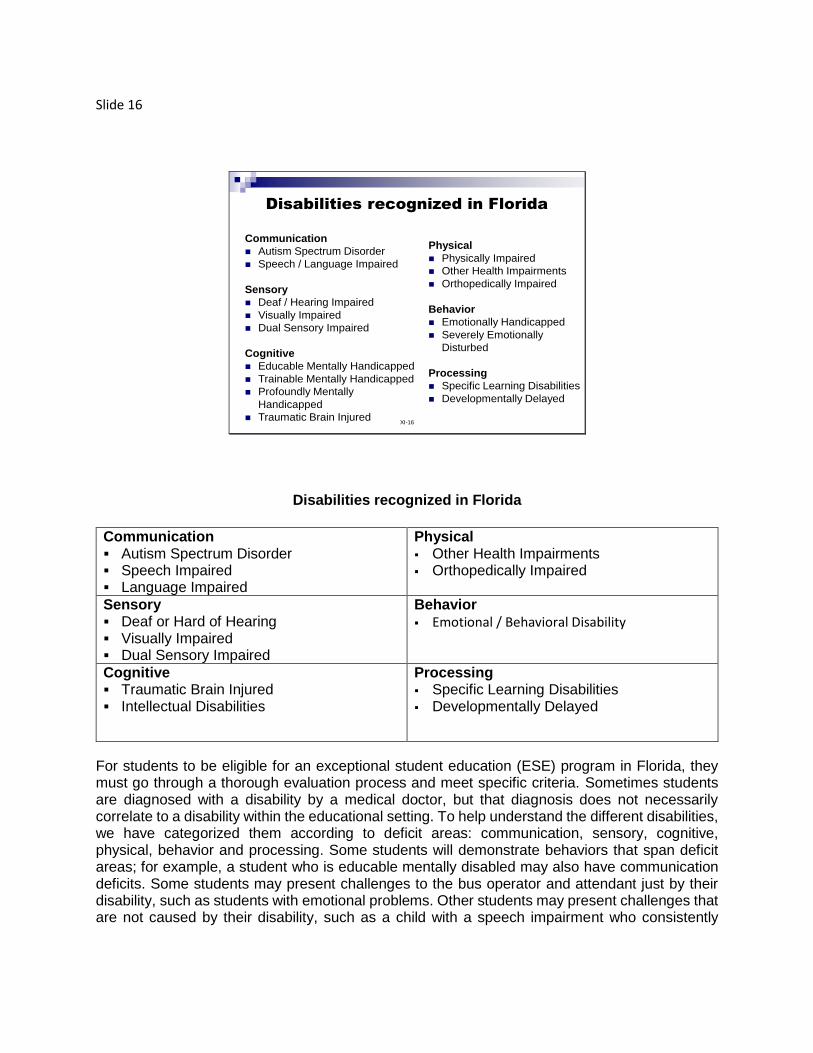
Slide 16
XI-16
Communication
Autism Spectrum Disorder
Speech / Language Impaired
Sensory
Deaf / Hearing Impaired
Visually Impaired
Dual Sensory Impaired
Cognitive
Educable Mentally Handicapped
Trainable Mentally Handicapped
Profoundly Mentally
Handicapped
Traumatic Brain Injured
Disabilities recognized in Florida
Physical
Physically Impaired
Other Health Impairments
Orthopedically Impaired
Behavior
Emotionally Handicapped
Severely Emotionally
Disturbed
Processing
Specific Learning Disabilities
Developmentally Delayed
Disabilities recognized in Florida
Communication Autism Spectrum Disorder Speech Impaired Language Impaired
Physical Other Health Impairments Orthopedically Impaired
Sensory Deaf or Hard of Hearing Visually Impaired Dual Sensory Impaired
Behavior
Emotional / Behavioral Disability
Cognitive Traumatic Brain Injured Intellectual Disabilities
Processing Specific Learning Disabilities Developmentally Delayed
For students to be eligible for an exceptional student education (ESE) program in Florida, they must go through a thorough evaluation process and meet specific criteria. Sometimes students are diagnosed with a disability by a medical doctor, but that diagnosis does not necessarily correlate to a disability within the educational setting. To help understand the different disabilities, we have categorized them according to deficit areas: communication, sensory, cognitive, physical, behavior and processing. Some students will demonstrate behaviors that span deficit areas; for example, a student who is educable mentally disabled may also have communication deficits. Some students may present challenges to the bus operator and attendant just by their disability, such as students with emotional problems. Other students may present challenges that are not caused by their disability, such as a child with a speech impairment who consistently

misbehaves on the bus. Some students with sensory impairments will require special accommodations due to their disability.
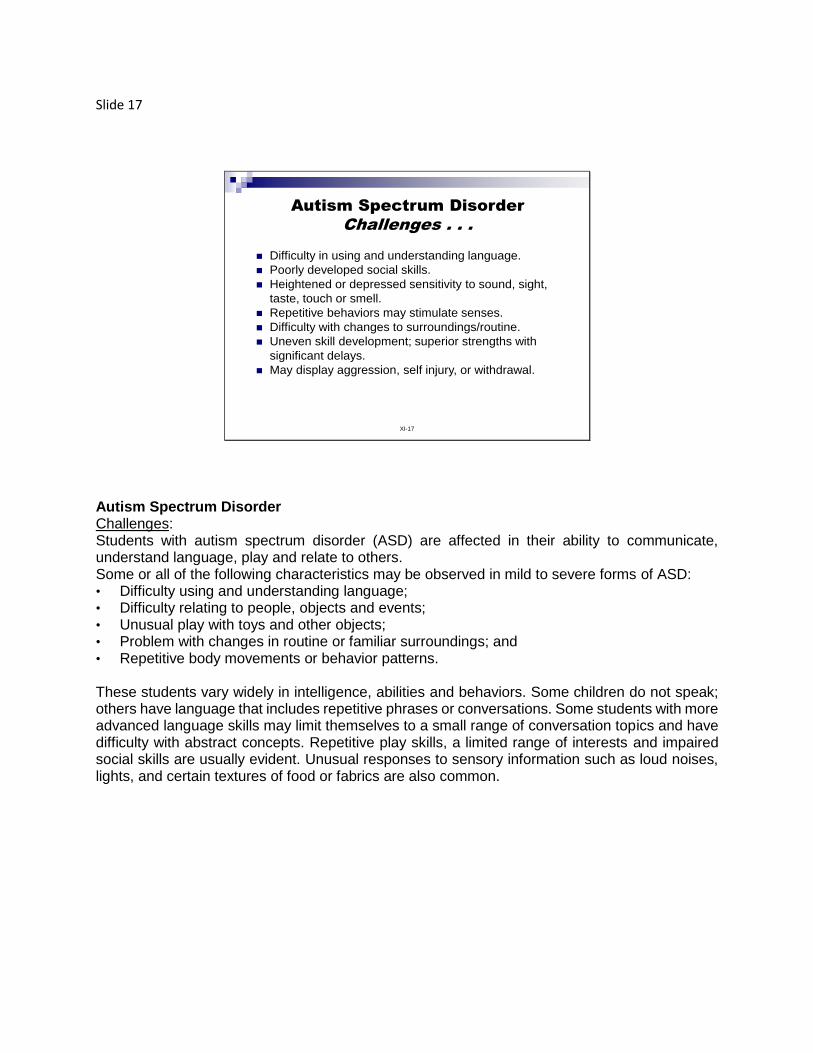
Slide 17
XI-17
Autism Spectrum Disorder
Challenges . . .
Difficulty in using and understanding language.
Poorly developed social skills.
Heightened or depressed sensitivity to sound, sight,
taste, touch or smell.
Repetitive behaviors may stimulate senses.
Difficulty with changes to surroundings/routine.
Uneven skill development; superior strengths with
significant delays.
May display aggression, self injury, or withdrawal.
Autism Spectrum Disorder Challenges: Students with autism spectrum disorder (ASD) are affected in their ability to communicate, understand language, play and relate to others. Some or all of the following characteristics may be observed in mild to severe forms of ASD: • Difficulty using and understanding language; • Difficulty relating to people, objects and events; • Unusual play with toys and other objects; • Problem with changes in routine or familiar surroundings; and • Repetitive body movements or behavior patterns.
These students vary widely in intelligence, abilities and behaviors. Some children do not speak; others have language that includes repetitive phrases or conversations. Some students with more advanced language skills may limit themselves to a small range of conversation topics and have difficulty with abstract concepts. Repetitive play skills, a limited range of interests and impaired social skills are usually evident. Unusual responses to sensory information such as loud noises, lights, and certain textures of food or fabrics are also common.
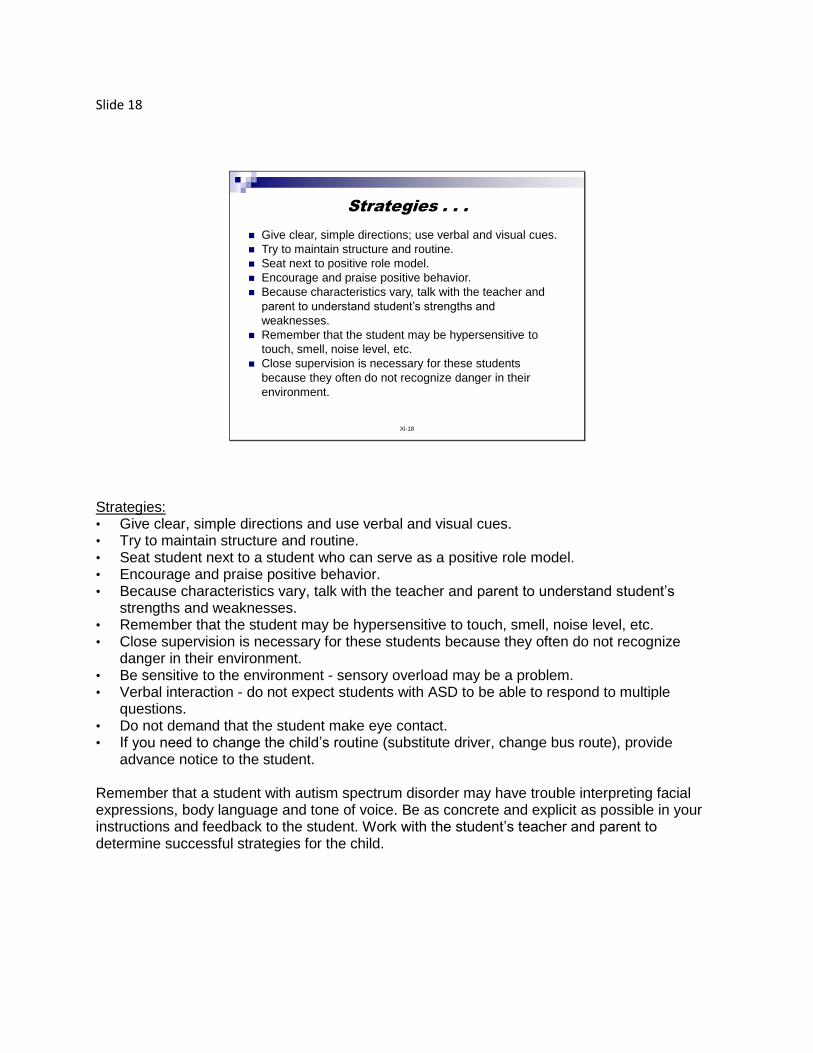
Slide 18
XI-18
Strategies . . .
Give clear, simple directions; use verbal and visual cues.
Try to maintain structure and routine.
Seat next to positive role model.
Encourage and praise positive behavior.
Because characteristics vary, talk with the teacher and
parent to understand student’s strengths and
weaknesses.
Remember that the student may be hypersensitive to
touch, smell, noise level, etc.
Close supervision is necessary for these students
because they often do not recognize danger in their
environment.
Strategies: • Give clear, simple directions and use verbal and visual cues. • Try to maintain structure and routine. • Seat student next to a student who can serve as a positive role model. • Encourage and praise positive behavior. • Because characteristics vary, talk with the teacher and parent to understand student’s
strengths and weaknesses. • Remember that the student may be hypersensitive to touch, smell, noise level, etc. • Close supervision is necessary for these students because they often do not recognize
danger in their environment. • Be sensitive to the environment - sensory overload may be a problem. • Verbal interaction - do not expect students with ASD to be able to respond to multiple
questions. • Do not demand that the student make eye contact. • If you need to change the child’s routine (substitute driver, change bus route), provide
advance notice to the student. Remember that a student with autism spectrum disorder may have trouble interpreting facial expressions, body language and tone of voice. Be as concrete and explicit as possible in your instructions and feedback to the student. Work with the student’s teacher and parent to determine successful strategies for the child.
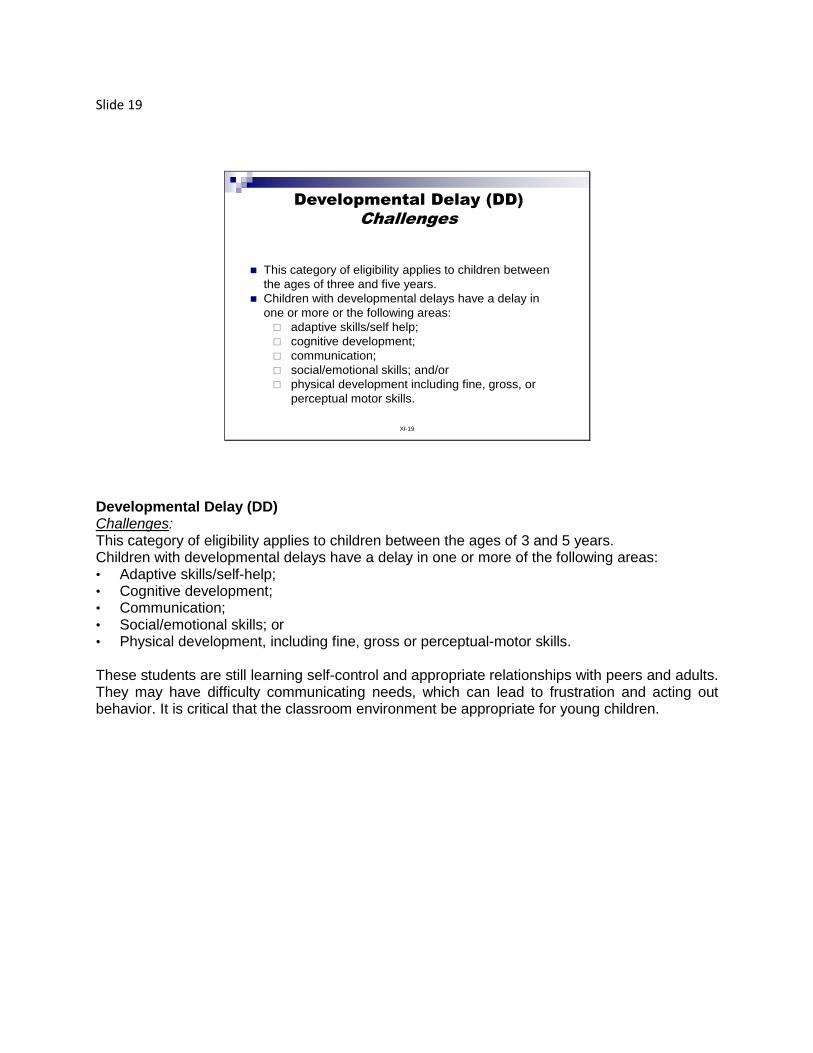
Slide 19
XI-19
Developmental Delay (DD)
Challenges
This category of eligibility applies to children between
the ages of three and five years.
Children with developmental delays have a delay in
one or more or the following areas:
adaptive skills/self help;
cognitive development;
communication;
social/emotional skills; and/or
physical development including fine, gross, or
perceptual motor skills.
Developmental Delay (DD) Challenges: This category of eligibility applies to children between the ages of 3 and 5 years. Children with developmental delays have a delay in one or more of the following areas: • Adaptive skills/self-help; • Cognitive development; • Communication; • Social/emotional skills; or • Physical development, including fine, gross or perceptual-motor skills. These students are still learning self-control and appropriate relationships with peers and adults. They may have difficulty communicating needs, which can lead to frustration and acting out behavior. It is critical that the classroom environment be appropriate for young children.
Slide 20
XI-20
Developmental Delay
Strategies . . .
Keep your language and rules simple.
Assign the student a seat up front, if possible.
Make sure you have the appropriate
safety equipment for the child’s age,
weight, and height.
Be sensitive to the child’s age – he or she is young and
will act like a young person.
Be sensitive to the child’s special needs, whether they
reflect a physical, communication, emotional/social, or
mental developmental delay.
Strategies: • Keep your language and rules simple. • Assign the student a seat upfront, if possible. • Make sure you have the appropriate safety equipment for the child’s age, weight and height. • Be sensitive to the child’s age; he or she is young and will act like a young person. • Be sensitive to the child’s special needs, whether they reflect a physical, communication,
emotional/social or mental developmental delay.
Slide 21
XI-21
Deaf or Hard of Hearing
Challenges Will have varying levels of
hearing loss. Deaf students may
communicate through sign language.
Hearing impaired students may use speech, sign language, or both.
Students receive information by listening, lip reading, gestures, and/or facial expressions.
May have difficulty learning vocabulary, grammar, and idiomatic expressions.
Strategies Make sure the
student sees
your face when speaking.
Don’t raise your voice when speaking; you may have to use different words to convey the message.
Knowing a few basic “signs” is very helpful.
Written notes are helpful with older students.
The student’s speech will become more understandable with time.
Deaf or Hard of Hearing Students will have varying levels of hearing loss. This category refers to students with all types of hearing disabilities, ranging from very slight hearing loss to profound deafness. Age of onset of hearing loss refers to the time when the hearing loss occurred. Whether the hearing loss occurred before or after the student acquired language often determines the type of support services the individual student will need to succeed. Challenges: • Deaf students may communicate through sign language. • Hearing-impaired students may use speech, sign language or both. • Students receive information by listening, lip reading, gestures and facial expressions. • Students may have difficulty learning vocabulary, grammar and idiomatic expressions. Strategies: • Make sure the student sees your face when you are speaking. • Do not raise your voice when speaking. You may have to use different words to convey the
message. • Knowing a few basic “signs” is very helpful. • Written notes are helpful with older students. • The student’s speech will become more understandable with time. Early hearing loss may mean a lifelong communication problem and difficulty in basic language
development through speaking and listening. Effective communication is essential (use of
interpreters, familiar communication partner). Miscommunication can lead to perceived
misbehavior and inappropriate discipline, e.g., the student did not understand that he/she was to
line up and consequently was thought to be defiant after failing to do so. Clear communication
can prevent some misbehavior.
Slide 22
XI-22
Visually Impaired
Challenges
Will have varying levels of
sight.
May rely on visual, auditory,
and/or tactile senses for
learning.
May have underdeveloped
social skills.
May not understand nonverbal
cues.
Strategies Use your voice clearly to
orient and guide the student.
May need to seat the student near the door.
If the student is sensitive to light, avoid seating next to window.
Allow the student to be as independent as possible.
Notify student of any changes to the bus stop area, including a different bus that may have different height of steps to climb.
Never leave him/her alone.
Visually Impaired The effect of visual disabilities on a student’s development depends on the severity and type of loss, the age of onset of the loss and the overall functioning level of the child. Social miscues may lead to perceived misbehavior (lack of incidental learning; social skills must be taught). Students with this disability will have varying levels of sight. The terms “low vision,” “legally blind,” and “totally blind” are used to describe students with visual impairments.
o "Legal blindness" refers to students with an acuity of 20/200 or a visual field of 20 degrees or less with correction.
o “Low vision” describes individuals who, though visually impaired, use visual information for everyday activities, learning, mobility, etc.
o “Totally blind” refers to individuals who have little or no usable vision and use tactile and auditory channels for acquiring information.
Challenges: • May rely on visual, auditory or tactile senses for learning. • May have underdeveloped social skills. • May not understand nonverbal cues. Strategies: • Use your voice clearly to orient and guide the student. • May need to seat the student near the door. • If the student is sensitive to light, avoid seating next to a window. • Allow the student to be as independent as possible. • Notify the student of any changes to the bus stop area, including a different bus with a different
height of steps to climb. • Never leave him/her alone.
Slide 23
XI-23
Dual Sensory Impaired (DSI)
Challenges
Have both visual and hearing loss.
Not necessarily completely deaf or blind.
Combination sensory loss creates serious
impairment of the student’s ability to acquire
information, communicate, and function within the
environment.
Communication and mobility are often affected.
Dual Sensory Impaired (DSI) Because of the varying levels of impairment, the level of special services, supervision and assistance for these students will vary. They may have additional disabilities, such as physical and mental impairments. They are often delayed in many areas of development due to the lack of sensory input. Challenges: • Students may have both visual and hearing loss. • Students are not necessarily completely deaf or blind. • Combination sensory loss creates severe impairment of the student’s ability to acquire
information, communicate and function within the environment. • Communication and mobility are often affected.

Slide 24
XI-24
Dual Sensory Impaired
Strategies
These students are generally compliant; misbehavior may
come from frustration and the inability to communicate their
wants and needs.
Routine and consistency in their daily lives are very beneficial.
Assign a seat for the student.
Seek advice from parents and teachers on how to
communicate with the student.
Check with the teacher regarding unusual behaviors and
whether to allow them to continue or to intervene (stop them).
Seek advice from the district’s Orientation and Mobility
Specialist or the student’s Vision Teacher.
These students must be closely supervised because they
are at increased risk due to their impairments.
Dual Sensory Impaired Strategies: • These students are generally compliant; misbehavior may come from frustration and the
inability to communicate their wants and needs. • Routine and consistency in their daily lives are very beneficial. • Assign a seat for the student. • Seek advice from parents and teachers on how to communicate with the student. • Check with the teacher regarding unusual behaviors and whether to intervene (stop student
from continuing behavior). • Seek advice from the district’s Orientation and Mobility Specialist or the student’s Vision
Teacher. These students must be closely supervised because they are at increased risk due to their impairments. Bus attendants may be needed to transport these students safely. The bus driver and attendant should work with the student’s teacher and parents to learn appropriate communication techniques and effective strategies to handle the student.

Slide 25
XI-25
Emotional/Behavioral Disabilities
Challenges . . .
Restless, hyperactive, fidgety.
Inability to stay seated.
Short attention span.
Inappropriate language
(name calling, profanity).
Aggression: hitting, fighting;
self-injurious behavior.
Trouble following directions.
Resistant to discipline, defiant, destructive, hard to manage.
Inappropriate conduct: lying, stealing, cruelty.
Temperamental--extreme emotions and feelings.
These students usually are seeking attention, acceptance,
and love, but often alienate people because of their
behaviors.
Emotional/Behavioral Disabilities Challenges: • Restless, hyperactive, fidgety. • Inability to stay seated. • Short attention span. • Use of inappropriate language (name-calling, profanity). • Aggression - hitting, fighting, self-injurious behavior. • Trouble following directions. • Resistant to discipline, defiant, destructive, hard to manage. • Inappropriate conduct - lying, stealing, cruelty. • Temperamental--extreme emotions and feelings. • These students usually seek attention, acceptance and love, but often alienate people because
of their behaviors. Often these students have average to above-average cognitive abilities. Students with an emotional disability exhibit behaviors that affect their educational performance due to their persistence and consistency. They will exhibit these behaviors across all environments and situations. Characteristics include: • Inability to build or maintain relationships. • Chronic and disruptive behaviors (non-compliance, aggression, poor social skills). • Mood swings, fears, phobias, excessive worrying, anxiety, etc. • Tendency to develop physical symptoms, pain or fears associated with personal or school
problems. • Inability to build or maintain satisfactory interpersonal relationships with peers or teachers. • A variety of excessive behaviors, ranging from hyperactive and aggressive responses to
severe depression and withdrawal.
Slide 26
XI-26
Strategies . . .
Establish rapport with the student;
learn his/her interests.
Catch the student being good!
Assign seating, if needed.
Display a positive, professional attitude.
Learn the student’s non-verbal cues.
Defuse situations early on;
react calmly when the student misbehaves.
Communicate with the teacher to
bridge the gap from the classroom
to the bus. Develop a consistent behavioral plan.
Emotional/Behavioral Handicaps Strategies: • Establish rapport with the student; learn his/her interests. • Catch the student being good! • Assign seating, if needed. • Display a positive, professional attitude. • Learn the student’s non-verbal cues. • Defuse situations early on. React calmly when the student misbehaves. • Communicate with the teacher to bridge the gap from the classroom to the bus. Develop a
consistent behavioral plan. • Be sensitive to the student’s personal space – proximity is a concern. • Allow the student to cool off before interacting with him or her; usually, when a student with an
emotional handicap is in an emotional state, he or she is not rational. • Intervention must take into consideration emotionality. Programs for students with emotional handicaps provide emotional and behavioral support and help the students master academic skills; develop social skills; and increase self-awareness, self-control and self-esteem. It is essential for the transportation staff to work with the student’s teacher(s) and parents to determine effective strategies that work for the student. These students will have a “behavioral intervention plan” as a part of their IEP. For a student with behavioral issues on the bus, transportation personnel should attend the student’s IEP development or request an IEP review to address his/her bus behavior.
Slide 27
XI-27
Intellectual Disabilities
Challenges . . .
Will have varying functional levels. Short attention span. Poor ability to generalize. May have poor communication skills--
speech, understanding, and expressing language.
Usually have poor self-care skills. May have inappropriate social skills
(overly friendly, aggressive). May have physical impairments. May have uncontrolled motor movements
(striking out of arms and legs).
Intellectual Disabilities Challenges for student: • Will have varying functional levels. • Short attention span. • Poor ability to generalize. • May have poor communication skills-- speech, understanding and expressing language. • Usually has poor self-care skills. • May have inappropriate social skills (overly friendly, aggressive). • May have physical impairments. • May have uncontrolled motor movements (striking out of arms and legs).
Slide 28
XI-28
Strategies . . . Interact with a sincere, caring approach.
Keep directions simple and clear; repeat often.
Match expectations with functional levels.
Praise the student for good behavior.
Communicate with parents and teachers to better understand the students.
TMH/PMH students may need restraints (vests, wheelchairs). Be sure to provide training for the driver and attendant on the student’s specific needs.
If student has communication device, provide training for the driver and attendant.
Supervise TMH/PMH students closely; they may have medical conditions that need monitoring.
Intellectual Disabilities Strategies: • Interact with a sincere, caring approach. • Keep directions simple and clear; repeat often. • Match expectations with functional levels. • Praise the student for good behavior. • Communicate with parents and teachers to better understand the students. • Students may need restraints (vests, wheelchairs). Be sure to provide training for the driver
and attendant on the student’s specific needs. • If a student has a communication device, provide training for the driver and attendant. • Supervise students closely; they may have medical conditions that need monitoring. Remember that students have limited response to most stimuli and may have limited awareness of what is happening around them. Verbal communication may be limited.
Slide 29
XI-29
Specific Learning Disabled
Challenges . . .
Difficulty following directions.
May have communication difficulties
--Understanding others or expressing self.
Look “normal”; disability is hidden.
May display hyperactivity, inattention, and
perceptual coordination problems.
May display impulsiveness, low tolerance for
frustration.
May have poor social skills.
Specific Learning Disabled Students with learning disabilities have a significant difference between their intellectual ability and achievement in one or more of the following areas: • Reading skills or comprehension; • Oral expression; • Listening comprehension; • Mathematics calculation or mathematics reasoning; • Written expression; and/or • Social interactions and situations. Challenges: • Difficulty following directions. • May have communication difficulties -- understanding others or expressing self. • May look “normal”; disability is hidden. • May display hyperactivity, inattention and perceptual coordination problems. • May display impulsiveness, low tolerance for frustration. • May have poor social skills.
Students with learning disabilities are not necessarily "slow learners," "dumb," or "lazy"; they usually have average to above-average intelligence. Students may have difficulty with abstract concepts such as that of time – for example, "yesterday," "today," and "tomorrow.“ They may have no physical symptoms – the handicap is "hidden." Frustration often leads to acting out behavior. Students can be impulsive and have difficulty resisting peer pressure. They may have trouble organizing thoughts and words, especially under pressure.
Slide 30
XI-30
Strategies . . .
Establish trusting and respectful
relationships.
Use simple and clear directions; may
need to use one-step directions due to the
student’s processing difficulties.
Allow the student time to respond to your directions.
Capitalize on the student’s strengths.
Intervene early when “situations” begin.
Keep calm when dealing with the student’s behavior.
Use praise and encouragement.
Specific Learning Disabled Strategies: • Establish trusting and respectful relationships. • Use simple and clear directions; may need to use one-step directions due to the student’s
processing difficulties. • Allow the student time to respond to your directions. • Capitalize on the student’s strengths. • Intervene early when “situations” begin. • Keep calm when dealing with the student’s behavior. • Use praise and encouragement. Students may need directions/questions/skill exercises repeated multiple times or in alternate ways. Be calm and specific when asking questions. Allow students to explain situations without interrupting or showing emotion. Give students time to process information by structuring "think time" into the instructional delivery. Be patient. Students may have trouble understanding and following multiple directions, written or verbal. Students may misinterpret tone of voice, facial expressions, or subtleties in language or social situations. As with all students, if the student is misbehaving, seek advice from the teacher and
parent regarding the best strategies for working with the student.
Slide 32
XI-32
Orthopedically Impaired
Challenges . . .
Students with severe skeletal, muscular, or neuromuscular impairment, such as cerebral palsy, amputations, etc.
They have limited strength, vitality, or alertness due to chronic or acute health problems.
They may need:
Physical assistance
Specialized seating
Adaptive equipment
Orthopedically Impaired Challenges: • Students may have severe skeletal, muscular or neuromuscular impairment, such as cerebral
palsy, amputations, etc. • Students may have limited strength, vitality or alertness due to chronic or acute health
problems. • Students may need:
o Physical assistance o Specialized seating o Adaptive equipment
"Orthopedically impaired" means a severe skeletal, muscular or neuromuscular impairment that adversely affects a child’s educational performance. These students may have average intelligence, but their speech skills may be affected by their impairment. They may have to use adaptive equipment, such as crutches, braces, wheelchairs, walkers or other devices. They will have varying physical and mental ability levels.
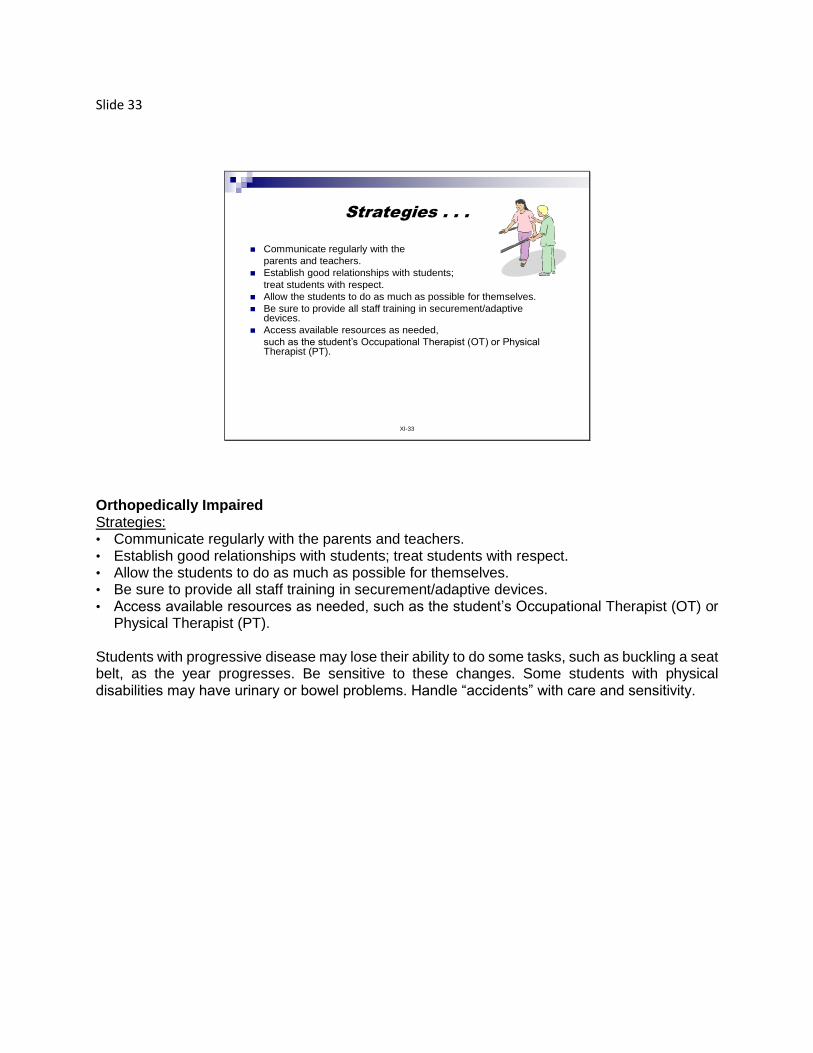
Slide 33
XI-33
Strategies . . .
Communicate regularly with the
parents and teachers.
Establish good relationships with students;
treat students with respect.
Allow the students to do as much as possible for themselves.
Be sure to provide all staff training in securement/adaptive devices.
Access available resources as needed,
such as the student’s Occupational Therapist (OT) or Physical Therapist (PT).
Orthopedically Impaired Strategies: • Communicate regularly with the parents and teachers. • Establish good relationships with students; treat students with respect. • Allow the students to do as much as possible for themselves. • Be sure to provide all staff training in securement/adaptive devices. • Access available resources as needed, such as the student’s Occupational Therapist (OT) or
Physical Therapist (PT). Students with progressive disease may lose their ability to do some tasks, such as buckling a seat belt, as the year progresses. Be sensitive to these changes. Some students with physical disabilities may have urinary or bowel problems. Handle “accidents” with care and sensitivity.
Slide 34
XI-34
Traumatic Brain Injury
Challenges . . .
Open or closed head injuries may result in impairments in one or more of the following areas:
cognition; language;
memory; attention;
reasoning; abstract thinking;
judgment; problem-solving;
perceptual and motor abilities; sensory;
psychosocial behavior; physical functions;
information processing; speech.
Traumatic Brain Injury Challenges: Open or closed head injuries may result in impairments in one or more of the following areas:
Cognition Language Sensory Memory Attention Physical functions Reasoning Abstract thinking Speech Judgment Problem-solving Information processing Perceptual and motor abilities Psychosocial behavior
Slide 35
XI-35
Strategies . . .
These students may display disruptive behaviors –non-compliance, aggression, poor social skills.
They may display mood swings, impulsivity, and poor judgment.
Be patient and sensitive to the needs of these students.
Seek assistance from the teacher/parents about how to handle the student’s specific needs and behaviors.
Traumatic Brain Injury These students may display disruptive behaviors – non-compliance, aggression, poor social skills. They may display mood swings, impulsivity and poor judgment. Strategies: • Be patient and sensitive to the needs of these students. • Seek assistance from the teacher/parents about how to handle a student’s specific needs and
behaviors.
Slide 36
XI-36
Other Health Impairments
Challenges
Other Health Impairments (OHI) means having limited strength, vitality, or alertness due to chronic or acute health problems such as a heart condition, tuberculosis, rheumatic fever, asthma, sickle cell anemia, hemophilia, epilepsy, leukemia, diabetes, and others that adversely affect a child’s educational performance.
In 1997, attention deficit disorder (ADD) and attention deficit hyperactivity disorder (ADHD) were included in the definition of "Other Health Impairments."
Other Health Impairments Other Health Impairments (OHI) means having limited strength, vitality or alertness due to chronic or acute health problems such as a heart condition, tuberculosis, rheumatic fever, asthma, sickle cell anemia, hemophilia, epilepsy, leukemia, or diabetes that adversely affect a child’s educational performance. In 1997, attention deficit disorder (ADD) and attention deficit hyperactivity disorder (ADHD) were included in the definition of "Other Health Impairments." With the reauthorization of IDEA in 1997, students identified with ADD/ADHD were eligible to receive exceptional student education (ESE) services under the “Other Health Impairment” category. Students with ADD or ADHD can present unique challenges to the bus operator and attendant due to the nature of their disability; that is, they have a difficult time maintaining focus.
Slide 37
XI-37
Strategies . . .
Be patient and sensitive to the needs ofthese students.
Seek assistance from the teacher/parentsabout how to handle the student’s specificneeds.
The school nurse or other health providerscan share information and provide trainingon an as-needed basis.
Other Health Impairments Strategies: • Be patient and sensitive to the needs of these students. • Seek assistance from the teacher/parents about how to handle the student’s specific needs. • The school nurse or other health providers can share information and provide training on an
as-needed basis.

Slide 38
XI-40
Medically Fragile Students
Challenges . . .
Varying severity of medical problems;
could be life-threatening
Often dependent on medical equipment
Often requires additional staff on the bus
(nurse, monitor)
Specialized training may be required
Do Not Resuscitate Orders (DNR)
Follow the district policy
Medically Fragile Students Challenges: • These students may have varying severity of medical problems; some could be life-
threatening. • These students are often dependent on medical equipment. • These students often require additional staff on the bus (nurse, monitor). • Specialized training may be required to help these students. • Always follow the district policy with regard to do not resuscitate orders (DNR).
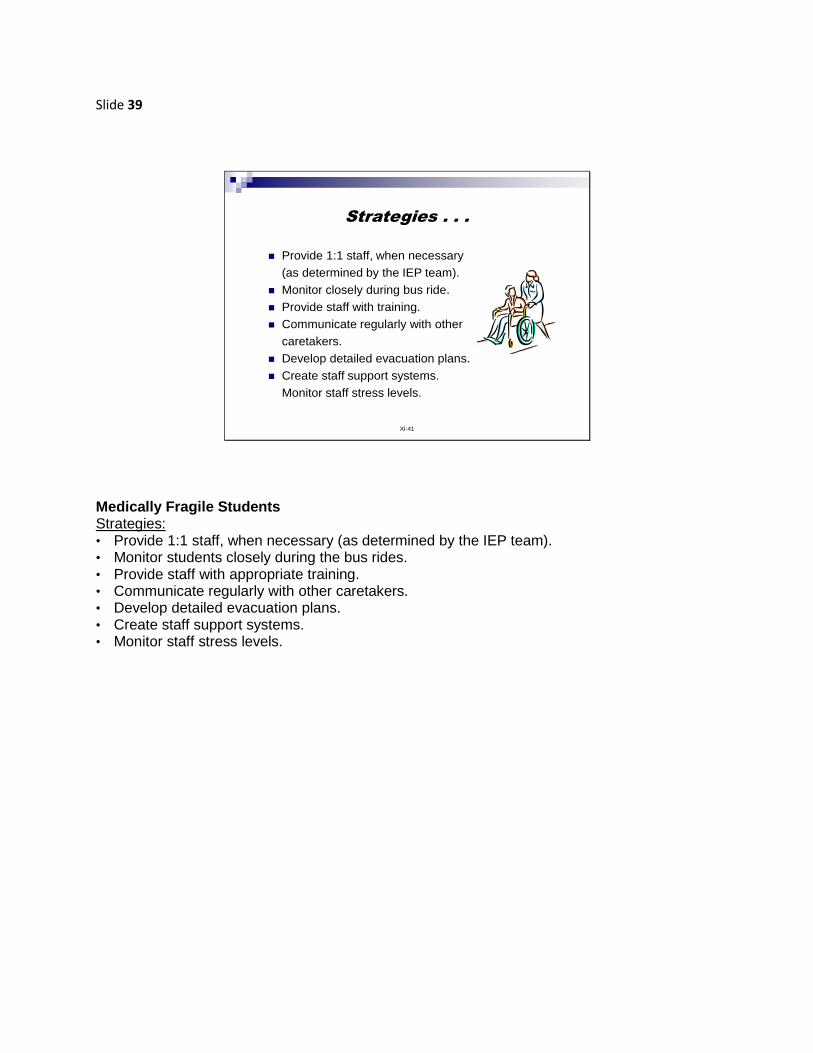
Slide 39
XI-41
Strategies . . .
Provide 1:1 staff, when necessary
(as determined by the IEP team).
Monitor closely during bus ride.
Provide staff with training.
Communicate regularly with other
caretakers.
Develop detailed evacuation plans.
Create staff support systems.
Monitor staff stress levels.
Medically Fragile Students Strategies: • Provide 1:1 staff, when necessary (as determined by the IEP team). • Monitor students closely during the bus rides. • Provide staff with appropriate training. • Communicate regularly with other caretakers. • Develop detailed evacuation plans. • Create staff support systems. • Monitor staff stress levels.
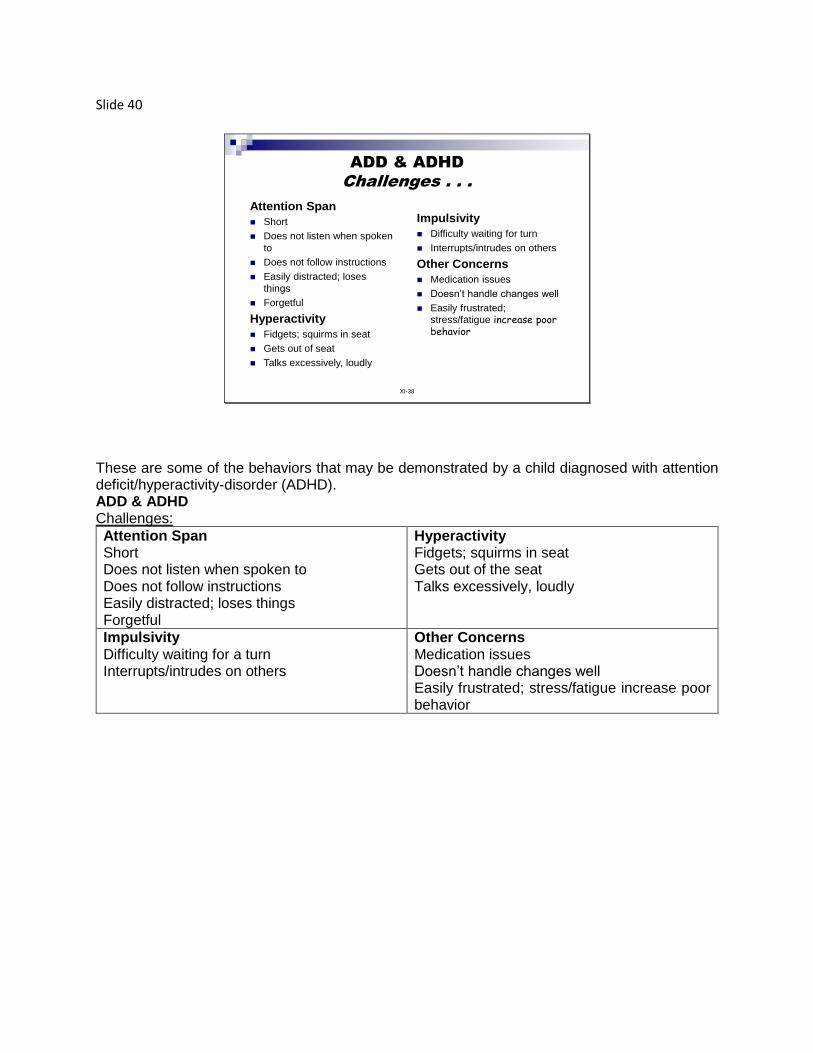
Slide 40
XI-38
ADD & ADHD
Challenges . . .
Attention Span
Short
Does not listen when spoken
to
Does not follow instructions
Easily distracted; loses
things
Forgetful
Hyperactivity
Fidgets; squirms in seat
Gets out of seat
Talks excessively, loudly
Impulsivity
Difficulty waiting for turn
Interrupts/intrudes on others
Other Concerns
Medication issues
Doesn’t handle changes well
Easily frustrated;
stress/fatigue increase poor behavior
These are some of the behaviors that may be demonstrated by a child diagnosed with attention deficit/hyperactivity-disorder (ADHD). ADD & ADHD Challenges:
Attention Span Short Does not listen when spoken to Does not follow instructions Easily distracted; loses things Forgetful
Hyperactivity Fidgets; squirms in seat Gets out of the seat Talks excessively, loudly
Impulsivity Difficulty waiting for a turn Interrupts/intrudes on others
Other Concerns Medication issues Doesn’t handle changes well Easily frustrated; stress/fatigue increase poor behavior
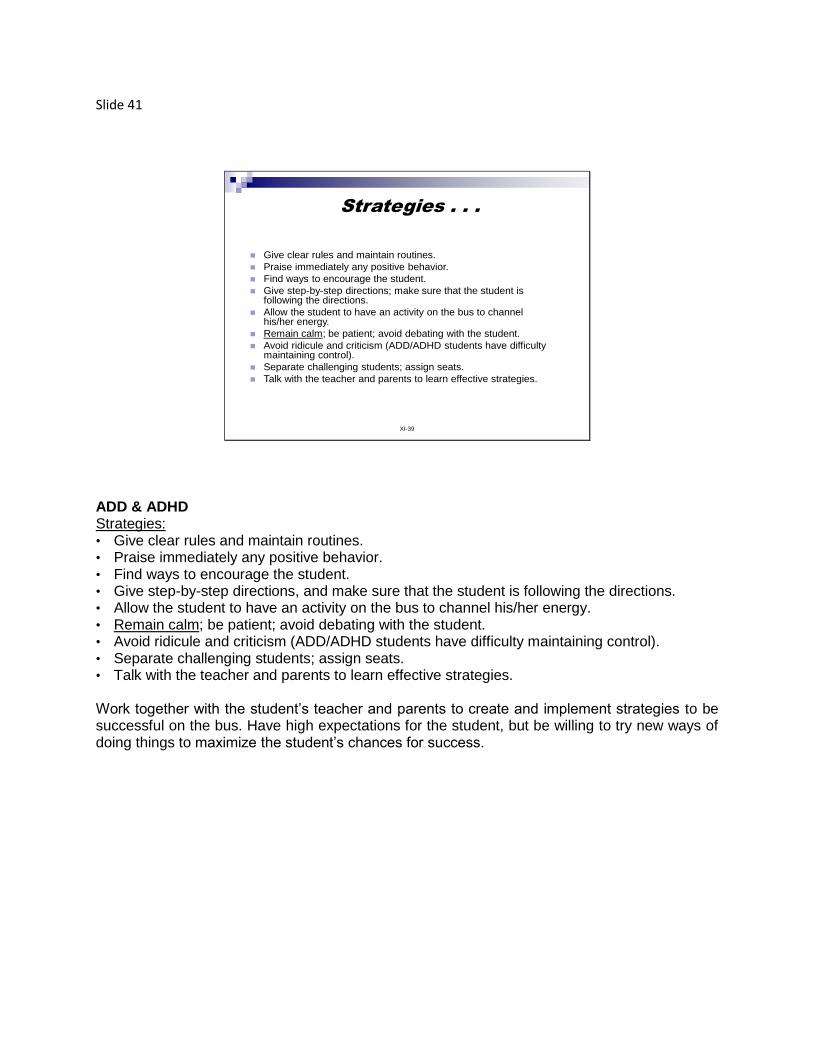
Slide 41
XI-39
Strategies . . .
Give clear rules and maintain routines.
Praise immediately any positive behavior.
Find ways to encourage the student.
Give step-by-step directions; make sure that the student is following the directions.
Allow the student to have an activity on the bus to channel his/her energy.
Remain calm; be patient; avoid debating with the student.
Avoid ridicule and criticism (ADD/ADHD students have difficulty maintaining control).
Separate challenging students; assign seats.
Talk with the teacher and parents to learn effective strategies.
ADD & ADHD Strategies: • Give clear rules and maintain routines. • Praise immediately any positive behavior. • Find ways to encourage the student. • Give step-by-step directions, and make sure that the student is following the directions. • Allow the student to have an activity on the bus to channel his/her energy. • Remain calm; be patient; avoid debating with the student. • Avoid ridicule and criticism (ADD/ADHD students have difficulty maintaining control). • Separate challenging students; assign seats. • Talk with the teacher and parents to learn effective strategies. Work together with the student’s teacher and parents to create and implement strategies to be successful on the bus. Have high expectations for the student, but be willing to try new ways of doing things to maximize the student’s chances for success.
Slide 42
XI-42
Language Impaired
Challenges
Language Impaired
Students who are language impaired have
difficulty either understanding language or
expressing themselves.
Often these students also lack social skills and
may not understand facial expressions, idiomatic
expressions, or sarcasm.
Students with a severe language impairment often
have a learning disability, also.
Language Impaired Challenges: • Students who are language impaired have difficulty either understanding language or
expressing themselves. • Often these students also lack social skills and may not understand facial expressions,
idiomatic expressions or sarcasm. • Students with a severe language impairment often have a learning disability, also. • If the student’s disability is in comprehension (understanding language), he or she may have
a hard time following directions, understanding complex thoughts and sequencing events. • With expressive language difficulties, students may have a hard time putting thoughts together
in a logical, understandable way. They may have a limited vocabulary and use short, simple sentences.
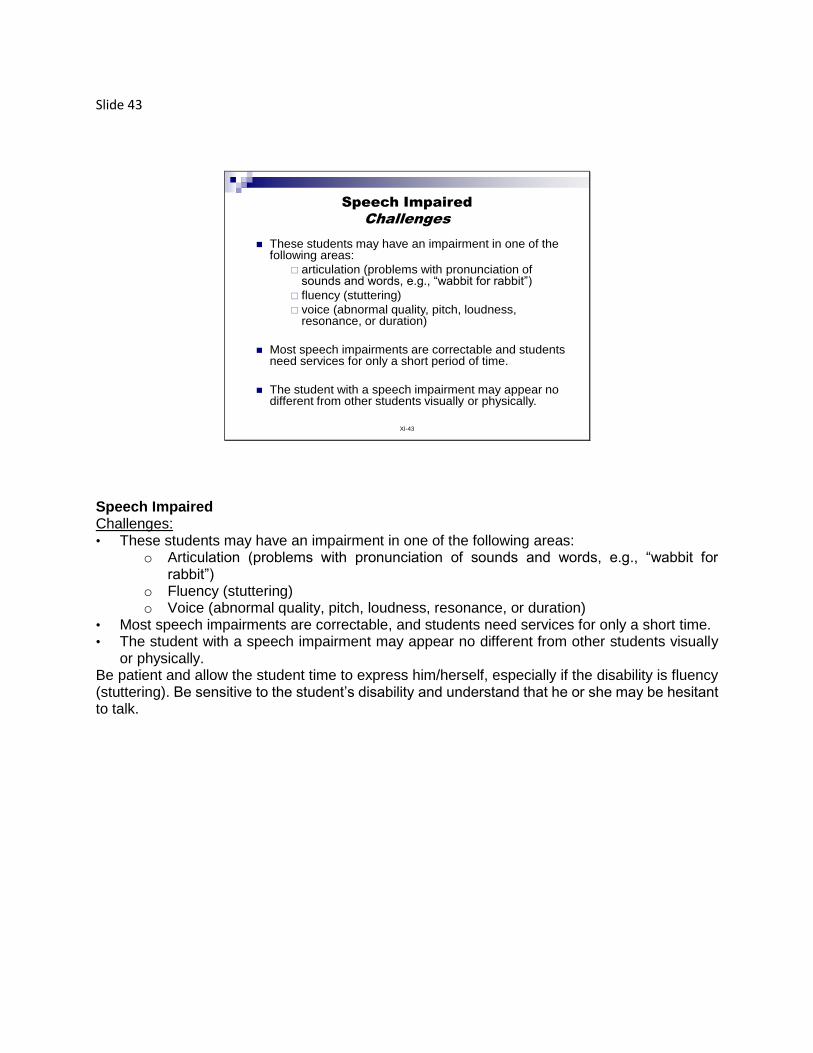
Slide 43
XI-43
Speech Impaired
Challenges
These students may have an impairment in one of the following areas:
articulation (problems with pronunciation of sounds and words, e.g., “wabbit for rabbit”)
fluency (stuttering)
voice (abnormal quality, pitch, loudness, resonance, or duration)
Most speech impairments are correctable and students need services for only a short period of time.
The student with a speech impairment may appear no different from other students visually or physically.
Speech Impaired Challenges: • These students may have an impairment in one of the following areas:
o Articulation (problems with pronunciation of sounds and words, e.g., “wabbit for rabbit”)
o Fluency (stuttering) o Voice (abnormal quality, pitch, loudness, resonance, or duration)
• Most speech impairments are correctable, and students need services for only a short time. • The student with a speech impairment may appear no different from other students visually
or physically. Be patient and allow the student time to express him/herself, especially if the disability is fluency (stuttering). Be sensitive to the student’s disability and understand that he or she may be hesitant to talk.
Slide 44
XI-44
Strategies . . .
Keep the bus rules and instructions
simple.
Recognize that it is difficult for language
impaired students to handle a series of
instructions.
Allow the student time to process your
instructions before responding.
Language and Speech Impaired Strategies: • Keep the bus rules and instructions simple. • Recognize that it is difficult for language-impaired students to handle a series of instructions. • Allow the student time to process your instructions before responding.

Slide 45
XI-45
When working with students with special needs . . .
Remember that each student is an individual.
While they may have similar characteristics, respect their uniqueness.
Collaborate with teachers, parents, and other staff to provide the best and safest transportation services possible!
When working with students with special needs, remember that each student is an individual. While they may have similar characteristics, respect their uniqueness. Collaborate with teachers, parents, and other staff to provide the best and safest transportation services possible.
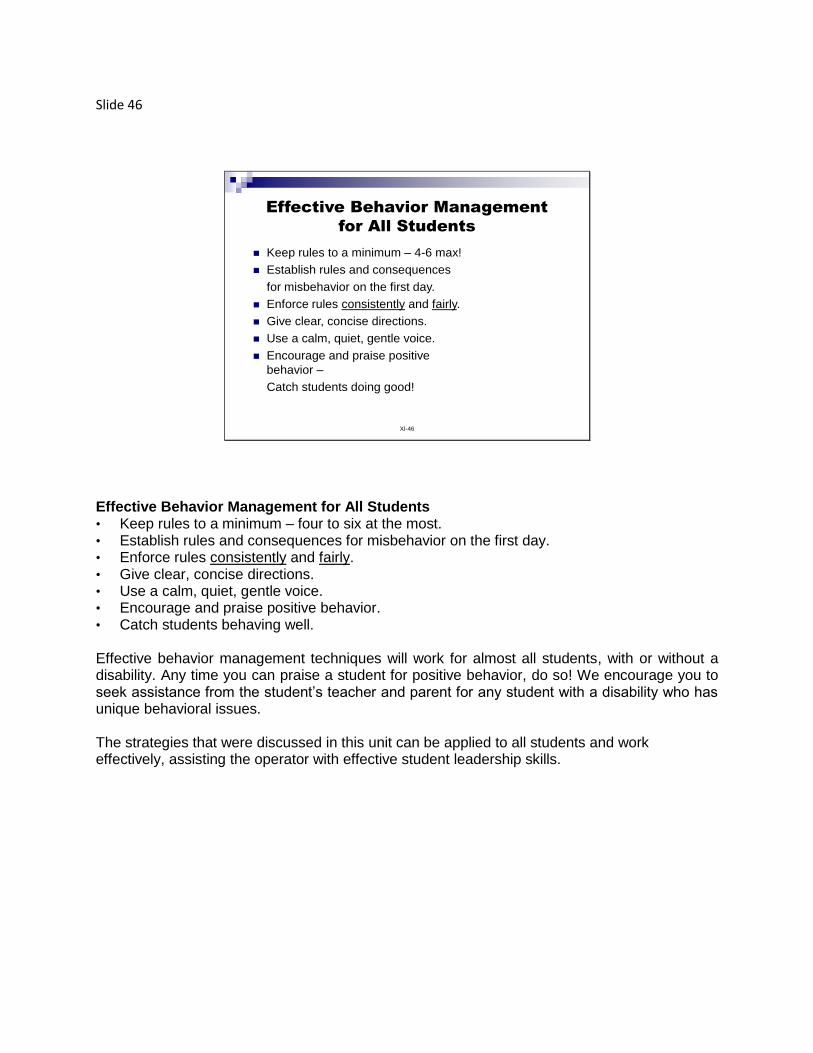
Slide 46
XI-46
Effective Behavior Management
for All Students
Keep rules to a minimum – 4-6 max!
Establish rules and consequences
for misbehavior on the first day.
Enforce rules consistently and fairly.
Give clear, concise directions.
Use a calm, quiet, gentle voice.
Encourage and praise positive
behavior –
Catch students doing good!
Effective Behavior Management for All Students • Keep rules to a minimum – four to six at the most. • Establish rules and consequences for misbehavior on the first day. • Enforce rules consistently and fairly. • Give clear, concise directions. • Use a calm, quiet, gentle voice. • Encourage and praise positive behavior. • Catch students behaving well. Effective behavior management techniques will work for almost all students, with or without a disability. Any time you can praise a student for positive behavior, do so! We encourage you to seek assistance from the student’s teacher and parent for any student with a disability who has unique behavioral issues. The strategies that were discussed in this unit can be applied to all students and work effectively, assisting the operator with effective student leadership skills.
Slide 47
XI-47
Communication
Nonverbal Communication voice tone, volume, and rate
body positioning, facial expressions, and gestures
personal space
Active Listening Give speaker your attention.
Maintain eye contact.
Acknowledge the message.
Show empathy, if appropriate.
Ask what can be done.
Communication Nonverbal Communication • Voice tone, volume, and rate • Body positioning, facial expressions and gestures • Personal space Active Listening • Give the speaker your attention. • Maintain eye contact. • Acknowledge the message. • Show empathy, if appropriate. • Ask what can be done to help the student.
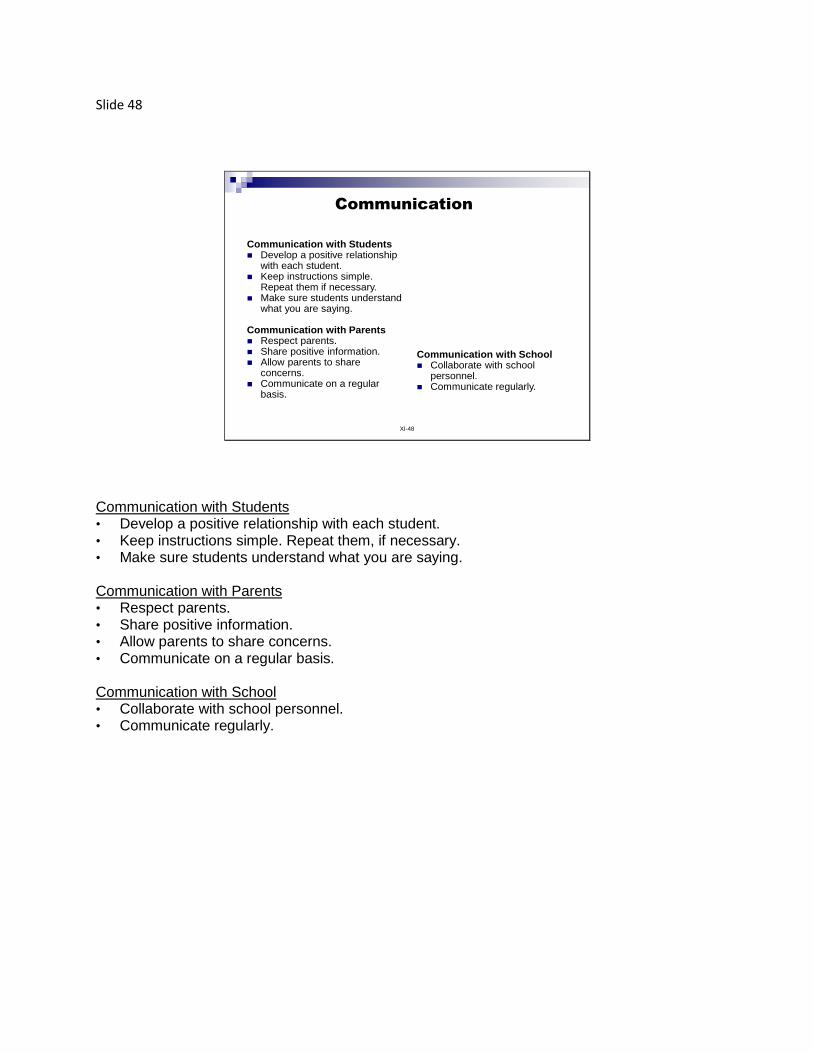
Slide 48
XI-48
Communication
Communication with Students Develop a positive relationship
with each student. Keep instructions simple.
Repeat them if necessary. Make sure students understand
what you are saying.
Communication with Parents Respect parents. Share positive information. Allow parents to share
concerns. Communicate on a regular
basis.
Communication with School Collaborate with school
personnel. Communicate regularly.
Communication with Students • Develop a positive relationship with each student. • Keep instructions simple. Repeat them, if necessary. • Make sure students understand what you are saying. Communication with Parents • Respect parents. • Share positive information. • Allow parents to share concerns. • Communicate on a regular basis. Communication with School • Collaborate with school personnel. • Communicate regularly.
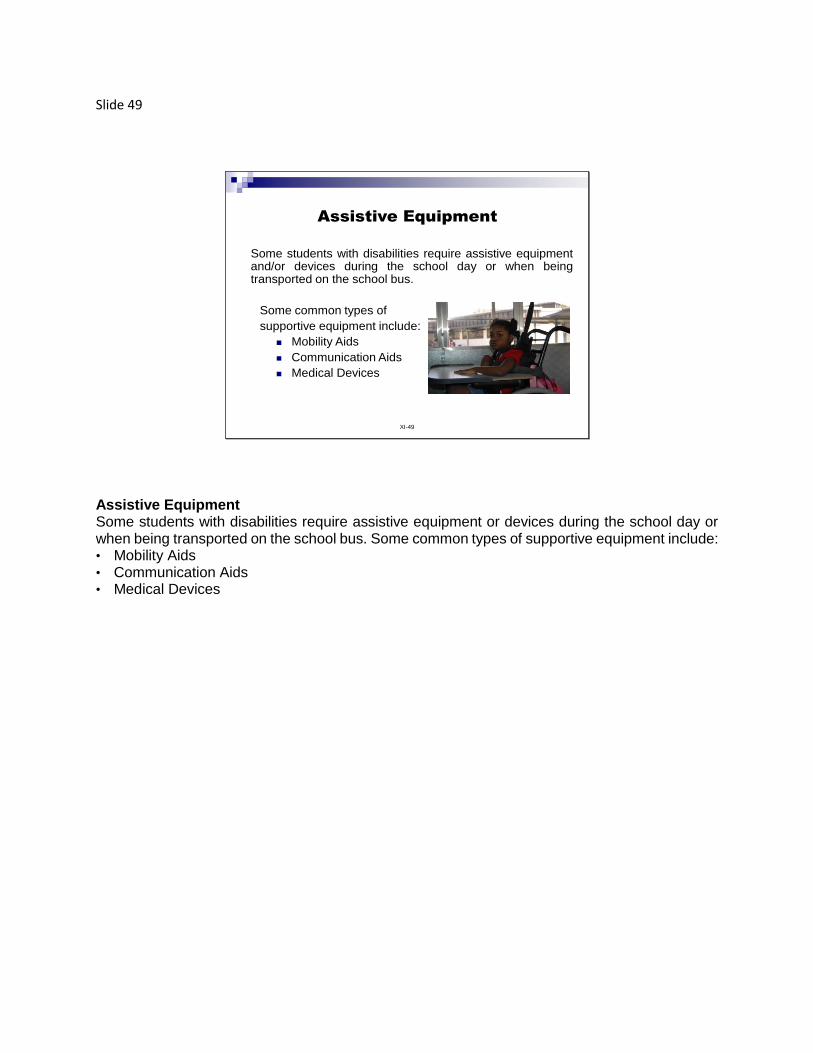
Slide 49
XI-49
Some students with disabilities require assistive equipmentand/or devices during the school day or when beingtransported on the school bus.
Some common types of
supportive equipment include:
Mobility Aids
Communication Aids
Medical Devices
Assistive Equipment
Assistive Equipment Some students with disabilities require assistive equipment or devices during the school day or when being transported on the school bus. Some common types of supportive equipment include: • Mobility Aids • Communication Aids • Medical Devices
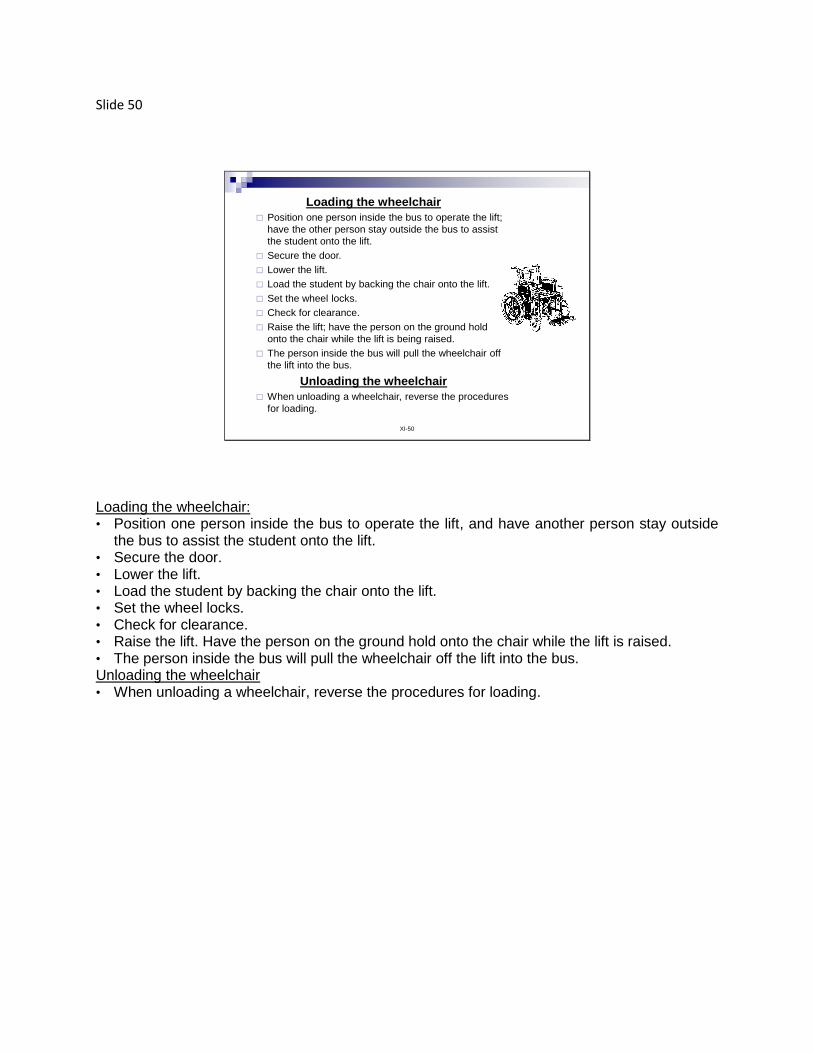
Slide 50
XI-50
Loading the wheelchair
Position one person inside the bus to operate the lift;
have the other person stay outside the bus to assist
the student onto the lift.
Secure the door.
Lower the lift.
Load the student by backing the chair onto the lift.
Set the wheel locks.
Check for clearance.
Raise the lift; have the person on the ground hold
onto the chair while the lift is being raised.
The person inside the bus will pull the wheelchair off
the lift into the bus.
Unloading the wheelchair
When unloading a wheelchair, reverse the procedures
for loading.
Loading the wheelchair: • Position one person inside the bus to operate the lift, and have another person stay outside
the bus to assist the student onto the lift. • Secure the door. • Lower the lift. • Load the student by backing the chair onto the lift. • Set the wheel locks. • Check for clearance. • Raise the lift. Have the person on the ground hold onto the chair while the lift is raised. • The person inside the bus will pull the wheelchair off the lift into the bus. Unloading the wheelchair • When unloading a wheelchair, reverse the procedures for loading.
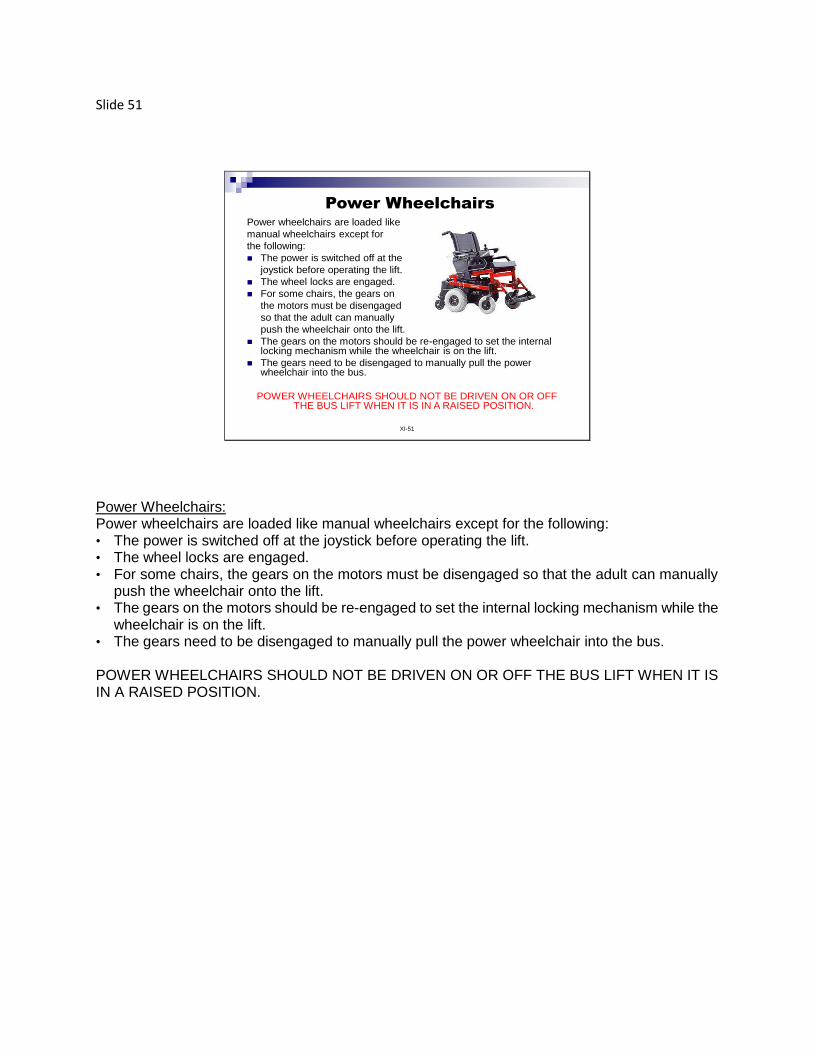
Slide 51
XI-51
Power WheelchairsPower wheelchairs are loaded like
manual wheelchairs except for
the following:
The power is switched off at the
joystick before operating the lift.
The wheel locks are engaged.
For some chairs, the gears on
the motors must be disengaged
so that the adult can manually
push the wheelchair onto the lift.
The gears on the motors should be re-engaged to set the internal locking mechanism while the wheelchair is on the lift.
The gears need to be disengaged to manually pull the power wheelchair into the bus.
POWER WHEELCHAIRS SHOULD NOT BE DRIVEN ON OR OFF THE BUS LIFT WHEN IT IS IN A RAISED POSITION.
Power Wheelchairs: Power wheelchairs are loaded like manual wheelchairs except for the following: • The power is switched off at the joystick before operating the lift. • The wheel locks are engaged. • For some chairs, the gears on the motors must be disengaged so that the adult can manually
push the wheelchair onto the lift. • The gears on the motors should be re-engaged to set the internal locking mechanism while the
wheelchair is on the lift. • The gears need to be disengaged to manually pull the power wheelchair into the bus. POWER WHEELCHAIRS SHOULD NOT BE DRIVEN ON OR OFF THE BUS LIFT WHEN IT IS IN A RAISED POSITION.

Slide 52
XI-52
Wheelchair Tiedown Occupant
Restraint System (WTORS)
It is important to use a complete WTORS to
secure the wheelchair and provide the
wheelchair occupant with a properly designed
and tested seatbelt system.
Always use a WTORS that
has been crash tested.
To protect the occupant, a seatbelt
system with both pelvic and upper
torso belts must be used.
Wheelchair Tie Down Occupant Restraint System (WTORS): • It is important to use a complete WTORS to secure the wheelchair and provide the wheelchair
occupant with a properly designed and tested seatbelt system. • Always use a WTORS that has been crash-tested. • To protect the occupant, a seatbelt system with both pelvic and upper torso belts must be used.
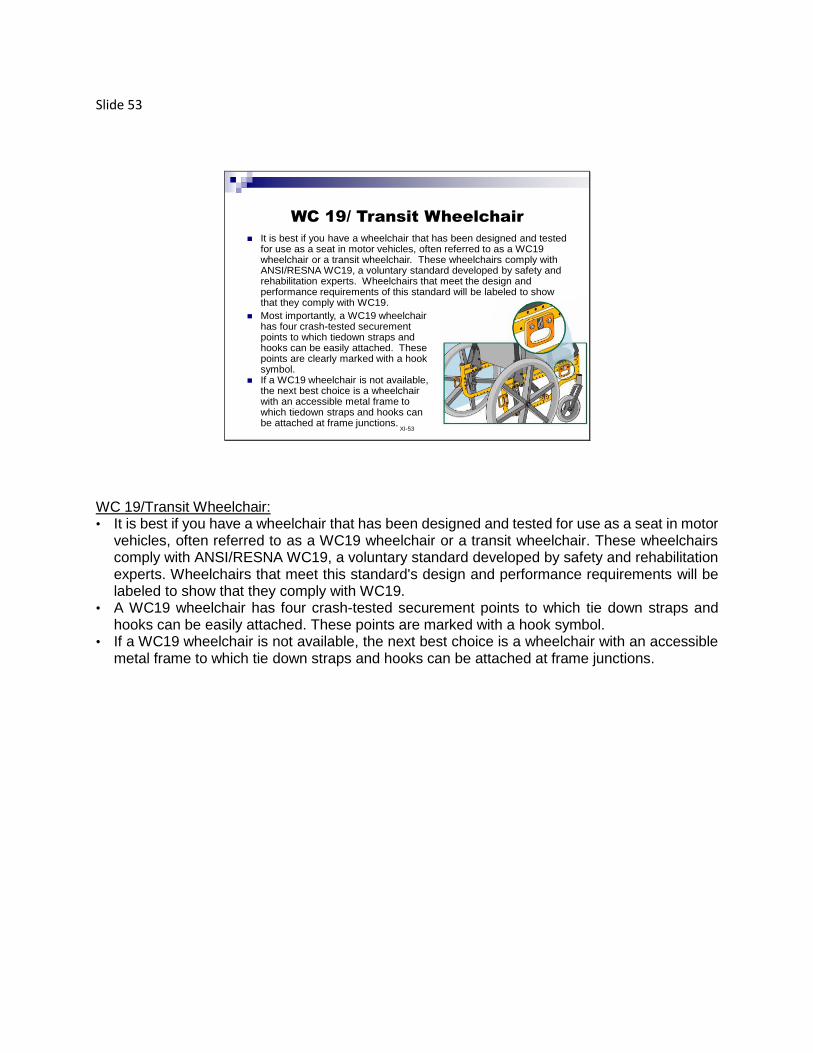
Slide 53
XI-53
WC 19/ Transit Wheelchair
It is best if you have a wheelchair that has been designed and tested for use as a seat in motor vehicles, often referred to as a WC19 wheelchair or a transit wheelchair. These wheelchairs comply with ANSI/RESNA WC19, a voluntary standard developed by safety and rehabilitation experts. Wheelchairs that meet the design and performance requirements of this standard will be labeled to show that they comply with WC19.
Most importantly, a WC19 wheelchair has four crash-tested securement points to which tiedown straps and hooks can be easily attached. These points are clearly marked with a hook symbol.
If a WC19 wheelchair is not available, the next best choice is a wheelchair with an accessible metal frame to which tiedown straps and hooks can be attached at frame junctions.
WC 19/Transit Wheelchair: • It is best if you have a wheelchair that has been designed and tested for use as a seat in motor
vehicles, often referred to as a WC19 wheelchair or a transit wheelchair. These wheelchairs comply with ANSI/RESNA WC19, a voluntary standard developed by safety and rehabilitation experts. Wheelchairs that meet this standard's design and performance requirements will be labeled to show that they comply with WC19.
• A WC19 wheelchair has four crash-tested securement points to which tie down straps and hooks can be easily attached. These points are marked with a hook symbol.
• If a WC19 wheelchair is not available, the next best choice is a wheelchair with an accessible metal frame to which tie down straps and hooks can be attached at frame junctions.
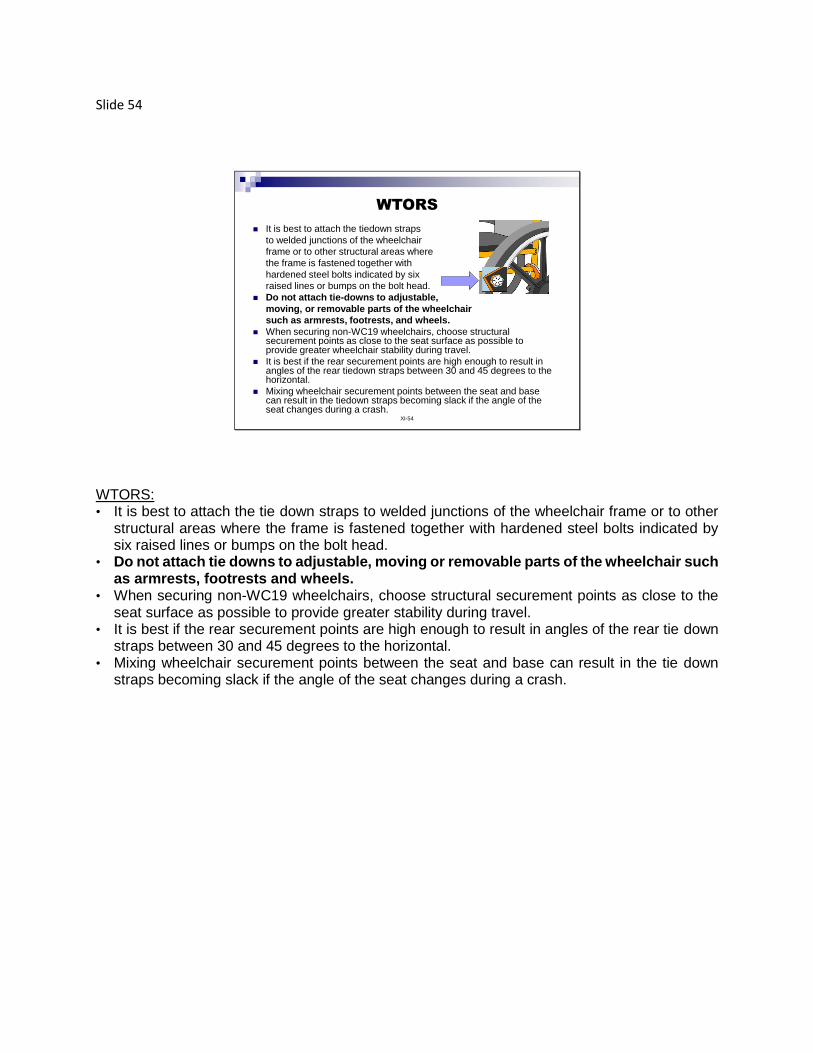
Slide 54
XI-54
WTORS
It is best to attach the tiedown straps
to welded junctions of the wheelchair
frame or to other structural areas where
the frame is fastened together with
hardened steel bolts indicated by six
raised lines or bumps on the bolt head.
Do not attach tie-downs to adjustable,
moving, or removable parts of the wheelchair
such as armrests, footrests, and wheels.
When securing non-WC19 wheelchairs, choose structural securement points as close to the seat surface as possible to provide greater wheelchair stability during travel.
It is best if the rear securement points are high enough to result in angles of the rear tiedown straps between 30 and 45 degrees to the horizontal.
Mixing wheelchair securement points between the seat and base can result in the tiedown straps becoming slack if the angle of the seat changes during a crash.
WTORS: • It is best to attach the tie down straps to welded junctions of the wheelchair frame or to other
structural areas where the frame is fastened together with hardened steel bolts indicated by six raised lines or bumps on the bolt head.
• Do not attach tie downs to adjustable, moving or removable parts of the wheelchair such as armrests, footrests and wheels.
• When securing non-WC19 wheelchairs, choose structural securement points as close to the seat surface as possible to provide greater stability during travel.
• It is best if the rear securement points are high enough to result in angles of the rear tie down straps between 30 and 45 degrees to the horizontal.
• Mixing wheelchair securement points between the seat and base can result in the tie down straps becoming slack if the angle of the seat changes during a crash.
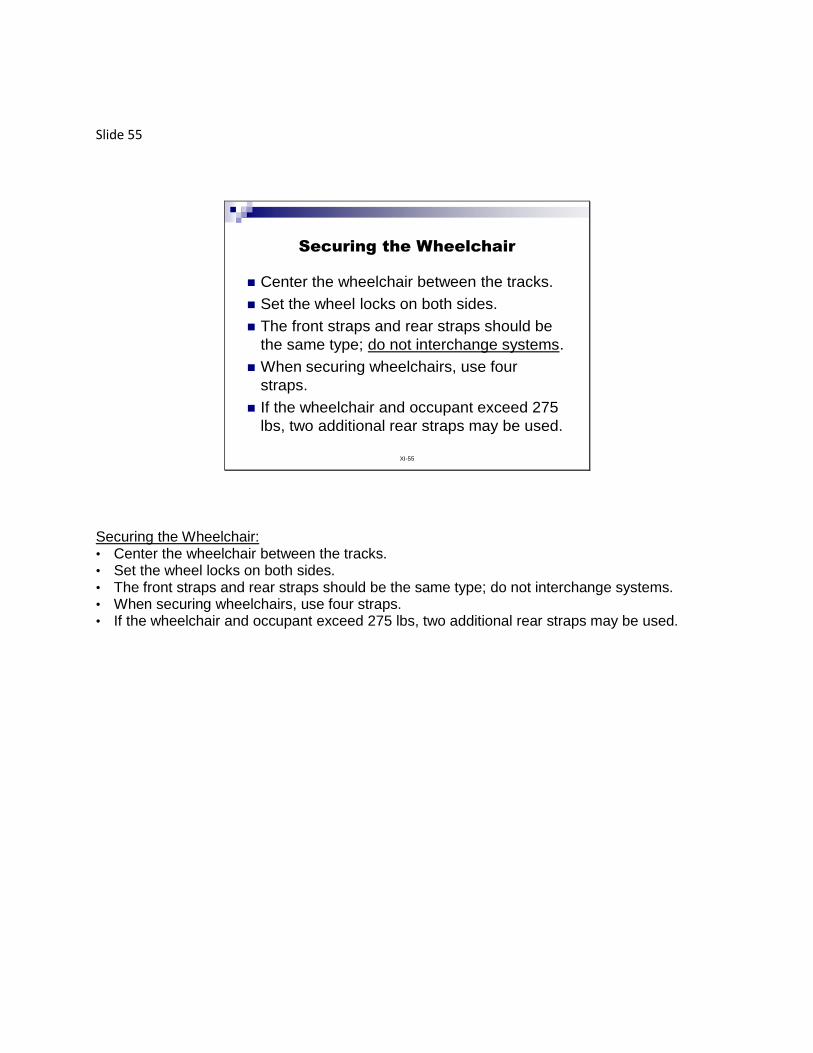
Slide 55
XI-55
Securing the Wheelchair
Center the wheelchair between the tracks.
Set the wheel locks on both sides.
The front straps and rear straps should be
the same type; do not interchange systems.
When securing wheelchairs, use four
straps.
If the wheelchair and occupant exceed 275
lbs, two additional rear straps may be used.
Securing the Wheelchair: • Center the wheelchair between the tracks. • Set the wheel locks on both sides. • The front straps and rear straps should be the same type; do not interchange systems. • When securing wheelchairs, use four straps. • If the wheelchair and occupant exceed 275 lbs, two additional rear straps may be used.
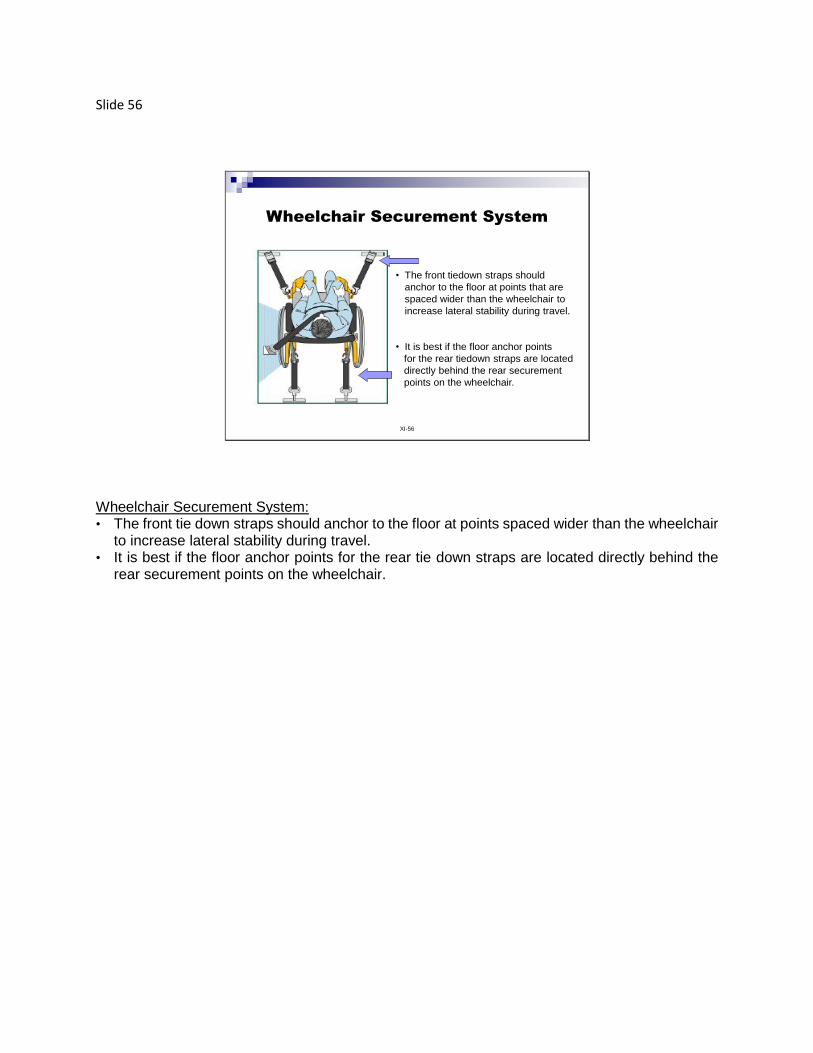
Slide 56
XI-56
Wheelchair Securement System
• The front tiedown straps should
anchor to the floor at points that are
spaced wider than the wheelchair to
increase lateral stability during travel.
• It is best if the floor anchor points
for the rear tiedown straps are located
directly behind the rear securement
points on the wheelchair.
Wheelchair Securement System: • The front tie down straps should anchor to the floor at points spaced wider than the wheelchair
to increase lateral stability during travel. • It is best if the floor anchor points for the rear tie down straps are located directly behind the
rear securement points on the wheelchair.
Slide 57
XI-57
Rear Straps
Hook the rear straps first in the inner tracks.
Secure the straps at a 30 to 60 degree angle (45
degree angle is the best).
Secure the upper part of the strap into the lowest point
of the wheelchair on a secure part of the frame.
Secure to a structurally firm location on the frame.
After securing the straps, release the wheelchair locks
and pull the straps tight.
Reset the wheelchair locks.
Rear Straps: • Hook the rear straps first in the inner tracks. • Secure the straps at a 30 to 60 degree angle (45 degree angle is the best). • Secure the upper part of the strap into the lowest point of the wheelchair on a secure part of
the frame. • Secure to a structurally firm location on the frame. • After securing the straps, release the wheelchair locks and pull the straps tight. • Reset the wheelchair locks.
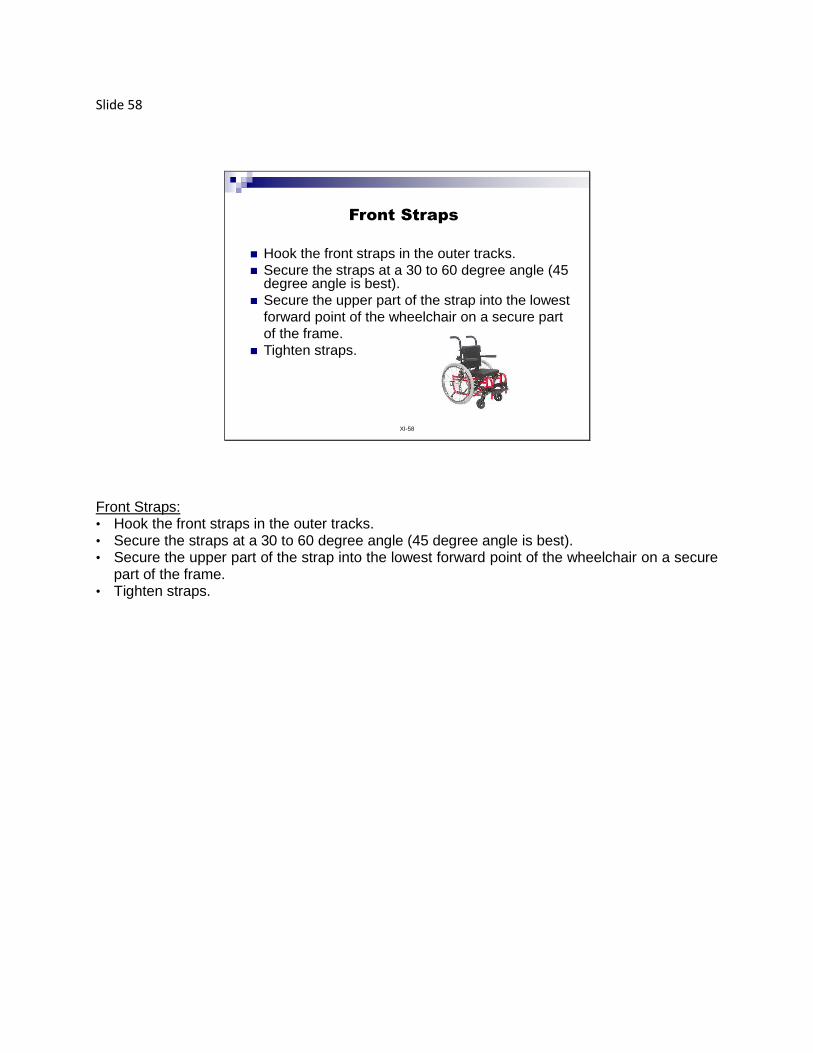
Slide 58
XI-58
Front Straps
Hook the front straps in the outer tracks.
Secure the straps at a 30 to 60 degree angle (45 degree angle is best).
Secure the upper part of the strap into the lowest
forward point of the wheelchair on a secure part
of the frame.
Tighten straps.
Front Straps: • Hook the front straps in the outer tracks. • Secure the straps at a 30 to 60 degree angle (45 degree angle is best). • Secure the upper part of the strap into the lowest forward point of the wheelchair on a secure
part of the frame. • Tighten straps.
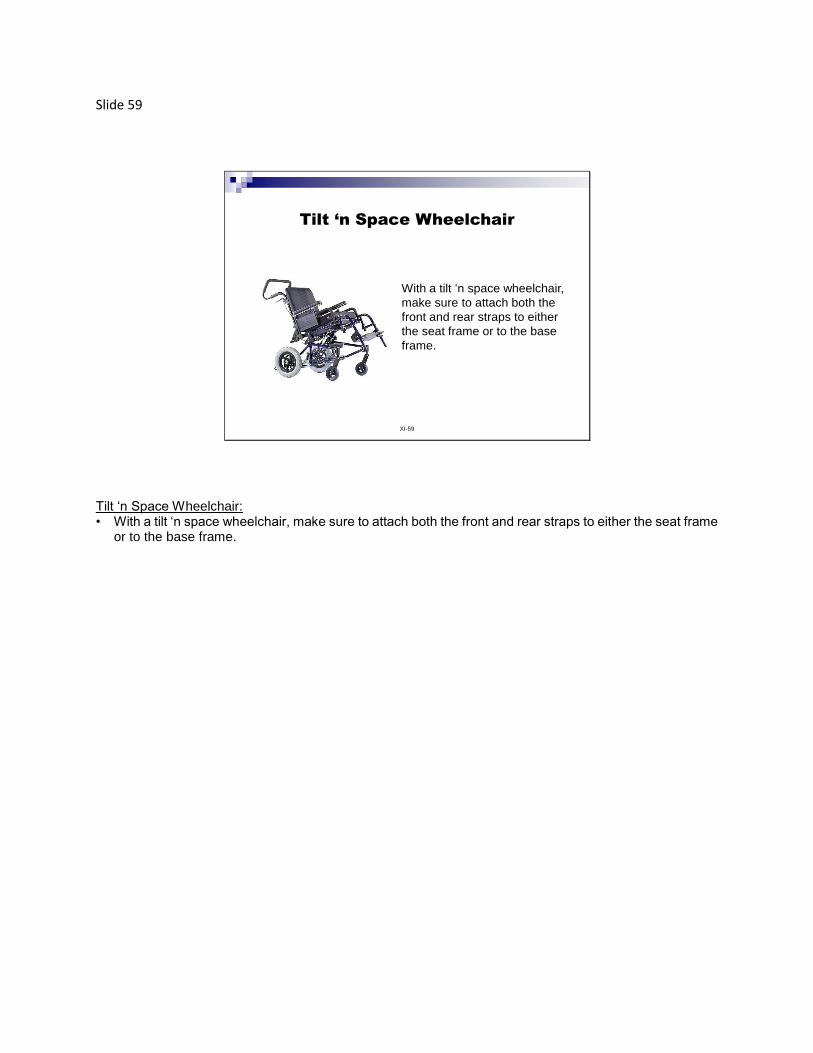
Slide 59
XI-59
Tilt ‘n Space Wheelchair
With a tilt ‘n space wheelchair,
make sure to attach both the
front and rear straps to either
the seat frame or to the base
frame.
Tilt ‘n Space Wheelchair: • With a tilt ‘n space wheelchair, make sure to attach both the front and rear straps to either the seat frame
or to the base frame.
Slide 60
XI-60
Occupant Securement System
Hook the lap belt adjustment straps to the back floor
tracks. Usually they will hook behind the rear straps.
Insert the side lap belt pelvic strap and secure it to the lap
belt adjustment straps.
Lap belt should be low and snug across the pelvis.
Tighten the lap belt at the bottom and then tighten the
shoulder harness.
The shoulder harness should be over the shoulder and
across the upper chest-- NOT ACROSS THE NECK.
Check the student for comfort.
Occupant Securement System: • Hook the lap belt adjustment straps to the back floor tracks. Usually, they will hook behind the
rear straps. • Insert the side lap belt pelvic strap and secure it to the lap belt adjustment straps. • The lap belt should be low and snug across the pelvis. • Tighten the lap belt at the bottom and then tighten the shoulder harness. • The shoulder harness should be over the shoulder and across the upper chest-- NOT ACROSS
THE NECK. • Check the student for comfort.
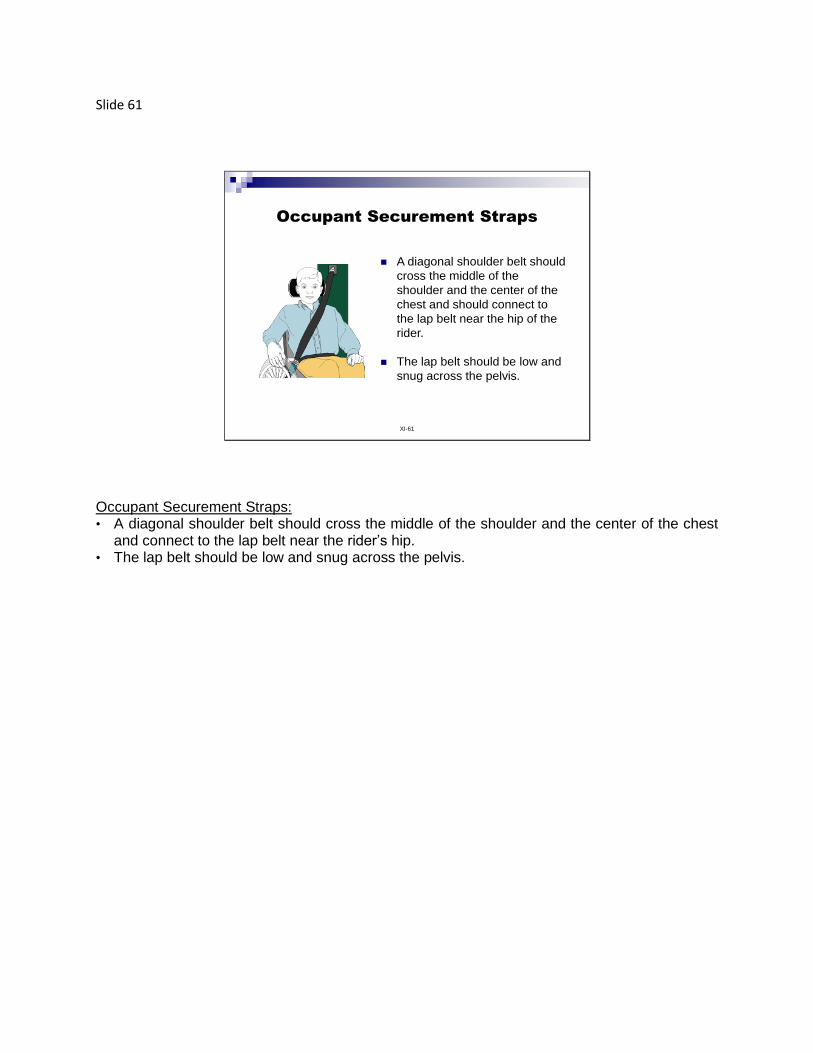
Slide 61
XI-61
Occupant Securement Straps
A diagonal shoulder belt should
cross the middle of the
shoulder and the center of the
chest and should connect to
the lap belt near the hip of the
rider.
The lap belt should be low and
snug across the pelvis.
Occupant Securement Straps: • A diagonal shoulder belt should cross the middle of the shoulder and the center of the chest
and connect to the lap belt near the rider’s hip. • The lap belt should be low and snug across the pelvis.
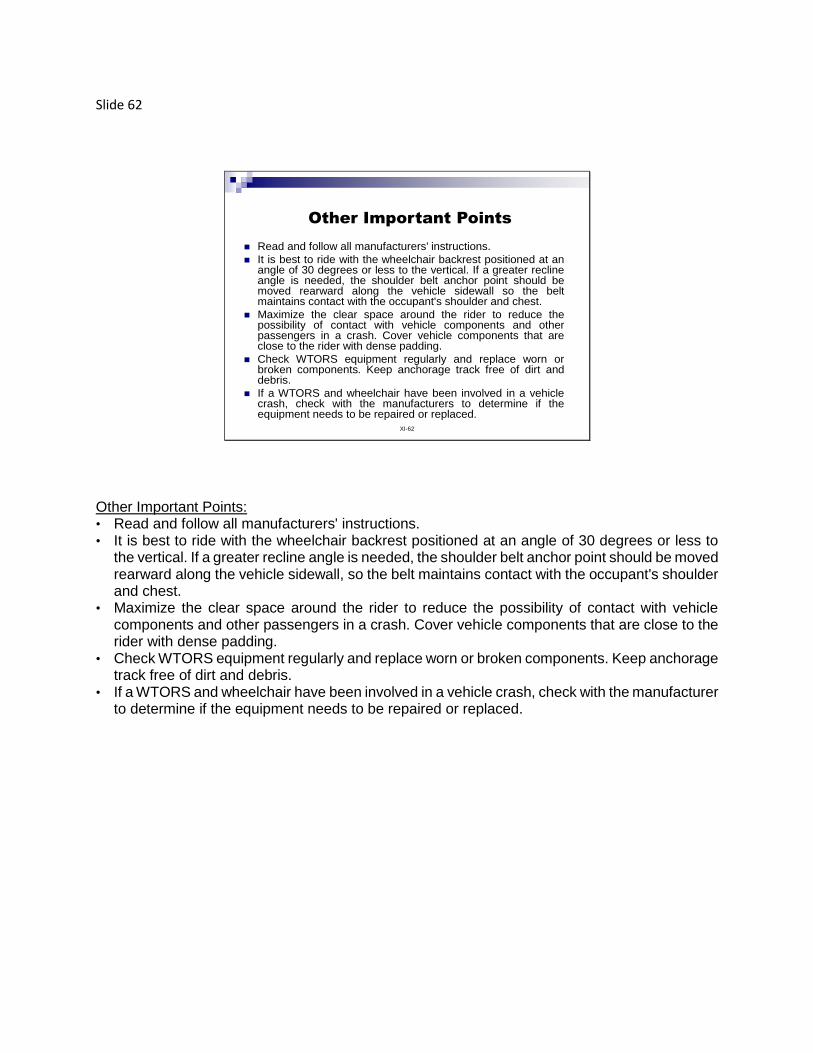
Slide 62
XI-62
Other Important Points
Read and follow all manufacturers' instructions.
It is best to ride with the wheelchair backrest positioned at anangle of 30 degrees or less to the vertical. If a greater reclineangle is needed, the shoulder belt anchor point should bemoved rearward along the vehicle sidewall so the beltmaintains contact with the occupant's shoulder and chest.
Maximize the clear space around the rider to reduce thepossibility of contact with vehicle components and otherpassengers in a crash. Cover vehicle components that areclose to the rider with dense padding.
Check WTORS equipment regularly and replace worn orbroken components. Keep anchorage track free of dirt anddebris.
If a WTORS and wheelchair have been involved in a vehiclecrash, check with the manufacturers to determine if theequipment needs to be repaired or replaced.
Other Important Points: • Read and follow all manufacturers' instructions. • It is best to ride with the wheelchair backrest positioned at an angle of 30 degrees or less to
the vertical. If a greater recline angle is needed, the shoulder belt anchor point should be moved rearward along the vehicle sidewall, so the belt maintains contact with the occupant's shoulder and chest.
• Maximize the clear space around the rider to reduce the possibility of contact with vehicle components and other passengers in a crash. Cover vehicle components that are close to the rider with dense padding.
• Check WTORS equipment regularly and replace worn or broken components. Keep anchorage track free of dirt and debris.
• If a WTORS and wheelchair have been involved in a vehicle crash, check with the manufacturer to determine if the equipment needs to be repaired or replaced.
Slide 63
XI-63
Other Important Points
(continued) If possible, remove hard trays and secure them elsewhere
in the vehicle to reduce the chance of rider injury fromcontact with the tray. Consider the use of foam traysinstead of rigid trays during transit. If it is not possible toremove a hard tray, place dense padding between the riderand the tray and make sure that the tray is securelyattached to the wheelchair so it will not break loose andcause injury to other occupants in a crash.
A properly positioned headrest can help protect the neck ina rear impact.
If it is necessary to use a head and neck support duringtravel, soft neck collars are safer than stiff collars or headstraps, which could cause neck injury in a crash. The softcollar should not be attached to the seating system.
Secure medical and other equipment to the wheelchair orvehicle to prevent it from breaking loose and causinginjuries in a crash.
Other Important Points (continued): • If possible, remove hard trays and secure them elsewhere in the vehicle to reduce the chance
of rider injury from contact with the tray. Consider the use of foam trays instead of rigid trays during transit. If it is not possible to remove a hard tray, place dense padding between the rider and the tray and make sure that the tray is securely attached to the wheelchair so it will not break loose and cause injury to other occupants in a crash.
• A properly positioned headrest can help protect the neck from a rear impact. • If it is necessary to use a head and neck support during travel, soft neck collars are safer than
stiff collars or head straps, which could cause neck injury in a crash. The soft collar should not be attached to the seating system.
• Secure medical and other equipment (e.g., portable oxygen tanks, assistive equipment) to the wheelchair or vehicle to prevent it from breaking loose and causing injuries in a crash.
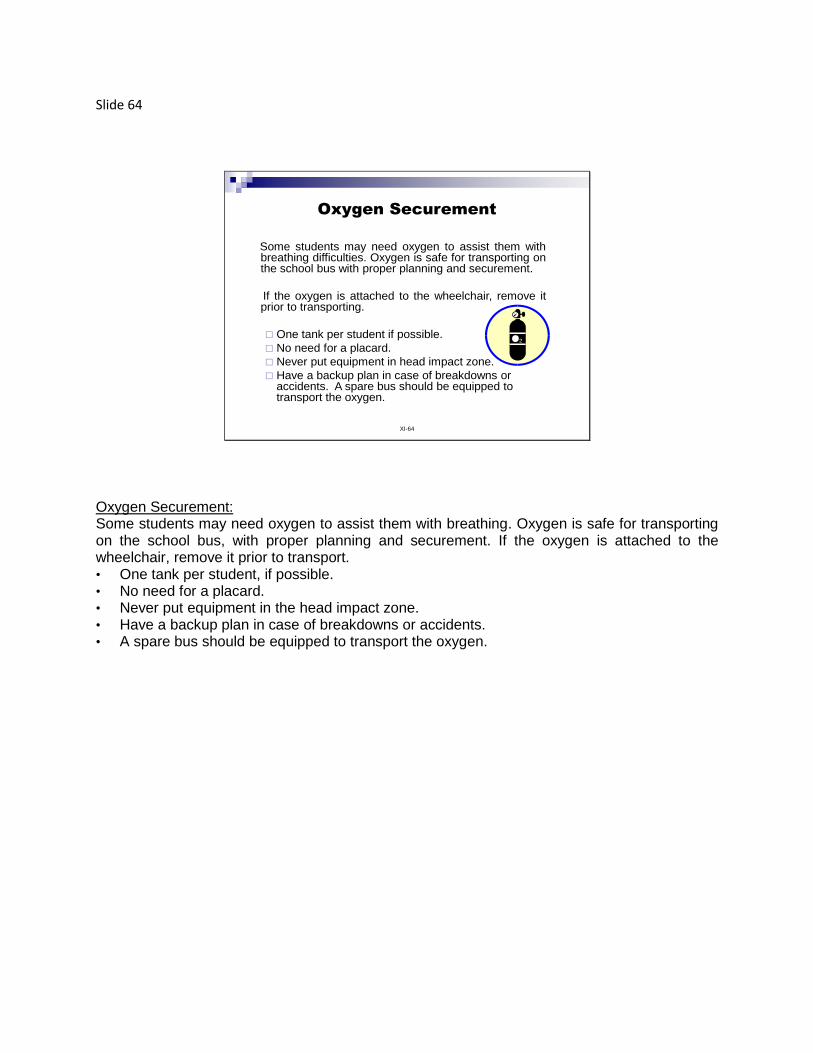
Slide 64
XI-64
Oxygen Securement
Some students may need oxygen to assist them withbreathing difficulties. Oxygen is safe for transporting onthe school bus with proper planning and securement.
If the oxygen is attached to the wheelchair, remove itprior to transporting.
One tank per student if possible.
No need for a placard.
Never put equipment in head impact zone.
Have a backup plan in case of breakdowns or accidents. A spare bus should be equipped totransport the oxygen.
Oxygen Securement: Some students may need oxygen to assist them with breathing. Oxygen is safe for transporting on the school bus, with proper planning and securement. If the oxygen is attached to the wheelchair, remove it prior to transport. • One tank per student, if possible. • No need for a placard. • Never put equipment in the head impact zone. • Have a backup plan in case of breakdowns or accidents. • A spare bus should be equipped to transport the oxygen.
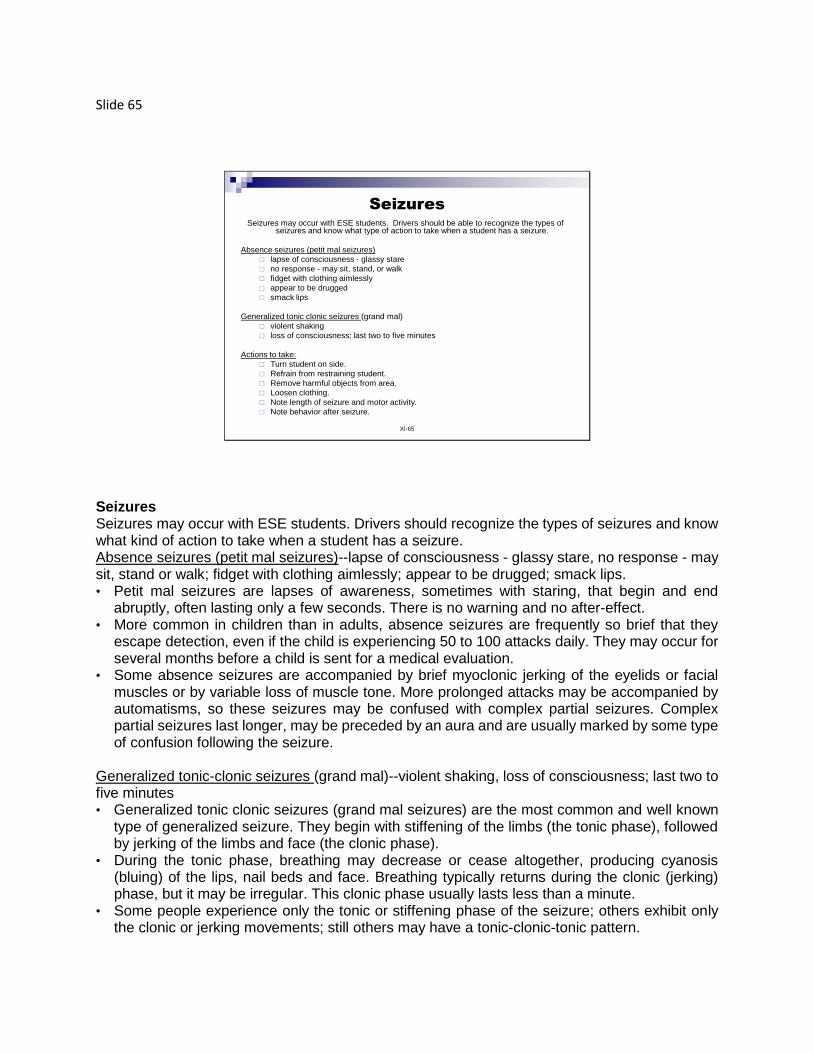
Slide 65
XI-65
SeizuresSeizures may occur with ESE students. Drivers should be able to recognize the types of
seizures and know what type of action to take when a student has a seizure.
Absence seizures (petit mal seizures)
lapse of consciousness - glassy stare
no response - may sit, stand, or walk
fidget with clothing aimlessly
appear to be drugged
smack lips
Generalized tonic clonic seizures (grand mal)
violent shaking
loss of consciousness; last two to five minutes
Actions to take:
Turn student on side.
Refrain from restraining student.
Remove harmful objects from area.
Loosen clothing.
Note length of seizure and motor activity.
Note behavior after seizure.
Seizures Seizures may occur with ESE students. Drivers should recognize the types of seizures and know what kind of action to take when a student has a seizure. Absence seizures (petit mal seizures)--lapse of consciousness - glassy stare, no response - may sit, stand or walk; fidget with clothing aimlessly; appear to be drugged; smack lips. • Petit mal seizures are lapses of awareness, sometimes with staring, that begin and end
abruptly, often lasting only a few seconds. There is no warning and no after-effect. • More common in children than in adults, absence seizures are frequently so brief that they
escape detection, even if the child is experiencing 50 to 100 attacks daily. They may occur for several months before a child is sent for a medical evaluation.
• Some absence seizures are accompanied by brief myoclonic jerking of the eyelids or facial muscles or by variable loss of muscle tone. More prolonged attacks may be accompanied by automatisms, so these seizures may be confused with complex partial seizures. Complex partial seizures last longer, may be preceded by an aura and are usually marked by some type of confusion following the seizure.
Generalized tonic-clonic seizures (grand mal)--violent shaking, loss of consciousness; last two to five minutes • Generalized tonic clonic seizures (grand mal seizures) are the most common and well known
type of generalized seizure. They begin with stiffening of the limbs (the tonic phase), followed by jerking of the limbs and face (the clonic phase).
• During the tonic phase, breathing may decrease or cease altogether, producing cyanosis (bluing) of the lips, nail beds and face. Breathing typically returns during the clonic (jerking) phase, but it may be irregular. This clonic phase usually lasts less than a minute.
• Some people experience only the tonic or stiffening phase of the seizure; others exhibit only the clonic or jerking movements; still others may have a tonic-clonic-tonic pattern.
First Aid for Generalized Tonic-Clonic Seizures Actions to take:
Clear students from the area. Turn student on side. Refrain from restraining student. Remove harmful objects from the area. Loosen clothing. Note the length of seizure and motor activity. Note behavior after the seizure.
• Following the seizure, the patient will be lethargic, possibly confused and want to sleep. Headache sometimes occurs. Full recovery takes minutes to hours, depending on the individual.
• Prevent further injury. Place something soft under the head, loosen tight clothing and clear the area of sharp or hard objects.
• Do not force objects into the person’s mouth. • Do not pour liquids into the person’s mouth or offer any food, drink or medication until he or
she is fully awake. Contrary to popular folk belief, nothing should be placed in the mouth during a seizure. • Do not restrain the person’s movements unless they place him or her in danger. • Turn the person on his or her side to open the airway and allow secretions to drain. • Stay with the person until the seizure ends. • If the person does not resume breathing after the seizure, call 911 and start cardiopulmonary
resuscitation. • Let the person rest until he or she is fully awake. • Be reassuring and supportive when consciousness returns. • A convulsive seizure is usually not a medical emergency unless it lasts longer than five
minutes, a second seizure occurs soon after the first, or the person is pregnant, injured, diabetic or not breathing easily. In these situations, the person should be taken to an emergency medical facility.
• Notify the parent/guardian, stating the time of the seizure, how long it lasted and the current condition of the student.
NOTE: Operators and attendants should have a response plan for students transported in special apparatus before the onset of a seizure. An example would be: Do you remove a student having a seizure from a wheelchair?
Slide 66
XI-66
Emergency Information
Emergency information for students with disabilitiesshould be maintained on the bus. The informationshould be updated at least annually or more often aschanges occur. Information should include parent,emergency contact, and general student information, aswell as specific needs and limitations of each student.
According to s. 1006.063(6), F.S., each district schoolboard shall establish emergency procedures inaccordance with s.381.0056(5) for life threateningemergencies.
Emergency Information: • Emergency information for students with disabilities should be maintained on the bus. The
information should be updated at least annually or more often as changes occur. Information should include parent, emergency contact, general student information, and specific needs and limitations of each student.
• According to s. 1006.063(6), F.S., each district school board shall establish emergency procedures in accordance with s. 381.0056(5), F.S., for life-threatening emergencies. It is the bus operator’s responsibility to know the district’s policies and procedures in the event of an emergency.
Slide 67
XI-67
Evacuations
When to Evacuate:
Evacuations should not be performed automatically after everycollision or incident. For instance, after most “fender-bender” buscrashes, children will usually be safer inside the bus until emergencyhelp arrives.
Reasons for an Emergency Evacuation:
Fire or smoke on the bus
Suspected fire (smelling something hot or noticing a strong fuelsmell)
Inoperable bus in danger of being hit by other vehicles (i.e., on arailroad track, on the edge of an embankment, under the brink of ahill, on a sharp curve, heavy fog conditions)
Flooding conditions
Evacuations When to Evacuate: • Evacuations should not be performed automatically after every collision or incident. For
instance, after most “fender-bender” bus crashes, children will usually be safer inside the bus than outside it while they wait for emergency help to arrive.
Reasons for an Emergency Evacuation: • Fire or smoke on the bus • Suspected fire (smelling something hot or noticing a strong fuel smell) • Inoperable bus in danger of being hit by other vehicles (i.e., on a railroad track, on the edge of
an embankment, under the brink of a hill, on a sharp curve, in heavy fog conditions) • Flooding conditions
Slide 68
XI-68
Specific ESE Bus Evacuation Plan
Each bus operator should have a specificevacuation plan for his/her bus that addressesthe individual needs of each student on the bus.
The bus operator should have a diagram ofhis/her bus and include the following in the plan:
Names of each student and seat location;
Next to the student’s name, indicate thefollowing information, as appropriate: Child Safety Restraint System
Hearing or Visually Impaired or Non-verbal
Other special needs that would affect the student’sability to safely evacuate the bus
Specific ESE Bus Evacuation Plan: Each bus operator should have a specific evacuation plan for his/her bus that addresses the individual needs of each student on the bus. The bus operator should have a diagram of his/her bus and include the following in the plan: • Names of each student and seat location; • Next to the student’s name, indicate the following information, as appropriate:
Child Safety Restraint System Deaf or Hard of Hearing or Visually Impaired or Non-verbal Other special needs that would affect the student’s ability to safely evacuate the bus. Order in which the students should be evacuated.
Slide 69
XI-69
Specific ESE Bus Evacuation Plan
The plan should include the best method of evacuation foreach student (may need input from teacher, physicaltherapist, and/or parent), such as: Student walks with/without assistance,
Remove student from wheelchair for evacuation,
Student should be carried or dragged,
(Dragging is usually more effective than lifting or carrying heavierstudents. A blanket or coat can be used for dragging.)
More than one adult will be needed to carry or drag the student, or
Keep the student in wheelchair for evacuation.
If a student is non-ambulatory, the bus operator andattendant should receive special training on how tosafely evacuate the student.
Specific ESE Bus Evacuation Plan (continued): The plan should include the best method of evacuation for each student (may need input from a teacher, physical therapist or parent), such as:
• The student walks with/without assistance; • Remove student from a wheelchair for evacuation; • The student should be carried or dragged (ragging is usually more effective than lifting
or carrying heavier students; a blanket or coat can be used for dragging); • More than one adult will be needed to carry or drag the student; or • Keep the student in a wheelchair for evacuation.
If a student is non-ambulatory, the bus operator and attendant should receive special training on how to safely evacuate the student.
Slide 70
XI-70
Evacuation Drills
The purpose of school bus evacuation drills is for the busoperator, bus attendant, and each student riding the busto understand and practice what to do in case of anemergency.
Evacuation drills should be held at least two times peryear with the times and dates of such drills coordinatedbetween the transportation department and schoolprincipals.
All students are required to participate in the drills unlesstheir disability would prevent their participation.
Parents should be notified of the drills in case they maywant to be at the school during the drill.
Evacuation Drills: The purpose of school bus evacuation drills is for the bus operator, bus attendant and each student riding the bus to understand and practice what to do in case of an emergency. Evacuation drills should be held at least two times per year, with the times and dates of such drills coordinated between the transportation department and school principals. All students are required to participate in the drills unless their disability would prevent their participation. Parents should be notified of the drills if they want to be at the school during the drill.
Slide 71
XI-71
Websites for Student Transportation
DOE memorandums, reports, and other documents related to
transportation
http://www.fldoe.org/schools/healthy-schools/transportation/
FDOE Exceptional Student Education, related services
https://www.fldoe.org/academics/exceptional-student-edu/related-
services/
Wheelchair Transportation Safety
http://wc-transportation-safety.umtri.umich.edu/wts-standards
Websites for Student Transportation DOE memorandums, reports, and other documents related to transportation
http://www.fldoe.org/schools/healthy-schools/transportation/ FDOE Exceptional Student Education, related services https://www.fldoe.org/academics/exceptional-student-edu/related-services/ Wheelchair Transportation Safety
http://wc-transportation-safety.umtri.umich.edu/wts-standards
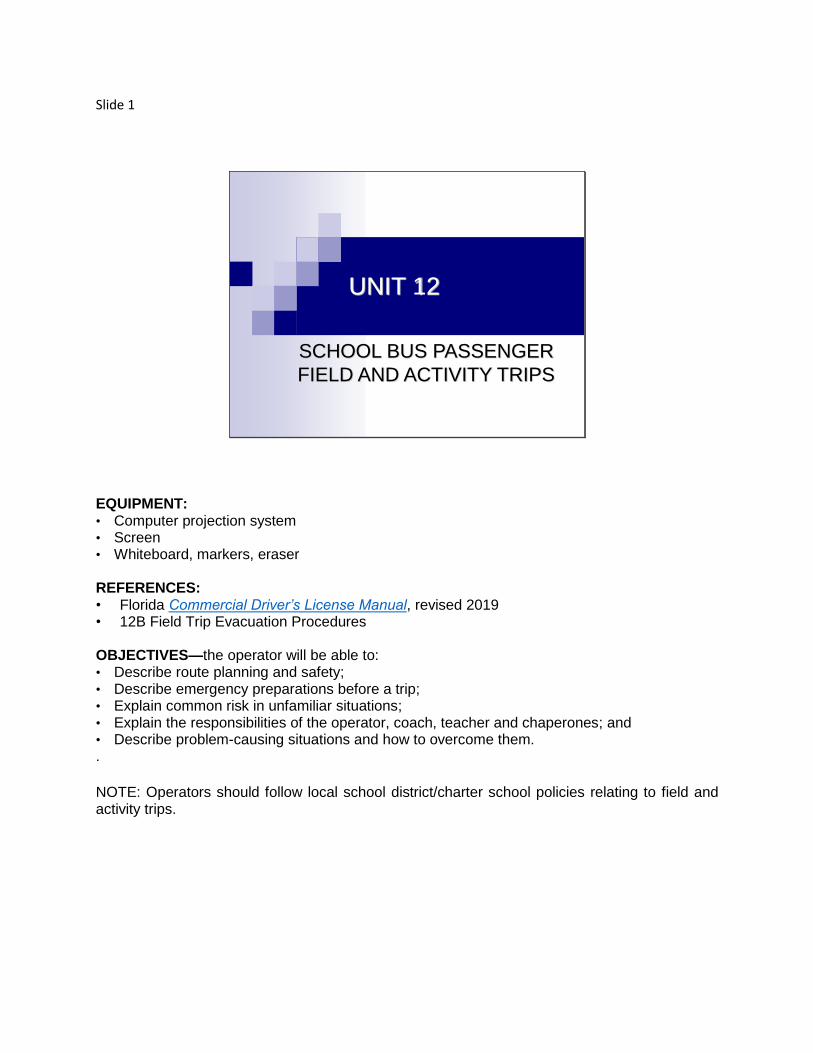
Slide 1
UNIT 12
SCHOOL BUS PASSENGER
FIELD AND ACTIVITY TRIPS
EQUIPMENT: • Computer projection system • Screen • Whiteboard, markers, eraser REFERENCES: • Florida Commercial Driver’s License Manual, revised 2019 • 12B Field Trip Evacuation Procedures OBJECTIVES—the operator will be able to: • Describe route planning and safety; • Describe emergency preparations before a trip; • Explain common risk in unfamiliar situations; • Explain the responsibilities of the operator, coach, teacher and chaperones; and • Describe problem-causing situations and how to overcome them. .
NOTE: Operators should follow local school district/charter school policies relating to field and activity trips.
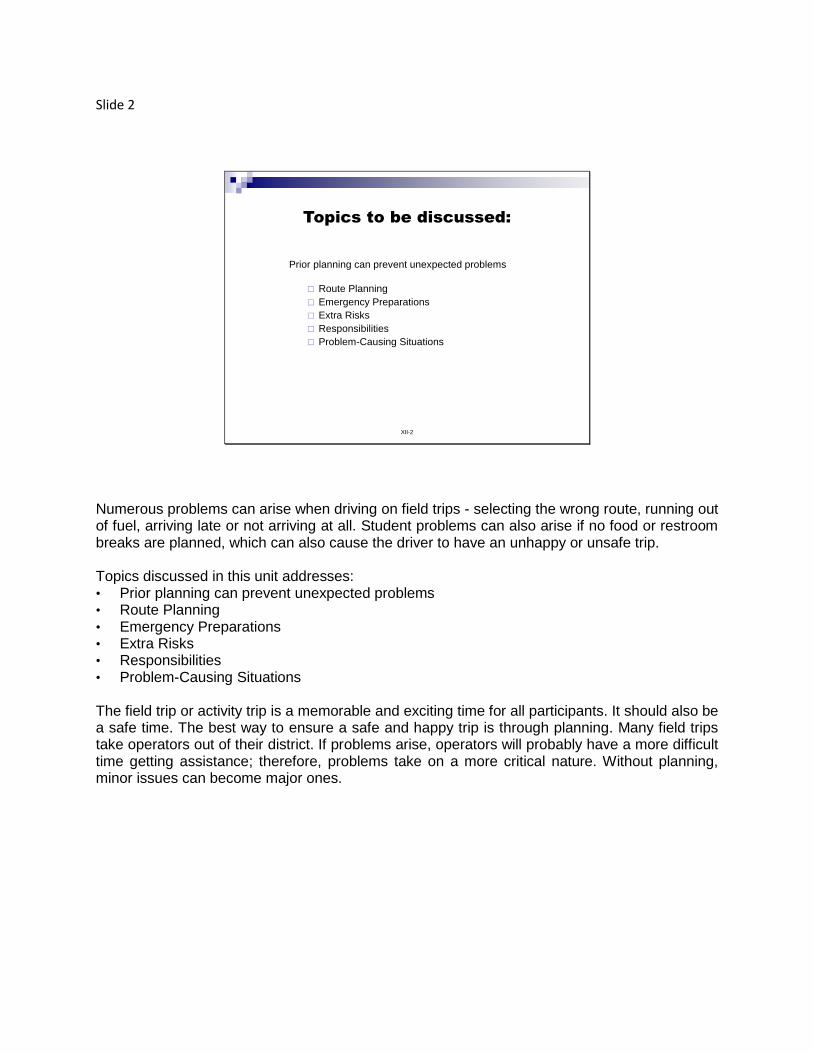
Slide 2
XII-2
Topics to be discussed:
Prior planning can prevent unexpected problems
Route Planning
Emergency Preparations
Extra Risks
Responsibilities
Problem-Causing Situations
Numerous problems can arise when driving on field trips - selecting the wrong route, running out of fuel, arriving late or not arriving at all. Student problems can also arise if no food or restroom breaks are planned, which can also cause the driver to have an unhappy or unsafe trip. Topics discussed in this unit addresses: • Prior planning can prevent unexpected problems • Route Planning • Emergency Preparations • Extra Risks • Responsibilities • Problem-Causing Situations The field trip or activity trip is a memorable and exciting time for all participants. It should also be a safe time. The best way to ensure a safe and happy trip is through planning. Many field trips take operators out of their district. If problems arise, operators will probably have a more difficult time getting assistance; therefore, problems take on a more critical nature. Without planning, minor issues can become major ones.
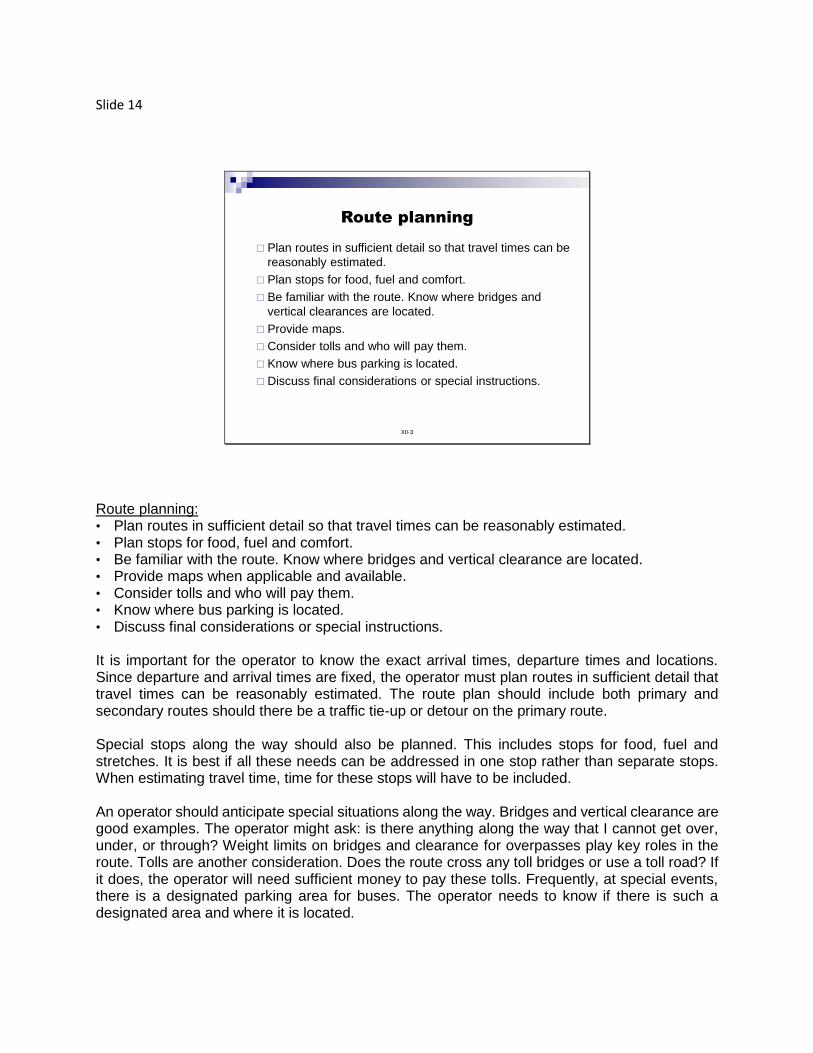
Slide 14
XII-3
Route planning
Plan routes in sufficient detail so that travel times can be
reasonably estimated.
Plan stops for food, fuel and comfort.
Be familiar with the route. Know where bridges and
vertical clearances are located.
Provide maps.
Consider tolls and who will pay them.
Know where bus parking is located.
Discuss final considerations or special instructions.
Route planning: • Plan routes in sufficient detail so that travel times can be reasonably estimated. • Plan stops for food, fuel and comfort. • Be familiar with the route. Know where bridges and vertical clearance are located. • Provide maps when applicable and available. • Consider tolls and who will pay them. • Know where bus parking is located. • Discuss final considerations or special instructions. It is important for the operator to know the exact arrival times, departure times and locations. Since departure and arrival times are fixed, the operator must plan routes in sufficient detail that travel times can be reasonably estimated. The route plan should include both primary and secondary routes should there be a traffic tie-up or detour on the primary route. Special stops along the way should also be planned. This includes stops for food, fuel and stretches. It is best if all these needs can be addressed in one stop rather than separate stops. When estimating travel time, time for these stops will have to be included. An operator should anticipate special situations along the way. Bridges and vertical clearance are good examples. The operator might ask: is there anything along the way that I cannot get over, under, or through? Weight limits on bridges and clearance for overpasses play key roles in the route. Tolls are another consideration. Does the route cross any toll bridges or use a toll road? If it does, the operator will need sufficient money to pay these tolls. Frequently, at special events, there is a designated parking area for buses. The operator needs to know if there is such a designated area and where it is located.
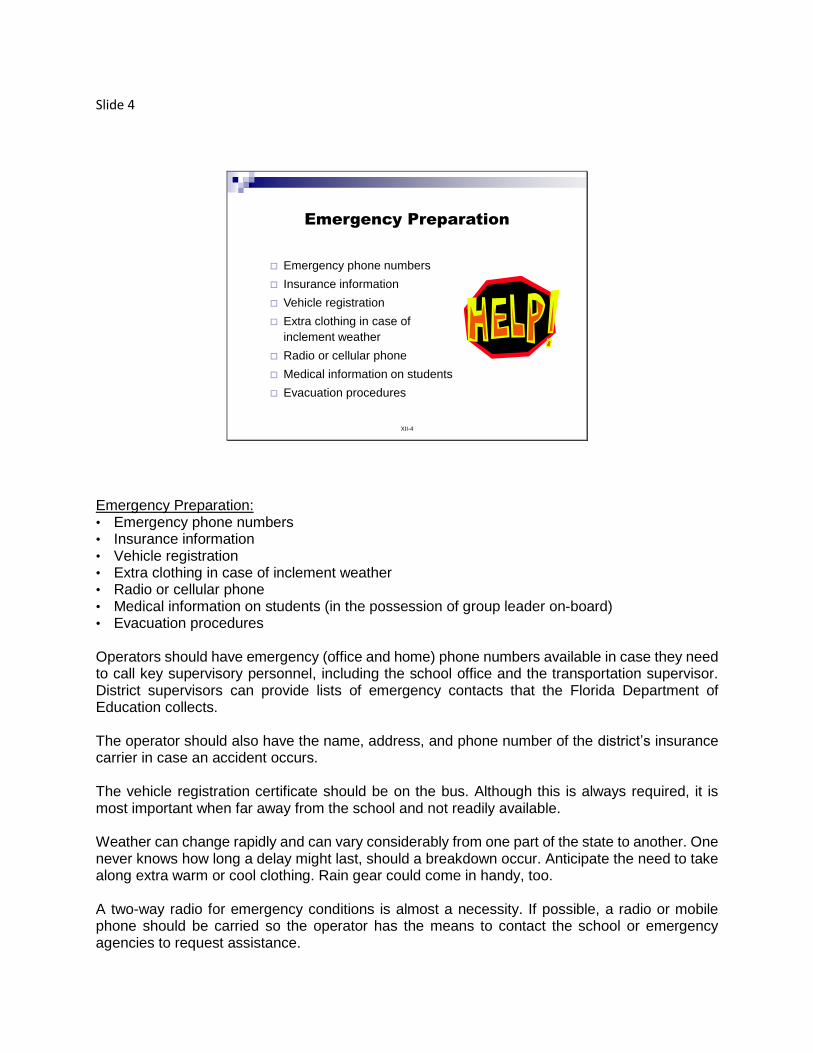
Slide 4
XII-4
Emergency Preparation
Emergency phone numbers
Insurance information
Vehicle registration
Extra clothing in case of
inclement weather
Radio or cellular phone
Medical information on students
Evacuation procedures
Emergency Preparation: • Emergency phone numbers • Insurance information • Vehicle registration • Extra clothing in case of inclement weather • Radio or cellular phone • Medical information on students (in the possession of group leader on-board) • Evacuation procedures Operators should have emergency (office and home) phone numbers available in case they need to call key supervisory personnel, including the school office and the transportation supervisor. District supervisors can provide lists of emergency contacts that the Florida Department of Education collects. The operator should also have the name, address, and phone number of the district’s insurance carrier in case an accident occurs. The vehicle registration certificate should be on the bus. Although this is always required, it is most important when far away from the school and not readily available. Weather can change rapidly and can vary considerably from one part of the state to another. One never knows how long a delay might last, should a breakdown occur. Anticipate the need to take along extra warm or cool clothing. Rain gear could come in handy, too. A two-way radio for emergency conditions is almost a necessity. If possible, a radio or mobile phone should be carried so the operator has the means to contact the school or emergency agencies to request assistance.

Some students may have special medical problems. Operators must be aware of these students and their medical conditions before the trip begins. Operators should communicate with group leaders about student medical needs before the trip starts. Before every trip, emergency evacuation procedures must be planned and presented. Find and review the FIELD TRIP EVACUATION PROCEDURES handout in the appendix.
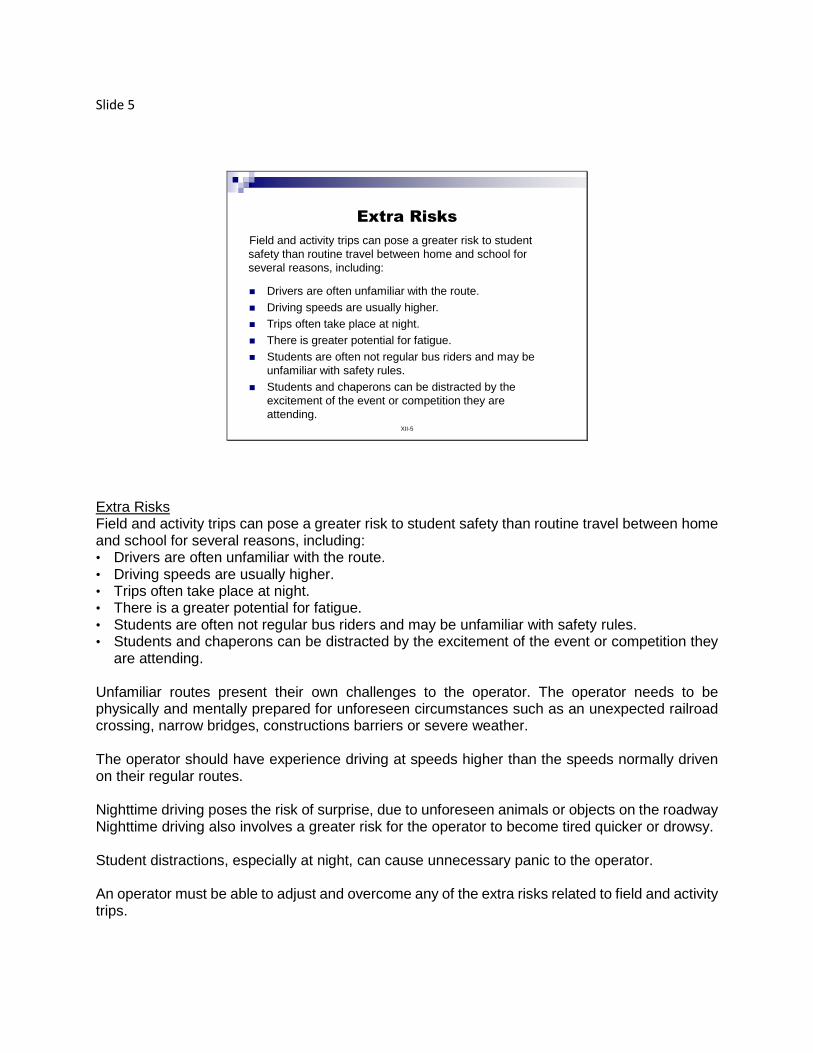
Slide 5
XII-5
Extra Risks
Drivers are often unfamiliar with the route.
Driving speeds are usually higher.
Trips often take place at night.
There is greater potential for fatigue.
Students are often not regular bus riders and may be
unfamiliar with safety rules.
Students and chaperons can be distracted by the
excitement of the event or competition they are
attending.
Field and activity trips can pose a greater risk to student
safety than routine travel between home and school for
several reasons, including:
Extra Risks Field and activity trips can pose a greater risk to student safety than routine travel between home and school for several reasons, including: • Drivers are often unfamiliar with the route. • Driving speeds are usually higher. • Trips often take place at night. • There is a greater potential for fatigue. • Students are often not regular bus riders and may be unfamiliar with safety rules. • Students and chaperons can be distracted by the excitement of the event or competition they
are attending. Unfamiliar routes present their own challenges to the operator. The operator needs to be physically and mentally prepared for unforeseen circumstances such as an unexpected railroad crossing, narrow bridges, constructions barriers or severe weather. The operator should have experience driving at speeds higher than the speeds normally driven on their regular routes. Nighttime driving poses the risk of surprise, due to unforeseen animals or objects on the roadway Nighttime driving also involves a greater risk for the operator to become tired quicker or drowsy. Student distractions, especially at night, can cause unnecessary panic to the operator. An operator must be able to adjust and overcome any of the extra risks related to field and activity trips.
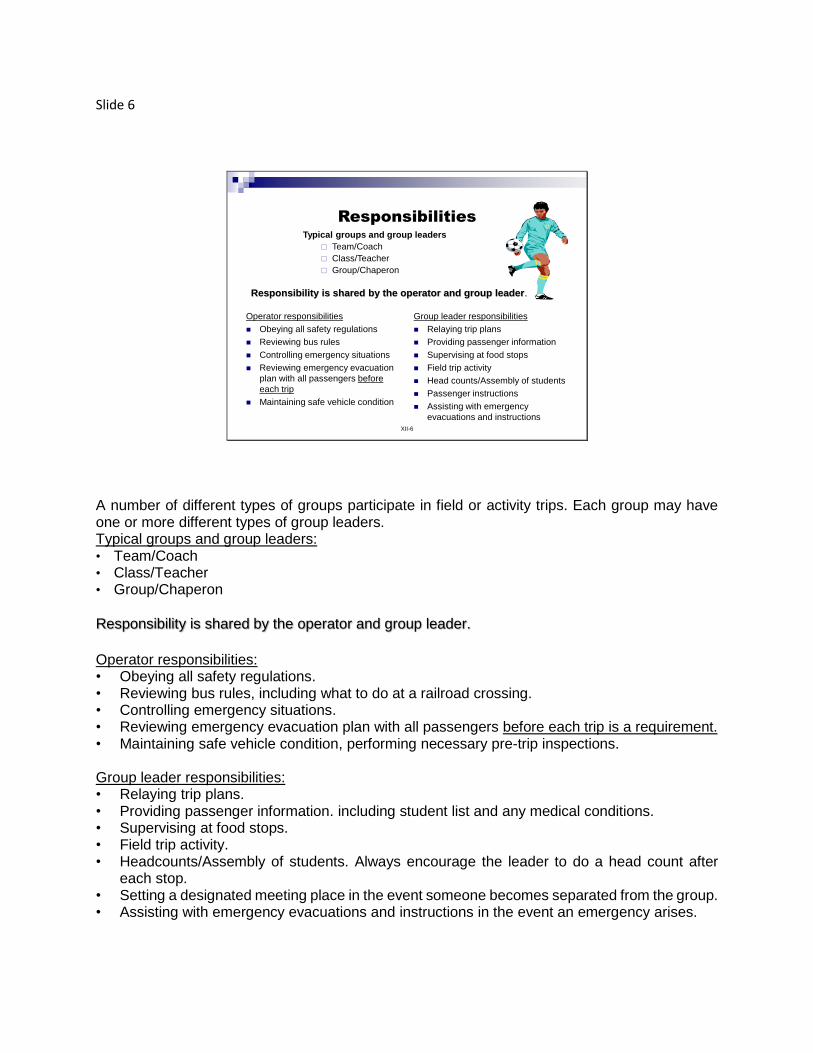
Slide 6
XII-6
ResponsibilitiesTypical groups and group leaders
Team/Coach
Class/Teacher
Group/Chaperon
Operator responsibilities
Obeying all safety regulations
Reviewing bus rules
Controlling emergency situations
Reviewing emergency evacuation
plan with all passengers before
each trip
Maintaining safe vehicle condition
Group leader responsibilities
Relaying trip plans
Providing passenger information
Supervising at food stops
Field trip activity
Head counts/Assembly of students
Passenger instructions
Assisting with emergency
evacuations and instructions
Responsibility is shared by the operator and group leader.
A number of different types of groups participate in field or activity trips. Each group may have one or more different types of group leaders. Typical groups and group leaders: • Team/Coach • Class/Teacher • Group/Chaperon
Responsibility is shared by the operator and group leader.
Operator responsibilities: • Obeying all safety regulations. • Reviewing bus rules, including what to do at a railroad crossing. • Controlling emergency situations. • Reviewing emergency evacuation plan with all passengers before each trip is a requirement. • Maintaining safe vehicle condition, performing necessary pre-trip inspections. Group leader responsibilities: • Relaying trip plans. • Providing passenger information. including student list and any medical conditions. • Supervising at food stops. • Field trip activity. • Headcounts/Assembly of students. Always encourage the leader to do a head count after
each stop. • Setting a designated meeting place in the event someone becomes separated from the group. • Assisting with emergency evacuations and instructions in the event an emergency arises.
Slide 7
XII-7
Responsibilities
Joint Responsibilities of Group Leaders and Operators
Select rest, food, and fuel stops
Maintain passenger control
Ensure that all aisles are clear and items secured
Aisles must never be blocked with coolers and equipment (rule 6A-3.0171, F.A.C.)
Student Responsibilities
To conduct themselves in the same manner as they conduct themselves in the classroom
Joint Responsibilities of Group Leaders and Operators: • Select rest, food and fuel stops before departure. • Maintain passenger control during the trip. • Ensure that all aisles are clear and items secured. • Aisles must never be blocked with coolers and equipment (rule 6A-3.0171, F.A.C.). Student Responsibilities: • To conduct themselves in the same manner as they conduct themselves in the classroom.
Slide 8
XII-8
Problem-Causing Situations
Plan sufficient rest stops
Expect the passengers to be excited
Discuss rules and expectations with group leaders before departing on trip
Problem-Causing Situations: Problems may arise while on a field or activity trip because of the nature and length of the trip. Unless plans are made and precautions taken, passenger behavior problems may arise that could get out of control. • Plan sufficient rest stops. • Expect the passengers to be excited. • Discuss rules and expectations with group leaders before departing on the trip. The following conditions should be identified: • Nighttime driving • Fatigue • Excitability • Emotional state • Discomfort • Misunderstanding guidelines
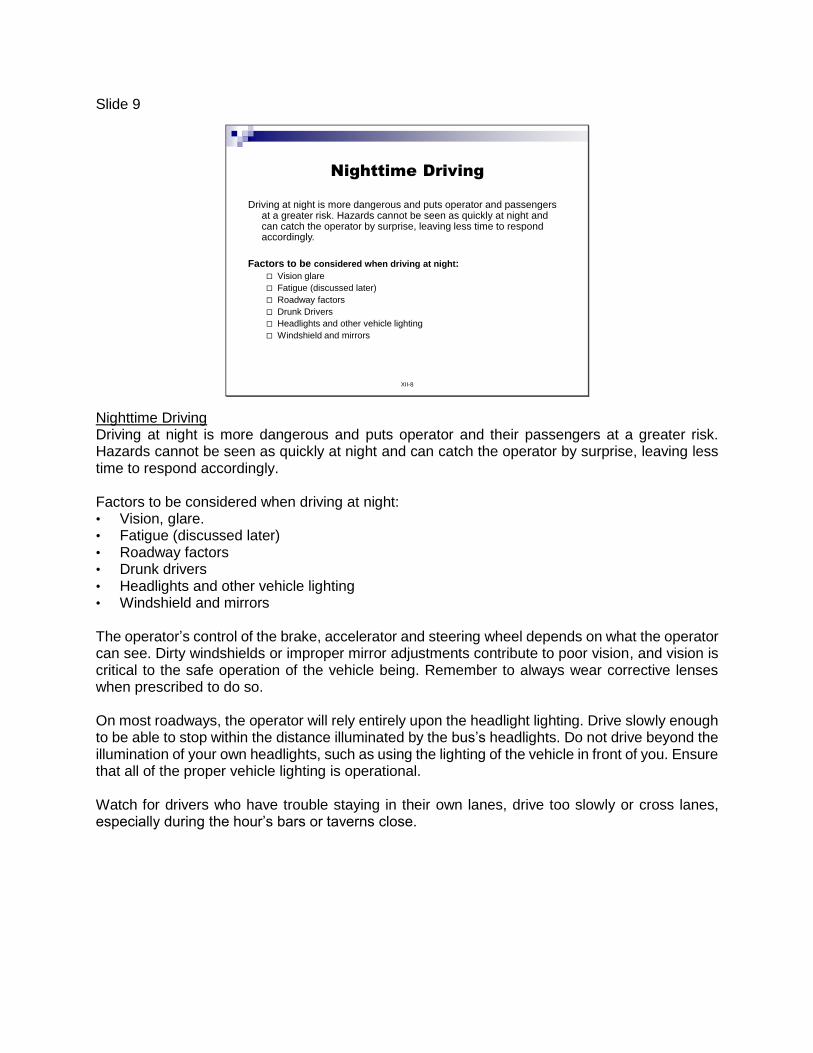
Slide 9
XII-8
Nighttime Driving
Driving at night is more dangerous and puts operator and passengers at a greater risk. Hazards cannot be seen as quickly at night and can catch the operator by surprise, leaving less time to respond accordingly.
Factors to be considered when driving at night:
Vision glare
Fatigue (discussed later)
Roadway factors
Drunk Drivers
Headlights and other vehicle lighting
Windshield and mirrors
Nighttime Driving Driving at night is more dangerous and puts operator and their passengers at a greater risk. Hazards cannot be seen as quickly at night and can catch the operator by surprise, leaving less time to respond accordingly. Factors to be considered when driving at night: • Vision, glare. • Fatigue (discussed later) • Roadway factors • Drunk drivers • Headlights and other vehicle lighting • Windshield and mirrors The operator’s control of the brake, accelerator and steering wheel depends on what the operator can see. Dirty windshields or improper mirror adjustments contribute to poor vision, and vision is critical to the safe operation of the vehicle being. Remember to always wear corrective lenses when prescribed to do so. On most roadways, the operator will rely entirely upon the headlight lighting. Drive slowly enough to be able to stop within the distance illuminated by the bus’s headlights. Do not drive beyond the illumination of your own headlights, such as using the lighting of the vehicle in front of you. Ensure that all of the proper vehicle lighting is operational. Watch for drivers who have trouble staying in their own lanes, drive too slowly or cross lanes, especially during the hour’s bars or taverns close.
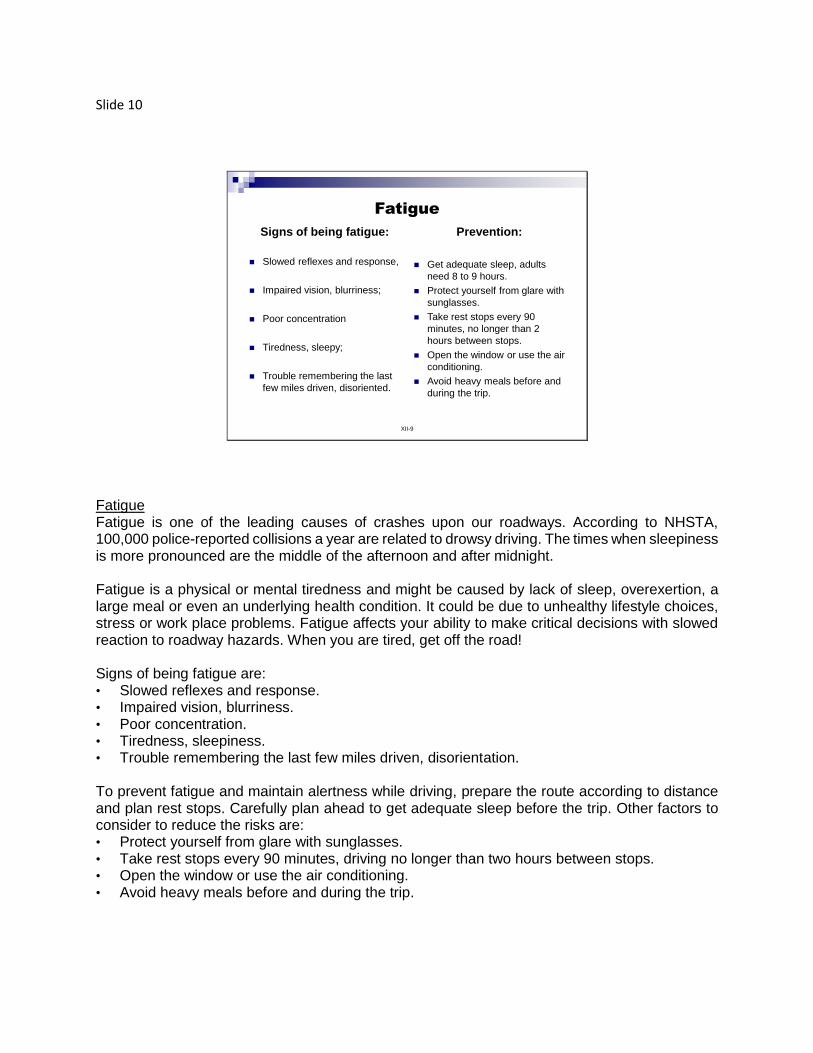
Slide 10
Fatigue
Signs of being fatigue:
Slowed reflexes and response,
Impaired vision, blurriness;
Poor concentration
Tiredness, sleepy;
Trouble remembering the last
few miles driven, disoriented.
Prevention:
Get adequate sleep, adults
need 8 to 9 hours.
Protect yourself from glare with
sunglasses.
Take rest stops every 90
minutes, no longer than 2
hours between stops.
Open the window or use the air
conditioning.
Avoid heavy meals before and
during the trip.
XII-9
Fatigue Fatigue is one of the leading causes of crashes upon our roadways. According to NHSTA, 100,000 police-reported collisions a year are related to drowsy driving. The times when sleepiness is more pronounced are the middle of the afternoon and after midnight. Fatigue is a physical or mental tiredness and might be caused by lack of sleep, overexertion, a large meal or even an underlying health condition. It could be due to unhealthy lifestyle choices, stress or work place problems. Fatigue affects your ability to make critical decisions with slowed reaction to roadway hazards. When you are tired, get off the road! Signs of being fatigue are: • Slowed reflexes and response. • Impaired vision, blurriness. • Poor concentration. • Tiredness, sleepiness. • Trouble remembering the last few miles driven, disorientation. To prevent fatigue and maintain alertness while driving, prepare the route according to distance and plan rest stops. Carefully plan ahead to get adequate sleep before the trip. Other factors to consider to reduce the risks are: • Protect yourself from glare with sunglasses. • Take rest stops every 90 minutes, driving no longer than two hours between stops. • Open the window or use the air conditioning. • Avoid heavy meals before and during the trip.
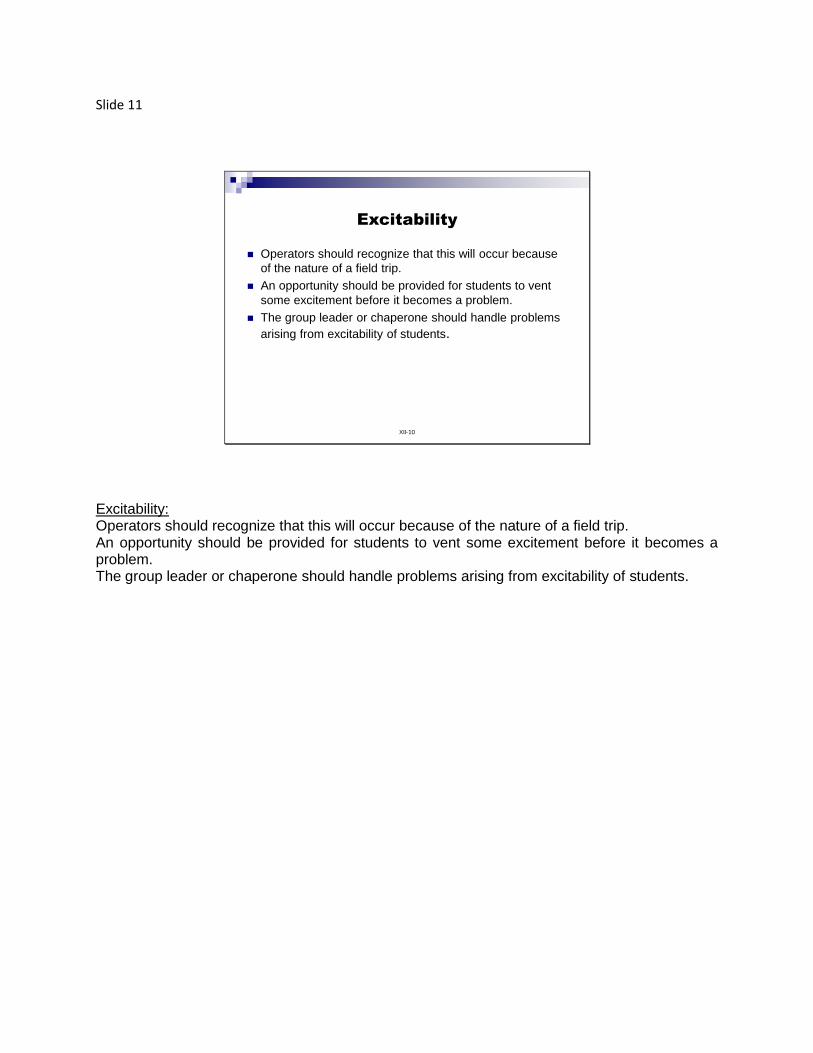
Slide 11
XII-10
Excitability
Operators should recognize that this will occur because
of the nature of a field trip.
An opportunity should be provided for students to vent
some excitement before it becomes a problem.
The group leader or chaperone should handle problems
arising from excitability of students.
Excitability: Operators should recognize that this will occur because of the nature of a field trip. An opportunity should be provided for students to vent some excitement before it becomes a problem. The group leader or chaperone should handle problems arising from excitability of students.
Slide 12
XII-11
Depression
Operators should recognize that this condition could occur and call it to the attention of the group leader or chaperone.
The group leader or chaperon should be alert for this condition and deal with it on a one-to-one basis with the affected student.
Emotional State: Operators should recognize that this condition could occur and call it to the attention of the group leader or chaperone. The group leader or chaperone should be alert for this condition and deal with it on a one-to-one basis with the affected student.
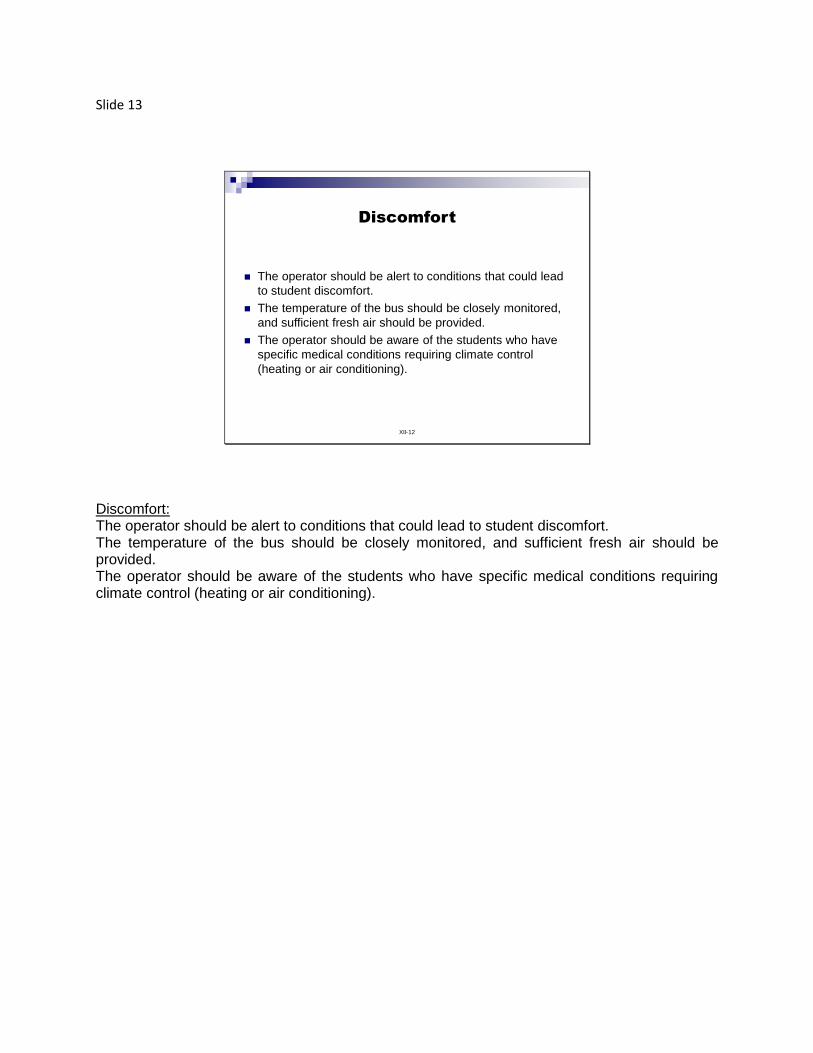
Slide 13
XII-12
Discomfort
The operator should be alert to conditions that could lead
to student discomfort.
The temperature of the bus should be closely monitored,
and sufficient fresh air should be provided.
The operator should be aware of the students who have
specific medical conditions requiring climate control
(heating or air conditioning).
Discomfort: The operator should be alert to conditions that could lead to student discomfort. The temperature of the bus should be closely monitored, and sufficient fresh air should be provided. The operator should be aware of the students who have specific medical conditions requiring climate control (heating or air conditioning).
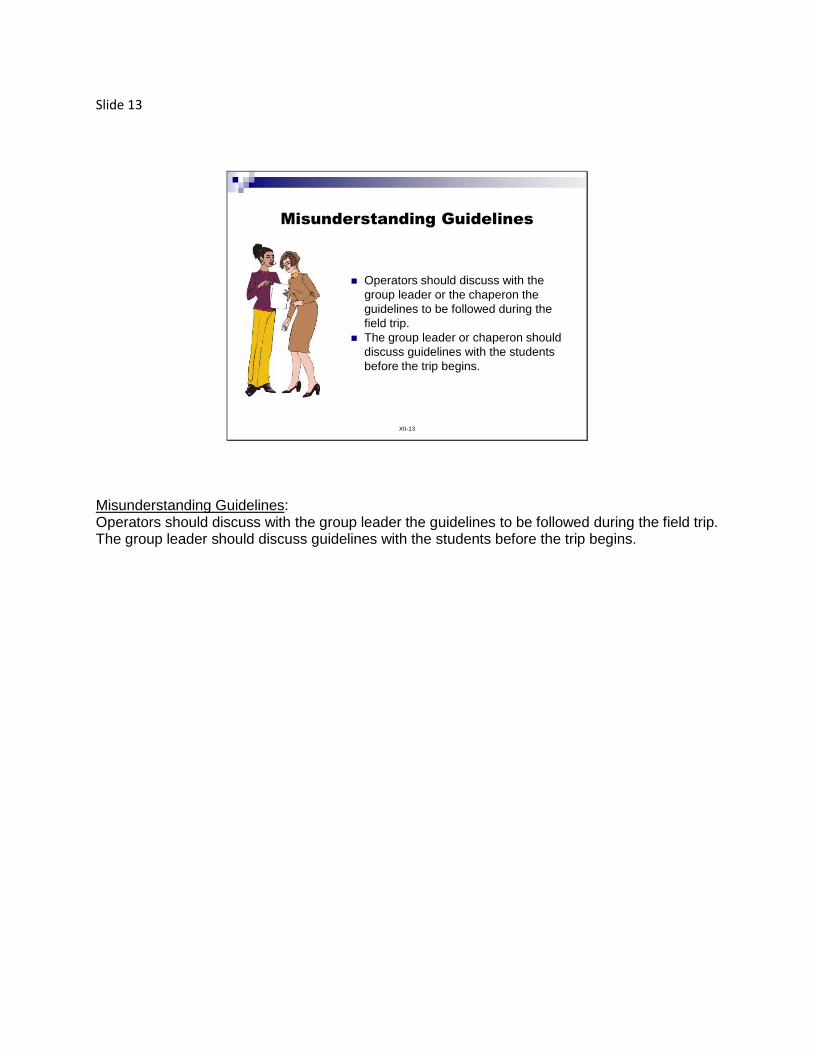
Slide 13
XII-13
Misunderstanding Guidelines
Operators should discuss with the
group leader or the chaperon the
guidelines to be followed during the
field trip.
The group leader or chaperon should
discuss guidelines with the students
before the trip begins.
Misunderstanding Guidelines: Operators should discuss with the group leader the guidelines to be followed during the field trip. The group leader should discuss guidelines with the students before the trip begins.

Slide 14
XII-14
Summary
Route planning
Emergency preparations
Extra risks
Responsibilities
Problem-causing situations
In this unit, we examined many topics that are necessary to consider when planning and conducting any field or activity trip. If adequate attention is paid to planning the trip and precautions are taken to avoid problem-producing situations, the trip should be a pleasant experience for all participants. Without planning, things can easily get out of hand. Be prepared and enjoy a pleasant trip.
FIELD TRIP EVACUATION PROCEDURES Can also be used for activity trips
To ensure the safety of school bus passengers in an actual emergency, every school bus operator assigned to transport students on field trips or activity trips will assign an evacuation team before each trip. The team may consist of teachers, coaches, students and any other passengers. A roster should be provided to the driver accounting for all passengers by the senior person in charge of the group that is being transported.
Passengers assigned to evacuation teams must be seated where they can effectively carry out their responsibilities in an emergency.
The following is a procedure for all operators on managing the presentation of their evacuation procedure for a field trip or activity trip.
A. After the bus is completely loaded and you have the attention of all your
passengers, announce that you are going to go over the Emergency Evacuation Procedure. If you have very young passengers, they may not understand “evacuation,” so you may wish to explain , “We need to understand how to get off the bus quickly and safely in case of an emergency.” Try not to use words like “fire” or “accident,” as many passengers might become alarmed. Also, mention that an emergency is a remote possibility, but that you want to be prepared.
B. Select three passengers in the front and three in the rear of the bus to be
your leaders and helpers. If you have adults on board, make sure you use them as leaders, as they will understand your instructions and will be a great help to you in case of an actual emergency. Select students who have already gone through an evacuation at school or students who are regular bus riders.
C. Explain to the selected passengers in detail their functions as leaders and
helpers so you won’t experience any problems if an emergency arises. Most importantly, show them how the emergency doors and windows open, and advise the leaders that they must take the passengers at least 100 feet from the bus in the case of an emergency. Don’t take for granted that everyone knows where the emergency exits are and how they open.
D. The final step is to demonstrate the back door exit. Otherwise, the
passengers who have not gone through an actual evacuation may attempt to jump, resulting in a severe injury to the passengers or your helpers.
Once you have finished your evacuation presentation, change the subject a little by saying, “Let’s get started now on our great trip.” The entire process should only take five minutes.

Slide 1
UNIT 13
SCHOOL BUS DRIVER
BEHIND-THE-WHEEL TRAINING
EQUIPMENT: • Commercial Operator Simulator • School Bus
REFERENCES: • 49 CFR, Appendix B to Part 380, Class B CDL Training Requirements • Florida Commercial Driver License Manual, revised 2019
• District-Approved Training Checklist OBJECTIVES—the operator will be able to: • Demonstrate proper seat, seatbelt and mirror adjustments; • Demonstrate basic range operation of the commercial motor vehicle; • Demonstrate and master behind-the-wheel operation; • Explain different operator techniques for roadway operation; and • Prepare for the required skills test to become a licensed operator.
Slide 2
Behind The Wheel Training
Topics to be discussed:
Getting behind the wheel and making initial adjustments.
Practicing basic maneuvers on the range.
Basic behind the wheel roadway driving.
Preparing for Basic Control Skills Test.
Preparing for skills Road Test.
Behind the Wheel Training Topics to be discussed: • Getting behind the wheel and initial adjustments. • Practicing basic maneuvers on the range. • Basic behind the wheel roadway driving. • Preparing for the Basic Control Skills Test. • Preparing for the skills Road Test.
Slide 3
Getting Behind The Wheel
Making necessary adjustments:
Proper operator seat and steering wheel adjustments to
ensure safe handling and operation.
Proper mirror adjustment: flat/convex (side view mirror),
crossover/crosswalk mirror and student mirror must be
adjusted to the operator.
Proper seatbelt adjustment and use.
Getting Behind the Wheel The operator must correctly adjust and wear the seatbelt and properly adjust all of the mirrors before operating the school bus. Making necessary adjustments: • Proper operator seat and steering wheel adjustments to ensure safe handling and operation. • Proper mirror adjustment: flat/convex (side view mirror), crossover/crosswalk mirror and
student mirror must be adjusted for the operator. • Proper seatbelt adjustment and use. Proper operator seat and steering wheel adjustments should be set for optimum visibility, arms reach and seating comfort for the bus operator. Slide the seat to a forward position that allows the operator's back to rest flat against the seat back and arms slightly bend at the elbows. There should be unrestricted movement of the steering wheel itself. The steering wheel should be low enough to have a clear view over it, yet not resting in the operator’s lap. The height adjustment of the seat should allow the operator's thigh to relax and be supported by the seat bottom. The operator's feet should rest flat on the floorboard and enable the operator to fully operate both pedals without discomfort or having to extend the toes. Proper mirror adjustments MUST allow the operator a clear view around the bus. Refer to Unit 3 for appropriate mirror adjustments. The operator should ask for assistance adjusting the crossover/crosswalk mirrors, which are not adjustable from inside the operator's area. The operator’s seatbelt should be snug and securely fastened without restricting movement needed to operate the school bus. The shoulder strap should come across the front of his/her left shoulder; never place the shoulder strap behind them
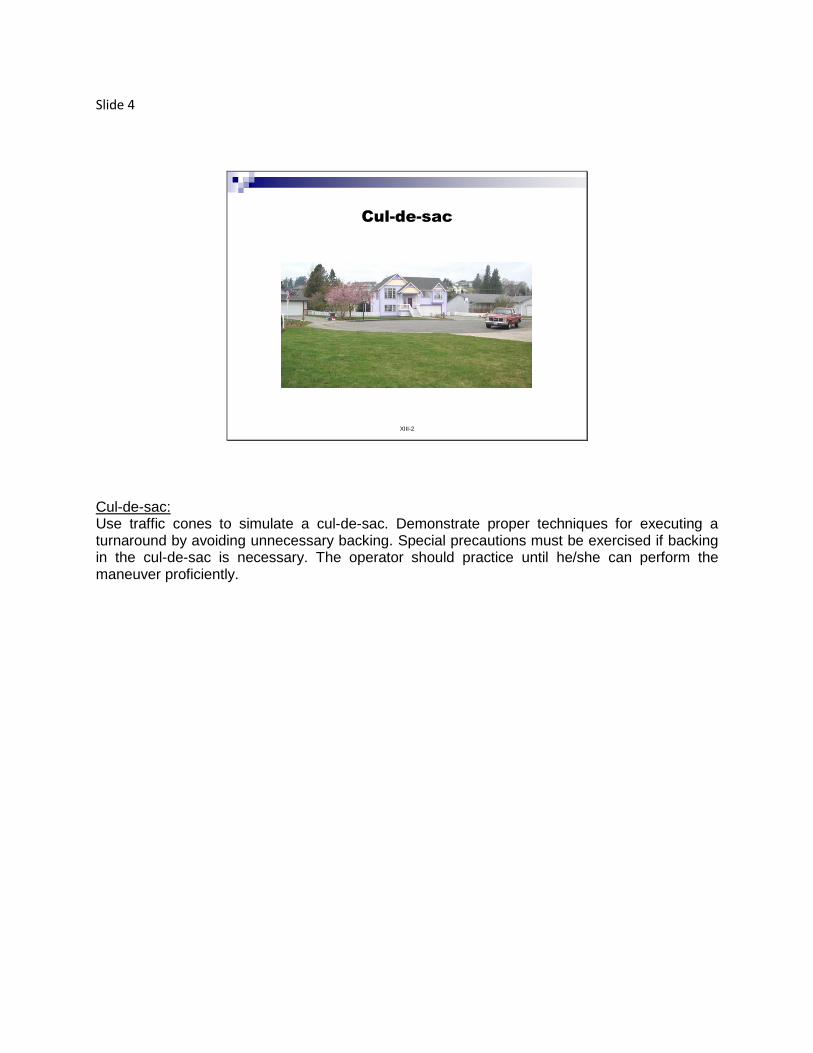
Slide 4
XIII-2
Cul-de-sac
Cul-de-sac: Use traffic cones to simulate a cul-de-sac. Demonstrate proper techniques for executing a turnaround by avoiding unnecessary backing. Special precautions must be exercised if backing in the cul-de-sac is necessary. The operator should practice until he/she can perform the maneuver proficiently.
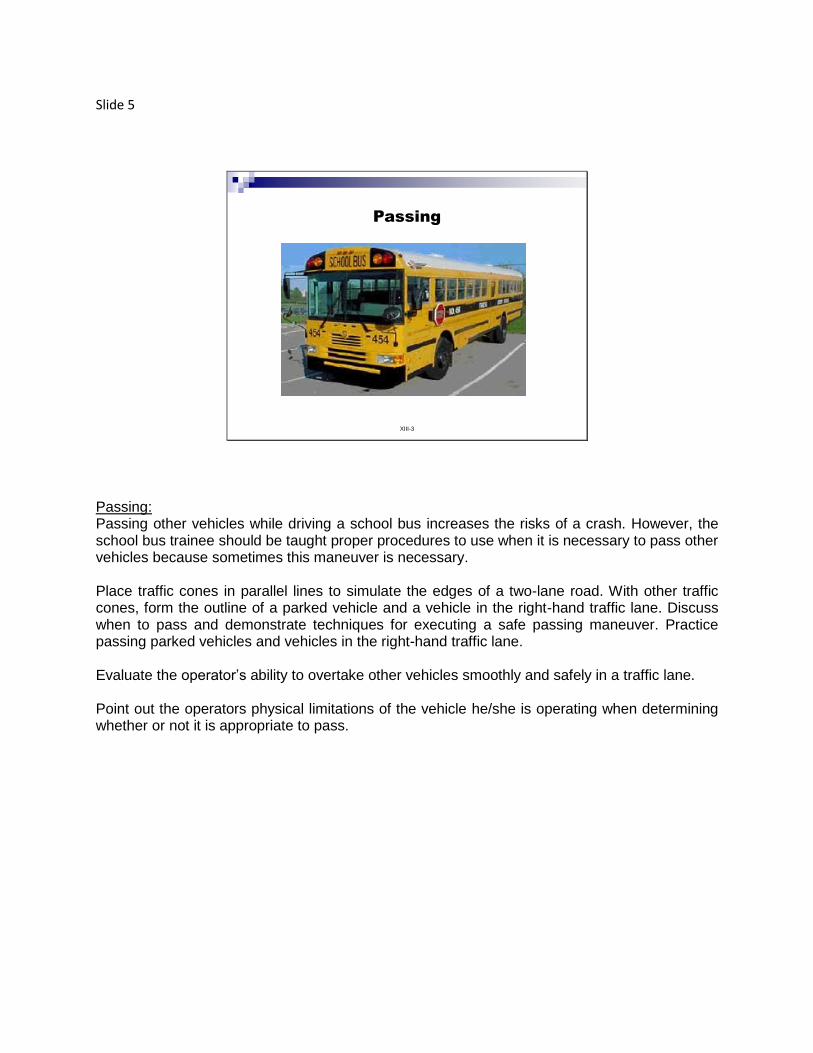
Slide 5
XIII-3
Passing
Passing: Passing other vehicles while driving a school bus increases the risks of a crash. However, the school bus trainee should be taught proper procedures to use when it is necessary to pass other vehicles because sometimes this maneuver is necessary. Place traffic cones in parallel lines to simulate the edges of a two-lane road. With other traffic cones, form the outline of a parked vehicle and a vehicle in the right-hand traffic lane. Discuss when to pass and demonstrate techniques for executing a safe passing maneuver. Practice passing parked vehicles and vehicles in the right-hand traffic lane. Evaluate the operator’s ability to overtake other vehicles smoothly and safely in a traffic lane. Point out the operators physical limitations of the vehicle he/she is operating when determining whether or not it is appropriate to pass.
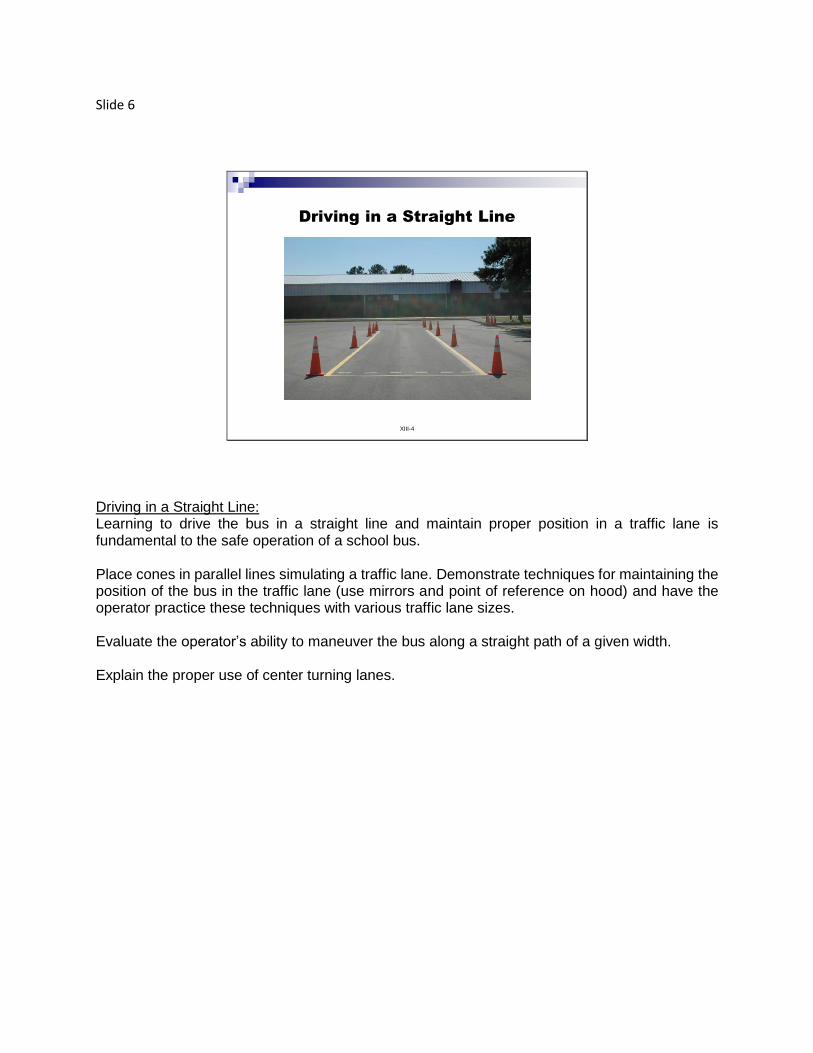
Slide 6
XIII-4
Driving in a Straight Line
Driving in a Straight Line: Learning to drive the bus in a straight line and maintain proper position in a traffic lane is fundamental to the safe operation of a school bus. Place cones in parallel lines simulating a traffic lane. Demonstrate techniques for maintaining the position of the bus in the traffic lane (use mirrors and point of reference on hood) and have the operator practice these techniques with various traffic lane sizes. Evaluate the operator’s ability to maneuver the bus along a straight path of a given width. Explain the proper use of center turning lanes.
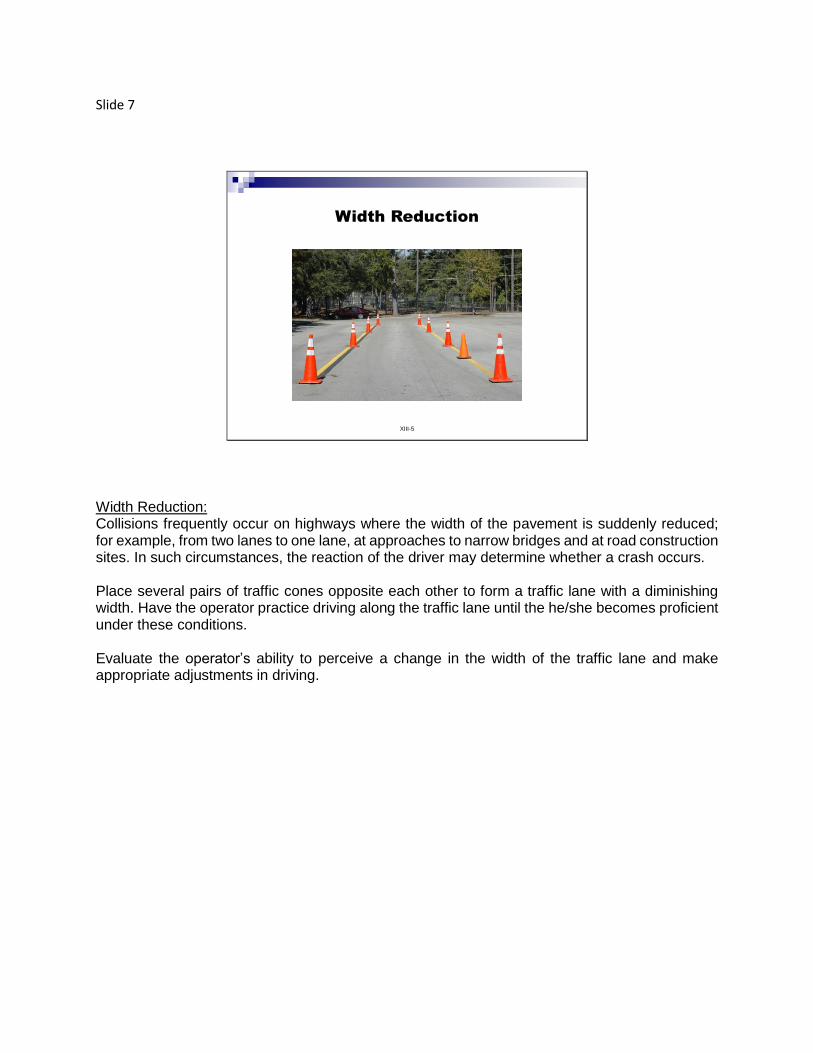
Slide 7
XIII-5
Width Reduction
Width Reduction: Collisions frequently occur on highways where the width of the pavement is suddenly reduced; for example, from two lanes to one lane, at approaches to narrow bridges and at road construction sites. In such circumstances, the reaction of the driver may determine whether a crash occurs. Place several pairs of traffic cones opposite each other to form a traffic lane with a diminishing width. Have the operator practice driving along the traffic lane until the he/she becomes proficient under these conditions. Evaluate the operator’s ability to perceive a change in the width of the traffic lane and make appropriate adjustments in driving.
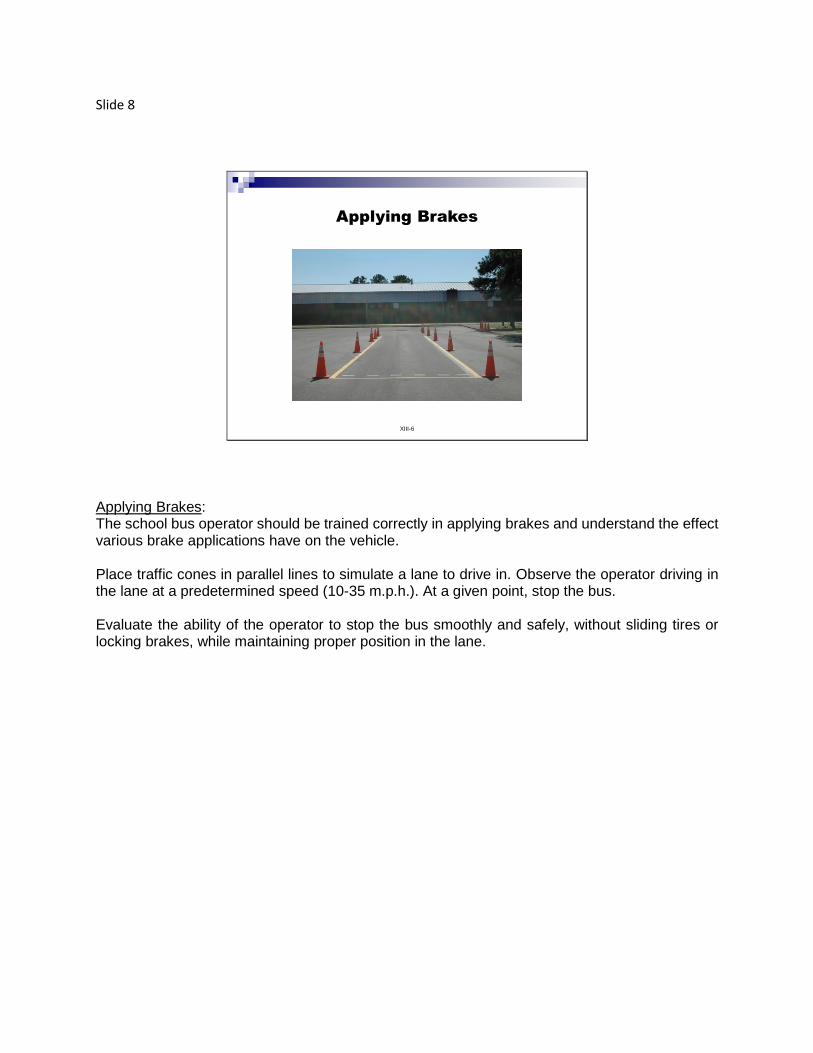
Slide 8
XIII-6
Applying Brakes
Applying Brakes: The school bus operator should be trained correctly in applying brakes and understand the effect various brake applications have on the vehicle. Place traffic cones in parallel lines to simulate a lane to drive in. Observe the operator driving in the lane at a predetermined speed (10-35 m.p.h.). At a given point, stop the bus. Evaluate the ability of the operator to stop the bus smoothly and safely, without sliding tires or locking brakes, while maintaining proper position in the lane.
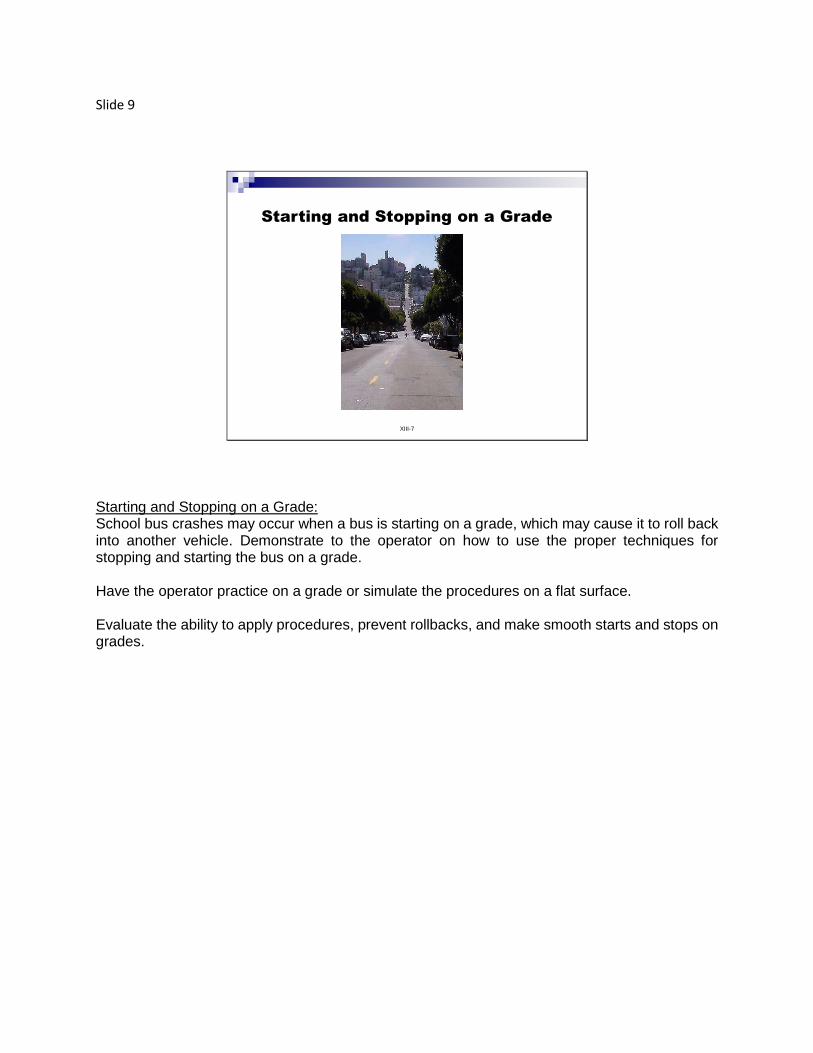
Slide 9
XIII-7
Starting and Stopping on a Grade
Starting and Stopping on a Grade: School bus crashes may occur when a bus is starting on a grade, which may cause it to roll back into another vehicle. Demonstrate to the operator on how to use the proper techniques for stopping and starting the bus on a grade. Have the operator practice on a grade or simulate the procedures on a flat surface. Evaluate the ability to apply procedures, prevent rollbacks, and make smooth starts and stops on grades.
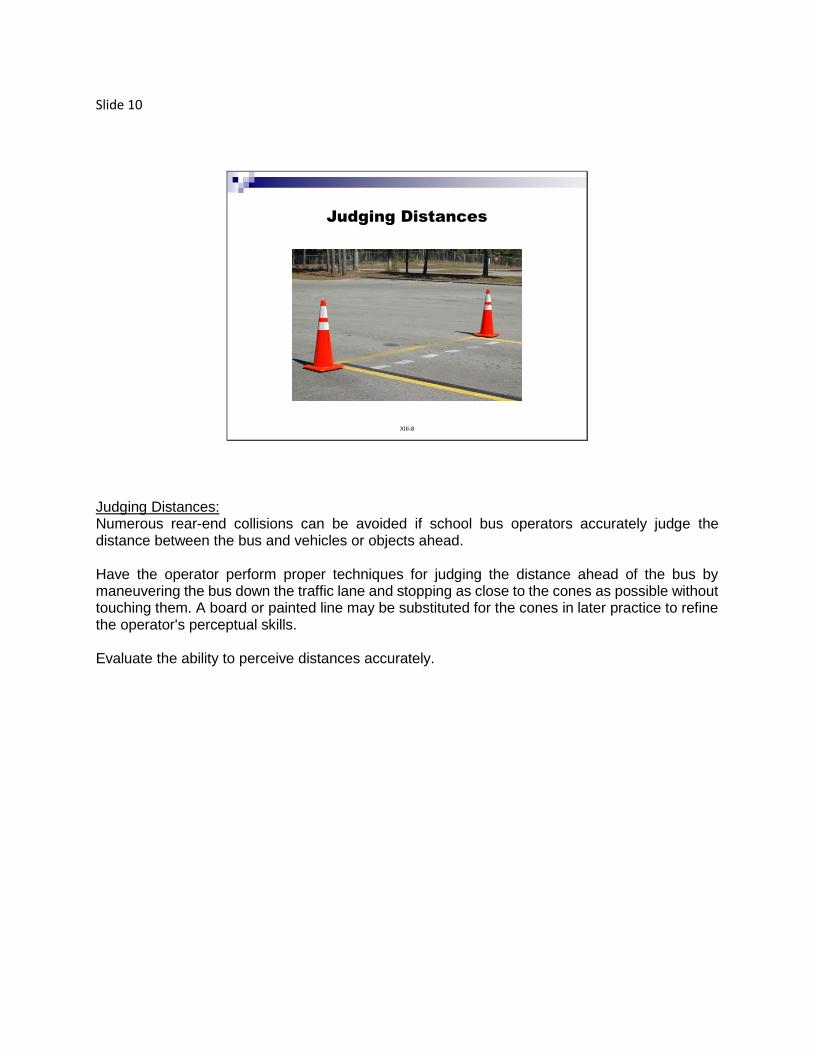
Slide 10
XIII-8
Judging Distances
Judging Distances: Numerous rear-end collisions can be avoided if school bus operators accurately judge the distance between the bus and vehicles or objects ahead. Have the operator perform proper techniques for judging the distance ahead of the bus by maneuvering the bus down the traffic lane and stopping as close to the cones as possible without touching them. A board or painted line may be substituted for the cones in later practice to refine the operator's perceptual skills. Evaluate the ability to perceive distances accurately.
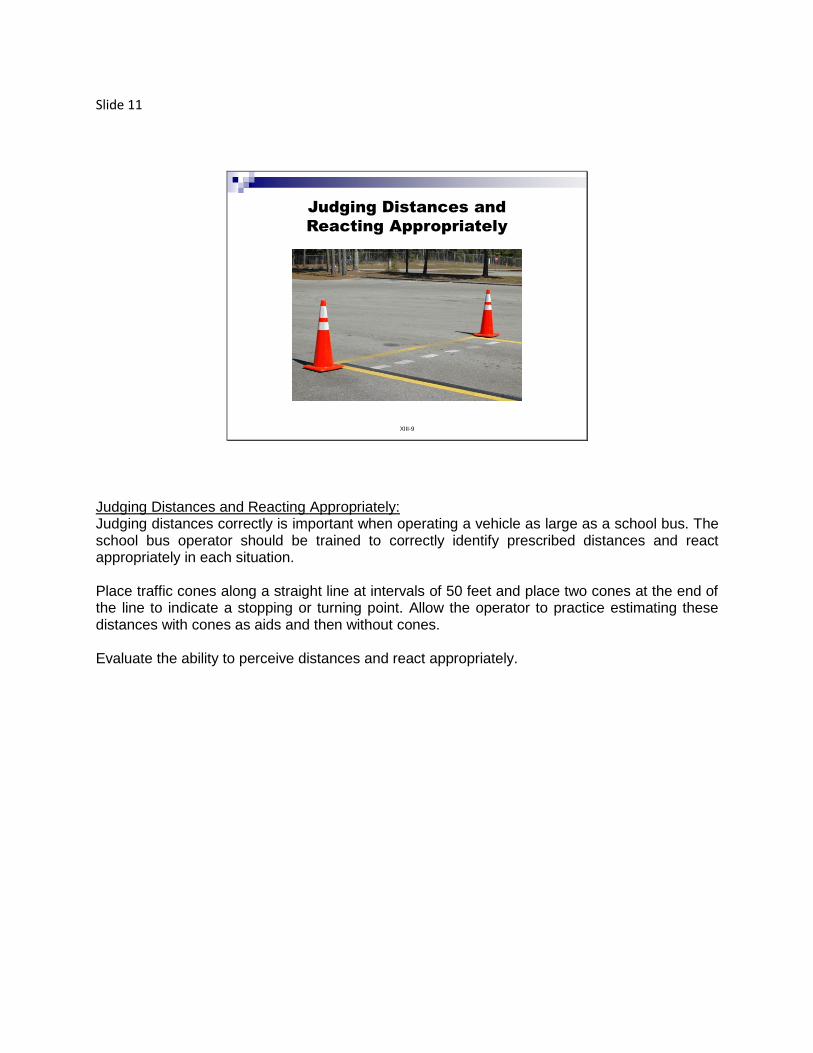
Slide 11
XIII-9
Judging Distances and
Reacting Appropriately
Judging Distances and Reacting Appropriately: Judging distances correctly is important when operating a vehicle as large as a school bus. The school bus operator should be trained to correctly identify prescribed distances and react appropriately in each situation. Place traffic cones along a straight line at intervals of 50 feet and place two cones at the end of the line to indicate a stopping or turning point. Allow the operator to practice estimating these distances with cones as aids and then without cones. Evaluate the ability to perceive distances and react appropriately.
Slide 12
XIII-10
Steering Effectively
Steering Effectively: A "10 and 2" position on the steering wheel, with both hands on the wheel, is recommended by the NHTSA. The push/pull method of steering should be practiced until it becomes a natural act for the operator. Place traffic cones in a straight line and at measured distances of 35 feet apart. Enter the course with the first cone on the right side of the vehicle, the second cone on the left side of the vehicle and the third cone on the right side, continuing to alternate sides, requiring the operator to weave the vehicle through the cones at a constant speed. Optional: As an advanced application, practice backing the vehicle around at least three of the measured cones. Evaluate vehicle position, smoothness and the number of cones struck.
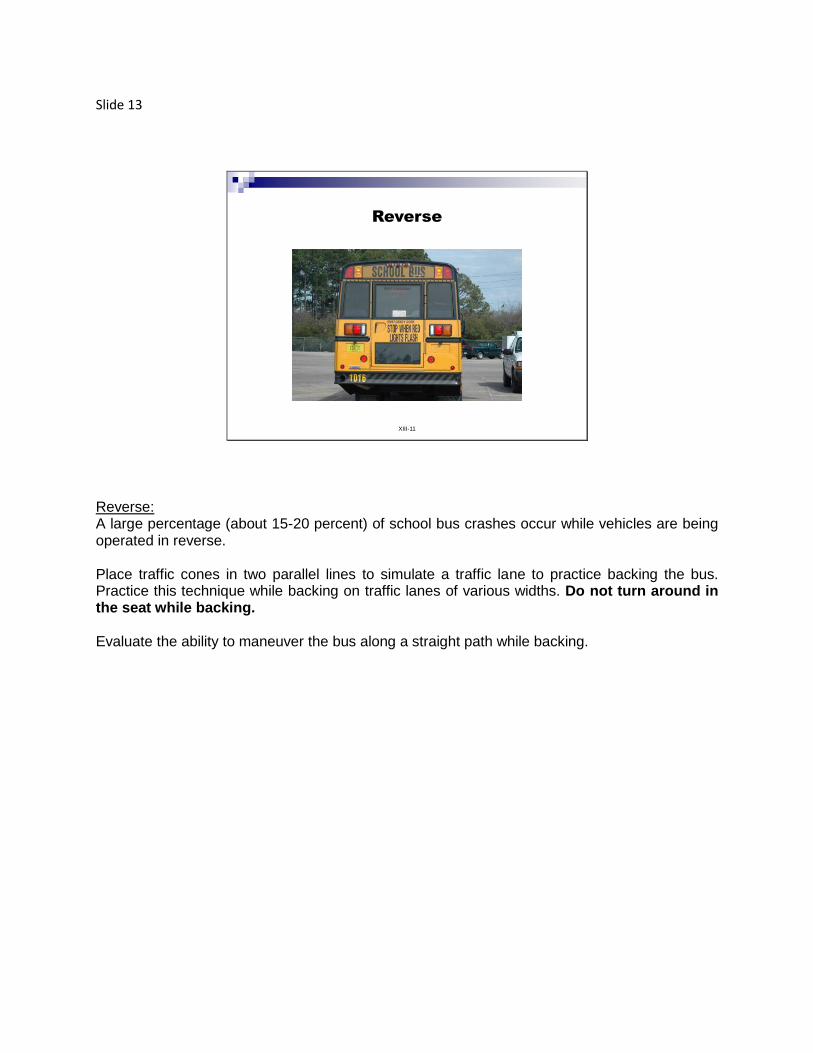
Slide 13
XIII-11
Reverse
Reverse: A large percentage (about 15-20 percent) of school bus crashes occur while vehicles are being operated in reverse. Place traffic cones in two parallel lines to simulate a traffic lane to practice backing the bus. Practice this technique while backing on traffic lanes of various widths. Do not turn around in the seat while backing. Evaluate the ability to maneuver the bus along a straight path while backing.
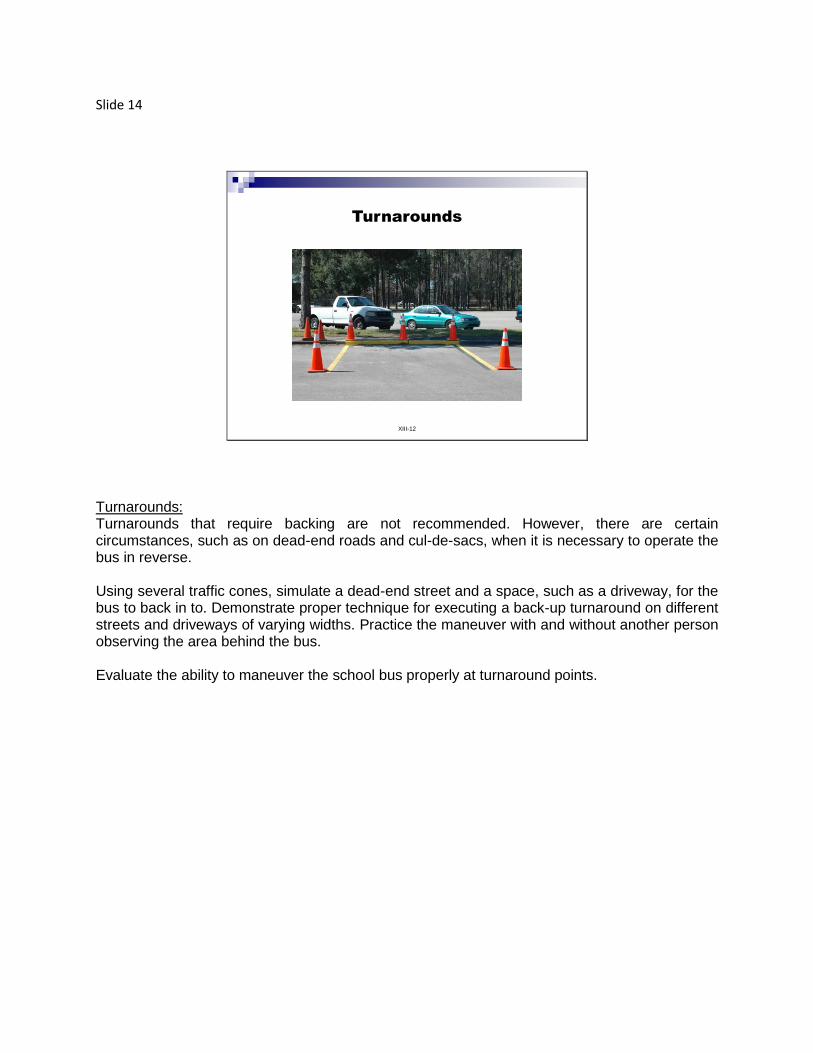
Slide 14
XIII-12
Turnarounds
Turnarounds: Turnarounds that require backing are not recommended. However, there are certain circumstances, such as on dead-end roads and cul-de-sacs, when it is necessary to operate the bus in reverse. Using several traffic cones, simulate a dead-end street and a space, such as a driveway, for the bus to back in to. Demonstrate proper technique for executing a back-up turnaround on different streets and driveways of varying widths. Practice the maneuver with and without another person observing the area behind the bus. Evaluate the ability to maneuver the school bus properly at turnaround points.
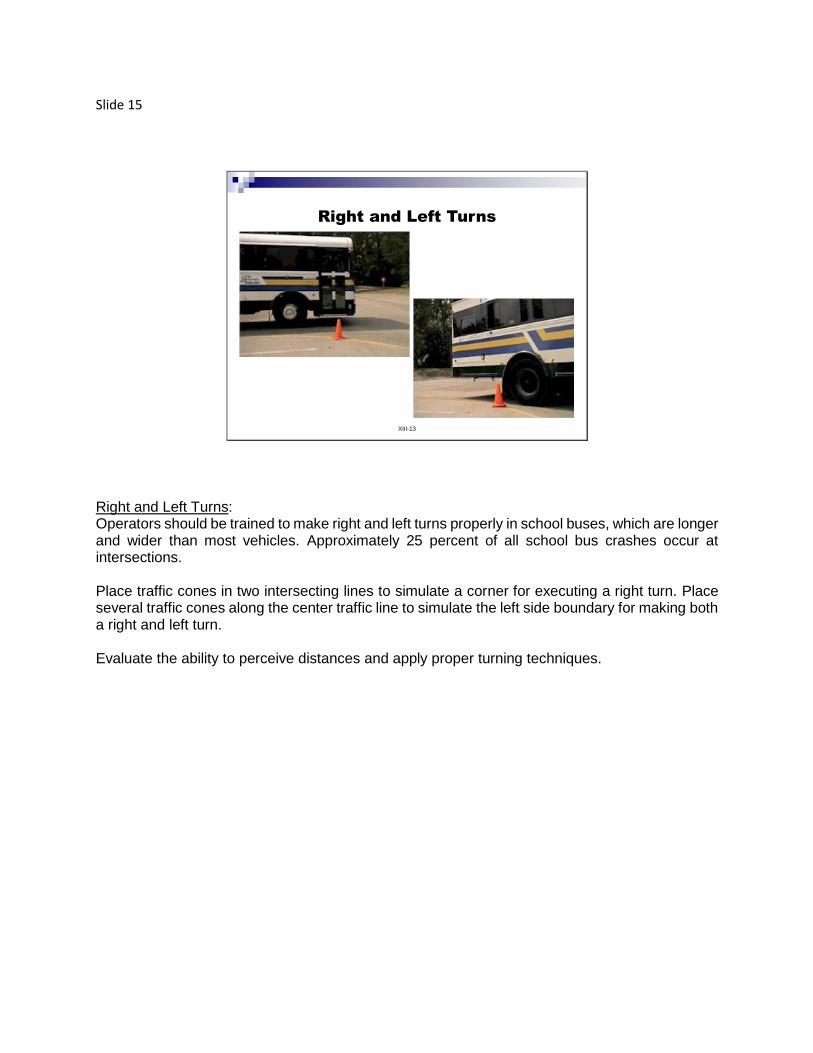
Slide 15
XIII-13
Right and Left Turns
Right and Left Turns: Operators should be trained to make right and left turns properly in school buses, which are longer and wider than most vehicles. Approximately 25 percent of all school bus crashes occur at intersections. Place traffic cones in two intersecting lines to simulate a corner for executing a right turn. Place several traffic cones along the center traffic line to simulate the left side boundary for making both a right and left turn. Evaluate the ability to perceive distances and apply proper turning techniques.
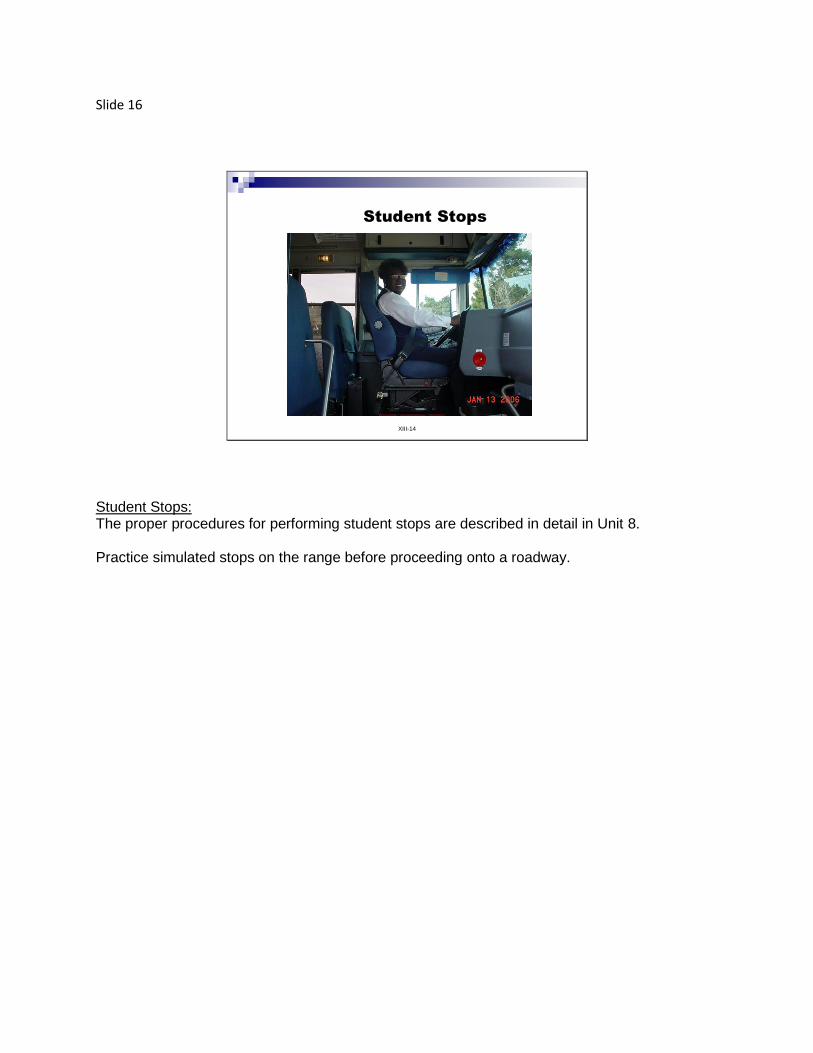
Slide 16
XIII-14
Student Stops
Student Stops: The proper procedures for performing student stops are described in detail in Unit 8. Practice simulated stops on the range before proceeding onto a roadway.
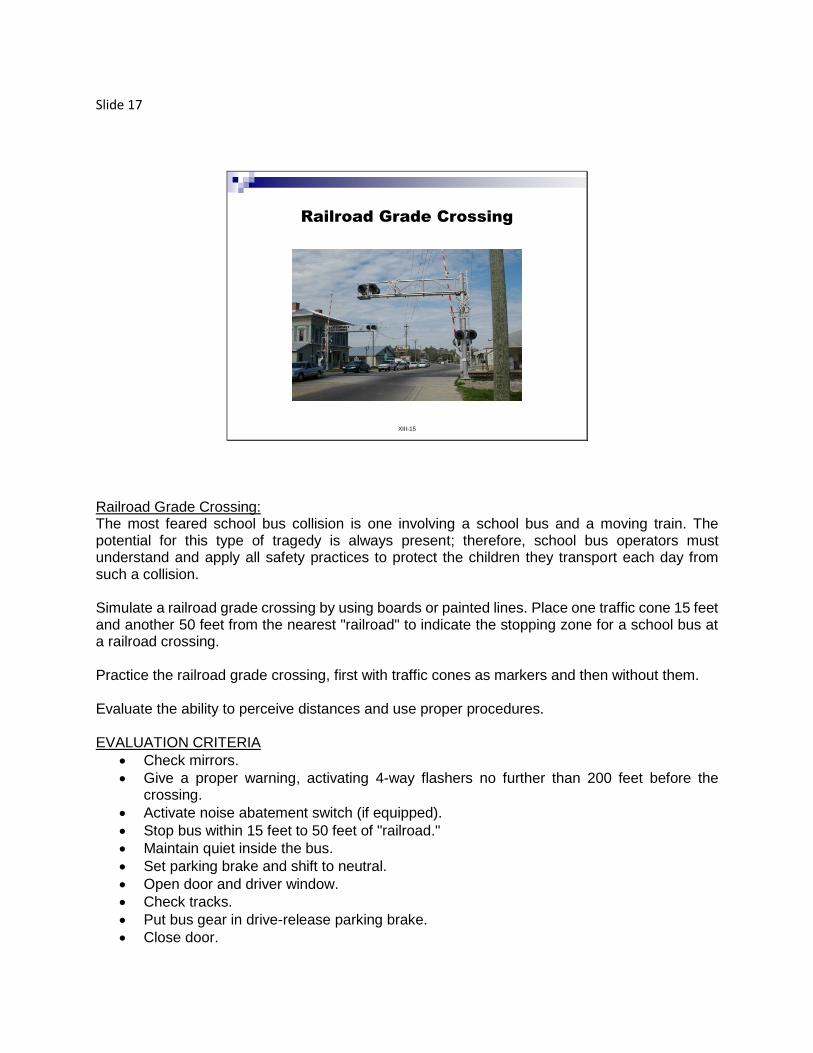
Slide 17
XIII-15
Railroad Grade Crossing
Railroad Grade Crossing: The most feared school bus collision is one involving a school bus and a moving train. The potential for this type of tragedy is always present; therefore, school bus operators must understand and apply all safety practices to protect the children they transport each day from such a collision. Simulate a railroad grade crossing by using boards or painted lines. Place one traffic cone 15 feet and another 50 feet from the nearest "railroad" to indicate the stopping zone for a school bus at a railroad crossing. Practice the railroad grade crossing, first with traffic cones as markers and then without them. Evaluate the ability to perceive distances and use proper procedures. EVALUATION CRITERIA
Check mirrors.
Give a proper warning, activating 4-way flashers no further than 200 feet before the crossing.
Activate noise abatement switch (if equipped).
Stop bus within 15 feet to 50 feet of "railroad."
Maintain quiet inside the bus.
Set parking brake and shift to neutral. Open door and driver window.
Check tracks.
Put bus gear in drive-release parking brake.
Close door.

Proceed with door closed.
Deactivate noise abatement switch (if equipped).
Deactivate 4-way flashers once clearing the last track. Estimate and practice needed outage space for the bus following the crossing and before an intersection.
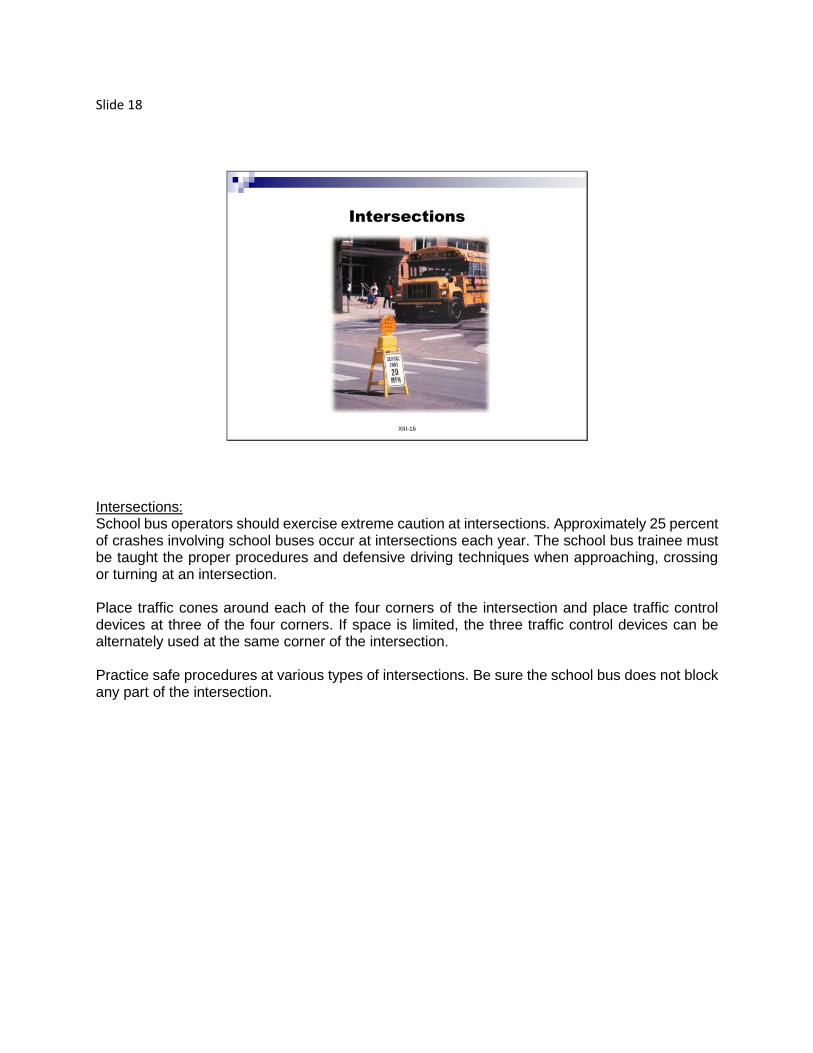
Slide 18
XIII-16
Intersections
Intersections: School bus operators should exercise extreme caution at intersections. Approximately 25 percent of crashes involving school buses occur at intersections each year. The school bus trainee must be taught the proper procedures and defensive driving techniques when approaching, crossing or turning at an intersection. Place traffic cones around each of the four corners of the intersection and place traffic control devices at three of the four corners. If space is limited, the three traffic control devices can be alternately used at the same corner of the intersection. Practice safe procedures at various types of intersections. Be sure the school bus does not block any part of the intersection.
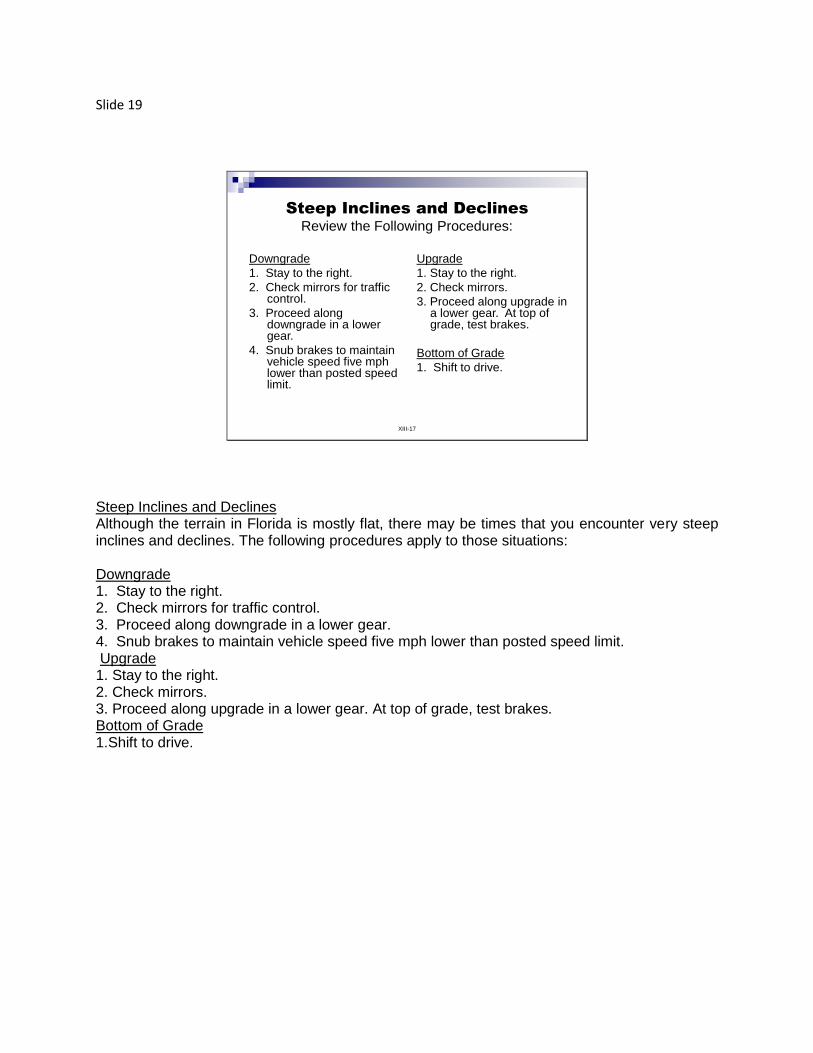
Slide 19
XIII-17
Steep Inclines and DeclinesReview the Following Procedures:
Downgrade
1. Stay to the right.
2. Check mirrors for traffic control.
3. Proceed along downgrade in a lower gear.
4. Snub brakes to maintain vehicle speed five mph lower than posted speed limit.
Upgrade
1. Stay to the right.
2. Check mirrors.
3. Proceed along upgrade in a lower gear. At top of grade, test brakes.
Bottom of Grade
1. Shift to drive.
Steep Inclines and Declines Although the terrain in Florida is mostly flat, there may be times that you encounter very steep inclines and declines. The following procedures apply to those situations: Downgrade 1. Stay to the right. 2. Check mirrors for traffic control. 3. Proceed along downgrade in a lower gear. 4. Snub brakes to maintain vehicle speed five mph lower than posted speed limit. Upgrade 1. Stay to the right. 2. Check mirrors. 3. Proceed along upgrade in a lower gear. At top of grade, test brakes. Bottom of Grade 1.Shift to drive.
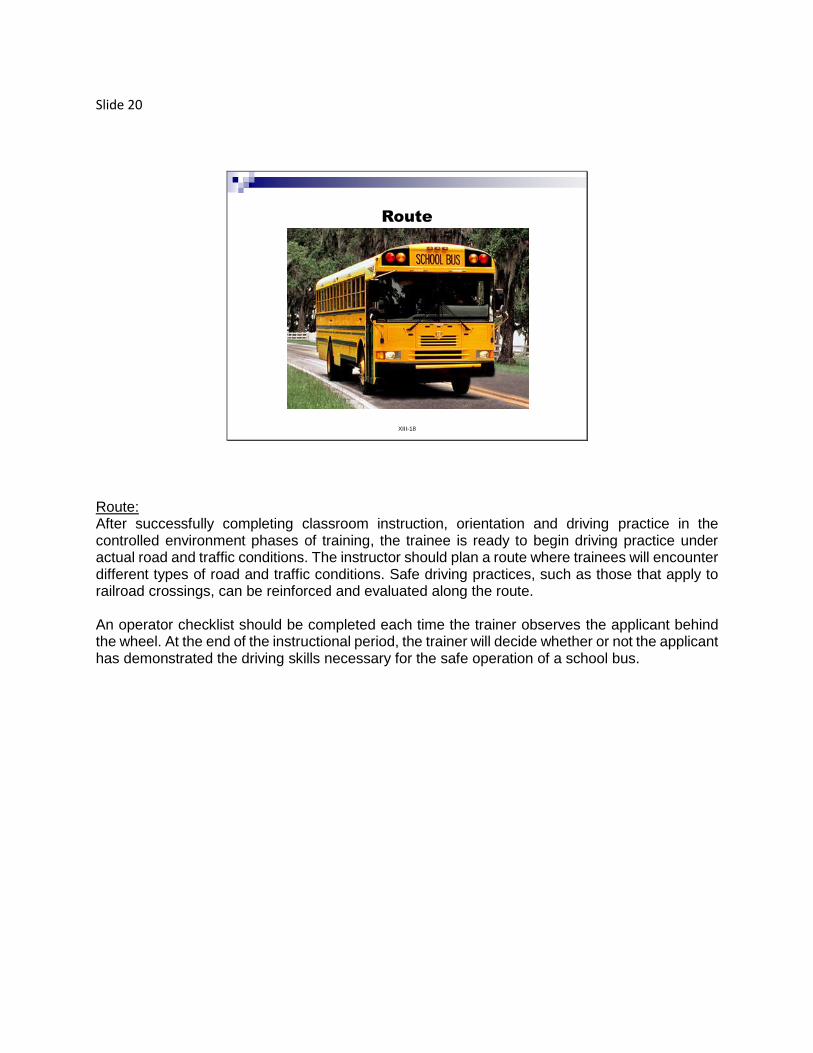
Slide 20
XIII-18
Route
Route: After successfully completing classroom instruction, orientation and driving practice in the controlled environment phases of training, the trainee is ready to begin driving practice under actual road and traffic conditions. The instructor should plan a route where trainees will encounter different types of road and traffic conditions. Safe driving practices, such as those that apply to railroad crossings, can be reinforced and evaluated along the route. An operator checklist should be completed each time the trainer observes the applicant behind the wheel. At the end of the instructional period, the trainer will decide whether or not the applicant has demonstrated the driving skills necessary for the safe operation of a school bus.
Slide 21
XIII-19
Summary
As training progresses, the trainee should experience different types of road and traffic conditions such as freeway, rural, urban, and night driving. The trainee also should become familiar with special hazards, such as steep grades, bad curves, or other characteristics of the locality that might affect the operation of the school bus. This experience should include practice driving on school grounds, at school loading zones, and leaving different school sites.
In addition, the trainee should have experience driving different types of buses, including van conversions and larger buses with different transmissions, brakes, and engines.
Summary As training progresses, the trainee should experience different types of road and traffic conditions such as freeway, rural, urban and night driving. The trainee also should become familiar with special hazards, such as steep grades, bad curves or other characteristics of the locality that might affect the operation of the school bus. This experience should include practicing driving on school grounds and loading zones, and leaving different school sites. In addition, the trainee should have experience driving different types of buses, including van conversions and larger buses with other transmissions, brakes and engines.
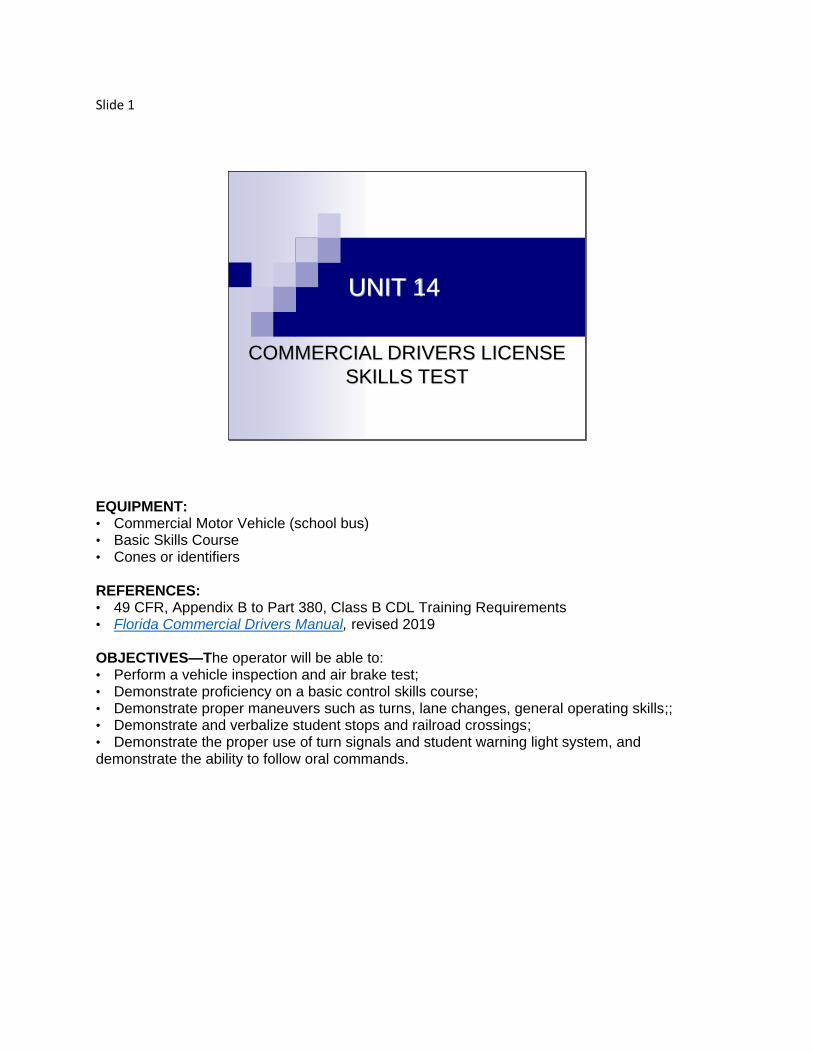
Slide 1
UNIT 14
COMMERCIAL DRIVERS LICENSE
SKILLS TEST
EQUIPMENT: • Commercial Motor Vehicle (school bus) • Basic Skills Course • Cones or identifiers REFERENCES: • 49 CFR, Appendix B to Part 380, Class B CDL Training Requirements • Florida Commercial Drivers Manual, revised 2019 OBJECTIVES—The operator will be able to: • Perform a vehicle inspection and air brake test; • Demonstrate proficiency on a basic control skills course; • Demonstrate proper maneuvers such as turns, lane changes, general operating skills;; • Demonstrate and verbalize student stops and railroad crossings; • Demonstrate the proper use of turn signals and student warning light system, and demonstrate the ability to follow oral commands.
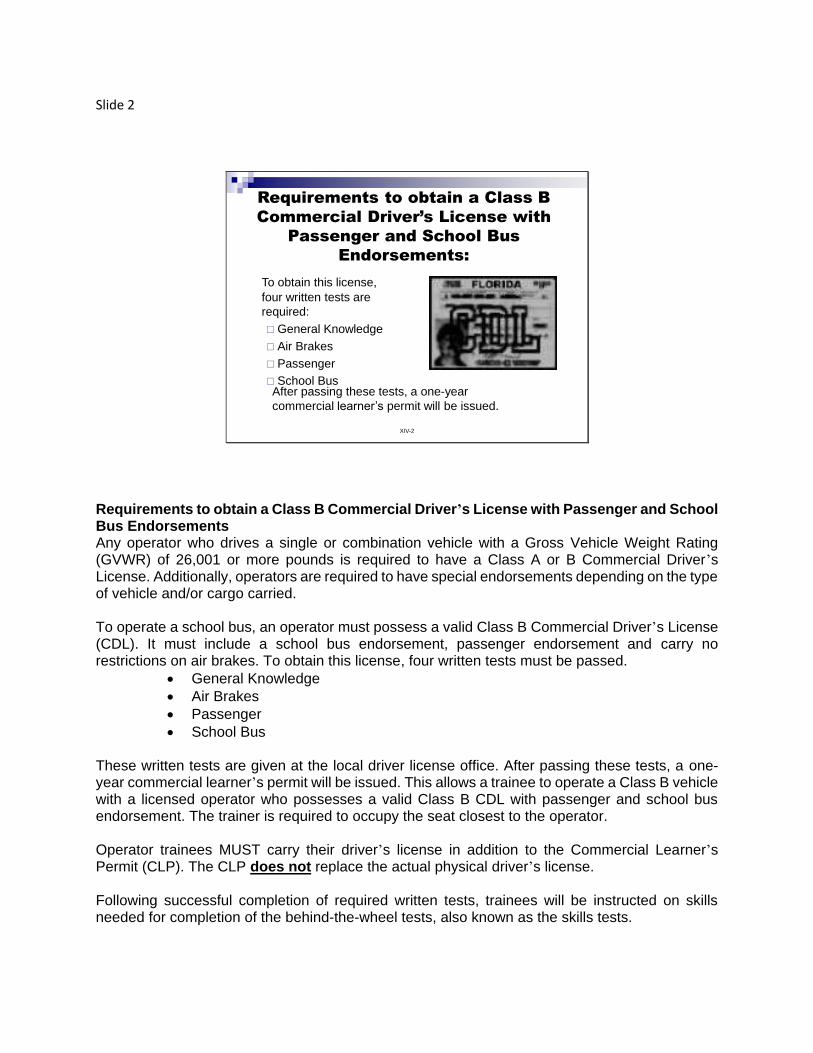
Slide 2
XIV-2
Requirements to obtain a Class B
Commercial Driver’s License with
Passenger and School Bus
Endorsements:
To obtain this license,
four written tests are
required:
General Knowledge
Air Brakes
Passenger
School BusAfter passing these tests, a one-year
commercial learner’s permit will be issued.
Requirements to obtain a Class B Commercial Driver’s License with Passenger and School Bus Endorsements Any operator who drives a single or combination vehicle with a Gross Vehicle Weight Rating (GVWR) of 26,001 or more pounds is required to have a Class A or B Commercial Driver’s License. Additionally, operators are required to have special endorsements depending on the type of vehicle and/or cargo carried. To operate a school bus, an operator must possess a valid Class B Commercial Driver’s License (CDL). It must include a school bus endorsement, passenger endorsement and carry no restrictions on air brakes. To obtain this license, four written tests must be passed.
General Knowledge
Air Brakes
Passenger
School Bus These written tests are given at the local driver license office. After passing these tests, a one-year commercial learner’s permit will be issued. This allows a trainee to operate a Class B vehicle with a licensed operator who possesses a valid Class B CDL with passenger and school bus endorsement. The trainer is required to occupy the seat closest to the operator. Operator trainees MUST carry their driver’s license in addition to the Commercial Learner’s Permit (CLP). The CLP does not replace the actual physical driver’s license. Following successful completion of required written tests, trainees will be instructed on skills needed for completion of the behind-the-wheel tests, also known as the skills tests.
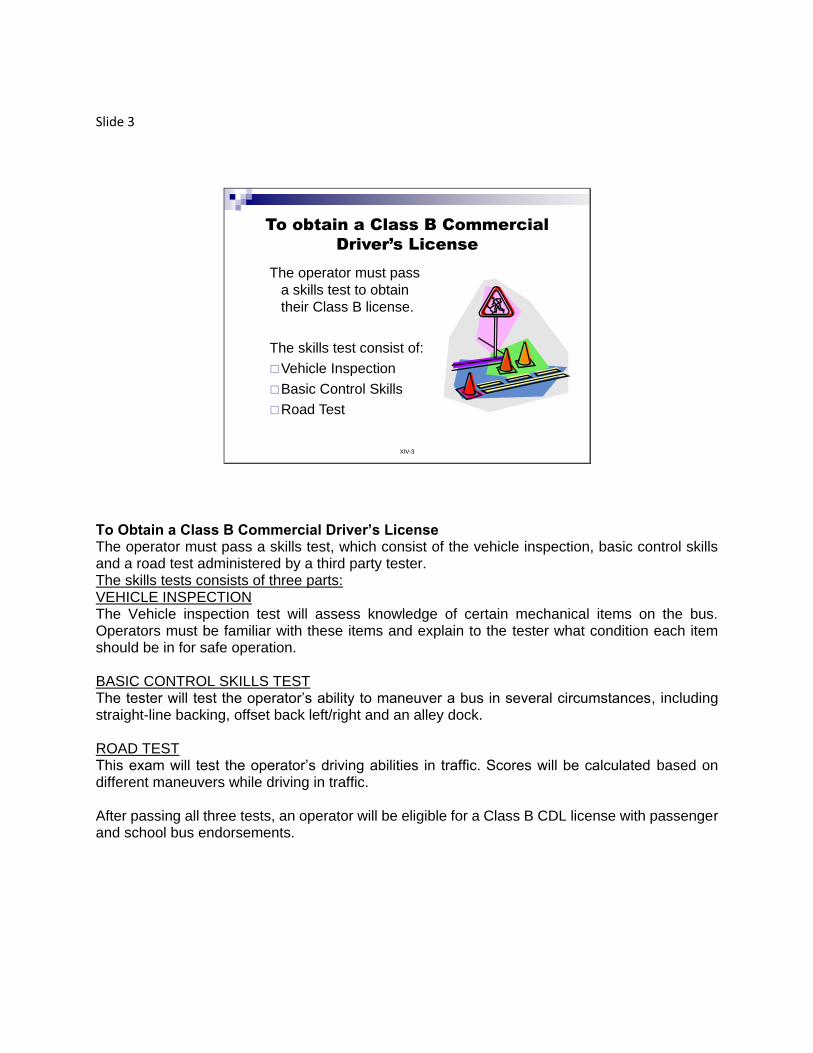
Slide 3
XIV-3
To obtain a Class B Commercial
Driver’s License
The operator must pass
a skills test to obtain
their Class B license.
The skills test consist of:
Vehicle Inspection
Basic Control Skills
Road Test
To Obtain a Class B Commercial Driver’s License The operator must pass a skills test, which consist of the vehicle inspection, basic control skills and a road test administered by a third party tester. The skills tests consists of three parts: VEHICLE INSPECTION The Vehicle inspection test will assess knowledge of certain mechanical items on the bus. Operators must be familiar with these items and explain to the tester what condition each item should be in for safe operation. BASIC CONTROL SKILLS TEST The tester will test the operator’s ability to maneuver a bus in several circumstances, including straight-line backing, offset back left/right and an alley dock. ROAD TEST This exam will test the operator’s driving abilities in traffic. Scores will be calculated based on different maneuvers while driving in traffic. After passing all three tests, an operator will be eligible for a Class B CDL license with passenger and school bus endorsements.
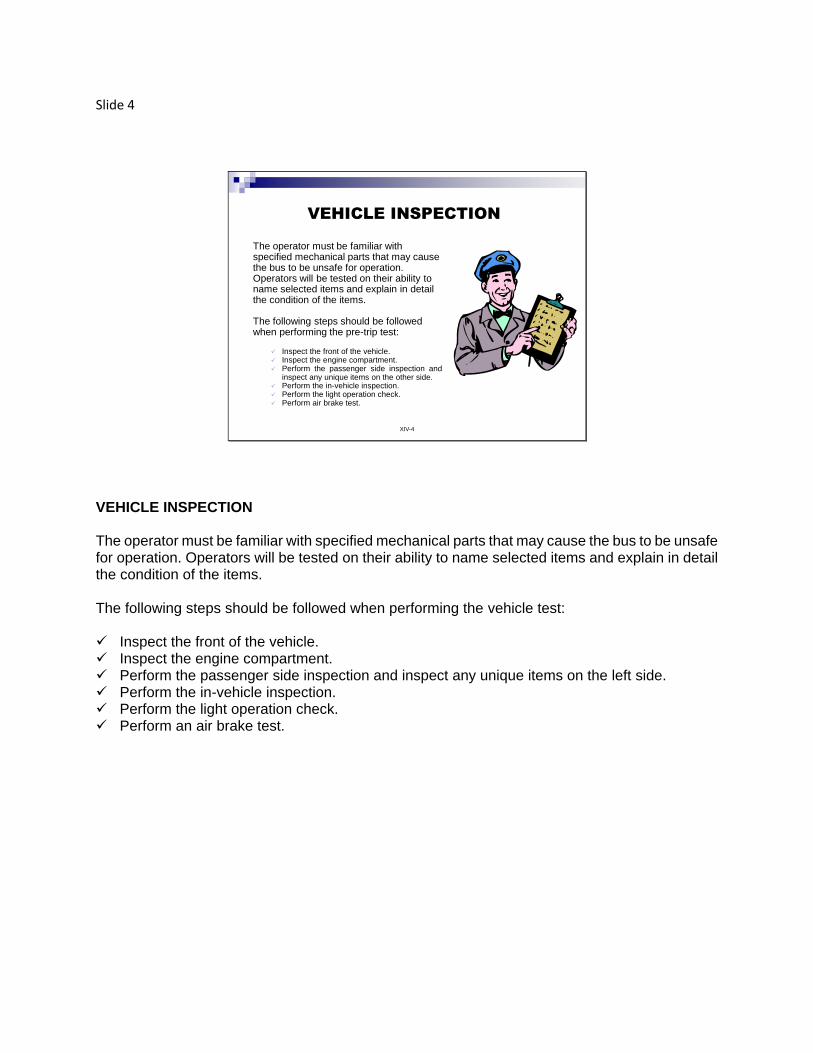
Slide 4
XIV-4
VEHICLE INSPECTION
The operator must be familiar with specified mechanical parts that may cause the bus to be unsafe for operation. Operators will be tested on their ability to name selected items and explain in detail the condition of the items.
The following steps should be followed when performing the pre-trip test:
Inspect the front of the vehicle. Inspect the engine compartment. Perform the passenger side inspection and
inspect any unique items on the other side. Perform the in-vehicle inspection. Perform the light operation check. Perform air brake test.
VEHICLE INSPECTION The operator must be familiar with specified mechanical parts that may cause the bus to be unsafe for operation. Operators will be tested on their ability to name selected items and explain in detail the condition of the items. The following steps should be followed when performing the vehicle test:
Inspect the front of the vehicle. Inspect the engine compartment. Perform the passenger side inspection and inspect any unique items on the left side. Perform the in-vehicle inspection. Perform the light operation check. Perform an air brake test.
Slide 5
XIV-5
VEHICLE INSPECTION Each of the following items must be checked:
Front of Vehicle
Lights/Reflectors: (front; condition)
Clearance, student (amber and red), headlights (high, low beam), four ways (hazard), left and right turn signals and reflectors are:
Proper colors.
Securely mounted.
Not cracked, broken or damaged.
Windshield:
Glass is clean, no obstructions or
illegal stickers.
Not broken or cracked, no hazing.
Wipers:
Securely mounted, snug on windshield.
Not cracked, no dry rot or missing blades.
Mirrors:
Securely mounted to the vehicle.;
Clean, not cracked or broken.
Adjusted from the inside to the driver.
Student Crossing Arm:
Securely mounted.
Not cracked or broken.
When checking operation, checks that
the arm extends fully.
Works in conjunction with the student
stop arms when activated.
Front of Vehicle--Each of the following items must be checked: Lights/Reflectors: (front; condition) o Clearance, student (amber and red), headlights (high, low beam), four ways (hazard), left and
right turn signals and reflectors are: o Proper colors. o Securely mounted. o Not cracked, broken or damaged. Windshield: o Glass is clean, no obstructions or illegal stickers. o Not broken or cracked. Wipers: o Securely mounted, snug on windshield. o Not cracked no dry rot or missing blades. Mirrors: o Securely mounted to the vehicle. o Clean, not cracked or broken. o Adjusted from the inside to the driver. Student Crossing Arm: o Securely mounted. o Not cracked or broken. o When checking operation, checks that the arm extends fully and works in conjunction with the student stop arms when activated.
Slide 6
XIV-6
VEHICLE INSPECTION
Each of the following items must be checked:
ENGINE COMPARTMENT
Leaks/Hoses:
Check for puddles of fluid under the engine and transmission area.
Look for leaks from engine compartment.
Check hoses for securement, cracks and/or leaks.
Oil Level:
Identify the oil dipstick
Demonstrate or verbalize that the dipstick sould be removed, wiped clean, reinserted and removed again to check the oil level is above the add line.
Coolant Level:
Check the sight glass for proper coolant level.
If there is no sight glass, describes how to allow the vehicle to cool before removing the cap and checking for proper level of the coolant in the reservoir. If the level is low, fluid sould be added.
ENGINE COMPARTMENT Leaks/Hoses: o Check for puddles of fluid under the engine and transmission area. o Look for leaks from engine compartment. o Check hoses for securement, cracks and/or leaks. Oil Level: o Identify the oil dipstick. o Demonstrate or verbalize that the dipstick should be removed, wiped clean, reinserted and
removed again to check the oil level is above the add line. Coolant Level: o Check the sight glass for proper coolant level. o If there is no sight glass, describes how to allow the vehicle to cool before removing the cap
and check for proper level of the coolant in the reservoir. If the level is low, fluid should be added.
Slide 7
PRE-TRIP INSPECTION
Each of the following items must be checkedEngine Compartment (continued)
Air Compressor:
Operating properly.
Not damaged or leaking.
Securely mounted.
States if compressor is *belt or gear
driven.
Power Steering Fluid:
Checks the sight glass or dipstick to
ensure the level is above the add line.
Not leaking, cracked or damaged.
Mounted securely.
States if the pump is *belt or gear
driven.
Alternator:
Operates properly.
Not damaged, no bare wires.
Securely mounted.
States if the alternator is *belt or gear
driven.
Water Pump:
Operates properly.
Not damaged or leaking.
Securely mounted.
States if the water Pump is *belt or
gear driven.
*Belts (if a component is belt driven) must be
identified and inspected for snugness, ½” to ¾”
of play at center of belt, no cracks, frays or
looseness detected.
Engine Compartment (continued) *BELTS (if a component is belt driven) must be identified and inspected for snugness, ½” to ¾” of play at center of belt, no cracks, frays or looseness detected. Air Compressor: o Operating properly. o Not damaged or leaking. o Securely mounted, o States if compressor is *belt or gear driven. Power Steering Fluid: o Check the sight glass or dipstick to ensure the level is above the add line. o Not leaking, cracked or damaged. o Mounted securely. o States if the pump is *belt or gear driven. Alternator: o Operates properly, o Not damaged, no bare wires, o Securely mounted, o States if the alternator is *belt or gear driven. Water Pump: o Operates properly, o Not damaged or leaking, o Securely mounted, o States if the water Pump is *belt or gear driven.
Slide 8
XIV-8
VEHICLE INSPECTION
Each of the following items must be checked:Under the Hood
Steering Box/Hoses: Securely mounted.
Not leaking.
Check for missing bolts or nuts.
Check hoses for leaks or damage.
Steering Linkage: Check connecting links, arms, and
rods for cracks, bends or damage,
Make sure joint sockets are not worn or loos.,
Check for loose or missing nuts, bolts or cotter keys.
.
Under the Hood Steering Box/Hoses: o Securely mounted. o Not leaking. o Check for missing bolts or nuts. o Check hoses for leaks or damage. Steering Linkage: o Check connecting links, arms, and rods for cracks, bends or damage. o Make sure joint sockets are not worn or loose. o Check for loose or missing nuts, bolts or cotter keys.
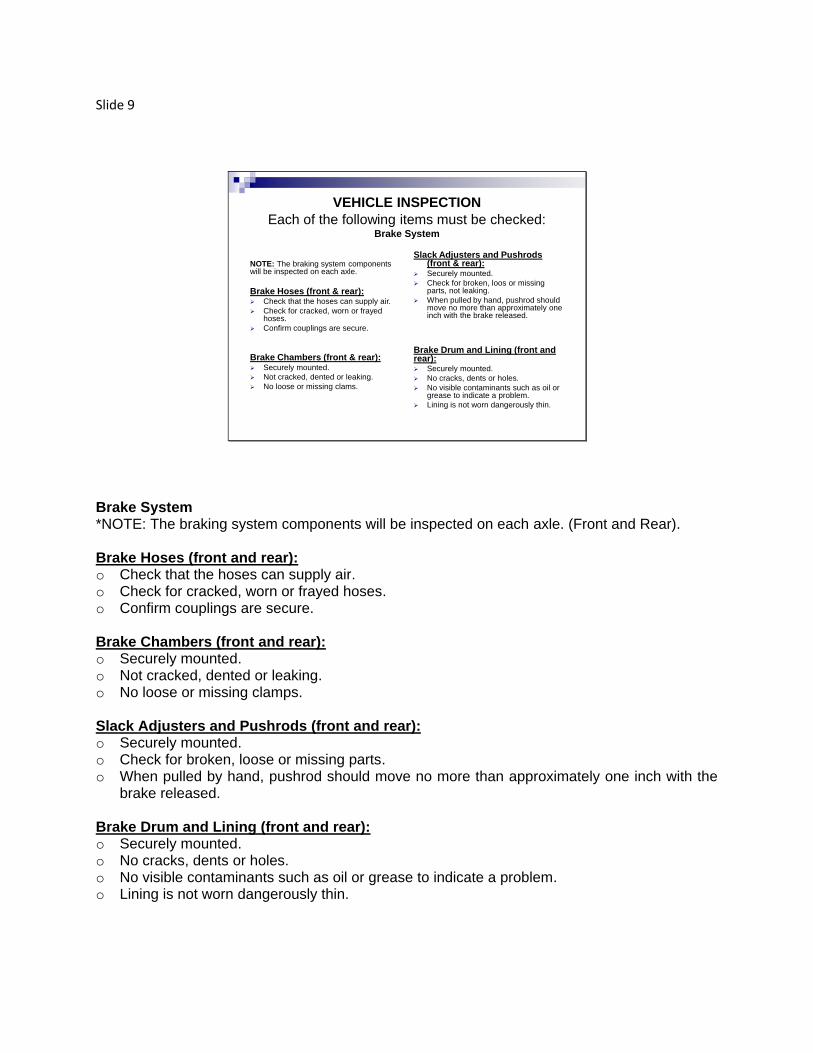
Slide 9
VEHICLE INSPECTION
Each of the following items must be checked:Brake System
NOTE: The braking system components will be inspected on each axle.
Brake Hoses (front & rear): Check that the hoses can supply air.
Check for cracked, worn or frayed hoses.
Confirm couplings are secure.
Brake Chambers (front & rear): Securely mounted.
Not cracked, dented or leaking.
No loose or missing clams.
Slack Adjusters and Pushrods (front & rear):
Securely mounted.
Check for broken, loos or missing parts, not leaking.
When pulled by hand, pushrod should move no more than approximately one inch with the brake released.
Brake Drum and Lining (front and rear): Securely mounted.
No cracks, dents or holes.
No visible contaminants such as oil or grease to indicate a problem.
Lining is not worn dangerously thin.
Brake System *NOTE: The braking system components will be inspected on each axle. (Front and Rear). Brake Hoses (front and rear): o Check that the hoses can supply air. o Check for cracked, worn or frayed hoses. o Confirm couplings are secure. Brake Chambers (front and rear): o Securely mounted. o Not cracked, dented or leaking. o No loose or missing clamps. Slack Adjusters and Pushrods (front and rear): o Securely mounted. o Check for broken, loose or missing parts. o When pulled by hand, pushrod should move no more than approximately one inch with the
brake released. Brake Drum and Lining (front and rear): o Securely mounted. o No cracks, dents or holes. o No visible contaminants such as oil or grease to indicate a problem. o Lining is not worn dangerously thin.
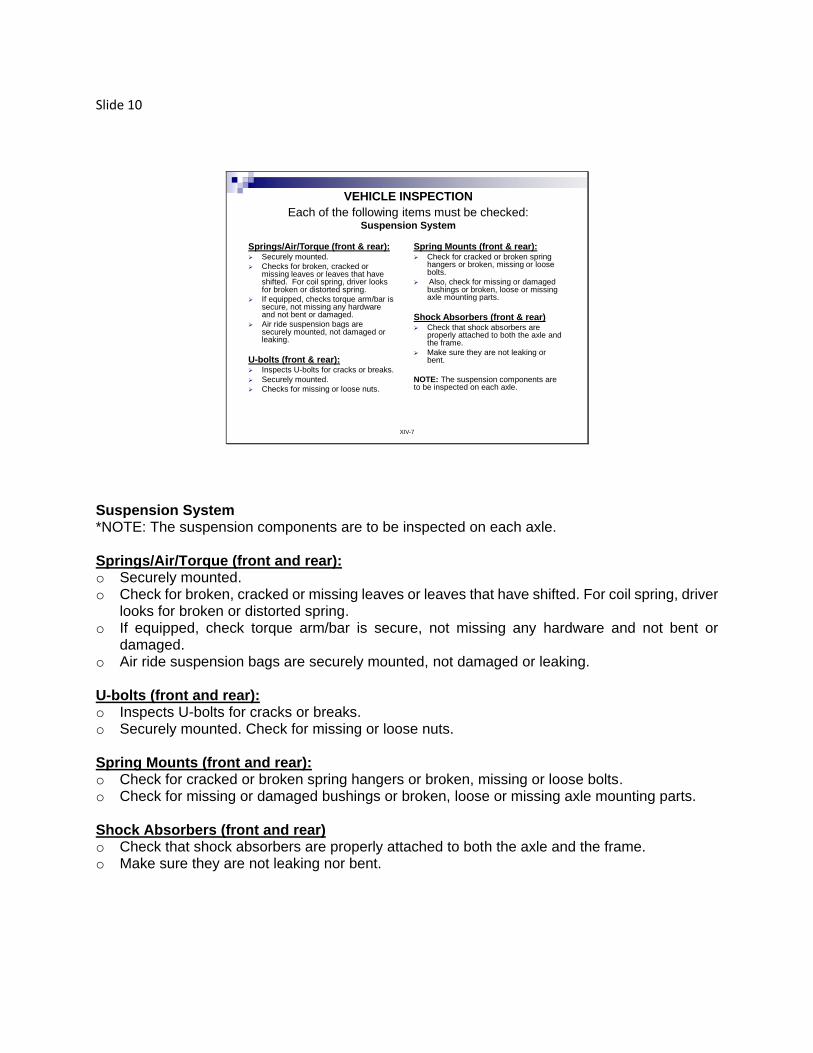
Slide 10
XIV-7
VEHICLE INSPECTION
Each of the following items must be checked:Suspension System
Springs/Air/Torque (front & rear): Securely mounted.
Checks for broken, cracked or missing leaves or leaves that have shifted. For coil spring, driver looks for broken or distorted spring.
If equipped, checks torque arm/bar is secure, not missing any hardware and not bent or damaged.
Air ride suspension bags are securely mounted, not damaged or leaking.
U-bolts (front & rear): Inspects U-bolts for cracks or breaks.
Securely mounted.
Checks for missing or loose nuts.
Spring Mounts (front & rear): Check for cracked or broken spring
hangers or broken, missing or loose bolts.
Also, check for missing or damaged bushings or broken, loose or missing axle mounting parts.
Shock Absorbers (front & rear) Check that shock absorbers are
properly attached to both the axle and the frame.
Make sure they are not leaking or bent.
NOTE: The suspension components are to be inspected on each axle.
Suspension System *NOTE: The suspension components are to be inspected on each axle. Springs/Air/Torque (front and rear): o Securely mounted. o Check for broken, cracked or missing leaves or leaves that have shifted. For coil spring, driver
looks for broken or distorted spring. o If equipped, check torque arm/bar is secure, not missing any hardware and not bent or
damaged. o Air ride suspension bags are securely mounted, not damaged or leaking. U-bolts (front and rear): o Inspects U-bolts for cracks or breaks. o Securely mounted. Check for missing or loose nuts. Spring Mounts (front and rear): o Check for cracked or broken spring hangers or broken, missing or loose bolts. o Check for missing or damaged bushings or broken, loose or missing axle mounting parts. Shock Absorbers (front and rear) o Check that shock absorbers are properly attached to both the axle and the frame. o Make sure they are not leaking nor bent.
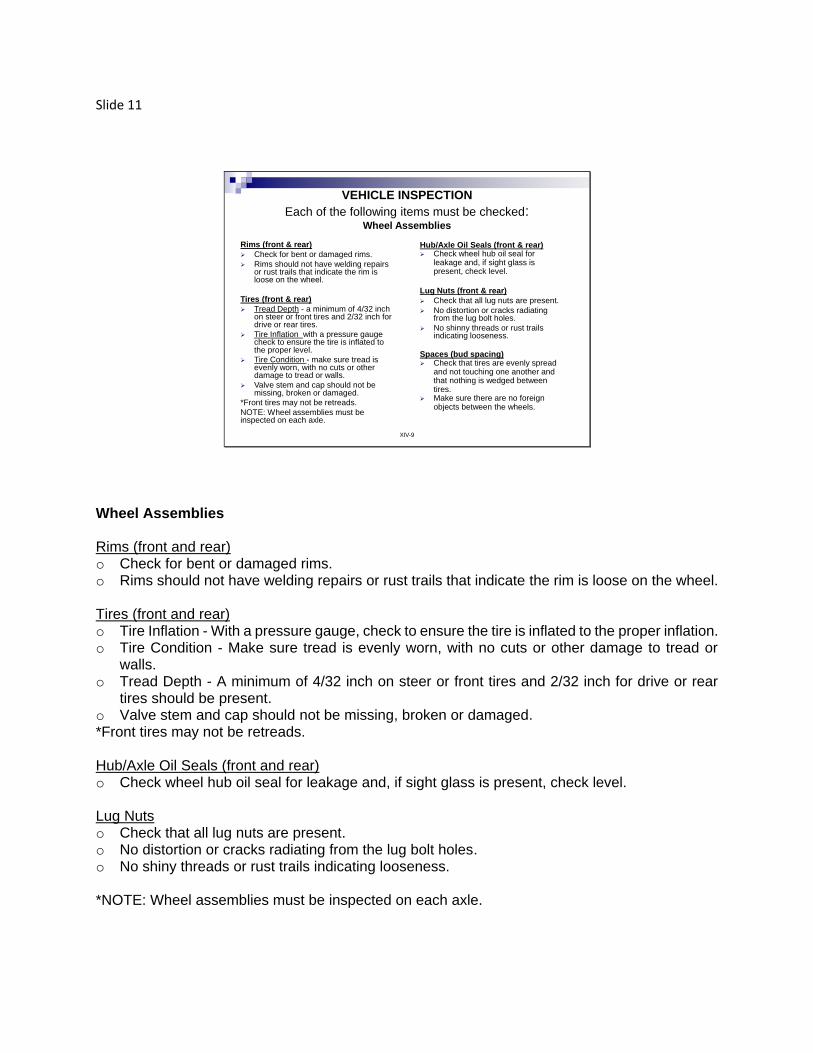
Slide 11
XIV-9
VEHICLE INSPECTION
Each of the following items must be checked:Wheel Assemblies
Rims (front & rear)
Check for bent or damaged rims.
Rims should not have welding repairs or rust trails that indicate the rim is loose on the wheel.
Tires (front & rear)
Tread Depth - a minimum of 4/32 inch on steer or front tires and 2/32 inch for drive or rear tires.
Tire Inflation with a pressure gauge check to ensure the tire is inflated to the proper level.
Tire Condition - make sure tread is evenly worn, with no cuts or other damage to tread or walls.
Valve stem and cap should not be missing, broken or damaged.
*Front tires may not be retreads.
NOTE: Wheel assemblies must be inspected on each axle.
Hub/Axle Oil Seals (front & rear) Check wheel hub oil seal for
leakage and, if sight glass is present, check level.
Lug Nuts (front & rear)
Check that all lug nuts are present.
No distortion or cracks radiating from the lug bolt holes.
No shinny threads or rust trails indicating looseness.
Spaces (bud spacing) Check that tires are evenly spread
and not touching one another and that nothing is wedged between tires.
Make sure there are no foreign objects between the wheels.
Wheel Assemblies Rims (front and rear) o Check for bent or damaged rims. o Rims should not have welding repairs or rust trails that indicate the rim is loose on the wheel. Tires (front and rear) o Tire Inflation - With a pressure gauge, check to ensure the tire is inflated to the proper inflation. o Tire Condition - Make sure tread is evenly worn, with no cuts or other damage to tread or
walls. o Tread Depth - A minimum of 4/32 inch on steer or front tires and 2/32 inch for drive or rear
tires should be present. o Valve stem and cap should not be missing, broken or damaged. *Front tires may not be retreads. Hub/Axle Oil Seals (front and rear) o Check wheel hub oil seal for leakage and, if sight glass is present, check level. Lug Nuts o Check that all lug nuts are present. o No distortion or cracks radiating from the lug bolt holes. o No shiny threads or rust trails indicating looseness. *NOTE: Wheel assemblies must be inspected on each axle.
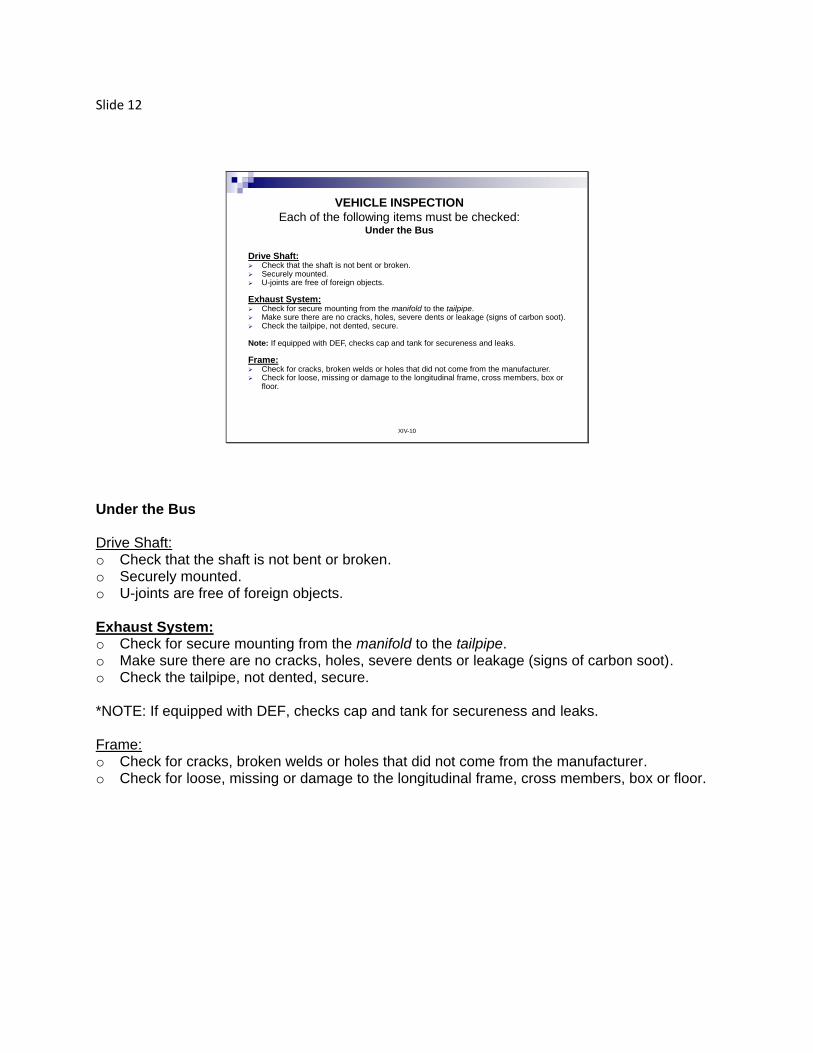
Slide 12
XIV-10
VEHICLE INSPECTION
Each of the following items must be checked:Under the Bus
Drive Shaft: Check that the shaft is not bent or broken. Securely mounted. U-joints are free of foreign objects.
Exhaust System: Check for secure mounting from the manifold to the tailpipe. Make sure there are no cracks, holes, severe dents or leakage (signs of carbon soot). Check the tailpipe, not dented, secure.
Note: If equipped with DEF, checks cap and tank for secureness and leaks.
Frame: Check for cracks, broken welds or holes that did not come from the manufacturer. Check for loose, missing or damage to the longitudinal frame, cross members, box or
floor.
Under the Bus Drive Shaft: o Check that the shaft is not bent or broken. o Securely mounted. o U-joints are free of foreign objects. Exhaust System: o Check for secure mounting from the manifold to the tailpipe. o Make sure there are no cracks, holes, severe dents or leakage (signs of carbon soot). o Check the tailpipe, not dented, secure. *NOTE: If equipped with DEF, checks cap and tank for secureness and leaks. Frame: o Check for cracks, broken welds or holes that did not come from the manufacturer. o Check for loose, missing or damage to the longitudinal frame, cross members, box or floor.
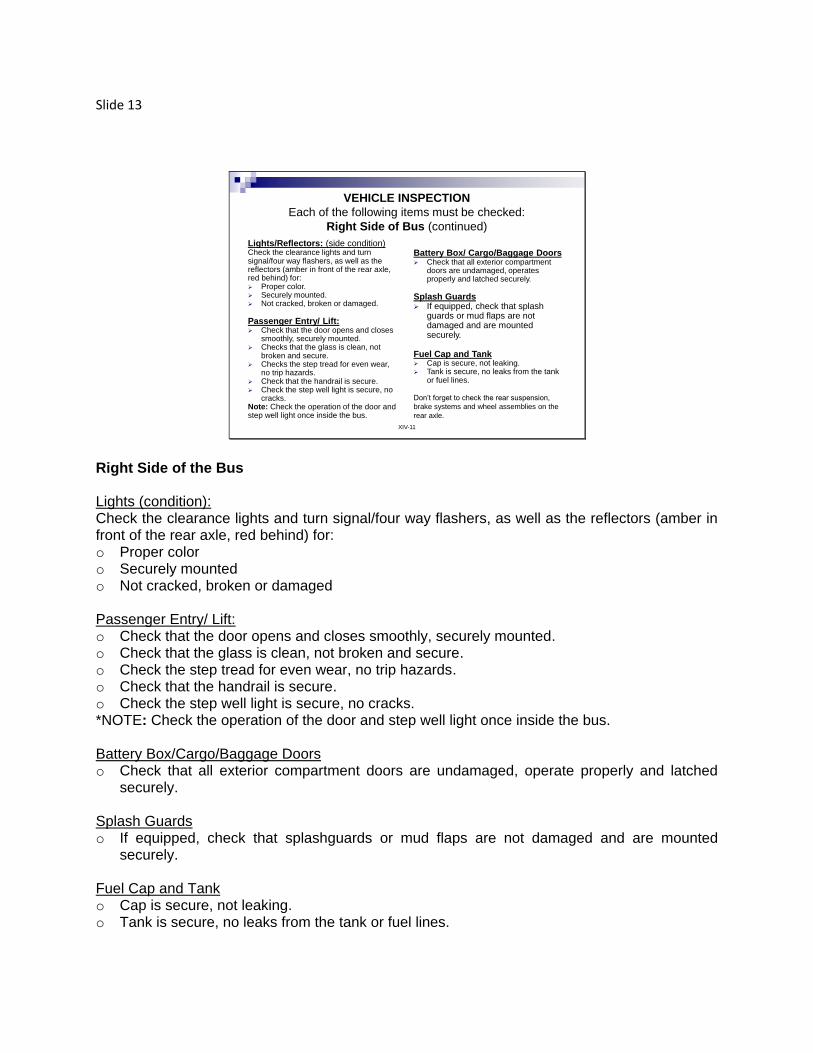
Slide 13
XIV-11
VEHICLE INSPECTION
Each of the following items must be checked:
Right Side of Bus (continued)
Lights/Reflectors: (side condition)Check the clearance lights and turn signal/four way flashers, as well as the reflectors (amber in front of the rear axle, red behind) for: Proper color. Securely mounted. Not cracked, broken or damaged.
Passenger Entry/ Lift: Check that the door opens and closes
smoothly, securely mounted. Checks that the glass is clean, not
broken and secure. Checks the step tread for even wear,
no trip hazards. Check that the handrail is secure. Check the step well light is secure, no
cracks.Note: Check the operation of the door and step well light once inside the bus.
Battery Box/ Cargo/Baggage Doors Check that all exterior compartment
doors are undamaged, operates properly and latched securely.
Splash Guards If equipped, check that splash
guards or mud flaps are not damaged and are mounted securely.
Fuel Cap and Tank Cap is secure, not leaking. Tank is secure, no leaks from the tank
or fuel lines.
Don’t forget to check the rear suspension,
brake systems and wheel assemblies on the
rear axle.
Right Side of the Bus Lights (condition): Check the clearance lights and turn signal/four way flashers, as well as the reflectors (amber in front of the rear axle, red behind) for: o Proper color o Securely mounted o Not cracked, broken or damaged Passenger Entry/ Lift: o Check that the door opens and closes smoothly, securely mounted. o Check that the glass is clean, not broken and secure. o Check the step tread for even wear, no trip hazards. o Check that the handrail is secure. o Check the step well light is secure, no cracks. *NOTE: Check the operation of the door and step well light once inside the bus. Battery Box/Cargo/Baggage Doors o Check that all exterior compartment doors are undamaged, operate properly and latched
securely. Splash Guards o If equipped, check that splashguards or mud flaps are not damaged and are mounted
securely. Fuel Cap and Tank o Cap is secure, not leaking. o Tank is secure, no leaks from the tank or fuel lines.
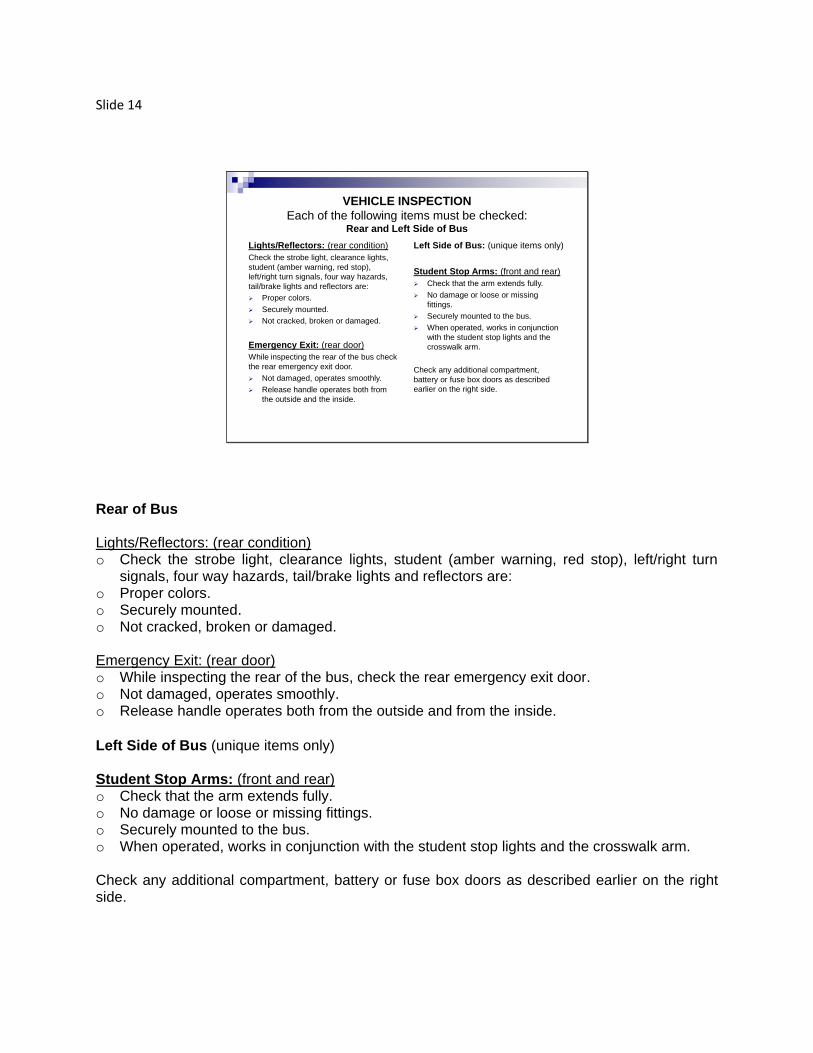
Slide 14
VEHICLE INSPECTION
Each of the following items must be checked:Rear and Left Side of Bus
Lights/Reflectors: (rear condition)
Check the strobe light, clearance lights,
student (amber warning, red stop),
left/right turn signals, four way hazards,
tail/brake lights and reflectors are:
Proper colors.
Securely mounted.
Not cracked, broken or damaged.
Emergency Exit: (rear door)
While inspecting the rear of the bus check
the rear emergency exit door.
Not damaged, operates smoothly.
Release handle operates both from
the outside and the inside.
Left Side of Bus: (unique items only)
Student Stop Arms: (front and rear)
Check that the arm extends fully.
No damage or loose or missing
fittings.
Securely mounted to the bus.
When operated, works in conjunction
with the student stop lights and the
crosswalk arm.
Check any additional compartment,
battery or fuse box doors as described
earlier on the right side.
Rear of Bus Lights/Reflectors: (rear condition) o Check the strobe light, clearance lights, student (amber warning, red stop), left/right turn
signals, four way hazards, tail/brake lights and reflectors are: o Proper colors. o Securely mounted. o Not cracked, broken or damaged. Emergency Exit: (rear door) o While inspecting the rear of the bus, check the rear emergency exit door. o Not damaged, operates smoothly. o Release handle operates both from the outside and from the inside.
Left Side of Bus (unique items only) Student Stop Arms: (front and rear) o Check that the arm extends fully. o No damage or loose or missing fittings. o Securely mounted to the bus. o When operated, works in conjunction with the student stop lights and the crosswalk arm. Check any additional compartment, battery or fuse box doors as described earlier on the right side.
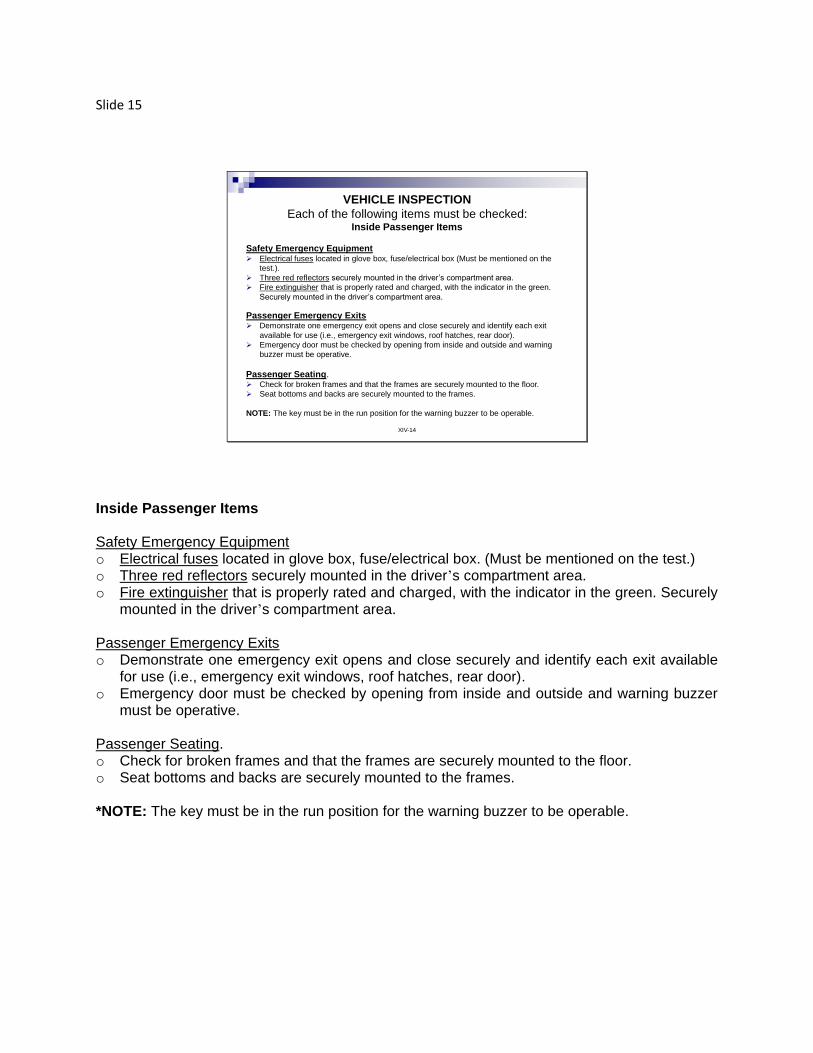
Slide 15
XIV-14
VEHICLE INSPECTION
Each of the following items must be checked:Inside Passenger Items
Safety Emergency Equipment Electrical fuses located in glove box, fuse/electrical box (Must be mentioned on the
test.).
Three red reflectors securely mounted in the driver’s compartment area.
Fire extinguisher that is properly rated and charged, with the indicator in the green.
Securely mounted in the driver’s compartment area.
Passenger Emergency Exits Demonstrate one emergency exit opens and close securely and identify each exit
available for use (i.e., emergency exit windows, roof hatches, rear door).
Emergency door must be checked by opening from inside and outside and warning
buzzer must be operative.
Passenger Seating. Check for broken frames and that the frames are securely mounted to the floor.
Seat bottoms and backs are securely mounted to the frames.
NOTE: The key must be in the run position for the warning buzzer to be operable.
Inside Passenger Items Safety Emergency Equipment o Electrical fuses located in glove box, fuse/electrical box. (Must be mentioned on the test.) o Three red reflectors securely mounted in the driver’s compartment area. o Fire extinguisher that is properly rated and charged, with the indicator in the green. Securely
mounted in the driver’s compartment area.
Passenger Emergency Exits o Demonstrate one emergency exit opens and close securely and identify each exit available
for use (i.e., emergency exit windows, roof hatches, rear door). o Emergency door must be checked by opening from inside and outside and warning buzzer
must be operative. Passenger Seating. o Check for broken frames and that the frames are securely mounted to the floor. o Seat bottoms and backs are securely mounted to the frames. *NOTE: The key must be in the run position for the warning buzzer to be operable.
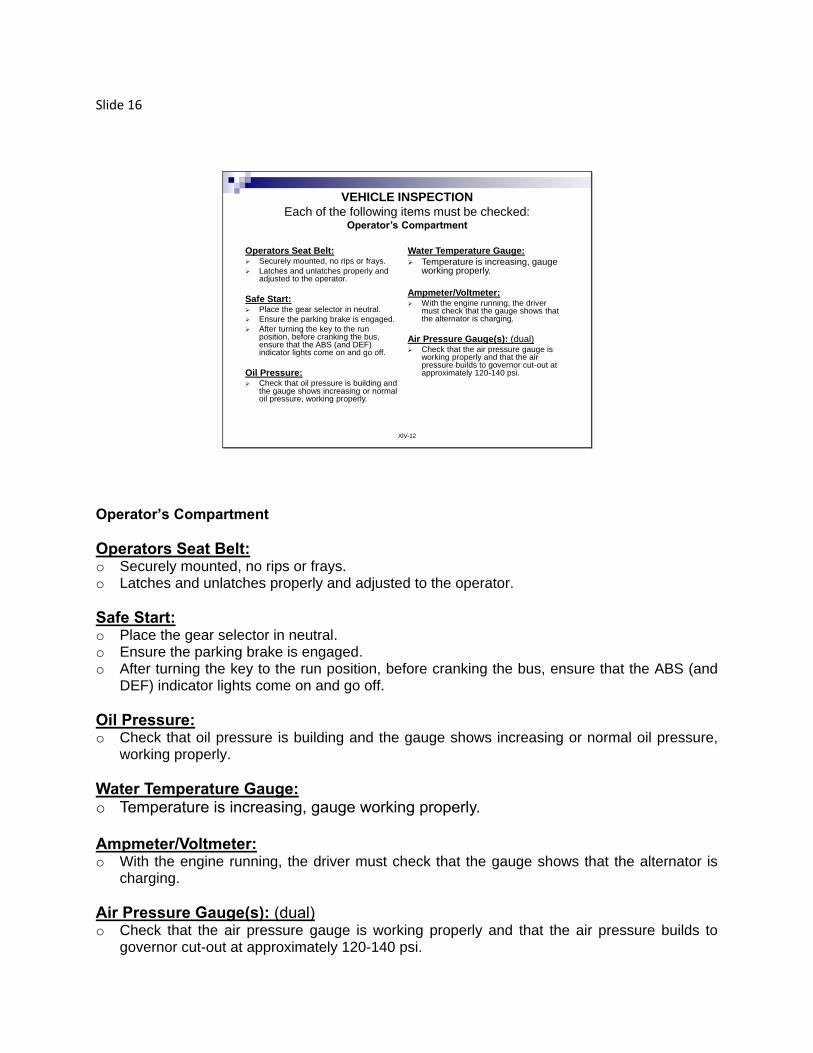
Slide 16
XIV-12
VEHICLE INSPECTION
Each of the following items must be checked:Operator’s Compartment
Operators Seat Belt: Securely mounted, no rips or frays.
Latches and unlatches properly and adjusted to the operator.
Safe Start: Place the gear selector in neutral.
Ensure the parking brake is engaged.
After turning the key to the run position, before cranking the bus, ensure that the ABS (and DEF) indicator lights come on and go off.
Oil Pressure: Check that oil pressure is building and
the gauge shows increasing or normal oil pressure, working properly.
Water Temperature Gauge:
Temperature is increasing, gauge working properly.
Ampmeter/Voltmeter: With the engine running, the driver
must check that the gauge shows that the alternator is charging.
Air Pressure Gauge(s): (dual) Check that the air pressure gauge is
working properly and that the air pressure builds to governor cut-out at approximately 120-140 psi.
Operator’s Compartment
Operators Seat Belt: o Securely mounted, no rips or frays. o Latches and unlatches properly and adjusted to the operator.
Safe Start: o Place the gear selector in neutral. o Ensure the parking brake is engaged. o After turning the key to the run position, before cranking the bus, ensure that the ABS (and
DEF) indicator lights come on and go off.
Oil Pressure: o Check that oil pressure is building and the gauge shows increasing or normal oil pressure,
working properly.
Water Temperature Gauge: o Temperature is increasing, gauge working properly. Ampmeter/Voltmeter: o With the engine running, the driver must check that the gauge shows that the alternator is
charging.
Air Pressure Gauge(s): (dual) o Check that the air pressure gauge is working properly and that the air pressure builds to
governor cut-out at approximately 120-140 psi.
Slide 17
XIV-13
VEHICLE INSPECTION
Each of the following items must be checked:Operator’s Compartment (continued)
Lighting Indicators: Check to ensure all indicators are
working properly -:left/ right turn signals, four way flashers and high beams.
Wipers and Washer Fluid: Check that, when activated, the wipers
and washer fluid are working properly.
Horn: Check to ensure that horn is working.
Heater/Defrosters: Check that heater/defroster works
on high and low settings.
Student Mirror: Checks for cracks, cleanliness and
securement. Ensures that ALL mirrors are properly
adjusted to the operator.
Light Operation Check: All lights must be checked from outside of the unit for operation. You may ask the examiner to assist on the outside, while operating on the inside. You must name each light to check.
Front and Sides: Check the front and side clearance,
turn signals and four way hazard lights. Check high and low beam headlights. Check student amber warning and red stop lights with the crosswalk arm and stop arms.
Rear of the Bus: Check the strobe light on the way
back. In the back check the clearance, student amber warning and red stop lights. Check turn signals, four way hazard and tail lights. Check that the brakes lights come on when the pedal is applied and go off when the pedal is released.
Operator’s Compartment (continued) Lighting Indicators: o Check to ensure all indicators are working properly - left/ right turn signals, four way flashers
and high beams.
Wipers and Washer Fluid: o Check that, when activated, the wipers and washer fluid are working properly.
Horn: o Check to ensure that horn is working.
Heater/Defrosters: o Check that heater/defroster works on high and low settings.
Student Mirror: o Check for cracks, cleanliness and securement. o Ensure that ALL mirrors are properly adjusted to the operator. Light Operation Check: All lights must be checked from outside of the unit for operation. You may ask the examiner to assist on the outside, while operating on the inside. You must name each light to check. Front and Sides: o Check the front and side clearance, turn signals and four-way hazard lights. Check high and
low-beam headlights. Check student amber warning and red stop lights with the crosswalk arm and stop arms.

Rear of the Bus: o Check the strobe light on the way back. In the back, check the clearance, student amber
warning and red stop lights. Check turn signals, four-way hazard and tail lights. Check that the brakes lights come on when the brakes are applied and go off when the pedal is released.
Slide 18
VEHICLE INSPECTION
Each of the following items must be checked
Parking Brake Test
The air pressure must be
built to the governor cut off.
With the parking brake
engaged, shift the bus to
drive while applying the
service brake.
Release the service brake
and with your foot on the
accelerator, rev the engine to
approximately 10 rpms.
If the unit doesn’t move when
feeling the tug, it has passed
the parking brake test.
Service Brake Test
With the bus still in drive,
release the parking brake and
pull forward at approximately
5 mph.
Apply the service brake.
The unit should stop
smoothly, not pulling to the
left or the right when the
service brake is applied.
If the unit stops and does not
pull, it has passed the service
brake test.
Brake Test Parking Brake Test: o The air pressure must be built up to the governor’s cut off. o With the parking brake engaged, shift the bus to drive while applying the service brake. o Release the service brake and, with your foot on the accelerator, rev the engine to
approximately 10 rpms. o If the unit does not move when feeling the tug, it has passed the parking brake test. Service Brake Test o With the bus still in drive, release the parking brake and pull forward at approximately 5 mph. o Apply the service brake. o The unit should stop smoothly, not pulling to the left or the right when the service brake is
applied. o If the unit stops and does not pull, it has passed the service brake test.
Slide 19
XIV-15
VEHICLE INSPECTION
Each of the following items must be checked:
Air Brake Test
Perform the following in order listed:
Must be verbalized and demonstrated: Allow air pressure to build to governed cut-out pressure (120 to 140 psi). With engine off and key in the "on" position, wheels chocked, release the
parking brake and fully apply foot brake. Start timing for 60 seconds, after the gauges stabilize. Listen and check the
gauges for any leaks to see if air pressure drops more than three psi in one minute. This is the leak check.
Start fanning off the air pressure by rapidly applying and releasing the foot brake. Low air pressure warning alarm should activate before air pressure drops to below 55 psi. This is the alarm check.
Continue to fan off the air pressure. At approximately 40 psi pressure or below, the spring brake push-pull valve should pop out. This is the button check.
All three parts of the air check must be performed properly to pass the vehicle inspection part of the skills test.
Air Brake Test Perform the following in order listed: Must be verbalized and demonstrated: o Allow air pressure to build to governed cut-out pressure (120 to 140 psi). o With engine off and key in the "on" position, wheels chocked, release the parking brake and
fully apply foot brake. o Start timing for 60 seconds, after gauges have stabilized. Listen and check the gauges for any
leaks to see if air pressure drops more than three psi in one minute. This is the leak check. o Start fanning off the air pressure by rapidly applying and releasing the foot brake. The low air
pressure warning alarm should activate before air pressure drops to below 55 psi. This is the alarm check.
o Continue to fan off the air pressure. At approximately 40 psi pressure or below, the spring brake push-pull valve should pop out. This is the button check.
All three parts of the air check must be performed properly to pass the vehicle inspection part of the skills test. End of test The driver should take a few minutes to think about the test and make sure nothing was forgotten. The tester will not rush you. If an item is forgotten, it is okay to go back to the item, even if it is under the hood or outside the bus. The operator will have to tell the tester when he or she has finished.
Slide 20
XIV-16
Basic Control Skills
STRAIGHT-LINE BACKING
OFFSET BACK
RIGHT/LEFT
PARALLEL PARK
DRIVER’S
SIDE/CONVENTIONAL
ALLEY DOCK
This test consists of a series of basic control driving exercises. The operator must stay within all boundaries and lines on each event. If the vehicle touches a cone, it will count against the operator. The tester will give instructions on each event. When an event is finished, the operator must set brakes and tap the horn to notify the examiner.
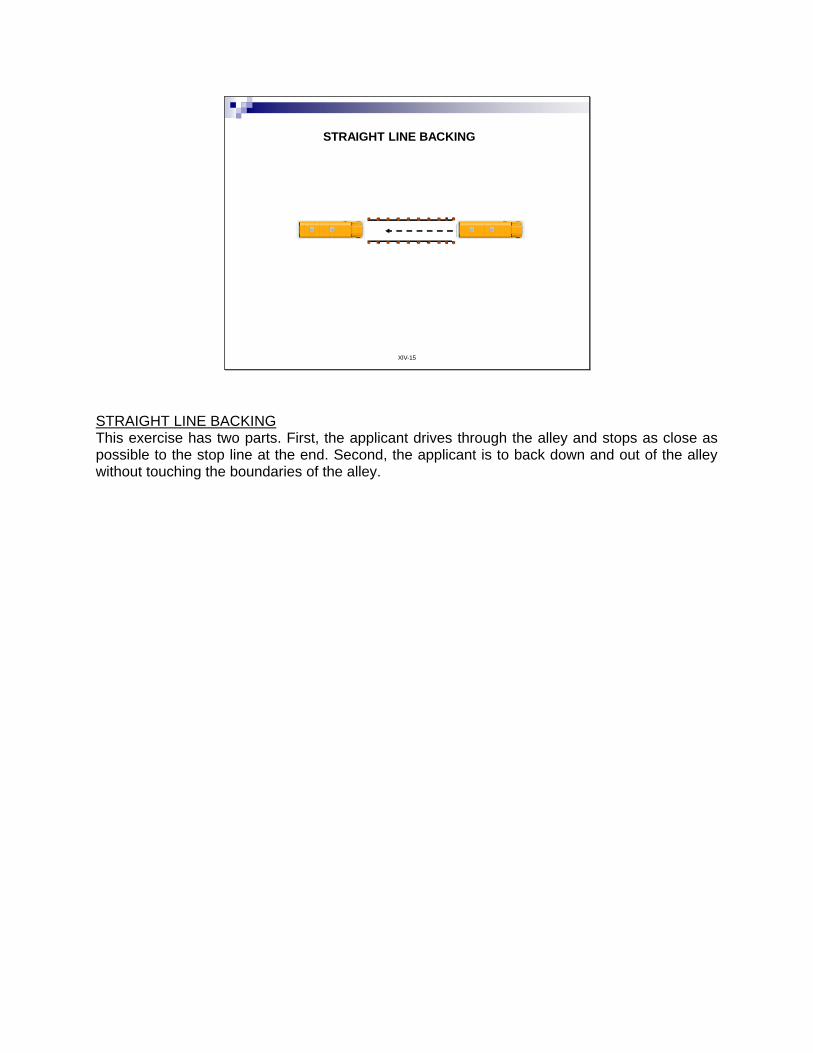
XIV-15
STRAIGHT LINE BACKING
STRAIGHT LINE BACKING This exercise has two parts. First, the applicant drives through the alley and stops as close as possible to the stop line at the end. Second, the applicant is to back down and out of the alley without touching the boundaries of the alley.
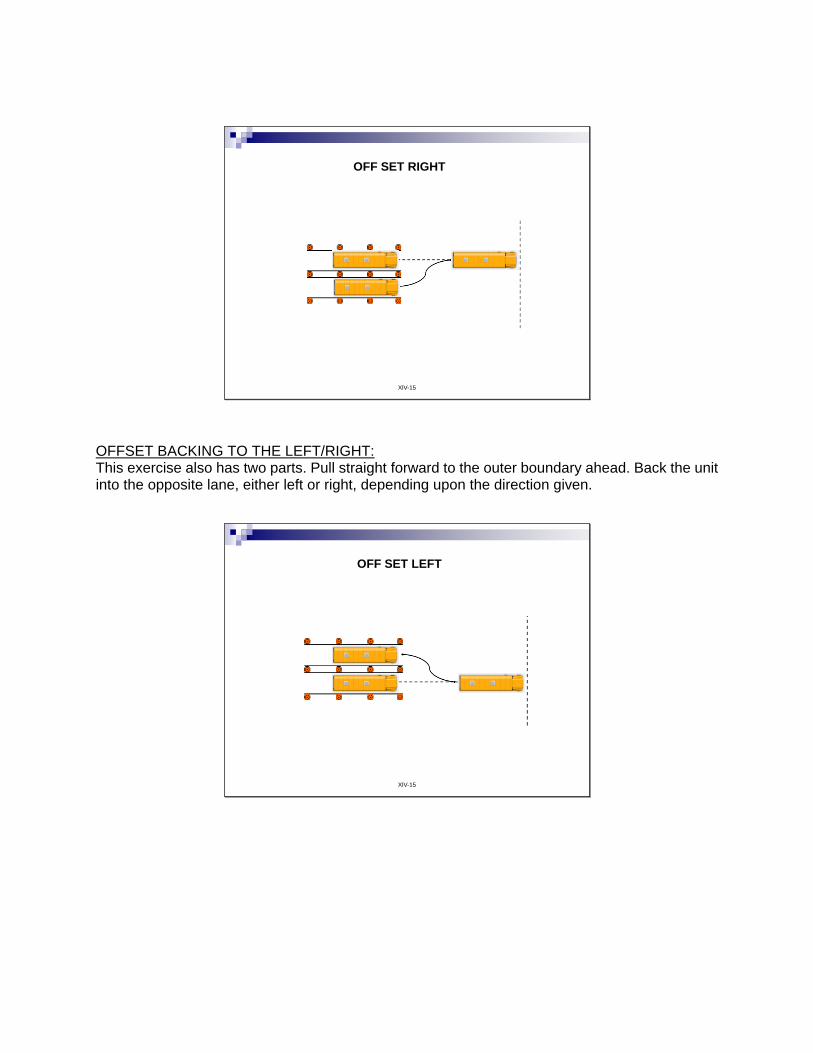
XIV-15
OFF SET RIGHT
OFFSET BACKING TO THE LEFT/RIGHT: This exercise also has two parts. Pull straight forward to the outer boundary ahead. Back the unit into the opposite lane, either left or right, depending upon the direction given.
XIV-15
OFF SET LEFT
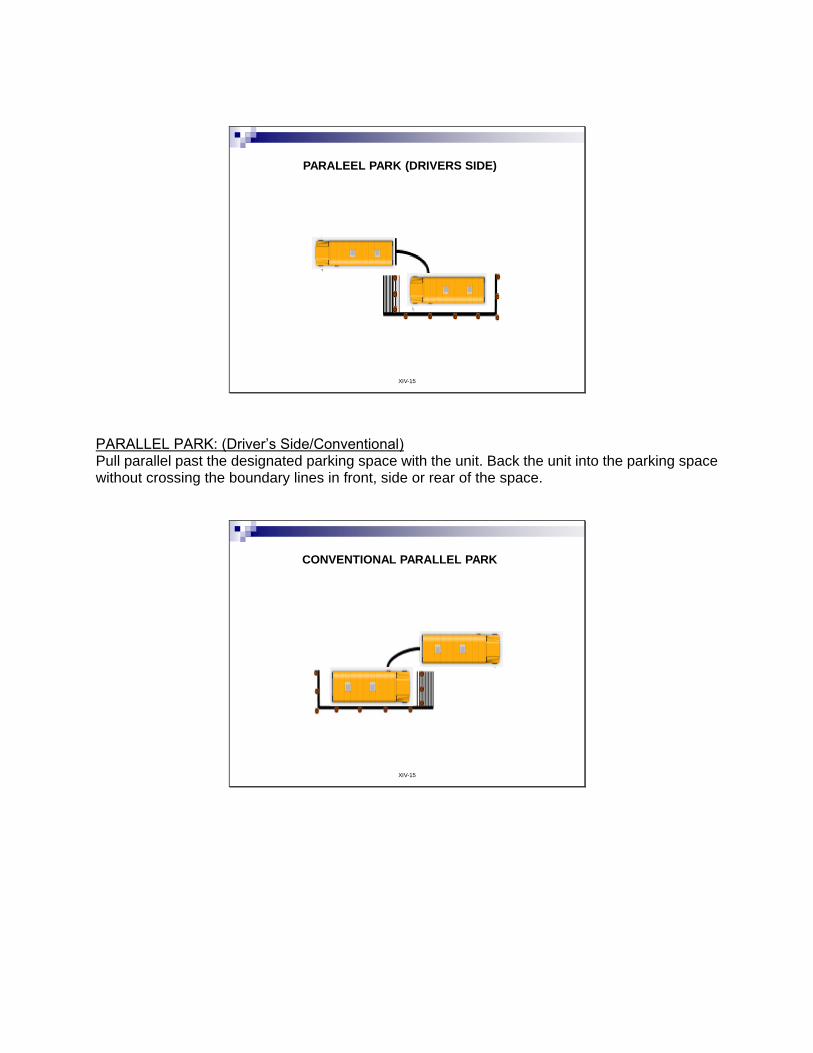
XIV-15
PARALEEL PARK (DRIVERS SIDE)
PARALLEL PARK: (Driver’s Side/Conventional) Pull parallel past the designated parking space with the unit. Back the unit into the parking space without crossing the boundary lines in front, side or rear of the space.
XIV-15
CONVENTIONAL PARALLEL PARK
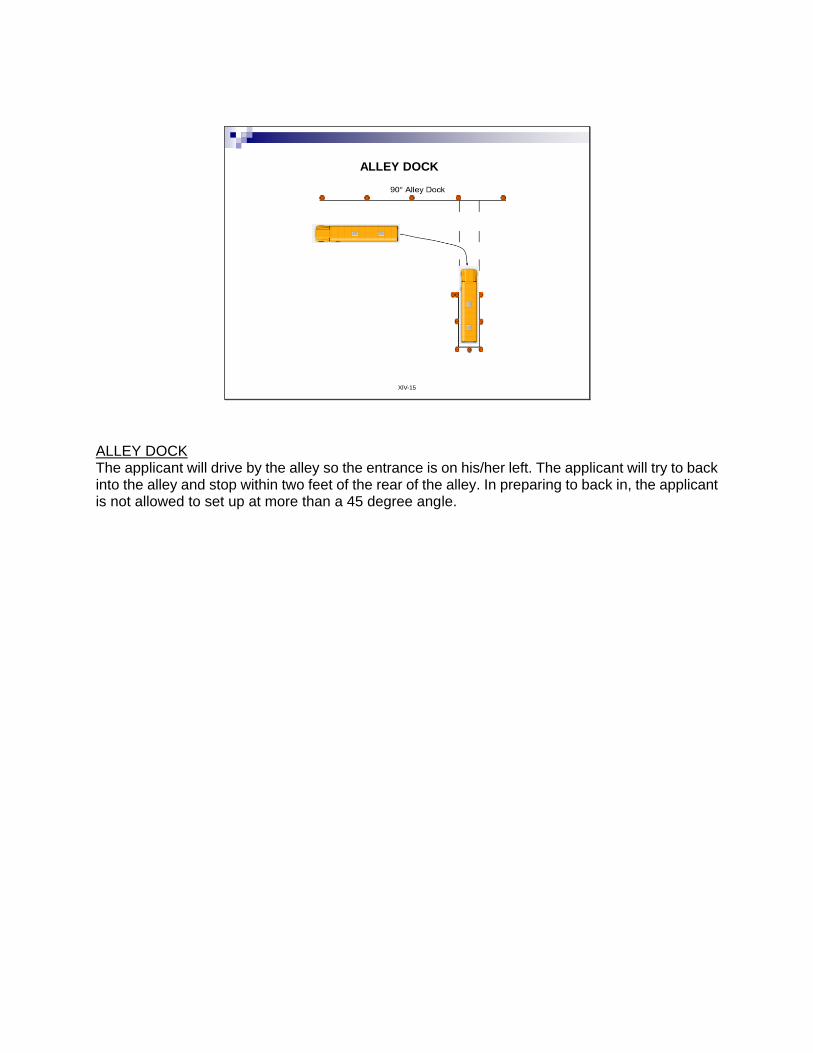
XIV-15
ALLEY DOCK
ALLEY DOCK The applicant will drive by the alley so the entrance is on his/her left. The applicant will try to back into the alley and stop within two feet of the rear of the alley. In preparing to back in, the applicant is not allowed to set up at more than a 45 degree angle.
Slide 21
XIV-17
The road test will follow a pre-determined route and will
contain the following scored maneuvers:
Turns
Intersections
Urban Business
Expressway/Rural/Limited Access Highway
Stop/Start
Curve
Railroad Crossing
Bridge/Overpass/Sign
Student Discharge
General Driving Behaviors
Brake Usage
Lane Usage
Steering
Regular Traffic Checks
Use of Turn Signals
Road Test
Road Test After passing the vehicle and the basic control skills tests, the applicant will be taken on a road test during which the applicant must drive in a safe and responsible manner. Wear your safety belt. Obey all traffic signs and signals. You must complete the test without an accident or moving violation. The examiner will give the operator instructions before beginning the test and an opportunity to ask questions before the test begins. During the exam, the examiner will give the operator directions to follow. The road test will follow a pre-determined route and will contain the following scored maneuvers:
Turns Student Discharge
Intersections General Driving Behaviors
Urban Business Brake Usage
Curve Lane Usage
Railroad Crossing Steering
Bridge/Overpass/Sign Regular Traffic Checks
Expressway/Rural/Limited Access Highway Use of Turn Signals
Bridge/Overpass/Sign
The operator must use the push/pull method when turning the vehicle. This will be scored.
After the operator has passed all of the above-referenced tests, the applicant will enter information online at the Division of Highway Safety Motor Vehicles website so applicant's information is available at any license office in Florida. The most important thing to remember before starting the test is to be prepared. Ask any questions before the test begins and take as much time as needed. The operator will be allowed to use a guide during the vehicle inspection, but notes will not be allowed. NOTE: Operator must verbalize the student discharge procedures to receive credit. If the railroad crossing maneuver is simulated, the operator must verbalize these procedures, also.
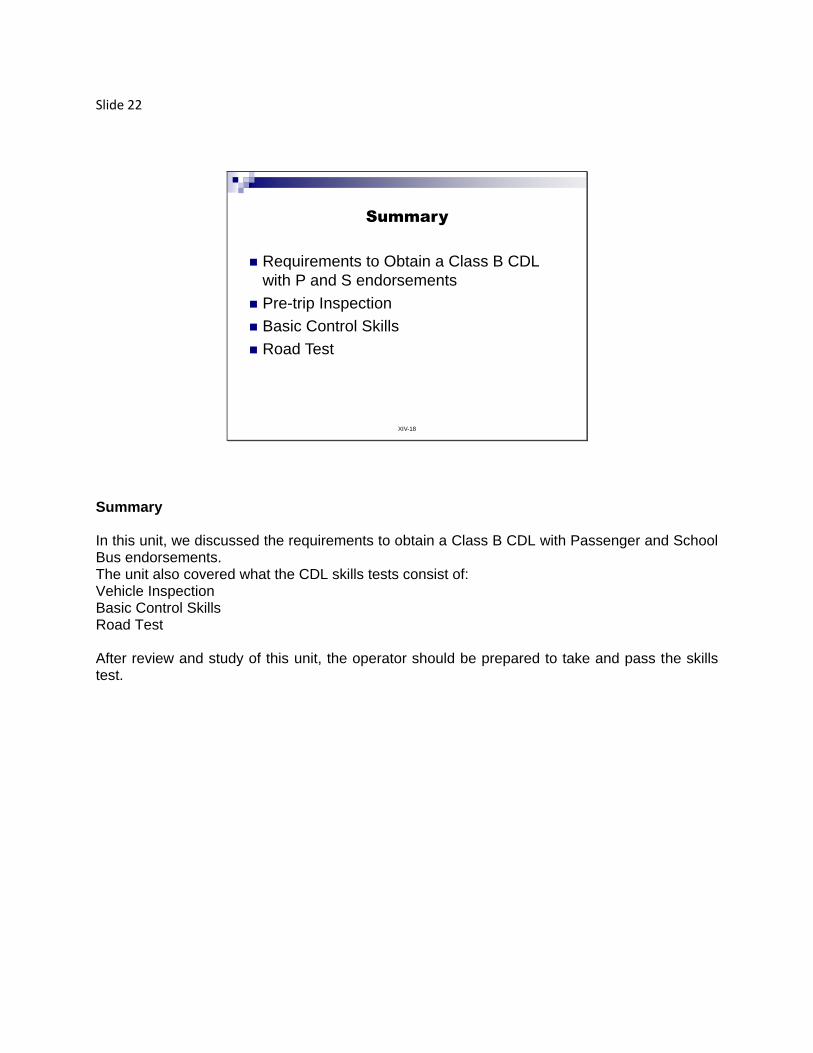
Slide 22
XIV-18
Summary
Requirements to Obtain a Class B CDL
with P and S endorsements
Pre-trip Inspection
Basic Control Skills
Road Test
Summary In this unit, we discussed the requirements to obtain a Class B CDL with Passenger and School Bus endorsements. The unit also covered what the CDL skills tests consist of: Vehicle Inspection Basic Control Skills Road Test After review and study of this unit, the operator should be prepared to take and pass the skills test.