Embed Size (px)
Citation preview
BMW G310 lowering link
Thanks for buying the CC Products lowering link for the G310 BMW. While the instillation is very straight
forward, these instructions will help doing the instillation quickly and efficiently as possible.
Tools needed: 5mm 3/8 “allen”, 8mm 3/8 allen, 6” 3/8” extension, 3/8 Tq wrench, 3/8 ratchet, 17mm
socket, 22mm wrench (for rear axle) 13mm open end wrench
1) Remove the 4 screws holding the rear fender on the swing arm with a 5mm allen.
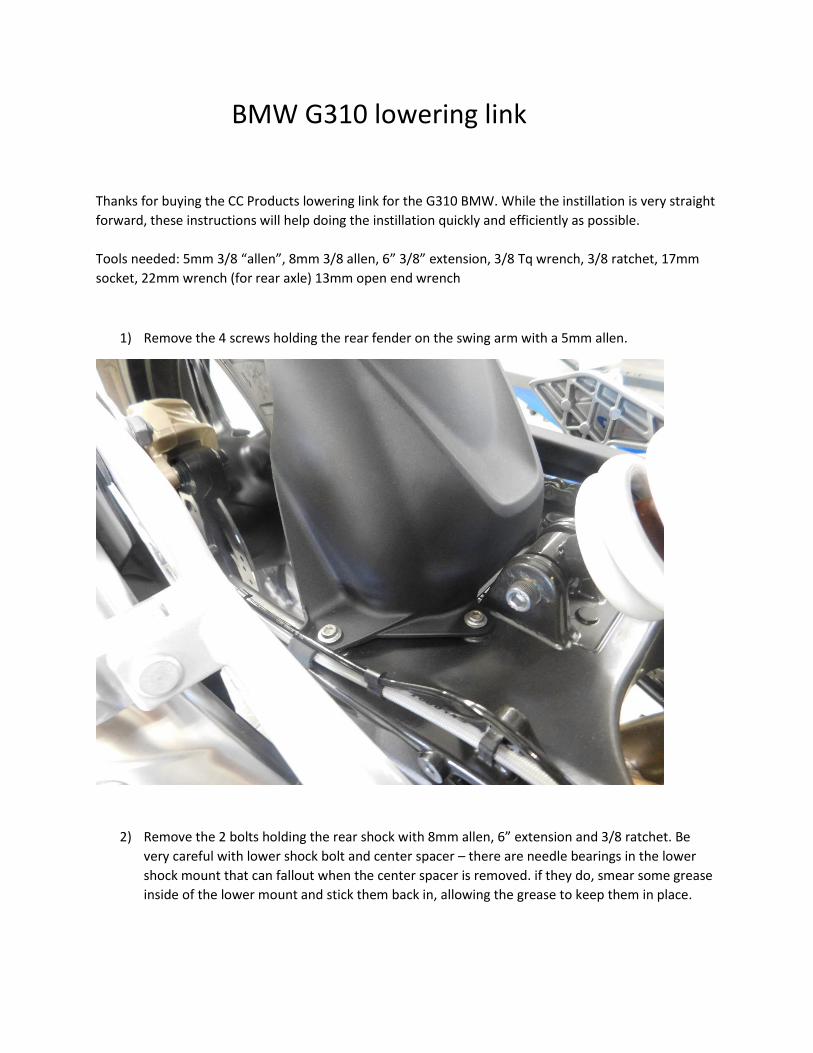
2) Remove the 2 bolts holding the rear shock with 8mm allen, 6” extension and 3/8 ratchet. Be
very careful with lower shock bolt and center spacer – there are needle bearings in the lower
shock mount that can fallout when the center spacer is removed. if they do, smear some grease
inside of the lower mount and stick them back in, allowing the grease to keep them in place.
Removing the rear shock
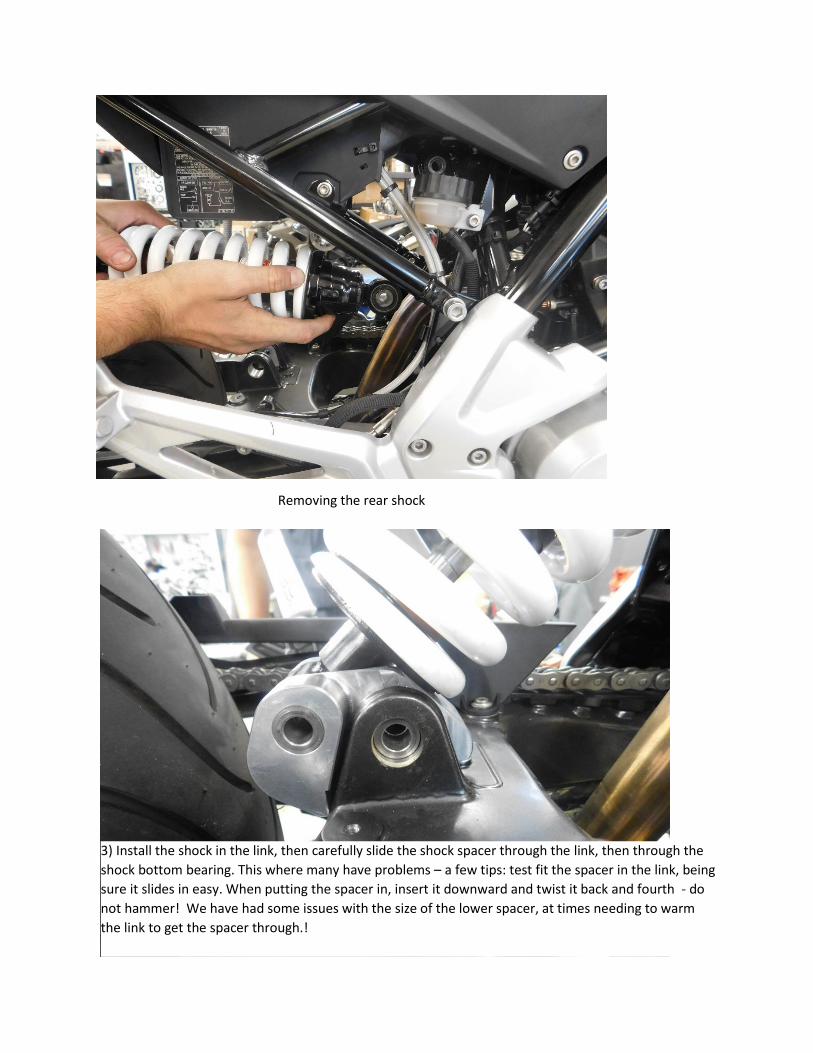
3) Install the shock in the link, then carefully slide the shock spacer through the link, then through the
shock bottom bearing. This where many have problems – a few tips: test fit the spacer in the link, being
sure it slides in easy. When putting the spacer in, insert it downward and twist it back and fourth - do
not hammer! We have had some issues with the size of the lower spacer, at times needing to warm
the link to get the spacer through.!
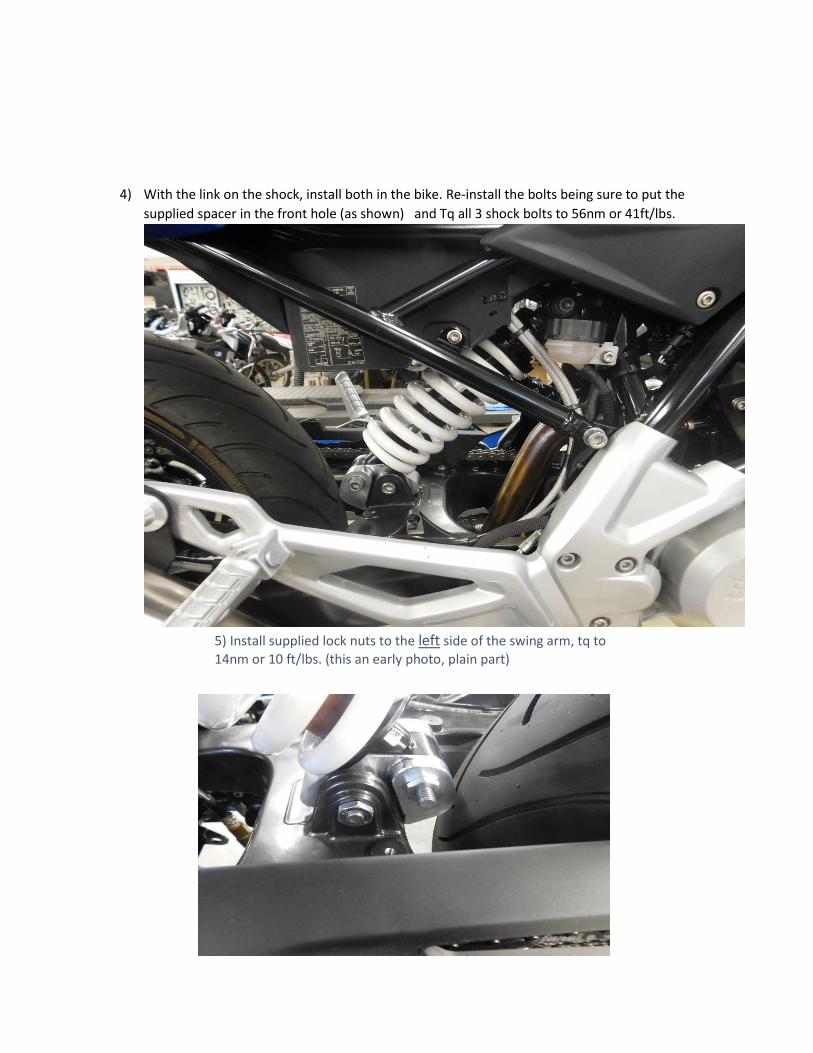
4) With the link on the shock, install both in the bike. Re-install the bolts being sure to put the
supplied spacer in the front hole (as shown) and Tq all 3 shock bolts to 56nm or 41ft/lbs.
5) Install supplied lock nuts to the left side of the swing arm, tq to 14nm or 10 ft/lbs. (this an early photo, plain part)
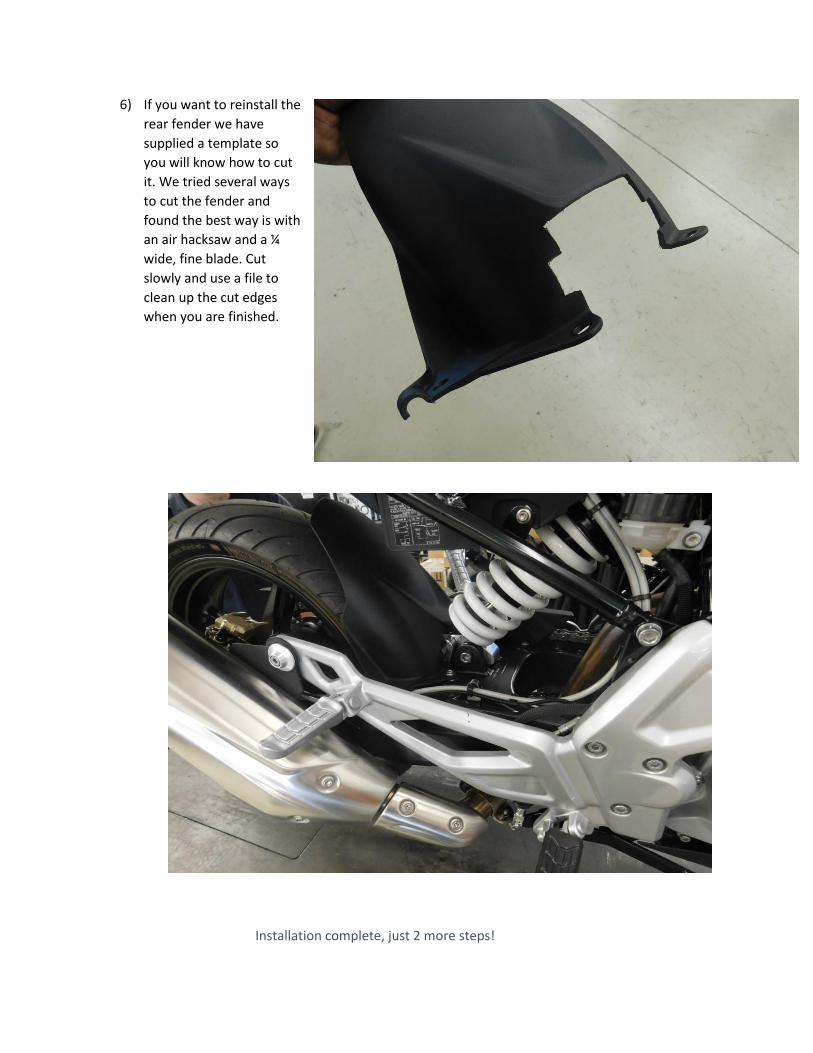
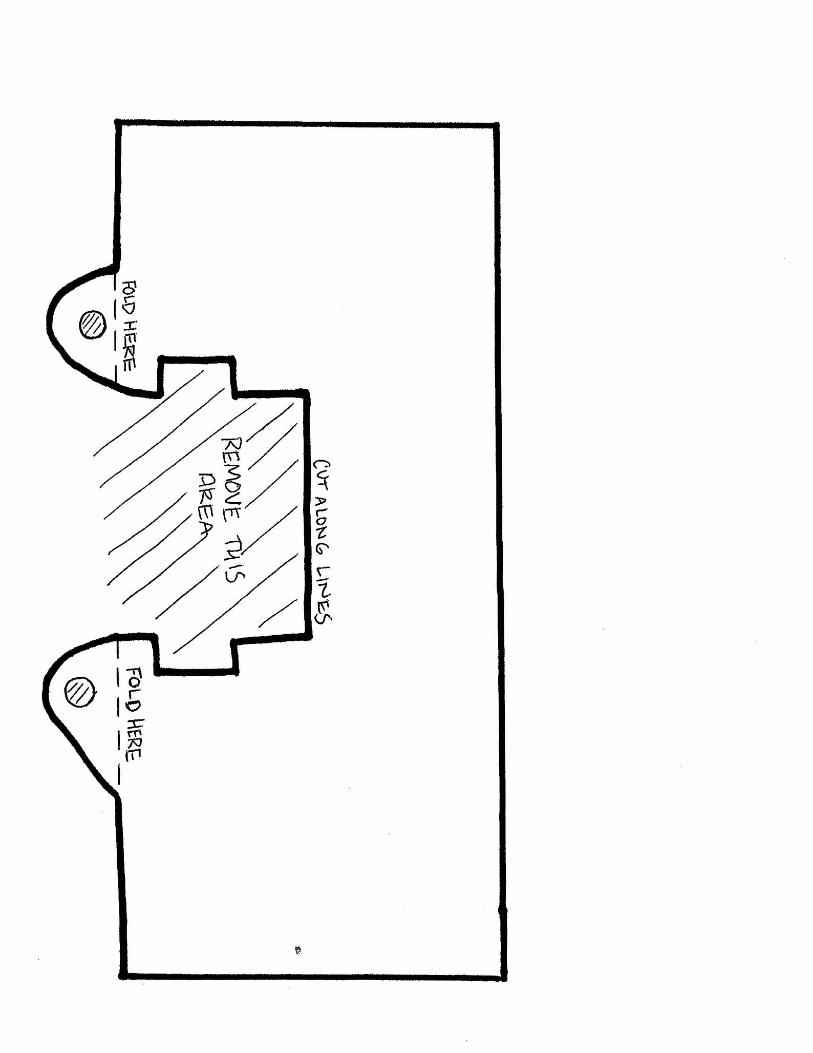
6) If you want to reinstall the
rear fender we have
supplied a template so
you will know how to cut
it. We tried several ways
to cut the fender and
found the best way is with
an air hacksaw and a ¼
wide, fine blade. Cut
slowly and use a file to
clean up the cut edges
when you are finished.
Installation complete, just 2 more steps!
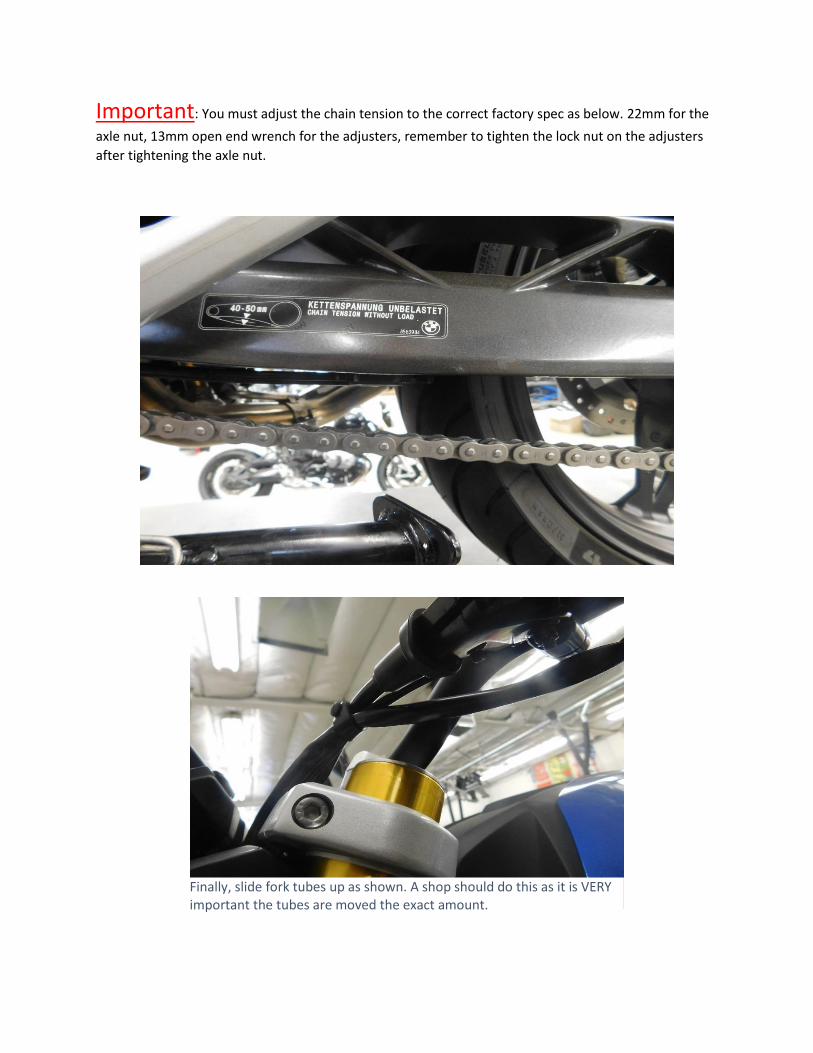
Important: You must adjust the chain tension to the correct factory spec as below. 22mm for the
axle nut, 13mm open end wrench for the adjusters, remember to tighten the lock nut on the adjusters
after tightening the axle nut.
Finally, slide fork tubes up as shown. A shop should do this as it is VERY important the tubes are moved the exact amount.