Embed Size (px)
Citation preview
Publishing ClickOnce Applications 1
Creating ClickOnce Applications for Others to Deploy 5
Deploying ClickOnce Applications For Testing and Production Servers without 9
Accessing Local and Remote Data in ClickOnce Applications 11
Deploying COM Components with ClickOnce 16
Building ClickOnce Applications from the Command Line 21
How to Publish a ClickOnce Application using the Publish Wizard 26
How to Specify Where Visual Studio Copies the Files 29
How to Specify the Location Where End Users Will Install From 30
How to Specify the ClickOnce Offline or Online Install Mode 31
How to Set the ClickOnce Publish Version 32
How to Automatically Increment the ClickOnce Publish Version 33
How to Specify Which Files Are Published by ClickOnce 34
How to Include a Data File in a ClickOnce Application 37
How to Install Prerequisites with a ClickOnce Application 39
How to Include Prerequisites with a ClickOnce Application 41
How to Manage Updates for a ClickOnce Application 43
How to Change the Publish Language for a ClickOnce Application 46
How to Specify a Start Menu Name for a ClickOnce Application 47
How to Specify a Link for Technical Support 48
How to Specify a Support URL for Individual Prerequisites in a ClickOnce Deploy 49
How to Specify a Publish Page for a ClickOnce Application 52
How to Customize the Default Web Page for a ClickOnce Application 54
How to Enable AutoStart for CD Installations 56
How to Create File Associations For a ClickOnce Application 57
How to Retrieve Query String Information in an Online ClickOnce Application 59
How to Disable URL Activation of ClickOnce Applications by Using the Designer 62
How to Disable URL Activation of ClickOnce Applications 63
How to Use ClickOnce to Deploy Applications That Can Run on Multiple Version 64
How to Publish a WPF Application with Visual Styles Enabled 67
Walkthrough Downloading Assemblies on Demand with the ClickOnce Deploy 72
Walkthrough Downloading Assemblies on Demand with the ClickOnce Deploym 77
Walkthrough Downloading Satellite Assemblies on Demand with the ClickOnce 82
Walkthrough Manually Deploying a ClickOnce Application 86
Walkthrough Manually Deploying a ClickOnce Application that Does Not Requi 91
Walkthrough Downloading Satellite Assemblies on Demand with the ClickOnce 96
Walkthrough Creating a Custom Installer for a ClickOnce Application 99
Publishing ClickOnce Applications
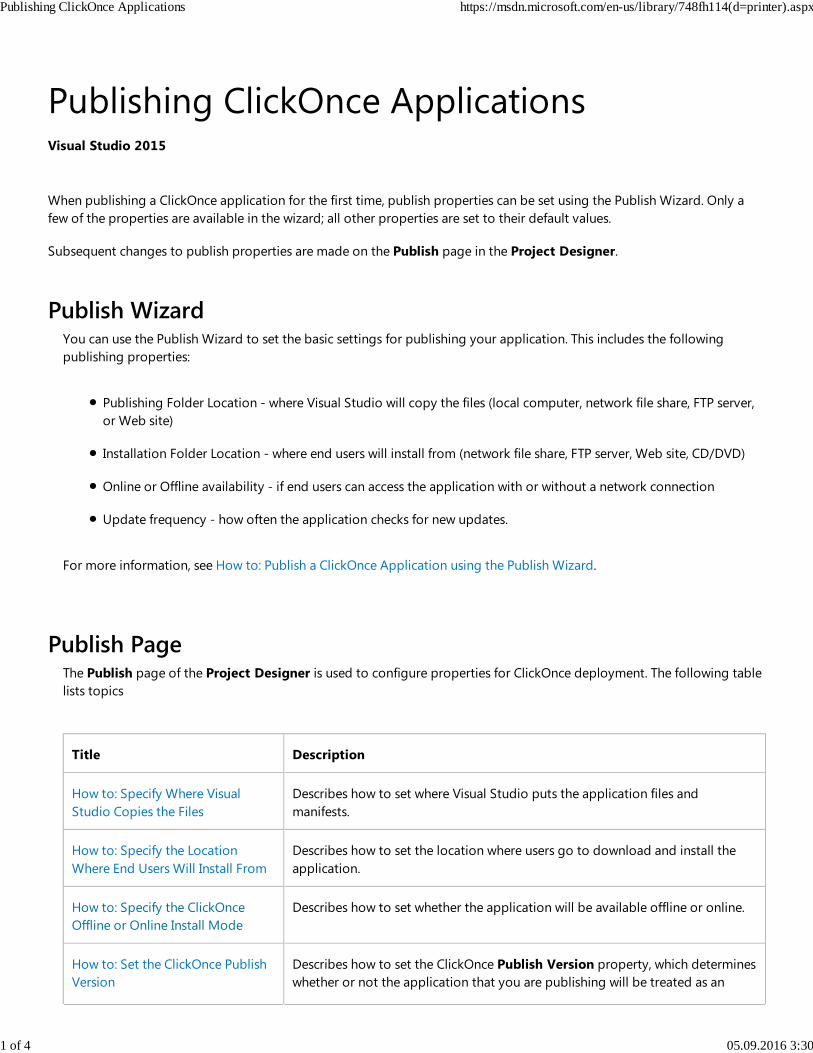
When publishing a ClickOnce application for the first time, publish properties can be set using the Publish Wizard. Only a
few of the properties are available in the wizard; all other properties are set to their default values.
Subsequent changes to publish properties are made on the Publish page in the Project Designer.
Publish WizardYou can use the Publish Wizard to set the basic settings for publishing your application. This includes the following
publishing properties:
Publishing Folder Location - where Visual Studio will copy the files (local computer, network file share, FTP server,
or Web site)
Installation Folder Location - where end users will install from (network file share, FTP server, Web site, CD/DVD)
Online or Offline availability - if end users can access the application with or without a network connection
Update frequency - how often the application checks for new updates.
For more information, see How to: Publish a ClickOnce Application using the Publish Wizard.
Publish PageThe Publish page of the Project Designer is used to configure properties for ClickOnce deployment. The following table
lists topics
Title Description
How to: Specify Where Visual
Studio Copies the Files
Describes how to set where Visual Studio puts the application files and
manifests.
How to: Specify the Location
Where End Users Will Install From
Describes how to set the location where users go to download and install the
application.
How to: Specify the ClickOnce
Offline or Online Install Mode
Describes how to set whether the application will be available offline or online.
How to: Set the ClickOnce Publish
Version
Describes how to set the ClickOnce Publish Version property, which determines
whether or not the application that you are publishing will be treated as an
Visual Studio 2015
Publishing ClickOnce Applications https://msdn.microsoft.com/en-us/library/748fh114(d=printer).aspx
1 of 4 05.09.2016 3:30
update.
How to: Automatically Increment
the ClickOnce Publish Version
Describes how to automatically increment the Revision number of the
Publish Version each time you publish the application.
For more information, see Publish Page, Project Designer
Application Files Dialog Box
This dialog box allows you to specify how the files in your project are categorized for publishing, dynamic
downloading, and updating. It contains a grid that lists the project files that are not excluded by default, or that have a
download group.
To exclude files, mark files as data files or prerequisites, and create groups of files for conditional installation in the
Visual Studio UI, see How to: Specify Which Files Are Published by ClickOnce. You can also mark data files by using the
Mage.exe. For more information, see How to: Include a Data File in a ClickOnce Application.
Prerequisites Dialog Box
This dialog box specifies which prerequisite components are installed, as well as how they are installed. For more
information, see How to: Install Prerequisites with a ClickOnce Application and Prerequisites Dialog Box.
Application Updates Dialog Box
This dialog box specifies how the application installation should check for updates. For more information, see How to:
Manage Updates for a ClickOnce Application.
Publish Options Dialog Box
The Publish Options dialog box specifies an application's deployment options.
How to: Change the Publish Language for
a ClickOnce Application
Describes how to specify a language and culture to match the
localized version.
How to: Specify a Start Menu Name for a
ClickOnce Application
Describes how to change the display name for a ClickOnce
application.
How to: Specify a Link for Technical
Support
Describes how to set the Support URL property, which identifies a
Web page or file share where users can go to get information about
the application.
How to: Specify a Support URL for
Individual Prerequisites in a ClickOnce
Demonstrated how to manually alter an application manifest to
include individual support URLs for each prerequisite.
Publishing ClickOnce Applications https://msdn.microsoft.com/en-us/library/748fh114(d=printer).aspx
2 of 4 05.09.2016 3:30
Deployment
How to: Specify a Publish Page for a
ClickOnce Application
Describes how to generate and publish a default Web page
(publish.htm) along with the application
How to: Customize the Default Web Page
for a ClickOnce Application
Describes how to customize the Web page that is automatically
generated and published along with the application.
How to: Enable AutoStart for CD
Installations
Describes how to enable AutoStart so that the ClickOnce application
is automatically launched when the media is inserted.
Related Topics
Title Description
How to: Create File Associations For a ClickOnce
Application
Describes how to add file name extension support to a
ClickOnce application.
How to: Retrieve Query String Information in an Online
ClickOnce Application
Demonstrates how to retrieve parameters passed in the
URL used to run a ClickOnce application.
How to: Disable URL Activation of ClickOnce Applications
by Using the Designer
Describes how to force users to start the application from
the Start menu by using the designer.
How to: Disable URL Activation of ClickOnce Applications Describes how to force users to start the application from
the Start menu.
Walkthrough: Downloading Assemblies on Demand with
the ClickOnce Deployment API Using the Designer
Explains how to download application assemblies only
when they are first used by the application using the
designer.
Walkthrough: Downloading Assemblies on Demand with
the ClickOnce Deployment API
Explains how to download application assemblies only
when they are first used by the application.
Walkthrough: Downloading Satellite Assemblies on
Demand with the ClickOnce Deployment API
Describes how to mark your satellite assemblies as
optional, and download only the assembly a client
machine needs for its current culture settings.
Walkthrough: Manually Deploying a ClickOnce
Application
Explains how to use .NET Framework utilities to deploy
your ClickOnce application.
Walkthrough: Manually Deploying a ClickOnce
Application that Does Not Require Re-Signing and that
Preserves Branding Information
Explains how to use .NET Framework utilities to deploy
your ClickOnce application without re-signing the
manifests.
Publishing ClickOnce Applications https://msdn.microsoft.com/en-us/library/748fh114(d=printer).aspx
3 of 4 05.09.2016 3:30
NIB: How to: Optimize an Application for a Specific CPU
Type
Explains how to publish for a 64-bit processor by
changing the Target CPU or Platform target property
in your project.
7f4383af-ed87-4853-b4d4-02a3967a5fd9 Explains how to enable a ClickOnce application to install
and run on multiple versions of the NET Framework.
Walkthrough: Creating a Custom Installer for a ClickOnce
Application
Explains how to create a custom installer to install a
ClickOnce application.
How to: Publish a WPF Application with Visual Styles
Enabled
Provides step-by-step instructions to resolve an error
that appears when you attempt to publish a WPF
application that has visual styles enabled.
See AlsoClickOnce Security and Deployment
ClickOnce Reference
© 2016 Microsoft
Publishing ClickOnce Applications https://msdn.microsoft.com/en-us/library/748fh114(d=printer).aspx
4 of 4 05.09.2016 3:30
Creating ClickOnce Applications for Othersto Deploy
Not all developers who are creating ClickOnce deployments plan to deploy the applications themselves. Many of them just
package their application by using ClickOnce and then hand the files off to a customer, such as a large corporation. The
customer becomes the one responsible for hosting the application on its network. This topic discusses some of the problems
inherent in such deployments in versions of the .NET Framework prior to version 3.5. It then describes a new solution
provided by using the new "use manifest for trust" feature in the .NET Framework 3.5. Finally, it concludes with
recommended strategies for creating ClickOnce deployments for customers who are still using older versions of the .NET
Framework.
Issues Involved in Creating Deployments for CustomersSeveral issues occur when you plan to supply a deployment to a customer. The first issue concerns code signing. In order
to be deployed across a network, the deployment manifest and application manifest of a ClickOnce deployment must
both be signed with a digital certificate. This raises the question of whether to use the developer's certificate or the
customer's certificate when signing the manifests.
The question of which certificate to use is critical, as a ClickOnce application's identity is based on the digital signature of
the deployment manifest. If the developer signs the deployment manifest, it could lead to conflicts if the customer is a
large company, and more than one division of the company deploys a customized version of the application.
For example, say that Adventure Works has a finance department and a human resources department. Both departments
license a ClickOnce application from Microsoft Corporation that generates reports from data stored in a SQL database.
Microsoft supplies each department with a version of the application that is customized for their data. If the applications
are signed with the same Authenticode certificate, a user who tries to use both applications would encounter an error, as
ClickOnce would regard the second application as being identical to the first. In this case, the customer could experience
unpredictable and unwanted side effects that include the loss of any data stored locally by the application.
An additional problem related to code signing is the deploymentProvider element in the deployment manifest, which
tells ClickOnce where to look for application updates. This element has to be added to the deployment manifest prior to
signing it. If this element is added afterward, the deployment manifest must be re-signed.
Requiring the Customer to Sign the Deployment Manifest
One solution to this problem of non-unique deployments is to have the developer sign the application manifest, and
the customer sign the deployment manifest. While this approach works, it introduces other issues. Since an
Authenticode certificate must remain a protected asset, the customer cannot just give the certificate to the developer
to sign the deployment. While the customer can sign the deployment manifest themselves by using tools freely
available with the .NET Framework SDK, this may require more technical knowledge than the customer is willing or able
to provide. In such cases, the developer usually creates an application, Web site, or other mechanism through which the
customer can submit their version of the application for signing.
Visual Studio 2015
Creating ClickOnce Applications for Others to Deploy https://msdn.microsoft.com/en-us/library/bb384248(d=printer).aspx
1 of 4 05.09.2016 16:07
The Impact of Customer Signing on ClickOnce Application Security
Even if the developer and the customer agree that the customer should sign the application manifest, this raises other
issues that surround the application's identity, especially as it applies to trusted application deployment. (For more
information about this feature, see Trusted Application Deployment Overview.) Say that Adventure Works wants to
configure its client computers so that any application provided to them by Microsoft Corporation runs with full trust. If
Adventure Works signs the deployment manifest, then ClickOnce will use Adventure Work's security signature to
determine the trust level of the application.
Creating Customer Deployments by Using Application Manifest for
TrustClickOnce in the .NET Framework 3.5 contains a new feature that gives developers and customers a new solution to the
scenario of how the manifests should be signed. The ClickOnce application manifest supports a new element named
<useManifestForTrust> that enables a developer to signify that the digital signature of the application manifest is
what should be used for making trust decisions. The developer uses ClickOnce packaging tools—such as Mage.exe,
MageUI.exe, and Visual Studio—to include this element in the application manifest, as well as to embed both their
Publisher name and the name of the application in the manifest.
When using <useManifestForTrust>, the deployment manifest does not have to be signed with an Authenticode
certificate issued by a certification authority. Instead, it can be signed with what is known as a self-signed certificate. A
self-signed certificate is generated by either the customer or the developer by using standard .NET Framework SDK tools,
and then applied to the deployment manifest by using the standard ClickOnce deployment tools. For more information,
see Makecert.exe (Certificate Creation Tool).
Using a self-signed certificate for the deployment manifest presents several advantages. By eliminating the need for the
customer to obtain or create their own Authenticode certificate, <useManifestForTrust> simplifies deployment for the
customer, while allowing the developer to maintain their own branding identity on the application. The result is a set of
signed deployments that are more secure and have unique application identities. This eliminates the potential conflict
that may occur from deploying the same application to multiple customers.
For step-by-step information about how to create a ClickOnce deployment with <useManifestForTrust> enabled, see
Walkthrough: Manually Deploying a ClickOnce Application that Does Not Require Re-Signing and that Preserves
Branding Information.
How Application Manifest for Trust Works at Runtime
To get a better understanding of how using the application manifest for trust works at runtime, consider the following
example. A ClickOnce application that targets the .NET Framework 3.5 is created by Microsoft. The application manifest
uses the <useManifestForTrust> element and is signed by Microsoft. Adventure Works signs the deployment
manifest by using a self-signed certificate. Adventure Works clients are configured to trust any application signed by
Microsoft.
When a user clicks a link to the deployment manifest, ClickOnce installs the application on the user's computer. The
certificate and deployment information identify the application uniquely to ClickOnce on the client computer. If the
user tries to install the same application again from a different location, ClickOnce can use this identity to determine
that the application already exists on the client.
Next, ClickOnce examines the Authenticode certificate that is used to sign the application manifest, which determines
Creating ClickOnce Applications for Others to Deploy https://msdn.microsoft.com/en-us/library/bb384248(d=printer).aspx
2 of 4 05.09.2016 16:07
the level of trust that ClickOnce will grant. Since Adventure Works has configured its clients to trust any application
signed by Microsoft, this ClickOnce application is granted full trust. For more information, see Trusted Application
Deployment Overview.
Creating Customer Deployments for Earlier VersionsWhat if a developer is deploying ClickOnce applications to customers who are using older versions of the .NET
Framework? The following sections summarize several recommended solutions, together with the benefits and drawbacks
of each.
Sign Deployments on Behalf of Customer
One possible deployment strategy is for the developer to create a mechanism to sign deployments on behalf of their
customers, by using the customer's own private key. This prevents the developer from having to manage private keys
or multiple deployment packages. The developer just provides the same deployment to each customer. It is up to the
customer to customize it for their environment by using the signing service.
One drawback to this method is the time and expense that are required to implement it. While such a service can be
built by using the tools provided in the .NET Framework SDK, it will add more development time to the product life
cycle.
As noted earlier in this topic, another drawback is that each customer's version of the application will have the same
application identity, which could lead to conflicts. If this is a concern, the developer can change the Name field that is
used when generating the deployment manifest to give each application a unique name. This will create a separate
identity for each version of the application, and eliminate any potential identity conflicts. This field corresponds to the
‐Name argument for Mage.exe, and to the Name field on the Name tab in MageUI.exe.
For example, say that the developer has created an application named Application1. Instead of creating a single
deployment with the Name field set to Application1, the developer can create several deployments with a customer-
specific variation on this name, such as Application1-CustomerA, Application1-CustomerB, and so on.
Deploy Using a Setup Package
A second possible deployment strategy is to generate a Microsoft Setup project to perform the initial deployment of
the ClickOnce application. This can be provided in one of several different formats: as an MSI deployment, as a setup
executable (.EXE), or as a cabinet (.cab) file together with a batch script.
Using this technique, the developer would provide the customer a deployment that includes the application files, the
application manifest, and a deployment manifest that serves as a template. The customer would run the setup program,
which would prompt them for a deployment URL (the server or file share location from which users will install the
ClickOnce application), as well as a digital certificate. The setup application may also choose to prompt for additional
ClickOnce configuration options, such as update check interval. Once this information is gathered, the setup program
would generate the real deployment manifest, sign it, and publish the ClickOnce application to the designated server
location.
There are three ways that the customer can sign the deployment manifest in this situation:
Creating ClickOnce Applications for Others to Deploy https://msdn.microsoft.com/en-us/library/bb384248(d=printer).aspx
3 of 4 05.09.2016 16:07
The customer can use a valid certificate issued by a certification authority (CA).1.
As a variation on this approach, the customer can choose to sign their deployment manifest with a self-signed
certificate. The drawback to this is that it will cause the application to display the words "Unknown Publisher"
when the user is asked whether to install it. However, the benefit is that it prevents smaller customers from
having to spend the time and money required for a certificate issued by a certification authority.
2.
Finally, the developer can include their own self-signed certificate in the setup package. This introduces the
potential problems with application identity discussed earlier in this topic.
3.
The drawback to the setup deployment project method is the time and expense required to build a custom
deployment application.
Have Customer Generate Deployment Manifest
A third possible deployment strategy is to hand only the application files and application manifest off to the customer.
In this scenario, the customer is responsible for using the .NET Framework SDK to generate and sign the deployment
manifest.
The drawback of this method is that it requires the customer to install the .NET Framework SDK tools, and to have a
developer or system administrator who is skilled at using them. Some customers may demand a solution that requires
little or no technical effort on their part.
See AlsoDeploying ClickOnce Applications For Testing and Production Servers without Resigning
Walkthrough: Manually Deploying a ClickOnce Application
Walkthrough: Manually Deploying a ClickOnce Application that Does Not Require Re-Signing and that Preserves
Branding Information
© 2016 Microsoft
Creating ClickOnce Applications for Others to Deploy https://msdn.microsoft.com/en-us/library/bb384248(d=printer).aspx
4 of 4 05.09.2016 16:07
Deploying ClickOnce Applications ForTesting and Production Servers withoutResigning
This topic discusses a new feature of ClickOnce introduced in the .NET Framework version 3.5 that enables the deployment
of ClickOnce applications from multiple network locations without re-signing or changing the ClickOnce manifests.
Note
Resigning is still the preferred method for deploying new versions of applications. Whenever possible, use the resigning
method. For more information, see Mage.exe (Manifest Generation and Editing Tool).
Third-party developers and ISVs can opt-in to this feature, making it easier for their customers to update their applications.
This feature can be used in the following situations:
When updating an application, not the first installation of an application.
When there is only one configuration of the application on a computer. For example, if an application is configured
to point to two different databases, you cannot use this feature.
Excluding deploymentProvider from Deployment ManifestsIn the .NET Framework 2.0 and the .NET Framework 3.0, any ClickOnce application that installs on the system for offline
availability must specify a deploymentProvider in its deployment manifest. The deploymentProvider is often referred
to as the update location; it is the location in which ClickOnce will check for application updates. This requirement,
coupled with the need for application publishers to sign their deployments, made it difficult for a company to update a
ClickOnce application from a vendor or other third-party. It also makes it more difficult to deploy the same application
from multiple locations on the same network.
With changes that were made to ClickOnce in the .NET Framework 3.5, it is possible for a third-party to provide a
ClickOnce application to another organization, which can then deploy the application on its own network.
In order to take advantage of this feature, developers of ClickOnce applications must exclude deploymentProvider from
their deployment manifests. This means excluding the ‐providerUrl argument when you create deployment manifests
with Mage.exe, or making sure the Launch Location text box on the Application Manifest tab is left blank if you are
generating deployment manifests with MageUI.exe.
Visual Studio 2015
Deploying ClickOnce Applications For Testing and Production Servers w... https://msdn.microsoft.com/en-us/library/bb384243(d=printer).aspx
1 of 2 05.09.2016 16:07
deploymentProvider and Application UpdatesStarting with the .NET Framework 3.5, you no longer have to specify a deploymentProvider in your deployment
manifest in order to deploy a ClickOnce application for both online and offline usage. This supports the scenario where
you need to package and sign the deployment yourself, but allow other companies to deploy the application over their
networks.
The key point to remember is that applications that exclude a deploymentProvider cannot change their install location
during updates, until they ship an update that includes the deploymentProvider tag again.
Here are two examples to clarify this point. In the first example, you publish a ClickOnce application that has no
deploymentProvider tag, and you ask users to install it from http://www.adatum.com/MyApplication/. If you decide
you want to publish the next update of the application from http://subdomain.adatum.com/MyApplication/, you will
have no way of signifying this in the deployment manifest that resides in http://www.adatum.com/MyApplication/. You
can do one of two things:
Tell your users to uninstall the previous version, and install the new version from the new location.
Include an update on http://www.adatum.com/MyApplication/ that includes a deploymentProvider pointing to
http://www.adatum.com/MyApplication/. Then, release another update later with deploymentProvider pointing
to http://subdomain.adatum.com/MyApplication/.
In the second example, you publish a ClickOnce application that specifies deploymentProvider, and you then decide to
remove it. Once the new version without deploymentProvider has been downloaded to clients, you will not be able to
redirect the path used for updates until you release a version of your application that has deploymentProvider restored.
As with the first example, deploymentProvider must initially point to the current update location, not your new
location. In this case, if you attempt to insert a deploymentProvider that refers to http://subdomain.adatum.com
/MyApplication/, then the next update will fail.
Creating a DeploymentFor step by step guidance on creating deployments that can be deployed from different network locations, see
Walkthrough: Manually Deploying a ClickOnce Application that Does Not Require Re-Signing and that Preserves
Branding Information.
See AlsoMage.exe (Manifest Generation and Editing Tool)
MageUI.exe (Manifest Generation and Editing Tool, Graphical Client)
© 2016 Microsoft
Deploying ClickOnce Applications For Testing and Production Servers w... https://msdn.microsoft.com/en-us/library/bb384243(d=printer).aspx
2 of 2 05.09.2016 16:07
Accessing Local and Remote Data inClickOnce Applications
Most applications consume or produce data. ClickOnce gives you a variety of options for reading and writing data, both
locally and remotely.
Local DataWith ClickOnce, you can load and store data locally by using any one of the following methods:
ClickOnce Data Directory
Isolated Storage
Other Local Files
ClickOnce Data Directory
Every ClickOnce application installed on a local computer has a data directory, stored in the user's Documents and
Settings folder. Any file included in a ClickOnce application and marked as a "data" file is copied to this directory when
an application is installed. Data files can be of any file type, the most frequently used being text, XML, and database
files such as Microsoft Access .mdb files.
The data directory is intended for application-managed data, which is data that the application explicitly stores and
maintains. All static, nondependency files not marked as "data" in the application manifest will instead reside in the
Application Directory. This directory is where the application's executable (.exe) files and assemblies reside.
Note
When a ClickOnce application is uninstalled, its Data Directory is also removed. Never use the Data Directory to
store end-user–managed data, such as documents.
Marking Data Files in a ClickOnce Distribution
To put an existing file inside the Data Directory, you must mark the existing file as a data file in your ClickOnce
application's application manifest file. For more information, see How to: Include a Data File in a ClickOnce
Application.
Visual Studio 2015
Accessing Local and Remote Data in ClickOnce Applications https://msdn.microsoft.com/en-us/library/d8saf4wy(d=printer).aspx
1 of 5 05.09.2016 16:08

Reading from and Writing to the Data Directory
Reading from the Data Directory requires that your ClickOnce application request Read permission; similarly, writing
to the directory requires Write permission. Your application will automatically have this permission if it is configured
to run with Full Trust. For more information about elevating permissions for your application by using either
Permission Elevation or Trusted Application Deployment, see Securing ClickOnce Applications.
Note
If your organization does not use Trusted Application Deployment and has turned off Permission Elevation,
asserting permissions will fail.
After your application has these permissions, it can access the Data Directory by using method calls on classes within
the System.IO. You can obtain the path of the Data Directory within a Windows Forms ClickOnce application by
using the DataDirectory property defined on the CurrentDeployment property of ApplicationDeployment. This is the
most convenient and recommended way to access your data. The following code example demonstrates how to do
this for a text file named CSV.txt that you have included in your deployment as a data file.
For more information on marking files in your deployment as data files, see How to: Include a Data File in a
ClickOnce Application.
You can also obtain the data directory path using the relevant variables on the Application class, such as
LocalUserAppDataPath.
Manipulating other types of files might require additional permissions. For example, if you want to use an Access
database (.mdb) file, your application must assert full trust in order to use the relevant System.Data classes.
Data Directory and Application Versions
Each version of an application has its own Data Directory, which is isolated from other versions. ClickOnce creates
this directory regardless of whether any data files are included in the deployment so that the application has a
location to create new data files at run time. When a new version of an application is installed, ClickOnce will copy all
If (ApplicationDeployment.IsNetworkDeployed) Then
Dim SR As StreamReader = Nothing
Try
SR = New StreamReader(ApplicationDeployment.CurrentDeployment.DataDirectory
& "\CSV.txt")
MessageBox.Show(SR.ReadToEnd())
Catch Ex As Exception
MessageBox.Show("Could not read file.")
Finally
SR.Close()
End Try
End If
VB
Accessing Local and Remote Data in ClickOnce Applications https://msdn.microsoft.com/en-us/library/d8saf4wy(d=printer).aspx
2 of 5 05.09.2016 16:08
the existing data files from the previous version's Data Directory into the new version's Data Directory—whether
they were included in the original deployment or created by the application.
ClickOnce will replace the older version of the file with the newer version of the server if a data file has a different
hash value in the old version of the application as in the new version. Also, if the earlier version of the application
created a new file that has the same name as a file included in the new version's deployment, ClickOnce will overwrite
the old version's file with the new file. In both cases, the old files will be included in a subdirectory inside the data
directory named .pre, so that the application can still access the old data for migration purposes.
If you need finer-grained migration of data, you can use the ClickOnce Deployment API to perform custom
migration from the old Data Directory to the new Data Directory. You will have to test for an available download by
using IsFirstRun, download the update using Update or UpdateAsync, and do any custom data migration work in
your own after the update is finished.
Isolated Storage
Isolated Storage provides an API for creating and accessing files by using a simple API. The actual location of the stored
files is hidden from both the developer and the user.
Isolated Storage works in all versions of the .NET Framework. Isolated Storage also works in partially trusted
applications without the need for additional permission grants. You should use Isolated Storage if your application
must run in partial trust, but must maintain application-specific data.
For more information, see Isolated Storage.
Other Local Files
If your application must work with or save end-user data such as reports, images, music, and so on, your application
will require FileIOPermission to read and write data to the local file system.
Remote DataAt some point, your application will likely have to retrieve information from a remote Web site, such as customer data or
market information. This section discusses the most common techniques for retrieving remote data.
Accessing Files by Using HTTP
You can access data from a Web server by using either the WebClient or the HttpWebRequest class in the System.Net
namespace. The data can be either static files or ASP.NET applications that return raw text or XML data. If your data is in
XML format, the fastest way to retrieve the data is by using the XmlDocument class, whose Load method takes a URL as
an argument. For an example, see Reading an XML Document into the DOM.
You have to consider security when your application accesses remote data over HTTP. By default, your ClickOnce
application's access to network resources may be restricted, depending on how your application was deployed. These
restrictions are applied to prevent malicious programs from gaining access to privileged remote data or from using a
Accessing Local and Remote Data in ClickOnce Applications https://msdn.microsoft.com/en-us/library/d8saf4wy(d=printer).aspx
3 of 5 05.09.2016 16:08
user's computer to attack other computers on the network.
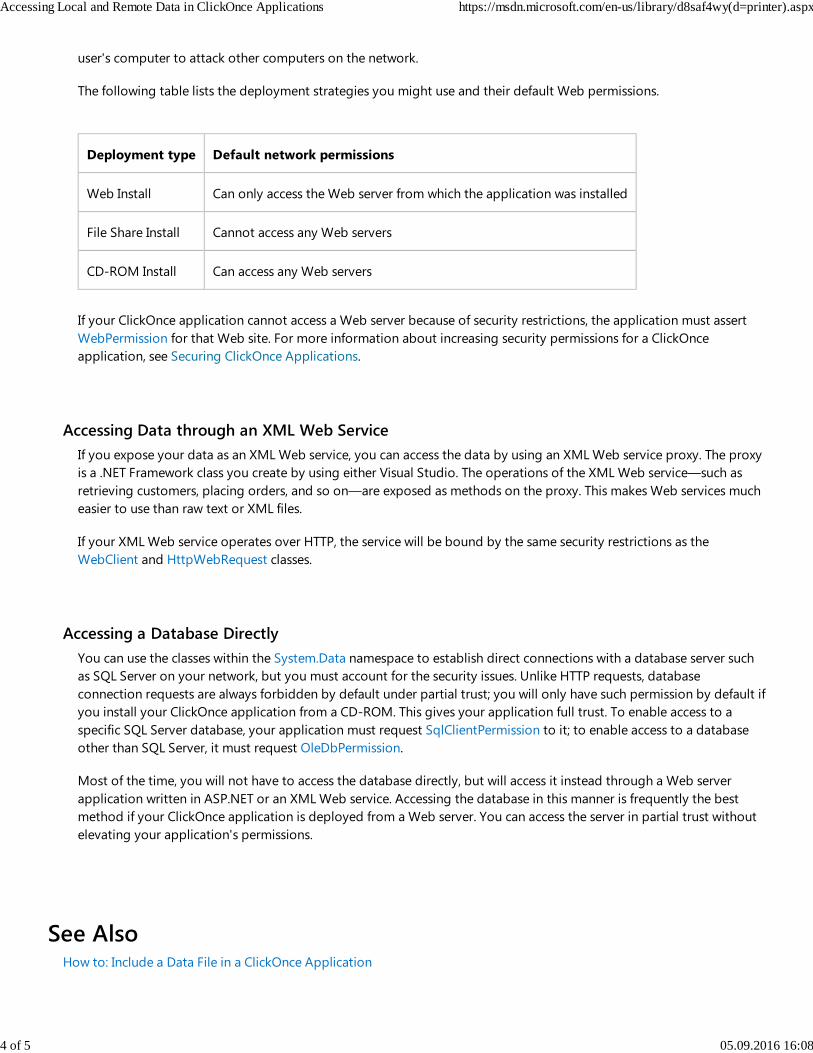
The following table lists the deployment strategies you might use and their default Web permissions.
Deployment type Default network permissions
Web Install Can only access the Web server from which the application was installed
File Share Install Cannot access any Web servers
CD-ROM Install Can access any Web servers
If your ClickOnce application cannot access a Web server because of security restrictions, the application must assert
WebPermission for that Web site. For more information about increasing security permissions for a ClickOnce
application, see Securing ClickOnce Applications.
Accessing Data through an XML Web Service
If you expose your data as an XML Web service, you can access the data by using an XML Web service proxy. The proxy
is a .NET Framework class you create by using either Visual Studio. The operations of the XML Web service—such as
retrieving customers, placing orders, and so on—are exposed as methods on the proxy. This makes Web services much
easier to use than raw text or XML files.
If your XML Web service operates over HTTP, the service will be bound by the same security restrictions as the
WebClient and HttpWebRequest classes.
Accessing a Database Directly
You can use the classes within the System.Data namespace to establish direct connections with a database server such
as SQL Server on your network, but you must account for the security issues. Unlike HTTP requests, database
connection requests are always forbidden by default under partial trust; you will only have such permission by default if
you install your ClickOnce application from a CD-ROM. This gives your application full trust. To enable access to a
specific SQL Server database, your application must request SqlClientPermission to it; to enable access to a database
other than SQL Server, it must request OleDbPermission.
Most of the time, you will not have to access the database directly, but will access it instead through a Web server
application written in ASP.NET or an XML Web service. Accessing the database in this manner is frequently the best
method if your ClickOnce application is deployed from a Web server. You can access the server in partial trust without
elevating your application's permissions.
See AlsoHow to: Include a Data File in a ClickOnce Application
Accessing Local and Remote Data in ClickOnce Applications https://msdn.microsoft.com/en-us/library/d8saf4wy(d=printer).aspx
4 of 5 05.09.2016 16:08
© 2016 Microsoft
Accessing Local and Remote Data in ClickOnce Applications https://msdn.microsoft.com/en-us/library/d8saf4wy(d=printer).aspx
5 of 5 05.09.2016 16:08
Deploying COM Components with ClickOnce
Deployment of legacy COM components has traditionally been a difficult task. Components need to be globally registered
and thus can cause undesirable side effects between overlapping applications. This situation is generally not a problem in
.NET Framework applications because components are completely isolated to an application or are side-by-side compatible.
Visual Studio allows you to deploy isolated COM components on the Windows XP or higher operating system.
ClickOnce provides an easy and safe mechanism for deploying your .NET applications. However, if your applications use
legacy COM components, you will need to take additional steps for deploying them. This topic describes how to deploy
isolated COM components and reference native components (for example, from Visual Basic 6.0 or Visual C++).
For more information on deploying isolated COM components, see "Simplify App Deployment with ClickOnce and
Registration-Free COM" at http://msdn.microsoft.com/msdnmag/issues/05/04/RegFreeCOM/default.aspx.
Registration-Free COMRegistration-free COM is a new technology for deploying and activating isolated COM components. It works by putting
all the component's type-library and registration information that is typically installed into the system registry into an
XML file called a manifest, stored in the same folder as the application.
Isolating a COM component requires that it be registered on the developer's machine, but it does not have to be
registered on the end user's computer. To isolate a COM component, all you need to do is set its reference's Isolated
property to True. By default, this property is set to False, indicating that it should be treated as a registered COM
reference. If this property is True, it causes a manifest to be generated for this component at build time. It also causes the
corresponding files to be copied to the application folder during installation.
When the manifest generator encounters an isolated COM reference, it enumerates all of the CoClass entries in the
component's type library, matching each entry with its corresponding registration data, and generating manifest
definitions for all the COM classes in the type library file.
Deploying Registration-Free COM Components Using ClickOnceClickOnce deployment technology is well-suited for deploying isolated COM components, because both ClickOnce and
registration-free COM require that a component have a manifest in order to be deployed.
Typically, the author of the component should provide a manifest. If not, however, Visual Studio is capable of generating
a manifest automatically for a COM component. The manifest generation is performed during the ClickOnce Publish
process; for more information, see Publishing ClickOnce Applications. This feature also allows you to leverage legacy
components that you authored in earlier development environments such as Visual Basic 6.0.
There are two ways that ClickOnce deploys COM components:
Use the bootstrapper to deploy your COM components; this works on all supported platforms.
Use native component isolation (also known as registration-free COM) deployment. However, this will only work
Visual Studio 2015
Deploying COM Components with ClickOnce https://msdn.microsoft.com/en-us/library/ms165432(d=printer).aspx
1 of 5 05.09.2016 16:08
on a Windows XP or higher operating system.
Example of Isolating and Deploying a Simple COM Component
In order to demonstrate registration-free COM component deployment, this example will create a Windows-based
application in Visual Basic that references an isolated native COM component created using Visual Basic 6.0, and deploy
it using ClickOnce.
First you will need to create the native COM component:
To create a native COM component
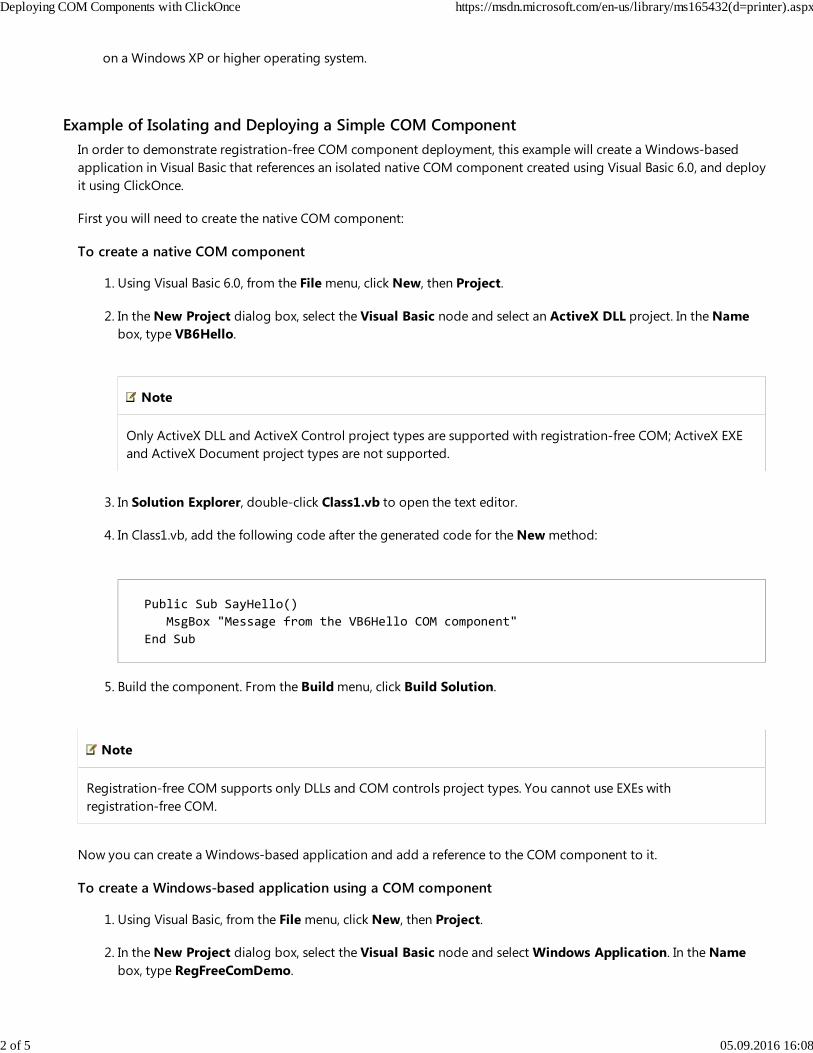
Using Visual Basic 6.0, from the File menu, click New, then Project.1.
In the New Project dialog box, select the Visual Basic node and select an ActiveX DLL project. In the Name
box, type VB6Hello.
Note
Only ActiveX DLL and ActiveX Control project types are supported with registration-free COM; ActiveX EXE
and ActiveX Document project types are not supported.
2.
In Solution Explorer, double-click Class1.vb to open the text editor.3.
In Class1.vb, add the following code after the generated code for the New method:4.
Build the component. From the Build menu, click Build Solution.5.
Note
Registration-free COM supports only DLLs and COM controls project types. You cannot use EXEs with
registration-free COM.
Now you can create a Windows-based application and add a reference to the COM component to it.
To create a Windows-based application using a COM component
Using Visual Basic, from the File menu, click New, then Project.1.
In the New Project dialog box, select the Visual Basic node and select Windows Application. In the Name
box, type RegFreeComDemo.
2.
Public Sub SayHello()
MsgBox "Message from the VB6Hello COM component"
End Sub
Deploying COM Components with ClickOnce https://msdn.microsoft.com/en-us/library/ms165432(d=printer).aspx
2 of 5 05.09.2016 16:08
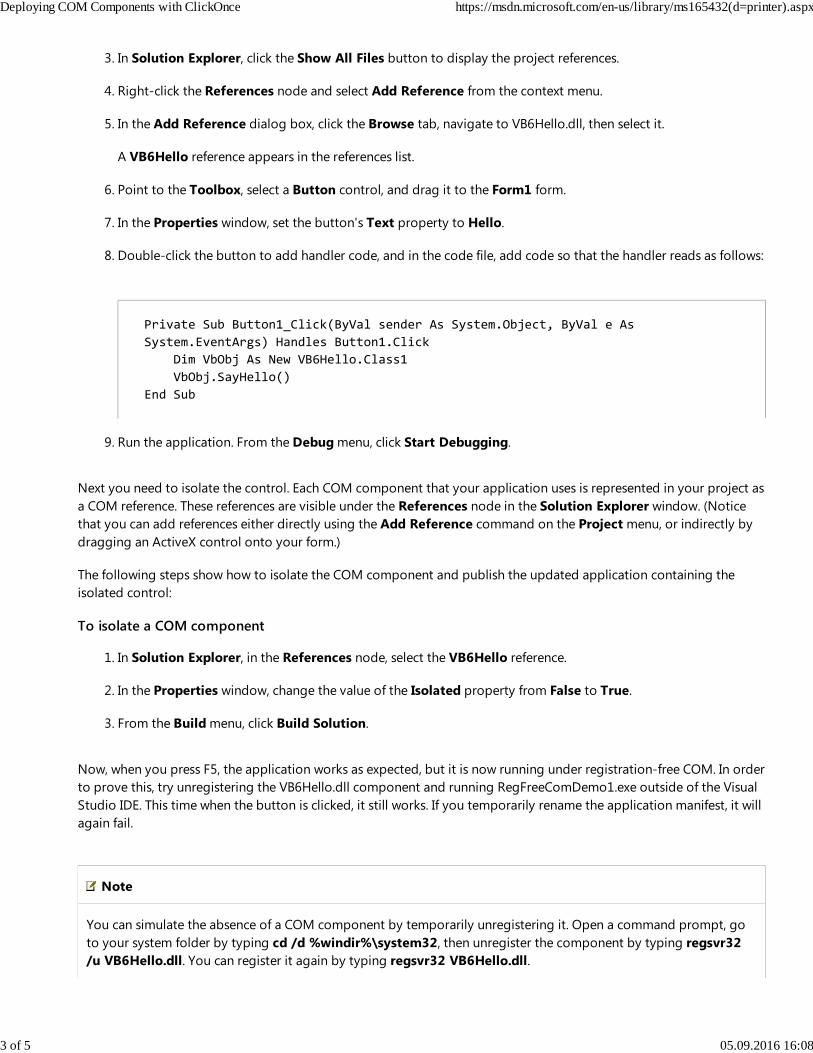
In Solution Explorer, click the Show All Files button to display the project references.3.
Right-click the References node and select Add Reference from the context menu.4.
In the Add Reference dialog box, click the Browse tab, navigate to VB6Hello.dll, then select it.
A VB6Hello reference appears in the references list.
5.
Point to the Toolbox, select a Button control, and drag it to the Form1 form.6.
In the Properties window, set the button's Text property to Hello.7.
Double-click the button to add handler code, and in the code file, add code so that the handler reads as follows:8.
Run the application. From the Debug menu, click Start Debugging.9.
Next you need to isolate the control. Each COM component that your application uses is represented in your project as
a COM reference. These references are visible under the References node in the Solution Explorer window. (Notice
that you can add references either directly using the Add Reference command on the Project menu, or indirectly by
dragging an ActiveX control onto your form.)
The following steps show how to isolate the COM component and publish the updated application containing the
isolated control:
To isolate a COM component
In Solution Explorer, in the References node, select the VB6Hello reference.1.
In the Properties window, change the value of the Isolated property from False to True.2.
From the Build menu, click Build Solution.3.
Now, when you press F5, the application works as expected, but it is now running under registration-free COM. In order
to prove this, try unregistering the VB6Hello.dll component and running RegFreeComDemo1.exe outside of the Visual
Studio IDE. This time when the button is clicked, it still works. If you temporarily rename the application manifest, it will
again fail.
Note
You can simulate the absence of a COM component by temporarily unregistering it. Open a command prompt, go
to your system folder by typing cd /d %windir%\system32, then unregister the component by typing regsvr32
/u VB6Hello.dll. You can register it again by typing regsvr32 VB6Hello.dll.
Private Sub Button1_Click(ByVal sender As System.Object, ByVal e As
System.EventArgs) Handles Button1.Click
Dim VbObj As New VB6Hello.Class1
VbObj.SayHello()
End Sub
Deploying COM Components with ClickOnce https://msdn.microsoft.com/en-us/library/ms165432(d=printer).aspx
3 of 5 05.09.2016 16:08
The final step is to publish the application using ClickOnce:
To publish an application update with an isolated COM component
From the Build menu, click Publish RegFreeComDemo.
The Publish Wizard appears.
1.
In the Publish Wizard, specify a location on the local computer's disk where you can access and examine the
published files.
2.
Click Finish to publish the application.3.
If you examine the published files, you will note that the sysmon.ocx file is included. The control is totally isolated to
this application, meaning that if the end user's machine has another application using a different version of the control,
it cannot interfere with this application.
Referencing Native AssembliesVisual Studio supports references to native Visual Basic 6.0 or C++ assemblies; such references are called native references.
You can tell whether a reference is native by verifying that its File Type property is set to Native or ActiveX.
To add a native reference, use the Add Reference command, then browse to the manifest. Some components place the
manifest inside the DLL. In this case, you can simply choose the DLL itself and Visual Studio will add it as a native reference
if it detects that the component contains an embedded manifest. Visual Studio will also automatically include any
dependent files or assemblies listed in the manifest if they are in the same folder as the referenced component.
COM control isolation makes it easy to deploy COM components that do not already have manifests. However, if a
component is supplied with a manifest, you can reference the manifest directly. In fact, you should always use the manifest
supplied by the author of the component wherever possible rather than using the Isolated property.
Limitations of Registration-Free COM Component DeploymentRegistration-free COM provides clear advantages over traditional deployment techniques. However, there are a few
limitations and caveats that should also be pointed out. The greatest limitation is that it only works on Windows XP or
higher. The implementation of registration-free COM required changes to the way in which components are loaded in the
core operating system. Unfortunately, there is no down-level support layer for registration-free COM.
Not every component is a suitable candidate for registration-free COM. A component is not a suitable if any of the
following are true:
The component is an out-of-process server. EXE servers are not supported; only DLLs are supported.
The component is part of the operating system, or is a system component, such as XML, Internet Explorer, or
Microsoft Data Access Components (MDAC). You should follow the redistribution policy of the component author;
check with your vendor.
The component is part of an application, such as Microsoft Office. For example, you should not attempt to isolate
Deploying COM Components with ClickOnce https://msdn.microsoft.com/en-us/library/ms165432(d=printer).aspx
4 of 5 05.09.2016 16:08
Microsoft Excel Object Model. This is part of Office and can only be used on a computer with the full Office
product installed.
The component is intended for use as an add-in or a snap-in, for example an Office add-in or a control in a Web
browser. Such components typically require some kind of registration scheme defined by the hosting environment
that is beyond the scope of the manifest itself.
The component manages a physical or virtual device for the system, for example, a device driver for a print
spooler.
The component is a Data Access redistributable. Data applications generally require a separate Data Access
redistributable to be installed before they can run. You should not attempt to isolate components such as the
Microsoft ADO Data Control, Microsoft OLE DB, or Microsoft Data Access Components (MDAC). Instead, if your
application uses MDAC or SQL Server Express, you should set them as prerequisites; see How to: Install
Prerequisites with a ClickOnce Application.
In some cases, it may be possible for the developer of the component to redesign it for registration-free COM. If this is
not possible, you can still build and publish applications that depend on them through the standard registration scheme
using the Bootstrapper. For more information, see Creating Bootstrapper Packages.
A COM component can only be isolated once per application. For example, you can't isolate the same COM component
from two different Class Library projects that are part of the same application. Doing so will result in a build warning,
and the application will fail to load at run time. In order to avoid this problem, Microsoft recommends that you
encapsulate COM components in a single class library.
There are several scenarios in which COM registration is required on the developer's machine, even though the
application's deployment does not require registration. The Isolated property requires that the COM component be
registered on the developer's machine in order to auto-generate the manifest during the build. There are no registration-
capturing capabilities that invoke the self-registration during the build. Also, any classes not explicitly defined in the type
library will not be reflected in the manifest. When using a COM component with a pre-existing manifest, such as a native
reference, the component may not need to be registered at development time. However, registration is required if the
component is an ActiveX control and you want to include it in the Toolbox and the Windows Forms designer.
See AlsoClickOnce Security and Deployment
© 2016 Microsoft
Deploying COM Components with ClickOnce https://msdn.microsoft.com/en-us/library/ms165432(d=printer).aspx
5 of 5 05.09.2016 16:08
Building ClickOnce Applications from theCommand Line
In Visual Studio, you can build projects from the command line, even if they are created in the integrated development
environment (IDE). In fact, you can rebuild a project created with Visual Studio on another computer that has only the .NET
Framework installed. This allows you to reproduce a build using an automated process, for example, in a central build lab or
using advanced scripting techniques beyond the scope of building the project itself.
Using MSBuild to Reproduce ClickOnce Application DeploymentsWhen you invoke msbuild /target:publish at the command line, it tells the MSBuild system to build the project and create
a ClickOnce application in the publish folder. This is equivalent to selecting the Publish command in the IDE.
This command executes msbuild.exe, which is on the path in the Visual Studio command-prompt environment.
A "target" is an indicator to MSBuild on how to process the command. The key targets are the "build" target and the
"publish" target. The build target is the equivalent to selecting the Build command (or pressing F5) in the IDE. If you only
want to build your project, you can achieve that by typing msbuild. This command works because the build target is the
default target for all projects generated by Visual Studio. This means you do not explicitly need to specify the build
target. Therefore, typing msbuild is the same operation as typing msbuild /target:build.
The /target:publish command tells MSBuild to invoke the publish target. The publish target depends on the build target.
This means that the publish operation is a superset of the build operation. For example, if you made a change to one of
your Visual Basic or C# source files, the corresponding assembly would automatically be rebuilt by the publish operation.
For information on generating a full ClickOnce deployment using the Mage.exe command-line tool to create your
ClickOnce manifest, see Walkthrough: Manually Deploying a ClickOnce Application.
Creating and Building a Basic ClickOnce Application Using MSBuild
To create and publish a ClickOnce project
Click New Project from the File menu. The New Project dialog box appears.1.
Select Windows Application and name it CmdLineDemo.2.
From the Build menu, click the Publish command.
This step ensures that the project is properly configured to produce a ClickOnce application deployment.
The Publish Wizard appears.
3.
In the Publish Wizard, click Finish.4.
Visual Studio 2015
Building ClickOnce Applications from the Command Line https://msdn.microsoft.com/en-us/library/ms165431(d=printer).aspx
1 of 5 05.09.2016 16:09
Visual Studio generates and displays the default Web page, called Publish.htm.
Save your project, and make note of the folder location in which it is stored.5.
The steps above create a ClickOnce project which has been published for the first time. Now you can reproduce the build
outside of the IDE.
To reproduce the build from the command line
Exit Visual Studio.1.
From the Windows Start menu, click All Programs, then Microsoft Visual Studio, then Visual Studio Tools,
then Visual Studio Command Prompt. This should open a command prompt in the root folder of the current
user.
2.
In the Visual Studio Command Prompt, change the current directory to the location of the project you just built
above. For example, type chdir My Documents\Visual Studio\Projects\CmdLineDemo.
3.
To remove the existing files produced in "To create and publish a ClickOnce project," type rmdir /s publish.
This step is optional, but it ensures that the new files were all produced by the command-line build.
4.
Type msbuild /target:publish.5.
The above steps will produce a full ClickOnce application deployment in a subfolder of your project named Publish.
CmdLineDemo.application is the ClickOnce deployment manifest. The folder CmdLineDemo_1.0.0.0 contains the files
CmdLineDemo.exe and CmdLineDemo.exe.manifest, the ClickOnce application manifest. Setup.exe is the bootstrapper,
which by default is configured to install the .NET Framework. The DotNetFX folder contains the redistributables for the
.NET Framework. This is the entire set of files you need to deploy your application over the Web or via UNC or CD/DVD.
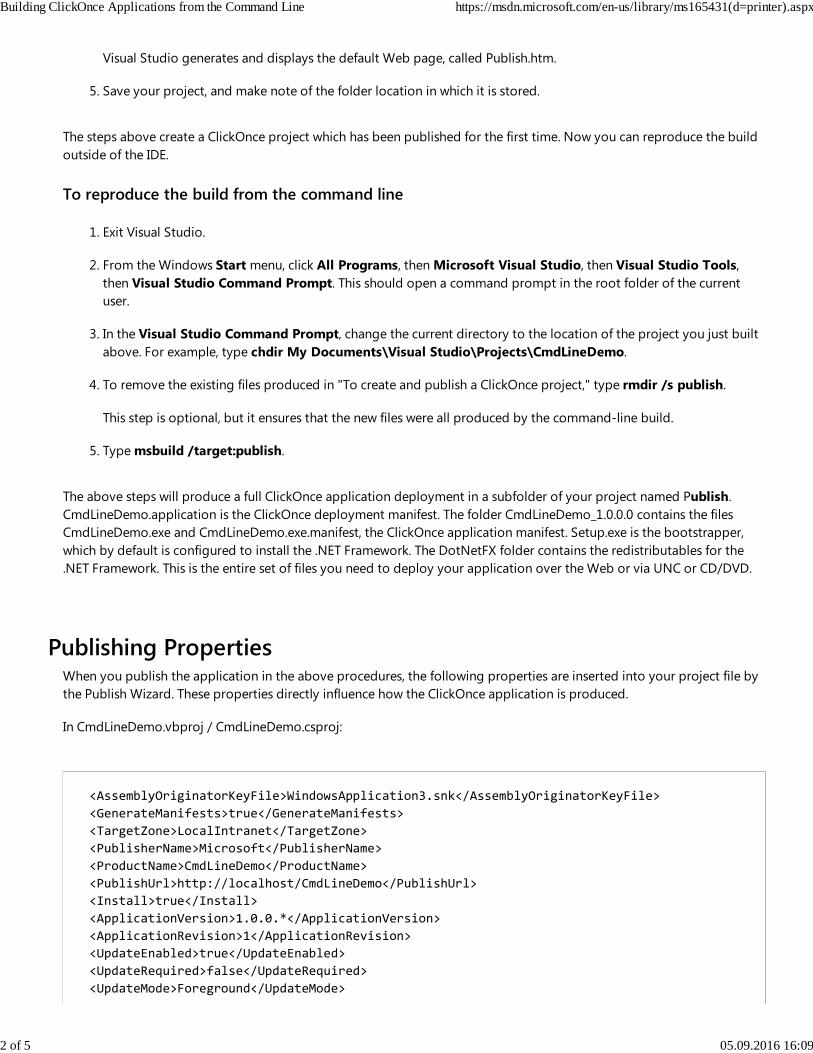
Publishing PropertiesWhen you publish the application in the above procedures, the following properties are inserted into your project file by
the Publish Wizard. These properties directly influence how the ClickOnce application is produced.
In CmdLineDemo.vbproj / CmdLineDemo.csproj:
<AssemblyOriginatorKeyFile>WindowsApplication3.snk</AssemblyOriginatorKeyFile>
<GenerateManifests>true</GenerateManifests>
<TargetZone>LocalIntranet</TargetZone>
<PublisherName>Microsoft</PublisherName>
<ProductName>CmdLineDemo</ProductName>
<PublishUrl>http://localhost/CmdLineDemo</PublishUrl>
<Install>true</Install>
<ApplicationVersion>1.0.0.*</ApplicationVersion>
<ApplicationRevision>1</ApplicationRevision>
<UpdateEnabled>true</UpdateEnabled>
<UpdateRequired>false</UpdateRequired>
<UpdateMode>Foreground</UpdateMode>
Building ClickOnce Applications from the Command Line https://msdn.microsoft.com/en-us/library/ms165431(d=printer).aspx
2 of 5 05.09.2016 16:09
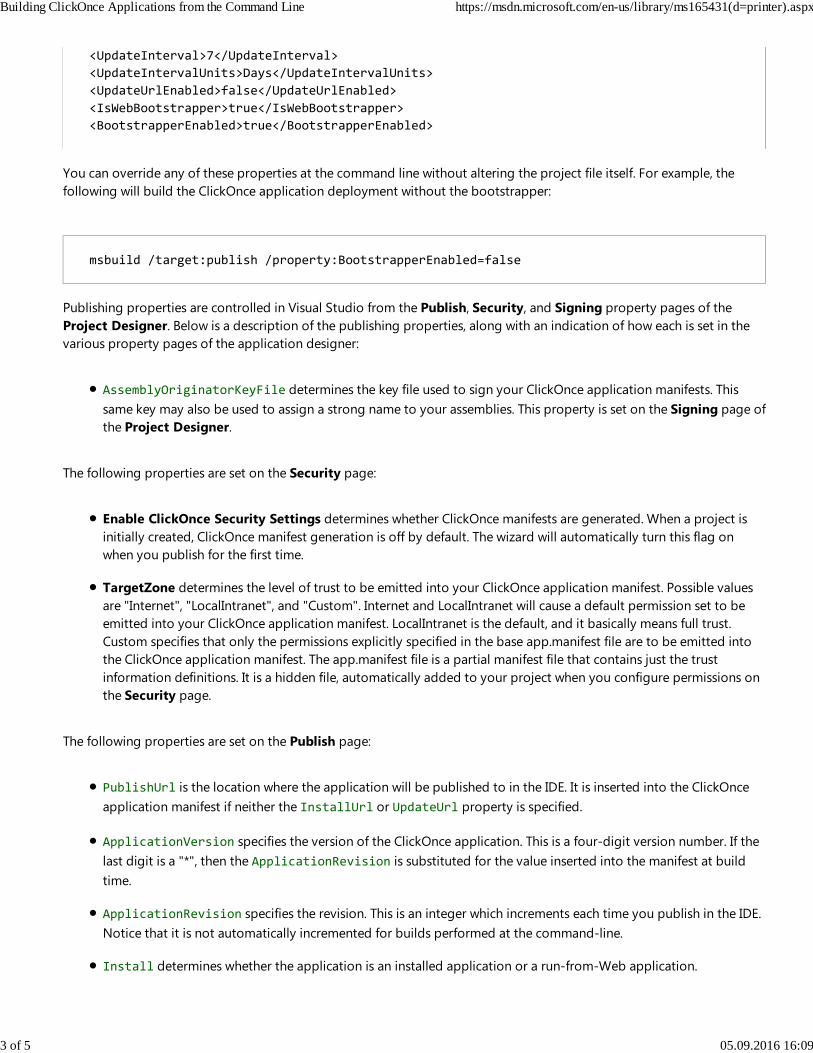
You can override any of these properties at the command line without altering the project file itself. For example, the
following will build the ClickOnce application deployment without the bootstrapper:
Publishing properties are controlled in Visual Studio from the Publish, Security, and Signing property pages of the
Project Designer. Below is a description of the publishing properties, along with an indication of how each is set in the
various property pages of the application designer:
AssemblyOriginatorKeyFile determines the key file used to sign your ClickOnce application manifests. This
same key may also be used to assign a strong name to your assemblies. This property is set on the Signing page of
the Project Designer.
The following properties are set on the Security page:
Enable ClickOnce Security Settings determines whether ClickOnce manifests are generated. When a project is
initially created, ClickOnce manifest generation is off by default. The wizard will automatically turn this flag on
when you publish for the first time.
TargetZone determines the level of trust to be emitted into your ClickOnce application manifest. Possible values
are "Internet", "LocalIntranet", and "Custom". Internet and LocalIntranet will cause a default permission set to be
emitted into your ClickOnce application manifest. LocalIntranet is the default, and it basically means full trust.
Custom specifies that only the permissions explicitly specified in the base app.manifest file are to be emitted into
the ClickOnce application manifest. The app.manifest file is a partial manifest file that contains just the trust
information definitions. It is a hidden file, automatically added to your project when you configure permissions on
the Security page.
The following properties are set on the Publish page:
PublishUrl is the location where the application will be published to in the IDE. It is inserted into the ClickOnce
application manifest if neither the InstallUrl or UpdateUrl property is specified.
ApplicationVersion specifies the version of the ClickOnce application. This is a four-digit version number. If the
last digit is a "*", then the ApplicationRevision is substituted for the value inserted into the manifest at build
time.
ApplicationRevision specifies the revision. This is an integer which increments each time you publish in the IDE.
Notice that it is not automatically incremented for builds performed at the command-line.
Install determines whether the application is an installed application or a run-from-Web application.
<UpdateInterval>7</UpdateInterval>
<UpdateIntervalUnits>Days</UpdateIntervalUnits>
<UpdateUrlEnabled>false</UpdateUrlEnabled>
<IsWebBootstrapper>true</IsWebBootstrapper>
<BootstrapperEnabled>true</BootstrapperEnabled>
msbuild /target:publish /property:BootstrapperEnabled=false
Building ClickOnce Applications from the Command Line https://msdn.microsoft.com/en-us/library/ms165431(d=printer).aspx
3 of 5 05.09.2016 16:09
InstallUrl (not shown) is the location where users will install the application from. If specified, this value is
burned into the setup.exe bootstrapper if the IsWebBootstrapper property is enabled. It is also inserted into the
application manifest if the UpdateUrl is not specified.
SupportUrl (not shown) is the location linked in the Add/Remove Programs dialog box for an installed
application.
The following properties are set in the Application Updates dialog box, accessed from the Publish page.
UpdateEnabled indicates whether the application should check for updates.
UpdateMode specifies either Foreground updates or Background updates.
UpdateInterval specifies how frequently the application should check for updates.
UpdateIntervalUnits specifies whether the UpdateInterval value is in units of hours, days, or weeks.
UpdateUrl (not shown) is the location from which the application will receive updates. If specified, this value is
inserted into the application manifest.
The following properties are set in the Publish Options dialog box, accessed from the Publish page.
PublisherName specifies the name of the publisher displayed in the prompt shown when installing or running the
application. In the case of an installed application, it is also used to specify the folder name on the Start menu.
ProductName specifies the name of the product displayed in the prompt shown when installing or running the
application. In the case of an installed application, it is also used to specify the shortcut name on the Start menu.
The following properties are set in the Prerequisites dialog box, accessed from the Publish page.
BootstrapperEnabled determines whether to generate the setup.exe bootstrapper.
IsWebBootstrapper determines whether the setup.exe bootstrapper works over the Web or in disk-based mode.
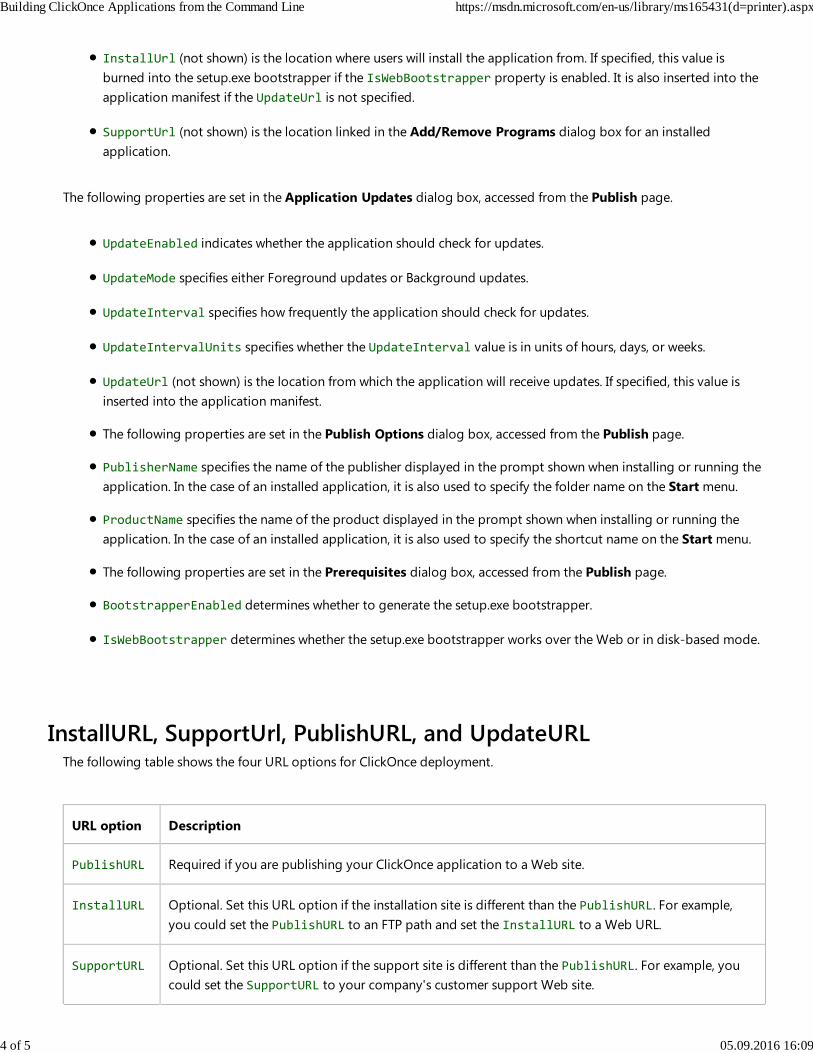
InstallURL, SupportUrl, PublishURL, and UpdateURLThe following table shows the four URL options for ClickOnce deployment.
URL option Description
PublishURL Required if you are publishing your ClickOnce application to a Web site.
InstallURL Optional. Set this URL option if the installation site is different than the PublishURL. For example,
you could set the PublishURL to an FTP path and set the InstallURL to a Web URL.
SupportURL Optional. Set this URL option if the support site is different than the PublishURL. For example, you
could set the SupportURL to your company's customer support Web site.
Building ClickOnce Applications from the Command Line https://msdn.microsoft.com/en-us/library/ms165431(d=printer).aspx
4 of 5 05.09.2016 16:09
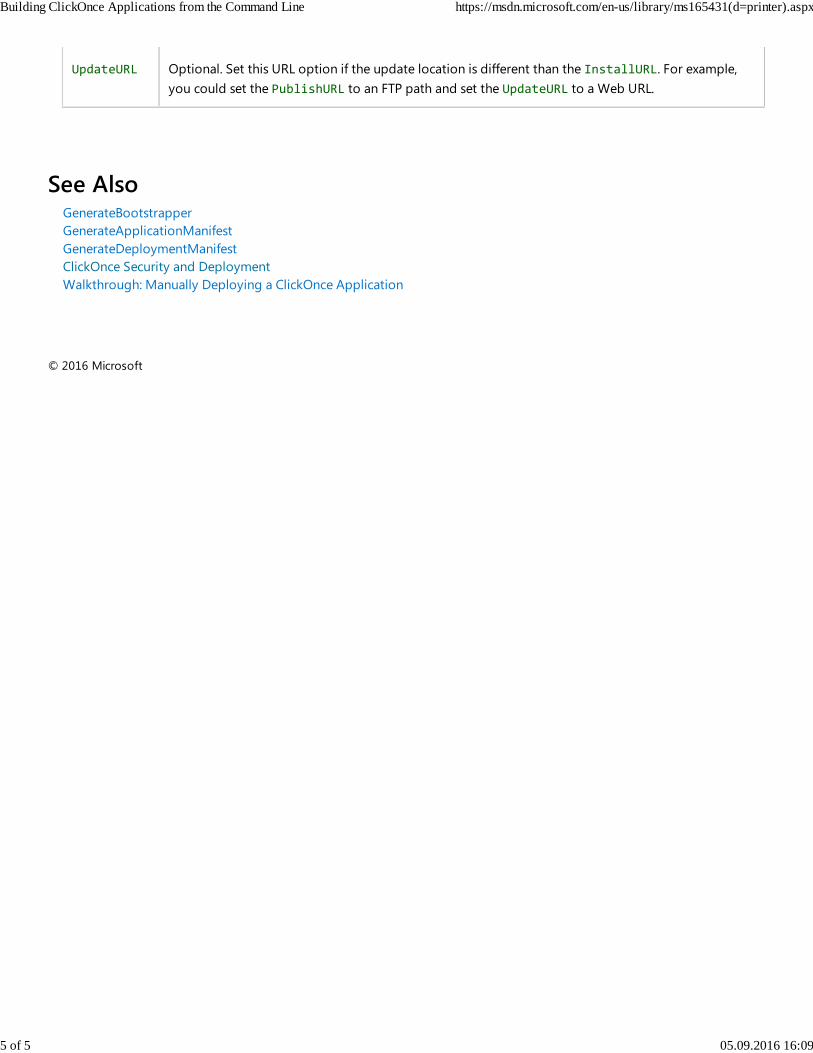
UpdateURL Optional. Set this URL option if the update location is different than the InstallURL. For example,
you could set the PublishURL to an FTP path and set the UpdateURL to a Web URL.
See AlsoGenerateBootstrapper
GenerateApplicationManifest
GenerateDeploymentManifest
ClickOnce Security and Deployment
Walkthrough: Manually Deploying a ClickOnce Application
© 2016 Microsoft
Building ClickOnce Applications from the Command Line https://msdn.microsoft.com/en-us/library/ms165431(d=printer).aspx
5 of 5 05.09.2016 16:09
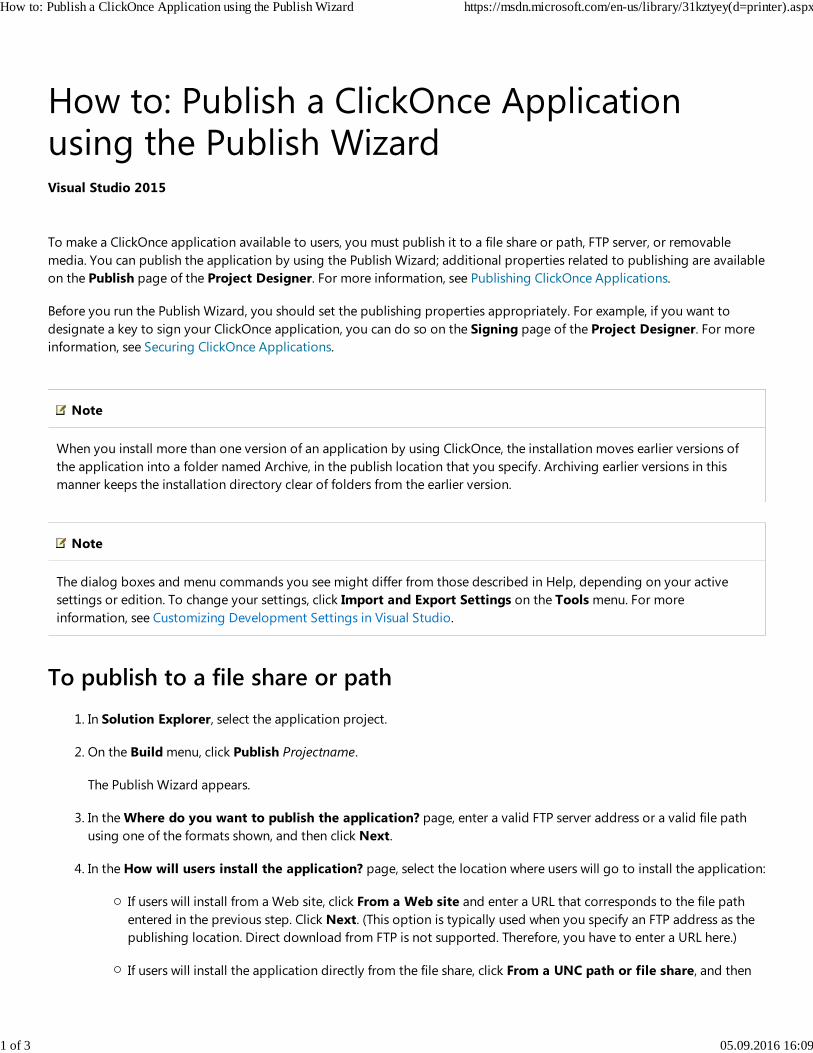
How to: Publish a ClickOnce Applicationusing the Publish Wizard
To make a ClickOnce application available to users, you must publish it to a file share or path, FTP server, or removable
media. You can publish the application by using the Publish Wizard; additional properties related to publishing are available
on the Publish page of the Project Designer. For more information, see Publishing ClickOnce Applications.
Before you run the Publish Wizard, you should set the publishing properties appropriately. For example, if you want to
designate a key to sign your ClickOnce application, you can do so on the Signing page of the Project Designer. For more
information, see Securing ClickOnce Applications.
Note
When you install more than one version of an application by using ClickOnce, the installation moves earlier versions of
the application into a folder named Archive, in the publish location that you specify. Archiving earlier versions in this
manner keeps the installation directory clear of folders from the earlier version.
Note
The dialog boxes and menu commands you see might differ from those described in Help, depending on your active
settings or edition. To change your settings, click Import and Export Settings on the Tools menu. For more
information, see Customizing Development Settings in Visual Studio.
To publish to a file share or path
In Solution Explorer, select the application project.1.
On the Build menu, click Publish Projectname.
The Publish Wizard appears.
2.
In the Where do you want to publish the application? page, enter a valid FTP server address or a valid file path
using one of the formats shown, and then click Next.
3.
In the How will users install the application? page, select the location where users will go to install the application:
If users will install from a Web site, click From a Web site and enter a URL that corresponds to the file path
entered in the previous step. Click Next. (This option is typically used when you specify an FTP address as the
publishing location. Direct download from FTP is not supported. Therefore, you have to enter a URL here.)
If users will install the application directly from the file share, click From a UNC path or file share, and then
4.
Visual Studio 2015
How to: Publish a ClickOnce Application using the Publish Wizard https://msdn.microsoft.com/en-us/library/31kztyey(d=printer).aspx
1 of 3 05.09.2016 16:09
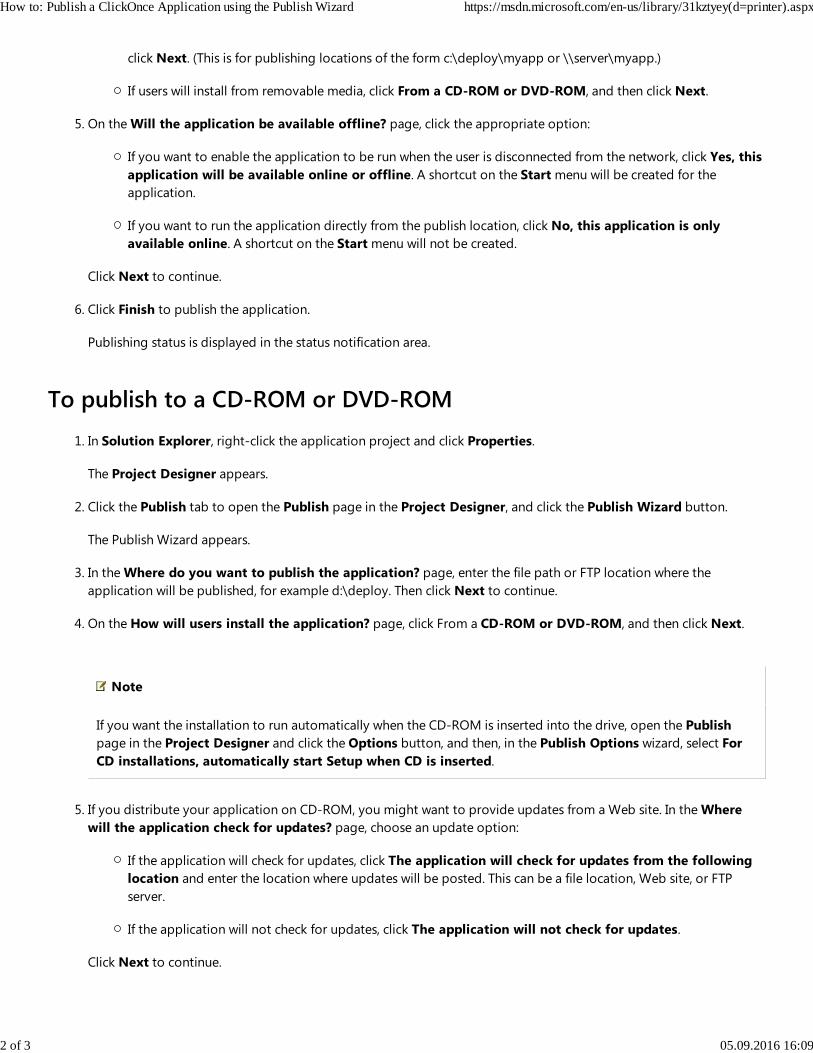
click Next. (This is for publishing locations of the form c:\deploy\myapp or \\server\myapp.)
If users will install from removable media, click From a CD-ROM or DVD-ROM, and then click Next.
On the Will the application be available offline? page, click the appropriate option:
If you want to enable the application to be run when the user is disconnected from the network, click Yes, this
application will be available online or offline. A shortcut on the Start menu will be created for the
application.
If you want to run the application directly from the publish location, click No, this application is only
available online. A shortcut on the Start menu will not be created.
Click Next to continue.
5.
Click Finish to publish the application.
Publishing status is displayed in the status notification area.
6.
To publish to a CD-ROM or DVD-ROM
In Solution Explorer, right-click the application project and click Properties.
The Project Designer appears.
1.
Click the Publish tab to open the Publish page in the Project Designer, and click the Publish Wizard button.
The Publish Wizard appears.
2.
In the Where do you want to publish the application? page, enter the file path or FTP location where the
application will be published, for example d:\deploy. Then click Next to continue.
3.
On the How will users install the application? page, click From a CD-ROM or DVD-ROM, and then click Next.
Note
If you want the installation to run automatically when the CD-ROM is inserted into the drive, open the Publish
page in the Project Designer and click the Options button, and then, in the Publish Options wizard, select For
CD installations, automatically start Setup when CD is inserted.
4.
If you distribute your application on CD-ROM, you might want to provide updates from a Web site. In the Where
will the application check for updates? page, choose an update option:
If the application will check for updates, click The application will check for updates from the following
location and enter the location where updates will be posted. This can be a file location, Web site, or FTP
server.
If the application will not check for updates, click The application will not check for updates.
Click Next to continue.
5.
How to: Publish a ClickOnce Application using the Publish Wizard https://msdn.microsoft.com/en-us/library/31kztyey(d=printer).aspx
2 of 3 05.09.2016 16:09
Click Finish to publish the application.
Publishing status is displayed in the status notification area.
Note
After publishing is complete, you will have to use a CD-Rewriter or DVD-Rewriter to copy the files from the
location specified in step 3 to the CD-ROM or DVD-ROM media.
6.
See AlsoClickOnce Security and Deployment
Securing ClickOnce Applications
Deploying an Office Solution by Using ClickOnce
© 2016 Microsoft
How to: Publish a ClickOnce Application using the Publish Wizard https://msdn.microsoft.com/en-us/library/31kztyey(d=printer).aspx
3 of 3 05.09.2016 16:09
How to: Specify Where Visual Studio Copiesthe Files
When you publish an application by using ClickOnce, the Publish Location property specifies the location where the
application files and manifest are put. This can be a file path or the path to an FTP server.
You can specify the Publish Location property on the Publish page of the Project Designer, or by using the Publish
Wizard. For more information, see How to: Publish a ClickOnce Application using the Publish Wizard.
Note
When you install more than one version of an application by using ClickOnce, the installation moves earlier versions of
the application into a folder named Archive, in the publish location that you specify. Archiving earlier versions in this
manner keeps the installation directory clear of folders from the earlier version.
To specify a publishing location
With a project selected in Solution Explorer, on the Project menu, click Properties.1.
Click the Publish tab.2.
In the Publish Location field, enter the publishing location by using one of the following formats:
To publish to a file share or disk path, enter the path by using either a UNC path (\\Server\ApplicationName)
or a file path (C:\Deploy\ApplicationName).
To publish to an FTP server, enter the path using the format ftp://ftp.microsoft.com/ApplicationName.
Note that text must be present in the Publishing Location box in order for the Browse (...) button to work.
3.
See AlsoPublishing ClickOnce Applications
How to: Publish a ClickOnce Application using the Publish Wizard
© 2016 Microsoft
Visual Studio 2015
How to: Specify Where Visual Studio Copies the Files https://msdn.microsoft.com/en-us/library/xctb6ae4(d=printer).aspx
1 of 1 05.09.2016 16:10
How to: Specify the Location Where EndUsers Will Install From
When publishing a ClickOnce application, the location where users go to download and install the application is not
necessarily the location where you initially publish the application. For example, in some organizations a developer might
publish an application to a staging server, and then an administrator would move the application to a Web server.
In this case, you can use the Installation URL property to specify the Web server where users will go to download the
application. This is necessary so that the application manifest knows where to look for updates.
The Installation URL property can be set on the Publish page of the Project Designer.
Note The Installation URL property can also be set using the Publish Wizard. For more information, see How to: Publish
a ClickOnce Application using the Publish Wizard.
To specify an Installation URL
With a project selected in Solution Explorer, on the Project menu, click Properties.1.
Click the Publish tab.2.
In the Installation URL field, enter the installation location using a fully qualified URL using the format
http://www.microsoft.com/ApplicationName, or a UNC path using the format \\Server\ApplicationName.
3.
See AlsoHow to: Specify Where Visual Studio Copies the Files
Publishing ClickOnce Applications
How to: Publish a ClickOnce Application using the Publish Wizard
© 2016 Microsoft
Visual Studio 2015
How to: Specify the Location Where End Users Will Install From https://msdn.microsoft.com/en-us/library/c37e68bc(d=printer).aspx
1 of 1 05.09.2016 16:10
How to: Specify the ClickOnce Offline orOnline Install Mode
The Install Mode for a ClickOnce application determines whether the application will be available offline or online. When
you choose The application is available online only, the user must have access to the ClickOnce publishing location
(either a Web page or a file share) in order to run the application. When you choose The application is available offline
as well, the application adds entries to the Start menu and the Add or Remove Programs dialog box; the user is able to
run the application when they are not connected.
The Install Mode can be set on the Publish page of the Project Designer.
Note The Install Mode can also be set using the Publish wizard. For more information, see How to: Publish a ClickOnce
Application using the Publish Wizard.
To make a ClickOnce application available online only
With a project selected in Solution Explorer, on the Project menu, click Properties.1.
Click the Publish tab.2.
In the Install Mode and Settings area, click the The application is available online only option button.3.
To make a ClickOnce application available online or offline
With a project selected in Solution Explorer, on the Project menu, click Properties.1.
Click the Publish tab.2.
In the Install Mode and Settings area, click the The application is available offline as well option button.
When installed, the application adds entries to the Start menu and to Add or Remove Programs in Control Panel.
3.
See AlsoPublishing ClickOnce Applications
How to: Publish a ClickOnce Application using the Publish Wizard
Choosing a ClickOnce Deployment Strategy
© 2016 Microsoft
Visual Studio 2015
How to: Specify the ClickOnce Offline or Online Install Mode https://msdn.microsoft.com/en-us/library/y0507x17(d=printer).aspx
1 of 1 05.09.2016 16:11
How to: Set the ClickOnce Publish Version
The ClickOnce Publish Version property determines whether or not the application that you are publishing will be treated
as an update. Each time version is incremented, the application will be published as an update.
The Publish Version property can be set on the Publish page of the Project Designer.
Note
There is a project option that will automatically increment the Publish Version property each time the application is
published; this option is enabled by default. For more information, see How to: Automatically Increment the ClickOnce
Publish Version.
To change the Publish Version
With a project selected in Solution Explorer, on the Project menu click Properties.1.
Click the Publish tab.2.
In Publish Version field, increment the Major, Minor, Build, or Revision version numbers.
Note
You should never decrement a version number; doing so could cause unpredictable update behavior.
3.
See AlsoChoosing a ClickOnce Update Strategy
How to: Automatically Increment the ClickOnce Publish Version
Publishing ClickOnce Applications
How to: Publish a ClickOnce Application using the Publish Wizard
© 2016 Microsoft
Visual Studio 2015
How to: Set the ClickOnce Publish Version https://msdn.microsoft.com/en-us/library/haeyaeba(d=printer).aspx
1 of 1 05.09.2016 16:11
How to: Automatically Increment theClickOnce Publish Version
When publishing a ClickOnce application, changing the Publish Version property causes the application to be published as
an update. By default, Visual Studio automatically increments the Revision number of the Publish Version each time you
publish the application.
You can disable this behavior on the Publish page of the Project Designer.
Note
The dialog boxes and menu commands you see might differ from those described in Help depending on your active
settings or edition. To change your settings, choose Import and Export Settings on the Tools menu. For more
information, see Customizing Development Settings in Visual Studio.
To disable automatically incrementing the Publish Version
With a project selected in Solution Explorer, on the Project menu, click Properties.1.
Click the Publish tab.2.
In the Publish Version section, clear the Automatically increment revision with each release check box.3.
See AlsoHow to: Set the ClickOnce Publish Version
Publishing ClickOnce Applications
How to: Publish a ClickOnce Application using the Publish Wizard
© 2016 Microsoft
Visual Studio 2015
How to: Automatically Increment the ClickOnce Publish Version https://msdn.microsoft.com/en-us/library/e6y518tc(d=printer).aspx
1 of 1 05.09.2016 16:13
How to: Specify Which Files Are Published byClickOnce
When publishing a ClickOnce application, all non-code files in the project are deployed along with the application. In some
cases, you may not want or need to publish certain files, or you may want to install certain files based on conditions. Visual
Studio provides the capabilities to exclude files, mark files as data files or prerequisites, and create groups of files for
conditional installation.
Files for a ClickOnce application are managed in the Application Files dialog box, accessible from the Publish page of the
Project Designer.
Initially, there is a single file group named (Required). You can create additional file groups and assign files to them. You
cannot change the Download Group for files that are required for the application to run. For example, the application's .exe
or files marked as data files must belong to the (Required) group.
The default publish status value of a file is tagged with (Auto). For example, the application's .exe has a publish status of
Include (Auto) by default.
Files with the Build Action property set to Content are designated as application files and will be marked as included by
default. They can be included, excluded, or marked as data files. The exceptions are as follows:
Data files such as SQL Database (.mdf and .mdb) files and XML files will be marked as data files by default.
References to assemblies (.dll files) are designated as follows when you add the reference: If Copy Local is False, it is
marked by default as a prerequisite assembly (Prerequisite (Auto)) that must be present in the GAC before the
application is installed. If Copy Local is True, the assembly is marked by default as an application assembly (Include
(Auto)) and will be copied into the application folder at installation. A COM reference will appear in the Application
Files dialog box (as an .ocx file) only if its Isolated property is set to True. By default, it will be included.
To add files to the Application Files Dialog Box
Select a data file in Solution Explorer.1.
In the Properties window, change the Build Action property to the Content value.2.
To exclude files from ClickOnce publishing
With a project selected in Solution Explorer, on the Project menu, click Properties.1.
Click the Publish tab.2.
Click the Application Files button to open the Application Files dialog box.3.
Visual Studio 2015
How to: Specify Which Files Are Published by ClickOnce https://msdn.microsoft.com/en-us/library/kzy0fky2(d=printer).aspx
1 of 3 05.09.2016 16:13
In the Application Files dialog box, select the file that you wish to exclude.4.
In the Publish Status field, select Exclude from the drop-down list.5.
To mark files as data files
With a project selected in Solution Explorer, on the Project menu, click Properties.1.
Click the Publish tab.2.
Click the Application Files button to open the Application Files dialog box.3.
In the Application Files dialog box, select the file that you wish to mark as data.4.
In the Publish Status field, select Data File from the drop-down list.5.
To mark files as prerequisites
With a project selected in Solution Explorer, on the Project menu, click Properties.1.
Click the Publish tab.2.
Click the Application Files button to open the Application Files dialog box.3.
In the Application Files dialog box, select the application assembly (.dll file) that you wish to mark as a prerequisite.
Note that your application must have a reference to the application assembly in order for it to appear in the list.
4.
In the Publish Status field, select Prerequisite from the drop-down list.5.
To add a new file group
With a project selected in Solution Explorer, on the Project menu, click Properties.1.
Click the Publish tab.2.
Click the Application Files button to open the Application Files dialog box.3.
In the Application Files dialog box, select the Group field for a file that you wish to include in the new group.
Note
Files must have the Build Action property set to Content before the file names appear in the Application Files
dialog box.
4.
In the Download Group field, select <New...> from the drop-down list.5.
In the New Group dialog box, enter a name for the group, and then click OK.6.
How to: Specify Which Files Are Published by ClickOnce https://msdn.microsoft.com/en-us/library/kzy0fky2(d=printer).aspx
2 of 3 05.09.2016 16:13
To add a file to a group
With a project selected in Solution Explorer, on the Project menu, click Properties.1.
Click the Publish tab.2.
Click the Application Files button to open the Application Files dialog box.3.
In the Application Files dialog box, select the Group field for a file that you wish to include in the new group.4.
In the Download Group field, select a group from the drop-down list.
Note
You cannot change the Download Group for files that are required for the application to run.
5.
See AlsoPublishing ClickOnce Applications
How to: Publish a ClickOnce Application using the Publish Wizard
© 2016 Microsoft
How to: Specify Which Files Are Published by ClickOnce https://msdn.microsoft.com/en-us/library/kzy0fky2(d=printer).aspx
3 of 3 05.09.2016 16:13
How to: Include a Data File in a ClickOnceApplication
Each ClickOnce application you install is assigned a data directory on the destination computer's local disk where the
application can manage its own data. Data files can include files of any type: text files, XML files, or even Microsoft Access
database (.mdb) files. The following procedures show you how to add a data file of any type into your ClickOnce application.
To include a data file by using Mage.exe
Add the data file to your application directory with the rest of your application's files.
Typically, your application directory will be a directory labeled with the deployment's current version—for example,
v1.0.0.0.
1.
Update your application manifest to list the data file.
mage -u v1.0.0.0\Application.manifest -FromDirectory v1.0.0.0
Performing this task re-creates the list of files in your application manifest and also automatically generates the hash
signatures.
2.
Open the application manifest in your preferred text or XML editor and find the file element for your recently
added file.
If you added an XML file named Data.xml, the file will look similar to the following code example.
3.
<file name="Data.xml" hash="23454C18A2DC1D23E5B391FEE299B1F235067C59" hashalg="SHA1"
asmv2:size="39500" />
Add the attribute type to this element, and supply it with a value of data.1.
<file name="Data.xml" writeableType="applicationData"
hash="23454C18A2DC1D23E5B391FEE299B1F235067C59" hashalg="SHA1" asmv2:size="39500" />
Re-sign your application manifest by using your key pair or certificate, and then re-sign your deployment manifest.
You must re-sign your deployment manifest because its hash of the application manifest has changed.
mage -s app manifest -cf cert_file -pwd password
mage -u deployment manifest -appm app manifest
mage -s deployment manifest -cf certfile -pwd password
1.
Visual Studio 2015
How to: Include a Data File in a ClickOnce Application https://msdn.microsoft.com/en-us/library/6fehc36e(d=printer).aspx
1 of 2 05.09.2016 16:14
2.
To include a data file by using MageUI.exe
Add the data file to your application directory with the rest of your application's files.1.
Typically, your application directory will be a directory labeled with the deployment's current version—for example,
v1.0.0.0.
2.
On the File menu, click Open to open your application manifest.3.
Select the Files tab.4.
In the text box at the top of the tab, enter the directory that contains your application's files, and then click Populate.
Your data file will appear in the grid.
5.
Set the File Type value of the data file to Data.6.
Save the application manifest, and then re-sign the file.
MageUI.exe will prompt you to re-sign the file.
7.
Re-sign your deployment manifest
You must re-sign your deployment manifest because its hash of the application manifest has changed.
8.
See AlsoAccessing Local and Remote Data in ClickOnce Applications
© 2016 Microsoft
How to: Include a Data File in a ClickOnce Application https://msdn.microsoft.com/en-us/library/6fehc36e(d=printer).aspx
2 of 2 05.09.2016 16:14
How to: Install Prerequisites with a ClickOnceApplication
All ClickOnce applications require that the correct version of the .NET Framework is installed on a computer before they can
be run; many applications have other prerequisites as well. When publishing a ClickOnce application, you can choose a set of
prerequisite components to be packaged along with your application. At installation time, a check will be performed for
each prerequisite to determine if it already exists; if not it will be installed prior to installing the ClickOnce application.
Instead of packaging and publishing prerequisites, you can also specify a download location for the components. For
example, rather than including prerequisites with every application that you publish, you might use a centralized file share or
Web location that contains the installers for all of your prerequisites—at install time, the components will be downloaded
and installed from that location.
Important
You should add prerequisite installer packages to your development computer before you publish your first ClickOnce
application. For more information, see How to: Include Prerequisites with a ClickOnce Application.
Prerequisites are managed in the Prerequisites dialog box, accessible from the Publish pane of the Project Designer.
Note
In addition to the predetermined list of prerequisites, you can add your own components to the list. For more
information, see Creating Bootstrapper Packages.
To specify prerequisites to install with a ClickOnce application
With a project selected in Solution Explorer, on the Project menu click Properties.1.
Select the Publish pane.2.
Click the Prerequisites button to open the Prerequisites dialog box.3.
In the Prerequisites dialog box, make sure that the Create setup program to install prerequisite components
check box is selected.
4.
In the Prerequisites list, check the components that you wish to install, and then click OK.
The selected components will be packaged and published along with your application.
5.
Visual Studio 2015
How to: Install Prerequisites with a ClickOnce Application https://msdn.microsoft.com/en-us/library/8st7th1x(d=printer).aspx
1 of 2 05.09.2016 16:14
To specify a different download location for prerequisites
With a project selected in Solution Explorer, on the Project menu click Properties.1.
Select the Publish pane.2.
Click the Prerequisites button to open the Prerequisites dialog box.3.
In the Prerequisites dialog box, make sure that the Create setup program to install prerequisite components
check box is selected.
4.
In the Specify the install location for prerequisites section, select Download prerequisites from the following
location.
5.
Select a location from the drop-down list, or enter a URL, file path, or FTP location, and then click OK.
Note
You must make sure that installers for the specified components exist at the specified location.
6.
See AlsoPublishing ClickOnce Applications
How to: Publish a ClickOnce Application using the Publish Wizard
© 2016 Microsoft
How to: Install Prerequisites with a ClickOnce Application https://msdn.microsoft.com/en-us/library/8st7th1x(d=printer).aspx
2 of 2 05.09.2016 16:14
How to: Include Prerequisites with aClickOnce Application
Before you can distribute prerequisite software with a ClickOnce application, you must first download the installer packages
for those prerequisites to your development computer. When you publish an application and choose Download
prerequisites from the same location as my application, an error will occur if the installer packages aren’t in the
Packages folder.
Note
To add an installer package for the .NET Framework, see .NET Framework Deployment Guide for Developers.
To add an installer package by using Package.xml
In File Explorer, open the Packages folder.
By default, the path is C:\Program Files\Microsoft Visual Studio 14.0\SDK\Bootstrapper\Packages on a 32-bit system
and C:\Program Files (x86)\Microsoft Visual Studio 14.0\SDK\Bootstrapper\Packages on a 64-bit system.
1.
Open the folder for the prerequisite that you want to add, and then open the language folder for your installed
version of Visual Studio (for example, en for English).
2.
In Notepad, open the Package.xml file.3.
Locate the Name element that contains http://go.microsoft.com/fwlink, and copy the URL. Include the LinkID
portion.
Note
If no Name element contains http://go.microsoft.com/fwlink, open the Product.xml file in the root folder for
the prerequisite and locate the fwlink string.
Important
Some prerequisites have multiple installer packages (for example, for 32-bit or 64-bit systems). If multiple Name
elements contain fwlink, you must repeat the remaining steps for each of them.
4.
Paste the URL into the address bar of your browser, and then, when you are prompted to run or save, choose Save.5.
Visual Studio 2015
How to: Include Prerequisites with a ClickOnce Application https://msdn.microsoft.com/en-us/library/hh873130(d=printer).aspx
1 of 2 05.09.2016 16:14
This step downloads the installer file to your computer.
Copy the file to the root folder for the prerequisite.
For example, for the Windows Installer 4.5 prerequisite, copy the file to the \Packages\WindowsInstaller4_5 folder.
You can now distribute the installer package with your application.
6.
See AlsoHow to: Install Prerequisites with a ClickOnce Application
© 2016 Microsoft
How to: Include Prerequisites with a ClickOnce Application https://msdn.microsoft.com/en-us/library/hh873130(d=printer).aspx
2 of 2 05.09.2016 16:14
How to: Manage Updates for a ClickOnceApplication
ClickOnce applications can check for updates automatically or programmatically. As a developer, you have lots of flexibility
in specifying when and how update checks are performed, whether updates are mandatory, and where the application
should check for updates.
You can configure the application to check for updates automatically before the application starts, or at set intervals after
the application starts. In addition you can specify a minimum required version; that is, an update is installed if the user's
version is lower than the required version.
You can configure the application to check for updates programmatically based on an event such as a user request. The
procedure "To check for updates programmatically" in this topic shows how you would write code that uses the
ApplicationDeployment class to check for updates based on an event.
You can also deploy your application from one location and update it from another. See the procedure "To specify a
different update location."
For more information, see Choosing a ClickOnce Update Strategy.
Update behavior is managed in the Application Updates dialog box, available from the Publish page of the Project
Designer.
To check for updates before the application starts
With a project selected in Solution Explorer, on the Project menu, click Properties.1.
Click the Publish tab.2.
Click the Updates button to open the Application Updates dialog box.3.
In the Application Updates dialog box, make sure that the The application should check for updates check box
is selected.
4.
In the Choose when the application should check for updates section, select Before the application starts. This
ensures that users connected to the network always run the application with the latest updates.
5.
To check for updates in the background after the application starts
With a project selected in Solution Explorer, on the Project menu, click Properties.1.
Click the Publish tab.2.
Click the Updates button to open the Application Updates dialog box.3.
Visual Studio 2015
How to: Manage Updates for a ClickOnce Application https://msdn.microsoft.com/en-us/library/1zyc39fb(d=printer).aspx
1 of 3 05.09.2016 16:15
In the Application Updates dialog box, make sure that the check box The application should check for updates
is selected.
4.
In the Choose when the application should check for updates section, select After the application starts. The
application will start more quickly this way, and then it will check for updates in the background, and only notify the
user when an update is available. Once installed, updates will not take effect until the application is restarted.
5.
In the Specify how frequently the application should check for updates section, select either Check every time
the application runs (the default) or Check every and enter a number and time interval.
6.
To specify a minimum required version for the application
With a project selected in Solution Explorer, on the Project menu, click Properties.1.
Click the Publish tab.2.
Click the Updates button to open the Application Updates dialog box.3.
In the Application Updates dialog box, make sure that the The application should check for updates check box
is selected.
4.
Select the Specify a minimum required version for this application check box, and then enter Major, Minor,
Build, and Revision numbers for the application.
5.
To specify a different update location
With a project selected in Solution Explorer, on the Project menu, click Properties.1.
Click the Publish tab.2.
Click the Updates button to open the Application Updates dialog box.3.
In the Application Updates dialog box, make sure that the The application should check for updates check box
is selected.
4.
In the Update location field, enter the update location with a fully qualified URL, using the format http://Hostname
/ApplicationName, or a UNC path using the format \\Server\ApplicationName, or click the Browse button to browse
for the update location.
5.
To check for updates programmatically
With a project selected in Solution Explorer, on the Project menu, click Properties.1.
Click the Publish tab.2.
Click the Updates button to open the Application Updates dialog box.3.
In the Application Updates dialog box, make sure that the The application should check for updates check box
is cleared. (Optionally, you can select this check box to check for updates programmatically and also let the ClickOnce
runtime check for updates automatically.)
4.
How to: Manage Updates for a ClickOnce Application https://msdn.microsoft.com/en-us/library/1zyc39fb(d=printer).aspx
2 of 3 05.09.2016 16:15
In the Update location field, enter the update location with a fully qualified URL, using the format http://Hostname
/ApplicationName, or a UNC path using the format \\Server\ApplicationName, or click the Browse button to browse
for the update location. The update location is where the application will look for an updated version of itself.
5.
Create a button, menu item, or other user interface item on a Windows Form that users will select to check for
updates. From that item's event handler, call a method to check for and install updates. You can find an example of
Visual Basic and Visual C# code for such a method in How to: Check for Application Updates Programmatically Using
the ClickOnce Deployment API.
6.
Build your application.7.
See AlsoApplicationDeployment
8eca8743-8e68-4d04-bfd5-4dc0a9b2934f
Choosing a ClickOnce Update Strategy
Publishing ClickOnce Applications
How to: Publish a ClickOnce Application using the Publish Wizard
How to: Check for Application Updates Programmatically Using the ClickOnce Deployment API
© 2016 Microsoft
How to: Manage Updates for a ClickOnce Application https://msdn.microsoft.com/en-us/library/1zyc39fb(d=printer).aspx
3 of 3 05.09.2016 16:15
How to: Change the Publish Language for aClickOnce Application
When publishing a ClickOnce application, the user interface displayed during installation defaults to the language and
culture of your development computer. If you are publishing a localized application, you will need to specify a language and
culture to match the localized version. This is determined by the Publish language property for your project.
The Publish language property can be set in the Publish Options dialog box, accessible from the Publish page of the
Project Designer.
Note
The dialog boxes and menu commands you see might differ from those described in Help depending on your active
settings or edition. To change your settings, choose Import and Export Settings on the Tools menu. For more
information, see Customizing Development Settings in Visual Studio.
To change the publish language
With a project selected in Solution Explorer, on the Project menu, click Properties.1.
Click the Publish tab.2.
Click the Options button to open the Publish Options dialog box.3.
Click Description.4.
In the Publish Options dialog box, select a language and culture from the Publish language drop-down list, and
then click OK.
5.
See AlsoPublishing ClickOnce Applications
How to: Publish a ClickOnce Application using the Publish Wizard
© 2016 Microsoft
Visual Studio 2015
How to: Change the Publish Language for a ClickOnce Application https://msdn.microsoft.com/en-us/library/dx009awb(d=printer).aspx
1 of 1 05.09.2016 16:15
How to: Specify a Start Menu Name for aClickOnce Application
When a ClickOnce application is installed for both online and offline use, an entry is added to the Start menu and the Add
or Remove Programs list. By default, the display name is the same as the name of the application assembly, but you can
change the display name by setting Product name in the Publish Options dialog box.
Product name will be displayed on the publish.htm page; for an installed offline application, it will be the name of the entry
in the Start menu, and it will also be the name that shows in Add or Remove Programs.
Publisher name will appear on the publish.htm page above Product name, and for an installed offline application, it will
also be the name of the folder that contains the application's icon in the Start menu.
You can set the Product name and Publisher name properties in the Publish Options dialog box, available on the
Publish page of the Project Designer.
To specify a Start menu name
With a project selected in Solution Explorer, on the Project menu, click Properties.1.
Click the Publish tab.2.
Click the Options button to open the Publish Options dialog box.3.
Click Description.4.
In the Publish Options dialog box, enter the name to display in Product name.5.
Optionally, you can enter a publisher name in Publisher name.6.
See AlsoPublishing ClickOnce Applications
How to: Publish a ClickOnce Application using the Publish Wizard
© 2016 Microsoft
Visual Studio 2015
How to: Specify a Start Menu Name for a ClickOnce Application https://msdn.microsoft.com/en-us/library/shfsy39d(d=printer).aspx
1 of 1 05.09.2016 16:16
How to: Specify a Link for Technical Support
When publishing a ClickOnce application, the Support URL property identifies a Web page or file share where users can go
to get information about the application. This property is optional; if provided, the URL will be displayed in the application's
entry Add or Remove Programs dialog box.
The Support URL property can be set on the Publish page of the Project Designer.
To specify a support URL
With a project selected in Solution Explorer, on the Project menu, click Properties.1.
Click the Publish tab.2.
Click the Options button to open the Publish Options dialog box.3.
Click Description.4.
In the Support URL field, enter a fully qualified path to a Web site, Web page, or UNC share.5.
See AlsoPublishing ClickOnce Applications
How to: Publish a ClickOnce Application using the Publish Wizard
© 2016 Microsoft
Visual Studio 2015
How to: Specify a Link for Technical Support https://msdn.microsoft.com/en-us/library/bsete0k3(d=printer).aspx
1 of 1 05.09.2016 16:16
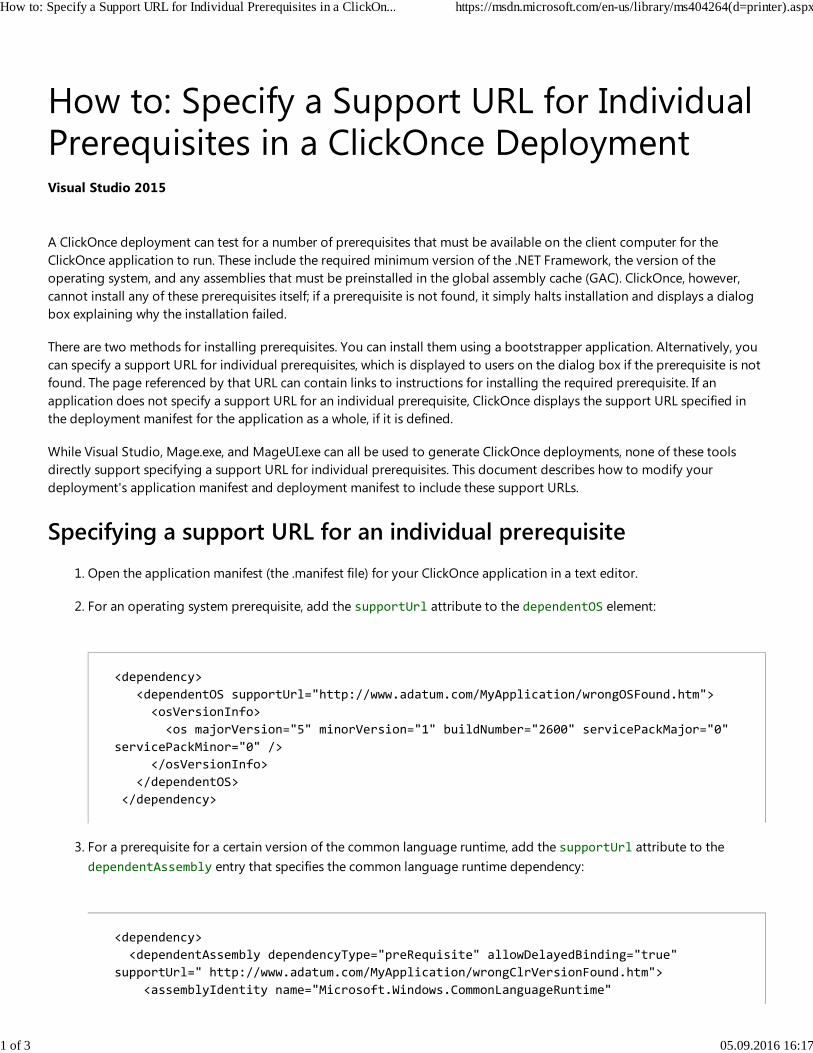
How to: Specify a Support URL for IndividualPrerequisites in a ClickOnce Deployment
A ClickOnce deployment can test for a number of prerequisites that must be available on the client computer for the
ClickOnce application to run. These include the required minimum version of the .NET Framework, the version of the
operating system, and any assemblies that must be preinstalled in the global assembly cache (GAC). ClickOnce, however,
cannot install any of these prerequisites itself; if a prerequisite is not found, it simply halts installation and displays a dialog
box explaining why the installation failed.
There are two methods for installing prerequisites. You can install them using a bootstrapper application. Alternatively, you
can specify a support URL for individual prerequisites, which is displayed to users on the dialog box if the prerequisite is not
found. The page referenced by that URL can contain links to instructions for installing the required prerequisite. If an
application does not specify a support URL for an individual prerequisite, ClickOnce displays the support URL specified in
the deployment manifest for the application as a whole, if it is defined.
While Visual Studio, Mage.exe, and MageUI.exe can all be used to generate ClickOnce deployments, none of these tools
directly support specifying a support URL for individual prerequisites. This document describes how to modify your
deployment's application manifest and deployment manifest to include these support URLs.
Specifying a support URL for an individual prerequisite
Open the application manifest (the .manifest file) for your ClickOnce application in a text editor.1.
For an operating system prerequisite, add the supportUrl attribute to the dependentOS element:2.
For a prerequisite for a certain version of the common language runtime, add the supportUrl attribute to the
dependentAssembly entry that specifies the common language runtime dependency:
3.
Visual Studio 2015
<dependency>
<dependentOS supportUrl="http://www.adatum.com/MyApplication/wrongOSFound.htm">
<osVersionInfo>
<os majorVersion="5" minorVersion="1" buildNumber="2600" servicePackMajor="0"
servicePackMinor="0" />
</osVersionInfo>
</dependentOS>
</dependency>
<dependency>
<dependentAssembly dependencyType="preRequisite" allowDelayedBinding="true"
supportUrl=" http://www.adatum.com/MyApplication/wrongClrVersionFound.htm">
<assemblyIdentity name="Microsoft.Windows.CommonLanguageRuntime"
How to: Specify a Support URL for Individual Prerequisites in a ClickOn... https://msdn.microsoft.com/en-us/library/ms404264(d=printer).aspx
1 of 3 05.09.2016 16:17
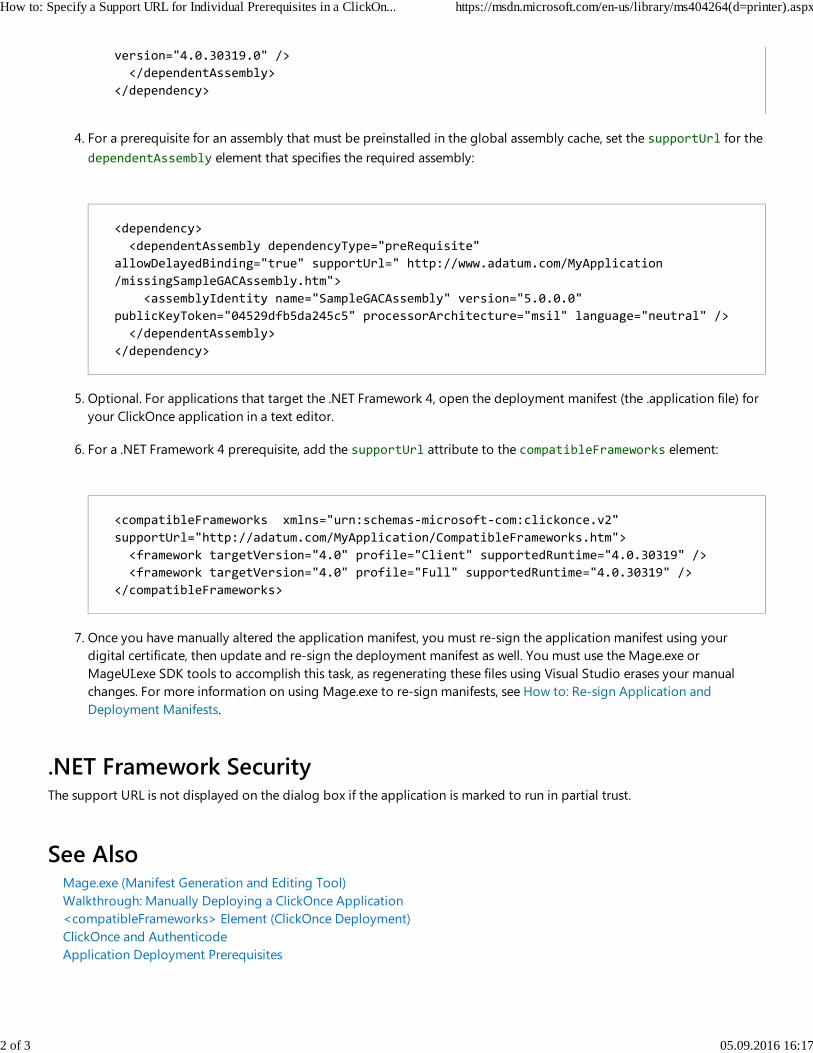
For a prerequisite for an assembly that must be preinstalled in the global assembly cache, set the supportUrl for the
dependentAssembly element that specifies the required assembly:
4.
Optional. For applications that target the .NET Framework 4, open the deployment manifest (the .application file) for
your ClickOnce application in a text editor.
5.
For a .NET Framework 4 prerequisite, add the supportUrl attribute to the compatibleFrameworks element:6.
Once you have manually altered the application manifest, you must re-sign the application manifest using your
digital certificate, then update and re-sign the deployment manifest as well. You must use the Mage.exe or
MageUI.exe SDK tools to accomplish this task, as regenerating these files using Visual Studio erases your manual
changes. For more information on using Mage.exe to re-sign manifests, see How to: Re-sign Application and
Deployment Manifests.
7.
.NET Framework SecurityThe support URL is not displayed on the dialog box if the application is marked to run in partial trust.
See AlsoMage.exe (Manifest Generation and Editing Tool)
Walkthrough: Manually Deploying a ClickOnce Application
<compatibleFrameworks> Element (ClickOnce Deployment)
ClickOnce and Authenticode
Application Deployment Prerequisites
version="4.0.30319.0" />
</dependentAssembly>
</dependency>
<dependency>
<dependentAssembly dependencyType="preRequisite"
allowDelayedBinding="true" supportUrl=" http://www.adatum.com/MyApplication
/missingSampleGACAssembly.htm">
<assemblyIdentity name="SampleGACAssembly" version="5.0.0.0"
publicKeyToken="04529dfb5da245c5" processorArchitecture="msil" language="neutral" />
</dependentAssembly>
</dependency>
<compatibleFrameworks xmlns="urn:schemas‐microsoft‐com:clickonce.v2"
supportUrl="http://adatum.com/MyApplication/CompatibleFrameworks.htm">
<framework targetVersion="4.0" profile="Client" supportedRuntime="4.0.30319" />
<framework targetVersion="4.0" profile="Full" supportedRuntime="4.0.30319" />
</compatibleFrameworks>
How to: Specify a Support URL for Individual Prerequisites in a ClickOn... https://msdn.microsoft.com/en-us/library/ms404264(d=printer).aspx
2 of 3 05.09.2016 16:17
© 2016 Microsoft
How to: Specify a Support URL for Individual Prerequisites in a ClickOn... https://msdn.microsoft.com/en-us/library/ms404264(d=printer).aspx
3 of 3 05.09.2016 16:17
How to: Specify a Publish Page for aClickOnce Application
When publishing a ClickOnce application, a default Web page (publish.htm) is generated and published along with the
application. This page contains the name of the application, a link to install the application and/or any prerequisites, and a
link to a Help topic describing ClickOnce. The Publish Page property for your project allows you to specify a name for the
Web page for your ClickOnce application.
Once the publish page has been specified, the next time you publish, it will be copied to the publish location; it will not be
overwritten if you publish again. If you wish to customize the appearance of the page, you can do so without worrying
about losing your changes. For more information, see How to: Customize the Default Web Page for a ClickOnce Application.
The Publish Page property can be set in the Publish Options dialog box, accessible from the Publish pane of the Project
Designer.
To specify a custom Web page for a ClickOnce application
With a project selected in Solution Explorer, on the Project menu click Properties.1.
Select the Publish pane.2.
Click the Options button to open the Publish Options dialog box.3.
Click Deployment.4.
In the Publish Options dialog box, make sure that the Open deployment web page after publish check box is
selected (it should be selected by default).
5.
In the Deployment web page: box, enter the name for your Web page, and then click OK.6.
To prevent the publish page from launching each time you publish
With a project selected in Solution Explorer, on the Project menu click Properties.1.
Select the Publish pane.2.
Click the Options button to open the Publish Options dialog box.3.
Click Deployment.4.
In the Publish Options dialog box, clear the Open deployment web page after publish check box.5.
See Also
Visual Studio 2015
How to: Specify a Publish Page for a ClickOnce Application https://msdn.microsoft.com/en-us/library/ws69w0k3(d=printer).aspx
1 of 2 05.09.2016 16:17
Publishing ClickOnce Applications
How to: Publish a ClickOnce Application using the Publish Wizard
How to: Customize the Default Web Page for a ClickOnce Application
© 2016 Microsoft
How to: Specify a Publish Page for a ClickOnce Application https://msdn.microsoft.com/en-us/library/ws69w0k3(d=printer).aspx
2 of 2 05.09.2016 16:17
How to: Customize the Default Web Page fora ClickOnce Application
When publishing a ClickOnce application to the Web, a Web page is automatically generated and published along with the
application. The default page contains the name of the application and links to install the application, install prerequisites, or
access help on MSDN.
Note
The actual links that you see on the page depend on the computer where the page is being viewed and what
prerequisites you are including.
The default name for the Web page is Publish.htm; you can change the name in the Project Designer. For more
information, see How to: Specify a Publish Page for a ClickOnce Application.
The Publish.htm Web page is published only if a newer version is detected.
Note
Changes that you make to your Publish settings will not affect the Publish.htm page, with one exception: if you add or
remove prerequisites after initially publishing, the list of prerequisites will no longer be accurate. You will need to edit the
text for the prerequisite link to reflect the changes.
To customize the publish Web page
Publish your ClickOnce application to a Web location. For more information, see How to: Publish a ClickOnce
Application using the Publish Wizard.
1.
On the Web server, open the Publish.htm file in Visual Web Designer or another HTML editor.2.
Customize the page as desired and save it.3.
Optional. To prevent Visual Studio from overwriting your customized publish Web page, uncheck Automatically
generate deployment web page after every publish in the Publish Options dialog box.
4.
See AlsoClickOnce Security and Deployment
Visual Studio 2015
How to: Customize the Default Web Page for a ClickOnce Application https://msdn.microsoft.com/en-us/library/k5befhe3(d=printer).aspx
1 of 2 05.09.2016 16:17
Publishing ClickOnce Applications
How to: Install Prerequisites with a ClickOnce Application
How to: Specify a Publish Page for a ClickOnce Application
© 2016 Microsoft
How to: Customize the Default Web Page for a ClickOnce Application https://msdn.microsoft.com/en-us/library/k5befhe3(d=printer).aspx
2 of 2 05.09.2016 16:17
How to: Enable AutoStart for CD Installations
When deploying a ClickOnce application by means of removable media such as CD-ROM or DVD-ROM, you can enable
AutoStart so that the ClickOnce application is automatically launched when the media is inserted.
AutoStart can be enabled on the Publish page of the Project Designer.
To enable AutoStart
With a project selected in Solution Explorer, on the Project menu click Properties.1.
Click the Publish tab.2.
Click the Options button.
The Publish Options dialog box appears.
3.
Click Deployment.4.
Select the For CD installations, automatically start Setup when CD is inserted check box.
An Autorun.inf file will be copied to the publish location when the application is published.
5.
See Also
Publishing ClickOnce Applications
How to: Publish a ClickOnce Application using the Publish Wizard
© 2016 Microsoft
Visual Studio 2015
How to: Enable AutoStart for CD Installations https://msdn.microsoft.com/en-us/library/xh8z150e(d=printer).aspx
1 of 1 05.09.2016 16:18
How to: Create File Associations For aClickOnce Application
ClickOnce applications can be associated with one or more file name extensions, so that the application will be started
automatically when the user opens a file of those types. Adding file name extension support to a ClickOnce application is
straightforward.
To create file associations for a ClickOnce application
Create a ClickOnce application normally, or use your existing ClickOnce application.1.
Open the application manifest with a text or XML editor, such as Notepad.2.
Find the assembly element. For more information, see ClickOnce Application Manifest.3.
As a child of the assembly element, add a fileAssociation element. The fileAssociation element has four
attributes:
extension: The file name extension you want to associate with the application.
description: A description of the file type, which will appear in the Windows shell.
progid: A string uniquely identifying the file type, to mark it in the registry.
defaultIcon: An icon to use for this file type. The icon must be added as a file resource in the application
manifest. For more information, see How to: Include a Data File in a ClickOnce Application.
For an example of the file and fileAssociation elements, see <fileAssociation> Element (ClickOnce Application).
4.
If you want to associate more than one file type with the application, add additional fileAssociation elements.
Note that the progid attribute should be different for each.
5.
Once you have finished with the application manifest, re-sign the manifest. You can do this from the command line by
using Mage.exe.
mage ‐Sign WindowsFormsApp1.exe.manifest ‐CertFile mycert.pfx
For more information, see Mage.exe (Manifest Generation and Editing Tool)
6.
See Also<fileAssociation> Element (ClickOnce Application)
ClickOnce Application Manifest
Visual Studio 2015
How to: Create File Associations For a ClickOnce Application https://msdn.microsoft.com/en-us/library/bb892924(d=printer).aspx
1 of 2 05.09.2016 16:18
Mage.exe (Manifest Generation and Editing Tool)
© 2016 Microsoft
How to: Create File Associations For a ClickOnce Application https://msdn.microsoft.com/en-us/library/bb892924(d=printer).aspx
2 of 2 05.09.2016 16:18
How to: Retrieve Query String Information inan Online ClickOnce Application
The query string is the portion of a URL beginning with a question mark (?) that contains arbitrary information in the form
name=value. Suppose you have a ClickOnce application named WindowsApp1 that you host on servername, and you
want to pass in a value for the variable username when the application launches. Your URL might look like the following:
http://servername/WindowsApp1.application?username=joeuser
The following two procedures show how to use a ClickOnce application to obtain query string information.
Note
You can only pass information in a query string when your application is being launched using HTTP, instead of using a
file share or the local file system.
The first procedure shows how your ClickOnce application can use a small piece of code to read these values when the
application launches.
The next procedure shows how to configure your ClickOnce application using MageUI.exe so that it can accept query string
parameters. You will need to do this whenever you publish your application.
Note
See the "Security" section later in this topic before you make a decision to enable this feature.
For information about how to create a ClickOnce deployment using Mage.exe or MageUI.exe, see Walkthrough: Manually
Deploying a ClickOnce Application.
Note
Starting in .NET Framework 3.5 SP1, it is possible to pass command-line arguments to an offline ClickOnce application. If
you want to supply arguments to the application, you can pass in parameters to the shortcut file with the .APPREF-MS
extension.
To obtain query string information from a ClickOnce application
Place the following code in your project. In order for this code to function, you will have to have a reference to1.
Visual Studio 2015
How to: Retrieve Query String Information in an Online ClickOnce Applic... https://msdn.microsoft.com/en-us/library/ms172242(d=printer).aspx
1 of 3 05.09.2016 16:19
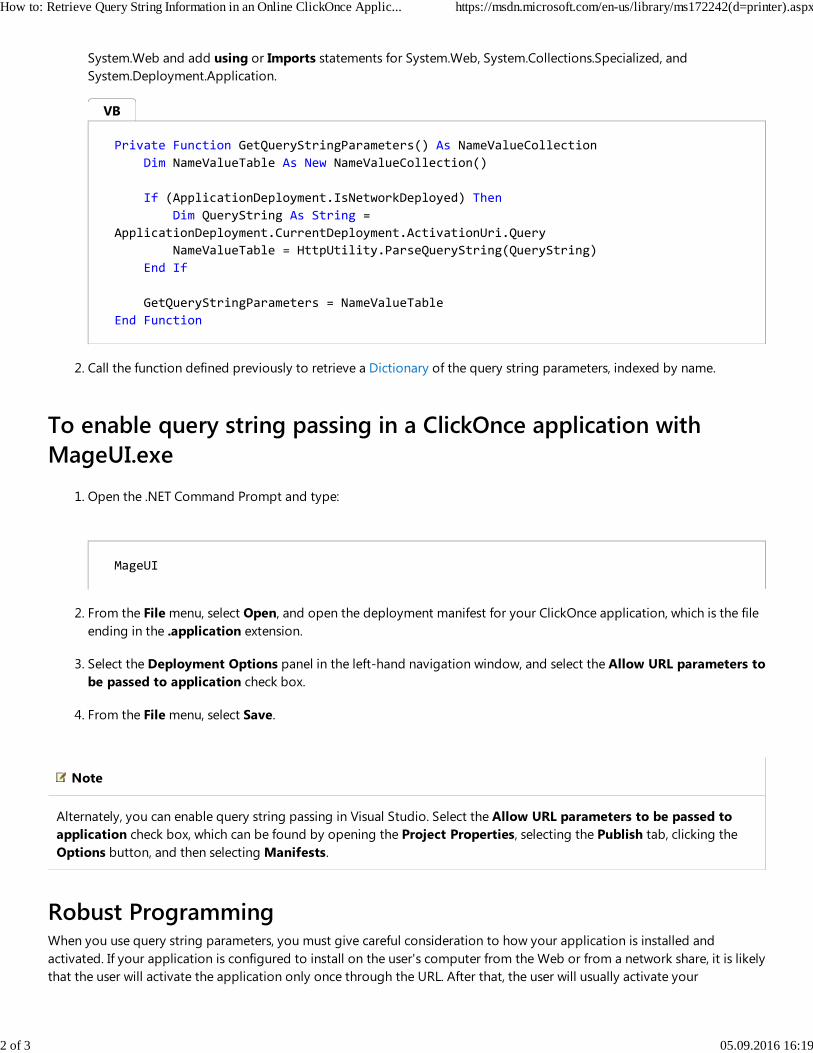
System.Web and add using or Imports statements for System.Web, System.Collections.Specialized, and
System.Deployment.Application.
Call the function defined previously to retrieve a Dictionary of the query string parameters, indexed by name.2.
To enable query string passing in a ClickOnce application with
MageUI.exe
Open the .NET Command Prompt and type:1.
From the File menu, select Open, and open the deployment manifest for your ClickOnce application, which is the file
ending in the .application extension.
2.
Select the Deployment Options panel in the left-hand navigation window, and select the Allow URL parameters to
be passed to application check box.
3.
From the File menu, select Save.4.
Note
Alternately, you can enable query string passing in Visual Studio. Select the Allow URL parameters to be passed to
application check box, which can be found by opening the Project Properties, selecting the Publish tab, clicking the
Options button, and then selecting Manifests.
Robust ProgrammingWhen you use query string parameters, you must give careful consideration to how your application is installed and
activated. If your application is configured to install on the user's computer from the Web or from a network share, it is likely
that the user will activate the application only once through the URL. After that, the user will usually activate your
Private Function GetQueryStringParameters() As NameValueCollection
Dim NameValueTable As New NameValueCollection()
If (ApplicationDeployment.IsNetworkDeployed) Then
Dim QueryString As String =
ApplicationDeployment.CurrentDeployment.ActivationUri.Query
NameValueTable = HttpUtility.ParseQueryString(QueryString)
End If
GetQueryStringParameters = NameValueTable
End Function
MageUI
VB
How to: Retrieve Query String Information in an Online ClickOnce Applic... https://msdn.microsoft.com/en-us/library/ms172242(d=printer).aspx
2 of 3 05.09.2016 16:19
application using the shortcut in the Start menu. As a result, your application is guaranteed to receive query string
arguments only once during its lifetime. If you choose to store these arguments on the user's machine for future use, you are
responsible for storing them in a safe and secure manner.
If your application is online only, it will always be activated through a URL. Even in this case, however, your application must
be written to function properly if the query string parameters are missing or corrupted.
.NET Framework SecurityAllow passing URL parameters to your ClickOnce application only if you plan to cleanse the input of any malicious
characters before using it. A string embedded with quotes, slashes, or semicolons, for example, might perform arbitrary data
operations if used unfiltered in a SQL query against a database. For more information on query string security, see Script
Exploits Overview.
See AlsoSecuring ClickOnce Applications
© 2016 Microsoft
How to: Retrieve Query String Information in an Online ClickOnce Applic... https://msdn.microsoft.com/en-us/library/ms172242(d=printer).aspx
3 of 3 05.09.2016 16:19
How to: Disable URL Activation of ClickOnceApplications by Using the Designer
Typically, a ClickOnce application will start automatically immediately after it is installed from a Web server. For security
reasons, you may decide to disable this behavior, and tell users to start the application from the Start menu instead. The
following procedure describes how to disable URL activation.
This technique can be used only for ClickOnce applications installed on the user's computer from a Web server. It cannot be
used for online-only applications, which can be started only by using their URL. For more information about the difference
between online-only and installed applications, see Choosing a ClickOnce Deployment Strategy.
This procedure uses Visual Studio. You can also accomplish this task by using the Windows Software Development Kit (SDK).
For more information, see How to: Disable URL Activation of ClickOnce Applications.
Procedure
To disable URL activation for your application
Right-click your project name in Solution Explorer, and click Properties.1.
On the Properties page, click the Publish tab.2.
Click Options.3.
Click Manifests.4.
Select the check box labeled Block application from being activated via a URL.5.
Deploy your application.6.
See AlsoPublishing ClickOnce Applications
© 2016 Microsoft
Visual Studio 2015
How to: Disable URL Activation of ClickOnce Applications by Using the... https://msdn.microsoft.com/en-us/library/ms404230(d=printer).aspx
1 of 1 05.09.2016 16:19
How to: Disable URL Activation of ClickOnceApplications
Typically, a ClickOnce application will launch automatically immediately after it is installed from a Web server. For security
reasons, you may decide to disable this behavior, and tell users to launch the application from the Start menu instead. The
following procedure describes how to disable URL activation.
This technique can be used only for ClickOnce applications installed on the user's computer from a Web server. It cannot be
used for online-only applications, which can be launched only by using their URL. For more information on the difference
between online-only and installed applications, see Choosing a ClickOnce Deployment Strategy.
This procedure uses the Windows Software Development Kit (SDK) tool MageUI.exe. For more information on this tool, see
MageUI.exe (Manifest Generation and Editing Tool, Graphical Client). You can also perform this procedure using Visual
Studio.
Procedure
To disable URL activation for your application
Open your deployment manifest in MageUI.exe. If you have not yet created one, follow the steps in Walkthrough:
Manually Deploying a ClickOnce Application.
1.
Select the Deployment Options tab.2.
Clear the Automatically run application after installing check box.3.
Save and sign the manifest.4.
See AlsoPublishing ClickOnce Applications
© 2016 Microsoft
Visual Studio 2015
How to: Disable URL Activation of ClickOnce Applications https://msdn.microsoft.com/en-us/library/ms404268(d=printer).aspx
1 of 1 05.09.2016 16:20
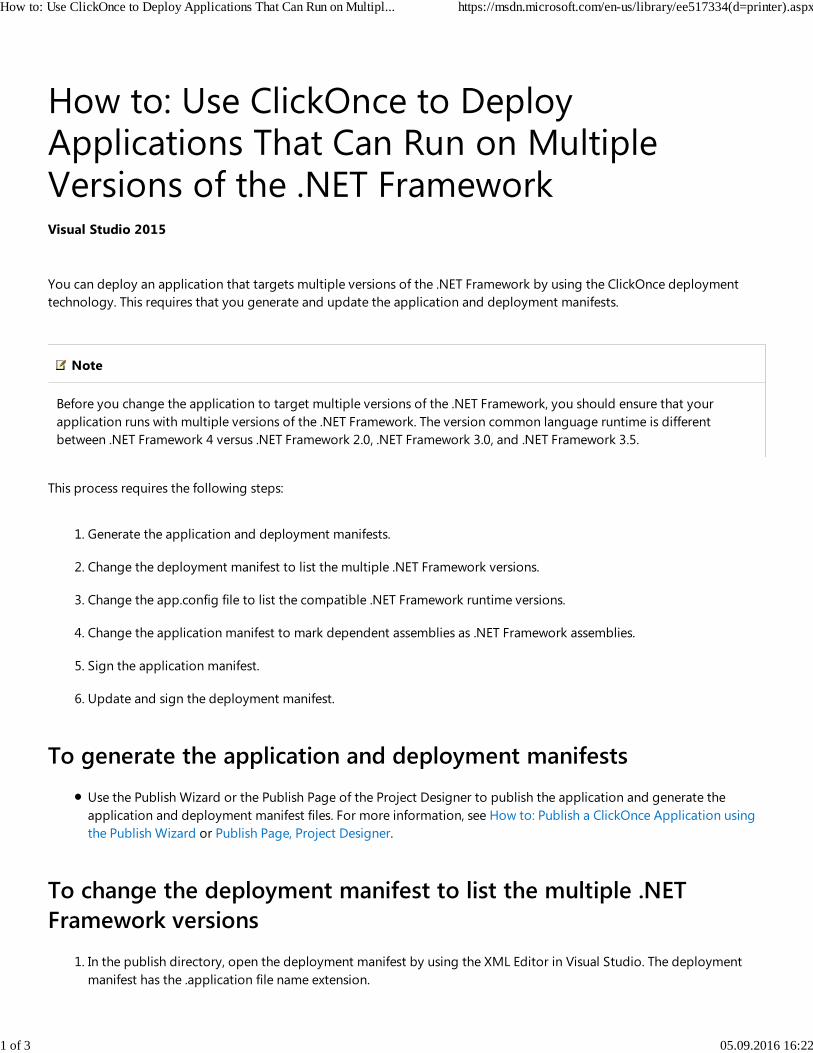
How to: Use ClickOnce to DeployApplications That Can Run on MultipleVersions of the .NET Framework
You can deploy an application that targets multiple versions of the .NET Framework by using the ClickOnce deployment
technology. This requires that you generate and update the application and deployment manifests.
Note
Before you change the application to target multiple versions of the .NET Framework, you should ensure that your
application runs with multiple versions of the .NET Framework. The version common language runtime is different
between .NET Framework 4 versus .NET Framework 2.0, .NET Framework 3.0, and .NET Framework 3.5.
This process requires the following steps:
Generate the application and deployment manifests.1.
Change the deployment manifest to list the multiple .NET Framework versions.2.
Change the app.config file to list the compatible .NET Framework runtime versions.3.
Change the application manifest to mark dependent assemblies as .NET Framework assemblies.4.
Sign the application manifest.5.
Update and sign the deployment manifest.6.
To generate the application and deployment manifests
Use the Publish Wizard or the Publish Page of the Project Designer to publish the application and generate the
application and deployment manifest files. For more information, see How to: Publish a ClickOnce Application using
the Publish Wizard or Publish Page, Project Designer.
To change the deployment manifest to list the multiple .NET
Framework versions
In the publish directory, open the deployment manifest by using the XML Editor in Visual Studio. The deployment
manifest has the .application file name extension.
1.
Visual Studio 2015
How to: Use ClickOnce to Deploy Applications That Can Run on Multipl... https://msdn.microsoft.com/en-us/library/ee517334(d=printer).aspx
1 of 3 05.09.2016 16:22
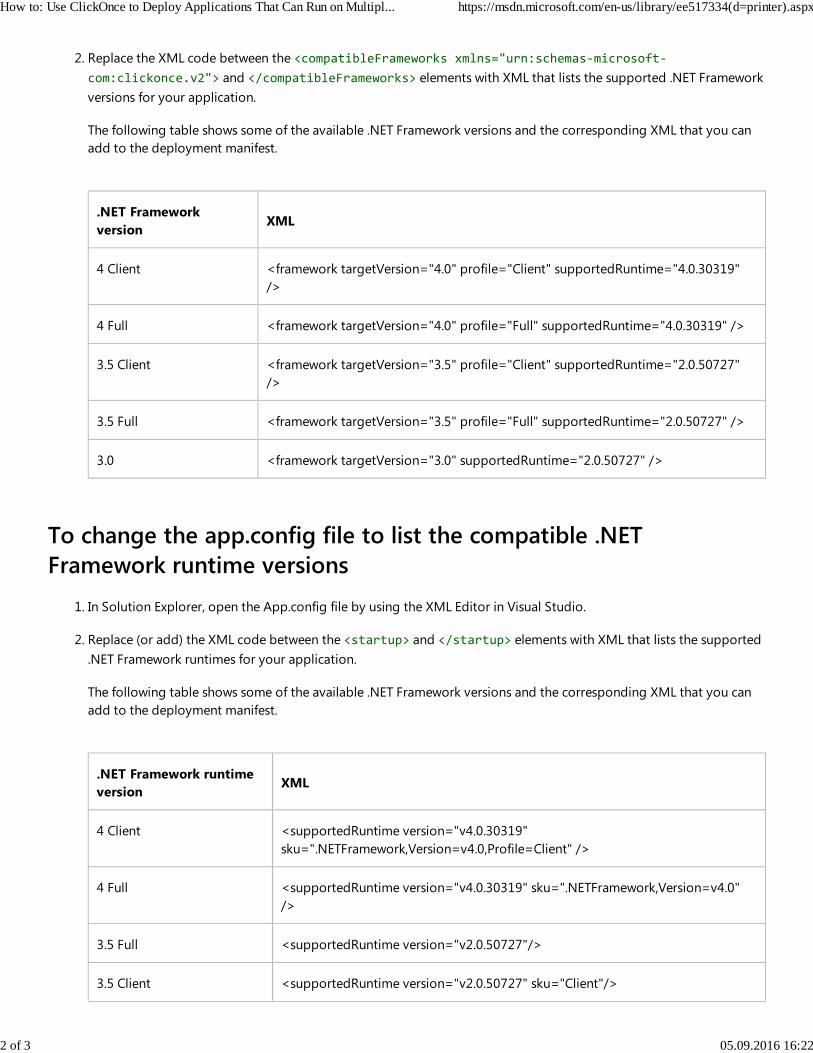
Replace the XML code between the <compatibleFrameworks xmlns="urn:schemas‐microsoft‐
com:clickonce.v2"> and </compatibleFrameworks> elements with XML that lists the supported .NET Framework
versions for your application.
The following table shows some of the available .NET Framework versions and the corresponding XML that you can
add to the deployment manifest.
.NET Framework
versionXML
4 Client <framework targetVersion="4.0" profile="Client" supportedRuntime="4.0.30319"
/>
4 Full <framework targetVersion="4.0" profile="Full" supportedRuntime="4.0.30319" />
3.5 Client <framework targetVersion="3.5" profile="Client" supportedRuntime="2.0.50727"
/>
3.5 Full <framework targetVersion="3.5" profile="Full" supportedRuntime="2.0.50727" />
3.0 <framework targetVersion="3.0" supportedRuntime="2.0.50727" />
2.
To change the app.config file to list the compatible .NET
Framework runtime versions
In Solution Explorer, open the App.config file by using the XML Editor in Visual Studio.1.
Replace (or add) the XML code between the <startup> and </startup> elements with XML that lists the supported
.NET Framework runtimes for your application.
The following table shows some of the available .NET Framework versions and the corresponding XML that you can
add to the deployment manifest.
.NET Framework runtime
versionXML
4 Client <supportedRuntime version="v4.0.30319"
sku=".NETFramework,Version=v4.0,Profile=Client" />
4 Full <supportedRuntime version="v4.0.30319" sku=".NETFramework,Version=v4.0"
/>
3.5 Full <supportedRuntime version="v2.0.50727"/>
3.5 Client <supportedRuntime version="v2.0.50727" sku="Client"/>
2.
How to: Use ClickOnce to Deploy Applications That Can Run on Multipl... https://msdn.microsoft.com/en-us/library/ee517334(d=printer).aspx
2 of 3 05.09.2016 16:22
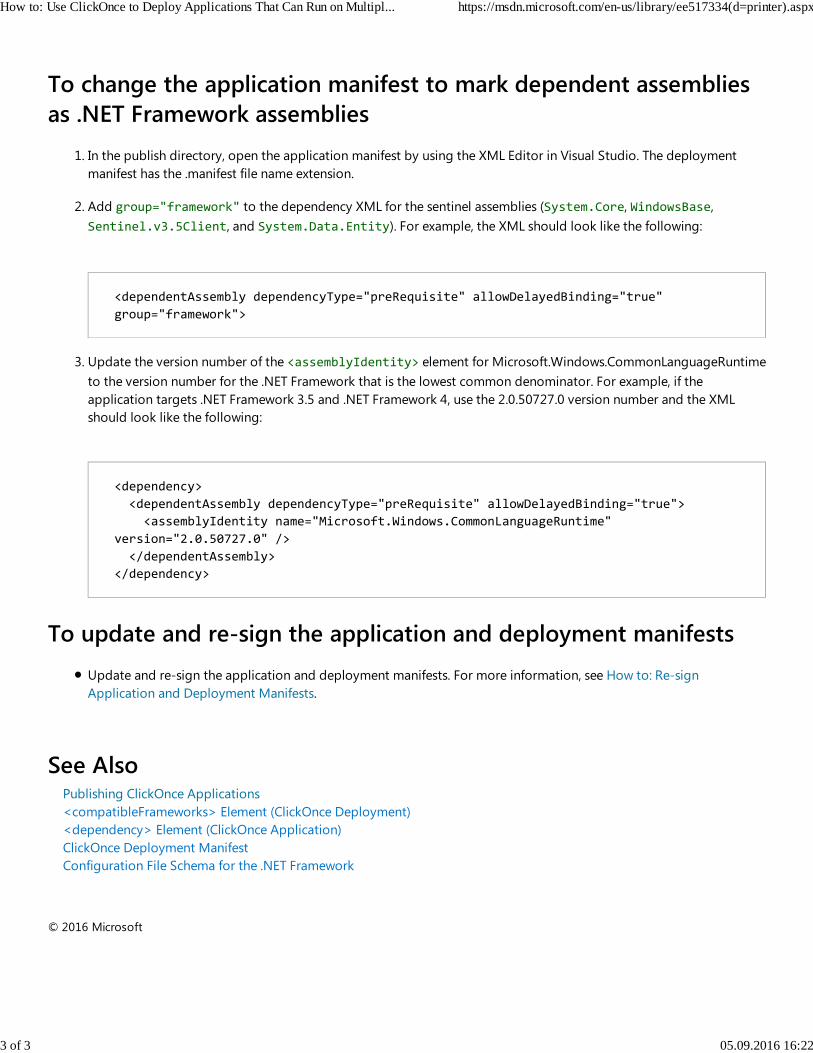
To change the application manifest to mark dependent assemblies
as .NET Framework assemblies
In the publish directory, open the application manifest by using the XML Editor in Visual Studio. The deployment
manifest has the .manifest file name extension.
1.
Add group="framework" to the dependency XML for the sentinel assemblies (System.Core, WindowsBase,
Sentinel.v3.5Client, and System.Data.Entity). For example, the XML should look like the following:
2.
Update the version number of the <assemblyIdentity> element for Microsoft.Windows.CommonLanguageRuntime
to the version number for the .NET Framework that is the lowest common denominator. For example, if the
application targets .NET Framework 3.5 and .NET Framework 4, use the 2.0.50727.0 version number and the XML
should look like the following:
3.
To update and re-sign the application and deployment manifests
Update and re-sign the application and deployment manifests. For more information, see How to: Re-sign
Application and Deployment Manifests.
See AlsoPublishing ClickOnce Applications
<compatibleFrameworks> Element (ClickOnce Deployment)
<dependency> Element (ClickOnce Application)
ClickOnce Deployment Manifest
Configuration File Schema for the .NET Framework
© 2016 Microsoft
<dependentAssembly dependencyType="preRequisite" allowDelayedBinding="true"
group="framework">
<dependency>
<dependentAssembly dependencyType="preRequisite" allowDelayedBinding="true">
<assemblyIdentity name="Microsoft.Windows.CommonLanguageRuntime"
version="2.0.50727.0" />
</dependentAssembly>
</dependency>
How to: Use ClickOnce to Deploy Applications That Can Run on Multipl... https://msdn.microsoft.com/en-us/library/ee517334(d=printer).aspx
3 of 3 05.09.2016 16:22
How to: Publish a WPF Application withVisual Styles Enabled
Visual styles enable the appearance of common controls to change based on the theme chosen by the user. By default, visual
styles are not enabled for Windows Presentation Foundation (WPF) applications, so you must enable them manually.
However, enabling visual styles for a WPF application and then publishing the solution causes an error. This topic describes
how to resolve this error and the process for publishing a WPF application with visual styles enabled. For more information
about visual styles, see 5B5D7BB6-684F-478D-BF5F-B8D18BBCFF2E. For more information about the error message, see
Troubleshooting Specific Errors in ClickOnce Deployments.
To resolve the error and to publish the solution, you must perform the following tasks:
Publish the solution without visual styles enabled.
Create a manifest file.
Embed the manifest file into the executable file of the published solution.
Sign the application and deployment manifests.
Then, you can move the published files to the location from which you want end users to install the application.
Publish the solution without visual styles enabled
Ensure that your project does not have visual styles enabled. First, check your project’s manifest file for the
following XML. Then, if the XML is present, enclose the XML with a comment tag.
By default, visual styles are not enabled.
The following procedures show how to open the manifest file associated with your project.
To open the manifest file in a Visual Basic project
On the menu bar, choose Project, ProjectNameProperties, where ProjectName is the name of your WPF
project.
a.
1.
Visual Studio 2015
<dependency> <dependentAssembly> <assemblyIdentity
type="win32" name="Microsoft.Windows.Common‐Controls"
version="6.0.0.0" processorArchitecture="*"
publicKeyToken="6595b64144ccf1df" language="*" />
</dependentAssembly> </dependency>
How to: Publish a WPF Application with Visual Styles Enabled https://msdn.microsoft.com/en-us/library/hh323463(d=printer).aspx
1 of 5 05.09.2016 16:23
The property pages for your WPF project appear.
On the Application tab, choose View Windows Settings.
The app.manifest file opens in the Code Editor.
b.
To open the manifest file in a C# project
On the menu bar, choose Project, ProjectNameProperties, where ProjectName is the name of your WPF
project.
The property pages for your WPF project appear.
a.
On the Application tab, make a note of the name that appears in the manifest field. This is the name of the
manifest that is associated with your project.
Note
If Embed manifest with default settings or Create application without manifest appear in the
manifest field, visual styles are not enabled. If the name of a manifest file appears in the manifest field,
proceed to the next step in this procedure.
b.
In Solution Explorer, choose Show All Files ().
This button shows all project items, including those that have been excluded and those that are normally
hidden. The manifest file appears as a project item.
c.
Build and publish your solution. For more information about how to publish the solution, see How to: Publish a
ClickOnce Application using the Publish Wizard.
2.
Create a manifest file
Paste the following XML into a Notepad file.
This XML describes the assembly that contains controls that support visual styles.
1.
<?xml version="1.0" encoding="utf‐8"?><asmv1:assembly
manifestVersion="1.0" xmlns="urn:schemas‐microsoft‐
com:asm.v1" xmlns:asmv1="urn:schemas‐microsoft‐
com:asm.v1" xmlns:asmv2="urn:schemas‐microsoft‐
com:asm.v2" xmlns:xsi="http://www.w3.org/2001/XMLSchema‐instance">
<dependency> <dependentAssembly> <assemblyIdentity
type="win32" name="Microsoft.Windows.Common‐Controls"
version="6.0.0.0" processorArchitecture="*"
publicKeyToken="6595b64144ccf1df" language="*" />
</dependentAssembly> </dependency></asmv1:assembly>
How to: Publish a WPF Application with Visual Styles Enabled https://msdn.microsoft.com/en-us/library/hh323463(d=printer).aspx
2 of 5 05.09.2016 16:23
In Notepad, click File, and then click Save As.2.
In the Save As dialog box, in the Save as type drop-down list, select All Files.3.
In the File name box, name the file and append .manifest to the end of the file name. For example:
themes.manifest.
4.
Choose the Browse Folders button, select any folder, and then click Save.
Note
The remaining procedures assume that the name of this file is themes.manifest and that the file is saved to the
C:\temp directory on your computer.
5.
Embed the manifest file into the executable file of the published
solution
Open the Visual Studio Command Prompt.
For more information about how to open the Visual Studio Command Prompt, see Developer Command
Prompt for Visual Studio.
Note
The remaining steps make the following assumptions about your solution:
The name of the solution is MyWPFProject.
The solution is located in the following directory: %UserProfile%\Documents\Visual Studio
2010\Projects\.
The solution is published to the following directory: %UserProfile%\Documents\Visual Studio
2010\Projects\publish.
The most recent version of the published application files is located in the following directory:
%UserProfile%\Documents\Visual Studio 2010\Projects\publish\Application
Files\WPFApp_1_0_0_0
You do not have to use the name or the directory locations described above. The name and locations described
above are used only to illustrate the steps required to publish your solution.
1.
At the command prompt, change the path to the directory that contains the most recent version of the published
application files. The following example demonstrates this step.
2.
How to: Publish a WPF Application with Visual Styles Enabled https://msdn.microsoft.com/en-us/library/hh323463(d=printer).aspx
3 of 5 05.09.2016 16:23

At the command prompt, run the following command to embed the manifest file into the executable file of the
application.
3.
Sign the application and deployment manifests
At the command prompt, run the following command to remove the .deploy extension from the executable file in
the current directory.
Note
This example assumes that only one file has the .deploy file extension. Make sure that you rename all files in
this directory that have the .deploy file extension.
1.
At the command prompt, run the following command to sign the application manifest.
Note
This example assumes that you sign the manifest by using the .pfx file of the project. If you are not signing the
manifest, you can omit the –cf parameter that is used in this example. If you are signing the manifest with a
certificate that requires a password, specify the –password option (For example: mage –u
MyWPFApp.exe.manifest –cf ..\..\..\MyWPFApp_TemporaryKey.pfx – password Password).
2.
At the command prompt, run the following command to add the .deploy extension to the name of the file that
you renamed in a previous step of this procedure.
3.
cd "%UserProfile%\Documents\Visual Studio 2010\Projects\MyWPFProject\publish
\Application Files\WPFApp_1_0_0_0"
mt –manifest c:\temp\themes.manifest –outputresource:MyWPFApp.exe.deploy
ren MyWPFApp.exe.deploy MyWPFApp.exe
mage ‐u MyWPFApp.exe.manifest ‐cf ..\..\..\MyWPFApp_TemporaryKey.pfx
How to: Publish a WPF Application with Visual Styles Enabled https://msdn.microsoft.com/en-us/library/hh323463(d=printer).aspx
4 of 5 05.09.2016 16:23
Note
This example assumes that only one file had a .deploy file extension. Make sure that you rename all files in this
directory that previously had the .deploy file name extension.
At the command prompt, run the following command to sign the deployment manifest.
Note
This example assumes that you sign the manifest by using the .pfx file of the project. If you are not signing the
manifest, you can omit the –cf parameter that is used in this example. If you are signing the manifest with a
certificate that requires a password, specify the –password option, as in this example:For example: mage –u
MyWPFApp.exe.manifest –cf ..\..\..\MyWPFApp_TemporaryKey.pfx – password Password.
4.
After you have performed these steps, you can move the published files to the location from which you want end users to
install the application. If you intend to update the solution often, you can move these commands into a script and run the
script each time that you publish a new version.
See AlsoTroubleshooting Specific Errors in ClickOnce Deployments
5B5D7BB6-684F-478D-BF5F-B8D18BBCFF2E
VS|Controls|~\controls\userex\cookbook.htm
Developer Command Prompt for Visual Studio
© 2016 Microsoft
ren MyWPFApp.exe MyWPFApp.exe.deploy
mage ‐u ..\..\MyWPFApp.application ‐appm MyWPFApp.exe.manifest ‐cf ..\..\..
\MyWPFApp_TemporaryKey.pfx
How to: Publish a WPF Application with Visual Styles Enabled https://msdn.microsoft.com/en-us/library/hh323463(d=printer).aspx
5 of 5 05.09.2016 16:23
Walkthrough: Downloading Assemblies onDemand with the ClickOnce Deployment APIUsing the Designer
By default, all the assemblies included in a ClickOnce application are downloaded when the application is first run. However,
there might be parts of your application that are used by a small set of the users. In this case, you want to download an
assembly only when you create one of its types. The following walkthrough demonstrates how to mark certain assemblies in
your application as "optional", and how to download them by using classes in the System.Deployment.Application
namespace when the common language runtime demands them.
Note
Your application will have to run in full trust to use this procedure.
Note
The dialog boxes and menu commands you see might differ from those described in Help depending on your active
settings or edition. To change your settings, click Import and Export Settings on the Tools menu. For more
information, see Customizing Development Settings in Visual Studio.
Creating the Projects
To create a project that uses an on-demand assembly with Visual Studio
Create a new Windows Forms project in Visual Studio. On the File menu, point to Add, and then click New
Project. Choose a Class Library project in the dialog box and name it ClickOnceLibrary.
Note
In Visual Basic, we recommend that you modify the project properties to change the root namespace for this
project to Microsoft.Samples.ClickOnceOnDemand or to a namespace of your choice. For simplicity, the two
projects in this walkthrough are in the same namespace.
1.
Define a class named DynamicClass with a single property named Message.2.
Visual Studio 2015
VB
Walkthrough: Downloading Assemblies on Demand with the ClickOnce D... https://msdn.microsoft.com/en-us/library/ak58kz04(d=printer).aspx
1 of 5 05.09.2016 16:23

Select the Windows Forms project in Solution Explorer. Add a reference to the System.Deployment.Application
assembly and a project reference to the ClickOnceLibrary project.
Note
In Visual Basic, we recommend that you modify the project properties to change the root namespace for this
project to Microsoft.Samples.ClickOnceOnDemand or to a namespace of your choice. For simplicity, the two
projects in this walkthrough are located in the same namespace.
3.
Right-click the form, click View Code from the menu, and add the following references to the form.4.
Add the following code to download this assembly on demand. This code shows how to map a set of assemblies to
a group name using a generic Dictionary class. Because we are only downloading a single assembly in this
walkthrough, there is only one assembly in our group. In a real application, you would likely want to download all
assemblies related to a single feature in your application at the same time. The mapping table enables you to do
this easily by associating all the DLLs that belong to a feature with a download group name.
5.
Public Class DynamicClass
Sub New()
End Sub
Public ReadOnly Property Message() As String
Get
Message = "Hello, world!"
End Get
End Property
End Class
Imports System.Reflection
Imports System.Deployment.Application
Imports System.Collections.Generic
Imports Microsoft.Samples.ClickOnceOnDemand
Imports System.Security.Permissions
' Maintain a dictionary mapping DLL names to download file groups. This is trivial
for this sample,
' but will be important in real‐world applications where a feature is spread
across multiple DLLs,
' and you want to download all DLLs for that feature in one shot.
Dim DllMappingTable As New Dictionary(Of String, String)()
<SecurityPermission(SecurityAction.Demand, ControlAppDomain:=True)> _
Sub New()
' This call is required by the Windows Form Designer.
VB
VB
Walkthrough: Downloading Assemblies on Demand with the ClickOnce D... https://msdn.microsoft.com/en-us/library/ak58kz04(d=printer).aspx
2 of 5 05.09.2016 16:23
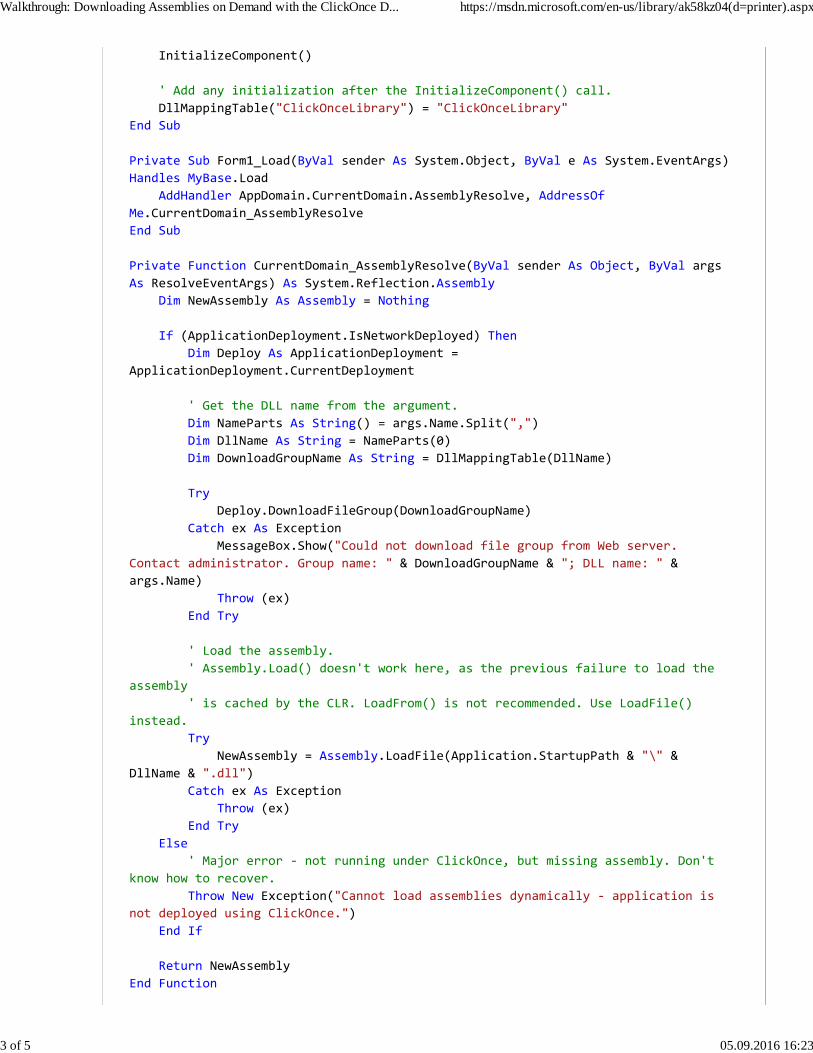
InitializeComponent()
' Add any initialization after the InitializeComponent() call.
DllMappingTable("ClickOnceLibrary") = "ClickOnceLibrary"
End Sub
Private Sub Form1_Load(ByVal sender As System.Object, ByVal e As System.EventArgs)
Handles MyBase.Load
AddHandler AppDomain.CurrentDomain.AssemblyResolve, AddressOf
Me.CurrentDomain_AssemblyResolve
End Sub
Private Function CurrentDomain_AssemblyResolve(ByVal sender As Object, ByVal args
As ResolveEventArgs) As System.Reflection.Assembly
Dim NewAssembly As Assembly = Nothing
If (ApplicationDeployment.IsNetworkDeployed) Then
Dim Deploy As ApplicationDeployment =
ApplicationDeployment.CurrentDeployment
' Get the DLL name from the argument.
Dim NameParts As String() = args.Name.Split(",")
Dim DllName As String = NameParts(0)
Dim DownloadGroupName As String = DllMappingTable(DllName)
Try
Deploy.DownloadFileGroup(DownloadGroupName)
Catch ex As Exception
MessageBox.Show("Could not download file group from Web server.
Contact administrator. Group name: " & DownloadGroupName & "; DLL name: " &
args.Name)
Throw (ex)
End Try
' Load the assembly.
' Assembly.Load() doesn't work here, as the previous failure to load the
assembly
' is cached by the CLR. LoadFrom() is not recommended. Use LoadFile()
instead.
Try
NewAssembly = Assembly.LoadFile(Application.StartupPath & "\" &
DllName & ".dll")
Catch ex As Exception
Throw (ex)
End Try
Else
' Major error ‐ not running under ClickOnce, but missing assembly. Don't
know how to recover.
Throw New Exception("Cannot load assemblies dynamically ‐ application is
not deployed using ClickOnce.")
End If
Return NewAssembly
End Function
Walkthrough: Downloading Assemblies on Demand with the ClickOnce D... https://msdn.microsoft.com/en-us/library/ak58kz04(d=printer).aspx
3 of 5 05.09.2016 16:23
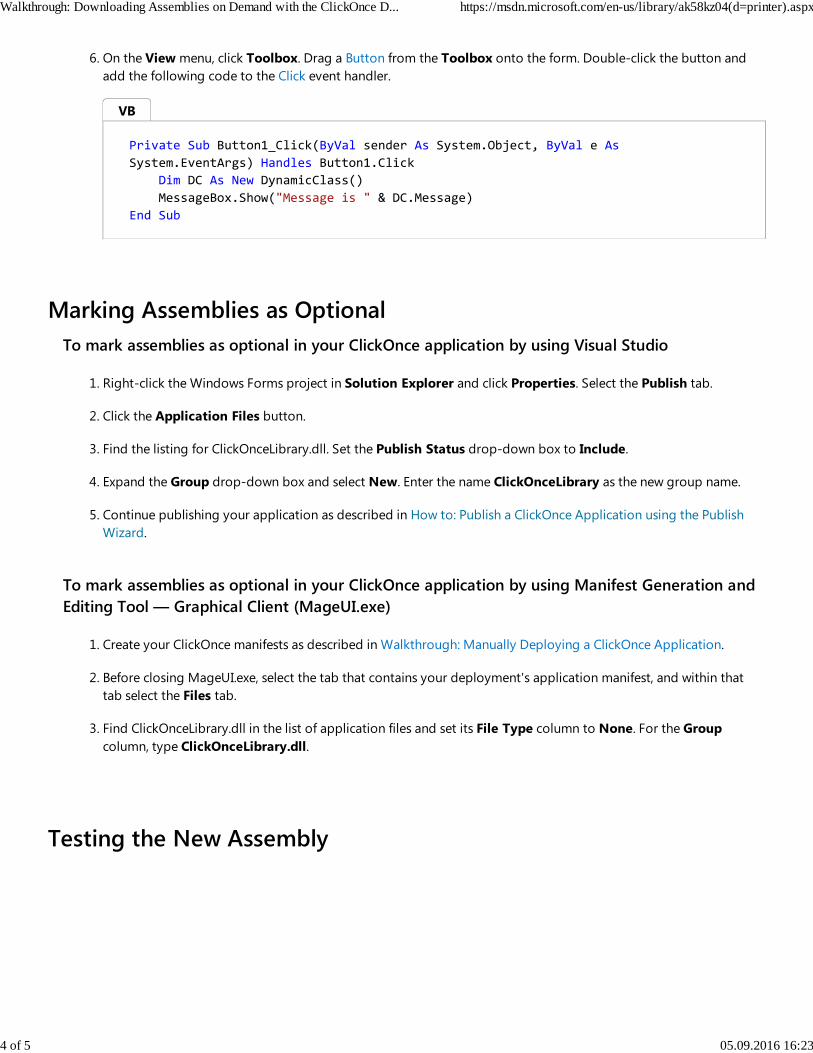
On the View menu, click Toolbox. Drag a Button from the Toolbox onto the form. Double-click the button and
add the following code to the Click event handler.
6.
Marking Assemblies as Optional
To mark assemblies as optional in your ClickOnce application by using Visual Studio
Right-click the Windows Forms project in Solution Explorer and click Properties. Select the Publish tab.1.
Click the Application Files button.2.
Find the listing for ClickOnceLibrary.dll. Set the Publish Status drop-down box to Include.3.
Expand the Group drop-down box and select New. Enter the name ClickOnceLibrary as the new group name.4.
Continue publishing your application as described in How to: Publish a ClickOnce Application using the Publish
Wizard.
5.
To mark assemblies as optional in your ClickOnce application by using Manifest Generation and
Editing Tool — Graphical Client (MageUI.exe)
Create your ClickOnce manifests as described in Walkthrough: Manually Deploying a ClickOnce Application.1.
Before closing MageUI.exe, select the tab that contains your deployment's application manifest, and within that
tab select the Files tab.
2.
Find ClickOnceLibrary.dll in the list of application files and set its File Type column to None. For the Group
column, type ClickOnceLibrary.dll.
3.
Testing the New Assembly
Private Sub Button1_Click(ByVal sender As System.Object, ByVal e As
System.EventArgs) Handles Button1.Click
Dim DC As New DynamicClass()
MessageBox.Show("Message is " & DC.Message)
End Sub
VB
Walkthrough: Downloading Assemblies on Demand with the ClickOnce D... https://msdn.microsoft.com/en-us/library/ak58kz04(d=printer).aspx
4 of 5 05.09.2016 16:23
To test your on-demand assembly
Start your application deployed with ClickOnce.1.
When your main form appears, press the Button. You should see a string in a message box window that reads,
"Hello, World!"
2.
See AlsoApplicationDeployment
© 2016 Microsoft
Walkthrough: Downloading Assemblies on Demand with the ClickOnce D... https://msdn.microsoft.com/en-us/library/ak58kz04(d=printer).aspx
5 of 5 05.09.2016 16:23
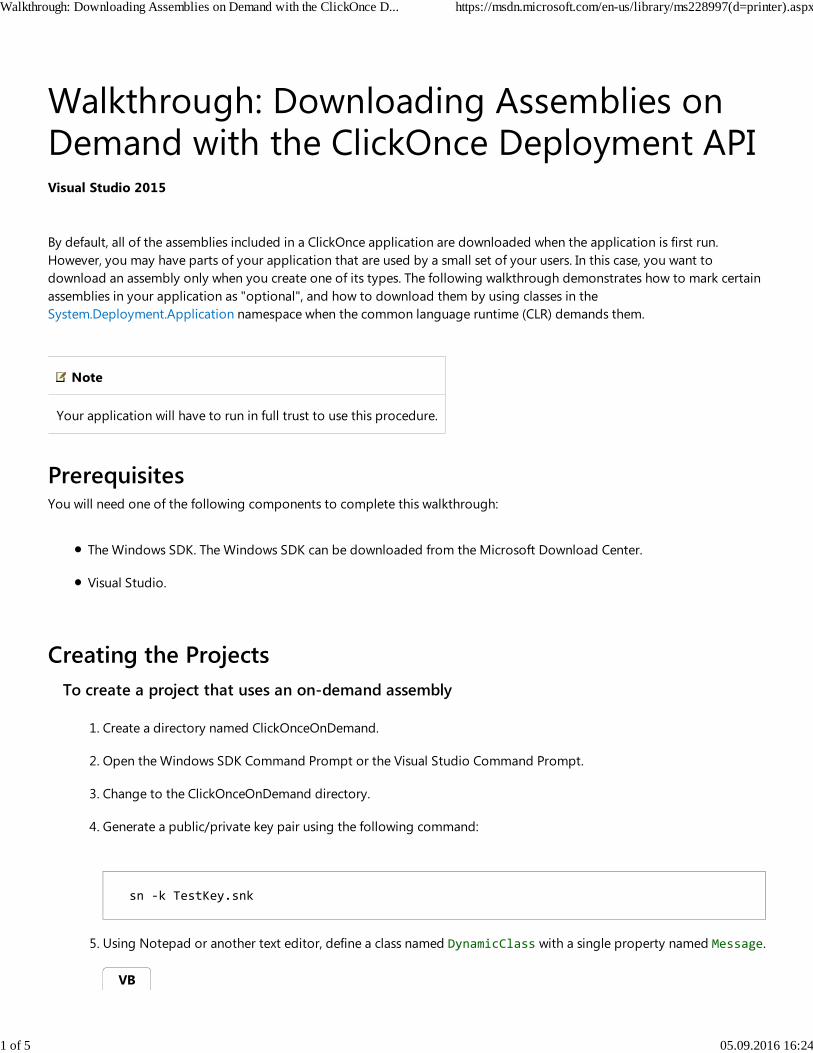
Walkthrough: Downloading Assemblies onDemand with the ClickOnce Deployment API
By default, all of the assemblies included in a ClickOnce application are downloaded when the application is first run.
However, you may have parts of your application that are used by a small set of your users. In this case, you want to
download an assembly only when you create one of its types. The following walkthrough demonstrates how to mark certain
assemblies in your application as "optional", and how to download them by using classes in the
System.Deployment.Application namespace when the common language runtime (CLR) demands them.
Note
Your application will have to run in full trust to use this procedure.
PrerequisitesYou will need one of the following components to complete this walkthrough:
The Windows SDK. The Windows SDK can be downloaded from the Microsoft Download Center.
Visual Studio.
Creating the Projects
To create a project that uses an on-demand assembly
Create a directory named ClickOnceOnDemand.1.
Open the Windows SDK Command Prompt or the Visual Studio Command Prompt.2.
Change to the ClickOnceOnDemand directory.3.
Generate a public/private key pair using the following command:4.
Using Notepad or another text editor, define a class named DynamicClass with a single property named Message.5.
Visual Studio 2015
sn ‐k TestKey.snk
VB
Walkthrough: Downloading Assemblies on Demand with the ClickOnce D... https://msdn.microsoft.com/en-us/library/ms228997(d=printer).aspx
1 of 5 05.09.2016 16:24
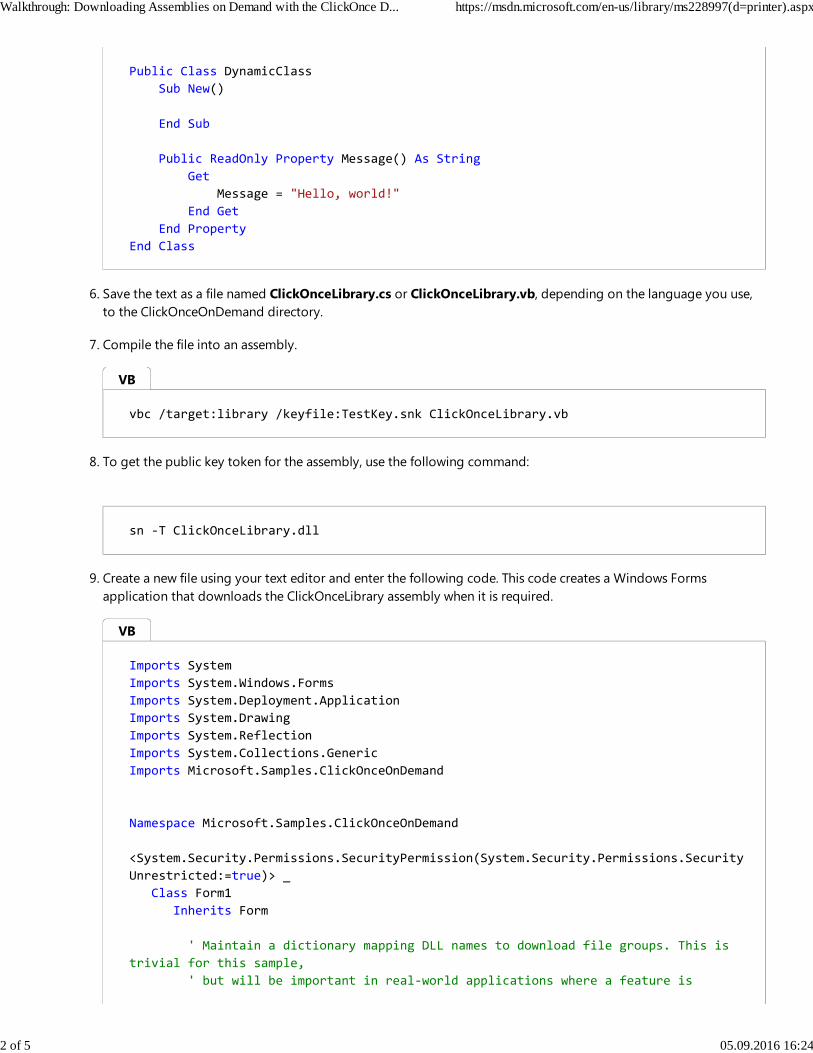
Save the text as a file named ClickOnceLibrary.cs or ClickOnceLibrary.vb, depending on the language you use,
to the ClickOnceOnDemand directory.
6.
Compile the file into an assembly.7.
To get the public key token for the assembly, use the following command:8.
Create a new file using your text editor and enter the following code. This code creates a Windows Forms
application that downloads the ClickOnceLibrary assembly when it is required.
9.
Public Class DynamicClass
Sub New()
End Sub
Public ReadOnly Property Message() As String
Get
Message = "Hello, world!"
End Get
End Property
End Class
vbc /target:library /keyfile:TestKey.snk ClickOnceLibrary.vb
sn ‐T ClickOnceLibrary.dll
Imports System
Imports System.Windows.Forms
Imports System.Deployment.Application
Imports System.Drawing
Imports System.Reflection
Imports System.Collections.Generic
Imports Microsoft.Samples.ClickOnceOnDemand
Namespace Microsoft.Samples.ClickOnceOnDemand
<System.Security.Permissions.SecurityPermission(System.Security.Permissions.SecurityAction.Demand,
Unrestricted:=true)> _
Class Form1
Inherits Form
' Maintain a dictionary mapping DLL names to download file groups. This is
trivial for this sample,
' but will be important in real‐world applications where a feature is
VB
VB
Walkthrough: Downloading Assemblies on Demand with the ClickOnce D... https://msdn.microsoft.com/en-us/library/ms228997(d=printer).aspx
2 of 5 05.09.2016 16:24

spread across multiple DLLs,
' and you want to download all DLLs for that feature in one shot.
Dim DllMapping as Dictionary(Of String, String) = new Dictionary(of
String, String)()
Public Sub New()
' Add button to form.
Dim GetAssemblyButton As New Button()
GetAssemblyButton.Location = New Point(100, 100)
GetAssemblyButton.Text = "Get assembly on demand"
AddHandler GetAssemblyButton.Click, AddressOf GetAssemblyButton_Click
Me.Controls.Add(GetAssemblyButton)
DllMapping("ClickOnceLibrary") = "ClickOnceLibrary"
AddHandler AppDomain.CurrentDomain.AssemblyResolve, AddressOf
CurrentDomain_AssemblyResolve
End Sub
<STAThread()> _
Shared Sub Main()
Application.EnableVisualStyles()
Application.Run(New Form1())
End Sub
Private Function CurrentDomain_AssemblyResolve(ByVal sender As Object,
ByVal args As ResolveEventArgs) As Assembly
If ApplicationDeployment.IsNetworkDeployed Then
Dim deploy As ApplicationDeployment =
ApplicationDeployment.CurrentDeployment
' Get the DLL name from the Name argument.
Dim nameParts() as String = args.Name.Split(",")
Dim dllName as String = nameParts(0)
Dim downloadGroupName as String = DllMapping(dllName)
Try
deploy.DownloadFileGroup(downloadGroupName)
Catch de As DeploymentException
End Try
' Load the assembly.
Dim newAssembly As Assembly = Nothing
Try
newAssembly = Assembly.LoadFile(Application.StartupPath & "\\"
& dllName & ".dll," & _
"Version=1.0.0.0, Culture=en,
PublicKeyToken=03689116d3a4ae33")
Catch ex As Exception
MessageBox.Show("Could not download assembly on demand.")
End Try
Walkthrough: Downloading Assemblies on Demand with the ClickOnce D... https://msdn.microsoft.com/en-us/library/ms228997(d=printer).aspx
3 of 5 05.09.2016 16:24

In the code, locate the call to LoadFile.10.
Set PublicKeyToken to the value that you retrieved earlier.11.
Save the file as either Form1.cs or Form1.vb.12.
Compile it into an executable using the following command.13.
Marking Assemblies as Optional
To mark assemblies as optional in your ClickOnce application by using MageUI.exe
Using MageUI.exe, create an application manifest as described in Walkthrough: Manually Deploying a ClickOnce
Application. Use the following settings for the application manifest:
Name the application manifest ClickOnceOnDemand.
On the Files page, in the ClickOnceLibrary.dll row, set the File Type column to None.
On the Files page, in the ClickOnceLibrary.dll row, type ClickOnceLibrary.dll in the Group column.
1.
Using MageUI.exe, create a deployment manifest as described in Walkthrough: Manually Deploying a ClickOnce
Application. Use the following settings for the deployment manifest:
Name the deployment manifest ClickOnceOnDemand.
2.
Testing the New Assembly
To test your on-demand assembly
CurrentDomain_AssemblyResolve = newAssembly
Else
CurrentDomain_AssemblyResolve = Nothing
End If
End Function
Private Sub GetAssemblyButton_Click(ByVal sender As Object, ByVal e As
EventArgs)
Dim ourClass As New DynamicClass()
MessageBox.Show("DynamicClass string is: " + ourClass.Message)
End Sub
End Class
End Namespace
vbc /target:exe /reference:ClickOnceLibrary.dll Form1.vb
VB
Walkthrough: Downloading Assemblies on Demand with the ClickOnce D... https://msdn.microsoft.com/en-us/library/ms228997(d=printer).aspx
4 of 5 05.09.2016 16:24
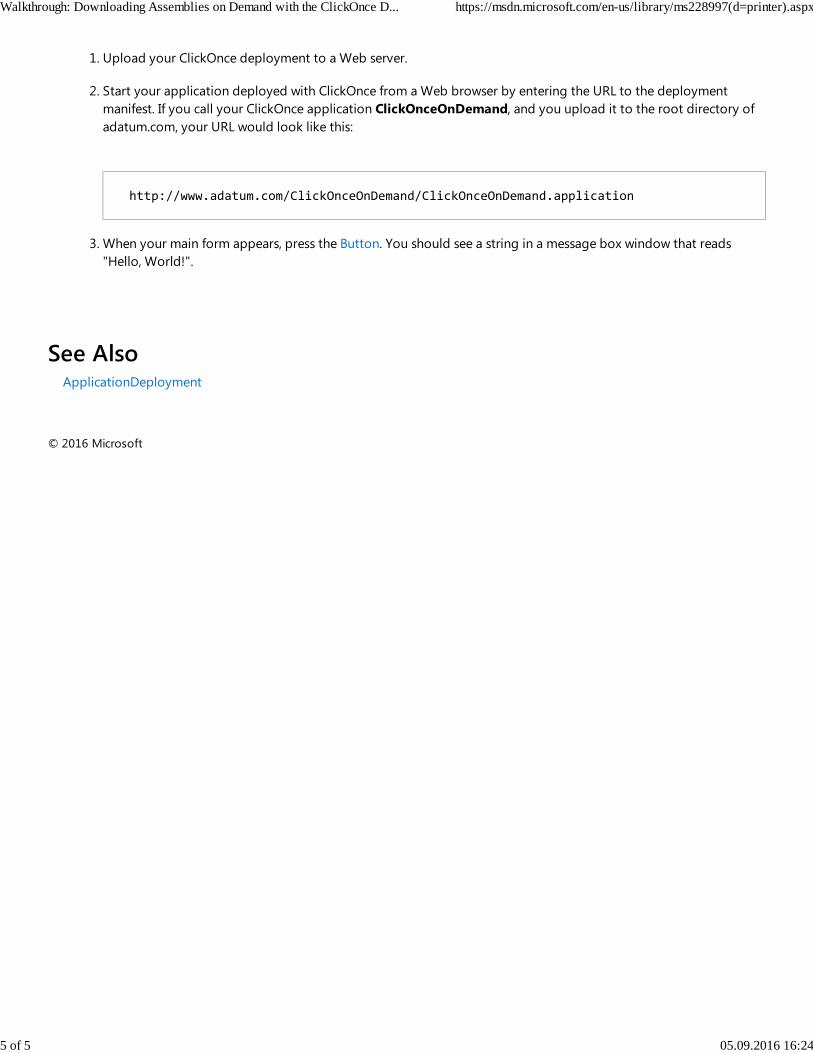
Upload your ClickOnce deployment to a Web server.1.
Start your application deployed with ClickOnce from a Web browser by entering the URL to the deployment
manifest. If you call your ClickOnce application ClickOnceOnDemand, and you upload it to the root directory of
adatum.com, your URL would look like this:
2.
When your main form appears, press the Button. You should see a string in a message box window that reads
"Hello, World!".
3.
See AlsoApplicationDeployment
© 2016 Microsoft
http://www.adatum.com/ClickOnceOnDemand/ClickOnceOnDemand.application
Walkthrough: Downloading Assemblies on Demand with the ClickOnce D... https://msdn.microsoft.com/en-us/library/ms228997(d=printer).aspx
5 of 5 05.09.2016 16:24
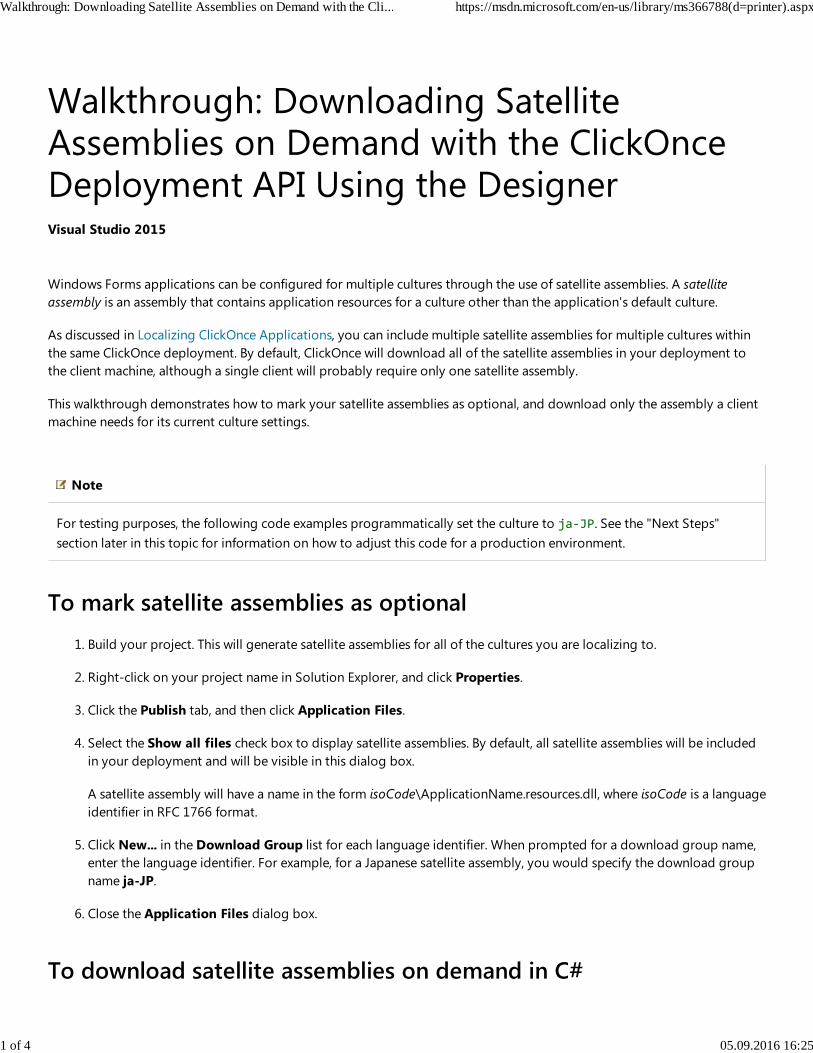
Walkthrough: Downloading SatelliteAssemblies on Demand with the ClickOnceDeployment API Using the Designer
Windows Forms applications can be configured for multiple cultures through the use of satellite assemblies. A satellite
assembly is an assembly that contains application resources for a culture other than the application's default culture.
As discussed in Localizing ClickOnce Applications, you can include multiple satellite assemblies for multiple cultures within
the same ClickOnce deployment. By default, ClickOnce will download all of the satellite assemblies in your deployment to
the client machine, although a single client will probably require only one satellite assembly.
This walkthrough demonstrates how to mark your satellite assemblies as optional, and download only the assembly a client
machine needs for its current culture settings.
Note
For testing purposes, the following code examples programmatically set the culture to ja‐JP. See the "Next Steps"
section later in this topic for information on how to adjust this code for a production environment.
To mark satellite assemblies as optional
Build your project. This will generate satellite assemblies for all of the cultures you are localizing to.1.
Right-click on your project name in Solution Explorer, and click Properties.2.
Click the Publish tab, and then click Application Files.3.
Select the Show all files check box to display satellite assemblies. By default, all satellite assemblies will be included
in your deployment and will be visible in this dialog box.
A satellite assembly will have a name in the form isoCode\ApplicationName.resources.dll, where isoCode is a language
identifier in RFC 1766 format.
4.
Click New... in the Download Group list for each language identifier. When prompted for a download group name,
enter the language identifier. For example, for a Japanese satellite assembly, you would specify the download group
name ja-JP.
5.
Close the Application Files dialog box.6.
To download satellite assemblies on demand in C#
Visual Studio 2015
Walkthrough: Downloading Satellite Assemblies on Demand with the Cli... https://msdn.microsoft.com/en-us/library/ms366788(d=printer).aspx
1 of 4 05.09.2016 16:25
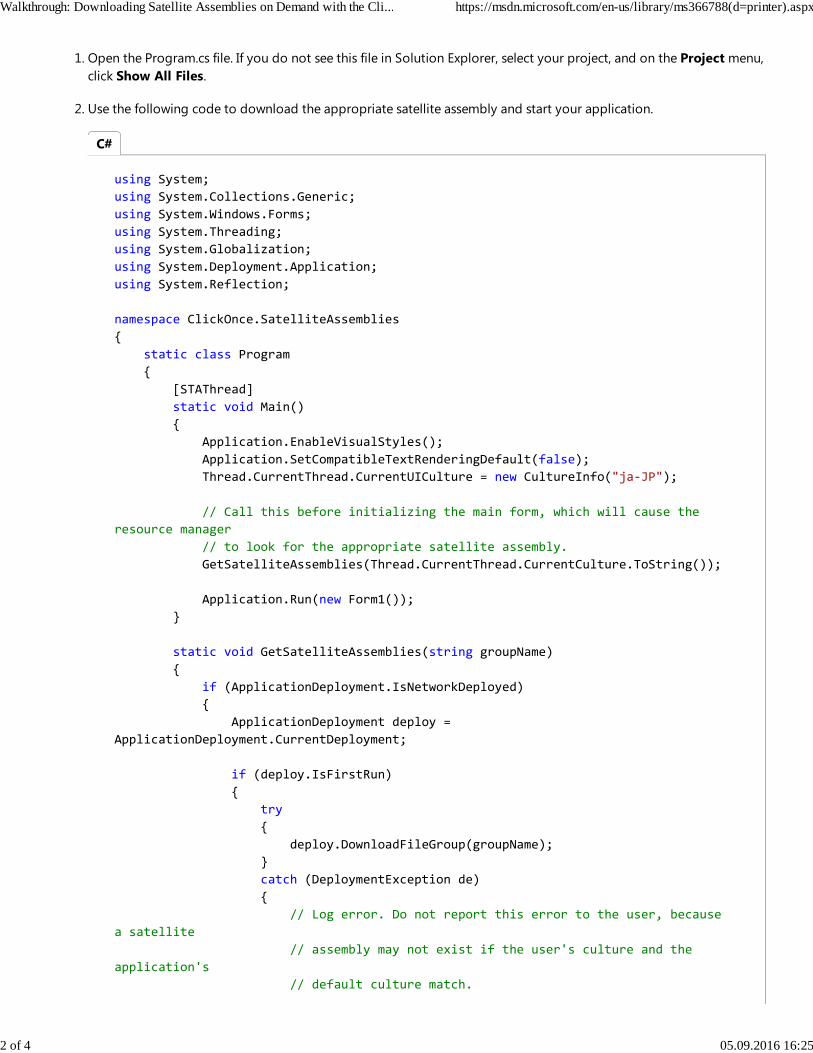
Open the Program.cs file. If you do not see this file in Solution Explorer, select your project, and on the Project menu,
click Show All Files.
1.
Use the following code to download the appropriate satellite assembly and start your application.2.
using System;
using System.Collections.Generic;
using System.Windows.Forms;
using System.Threading;
using System.Globalization;
using System.Deployment.Application;
using System.Reflection;
namespace ClickOnce.SatelliteAssemblies
{
static class Program
{
[STAThread]
static void Main()
{
Application.EnableVisualStyles();
Application.SetCompatibleTextRenderingDefault(false);
Thread.CurrentThread.CurrentUICulture = new CultureInfo("ja‐JP");
// Call this before initializing the main form, which will cause the
resource manager
// to look for the appropriate satellite assembly.
GetSatelliteAssemblies(Thread.CurrentThread.CurrentCulture.ToString());
Application.Run(new Form1());
}
static void GetSatelliteAssemblies(string groupName)
{
if (ApplicationDeployment.IsNetworkDeployed)
{
ApplicationDeployment deploy =
ApplicationDeployment.CurrentDeployment;
if (deploy.IsFirstRun)
{
try
{
deploy.DownloadFileGroup(groupName);
}
catch (DeploymentException de)
{
// Log error. Do not report this error to the user, because
a satellite
// assembly may not exist if the user's culture and the
application's
// default culture match.
C#
Walkthrough: Downloading Satellite Assemblies on Demand with the Cli... https://msdn.microsoft.com/en-us/library/ms366788(d=printer).aspx
2 of 4 05.09.2016 16:25
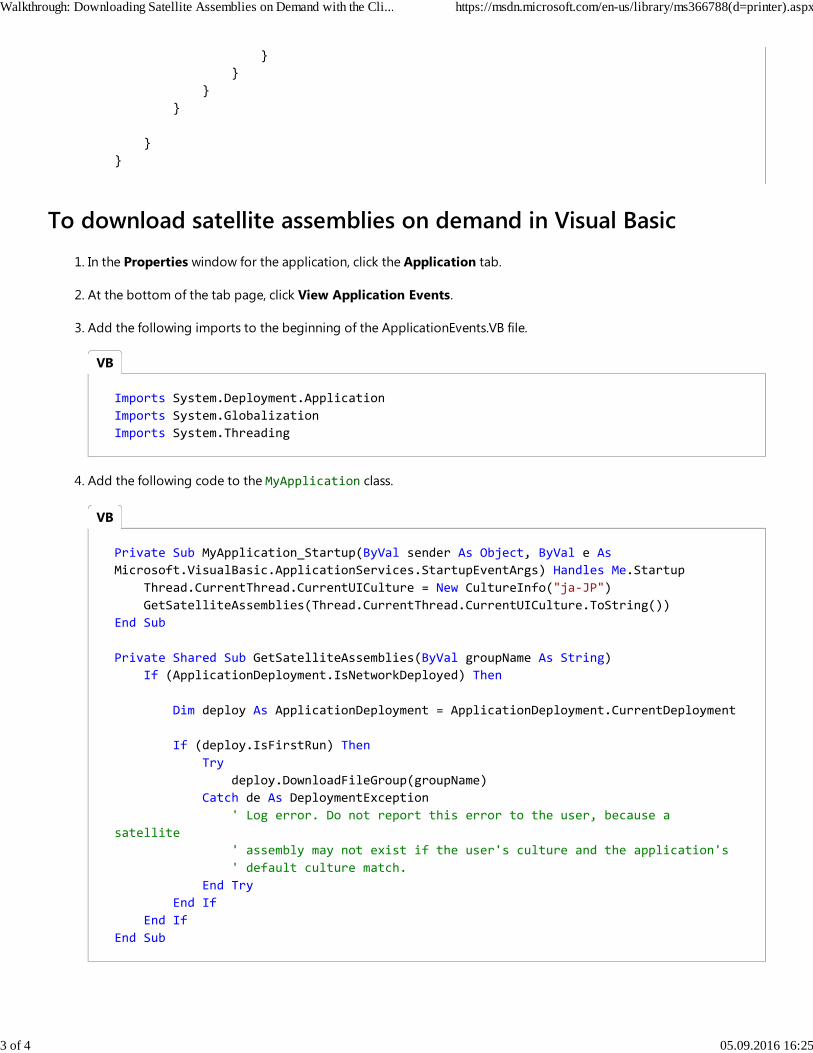
To download satellite assemblies on demand in Visual Basic
In the Properties window for the application, click the Application tab.1.
At the bottom of the tab page, click View Application Events.2.
Add the following imports to the beginning of the ApplicationEvents.VB file.3.
Add the following code to the MyApplication class.4.
}
}
}
}
}
}
Imports System.Deployment.Application
Imports System.Globalization
Imports System.Threading
Private Sub MyApplication_Startup(ByVal sender As Object, ByVal e As
Microsoft.VisualBasic.ApplicationServices.StartupEventArgs) Handles Me.Startup
Thread.CurrentThread.CurrentUICulture = New CultureInfo("ja‐JP")
GetSatelliteAssemblies(Thread.CurrentThread.CurrentUICulture.ToString())
End Sub
Private Shared Sub GetSatelliteAssemblies(ByVal groupName As String)
If (ApplicationDeployment.IsNetworkDeployed) Then
Dim deploy As ApplicationDeployment = ApplicationDeployment.CurrentDeployment
If (deploy.IsFirstRun) Then
Try
deploy.DownloadFileGroup(groupName)
Catch de As DeploymentException
' Log error. Do not report this error to the user, because a
satellite
' assembly may not exist if the user's culture and the application's
' default culture match.
End Try
End If
End If
End Sub
VB
VB
Walkthrough: Downloading Satellite Assemblies on Demand with the Cli... https://msdn.microsoft.com/en-us/library/ms366788(d=printer).aspx
3 of 4 05.09.2016 16:25
Next StepsIn a production environment, you will likely need to remove the line in the code examples that sets CurrentUICulture to a
specific value, because client machines will have the correct value set by default. When your application runs on a Japanese
client machine, for example, CurrentUICulture will be ja-JP by default. Setting it programmatically is a good way to test your
satellite assemblies before you deploy your application.
See AlsoWalkthrough: Downloading Satellite Assemblies on Demand with the ClickOnce Deployment API
Localizing ClickOnce Applications
© 2016 Microsoft
Walkthrough: Downloading Satellite Assemblies on Demand with the Cli... https://msdn.microsoft.com/en-us/library/ms366788(d=printer).aspx
4 of 4 05.09.2016 16:25
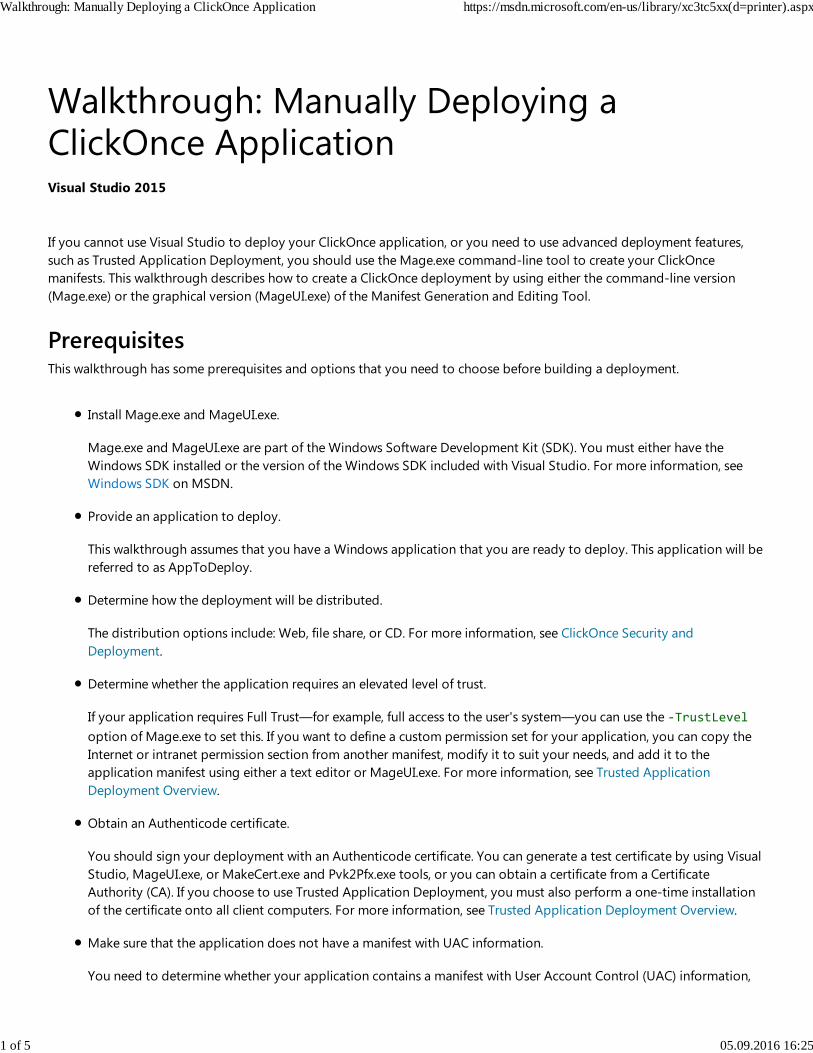
Walkthrough: Manually Deploying aClickOnce Application
If you cannot use Visual Studio to deploy your ClickOnce application, or you need to use advanced deployment features,
such as Trusted Application Deployment, you should use the Mage.exe command-line tool to create your ClickOnce
manifests. This walkthrough describes how to create a ClickOnce deployment by using either the command-line version
(Mage.exe) or the graphical version (MageUI.exe) of the Manifest Generation and Editing Tool.
PrerequisitesThis walkthrough has some prerequisites and options that you need to choose before building a deployment.
Install Mage.exe and MageUI.exe.
Mage.exe and MageUI.exe are part of the Windows Software Development Kit (SDK). You must either have the
Windows SDK installed or the version of the Windows SDK included with Visual Studio. For more information, see
Windows SDK on MSDN.
Provide an application to deploy.
This walkthrough assumes that you have a Windows application that you are ready to deploy. This application will be
referred to as AppToDeploy.
Determine how the deployment will be distributed.
The distribution options include: Web, file share, or CD. For more information, see ClickOnce Security and
Deployment.
Determine whether the application requires an elevated level of trust.
If your application requires Full Trust—for example, full access to the user's system—you can use the ‐TrustLevel
option of Mage.exe to set this. If you want to define a custom permission set for your application, you can copy the
Internet or intranet permission section from another manifest, modify it to suit your needs, and add it to the
application manifest using either a text editor or MageUI.exe. For more information, see Trusted Application
Deployment Overview.
Obtain an Authenticode certificate.
You should sign your deployment with an Authenticode certificate. You can generate a test certificate by using Visual
Studio, MageUI.exe, or MakeCert.exe and Pvk2Pfx.exe tools, or you can obtain a certificate from a Certificate
Authority (CA). If you choose to use Trusted Application Deployment, you must also perform a one-time installation
of the certificate onto all client computers. For more information, see Trusted Application Deployment Overview.
Make sure that the application does not have a manifest with UAC information.
You need to determine whether your application contains a manifest with User Account Control (UAC) information,
Visual Studio 2015
Walkthrough: Manually Deploying a ClickOnce Application https://msdn.microsoft.com/en-us/library/xc3tc5xx(d=printer).aspx
1 of 5 05.09.2016 16:25
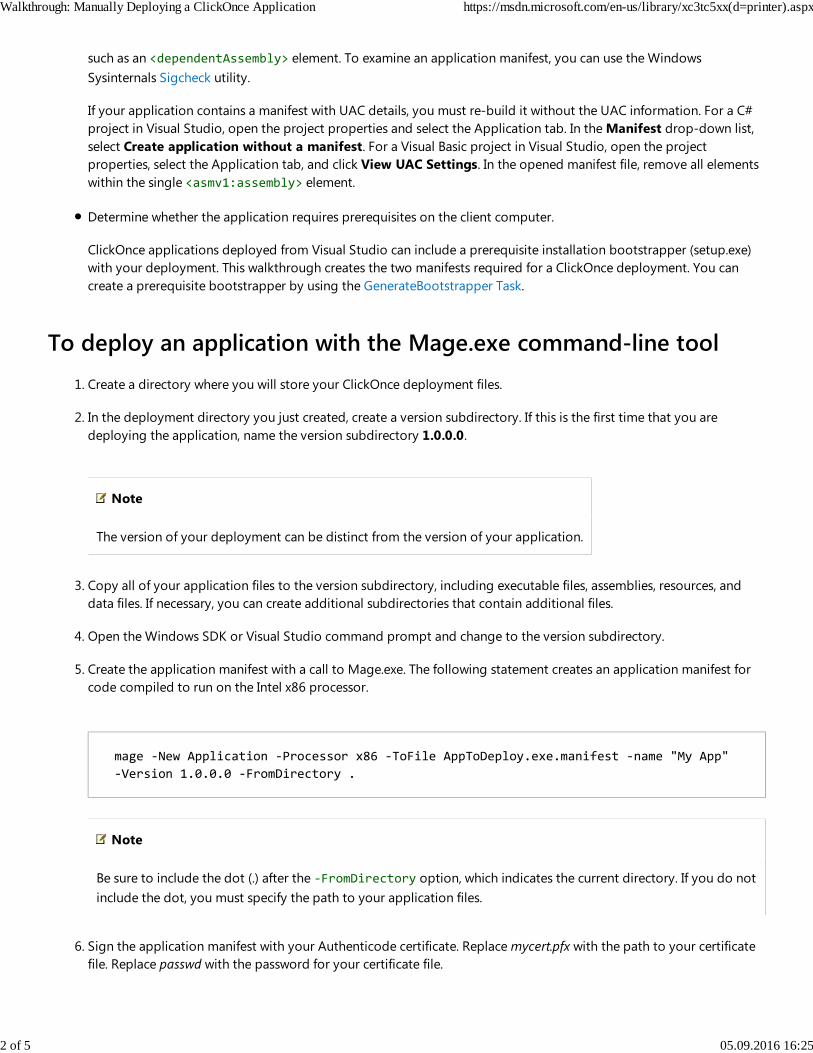
such as an <dependentAssembly> element. To examine an application manifest, you can use the Windows
Sysinternals Sigcheck utility.
If your application contains a manifest with UAC details, you must re-build it without the UAC information. For a C#
project in Visual Studio, open the project properties and select the Application tab. In the Manifest drop-down list,
select Create application without a manifest. For a Visual Basic project in Visual Studio, open the project
properties, select the Application tab, and click View UAC Settings. In the opened manifest file, remove all elements
within the single <asmv1:assembly> element.
Determine whether the application requires prerequisites on the client computer.
ClickOnce applications deployed from Visual Studio can include a prerequisite installation bootstrapper (setup.exe)
with your deployment. This walkthrough creates the two manifests required for a ClickOnce deployment. You can
create a prerequisite bootstrapper by using the GenerateBootstrapper Task.
To deploy an application with the Mage.exe command-line tool
Create a directory where you will store your ClickOnce deployment files.1.
In the deployment directory you just created, create a version subdirectory. If this is the first time that you are
deploying the application, name the version subdirectory 1.0.0.0.
Note
The version of your deployment can be distinct from the version of your application.
2.
Copy all of your application files to the version subdirectory, including executable files, assemblies, resources, and
data files. If necessary, you can create additional subdirectories that contain additional files.
3.
Open the Windows SDK or Visual Studio command prompt and change to the version subdirectory.4.
Create the application manifest with a call to Mage.exe. The following statement creates an application manifest for
code compiled to run on the Intel x86 processor.
Note
Be sure to include the dot (.) after the ‐FromDirectory option, which indicates the current directory. If you do not
include the dot, you must specify the path to your application files.
5.
Sign the application manifest with your Authenticode certificate. Replace mycert.pfx with the path to your certificate
file. Replace passwd with the password for your certificate file.
6.
mage ‐New Application ‐Processor x86 ‐ToFile AppToDeploy.exe.manifest ‐name "My App"
‐Version 1.0.0.0 ‐FromDirectory .
Walkthrough: Manually Deploying a ClickOnce Application https://msdn.microsoft.com/en-us/library/xc3tc5xx(d=printer).aspx
2 of 5 05.09.2016 16:25
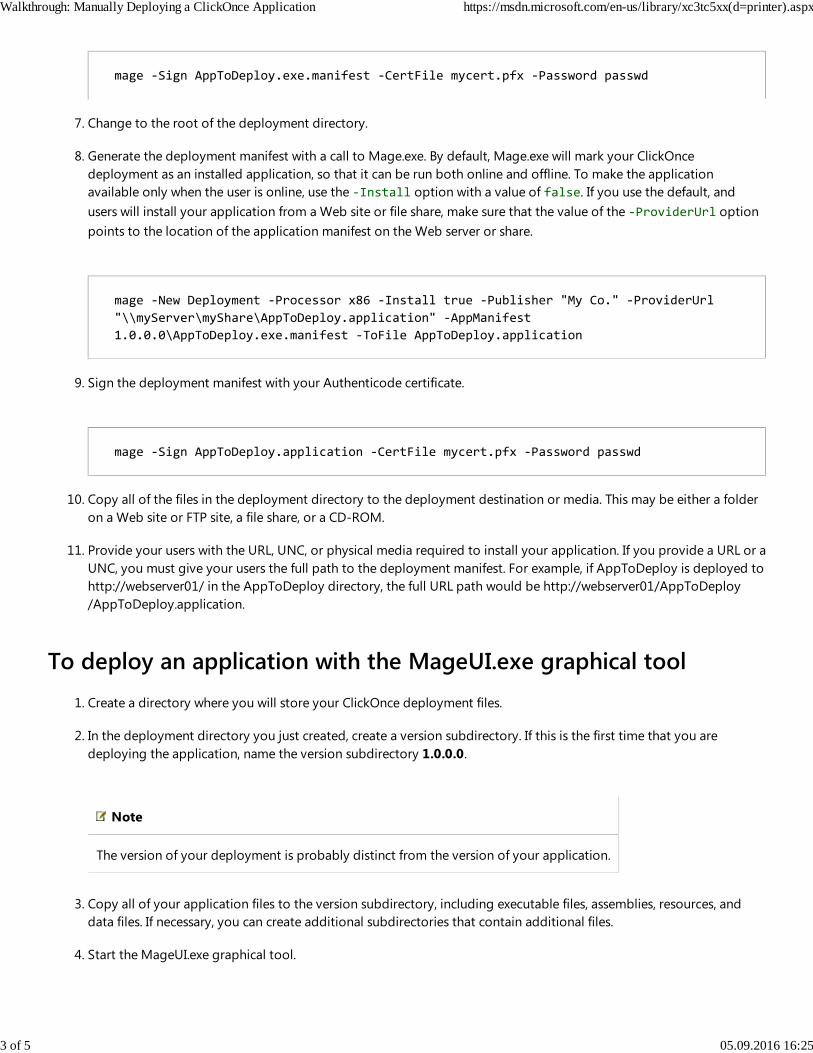
Change to the root of the deployment directory.7.
Generate the deployment manifest with a call to Mage.exe. By default, Mage.exe will mark your ClickOnce
deployment as an installed application, so that it can be run both online and offline. To make the application
available only when the user is online, use the ‐Install option with a value of false. If you use the default, and
users will install your application from a Web site or file share, make sure that the value of the ‐ProviderUrl option
points to the location of the application manifest on the Web server or share.
8.
Sign the deployment manifest with your Authenticode certificate.9.
Copy all of the files in the deployment directory to the deployment destination or media. This may be either a folder
on a Web site or FTP site, a file share, or a CD-ROM.
10.
Provide your users with the URL, UNC, or physical media required to install your application. If you provide a URL or a
UNC, you must give your users the full path to the deployment manifest. For example, if AppToDeploy is deployed to
http://webserver01/ in the AppToDeploy directory, the full URL path would be http://webserver01/AppToDeploy
/AppToDeploy.application.
11.
To deploy an application with the MageUI.exe graphical tool
Create a directory where you will store your ClickOnce deployment files.1.
In the deployment directory you just created, create a version subdirectory. If this is the first time that you are
deploying the application, name the version subdirectory 1.0.0.0.
Note
The version of your deployment is probably distinct from the version of your application.
2.
Copy all of your application files to the version subdirectory, including executable files, assemblies, resources, and
data files. If necessary, you can create additional subdirectories that contain additional files.
3.
Start the MageUI.exe graphical tool.4.
mage ‐Sign AppToDeploy.exe.manifest ‐CertFile mycert.pfx ‐Password passwd
mage ‐New Deployment ‐Processor x86 ‐Install true ‐Publisher "My Co." ‐ProviderUrl
"\\myServer\myShare\AppToDeploy.application" ‐AppManifest
1.0.0.0\AppToDeploy.exe.manifest ‐ToFile AppToDeploy.application
mage ‐Sign AppToDeploy.application ‐CertFile mycert.pfx ‐Password passwd
Walkthrough: Manually Deploying a ClickOnce Application https://msdn.microsoft.com/en-us/library/xc3tc5xx(d=printer).aspx
3 of 5 05.09.2016 16:25
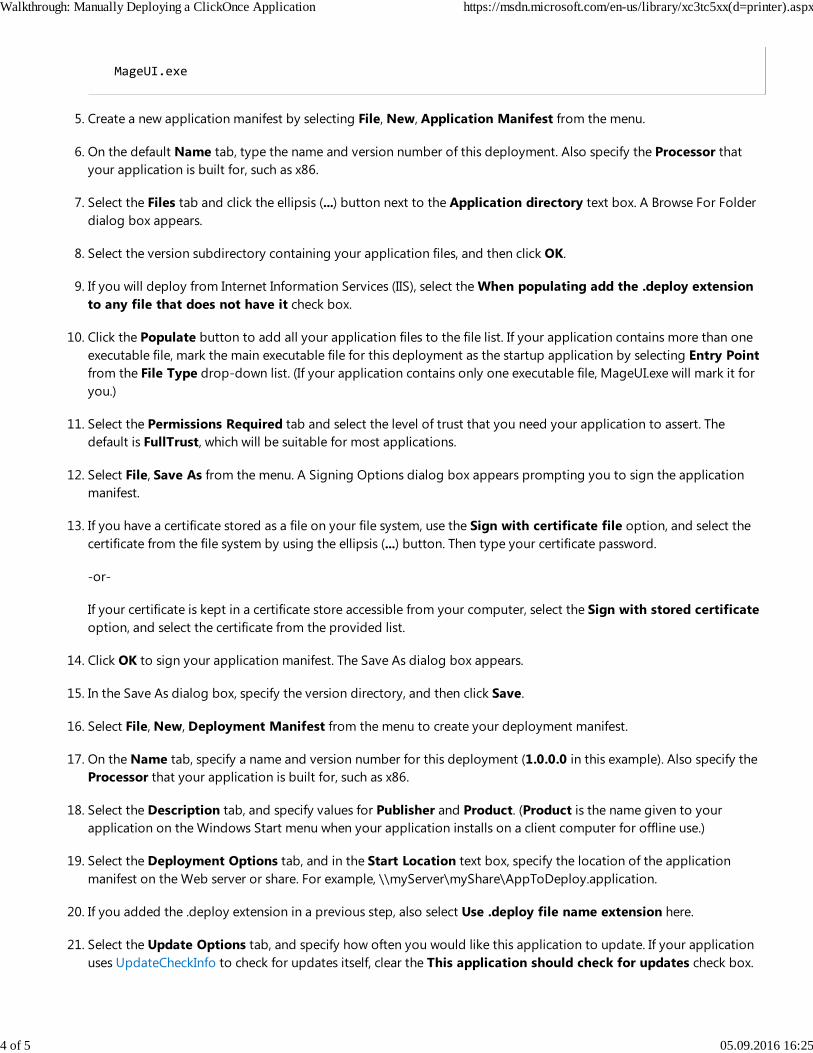
Create a new application manifest by selecting File, New, Application Manifest from the menu.5.
On the default Name tab, type the name and version number of this deployment. Also specify the Processor that
your application is built for, such as x86.
6.
Select the Files tab and click the ellipsis (...) button next to the Application directory text box. A Browse For Folder
dialog box appears.
7.
Select the version subdirectory containing your application files, and then click OK.8.
If you will deploy from Internet Information Services (IIS), select the When populating add the .deploy extension
to any file that does not have it check box.
9.
Click the Populate button to add all your application files to the file list. If your application contains more than one
executable file, mark the main executable file for this deployment as the startup application by selecting Entry Point
from the File Type drop-down list. (If your application contains only one executable file, MageUI.exe will mark it for
you.)
10.
Select the Permissions Required tab and select the level of trust that you need your application to assert. The
default is FullTrust, which will be suitable for most applications.
11.
Select File, Save As from the menu. A Signing Options dialog box appears prompting you to sign the application
manifest.
12.
If you have a certificate stored as a file on your file system, use the Sign with certificate file option, and select the
certificate from the file system by using the ellipsis (...) button. Then type your certificate password.
-or-
If your certificate is kept in a certificate store accessible from your computer, select the Sign with stored certificate
option, and select the certificate from the provided list.
13.
Click OK to sign your application manifest. The Save As dialog box appears.14.
In the Save As dialog box, specify the version directory, and then click Save.15.
Select File, New, Deployment Manifest from the menu to create your deployment manifest.16.
On the Name tab, specify a name and version number for this deployment (1.0.0.0 in this example). Also specify the
Processor that your application is built for, such as x86.
17.
Select the Description tab, and specify values for Publisher and Product. (Product is the name given to your
application on the Windows Start menu when your application installs on a client computer for offline use.)
18.
Select the Deployment Options tab, and in the Start Location text box, specify the location of the application
manifest on the Web server or share. For example, \\myServer\myShare\AppToDeploy.application.
19.
If you added the .deploy extension in a previous step, also select Use .deploy file name extension here.20.
Select the Update Options tab, and specify how often you would like this application to update. If your application
uses UpdateCheckInfo to check for updates itself, clear the This application should check for updates check box.
21.
MageUI.exe
Walkthrough: Manually Deploying a ClickOnce Application https://msdn.microsoft.com/en-us/library/xc3tc5xx(d=printer).aspx
4 of 5 05.09.2016 16:25
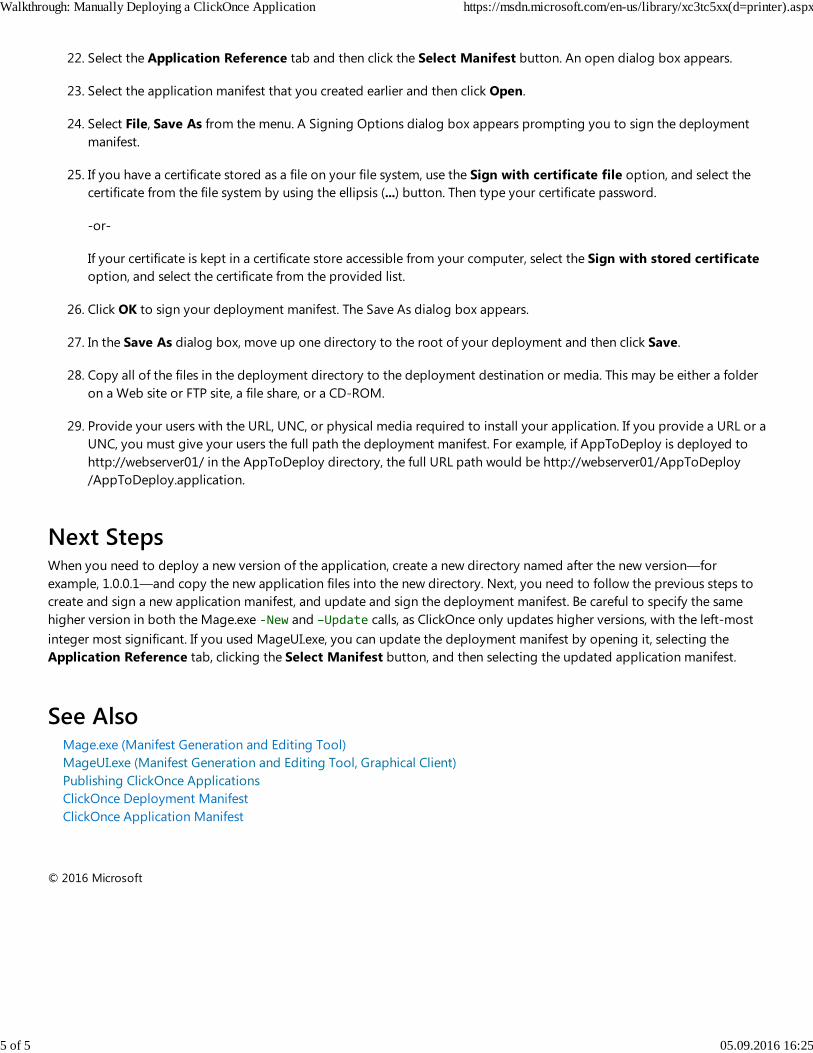
Select the Application Reference tab and then click the Select Manifest button. An open dialog box appears.22.
Select the application manifest that you created earlier and then click Open.23.
Select File, Save As from the menu. A Signing Options dialog box appears prompting you to sign the deployment
manifest.
24.
If you have a certificate stored as a file on your file system, use the Sign with certificate file option, and select the
certificate from the file system by using the ellipsis (...) button. Then type your certificate password.
-or-
If your certificate is kept in a certificate store accessible from your computer, select the Sign with stored certificate
option, and select the certificate from the provided list.
25.
Click OK to sign your deployment manifest. The Save As dialog box appears.26.
In the Save As dialog box, move up one directory to the root of your deployment and then click Save.27.
Copy all of the files in the deployment directory to the deployment destination or media. This may be either a folder
on a Web site or FTP site, a file share, or a CD-ROM.
28.
Provide your users with the URL, UNC, or physical media required to install your application. If you provide a URL or a
UNC, you must give your users the full path the deployment manifest. For example, if AppToDeploy is deployed to
http://webserver01/ in the AppToDeploy directory, the full URL path would be http://webserver01/AppToDeploy
/AppToDeploy.application.
29.
Next StepsWhen you need to deploy a new version of the application, create a new directory named after the new version—for
example, 1.0.0.1—and copy the new application files into the new directory. Next, you need to follow the previous steps to
create and sign a new application manifest, and update and sign the deployment manifest. Be careful to specify the same
higher version in both the Mage.exe ‐New and –Update calls, as ClickOnce only updates higher versions, with the left-most
integer most significant. If you used MageUI.exe, you can update the deployment manifest by opening it, selecting the
Application Reference tab, clicking the Select Manifest button, and then selecting the updated application manifest.
See AlsoMage.exe (Manifest Generation and Editing Tool)
MageUI.exe (Manifest Generation and Editing Tool, Graphical Client)
Publishing ClickOnce Applications
ClickOnce Deployment Manifest
ClickOnce Application Manifest
© 2016 Microsoft
Walkthrough: Manually Deploying a ClickOnce Application https://msdn.microsoft.com/en-us/library/xc3tc5xx(d=printer).aspx
5 of 5 05.09.2016 16:25
Walkthrough: Manually Deploying aClickOnce Application that Does Not RequireRe-Signing and that Preserves BrandingInformation
When you create a ClickOnce application and then give it to a customer to publish and deploy, the customer has
traditionally had to update the deployment manifest and re-sign it. While that is still the preferred method in most cases,
the .NET Framework 3.5 enables you to create ClickOnce deployments that can be deployed by customers without having to
regenerate a new deployment manifest. For more information, see Deploying ClickOnce Applications For Testing and
Production Servers without Resigning.
When you create a ClickOnce application and then give it to a customer to publish and deploy, the application can use the
customer's branding or can preserve your branding. For example, if the application is a single proprietary application, you
might want to preserve your branding. If the application is highly customized for each customer, you might want to use the
customer's branding. The .NET Framework 3.5 enables you to preserve your branding, publisher information and security
signature when you give an application to an organization to deploy. For more information, see Creating ClickOnce
Applications for Others to Deploy.
Note
In this walkthrough you create deployments manually by using either the command-line tool Mage.exe or the graphical
tool MageUI.exe. For more information about manual deployments, see Walkthrough: Manually Deploying a ClickOnce
Application.
PrerequisitesTo perform the steps in this walkthrough you need the following:
A Windows Forms application that you are ready to deploy. This application will be referred to as
WindowsFormsApp1.
Visual Studio or the Windows SDK.
To deploy a ClickOnce application with multiple deployment and
branding support using Mage.exe
Open a Visual Studio command prompt or a Windows SDK command prompt, and change to the directory in which1.
Visual Studio 2015
Walkthrough: Manually Deploying a ClickOnce Application that Does No... https://msdn.microsoft.com/en-us/library/bb384246(d=printer).aspx
1 of 5 05.09.2016 16:26
you will store your ClickOnce files.
Create a directory named after the current version of your deployment. If this is the first time that you are deploying
the application, you will likely choose 1.0.0.0.
Note
The version of your deployment may be distinct from the version of your application files.
2.
Create a subdirectory named bin and copy all of your application files here, including executable files, assemblies,
resources, and data files.
3.
Generate the application manifest with a call to Mage.exe.4.
Sign the application manifest with your digital certificate.5.
Generate the deployment manifest with a call to Mage.exe. By default, Mage.exe will mark your ClickOnce
deployment as an installed application, so that it can be run both online and offline. To make the application
available only when the user is online, use the ‐i argument with a value of f. Since this application will take
advantage of the multiple deployment feature, exclude the ‐providerUrl argument to Mage.exe. (In versions of the
.NET Framework prior to version 3.5, excluding ‐providerUrl for an offline application will result in an error.)
6.
Do not sign the deployment manifest.7.
Provide all of the files to the customer, who will deploy the application on his network.8.
At this point, the customer must sign the deployment manifest with his own self-generated certificate. For example, if
the customer works for a company named Adventure Works, he can generate a self-signed certificate using the
MakeCert.exe tool. Next, use the Pvk2pfx.exe tool to combine the files created by MakeCert.exe into a PFX file that
can be passed to Mage.exe.
9.
mage ‐New Application ‐ToFile 1.0.0.0\WindowsFormsApp1.exe.manifest ‐Name "Windows
Forms App 1" ‐Version 1.0.0.0 ‐FromDirectory 1.0.0.0\bin ‐UseManifestForTrust true
‐Publisher "A. Datum Corporation"
mage ‐Sign WindowsFormsApp1.exe.manifest ‐CertFile mycert.pfx
mage ‐New Deployment ‐ToFile WindowsFormsApp1.application ‐Name "Windows Forms App
1" ‐Version 1.0.0.0 ‐AppManifest 1.0.0.0\WindowsFormsApp1.manifest
makecert ‐r ‐pe ‐n "CN=Adventure Works" ‐sv MyCert.pvk MyCert.cer
Walkthrough: Manually Deploying a ClickOnce Application that Does No... https://msdn.microsoft.com/en-us/library/bb384246(d=printer).aspx
2 of 5 05.09.2016 16:26
The customer next uses this certificate to sign the deployment manifest.10.
The customer deploys the application to their users.11.
To deploy a ClickOnce application with multiple deployment and
branding support using MageUI.exe
Open a Visual Studio command prompt or a Windows SDK command prompt, and navigate to the directory in which
you will store your ClickOnce files.
1.
Create a subdirectory named bin and copy all of your application files here, including executable files, assemblies,
resources, and data files.
2.
Create a subdirectory named after the current version of your deployment. If this is the first time that you are
deploying the application, you will likely choose 1.0.0.0.
Note
The version of your deployment may be distinct from the version of your application files.
3.
Move the \bin directory into the directory you created in step 2.4.
Start the graphical tool MageUI.exe.5.
Create a new application manifest by selecting File, New, Application Manifest from the menu.6.
On the default Name tab, enter the name and version number of this deployment. Also, supply a value for Publisher,
which will be used as the folder name for the application's shortcut link in the Start menu when it is deployed.
7.
Select the Application Options tab and click Use Application Manifest for Trust Information. This will enable
third-party branding for this ClickOnce application.
8.
Select the Files tab and click the Browse button next to the Application Directory text box.9.
Select the directory that contains your application files that you created in step 2, and click OK on the folder selection
dialog box.
10.
Click the Populate button to add all your application files to the file list. If your application contains more than one11.
pvk2pfx.exe ‐pvk MyCert.pvk ‐spc MyCert.cer ‐pfx MyCert.pfx
mage ‐Sign WindowsFormsApp1.application ‐CertFile MyCert.pfx
MageUI.exe
Walkthrough: Manually Deploying a ClickOnce Application that Does No... https://msdn.microsoft.com/en-us/library/bb384246(d=printer).aspx
3 of 5 05.09.2016 16:26
executable file, mark the main executable file for this deployment as the startup application by selecting Entry Point
from the File Type drop-down list. (If your application only contains one executable file, MageUI.exe will mark it for
you.)
Select the Permissions Required tab and select the level of trust you need your application to assert. The default is
Full Trust, which will be appropriate for most applications.
12.
Select File, Save from the menu, and save the application manifest. You will be prompted to sign the application
manifest when you save it.
13.
If you have a certificate stored as a file on your file system, use the Sign as certificate file option, and select the
certificate from the file system using the ellipsis (...) button.
-or-
If your certificate is kept in a certificate store that can be accessed from your computer, select the Sign with stored
certificate option, and select the certificate from the list provided.
14.
Select File, New, Deployment Manifest from the menu to create your deployment manifest, and then on the Name
tab, supply a name and version number (1.0.0.0 in this example).
15.
Switch to the Update tab, and specify how often you want this application to update. If your application uses the
ClickOnce Deployment API to check for updates itself, clear the check box labeled This application should check
for updates.
16.
Switch to the Application Reference tab. You can pre-populate all of the values on this tab by clicking the Select
Manifest button and selecting the application manifest you created in previous steps.
17.
Choose Save and save the deployment manifest to disk. You will be prompted to sign the application manifest when
you save it. Click Cancel to save the manifest without signing it.
18.
Provide all of the application files to the customer.19.
At this point, the customer must sign the deployment manifest with his own self-generated certificate. For example, if
the customer works for a company named Adventure Works, he can generate a self-signed certificate using the
MakeCert.exe tool. Next, use the Pvk2pfx.exe tool to combine the files created by MakeCert.exe into a PFX file that
can be passed to MageUI.exe.
20.
With the certificate generated, the customer now signs the deployment manifest by opening the deployment
manifest in MageUI.exe, and then saving it. When the signing dialog box appears, the customer selects Sign as
certificate file option, and chooses the PFX file he has saved on disk.
21.
The customer deploys the application to their users.22.
Next Steps
See Also
makecert ‐r ‐pe ‐n "CN=Adventure Works" ‐sv MyCert.pvk MyCert.cer
pvk2pfx.exe ‐pvk MyCert.pvk ‐spc MyCert.cer ‐pfx MyCert.pfx
Walkthrough: Manually Deploying a ClickOnce Application that Does No... https://msdn.microsoft.com/en-us/library/bb384246(d=printer).aspx
4 of 5 05.09.2016 16:26
Mage.exe (Manifest Generation and Editing Tool)
MageUI.exe (Manifest Generation and Editing Tool, Graphical Client)
Makecert.exe (Certificate Creation Tool)
© 2016 Microsoft
Walkthrough: Manually Deploying a ClickOnce Application that Does No... https://msdn.microsoft.com/en-us/library/bb384246(d=printer).aspx
5 of 5 05.09.2016 16:26
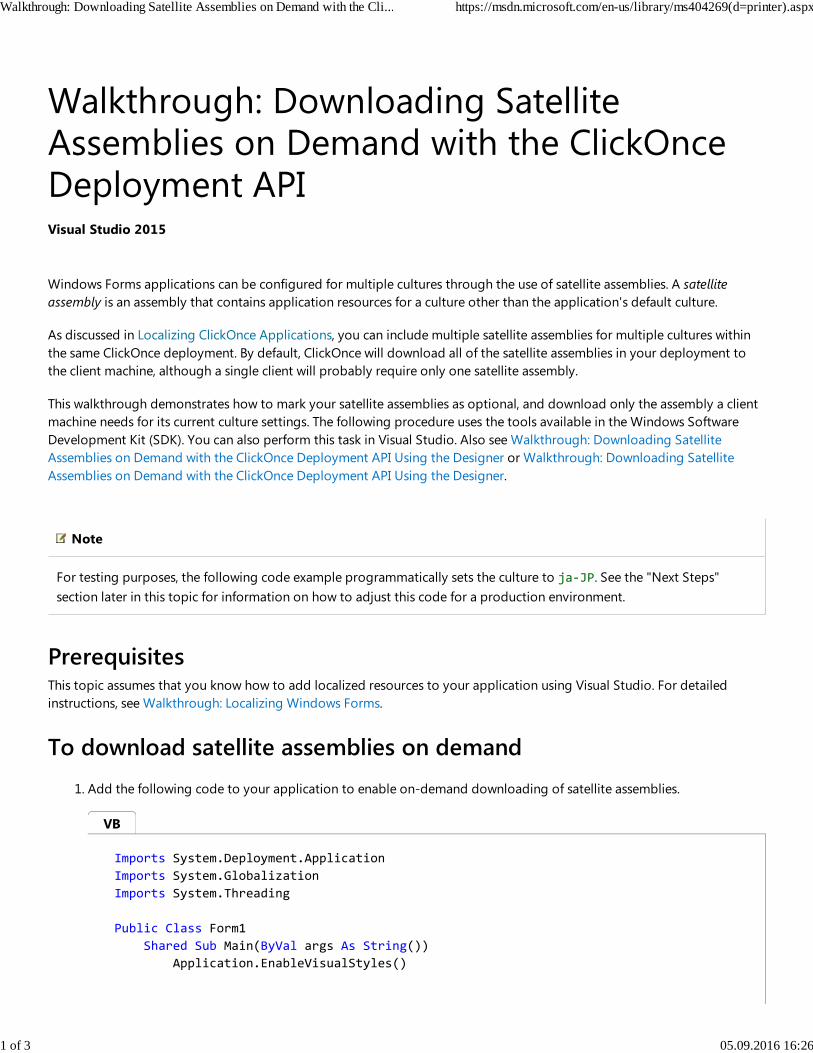
Walkthrough: Downloading SatelliteAssemblies on Demand with the ClickOnceDeployment API
Windows Forms applications can be configured for multiple cultures through the use of satellite assemblies. A satellite
assembly is an assembly that contains application resources for a culture other than the application's default culture.
As discussed in Localizing ClickOnce Applications, you can include multiple satellite assemblies for multiple cultures within
the same ClickOnce deployment. By default, ClickOnce will download all of the satellite assemblies in your deployment to
the client machine, although a single client will probably require only one satellite assembly.
This walkthrough demonstrates how to mark your satellite assemblies as optional, and download only the assembly a client
machine needs for its current culture settings. The following procedure uses the tools available in the Windows Software
Development Kit (SDK). You can also perform this task in Visual Studio. Also see Walkthrough: Downloading Satellite
Assemblies on Demand with the ClickOnce Deployment API Using the Designer or Walkthrough: Downloading Satellite
Assemblies on Demand with the ClickOnce Deployment API Using the Designer.
Note
For testing purposes, the following code example programmatically sets the culture to ja‐JP. See the "Next Steps"
section later in this topic for information on how to adjust this code for a production environment.
PrerequisitesThis topic assumes that you know how to add localized resources to your application using Visual Studio. For detailed
instructions, see Walkthrough: Localizing Windows Forms.
To download satellite assemblies on demand
Add the following code to your application to enable on-demand downloading of satellite assemblies.1.
Visual Studio 2015
Imports System.Deployment.Application
Imports System.Globalization
Imports System.Threading
Public Class Form1
Shared Sub Main(ByVal args As String())
Application.EnableVisualStyles()
VB
Walkthrough: Downloading Satellite Assemblies on Demand with the Cli... https://msdn.microsoft.com/en-us/library/ms404269(d=printer).aspx
1 of 3 05.09.2016 16:26
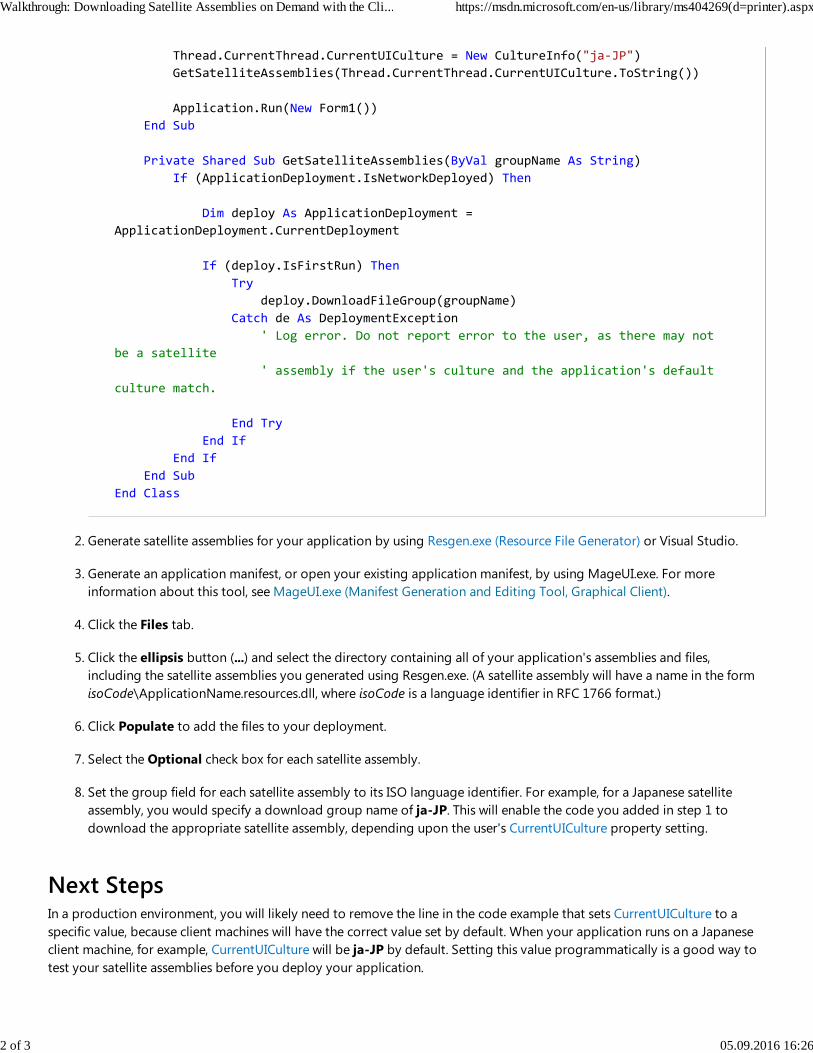
Generate satellite assemblies for your application by using Resgen.exe (Resource File Generator) or Visual Studio.2.
Generate an application manifest, or open your existing application manifest, by using MageUI.exe. For more
information about this tool, see MageUI.exe (Manifest Generation and Editing Tool, Graphical Client).
3.
Click the Files tab.4.
Click the ellipsis button (...) and select the directory containing all of your application's assemblies and files,
including the satellite assemblies you generated using Resgen.exe. (A satellite assembly will have a name in the form
isoCode\ApplicationName.resources.dll, where isoCode is a language identifier in RFC 1766 format.)
5.
Click Populate to add the files to your deployment.6.
Select the Optional check box for each satellite assembly.7.
Set the group field for each satellite assembly to its ISO language identifier. For example, for a Japanese satellite
assembly, you would specify a download group name of ja-JP. This will enable the code you added in step 1 to
download the appropriate satellite assembly, depending upon the user's CurrentUICulture property setting.
8.
Next StepsIn a production environment, you will likely need to remove the line in the code example that sets CurrentUICulture to a
specific value, because client machines will have the correct value set by default. When your application runs on a Japanese
client machine, for example, CurrentUICulture will be ja-JP by default. Setting this value programmatically is a good way to
test your satellite assemblies before you deploy your application.
Thread.CurrentThread.CurrentUICulture = New CultureInfo("ja‐JP")
GetSatelliteAssemblies(Thread.CurrentThread.CurrentUICulture.ToString())
Application.Run(New Form1())
End Sub
Private Shared Sub GetSatelliteAssemblies(ByVal groupName As String)
If (ApplicationDeployment.IsNetworkDeployed) Then
Dim deploy As ApplicationDeployment =
ApplicationDeployment.CurrentDeployment
If (deploy.IsFirstRun) Then
Try
deploy.DownloadFileGroup(groupName)
Catch de As DeploymentException
' Log error. Do not report error to the user, as there may not
be a satellite
' assembly if the user's culture and the application's default
culture match.
End Try
End If
End If
End Sub
End Class
Walkthrough: Downloading Satellite Assemblies on Demand with the Cli... https://msdn.microsoft.com/en-us/library/ms404269(d=printer).aspx
2 of 3 05.09.2016 16:26
See AlsoLocalizing ClickOnce Applications
© 2016 Microsoft
Walkthrough: Downloading Satellite Assemblies on Demand with the Cli... https://msdn.microsoft.com/en-us/library/ms404269(d=printer).aspx
3 of 3 05.09.2016 16:26
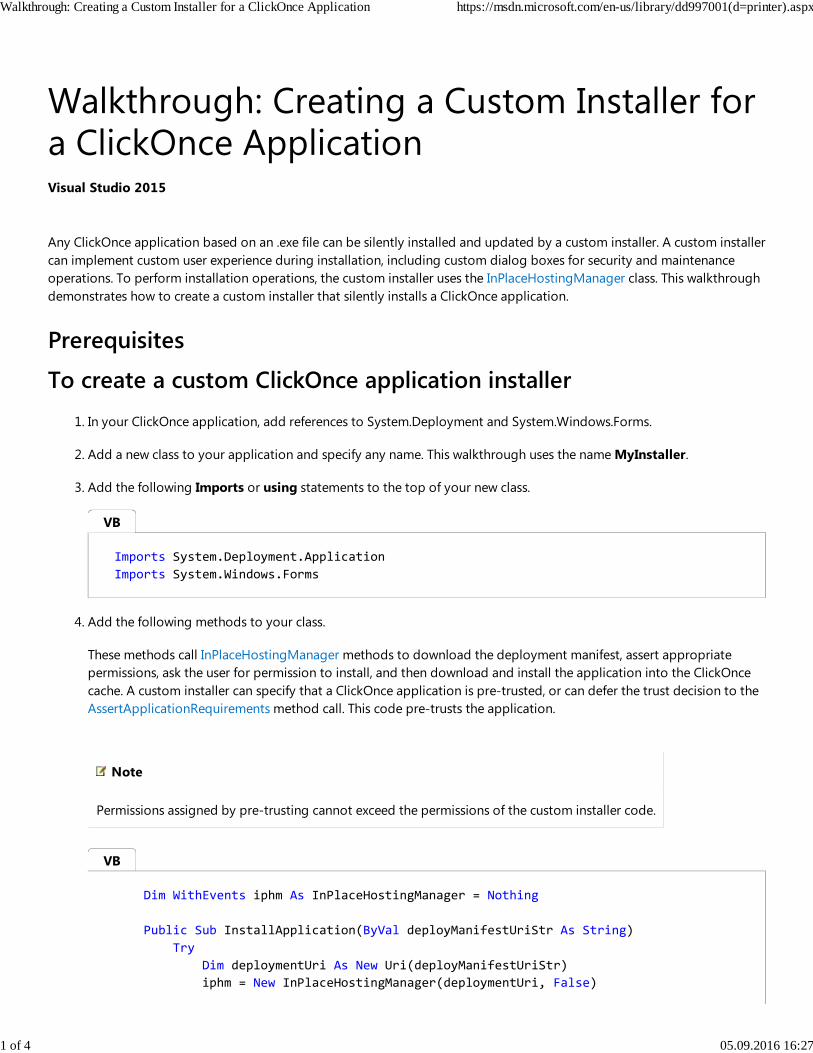
Walkthrough: Creating a Custom Installer fora ClickOnce Application
Any ClickOnce application based on an .exe file can be silently installed and updated by a custom installer. A custom installer
can implement custom user experience during installation, including custom dialog boxes for security and maintenance
operations. To perform installation operations, the custom installer uses the InPlaceHostingManager class. This walkthrough
demonstrates how to create a custom installer that silently installs a ClickOnce application.
Prerequisites
To create a custom ClickOnce application installer
In your ClickOnce application, add references to System.Deployment and System.Windows.Forms.1.
Add a new class to your application and specify any name. This walkthrough uses the name MyInstaller.2.
Add the following Imports or using statements to the top of your new class.3.
Add the following methods to your class.
These methods call InPlaceHostingManager methods to download the deployment manifest, assert appropriate
permissions, ask the user for permission to install, and then download and install the application into the ClickOnce
cache. A custom installer can specify that a ClickOnce application is pre-trusted, or can defer the trust decision to the
AssertApplicationRequirements method call. This code pre-trusts the application.
Note
Permissions assigned by pre-trusting cannot exceed the permissions of the custom installer code.
4.
Visual Studio 2015
Imports System.Deployment.Application
Imports System.Windows.Forms
Dim WithEvents iphm As InPlaceHostingManager = Nothing
Public Sub InstallApplication(ByVal deployManifestUriStr As String)
Try
Dim deploymentUri As New Uri(deployManifestUriStr)
iphm = New InPlaceHostingManager(deploymentUri, False)
VB
VB
Walkthrough: Creating a Custom Installer for a ClickOnce Application https://msdn.microsoft.com/en-us/library/dd997001(d=printer).aspx
1 of 4 05.09.2016 16:27
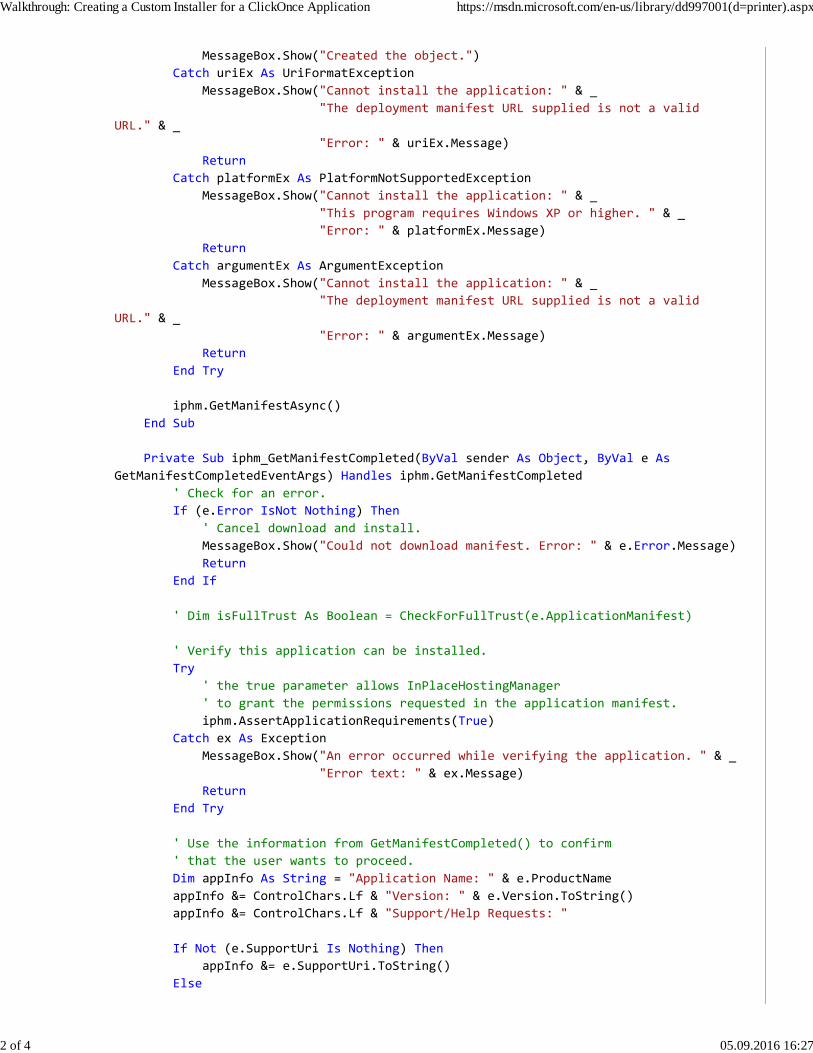
MessageBox.Show("Created the object.")
Catch uriEx As UriFormatException
MessageBox.Show("Cannot install the application: " & _
"The deployment manifest URL supplied is not a valid
URL." & _
"Error: " & uriEx.Message)
Return
Catch platformEx As PlatformNotSupportedException
MessageBox.Show("Cannot install the application: " & _
"This program requires Windows XP or higher. " & _
"Error: " & platformEx.Message)
Return
Catch argumentEx As ArgumentException
MessageBox.Show("Cannot install the application: " & _
"The deployment manifest URL supplied is not a valid
URL." & _
"Error: " & argumentEx.Message)
Return
End Try
iphm.GetManifestAsync()
End Sub
Private Sub iphm_GetManifestCompleted(ByVal sender As Object, ByVal e As
GetManifestCompletedEventArgs) Handles iphm.GetManifestCompleted
' Check for an error.
If (e.Error IsNot Nothing) Then
' Cancel download and install.
MessageBox.Show("Could not download manifest. Error: " & e.Error.Message)
Return
End If
' Dim isFullTrust As Boolean = CheckForFullTrust(e.ApplicationManifest)
' Verify this application can be installed.
Try
' the true parameter allows InPlaceHostingManager
' to grant the permissions requested in the application manifest.
iphm.AssertApplicationRequirements(True)
Catch ex As Exception
MessageBox.Show("An error occurred while verifying the application. " & _
"Error text: " & ex.Message)
Return
End Try
' Use the information from GetManifestCompleted() to confirm
' that the user wants to proceed.
Dim appInfo As String = "Application Name: " & e.ProductName
appInfo &= ControlChars.Lf & "Version: " & e.Version.ToString()
appInfo &= ControlChars.Lf & "Support/Help Requests: "
If Not (e.SupportUri Is Nothing) Then
appInfo &= e.SupportUri.ToString()
Else
Walkthrough: Creating a Custom Installer for a ClickOnce Application https://msdn.microsoft.com/en-us/library/dd997001(d=printer).aspx
2 of 4 05.09.2016 16:27
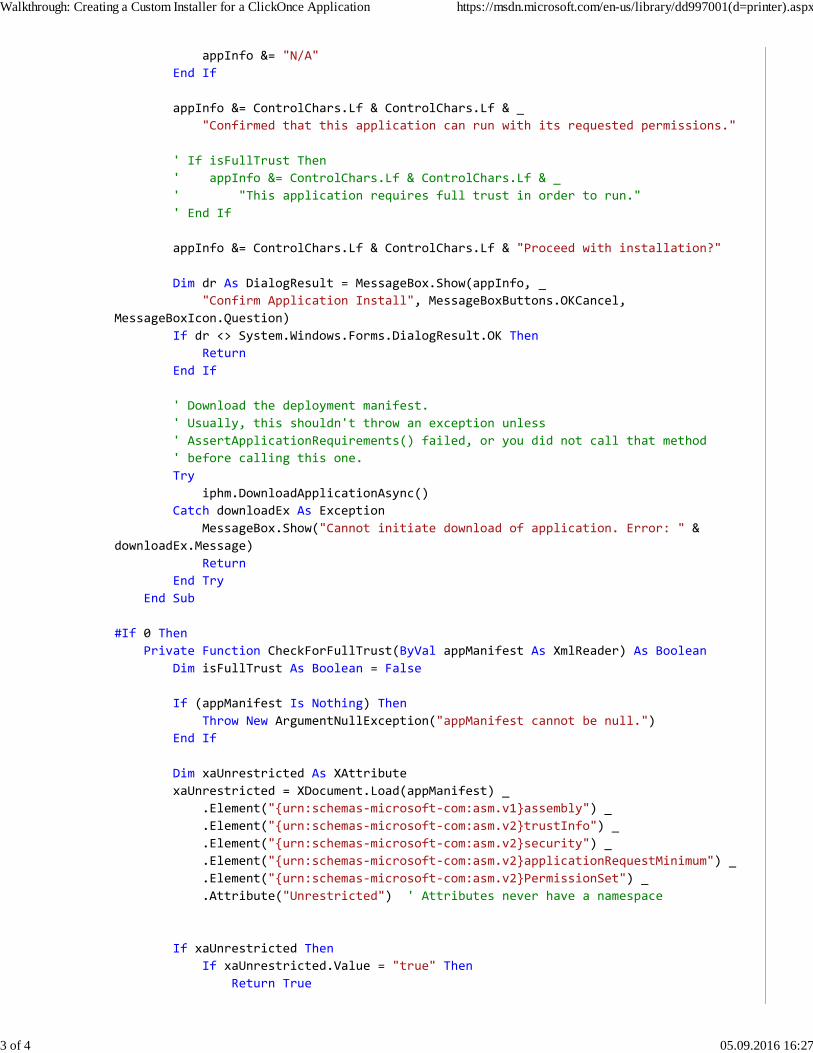
appInfo &= "N/A"
End If
appInfo &= ControlChars.Lf & ControlChars.Lf & _
"Confirmed that this application can run with its requested permissions."
' If isFullTrust Then
' appInfo &= ControlChars.Lf & ControlChars.Lf & _
' "This application requires full trust in order to run."
' End If
appInfo &= ControlChars.Lf & ControlChars.Lf & "Proceed with installation?"
Dim dr As DialogResult = MessageBox.Show(appInfo, _
"Confirm Application Install", MessageBoxButtons.OKCancel,
MessageBoxIcon.Question)
If dr <> System.Windows.Forms.DialogResult.OK Then
Return
End If
' Download the deployment manifest.
' Usually, this shouldn't throw an exception unless
' AssertApplicationRequirements() failed, or you did not call that method
' before calling this one.
Try
iphm.DownloadApplicationAsync()
Catch downloadEx As Exception
MessageBox.Show("Cannot initiate download of application. Error: " &
downloadEx.Message)
Return
End Try
End Sub
#If 0 Then
Private Function CheckForFullTrust(ByVal appManifest As XmlReader) As Boolean
Dim isFullTrust As Boolean = False
If (appManifest Is Nothing) Then
Throw New ArgumentNullException("appManifest cannot be null.")
End If
Dim xaUnrestricted As XAttribute
xaUnrestricted = XDocument.Load(appManifest) _
.Element("{urn:schemas‐microsoft‐com:asm.v1}assembly") _
.Element("{urn:schemas‐microsoft‐com:asm.v2}trustInfo") _
.Element("{urn:schemas‐microsoft‐com:asm.v2}security") _
.Element("{urn:schemas‐microsoft‐com:asm.v2}applicationRequestMinimum") _
.Element("{urn:schemas‐microsoft‐com:asm.v2}PermissionSet") _
.Attribute("Unrestricted") ' Attributes never have a namespace
If xaUnrestricted Then
If xaUnrestricted.Value = "true" Then
Return True
Walkthrough: Creating a Custom Installer for a ClickOnce Application https://msdn.microsoft.com/en-us/library/dd997001(d=printer).aspx
3 of 4 05.09.2016 16:27
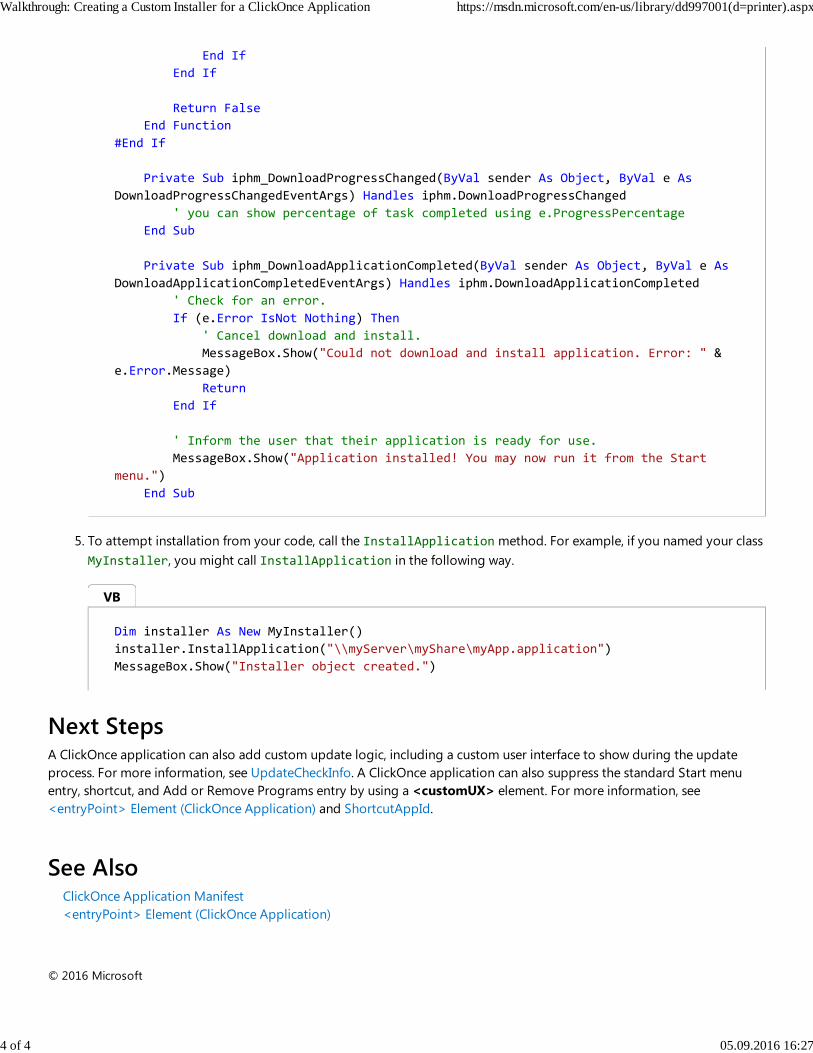
To attempt installation from your code, call the InstallApplication method. For example, if you named your class
MyInstaller, you might call InstallApplication in the following way.
5.
Next StepsA ClickOnce application can also add custom update logic, including a custom user interface to show during the update
process. For more information, see UpdateCheckInfo. A ClickOnce application can also suppress the standard Start menu
entry, shortcut, and Add or Remove Programs entry by using a <customUX> element. For more information, see
<entryPoint> Element (ClickOnce Application) and ShortcutAppId.
See AlsoClickOnce Application Manifest
<entryPoint> Element (ClickOnce Application)
© 2016 Microsoft
End If
End If
Return False
End Function
#End If
Private Sub iphm_DownloadProgressChanged(ByVal sender As Object, ByVal e As
DownloadProgressChangedEventArgs) Handles iphm.DownloadProgressChanged
' you can show percentage of task completed using e.ProgressPercentage
End Sub
Private Sub iphm_DownloadApplicationCompleted(ByVal sender As Object, ByVal e As
DownloadApplicationCompletedEventArgs) Handles iphm.DownloadApplicationCompleted
' Check for an error.
If (e.Error IsNot Nothing) Then
' Cancel download and install.
MessageBox.Show("Could not download and install application. Error: " &
e.Error.Message)
Return
End If
' Inform the user that their application is ready for use.
MessageBox.Show("Application installed! You may now run it from the Start
menu.")
End Sub
Dim installer As New MyInstaller()
installer.InstallApplication("\\myServer\myShare\myApp.application")
MessageBox.Show("Installer object created.")
VB
Walkthrough: Creating a Custom Installer for a ClickOnce Application https://msdn.microsoft.com/en-us/library/dd997001(d=printer).aspx
4 of 4 05.09.2016 16:27