Embed Size (px)
Citation preview
Empowered Learner
CSD Education Technology Department
CANYONS SCHOOL DISTRICT TECHNOLOGY BRAIN BOOSTER
photo by geralt on pixabay.com labeled for noncommercial reuse with modification
Block 1 at a Glance
ii
Empowered LearnerEmpowered LearnerEmpowered LearnerEmpowered LearnerEmpowered Learner
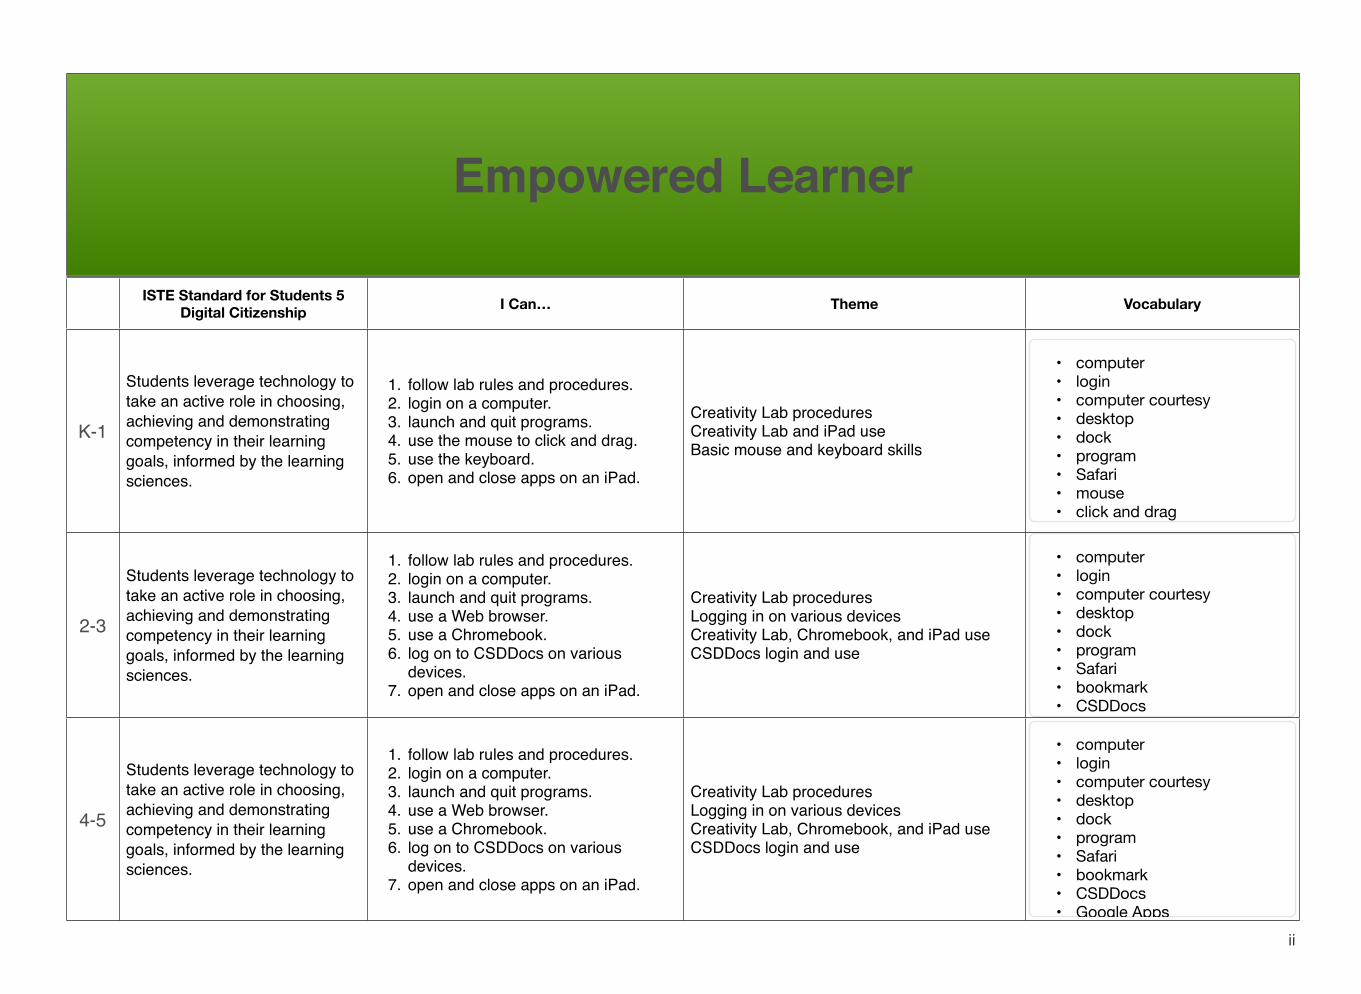
ISTE Standard for Students 5 Digital Citizenship I Can… Theme Vocabulary
K-1
Students leverage technology to take an active role in choosing, achieving and demonstrating competency in their learning goals, informed by the learning sciences.
1. follow lab rules and procedures.2. login on a computer.3. launch and quit programs.4. use the mouse to click and drag.5. use the keyboard.6. open and close apps on an iPad.
Creativity Lab proceduresCreativity Lab and iPad useBasic mouse and keyboard skills
2-3
Students leverage technology to take an active role in choosing, achieving and demonstrating competency in their learning goals, informed by the learning sciences.
1. follow lab rules and procedures.2. login on a computer.3. launch and quit programs.4. use a Web browser.5. use a Chromebook.6. log on to CSDDocs on various
devices.7. open and close apps on an iPad.
Creativity Lab proceduresLogging in on various devicesCreativity Lab, Chromebook, and iPad useCSDDocs login and use
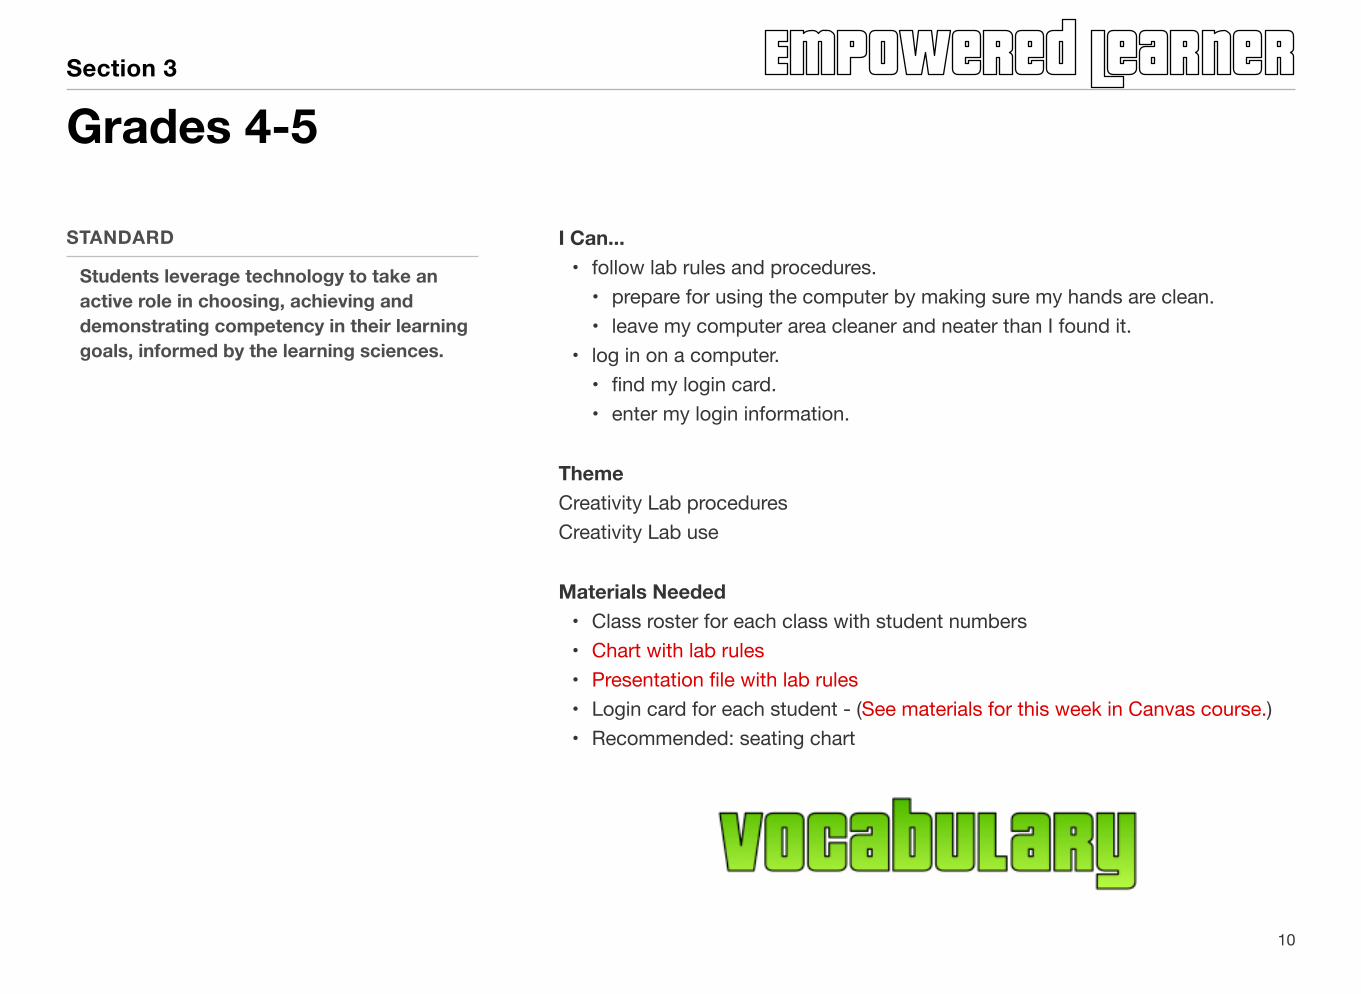
4-5
Students leverage technology to take an active role in choosing, achieving and demonstrating competency in their learning goals, informed by the learning sciences.
1. follow lab rules and procedures.2. login on a computer.3. launch and quit programs.4. use a Web browser.5. use a Chromebook.6. log on to CSDDocs on various
devices.7. open and close apps on an iPad.
Creativity Lab proceduresLogging in on various devicesCreativity Lab, Chromebook, and iPad useCSDDocs login and use
• computer• login• computer courtesy• desktop• dock• program• Safari• bookmark• CSDDocs• Google Apps• Google Docs• Google Drive• Chromebook• document• Slides• iPad• home button• app
• computer• login• computer courtesy• desktop• dock• program• Safari• bookmark• CSDDocs• Google Apps• Google Docs• Google Drive• Chromebook• document• Slides• iPad• home button• app
• computer• login• computer courtesy• desktop• dock• program• Safari• mouse• click and drag• Pixie• iPad• app• home button• folder
Chapter 1
Week 1
These are the materials for week 1. The materials for each grade band will be divided by section.
To see the vocabulary for each lesson, tap on “Vocabulary” on the 1st page of every lesson.
flickr photo by soulzdead https://flickr.com/photos/sgautam/5541781271 shared under a Creative Commons (BY-ND) license

I Can...• follow lab rules and procedures.• prepare for using the computer by making sure my hands are clean.• leave my computer area cleaner and neater than I found it.
• log in on a computer.• find my login card.• enter my login information.
ThemeCreativity Lab proceduresCreativity Lab use
Materials Needed• Class roster for each class with student numbers• Chart with lab rules• Presentation file with lab rules• Login card for each student - (See materials for this week in Canvas course.)• Recommended: seating chart
Section 1
STANDARD
Students leverage technology to take an active role in choosing, achieving and demonstrating competency in their learning goals, informed by the learning sciences.
Grades K-1
4
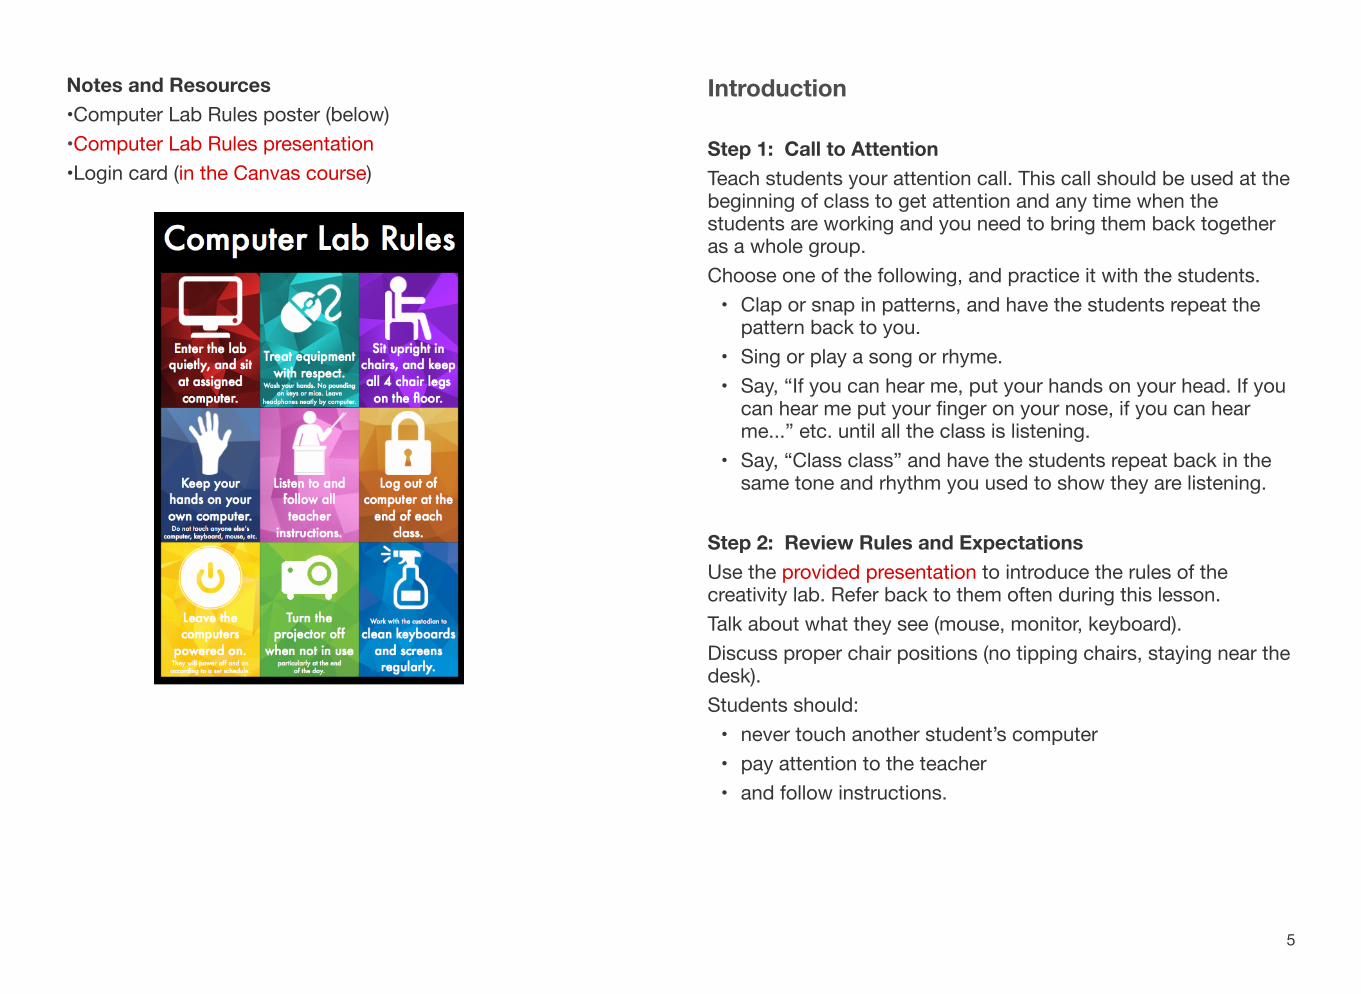
Notes and Resources•Computer Lab Rules poster (below)•Computer Lab Rules presentation•Login card (in the Canvas course)
Introduction
Step 1: Call to AttentionTeach students your attention call. This call should be used at the beginning of class to get attention and any time when the students are working and you need to bring them back together as a whole group.Choose one of the following, and practice it with the students.• Clap or snap in patterns, and have the students repeat the
pattern back to you.• Sing or play a song or rhyme.• Say, “If you can hear me, put your hands on your head. If you
can hear me put your finger on your nose, if you can hear me...” etc. until all the class is listening.
• Say, “Class class” and have the students repeat back in the same tone and rhythm you used to show they are listening.
Step 2: Review Rules and ExpectationsUse the provided presentation to introduce the rules of the creativity lab. Refer back to them often during this lesson.Talk about what they see (mouse, monitor, keyboard).Discuss proper chair positions (no tipping chairs, staying near the desk).Students should:• never touch another student’s computer• pay attention to the teacher• and follow instructions.
5

Step 3: Starter Say: Welcome to the Creativity Lab. We are going to learn a lot about computers and technology this year. Let’s learn about the lab! Pass out login cards.
Lesson
Step 1: Show HowLook at the computer login screen and the keyboard. (Younger grades will need extra help to be able to find the letters of their login on the keyboard.)Show the example of the login card.Show the students how to login correctly.
Step 2: Practice TogetherHave the students log in to the computers. If students have issues, have them re-enter their login. If there are still issues, work directly with students to make sure they are entering their login correctly.For younger students you will need to be extremely patient. Not all will get logged in the first try. The goal is to have each student successfully log in, but it may take a lot of practice for some.
Step 3: Independent PracticeHave students practice logging in and out of their accounts. When finished, have the students log out of their computers. Remind them to clean up and leave their work area cleaner than they found it.
Wrap Up
Step 1: Review StandardHave students recite some of the rules.
Step 2: Have students rate themselves daily on I can...Help students reflect on the login process by rating themselves on a scale answering this question:Was I able to log in successfully to my account?
1. I was never able to log in to my account this session.2. I was able to log in to my account once during the session.3. I was able to log in and log out of my account more than once
during this session.
6
I Can...• follow lab rules and procedures.• prepare for using the computer by making sure my hands are clean.• leave my computer area cleaner and neater than I found it.
• log in on a computer.• find my login card.• enter my login information.
ThemeCreativity Lab proceduresCreativity Lab use
Materials Needed• Class roster for each class with student numbers• Chart with lab rules• Presentation file with lab rules• Login card for each student - (See materials for this week in Canvas course.)• Recommended: seating chart
STANDARD
Students leverage technology to take an active role in choosing, achieving and demonstrating competency in their learning goals, informed by the learning sciences.
Grades 2-3
7
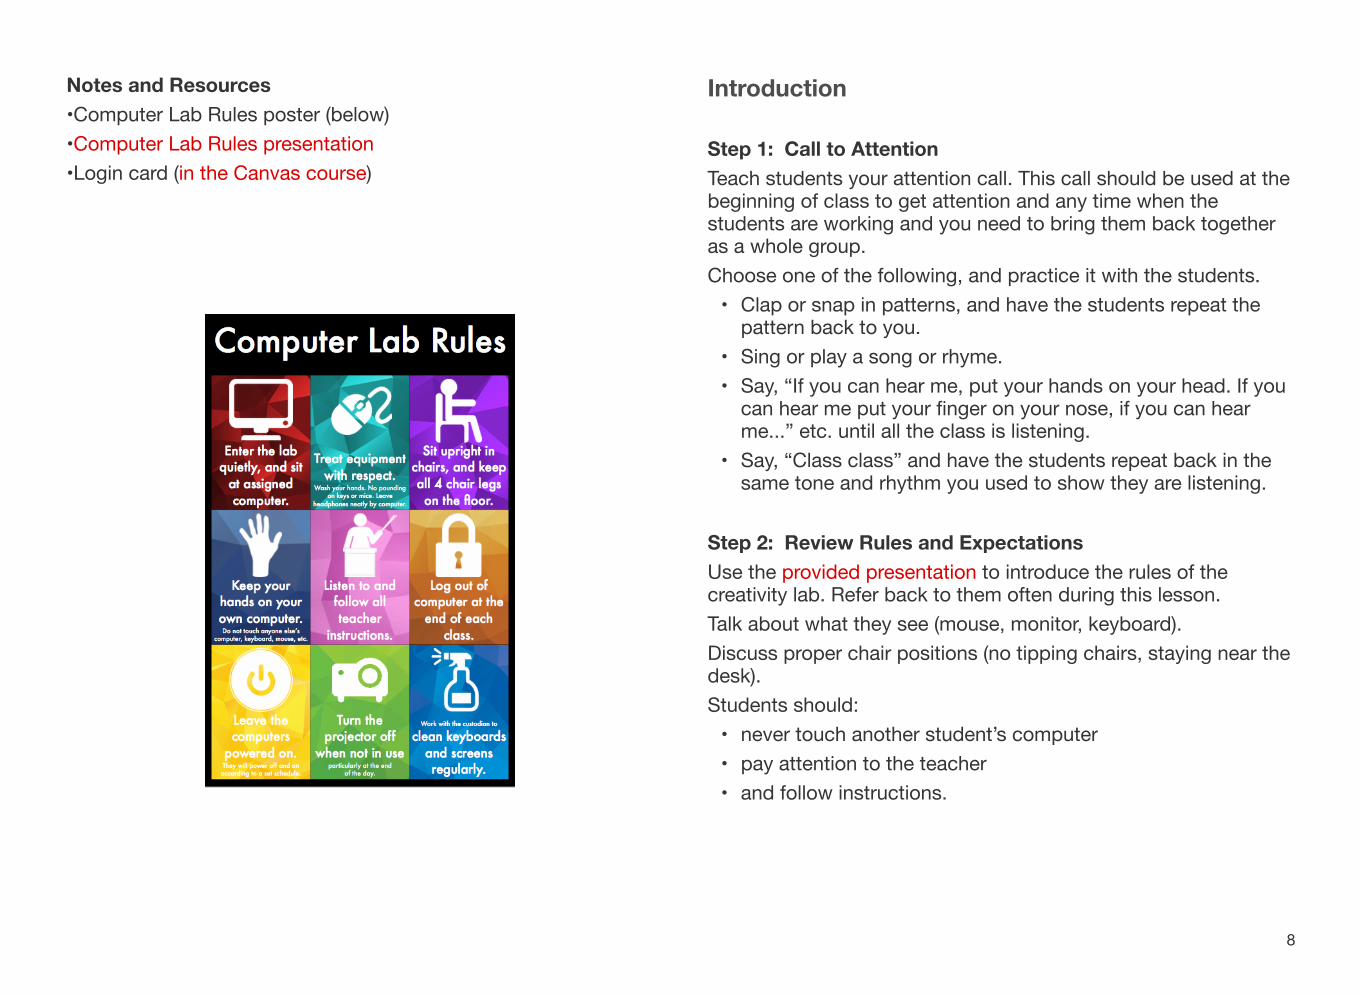
Notes and Resources•Computer Lab Rules poster (below)•Computer Lab Rules presentation•Login card (in the Canvas course)
Introduction
Step 1: Call to AttentionTeach students your attention call. This call should be used at the beginning of class to get attention and any time when the students are working and you need to bring them back together as a whole group.Choose one of the following, and practice it with the students.• Clap or snap in patterns, and have the students repeat the
pattern back to you.• Sing or play a song or rhyme.• Say, “If you can hear me, put your hands on your head. If you
can hear me put your finger on your nose, if you can hear me...” etc. until all the class is listening.
• Say, “Class class” and have the students repeat back in the same tone and rhythm you used to show they are listening.
Step 2: Review Rules and ExpectationsUse the provided presentation to introduce the rules of the creativity lab. Refer back to them often during this lesson.Talk about what they see (mouse, monitor, keyboard).Discuss proper chair positions (no tipping chairs, staying near the desk).Students should:• never touch another student’s computer• pay attention to the teacher• and follow instructions.
8
Step 3: Starter Say: Welcome to the Creativity Lab. We are going to learn a lot about computers and technology this year. Let’s learn about the lab! Pass out login cards.
Lesson
Step 1: Show HowLook at the computer login screen and the keyboard. (Younger grades will need extra help to be able to find the letters of their login on the keyboard.)Show the example of the login card.Show the students how to login correctly.
Step 2: Practice TogetherHave the students log in to the computers. If students have issues, have them re-enter their login. If there are still issues, work directly with students to make sure they are entering their login correctly.For younger students you will need to be extremely patient. Not all will get logged in the first try. The goal is to have each student successfully log in, but it may take a lot of practice for some.
Step 3: Independent PracticeHave students practice logging in and out of their accounts. When finished, have the students log out of their computers. Remind them to clean up and leave their work area cleaner than they found it.
Wrap Up
Step 1: Review StandardHave students recite some of the rules.
Step 2: Have students rate themselves daily on I can...Help students reflect on the login process by rating themselves on a scale answering this question:Was I able to log in successfully to my account?
1. I was never able to log in to my account this session.2. I was able to log in to my account once during the session.3. I was able to log in and log out of my account more than once
during this session.
9
I Can...• follow lab rules and procedures.• prepare for using the computer by making sure my hands are clean.• leave my computer area cleaner and neater than I found it.
• log in on a computer.• find my login card.• enter my login information.
ThemeCreativity Lab proceduresCreativity Lab use
Materials Needed• Class roster for each class with student numbers• Chart with lab rules• Presentation file with lab rules• Login card for each student - (See materials for this week in Canvas course.)• Recommended: seating chart
Section 3
STANDARD
Students leverage technology to take an active role in choosing, achieving and demonstrating competency in their learning goals, informed by the learning sciences.
Grades 4-5
10

Notes and Resources•Computer Lab Rules poster (below)•Computer Lab Rules presentation•Login card (in the Canvas course)
Introduction
Step 1: Call to AttentionTeach students your attention call. This call should be used at the beginning of class to get attention and any time when the students are working and you need to bring them back together as a whole group.Choose one of the following, and practice it with the students.• Clap or snap in patterns, and have the students repeat the
pattern back to you.• Sing or play a song or rhyme.• Say, “If you can hear me, put your hands on your head. If you
can hear me put your finger on your nose, if you can hear me...” etc. until all the class is listening.
• Say, “Class class” and have the students repeat back in the same tone and rhythm you used to show they are listening.
Step 2: Review Rules and ExpectationsUse the provided presentation to introduce the rules of the creativity lab. Refer back to them often during this lesson.Talk about what they see (mouse, monitor, keyboard).Discuss proper chair positions (no tipping chairs, staying near the desk).Students should:• never touch another student’s computer• pay attention to the teacher• and follow instructions.
11
Step 3: Starter Say: Welcome to the Creativity Lab. We are going to learn a lot about computers and technology this year. Let’s learn about the lab! Pass out login cards.
Lesson
Step 1: Show HowLook at the computer login screen and the keyboard. (Younger grades will need extra help to be able to find the letters of their login on the keyboard.)Show the example of the login card.Show the students how to login correctly.
Step 2: Practice TogetherHave the students log in to the computers. If students have issues, have them re-enter their login. If there are still issues, work directly with students to make sure they are entering their login correctly.
Step 3: Independent PracticeHave students practice logging in and out of their accounts. When finished, have the students log out of their computer. Remind them to clean up and leave their work area cleaner than they found it.
Wrap Up
Step 1: Review StandardHave students recite some of the rules.
Step 2: Have students rate themselves daily on I can...Help students reflect on the login process by rating themselves on a scale answering this question:Was I able to log in successfully to my account?
1. I was never able to log in to my account this session.2. I was able to log in to my account once during the session.3. I was able to log in and log out of my account more than once
during this session.
12
Chapter 2
Week 2
These are the materials for week 2. The materials for each grade band will be divided by section.
To see the vocabulary for each lesson, tap on “Vocabulary” on the 1st page of every lesson.

I Can...• follow lab rules and procedures.• prepare for using the computer by making sure my hands are clean.• leave my computer area cleaner and neater then I found it.
• log in on a computer.• launch and quit programs.
ThemeCreativity Lab use
Materials Needed• Class roster for each class with student numbers• Chart with lab rules• Presentation file with lab rules• Login card for each student - (See materials for this week in Canvas course.)• Recommended: seating chart
Section 1
STANDARD
Students leverage technology to take an active role in choosing, achieving and demonstrating competency in their learning goals, informed by the learning sciences.
Grades K-1
14

Notes and Resources Introduction
Step 1: Call to AttentionRemind students of your call to attention.Choose one of the following, and practice it with students:• Clap or snap in patterns, and have the students repeat the
pattern back to you.• Sing or play a song or rhyme.• Say, “If you can hear me, put your hands on your head. If you
can hear me put your finger on your nose, if you can hear me...” etc. until all the class is listening.
• Say, “Class class” and have the students repeat back in the same tone and rhythm you used to show they are listening.
Step 2: Review Rules and ExpectationsReview the lab rules as outlined in Week 1.
Step 3: Starter Say: Today we are going to log in on the computers and learn how to start up programs.Pass out login cards.
15
Lesson
Step 1: Show HowShow the students how to log in correctly. Remind them as needed.Explain that the screen they see when they first log in is the desktop.Explain that the bar with icons on it on the left side of the screen is called the dock. Clicking on those icons launches programs.Show them the Safari icon as they will be using a Web browser a lot throughout the year.Show the students how to correctly quit out of programs. (Note: On a Mac, some programs require students to quit for them to be properly closed. Teach them to use Quit on the application’s menu or to use the command Q shortcut rather than just clicking the red bubble.)
Step 2: Practice TogetherHave the students log in on the computers. If students have issues, have them re-enter their login.Login issues from the previous week should be resolved. If there are still issues, work directly with students to make sure they are entering their login information correctly. For these younger students you will need to be extremely patient.Once they are logged in, in partners have students practice locating the Safari icon on the dock and launching the browser.
Step 3: Independent PracticeHave students practice launching Safari and quitting out of the program. When finished, have the students properly quit out of Safari and log out of their computers. Remind them to clean up and leave their work area cleaner than they found it.
Wrap Up
Step 1: Review StandardHave students explain how to open Safari and how to properly quit.
Step 2: Have students rate themselves daily on I can...Ask students to give a thumbs up if they successfully opened Safari and successfully quit. Ask students who didn’t to give a thumbs down.
16
I Can...• follow lab rules and procedures.• prepare for using the computer by making sure my hands are clean.• leave my computer area cleaner and neater then I found it.
• log in on a computer.• launch and quit programs.
ThemeCreativity Lab use
Materials Needed• Class roster for each class with student numbers• Chart with lab rules• Presentation file with lab rules• Login card for each student - (See materials for this week in Canvas course.)• Recommended: seating chart
Section 2
STANDARD
Students leverage technology to take an active role in choosing, achieving and demonstrating competency in their learning goals, informed by the learning sciences.
Grades 2-3
17

Notes and Resources Introduction
Step 1: Call to AttentionRemind students of your call to attention.Choose one of the following, and practice it with students:• Clap or snap in patterns, and have the students repeat the
pattern back to you.• Sing or play a song or rhyme.• Say, “If you can hear me, put your hands on your head. If you
can hear me put your finger on your nose, if you can hear me...” etc. until all the class is listening.
• Say, “Class class” and have the students repeat back in the same tone and rhythm you used to show they are listening.
Step 2: Review Rules and ExpectationsReview the lab rules as outlined in Week 1.
Step 3: Starter Say: Today we are going to log in on the computers and learn how to start up programs.Pass out login cards.
18

Lesson
Step 1: Show HowShow the students how to log in correctly. Remind them as needed.Explain that the screen they see when they first log in is the desktop.Explain that the bar with icons on it on the left side of the screen is called the dock. Clicking on those icons launches programs.Show them the Safari icon as they will be using a Web browser a lot throughout the year.Show them the bookmarks in the bookmark bar. Show them how new pages in the browser open.Explain the browser behavior and how to get back to previous pages.Show the students how to correctly quit out of programs. (Note: On a Mac, some programs require students to quit for them to be properly closed. Teach them to use Quit on the application’s menu or to use the command Q shortcut rather than just clicking the red bubble.)
Step 2: Practice TogetherHave the students log in on the computers. If students have issues, have them re-enter their login.Login issues from the previous week should be resolved by this session.Once they are logged in, have the students practice locating the Safari icon on the dock and launching the browser. Have the students check with table partners to make sure all students on their row can open Safari.
Step 3: Independent PracticeHave the students practice opening webpages from the bookmark bar and navigating through different screens in the browser.Have students practice quitting out of the program properly. When finished, have the students properly quit out of Safari and log out of their computers. Remind them to clean up and leave their work area cleaner than they found it.
Wrap Up
Step 1: Review StandardHave students recite some of the rules.
Step 2: Have kids rate themselves daily on I can...Have the students give thumbs up if they were able to launch Safari and navigate the browser successfully.Have the students give thumbs down if they were not able or do not feel like they can successfully navigate the browser.
19

I Can...• follow lab rules and procedures.• prepare for using the computer by making sure my hands are clean.• leave my computer area cleaner and neater then I found it.
• log in on a computer.• launch and quit programs.
ThemeCreativity Lab use
Materials Needed• Class roster for each class with student numbers• Chart with lab rules• Presentation file with lab rules• Login card for each student - (See materials for this week in Canvas course.)• Recommended: seating chart
Section 3
STANDARD
Students leverage technology to take an active role in choosing, achieving and demonstrating competency in their learning goals, informed by the learning sciences.
Grades 4-5
20

Notes and Resources Introduction
Step 1: Call to AttentionRemind students of your call to attention.Choose one of the following, and practice it with students:• Clap or snap in patterns, and have the students repeat the
pattern back to you.• Sing or play a song or rhyme.• Say, “If you can hear me, put your hands on your head. If you
can hear me put your finger on your nose, if you can hear me...” etc. until all the class is listening.
• Say, “Class class” and have the students repeat back in the same tone and rhythm you used to show they are listening.
Step 2: Review Rules and ExpectationsReview the lab rules as outlined in Week 1.
Step 3: Starter Say: Today we are going to log in on the computers and learn how to start up programs.Pass out login cards.
21
Lesson
Step 1: Show HowShow the students how to log in correctly. Remind them as needed.Explain that the screen they see when they first log in is the desktop.Explain that the bar with icons on it on the left side of the screen is called the dock. Clicking on those icons launches programs.Show them the Safari icon as they will be using a Web browser a lot throughout the year.Show them the bookmarks in the bookmark bar. Show them how new pages in the browser open.Explain the browser behavior and how to get back to previous pages.Show the students how to correctly quit out of programs. (Note: On a Mac, some programs require students to quit for them to be properly closed. Teach them to use Quit on the application’s menu or to use the command Q shortcut rather than just clicking the red bubble.)
Step 2: Practice TogetherHave the students log in on the computers. If students have issues, have them re-enter their login.Login issues from the previous week should be resolved by this session.Once they are logged in, have the students practice locating the Safari icon on the dock and launching the browser. Have the students check with table partners to make sure all students on their row can open Safari.
Step 3: Independent PracticeHave the students practice opening webpages from the bookmark bar and navigating through different screens in the browser.Have students practice quitting out of the program properly. When finished, have the students properly quit out of Safari and log out of their computers. Remind them to clean up and leave their work area cleaner than they found it.
Wrap Up
Step 1: Review StandardHave students recite some of the rules.
Step 2: Have kids rate themselves daily on I can...Have the students give thumbs up if they were able to launch Safari and navigate the browser successfully.Have the students give thumbs down if they were not able or do not feel like they can successfully navigate the browser.
22
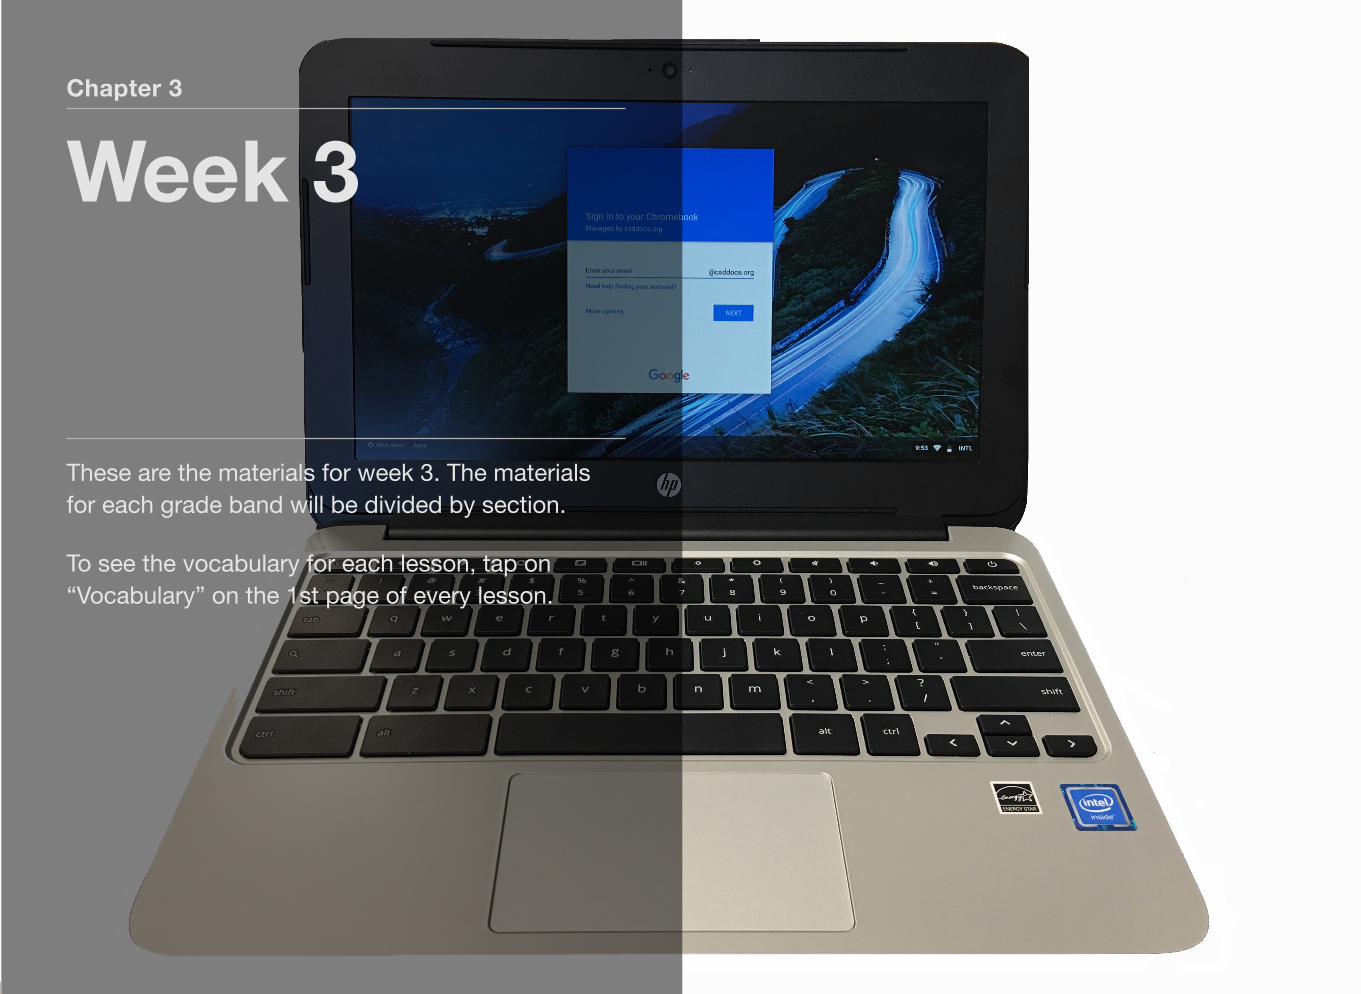
Chapter 3
Week 3
These are the materials for week 3. The materials for each grade band will be divided by section.
To see the vocabulary for each lesson, tap on “Vocabulary” on the 1st page of every lesson.
I Can...• follow lab rules and procedures.• prepare for using the computer by making sure my hands are clean.• leave my computer area cleaner and neater then I found it.
• log in on a computer.• launch and quit programs.• use the mouse to click and drag.
ThemeBasic mouse skills
Materials Needed• Class roster for each class with student numbers• Chart with lab rules• Login card for each student - (See materials for this week in Canvas course.)• Recommended: seating chart• Chateau Meddybemps Spacial Concepts website: http://
www.meddybemps.com/9.691.html
Section 1
STANDARD
Students demonstrate a sound understanding of technology concepts, systems, and operations.
Grades K-1
24
Notes and Resources
•Chateau Meddybemps Spacial Concepts website: http://www.meddybemps.com/9.691.html
Introduction
Step 1: Call to AttentionRemind the students of your call to attention.
Step 2: Review Rules and ExpectationsReview the lab rules as outlined in weeks 1 and 2.
Step 3: Starter Say: Today we will be practicing using the mouse to click and drag.Pass out login cards.
25
Lesson
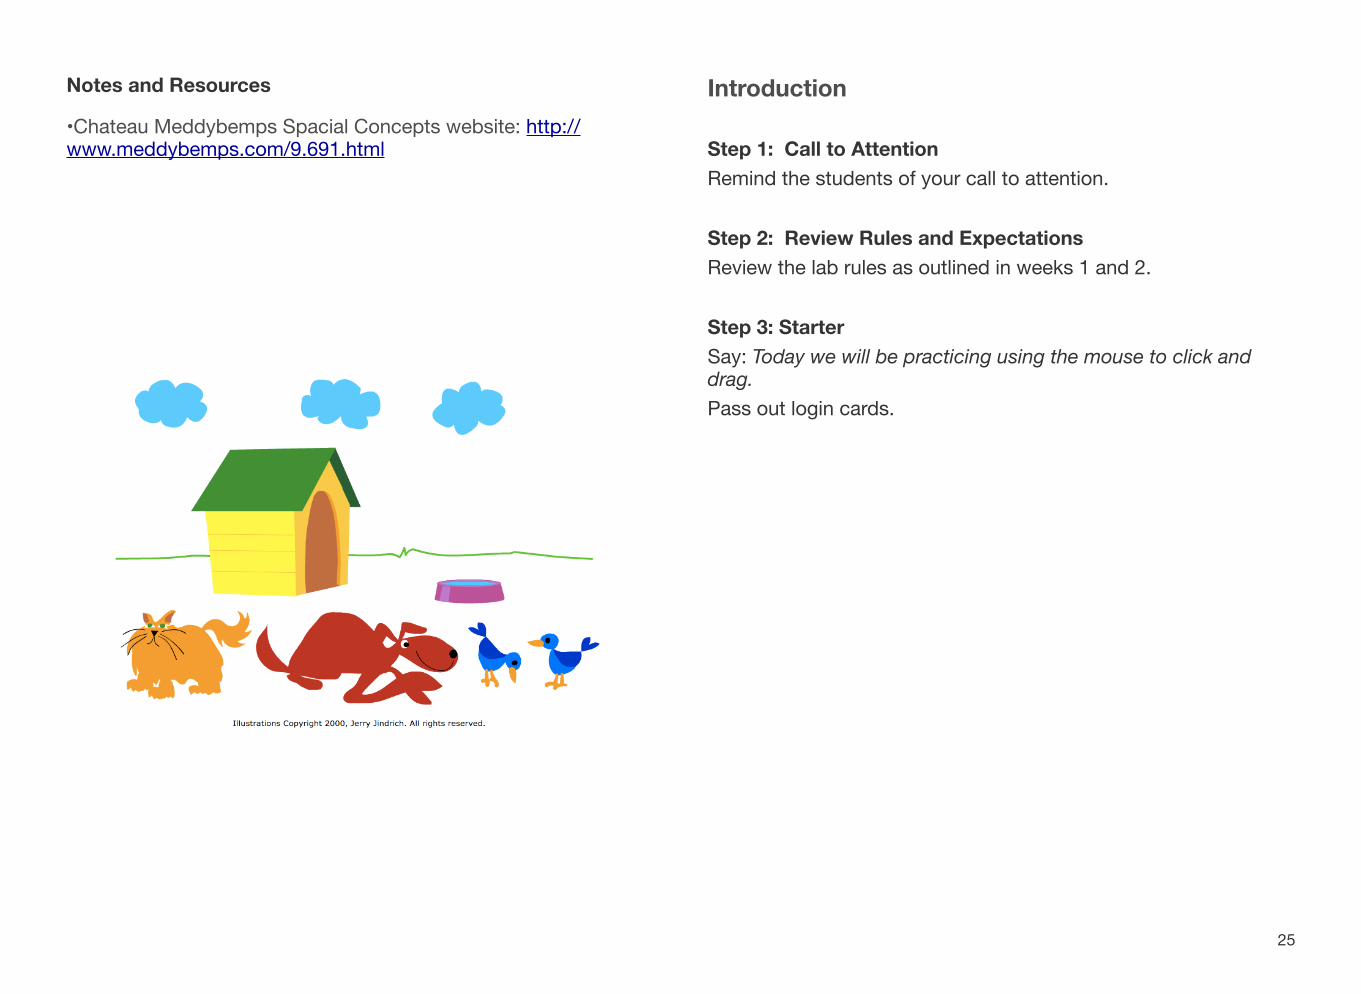
Step 1: Show HowHave the students log in on the computers. If students have issues, have them re-enter their login. Login issues from the previous week should be resolved by this session.Once they are logged in, have students locate the Safari icon on the dock and launch the browser.Using LANSchool or the projector, show the students the Chateau Meddybemps Spacial Concepts website. Explain that you are going to give the students directions of where to place the animals on their screen and that they will need to use their mouse to click and drag the animals to the proper places.In front of the class with an unplugged mouse, demonstrate for the students the proper way to click and drag with the mouse. Specifically point out the difference between the left and right click on the mouse and teach them to click on the left side of the mouse.Demonstrate clicking and dragging the various animals on the website.
Step 2: Practice TogetherUsing LANSchool, send the Chateau Meddybemps Spacial Concepts website to each student’s computer and have them open the website.Have them practice clicking and dragging the various animals using their mouse. Have students use table partners to watch and make sure they can properly click and drag. Walk around the room to observe the students’ progress and help any who are struggling.
Step 3: Independent PracticeCall the students to attention. Explain that you are going to give them some instructions to see if they can use their mouse to put the animals in and on things in the picture.Review the difference between in and on with the students.Read the following sentences, and have the students use the mouse to follow your instructions:
1. Put the dog in the dog house.2. Put the cat on the dog house.3. Put a bird in the water dish.4. Put the other bird on the dog.
Continue with other sentences as time allows. Walk the room to check for student understanding. Help students who are struggling with using the mouse as needed.When finished, have the students properly quit out of Safari and log out of their computer. Remind them to clean up and leave their work area cleaner than they found it.
Wrap Up
Step 1: Review StandardChoose a couple of students demonstrate with an unplugged mouse how to click and drag.
Step 2: Have students rate themselves daily on I can...Ask students to give a thumbs up if they feel the are now great at clicking and dragging. Have them give a thumbs down if they are still having a hard time using the mouse. Have them wiggle their thumb somewhere in the middle if they feel they’re getting better but just need a little more practice.
26
*NOTE: This lesson teaches Chromebook login and use. If your school’s second graders do not use or have access to Chromebooks, you may choose to use the K-1 Week 3 lesson with them instead.
I Can...• use a Chromebook.• log on to CSDDocs on various devices.
ThemeLogging in on various devicesChromebook useCSDDocs login and use
Materials Needed• Chromebook cart• Class rosters for each class with student numbers• Chromebook procedure poster• Log in Cards for each student with the complete CSDDocs Login (example-
[email protected] with password jumphat1)• Acrostic Name Poem pdf file• Recommended: seating chart
Section 2
STANDARD
Students leverage technology to take an active role in choosing, achieving and demonstrating competency in their learning goals, informed by the learning sciences.
Grades 2-3
27
Notes and Resources• Chromebook procedure poster• CSDDocs login template• Acrostic Name Poem pdf file
Introduction
Step 1: Call to AttentionRemind the students of your call to attention.
Step 2: Review Rules and ExpectationsReview the lab rules as outlined in weeks 1 and 2.
Step 3: Starter Say: Today we will be using the Chromebooks. Please line up in number order while I hand you your numbered Chromebook.Share the Chromebook handling procedures, demonstrating each part:• Wait in line for your Chromebook.• Carry the Chromebook to your seat holding it with both
hands.
28
Lesson
Step 1: Show HowOpen a Chromebook. Project the Chromebook’s sign-in screen or hold up the device to show the students.Have them put their finger on the CSDDocs login on their login card. Do a visual scan of the room to make sure everyone understands where to find the login.For younger students, the classroom teacher or you should fill in the login cards for the students before class. Older students can fill in the blanks on their login cards themselves using the formula for CSDDocs logins:
1st letter of the first name + 1st 3 letters of the last name + last 4 numbers of the student number + @csddocs.org
Student passwords are usually a combination of two words and one number, unless students or their parents have changed them.
Step 2: Practice TogetherHave the students log in to their Chromebook by typing the CSDDocs email address they learned on the first screen. Once it has been verified as correct by the teacher or a peer, have them click “next” and move to the password screen all together as a class.Students then type their passwords and click “log in”. Those who were unsuccessful should check their CSDDocs address and student number again.If login problems persist, teacher assistance may be needed. If there is a continued issue with verified, correct information, fill in a help ticket with the student’s name and student number by sending an email to [email protected] the students the main parts of the CSDDocs screen:
• the dock
• the Google suite of apps at the bottom of their screenHave the students open a document (blue icon at the bottom) and explore the typing tools available in a Google Doc.
Step 3: Independent PracticeHave the students explore the Google Doc app for a few minutes.Display the following pdf on the projector and have the students create their own name poem and type it into their open document:Acrostic Name Poem pdf file
Show the students how to click the name of the document to rename it. Have them rename it Acrostic Poem Student Name. Show the students how they can access Google Drive by clicking the Google Drive icon in the dock at the bottom of the screen.Have the students show their neighbors their Acrostic poem.
29
Wrap Up
Step 1: Review StandardHave the students click the icon in the bottom right of the screen with their picture and “sign out”.Once signed out, students should then close their Chromebooks.Call students 5 at a time to put their Chromebook back into the cart. Help them be sure to:• walk to the cart in an orderly fashion,• place their Chromebook in the correct numbered slot,• and plug their Chromebook in.
When all the Chromebooks are in the cart, be sure to check that they are properly plugged in, then close and lock the cart. Never share the lock code with students.
Step 2: Have students rate themselves daily on I can...Ask: How do we carry our Chromebooks to our seats? They answer, “With both hands.”Have the students rate themselves on this statement: I was able to successfully log in to my account and open a document.
1. I was never able to log in to my Chromebook. 2. I was able to log in, but was not able to open a document. 3. I was able to log in and open a document, but could not title
it.4. I was able to log in, open a document, type on it, and title it.
30
I Can...• use a Chromebook.• log on to CSDDocs on various devices.
ThemeLogging in on various devicesChromebook useCSDDocs login and use
Materials Needed• Chromebook cart• Class roster for each class with student numbers• Chromebook procedure poster• CSDDocs login template• Acrostic Name Poem pdf file• Log in Cards for each student with the complete CSDDocs Login (example-
[email protected] with password jumphat1)• Recommended: seating chart
Section 3
STANDARD
Students leverage technology to take an active role in choosing, achieving and demonstrating competency in their learning goals, informed by the learning sciences.
Grades 4-5
31

Notes and Resources• Chromebook procedure poster• CSDDocs login template• Acrostic Name Poem pdf file
Introduction
Step 1: Call to AttentionRemind the students of your call to attention.
Step 2: Review Rules and ExpectationsReview the lab rules as outlined in weeks 1 and 2.
Step 3: Starter Say: Today we will be using the Chromebooks. Please line up in number order while I hand you your numbered Chromebook.Share the Chromebook handling procedures, demonstrating each part:• Wait in line for your Chromebook.• Carry the Chromebook to your seat holding it with both
hands.
32
Lesson
Step 1: Show HowOpen a Chromebook. Project the Chromebook’s sign-in screen or hold up the device to show the students.Have them put their finger on the CSDDocs login on their login card. Do a visual scan of the room to make sure everyone understands where to find the login.For younger students, the classroom teacher or you should fill in the login cards for the students before class. Older students can fill in the blanks on their login cards themselves using the formula for CSDDocs logins:
1st letter of the first name + 1st 3 letters of the last name + last 4 numbers of the student number + @csddocs.org
Student passwords are usually a combination of two words and one number, unless students or their parents have changed them.
Step 2: Practice TogetherHave the students log in to their Chromebooks by typing the CSDDocs email address they learned on the first screen. Once it has been verified as correct by the teacher or a peer, have them click “next” and move to the password screen all together as a class.Students then type their password and click “log in”. Those who were unsuccessful should check their CSDDocs address and student number again.If login problems persist, teacher assistance may be needed. If there is a continued issue with verified, correct information, fill in a help ticket with the student’s name and student number by sending an email to [email protected] the students the main parts of the CSDDocs screen:
• the dock
• the Google suite of apps at the bottom of their screenHave the students open a document (blue icon at the bottom) and explore the typing tools available in a Google Doc.
Step 3: Independent PracticeHave the students explore the Google Doc app for a few minutes.Display the following pdf on the projector and have the students create their own name poem and type it into their open document:• Acrostic Name Poem pdf file
Show the students how to click the name of the document to rename it. Have them rename it Acrostic Poem Student Name. Show the students how they can access Google Drive by clicking the Google Drive icon in the dock at the bottom of the screen.Have the students show their neighbors their Acrostic poem.
33
Wrap Up
Step 1: Review StandardHave the students click the icon in the bottom right of the screen with their picture and “sign out”.Once signed out, students should then close their Chromebooks.Call students 5 at a time to put their Chromebooks back into the cart. Help them be sure to:• walk to the cart in an orderly fashion,• place their Chromebooks in the correct numbered slot,• and plug their Chromebooks in.
When all the Chromebooks are in the cart, be sure to check that they are properly plugged in, then close and lock the cart. Never share the lock code with students.
Step 2: Have students rate themselves daily on I can...Ask: How do we carry our Chromebooks to our seats? They answer “With both hands.”Have the students rate themselves on this statement: I was able to successfully log in to my account and open a document.
1. I was never able to log in to my Chromebook. 2. I was able to log in, but was not able to open a document. 3. I was able to log in and open a document, but could not title
it.4. I was able to log in, open a document, type on it, and title it.
34
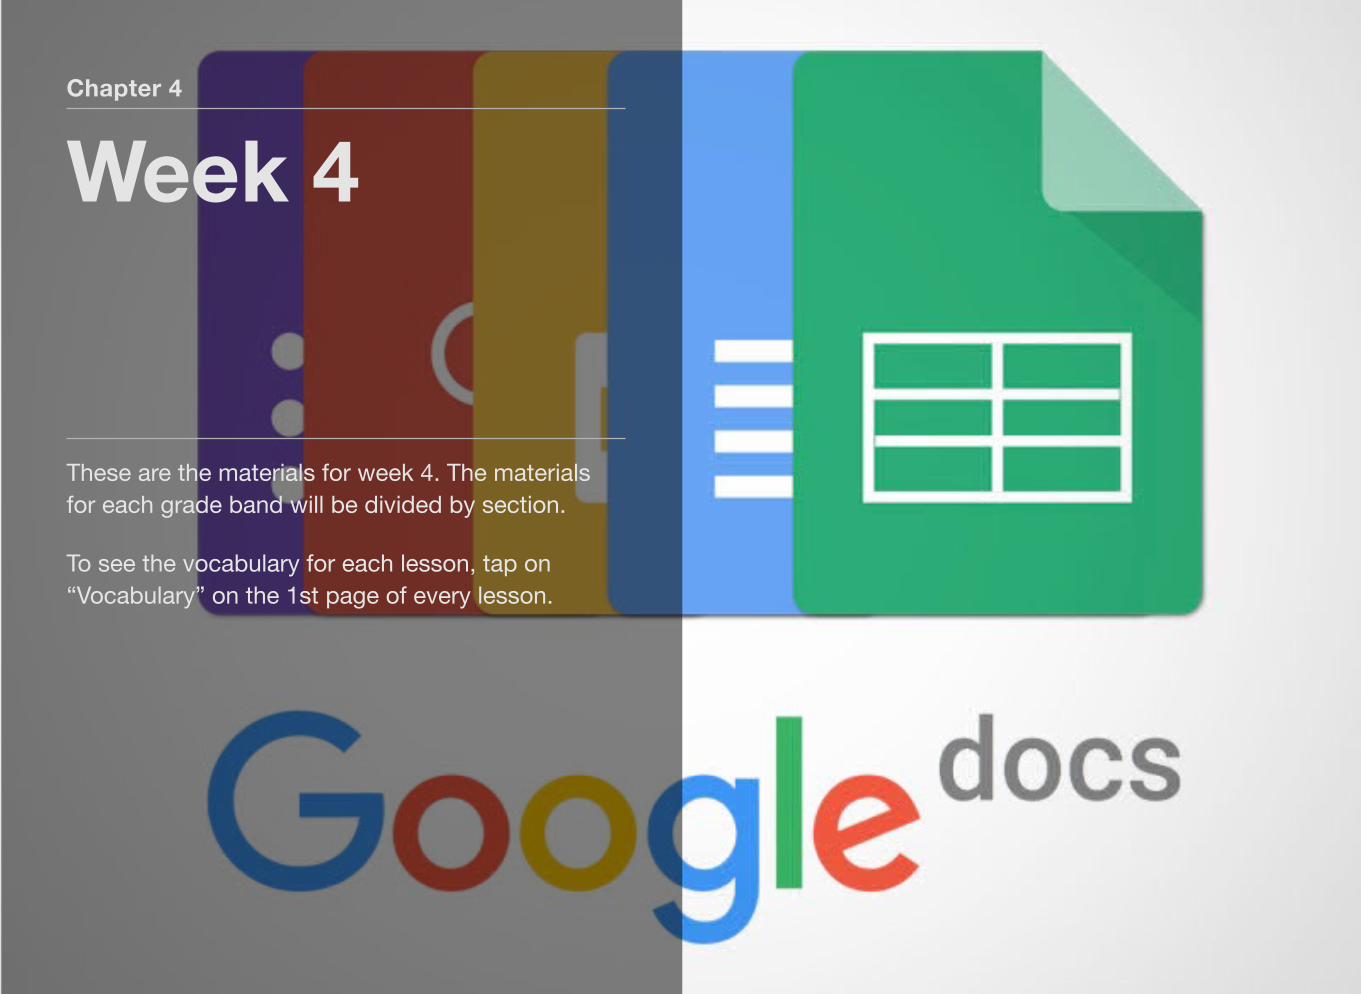
Chapter 4
Week 4
These are the materials for week 4. The materials for each grade band will be divided by section.
To see the vocabulary for each lesson, tap on “Vocabulary” on the 1st page of every lesson.
I Can...• follow lab rules and procedures.• log in on a computer.• launch and quit programs.• use the mouse to click and drag.• use the keyboard.
ThemeBasic mouse and keyboard skills
Materials Needed• Class rosters for each class with student numbers• Chart with lab rules• Login card for each student - (See materials for this week in Canvas course.)• Recommended: seating chart
Section 1
STANDARD
Students leverage technology to take an active role in choosing, achieving and demonstrating competency in their learning goals, informed by the learning sciences.
Grades K-1
36
Notes and Resources
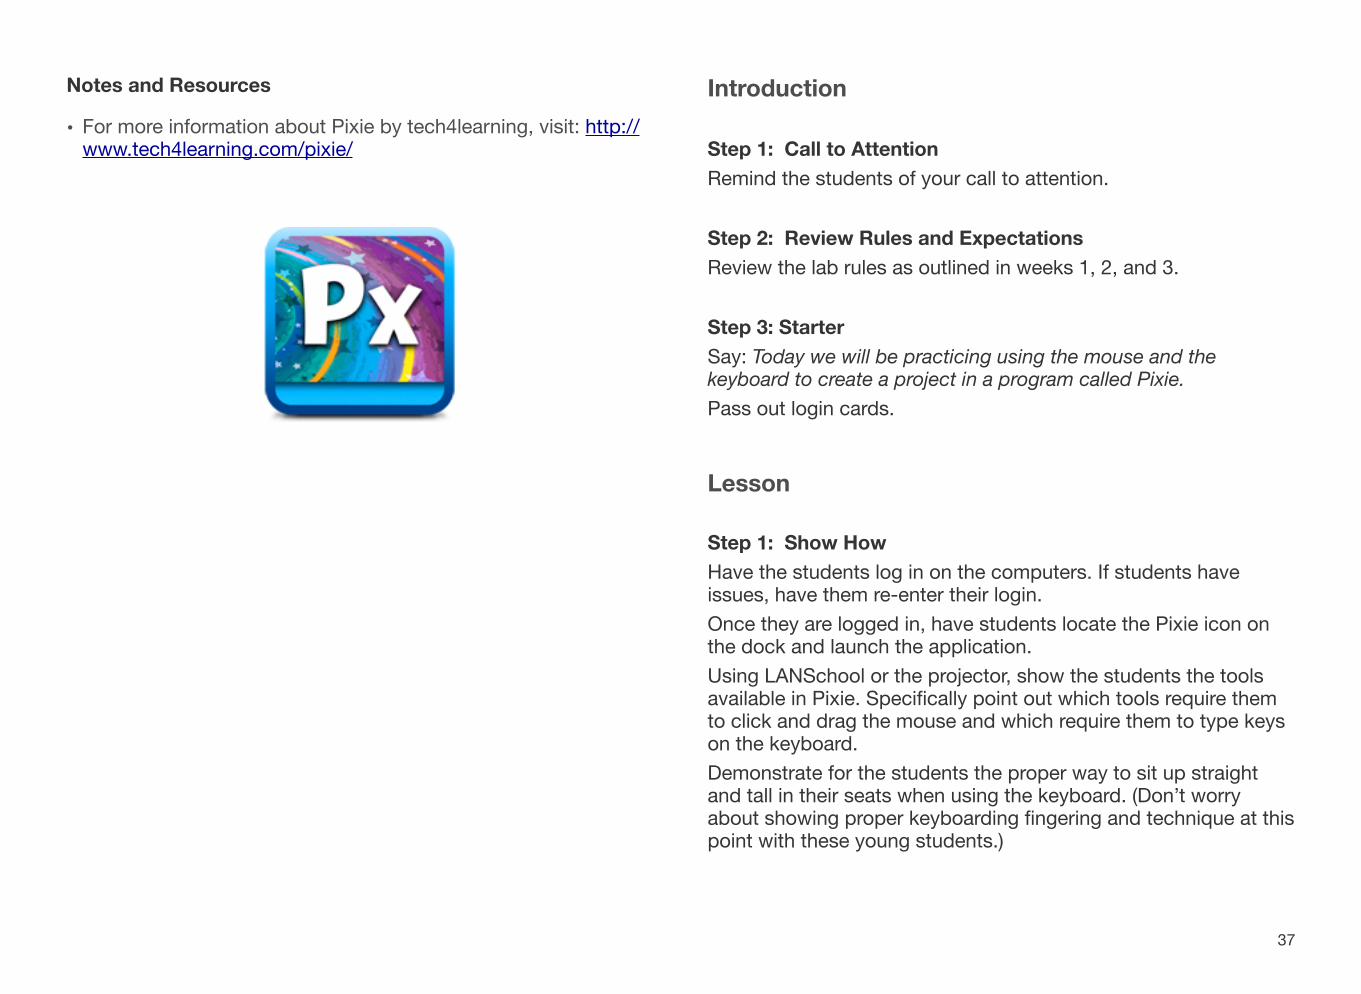
• For more information about Pixie by tech4learning, visit: http://www.tech4learning.com/pixie/
Introduction
Step 1: Call to AttentionRemind the students of your call to attention.
Step 2: Review Rules and ExpectationsReview the lab rules as outlined in weeks 1, 2, and 3.
Step 3: Starter Say: Today we will be practicing using the mouse and the keyboard to create a project in a program called Pixie.Pass out login cards.
Lesson
Step 1: Show HowHave the students log in on the computers. If students have issues, have them re-enter their login.Once they are logged in, have students locate the Pixie icon on the dock and launch the application.Using LANSchool or the projector, show the students the tools available in Pixie. Specifically point out which tools require them to click and drag the mouse and which require them to type keys on the keyboard.Demonstrate for the students the proper way to sit up straight and tall in their seats when using the keyboard. (Don’t worry about showing proper keyboarding fingering and technique at this point with these young students.)
37
Step 2: Practice TogetherHave the students explore the tools available in Pixie. Remind them to practice:• how to click and drag with the mouse when using paint and
shape tools, • how to click on the left side of the mouse when using stamp
tools,• and to use the typing tool and explore where the letters are on
the keyboard.
Step 3: Independent PracticeCall the students to attention. Ask them to erase their Pixie screen and create a new picture that includes the following:
1. Something they had to click and drag to create (like paint, markers, or shapes)
2. Something they had to click to create (like stamps)3. A text box with their name typed in it
Walk the room to check student work. Choose a couple of students and print their work to show to the class later. Have the students show their work to a table partner.When finished, have the students properly quit out of Pixie and log out of their computer. Remind them to clean up and leave their work area cleaner than they found it.
Wrap Up
Step 1: Review StandardShow the class the couple of sample Pixie projects you printed earlier. Have the students point out where they used the mouse and the keyboard to create the project.
Step 2: Have students rate themselves daily on I can...Ask students to rank themselves on a scale of 1 to 3 using their fingers:
1. I was not able to get into the Pixie program on my computer.2. I was able to get into Pixie and use the mouse, but I need
more practice using the keyboard.3. I was able to get into Pixie, use the mouse, and type my name
using the keyboard.
38
*NOTE: This lesson teaches CSDDocs login and use. If your school’s second graders do not yet use CSDDocs, you may choose to use the K-1 Week 4 lesson with them instead.
I Can...• log on to CSDDocs on various devices.
ThemeLogging in on various devicesCSDDocs login and use
Materials Needed• Class rosters for each class with student numbers• Creativity Lab login card for each student• Log in Cards for each student with the complete CSDDocs Login• Recommended: seating chart
Section 2
STANDARD
Students leverage technology to take an active role in choosing, achieving and demonstrating competency in their learning goals, informed by the learning sciences.
Grades 2-3
39

Notes and ResourcesIntroduction
Step 1: Call to AttentionRemind students of your call to attention.
Step 2: Review Rules and ExpectationsReview the lab procedures and expectations.
Step 3: Starter Say: Today we will be using the Creativity Lab computers to log into our CSDDocs account and create a Google Slides project. Please log in to your computer with your first.last name (refer to the log in cards) and your student number as your password.Hand out login cards.Wait for everyone to log in to the computer.
Lesson
Step 1: Show HowUsing the projector or LANschool, demonstrate for the students how to launch the Safari or Chrome application from the dock. Then type in the Web URL drive.google.com.The website should open Google Drive, which should send them to a Log in screen. Demonstrate how to log in to Google Drive using the student CSDDocs login ticket. You could log in using the account of an absent student or have a student from the class demonstrate with his/her account.
40

Step 2: Practice TogetherNow have the students open Safari or Chrome and go to drive.google.com and log in using their CSDDocs login card. (Note: It is best to have every student use the same web browser, so instruct them which one you would like them to use so they are all on Safari or all on Chrome.)Give the students a chance to log in. If anyone is having a problem, ask them first to retype their log in. If the problem persists, type it for them and see if the problem is with their accuracy in typing (it almost always is). If this does not resolve the issue, submit a help ticket. This can be done by emailing the student’s full name and student number to [email protected] using your Canyons District email. Once the students are logged in, have them click the red “New” button and choose the yellow “Google Slides”. This will open a new tab where their document will open.Tell the students to not close or “X” the Google Drive tab.Give the students 5-10 minutes to explore and create something new in their Google Slides Document. Allow students to help one another navigate the features of the document. Move around the room while they explore to offer help and answer questions.Stop the students after about 10 minutes and regain their attention.
Step 3: Independent PracticeHave the students close the browser and have only the desktop visible.Have the students open Safari or Chrome and go to drive.google.com again. If they can see their “untitled document” in their Google Drive, have them give a thumbs up to their neighbor. Walk around the room to see who has successfully done so.Evaluate who may need extra help in future classes. Be sure to take note and follow up next time you see the student.
Wrap Up
Step 1: Review StandardAsk students to log out of the computer and return their log in cards to you.Once all students have logged out and all cards have been collected, students should begin the self evaluation, asking the questions shown below.
Step 2: Have kids rate themselves daily on I can...Ask: What is the name of the place where your new document is stored? They answer: Google Drive.Have students rate themselves on the following statement: I was able to successfully log in to my CSDDocs account, create a Slides document, and see it again in my Google Drive.
1. I was never able to log in to my CSDDocs account. 2. I was able to log in, but I could not open a Slides document. 3. I was able to log in and open a Slides document, but I never
found it again in my Google Drive. 4. I was able to log in, open a Slides document, and see it again
in my Google Drive.
41
I Can...• log on to CSDDocs on various devices.
ThemeLogging in on various devicesCSDDocs login and use
Materials Needed• Class rosters for each class with student numbers• Creativity Lab login card for each student• Log in Cards for each student with the complete CSDDocs Login• Recommended: seating chart
Section 3
STANDARD
Students leverage technology to take an active role in choosing, achieving and demonstrating competency in their learning goals, informed by the learning sciences.
Grades 4-5
42
Notes and Resources Introduction
Step 1: Call to AttentionRemind students of your call to attention.
Step 2: Review Rules and ExpectationsReview the lab procedures and expectations.
Step 3: Starter Say: Today we will be using the Creativity Lab computers to log into our CSDDocs account and create a Google Slides project. Please log in to your computer with your first.last name (refer to the log in cards) and your student number as your password.Hand out login cards.Wait for everyone to log in to the computer.
Lesson
Step 1: Show HowUsing the projector or LANschool, demonstrate for the students how to launch the Safari or Chrome application from the dock. Then type in the Web URL drive.google.com.The website should open Google Drive, which should send them to a Log in screen. Demonstrate how to log in to Google Drive using the student CSDDocs login ticket. You could log in using the account of an absent student or have a student from the class demonstrate with his/her account.
43
Step 2: Practice TogetherNow have the students open Safari or Chrome and go to drive.google.com and log in using their CSDDocs login card. (Note: It is best to have every student use the same web browser, so instruct them which one you would like them to use so they are all on Safari or all on Chrome.)Give the students a chance to log in. If anyone is having a problem, ask them first to retype their log in. If the problem persists, type it for them and see if the problem is with their accuracy in typing (it almost always is). If this does not resolve the issue, submit a help ticket. This can be done by emailing the student’s full name and student number to [email protected] using your Canyons District email. Once the students are logged in, have them click the red “New” button and choose the yellow “Google Slides”. This will open a new tab where their document will open.Tell the students to not close or “X” the Google Drive tab.Give the students 5-10 minutes to explore and create something new in their Google Slides Document. Allow students to help one another navigate the features of the document. Move around the room while they explore to offer help and answer questions.Stop the students after about 10 minutes and regain their attention.
Step 3: Independent PracticeHave the students close the browser and have only the desktop visible.Have the students open Safari or Chrome and go to drive.google.com again. If they can see their “untitled document” in their Google Drive, have them give a thumbs up to their neighbor. Walk around the room to see who has successfully done so.Evaluate who may need extra help in future classes. Be sure to take note and follow up next time you see the student.
Wrap Up
Step 1: Review StandardAsk students to log out of the computer and return their log in cards to you.Once all students have logged out and all cards have been collected, students should begin the self evaluation, asking the questions shown below.
Step 2: Have kids rate themselves daily on I can...Ask: What is the name of the place where your new document is stored? They answer: Google Drive.Have students rate themselves on the following statement: I was able to successfully log in to my CSDDocs account, create a Slides document, and see it again in my Google Drive.
1. I was never able to log in to my CSDDocs account. 2. I was able to log in, but I could not open a Slides document. 3. I was able to log in and open a Slides document, but I never
found it again in my Google Drive. 4. I was able to log in, open a Slides document, and see it again
in my Google Drive.
44
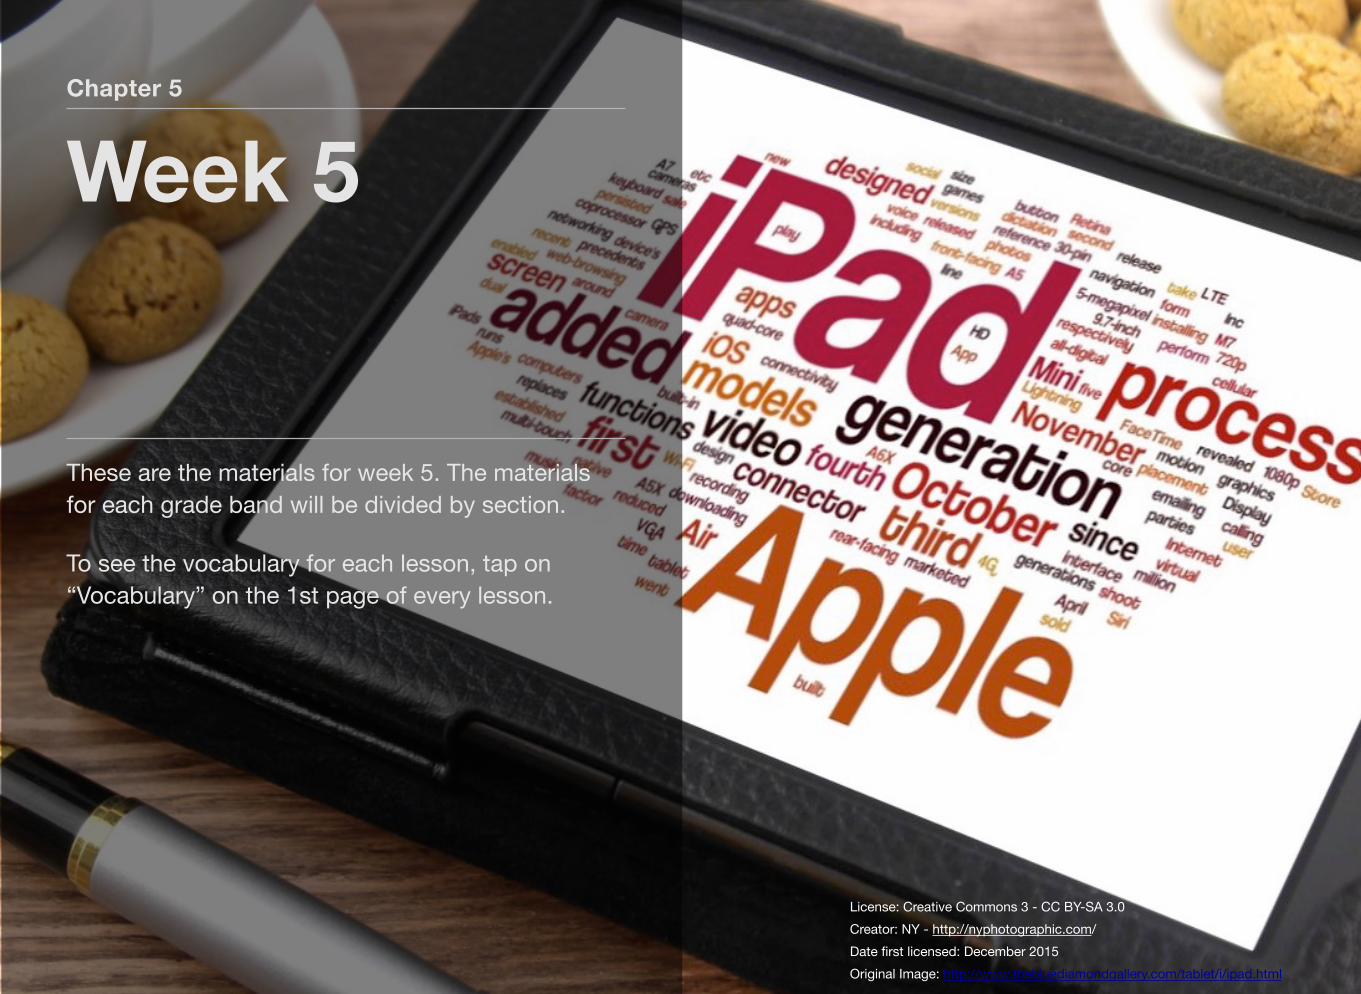
Chapter 5
Week 5
These are the materials for week 5. The materials for each grade band will be divided by section.
To see the vocabulary for each lesson, tap on “Vocabulary” on the 1st page of every lesson.
License: Creative Commons 3 - CC BY-SA 3.0Creator: NY - http://nyphotographic.com/Date first licensed: December 2015Original Image: http://www.thebluediamondgallery.com/tablet/i/ipad.html
I Can...• open and close apps on an iPad.
ThemeiPad use
Materials Needed• iPad Lab• Class rosters for each class with student numbers• Chart with lab rules• Recommended: seating chart
Vocabulary
Section 1
STANDARD
Students leverage technology to take an active role in choosing, achieving and demonstrating competency in their learning goals, informed by the learning sciences.
Grades K-1
46
Notes and Resources
• Any of the following free apps can be used in this lesson. Decide on a few you would like to use, and contact your school’s Ed Tech Specialist before teaching this lesson to ensure these apps are loaded onto your school’s student iPads.• ScreenChomp• Magnetic Alphabet• Virtuoso• Soundrop• Any other quick, educational tools for young students.
Introduction
Step 1: Call to AttentionRemind the students of your call to attention.
Step 2: Review Rules and ExpectationsReview the lab procedures and expectations.
Step 3: Starter Say:Today we will be using the iPads. When instructed, you will come to the iPad cart and be handed your iPad. Carry the iPad with two hands back to your seat. Place the iPad on your desk and do not open the cover until instructed to do so.
Lesson
Step 1: Show HowHold an iPad up in front of the class. Demonstrate the following:• how to use the home button• how to use the volume buttons• how to unlock and navigate the iPad• how to open an app on the iPad• how to close an app by pressing the home button• how to close all apps by double-clicking on the home button,
then swiping up on the open apps to close them out
47
Step 2: Practice TogetherHave the students follow along with you as you repeat what you showed them in Step 1. If any are struggling, have them ask a partner to help them.
Step 3: Independent PracticeHave the students practice opening any of the following apps on their own:• ScreenChomp• Magnetic Alphabet• Virtuoso• Soundrop
They may quickly try each app, then have them practice closing out of each app and closing out of all apps.Have 5 students at a time bring the iPads back to you at the cart. Help them place their iPads in the correct numbered slots and properly plug the iPads in. Remind them what proper behavior looks like while waiting their turn and walking to and from the cart.
Wrap Up
Step 1: Review StandardAsk students to repeat back to you what they did on the iPad today:
• Open cover• Tap on apps to open them• Click the home button to close apps• Double-click the home button to show all open apps and
swipe up on apps to close them out• Properly return iPads to the cart
Step 2: Have the students rate themselves daily on I can...Have students give a thumbs up if they were able to do everything on the list of iPad skills in Step 1.Have students give a thumbs down if they were not able to do everything on the list of iPad skills in Step 1.
48
*NOTE: This lesson teaches CSDDocs login and use. If your school’s second graders do not yet use CSDDocs, you may choose to use the K-1 Week 4 lesson with them instead.
I Can...• log on to CSDDocs on various devices.• open and close apps on an iPad.
ThemeiPad useCSDDocs login and use
Materials Needed• iPad Lab• Google Drive app• Google Slides app• Class rosters for each class with student numbers• Chart with lab rules• Recommended: seating chart • Log in cards for each student with the complete CSDDocs Login
Section 2
STANDARD
Students leverage technology to take an active role in choosing, achieving and demonstrating competency in their learning goals, informed by the learning sciences.
Grades 2-3
49
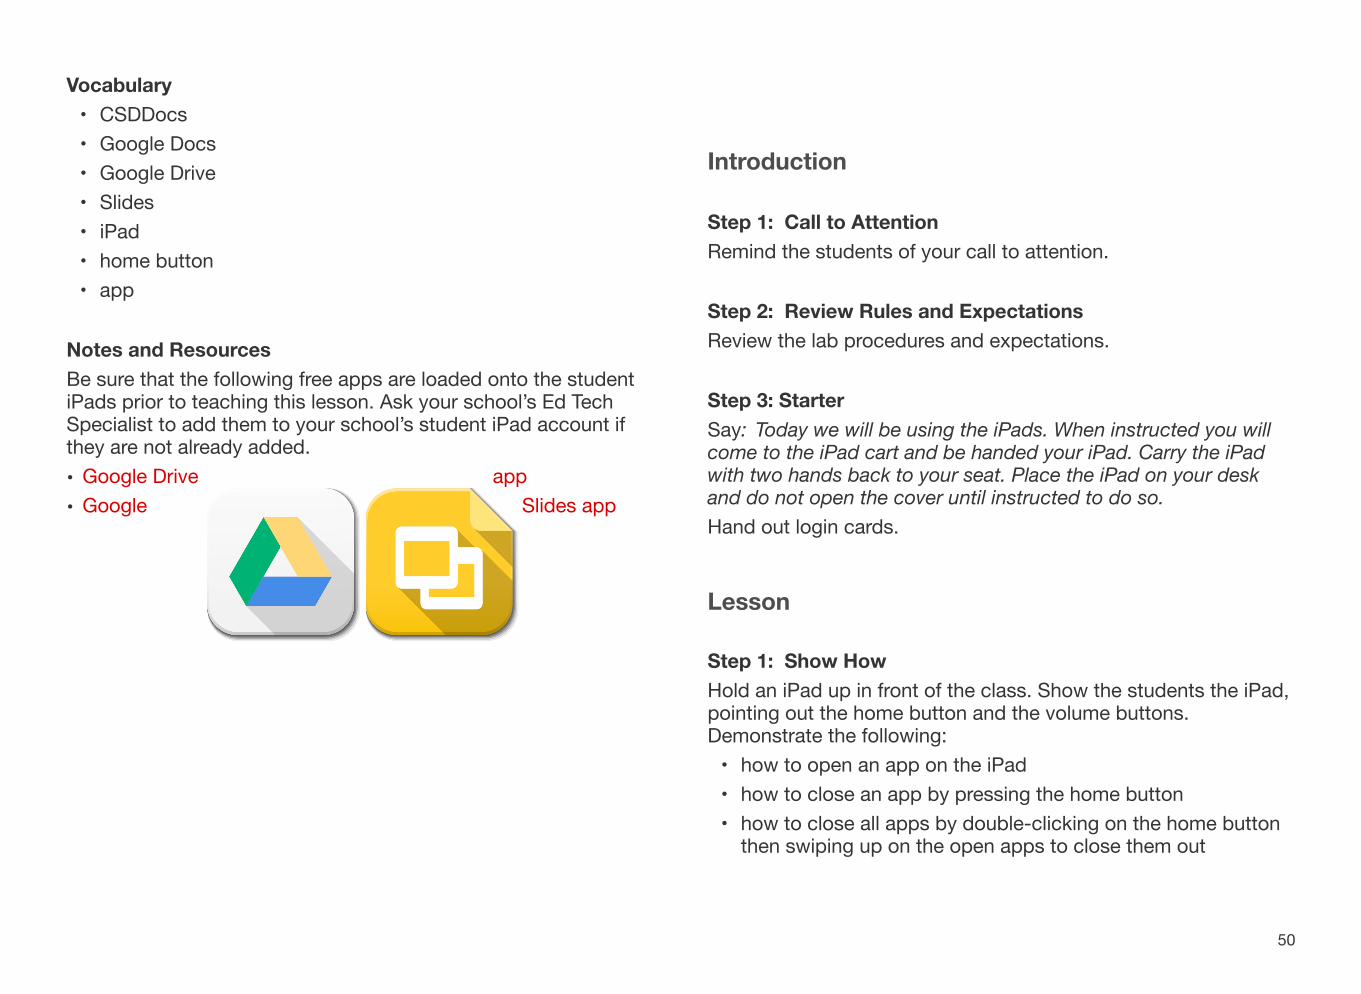
Vocabulary• CSDDocs• Google Docs• Google Drive• Slides• iPad• home button• app
Notes and ResourcesBe sure that the following free apps are loaded onto the student iPads prior to teaching this lesson. Ask your school’s Ed Tech Specialist to add them to your school’s student iPad account if they are not already added.• Google Drive app• Google Slides app
Introduction
Step 1: Call to AttentionRemind the students of your call to attention.
Step 2: Review Rules and ExpectationsReview the lab procedures and expectations.
Step 3: Starter Say:Today we will be using the iPads. When instructed you will come to the iPad cart and be handed your iPad. Carry the iPad with two hands back to your seat. Place the iPad on your desk and do not open the cover until instructed to do so. Hand out login cards.
Lesson
Step 1: Show HowHold an iPad up in front of the class. Show the students the iPad, pointing out the home button and the volume buttons. Demonstrate the following:• how to open an app on the iPad• how to close an app by pressing the home button• how to close all apps by double-clicking on the home button
then swiping up on the open apps to close them out
50
Show the students what the Google Drive app looks like. Open the Drive app and show them how to log in to CSDDocs in the Drive app.
Step 2: Practice TogetherHave the students open up the iPads then find and open the Drive app. Have them log in to the Drive app. They should see any documents previously created.Have them log out of the Drive app then close out of the app.Finally, have them close any other open apps by double-clicking on the home button and swiping up to clear any apps.
Step 3: Independent PracticeIf time permits, have the students log back into the Drive app. Have them find the untitled Slides project they created in the Week 4 lesson. Have the students do the following:• Tap on the untitled Slides presentation to open it.• Tap on the add slide button and create a new slide in the
presentation. (The add slide button is located in the bottom right corner of the screen. It has a picture of a slide and a +.)
• Explore the tools available in the Slides app. Add any elements you choose (text, images, colors) to the new slide.
• Tap the arrow in the upper left corner of the screen to go back to this list of your presentations.
• Tap on the 3 dots next to “Untitled presentation”, then tap “Rename”. Type a new name for the presentation and tap “Rename”.
You should walk around to monitor the group and make sure they are performing the correct tasks.When finished, have the students close the Drive app by pressing the home button. Have them close any other open apps by
double-clicking on the home button and swiping up to clear any apps. Have the students return their iPads to the correct numbered slots in the iPad cart. Direct the students to make sure the iPads are returned in an orderly fashion, placed correctly, and plugged in.
Wrap Up
Step 1: Review StandardAsk the students to repeat back to you what they did on the iPad today:
• Open the cover • Tap on Drive app to open it• Log into and out of the Drive app• Click the home button to close the app• Double-click the home button to show all open apps, and
swipe up on the apps to close them out
Step 2: Have the students rate themselves daily on I can...Have the students give a thumbs up if they were able to do everything asked on the iPads today. Have the students give a thumbs down if they were not able to do everything asked on the iPads today.
51
I Can...• log on to CSDDocs on various devices.• open and close apps on an iPad.
ThemeiPad useCSDDocs login and use
Materials Needed• iPad Lab• Google Drive app• Google Slides app• Class rosters for each class with student numbers• Chart with lab rules• Recommended: seating chart • Log in cards for each student with the complete CSDDocs Login
Section 3
STANDARD
Students leverage technology to take an active role in choosing, achieving and demonstrating competency in their learning goals, informed by the learning sciences.
Grades 4-5
52
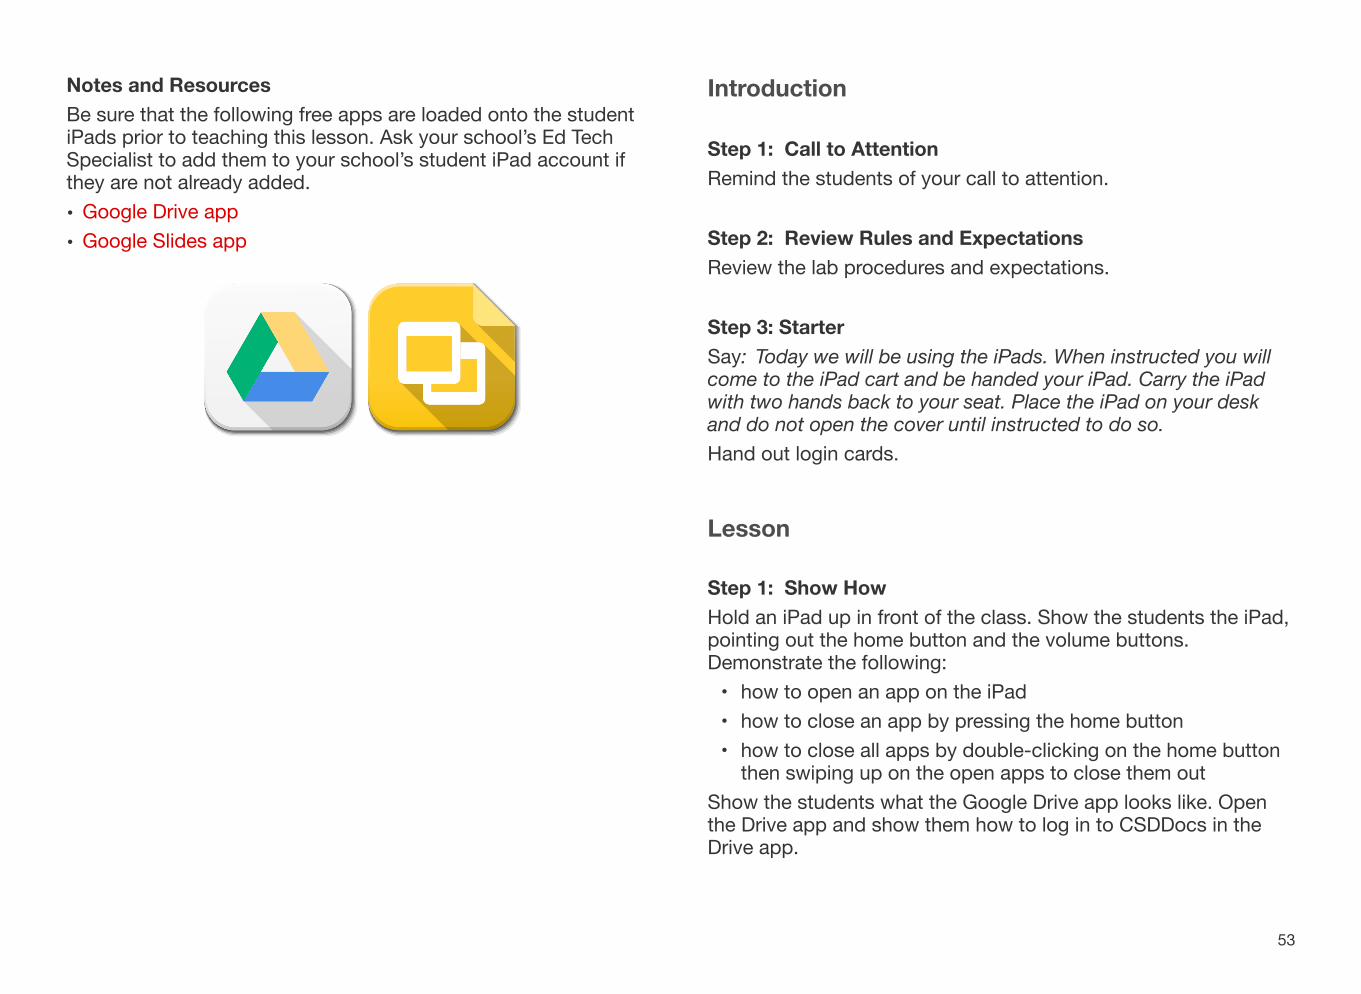
Notes and ResourcesBe sure that the following free apps are loaded onto the student iPads prior to teaching this lesson. Ask your school’s Ed Tech Specialist to add them to your school’s student iPad account if they are not already added.• Google Drive app• Google Slides app
Introduction
Step 1: Call to AttentionRemind the students of your call to attention.
Step 2: Review Rules and ExpectationsReview the lab procedures and expectations.
Step 3: Starter Say:Today we will be using the iPads. When instructed you will come to the iPad cart and be handed your iPad. Carry the iPad with two hands back to your seat. Place the iPad on your desk and do not open the cover until instructed to do so. Hand out login cards.
Lesson
Step 1: Show HowHold an iPad up in front of the class. Show the students the iPad, pointing out the home button and the volume buttons. Demonstrate the following:• how to open an app on the iPad• how to close an app by pressing the home button• how to close all apps by double-clicking on the home button
then swiping up on the open apps to close them outShow the students what the Google Drive app looks like. Open the Drive app and show them how to log in to CSDDocs in the Drive app.
53
Step 2: Practice TogetherHave the students open up the iPads then find and open the Drive app. Have them log in to the Drive app. They should see any documents previously created.Have them log out of the Drive app then close out of the app.Finally, have them close any other open apps by double-clicking on the home button and swiping up to clear any apps.
Step 3: Independent PracticeIf time permits, have the students log back into the Drive app. Have them find the untitled Slides project they created in the Week 4 lesson. Have the students do the following:• Tap on the untitled Slides presentation to open it.• Tap on the add slide button and create a new slide in the
presentation. (The add slide button is located in the bottom right corner of the screen. It has a picture of a slide and a +.)
• Explore the tools available in the Slides app. Add any elements you choose (text, images, colors) to the new slide.
• Tap the arrow in the upper left corner of the screen to go back to this list of your presentations.
• Tap on the 3 dots next to “Untitled presentation”, then tap “Rename”. Type a new name for the presentation and tap “Rename”.
You should walk around to monitor the group and make sure they are performing the correct tasks.When finished, have the students close the Drive app by pressing the home button. Have them close any other open apps by double-clicking on the home button and swiping up to clear any apps. Have the students return their iPads to the correct numbered slots in the iPad cart. Direct the students to make sure the iPads are returned in an orderly fashion, placed correctly, and plugged in.
Wrap Up
Step 1: Review StandardAsk the students to repeat back to you what they did on the iPad today:
• Open the cover • Tap on Drive app to open it• Log into and out of the Drive app• Click the home button to close the app• Double-click the home button to show all open apps, and
swipe up on the apps to close them out
Step 2: Have the students rate themselves daily on I can...Have the students give a thumbs up if they were able to do everything asked on the iPads today. Have the students give a thumbs down if they were not able to do everything asked on the iPads today.
54


