Embed Size (px)
Citation preview
Emergency Care
CHAPTER
Copyright © 2016, 2012, 2009 by Pearson Education, Inc.All Rights Reserved
Emergency Care, 13eDaniel Limmer | Michael F. O'Keefe
THIRTEENTH EDITION
The Secondary Assessment
14
Copyright © 2016, 2012, 2009 by Pearson Education, Inc.All Rights Reserved
Emergency Care, 13eDaniel Limmer | Michael F. O'Keefe
Multimedia Directory
Slide 58 Physical Examination Techniques VideoSlide 101 Trauma Patient Assessment VideoSlide 148 Decision-Making Information VideoSlide 152 Leadership VideoSlide 153 Delegating Authority Video
Copyright © 2016, 2012, 2009 by Pearson Education, Inc.All Rights Reserved
Emergency Care, 13eDaniel Limmer | Michael F. O'Keefe
Topics
• The Secondary Assessment• Body System Examinations• Secondary Assessment of the Medical
Patient• Secondary Assessment of the Trauma
Patient• Detailed Physical Exam
continued on next slide
Copyright © 2016, 2012, 2009 by Pearson Education, Inc.All Rights Reserved
Emergency Care, 13eDaniel Limmer | Michael F. O'Keefe
Topics
• Reassessment• Critical Thinking and Decision Making
Copyright © 2016, 2012, 2009 by Pearson Education, Inc.All Rights Reserved
Emergency Care, 13eDaniel Limmer | Michael F. O'Keefe
The Secondary Assessment
Copyright © 2016, 2012, 2009 by Pearson Education, Inc.All Rights Reserved
Emergency Care, 13eDaniel Limmer | Michael F. O'Keefe
Components of the Secondary Assessment
• Physical examination• Patient history History of the present illness (HPI) Past medical history (PMH)
• Vital signs
continued on next slide
Copyright © 2016, 2012, 2009 by Pearson Education, Inc.All Rights Reserved
Emergency Care, 13eDaniel Limmer | Michael F. O'Keefe
Components of the Secondary Assessment
• Sign Something you can see
• Symptom Something the patient tell you
• Reassessment is a continual process.
Copyright © 2016, 2012, 2009 by Pearson Education, Inc.All Rights Reserved
Emergency Care, 13eDaniel Limmer | Michael F. O'Keefe
Techniques of Assessment
• History-taking techniques Ask open-ended questions Use mnemonics
• SAMPLE• OPQRST
continued on next slide
Copyright © 2016, 2012, 2009 by Pearson Education, Inc.All Rights Reserved
Emergency Care, 13eDaniel Limmer | Michael F. O'Keefe
Techniques of Assessment
• Physical examination techniques Observe Auscultate Palpate
Copyright © 2016, 2012, 2009 by Pearson Education, Inc.All Rights Reserved
Emergency Care, 13eDaniel Limmer | Michael F. O'Keefe
Techniques of Assessment
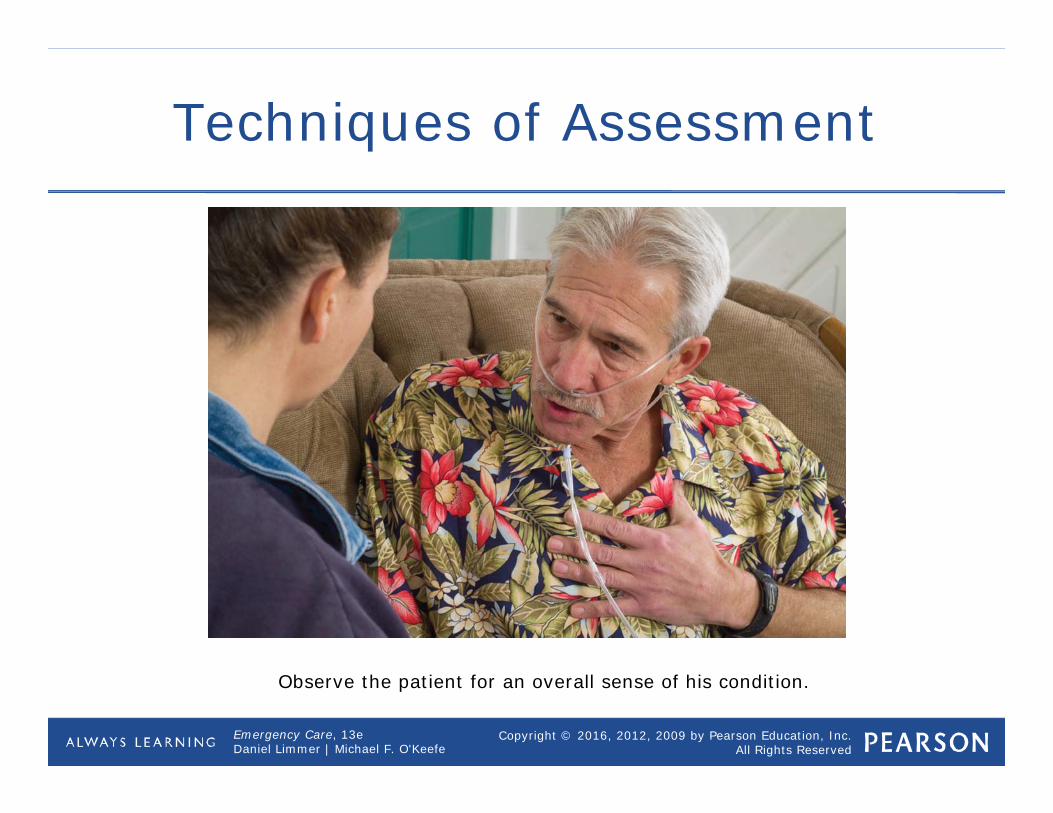
Observe the patient for an overall sense of his condition.
Copyright © 2016, 2012, 2009 by Pearson Education, Inc.All Rights Reserved
Emergency Care, 13eDaniel Limmer | Michael F. O'Keefe
Body System Examinations
Copyright © 2016, 2012, 2009 by Pearson Education, Inc.All Rights Reserved
Emergency Care, 13eDaniel Limmer | Michael F. O'Keefe
Respiratory System
• The most important determination when assessing the respiratory system is whether patient is breathing adequately.
Copyright © 2016, 2012, 2009 by Pearson Education, Inc.All Rights Reserved
Emergency Care, 13eDaniel Limmer | Michael F. O'Keefe
Respiratory Assessment—History
• Obtain history of existing respiratory conditions and medications taken for each.
• Determine if medications have been taken as prescribed.
• Determine if signs and symptoms of this episode match previous episodes.
Copyright © 2016, 2012, 2009 by Pearson Education, Inc.All Rights Reserved
Emergency Care, 13eDaniel Limmer | Michael F. O'Keefe
Respiratory Assessment—Physical Examination
• Mental status• Level of respiratory distress• Chest wall motion• Auscultate lung sounds• Use pulse oximetry• Observe edema• Fever
Copyright © 2016, 2012, 2009 by Pearson Education, Inc.All Rights Reserved
Emergency Care, 13eDaniel Limmer | Michael F. O'Keefe
Cardiovascular System
• Heart• Blood vessels• Cardiac patient and patient in shock or
with a vascular problem
Copyright © 2016, 2012, 2009 by Pearson Education, Inc.All Rights Reserved
Emergency Care, 13eDaniel Limmer | Michael F. O'Keefe
Cardiovascular System—History
• Existing cardiac conditions and medications
• Signs and symptoms of episode • Description of chest pain using OPQRST• Determine specific characteristics of
pain
Copyright © 2016, 2012, 2009 by Pearson Education, Inc.All Rights Reserved
Emergency Care, 13eDaniel Limmer | Michael F. O'Keefe
Cardiovascular System—Physical Examination
• Look for signs condition may be severe.• Obtain pulse.• Obtain blood pressure.• Note pulse pressure.• Look for jugular vein distention (JVD).• Palpate the chest.• Observe posture and breathing.
Copyright © 2016, 2012, 2009 by Pearson Education, Inc.All Rights Reserved
Emergency Care, 13eDaniel Limmer | Michael F. O'Keefe
Nervous System
• Mental status• Signs of dysfunction in the body
Copyright © 2016, 2012, 2009 by Pearson Education, Inc.All Rights Reserved
Emergency Care, 13eDaniel Limmer | Michael F. O'Keefe
Neurologic Assessment—History
• Determine patient's mental status.• Determine patient's normal state of
mental functioning.• Obtain history of neurologic conditions.• Note patient's speech.
Copyright © 2016, 2012, 2009 by Pearson Education, Inc.All Rights Reserved
Emergency Care, 13eDaniel Limmer | Michael F. O'Keefe
Neurologic Assessment—Physical Examination
• Perform a stroke scale.• Check peripheral sensation and
movement.• Gently palpate the spine.• Check extremity strength.• Check patient's pupils for equality and
reactivity.

Copyright © 2016, 2012, 2009 by Pearson Education, Inc.All Rights Reserved
Emergency Care, 13eDaniel Limmer | Michael F. O'Keefe
Endocrine System
• The most common endocrine emergency is the diabetic patient.
Copyright © 2016, 2012, 2009 by Pearson Education, Inc.All Rights Reserved
Emergency Care, 13eDaniel Limmer | Michael F. O'Keefe
Endocrine Assessment—History
• Diabetes mellitus or thyroid disease history
• Current medications and whether being taken properly
• Whether patient has eaten or exerted energy at an unusual level
• Whether patient is sick• Whether patient has taken blood
glucose or uses insulin pump
Copyright © 2016, 2012, 2009 by Pearson Education, Inc.All Rights Reserved
Emergency Care, 13eDaniel Limmer | Michael F. O'Keefe
Endocrine Assessment—Physical Examination
• Evaluate patient's mental status.• Observe the patient's skin.• Obtain a blood glucose level.• Look for an insulin pump.
Copyright © 2016, 2012, 2009 by Pearson Education, Inc.All Rights Reserved
Emergency Care, 13eDaniel Limmer | Michael F. O'Keefe
Gastrointestinal System
• Looking for: What goes in What comes out What it looks like when it comes out
Copyright © 2016, 2012, 2009 by Pearson Education, Inc.All Rights Reserved
Emergency Care, 13eDaniel Limmer | Michael F. O'Keefe
Gastrointestinal Assessment—History
• Oral intake• Pain• Gastrointestinal issues• Vomiting• Bowel movements
Copyright © 2016, 2012, 2009 by Pearson Education, Inc.All Rights Reserved
Emergency Care, 13eDaniel Limmer | Michael F. O'Keefe
Gastrointestinal Assessment—Physical Examination
• Observe patient's position.• Assess the abdomen.• Inspect other parts of the
gastrointestinal system.• Inspect vomitus or feces if available.
Copyright © 2016, 2012, 2009 by Pearson Education, Inc.All Rights Reserved
Emergency Care, 13eDaniel Limmer | Michael F. O'Keefe
Immune System
• Allergic reaction most relevant for EMS Anaphylaxis
Copyright © 2016, 2012, 2009 by Pearson Education, Inc.All Rights Reserved
Emergency Care, 13eDaniel Limmer | Michael F. O'Keefe
Immune System—Patient History
• History of allergies If so, what are typical reactions like?
• Symptoms of tightness in chest or throat
• Medications for allergic reaction
Copyright © 2016, 2012, 2009 by Pearson Education, Inc.All Rights Reserved
Emergency Care, 13eDaniel Limmer | Michael F. O'Keefe
Immune System—Physical Examination
• Perform physical examination Inspect point of contact with allergen. Inspect patient's skin for hives. Inspect the face, lips, and mouth for
swelling. Listen to lungs to assure adequate
breathing.
Copyright © 2016, 2012, 2009 by Pearson Education, Inc.All Rights Reserved
Emergency Care, 13eDaniel Limmer | Michael F. O'Keefe
Musculoskeletal System
• Medical diseases in this system are rare.
• Bones most important aspect to assess
Copyright © 2016, 2012, 2009 by Pearson Education, Inc.All Rights Reserved
Emergency Care, 13eDaniel Limmer | Michael F. O'Keefe
Musculoskeletal Assessment—History
• Prior injuries• Whether patient takes blood-thinning
medication• History to determine if a medical
problem caused the traumatic injury
Copyright © 2016, 2012, 2009 by Pearson Education, Inc.All Rights Reserved
Emergency Care, 13eDaniel Limmer | Michael F. O'Keefe
Musculoskeletal Assessment—Physical Examination
• Inspect for signs of injury, such as deformity.
• Palpate areas with suspected injury.• Compare sides for symmetry.• Be alert for crepitation.• Assess patient head-to-toe if there are
multiple injuries or if the patient is unresponsive.
Copyright © 2016, 2012, 2009 by Pearson Education, Inc.All Rights Reserved
Emergency Care, 13eDaniel Limmer | Michael F. O'Keefe
Secondary Assessmentof the Medical Patient
Copyright © 2016, 2012, 2009 by Pearson Education, Inc.All Rights Reserved
Emergency Care, 13eDaniel Limmer | Michael F. O'Keefe
Secondary Assessmentof the Medical Patient
• Assessment varies depending on patient's ability to communicate. Responsive medical patient
• Focus on chief complaint. Unresponsive medical patient
• Focus on physical findings.
Copyright © 2016, 2012, 2009 by Pearson Education, Inc.All Rights Reserved
Emergency Care, 13eDaniel Limmer | Michael F. O'Keefe
Responsive Medical Patient
• Take a history of present illness.• Take a past medical history• Perform physical exam.• Obtain baseline vital signs.• Administer interventions and transport
the patient.
Copyright © 2016, 2012, 2009 by Pearson Education, Inc.All Rights Reserved
Emergency Care, 13eDaniel Limmer | Michael F. O'Keefe
Take a History of the Present Illness
• Obtain from patient.• Obtain from family or bystanders.• Ask open-ended questions.
continuedcontinued on next slide
Copyright © 2016, 2012, 2009 by Pearson Education, Inc.All Rights Reserved
Emergency Care, 13eDaniel Limmer | Michael F. O'Keefe
Take a History of the Present Illness
• Chief complaint Why patient activated EMS What is bothering patient most
continued on next slide
Copyright © 2016, 2012, 2009 by Pearson Education, Inc.All Rights Reserved
Emergency Care, 13eDaniel Limmer | Michael F. O'Keefe
Take a History of the Present Illness
• Onset What were you doing when the pain
started?• Provocation Does anything trigger pain?
• Quality Describe the pain.
continued on next slide
Copyright © 2016, 2012, 2009 by Pearson Education, Inc.All Rights Reserved
Emergency Care, 13eDaniel Limmer | Michael F. O'Keefe
Take a History of the Present Illness
• Region, Relief Where is pain? Does it seem to spread
or shoot anywhere?• Severity How bad is pain? (1–10 scale)
• Time When did pain start?
Copyright © 2016, 2012, 2009 by Pearson Education, Inc.All Rights Reserved
Emergency Care, 13eDaniel Limmer | Michael F. O'Keefe
Take a Past Medical History
• Symptoms• Allergies• Medications• Pertinent past history• Last oral intake• Events leading to illness
Copyright © 2016, 2012, 2009 by Pearson Education, Inc.All Rights Reserved
Emergency Care, 13eDaniel Limmer | Michael F. O'Keefe
Tailoring the Physical Examfor Specific Chief Complaints
• Important information can be gained by tailoring history to patient's chief complaint.
• Ask questions pertinent to chief complaint
• Body systems approach Focus questioning and examination on
particular body system most likely involved.
Copyright © 2016, 2012, 2009 by Pearson Education, Inc.All Rights Reserved
Emergency Care, 13eDaniel Limmer | Michael F. O'Keefe
Pediatric Note
• Get on same level with child.• Put questions in simple language.• Gather information from caregivers.
Copyright © 2016, 2012, 2009 by Pearson Education, Inc.All Rights Reserved
Emergency Care, 13eDaniel Limmer | Michael F. O'Keefe
Perform a Physical Exam
• Usually brief• Examine areas of concern based on
chief complaint.
Copyright © 2016, 2012, 2009 by Pearson Education, Inc.All Rights Reserved
Emergency Care, 13eDaniel Limmer | Michael F. O'Keefe
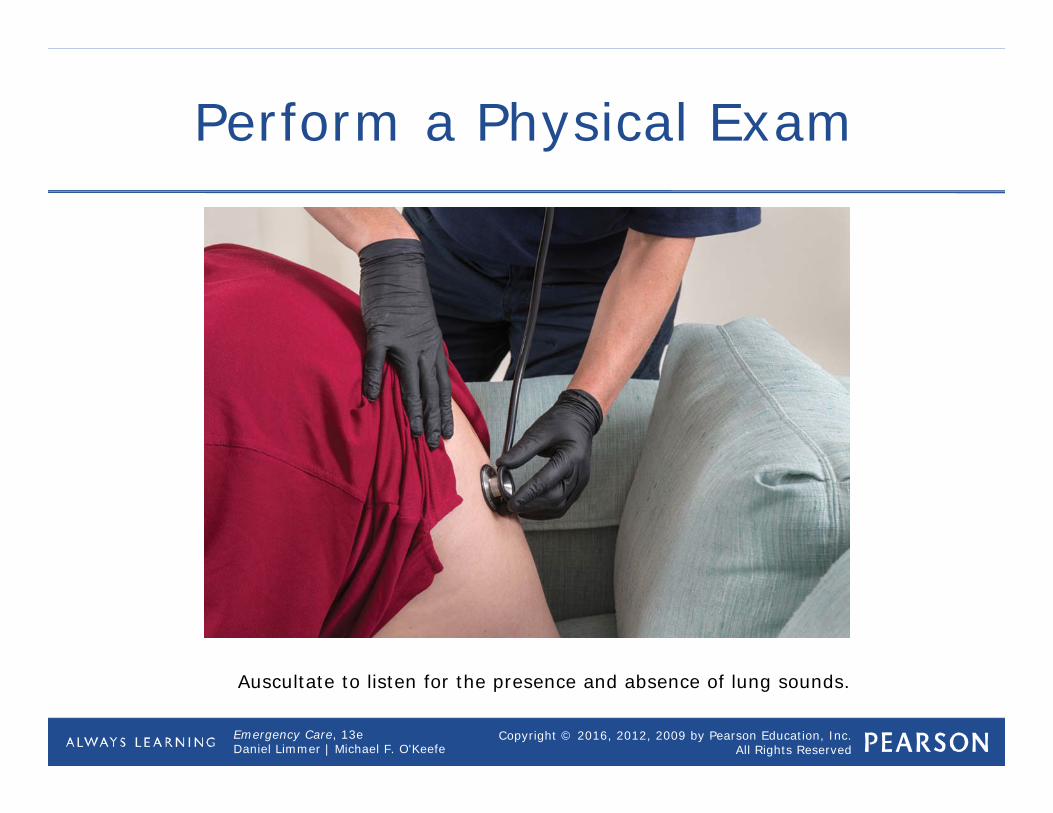
Perform a Physical Exam
Auscultate to listen for the presence and absence of lung sounds.
Copyright © 2016, 2012, 2009 by Pearson Education, Inc.All Rights Reserved
Emergency Care, 13eDaniel Limmer | Michael F. O'Keefe
Obtain Baseline Vital Signs
• Essential to assessment of medical patient
• Later assessments of vital signs will be compared to baseline.
Copyright © 2016, 2012, 2009 by Pearson Education, Inc.All Rights Reserved
Emergency Care, 13eDaniel Limmer | Michael F. O'Keefe
Administer Interventionsand Transport the Patient
• Remember a decision for prompt transportation of critical patients or those with specific complaints is part of a treatment plan.
Copyright © 2016, 2012, 2009 by Pearson Education, Inc.All Rights Reserved
Emergency Care, 13eDaniel Limmer | Michael F. O'Keefe
Think About It
• Where would you focus your physical examination on a patient complaining of shortness of breath?
Copyright © 2016, 2012, 2009 by Pearson Education, Inc.All Rights Reserved
Emergency Care, 13eDaniel Limmer | Michael F. O'Keefe
Unresponsive Medical Patient
• Begin with physical exam and baseline vital signs
• Then gather history from bystanders or family members
• Do rapid assessment of entire body
Copyright © 2016, 2012, 2009 by Pearson Education, Inc.All Rights Reserved
Emergency Care, 13eDaniel Limmer | Michael F. O'Keefe
Perform a Rapid Physical Exam
• Similar to head-to-toe physical exam for trauma patient
• Assess head, neck, chest, abdomen, pelvis, extremities, and posterior.
continued on next slide
Copyright © 2016, 2012, 2009 by Pearson Education, Inc.All Rights Reserved
Emergency Care, 13eDaniel Limmer | Michael F. O'Keefe
Perform a Rapid Physical Exam
• Neck Jugular vein distention, medical
identification devices• Chest Breath sounds
• Abdomen Distention, firmness or rigidity
continued on next slide
Copyright © 2016, 2012, 2009 by Pearson Education, Inc.All Rights Reserved
Emergency Care, 13eDaniel Limmer | Michael F. O'Keefe
Perform a Rapid Physical Exam
• Pelvis Incontinence of urine or feces
• Extremities Pulse, motor function, sensation,
oxygen saturation, medical identification devices
• Check for Medical ID devices.• Check pupils.
Copyright © 2016, 2012, 2009 by Pearson Education, Inc.All Rights Reserved
Emergency Care, 13eDaniel Limmer | Michael F. O'Keefe
Obtain Baseline Vital Signs
• Assess: Pulse Respirations Skin Pupils Blood pressure
• Take note of any abnormalities.
Copyright © 2016, 2012, 2009 by Pearson Education, Inc.All Rights Reserved
Emergency Care, 13eDaniel Limmer | Michael F. O'Keefe
Consider a Request for ALS Personnel
• Obtain baseline vital signs.• Consider a request for ALS personnel. Depends on geographic options, types
of facility available
Copyright © 2016, 2012, 2009 by Pearson Education, Inc.All Rights Reserved
Emergency Care, 13eDaniel Limmer | Michael F. O'Keefe
Take a History of Present Illness and a Past Medical History
• Question bystanders What is the patient's name? What happened? Did you see anything else? Did the patient complain before this
happened? Does patient have any known illnesses
or problems? Is the patient taking any medications?
Copyright © 2016, 2012, 2009 by Pearson Education, Inc.All Rights Reserved
Emergency Care, 13eDaniel Limmer | Michael F. O'Keefe
Administer Interventions and Transport Patient
• Look for mechanism of injury or signs that suggest a spine injury.
• If needed, immobilize the patient's spine.
Copyright © 2016, 2012, 2009 by Pearson Education, Inc.All Rights Reserved
Emergency Care, 13eDaniel Limmer | Michael F. O'Keefe
Think About It
• What other mechanisms might you have to obtain patient history other than speaking to bystanders?
Copyright © 2016, 2012, 2009 by Pearson Education, Inc.All Rights Reserved
Emergency Care, 13eDaniel Limmer | Michael F. O'Keefe
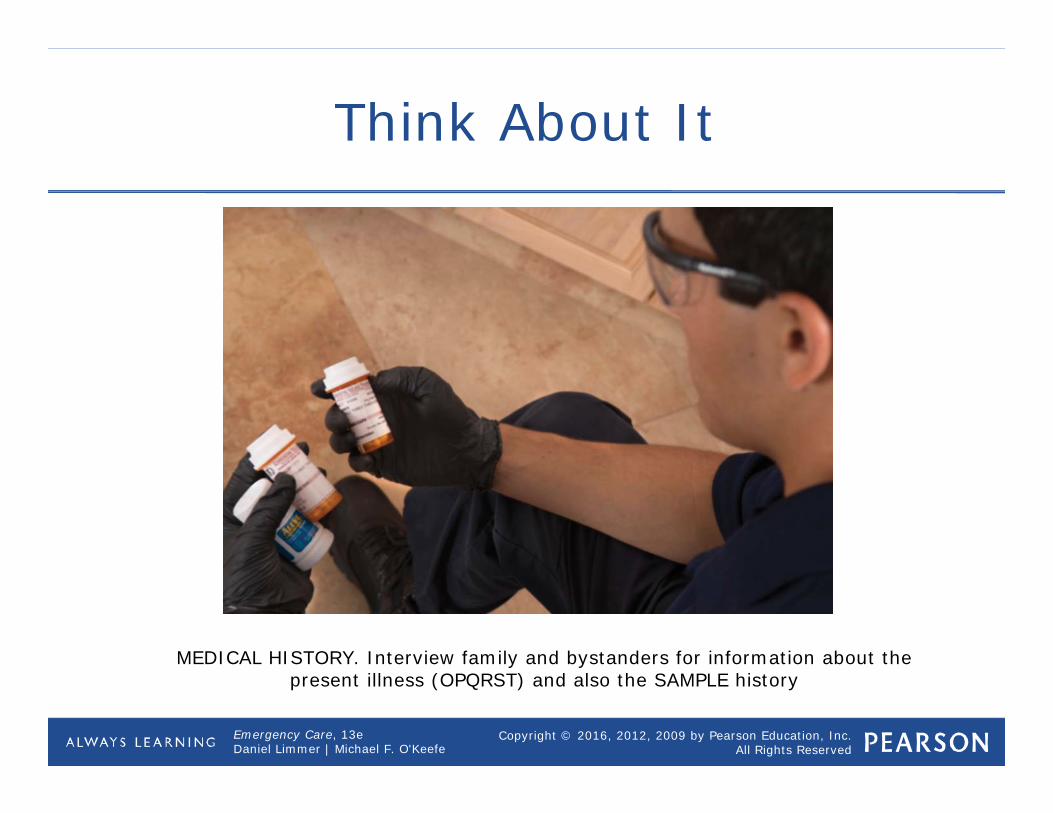
Think About It
MEDICAL HISTORY. Interview family and bystanders for information about the present illness (OPQRST) and also the SAMPLE history
Copyright © 2016, 2012, 2009 by Pearson Education, Inc.All Rights Reserved
Emergency Care, 13eDaniel Limmer | Michael F. O'Keefe
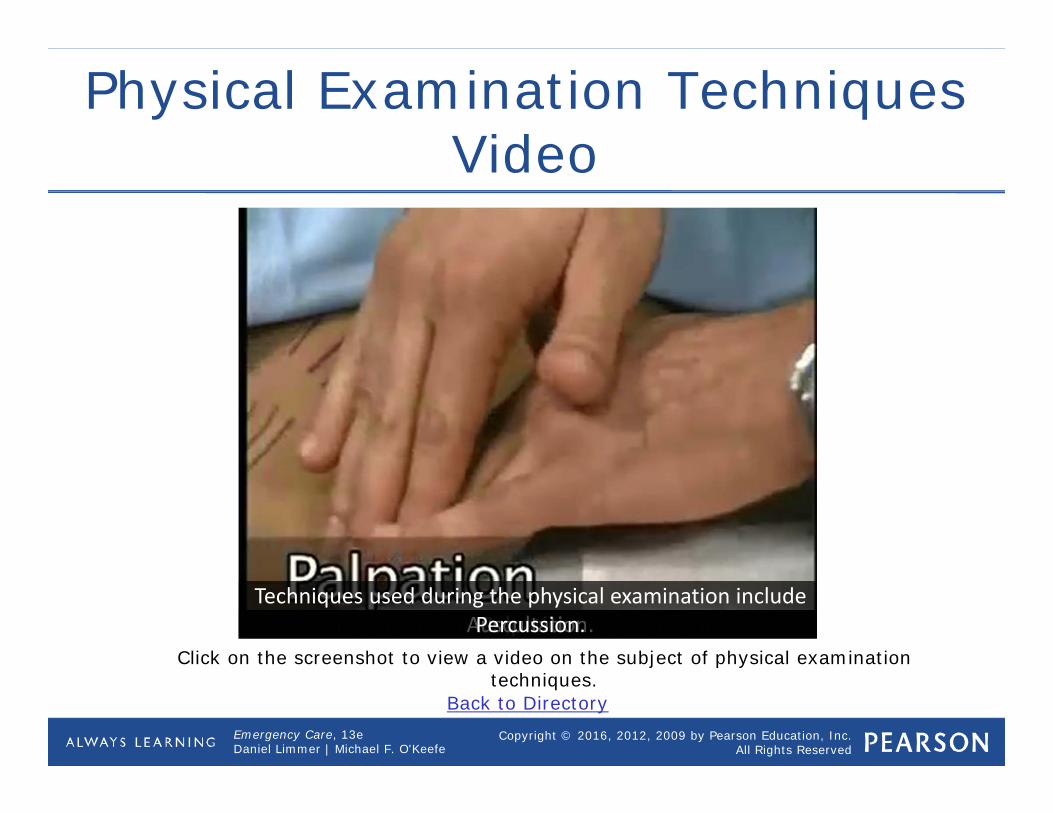
Physical Examination Techniques Video
Click on the screenshot to view a video on the subject of physical examination techniques.
Back to Directory
[ Background Music ] Techniques used during the physical examination include
inspection, palpation, auscultation, and percussion. Inspection. Palpation. Auscultation. Percussion.
Copyright © 2016, 2012, 2009 by Pearson Education, Inc.All Rights Reserved
Emergency Care, 13eDaniel Limmer | Michael F. O'Keefe
Mid-Chapter Review
• The secondary assessment of the medical patient takes two forms, depending on whether the patient is or is not responsive.
continued on next slide
Copyright © 2016, 2012, 2009 by Pearson Education, Inc.All Rights Reserved
Emergency Care, 13eDaniel Limmer | Michael F. O'Keefe
Mid-Chapter Review
• You assess the responsive patient by getting a history of the present illness and a past medical history then performing a physical exam of affected parts of the body before getting baseline vital signs.
continued on next slide
Copyright © 2016, 2012, 2009 by Pearson Education, Inc.All Rights Reserved
Emergency Care, 13eDaniel Limmer | Michael F. O'Keefe
Mid-Chapter Review
• Since unresponsive medical patients cannot communicate, it is appropriate to start the assessment with a rapid physical exam. Baseline vital signs come next; then you interview bystanders, family, and friends to get any history that can be obtained.
continued on next slide
Copyright © 2016, 2012, 2009 by Pearson Education, Inc.All Rights Reserved
Emergency Care, 13eDaniel Limmer | Michael F. O'Keefe
Mid-Chapter Review
• You may not change any field treatment as a result of the information gathered here, but the results of the assessment may be very important to the emergency department staff.
Copyright © 2016, 2012, 2009 by Pearson Education, Inc.All Rights Reserved
Emergency Care, 13eDaniel Limmer | Michael F. O'Keefe
Secondary Assessment of the Trauma Patient
Copyright © 2016, 2012, 2009 by Pearson Education, Inc.All Rights Reserved
Emergency Care, 13eDaniel Limmer | Michael F. O'Keefe
Secondary Assessment of the Trauma Patient
• Injuries can range from slight to severe.
• To determine how serious an injury is consider: Location of injury or injuries on patient Patient's mental status
continued on next slide
Copyright © 2016, 2012, 2009 by Pearson Education, Inc.All Rights Reserved
Emergency Care, 13eDaniel Limmer | Michael F. O'Keefe
Secondary Assessment of the Trauma Patient
• To determine how serious an injury is consider: Patient's airway status Vital signs Mechanism of injury Patient's age or preexisting conditions
Copyright © 2016, 2012, 2009 by Pearson Education, Inc.All Rights Reserved
Emergency Care, 13eDaniel Limmer | Michael F. O'Keefe
Trauma Patient with Minor Injury/Low Priority
• Assessment is focused on areas patient notes are painful or that mechanism of injury (MOI) indicates.
• Determine the chief complaint• Conduct a history of present illness to
gain information on how injury occurred
Copyright © 2016, 2012, 2009 by Pearson Education, Inc.All Rights Reserved
Emergency Care, 13eDaniel Limmer | Michael F. O'Keefe
Determine the Chief Complaint
• What the patient tells you is the matter
Copyright © 2016, 2012, 2009 by Pearson Education, Inc.All Rights Reserved
Emergency Care, 13eDaniel Limmer | Michael F. O'Keefe
Conduct a History of the Present Illness
• Nature of force involved• Direction and strength of force• Protective equipment used by patient• Actions taken to prevent or minimize
injury • Areas of pain and injuries resulting
from incident
Copyright © 2016, 2012, 2009 by Pearson Education, Inc.All Rights Reserved
Emergency Care, 13eDaniel Limmer | Michael F. O'Keefe
Physical Examination
• Areas assessed depend on injuries and chief complaint.
• Mechanism of injury may point to potential injuries.
• Three techniques: observation, palpation, and auscultation
Copyright © 2016, 2012, 2009 by Pearson Education, Inc.All Rights Reserved
Emergency Care, 13eDaniel Limmer | Michael F. O'Keefe
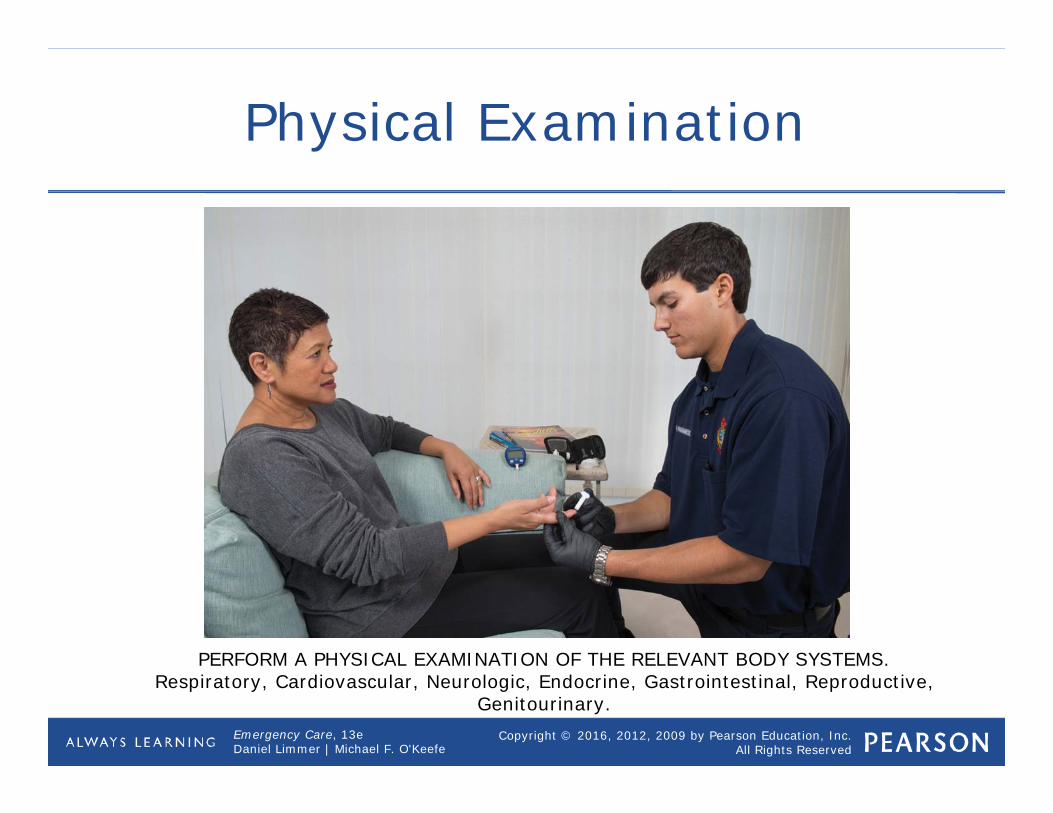
Physical Examination
PERFORM A PHYSICAL EXAMINATION OF THE RELEVANT BODY SYSTEMS. Respiratory, Cardiovascular, Neurologic, Endocrine, Gastrointestinal, Reproductive,
Genitourinary.
Copyright © 2016, 2012, 2009 by Pearson Education, Inc.All Rights Reserved
Emergency Care, 13eDaniel Limmer | Michael F. O'Keefe
Physical Examination
• Observe for: Abnormalities in symmetry Color Shape Movement
continued on next slide
Copyright © 2016, 2012, 2009 by Pearson Education, Inc.All Rights Reserved
Emergency Care, 13eDaniel Limmer | Michael F. O'Keefe
Physical Examination
• Palpate for: Abnormalities in shape Temperature Texture Sensation
continued on next slide
Copyright © 2016, 2012, 2009 by Pearson Education, Inc.All Rights Reserved
Emergency Care, 13eDaniel Limmer | Michael F. O'Keefe
Physical Examination
• Auscultate for: Decreased or absent breath sounds
continued on next slide
Copyright © 2016, 2012, 2009 by Pearson Education, Inc.All Rights Reserved
Emergency Care, 13eDaniel Limmer | Michael F. O'Keefe
Physical Examination
• DCAP-BTLS Deformities Contusions Abrasions Punctures and penetrations Burns Tenderness Lacerations Swelling
Copyright © 2016, 2012, 2009 by Pearson Education, Inc.All Rights Reserved
Emergency Care, 13eDaniel Limmer | Michael F. O'Keefe
Obtain Baseline Vital Signsand a Past Medical History
• After physical exam is conducted on a trauma patient, then assess his baseline vital signs and take a past medical history.
• Use SAMPLE and other pertinent questions when examining the patient.
continued on next slide
Copyright © 2016, 2012, 2009 by Pearson Education, Inc.All Rights Reserved
Emergency Care, 13eDaniel Limmer | Michael F. O'Keefe
Obtain Baseline Vital Signsand a Past Medical History
• SAMPLE Signs and symptoms Allergies Medications Pertinent past history Last oral intake Events leading to injury or illness
Copyright © 2016, 2012, 2009 by Pearson Education, Inc.All Rights Reserved
Emergency Care, 13eDaniel Limmer | Michael F. O'Keefe
Applying a Cervical Collar
• Apply if MOI, history, or signs and symptoms indicate use.
• Make sure collar is correct size.
Copyright © 2016, 2012, 2009 by Pearson Education, Inc.All Rights Reserved
Emergency Care, 13eDaniel Limmer | Michael F. O'Keefe
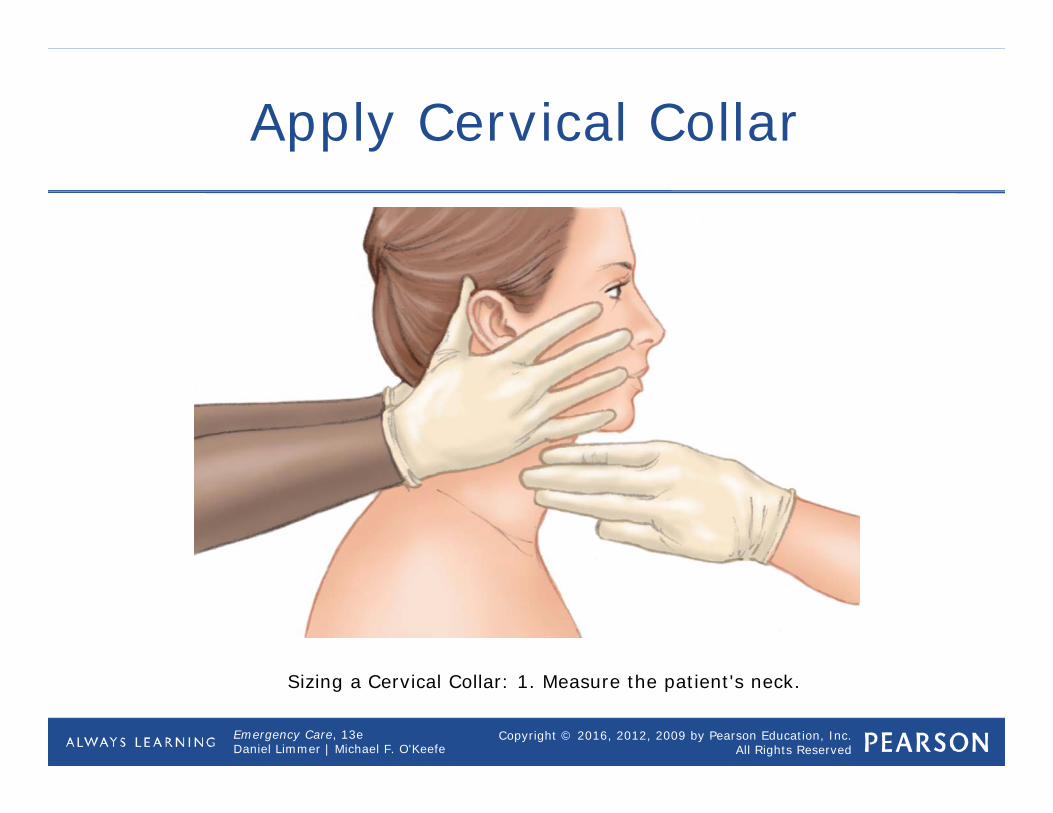
Apply Cervical Collar
Sizing a Cervical Collar: 1. Measure the patient's neck.
Copyright © 2016, 2012, 2009 by Pearson Education, Inc.All Rights Reserved
Emergency Care, 13eDaniel Limmer | Michael F. O'Keefe
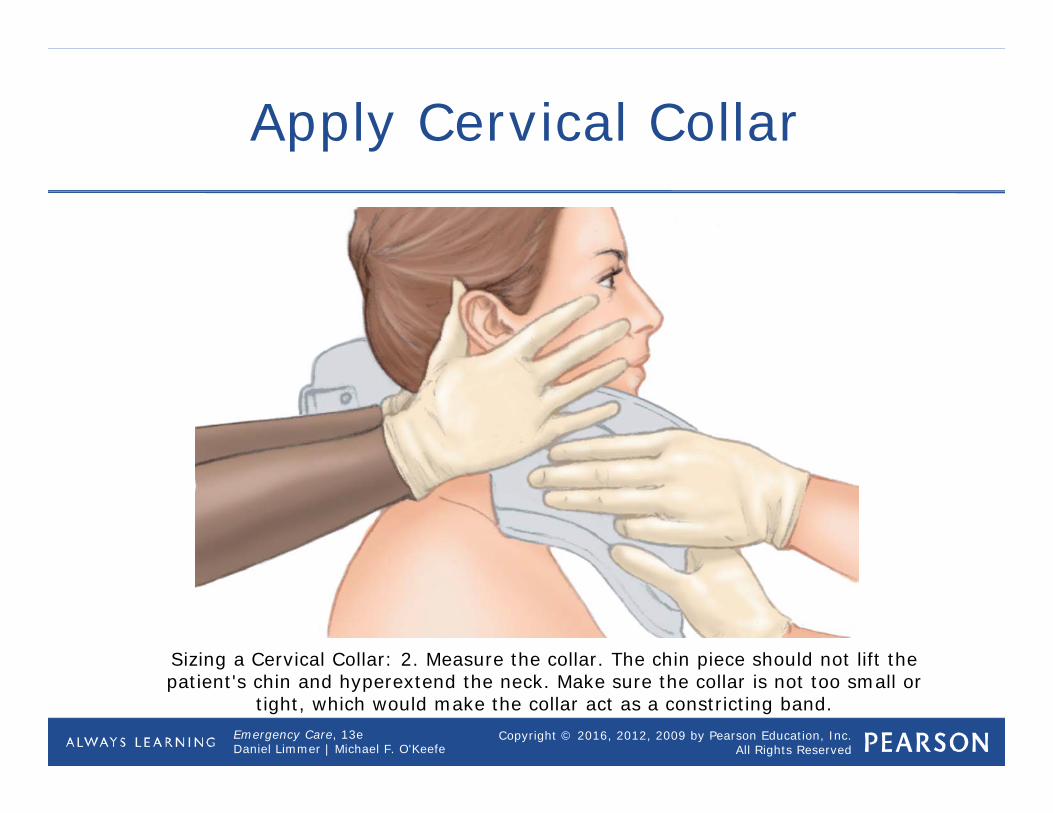
Apply Cervical Collar
Sizing a Cervical Collar: 2. Measure the collar. The chin piece should not lift the patient's chin and hyperextend the neck. Make sure the collar is not too small or
tight, which would make the collar act as a constricting band.
Copyright © 2016, 2012, 2009 by Pearson Education, Inc.All Rights Reserved
Emergency Care, 13eDaniel Limmer | Michael F. O'Keefe
Applying a Cervical Collar
• Assess patient's neck prior to placing collar.
• Reassure patient.• Size collar.• Remove jewelry and move hair.• Keep patient's head in the in-line
anatomical position.• Slide collar into place from front.
Copyright © 2016, 2012, 2009 by Pearson Education, Inc.All Rights Reserved
Emergency Care, 13eDaniel Limmer | Michael F. O'Keefe
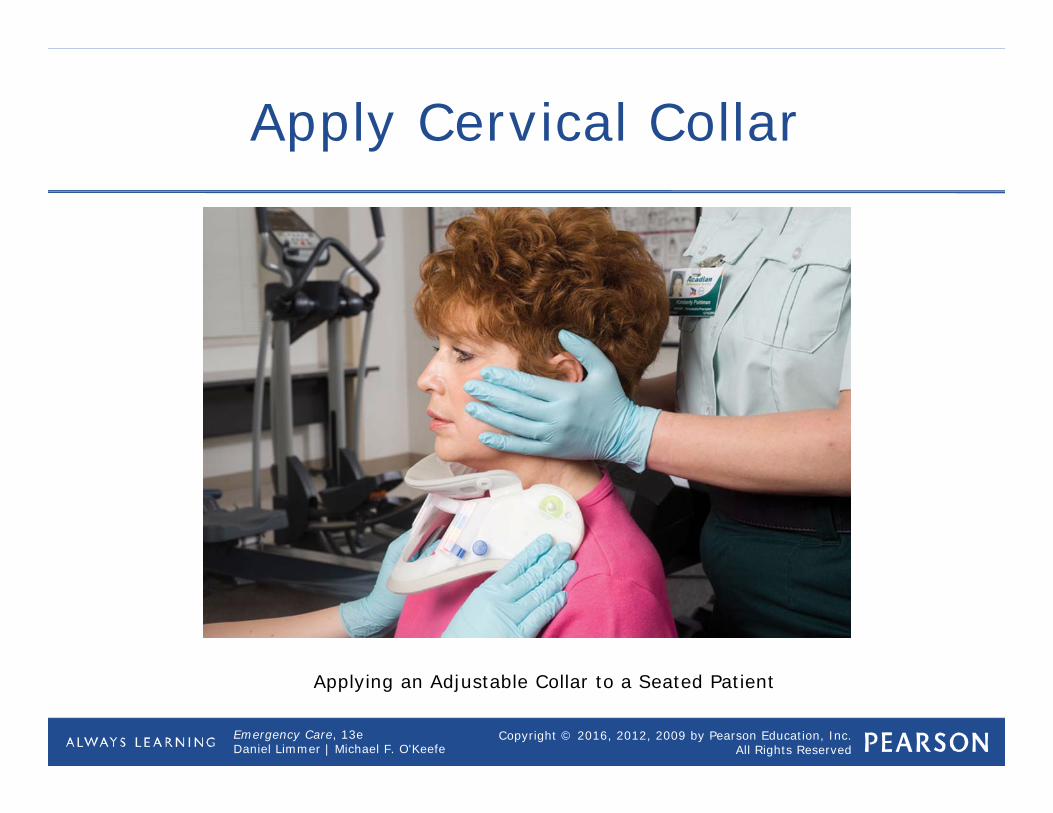
Apply Cervical Collar
Applying an Adjustable Collar to a Seated Patientcontinued
Copyright © 2016, 2012, 2009 by Pearson Education, Inc.All Rights Reserved
Emergency Care, 13eDaniel Limmer | Michael F. O'Keefe
Applying a Cervical Collar
• Collar alone does not provide adequate in-line immobilization.
• Must be paired with manual stabilization or fixation to long board.

Copyright © 2016, 2012, 2009 by Pearson Education, Inc.All Rights Reserved
Emergency Care, 13eDaniel Limmer | Michael F. O'Keefe
Trauma Patient with Serious Injury or Multisystem Trauma/High Priority
• Continue spinal stabilization• Consider a request for Advanced Life
Support (ALS) personnel

Copyright © 2016, 2012, 2009 by Pearson Education, Inc.All Rights Reserved
Emergency Care, 13eDaniel Limmer | Michael F. O'Keefe
Secondary Assessment: Trauma Patient with Significant Injury
RAPID TRAUMA ASSESSMENT: Rapidly assess each part of the body.HEAD: Check for wounds, tenderness, and deformities plus crepitation.
Copyright © 2016, 2012, 2009 by Pearson Education, Inc.All Rights Reserved
Emergency Care, 13eDaniel Limmer | Michael F. O'Keefe
Perform a Rapid Trauma Assessment
• Requires only a few moments• Should be performed at scene• Care provided en route will be based on
this assessment.
continued on next slide
Copyright © 2016, 2012, 2009 by Pearson Education, Inc.All Rights Reserved
Emergency Care, 13eDaniel Limmer | Michael F. O'Keefe
Perform a Rapid Trauma Assessment
• Rapid assessment of the head Palpate cranium, face, ears, eyes, nose,
and mouth Blood or clear fluid are serious findings.
• Rapid assessment of the neck Wounds, tenderness, deformities, and
jugular vein distention Stoma or tracheostomy
Copyright © 2016, 2012, 2009 by Pearson Education, Inc.All Rights Reserved
Emergency Care, 13eDaniel Limmer | Michael F. O'Keefe
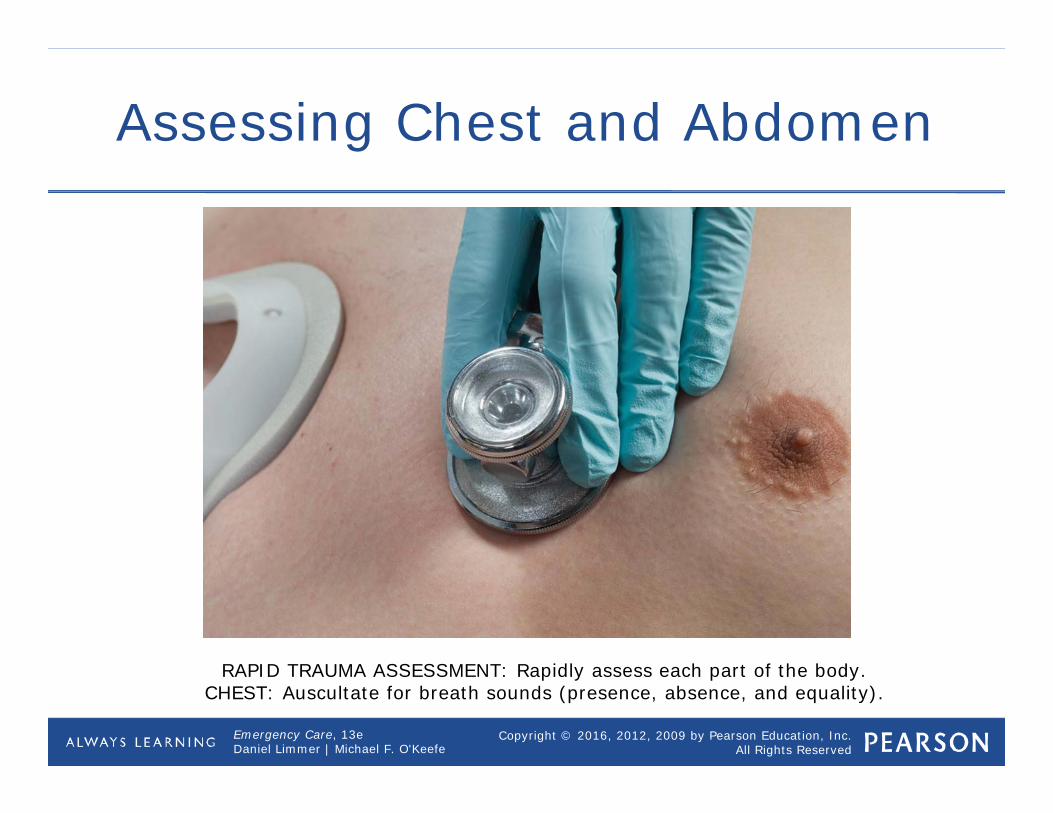
Assessing Chest and Abdomen
RAPID TRAUMA ASSESSMENT: Rapidly assess each part of the body.CHEST: Auscultate for breath sounds (presence, absence, and equality).
Copyright © 2016, 2012, 2009 by Pearson Education, Inc.All Rights Reserved
Emergency Care, 13eDaniel Limmer | Michael F. O'Keefe
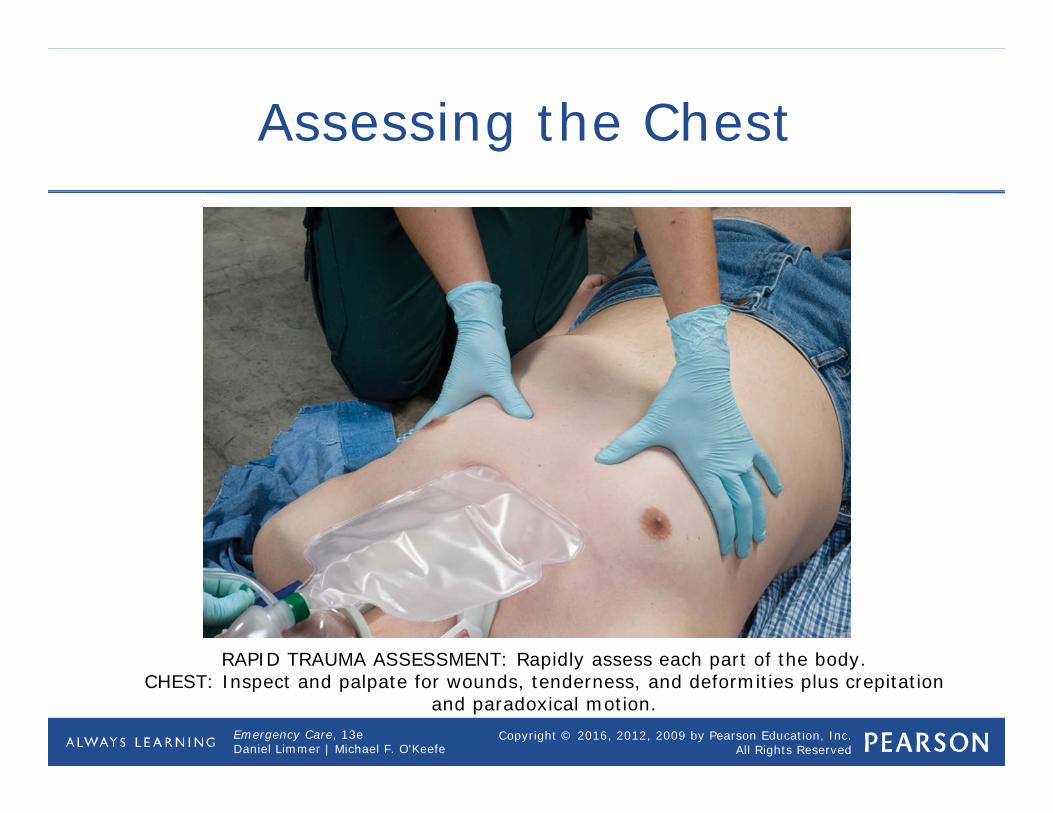
Assessing the Chest
RAPID TRAUMA ASSESSMENT: Rapidly assess each part of the body.CHEST: Inspect and palpate for wounds, tenderness, and deformities plus crepitation
and paradoxical motion.
Copyright © 2016, 2012, 2009 by Pearson Education, Inc.All Rights Reserved
Emergency Care, 13eDaniel Limmer | Michael F. O'Keefe
Perform a Rapid Trauma Assessment
• Application of a cervical collar Size and apply if indicated by protocols
• Rapid assessment of the chest Paradoxical motion, crepitation, and
breath sounds Rib cage and chest must be exposed.
continued on next slide
Copyright © 2016, 2012, 2009 by Pearson Education, Inc.All Rights Reserved
Emergency Care, 13eDaniel Limmer | Michael F. O'Keefe
Perform a Rapid Trauma Assessment
• Rapid assessment of the abdomen Distention, pulsating mass Gently press down on quadrants.
• Rapid assessment of the pelvis Bleeding Priapism
• Rapid assessment of the extremities Tenderness, deformities, circulation,
sensation, and motor function
Copyright © 2016, 2012, 2009 by Pearson Education, Inc.All Rights Reserved
Emergency Care, 13eDaniel Limmer | Michael F. O'Keefe
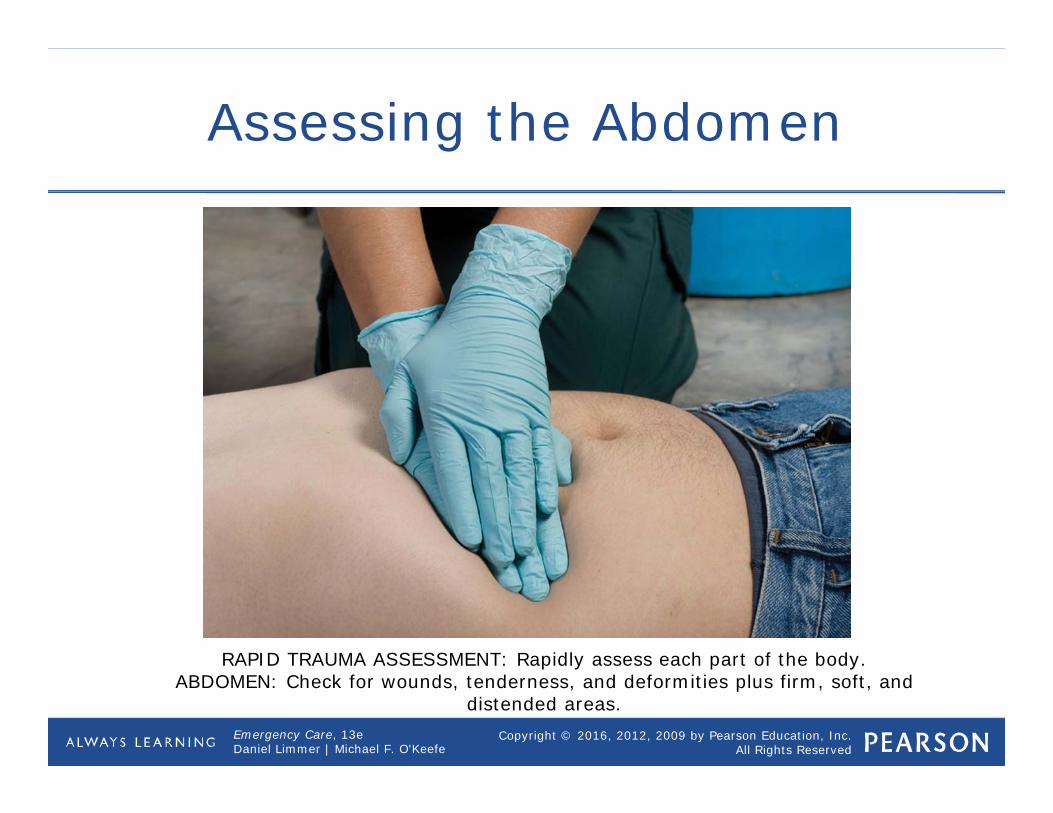
Assessing the Abdomen
RAPID TRAUMA ASSESSMENT: Rapidly assess each part of the body.ABDOMEN: Check for wounds, tenderness, and deformities plus firm, soft, and
distended areas.

Copyright © 2016, 2012, 2009 by Pearson Education, Inc.All Rights Reserved
Emergency Care, 13eDaniel Limmer | Michael F. O'Keefe
Perform a Rapid Trauma Assessment
• Rapid assessment of the posterior body and immobilization on a backboard Roll patient on side, then assess When you roll the patient into a supine
position, they will be on the backboard.• Obtain baseline vital signs and past
medical history Use pulse oximeter if applicable
Copyright © 2016, 2012, 2009 by Pearson Education, Inc.All Rights Reserved
Emergency Care, 13eDaniel Limmer | Michael F. O'Keefe
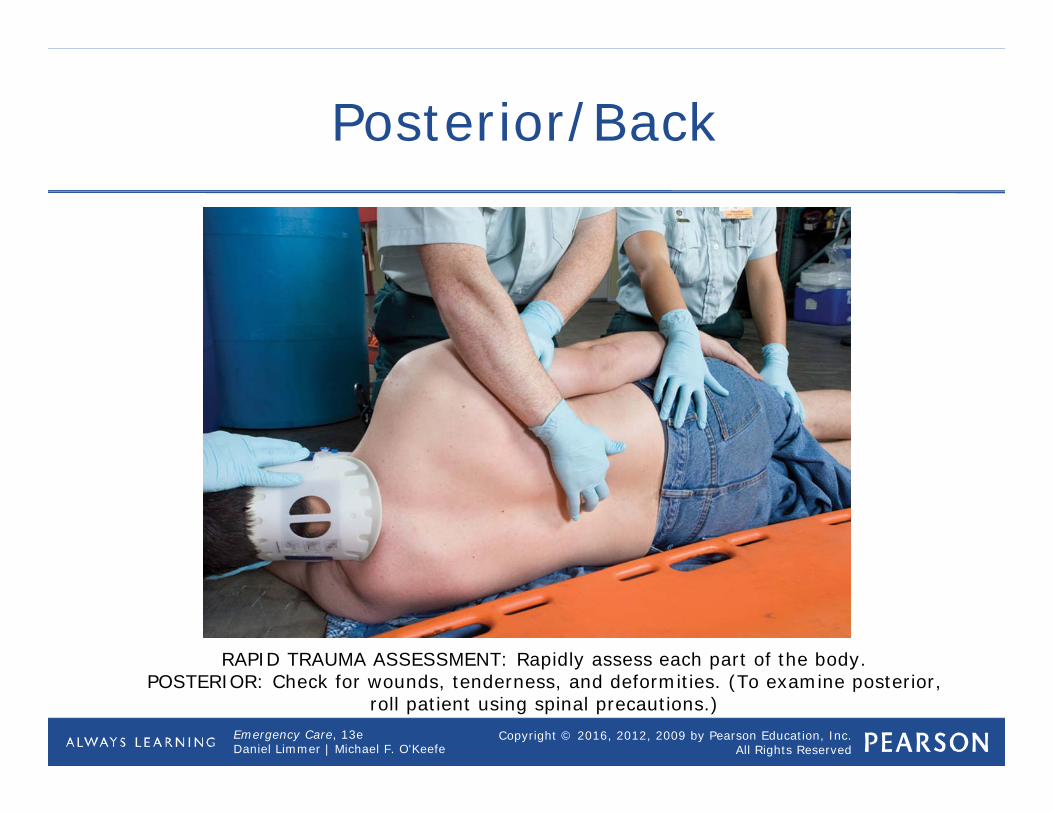
Posterior/Back
RAPID TRAUMA ASSESSMENT: Rapidly assess each part of the body.POSTERIOR: Check for wounds, tenderness, and deformities. (To examine posterior,
roll patient using spinal precautions.)
Copyright © 2016, 2012, 2009 by Pearson Education, Inc.All Rights Reserved
Emergency Care, 13eDaniel Limmer | Michael F. O'Keefe
Some General Principles
• Communicate with patient.• Expose injured area before examining
it.• Maintain eye contact.• Assume spinal injury.• Stop or alter assessment process to
provide care.
Copyright © 2016, 2012, 2009 by Pearson Education, Inc.All Rights Reserved
Emergency Care, 13eDaniel Limmer | Michael F. O'Keefe
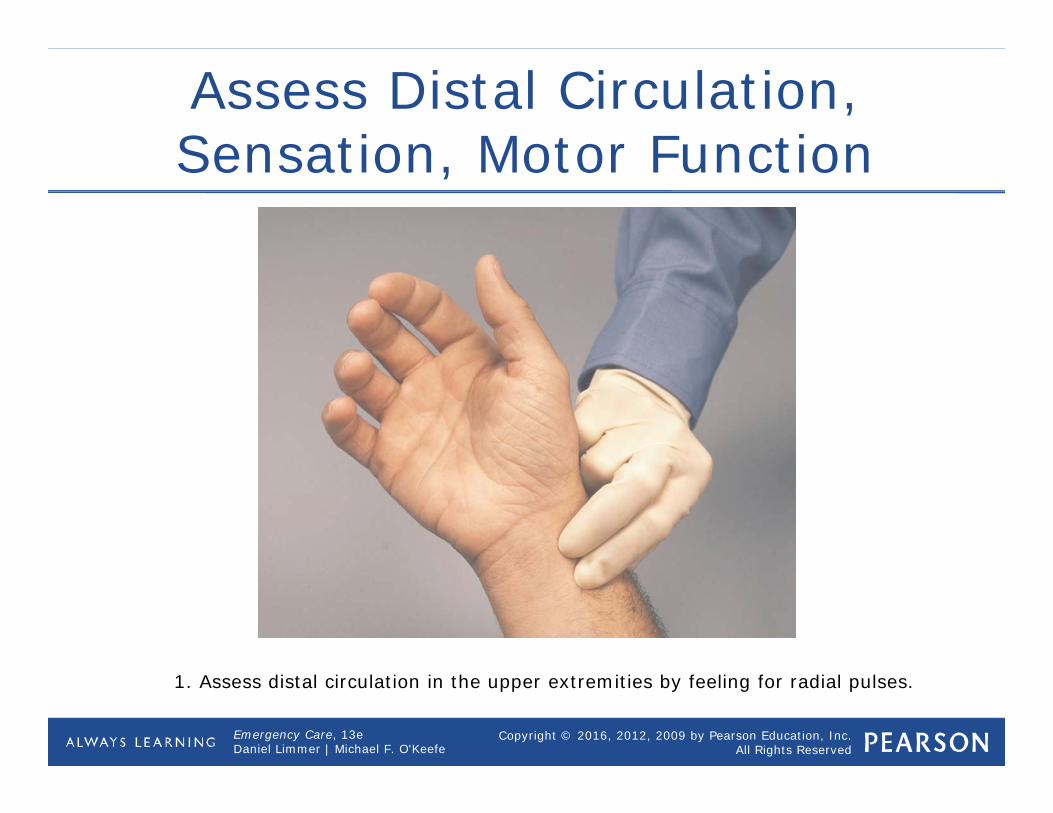
Assess Distal Circulation, Sensation, Motor Function
1. Assess distal circulation in the upper extremities by feeling for radial pulses.
Copyright © 2016, 2012, 2009 by Pearson Education, Inc.All Rights Reserved
Emergency Care, 13eDaniel Limmer | Michael F. O'Keefe
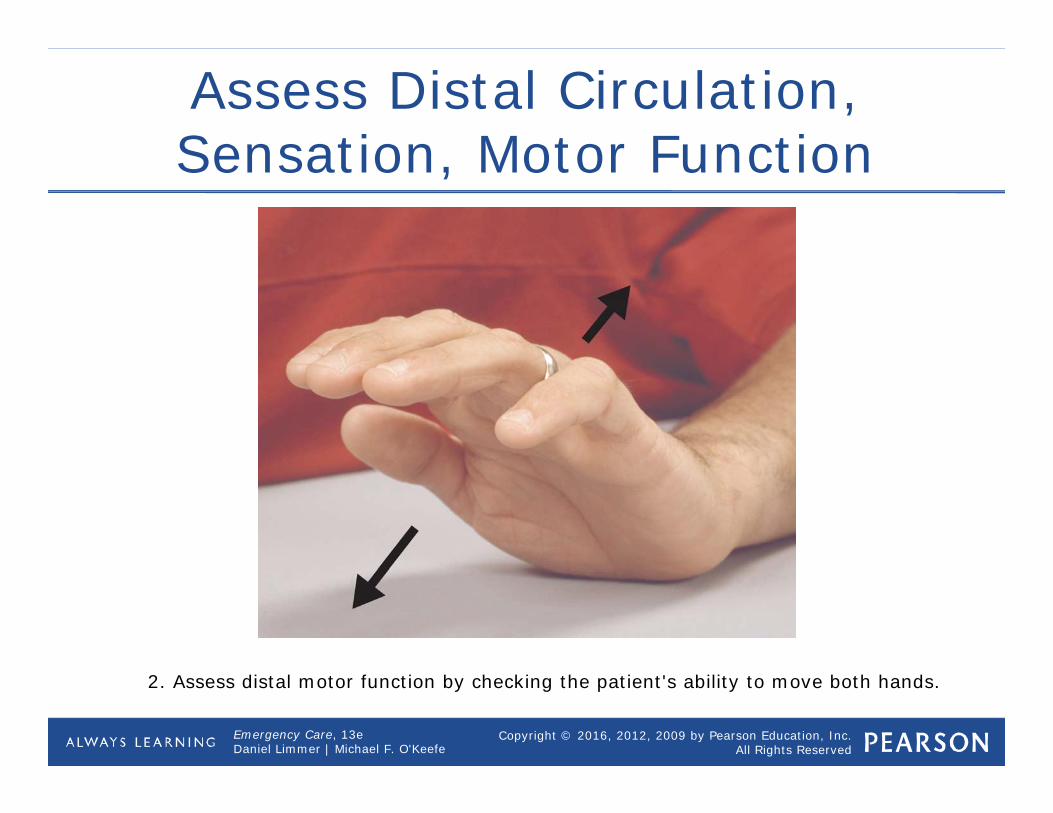
Assess Distal Circulation, Sensation, Motor Function
2. Assess distal motor function by checking the patient's ability to move both hands.
Copyright © 2016, 2012, 2009 by Pearson Education, Inc.All Rights Reserved
Emergency Care, 13eDaniel Limmer | Michael F. O'Keefe
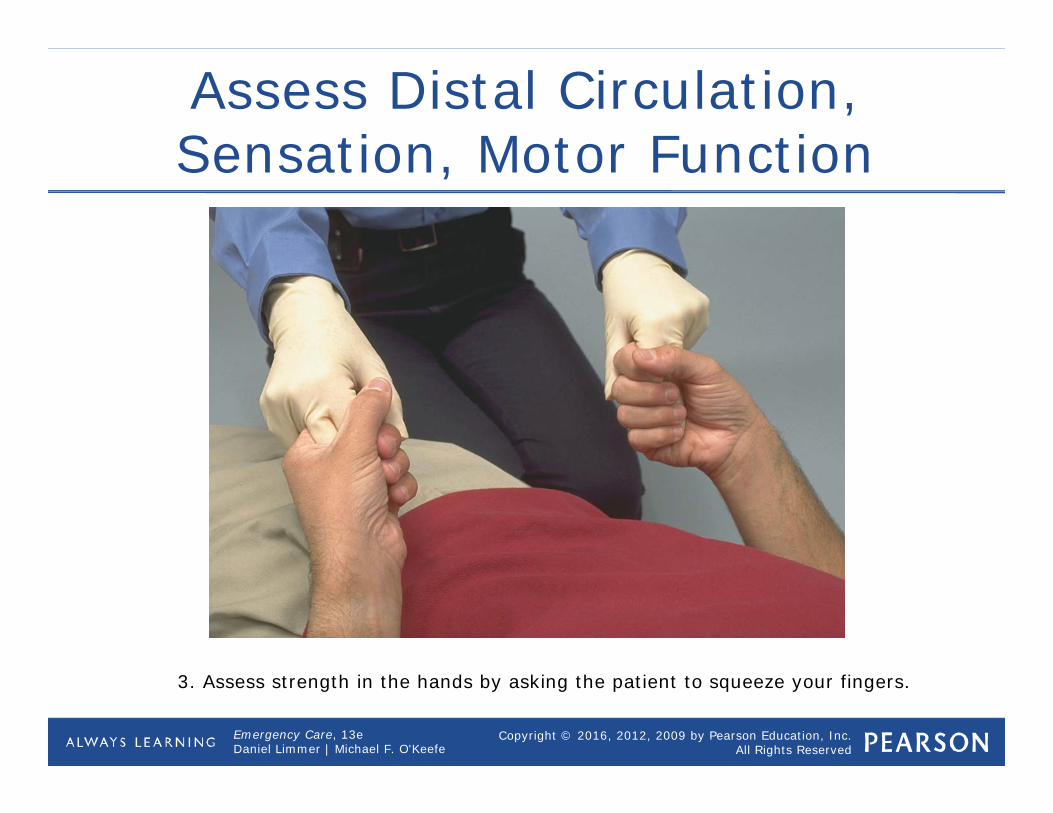
Assess Distal Circulation, Sensation, Motor Function
3. Assess strength in the hands by asking the patient to squeeze your fingers.
Copyright © 2016, 2012, 2009 by Pearson Education, Inc.All Rights Reserved
Emergency Care, 13eDaniel Limmer | Michael F. O'Keefe
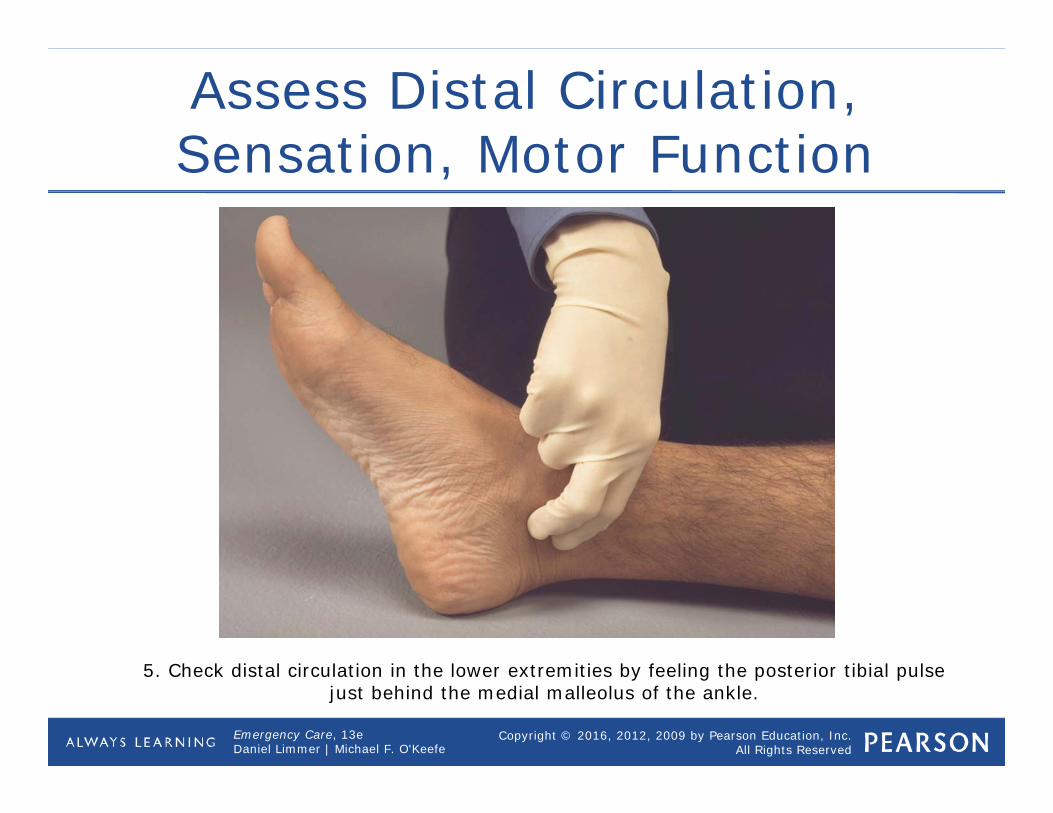
Assess Distal Circulation, Sensation, Motor Function
5. Check distal circulation in the lower extremities by feeling the posterior tibial pulse just behind the medial malleolus of the ankle.
Copyright © 2016, 2012, 2009 by Pearson Education, Inc.All Rights Reserved
Emergency Care, 13eDaniel Limmer | Michael F. O'Keefe
Pediatric Note
• Lesser mechanisms can cause significant damage.
• Explain assessments more thoroughly in this population.
Copyright © 2016, 2012, 2009 by Pearson Education, Inc.All Rights Reserved
Emergency Care, 13eDaniel Limmer | Michael F. O'Keefe
Think About It
• What criteria would you use to decide whether to perform a focused physical exam or a rapid trauma exam?
Copyright © 2016, 2012, 2009 by Pearson Education, Inc.All Rights Reserved
Emergency Care, 13eDaniel Limmer | Michael F. O'Keefe
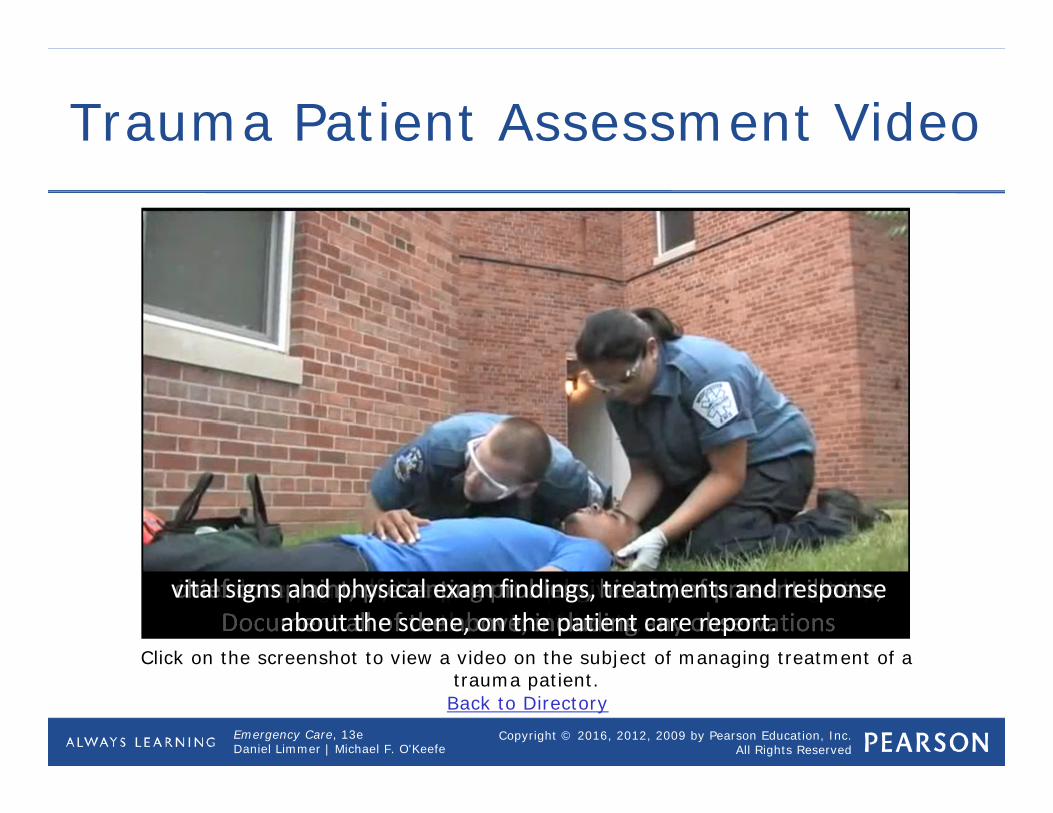
Trauma Patient Assessment Video
Click on the screenshot to view a video on the subject of managing treatment of a trauma patient.
Back to Directory
The most valuable tool an EMT can possess is excellent patient assessment skills.
While there are differences between how we assess medical and trauma patients, the initial approach is largely the same.
Take standard precautions for body substance isolation based on what you know of the call.
Gloves and goggles are a minimum for every call, but you may need a gown for massive bleeding or face mask if airway management is going to be required. The scene size up actually begins with your dispatch information.
What you are told about the location of the call and complaint can give you information about what to expect when you arrive. For example, if you are responding to a martial arts studio, you might expect a fall or musculoskeletal injury.
Upon arrival, ensure the situation is safe to enter meaning that there are no hazards
to the safety of you or your crew such as a loose dog, poor lighting or a fight in progress.
Determine the number of patients who need your attention and whether
or not additional resources such as ALS responders, law enforcement, hazmat, or the power company will be required. Call for help now if additional resources are needed.
Once the scene is secure and additional help has been called if needed, determine the mechanism
of injury based on the patient's chief complaint and initial presentation. Or, if the patient is unconscious, bystanders or scene clues such an overturned ladder or vehicle deformity.
If the patient has been involved in any type of fall or blunt force trauma, or presents to you
on the ground without explanation, begin manual immobilization of the spine now until you are able to confirm that a spinal injury is unlikely.
Your primary assessment should be done the same way, every time, on every patient. The purpose of the primary is to find and correct life threats such as apnea or hemorrhage.
Having a consistent approach to the primary assessment will ensure that you identify the most pressing, life threatening issues with your patients every time. Next, determine the patient's level of consciousness.
Discover whether they are alert when you come in, meaning they are aware of your presence.
If they do not seem aware that you have arrived and are presenting with their eyes closed,
attempt to gain their attention by using loud verbal stimuli, and if unsuccessful, appropriate painful stimuli such as inter‐digital pressure.
If they do not open their eyes or speak to either verbal or painful stimuli, they are said to be unresponsive.
Regardless of level of responsiveness, introduce yourself and attempt to gain consent to treat the patient.
Of course, you may treat an unconscious patient using implied consent. If the patient is alert, ask them for their chief complaint, or the main reason you were called.
In the event of an unresponsive patient, you may be able to determine the problem from bystanders or the scene itself. Your assessment of the airway is next. You will need to confirm that the airway is patent, and if it is not,
open it now using a jaw‐thrust technique to avoid compromise of the cervical spine. Look inside the airway to make sure there are no obstructions or substances that need to be suctioned. If suctioning is required, clear the airway now.
In a situation where it appears that the patient is unable to maintain a patent airway,
such as in a patient with an altered level of consciousness, insert an OPA or NPA now.
Assessment of breathing comes next including respiratory rate, rhythm and quality along.
You will also need to determine if the patient has adequate tidal volume.
To begin this assessment, you should bare the chest to check for any wounds or bleeding.
If an open chest wound was apparent an occlusive dressing should be applied. Also look for medic alert tags.
It is not uncommon that a medical emergency precedes a traumatic event.
A bare chest will also help you listen to lung sounds without interference from clothing. In addition to auscultation and inspection of the chest, you will need to palpate the chest wall for stability and to ensure
that the patient doesn't have subcutaneous emphysema, crepitus or pain on palpation. Oxygen should be applied now, if it is indicated.
For respiratory rates less than 10 or greater than 28‐30, or for inadequate tidal volume,
ventilations should be assisted using the bag‐valve‐mask attached to 100% oxygen.
The radial or carotid pulse can be used to assess circulation of a trauma patient.
If a radial pulse is not present due to poor perfusion, move to the carotid pulse. Check for pulse rate, rhythm and quality. Assess the skin for color, temperature, and moisture.
Another way to assess for distal perfusion is by checking capillary refill time
by putting pressure on the nailbed and counting the number of seconds for blood to return to the area after it is blanched. Normal capillary refill time is less than two seconds, indicating adequate distal perfusion to the extremities. Control any major bleeding, if present and possible.
You can begin to control external hemorrhage with direct pressure. In some situations, a patient will present with internal bleeding. Internal bleeding from, say, a liver laceration or damaged kidney, obviously cannot be controlled by EMTs.
Therefore, you'll need to begin treatment for shock which includes lying the patient down flat and covering him or her with a blanket to preserve body heat.
While you already determined level of responsiveness using the AVPU scale,
it is now time to determine level of orientation using the patient's answers to questions
about their name, time of day, current location, and events leading up to EMTs being called.
This is called Alert and Oriented times 1, 2, 3 or 4 depending on how many questions about person, place time, and event they answered correctly. You could also use a Glasgow Coma Score to report level of consciousness in trauma patients.
Now is the time to assess pupil size and reactivity to light as another measure of neurological activity or disability. In some situations, a patient will present with major trauma.
Major trauma patients need to be fully exposed, with their clothes cut off or otherwise removed.
An isolated injury, such as an ankle fracture, could have just the area involved exposed. Based on the information gathered in the primary assessment, identify and treat any life threatening conditions.
Any insult to airway, breathing, circulation or neurological disability, including altered mental status, indicates a critical patient.
If the patient does have life threatening conditions, begin packaging and transport now.
In a situation where no life‐threatening condition exists, you will likely stay on scene for a while to gather more information, take vital signs, splint injuries, and treat for pain.
While vital signs are actually the first part of the secondary survey,
it is unlikely that you will take these yourself as you will be busy talking to the patient. It is appropriate to delegate vital signs to a partner
so that the information can be gathered simultaneously during your history taking.
Note that in the critical trauma patient, the history, secondary assessment
and reassessment are all performed enroute to the trauma center. First, gather a History of Present Illness
by asking the patient what happened today to make them call EMS. The mnemonic OPQRST can help explore a complaint of pain. O stands for Onset.
You would ask what the patient was doing when the pain started, or what caused it.
P stands for Provocation and Palliation, meaning what makes it feel better or worse. Q stands for the Quality of the pain.
To assess quality, you will ask the patient to describe what the pain feels like.
They should give you an answer such as sharp, tearing, or pressure. R stands for Region and Radiation... ...meaning where it hurts and if that pain moves anywhere such as the neck, jaw, back or shoulder. S stands for Severity and should be rated on a scale of 1 to 10. T stands for time or timing, meaning when the pain started and whether it is constant or comes and goes.
Next, get a SAMPLE history to include signs and symptoms, any allergies the patient has
to medication, food, or the environment; any medications the patient is taking or supposed
to be taking, including any recently started or stopped, any herbal or over the counter preparations; pertinent past medical history;
last oral intake which is especially important when treating possible diabetic
or allergic patients involved in trauma; and events leading up to the present illness.
Once you have finished the history gathering, check in on the vital signs you delegated, or take them yourself now if necessary. You will want to know about the patient's pulse, respirations, skin signs, pupils and blood pressure.
You can gather other diagnostics now if you have them available to you such as pulse oximetry and blood glucose monitoring.
The body system to be examined first should be related to the chief complaint.
For example, if you are treating a simple musculoskeletal injury, it may only be necessary to examine the injured extremity.
In an alternate situation, where the patient is unconscious and cannot relay
to you the chief complaint or mechanism of injury, then it is appropriate to do a head to toe assessment which begins, naturally, with the head.
Use the tools of inspection, palpation, and auscultation to find any abnormalities that might be contributing to the patient's condition.
When assessing the head, check for skull fractures, bleeding, stability of orbits, blood or fluid in nose or ears, or loose teeth. Check the neck, both front and back, for tenderness when the spinal vertebrae are palpated,
heat or warmth which could indicate a fracture, jugular vein distention or tracheal deviation. A cervical collar can now be applied if needed.
Although you have already examined the chest once, it is not inappropriate to go back and reassess the chest now for paradoxical movement, stability, or signs of increased work of breathing. Check all four quadrants of the abdomen for tenderness, rigidity, masses, bruising or bleeding. Push anterior to posterior and laterally on the pelvic wings to test for stability, pain or crepitus. Do not rock the pelvis.
Check all four extremities for wounds, stability, and distal circulation, sensation and movement, often referred to as PMS.
Don't forget to check the posterior of the body for bleeding or other injuries.
Decide what you think is likely the problem, called your field impression, and inform the patient and your team of the treatment plan.
As soon as time permits, usually every 5 minutes for unstable patients and every 15 minutes for stable patients, reassess your patient. Since scene time is kept minimal in trauma patients,
reassessment will most likely be performed in the ambulance enroute to the trauma center.
You will repeat your initial assessment, or ABCDs, including the chief complaint. Now that you have more information, determine if the chief complaint has changed or the condition worsened. Take another set of vital signs.
It is your goal to get serial vital signs, or at least three sets prior to transfer of care.
Serial vital signs allow you to trend the patient's condition as it gets better or worse. Evaluate the patient's response to your treatments. For example, if you splinted an extremity,
check to see that continued swelling has not caused the splint to become too tight.
If anything has changed or no longer seems helpful to the patient's condition,
revise your treatment plan now and take appropriate corrective action such as changing to onboard oxygen if the portable tank has run out.
Either during a radio report or upon arrival to the emergency department or other facility,
introduce yourself, the patient and give a full report about the patient's mechanism of injury,
chief complaint, presenting problem, history of present illness, past medical history,
vital signs and physical exam findings, treatments and response to those treatments. Document all of the above, including any observations about the scene, on the patient care report.
Copyright © 2016, 2012, 2009 by Pearson Education, Inc.All Rights Reserved
Emergency Care, 13eDaniel Limmer | Michael F. O'Keefe
Detailed Physical Exam
Copyright © 2016, 2012, 2009 by Pearson Education, Inc.All Rights Reserved
Emergency Care, 13eDaniel Limmer | Michael F. O'Keefe
Detailed Physical Exam
• Typically completed en route to hospital• Gathers additional information• Complements primary and secondary
assessments• Performed after all critical interventions
completed• Primary assessment re-evaluated again
before initiating
Copyright © 2016, 2012, 2009 by Pearson Education, Inc.All Rights Reserved
Emergency Care, 13eDaniel Limmer | Michael F. O'Keefe
Trauma Patient with a Significant Injury
• For these patients, you will have assessed almost the entire body during the rapid trauma assessment.
• Now need to assess the entire body more thoroughly to possibly reveal signs or symptoms of injury you may have missed or have changed since the rapid trauma assessment.
Copyright © 2016, 2012, 2009 by Pearson Education, Inc.All Rights Reserved
Emergency Care, 13eDaniel Limmer | Michael F. O'Keefe
Before Beginning the Detailed Physical Exam
• Remember to perform this only after you have performed all critical interventions.
• If you are treating a severely injured patient and are too busy to complete the detailed exam, it is not a failure. It is your responsibility to give the
patient the best care possible, which may mean skipping the exam in order to maintain ABCs.
Copyright © 2016, 2012, 2009 by Pearson Education, Inc.All Rights Reserved
Emergency Care, 13eDaniel Limmer | Michael F. O'Keefe
Performing the Detailed Physical Exam
• Expose patient.• Work around immobilization equipment.• Components similar to rapid trauma
exam More detail and focus
Copyright © 2016, 2012, 2009 by Pearson Education, Inc.All Rights Reserved
Emergency Care, 13eDaniel Limmer | Michael F. O'Keefe
Trauma Patient Who Is Not Seriously Injured
• Generally does not need a detailed physical exam
• Keep a high index of suspicion, and when in doubt perform a detailed physical exam.
• Be aware of patient's fear and need for emotional support.
Copyright © 2016, 2012, 2009 by Pearson Education, Inc.All Rights Reserved
Emergency Care, 13eDaniel Limmer | Michael F. O'Keefe
Think About It
• Is it necessary to always complete a detailed assessment on a trauma patient with no significant mechanism or injury?
Copyright © 2016, 2012, 2009 by Pearson Education, Inc.All Rights Reserved
Emergency Care, 13eDaniel Limmer | Michael F. O'Keefe
Mid-Chapter Review
• The patient without a significant mechanism of injury receives a history of the present illness and physical exam focused on areas that the patient complains about and areas that you think may be injured based on the mechanism of injury.
• Next gather a set of baseline vital signs and a past medical history.
continued on next slide
Copyright © 2016, 2012, 2009 by Pearson Education, Inc.All Rights Reserved
Emergency Care, 13eDaniel Limmer | Michael F. O'Keefe
Mid-Chapter Review
• For the patient with a significant injury or MOI, ensure continued manual stabilization of the head and neck, consider whether to call Advanced Life Support personnel (if available), get a brief history of the present illness, and perform a rapid trauma assessment.
continued on next slide
Copyright © 2016, 2012, 2009 by Pearson Education, Inc.All Rights Reserved
Emergency Care, 13eDaniel Limmer | Michael F. O'Keefe
Mid-Chapter Review
• In the rapid trauma assessment, look for wounds, tenderness, and deformities, plus certain additional signs appropriate to the part being assessed (as summarized in Table 14-8). Systematically examine the head, neck, chest, abdomen, pelvis, extremities, and posterior body.
continued on next slide
Copyright © 2016, 2012, 2009 by Pearson Education, Inc.All Rights Reserved
Emergency Care, 13eDaniel Limmer | Michael F. O'Keefe
Mid-Chapter Review
• After assessing the neck, apply a cervical collar. After completing the physical assessment, immobilize the patient to a spine board and get a baseline set of vital signs and a past medical history.
continued on next slide
Copyright © 2016, 2012, 2009 by Pearson Education, Inc.All Rights Reserved
Emergency Care, 13eDaniel Limmer | Michael F. O'Keefe
Mid-Chapter Review
• After you have performed the appropriate critical interventions and begun transport, the patient may receive a detailed physical exam en route to the hospital.
continued on next slide

Copyright © 2016, 2012, 2009 by Pearson Education, Inc.All Rights Reserved
Emergency Care, 13eDaniel Limmer | Michael F. O'Keefe
Mid-Chapter Review
• The detailed physical exam is very similar to the rapid trauma assessment, but there is time to be more thorough in the assessment. The detailed physical exam does not take place before transport unless transport is delayed.
continued on next slide
Copyright © 2016, 2012, 2009 by Pearson Education, Inc.All Rights Reserved
Emergency Care, 13eDaniel Limmer | Michael F. O'Keefe
Mid-Chapter Review
• The detailed physical exam is most appropriate for the trauma patient who is unresponsive or has a significant injury or unknown MOI.
• A responsive trauma patient with no significant injury or MOI will seldom require a detailed physical exam.
Copyright © 2016, 2012, 2009 by Pearson Education, Inc.All Rights Reserved
Emergency Care, 13eDaniel Limmer | Michael F. O'Keefe
Reassessment
Copyright © 2016, 2012, 2009 by Pearson Education, Inc.All Rights Reserved
Emergency Care, 13eDaniel Limmer | Michael F. O'Keefe
Reassessment
• Continues on initial steps of assessment• Identifies changes and trends• Must never be skipped except when
lifesaving interventions prevent you from doing it
continued on next slide

Copyright © 2016, 2012, 2009 by Pearson Education, Inc.All Rights Reserved
Emergency Care, 13eDaniel Limmer | Michael F. O'Keefe
Reassessment
• Identifies Changes
• Subtle and profound Trends Deterioration Improvement
continued on next slide
Copyright © 2016, 2012, 2009 by Pearson Education, Inc.All Rights Reserved
Emergency Care, 13eDaniel Limmer | Michael F. O'Keefe
Reassessment
• Communicate with the patient. Explain process. Consider patient's feelings, such as
anxiety or embarrassment.
Copyright © 2016, 2012, 2009 by Pearson Education, Inc.All Rights Reserved
Emergency Care, 13eDaniel Limmer | Michael F. O'Keefe
Components of Reassessment
• Repeat the primary assessment Recheck for life-threatening problems
• Reassess mental status.• Maintain open airway.• Monitor breathing for rate and quality.• Reassess pulse for rate and quality.• Monitor skin color and temperature.• Reestablish patient priorities.
Copyright © 2016, 2012, 2009 by Pearson Education, Inc.All Rights Reserved
Emergency Care, 13eDaniel Limmer | Michael F. O'Keefe
Pediatric Note
• The mental status of an unresponsive child or infant can be checked by shouting (verbal stimulus) or flicking the feet (painful stimulus).
• Crying is an expected response from a child with adequate mental status.
Copyright © 2016, 2012, 2009 by Pearson Education, Inc.All Rights Reserved
Emergency Care, 13eDaniel Limmer | Michael F. O'Keefe
Components of Reassessment
• Reassess and record vital signs Compare results with baseline
measurements. Reevaluate oxygen saturation. Document findings to record and
identify trends.
Copyright © 2016, 2012, 2009 by Pearson Education, Inc.All Rights Reserved
Emergency Care, 13eDaniel Limmer | Michael F. O'Keefe
Think About It
• Think of an example of a problem that might develop into a life threat to the patient on the way to the hospital.
Copyright © 2016, 2012, 2009 by Pearson Education, Inc.All Rights Reserved
Emergency Care, 13eDaniel Limmer | Michael F. O'Keefe
Components of Reassessment
• Repeat pertinent parts of the history and physical exam Chief complaint may change, especially
with regard to severity. Ask about changes in symptoms,
especially ones anticipated because of treatments administered.
continued on next slide
Copyright © 2016, 2012, 2009 by Pearson Education, Inc.All Rights Reserved
Emergency Care, 13eDaniel Limmer | Michael F. O'Keefe
Components of Reassessment
• Repeat pertinent parts of the history and physical exam Repeat physical exam to identify
changes from baseline. Check any interventions.
continued on next slide
Copyright © 2016, 2012, 2009 by Pearson Education, Inc.All Rights Reserved
Emergency Care, 13eDaniel Limmer | Michael F. O'Keefe
Components of Reassessment
• Check interventions Ensure adequacy of oxygen delivery and
artificial ventilation. Ensure management of bleeding. Ensure adequacy of other interventions.

Copyright © 2016, 2012, 2009 by Pearson Education, Inc.All Rights Reserved
Emergency Care, 13eDaniel Limmer | Michael F. O'Keefe
Check Interventions
4. Check interventions.
Copyright © 2016, 2012, 2009 by Pearson Education, Inc.All Rights Reserved
Emergency Care, 13eDaniel Limmer | Michael F. O'Keefe
Think About It
• Describe an example of an intervention that might need to be reevaluated and discuss your process for examining it.
Copyright © 2016, 2012, 2009 by Pearson Education, Inc.All Rights Reserved
Emergency Care, 13eDaniel Limmer | Michael F. O'Keefe
Observing Trends
• Repeat reassessment steps frequently.• Establish and document trends.• Trending Observing patterns that have emerged
among vital signs• Trends may indicate new treatments or
adjustments to ongoing treatments.
Copyright © 2016, 2012, 2009 by Pearson Education, Inc.All Rights Reserved
Emergency Care, 13eDaniel Limmer | Michael F. O'Keefe
Observing Trends
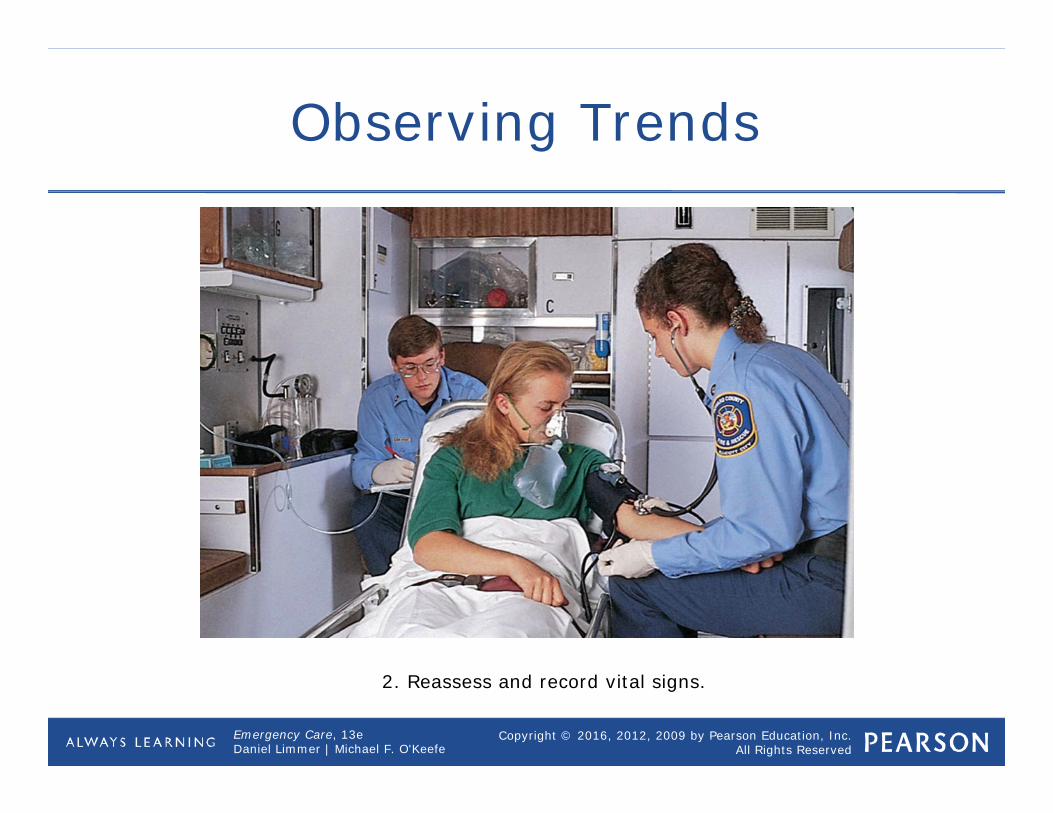
2. Reassess and record vital signs.

Copyright © 2016, 2012, 2009 by Pearson Education, Inc.All Rights Reserved
Emergency Care, 13eDaniel Limmer | Michael F. O'Keefe
Reassessment for Stableand Unstable Patients
• Patient's condition, as well as length of time with patient, will determine how often you reassess.
• The more serious patient's condition, the more often you will reassess.
continued on next slide
Copyright © 2016, 2012, 2009 by Pearson Education, Inc.All Rights Reserved
Emergency Care, 13eDaniel Limmer | Michael F. O'Keefe
Reassessment for Stableand Unstable Patients
• When to reassess Every 15 minutes for stable patient Every 5 minutes for unstable or
potentially unstable patient If you believe there may have been a
change in patient's condition, repeat at least primary assessment.
Copyright © 2016, 2012, 2009 by Pearson Education, Inc.All Rights Reserved
Emergency Care, 13eDaniel Limmer | Michael F. O'Keefe
Mid-Chapter Review
• Reassessment is the last step in your patient assessment.
• You should reassess a stable patient at least every 15 minutes and an unstable patient at least every 5 minutes.
continued on next slide
Copyright © 2016, 2012, 2009 by Pearson Education, Inc.All Rights Reserved
Emergency Care, 13eDaniel Limmer | Michael F. O'Keefe
Mid-Chapter Review
• Elements of reassessment include repeating the primary assessment, repeating and recording vital signs, repeating pertinent parts of the history and physical exam, and checking the interventions you performed for the patient.
continued on next slide

Copyright © 2016, 2012, 2009 by Pearson Education, Inc.All Rights Reserved
Emergency Care, 13eDaniel Limmer | Michael F. O'Keefe
Mid-Chapter Review
• Interventions you need to check include oxygen, bleeding, spine immobilization, and splints.
Copyright © 2016, 2012, 2009 by Pearson Education, Inc.All Rights Reserved
Emergency Care, 13eDaniel Limmer | Michael F. O'Keefe
Critical Thinking and Decision Making
Copyright © 2016, 2012, 2009 by Pearson Education, Inc.All Rights Reserved
Emergency Care, 13eDaniel Limmer | Michael F. O'Keefe
EMT Diagnosis and Critical Thinking
• Diagnosis is label for condition. Based on history, physical examination,
vital signs Involves both physical and intellectual
activity

Copyright © 2016, 2012, 2009 by Pearson Education, Inc.All Rights Reserved
Emergency Care, 13eDaniel Limmer | Michael F. O'Keefe
EMT Diagnosis and Critical Thinking
The traditional approach to reaching a diagnosis includes interviewing the patient in the controlled environment of a clinic or office.
Copyright © 2016, 2012, 2009 by Pearson Education, Inc.All Rights Reserved
Emergency Care, 13eDaniel Limmer | Michael F. O'Keefe
How a Clinician Reaches a Diagnosis
• Clinicians have different levels of training, experience, time, technology and other resources.
• Techniques vary among types of clinicians.
Copyright © 2016, 2012, 2009 by Pearson Education, Inc.All Rights Reserved
Emergency Care, 13eDaniel Limmer | Michael F. O'Keefe
The Traditional Approach to Diagnosis in Medicine
• Assess patient• List of conditions or diagnoses "Differential diagnosis" or "the
differential"• Further evaluation Reevaluate the differential
• Final diagnosis
Copyright © 2016, 2012, 2009 by Pearson Education, Inc.All Rights Reserved
Emergency Care, 13eDaniel Limmer | Michael F. O'Keefe
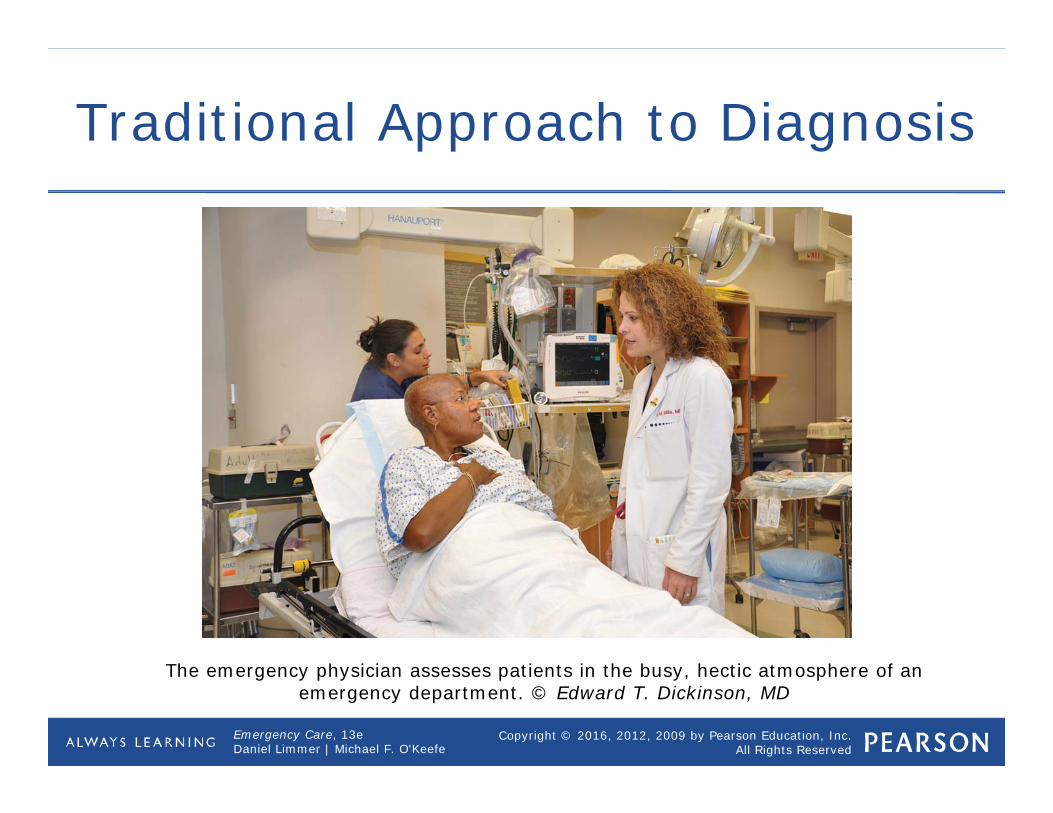
Traditional Approach to Diagnosis
The emergency physician assesses patients in the busy, hectic atmosphere of an emergency department. © Edward T. Dickinson, MD

Copyright © 2016, 2012, 2009 by Pearson Education, Inc.All Rights Reserved
Emergency Care, 13eDaniel Limmer | Michael F. O'Keefe
The Emergency Medicine Approach to Diagnosis
• Quickly rule out and treat immediate life threats. Stabilize patient.
• Return to gather additional information.• Focus on ruling out worst-case
scenario. Red flags suggest problem serious.
• May be responsible for multiple patients
Copyright © 2016, 2012, 2009 by Pearson Education, Inc.All Rights Reserved
Emergency Care, 13eDaniel Limmer | Michael F. O'Keefe
The EMS Approach to Diagnosis
• Must be very efficient Be available for another call as soon as
possible.• Work in uncontrolled environment• Limited tools and skill set• Narrow educational focus
continued on next slide
Copyright © 2016, 2012, 2009 by Pearson Education, Inc.All Rights Reserved
Emergency Care, 13eDaniel Limmer | Michael F. O'Keefe
The EMS Approach to Diagnosis
• Follows same steps as emergency physician Most are abbreviated or limited.
• Considers most serious conditions associated with patient Rules them in or out
• Creates a diagnosis
Copyright © 2016, 2012, 2009 by Pearson Education, Inc.All Rights Reserved
Emergency Care, 13eDaniel Limmer | Michael F. O'Keefe
Think About It
• You can reach a diagnosis, but your work is not done. Why?

Copyright © 2016, 2012, 2009 by Pearson Education, Inc.All Rights Reserved
Emergency Care, 13eDaniel Limmer | Michael F. O'Keefe
The Highly Experienced Clinician's Approach to Diagnosis in Medicine
• Experienced clinicians learn heuristics (shortcuts). Pattern recognition Features narrowing possibilities
• Allows efficient diagnosis and prompt treatment
• Realizes limitations of shortcuts Understands common biases of
heuristicscontinued on next slide
Copyright © 2016, 2012, 2009 by Pearson Education, Inc.All Rights Reserved
Emergency Care, 13eDaniel Limmer | Michael F. O'Keefe
The Highly Experienced Clinician's Approach to Diagnosis in Medicine
• Common heuristics Representativeness Availability Overconfidence Confirmation bias Illusory correlation Anchoring and adjustment Search satisfying
Copyright © 2016, 2012, 2009 by Pearson Education, Inc.All Rights Reserved
Emergency Care, 13eDaniel Limmer | Michael F. O'Keefe
Decision-Making Information Video
Click on the screenshot to view a video on the subject of making decisions.
Back to Directory
[ Music ] To be effective when reaching a reasoned decision, nurse managers must examine underlying assumptions,
interpret and evaluate arguments, imagine and explore alternatives, and develop an
analytical and reflective approach. Decision making involves the selection of the most reasonable alternative whereas problem
solving is a larger pursuit, which involves the diagnosis and resolution of a gap between an existing state, and a desired one. All problem solving activity begins with questioning. Different methods like trial and error and reliance on past experience and intuition may be used. Defining a problem facilitates information gathering,
which then leads to analysis and the development of solutions. Today, consensus‐based problem solving in a group
setting is the norm. Groups, since they collectively possess a greater
knowledge base can solve complex problems more creatively and efficiently than
individuals. They are particularly effective in dealing with problems
that cross organizational boundaries. However, group problem solving may involve conflict, and decisions may be skewed by the group‐think
mentality. Group think involves the pressure on individuals to
conform leading to mind guarding, self‐censorship, a false perception of moral superiority, and bias perceptions of people outside the group. Groups work best when they apply critical thinking, and
acknowledge the value of descent. Such group decisions have a greater likelihood of being
implemented effectively.
Copyright © 2016, 2012, 2009 by Pearson Education, Inc.All Rights Reserved
Emergency Care, 13eDaniel Limmer | Michael F. O'Keefe
How an EMT Can Learn to Think Like an Experienced Physician
• Learn to love ambiguity.• Understand the limitations of
technology and people.• Realize that no one strategy works for
everything.• Form a strong foundation of knowledge.
continued on next slide
Copyright © 2016, 2012, 2009 by Pearson Education, Inc.All Rights Reserved
Emergency Care, 13eDaniel Limmer | Michael F. O'Keefe
How an EMT Can Learn to Think Like an Experienced Physician
• Organize the data in your head.• Change the way you think.• Learn from others.• Reflect on what you have learned.
Copyright © 2016, 2012, 2009 by Pearson Education, Inc.All Rights Reserved
Emergency Care, 13eDaniel Limmer | Michael F. O'Keefe
Think About It
• What are some of the important things to remember as you learn how to make a diagnosis and improve your critical thinking skills in EMS?
Copyright © 2016, 2012, 2009 by Pearson Education, Inc.All Rights Reserved
Emergency Care, 13eDaniel Limmer | Michael F. O'Keefe
Leadership Video
Click on the screenshot to view a video on the subject of effective leadership.
Back to Directory
[ Music ] Today all nurses are managers. Not in the formal organizational sense but in practice. They direct the work of nonprofessionals and
professionals in order to achieve desired outcomes in patient care. But all good managers must also be good leaders. As such all nurses need to learn leadership and
management skills to be more efficient and effective. A leader must have enthusiasm and commitment but
most important must inspire others to commit to the goals of the organization. Within nurse management a leader must balance the
needs of patients, the organization, employees, physicians and the self. A manager must be responsible for efficiently accomplishing the goals of the organization.
Nurse managers are accountable for the quality of clinical practice, use of resources,
personnel development, institutional compliance, strategic planning and interdisciplinary collaboration. Typically nurse managers appear at three levels.
First level managers are directly involved with the day to day allocation of resources. Middle managers serve as liaisons and supervisors. And upper level managers execute organizational goals.
Copyright © 2016, 2012, 2009 by Pearson Education, Inc.All Rights Reserved
Emergency Care, 13eDaniel Limmer | Michael F. O'Keefe
Delegating Authority Video
Click on the screenshot to view a video on the subject of delegation.
Back to Directory
[ Music ] Effective two way communication is vital for the success
of the delegation process. The transfer of authority and responsibility for
performing a task, by the person who is originally responsible for it, is
called delegation. However, accountability for the proper performance of the task, remains with the delegator. Delegation is a process that empowers subordinates,
builds trust and enhances communication while developing strong
leadership skills and efficient teams. Routine low priority tasks are ideal for delegation. Such definition also allows for subdivision of the larger
tasks into smaller ones, to match the skills of subordinates. Understanding whether the subordinate is capable of
accepting responsibility and performing the various tasks, is a critical step in
delegation. Ideally, the person lowest in hierarchy, among those
capable of performing the task, should be chosen. A good manager clearly defines expectations for the
performance of the task. Delegates must know their range of authority and responsibility, the reasons for the performance of the task, the procedures for reporting and the
standards by which their performance will be evaluated. A number of factors may interfere with effective
delegation, including limitations placed by organizational guidelines and availability of
resources. Ineffective interpersonal skills, also make for poor
delegation. It is the responsibility of the delegator to monitor the
performance and provide feedback to the delegate. Praise and recognition, especially in public settings,
enhance performance.

Copyright © 2016, 2012, 2009 by Pearson Education, Inc.All Rights Reserved
Emergency Care, 13eDaniel Limmer | Michael F. O'Keefe
Chapter Review
Copyright © 2016, 2012, 2009 by Pearson Education, Inc.All Rights Reserved
Emergency Care, 13eDaniel Limmer | Michael F. O'Keefe
Mid-Chapter Review
• EMTs make some diagnoses in the field, although they are not as extensive or detailed as physicians' diagnoses.
• The traditional approach to reaching a diagnosis is to assess the patient, draw up a list of differential diagnoses, assess further to rule in or rule out different conditions, and narrow the list until you reach a conclusion.
continued on next slide
Copyright © 2016, 2012, 2009 by Pearson Education, Inc.All Rights Reserved
Emergency Care, 13eDaniel Limmer | Michael F. O'Keefe
Mid-Chapter Review
• Highly experienced physicians don't always use the traditional approach. They use heuristics (shortcuts) in combination with their experience and training, which speeds up the process of reaching a diagnosis.
continued on next slide
Copyright © 2016, 2012, 2009 by Pearson Education, Inc.All Rights Reserved
Emergency Care, 13eDaniel Limmer | Michael F. O'Keefe
Mid-Chapter Review
• Shortcomings of heuristics include representativeness, anchoring and adjustment, overconfidence, confirmation bias, illusory correlation, and search satisfying.
continued on next slide
Copyright © 2016, 2012, 2009 by Pearson Education, Inc.All Rights Reserved
Emergency Care, 13eDaniel Limmer | Michael F. O'Keefe
Mid-Chapter Review
• Learn to think more critically by accepting the ambiguity of EMS working conditions, understanding limitations of people and technology, forming a strong foundation of knowledge, and organizing the data in your mind.
continued on next slide

Copyright © 2016, 2012, 2009 by Pearson Education, Inc.All Rights Reserved
Emergency Care, 13eDaniel Limmer | Michael F. O'Keefe
Mid-Chapter Review
• When considering the cause of a patient's condition, don't let your search for a cause delay your treatment of the patient.
Copyright © 2016, 2012, 2009 by Pearson Education, Inc.All Rights Reserved
Emergency Care, 13eDaniel Limmer | Michael F. O'Keefe
Remember
• Use MOI to determine the need for a rapid trauma assessment.
• Assume spinal injury.• Work as a team to complete the
assessment.

Copyright © 2016, 2012, 2009 by Pearson Education, Inc.All Rights Reserved
Emergency Care, 13eDaniel Limmer | Michael F. O'Keefe
Questions to Consider
• How do the focused physical exam of a trauma patient with a significant MOI differ from those for a trauma patient with no significant MOI?
continued on next slide
Copyright © 2016, 2012, 2009 by Pearson Education, Inc.All Rights Reserved
Emergency Care, 13eDaniel Limmer | Michael F. O'Keefe
Questions to Consider
• List the steps and areas covered in the rapid trauma assessment. How are these steps different in the detailed assessment?
Copyright © 2016, 2012, 2009 by Pearson Education, Inc.All Rights Reserved
Emergency Care, 13eDaniel Limmer | Michael F. O'Keefe
Critical Thinking
• You are assessing a patient who fell three stories. He is unresponsive and bleeding into his airway. The driver of the ambulance is positioning the vehicle and bringing equipment to you.
continued on next slide
Copyright © 2016, 2012, 2009 by Pearson Education, Inc.All Rights Reserved
Emergency Care, 13eDaniel Limmer | Michael F. O'Keefe
Critical Thinking
• How do you balance the patient's need for airway control (he requires frequent suctioning) with the need to assess his injuries?