Embed Size (px)
Citation preview
Oracle® Fusion MiddlewareInstalling Oracle JDeveloper
12c (12.2.1)
E60735-04
May 2016
Documentation for installers and application developers thatexplains how to install Oracle JDeveloper on various operatingsystems.

Oracle Fusion Middleware Installing Oracle JDeveloper, 12c (12.2.1)
E60735-04
Copyright © 2013, 2016, Oracle and/or its affiliates. All rights reserved.
Primary Authors: Ingrid Snedecor, Peter Laquerre, Rekha M. Kamath, Brian Fry, Jacob Danner, DominiquePoudret
This software and related documentation are provided under a license agreement containing restrictions onuse and disclosure and are protected by intellectual property laws. Except as expressly permitted in yourlicense agreement or allowed by law, you may not use, copy, reproduce, translate, broadcast, modify, license,transmit, distribute, exhibit, perform, publish, or display any part, in any form, or by any means. Reverseengineering, disassembly, or decompilation of this software, unless required by law for interoperability, isprohibited.
The information contained herein is subject to change without notice and is not warranted to be error-free. Ifyou find any errors, please report them to us in writing.
If this is software or related documentation that is delivered to the U.S. Government or anyone licensing it onbehalf of the U.S. Government, then the following notice is applicable:
U.S. GOVERNMENT END USERS: Oracle programs, including any operating system, integrated software,any programs installed on the hardware, and/or documentation, delivered to U.S. Government end users are"commercial computer software" pursuant to the applicable Federal Acquisition Regulation and agency-specific supplemental regulations. As such, use, duplication, disclosure, modification, and adaptation of theprograms, including any operating system, integrated software, any programs installed on the hardware,and/or documentation, shall be subject to license terms and license restrictions applicable to the programs.No other rights are granted to the U.S. Government.
This software or hardware is developed for general use in a variety of information management applications.It is not developed or intended for use in any inherently dangerous applications, including applications thatmay create a risk of personal injury. If you use this software or hardware in dangerous applications, then youshall be responsible to take all appropriate fail-safe, backup, redundancy, and other measures to ensure itssafe use. Oracle Corporation and its affiliates disclaim any liability for any damages caused by use of thissoftware or hardware in dangerous applications.
Oracle and Java are registered trademarks of Oracle and/or its affiliates. Other names may be trademarks oftheir respective owners.
Intel and Intel Xeon are trademarks or registered trademarks of Intel Corporation. All SPARC trademarks areused under license and are trademarks or registered trademarks of SPARC International, Inc. AMD, Opteron,the AMD logo, and the AMD Opteron logo are trademarks or registered trademarks of Advanced MicroDevices. UNIX is a registered trademark of The Open Group.
This software or hardware and documentation may provide access to or information about content, products,and services from third parties. Oracle Corporation and its affiliates are not responsible for and expresslydisclaim all warranties of any kind with respect to third-party content, products, and services unlessotherwise set forth in an applicable agreement between you and Oracle. Oracle Corporation and its affiliateswill not be responsible for any loss, costs, or damages incurred due to your access to or use of third-partycontent, products, or services, except as set forth in an applicable agreement between you and Oracle.
Contents
Preface ................................................................................................................................................................. v
Audience ........................................................................................................................................................ v
Related Documents....................................................................................................................................... v
Conventions................................................................................................................................................... v
1 Preparing to Install Oracle JDeveloper
1.1 Introducing Oracle JDeveloper...................................................................................................... 1-1
1.2 Roadmap for Installing Oracle JDeveloper.................................................................................. 1-2
1.3 Verifying the Oracle JDeveloper Certification Information ...................................................... 1-2
1.4 Verifying System Requirements .................................................................................................... 1-3
1.5 Understanding and Obtaining the Oracle JDeveloper Distributions....................................... 1-3
1.6 Deploying and Testing Applications Developed in Oracle JDeveloper.................................. 1-4
2 Installing the Oracle JDeveloper Software
2.1 Understanding the Oracle JDeveloper Installation Types......................................................... 2-1
2.2 Installing Oracle JDeveloper Studio.............................................................................................. 2-2
2.2.1 Starting the Oracle JDeveloper Studio Installation Program......................................... 2-3
2.2.2 Navigating the Installation Screens ................................................................................... 2-5
2.2.3 Customizing Oracle JDeveloper on Startup ..................................................................... 2-7
2.3 Verifying the Oracle JDeveloper Studio Installation .................................................................. 2-8
2.4 Installing the JDeveloper Java Distribution ................................................................................. 2-9
2.5 Specifying the JDK Location for JDeveloper Java ....................................................................... 2-9
3 Next Steps After Installing Oracle JDeveloper Studio
3.1 Preparing to Launch Oracle JDeveloper....................................................................................... 3-2
3.1.1 Optimizing Oracle JDeveloper on Linux, UNIX, and Mac OS X................................... 3-3
3.1.2 Optimizing Oracle JDeveloper on Windows ................................................................... 3-6
3.1.3 Optimizing Oracle JDeveloper in a Multiuser Environment......................................... 3-9
3.2 Launching Oracle JDeveloper ...................................................................................................... 3-10
On Linux, UNIX, and Mac OS X: ................................................................................................. 3-10
On Windows: .................................................................................................................................. 3-10
On the Command Line: ................................................................................................................. 3-11
iii
3.3 Migrating Oracle JDeveloper From a Previous Version .......................................................... 3-11
3.3.1 Migrating User Settings..................................................................................................... 3-11
3.3.2 Migrating Projects .............................................................................................................. 3-12
3.3.3 Using Headless Migration ................................................................................................ 3-12
3.4 Enabling Oracle JDeveloper Extensions ..................................................................................... 3-14
3.5 Using Oracle WebLogic Server with Oracle JDeveloper ......................................................... 3-15
3.5.1 Using the Integrated Oracle WebLogic Server............................................................... 3-16
3.6 Understanding Oracle JDeveloper Accessibility Information ................................................ 3-16
3.6.1 Using a Screen Reader and Java Access Bridge with Oracle JDeveloper................... 3-16
3.6.2 Finding Accessibility Information ................................................................................... 3-18
3.7 Additional Resources .................................................................................................................... 3-18
4 Deinstalling Oracle JDeveloper
4.1 Performing Pre-Deinstallation Tasks............................................................................................ 4-1
4.2 Deinstalling Oracle JDeveloper ..................................................................................................... 4-1
4.2.1 Starting the Deinstaller ........................................................................................................ 4-1
4.2.2 Manually Removing Artifacts ............................................................................................ 4-2
A Silent Installation and Deinstallation of Oracle JDeveloper
A.1 Installing Oracle JDeveloper Studio in Silent Mode.................................................................. A-1
A.2 Deinstalling Oracle JDeveloper in Silent Mode ......................................................................... A-1
iv
Preface
This document describes how to install Oracle JDeveloper.
Audience
Related Documents
Conventions
AudienceThis guide is intended for application developers who want to develop Javaapplications using JDeveloper. It is assumed that readers are familiar with Webtechnologies and have a general understanding of Windows and UNIX platforms.
Related DocumentsFor more information, see the following documents in the Oracle Fusion Middlewarelibrary:
• Planning an Installation of Oracle Fusion Middleware
• Oracle Fusion Middleware System Requirements and Specifications
• Installing and Configuring Oracle WebLogic Server and Coherence
• Developing Fusion Web Applications with Oracle Application Development Framework
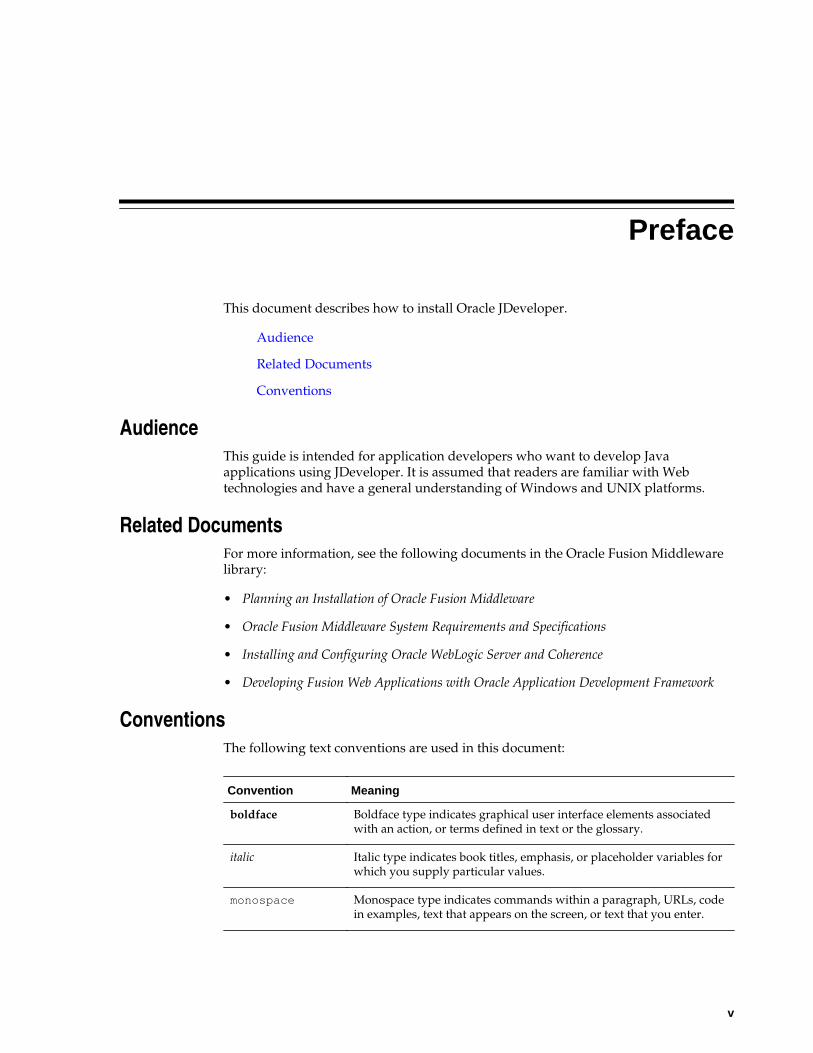
ConventionsThe following text conventions are used in this document:
Convention Meaning
boldface Boldface type indicates graphical user interface elements associatedwith an action, or terms defined in text or the glossary.
italic Italic type indicates book titles, emphasis, or placeholder variables forwhich you supply particular values.
monospace Monospace type indicates commands within a paragraph, URLs, codein examples, text that appears on the screen, or text that you enter.
v

1Preparing to Install Oracle JDeveloper
To prepare for your Oracle JDeveloper installation, understand what’s new in thisrelease, verify that your system meets the basic requirements, then obtain the correctinstallation software.
Introducing Oracle JDeveloperOracle JDeveloper provides an extremely productive developmentenvironment that covers the full development life cycle and integratesfeatures addressing the multitude of technologies used for buildingstandard-based enterprise applications.
Roadmap for Installing Oracle JDeveloperThis roadmap provides all the steps required to install OracleJDeveloper.
Verifying the Oracle JDeveloper Certification InformationBefore you install Oracle JDeveloper, you should understandcompatibility with other certified software.
Verifying System RequirementsBefore you install Oracle JDeveloper, you should understand the systemrequirements.
Understanding and Obtaining the Oracle JDeveloper DistributionsOracle JDeveloper is available in two distinct distributions: OracleJDeveloper Studio and Oracle JDeveloper Java.
Deploying and Testing Applications Developed in Oracle JDeveloperWith the Oracle JDeveloper Studio distribution, you can test yourapplications locally in an embedded version of Oracle WebLogic Serverthat contains the required libraries and Oracle ADF runtime software.
1.1 Introducing Oracle JDeveloperOracle JDeveloper provides an extremely productive development environment thatcovers the full development life cycle and integrates features addressing the multitudeof technologies used for building standard-based enterprise applications.
Some of the salient features of Oracle JDeveloper are:
• Integrates development features for Java, SOA, Web 2.0, Database, XML and Webservices into a single development tool.
• Covers the full development life cycle from initial design and analysis, through thecoding and testing phases, all the way to deployment.
• Focuses on increasing developers productivity by offering a visual and declarativeapproach to application design that provide a simpler way to define the
Preparing to Install Oracle JDeveloper 1-1
components that construct an application, thereby simplifying and eliminatingtedious coding.
• Integrates the full set of features needed for developing composite applicationswith specific features that address technologies such as Java, Database, web pagedesigning, Web Services and XML, Fusion Middleware, and others.
Note: This release of JDeveloper requires Java SE Development Kit (JDK) 8.
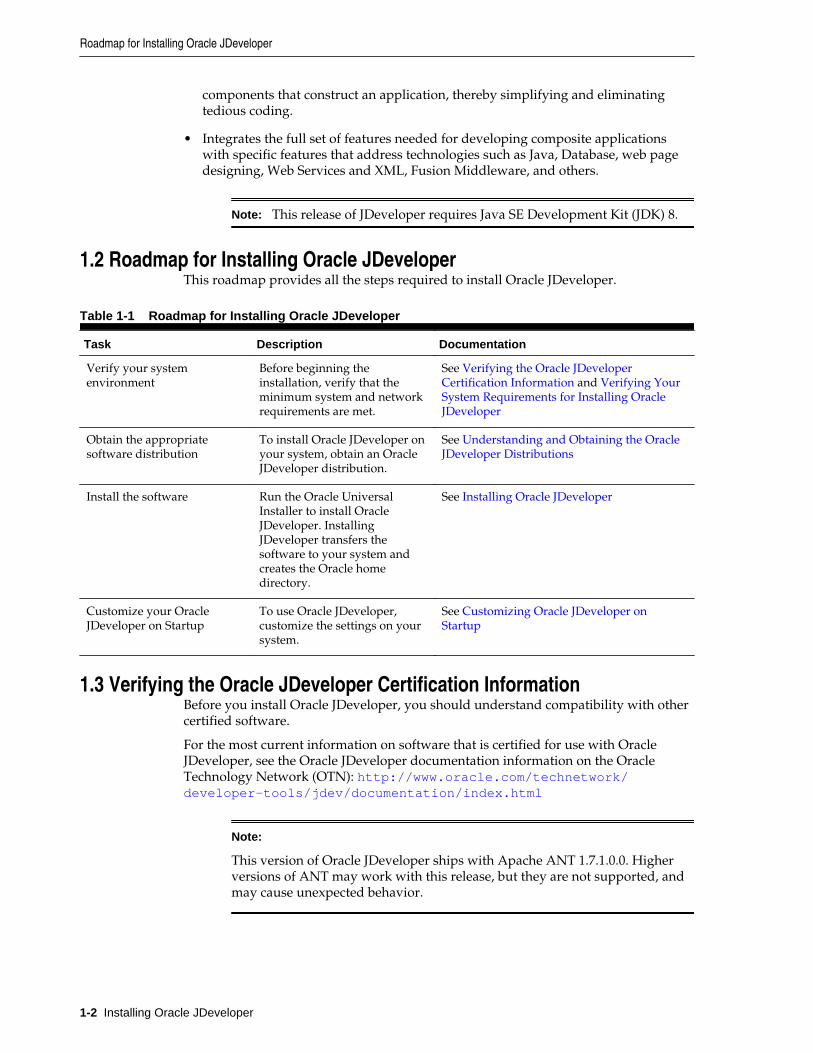
1.2 Roadmap for Installing Oracle JDeveloperThis roadmap provides all the steps required to install Oracle JDeveloper.
Table 1-1 Roadmap for Installing Oracle JDeveloper
Task Description Documentation
Verify your systemenvironment
Before beginning theinstallation, verify that theminimum system and networkrequirements are met.
See Verifying the Oracle JDeveloperCertification Information and Verifying YourSystem Requirements for Installing OracleJDeveloper
Obtain the appropriatesoftware distribution
To install Oracle JDeveloper onyour system, obtain an OracleJDeveloper distribution.
See Understanding and Obtaining the OracleJDeveloper Distributions
Install the software Run the Oracle UniversalInstaller to install OracleJDeveloper. InstallingJDeveloper transfers thesoftware to your system andcreates the Oracle homedirectory.
See Installing Oracle JDeveloper
Customize your OracleJDeveloper on Startup
To use Oracle JDeveloper,customize the settings on yoursystem.
See Customizing Oracle JDeveloper onStartup
1.3 Verifying the Oracle JDeveloper Certification InformationBefore you install Oracle JDeveloper, you should understand compatibility with othercertified software.
For the most current information on software that is certified for use with OracleJDeveloper, see the Oracle JDeveloper documentation information on the OracleTechnology Network (OTN): http://www.oracle.com/technetwork/developer-tools/jdev/documentation/index.html
Note:
This version of Oracle JDeveloper ships with Apache ANT 1.7.1.0.0. Higherversions of ANT may work with this release, but they are not supported, andmay cause unexpected behavior.
Roadmap for Installing Oracle JDeveloper
1-2 Installing Oracle JDeveloper
1.4 Verifying System RequirementsBefore you install Oracle JDeveloper, you should understand the system requirements.
This release of Oracle JDeveloper has been tested and certified on Windows, Linux,and Mac OS X. It has not been certified for porting platform like Solaris, AIX, or HPI,but Oracle provides support if you are running Oracle JDeveloper on any platformwith Java SE Development Kit (JDK) 8.
For information about recommended CPU, memory, display, and hard driveconfigurations, see "Oracle JDeveloper Requirements" in Oracle Fusion MiddlewareSystem Requirements and Specifications
For information about the certified JDK for your installation, see Understanding JDKRequirements for an Oracle Fusion Middleware Installation in Planning an Installationof Oracle Fusion Middleware.
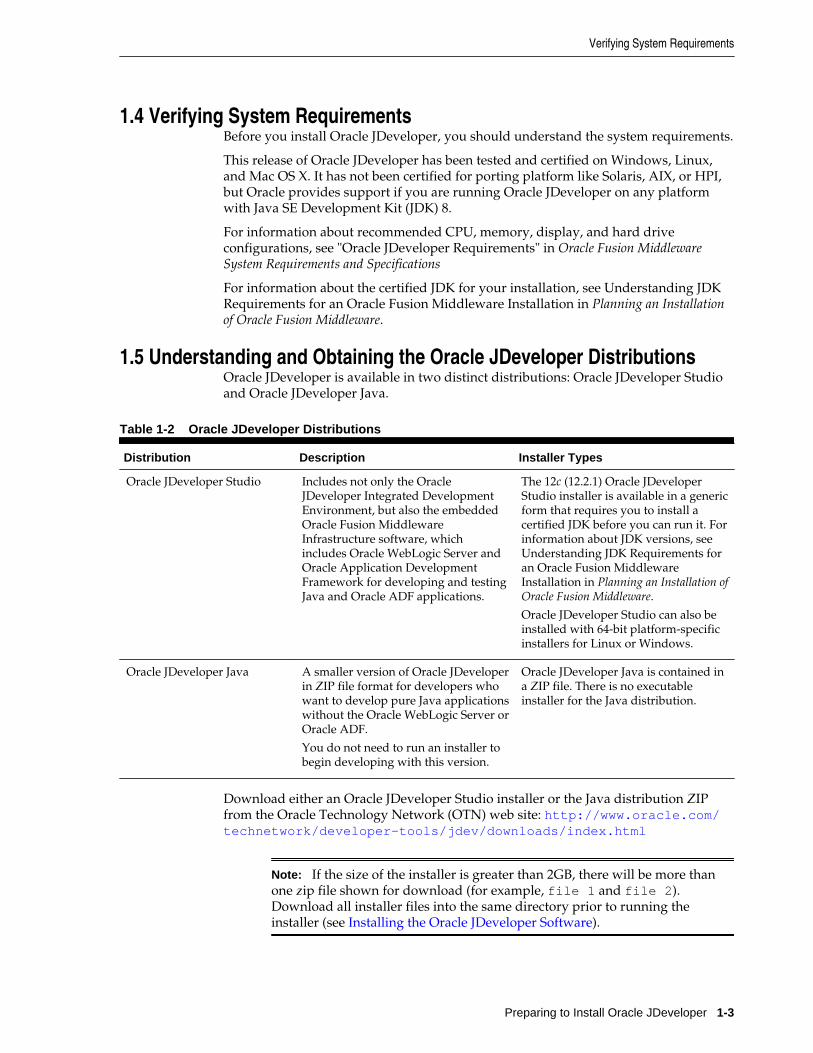
1.5 Understanding and Obtaining the Oracle JDeveloper DistributionsOracle JDeveloper is available in two distinct distributions: Oracle JDeveloper Studioand Oracle JDeveloper Java.
Table 1-2 Oracle JDeveloper Distributions
Distribution Description Installer Types
Oracle JDeveloper Studio Includes not only the OracleJDeveloper Integrated DevelopmentEnvironment, but also the embeddedOracle Fusion MiddlewareInfrastructure software, whichincludes Oracle WebLogic Server andOracle Application DevelopmentFramework for developing and testingJava and Oracle ADF applications.
The 12c (12.2.1) Oracle JDeveloperStudio installer is available in a genericform that requires you to install acertified JDK before you can run it. Forinformation about JDK versions, see Understanding JDK Requirements foran Oracle Fusion MiddlewareInstallation in Planning an Installation ofOracle Fusion Middleware.
Oracle JDeveloper Studio can also beinstalled with 64-bit platform-specificinstallers for Linux or Windows.
Oracle JDeveloper Java A smaller version of Oracle JDeveloperin ZIP file format for developers whowant to develop pure Java applicationswithout the Oracle WebLogic Server orOracle ADF.
You do not need to run an installer tobegin developing with this version.
Oracle JDeveloper Java is contained ina ZIP file. There is no executableinstaller for the Java distribution.
Download either an Oracle JDeveloper Studio installer or the Java distribution ZIPfrom the Oracle Technology Network (OTN) web site: http://www.oracle.com/technetwork/developer-tools/jdev/downloads/index.html
Note: If the size of the installer is greater than 2GB, there will be more thanone zip file shown for download (for example, file 1 and file 2).Download all installer files into the same directory prior to running theinstaller (see Installing the Oracle JDeveloper Software).
Verifying System Requirements
Preparing to Install Oracle JDeveloper 1-3
1.6 Deploying and Testing Applications Developed in Oracle JDeveloperWith the Oracle JDeveloper Studio distribution, you can test your applications locallyin an embedded version of Oracle WebLogic Server that contains the required librariesand Oracle ADF runtime software.
For more information, see Using Oracle WebLogic Server with Oracle JDeveloper.
To deploy Java Enterprise Edition (Java EE) applications from Oracle JDeveloper,install and configure the Oracle WebLogic Server and Coherence distribution. Formore information, see Installing and Configuring Oracle WebLogic Server and Coherence.
To deploy Oracle ADF applications from Oracle JDeveloper, install and configure theOracle Fusion Middleware Infrastructure distribution. For more information, see Installing and Configuring the Oracle Fusion Middleware Infrastructure.
Deploying and Testing Applications Developed in Oracle JDeveloper
1-4 Installing Oracle JDeveloper
2Installing the Oracle JDeveloper Software
Follow the steps pertinent to your operating system to install the Oracle JDevelopersoftware.
Note: The Oracle JDeveloper software installation described here does notenable you to develop SOA or Business Process Management applications.
To install a version of JDeveloper pre-configured for SOA Suite or BusinessProcess Management Suite applications, see Introducing the Quick StartDistributions in Installing SOA Suite and Business Process Management SuiteQuick Start for Developers.
Understanding the Oracle JDeveloper Installation TypesThe installation steps depend on the Oracle JDeveloper distribution andinstaller you are using.
Installing Oracle JDeveloper StudioYou can install Oracle JDeveloper Studio on Linux, UNIX, Mac OS X,and Windows operating systems.
Verifying the Oracle JDeveloper Studio InstallationAfter you complete the installation of Oracle JDeveloper Studio, verify itwas successful.
Installing the JDeveloper Java DistributionJDeveloper Java does not require an installer. To install the OracleJDeveloper Java distribution, all you need is an unzip tool.
Specifying the JDK Location for JDeveloper JavaWhen you start the Java edition of Oracle JDeveloper for the first time,the jdev script prompts you to provide the location of your JDKinstallation if it cannot locate it.
2.1 Understanding the Oracle JDeveloper Installation TypesThe installation steps depend on the Oracle JDeveloper distribution and installer youare using.
Note:
The installation types described here do not support SOA extensions. Toinstall a version of JDeveloper pre-configured for SOA Suite or BusinessProcess Management Suite applications, see Introducing the Quick StartDistributions in Installing SOA Suite and Business Process Management SuiteQuick Start for Developers.
Installing the Oracle JDeveloper Software 2-1

You should have obtained the appropriate installer for your operating system asdescribed in Understanding and Obtaining the Oracle JDeveloper Distributions.Depending on what distribution and installer you are using, the type of installationyou will perform differs:
• If you are installing the Oracle JDeveloper Java distribution, all you need to do isunzip the files. This process is covered in Installing the JDeveloper JavaDistribution.
• If you are using a platform-specific installer for Oracle JDeveloper Studio, the JDKversion specific to this Oracle JDeveloper installation is installed automatically.
• If you are going to run the generic installer for Oracle JDeveloper Studio, ensurethat the following prerequisites are met:
– You must have the required JDK installed on your system.
Identify what JDK versions are certified for JDeveloper 12c (12.2.1) on youroperating system using this site: http://www.oracle.com/technetwork/developer-tools/jdev/documentation/index.html
Obtain a certified version of the JDK from the following location on OTN: http://www.oracle.com/technetwork/java/javase/downloads/index.html
– To streamline the installation process, the JDK you wish to use with the productshould be the one you use to start the installer program. Make sure that thedesired JDK is the first one in your system PATH, or reference it explicitly on thecommand line.
2.2 Installing Oracle JDeveloper StudioYou can install Oracle JDeveloper Studio on Linux, UNIX, Mac OS X, and Windowsoperating systems.
Note:
The Oracle JDeveloper Studio installation described here cannot be used todevelop SOA Suite or Business Process Management Suite applications. See Understanding the Oracle JDeveloper Installation Types for details.
Installing Oracle JDeveloper Studio
2-2 Installing Oracle JDeveloper
Starting the Oracle JDeveloper Studio Installation ProgramThe steps to launch the Oracle JDeveloper Studio installation programdepends on the type of installer you are using.
Navigating the Installation ScreensThe installer shows a series of screens where you verify or enterinformation.
Customizing Oracle JDeveloper on StartupYou can customize Oracle JDeveloper Studio on startup using options onthe Installation Complete screen of the installer.
2.2.1 Starting the Oracle JDeveloper Studio Installation ProgramThe steps to launch the Oracle JDeveloper Studio installation program depends on thetype of installer you are using.
• Launching the Generic Installer on Linux, UNIX, and Mac OS X
• Launching the Generic Installer on Windows
• Launching the Platform-Specific Installer for Linux, UNIX, and Mac OS X
• Launching the Windows-Specific Installer
• Launching the Installer in Silent Mode
Launching the Generic Installer on Linux, UNIX, and Mac OS X
To launch the platform-independent installer on your hosted Linux, UNIX, or Mac OSX machine:
1. Log into the host computer where you want to install Oracle JDeveloper.
Be sure the user account you use for installing Oracle JDeveloper has the requiredprivileges. For more information, see Selecting an Installation User in Planning anInstallation of Oracle Fusion Middleware.
2. Ensure that a certified JDK exists on the system on which you are about to installOracle JDeveloper. If you checked the prerequisites for generic installers asdescribed in Understanding the Oracle JDeveloper Installation Types, you shouldhave already obtained and installed a certified JDK on your system.
You can double-check your JDK version by running java -version from thecommand line. This command will return the JDK version that you have installedon your machine. Make sure the outputted version is certified for 12c (12.2.1)JDeveloper by checking here: http://www.oracle.com/technetwork/developer-tools/jdev/documentation/index.html
3. Navigate to the directory where you downloaded the installer files.
4. Launch the installer by invoking java -jar from the JDK directory on yoursystem, as shown in the example below:
\home\Oracle\jdk1.8.0_60\bin\java -jar jdev_suite_122100.jar
Be sure to replace /home/Oracle/jdk1.8.0_60 in this example with thelocation of the JDK on your system.
Installing Oracle JDeveloper Studio
Installing the Oracle JDeveloper Software 2-3
When the installation program appears, you are ready to begin the installation. See Navigating the Installation Screens to Install Oracle JDeveloper for a description ofeach installation program screen.
Launching the Generic Installer on Windows
To launch the platform-independent installer on your Windows machine:
1. Log into the host computer where you want to install Oracle JDeveloper.
Be sure the user account you use for installing Oracle JDeveloper has the requiredprivileges. For more information, see Selecting an Installation User in Planning anInstallation of Oracle Fusion Middleware.
2. Ensure that a certified JDK exists on the system on which you are about to installOracle JDeveloper. If you checked the prerequisites for generic installers asdescribed in Understanding the Oracle JDeveloper Installation Types, you shouldhave already obtained and installed a certified JDK on your system.
You can double-check your JDK version using one of the methods described here: https://www.java.com/en/download/help/version_manual.xml.Make sure your JDK version is certified for 12c (12.2.1) JDeveloper by checking thecertification information for this release at the following page: http://www.oracle.com/technetwork/developer-tools/jdev/documentation/index.html
3. Navigate to the directory where you downloaded the installer files.
4. Launch the installer by invoking java -jar from the JDK directory on yoursystem, as shown in the example below:
\home\Oracle\jdk1.8.0_60\bin\java -jar jdev_suite_122100.jar
Be sure to replace \home\Oracle\jdk1.8.0_60 in this example with thelocation of the JDK on your system.
You can also navigate to the folder where you downloaded the Oracle JDeveloperinstaller and double-click on the icon to launch the installation wizard.
When the installation program appears, you are ready to begin the installation. See Navigating the Installation Screens to Install Oracle JDeveloper for a description ofeach installation program screen.
Launching the Platform-Specific Installer for Linux, UNIX, and Mac OS X
To launch the platform-specific installer on Linux, UNIX, or Mac OS X:
1. Log into the host computer where you want to install Oracle JDeveloper.
Be sure the user account you use for installing Oracle JDeveloper has the requiredprivileges. For more information, see Selecting an Installation User in Planning anInstallation of Oracle Fusion Middleware.
2. Navigate to the directory where you downloaded the platform-specific installerfiles.
3. Launch the installer by running the following command:
./jdev_suite_122100_linux64.bin
Installing Oracle JDeveloper Studio
2-4 Installing Oracle JDeveloper
You can also navigate to the folder where you downloaded the Oracle JDeveloperinstaller and double-click on the icon to launch the installation wizard.
When the installation program appears, you are ready to begin the installation. See Navigating the Installation Screens to Install Oracle JDeveloper for a description ofeach installation program screen.
Launching the Windows-Specific Installer
To launch the platform-specific installer on Windows:
1. Log into the host computer where you want to install Oracle JDeveloper.
Be sure the user account you use for installing Oracle JDeveloper has the requiredprivileges. For more information, see Selecting an Installation User in Planning anInstallation of Oracle Fusion Middleware.
2. Navigate to the directory where you downloaded the platform-specific installerfiles.
3. Launch the installer. You launch it from the command line by running thefollowing command:
jdev_suite_122100_win64.exe
You can also navigate to the folder where you downloaded the Oracle JDeveloperinstaller and double-click on the icon to launch the installation wizard.
When the installation program appears, you are ready to begin the installation.See Navigating the Installation Screens to Install Oracle JDeveloper for adescription of each installation program screen.
Launching the Installer in Silent Mode
You can also launch the installer in silent mode to ensure that no configuration optionsare displayed during the installation process. For more information, see InstallingOracle JDeveloper Studio in Silent Mode.
2.2.2 Navigating the Installation ScreensThe installer shows a series of screens where you verify or enter information.
The following table lists the order in which installer screens appear. If you needadditional help with an installation screen, click the screen name in the table or Helpin the installer.
Table 2-1 Oracle JDeveloper Install Screens
Installing Oracle JDeveloper Studio
Installing the Oracle JDeveloper Software 2-5
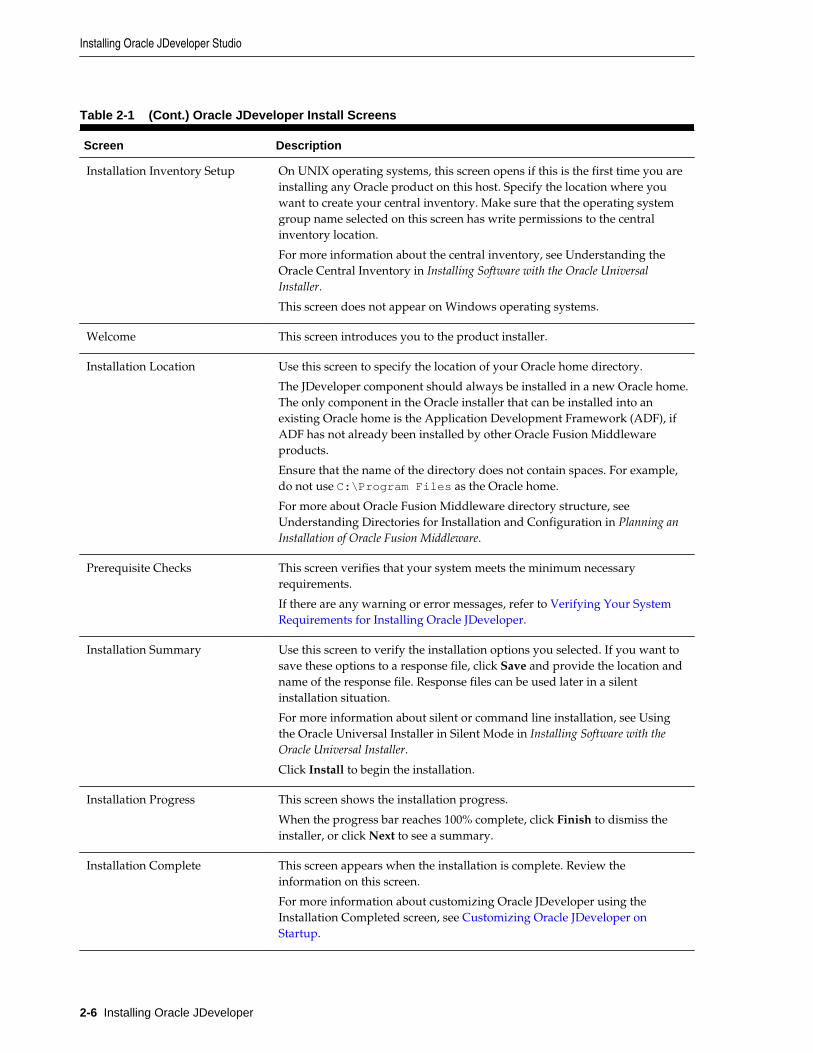
Table 2-1 (Cont.) Oracle JDeveloper Install Screens
Screen Description
Installation Inventory Setup On UNIX operating systems, this screen opens if this is the first time you areinstalling any Oracle product on this host. Specify the location where youwant to create your central inventory. Make sure that the operating systemgroup name selected on this screen has write permissions to the centralinventory location.
For more information about the central inventory, see Understanding theOracle Central Inventory in Installing Software with the Oracle UniversalInstaller.
This screen does not appear on Windows operating systems.
Welcome This screen introduces you to the product installer.
Installation Location Use this screen to specify the location of your Oracle home directory.
The JDeveloper component should always be installed in a new Oracle home.The only component in the Oracle installer that can be installed into anexisting Oracle home is the Application Development Framework (ADF), ifADF has not already been installed by other Oracle Fusion Middlewareproducts.
Ensure that the name of the directory does not contain spaces. For example,do not use C:\Program Files as the Oracle home.
For more about Oracle Fusion Middleware directory structure, see Understanding Directories for Installation and Configuration in Planning anInstallation of Oracle Fusion Middleware.
Prerequisite Checks This screen verifies that your system meets the minimum necessaryrequirements.
If there are any warning or error messages, refer to Verifying Your SystemRequirements for Installing Oracle JDeveloper.
Installation Summary Use this screen to verify the installation options you selected. If you want tosave these options to a response file, click Save and provide the location andname of the response file. Response files can be used later in a silentinstallation situation.
For more information about silent or command line installation, see Usingthe Oracle Universal Installer in Silent Mode in Installing Software with theOracle Universal Installer.
Click Install to begin the installation.
Installation Progress This screen shows the installation progress.
When the progress bar reaches 100% complete, click Finish to dismiss theinstaller, or click Next to see a summary.
Installation Complete This screen appears when the installation is complete. Review theinformation on this screen.
For more information about customizing Oracle JDeveloper using theInstallation Completed screen, see Customizing Oracle JDeveloper onStartup.
Installing Oracle JDeveloper Studio
2-6 Installing Oracle JDeveloper
For more information about the installation screens that appear while installing OracleJDeveloper, see Oracle Universal Installer Installation Screens in Installing Softwarewith the Oracle Universal Installer.
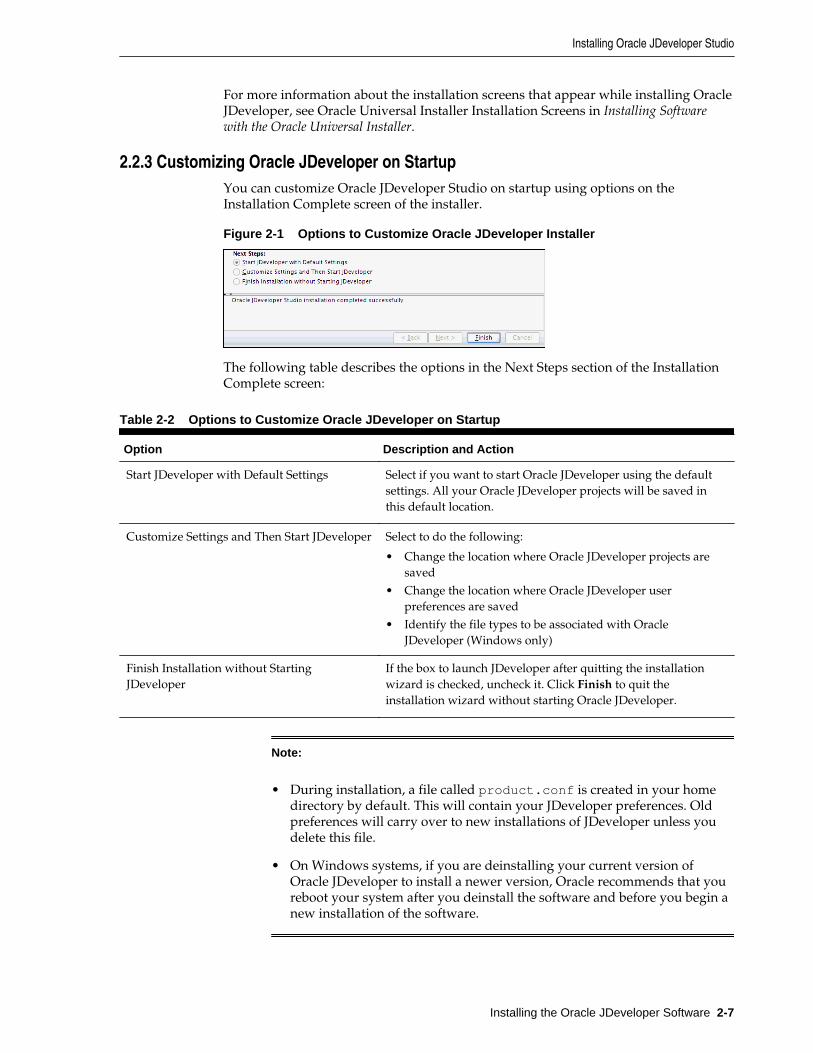
2.2.3 Customizing Oracle JDeveloper on StartupYou can customize Oracle JDeveloper Studio on startup using options on theInstallation Complete screen of the installer.
Figure 2-1 Options to Customize Oracle JDeveloper Installer
The following table describes the options in the Next Steps section of the InstallationComplete screen:
Table 2-2 Options to Customize Oracle JDeveloper on Startup
Option Description and Action
Start JDeveloper with Default Settings Select if you want to start Oracle JDeveloper using the defaultsettings. All your Oracle JDeveloper projects will be saved inthis default location.
Customize Settings and Then Start JDeveloper Select to do the following:
• Change the location where Oracle JDeveloper projects aresaved
• Change the location where Oracle JDeveloper userpreferences are saved
• Identify the file types to be associated with OracleJDeveloper (Windows only)
Finish Installation without StartingJDeveloper
If the box to launch JDeveloper after quitting the installationwizard is checked, uncheck it. Click Finish to quit theinstallation wizard without starting Oracle JDeveloper.
Note:
• During installation, a file called product.conf is created in your homedirectory by default. This will contain your JDeveloper preferences. Oldpreferences will carry over to new installations of JDeveloper unless youdelete this file.
• On Windows systems, if you are deinstalling your current version ofOracle JDeveloper to install a newer version, Oracle recommends that youreboot your system after you deinstall the software and before you begin anew installation of the software.
Installing Oracle JDeveloper Studio
Installing the Oracle JDeveloper Software 2-7
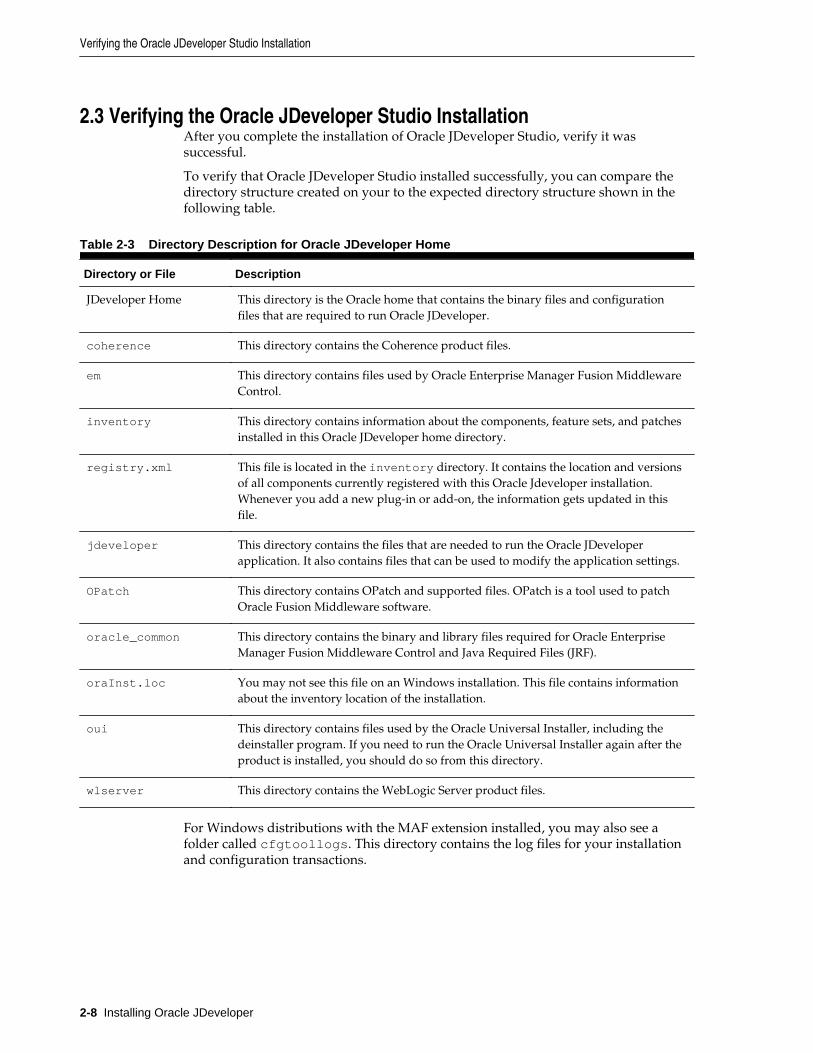
2.3 Verifying the Oracle JDeveloper Studio InstallationAfter you complete the installation of Oracle JDeveloper Studio, verify it wassuccessful.
To verify that Oracle JDeveloper Studio installed successfully, you can compare thedirectory structure created on your to the expected directory structure shown in thefollowing table.
Table 2-3 Directory Description for Oracle JDeveloper Home
Directory or File Description
JDeveloper Home This directory is the Oracle home that contains the binary files and configurationfiles that are required to run Oracle JDeveloper.
coherence This directory contains the Coherence product files.
em This directory contains files used by Oracle Enterprise Manager Fusion MiddlewareControl.
inventory This directory contains information about the components, feature sets, and patchesinstalled in this Oracle JDeveloper home directory.
registry.xml This file is located in the inventory directory. It contains the location and versionsof all components currently registered with this Oracle Jdeveloper installation.Whenever you add a new plug-in or add-on, the information gets updated in thisfile.
jdeveloper This directory contains the files that are needed to run the Oracle JDeveloperapplication. It also contains files that can be used to modify the application settings.
OPatch This directory contains OPatch and supported files. OPatch is a tool used to patchOracle Fusion Middleware software.
oracle_common This directory contains the binary and library files required for Oracle EnterpriseManager Fusion Middleware Control and Java Required Files (JRF).
oraInst.loc You may not see this file on an Windows installation. This file contains informationabout the inventory location of the installation.
oui This directory contains files used by the Oracle Universal Installer, including thedeinstaller program. If you need to run the Oracle Universal Installer again after theproduct is installed, you should do so from this directory.
wlserver This directory contains the WebLogic Server product files.
For Windows distributions with the MAF extension installed, you may also see afolder called cfgtoollogs. This directory contains the log files for your installationand configuration transactions.
Verifying the Oracle JDeveloper Studio Installation
2-8 Installing Oracle JDeveloper
2.4 Installing the JDeveloper Java DistributionJDeveloper Java does not require an installer. To install the Oracle JDeveloper Javadistribution, all you need is an unzip tool.
You can download a free, cross-platform unzip tool, Info-Zip, available at: http://www.info-zip.org/.
Caution:
Ensure that the directory that in which you install Oracle JDeveloper does notcontain spaces. For example, do not use C:\Program Files as theinstallation directory.
To install Oracle JDeveloper from jdev-java-122100.zip:
1. Obtain the required JDK.
Identify what JDK versions are certified for this release of JDeveloper on youroperating system using this site: http://www.oracle.com/technetwork/developer-tools/jdev/documentation/index.html
Obtain a certified version of JDK from the following location on OTN: http://www.oracle.com/technetwork/java/javase/downloads/index.html
2. Unzip jdev-java-122100.zip to the target directory.
Note:
In this guide, in the context of the Java Edition, JDEV_HOME is used torepresent the directory of the installation. For example, if you unzippedjdev-java-122100.zip into C:\jdev_install\, then JDEV_HOME refersto C:\jdev_install.
2.5 Specifying the JDK Location for JDeveloper JavaWhen you start the Java edition of Oracle JDeveloper for the first time, the jdev scriptprompts you to provide the location of your JDK installation if it cannot locate it.
When prompted, enter the path to the Java executable file.
For Windows, your path definition may look like this: D:\jdk1.8.0_60\bin
For Linux, UNIX, and Mac OS X, your path may look like this: /home/jdk1.8.0_60/bin.
Installing the JDeveloper Java Distribution
Installing the Oracle JDeveloper Software 2-9

Specifying the JDK Location for JDeveloper Java
2-10 Installing Oracle JDeveloper
3Next Steps After Installing Oracle
JDeveloper Studio
After installing Oracle JDeveloper, you can launch JDeveloper and perform relatedtasks.
Next Steps After Installing Oracle JDeveloper Studio 3-1
Preparing to Launch Oracle JDeveloperYou can launch Oracle JDeveloper on Linux, UNIX, Mac OS X,Windows, and multiuser environments.
Launching Oracle JDeveloperTo start Oracle JDeveloper, follow the steps for the operating system youare using, or launch it from the command line.
Migrating Oracle JDeveloper From a Previous VersionOracle JDeveloper 12c (12.2.1) supports migration from OracleJDeveloper 11.1.1.9.0 or 11.1.2.3.0.
Enabling Oracle JDeveloper ExtensionsOracle JDeveloper extensions (such as JUnit) are available throughJDeveloper or by downloading from OTN.
Using Oracle WebLogic Server with Oracle JDeveloperInstalling Oracle JDeveloper Studio 12c (12.2.1) also automaticallyinstalls Oracle WebLogic Server 12c (12.2.1).
Understanding Oracle JDeveloper Accessibility InformationYou can use a screen reader with Oracle JDeveloper, and becomefamiliar with assistive technologies in Oracle products and OracleJDeveloper.
Additional ResourcesUseful Oracle resources related to Oracle JDeveloper are available on theWeb.
3.1 Preparing to Launch Oracle JDeveloperYou can launch Oracle JDeveloper on Linux, UNIX, Mac OS X, Windows, andmultiuser environments.
Optimizing Oracle JDeveloper on Linux, UNIX, and Mac OS XBefore launching Oracle JDeveloper, you can specify settings for Linux,UNIX, and Mac OS X environments.
Optimizing Oracle JDeveloper on WindowsBefore launching Oracle JDeveloper, you can specify settings for aWindows environment.
Optimizing Oracle JDeveloper in a Multiuser EnvironmentWhen installing and configuring Oracle JDeveloper for a multiuserenvironment (such as Microsoft Terminal Server, Citrix MetaFrame andMetaFrame XP (for Windows), and MetaFrame 1.1 for UNIX), you willneed to account for resource planning, such as number of users and
Preparing to Launch Oracle JDeveloper
3-2 Installing Oracle JDeveloper
power of the server to deliver optimal performance for JDeveloper andyour users.
3.1.1 Optimizing Oracle JDeveloper on Linux, UNIX, and Mac OS XBefore launching Oracle JDeveloper, you can specify settings for Linux, UNIX, andMac OS X environments.
Setting the System Resource LimitThe minimum recommended system resource limit for OracleJDeveloper on Linux systems is 4096.
Setting the User Home Directory on Linux, UNIX, and Mac OS XYou can permanently redefine the location of your user home directoryin a Linux, UNIX, or Mac OS X environment.
Changing the JDK Location on Linux, UNIX, and Mac OS XYou can permanently change the location of your JDK if it has changedsince the first time you launched JDeveloper.
Changing System Cursors on Linux, UNIX, and Mac OS XOn Linux platforms, the Java cursors might display as large and opaque,creating difficulties when used for drag and drop operations.
3.1.1.1 Setting the System Resource LimitThe minimum recommended system resource limit for Oracle JDeveloper on Linuxsystems is 4096.
To determine the resource limit configuration for your system, enter the followingcommand:
/bin/sh -c 'ulimit -n'
If the value returned is less than 4096, set the system resource limit as follows:
1. Open the limits.conf file, which is located at /etc/security/.
2. Find the following parameters:
soft nofile value_of_the_parameterhard nofile value_of_the_parameter
3. Change the value of these parameters to 4096:
soft nofile 4096hard nofile 4096
Note:
If the parameters listed in Step 2 do not exist, add the parameters with theirvalues as listed in Step 3 to the limits.conf file.
3.1.1.2 Setting the User Home Directory on Linux, UNIX, and Mac OS XYou can permanently redefine the location of your user home directory in a Linux,UNIX, or Mac OS X environment.
When you define the user home directory, it will contain a system subdirectory thatstores the user's preferences for JDeveloper, also known as the domain home. The user
Preparing to Launch Oracle JDeveloper
Next Steps After Installing Oracle JDeveloper Studio 3-3
home directory will also contain a separate subdirectory for user-generated contentand other configuration files that are specific to a given user, also known as theapplication home.
If you do not define a user home directory, these subdirectories will be located indifferent areas on your computer.
• The default location for the system subdirectory is $HOME/.jdeveloper/system12.2.1.XX.XX.XX, where XX.XX.XX is the unique number of theproduct build.
• The default location for user-generated content is $HOME/jdeveloper/mywork.
There are two ways to set your user home directory if you do not want yourJDeveloper files to be stored at $HOME. Both methods set the user home directory forall instances of JDeveloper on your system.
Use either of the following methods to set the user home directory:
• Editing product.conf
• Setting environment variable JDEV_USER_DIR, which will require you to restartyour terminal session
Editing product.conf
With 12c (12.2.1), many JDeveloper settings, including the location of your JDK, arestored in product.conf. This file is created by JDeveloper on first startup unless thefile already exists from a previous installation. JDeveloper will use the settings storedin product.conf even if they are from a previous installation.
Note:
In earlier versions of JDeveloper, product.conf was named jdev.conf.
1. Find the product.conf file. It should be located at $HOME/.jdeveloper/12.2.1.0.0.
2. Open product.conf in an editor. Add a line to set AddVMOption -Dide.user.dir to your preferred directory path.
For example, if your preferred directory is $HOME/mydocs/jdevfiles, yourdefinition should look like this:
AddVMOption -Dide.user.dir=$HOME/mydocs/jdevfiles
Caution:
Do not use a directory that contains spaces as the home directory. Forexample, do not specify $HOME/my projects as the home directory.
3. Save your changes. The changes should take effect immediately when you startJDeveloper. The changes made to product.conf will also override anyenvironment variable you have defined.
When you launch Oracle JDeveloper for the first time, you can verify that the userhome directory has been set to your preferred directory by accessing the Help
Preparing to Launch Oracle JDeveloper
3-4 Installing Oracle JDeveloper
menu, selecting About from the drop-down menu, toggling the Properties tab,and finding the definition for ide.user.dir.
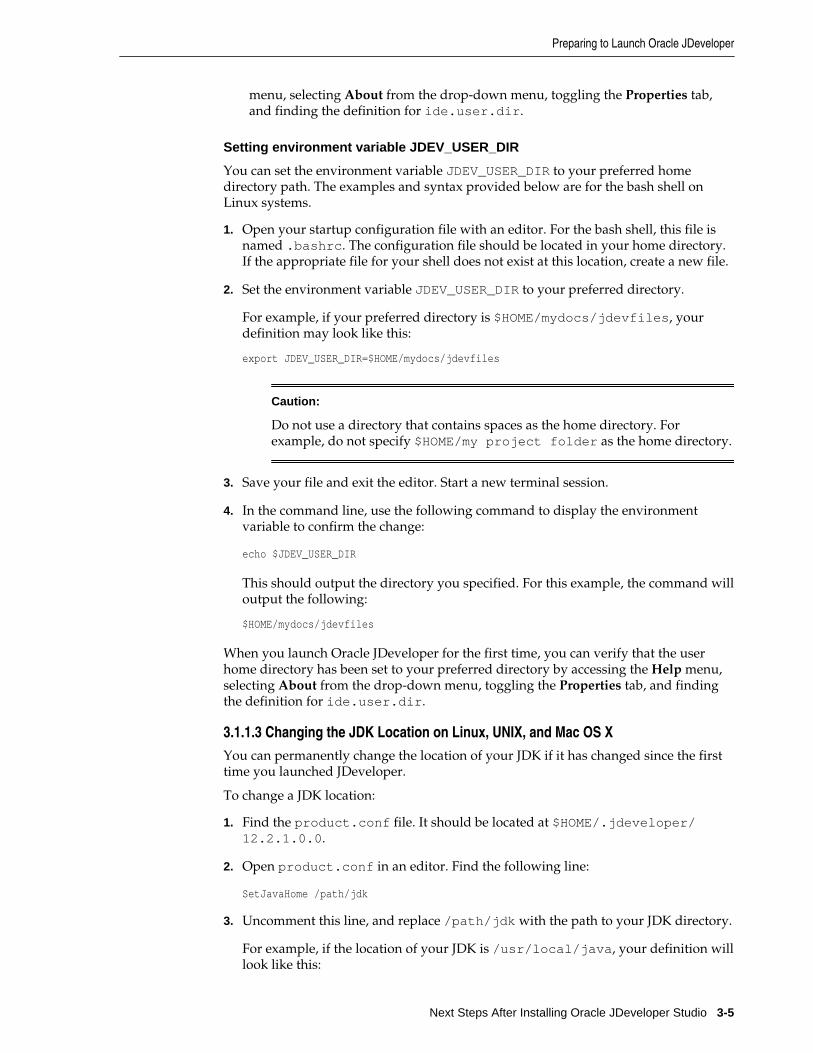
Setting environment variable JDEV_USER_DIR
You can set the environment variable JDEV_USER_DIR to your preferred homedirectory path. The examples and syntax provided below are for the bash shell onLinux systems.
1. Open your startup configuration file with an editor. For the bash shell, this file isnamed .bashrc. The configuration file should be located in your home directory.If the appropriate file for your shell does not exist at this location, create a new file.
2. Set the environment variable JDEV_USER_DIR to your preferred directory.
For example, if your preferred directory is $HOME/mydocs/jdevfiles, yourdefinition may look like this:
export JDEV_USER_DIR=$HOME/mydocs/jdevfiles
Caution:
Do not use a directory that contains spaces as the home directory. Forexample, do not specify $HOME/my project folder as the home directory.
3. Save your file and exit the editor. Start a new terminal session.
4. In the command line, use the following command to display the environmentvariable to confirm the change:
echo $JDEV_USER_DIR
This should output the directory you specified. For this example, the command willoutput the following:
$HOME/mydocs/jdevfiles
When you launch Oracle JDeveloper for the first time, you can verify that the userhome directory has been set to your preferred directory by accessing the Help menu,selecting About from the drop-down menu, toggling the Properties tab, and findingthe definition for ide.user.dir.
3.1.1.3 Changing the JDK Location on Linux, UNIX, and Mac OS XYou can permanently change the location of your JDK if it has changed since the firsttime you launched JDeveloper.
To change a JDK location:
1. Find the product.conf file. It should be located at $HOME/.jdeveloper/12.2.1.0.0.
2. Open product.conf in an editor. Find the following line:
SetJavaHome /path/jdk
3. Uncomment this line, and replace /path/jdk with the path to your JDK directory.
For example, if the location of your JDK is /usr/local/java, your definition willlook like this:
Preparing to Launch Oracle JDeveloper
Next Steps After Installing Oracle JDeveloper Studio 3-5
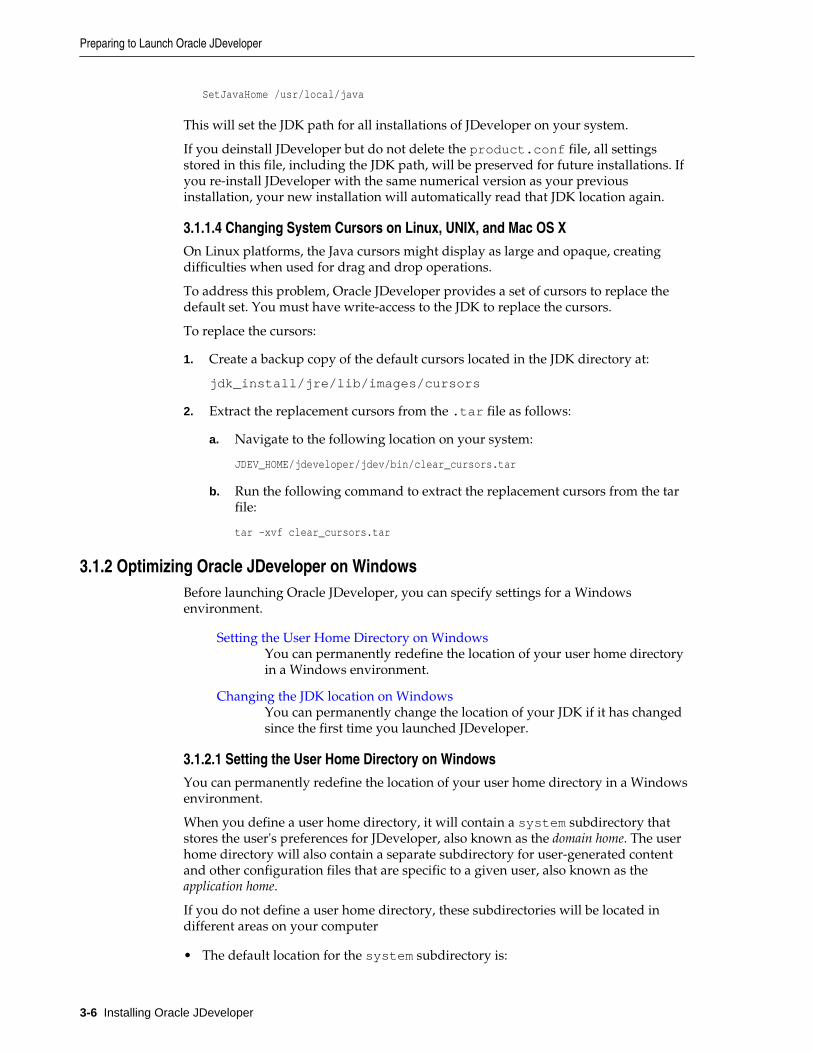
SetJavaHome /usr/local/java
This will set the JDK path for all installations of JDeveloper on your system.
If you deinstall JDeveloper but do not delete the product.conf file, all settingsstored in this file, including the JDK path, will be preserved for future installations. Ifyou re-install JDeveloper with the same numerical version as your previousinstallation, your new installation will automatically read that JDK location again.
3.1.1.4 Changing System Cursors on Linux, UNIX, and Mac OS XOn Linux platforms, the Java cursors might display as large and opaque, creatingdifficulties when used for drag and drop operations.
To address this problem, Oracle JDeveloper provides a set of cursors to replace thedefault set. You must have write-access to the JDK to replace the cursors.
To replace the cursors:
1. Create a backup copy of the default cursors located in the JDK directory at:
jdk_install/jre/lib/images/cursors
2. Extract the replacement cursors from the .tar file as follows:
a. Navigate to the following location on your system:
JDEV_HOME/jdeveloper/jdev/bin/clear_cursors.tar
b. Run the following command to extract the replacement cursors from the tarfile:
tar -xvf clear_cursors.tar
3.1.2 Optimizing Oracle JDeveloper on WindowsBefore launching Oracle JDeveloper, you can specify settings for a Windowsenvironment.
Setting the User Home Directory on WindowsYou can permanently redefine the location of your user home directoryin a Windows environment.
Changing the JDK location on WindowsYou can permanently change the location of your JDK if it has changedsince the first time you launched JDeveloper.
3.1.2.1 Setting the User Home Directory on WindowsYou can permanently redefine the location of your user home directory in a Windowsenvironment.
When you define a user home directory, it will contain a system subdirectory thatstores the user's preferences for JDeveloper, also known as the domain home. The userhome directory will also contain a separate subdirectory for user-generated contentand other configuration files that are specific to a given user, also known as theapplication home.
If you do not define a user home directory, these subdirectories will be located indifferent areas on your computer
• The default location for the system subdirectory is:
Preparing to Launch Oracle JDeveloper
3-6 Installing Oracle JDeveloper
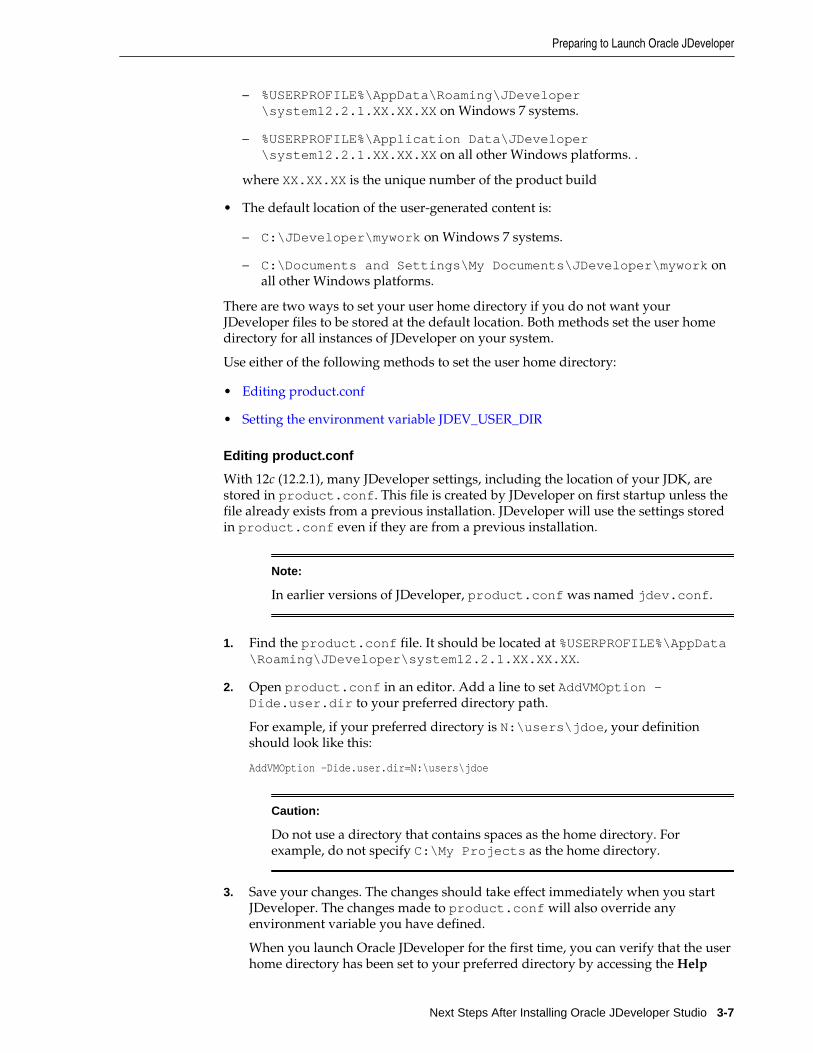
– %USERPROFILE%\AppData\Roaming\JDeveloper\system12.2.1.XX.XX.XX on Windows 7 systems.
– %USERPROFILE%\Application Data\JDeveloper\system12.2.1.XX.XX.XX on all other Windows platforms. .
where XX.XX.XX is the unique number of the product build
• The default location of the user-generated content is:
– C:\JDeveloper\mywork on Windows 7 systems.
– C:\Documents and Settings\My Documents\JDeveloper\mywork onall other Windows platforms.
There are two ways to set your user home directory if you do not want yourJDeveloper files to be stored at the default location. Both methods set the user homedirectory for all instances of JDeveloper on your system.
Use either of the following methods to set the user home directory:
• Editing product.conf
• Setting the environment variable JDEV_USER_DIR
Editing product.conf
With 12c (12.2.1), many JDeveloper settings, including the location of your JDK, arestored in product.conf. This file is created by JDeveloper on first startup unless thefile already exists from a previous installation. JDeveloper will use the settings storedin product.conf even if they are from a previous installation.
Note:
In earlier versions of JDeveloper, product.conf was named jdev.conf.
1. Find the product.conf file. It should be located at %USERPROFILE%\AppData\Roaming\JDeveloper\system12.2.1.XX.XX.XX.
2. Open product.conf in an editor. Add a line to set AddVMOption -Dide.user.dir to your preferred directory path.
For example, if your preferred directory is N:\users\jdoe, your definitionshould look like this:
AddVMOption -Dide.user.dir=N:\users\jdoe
Caution:
Do not use a directory that contains spaces as the home directory. Forexample, do not specify C:\My Projects as the home directory.
3. Save your changes. The changes should take effect immediately when you startJDeveloper. The changes made to product.conf will also override anyenvironment variable you have defined.
When you launch Oracle JDeveloper for the first time, you can verify that the userhome directory has been set to your preferred directory by accessing the Help
Preparing to Launch Oracle JDeveloper
Next Steps After Installing Oracle JDeveloper Studio 3-7
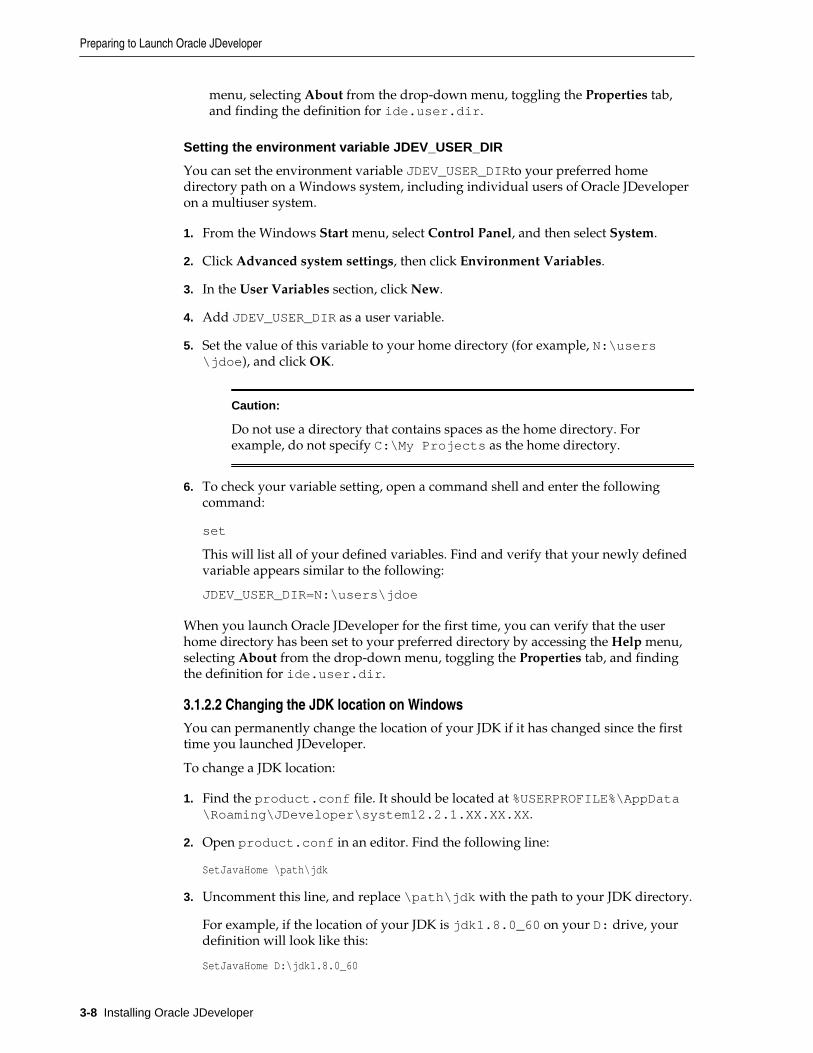
menu, selecting About from the drop-down menu, toggling the Properties tab,and finding the definition for ide.user.dir.
Setting the environment variable JDEV_USER_DIR
You can set the environment variable JDEV_USER_DIRto your preferred homedirectory path on a Windows system, including individual users of Oracle JDeveloperon a multiuser system.
1. From the Windows Start menu, select Control Panel, and then select System.
2. Click Advanced system settings, then click Environment Variables.
3. In the User Variables section, click New.
4. Add JDEV_USER_DIR as a user variable.
5. Set the value of this variable to your home directory (for example, N:\users\jdoe), and click OK.
Caution:
Do not use a directory that contains spaces as the home directory. Forexample, do not specify C:\My Projects as the home directory.
6. To check your variable setting, open a command shell and enter the followingcommand:
set
This will list all of your defined variables. Find and verify that your newly definedvariable appears similar to the following:
JDEV_USER_DIR=N:\users\jdoe
When you launch Oracle JDeveloper for the first time, you can verify that the userhome directory has been set to your preferred directory by accessing the Help menu,selecting About from the drop-down menu, toggling the Properties tab, and findingthe definition for ide.user.dir.
3.1.2.2 Changing the JDK location on WindowsYou can permanently change the location of your JDK if it has changed since the firsttime you launched JDeveloper.
To change a JDK location:
1. Find the product.conf file. It should be located at %USERPROFILE%\AppData\Roaming\JDeveloper\system12.2.1.XX.XX.XX.
2. Open product.conf in an editor. Find the following line:
SetJavaHome \path\jdk
3. Uncomment this line, and replace \path\jdk with the path to your JDK directory.
For example, if the location of your JDK is jdk1.8.0_60 on your D: drive, yourdefinition will look like this:
SetJavaHome D:\jdk1.8.0_60
Preparing to Launch Oracle JDeveloper
3-8 Installing Oracle JDeveloper
This will set the JDK path for all installations of JDeveloper on your system.
If you deinstall JDeveloper but do not delete the product.conf file, all settingsstored in this file, including the JDK path, will be preserved. If you re-installJDeveloper with the same numerical version as your previous installation, your newinstallation will automatically read that JDK location again.
3.1.3 Optimizing Oracle JDeveloper in a Multiuser EnvironmentWhen installing and configuring Oracle JDeveloper for a multiuser environment (suchas Microsoft Terminal Server, Citrix MetaFrame and MetaFrame XP (for Windows),and MetaFrame 1.1 for UNIX), you will need to account for resource planning, such asnumber of users and power of the server to deliver optimal performance forJDeveloper and your users.
These environments allow many clients to access one installation of Oracle JDeveloper.In all cases, users can save their projects locally.
Installing Oracle JDeveloper on a Citrix MetaFrame Server or a MicrosoftTerminal Server
With administrative privileges, you can install Oracle JDeveloper on aCitrix Metaframe Server or a Microsoft Terminal Server.
Configuring Terminal Server Clients for Running Oracle JDeveloperAfter installing a Citrix MetaFrame or Microsoft Terminal Server clientlocally, and JDeveloper installed and configured, you can configure aterminal server client for running Oracle JDeveloper.
Troubleshooting a System DLL ole32.dll Memory ErrorYou may encounter this error when you run Oracle JDeveloper in amultiuser environment.
3.1.3.1 Installing Oracle JDeveloper on a Citrix MetaFrame Server or a MicrosoftTerminal ServerWith administrative privileges, you can install Oracle JDeveloper on a CitrixMetaframe Server or a Microsoft Terminal Server.
Run the Oracle JDeveloper installer on your Citrix MetaFrame or Microsoft TerminalServer as detailed in Installing Oracle JDeveloper. Do not launch Oracle JDeveloper atthe end of installation, as you must first configure the user home directories andterminal server clients as described in the following sections.
3.1.3.2 Configuring Terminal Server Clients for Running Oracle JDeveloperAfter installing a Citrix MetaFrame or Microsoft Terminal Server client locally, andJDeveloper installed and configured, you can configure a terminal server client forrunning Oracle JDeveloper.
To configure a terminal server client for running Oracle JDeveloper:
1. Verify that the color resolution of the terminal server client has been set to aminimum of 256 colors.
2. Log in to your terminal server.
3. Verify that the user home environment variable has been defined. Confirm thenaming convention that is used on your system. The default variable isJDEV_USER_DIR.
Preparing to Launch Oracle JDeveloper
Next Steps After Installing Oracle JDeveloper Studio 3-9
4. Launch Oracle JDeveloper.
5. Oracle JDeveloper prompts you to confirm if the user home directory needs to becreated. Click Yes.
6. Verify that the user home directory has been set to your preferred directory:
• From the Help menu, select About.
• Toggle the Properties tab, and finding the definition for ide.user.dir.
3.1.3.3 Troubleshooting a System DLL ole32.dll Memory ErrorYou may encounter this error when you run Oracle JDeveloper in a multiuserenvironment.
The system DLL ole32.dll was relocated in memory. Theapplication will not run properly. The relocation occurredbecause the DLL Dynamically Allocated Memory occupied an addressrange reserved for Windows NT system DLL's. The vendor supplyingthe DLL should be contacted for a new DLL.
If you see this error, update the product.conf file in $HOME/.jdeveloper/12.2.1.0.0 file by uncommenting the following parameter:
AddVMOption -Xheapbase100000000
In addition, each user must modify the default project to apply this setting. To specifythis value in the default project settings:
1. From the Application menu, select Default Project Properties.
2. In the Default Project Properties dialog, click Run/Debug/Profile, then click Edit.
3. Click the Launch Settings node.
4. On the Launch Settings page, enter -Xheapbase100000000 in the Java Optionsfield.
3.2 Launching Oracle JDeveloperTo start Oracle JDeveloper, follow the steps for the operating system you are using, orlaunch it from the command line.
On Linux, UNIX, and Mac OS X:
1. Navigate to the following location:
JDEV_HOME/jdeveloper/jdev/bin/
2. Run the following command:
./jdev
On Windows:From the Start Menu, select All Programs, then select Oracle Fusion Middleware12.2.1, and then select JDeveloper Studio 12.2.1.
Launching Oracle JDeveloper
3-10 Installing Oracle JDeveloper
On the Command Line:You can also start Oracle JDeveloper from the command line by running one of thefollowing commands:
• JDEV_HOME\jdeveloper\jdeveloper.exe
• JDEV_HOME\jdeveloper\jdev\bin\jdevw.exe
• JDEV_HOME\jdeveloper\jdev\bin\jdev.exe (to display a console windowfor internal diagnostic information)
3.3 Migrating Oracle JDeveloper From a Previous VersionOracle JDeveloper 12c (12.2.1) supports migration from Oracle JDeveloper 11.1.1.9.0 or11.1.2.3.0.
Oracle recommends migrating to Oracle JDeveloper 11.1.1.9.0 or 11.1.2.3.0 from allother earlier versions before migrating to this release of Oracle JDeveloper.
Migrating User Settings
Migrating Projects
Using Headless Migration
3.3.1 Migrating User SettingsWhen you start Oracle JDeveloper for the first time (and each time you add a newextension or upgrade to a newer version), JDeveloper displays the Confirm ImportPreferences dialog to confirm whether to import your preferences and settings from aprevious installation.
When the Confirm Import Preferences dialog is displayed, click Show AllInstallations to view a list of all the previous installations. From this list, choose theinstallation that you want to import preferences and settings from. When you hoverthe mouse over an item in list, the path to the installation is displayed as a tooltip.
Alternatively, you can click Find a previous installation manually (with the image ofa magnifying glass) on the top right of the installation list to browse for an installationmanually. Clicking Yes on the Confirm Import Preferences dialog imports userpreferences and the state of the IDE from the previous installation.
To force Oracle JDeveloper to display the Confirm Import Preferences dialog uponsubsequent startups, use the -migrate flag when starting Oracle JDeveloper from thecommand line, for example, jdev -migrate.
Note:
If you migrate to 12c (12.2.1) from another version of Oracle JDeveloper, youwill need to reinstall the extensions that you want to use. Some extensions forolder versions may no longer exist.
For more information on installing extensions, see Enabling Oracle JDeveloperExtensions.
Migrating Oracle JDeveloper From a Previous Version
Next Steps After Installing Oracle JDeveloper Studio 3-11
3.3.2 Migrating ProjectsWhen you open an application or project that was created in a previous release, OracleJDeveloper prompts you to migrate the project to Oracle JDeveloper 12c. Dependingon the content of the projects, Oracle JDeveloper might display additional prompts tomigrate some specific source files as well.
Oracle recommends that you create a backup copy of your projects before migratingthem. Accepting the initial prompts to migrate your projects means that JDeveloperwill update the format for crucial XML files, but migration does not rewrite or updatespecific project code. After migration, you should re-test your applications tocompletely verify that they work.
See the Oracle JDeveloper page on OTN for more information about migrating specifictypes of projects to 12c.
Migrating JSF and JSTL Projects
3.3.2.1 Migrating JSF and JSTL Projects
This release of Oracle JDeveloper requires that all projects with JavaServer Faces andJSTL be migrated to the latest versions of the technologies (version 2.0 and 1.2respectively). Additionally, any web.xml deployment descriptors will be migrated toversion 2.5.
For the most current information on migration, see the Oracle JDeveloperdocumentation page on OTN: http://www.oracle.com/technetwork/developer-tools/jdev/documentation/1212-cert-1964670.html#Abrams-SupportInformation-MigrationSupport.
3.3.3 Using Headless MigrationYou can also migrate files silently from the command line using the headlessmigration tool. This tool can be found at jdeveloper/jdev/bin/ojmigrate.
Understanding How to Use ojmigrate
Troubleshooting ojmigrate
3.3.3.1 Understanding How to Use ojmigrate
The command to use ojmigrate uses the following structure:
ojmigrate [option]... file...|@file
Specifying a value for the option parameter is optional. The file or the @fileparameter value is required.
Using the option Parameter
You can use the following flags for the option parameter:
-ade to connect to the current ADE view-dry to initiate a dry run and skip calling migrators-failFast to stop the migration after the first failure-generateDefaults to let migrator helpers generate a migration.prperties file,alongside the .jws file, that contains the defaults for migration options.
Migrating Oracle JDeveloper From a Previous Version
3-12 Installing Oracle JDeveloper
You can view these valid values and their use cases by invoking the help file forojmigrate in the command line.
Using the file Parameter
If you want to migrate one application, specify the path to the .jws file you want tomigrate as the value for file.
For example, if you are trying to migrate example.jws with no option flag, yourcommand would be structured like the following:
ojmigrate example.jws
If you want to migrate more than one application, you should use the @fileparameter described in the next section.
Using the @file Parameter
If you want to migrate more than one application at a time, you can create a filecontaining all the paths to applications you want to migrate and use the @fileparameter to point to this file.
You can autogenerate this file by using a script like the following:
find . -name "*.jws" -printf "%P\n" > workspaces.txt
Once this file is generated, you should check it to make sure all the applications youwant migrated are included. You can also create the file manually.
Once you have created and saved this file, specify the path to this file as the value for@file in the example command structure. The @ symbol must be appended to yourfilename when specifying this parameter.
For example, if you have listed the location of multiple .jws files in example.txt,your command would be structured like the following:
ojmigrate @example.txt
3.3.3.2 Troubleshooting ojmigrate
If you encounter errors during migration, you can try to troubleshoot them with thestrategies listed in this section. To isolate the cause of your errors, run ojmigratewith the -failFast flag. This will cause ojmigrate to stop after its firstunsuccessful migration and analyze the issue.
Migrating Applications With -ade
If you see errors about being unable to check out read-only files, you should migratethese applications in ADE.
Make sure you are in ADE view and have a transaction started. Because the ADEextension is not part of the JDeveloper non-debug builds, you should use either aJDeveloper debug build or you should manually install the ADE extension.
Once you are in ADE view, invoke ojmigrate with the -ade flag.
The commands for this section should resemble the following:
ade useview VIEW_NAMEade begintrans TXN_NAME ojmigrate -ade @workspaces.txt
Migrating Oracle JDeveloper From a Previous Version
Next Steps After Installing Oracle JDeveloper Studio 3-13
Using a Two-Pass Migration
Migration could have failed because some migrators require extra data normallyprovided in the migration wizard, or the defaults that the migrators are using are notsuitable for your application. In these cases, you should do a two-pass migration.
For the first pass, run the ojmigrate command with the -generateDefaults flag.Your command may look like this:
ojmigrate -genarateDefaults @workspaces.txt
This command generates a properties file containing a list of defaults formatted asname/value pairs with comments. The key/value pair is per application and perNodeMigratorHelper, meaning that there is one set of key pairs for every application,and the key is prefixed with the class name of the correspondingNodeMigratorHelper.
The properties file is generated beside the .jws application you are trying to migrate.Its title will be formatted as workspacename.migration.properties.
If the file is generated, open it, change the appropriate values, and save your changes.If you ran the command and do not see a file like this, no migrators generateddefaults.
On the second pass, run the command without the -generateDefaults flag.
ojmigrate @workspaces.txt
If you still encounter errors, then some migrators may not be headless friendly. Adeveloper should prepare your migrator for headless migration before attempting thetwo-pass migration again.
Preparing a NodeMigratorHelper for Headless Migration
If you need data from the user before performing a migration, you should do thefollowing:
1. Override the NodeMigratorHelper.generateDefaults(MigrationInf[],TraversableContext) method. This method is called on your helper on the firstrun of the two-pass migration.
Then use the putDefault(String key, String value, Stringcomment) method to store the keys and default values you will retrieve on secondrun of the two-pass migration.
2. In your helper's migrate method, call isMigrationHeadless() on the helper totest if the migration is headless. If so, use getDefault(your_key) to ask foryour data values. Read the data and act accordingly during the migration.
3.4 Enabling Oracle JDeveloper ExtensionsOracle JDeveloper extensions (such as JUnit) are available through JDeveloper or bydownloading from OTN.
To locate and install extensions using Oracle JDeveloper:
1. Launch JDeveloper.
2. Click Help, then select Check for Updates to launch an Update wizard.
Enabling Oracle JDeveloper Extensions
3-14 Installing Oracle JDeveloper
3. On the first screen of the Update wizard, Oracle Fusion Middleware Productsand Official Oracle Extensions and Updates are selected by default. Select theother two boxes if you want more options.
Note:
Starting in 12c (12.1.3), you can no longer download SOA extensions. Youneed to use a Quick Start distribution to obtain a version of JDeveloper pre-configured for either SOA Suite or Business Process Management Suite. See Introducing the Quick Start Distributions in Installing SOA Suite and BusinessProcess Management Suite Quick Start for Developers for more information.
Click Next when you have identified and selected your sources.
4. On the Updatesscreen, select the extensions that you want to install and clickNext.
5. On the License Agreements screen, you need to agree to the license terms for theextensions you selected on the previous screen. Click Next to begin the download.
6. When the extensions have finished downloading, the wizard displays a summaryof the installations or upgrades that you installed. Click Finish to exit the wizard.
7. In the dialog box that appears, respond to the prompt to restart JDeveloper tofinish installing updates.
Alternatively, you can manually download and install an Oracle JDeveloper extensionfrom OTN as follows:
1. Go to the following link: http://www.oracle.com/ocom/groups/public/@otn/documents/webcontent/131167.xml.
2. Select an Oracle JDeveloper extension. Make sure that you are selecting extensionsfor 12c (12.2.1), as there may be different versions of each extension for differentversions of JDeveloper.
3. Follow the instructions to download the zip file.
4. Verify if there are additional installation instructions in the extension archive.
5. From the Help menu, select Check for Updates.
6. In Step 1 of the wizard, select Install from a Local File and navigate to the zip fileon your system.
7. Finish the wizard and restart Oracle JDeveloper to use the extension.
3.5 Using Oracle WebLogic Server with Oracle JDeveloperInstalling Oracle JDeveloper Studio 12c (12.2.1) also automatically installs OracleWebLogic Server 12c (12.2.1).
Note:
The information in this section is not applicable to the Java edition of OracleJDeveloper.
Using Oracle WebLogic Server with Oracle JDeveloper
Next Steps After Installing Oracle JDeveloper Studio 3-15
Oracle JDeveloper uses the preconfigured Oracle WebLogic Server installation as theIntegrated Oracle WebLogic Server and JDeveloper managed server for testing anddebugging your applications from within the IDE. After installing Oracle JDeveloper,all the applications that you need to begin developing, testing, and debugging areinstalled and configured.
For additional information about using a standalone Oracle WebLogic Server instancewith JDeveloper, see Deploying Applications in Developing Applications with OracleJDeveloper.
Using the Integrated Oracle WebLogic Server
3.5.1 Using the Integrated Oracle WebLogic ServerOracle JDeveloper is bundled with an integrated application server called IntegratedWebLogic Server, and a default instance called IntegratedWebLogicServer isdefined for it.
All applications are bound, by default, to IntegratedWebLogicServer. OracleJDeveloper manages the Integrated WebLogic Server lifecycle for testing yourapplication. The first time Integrated WebLogic Server is needed, Oracle JDevelopercreates the DefaultDomain and prompts you to provide the administrativeusername and password. The location of configuration files for the default domain isthe DefaultDomain directory located in the Oracle JDeveloper system directory.
Note:
The Oracle WebLogic Server domain that is created for you duringinstallation, DefaultDomain, is not intended for use outside of the IDE. Todeploy ADF applications to a standalone Oracle WebLogic Server, the servermust be configured to run ADF applications.
For more information, see Preparing the Standalone Application Server forDeployment in Administering Oracle ADF Applications.
The IntegratedWebLogicServer's DefaultDomain uses Java DB. If theIntegratedWebLogicServer fails to create the DefaultDomain, you shouldsearch for any preexisting instances of Java DB or Derby Client running in thebackground and stop them.
3.6 Understanding Oracle JDeveloper Accessibility InformationYou can use a screen reader with Oracle JDeveloper, and become familiar withassistive technologies in Oracle products and Oracle JDeveloper.
Using a Screen Reader and Java Access Bridge with Oracle JDeveloper
Finding Accessibility Information
3.6.1 Using a Screen Reader and Java Access Bridge with Oracle JDeveloperTo make the best use of accessibility features, Oracle Corporation recommends thefollowing minimum configuration:
• Windows XP, Windows Vista
• Java J2SE 1.7.0_15
Understanding Oracle JDeveloper Accessibility Information
3-16 Installing Oracle JDeveloper
• Java Access Bridge 2.0.1
• JAWS 12.0.522
• Microsoft Internet Explorer 7.0 or higher
• Mozilla Firefox 3.5 or higher
To set up a screen reader and Java Access Bridge:
Note:
• These steps apply to machines that have the Windows operating system.
• You must use a screen reader that is compatible with Windows.
1. Install the screen reader if it is not already installed.
For more information about installation, refer to the documentation for your screenreader.
2. Install Oracle JDeveloper.
For information about performing a silent installation, see Installing OracleJDeveloper Studio in Silent Mode.
3. Download Java Access Bridge for Windows version 2.0.1. The latest version of thefile is available at the following location: http://www.oracle.com/technetwork/java/javase/tech/index-jsp-136191.html.
For more information about Java Access Bridge, refer to the Java Access Bridgedocumentation available on the web site.
4. Extract the contents of the zip file to a folder, accessbridge_home.
5. Install Java Access Bridge by running the install.exe file from theaccessbridge_home\installer folder.
The installer first checks the JDK version for compatibility. Then, the Available Javavirtual machines dialog displays.
6. Click Search Disks. Then customize your search for only the drive that contain theOracle JDeveloper build and the JDK version in the program files directory (if itexists).
The search process can take a long time if the disk that has many instances of JDKor Oracle JDeveloper, or when searching multiple disks. However, unless youcomplete an exhaustive search of your disk, Access Bridge will not be configuredoptimally, and will not be correctly installed to all of the Java virtual machines onyour system. After selecting the disk to search, click Search.
7. Confirm that you want to install the Java Access Bridge into each of the Java virtualmachines displayed in the dialog, by clicking Install in All.
8. Click OK when you see the Installation Completed message.
9. Confirm that the following files have been installed in the Winnt\System32directory (or the equivalent Windows XP or Vista directory), or copy them from
Understanding Oracle JDeveloper Accessibility Information
Next Steps After Installing Oracle JDeveloper Studio 3-17
accessbridge_home\installerfiles, as they must be in the system path towork with Oracle JDeveloper:
JavaAccessBridge.dllJAWTAccessBridge.dllWindowsAccessBridge.dll
Note that the system directory is required in the PATH system variable.
10. Confirm that the following files have been installed in the JDEV_HOME\jdk\jre\lib\ext directory, or copy them from accessbridge_home\installerfiles:
access-bridge.jarjaccess-1_4.jar
11. Confirm that the file accessibility.properties has been installed in thejdev_home\jdk\jre\lib directory, or copy it from \installerfiles.
12. Start your screen reader.
13. Start Oracle JDeveloper by running the file jdev.exe located in the folderJDEV_HOME\jdeveloper\jdev\bin.
A console window that contains error information (if any) is displayed first . TheOracle JDeveloper window appears when Oracle JDeveloper starts up. Any error orwarning messages that appear do not affect the functionality of Oracle JDeveloper.
3.6.2 Finding Accessibility InformationFor the latest configuration information or for information about addressingaccessibility and assistive technology issues, see the Oracle Accessibility FAQ at http://www.oracle.com/us/corporate/accessibility/faqs/index.htm.See also Oracle JDeveloper Accessibility Information in Developing Applications withOracle JDeveloper
3.7 Additional ResourcesUseful Oracle resources related to Oracle JDeveloper are available on the Web.
The following table lists some sites you may find helpful.
Table 3-1 Oracle Resources on the Web
Description URL
Oracle JDeveloper Home Pages http://www.oracle.com/technetwork/developer-tools/jdev/overview/index.html
Oracle JDeveloper Discussion Forum http://forums.oracle.com/forums/forum.jspa?forumID=83
Corporate Site http://www.oracle.com/
Oracle Technology Network http://www.oracle.com/technetwork/index.html
Oracle Accessibility Site http://www.oracle.com/us/corporate/accessibility/index.html
Additional Resources
3-18 Installing Oracle JDeveloper
4Deinstalling Oracle JDeveloper
Follow the instructions in this section to deinstall Oracle JDeveloper.
Performing Pre-Deinstallation TasksBefore deinstalling Oracle Fusion Middleware software components,you should stop all Oracle JDeveloper processes.
Deinstalling Oracle JDeveloperWhen you run the Oracle JDeveloper deinstaller, it removes everythingunder the Oracle home from which the deinstaller is started.
4.1 Performing Pre-Deinstallation TasksBefore deinstalling Oracle Fusion Middleware software components, you should stopall Oracle JDeveloper processes.
For more information about starting and stopping Oracle Fusion Middleware, see Starting and Stopping Oracle Fusion Middleware in Administering Oracle FusionMiddleware.
4.2 Deinstalling Oracle JDeveloperWhen you run the Oracle JDeveloper deinstaller, it removes everything under theOracle home from which the deinstaller is started.
Be sure that no system components are using the Oracle home (referred to in thisguide as JDEV_HOME) you want to remove.
Starting the Deinstaller
Manually Removing Artifacts
4.2.1 Starting the DeinstallerTo deinstall Oracle JDeveloper Studio:
1. Go to the following location in your JDEV_HOME:
• On a Windows system:
JDEV_HOME\oui\bin\
• On Linux, UNIX, and Mac OS X systems:
JDEV_HOME/oui/bin/
2. Start the deinstaller by running the following command:
• On a Windows system:
install.exe -deinstall
Deinstalling Oracle JDeveloper 4-1
• On Linux, UNIX, Mac OS X systems:
./deinstall.sh
4.2.2 Manually Removing ArtifactsIf you selected No on the warning screen during deinstallation, you must manuallyremove your JDEV_HOME directory and all sub-directories. For example, if yourJDEV_HOME directory is /home/Oracle/, then on a Linux or UNIX operating systemrun the following command:
cd /home/Oracle/rm -rf JDEV_HOME
On a Windows operating system, if your JDEV_HOME directory is C:\Oracle\JDEV_HOME, use a file manager window and navigate to the C:\Oracle\ directory,then right-click on the JDEV_HOME folder and select Delete.
If you plan on doing a clean reinstall of JDeveloper in the future, you should also findand delete the product.conf file that contains JDeveloper settings from previousinstallations.
If you did not redefine your user home directory, product.conf will be located at%USERPROFILE%\AppData\Roaming\JDeveloper\system12.2.1.XX.XX.XXfor Windows and $HOME/.jdeveloper/12.2.1.0.0 for Linux.
Deinstalling Oracle JDeveloper
4-2 Installing Oracle JDeveloper
ASilent Installation and Deinstallation of
Oracle JDeveloper
Silent-mode installation and deinstallation is a way of setting configurations only onceto ensure that no configuration options are displayed during the installation ordeinstallation process.
During installation in silent mode, the installation program reads the settings from aresponse file that you create before beginning the installation.
Installing Oracle JDeveloper Studio in Silent Mode
Deinstalling Oracle JDeveloper in Silent Mode
A.1 Installing Oracle JDeveloper Studio in Silent ModeFor information about installing Oracle JDeveloper in silent mode, see Running theOracle Universal Installer in Silent Mode in Installing Software with the Oracle UniversalInstaller.
A.2 Deinstalling Oracle JDeveloper in Silent ModeFor information about deinstalling Oracle JDeveloper in silent mode, see Running theOracle Universal Installer for Silent Deinstallation in Installing Software with the OracleUniversal Installer.
Silent Installation and Deinstallation of Oracle JDeveloper A-1

Deinstalling Oracle JDeveloper in Silent Mode
A-2 Installing Oracle JDeveloper


![[1 ] Oracle® Traffic Director - Oracle Help Center](https://img.pdfslide.net/doc/110x75/6322fd7e28c4459891060116/1-oracle-traffic-director-oracle-help-center.jpg)


