Embed Size (px)
Citation preview
3/28/2021 How to Control Servo Motors with Arduino (3 Examples)
https://www.makerguides.com/servo-arduino-tutorial/ 1/35
Makerguides.com
How to control servo motors with ArduinoWritten by Benne de Bakker (https://www.makerguides.com/author/benne-de-bakker/)
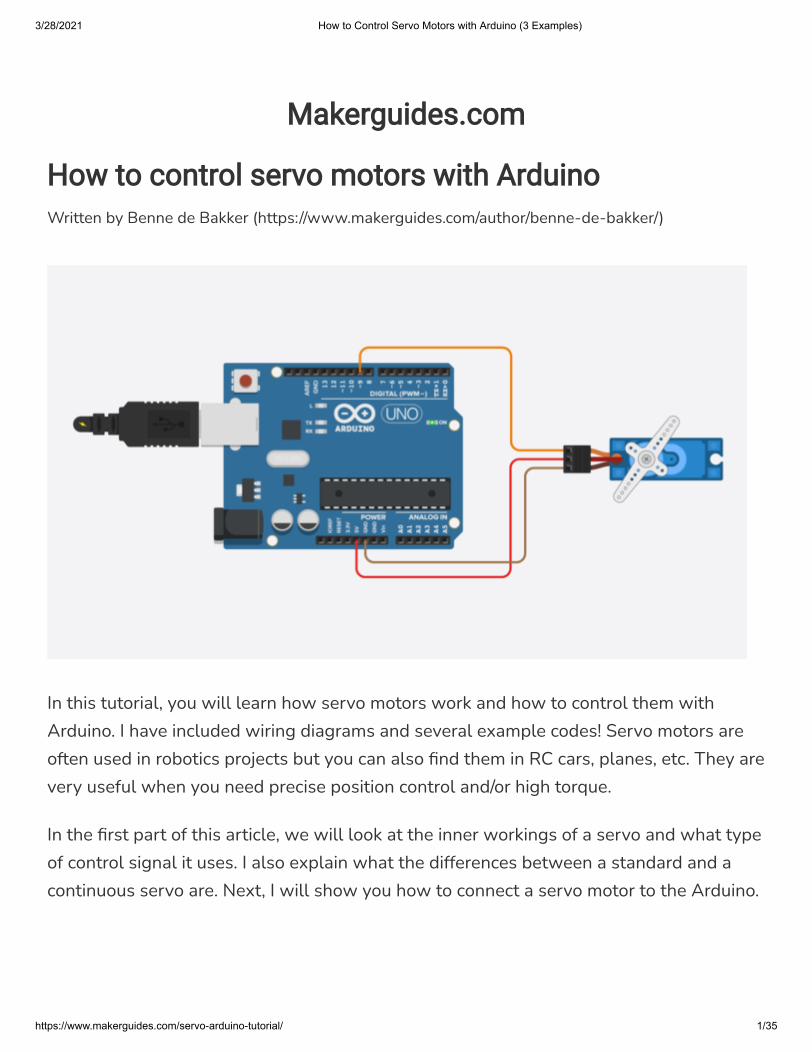
In this tutorial, you will learn how servo motors work and how to control them withArduino. I have included wiring diagrams and several example codes! Servo motors areoften used in robotics projects but you can also �nd them in RC cars, planes, etc. They arevery useful when you need precise position control and/or high torque.
In the �rst part of this article, we will look at the inner workings of a servo and what typeof control signal it uses. I also explain what the differences between a standard and acontinuous servo are. Next, I will show you how to connect a servo motor to the Arduino.
3/28/2021 How to Control Servo Motors with Arduino (3 Examples)
https://www.makerguides.com/servo-arduino-tutorial/ 2/35
With the �rst code example, you can control both the position as well as the speed of theservo motor. After that, we will look into controlling a servo with a potentiometer andhow you can modify the code to control multiple servo motors at the same time. Lastly, atthe end of this article, you can �nd the speci�cations and dimensions of some of the mostpopular servo motors on the market.
If you would like to learn more about other types of motors, check out the articles below:
Recommended articles
28BYJ-48 Stepper Motor with ULN2003 Driver and Arduino Tutorial(https://www.makerguides.com/28byj-48-stepper-motor-arduino-tutorial/)How to control a Stepper Motor with Arduino Motor Shield Rev3(https://www.makerguides.com/arduino-motor-shield-stepper-motor-tutorial/)How to control a stepper motor with A4988 driver and Arduino(https://www.makerguides.com/a4988-stepper-motor-driver-arduino-tutorial/)How to control a character I2C LCD with Arduino(https://www.makerguides.com/character-i2c-lcd-arduino-tutorial/)
If you have any questions, please leave a comment below.
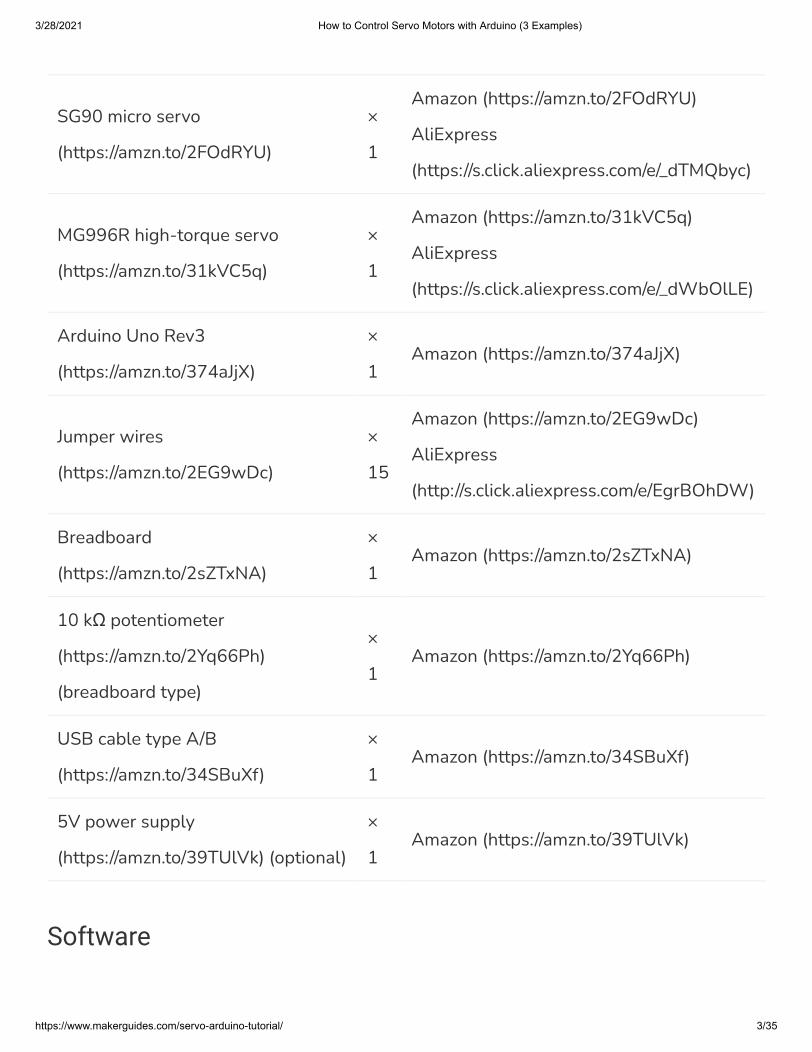
Supplies
Hardware components
3/28/2021 How to Control Servo Motors with Arduino (3 Examples)
https://www.makerguides.com/servo-arduino-tutorial/ 3/35
SG90 micro servo
(https://amzn.to/2FOdRYU)
×
1
Amazon (https://amzn.to/2FOdRYU)
AliExpress
(https://s.click.aliexpress.com/e/_dTMQbyc)
MG996R high-torque servo
(https://amzn.to/31kVC5q)
×
1
Amazon (https://amzn.to/31kVC5q)
AliExpress
(https://s.click.aliexpress.com/e/_dWbOlLE)
Arduino Uno Rev3
(https://amzn.to/374aJjX)
×
1Amazon (https://amzn.to/374aJjX)
Jumper wires
(https://amzn.to/2EG9wDc)
×
15
Amazon (https://amzn.to/2EG9wDc)
AliExpress
(http://s.click.aliexpress.com/e/EgrBOhDW)
Breadboard
(https://amzn.to/2sZTxNA)
×
1Amazon (https://amzn.to/2sZTxNA)
10 kΩ potentiometer
(https://amzn.to/2Yq66Ph)
(breadboard type)
×
1Amazon (https://amzn.to/2Yq66Ph)
USB cable type A/B
(https://amzn.to/34SBuXf)
×
1Amazon (https://amzn.to/34SBuXf)
5V power supply
(https://amzn.to/39TUlVk) (optional)
×
1Amazon (https://amzn.to/39TUlVk)
Software
3/28/2021 How to Control Servo Motors with Arduino (3 Examples)
https://www.makerguides.com/servo-arduino-tutorial/ 4/35
Arduino IDE (https://www.arduino.cc/en/Main/Software)
Makerguides.com is a participant in the Amazon Services LLC Associates Program, an af�liate advertising programdesigned to provide a means for sites to earn advertising fees by advertising and linking to products onAmazon.com.
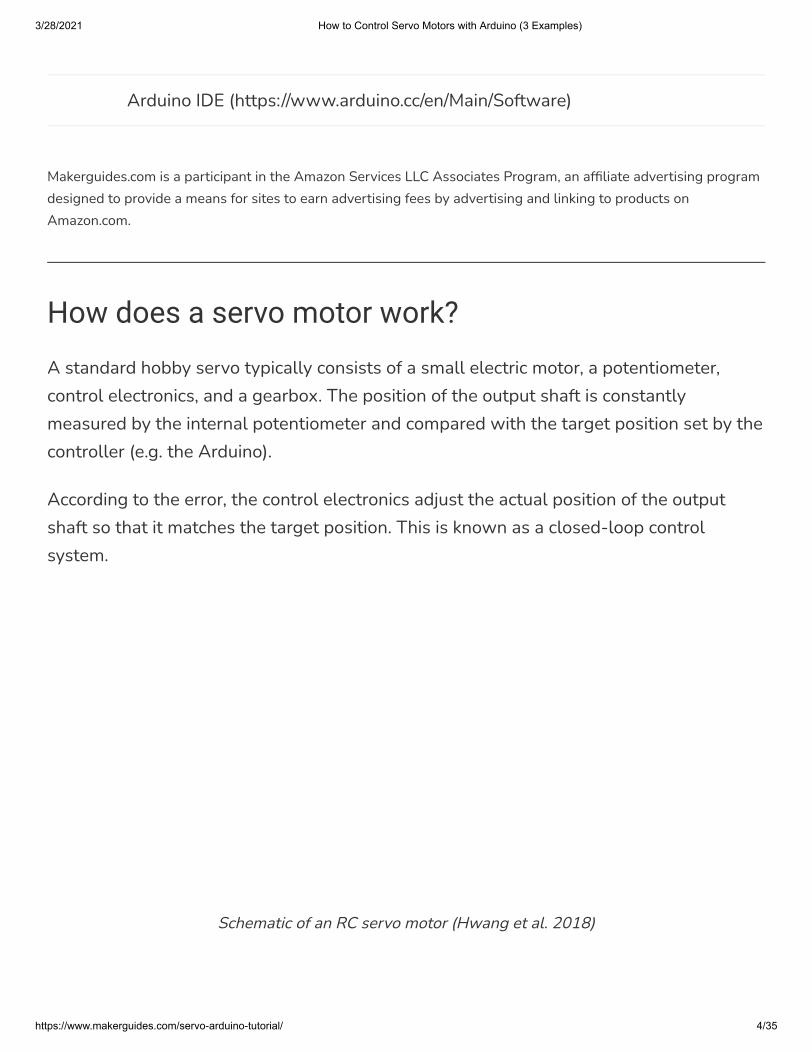
How does a servo motor work?
A standard hobby servo typically consists of a small electric motor, a potentiometer,control electronics, and a gearbox. The position of the output shaft is constantlymeasured by the internal potentiometer and compared with the target position set by thecontroller (e.g. the Arduino).
According to the error, the control electronics adjust the actual position of the outputshaft so that it matches the target position. This is known as a closed-loop controlsystem.
Schematic of an RC servo motor (Hwang et al. 2018)
3/28/2021 How to Control Servo Motors with Arduino (3 Examples)
https://www.makerguides.com/servo-arduino-tutorial/ 5/35
The gearbox decreases the speed of the motor, which increases the torque at the outputshaft. The maximum speed of the output shaft is usually around 60 RPM.
Servo control
Servo motors are controlled by sending a PWM (pulse-width modulation) signal to thesignal line of the servo. The width of the pulses determines the position of the outputshaft. When you send the servo a signal with a pulse width of 1.5 milliseconds (ms), theservo will move to the neutral position (90 degrees). The min (0 degrees) and max (180degrees) position typically correspond to a pulse width of 1 ms and 2 ms respectively.Note this can vary slightly between different types and brands of servo motors (e.g. 0.5and 2.5 ms). Many servos only rotate through about 170 degrees (or even only 90) butthe middle position is almost always at 1.5 ms.
For adjusting the min and max position in the code, see the section below.
3/28/2021 How to Control Servo Motors with Arduino (3 Examples)
https://www.makerguides.com/servo-arduino-tutorial/ 6/35
Servo motors generally expect a pulse every 20 milliseconds or 50 Hz but many RCservos work �ne in a range of 40 to 200 Hz.
360-degree (continuous) vs 180-degree (standard)servo
Most RC servos are from the 180-degree variety, which means that they can only rotatein a range of 0 to 180 degrees. However, continuous rotation, also known as 360-degreeservo motors, are also available.
Continuous rotation servos react differently to the control signal than standard 180-degree servos. With a continuous rotation servo, you can not control the exact position ofthe output shaft, only the speed and the direction. A 1 ms pulse will set the speed of theservo motor to full speed in one direction and a 2 ms pulse to full speed in the other. Avalue near 1.5 ms lets the motor stop.
If your servo behaves in an unexpected way, you might be using a continuous servoinstead of a standard one.
3/28/2021 How to Control Servo Motors with Arduino (3 Examples)
https://www.makerguides.com/servo-arduino-tutorial/ 7/35
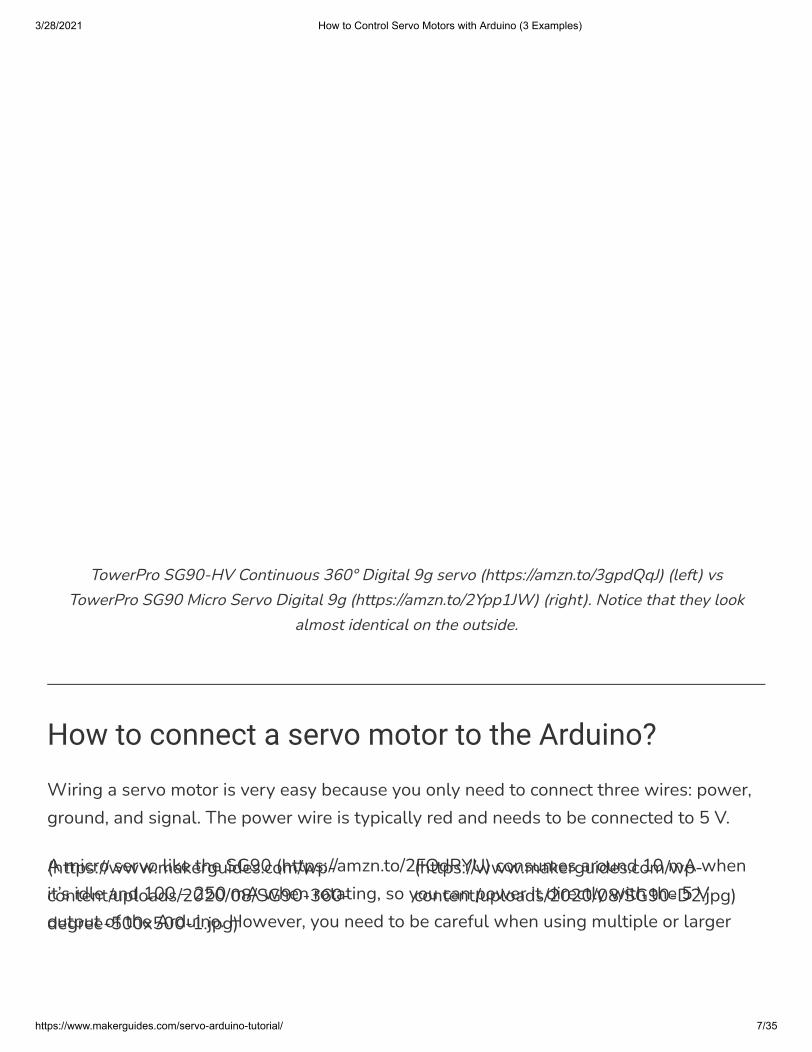
TowerPro SG90-HV Continuous 360° Digital 9g servo (https://amzn.to/3gpdQqJ) (left) vsTowerPro SG90 Micro Servo Digital 9g (https://amzn.to/2Ypp1JW) (right). Notice that they look
almost identical on the outside.
How to connect a servo motor to the Arduino?
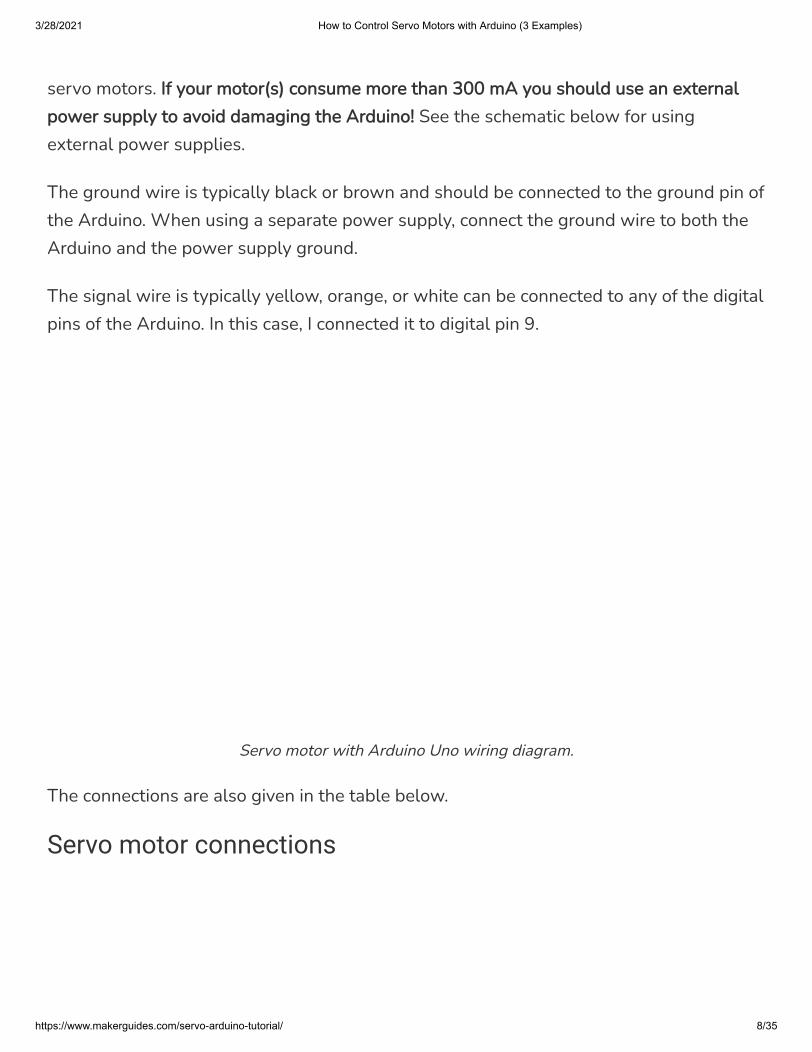
Wiring a servo motor is very easy because you only need to connect three wires: power,ground, and signal. The power wire is typically red and needs to be connected to 5 V.
A micro servo like the SG90 (https://amzn.to/2FOdRYU) consumes around 10 mA whenit’s idle and 100 – 250 mA when rotating, so you can power it directly with the 5 Voutput of the Arduino. However, you need to be careful when using multiple or larger
(https://www.makerguides.com/wp-content/uploads/2020/08/SG90-360-degree-500x500-1.jpg)
(https://www.makerguides.com/wp-content/uploads/2020/08/SG90-D2.jpg)
3/28/2021 How to Control Servo Motors with Arduino (3 Examples)
https://www.makerguides.com/servo-arduino-tutorial/ 8/35
servo motors. If your motor(s) consume more than 300 mA you should use an externalpower supply to avoid damaging the Arduino! See the schematic below for usingexternal power supplies.
The ground wire is typically black or brown and should be connected to the ground pin ofthe Arduino. When using a separate power supply, connect the ground wire to both theArduino and the power supply ground.
The signal wire is typically yellow, orange, or white can be connected to any of the digitalpins of the Arduino. In this case, I connected it to digital pin 9.
Servo motor with Arduino Uno wiring diagram.
The connections are also given in the table below.
Servo motor connections
3/28/2021 How to Control Servo Motors with Arduino (3 Examples)
https://www.makerguides.com/servo-arduino-tutorial/ 9/35
Servo motor Arduino
Power (red) 5 V
Ground (black or brown) GND
Signal (yellow, orange or white) Pin 9
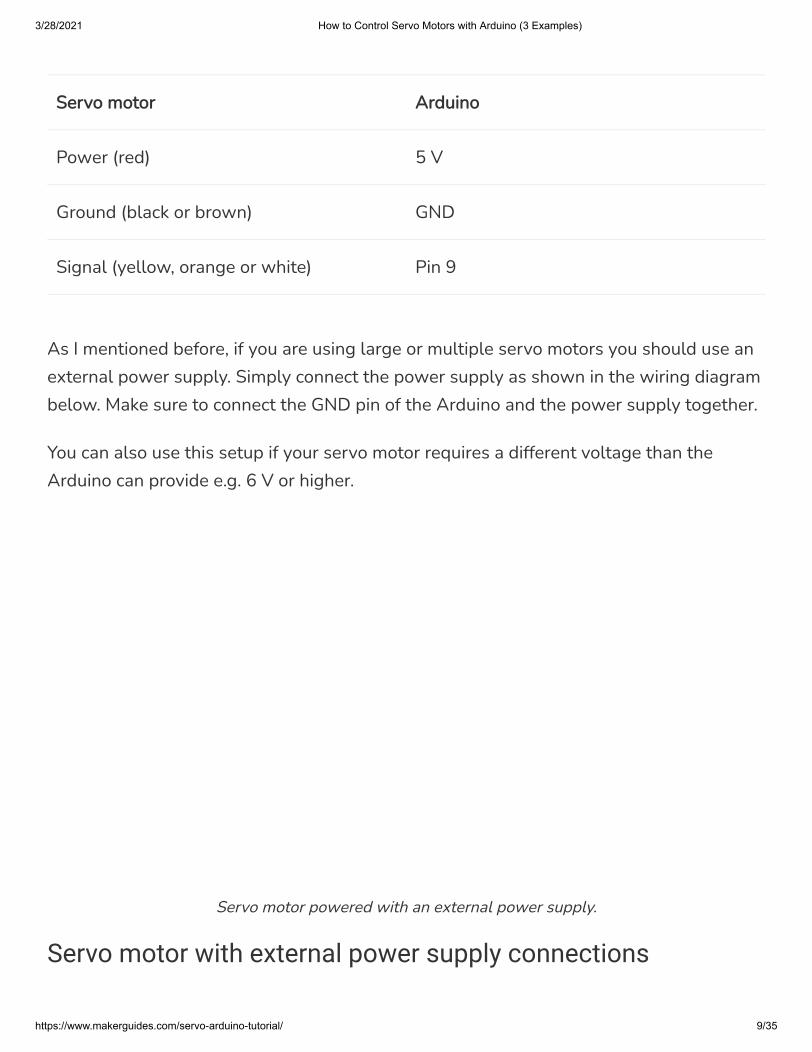
As I mentioned before, if you are using large or multiple servo motors you should use anexternal power supply. Simply connect the power supply as shown in the wiring diagrambelow. Make sure to connect the GND pin of the Arduino and the power supply together.
You can also use this setup if your servo motor requires a different voltage than theArduino can provide e.g. 6 V or higher.
Servo motor powered with an external power supply.
Servo motor with external power supply connections
3/28/2021 How to Control Servo Motors with Arduino (3 Examples)
https://www.makerguides.com/servo-arduino-tutorial/ 10/35
Servo motor Connection
Power (red) 5 V power supply
Ground (black or brown) Power supply ground and Arduino GND
Signal (yellow, orange or white) Pin 9 Arduino
Servo motor with Arduino example code
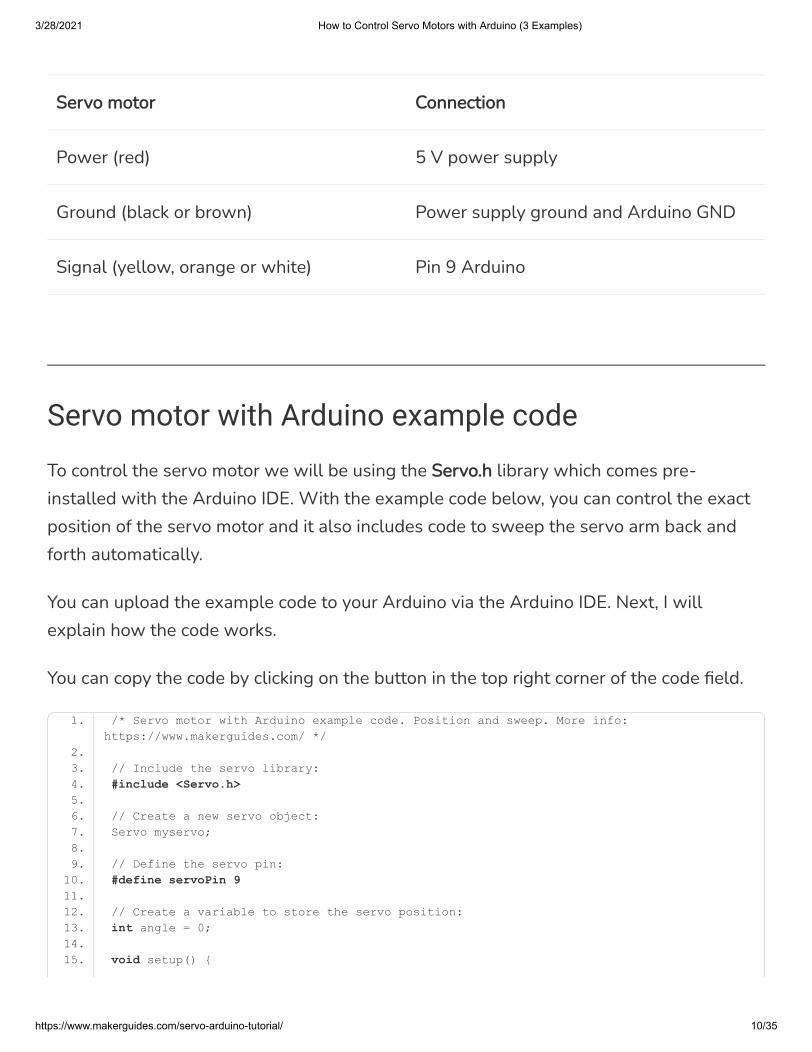
To control the servo motor we will be using the Servo.h library which comes pre-installed with the Arduino IDE. With the example code below, you can control the exactposition of the servo motor and it also includes code to sweep the servo arm back andforth automatically.
You can upload the example code to your Arduino via the Arduino IDE. Next, I willexplain how the code works.
You can copy the code by clicking on the button in the top right corner of the code �eld.
1. /* Servo motor with Arduino example code. Position and sweep. More info: https://www.makerguides.com/ */
2. 3. // Include the servo library:4. #include <Servo.h>5. 6. // Create a new servo object:7. Servo myservo;8. 9. // Define the servo pin:
10. #define servoPin 911. 12. // Create a variable to store the servo position:13. int angle = 0;14. 15. void setup() {
3/28/2021 How to Control Servo Motors with Arduino (3 Examples)
https://www.makerguides.com/servo-arduino-tutorial/ 11/35
How the code works
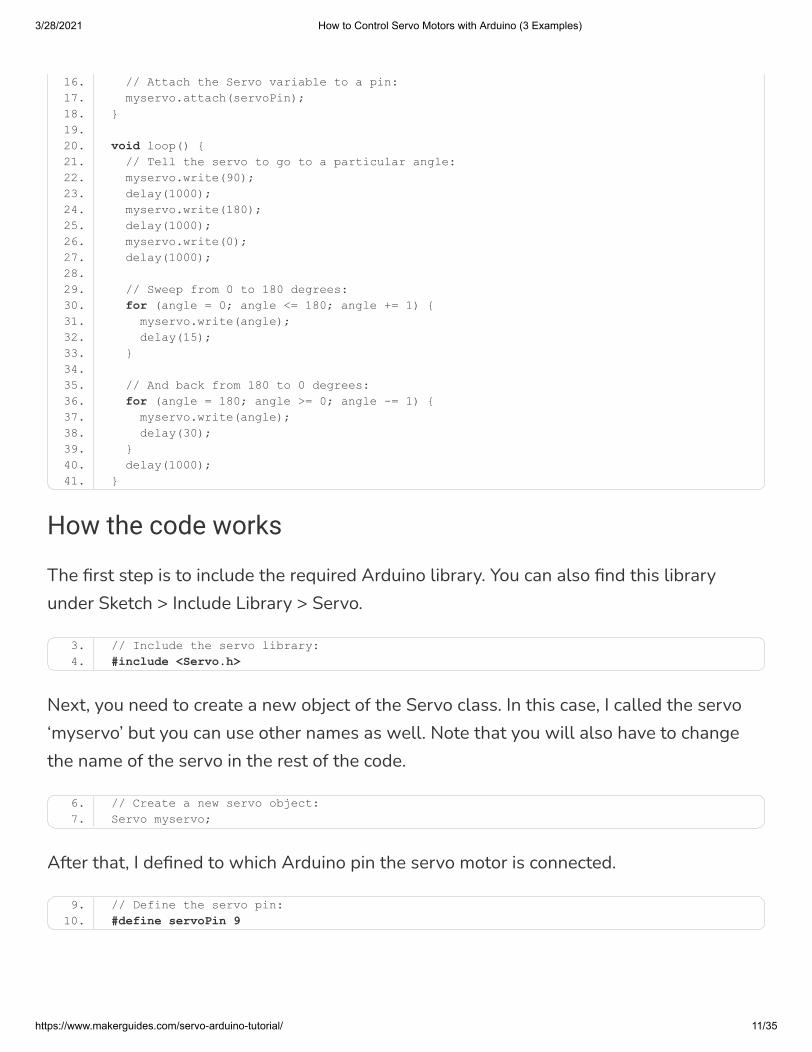
The �rst step is to include the required Arduino library. You can also �nd this libraryunder Sketch > Include Library > Servo.
Next, you need to create a new object of the Servo class. In this case, I called the servo‘myservo’ but you can use other names as well. Note that you will also have to changethe name of the servo in the rest of the code.
After that, I de�ned to which Arduino pin the servo motor is connected.
16. // Attach the Servo variable to a pin:17. myservo.attach(servoPin);18. }19. 20. void loop() {21. // Tell the servo to go to a particular angle:22. myservo.write(90);23. delay(1000);24. myservo.write(180);25. delay(1000);26. myservo.write(0);27. delay(1000);28. 29. // Sweep from 0 to 180 degrees:30. for (angle = 0; angle <= 180; angle += 1) {31. myservo.write(angle);32. delay(15);33. }34. 35. // And back from 180 to 0 degrees:36. for (angle = 180; angle >= 0; angle -= 1) {37. myservo.write(angle);38. delay(30);39. }40. delay(1000);41. }
3. // Include the servo library:4. #include <Servo.h>
6. // Create a new servo object:7. Servo myservo;
9. // Define the servo pin:10. #define servoPin 9
3/28/2021 How to Control Servo Motors with Arduino (3 Examples)
https://www.makerguides.com/servo-arduino-tutorial/ 12/35
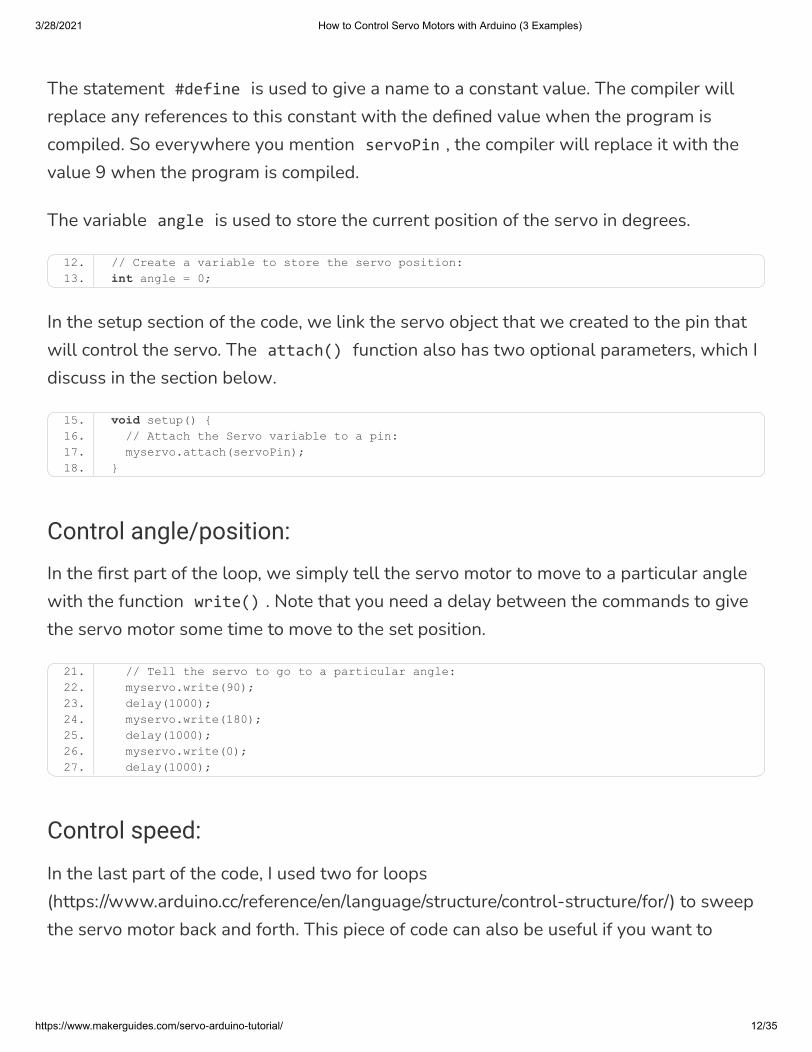
The statement #define is used to give a name to a constant value. The compiler willreplace any references to this constant with the de�ned value when the program iscompiled. So everywhere you mention servoPin , the compiler will replace it with thevalue 9 when the program is compiled.
The variable angle is used to store the current position of the servo in degrees.
In the setup section of the code, we link the servo object that we created to the pin thatwill control the servo. The attach() function also has two optional parameters, which Idiscuss in the section below.
Control angle/position:
In the �rst part of the loop, we simply tell the servo motor to move to a particular anglewith the function write() . Note that you need a delay between the commands to givethe servo motor some time to move to the set position.
Control speed:
In the last part of the code, I used two for loops(https://www.arduino.cc/reference/en/language/structure/control-structure/for/) to sweepthe servo motor back and forth. This piece of code can also be useful if you want to
12. // Create a variable to store the servo position:13. int angle = 0;
15. void setup() {16. // Attach the Servo variable to a pin:17. myservo.attach(servoPin);18. }
21. // Tell the servo to go to a particular angle:22. myservo.write(90);23. delay(1000);24. myservo.write(180);25. delay(1000);26. myservo.write(0);27. delay(1000);
3/28/2021 How to Control Servo Motors with Arduino (3 Examples)
https://www.makerguides.com/servo-arduino-tutorial/ 13/35
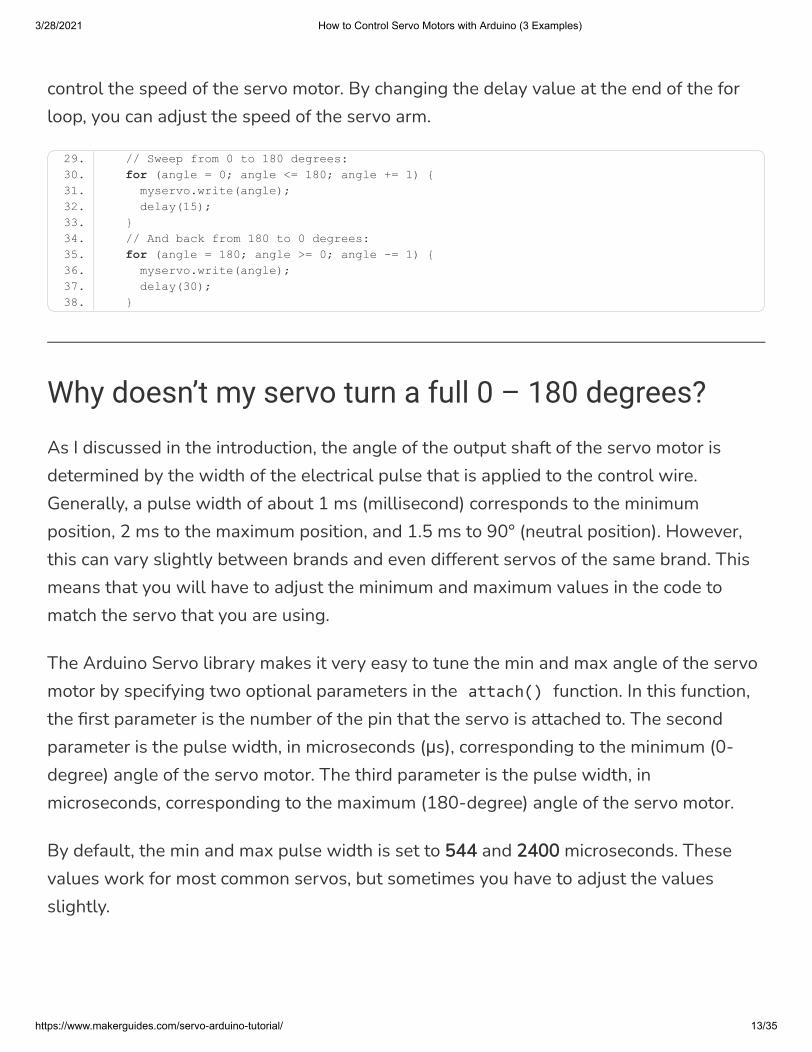
control the speed of the servo motor. By changing the delay value at the end of the forloop, you can adjust the speed of the servo arm.
Why doesn’t my servo turn a full 0 – 180 degrees?
As I discussed in the introduction, the angle of the output shaft of the servo motor isdetermined by the width of the electrical pulse that is applied to the control wire.Generally, a pulse width of about 1 ms (millisecond) corresponds to the minimumposition, 2 ms to the maximum position, and 1.5 ms to 90° (neutral position). However,this can vary slightly between brands and even different servos of the same brand. Thismeans that you will have to adjust the minimum and maximum values in the code tomatch the servo that you are using.
The Arduino Servo library makes it very easy to tune the min and max angle of the servomotor by specifying two optional parameters in the attach() function. In this function,the �rst parameter is the number of the pin that the servo is attached to. The secondparameter is the pulse width, in microseconds (μs), corresponding to the minimum (0-degree) angle of the servo motor. The third parameter is the pulse width, inmicroseconds, corresponding to the maximum (180-degree) angle of the servo motor.
By default, the min and max pulse width is set to 544 and 2400 microseconds. Thesevalues work for most common servos, but sometimes you have to adjust the valuesslightly.
29. // Sweep from 0 to 180 degrees:30. for (angle = 0; angle <= 180; angle += 1) {31. myservo.write(angle);32. delay(15);33. }34. // And back from 180 to 0 degrees:35. for (angle = 180; angle >= 0; angle -= 1) {36. myservo.write(angle);37. delay(30);38. }
3/28/2021 How to Control Servo Motors with Arduino (3 Examples)
https://www.makerguides.com/servo-arduino-tutorial/ 14/35
I recommend adjusting the min and max values in small increments (10-20microseconds) to avoid damaging the servo. If the servo arm is hitting the physical limitsof the motor, increase the min value, and decrease the max value.
Control a servo motor with a potentiometer andArduino
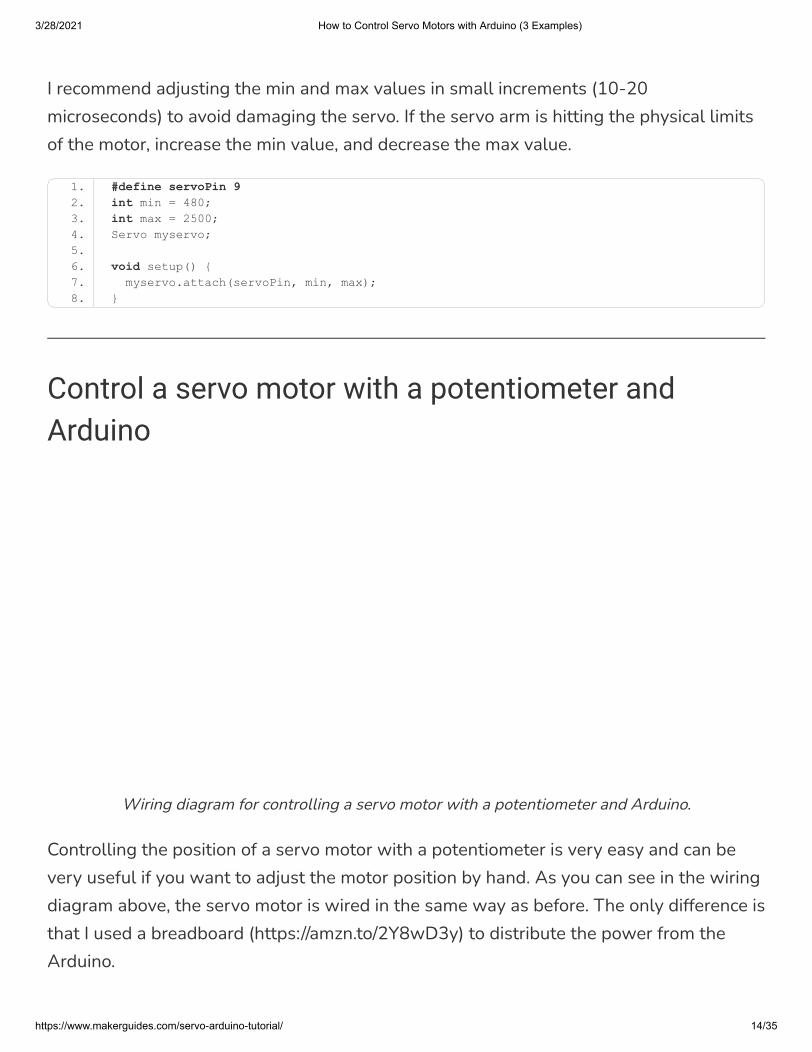
Wiring diagram for controlling a servo motor with a potentiometer and Arduino.
Controlling the position of a servo motor with a potentiometer is very easy and can bevery useful if you want to adjust the motor position by hand. As you can see in the wiringdiagram above, the servo motor is wired in the same way as before. The only difference isthat I used a breadboard (https://amzn.to/2Y8wD3y) to distribute the power from theArduino.
1. #define servoPin 92. int min = 480;3. int max = 2500;4. Servo myservo;5. 6. void setup() {7. myservo.attach(servoPin, min, max);8. }
3/28/2021 How to Control Servo Motors with Arduino (3 Examples)
https://www.makerguides.com/servo-arduino-tutorial/ 15/35
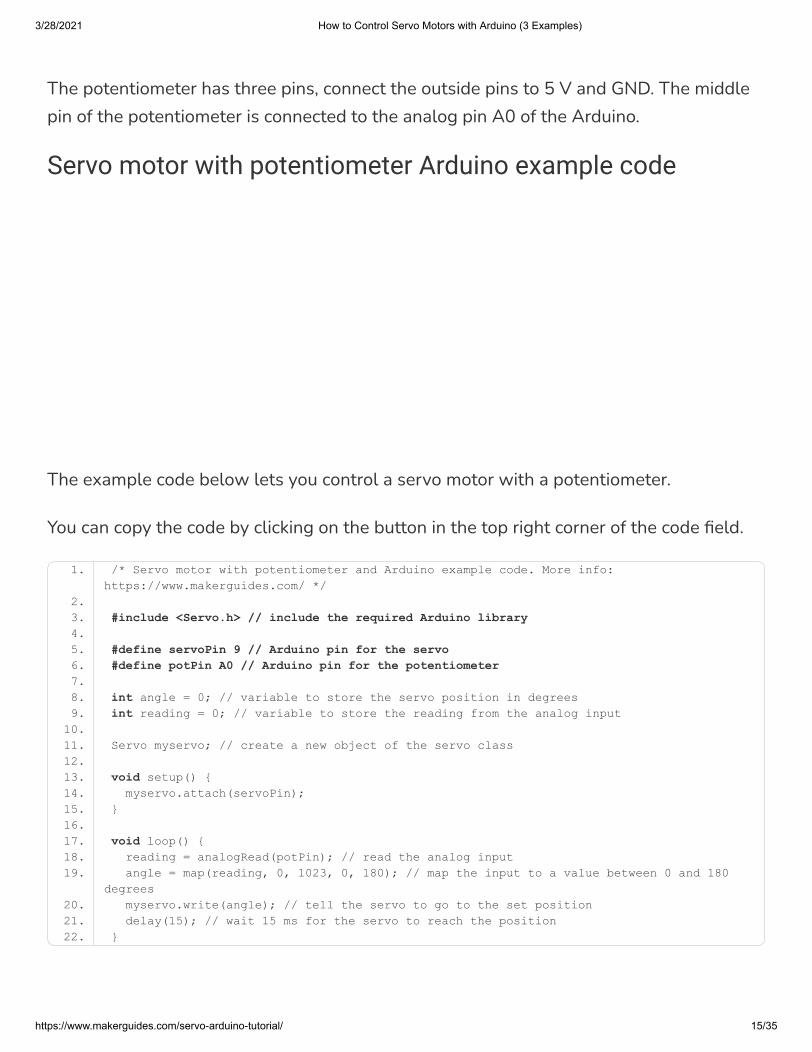
The potentiometer has three pins, connect the outside pins to 5 V and GND. The middlepin of the potentiometer is connected to the analog pin A0 of the Arduino.
Servo motor with potentiometer Arduino example code
The example code below lets you control a servo motor with a potentiometer.
You can copy the code by clicking on the button in the top right corner of the code �eld.
1. /* Servo motor with potentiometer and Arduino example code. More info: https://www.makerguides.com/ */
2. 3. #include <Servo.h> // include the required Arduino library4. 5. #define servoPin 9 // Arduino pin for the servo6. #define potPin A0 // Arduino pin for the potentiometer7. 8. int angle = 0; // variable to store the servo position in degrees9. int reading = 0; // variable to store the reading from the analog input
10. 11. Servo myservo; // create a new object of the servo class12. 13. void setup() {14. myservo.attach(servoPin);15. }16. 17. void loop() {18. reading = analogRead(potPin); // read the analog input19. angle = map(reading, 0, 1023, 0, 180); // map the input to a value between 0 and 180
degrees20. myservo.write(angle); // tell the servo to go to the set position21. delay(15); // wait 15 ms for the servo to reach the position22. }
3/28/2021 How to Control Servo Motors with Arduino (3 Examples)
https://www.makerguides.com/servo-arduino-tutorial/ 16/35
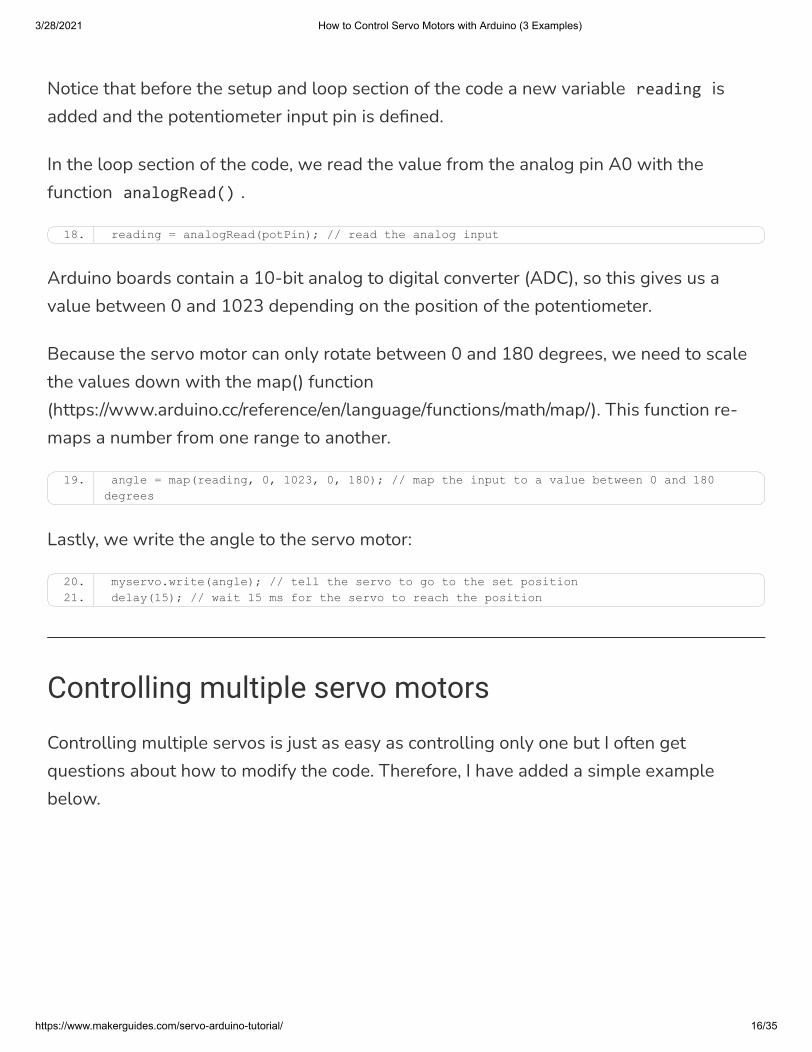
Notice that before the setup and loop section of the code a new variable reading isadded and the potentiometer input pin is de�ned.
In the loop section of the code, we read the value from the analog pin A0 with thefunction analogRead() .
Arduino boards contain a 10-bit analog to digital converter (ADC), so this gives us avalue between 0 and 1023 depending on the position of the potentiometer.
Because the servo motor can only rotate between 0 and 180 degrees, we need to scalethe values down with the map() function(https://www.arduino.cc/reference/en/language/functions/math/map/). This function re-maps a number from one range to another.
Lastly, we write the angle to the servo motor:
Controlling multiple servo motors
Controlling multiple servos is just as easy as controlling only one but I often getquestions about how to modify the code. Therefore, I have added a simple examplebelow.
18. reading = analogRead(potPin); // read the analog input
19. angle = map(reading, 0, 1023, 0, 180); // map the input to a value between 0 and 180 degrees
20. myservo.write(angle); // tell the servo to go to the set position21. delay(15); // wait 15 ms for the servo to reach the position
3/28/2021 How to Control Servo Motors with Arduino (3 Examples)
https://www.makerguides.com/servo-arduino-tutorial/ 17/35
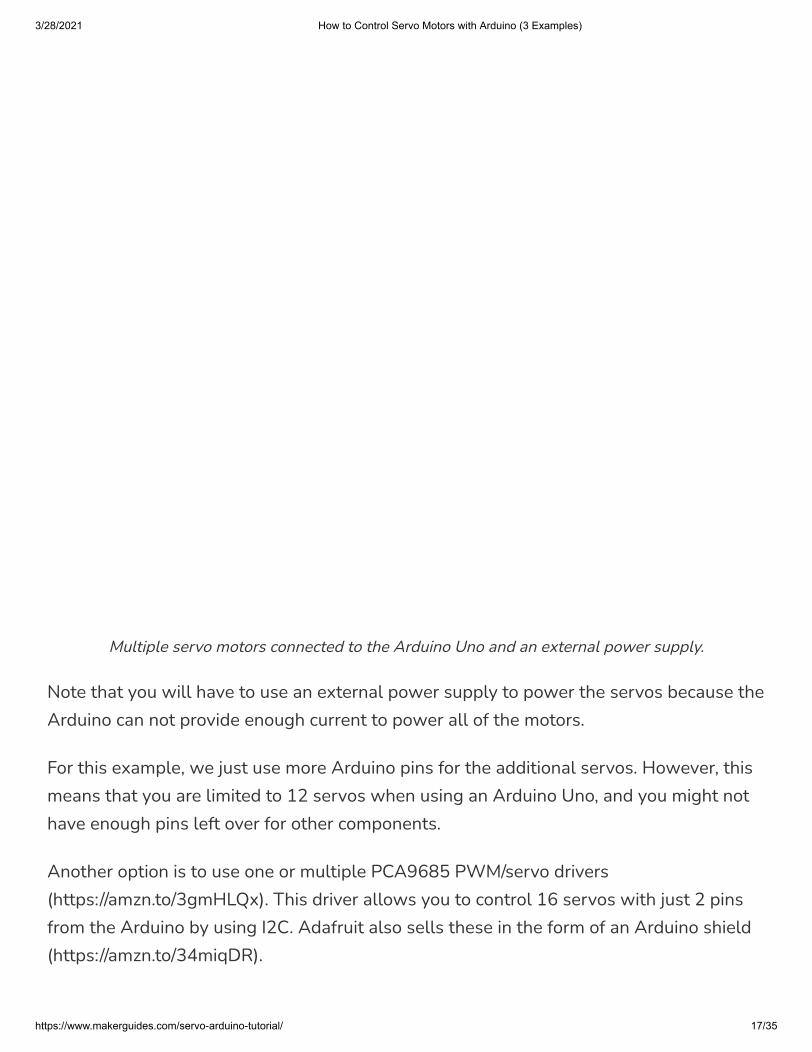
Multiple servo motors connected to the Arduino Uno and an external power supply.
Note that you will have to use an external power supply to power the servos because theArduino can not provide enough current to power all of the motors.
For this example, we just use more Arduino pins for the additional servos. However, thismeans that you are limited to 12 servos when using an Arduino Uno, and you might nothave enough pins left over for other components.
Another option is to use one or multiple PCA9685 PWM/servo drivers(https://amzn.to/3gmHLQx). This driver allows you to control 16 servos with just 2 pinsfrom the Arduino by using I2C. Adafruit also sells these in the form of an Arduino shield(https://amzn.to/34miqDR).
3/28/2021 How to Control Servo Motors with Arduino (3 Examples)
https://www.makerguides.com/servo-arduino-tutorial/ 18/35
(https://amzn.to/2EngTTk)
PCA9685 PWM/servo drivers
Because the setup of these servo drivers is a bit more dif�cult, I will cover this in aseparate tutorial.
Arduino with multiple servos example code
As you can see in the example below, you just have to create more objects of the Servoclass with different names. You can address each servo by using the correct name in thesetup and loop section of the code.
1. /* Arduino with multiple servos example code. More info: https://www.makerguides.com/ */2. 3. #include <Servo.h>4. 5. Servo servo1;6. Servo servo2;7. Servo servo3;8. Servo servo4;9. Servo servo5;
10. 11. void setup()12. {13. servo1.attach(9);14. servo2.attach(10);15. servo3.attach(11);16. servo4.attach(12);17. servo5.attach(13);18. }19. 20. void loop()21. {22. servo1.write(0);23. servo2.write(0);24. servo3.write(0);
3/28/2021 How to Control Servo Motors with Arduino (3 Examples)
https://www.makerguides.com/servo-arduino-tutorial/ 19/35
Servo motor speci�cations
Below you can �nd the speci�cations of some of the most popular servo motors on themarket. The original manufacturer of these servo motors is Tower Pro Pte Ltd.(https://www.towerpro.com.tw/)but similar models can be purchased from many othersuppliers as well.
SG90 analog micro servo (https://amzn.to/3h5WO2g)
(https://amzn.to/3h5WO2g)
[Source: towerpro.com.tw (https://www.towerpro.com.tw/)]
25. servo4.write(0);26. servo5.write(0);27. delay(2000);28. servo1.write(90);29. servo2.write(90);30. servo3.write(90);31. servo4.write(90);32. servo5.write(90);33. delay(1000);34. servo1.write(180);35. servo2.write(180);36. servo3.write(180);37. servo4.write(180);38. servo5.write(180);39. delay(1000);40. }
3/28/2021 How to Control Servo Motors with Arduino (3 Examples)
https://www.makerguides.com/servo-arduino-tutorial/ 20/35
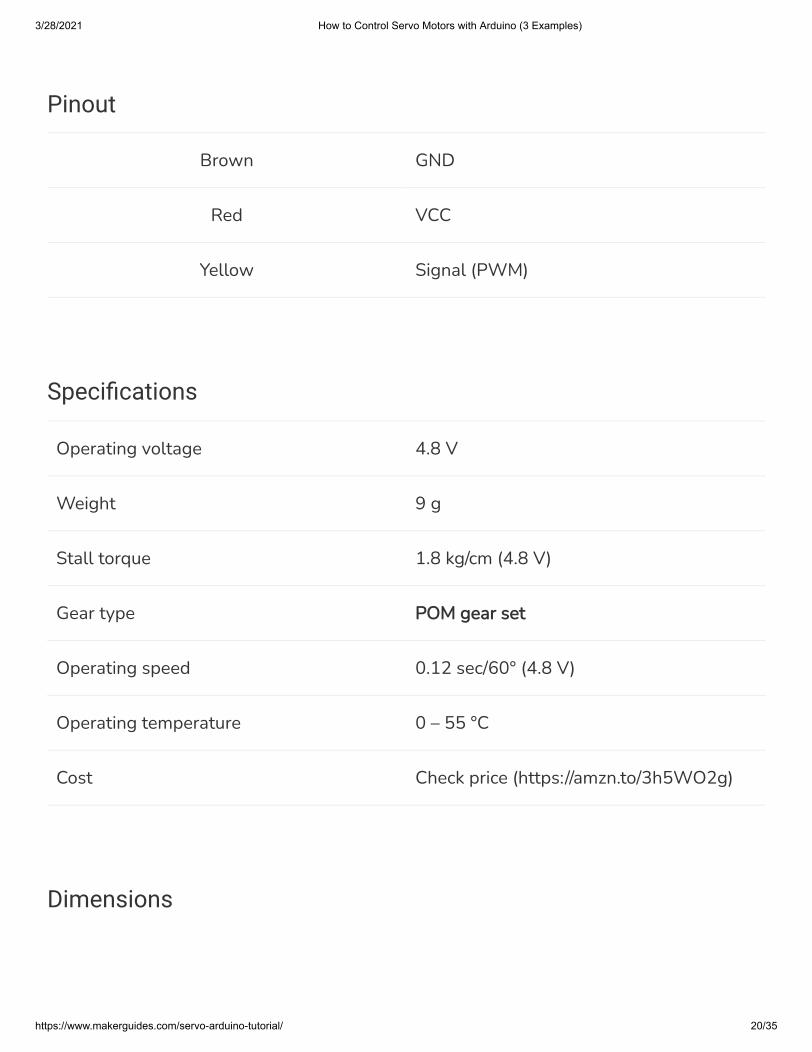
Pinout
Brown GND
Red VCC
Yellow Signal (PWM)
Speci�cations
Operating voltage 4.8 V
Weight 9 g
Stall torque 1.8 kg/cm (4.8 V)
Gear type POM gear set
Operating speed 0.12 sec/60° (4.8 V)
Operating temperature 0 – 55 °C
Cost Check price (https://amzn.to/3h5WO2g)
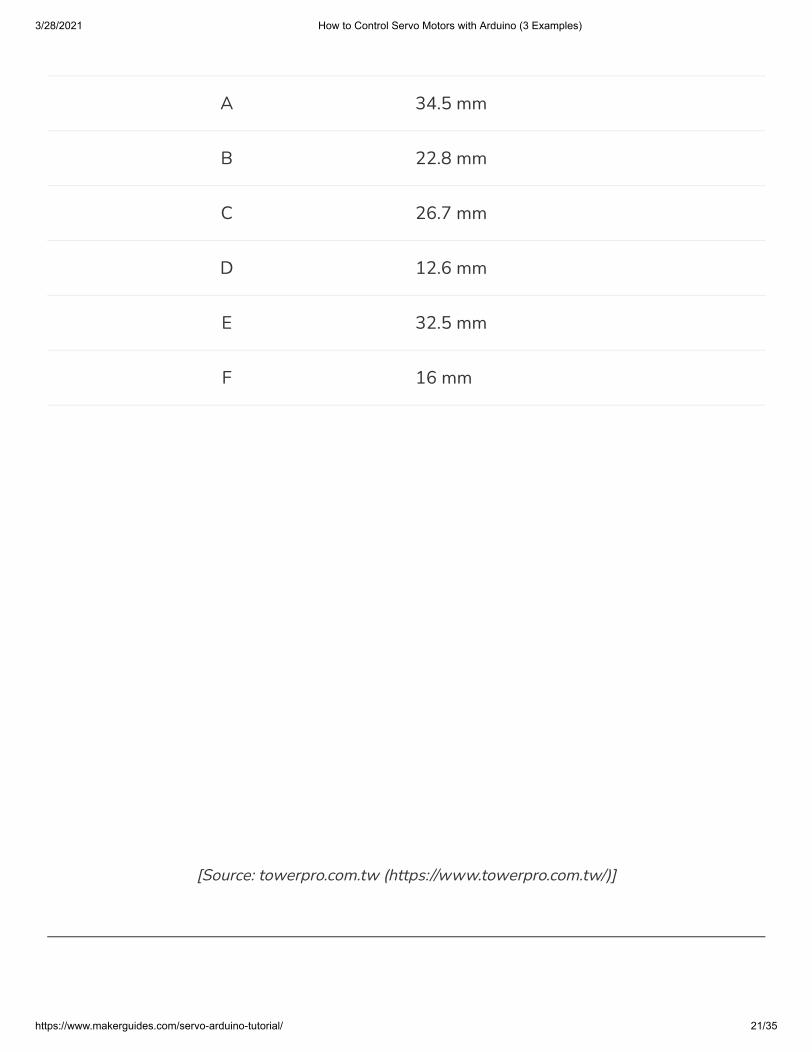
Dimensions
3/28/2021 How to Control Servo Motors with Arduino (3 Examples)
https://www.makerguides.com/servo-arduino-tutorial/ 21/35
A 34.5 mm
B 22.8 mm
C 26.7 mm
D 12.6 mm
E 32.5 mm
F 16 mm
[Source: towerpro.com.tw (https://www.towerpro.com.tw/)]
3/28/2021 How to Control Servo Motors with Arduino (3 Examples)
https://www.makerguides.com/servo-arduino-tutorial/ 22/35
MG90S digital micro servo (https://amzn.to/2Eei07r)
(https://amzn.to/2Eei07r)
[Source: towerpro.com.tw (https://www.towerpro.com.tw/)]
Pinout
Brown GND
Red VCC
Yellow Signal (PWM)
Speci�cations
3/28/2021 How to Control Servo Motors with Arduino (3 Examples)
https://www.makerguides.com/servo-arduino-tutorial/ 23/35
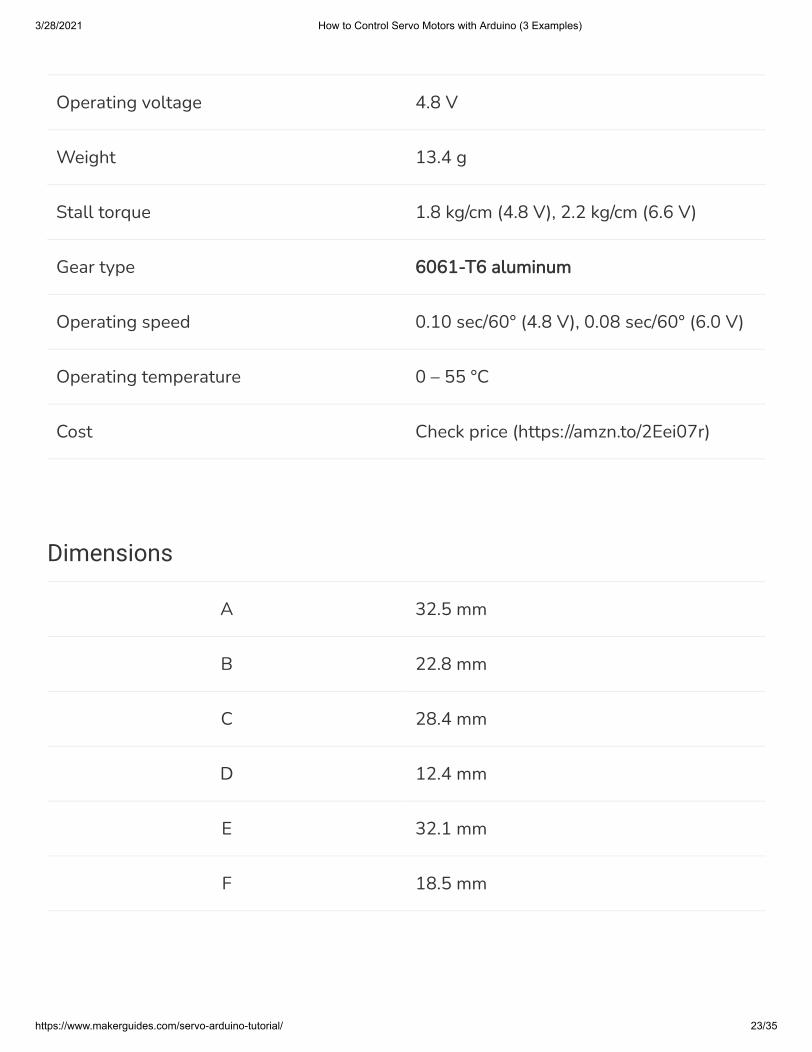
Operating voltage 4.8 V
Weight 13.4 g
Stall torque 1.8 kg/cm (4.8 V), 2.2 kg/cm (6.6 V)
Gear type 6061-T6 aluminum
Operating speed 0.10 sec/60° (4.8 V), 0.08 sec/60° (6.0 V)
Operating temperature 0 – 55 °C
Cost Check price (https://amzn.to/2Eei07r)
Dimensions
A 32.5 mm
B 22.8 mm
C 28.4 mm
D 12.4 mm
E 32.1 mm
F 18.5 mm

3/28/2021 How to Control Servo Motors with Arduino (3 Examples)
https://www.makerguides.com/servo-arduino-tutorial/ 24/35
[Source: towerpro.com.tw (https://www.towerpro.com.tw/)]
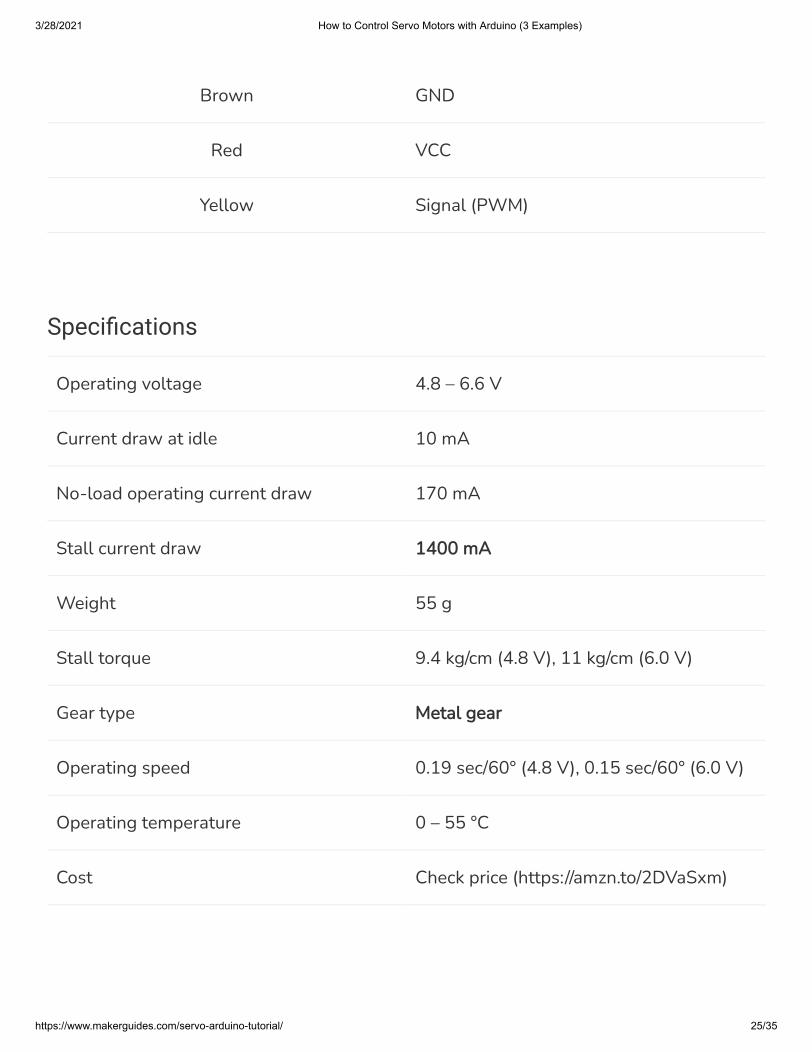
MG996R high torque digital servo (https://amzn.to/2DVaSxm)
(https://amzn.to/2DVaSxm)
[Source: towerpro.com.tw (https://www.towerpro.com.tw/)]
Pinout
3/28/2021 How to Control Servo Motors with Arduino (3 Examples)
https://www.makerguides.com/servo-arduino-tutorial/ 25/35
Brown GND
Red VCC
Yellow Signal (PWM)
Speci�cations
Operating voltage 4.8 – 6.6 V
Current draw at idle 10 mA
No-load operating current draw 170 mA
Stall current draw 1400 mA
Weight 55 g
Stall torque 9.4 kg/cm (4.8 V), 11 kg/cm (6.0 V)
Gear type Metal gear
Operating speed 0.19 sec/60° (4.8 V), 0.15 sec/60° (6.0 V)
Operating temperature 0 – 55 °C
Cost Check price (https://amzn.to/2DVaSxm)
3/28/2021 How to Control Servo Motors with Arduino (3 Examples)
https://www.makerguides.com/servo-arduino-tutorial/ 26/35
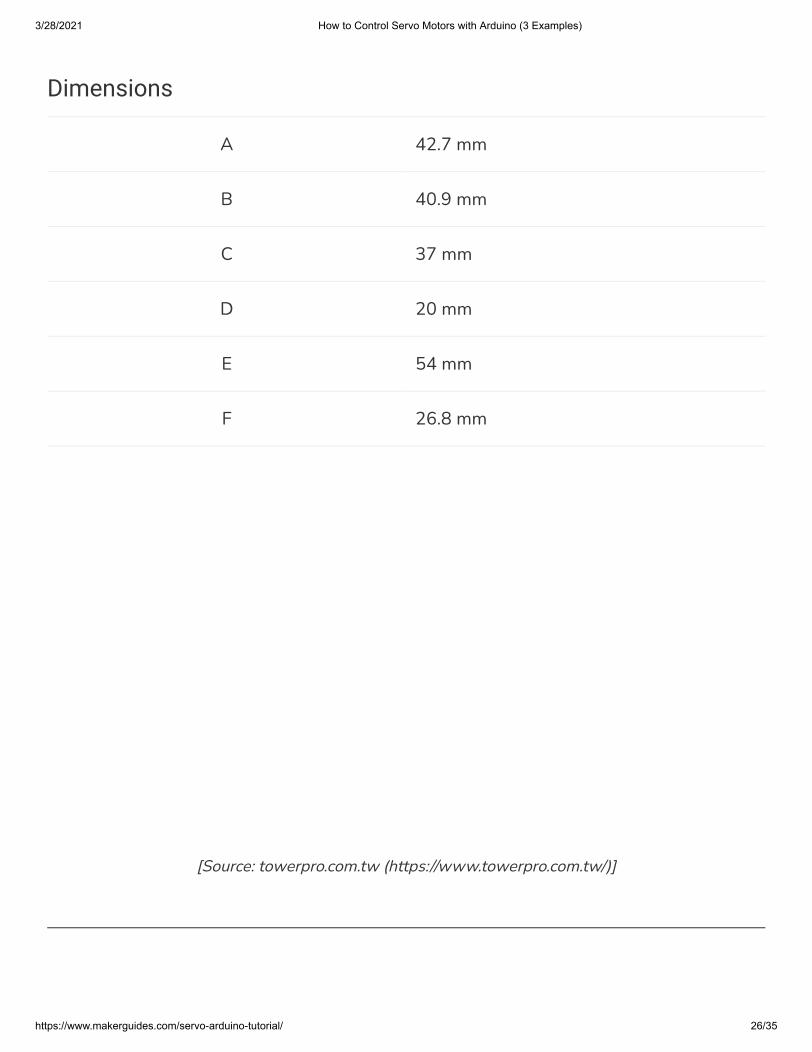
Dimensions
A 42.7 mm
B 40.9 mm
C 37 mm
D 20 mm
E 54 mm
F 26.8 mm
[Source: towerpro.com.tw (https://www.towerpro.com.tw/)]
3/28/2021 How to Control Servo Motors with Arduino (3 Examples)
https://www.makerguides.com/servo-arduino-tutorial/ 27/35
Conclusion
In this tutorial, I have shown you how to use servo motors with Arduino. We looked atthe basics of controlling the position and speed of servo motors, how to control a servomotor with a potentiometer, and how to control multiple servo motors at the same time.
I hope you found this article useful and informative. If you did, please share it with afriend who also likes electronics and making things!
I would love to know what project you plan on building or have already built with servomotors and the Arduino. If you have any questions, suggestions, or if you think thatthings are missing in this tutorial, please leave a comment below.
Note that comments are held for moderation to prevent spam.
This work is licensed under a Creative Commons Attribution-NonCommercial-ShareAlike4.0 International License (https://creativecommons.org/licenses/by-nc-sa/4.0/).
Beginner
What to read next?
LM35 analog temperature sensor with Arduino tutorial(https://www.makerguides.com/lm35-arduino-tutorial/)
TMP36 analog temperature sensor with Arduino tutorial(https://www.makerguides.com/tmp36-arduino-tutorial/)
Arduino Nano Board Guide (Pinout, Speci�cations, Comparison)(https://www.makerguides.com/arduino-nano/)
13SHARES
3/28/2021 How to Control Servo Motors with Arduino (3 Examples)
https://www.makerguides.com/servo-arduino-tutorial/ 28/35
The complete guide for DS18B20 digital temperature sensors with Arduino(https://www.makerguides.com/ds18b20-arduino-tutorial/)
How to use an IR receiver and remote with Arduino(https://www.makerguides.com/ir-receiver-remote-arduino-tutorial/)
Comments
Ted Becker saysJanuary 29, 2021 at 9:27 am (https://www.makerguides.com/servo-arduino-tutorial/#comment-6261)
The diagram in this tutorial is WRONG!
Pulse width into a SG90 is as follows
.5 mSec = 0 Degrees 1.0 mSec = 45 Degrees 1.5 mSec = 90 Degrees 2.0 mSec = 135 Degrees 2.5 mSec = 180 Degrees
The angles are approximate.
See what results you get with: myservo.writeMicroseconds(1000); myservo.writeMicroseconds(1500); myservo.writeMicroseconds(2000);
I suggest the authors actually hook up the circuit and try it out. Check the pulsewidth with an oscilloscope like I did.
3/28/2021 How to Control Servo Motors with Arduino (3 Examples)
https://www.makerguides.com/servo-arduino-tutorial/ 29/35
Reply
Benne de Bakker saysJanuary 29, 2021 at 9:40 am (https://www.makerguides.com/servo-arduino-tutorial/#comment-6262)
Hi Ted,
Thank you for your comment. As I mentioned in the article, the min (o degrees)and max (180 degrees) positions of the servo can vary between type andbrand/manufacturer. Also, see the section under ‘Why doesn’t my servo turn afull 0 – 180 degrees?’ where I explain how to adjust the min and max timingusing the attach() function.
Benne
Reply
simon legrand saysJanuary 7, 2021 at 3:01 pm (https://www.makerguides.com/servo-arduino-tutorial/#comment-5859)
Hi Benne,
Great article, it helped out a lot! I do have this weird problem: At school we work with the tinkerkits, and whenever i plug in my servo it keepsdisrupting the power supply (noti�cation sound on my laptop and the LED that issupposed to be on at all times dims for a few seconds). This makes the wholesystem reset, which holds it from working properly.
3/28/2021 How to Control Servo Motors with Arduino (3 Examples)
https://www.makerguides.com/servo-arduino-tutorial/ 30/35
Do you know a solution for my problem? Thanks in advance, Simon
Reply
Mary saysDecember 20, 2020 at 6:43 am (https://www.makerguides.com/servo-arduino-tutorial/#comment-5515)
Hi Benne, Many thanks to the tutorial. I have installed Arduino 1.8.13 and made a new scriptand copied your �rst code to control a servo motor. I don’t have the servo andArduino board yet and was wondering if before actual connection of the hardware, ican see the outcome of the program simulated somehow in the Arduino.net? I haveseen some cool simulation tools (such as Tinkercad) and the codes that i copiedfrom the simulation planform are not working when i paste them in Arduino.net.Thank you. Mary
Reply
Giancarlo saysOctober 3, 2020 at 11:17 am (https://www.makerguides.com/servo-arduino-tutorial/#comment-4049)
Hi Benne, congratulation for very good tutorial on servo motor controlled byArduino. In this article you wrote brie�y about using PCA9685 PWM/servo driver tocontrol servo motor referring to a tutorial. Please could you show me the link to getit? Regards
3/28/2021 How to Control Servo Motors with Arduino (3 Examples)
https://www.makerguides.com/servo-arduino-tutorial/ 31/35
Reply
Benne de Bakker saysOctober 3, 2020 at 12:22 pm (https://www.makerguides.com/servo-arduino-tutorial/#comment-4050)
Hi Giancarlo,
Thank you! Unfortunately, I haven’t yet had time to write an article for thePCA9685. I will de�nitely write one in the future, but in the meantime, Isuggest you check out this tutorial from Adafruit: https://learn.adafruit.com/16-channel-pwm-servo-driver/hooking-it-up (https://learn.adafruit.com/16-channel-pwm-servo-driver/hooking-it-up)
Benne
Reply
3/28/2021 How to Control Servo Motors with Arduino (3 Examples)
https://www.makerguides.com/servo-arduino-tutorial/ 32/35
(https://www.makerguides.com/fsr-arduino-tutorial/)
Force Sensing Resistor (FSR) with Arduino Tutorial(https://www.makerguides.com/fsr-arduino-tutorial/)
3/28/2021 How to Control Servo Motors with Arduino (3 Examples)
https://www.makerguides.com/servo-arduino-tutorial/ 33/35
(https://www.makerguides.com/sharp-gp2y0a710k0f-ir-distance-sensor-arduino-tutorial/)
How to use a SHARP GP2Y0A710K0F IR Distance Sensor withArduino (https://www.makerguides.com/sharp-gp2y0a710k0f-ir-distance-sensor-arduino-tutorial/)
3/28/2021 How to Control Servo Motors with Arduino (3 Examples)
https://www.makerguides.com/servo-arduino-tutorial/ 34/35
Ezoic (https://www.ezoic.com/what-is-ezoic/)
report this ad
(https://www.makerguides.com/28byj-48-stepper-motor-arduino-tutorial/)
28BYJ-48 Stepper Motor with ULN2003 Driver and Arduino Tutorial(https://www.makerguides.com/28byj-48-stepper-motor-arduino-tutorial/)

3/28/2021 How to Control Servo Motors with Arduino (3 Examples)
https://www.makerguides.com/servo-arduino-tutorial/ 35/35
© 2021 Makerguides.com - All Rights Reserved