Embed Size (px)
Citation preview

Oracle® VM
Installation and Upgrade Guide for Release 3.2
E35330-06March 2014

Oracle® VM: Installation and Upgrade Guide for Release 3.2
Copyright © 2011, 2014, Oracle and/or its affiliates. All rights reserved.
Oracle and Java are registered trademarks of Oracle and/or its affiliates. Other names may be trademarks of their respective owners.
Intel and Intel Xeon are trademarks or registered trademarks of Intel Corporation. All SPARC trademarks are used under license and aretrademarks or registered trademarks of SPARC International, Inc. AMD, Opteron, the AMD logo, and the AMD Opteron logo are trademarks orregistered trademarks of Advanced Micro Devices. UNIX is a registered trademark of The Open Group.
This software and related documentation are provided under a license agreement containing restrictions on use and disclosure and are protectedby intellectual property laws. Except as expressly permitted in your license agreement or allowed by law, you may not use, copy, reproduce,translate, broadcast, modify, license, transmit, distribute, exhibit, perform, publish, or display any part, in any form, or by any means. Reverseengineering, disassembly, or decompilation of this software, unless required by law for interoperability, is prohibited.
The information contained herein is subject to change without notice and is not warranted to be error-free. If you find any errors, please report themto us in writing.
If this is software or related documentation that is delivered to the U.S. Government or anyone licensing it on behalf of the U.S. Government, thefollowing notice is applicable:
U.S. GOVERNMENT END USERS: Oracle programs, including any operating system, integrated software, any programs installed on the hardware,and/or documentation, delivered to U.S. Government end users are "commercial computer software" pursuant to the applicable Federal AcquisitionRegulation and agency-specific supplemental regulations. As such, use, duplication, disclosure, modification, and adaptation of the programs,including any operating system, integrated software, any programs installed on the hardware, and/or documentation, shall be subject to licenseterms and license restrictions applicable to the programs. No other rights are granted to the U.S. Government.
This software or hardware is developed for general use in a variety of information management applications. It is not developed or intended foruse in any inherently dangerous applications, including applications that may create a risk of personal injury. If you use this software or hardwarein dangerous applications, then you shall be responsible to take all appropriate fail-safe, backup, redundancy, and other measures to ensure itssafe use. Oracle Corporation and its affiliates disclaim any liability for any damages caused by use of this software or hardware in dangerousapplications.
This software or hardware and documentation may provide access to or information on content, products, and services from third parties. OracleCorporation and its affiliates are not responsible for and expressly disclaim all warranties of any kind with respect to third-party content, products,and services. Oracle Corporation and its affiliates will not be responsible for any loss, costs, or damages incurred due to your access to or use ofthird-party content, products, or services.
Abstract
Document generated on: 2014-03-06 (revision: 3777)

iii
Table of ContentsPreface .............................................................................................................................................. v
1 Audience ................................................................................................................................. v2 Documentation Accessibility ..................................................................................................... v3 Related Documents ................................................................................................................. v4 Command Syntax .................................................................................................................... v5 Conventions ............................................................................................................................ vi
1 Installation Overview ........................................................................................................................ 11.1 Installing Oracle VM ............................................................................................................. 1
1.1.1 Installing Oracle VM Server on x86 ............................................................................ 11.1.2 Installing Oracle VM Server on SPARC ...................................................................... 11.1.3 Installing Oracle VM Manager .................................................................................... 2
1.2 Upgrading Oracle VM ........................................................................................................... 22 Installing Oracle VM Server on x86 .................................................................................................. 3
2.1 Preinstallation Tasks and Requirements ................................................................................ 32.1.1 Hardware Requirements ............................................................................................. 32.1.2 Software Requirements .............................................................................................. 32.1.3 Network Requirements ............................................................................................... 32.1.4 Oracle VM Server Memory Settings ............................................................................ 42.1.5 Getting the Software .................................................................................................. 4
2.2 Installing Oracle VM Server From a CD ................................................................................. 52.3 Changing the Dom0 Memory Size ....................................................................................... 202.4 SNMP Support for Oracle VM Server .................................................................................. 202.5 Installing Oracle VM Server Support Tools ........................................................................... 21
3 Installing Oracle VM Server for SPARC .......................................................................................... 253.1 Preinstallation Tasks and Requirements .............................................................................. 25
3.1.1 Hardware Requirements ........................................................................................... 253.1.2 Software Requirements ............................................................................................ 253.1.3 Network Requirements ............................................................................................. 263.1.4 LDoms Configuration Requirements .......................................................................... 273.1.5 Getting the Oracle VM Agent for SPARC Software .................................................... 27
3.2 Installing Oracle VM Agent for SPARC ................................................................................ 283.3 Configuring Oracle VM Agent for SPARC ............................................................................ 28
3.3.1 Configuring the Network ........................................................................................... 293.3.2 Oracle VM Agent Configuration ................................................................................ 323.3.3 Configuring the LDoms Manager .............................................................................. 333.3.4 Configuring LDoms .................................................................................................. 33
3.4 Control Domain CPU and Memory Settings ......................................................................... 343.5 Using the Oracle VM Agent for SPARC Service ................................................................... 343.6 Oracle VM Agent for SPARC Log File ................................................................................. 353.7 Uninstalling Oracle VM Agent for SPARC ............................................................................ 35
4 Installing Oracle VM Manager ........................................................................................................ 374.1 Installation Overview ........................................................................................................... 374.2 Oracle VM Manager Components ........................................................................................ 384.3 Minimum Hardware and Software Requirements .................................................................. 40
4.3.1 Hardware Requirements ........................................................................................... 404.3.2 Software Requirements ............................................................................................ 40
4.4 Installing Oracle VM Manager ............................................................................................. 444.4.1 Mounting the Oracle VM Manager Installation Media .................................................. 454.4.2 Running the Oracle VM Manager Installer ................................................................. 454.4.3 Configuring the NTP Service .................................................................................... 534.4.4 Installing and Configuring Virtual Machine Console Utilities ........................................ 55

Oracle® VM
iv
4.4.5 Installation Logs ....................................................................................................... 564.4.6 Installation Directories .............................................................................................. 57
4.5 Logging in to Oracle VM Manager ....................................................................................... 574.6 Starting and Stopping Oracle VM Manager .......................................................................... 584.7 Running Oracle VM Manager as a Virtual Machine ............................................................... 594.8 Adding a Trusted CA Certificate and Keystore for SSL Encryption ......................................... 604.9 Enabling Remote Log Ins .................................................................................................... 624.10 Configuring UI Session Timeout ........................................................................................ 634.11 Changing the Oracle VM Manager admin User Password ................................................... 644.12 Backing Up Oracle VM Manager ....................................................................................... 654.13 Restoring Oracle VM Manager .......................................................................................... 664.14 Uninstalling Oracle VM Manager ....................................................................................... 674.15 Troubleshooting ................................................................................................................ 68
4.15.1 General MySQL Debugging .................................................................................... 684.15.2 libaio Not Installed .................................................................................................. 694.15.3 Cannot Install MySQL ............................................................................................ 694.15.4 Cannot Create OVS Database Schema ................................................................... 694.15.5 Oracle Database Schema Exists ............................................................................. 704.15.6 Installation Fails on Non-English Character Set ........................................................ 704.15.7 Installation Fails When Using an NIS-based oracle User Account .............................. 70
5 Upgrading Oracle VM .................................................................................................................... 735.1 Upgrading Overview ........................................................................................................... 735.2 Upgrading Oracle VM Manager ........................................................................................... 74
5.2.1 Post-upgrade Steps ................................................................................................. 765.3 Upgrading Oracle VM Server for x86 ................................................................................... 77
5.3.1 Upgrading Oracle VM Server Using a Yum Repository ............................................... 775.3.2 Upgrading Oracle VM Server Using the CD ............................................................... 775.3.3 Upgrading Oracle VM Server Using Multipath SANs .................................................. 80
A Oracle VM Manager Installation Script (runInstaller) ........................................................................ 83A.1 runInstaller ......................................................................................................................... 83
A.1.1 Options ................................................................................................................... 83A.2 Installer Configuration File .................................................................................................. 84
B Oracle VM Manager MySQL Backup and Restore .......................................................................... 87B.1 Oracle VM Manager MySQL Backup ................................................................................... 87
B.1.1 Backup Directories and Logs ................................................................................... 87B.1.2 Performing a Backup Manually ................................................................................. 88
B.2 Restoring the MySQL Database for Oracle VM Manager ...................................................... 88Index ................................................................................................................................................ 91

v
Preface
Table of Contents1 Audience ......................................................................................................................................... v2 Documentation Accessibility ............................................................................................................. v3 Related Documents ......................................................................................................................... v4 Command Syntax ............................................................................................................................ v5 Conventions .................................................................................................................................... vi
The preface contains information on how to use the Oracle VM Installation and Upgrade Guide.
1 AudienceThe Oracle VM Installation and Upgrade Guide is intended for system administrators and end users whowant to install or upgrade Oracle VM.
2 Documentation AccessibilityFor information about Oracle's commitment to accessibility, visit the Oracle Accessibility Program websiteat http://www.oracle.com/pls/topic/lookup?ctx=acc&id=docacc.
Access to Oracle Support
Oracle customers have access to electronic support through My Oracle Support. For information, visithttp://www.oracle.com/pls/topic/lookup?ctx=acc&id=info or visit http://www.oracle.com/pls/topic/lookup?ctx=acc&id=trs if you are hearing impaired.
3 Related DocumentsFor more information, see the following documents in the Oracle VM Release 3.2 documentation set:
• Oracle VM Release Notes
• Oracle VM Getting Started Guide
• Oracle VM User's Guide
• Oracle VM Windows Paravirtual Drivers Installation Guide
• Oracle VM Security Guide
• Oracle VM Utilities Guide
• Oracle VM Command Line Interface User's Guide
You can also get the latest information on Oracle VM by going to the Oracle virtualization Web site:
http://www.oracle.com/virtualization
4 Command SyntaxCommand syntax appears in monospace font. The dollar character ($), number sign (#), or percentcharacter (%) are command prompts. Do not enter them as part of the command. The following commandsyntax conventions are used in this guide:

Conventions
vi
Convention Description
backslash \ A backslash is the command continuation character. It is used in commandexamples that are too long to fit on a single line. Enter the command asdisplayed (with a backslash) or enter it on a single line without a backslash:
dd if=/dev/rdsk/c0t1d0s6 of=/dev/rst0 bs=10b \ count=10000
braces { } Braces indicate required items:
.DEFINE {macro1}
brackets [ ] Brackets indicate optional items:
cvtcrt termname [outfile]
ellipses ... Ellipses indicate an arbitrary number of similar items:
CHKVAL fieldname value1 value2 ... valueN
italics Italic type indicates a variable. Substitute a value for the variable:
library_name
vertical line | A vertical line indicates a choice within braces or brackets:
FILE filesize [K|M]
5 Conventions
The following text conventions are used in this document:
Convention Meaning
boldface Boldface type indicates graphical user interface elements associated with anaction, or terms defined in text or the glossary.
italic Italic type indicates book titles, emphasis, or placeholder variables for whichyou supply particular values.
monospace Monospace type indicates commands within a paragraph, URLs, code inexamples, text that appears on the screen, or text that you enter.

1
Chapter 1 Installation Overview
Table of Contents1.1 Installing Oracle VM ..................................................................................................................... 1
1.1.1 Installing Oracle VM Server on x86 .................................................................................... 11.1.2 Installing Oracle VM Server on SPARC .............................................................................. 11.1.3 Installing Oracle VM Manager ............................................................................................ 2
1.2 Upgrading Oracle VM ................................................................................................................... 2
This chapter contains introductory information on Oracle VM installation procedures.
1.1 Installing Oracle VMTo install Oracle VM, you must install at least one Oracle VM Server, and then install one instance ofOracle VM Manager. Your Oracle VM Server can be on either x86 hardware, or on SPARC hardware.Oracle VM Servers in a server pool must be of the same type, either x86 or SPARC. You cannot mix x86and SPARC servers in the same server pool, however Oracle VM Manager is capable of simultaneouslymanaging server pools of different types.
Important
In a production environment Oracle VM Manager and Oracle VM Server versionsmust ideally match. While it is supported to use Oracle VM Manager to managean Oracle VM Server within the same release but at a different patch level, it isrecommended that customers maintain the same patch level for both server andmanager.
1.1.1 Installing Oracle VM Server on x86
Installing Oracle VM Server on x86 deletes any previous operating system and data on the drive selectedfor installation. To install Oracle VM Server on an x86 server:
1. Boot the computer on which you want to install Oracle VM Server with your Oracle VM Server CD.
2. At the boot prompt, press Enter.
3. Follow the prompts to install Oracle VM Server.
See Chapter 2, Installing Oracle VM Server on x86 for detailed information on installing Oracle VM Server.
If you want to use more than one Oracle VM Server, repeat the installation process. Oracle VM Serverscan be added to a server pool and managed by Oracle VM Manager.
1.1.2 Installing Oracle VM Server on SPARC
Installing Oracle VM Server on a SPARC server requires you install and configure the following on theSPARC server:
1. Oracle Solaris OS in the control domain.
2. Oracle VM Server for SPARC. This is included in Oracle Solaris 11 OS.
3. Oracle VM Agent for SPARC.

Installing Oracle VM Manager
2
Note that installing Oracle Solaris within the control domain will destroy the data on the disk on which it isinstalled, however if Oracle Solaris 11 is already installed within the control domain then Oracle VM Serverfor SPARC is already available and there is no need to reinstall. Setting up Oracle VM Server for SPARCin this environment will not result in any data being destroyed.
See Chapter 3, Installing Oracle VM Server for SPARC for detailed information on installing Oracle VMServer on SPARC servers.
If you want to use more than one Oracle VM Server, repeat the installation process.
1.1.3 Installing Oracle VM Manager
To install Oracle VM Manager:
1. Start up the operating system on the computer on which you want to install Oracle VM Manager.
2. Insert and mount the Oracle VM Manager CD.
3. As the root user, start the Oracle VM Manager installation script:
# ./runInstaller.sh
4. Follow the prompts to install Oracle VM Manager.
See Chapter 4, Installing Oracle VM Manager for detailed information on installing Oracle VM Manager.
1.2 Upgrading Oracle VM
You cannot upgrade Oracle VM 2.x to Oracle VM 3.x. A full reinstall of your Oracle VM environment isrequired. You can however upgrade an Oracle VM 3.x environment. See Chapter 5, Upgrading Oracle VMfor information on performing an upgrade.
Note
Since Oracle VM Release 3.2 is the first release available with support for SPARC,upgrade procedures mentioned in this document only apply to environmentsrunning on x86 hardware.

3
Chapter 2 Installing Oracle VM Server on x86
Table of Contents2.1 Preinstallation Tasks and Requirements ........................................................................................ 3
2.1.1 Hardware Requirements ..................................................................................................... 32.1.2 Software Requirements ...................................................................................................... 32.1.3 Network Requirements ....................................................................................................... 32.1.4 Oracle VM Server Memory Settings .................................................................................... 42.1.5 Getting the Software .......................................................................................................... 4
2.2 Installing Oracle VM Server From a CD ......................................................................................... 52.3 Changing the Dom0 Memory Size ............................................................................................... 202.4 SNMP Support for Oracle VM Server .......................................................................................... 202.5 Installing Oracle VM Server Support Tools ................................................................................... 21
This chapter is intended for system administrators who want to install Oracle VM Server. This chapterdiscusses downloading and installing Oracle VM Server.
2.1 Preinstallation Tasks and Requirements
Before you start the Oracle VM Server installation, make sure your computer meets the minimum hardwareand software requirements.
2.1.1 Hardware Requirements
This release of Oracle VM Server supports x86_64 host hardware. Oracle VM Server requires a 64-bitprocessor.
For hardware virtualized (unmodified) guest operating systems (for example, Microsoft Windows), aCPU with hardware virtualization support is required. This feature may also need to be enabled in theBIOS. Please refer to your processor documentation for information on whether your processor supportshardware virtualization and how to enable it in the BIOS.
A dual core CPU or multiple CPUs are recommended to run multiple guests.
The minimum memory requirement is 1GB RAM, although it is recommended you have a computer with atleast 2GB RAM. Guest memory requirements vary for each guest operating system. You should performyour own memory sizing for guest operating systems.
2.1.2 Software Requirements
There are no prerequisite software requirements. Oracle VM Server includes a small Linux-basedmanagement operating system. All previous operating systems and data on the disk selected forinstallation are lost during the installation of Oracle VM Server.
Migration from any operating system, or previous alternate virtualization environment, is not supported inthis release.
2.1.3 Network Requirements
Oracle VM Server requires at least one stable and static IP address that does not change over serverreboots. If you use DHCP within your environment, you should configure your DHCP server to assign static

Oracle VM Server Memory Settings
4
DHCP addresses to the systems on which you will be installing Oracle VM Server. This ensures that yourhost always receives the same IP address. The behavior of the Oracle VM Server host is undefined if usedin an environment where your IP address may change due to DHCP lease expiry.
If your DHCP server is configured to provide a default gateway, this could impact on the behavior ofOracle VM Server as the gateway provided over DHCP would override any statically defined gatewayset on Oracle VM Server. Therefore, Oracle recommends that you ensure that your DHCP server is notconfigured to provide a default gateway unless you are certain that the default route is the one that youwant your Oracle VM Server instances to make use of.
Technically, it is possible to run Oracle VM Server with a single network interface per physical server.During the installation of the Oracle VM Servers the management interface is configured, and duringdiscovery by Oracle VM Manager the server management interfaces are included in the defaultmanagement network. Since the management network is capable of providing all network functionsin Oracle VM, including storage and virtual machine traffic, there is no functional need for additionalnetworks. Even if you wish to separate different types of network traffic, a single interface is enough: themanagement network can be run on a VLAN and additional network connections can be made via VLANinterfaces configured on top of the single physical network interface.
The main reasons to opt for multiple physical network interfaces are:
• Security. You may wish to keep internal and inter-server traffic separated from networks with a routeto the internet. Or you may need to guarantee that network traffic from different virtual environments, ordifferent types of network traffic, are physically separated.
• Redundancy. You do not want your environment to stop working if one network interface fails. A goodway to avoid this is to aggregate two interfaces in a bond interface. A bond port, as it is called in OracleVM, can work in active-backup mode, but also increases performance when used as an aggregation oftwo active links with twice the bandwidth and load balancing.
• Performance. If you have multiple physical network interfaces, link aggregation is a good way to addbandwidth for a given network function. In addition, or as an alternative, you can create multiple physicalnetworks and use them for dedicated functions; for example a separate storage network or a network forvirtual machine traffic only.
Note
Oracle VM Ethernet network functionality can be applied to standard10/100/1000Mbit Ethernet interfaces as well as 10Gbit Ethernet interfaces.
2.1.4 Oracle VM Server Memory Settings
Installation allocates memory to dom0 using the following algorithm:
(512 + 0.0205 * Physical memory (MB)) round to 8
Oracle does not recommend changing this default value.
2.1.5 Getting the Software
If you do not already have the Oracle VM Server software, download the Oracle VM Server ISO file fromthe Oracle Software Delivery Cloud:
http://edelivery.oracle.com/oraclevm

Installing Oracle VM Server From a CD
5
Burn the Oracle VM ISO file to a bootable CD. To install Oracle VM Server from a CD, see Section 2.2,“Installing Oracle VM Server From a CD”.
2.2 Installing Oracle VM Server From a CD
To install Oracle VM Server from a CD:
1. Make sure that the server BIOS is set to boot from CD.
2. Insert the Oracle VM Server CD into your CD drive.
3. Boot the server with the Oracle VM Server CD.
4. The Oracle VM Server screen is displayed.
Press Enter to begin the installation. If you do not press a key for one minute, the installer automaticallystarts. The installer is only available in text mode.
5. The CD Found screen is displayed.

Installing Oracle VM Server From a CD
6
If you want to make sure the CD has been created correctly you can have the installer test it for errors.To test the CD, select OK and press Enter. The CD is tested and any errors are reported.
Warning
Testing the installation media requires a server reboot to continue theinstallation. If you do not have physical access to the server itself, it is notrecommended that you perform this test.
To skip media testing and continue with the install, select Skip and press Enter.
6. The Keyboard Selection screen is displayed.

Installing Oracle VM Server From a CD
7
Select the keyboard layout type (for example, us for U.S. English) from the list of available options. Thekeyboard you select becomes the default keyboard for the operating system.
Select OK and press Enter.
7. The Oracle VM Server 3.x End User License Agreement screen is displayed.
Read the License Agreement text and click Accept to accept the terms of the agreement and continuethe installation.
8. If an existing Oracle VM Server installation is found on the computer, the System to Upgrade screen isdisplayed.

Installing Oracle VM Server From a CD
8
Select Reinstall System to overwrite the existing installation.
Select Oracle VM Server 3.x (disk) to upgrade the existing installation. Upgrade instructions aredescribed in Section 5.3.2, “Upgrading Oracle VM Server Using the CD”. Upgrading an Oracle VMServer from Release 2.x is not supported; you must perform a fresh install.
Select OK and press Enter.
9. The Partitioning Type screen is displayed.
Select whether you want to:

Installing Oracle VM Server From a CD
9
• Remove all partitions and create a new default partition layout
• Remove all Linux partitions and create a new default partition layout
• Use the free space on selected drives to create a new default partition layout
• Create a minimal partition layout for installation to a USB drive
• Create a custom partition layout
Oracle recommends you use a default partition layout.
Select which drive(s) you want to use for the installation.
Select OK and press Enter.
10. If you selected to remove a partition, a Warning screen is displayed to confirm that you want to removethe partition(s), including the data contained on any partitions.
Select Yes and press Enter.
11. The Review Partition Layout screen is displayed.

Installing Oracle VM Server From a CD
10
If you do not want to review the partition layout and accept the default partition layout, select No andpress Enter.
If you want to review the partition layout, select Yes and press Enter.
The Partitioning screen is displayed.
Review the partition layout, and make any changes you want.
Select OK and press Enter to save any changes.
12. The Boot Loader Configuration screen is displayed.

Installing Oracle VM Server From a CD
11
Be sure to select the option to boot from a multipath device if you install Oracle VM Server on a disksubsystem that allows access through multiple physical paths.
Warning
If only a single path is available at the time of installation, you will need tocorrect the blacklisting configuration afterwards: identify the SCSI device usedto boot from (using mount or df), locate and remove its entry in the file /etc/blacklisted.wwids, then reboot the Oracle VM Server. This allows theserver to use multipath SAN boot instead of a single SCSI disk.
If necessary, you can change the drive for the master boot record by clicking Change drive order andselecting a different drive.

Installing Oracle VM Server From a CD
12
Select a drive in the list and click the Move up and Move down buttons to change the order, makingsure that the drive to locate the Master Boot Record is at the top.
Select Back and press Enter to return to the Boot Loader Configuration screen.
Select OK and press Enter.
13. The Oracle VM Management Interface screen is displayed.
Select the network interface to use for management of the computer.

Installing Oracle VM Server From a CD
13
Choose one of these options:
• Select OK to connect the interface to a regular network.
• Select Add to VLAN to connect the interface to a VLAN-type network.
Press Enter.
14. For non-VLAN installation, proceed to the next step.
If you selected Add to VLAN, the Oracle VM Management VLAN screen is displayed.
If your Oracle VM Management network is on a VLAN, enter the applicable VLAN tag. Note that 0 isreserved and that 1 corresponds with "untagged".
Select OK and press Enter.
15. The Network Interface Configuration screen is displayed.

Installing Oracle VM Server From a CD
14
If your computer uses a static IP address, enter the IP address and prefix (netmask) for your computer.
If your computer uses DHCP to assign its IP address, select Dynamic IP configuration (DHCP). SeeSection 2.1.3, “Network Requirements ” for more information on using DHCP with Oracle VM.
Select OK and press Enter.
16. The Miscellaneous Network Settings screen is displayed.
Enter the Gateway, Primary DNS and optional Secondary DNS in the respective fields.

Installing Oracle VM Server From a CD
15
Select OK and press Enter.
17. The Hostname Configuration screen is displayed.
If your machine has its own hostname, select manually and enter the hostname or IP address. Youshould use a fully qualified hostname, for example, myserver.example.com.
If your machine uses DHCP to assign its hostname, select automatically via DHCP. SeeSection 2.1.3, “Network Requirements ” for more information on using DHCP with Oracle VM.
Select OK and press Enter.
18. The Time Zone Selection screen is displayed.

Installing Oracle VM Server From a CD
16
If your operating system uses Coordinated Universal Time (UTC), select System clock uses UTC.
Select your time zone by selecting the city closest to your computer's physical location.
Select OK and press Enter.
19. The Oracle VM Agent password screen is displayed.
Enter a password to be used for the Oracle VM Agent in the Password field. This password is used byOracle VM Manager to manage and monitor the Oracle VM Server, and the guests created and runningwithin it. This is the password you use when discovering Oracle VM Servers in Oracle VM Manager.

Installing Oracle VM Server From a CD
17
Re-enter the password in the Password (confirm) field.
The password characters are not echoed to the screen.
Select OK and press Enter. If the two passwords do not match, the installer prompts you to enter themagain.
Note
If you need to change this password, use the applicable option in the OracleVM Manager user interface. This will change the Oracle VM Agent passwordfor all Oracle VM Servers in the server pool. See Changing Oracle VM AgentPasswords on Oracle VM Servers in the Oracle VM User's Guide for moreinformation.
20. The Root Password screen is displayed.
Enter a password for the root user in the Password field. The root password must be at least sixcharacters long.
Re-enter the password in the Password (confirm) field.
The password characters are not echoed to the screen.
Select OK and press Enter. If the two passwords do not match, the installer prompts you to enter themagain.
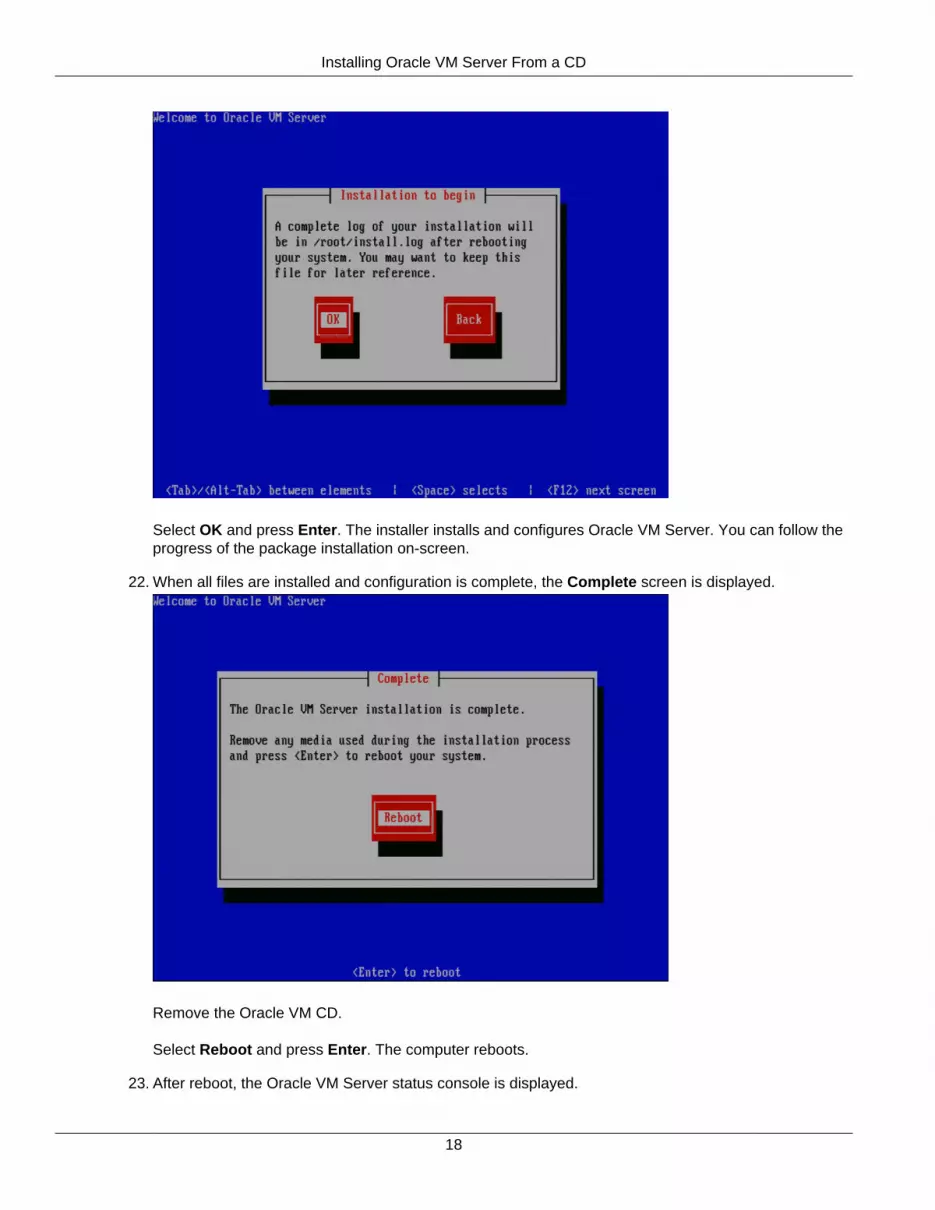
21. The Installation to begin screen is displayed.
Installing Oracle VM Server From a CD
18
Select OK and press Enter. The installer installs and configures Oracle VM Server. You can follow theprogress of the package installation on-screen.
22. When all files are installed and configuration is complete, the Complete screen is displayed.
Remove the Oracle VM CD.
Select Reboot and press Enter. The computer reboots.
23. After reboot, the Oracle VM Server status console is displayed.

Installing Oracle VM Server From a CD
19
The status console displays useful information about the Oracle VM Server's hardware andconfiguration as well as its cluster and server pool membership. Right after installation there is very littleinformation available, but this screen is populated with more information when the Oracle VM Server isunder the control of Oracle VM Manager.
24. To log on to the Oracle VM, press Alt+F2 to display the login console.
You can log into Oracle VM as root, with the password you set during the install. To switch back to thestatus console, press Alt+F1.

Changing the Dom0 Memory Size
20
The Oracle VM Server installation is complete. The Oracle VM Agent is started automatically and restartseach time the computer is rebooted.
Note
A log of the install is located in /root/install.log. If the install fails, review thislog file for help identifying the cause.
2.3 Changing the Dom0 Memory Size
When you install Oracle VM Server, the installer sets a default memory size for Dom0. The algorithm usedis:
dom0_mem = 502 + int(physical_mem * 0.0205)
Example sizes are set out in table Table 2.1.
Table 2.1 Default Dom0 Memory Size
Physical Memory Dom0 Memory
2 GB 560 MB
4 GB 600 MB
8 GB 680 MB
16 GB 848 MB
32 GB 1184 MB
64 GB 1856 MB
128 GB 4000 MB
256 GB 5888 MB
512 GB 11264 MB
1024 GB 22008 MB
2048 GB 43504 MB
You may encounter performance issues if the dom0 memory size is not set appropriately for your needs onthe Oracle VM Server.
To change the Dom0 memory allocation, edit the /boot/grub/grub.conf file on the Oracle VM Server andchange the dom0_mem parameter, for example, to change the memory allocation to 1024 MB, edit the fileto be:
kernel /xen.gz console=com1,vga com1=38400,8n1 dom0_mem=1024M
2.4 SNMP Support for Oracle VM Server
Oracle VM Server includes support for SNMP monitoring, allowing you to take advantage of SNMPmonitoring tools like Nagios. By default, the appropriate SNMP packages are installed on Oracle VMServer. Availability of these packages can be checked in the following way:
# rpm -qa | grep snmpnet-snmp-utils-5.3.2.2-17.0.1.el5_8.1net-snmp-libs-5.3.2.2-17.0.1.el5_8.1net-snmp-5.3.2.2-17.0.1.el5_8.1

Installing Oracle VM Server Support Tools
21
The SNMP daemons are disabled by default, and should be enabled if you intend to use SNMP to monitoran Oracle VM Server. You can check your configuration to determine whether the service has beenenabled in the following way:
# chkconfig --list |grep snmpsnmpd 0:off 1:off 2:off 3:off 4:off 5:off 6:offsnmptrapd 0:off 1:off 2:off 3:off 4:off 5:off 6:off
To enable the SNMP service, you can start it manually by issuing the following command:
# service snmpd start
To enable the SNMP service permanently, you can issue the following command:
# chkconfig --level 2345 snmpd on
Once running, you can use the snmpwalk command line utility to view the available MIBs. The followingoutput shows usage of the snmpwalk command to view the MIBs that are enabled by default:
# snmpwalk -v2c -c public localhostSNMPv2-MIB::sysDescr.0 = STRING: Linux test.us.oracle.com 2.6.39-300.12.0.el5uek #1 SMP Thu Oct 4 14:13:28 PDT 2012 x86_64SNMPv2-MIB::sysObjectID.0 = OID: NET-SNMP-MIB::netSnmpAgentOIDs.10DISMAN-EVENT-MIB::sysUpTimeInstance = Timeticks: (64612) 0:10:46.12SNMPv2-MIB::sysContact.0 = STRING: Root >root@localhost> (configure /etc/snmp/snmp.local.conf)SNMPv2-MIB::sysName.0 = STRING: test.us.oracle.comSNMPv2-MIB::sysLocation.0 = STRING: Unknown (edit /etc/snmp/snmpd.conf)SNMPv2-MIB::sysORLastChange.0 = Timeticks: (1) 0:00:00.01SNMPv2-MIB::sysORID.1 = OID: SNMPv2-MIB::snmpMIBSNMPv2-MIB::sysORID.2 = OID: TCP-MIB::tcpMIBSNMPv2-MIB::sysORID.3 = OID: IP-MIB::ipSNMPv2-MIB::sysORID.4 = OID: UDP-MIB::udpMIBSNMPv2-MIB::sysORID.5 = OID: SNMP-VIEW-BASED-ACM-MIB::vacmBasicGroupSNMPv2-MIB::sysORID.6 = OID: SNMP-FRAMEWORK-MIB::snmpFrameworkMIBComplianceSNMPv2-MIB::sysORID.7 = OID: SNMP-MPD-MIB::snmpMPDComplianceSNMPv2-MIB::sysORID.8 = OID: SNMP-USER-BASED-SM-MIB::usmMIBComplianceSNMPv2-MIB::sysORDescr.1 = STRING: The MIB module for SNMPv2 entitiesSNMPv2-MIB::sysORDescr.2 = STRING: The MIB module for managing TCP implementationsSNMPv2-MIB::sysORDescr.3 = STRING: The MIB module for managing IP and ICMP implementationsSNMPv2-MIB::sysORDescr.4 = STRING: The MIB module for managing UDP implementationsSNMPv2-MIB::sysORDescr.5 = STRING: View-based Access Control Model for SNMP.SNMPv2-MIB::sysORDescr.6 = STRING: The SNMP Management Architecture MIB.SNMPv2-MIB::sysORDescr.7 = STRING: The MIB for Message Processing and Dispatching.SNMPv2-MIB::sysORDescr.8 = STRING: The management information definitions for the SNMP User-based Security Model.SNMPv2-MIB::sysORUpTime.1 = Timeticks: (0) 0:00:00.00SNMPv2-MIB::sysORUpTime.2 = Timeticks: (0) 0:00:00.00SNMPv2-MIB::sysORUpTime.3 = Timeticks: (0) 0:00:00.00SNMPv2-MIB::sysORUpTime.4 = Timeticks: (0) 0:00:00.00SNMPv2-MIB::sysORUpTime.5 = Timeticks: (0) 0:00:00.00SNMPv2-MIB::sysORUpTime.6 = Timeticks: (1) 0:00:00.01SNMPv2-MIB::sysORUpTime.7 = Timeticks: (1) 0:00:00.01SNMPv2-MIB::sysORUpTime.8 = Timeticks: (1) 0:00:00.01HOST-RESOURCES-MIB::hrSystemUptime.0 = Timeticks: (105614) 0:17:36.14HOST-RESOURCES-MIB::hrSystemUptime.0 = No more variables left in this MIB View (It is past the end of the MIB tree)
To edit the configuration of the SNMP daemon on your Oracle VM Server you can either edit theconfiguration file at /etc/snmp/snmpd.conf directly, or you can use the snmpconf command line utilityto assist you with any further configuration that you may require.
2.5 Installing Oracle VM Server Support ToolsAdditional packages that Oracle VM Server is not dependent on, but which can be useful to resolvesupport issues are also available within the Oracle VM Server ISO. Depending on your own security policy,

Installing Oracle VM Server Support Tools
22
you may or may not choose to install these packages. They are not installed automatically by default. If youchoose to install them, you can do so by installing the ovs-support-tools meta-package by running thefollowing command on Oracle VM Server as root:
# yum install ovs-support-tools
This meta-package will install the following dependencies:
• sudo
• bind-utils
• rsync
• sysstat
• traceroute
• iperf
Note
The sudo package is installed automatically by default on Oracle VM Server3.1.1. If you have upgraded from Oracle VM Server 3.1.1, the sudo package isalready installed. If you do not want this package present on your Oracle VM Serverinstallation, you should manually remove the package by running the followingcommand as root:
# yum remove sudo
As an optional post-installation step, Oracle recommends that you also install and configure diagnosticstools on all Oracle VM Servers. These tools can be used to help debug and diagnose issues such assystem crashes, hanging, unscheduled reboots, and OCFS2 cluster errors. The output from these toolscan be used by Oracle Support and can significantly improve resolution and response times.
Obtaining a system memory dump (vmcore) can be very useful when attempting to diagnose and resolvethe root cause of an issue. To be able to get a useful vmcore dump, a proper kdump service configurationis required. See the Oracle Support Document 1351399.1, How to Configure 'kdump' for Oracle VM 3.0, forinformation on how to install kdump.
https://support.oracle.com/epmos/faces/DocumentDisplay?id=1351399.1
In addition, you can install netconsole, a utility allowing system console messages to be redirectedacross the network to another server. See the Oracle Support Document 1351524.1, How to Configure"netconsole" for Oracle VM Server 3.0, for information on how to install netconsole.
https://support.oracle.com/epmos/faces/DocumentDisplay?id=1351524.1
The OSWatcher Black Box (OSWbb) utility may also be useful as it collects and archives operating systemand network metrics that you can use to diagnose performance issues. OSWbb operates as a set ofbackground processes on the server and gathers data on a regular basis, invoking utilities like vmstat,netstat, iostat, and top. See the Oracle Support Document 580513.1, How To Start OSWatcher Black BoxEvery System Boot, for information on how to install OSWbb.
https://support.oracle.com/epmos/faces/DocumentDisplay?id=580513.1
Additional information on using diagnostic tools is provided in the Oracle Linux documentation. See thechapter titled Support Diagnostic Tools in the Oracle Linux Administrator's Solutions Guide.

Installing Oracle VM Server Support Tools
23
http://docs.oracle.com/cd/E37670_01/E37355/html/ol_diag.html

24

25
Chapter 3 Installing Oracle VM Server for SPARC
Table of Contents3.1 Preinstallation Tasks and Requirements ...................................................................................... 25
3.1.1 Hardware Requirements ................................................................................................... 253.1.2 Software Requirements .................................................................................................... 253.1.3 Network Requirements ..................................................................................................... 263.1.4 LDoms Configuration Requirements .................................................................................. 273.1.5 Getting the Oracle VM Agent for SPARC Software ............................................................ 27
3.2 Installing Oracle VM Agent for SPARC ........................................................................................ 283.3 Configuring Oracle VM Agent for SPARC .................................................................................... 28
3.3.1 Configuring the Network ................................................................................................... 293.3.2 Oracle VM Agent Configuration ........................................................................................ 323.3.3 Configuring the LDoms Manager ...................................................................................... 333.3.4 Configuring LDoms .......................................................................................................... 33
3.4 Control Domain CPU and Memory Settings ................................................................................. 343.5 Using the Oracle VM Agent for SPARC Service ........................................................................... 343.6 Oracle VM Agent for SPARC Log File ......................................................................................... 353.7 Uninstalling Oracle VM Agent for SPARC .................................................................................... 35
In addition to x86-based hardware, this release of Oracle VM Manager can manage SPARC-based hosthardware. This chapter discusses installing and configuring the software required to support managementof server pools, Oracle VM Servers, and guest virtual machines on SPARC systems in Oracle VMManager. This chapter is intended for system administrators who want to install the software required tomanage Oracle VM Server for SPARC systems in Oracle VM Manager.
3.1 Preinstallation Tasks and Requirements
Your SPARC server must meet the minimum hardware and software requirements listed in this section.
3.1.1 Hardware Requirements
To install Oracle VM Server for SPARC, you need a SPARC T-Series server, series T2 or later. A full list ofthe supported hardware is available in the Oracle VM Server for SPARC 3.0 Release Notes:
http://docs.oracle.com/cd/E37707_01/index.html
3.1.2 Software Requirements
The software required to configure your SPARC server so that it is discoverable by Oracle VM Manager islisted below.
Oracle Solaris 11.1 OS
A control domain running Oracle Solaris 11.1 OS. Installing Oracle Solaris 11.1 is outside the scope of thisguide. For a full list of the Oracle Solaris 11.1 OS requirements see the Required Software Patches sectionin the Oracle VM Server for SPARC 3.0 Release Notes:
http://docs.oracle.com/cd/E37707_01

Network Requirements
26
For information on installing or upgrading the Oracle Solaris OS, see the Installing and Enabling Softwaresection in the Oracle VM Server for SPARC 3.0 Administration Guide:
http://docs.oracle.com/cd/E37707_01
SPARC Firmware
The firmware for your SPARC servers must match the required version to support Oracle VM Server forSPARC. The required firmware version numbers are described in the Required Software to Enable OracleVM Server for SPARC 3.0 Features section in the Oracle VM Server for SPARC 3.0 Release Notes:
http://docs.oracle.com/cd/E37707_01
For information on upgrading the system firmware, see the Upgrading the System Firmware section in theOracle VM Server for SPARC 3.0 Administration Guide:
http://docs.oracle.com/cd/E37707_01
Oracle VM Server for SPARC Release 3.0
Oracle VM Server for SPARC Release 3.0 or later (the ldomsmanager package). Oracle VM Serverfor SPARC Release 2.1 is included by default with the Oracle Solaris 11 OS, so you do not need tomanually install this software. You do, however, need to update it to Release 3.0. Upgrading Oracle VMServer for SPARC is outside the scope of this guide. For information on upgrading Oracle VM Server forSPARC to Release 3.0, see the Upgrade LDOMs System section in the Oracle VM Server for SPARC 3.0Administration Guide:
http://docs.oracle.com/cd/E37707_01
Oracle VM Agent for SPARC
Oracle VM Agent for SPARC must be installed in the control domain. Oracle VM Agent for SPARC enablessystems running Oracle VM Server for SPARC to be discovered and managed by Oracle VM Manager.See Section 3.1.5, “Getting the Oracle VM Agent for SPARC Software” for information on downloading andinstalling Oracle VM Agent for SPARC.
3.1.3 Network Requirements
Oracle VM Server for SPARC has the same basic network requirements as specified for x86 hardware inSection 2.1.3, “Network Requirements ”.
Oracle VM Server for SPARC has the following additional network requirements:
Network Configuration Profile
The Oracle VM Agent for SPARC requires the control domain to be configured with the DefaultFixednetwork configuration profile. If this network configuration profile is not enabled on the control domain then,during the installation of the Oracle VM Agent for SPARC software, the Oracle VM Agent for SPARC setuptool offers the opportunity to enable this network configuration profile and to reconfigure the network.
Alternatively, you can manually configure the DefaultFixed network configuration profile and the network onthe control domain before installing the Oracle VM Agent for SPARC. For more information about networkconfiguration profiles, see the Network Configuration Profiles section in the Introduction to Oracle Solaris11 Networking guide available at:
LDoms Configuration Requirements
27
http://docs.oracle.com/cd/E26502_01/html/E28986/index.html
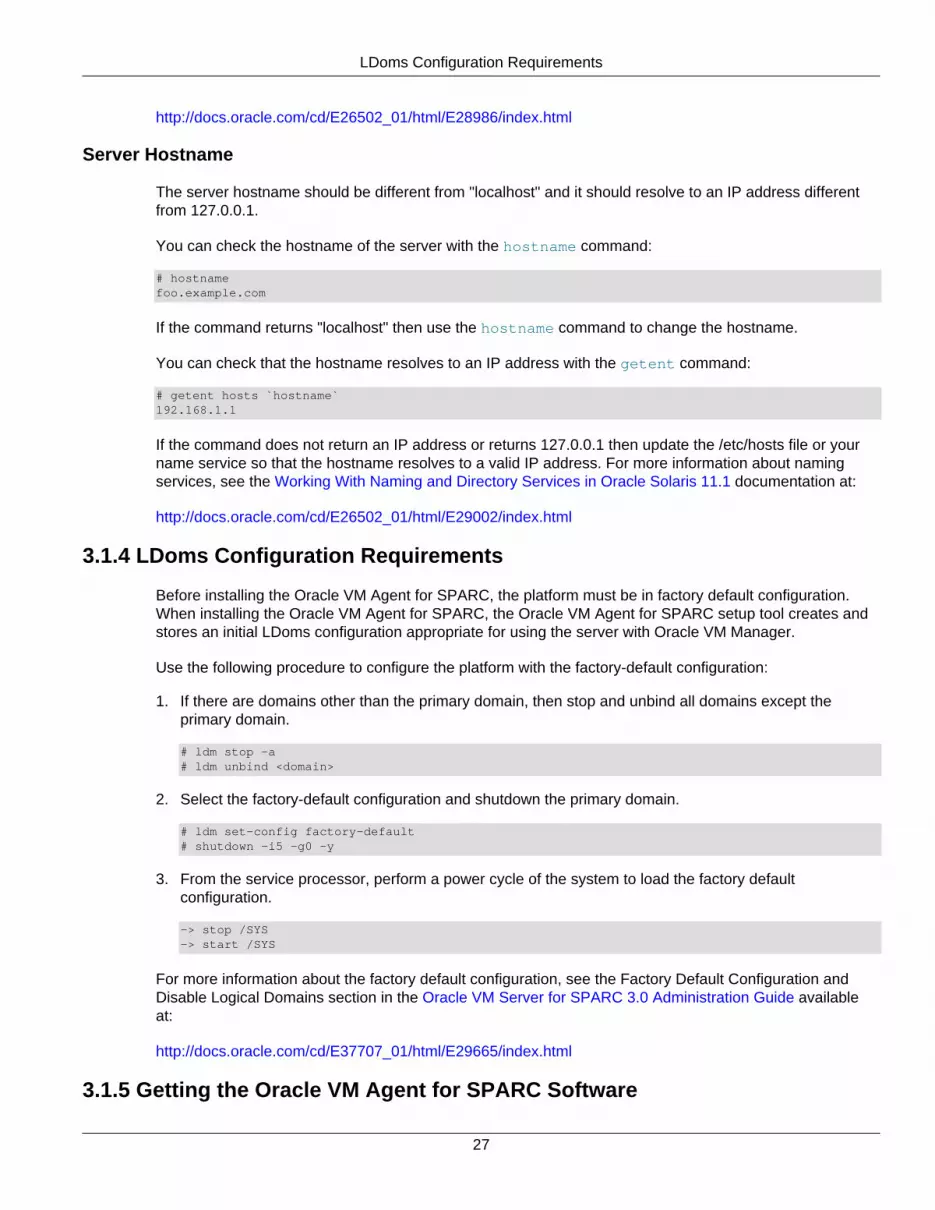
Server Hostname
The server hostname should be different from "localhost" and it should resolve to an IP address differentfrom 127.0.0.1.
You can check the hostname of the server with the hostname command:
# hostnamefoo.example.com
If the command returns "localhost" then use the hostname command to change the hostname.
You can check that the hostname resolves to an IP address with the getent command:
# getent hosts `hostname`192.168.1.1
If the command does not return an IP address or returns 127.0.0.1 then update the /etc/hosts file or yourname service so that the hostname resolves to a valid IP address. For more information about namingservices, see the Working With Naming and Directory Services in Oracle Solaris 11.1 documentation at:
http://docs.oracle.com/cd/E26502_01/html/E29002/index.html
3.1.4 LDoms Configuration Requirements
Before installing the Oracle VM Agent for SPARC, the platform must be in factory default configuration.When installing the Oracle VM Agent for SPARC, the Oracle VM Agent for SPARC setup tool creates andstores an initial LDoms configuration appropriate for using the server with Oracle VM Manager.
Use the following procedure to configure the platform with the factory-default configuration:
1. If there are domains other than the primary domain, then stop and unbind all domains except theprimary domain.
# ldm stop -a# ldm unbind <domain>
2. Select the factory-default configuration and shutdown the primary domain.
# ldm set-config factory-default# shutdown -i5 -g0 -y
3. From the service processor, perform a power cycle of the system to load the factory defaultconfiguration.
-> stop /SYS-> start /SYS
For more information about the factory default configuration, see the Factory Default Configuration andDisable Logical Domains section in the Oracle VM Server for SPARC 3.0 Administration Guide availableat:
http://docs.oracle.com/cd/E37707_01/html/E29665/index.html
3.1.5 Getting the Oracle VM Agent for SPARC Software
Installing Oracle VM Agent for SPARC
28
If you do not already have the Oracle VM Agent for SPARC software, download Oracle VM Agent forSPARC from the Oracle Software Delivery Cloud:
https://edelivery.oracle.com/oraclevm
Save the Oracle VM Agent for SPARC archive file in the control domain.
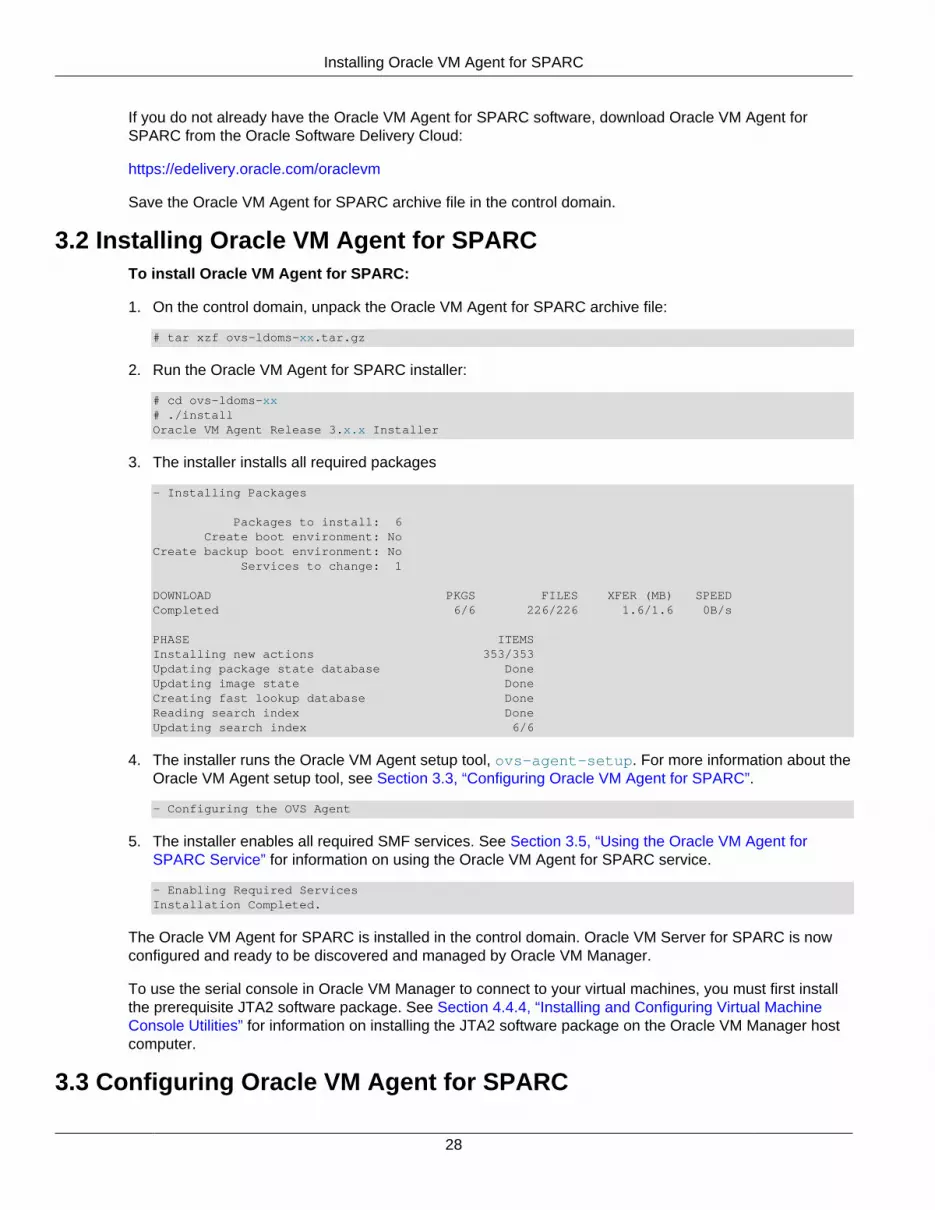
3.2 Installing Oracle VM Agent for SPARCTo install Oracle VM Agent for SPARC:
1. On the control domain, unpack the Oracle VM Agent for SPARC archive file:
# tar xzf ovs-ldoms-xx.tar.gz
2. Run the Oracle VM Agent for SPARC installer:
# cd ovs-ldoms-xx# ./installOracle VM Agent Release 3.x.x Installer
3. The installer installs all required packages
- Installing Packages Packages to install: 6 Create boot environment: NoCreate backup boot environment: No Services to change: 1 DOWNLOAD PKGS FILES XFER (MB) SPEEDCompleted 6/6 226/226 1.6/1.6 0B/s PHASE ITEMSInstalling new actions 353/353Updating package state database DoneUpdating image state DoneCreating fast lookup database DoneReading search index DoneUpdating search index 6/6
4. The installer runs the Oracle VM Agent setup tool, ovs-agent-setup. For more information about theOracle VM Agent setup tool, see Section 3.3, “Configuring Oracle VM Agent for SPARC”.
- Configuring the OVS Agent
5. The installer enables all required SMF services. See Section 3.5, “Using the Oracle VM Agent forSPARC Service” for information on using the Oracle VM Agent for SPARC service.
- Enabling Required ServicesInstallation Completed.
The Oracle VM Agent for SPARC is installed in the control domain. Oracle VM Server for SPARC is nowconfigured and ready to be discovered and managed by Oracle VM Manager.
To use the serial console in Oracle VM Manager to connect to your virtual machines, you must first installthe prerequisite JTA2 software package. See Section 4.4.4, “Installing and Configuring Virtual MachineConsole Utilities” for information on installing the JTA2 software package on the Oracle VM Manager hostcomputer.
3.3 Configuring Oracle VM Agent for SPARC
Configuring the Network
29
The Oracle VM Agent for SPARC can be configured using the Oracle VM Agent for SPARC setupcommand, ovs-agent-setup. This command checks that the system is properly configured to runthe Oracle VM Agent. If the system is not properly configured then the command attempts to fix theconfiguration. The ovs-agent-setup command is automatically run when installing the Oracle VMAgent.
It is possible to run this command manually to control the configuration of the Oracle VM Agent for SPARC,run the ovs-agent-setup command on the control domain:
# ovs-agent-setup
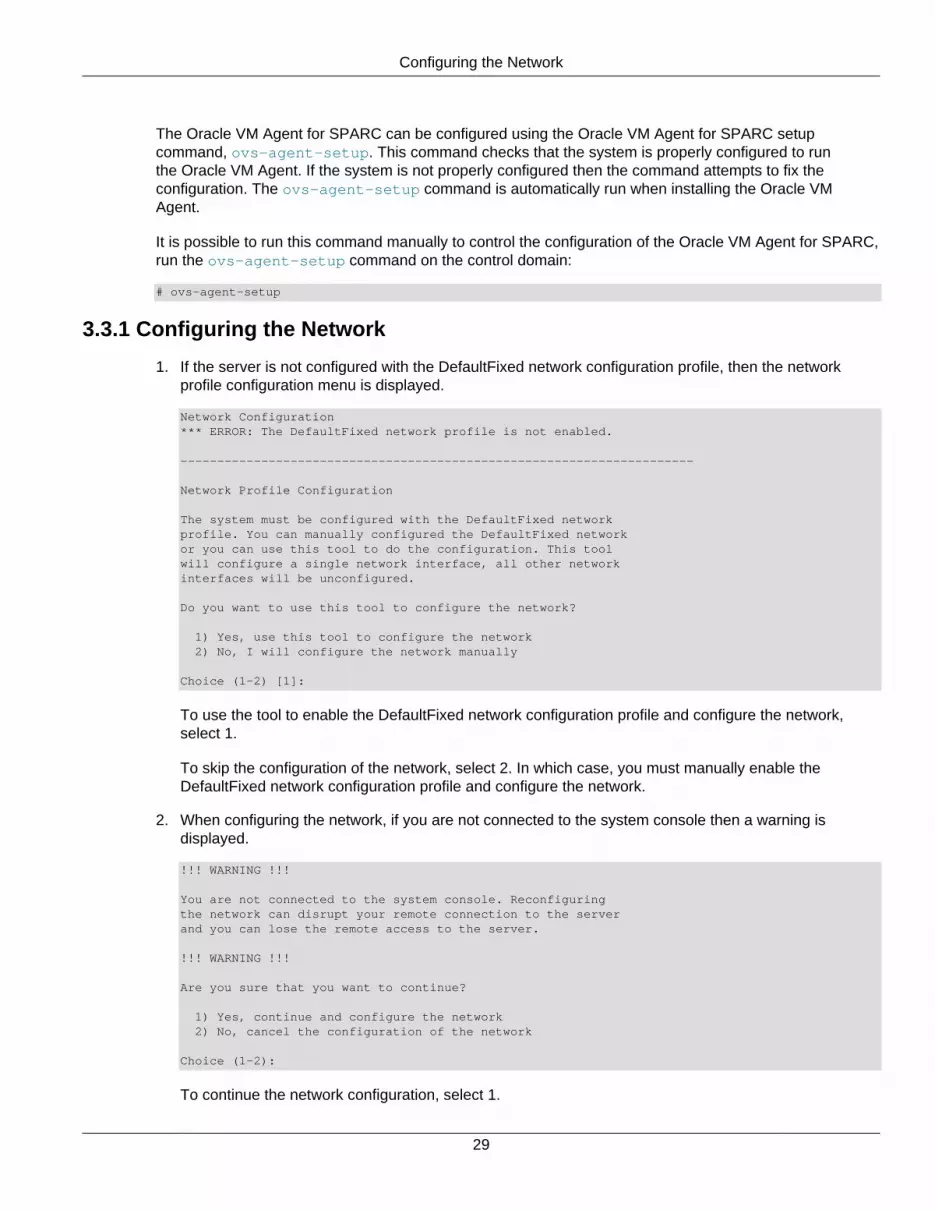
3.3.1 Configuring the Network
1. If the server is not configured with the DefaultFixed network configuration profile, then the networkprofile configuration menu is displayed.
Network Configuration*** ERROR: The DefaultFixed network profile is not enabled. ---------------------------------------------------------------------- Network Profile Configuration The system must be configured with the DefaultFixed networkprofile. You can manually configured the DefaultFixed networkor you can use this tool to do the configuration. This toolwill configure a single network interface, all other networkinterfaces will be unconfigured. Do you want to use this tool to configure the network? 1) Yes, use this tool to configure the network 2) No, I will configure the network manually Choice (1-2) [1]:
To use the tool to enable the DefaultFixed network configuration profile and configure the network,select 1.
To skip the configuration of the network, select 2. In which case, you must manually enable theDefaultFixed network configuration profile and configure the network.
2. When configuring the network, if you are not connected to the system console then a warning isdisplayed.
!!! WARNING !!! You are not connected to the system console. Reconfiguringthe network can disrupt your remote connection to the serverand you can lose the remote access to the server. !!! WARNING !!! Are you sure that you want to continue? 1) Yes, continue and configure the network 2) No, cancel the configuration of the network Choice (1-2):
To continue the network configuration, select 1.

Configuring the Network
30
Warning
Configuring the network can disrupt current network connections to the serverand you can potentially lose your connection to the server. So it is safer toconfigure the network from the system console.
To cancel the configuration of the network, select 2. Then connect to the system console, and restartthe configuration by running the ovs-agent-setup again.
3. The Oracle VM Management Interface menu is displayed.
Collecting information about network interfaces... ---------------------------------------------------------------------- Oracle VM Management Interface Choose the network interface to use for the management of thismachine. 1) net0: 00:14:4f:e3:0f:12 (nxge0) 2) net1: 00:14:4f:e3:0f:13 (nxge1) 3) net2: 00:14:4f:e3:0f:14 (nxge2) 4) net3: 00:14:4f:e3:0f:15 (nxge3) Interface (1-4) [1]:
Select the network interface to use for the management of the server.
4. The Network Interface Configuration menu is displayed.
IPv4 Configuration for net0 1) Dynamic IP configuration (DHCP) 2) Manual address configuration IPv4 Configuration (1-2) [1]:
To configure the network interface with DHCP, select 1. To configure the network interface with a staticIP address, select 2.
Configuring the Network with DHCP
a. If the network interface is to be configured with DHCP, then the Hostname Configuration menu isdisplayed.
Hostname Configuration If your system is part of a larger network where hostnamesare assigned by DHCP, select automatically via DHCP.Otherwise, select manually and enter a hostname for yoursystem. 1) automatically via DHCP 2) manually Hostname Configuration (1-2) [1]:
If the server uses DHCP to assign its hostname, select 1. If the server has its own hostname, select2. Then, at 'Hostname' prompt, enter the hostname to be used.
Configuring the Network
31
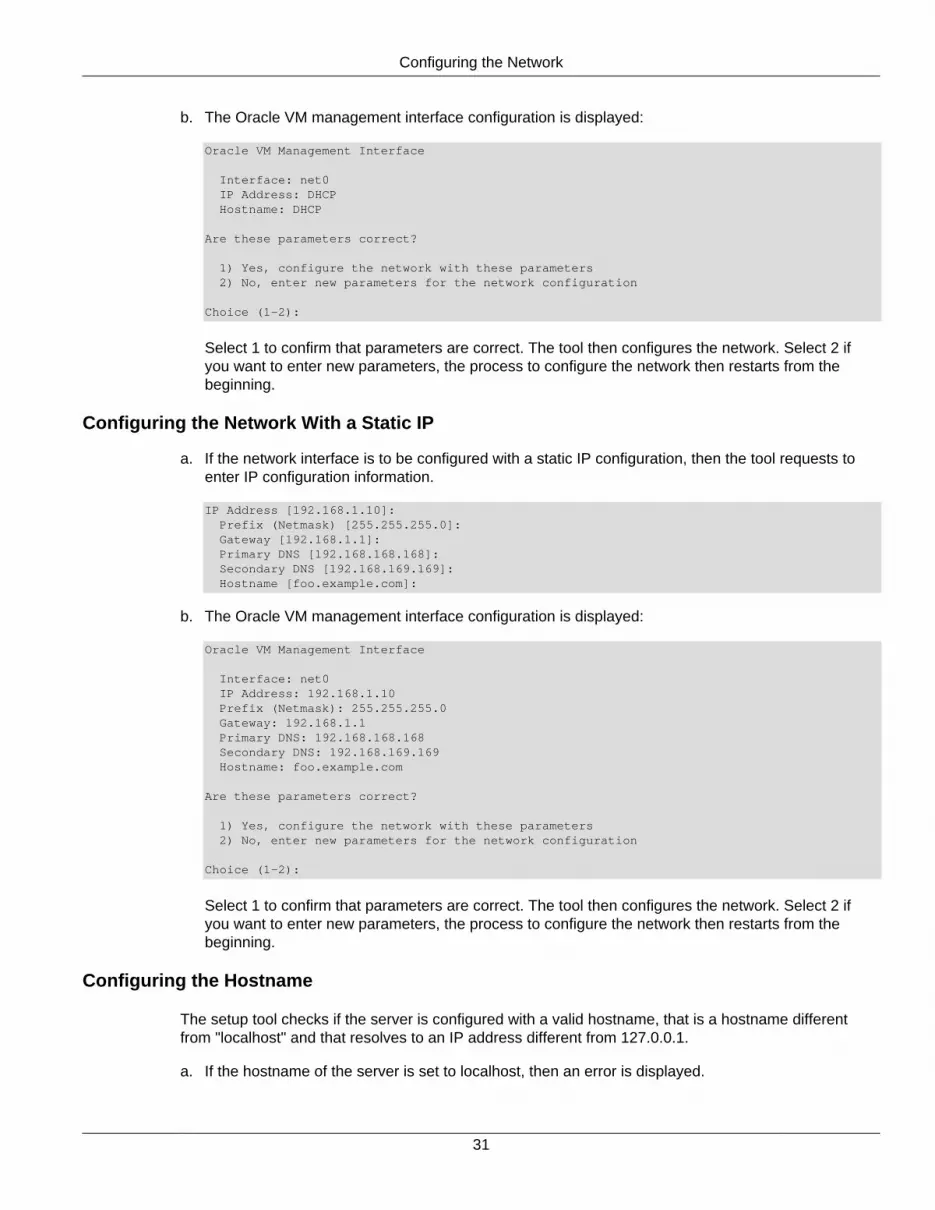
b. The Oracle VM management interface configuration is displayed:
Oracle VM Management Interface Interface: net0 IP Address: DHCP Hostname: DHCP Are these parameters correct? 1) Yes, configure the network with these parameters 2) No, enter new parameters for the network configuration Choice (1-2):
Select 1 to confirm that parameters are correct. The tool then configures the network. Select 2 ifyou want to enter new parameters, the process to configure the network then restarts from thebeginning.
Configuring the Network With a Static IP
a. If the network interface is to be configured with a static IP configuration, then the tool requests toenter IP configuration information.
IP Address [192.168.1.10]: Prefix (Netmask) [255.255.255.0]: Gateway [192.168.1.1]: Primary DNS [192.168.168.168]: Secondary DNS [192.168.169.169]: Hostname [foo.example.com]:
b. The Oracle VM management interface configuration is displayed:
Oracle VM Management Interface Interface: net0 IP Address: 192.168.1.10 Prefix (Netmask): 255.255.255.0 Gateway: 192.168.1.1 Primary DNS: 192.168.168.168 Secondary DNS: 192.168.169.169 Hostname: foo.example.com Are these parameters correct? 1) Yes, configure the network with these parameters 2) No, enter new parameters for the network configuration Choice (1-2):
Select 1 to confirm that parameters are correct. The tool then configures the network. Select 2 ifyou want to enter new parameters, the process to configure the network then restarts from thebeginning.
Configuring the Hostname
The setup tool checks if the server is configured with a valid hostname, that is a hostname differentfrom "localhost" and that resolves to an IP address different from 127.0.0.1.
a. If the hostname of the server is set to localhost, then an error is displayed.

Oracle VM Agent Configuration
32
*** ERROR: The server has an invalid hostname (localhost). ---------------------------------------------------------------------- Server Hostname The server has no hostname or an invalid hostname. Usethe "hostname" command to check and configure the hostnameof the server. You might also want to check the networkconfiguration of the server. Press <return> to continue...*** ERROR: The server has an invalid hostname (localhost).
After the setup tool exists, you must use the hostname command to configure the hostname of theserver.
b. If the hostname resolves to the 127.0.0.1 then an error is displayed and the /etc/hosts file isupdated to not resolve the hostname to 127.0.0.1.
*** ERROR: The server hostname (foo) should not resolve to 127.0.0.1.Configuring /etc/hosts to not resolve foo to 127.0.0.1Updating /etc/inet/hosts, the previous file is backed up as /etc/inet/hosts.20121128190648
When the setup tool updates the /etc/hosts file, the orignal /etc/hosts file is backup as /etc/inet/hosts.<date-and-time>.
c. If the hostname does not resolve to an IP address then an error is displayed.
*** ERROR: The server hostname (foo) does not resolve to an IP address. ---------------------------------------------------------------------- Server IP Address The server hostname does not resolve to an IP address. hostname: foo Update the /etc/hosts file or the name service so that thehostname of the server is resolved to a valid IP address.You might also want to check the network configuration ofthe server. Press <return> to continue...*** ERROR: The server hostname (fooxxx) does not resolve to an IP address.
After the setup tool exits, you must update the /etc/hosts file or your name service so that thehostname resolves to a valid IP address. For more information about naming services, see theWorking With Naming and Directory Services in Oracle Solaris 11.1 documentation at:
http://docs.oracle.com/cd/E26502_01/html/E29002/index.html
3.3.2 Oracle VM Agent Configuration
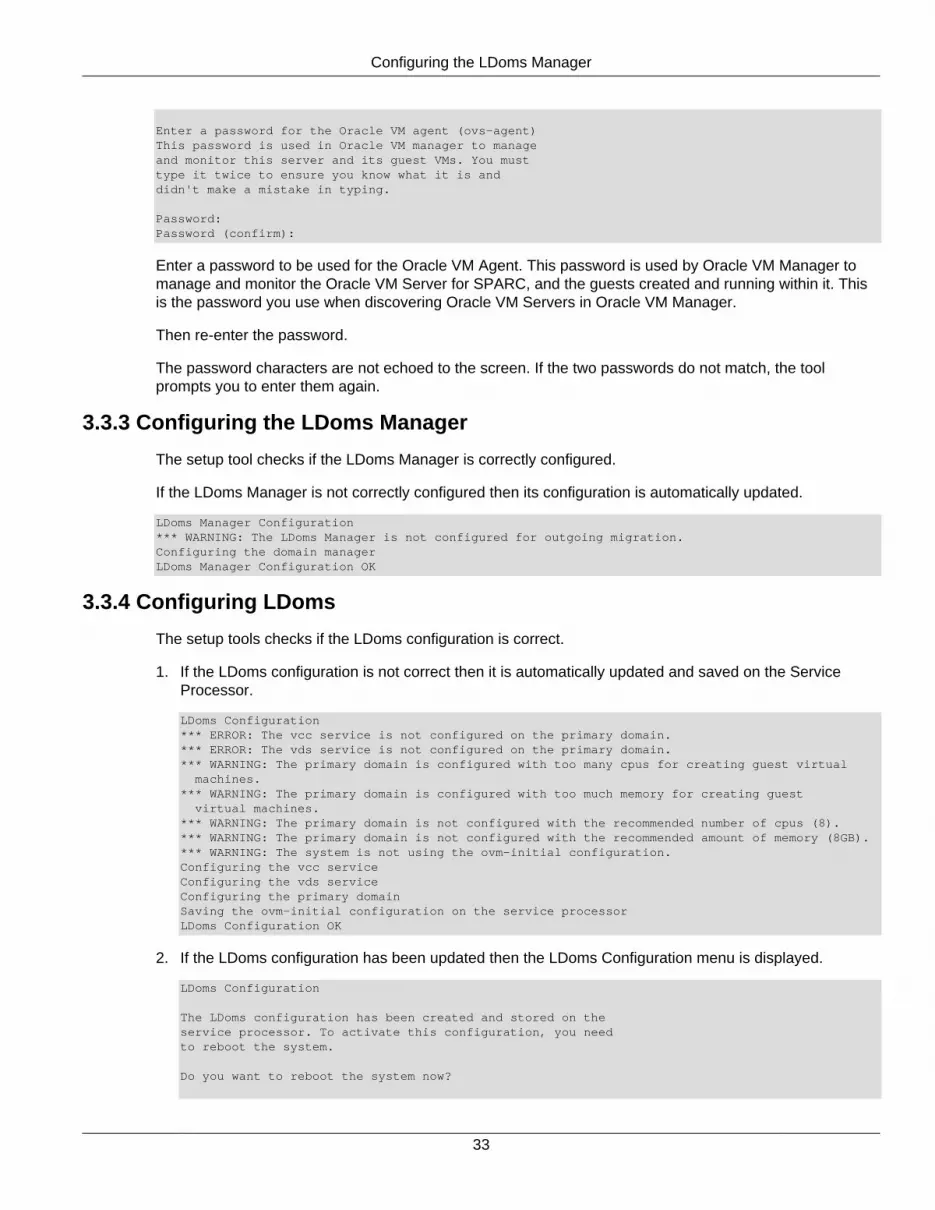
If the Oracle VM Agent password is not defined then the Oracle VM Agent password menu is displayed.
*** ERROR: The Oracle VM agent password is not defined. ---------------------------------------------------------------------- Oracle VM Agent password
Configuring the LDoms Manager
33
Enter a password for the Oracle VM agent (ovs-agent)This password is used in Oracle VM manager to manageand monitor this server and its guest VMs. You musttype it twice to ensure you know what it is anddidn't make a mistake in typing. Password:Password (confirm):
Enter a password to be used for the Oracle VM Agent. This password is used by Oracle VM Manager tomanage and monitor the Oracle VM Server for SPARC, and the guests created and running within it. Thisis the password you use when discovering Oracle VM Servers in Oracle VM Manager.
Then re-enter the password.
The password characters are not echoed to the screen. If the two passwords do not match, the toolprompts you to enter them again.
3.3.3 Configuring the LDoms Manager
The setup tool checks if the LDoms Manager is correctly configured.
If the LDoms Manager is not correctly configured then its configuration is automatically updated.
LDoms Manager Configuration*** WARNING: The LDoms Manager is not configured for outgoing migration.Configuring the domain managerLDoms Manager Configuration OK
3.3.4 Configuring LDoms
The setup tools checks if the LDoms configuration is correct.
1. If the LDoms configuration is not correct then it is automatically updated and saved on the ServiceProcessor.
LDoms Configuration*** ERROR: The vcc service is not configured on the primary domain.*** ERROR: The vds service is not configured on the primary domain.*** WARNING: The primary domain is configured with too many cpus for creating guest virtual machines.*** WARNING: The primary domain is configured with too much memory for creating guest virtual machines.*** WARNING: The primary domain is not configured with the recommended number of cpus (8).*** WARNING: The primary domain is not configured with the recommended amount of memory (8GB).*** WARNING: The system is not using the ovm-initial configuration.Configuring the vcc serviceConfiguring the vds serviceConfiguring the primary domainSaving the ovm-initial configuration on the service processorLDoms Configuration OK
2. If the LDoms configuration has been updated then the LDoms Configuration menu is displayed.
LDoms Configuration The LDoms configuration has been created and stored on theservice processor. To activate this configuration, you needto reboot the system. Do you want to reboot the system now?

Control Domain CPU and Memory Settings
34
1) Yes, reboot the system now 2) No, I will reboot the system later Choice (1-2):
Select 1 to reboot the system now and activate the LDoms configuration. Select 2 to exit the installer,you need to manually reboot the system to activate the LDoms configuration.
3.4 Control Domain CPU and Memory Settings
Installation allocates 8 CPU threads and 8GB of memory to the control domain. Oracle does notrecommend changing these default values.
If you encounter performance issues because the control domain does not have enough CPUs or memory,use the following procedure to change the number of CPUs or the amount of memory assigned to thecontrol domain:
1. From the Oracle VM Manager ensure that no virtual machine is running on the server.
2. On the control domain, disable the Oracle VM Agent service.
# svcadm disable -s ovs-agent
3. Shutdown the control domain.
# shutdown -i5 -g0 -y
4. From the service process, perform a power cycle of the system.
# stop /SYS# start /SYS
5. After the control domain has rebooted, change the number of CPUs and the amount memory assignedto the control domain.
# ldm set-vcpu 16 primary# ldm set-memory 16g primary
6. Update the configuration on the service processor.
# ldm rm-config ovm-initial# ldm add-config ovm-initial
7. Enable the Oracle VM Agent service.
# svcadm enable -s ovs-agent
3.5 Using the Oracle VM Agent for SPARC Service
To check the status of the Oracle VM Agent for SPARC service:
# svcs ovs-agent
To start the Oracle VM Agent for SPARC service:
# svcadm enable -r ovs-agent
To stop the Oracle VM Agent for SPARC service:
# svcadm disable ovs-agent

Oracle VM Agent for SPARC Log File
35
If the Oracle VM Agent service fails to come online, look for errors in the /var/svc/log/ovm-ovs-agent:default.log file.
You can also check if the configuration has any error by running the following command:
# ovs-agent-setup -c
If the command reports any error, then the Oracle VM Agent service is be unable to start.
For more detailed information about managing Oracle Solaris 11 services, see Oracle SolarisAdministration: Common Tasks:
http://docs.oracle.com/cd/E23824_01/html/821-1451/hbrunlevels-25516.html#scrolltoc
3.6 Oracle VM Agent for SPARC Log File
The Oracle VM Agent for SPARC log file is located at:
/var/log/ovs-agent.log
The Oracle VM Agent for SPARC service log file is located at:
/var/svc/log/ovm-ovs-agent:default.log
3.7 Uninstalling Oracle VM Agent for SPARCTo uninstall Oracle VM Agent for SPARC:
1. On the control domain, change directory to the location in which you uncompressed the Oracle VMAgent (see Section 3.2, “Installing Oracle VM Agent for SPARC”), and run the following as the rootuser:
# cd ovs-ldoms-xx# ./uninstall
The script uninstalls Oracle VM Agent for SPARC and removes the default Storage Connect plug-ins.

36
37
Chapter 4 Installing Oracle VM Manager
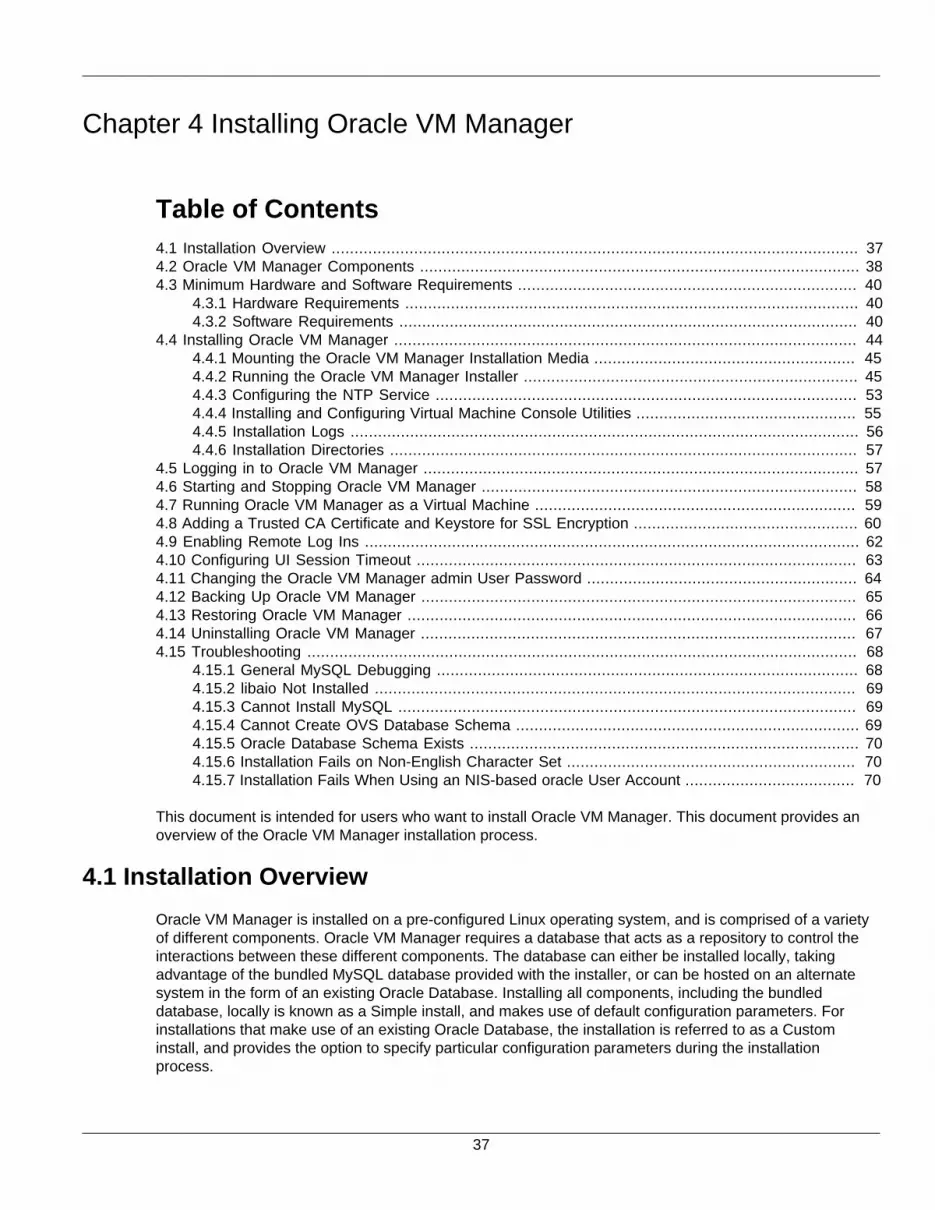
Table of Contents4.1 Installation Overview ................................................................................................................... 374.2 Oracle VM Manager Components ................................................................................................ 384.3 Minimum Hardware and Software Requirements .......................................................................... 40
4.3.1 Hardware Requirements ................................................................................................... 404.3.2 Software Requirements .................................................................................................... 40
4.4 Installing Oracle VM Manager ..................................................................................................... 444.4.1 Mounting the Oracle VM Manager Installation Media ......................................................... 454.4.2 Running the Oracle VM Manager Installer ......................................................................... 454.4.3 Configuring the NTP Service ............................................................................................ 534.4.4 Installing and Configuring Virtual Machine Console Utilities ................................................ 554.4.5 Installation Logs ............................................................................................................... 564.4.6 Installation Directories ...................................................................................................... 57
4.5 Logging in to Oracle VM Manager ............................................................................................... 574.6 Starting and Stopping Oracle VM Manager .................................................................................. 584.7 Running Oracle VM Manager as a Virtual Machine ...................................................................... 594.8 Adding a Trusted CA Certificate and Keystore for SSL Encryption ................................................. 604.9 Enabling Remote Log Ins ............................................................................................................ 624.10 Configuring UI Session Timeout ................................................................................................ 634.11 Changing the Oracle VM Manager admin User Password ........................................................... 644.12 Backing Up Oracle VM Manager ............................................................................................... 654.13 Restoring Oracle VM Manager .................................................................................................. 664.14 Uninstalling Oracle VM Manager ............................................................................................... 674.15 Troubleshooting ........................................................................................................................ 68
4.15.1 General MySQL Debugging ............................................................................................ 684.15.2 libaio Not Installed ......................................................................................................... 694.15.3 Cannot Install MySQL .................................................................................................... 694.15.4 Cannot Create OVS Database Schema ........................................................................... 694.15.5 Oracle Database Schema Exists ..................................................................................... 704.15.6 Installation Fails on Non-English Character Set ............................................................... 704.15.7 Installation Fails When Using an NIS-based oracle User Account ..................................... 70
This document is intended for users who want to install Oracle VM Manager. This document provides anoverview of the Oracle VM Manager installation process.
4.1 Installation Overview
Oracle VM Manager is installed on a pre-configured Linux operating system, and is comprised of a varietyof different components. Oracle VM Manager requires a database that acts as a repository to control theinteractions between these different components. The database can either be installed locally, takingadvantage of the bundled MySQL database provided with the installer, or can be hosted on an alternatesystem in the form of an existing Oracle Database. Installing all components, including the bundleddatabase, locally is known as a Simple install, and makes use of default configuration parameters. Forinstallations that make use of an existing Oracle Database, the installation is referred to as a Custominstall, and provides the option to specify particular configuration parameters during the installationprocess.

Oracle VM Manager Components
38
Note
As of Oracle VM Release 3.2, the Simple installation of Oracle VM Manager is fullysupported within production environments.
Important
If you intend to make use of an Oracle Database backend by performing a Custominstallation of Oracle VM Manager it is imperative that you ensure that an adequatedatabase backup regime is adhered to if you intend to make use of Oracle SupportServices.
As of Oracle VM Release 3.2, the MySQL Database that is included in a Simpleinstallation is automatically backed up.
Installation of Oracle VM Manager includes the installation of Java, Oracle WebLogic Server and theOracle VM Manager application itself. When performing a Simple installation, MySQL v5.5 is also installed.
An uninstaller is included with the installation script. The uninstaller gives you options to remove MySQL,Java, the Oracle VM Manager application, and the Oracle WebLogic Server.
4.2 Oracle VM Manager Components
The applications necessary to run Oracle VM Manager are packaged in the ISO image. Some or all of thefollowing applications may be installed on the host computer when you install Oracle VM Manager:
Oracle VM Manager The Oracle VM Manager application provided as a Oracle WebLogicServer domain and container.
Oracle WebLogic Server 11g Oracle WebLogic Server Release 11g, including ApplicationDevelopment Framework (ADF) Release 11g. For more informationabout Oracle WebLogic, see the Oracle WebLogic 11g documentation:
http://docs.oracle.com/cd/E21764_01/wls.htm
Use of Oracle WebLogic Server with Oracle VM Manager is restrictedto the servlet functionality without clustering for the Oracle VMManagement Server.
Oracle VM ManagerManagement Repository
Oracle VM Manager is able to use any of the following database typesto act as a management repository:
• Oracle Database Standard Edition (Oracle SE)
• Oracle Database Enterprise Edition (Oracle EE)
• MySQL Enterprise Edition
If you select to use MySQL as your backend repository, Oracle VMManager can be installed using the Simple installation which will locallyinstall the default MySQL database that is packaged with the Oracle VMManager installer. Oracle VM Manager makes use of its own versionof MySQL 5.5 Enterprise Edition which is licensed for exclusive useby Oracle VM (see MySQL Enterprise Edition ). MySQL is installedinto the standard location with databases and configuration informationlocated at /u01/app/oracle/mysql/data. The MySQL server that

Oracle VM Manager Components
39
is installed uses a non-standard TCP Port (49500) for exclusive useby Oracle VM Manager. Do not use the bundled database for otherapplications.
In order to prevent potential conflicts with existing MySQL installations,The Oracle VM Manager installer will require that you remove anyexisting MySQL installation prior to installation. If you are runningMySQL on the system where you are installing Oracle VM Manager,the installer will exit to allow you to backup any existing databasesand remove the existing MySQL instance before proceeding with theinstallation.
If you select to use an Oracle Database type as your backendrepository, you must install and configure it for use according tothe documentation packaged with it prior to installing Oracle VMManager. When running the Oracle VM Manager installer you canselect to perform a Custom installation, which allows you to specifythe parameters that are required in order to connect to the existingdatabase. The Oracle VM Manager installer does not install any OracleDatabase itself.
You should not use an Oracle XE database as the Oracle VM Managerrepository. Oracle XE is not a supported product and Oracle SupportServices cannot provide bug fixes or patches for this product. Youshould use MySQL or Oracle Database Standard or Enterprise Edition.Oracle VM Manager includes a restricted-use license of the OracleDatabase (Standard Edition or Enterprise Edition) for use as the OracleVM Manager Management Repository only (see Oracle Database ).
MySQL Enterprise Edition MySQL Enterprise Edition is included for use as the Oracle VMManager Management Repository. Use of MySQL Enterprise Edition,including without limitation MySQL Enterprise Backup, is restricted touse with Oracle VM Manager.
Oracle Database Your license to Oracle VM Manager includes a restricted-use licenseof the Oracle Database (Standard Edition or Enterprise Edition) for useas the an external Oracle VM Manager Management Repository only.If you wish to use Oracle Database in this manner you must separatelyobtain and install it to Oracle VM Manager; Oracle Database SE or EEmay be obtained from the Oracle Software Delivery Cloud at:
https://edelivery.oracle.com/
The supported versions of Oracle Database are:
• Oracle Database Release 10.2.0.4 or greater
• Oracle Database Release 11.1.0.7 or greater
• Oracle Database Release 11.2.0.1 or greater
Oracle Virtual Assembly Builder(OVAB)
If you are subject to a current Oracle support agreement for Oracle VMServer your license to Oracle VM Manager includes a restricted-uselicense of Oracle Virtual Assembly Builder (OVAB) product to deployOracle VM Assemblies. If you wish to use OVAB in this manner youmust separately obtain and install it; OVAB may be obtained from the

Minimum Hardware and Software Requirements
40
Oracle Software Delivery Cloud at: https://edelivery.oracle.com/ underOracle Fusion Middleware 11g Media Pack for Linux x86.
4.3 Minimum Hardware and Software Requirements
The following minimum system requirements must be met on the computer on which you want to installOracle VM Manager.
4.3.1 Hardware Requirements
Before you install Oracle VM Manager, make sure that your computer meets the minimum hardwarerequirements listed in Table 4.1:
Table 4.1 Hardware Requirements for Oracle VM Manager
Items Minimum Value
Memory 6.0 GB (8.0 GB if using local MySQL)
Processor Type 64 bit
Processor Speed 1.83 GHz*1
Swap Space 2.1 GB
Hard Disk Space 5.5 GB in /u01
2 GB in /tmp
500 MB in /var
500 MB in /usr
4.3.2 Software Requirements
Before you install Oracle VM Manager, make sure that your computer meets the following minimumsoftware and configuration requirements.
4.3.2.1 Operating Systems
Oracle VM Manager is supported on the following operating systems:
• Oracle Linux 5 Update 5 64-bit or later
• Oracle Linux 6 64-bit or later
• Red Hat Enterprise Linux 5 Update 5 64-bit or later
• Red Hat Enterprise Linux 6 64-bit or later
You can download Oracle Linux from:
https://edelivery.oracle.com/linux
Note
For more information about Oracle Linux, see:
http://linux.oracle.com/

Software Requirements
41
http://www.oracle.com/technetwork/topics/linux/whatsnew/index.html
4.3.2.2 Network
The host computer on which you install Oracle VM Manager must have the host name correctly configured(pingable). Make sure the computer's host name matches the host name in the /etc/hosts file. Use thefollowing command to check the host name:
# hostname
Use a text editor to check the host name in the /etc/hosts file. For example, to use VI enter
# vi /etc/hosts
For example, if the computer's host name is hostname1.example.com, and the IP address is 10.1.1.1, thecorresponding item in the /etc/hosts file should be:
10.1.1.1 hostname1.example.com hostname1
4.3.2.3 Web Browsers
The Oracle VM Manager user interface is supported in the following Web browsers:
• Microsoft Internet Explorer 7.0 and above
• Mozilla Firefox 3.5 and above
• Apple Safari 5.0 and above
• Google Chrome 1.0 and above
4.3.2.4 Environment Configuration Script
The createOracle.sh is a script that automatically:
• Creates the required operating system users and groups (oracle/dba) in order for the components to runcorrectly.
• Creates the /u01 directory if it does not already exist, and corrects permissions on required installationfolders.
• Sets the required parameters in the /etc/security/limits.conf file
• Opens the required ports in the /etc/sysconfig/iptables file
To run the createOracle.sh script, you must first mount the Oracle VM Manager installer ISO file or CD.See Section 4.4.1, “Mounting the Oracle VM Manager Installation Media” for information on mounting theinstallation media. Change directory to the mount point that you created for the CD or ISO, for example, /OVMCD. Then run the createOracle.sh script as the root user:
# cd /OVMCD# ./createOracle.sh
4.3.2.5 Prerequisite Packages
This section contains the prerequisite operating system packages that may be required prior to installingOracle VM Manager.

Software Requirements
42
unzip
If you have a minimal installation of Oracle Linux, you may not have unzip installed, which is a requiredpackage for the Oracle VM Manager installer. To install unzip, enter:
# yum install unzip
4.3.2.6 Firewall Configuration
A default Oracle Linux install has the firewall enabled (iptables on). In order to use Oracle VM Manager ona system with iptables enabled you can either open all the ports used by Oracle VM Manager, or open allports by disabling iptables.
The ports required for the web browser connection to Oracle VM Manager are: 7002 and 15901. TCP7002 is used by the Oracle VM Servers to connect to Oracle VM Manager. Oracle VM Manager, in turn,connects to the Oracle VM Servers through port 8899 for Oracle VM Agent communication, and port 6900and up for secure VNC tunneling to virtual machines (one port per VM). Ports 7900 and up are used toallow Oracle VM Manager to open secure serial console tunnels to virtual machines (one port per VM) onthe Oracle VM Servers. The Oracle VM Command Line Interface connects to Oracle VM Manager on port10000. TCP ports 54321 and 54322 can be optionally enabled for remote API access to the Oracle VMManager core. This must be done if using an external client, such as the Oracle VM Utilities, or UI instanceto manage the deployment 1 . In a Simple installation, a MySQL database is configured on port 49500.Since the MySQL database is hosted on the same system as Oracle VM Manager it is not necessaryto enable access to this port through the firewall, however in a Custom installation where the databasemay be hosted on a separate system, the appropriate port must be accessible to Oracle VM Managerthrough any firewall configuration. Be sure to open the necessary ports on the different firewalls that maybe installed between different parts of your network. Follow the guidelines of in the diagram below:
To disable iptables and open all ports, enter the following commands as the root user:
# service iptables stop# chkconfig iptables off
To configure the firewall to open the required ports automatically, use the environment configuration scriptprovided with the Oracle VM Manager installer. See Section 4.3.2.4, “Environment Configuration Script” forinformation on using this script.
Alternatively, to open the required ports manually by using the iptables command as the root user:
# iptables -A INPUT -m state --state NEW -m tcp -p tcp --dport 7002 -j ACCEPT
1 See Section 4.9, “Enabling Remote Log Ins” for information on configuring a remote UI instance.

Software Requirements
43
# iptables -A INPUT -m state --state NEW -m tcp -p tcp --dport 15901 -j ACCEPT# iptables -A INPUT -m state --state NEW -m udp -p udp --dport 123 -j ACCEPT# iptables -A INPUT -m state --state NEW -m udp -p tcp --dport 10000 -j ACCEPT
To remotely connect to the Oracle VM Manager core API using an alternate UI instance or an alternateclient, also enter the following command:
# iptables -A INPUT -m state --state NEW -m tcp -p tcp --dport 54321 -j ACCEPT
To enable the Oracle VM Command Line Interface, enter the following command:
# iptables -A INPUT -m state --state NEW -m tcp -p tcp --dport 10000 -j ACCEPT
When all the ports have been opened, save the iptables configuration:
# service iptables save
This does not require iptables to be restarted as the commands open the ports while iptables is runningand the save ensures they are opened on reboot/restart in future.
4.3.2.7 Installation Ports, Passwords, and Database Information
During the Oracle VM Manager installation, you may be required to set or enter the following ports,passwords and database connection information:
• The database system hostname. This is the IP address or hostname of the host on which the databaseto use as the Oracle VM Manager database repository is located. The default is localhost. This is onlyrequired during a Custom installation.
• The Oracle Database System ID (SID). This is the database SID to use to connect to the Oracle VMManager database repository. This is only required during a Custom installation.
For installations using MySQL as the database backend, this can be set to the name of the database touse for the installation. By default, this is ovs.
• The Oracle Database HTTP port. The default port number is 8080. This is only required during aCustom installation.
• The database listener port. The default port number for installations using an Oracle Database is 1521.This is only required during a Custom installation.
The port number that is set for MySQL during a Simple installation is set to 49500 by default.
• A system-wide password is required when performing a Simple installation. This password is used forall components used by Oracle VM Manager including MySQL, Oracle WebLogic and the Oracle VMManager application itself. Note that the password should at least adhere to the requirements for anOracle WebLogic password as set out below.
• The password for the Oracle Database SYS and SYSTEM accounts. You cannot use special charactersfor this password. Use only alpha numeric characters. This is only required during a Custom installation.
• The password for the Oracle VM Manager OVS database schema. This is only required during a Custominstallation.
• The password for the Oracle WebLogic admin account. This is only required during a Custominstallation.
The password you use for the Oracle WebLogic admin account must conform to the following rules:

Installing Oracle VM Manager
44
• Be between 8 and 16 characters in length.
• Contain at least 1 lower case and 1 upper case letter.
• Contain at least 1 numeric value or special character.
4.3.2.8 Oracle User
You must have an oracle user that is a member of a group named dba and which has the correct securitylimits set.
To configure the oracle user automatically, use the environment configuration script provided with theOracle VM Manager installer. See Section 4.3.2.4, “Environment Configuration Script” for information onusing this script.
Alternatively, you can setup the oracle user by following the commands below:
• If the oracle user does not exist on the Oracle VM Manager host, enter the following commands as theroot user to create the user, create the group, add the user to the group, and set the user's password:
# groupadd dba# useradd -g dba oracle
• If the oracle user already exists, add it to the dba group using the following command:
# usermod -g dba oracle
• The oracle user must also have a hard nofiles and soft nofiles minimum of at least 8192, aswell as some other security limits set. To set these, edit the /etc/security/limits.conf file to include thefollowing:
oracle hard nofile 8192oracle soft nofile 8192oracle soft nproc 4096oracle hard nproc 4096oracle soft core unlimitedoracle hard core unlimited
4.3.2.9 /u01 Directory
Oracle VM Manager and supporting products are installed into the /u01/app/oracle directory. Before youbegin the Oracle VM Manager installation, make sure a /u01 directory exists, and it has at least 2.4 GB ofspace available.
To create the /u01 directory automatically, use the environment configuration script provided with theOracle VM Manager installer. See Section 4.3.2.4, “Environment Configuration Script” for information onusing this script.
4.4 Installing Oracle VM ManagerIt takes approximately 8-15 minutes to complete the installation of Oracle VM Manager, depending on theperformance of the Oracle VM Manager host, and the installation type you choose.
Before you begin the installation, download the Oracle VM Manager software from:
http://edelivery.oracle.com/oraclevm
This section describes the Oracle VM Manager installation process.

Mounting the Oracle VM Manager Installation Media
45
Note
If you want to install Oracle VM Manager in a virtualized environment, do not installit on Oracle VM Server (dom0) directly; install it into a virtual machine running onan Oracle VM Server. For more information, see Section 4.7, “Running Oracle VMManager as a Virtual Machine”.
4.4.1 Mounting the Oracle VM Manager Installation Media
Before you can run the Oracle VM Manager installer, you must mount the installation media. You caneither burn the installation media to a CD and mount the CD, or mount the ISO file directly from the harddrive. Which ever way you choose to mount the installation media, you should perform this as the root useron the computer on which you want to install Oracle VM Manager.
• To install Oracle VM Manager from a CD, burn the Oracle VM Manager ISO file to a CD. Insert andmount the Oracle VM Manager CD using the following commands:
# mkdir mount-point# mount /dev/cdrom mount-point
Where mount-point refers to the directory on which you mount the ISO file.
• To install Oracle VM Manager from a hard drive, locate the folder that contains the ISO file. Mount theISO file to an existing directory using the following commands:
# mkdir mount-point# mount -o loop OracleVM-Manager-version.iso mount-point
Where mount-point refers to the directory on which you mount the ISO file. For example:
# mkdir /OVMCD# mount -o loop OracleVM-Manager-3.x.x.iso /OVMCD
You can find all the mounted files under the directory /OVMCD.
Note
The location of the mounted Oracle VM Manager ISO file should be accessible bythe oracle user.
4.4.2 Running the Oracle VM Manager Installer
To install Oracle VM Manager, enter the mount point you created in Section 4.4.1, “Mounting the OracleVM Manager Installation Media”, for example, /OVMCD and start the installation with the runInstaller scriptas the root user:
Important
Please ensure that you have met the requirements outlined in Section 4.3,“Minimum Hardware and Software Requirements” before running the runInstaller.shscript.
# cd /OVMCD# ./runInstaller.sh
A set of installer options are displayed:
Please select an installation type:

Running the Oracle VM Manager Installer
46
1: Simple (includes database if necessary) 2: Custom (using existing Oracle database) 3: Uninstall 4: Help
At the command prompt, enter 1 to perform a Simple installation or 2 to perform a Custom installation. Ifyou already have Oracle VM Manager installed and want to uninstall it, select 3 to Uninstall.
See Section 4.4.2.1, “Simple Installation (includes database if necessary)” for information on installingOracle VM Manager using the Simple install option.
See Section 4.4.2.2, “Custom Installation (using existing Oracle database)” for information on installingOracle VM Manager using the Custom install option.
See Section 4.14, “Uninstalling Oracle VM Manager” for information on uninstalling Oracle VM Manager,and its components such as MySQL (if applicable), Oracle WebLogic Server, ADF and Java.
You can also perform a silent install using the installer script optional parameters. See Section 4.4.2.3,“Performing a Silent Install”on how to perform a silent install, and Appendix A, Oracle VM ManagerInstallation Script (runInstaller) at the end of this chapter for the full syntax to the installation script.
4.4.2.1 Simple Installation (includes database if necessary)
The Simple installation option should be used if you do not have an existing Oracle Database installed or ifyou would like to keep Oracle VM Manager running independently of any existing Oracle Database.
The Simple installation option installs MySQL Enterprise Edition, MySQL Enterprise Edition Backup,Oracle WebLogic Server, Oracle Application Development Framework (ADF), Java, and Oracle VMManager on the local system. The following example shows the Simple installation process.
Note
If you have an existing MySQL installation on the system where you intend to installOracle VM Manager you should backup your databases and uninstall it. Oracle VMManager requires exclusive use of MySQL due to the specific tuning parametersthat it applies to the configuration. Oracle VM Manager uses MySQL EnterpriseEdition on a non-standard port. The licensing of the MySQL Enterprise Editionprovided with Oracle VM Manager grants exclusive use to Oracle VM. You mustnot use the MySQL server provided for any other purpose. If MySQL is installedas a result of a previous installation of Oracle VM Manager the installation promptsyou to provide the hostname, root password and port number that was used in theprevious installation.
Example 4.1 Simple Installation
# ./runInstaller.sh
Oracle VM Manager Release 3.x.x Installer Oracle VM Manager Installer log file: /tmp/filename.log Please select an installation type:1: Simple (includes database if necessary)2: Custom (using existing Oracle database)3: Uninstall4: Help Select Number (1-4): 1

Running the Oracle VM Manager Installer
47
The installation process starts, and the following is displayed:
Starting production with local database installation ...
Verifying installation prerequisites ...
One password is used for all users created and used during the installation.Enter a password for all logins used during the installation:Enter a password for all logins used during the installation (confirm):
Enter a system-wide password that can be used when creating accounts for all of the components withinthe Oracle VM Manager installation. This password will be used for your MySQL install, WebLogic andOracle VM Manager itself. Password requirements are outlined in Section 4.3.2.7, “Installation Ports,Passwords, and Database Information”. You will need to confirm your password after you have entered it.
Verifying configuration ...
Warnings may occur if not all recommendations are met.
The installer provides a final option to continue or to abort the installation process. Enter 1 to continue.Progress of the installation is output on your screen step by step, as shown below:
Start installing the configured components: 1: Continue 2: Abort
Select Number (1-2): 1
Step 1 of 9 : Database Software...Installing Database Software...Retrieving MySQL Database 5.5 ...Unzipping MySQL RPM File ...Installing MySQL 5.5 RPM package ...Configuring MySQL Database 5.5 ....
Step 2 of 9 : Java ...Installing Java ...
Step 3 of 9 : Database schema ...Creating database 'ovs' ...Creating user 'ovs' for database 'ovs'...
Step 4 of 9 : WebLogic ...Retrieving Oracle WebLogic Server 11g ...Installing Oracle WebLogic Server 11g ...
Step 5 of 9 : ADF ...Retrieving Oracle Application Development Framework (ADF) ...Unzipping Oracle ADF ...Installing Oracle ADF ...Installing Oracle ADF Patch...
Step 6 of 9 : Oracle VM ...Retrieving Oracle VM Manager Application ...Extracting Oracle VM Manager Application ...Installing Oracle VM Manager Core ...
Step 7 of 9 : Domain creation ...Creating Oracle WebLogic Server domain ...Starting Oracle WebLogic Server 11g ...Configuring data source 'OVMDS' ...Creating Oracle VM Manager user 'admin' ...
Step 8 of 9 : Deploy ...

Running the Oracle VM Manager Installer
48
Deploying Oracle VM Manager Core container ...Deploying Oracle VM Manager UI Console ...Deploying Oracle VM Manager Help ...Granting ovm-admin role to user 'admin' ...Set Log Rotation ...Disabling HTTP and enabling HTTPS...Configuring Https Identity and Trust...
Step 9 of 9 : Oracle VM Manager Shell ...Retrieving Oracle VM Manager Shell & API ...Extracting Oracle VM Manager Shell & API ...Installing Oracle VM Manager Shell & API ...
Retrieving Oracle VM Manager Upgrade tool ...Extracting Oracle VM Manager Upgrade tool ...Installing Oracle VM Manager Upgrade tool ...
Retrieving Oracle VM Manager CLI tool ...Extracting Oracle VM Manager CLI tool...Installing Oracle VM Manager CLI tool ...Copying Oracle VM Manager shell to '/usr/bin/ovm_shell.sh' ...Installing ovm_admin.sh in '/u01/app/oracle/ovm-manager-3/bin' ...Installing ovm_upgrade.sh in '/u01/app/oracle/ovm-manager-3/bin' ...Enabling Oracle VM Manager service ...Shutting down Oracle VM Manager instance ...Restarting Oracle VM Manager instance ...Waiting for the application to initialize ...Oracle VM Manager is running ...Oracle VM Manager installed.
Please wait while WebLogic configures the applications... This can take up to 5 minutes.
When the installation is complete a summary similar to the following is displayed:
Installation Summary--------------------Database configuration: Database type : MySQL Database host name : localhost Database name : ovs Database listener port : 49500 Oracle VM Manager schema : ovs
Weblogic Server configuration: Administration username : weblogic
Oracle VM Manager configuration: Username : admin Core management port : 54321 UUID : 0004fb00000100008e2c477634f634c9
Passwords:There are no default passwords for any users. The passwords to use for Oracle VM Manager, Database, and Oracle WebLogic Server have been set by you during this installation. In the case of a default install, all passwords are the same.
Oracle VM Manager UI: https:/hostname:7002/ovm/consoleLog in with the user 'admin', and the password you set during the installation.
Please note that you need to install tightvnc-java on this computer to access a virtual machine's console.
For more information about Oracle Virtualization, please visit: http://www.oracle.com/virtualization/

Running the Oracle VM Manager Installer
49
Oracle VM Manager installation complete.
Please remove configuration file /tmp/ovm_configid.
Important
Make sure you delete the temporary configuration file created during theinstallation:
/tmp/ovm_configid
This file is useful for debugging installation issues, but does contain some sensitiveinformation that may present a security issue if left in place.
Warning
Some performance degradation may be noted when installing onto an OracleLinux system using an EXT4 formatted filesystem. This is the result of thedefault mount parameters for EXT4 on an Oracle Linux installation. In order toensure that your installation performs optimally, the /etc/fstab must be edited toprovide alternate mount options for the mount point where Oracle VM Manageris installed. Mount options for an EXT4 filesystem should be specified as:rw,noatime,data=writeback,barrier=0,nobh.
4.4.2.2 Custom Installation (using existing Oracle database)
The Custominstallation option allows you to use an existing local or remote Oracle Database as the OracleVM Manager database repository. During the Custominstallation process, you need to set the usersand passwords to use in order to connect to the database, the SID that should be used within the OracleDatabase to load the Oracle VM Manager schema, the username and password to be used for the OracleWebLogic Server, and the password for the admin user account in Oracle VM Manager. The followingexample shows the Custominstallation process.
Example 4.2 Custom Installation
# ./runInstaller.sh
Oracle VM Manager Release 3.x.x Installer Oracle VM Manager Installer log file: /tmp/ovm-manager-3-install-date-id.log Please select an installation type:1: Simple (includes database)2: Custom (using existing Oracle database)3: Uninstall4: Help
Select Number (1-4): 2
The installation process starts, and the following is displayed:
Starting production installation ...
Verifying installation prerequisites ...
Oracle Database Repository==========================

Running the Oracle VM Manager Installer
50
Use an existing Oracle database
When prompted, enter the following information as outlined in section Section 4.3.2.7, “Installation Ports,Passwords, and Database Information”:
Enter the Oracle Database hostname [localhost]: Enter the Oracle Database System ID (SID) [ORCL]: Enter the Oracle Database SYSTEM password: Enter the Oracle Database listener port [1521]: Enter the Oracle VM Manager database schema [ovs]: Enter the Oracle VM Manager database schema password: Enter the Oracle VM Manager database schema password (confirm):
Oracle Weblogic Server 11g==========================Enter the Oracle WebLogic Server 11g user [weblogic]: Enter the Oracle WebLogic Server 11g user password: Enter the Oracle WebLogic Server 11g user password (confirm):
Oracle VM Manager application=============================Enter the username for the Oracle VM Manager administration user [admin]: Enter the admin user password: Enter the admin user password (confirm):
Verifying configuration ...
Start installing the configured components: 1: Continue 2: Abort
Select Number (1-2): 1
You have the option to continue or abort the installation. Enter 1 to continue. You may be prompted againto either abort or continue the installation in case certain components are already present on your system.Progress of the installation is output on your screen step by step, as shown below:
Start installing the configured components: 1: Continue 2: Abort
Select Number (1-2): 1
Step 1 of 9 : Database ...Installing Database ...Database installation skipped ...
Step 2 of 9 : Java ...Installing Java ...
If an existing Oracle VM Manager database schema is found in the database, the following is displayed:
Step 3 of 9 : Database Schema ...An existing OVM database was found. How should the install proceed? 1: Use the existing OVM database 2: Remove the existing OVM database and create a new OVM database 3: Abort
Select Number (1-3): 1
Enter 1 - 3, depending on your requirements. In this example, the existing schema is retained.
Alternatively, if no existing Oracle VM Manager database schema is found in the database, the schema iscreated.

Running the Oracle VM Manager Installer
51
Step 3 of 9 : Database Schema ...Creating database schema 'ovs' ...
Step 4 of 9 : WebLogic ...Retrieving Oracle WebLogic Server 11g ...Installing Oracle WebLogic Server 11g ...
Step 5 of 9 : ADF ...Retrieving Oracle Application Development Framework (ADF) ...Unzipping Oracle ADF ...Installing Oracle ADF ...
Step 6 of 9 : Oracle VM ...Retrieving Oracle VM Manager Application ...Extracting Oracle VM Manager Application ...Installing Oracle VM Manager Core ...
Step 7 of 9 : Domain creation ...Creating Oracle WebLogic Server domain ...Starting Oracle WebLogic Server 11g ...Configuring data source 'OVMDS' ...Creating Oracle VM Manager user 'admin' ...
Step 8 of 9 : Deploy ...Deploying Oracle VM Manager Core container ...Deploying Oracle VM Manager UI Console ...Deploying Oracle VM Manager Help ...Granting ovm-admin role to user 'admin' ...Set Log Rotation ...Disabling HTTP and enabling HTTPS...Configuring Https Identity and Trust...
Step 9 of 9 : Oracle VM Manager Shell ...Retrieving Oracle VM Manager Shell & API ...Extracting Oracle VM Manager Shell & API ...Installing Oracle VM Manager Shell & API ...
Retrieving Oracle VM Manager Upgrade tool ...Extracting Oracle VM Manager Upgrade tool ...Installing Oracle VM Manager Upgrade tool ...Copying Oracle VM Manager shell to '/usr/bin/ovm_shell.sh' ...Installing ovm_admin.sh in '/u01/app/oracle/ovm-manager-3/bin' ...Installing ovm_upgrade.sh in '/u01/app/oracle/ovm-manager-3/bin' ...Enabling Oracle VM Manager service ...Shutting down Oracle VM Manager instance ...Restarting Oracle VM Manager instance ...Waiting 15 seconds for the application to initialize ...Oracle VM Manager is running ...Oracle VM Manager installed.
Please wait while WebLogic configures the applications... This can take up to 5 minutes.
When the installation is complete a summary similar to the following is displayed:
Installation Summary--------------------Database configuration: Database host name : localhost Database instance name (SID): MYDB Database listener port : 1521 Application Express port : 8080 Oracle VM Manager schema : ovs
Weblogic Server configuration: Administration username : weblogic
Oracle VM Manager configuration:

Running the Oracle VM Manager Installer
52
Username : admin Core management port : 54321 UUID : 0004fb0000010000cc1b57e39ff77ea9
Passwords:There are no default passwords for any users. The passwords to use for Oracle VMManager, Database, and Oracle WebLogic Server have been set by youduring this installation. In the case of a demo install, all passwords are thesame.
Oracle VM Manager UI: https://myserver.example.com:7002/ovm/consoleLog in with the user 'admin', and the password you set during the installation.
Please note that you need to install tightvnc-java on this computer to access a virtual machine's console.
For more information about Oracle Virtualization, please visit: http://www.oracle.com/virtualization/
Oracle VM Manager installation complete.
Please remove configuration file /tmp/ovm_configid.
Important
Make sure you delete the temporary configuration file created during theinstallation:
/tmp/ovm_configid
Warning
If performing a custom installation using an existing Oracle Database, when youhave completed the installation, ensure that you migrate any LOBs using the OracleBasicFiles format to use the Oracle SecureFiles format instead. This can lead toimproved performance and may help to avoid the possibility of LOB corruption. Thisissue is described in Oracle DB Corruption Can Occur on Databases Using theBasicFiles LOB in the Oracle™ VMOracle VM Release Notes .
4.4.2.3 Performing a Silent Install
The Oracle VM Manager installer can be installed silently, without any intervention. An installationconfiguration script can be used to provide the installation options, and a set of command line optionsare available for the installation parameters. See Appendix A, Oracle VM Manager Installation Script(runInstaller) at the end of this chapter for information on the command line options. The configurationscript is written in YAML. Structure is shown through indentation (one or more spaces). Sequence itemsare denoted by a dash, and key value pairs within a map are separated by a colon. Structure is shownthrough indentation (one or more spaces) and key value pairs within a map are separated by a colon.
The following example silently performs a Custom install.
Warning
Always provide the absolute path to the configuration file. The installer cannotprocess a relative path and will simply terminate the installation process.
Example 4.3 Silent install using configuration file
The command to run the silent production installation using a configuration file is:

Configuring the NTP Service
53
./runInstaller.sh --config=/path/config.yml --installtype=Custom --assumeyes
The configuration file used in this installation example (config.yml) installs a local MySQL database.Replace the password entry with your own password.
db: install : Yes host : localhost sys_password : password port : 49500 sid : ovs mgmt_port : 8080 user : ovs password : password webLogic: install : Yes user : weblogic password : password java: install : Yes ADF: install : Yes OVMCore: install : Yes user : admin password : password OVMConsole: install : Yes OVMShell: install : Yes onFailure: cleanup : No
OVMUpgrade: install : Yes
4.4.3 Configuring the NTP Service
When an Oracle VM Server is discovered in Oracle VM Manager, NTP (Network Time Protocol) isautomatically configured and enabled to ensure time synchronization. Oracle VM automatically configuresthe Oracle VM Manager host computer as the NTP source for all Oracle VM Servers under its control,unless other NTP servers are configured in the user interface or CLI. See Managing NTP on Oracle VMServers for information on configuring your own set of NTP servers.
If you do not set up your own list of NTP servers, and want to use the Oracle VM Manager host computerto provide NTP time synchronization services, NTP must first be installed and configured on the OracleVM Manager host server. Make sure that your Oracle VM Manager host is either registered with theUnbreakable Linux Network (ULN) or configured to use Oracle's public YUM service.
To configure NTP on the Oracle VM Manager host:
1. Install the NTP package.
# yum install ntp
When NTP is installed, configure it to both synchronize with upstream servers and provide timeservices to the local network, where the Oracle VM Servers reside.

Configuring the NTP Service
54
2. Enable upstream synchronization by defining the upstream time servers in the ntp.conf file.
Oracle Linux uses three public NTP servers as upstream time sources by default. Check with yournetwork administrator if time services are provided on the corporate network and, if necessary, replacethe default entries with the names or IP addresses of your NTP servers.
Use your favorite text editor to modify /etc/ntp.conf. Search for these entries:
# vi /etc/ntp.conf
server 0.rhel.pool.ntp.orgserver 1.rhel.pool.ntp.orgserver 2.rhel.pool.ntp.org
3. Configure downstream access for the Oracle VM Servers in your local network. To do so, disable thedefault "noquery" option for the Oracle VM Server management network.
Again in the /etc/ntp.conf file, search for this entry:
#restrict 192.168.1.0 mask 255.255.255.0 nomodify notrap
Remove the # character at the start of the line to uncomment this entry. Replace 192.168.1.0 withthe network address of your Oracle VM Server management network. You may also need to adjust thenetmask (255.255.255.0). Once you have finished editing, save the /etc/ntp.conf file.
4. Start the NTP service and set it to launch automatically upon boot.
# service ntpd start# chkconfig ntpd on
5. When NTP is running, check upstream synchronization. The ntpq command should output somethingsimilar to this example:
# ntpq -p
remote refid st t when poll reach delay offset jitter============================================================================== lists2.luv.asn. 203.161.12.165 16 u 25 64 3 3.495 -3043.1 0.678 ns2.novatelbg.n 130.95.179.80 16 u 27 64 3 26.633 -3016.1 0.797 sp1.mycdn.fr 130.234.255.83 16 u 24 64 3 4.314 -3036.3 1.039
When upstream NTP is working properly, delay and offset values should be non-zero and the jittervalue should be below 100.
6. Test downstream synchronization from another server in the management network to ensure that NTPservices are working. Note that it may take several minutes before your NTP server is able to providetime services to downstream clients. Begin by checking the stratum level of your server:
# ntpq -c rv
assID=0 status=c011 sync_alarm, sync_unspec, 1 event, event_restart,version="ntpd [email protected] Tue Jul 6 21:50:26 UTC 2010 (1)",processor="x86_64", system="Linux/2.6.32-200.19.1.el6uek.x86_64",leap=11, stratum=16 , precision=-20, rootdelay=0.000,rootdispersion=1.020, peer=0, refid=INIT,reftime=00000000.00000000 Thu, Feb 7 2036 17:28:16.000, poll=6,clock=d21d4a96.a26c5962 Fri, Sep 16 2011 14:09:58.634, state=0,offset=0.000, frequency=0.000, jitter=0.001, noise=0.001,stability=0.000, tai=0
If the server is showing stratum=16, wait a few minutes and try again. It may take up to 15 minutesfor an NTP server to stabilize sufficiently to lower its stratum level.

Installing and Configuring Virtual Machine Console Utilities
55
Downstream clients will not synchronize with a server at stratum level 16. Once the stratum levelhas dropped, log in to an available Linux host in your management network, not running Oracle VMManager, and issue the following command:
# ntpdate -d manager.hostname[...]16 Sep 13:58:25 ntpdate[1603]: step time server 192.168.1.1 offset 3.009257 sec
This command runs ntpdate in debug mode, in which case the availability of the remote time serveris checked. If the debug run ends in a line similar to the one in this example, the test is successful. Incase the stratum level is still too high, the error message "Server dropped: strata too high"is displayed.
When you have confirmed with these tests that NTP is working properly for your environment, you shouldnot need to check this again.
Caution
NTP communicates over UDP port 123. Ensure that no firewall is blocking thistraffic.
4.4.4 Installing and Configuring Virtual Machine Console Utilities
There are two types of virtual machine consoles in Oracle VM Manager: the VNC console used to connectvirtual machines in x86-based server pools, and the serial console used to connect to virtual machines inboth x86-based and SPARC-based server pools. This section discusses installing the prerequisite softwareand any configuration required to use both console types.
4.4.4.1 Oracle VM Server VNC Console for x86
Oracle VM Manager uses a secure tunnel to protect the virtual machine console (remote connection utility)data across the network. Oracle VM Manager does not communicate directly with the VNC client, butrather connects via an SSH-encrypted tunnel on port 69xx (where xx is based on the guest to which it isconnecting).
Any firewall between the client and Oracle VM Manager needs port 15901 to be open. Any firewallbetween the Oracle VM Manager and the Oracle VM Servers needs ports 6900 and above open; one portfor each virtual machine on an Oracle VM Server. For example, if you have 100 virtual machines on anOracle VM Server, you should open ports 6900-6999 (100 ports) on any firewall between the Oracle VMServer and Oracle VM Manager.
To connect to a virtual machine's VNC console in Oracle VM Manager, you should have a VNC viewerinstalled somewhere in your environment, either:
• On the Oracle VM Manager host computer
• On the client computer
• On both the Oracle VM Manager host computer and the client computer
The virtual machine VNC console feature uses the client instance of a VNC viewer, if one exists, toconnect to a virtual machine's console. If a VNC viewer is not found on the client computer, a request issent to the Oracle VM Manager host computer to display the VNC viewer.
It is preferred that you install TightVNC on the Oracle VM Manager host computer. You can get the latestTightVNC package from:

Installation Logs
56
http://oss.oracle.com/oraclevm/manager/RPMS/
Install TightVNC with the command:
# rpm -ivh tightvnc-java-version.noarch.rpm
Packages are also available at Oracle's public YUM repository:
• TightVNC (Oracle Linux 5): http://public-yum.oracle.com/repo/EnterpriseLinux/EL5/addons/x86_64/tightvnc-java-1.3.9-4.noarch.rpm
• TightVNC (Oracle Linux 6): http://public-yum.oracle.com/repo/OracleLinux/OL6/addons/x86_64/tightvnc-java-1.3.9-4.noarch.rpm
On the client computer you use to connect to Oracle VM Manager it is recommended that you installRealVNC. Oracle recommends RealVNC on the client computer as it renders quickly, has better keyboardsupport, and has less mouse control issues compared to other VNC clients. The RAS proxy applet usedto view the screen or console of a virtual machine looks for RealVNC by default. If you have multiple VNCviewers on your client computer, you can configure which one is used from the virtual machine console inOracle VM Manager. See Connecting to a Virtual Machine for more information on using and configuringthe VNC client.
If you are using a Linux-based operating system on your client computer, you can also install TightVNC asabove on your client computer and it is automatically discovered when you connect to a virtual machineusing the console feature in Oracle VM Manager.
4.4.4.2 Oracle VM Server Serial Console for x86 and SPARC
You cannot use the standard VNC console to connect to virtual machines on a SPARC-based server pool.Instead, use the serial console. The serial console can also be used to connect to virtual machines runningon x86-based server pools. The serial console behaves differently to the VNC-based x86 console, and theconsole must be displayed using the Java Telnet Application (JTA2) package installed on the Oracle VMManager host computer. You can get the latest JTA2 package from:
http://oss.oracle.com/oraclevm/manager/RPMS/
Install JTA2 with the command:
# rpm -ivh jta-version.noarch.rpm
Packages are also available at Oracle's public yum server:
• JTA (Oracle Linux 5): http://public-yum.oracle.com/repo/EnterpriseLinux/EL5/addons/x86_64/jta-2.6-1.noarch.rpm
• JTA (Oracle Linux 6): http://public-yum.oracle.com/repo/OracleLinux/OL6/addons/x86_64/jta-2.6-1.noarch.rpm
Any firewall between the Oracle VM Manager and the Oracle VM Servers needs ports 7900 and aboveopen; one port for each virtual machine on an Oracle VM Server. For example, if you have 100 virtualmachines on an Oracle VM Server, you should open ports 7900-7999 (100 ports) on any firewall betweenthe Oracle VM Server and Oracle VM Manager.
See Connecting to a Virtual Machine for more information on using the serial console to connect to virtualmachines in SPARC-based server pools.
4.4.5 Installation Logs

Installation Directories
57
If any errors occur during installation, check the Oracle VM Manager installation log file:
/tmp/ovmm-installer.selfextract_id/ovm-manager-3-install-date.log
When the installation is complete, the installation log is copied to:
/tmp/ovm-manager-3-install-date.log
4.4.6 Installation Directories
The locations of the Oracle VM Manager components are listed in Table 4.2.
Table 4.2 Oracle VM Manager component installation locations
Component Location
MySQL /u01/app/oracle/mysql/data
MySQL Enterprise Backup /opt/mysql/meb-3.8/
Backups stored in: /u01/app/oracle/mysql/dbbackup
Java /u01/app/oracle/java
Oracle WebLogic Server 11g /u01/app/oracle/Middleware/
Oracle ADF /u01/app/oracle/Middleware/
Oracle VM Manager application /u01/app/oracle/ovm-manager-3/
Oracle WebLogic Server domain /u01/app/oracle/ovm-manager-3/machine1/base_adf_domain
4.5 Logging in to Oracle VM ManagerTo open the Login page of Oracle VM Manager, enter the following address in a Web browser:
https://hostname:port/ovm/console
Where, hostname refers to the host name or IP address of the Oracle VM Manager host, and port refers tothe port number on which Oracle VM Manager is listening.
Note
In previous version of Oracle VM Manager unencrypted HTTP traffic was allowed bydefault. This has been disabled to always encrypt traffic using the Secure SocketsLayer (SSL). Therefore, you should always use https within the protocol portion ofthe URL to access the Oracle VM Manager.
To connect to Oracle VM Manager on a host named myserver.example.com, use:
https://myserver.example.com:7002/ovm/console
Important
You should ensure that if you are accessing Oracle VM Manager through a firewall,the firewall should be configured to allow TCP traffic on the port configured inOracle VM Manager. By default, this is set to 7002.
Enter your Oracle VM Manager administration username (which is admin by default) in the Usernamefield. This is the administration username you create during the Oracle VM Manager install. Enter thepassword for the Oracle VM Manager administration username in the Password field.

Starting and Stopping Oracle VM Manager
58
Warning
In addition to the default admin user, you can also log into Oracle VM Managerusing other default accounts created by the Oracle VM Manager installer, namely:
• OracleSystemUser
• weblogic
Make sure the passwords for all accounts are secure. See Other Oracle VMTools in the Oracle VM Utilities Guide for information on managing Oracle VMusers and passwords.
To manage the local instance of Oracle VM Manager (installed on localhost), leave the ManagementServer URI field as the default, tcp://localhost. If you want to manage a remote instance of OracleVM Manager, enter the hostname or IP address for that machine, for example:
tcp://myserver.example.com
See Section 4.9, “Enabling Remote Log Ins” for more information on accessing remote instances of OracleVM Manager.
Now you are logged in, you can create storage repositories, server pools, add Oracle VM Servers, andcreate virtual machines, import resources, and so on.
The user interface displays context sensitive information, relevant to the selection in the navigator andcontent panes.
4.6 Starting and Stopping Oracle VM Manager
When Oracle VM Manager is installed, it is set to automatically start when the operating system starts. Ifyou want to disable this, enter:
# chkconfig ovmm off
To manually start or stop Oracle VM Manager, and to verify its status, log in as the root user, and use thesyntax:
/sbin/service ovmm [start|stop|status|check|restart]
For example, to start Oracle VM Manager:
# /sbin/service ovmm start
To stop Oracle VM Manager:
# /sbin/service ovmm stop
To restart Oracle VM Manager:
# /sbin/service ovmm restartStopping Oracle VM ManagerStarting Oracle VM Manager
To check the status of Oracle VM Manager:
# /sbin/service ovmm status
Running Oracle VM Manager as a Virtual Machine
59
-- OR --# /sbin/service ovmm check
Oracle VM Manager is running...
The status and check options return whether the Oracle VM Manager service is running or stopped.
If the Oracle VM Manager host computer runs a full graphical desktop environment, you can also usethe Services dialog to start and stop Oracle VM Manager. From the Applications menu, select SystemSettings > Server Settings > Services. Or by running the following command in a terminal to use displayServices dialog:
# /usr/bin/system-config-services
In the Service Configuration dialog, select ovmm to check the status, and start or stop it.
4.7 Running Oracle VM Manager as a Virtual Machine
The Oracle VM Manager does not necessarily have to run on a separate physical server in yourenvironment. You can save on your resources by turning theOracle VM Manager into a virtual machine. Asa result, it benefits from all the typical advantages of virtualization: hardware consolidation, high availability,live migration and so on. Because the Oracle VM Manager is not tied to one physical server, it leavesmore physical resources for other applications, and at the same time it can be hot-cloned, backed up andmigrated without downtime to other hardware when server maintenance is required.
Important
If you intend to virtualize Oracle VM Manager, you should ensure that it does notrun on top of the same platform that it is managing. This can cause problems if thevirtual machine where Oracle VM Manager resides happens to go down, as you arenot able to easily restart the virtual machine. Typical deployments where the OracleVM Manager is virtualized have two distinct Oracle VM environments configured,where Oracle VM Manager runs on a virtual machine in each environment tomanage the other.
The procedure to turn Oracle VM Manager into a virtual machine starts with a regular installation, eitheron a physical server or using a virtualization tool such as Oracle VM VirtualBox. Using this installation youset up the bare minimum to run a virtual machine: one Oracle VM Server, one NFS storage server and thedefault management network should suffice. Once the environment is up and running, you install a virtualmachine on your environment and let it take over the role of the Oracle VM Manager instance that it shouldreplace. This section explains the steps to reach that final result.
Note
This procedure is not intended for the reconfiguration of an Oracle VM environmentin use. If you wish to run Oracle VM Manager as a virtual machine, run thisprocedure as part of the setup, with a minimal install, before any significantconfiguration has taken place.
To run Oracle VM Manager as a Virtual Machine in the virtualized environment:
1. In environment A, install Oracle VM Manager on a physical server, according to the instructions inSection 4.4, “Installing Oracle VM Manager”.
2. Discover at least two Oracle VM Servers for your environment, create a clustered server pool, use thedefault management network and set up the minimum storage required: a server pool file system and

Adding a Trusted CA Certificate and Keystore for SSL Encryption
60
a storage repository for the VM resources. To do so, follow the instructions in the Oracle VM User'sGuide.
3. Create a new virtual machine that complies with the Oracle VM Manager hardware requirements asdescribed in Section 4.3.1, “Hardware Requirements”. Make sure that the new virtual machine has HA(high availability) enabled.
4. Install the operating system (Oracle Linux) and make sure that the virtual machine complieswith all software requirements for Oracle VM Manager, as described in Section 4.3.2, “SoftwareRequirements”.
5. On this new virtual machine, install Oracle VM Manager according to the instructions in Section 4.4,“Installing Oracle VM Manager”. Run the installer with the --uuid option to install this new Oracle VMManager instance with the same UUID as one running on a physical server in environment B.
Caution
If you intend to run the Oracle VM Manager database on a separate virtualmachine, make sure that the database is up and running before you install theOracle VM Manager virtual machine.
• Copy the UUID of the Oracle VM Manager instance in environment B from the file /u01/app/oracle/ovm-manager-3/.config.
• After mounting the Oracle VM Manager install dvd on the file system of your virtual machine, run theinstaller as follows: ./runinstaller.sh --uuid <original_manager_uuid>. Select yourpreferred installation type, as you would with a regular install.
6. Stop the Oracle VM Manager instance in environment B.
7. From the new Oracle VM Manager virtual machine in environment A, rediscover the Oracle VMServers and storage from environment B. Refresh the storage repository to make sure that all your VMresources reappear for environment B.
Oracle VM Manager is now running as an HA VM in environment A, to manage Oracle VM deploymentrunning in environment B. If the Oracle VM Server hosting the Oracle VM Manager VM fails, the VM willbe brought up automatically on a different Oracle VM Server in environment A, and you will continue to beable to access it to manage environment B.
At this point, the Oracle VM Manager instance responsible for environment A is still running on a physicalserver. You can just as equally create a virtual machine in environment B, and set up a new Oracle VMManager instance running with the same UUID to take over this responsibility. In this way, the two OracleVM Manager instances can take advantage of the HA functionality provided by a clustered server pool.Each Oracle VM Manager instance runs in one environment to manage the other.
4.8 Adding a Trusted CA Certificate and Keystore for SSLEncryption
By default, Oracle VM Manager provides its own SSL certification stored within a custom keystore. Thecertificate that is provided is not signed by a recognized Certificate Authority. While it serves to provideSSL encryption for all HTTP traffic, it is recommended that you obtain and install a trusted certificate from awell-known and recognized Certificate Authority (CA).
A default installation of Oracle VM Manager does not use the default keystore and certification providedby Oracle WebLogic Server. Instead, it makes use of its own 2048-bit keystore located at /u01/app/

Adding a Trusted CA Certificate and Keystore for SSL Encryption
61
oracle/ovm-manager-3/weblogic/ovmm_wls.jks. This folder also contains the scripts that areused to set up the keystore during installation, as well as the certificates required for Oracle VM Manager.
Oracle VM Manager runs on Oracle WebLogic Server, and Oracle WebLogic provides the interface forupdating the digital certificate and keystore. To add your own trusted CA certificate and keystore, see theprocedures set out in the Oracle WebLogic documentation:
http://docs.oracle.com/cd/E17904_01/apirefs.1111/e13952/taskhelp/security/ConfigureKeystoresAndSSL.html and http://docs.oracle.com/cd/E23943_01/web.1111/e13707/identity_trust.htm
Two variables are mentioned in this procedure that you need to know when installing the certificate. Thevalues for these variables in Oracle VM Manager are:
$JAVA_HOME\jre\lib\security /u01/app/oracle/java/jre/lib/security$WL_HOME\server\lib /u01/app/oracle/Middleware/wlserver_10.3/server/lib
To access the Oracle WebLogic Server console, enter:
https://hostname:7002/console
Log in with the user weblogic and the password you set during the Oracle VM Manager installation.
If you need to revert back to the default keystore and certificates provided with a fresh installation of OracleVM Manager, this can be easily achieved by running the script at /u01/app/oracle/ovm-manager-3/weblogic/configureIdentityTrust.sh. You will be prompted for the password that you haveconfigured for Weblogic Server during the installation process:
# /u01/app/oracle/ovm-manager-3/weblogic/configureIdentityTrust.sh Configuring OVM Manager Identity and Trust Keystore ...
Please enter the password for weblogic : Initializing WebLogic Scripting Tool (WLST) ...
Welcome to WebLogic Server Administration Scripting Shell
Type help() for help on available commands
Connecting to t3://localhost:7001 with userid weblogic ...Successfully connected to Admin Server 'AdminServer' that belongs to domain 'base_adf_domain'.
Warning: An insecure protocol was used to connect to the server. To ensure on-the-wire security, the SSL port or Admin port should be used instead.
Location changed to edit tree. This is a writable tree with DomainMBean as the root. To make changes you will need to start an edit session via startEdit().
For more help, use help(edit)
Starting an edit session ...Started edit session, please be sure to save and activate your changes once you are done.Saving all your changes ...Saved all your changes successfully.Saving all your changes ...Saved all your changes successfully.Activating all your changes, this may take a while ... The edit lock associated with this edit session is released once the activation is completed.
The following non-dynamic attribute(s) have been changed on MBeans

Enabling Remote Log Ins
62
that require server re-start:MBean Changed : com.bea:Name=t3,Type=NetworkAccessPoint,Server=AdminServerAttributes changed : CustomPrivateKeyPassPhraseEncrypted
Activation completedDisconnected from weblogic server: AdminServerConfiguring OVM Manager Identity and Trust Keystore succeeded, it needs to restart OVM Manager to take effect.
Note
Since the script is used to initially configure SSL on the WebLogic Server duringthe installation process, it connects to WebLogic using the unencrypted HTTP port(7001). You can ignore the warning message that is generated in the output.
4.9 Enabling Remote Log InsBy default, the Oracle VM Manager UI can only log into the local installation of Oracle VM Manager. Insome situations you may want to use Oracle VM Manager UI to log into a remote instance of Oracle VMManager. To enable this, you must perform some set up on the Oracle VM Manager host to allow remotelog ins.
Important
You should not configure remote log ins unless directed to by Oracle Support.
Once secure TCP connectivity has been configured, it cannot be disabled again.There are no remote (regular) TCP connections allowed.
If remote log ins are configured, a remote instance of the Oracle VM Manager UI can log into the localinstance of Oracle VM Manager and interact with all the objects the local instance owns and manages.If you want to enable remote instances of Oracle VM Manager UI to log in, you set up remote TCPSauthentication. To do this you must first generate a keystore, then use it to enable remote TCPSconnections.
To enable TCPS connections from a remote Oracle VM Manager:
1. Enter the following commands on the Oracle VM Manager host to create the keystore:
# cd /u01/app/oracle/ovm-manager-3/bin# ./secureOvmmTcpGenKeyStore.sh
You are prompted to enter the following information:
Generate OVMM TCP over SSH key store by following steps:Enter keystore password: passwordRe-enter new password: passwordWhat is your first and last name? [Unknown]: name What is the name of your organizational unit? [Unknown]: unit What is the name of your organization? [Unknown]: organizationWhat is the name of your City or Locality? [Unknown]: CityWhat is the name of your State or Province? [Unknown]: StateWhat is the two-letter country code for this unit? [Unknown]: country_codeIs CN=name, OU=unit, O=organization, L=City, ST=State, C=country_code correct? [no]: yes

Configuring UI Session Timeout
63
Enter key password for <ovmm> (RETURN if same as keystore password): passwordRe-enter new password: password
2. Use the keystore to enable the TCPS service using the secureOvmmTcp.sh script, which is in thesame directory as the keystore script above. On the Oracle VM Manager host, enter:
# ./secureOvmmTcp.sh
You are prompted to enter the following information:
Enabling OVMM TCP over SSH service
Please enter the OVM manager user name: username The local Oracle VM Manager username to usePlease enter the OVM manager user password: password The local Oracle VM Manager password to usePlease enter the password for TCPS key store : password The keystore password created in the previous scriptThe job of enabling OVMM TCPS service is committed, please restart OVMM to take effect.
The username and password entered here are the local Oracle VM Manager authentication credentialsto use when logging in from the remote Oracle VM Manager UI instance.
3. Restart the local Oracle VM Manager instance:
# /sbin/service ovmm stop# /sbin/service ovmm start-- OR --# /sbin/service ovmm restart
4. In the Oracle VM Manager UI, check the Show Management Server URI checkbox in the Preferencessub tab of the Tools and Resources tab to display the Management Server URI field on the loginscreen.
5. You can now connect to the Oracle VM Manager, using a remote instance of the Oracle VM ManagerUI, using the following syntax in the Management Server URI field in the remote Oracle VM ManagerUI login screen:
tcps://hostname
Using the username and password you enabled with the secureOvmmTcp.sh script.
If you perform an upgrade from Oracle VM Manager 3.0.x to Oracle VM Manager 3.1.1, the abovescripts are not included. You should download the scripts by searching the patch 14067211 fromthe My Oracle Support website at: https://updates.oracle.com/ARULink/PatchDetails/process_form?patch_num=14067211.
Alternatively you can use Java keytool and Oracle VM Utilities which provide more configuration options.For information on configuring secure TCP (TCPS) for Oracle VM Manager, see the My Oracle Supportwebsite at: https://support.oracle.com/oip/faces/secure/km/DocumentDisplay.jspx?id=1456338.1.
4.10 Configuring UI Session TimeoutYou can change the amount of time that an Oracle VM Manager session can remain inactive before it isinvalidated. Oracle VM Manager runs on Oracle WebLogic Server, and to configure Oracle VM Managertimeout settings you need to access the Oracle WebLogic Server console.

Changing the Oracle VM Manager admin User Password
64
To configure Oracle VM Manager session timeout:
1. Access the Oracle WebLogic Server console by entering:
https://hostname:7002/console
Log in with the user weblogic and the password you set during the Oracle VM Manager installation.
2. Click Deployments in the left pane of the Administration Console.
3. Click Next to change the page until ovm_console is listed in the Deployments table.
4. Click the "+" next to ovm_console to expand the view for the ovm_console deployment.
5. Click ovm/console in the Modules list. The settings for ovm_console is displayed.
6. Click on the Configuration tab.
7. Click Lock and Edit in the Change Center pane to modify the settings.
8. Click the Configuration tab and then click the General subtab. Edit the Session Timeout (in seconds)field in the table. The default setting is half an hour (1800 seconds). Click Save.
If you receive a permissions related error, you may need to change the permissions or ownership onthe file located at /u01/app/oracle/ovm-manager-3/weblogic/deploy/ovm_console/plan/plan.xml. You can do this by running the following command:
chown oracle:dba /u01/app/oracle/ovm-manager-3/weblogic/deploy/ovm_console/plan/plan.xml
You will need to resave your changes in order for them to take effect.
9. Go back to the Deployments page by clicking Deployments in the left pane. In the Deployments table,select the ovm_console check box. Click Update to redeploy the application.
10. Change the source and deployment plan paths as desired. Click Finish.
11. To activate the changes, click Activate Changes in the Change Center of the Administration Console.
For more information on updating a Web application, see the Oracle WebLogic documentation:
http://docs.oracle.com/cd/E23549_01/apirefs.1111/e13952/taskhelp/web_applications/UpdateWebApplication.html
4.11 Changing the Oracle VM Manager admin User PasswordThe Oracle VM Manager admin user is used to log in to the Oracle VM Manager user interface. To changethe password for the Oracle VM Manager admin user account, log in to the Oracle VM Manager hostcomputer as the root user and perform the following:
# cd /u01/app/oracle/ovm-manager-3/bin#./ovm_admin --modifyuser
Oracle VM Manager Release 3.x.x Admin toolPlease enter the username : adminPlease enter the current password :
Enter the current password for the admin user. The Oracle VM Manager administration tool prompts youfor a new password.
Please enter a new password for admin :

Backing Up Oracle VM Manager
65
Please re-enter the password :
Enter the new password for the admin user. The password you use for the Oracle WebLogic adminaccount must conform to the following rules:
• Be between 8 and 16 characters in length.
• Contain at least 1 lower case and 1 upper case letter.
• Contain at least 1 numeric value or special character.
The Oracle VM Manager administration tool prompts you to confirm the new password. The Oracle VMManager administration tool continues.
Please enter the password for weblogic :
Enter the Oracle WebLogic password. You set this during the installation of Oracle VM Manager. The utilityconnects to Oracle WebLogic and changes the Oracle VM Manager admin password.
Initializing WebLogic Scripting Tool (WLST) ...
Welcome to WebLogic Server Administration Scripting Shell
Type help() for help on available commands
Connecting to WebLogic server ...
Connected ...Modifying user 'admin' ...Modified user 'admin' successfully ...Exiting...
4.12 Backing Up Oracle VM ManagerTo back up Oracle VM Manager, you should back up the Oracle VM Manager configuration file, and theOracle VM Manager database schema. By default, this schema is named OVS, and this is used in thebackup example. Replace the schema name with your own.
The Oracle VM Manager configuration file is stored in this location:
/u01/app/oracle/ovm-manager-3/.config
This configuration file contains database connection information, ports and the UUID used by Oracle VMManager. An example of this configuration file follows:
Example 4.4 Oracle VM Manager configuration file
DBHOST=<hostname of database server>SID=<oracle SID>LSNR=<listener port number defaults 1521>APEX=<application express port number defaults 8080>OVSSCHEMA=<database schema name for oracle vm manager defaults ovs>WLSADMIN=<weblogic server admin defaults weblogic>OVSADMIN=<oracle vm manager administrator name defaults admin>COREPORT=<oracle vm manager core port defaults 54321>UUID=<oracle vm manager uuid>
To back up Oracle VM Manager:
1. Back up/copy the Oracle VM Manager configuration file located at
/u01/app/oracle/ovm-manager-3/.config

Restoring Oracle VM Manager
66
2. Back up the Oracle VM Manager database OVS schema. Run the Oracle Database EXP utility to exportthe OVS schema if you are using an Oracle Database. For installations of Oracle VM Manager thatuse a MySQL database, the entire database is backed up automatically every 24 hours using theMySQL Enterprise Backup utility, but it is also possible to perform a manual backup. See Appendix B,Oracle VM Manager MySQL Backup and Restore for more information on Oracle VM Manager MySQLdatabase backup and restore facilities.
Important
If you are using an Oracle Database for Oracle VM Manager it is imperative thatyou ensure that there is a regular backup strategy in place for the database. WhileOracle VM Manager is able to automate backups for a locally hosted MySQLdatabase, it is unable to handle backups for an externally hosted Oracle Database.Without an adequate backup of the database, it is very unlikely that you will be ableto restore your environment cleanly in the event of database corruption or failure.
4.13 Restoring Oracle VM Manager
To restore Oracle VM Manager, and the Oracle VM Manager database schema from a backup, youmust have performed the steps to back up Oracle VM Manager in Section 4.12, “Backing Up Oracle VMManager”.
To restore Oracle VM Manager from a backup:
1. First, if you need to reinstall or upgrade Oracle VM Manager, use the Oracle VM Manager installationmedia to perform an install or upgrade of the software on your server. See Section 4.4, “InstallingOracle VM Manager” for information on how to perform the installation. See Section 5.2, “UpgradingOracle VM Manager” for information on how to perform the upgrade.
You should perform the install using the runInstaller.sh --uuid uuid option and provide theUUID from the previous manager installation you created a backup from. The UUID can be found in theOracle VM Manager configuration file.
Note
The Oracle VM Manager UUID is also persisted in the /etc/sysconfig/ovmm file. If the system disk of the server on which you are installing or restoringOracle VM Manager was not wiped entirely, the existing UUID is still presentand will be detected when running the installer.
• The --uuid option overrides this existing UUID.
• If no UUID is present in /etc/sysconfig/ovmm, the --uuid option addsthe UUID to the file.
The install command syntax is as shown in this example:
# ./runInstaller.sh --uuid 0004FB000000100002CB7F2DFFA8D8
When the Oracle VM Manager installer prompts for installation information other than passwords, reusethe same usernames for the Database schema, Oracle WebLogic Server and Oracle VM Manageradministration user, as set out in the backup of the Oracle VM Manager configuration file. You must setthe passwords again as the passwords are not backed up and cannot be restored.
2. After installation, reinstallation or upgrade, stop Oracle VM Manager and the database before yourestore the backup

Uninstalling Oracle VM Manager
67
# /sbin/service ovmm stop# /sbin/service ovmm_mysql stop
3. Restore the Oracle VM Manager OVS database schema. If you are using an Oracle Database, followyour usual database restoration procedure. If you are using the bundled MySQL database providedwith Oracle VM Manager, refer to Appendix B, Oracle VM Manager MySQL Backup and Restore formore information on Oracle VM Manager MySQL database backup and restore facilities.
4. Restart the database and Oracle VM Manager:
# /sbin/service ovmm_mysql start# /sbin/service ovmm start
5. Within Oracle VM Manager go to the Servers and VMs tab and perform a Refresh All on your existingserver pools. See Oracle VM User's Guide for more information.
4.14 Uninstalling Oracle VM Manager
Before uninstalling Oracle VM Manager, you may want to back up Oracle VM Manager and the Oracle VMManager database schema. For information on how to back up Oracle VM Manager, see Section 4.12,“Backing Up Oracle VM Manager”.
You perform the uninstall using the Oracle VM Manager installation script. You must start the installer fromthe installation media; you cannot perform an uninstall without the installation media as there is no installerlocated on the Oracle VM Manager host computer. See Section 4.4.2, “Running the Oracle VM ManagerInstaller” for information on starting the installer. Follow the prompts to uninstall Oracle VM Manager.See Appendix A, Oracle VM Manager Installation Script (runInstaller) at the end of this chapter for the fullsyntax to the installation script.
An example follows which shows an uninstall of a default Oracle VM Manager installation using a localMySQL database. Before you uninstall Oracle VM Manager, make sure it is shut down:
# service ovmm stop# service ovmmcli stop
Example 4.5 Uninstall Oracle VM Manager
# ./runInstaller.sh
Oracle VM Manager Release 3.x.x Installer Oracle VM Manager Installer log file: /tmp/filename.log Please select an installation type:1: Simple (includes database if necessary)2: Custom (using existing Oracle database)3: Uninstall4: Help Select Number (1-4): 3
The uninstallation process starts, and the following is displayed:
Uninstall Oracle VM Manager
Uninstall Oracle VM Manager
DB component : MySQL 5.5 rpm
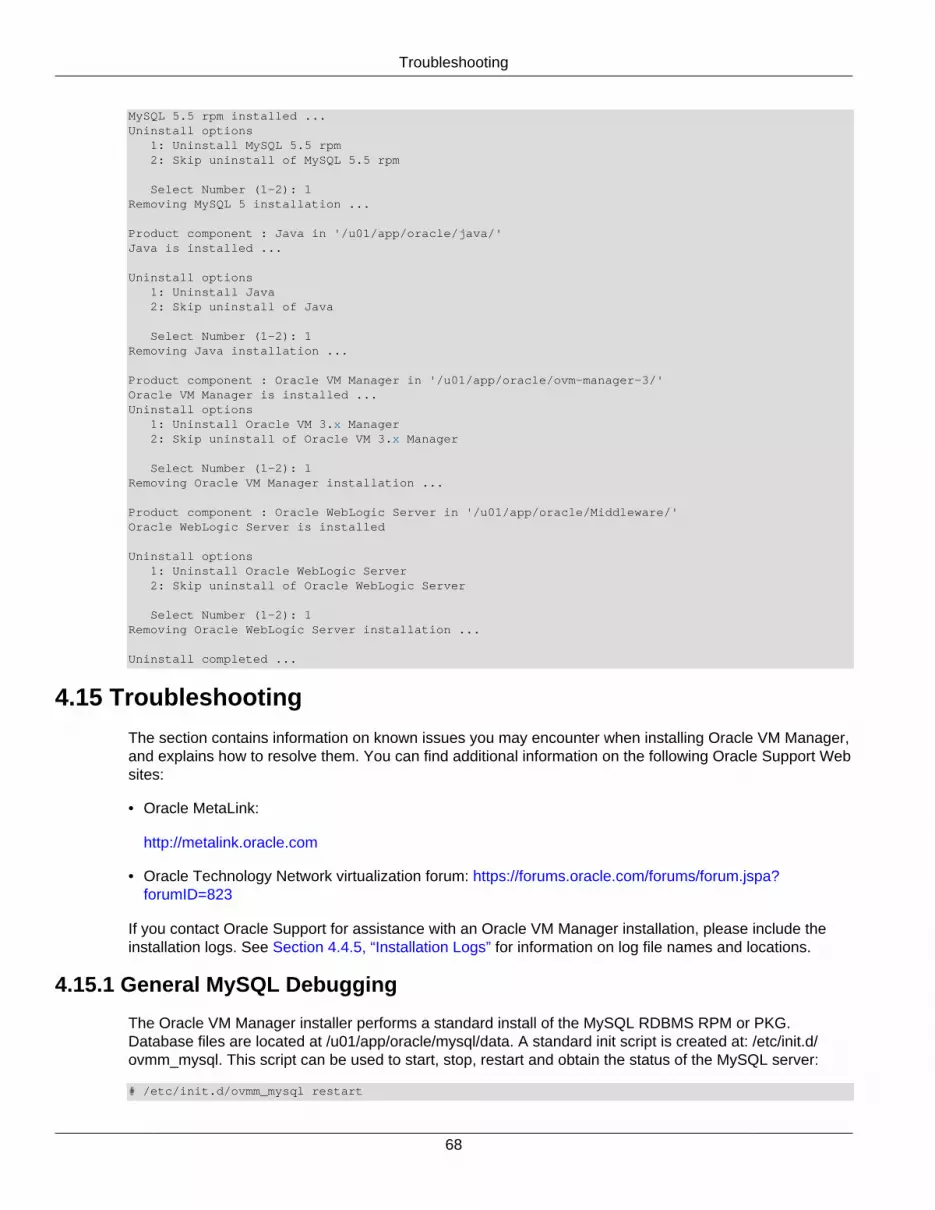
Troubleshooting
68
MySQL 5.5 rpm installed ...Uninstall options 1: Uninstall MySQL 5.5 rpm 2: Skip uninstall of MySQL 5.5 rpm
Select Number (1-2): 1Removing MySQL 5 installation ...
Product component : Java in '/u01/app/oracle/java/'Java is installed ...
Uninstall options 1: Uninstall Java 2: Skip uninstall of Java
Select Number (1-2): 1Removing Java installation ...
Product component : Oracle VM Manager in '/u01/app/oracle/ovm-manager-3/'Oracle VM Manager is installed ...Uninstall options 1: Uninstall Oracle VM 3.x Manager 2: Skip uninstall of Oracle VM 3.x Manager
Select Number (1-2): 1Removing Oracle VM Manager installation ...
Product component : Oracle WebLogic Server in '/u01/app/oracle/Middleware/'Oracle WebLogic Server is installed
Uninstall options 1: Uninstall Oracle WebLogic Server 2: Skip uninstall of Oracle WebLogic Server
Select Number (1-2): 1Removing Oracle WebLogic Server installation ...
Uninstall completed ...
4.15 Troubleshooting
The section contains information on known issues you may encounter when installing Oracle VM Manager,and explains how to resolve them. You can find additional information on the following Oracle Support Websites:
• Oracle MetaLink:
http://metalink.oracle.com
• Oracle Technology Network virtualization forum: https://forums.oracle.com/forums/forum.jspa?forumID=823
If you contact Oracle Support for assistance with an Oracle VM Manager installation, please include theinstallation logs. See Section 4.4.5, “Installation Logs” for information on log file names and locations.
4.15.1 General MySQL Debugging
The Oracle VM Manager installer performs a standard install of the MySQL RDBMS RPM or PKG.Database files are located at /u01/app/oracle/mysql/data. A standard init script is created at: /etc/init.d/ovmm_mysql. This script can be used to start, stop, restart and obtain the status of the MySQL server:
# /etc/init.d/ovmm_mysql restart

libaio Not Installed
69
Configuration for the OVMM MySQL instance is contained in /u01/app/oracle/mysql/data/my.cnf. Editingthis file may break your Oracle VM Manager installation. Do not edit it without instruction from a supportrepresentative.
MySQL events are logged in a log file located at /u01/app/oracle/mysql/data/mysqld.err
4.15.2 libaio Not Installed
The following error is displayed during installation if the prerequisite libaio package is not installed:
libaio is not installed...
Workaround: Install the libaio package. For information on how to install libaio, see Section 4.3.2.5,“Prerequisite Packages”.
4.15.3 Cannot Install MySQL
The Oracle VM Manager installer may fail to install MySQL and displays the message:
Failed: The database instance is not available.
You can check the log file at /tmp/ovmm-installer.selfextract_id/ovm-manager-3-install-date.log for moredetailed information.
Workaround: There are two workarounds to this issue.
a. Make sure that MySQL is not installed, or has installed correctly. Use the following command to checkthe status:
$ /etc/init.d/ovmm_mysql status
If MySQL is running, run the Oracle VM Manager installation script to uninstall it, and reinstall OracleVM Manager.
b. Make sure the computer's host name matches the host name in the /etc/hosts file. See Section 4.3.2.2,“Network” to configure the host name.
4.15.4 Cannot Create OVS Database Schema
You may encounter the following message:
Creating the Oracle VM Manager database schema ... Failed.
You can check the log file at /tmp/ovmm-installer.selfextract_id/ovm-manager-3-install-date.log for moredetailed information.
Workaround: Possible workarounds for this issue are:
a. Make sure that MySQL has installed correctly. Use the following command to check the status:
$ /etc/init.d/ovmm_mysql status
If MySQL is running, run the Oracle VM Manager installation script to uninstall it, and reinstall OracleVM Manager.
b. If you are installing into an existing Oracle database, make sure that you have entered the correctpassword for the SYS account.
c. Reinstall Oracle VM Manager.

Oracle Database Schema Exists
70
4.15.5 Oracle Database Schema Exists
If the installer fails after creating the Oracle Database OVS schema, but before the end of the installationprocess is complete, you may end up with a schema that cannot be overwritten when you attempt toperform the install again. To resolve this issue, you should drop the OVS schema, then continue with thereinstall again when you have resolved the install problem.
To drop the OVS schema, log into the Oracle Database as the sys or system user and perform thefollowing steps:
$ sqlplus system/passwordSQL> drop user OVS cascade;SQL> drop profile OVMM_PROFILE cascade;SQL> exit;
The schema name used in this example uses the default schema name, OVS. If you used a customschema name during the installation, you should replace OVS with the name of your schema. The name ofyour schema is located in the Oracle VM Manager configuration file located at:
/u01/app/oracle/ovm-manager-3/.config
If you are performing a Simple install using a MySQL database, uninstall and reinstall Oracle VM Manager.
4.15.6 Installation Fails on Non-English Character Set
If the operating system is a non-English character set or language, the Oracle VM Manager installer maydisplay the following error:
Update default password failed.
Oracle VM Manager only supports the English language and character set.
You can check the log file at /tmp/ovmm-installer.selfextract_id/ovm-manager-3-install-date.log for moredetailed information.
Workaround: Set the character set to en_US.UTF-8:
1. Run the following command to check if the value of LANG is en_US.UTF-8:
# env|grep LANG
2. If the character set is not en_US.UTF-8, change it to en_US.UTF-8:
# export LC_CTYPE="en_US.UTF-8"
3. Reinstall Oracle VM Manager.
4.15.7 Installation Fails When Using an NIS-based oracle User Account
If the oracle user account is created using NIS-based authentication (Network Information Services), theOracle VM Manager installation fails during the prerequisite check, and the following error is displayed:
Verifying installation prerequisites ...hardnofiles should be set to 8192 but was 0Configuration verification failed ...
Or the installation may pass prerequisite check, but may fail later during the installation of the ApplicationDevelopment Framework:

Installation Fails When Using an NIS-based oracle User Account
71
Retrieving Oracle Application Development Framework (ADF) ...Unzipping Oracle ADF ...Installing Oracle ADF ...Installing Oracle ADF Patch...
To workaround this issue, disable ypbind service and create a non-NIS-based oracle user account usingcreateOracle.sh on the host computer and rerun the installer:
# /sbin/service ypbind stop# service ypbind statusypbind is stopped# ./createOracle.sh# ./runInstaller.sh

72

73
Chapter 5 Upgrading Oracle VM
Table of Contents5.1 Upgrading Overview ................................................................................................................... 735.2 Upgrading Oracle VM Manager ................................................................................................... 74
5.2.1 Post-upgrade Steps ......................................................................................................... 765.3 Upgrading Oracle VM Server for x86 ........................................................................................... 77
5.3.1 Upgrading Oracle VM Server Using a Yum Repository ....................................................... 775.3.2 Upgrading Oracle VM Server Using the CD ...................................................................... 775.3.3 Upgrading Oracle VM Server Using Multipath SANs .......................................................... 80
Oracle VM Release 3.x is not backwardly compatible with Oracle VM Release 2.x. If you are using OracleVM Release 2.x you cannot upgrade to Release 3.x. You must reinstall your Oracle VM Servers andOracle VM Manager. You can, however, reuse your virtual machine templates from Oracle VM Release 2.xby importing them into Oracle VM 3.x.
For information on repository migration from Oracle VM Release 2 to Oracle VM Release 3, see theMy Oracle Support website at: https://support.oracle.com/oip/faces/secure/km/DocumentDisplay.jspx?id=1366216.1
There is no provision for upgrading releases where an Oracle Database XE has been used as a backendrepository for Oracle VM Manager. Oracle VM Manager no longer supports Oracle Database XE as abackend repository and there is no way to migrate to the new MySQL database backend supported inOracle VM 3.2. If you are willing to migrate your Oracle Database XE to a supported Oracle Database suchas Oracle Database SE or Oracle Database EE, you will be able to perform an upgrade using the Custominstallation process.
The upgrade procedures discussed in this chapter refer to upgrades between Oracle VM 3.x releases, forexample, upgrading from Oracle VM Release 3.0.1 to 3.0.3, or from Release 3.0.3 to 3.1.1 This chapteroutlines the upgrade process for all the components of Oracle VM when upgrading to minimize down timeand make sure the upgrade process is performed in the correct order.
Note
Generally, there is no need to perform incremental upgrades between releases; thatis, you can skip releases as long as you upgrade from Oracle VM 3.x to 3.x. Forexample, you can upgrade from Release 3.0.2 to 3.1.1. The exception to this is ifyou are running Oracle VM Release 3.0.1, where you must first upgrade to Release3.0.2 or 3.0.3 before upgrading to Release 3.2. Upgrades from Release 3.0.3 toRelease 3.2 and from Release 3.1.1 to Release 3.2 have been successfully testedand are fully supported.
5.1 Upgrading Overview
When upgrading Oracle VM, you must upgrade Oracle VM Manager first, then upgrade the Oracle VMServers managed by Oracle VM Manager. The Oracle VM Manager upgrade is performed with the OracleVM Manager ISO file/CD or with the patch zip file. The Oracle VM Server upgrade can be performedusing either the Oracle VM Server CD, or using Oracle VM Manager from a Yum repository (which youmust create) that retrieves the Oracle VM Server updates from the Unbreakable Linux Network (ULN). Toaccess ULN, you need an Oracle Support contract.

Upgrading Oracle VM Manager
74
Before you begin the Oracle VM Manager upgrade, download the Oracle VM Manager software from theOracle Software Delivery Cloud at:
http://edelivery.oracle.com/oraclevm
If you want to use the Oracle VM Server CD upgrade method, also download the Oracle VM Serversoftware from the Oracle Software Delivery Cloud:
If you have an Oracle Support contract, you can also download Oracle VM Manager patch updates fromthe My Oracle Support web site at:
https://support.oracle.com
The process you should follow when upgrading Oracle VM is described in a high level view below. Moredetailed information is available in the sections that follow.
To upgrade Oracle VM:
1. Download the Oracle VM software.
2. To upgrade Oracle VM Manager:
a. If you downloaded the Oracle VM Manager ISO file from the Oracle Software Delivery Cloud,mount the Oracle VM Manager ISO file or burn and load the CD on the Oracle VM Manager hostcomputer. If you downloaded an Oracle VM Manager patch file from My Oracle Support, extract thezip file to a directory on the Oracle VM Manager host computer.
b. On the Oracle VM Manager host computer, run the runUpgrader.sh script from the mounted OracleVM Manager ISO file/CD or directory to upgrade Oracle VM Manager.
3. To upgrade Oracle VM Server, either:
• Set up a Yum repository which retrieves updates from the Oracle VM 3.x channel on ULN. Then,from Oracle VM Manager: add the Yum repository, place each Oracle VM Server into maintenancemode and update each Oracle VM Server. When the update is complete, take each Oracle VMServer out of maintenance mode. This is the preferred method of upgrading Oracle VM Servers.
• Burn the Oracle VM Server ISO file to a bootable CD. Upgrade each Oracle VM Server using theOracle VM Server CD.
The following sections discuss these steps in more detail.
Caution
When Oracle VM Manager is upgraded, you must upgrade all the Oracle VMServers managed by that instance of Oracle VM Manager before you can returnthe Oracle VM environment to normal operation. Rolling upgrades of the OracleVM Servers is supported, but Oracle VM Manager and all Oracle VM Servers mustbe at the same software revision level during normal operation of the Oracle VMenvironment, for example, Oracle VM Manager and all Oracle VM Servers shouldbe running Oracle VM Release 3.2.
5.2 Upgrading Oracle VM Manager
Before you upgrade Oracle VM Manager, you should back up the Oracle VM Manager repository andconfiguration file. See Section 4.12, “Backing Up Oracle VM Manager” for information on backing upOracle VM Manager.

Upgrading Oracle VM Manager
75
The upgrade script is designed to skip the database upgrade for the same revision of Oracle VM Manager,for example when upgrading from 3.2.1.100 to 3.2.1.250. If a database upgrade is needed for the samerevision you can force an upgrade by passing an argument to the upgrade script:
# ./runUpgrader.sh --dbupgrade
If no argument is passed the script does not upgrade the database for the same product version. When thedatabase is not being upgraded, the script prints the message: "Skipping database upgrade for the sameproduct version (3.2.x to 3.2.x)".
To see the upgrade script usage, enter:
# ./runUpgrader.sh --help
Note
You may be asked for a password during the upgrade procedure, in which caseyou should enter the password you set for that component during the originalinstallation.
A log of the upgrade is available in the /temp/ovm-manager-3-upgrade-date_id.log file.
To upgrade Oracle VM Manager:
1. Log in to the Oracle VM Manager host computer as the root user.
2. Oracle VM Manager must be running to perform the upgrade. If Oracle VM Manager is not running,start it:
# service ovmm start
3. If you downloaded the Oracle VM Manager ISO file from the Oracle Software Delivery Cloud, mountthe Oracle VM Manager ISO file. This example uses the ISO file and mounts it to a directory namedOVMCD.
# mount -o loop OracleVM-Manager-3.x.x.iso /OVMCD
Tip
Instead of downloading the full Oracle VM Manager installer, you can alsochoose the upgrade ISO file. The procedure is the same as for the installer ISOfile, but the download size of the upgrade is much smaller.
Alternatively you can burn the ISO file to a CD or DVD and load the DVD on the Oracle VM Managerhost computer. If you downloaded an Oracle VM Manager patch file from My Oracle Support, extractthe zip file contents to a directory on the Oracle VM Manager host computer and use that directory forfurther installation instructions.
4. Start the Oracle VM Manager upgrade script:
# cd /OVMCD# ./runUpgrader.sh
The upgrade starts and reminds you to back up Oracle VM Manager.
Oracle VM Manager 3.x.x.xx upgrade utilityUpgrade logfile : /tmp/ovm-manager-3-upgrade-date-id.log It is highly recommended to do a full database repository backup prior to upgrading Oracle VM Manager ...

Post-upgrade Steps
76
Press any key to continue ...
Press Enter to continue with the upgrade.
Oracle VM Manager is running ...Verifying installation status ...Read Oracle VM Manager config file ...Skipping database upgrade for the same product version (3.x.x to 3.x.x)Found Oracle VM Manager install files ...Found Oracle VM Manager upgrader ...Found Oracle WebLogic Server ...Found Java ...Using the following information : Database Type : type Database Host : hostname Database SID : SID Database LSNR : port Oracle VM Schema : ovs Oracle VM Manager UUID : UUID Current Build ID : 3.x.x.xx Upgrade from version : 3.x.x Upgrade to version : 3.x.xUsing /tmp/directory for backup and export location.Using /tmp/directory for patching.Undeploying previous version of Oracle VM Manager application ...Undeploying Oracle VM Manager help ...Undeploying Oracle VM Manager console ...Undeploying Oracle VM Manager core ...Waiting for Oracle VM Manager core to fully undeploy...Waiting...Finished undeploying previous version ...Upgrading Oracle VM Manager ...Backing up old files to /tmp/directoryRemoving old files ...Unpacking Oracle VM Manager 3.x.x.xxRedeploying Oracle VM Manager core container ...Redeploying Oracle VM Manager console ...Redeploying Oracle VM Manager help ...Completed upgrade to 3.x.x.xx ...Writing updated config in /u01/app/oracle/ovm-manager-3/.configRestart WebLogic ...Stopping Oracle VM Manager [ OK ]Starting Oracle VM Manager [ OK ]
Starting with Oracle VM Manager Release 3.2, HTTPS is required to connect to the Manager.Please adjust your URL and firewall settings accordingly.For example: In Release 3.1 your URL may have looked like: http://<managementsystem>:7001/ovm/console In Release 3.2 your new URL should look like: https://<managementsystem>:7002/ovm/consolePlease change your firewall settings to allow traffic through port 7002 to the management system.
Oracle VM Manager upgrade finished on date
The Oracle VM Manager upgrade is complete.
5.2.1 Post-upgrade Steps
After you have finished an upgrade of Oracle VM Manager from a previous release, it is highlyrecommended that you run the following commands on the server where Oracle VM Manager is installed:
# cd /u01/app/oracle/ovm-manager-3/weblogic# sh configureIdentityTrust.sh# service ovmm stop# service ovmm start

Upgrading Oracle VM Server for x86
77
These instructions will update your SSL certificates to enable HTTPS connectivity to Oracle VM Managerfor Microsoft Internet Explorer 7, 8 and 9. Note that it is important that Internet Explorer has been updatedwith the latest security update described at http://support.microsoft.com/kb/2661254.
For more information about updating your SSL certificates, please see Section 4.8, “Adding a Trusted CACertificate and Keystore for SSL Encryption”.
5.3 Upgrading Oracle VM Server for x86
Before you upgrade your Oracle VM Servers, you must upgrade the Oracle VM Manager which managesthem. See Section 5.2, “Upgrading Oracle VM Manager” for information on upgrading Oracle VM Manager.
There are two methods you can use to upgrade Oracle VM Servers:
• Section 5.3.1, “Upgrading Oracle VM Server Using a Yum Repository”
• Section 5.3.2, “Upgrading Oracle VM Server Using the CD”
Warning
There are two supported ways to upgrade: you must use either Oracle VM Managerto perform an Oracle VM Server upgrade from a Yum repository, or the Oracle VMServer CD.
5.3.1 Upgrading Oracle VM Server Using a Yum Repository
This section directs you to the location in the Oracle VM documentation which discusses upgrading theOracle VM Servers in your Oracle VM Release 3.x environment using a Yum Repository. This is thepreferred method for upgrading Oracle VM Servers.
To upgrade Oracle VM Server using a Yum repository, you must first set up a Yum repository based onthe Oracle VM Release 3.x channel on ULN. When you have created the Yum repository, add the Yumrepository to Oracle VM Manager. You then use Oracle VM Manager to perform the upgrades on theOracle VM Servers. For information on setting up an Oracle VM Server Yum repository and using OracleVM Manager to perform the upgrade of Oracle VM Servers, see Updating and Upgrading Oracle VMServers in the Oracle VM User's Guide.
5.3.2 Upgrading Oracle VM Server Using the CD
To upgrade the Oracle VM Server using the Oracle VM Server CD:
1. Burn the Oracle VM Server ISO file to a bootable CD.
2. Start the Oracle VM Server installer by following the steps in Section 2.2, “Installing Oracle VM ServerFrom a CD”.
3. If an existing Oracle VM Server installation is found on the computer, the System to Upgrade screen isdisplayed.

Upgrading Oracle VM Server Using the CD
78
Select Oracle VM Server 3.x (disk) to upgrade the existing installation.
Select OK and press Enter.
4. The Upgrade Boot Loader Configuration screen is displayed.
Select Update boot loader configuration to update the existing boot loader. Select Skip boot loaderupdating to make no changes to the boot loader. Select Create new boot loader configuration tocreate a new boot loader.
Select OK and press Enter.
If you selected Create new boot loader configuration, the Boot Loader Configuration screen isdisplayed.
The Boot Loader Configuration screen is displayed.

Upgrading Oracle VM Server Using the CD
79
If you want to set a boot loader password to increase security of your machine, select Use a GRUBPassword, enter a password in the Boot Loader Password field, and re-enter the password in theConfirm field.
Warning
Do not use boot loader passwords if Distributed Power Management (DPM)is used. A boot loader password has to be entered manually with every boot,which prevents DPM from starting a server successfully. For more informationabout DPM, see Server Pool Policies in the Oracle VM User's Guide
Select OK and press Enter.
The Boot Loader Configuration screen is displayed.
Select Master Boot Record (MBR) or First sector of boot partition as the location to install the bootloader. If you want to change the drive order, select Change drive order and follow the prompts tochange the drive order.
Select OK and press Enter.

Upgrading Oracle VM Server Using Multipath SANs
80
5. The Upgrade to begin screen is displayed.
Select OK and press Enter. The installer installs and configures Oracle VM.
6. When all files are installed and configuration complete, the Complete screen is displayed.
If you performed the upgrade from the CDROM drive, remove the Oracle VM CDROM.
Select Reboot and press Enter. The computer reboots.
The Oracle VM console is displayed.
The Oracle VM Server upgrade is complete.
Note
A log of the install is located in /root/upgrade.log. If the installation fails, review thislog file for help identify the cause of any installation problems.
5.3.3 Upgrading Oracle VM Server Using Multipath SANs

Upgrading Oracle VM Server Using Multipath SANs
81
Upgrading Oracle VM Server from Release 3.0.3 or 3.1.1 to Release 3.2 using the CD or a YUM repositoryin a multipath boot from SAN environment is not supported. If this type of upgrade is attempted the OracleVM Server panics after a reboot. You can, however, upgrade Oracle VM Server using a YUM repository ina single path (no multipath) boot from SAN environment.
To upgrade Oracle VM Server from Release 3.0.3 or 3.1.1 to Release 3.2 using multipath boot from SAN,follow which ever instructions below apply to your configuration.
For more information on configuring multipath SANs, see Enabling Multipath I/O Support.
To upgrade Oracle VM Server with multiple paths:
1. Revert the Oracle VM Server to use single path SAN boot by removing all disk paths, leaving only onepath visible to the Oracle VM Server.
2. Update the Oracle VM Server grub.conf file to use the no multipath support initrd.
3. Add the boot disk wwid to /etc/blacklisted.wwids, for example:
wwid "3600805f3000dd9c0000000006745005b"
4. Restart the Oracle VM Server. Make sure the Oracle VM Server boots and mounts over the single pathSAN disk, for example, sdX 3.
5. Now the Oracle VM Server is configured to boot from a single path SAN, follow the steps in the nextprocedure to upgrade the Oracle VM Server and reconfigure multiple paths.
To upgrade Oracle VM Server with a single path:
1. Upgrade Oracle VM Server using a YUM repository. See Section 5.3.1, “Upgrading Oracle VM ServerUsing a Yum Repository” for information on upgrading using a YUM repository. Alternatively use a CDto perform the Oracle VM Server upgrade. See Section 5.3.2, “Upgrading Oracle VM Server Using theCD” for more information on upgrading using a CD.
2. Delete the /etc/multipath/bindings file if it exists.
3. Run mkinitrd to include multipath, for example:
# mkinitrd --add-multipath -f /boot/initrd-2.6.39-200.0.13.el5uek_mp.img 2.6.39-200.0.13.el5uek
4. Edit the /etc/fstab file to make sure the entries refer to the /dev/mapper devices of your boot disk:
#UUID=363ca8da-b927-4ace-9b24-d06edb0dba5c / ext3 defaults 1 1#UUID=d6be5e20-5946-4ca9-aa88-2e7937461b03 /boot ext3 defaults 1 2/dev/mapper/360060160d3102200dcd34d042424e111p2 / ext3 defaults 1 1/dev/mapper/360060160d3102200dcd34d042424e111p1 /boot ext3 defaults 1 2/dev/mapper/360060160d3102200dcd34d042424e111p3 swap swap defaults 0 0
Note
If you do not know the /dev/mapper device of your boot disk, save the WWIDfrom the /etc/blacklisted.wwids file.
5. Remove the boot disk entry from the /etc/blacklisted.wwids file.
6. Edit the grub.conf file to boot the multipath initrd-xxxx_mp.img.
7. Add additional disk paths.
8. Restart the Oracle VM Server. The upgrade is completed.

82
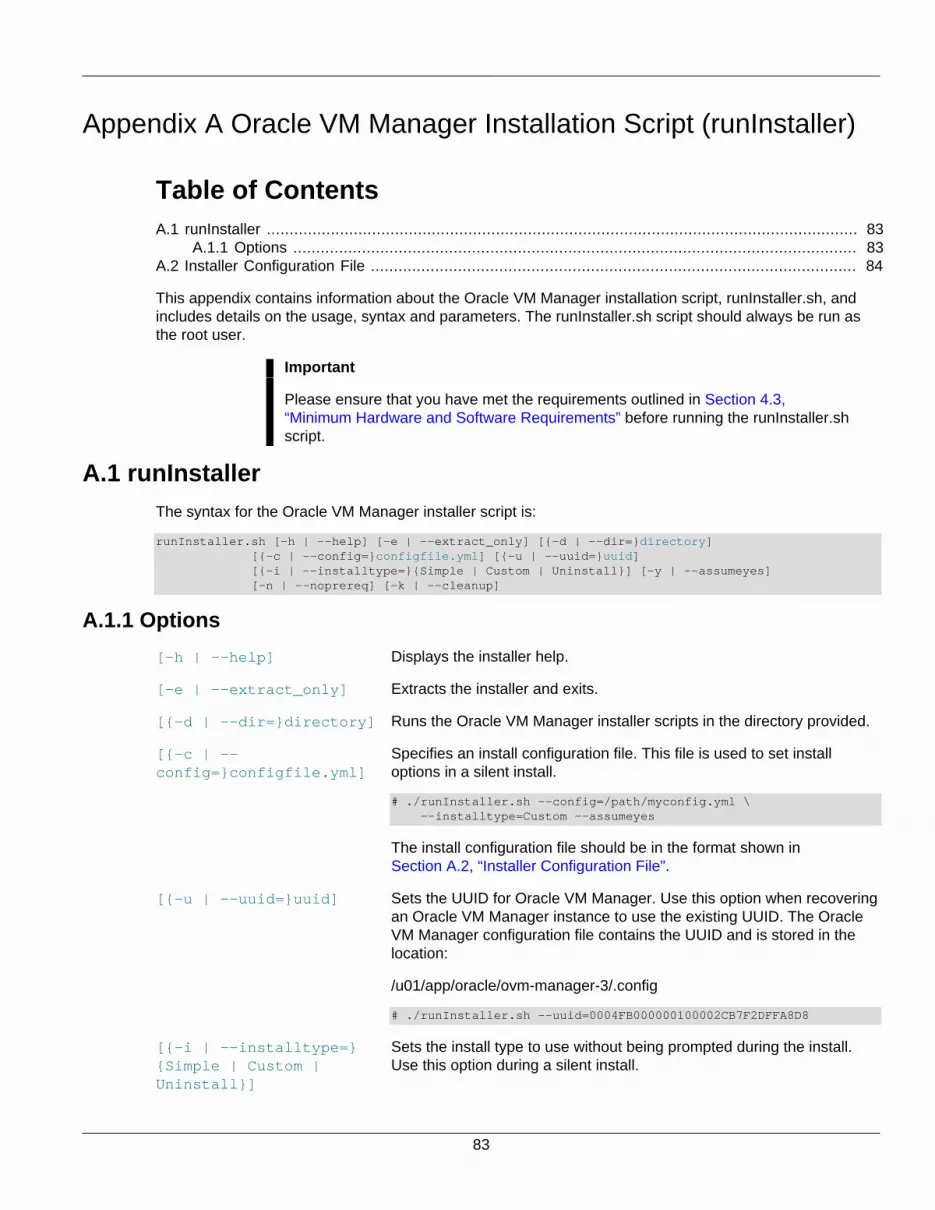
83
Appendix A Oracle VM Manager Installation Script (runInstaller)
Table of ContentsA.1 runInstaller ................................................................................................................................. 83
A.1.1 Options ........................................................................................................................... 83A.2 Installer Configuration File .......................................................................................................... 84
This appendix contains information about the Oracle VM Manager installation script, runInstaller.sh, andincludes details on the usage, syntax and parameters. The runInstaller.sh script should always be run asthe root user.
Important
Please ensure that you have met the requirements outlined in Section 4.3,“Minimum Hardware and Software Requirements” before running the runInstaller.shscript.
A.1 runInstallerThe syntax for the Oracle VM Manager installer script is:
runInstaller.sh [-h | --help] [-e | --extract_only] [{-d | --dir=}directory] [{-c | --config=}configfile.yml] [{-u | --uuid=}uuid] [{-i | --installtype=}{Simple | Custom | Uninstall}] [-y | --assumeyes] [-n | --noprereq] [-k | --cleanup]
A.1.1 Options
[-h | --help] Displays the installer help.
[-e | --extract_only] Extracts the installer and exits.
[{-d | --dir=}directory] Runs the Oracle VM Manager installer scripts in the directory provided.
[{-c | --config=}configfile.yml]
Specifies an install configuration file. This file is used to set installoptions in a silent install.
# ./runInstaller.sh --config=/path/myconfig.yml \ --installtype=Custom --assumeyes
The install configuration file should be in the format shown inSection A.2, “Installer Configuration File”.
[{-u | --uuid=}uuid] Sets the UUID for Oracle VM Manager. Use this option when recoveringan Oracle VM Manager instance to use the existing UUID. The OracleVM Manager configuration file contains the UUID and is stored in thelocation:
/u01/app/oracle/ovm-manager-3/.config
# ./runInstaller.sh --uuid=0004FB000000100002CB7F2DFFA8D8
[{-i | --installtype=}{Simple | Custom |Uninstall}]
Sets the install type to use without being prompted during the install.Use this option during a silent install.

Installer Configuration File
84
# ./runInstaller.sh --config=/path/myconfig.yml \ --installtype=Custom --assumeyes
[-y | --assumeyes] Sets each prompt during the install to respond as yes. If combined withthe --installtype=Simple option, performs a silent install with thedefault settings, using a new locally installed MySQL database.
# ./runInstaller.sh --assumeyes --installtype=Simple
[-n | --noprereq] Sets the installer to ignore all prerequisite system checks such asmemory or operating system requirements.
# ./runInstaller.sh --noprereq
[-k | --cleanup] Cleans up all temporary installation configuration files after the installcompletes.
# ./runInstaller.sh --cleanup
A.2 Installer Configuration File
This section describes the configuration file you can use during an Oracle VM Manager installation toperform a silent installation. You should use spaces and not tabs when formatting this configuration file.This is because the configuration file is written in YAML and tabs are treated differently across editors. Thenumber of spaces that you use to perform an indent is not important, only that you are consistent in yourindentation. To use the configuration file, enter:
# ./runInstaller.sh --config=/path/myconfig.yml --installtype=Custom --assumeyes
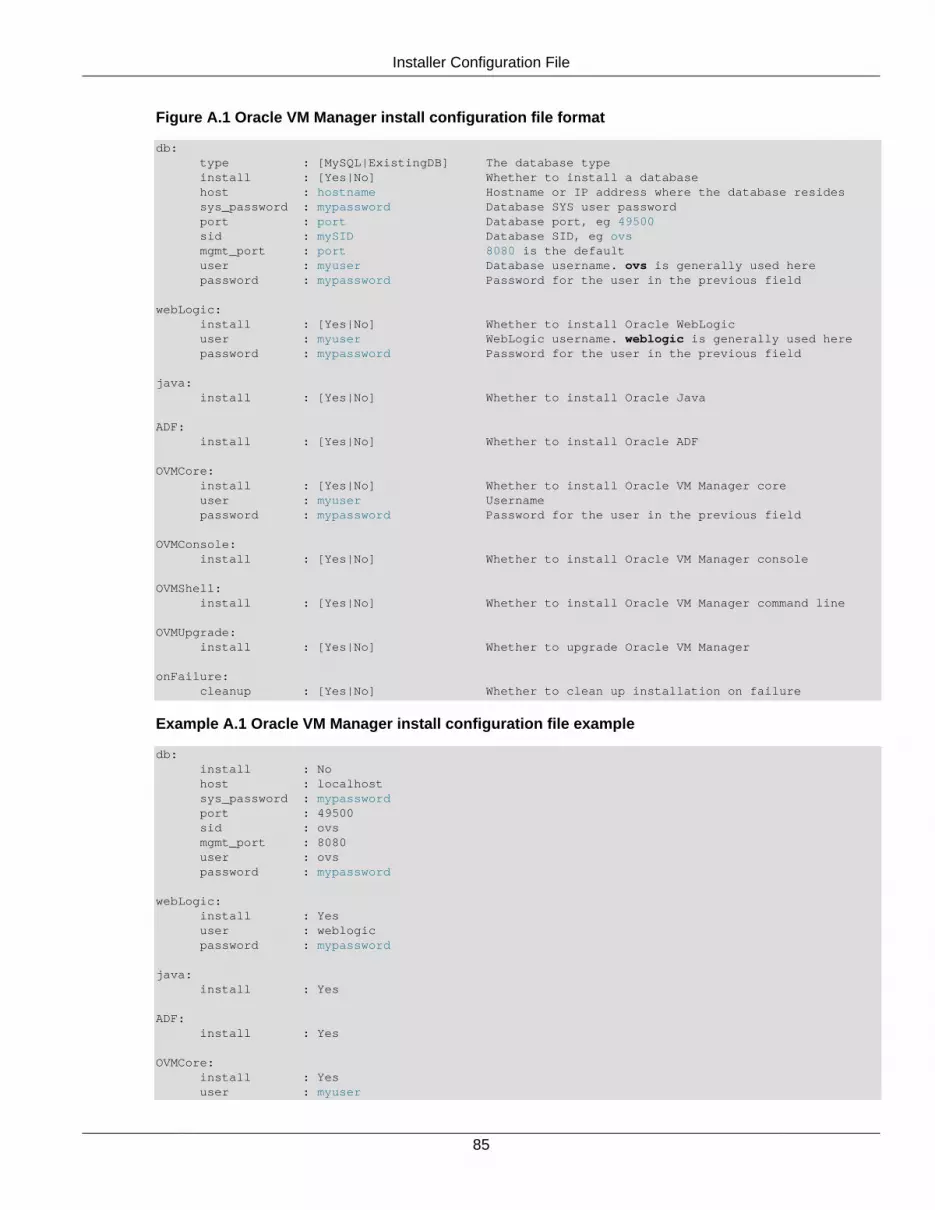
Installer Configuration File
85
Figure A.1 Oracle VM Manager install configuration file format
db: type : [MySQL|ExistingDB] The database type install : [Yes|No] Whether to install a database host : hostname Hostname or IP address where the database resides sys_password : mypassword Database SYS user password port : port Database port, eg 49500 sid : mySID Database SID, eg ovs mgmt_port : port 8080 is the default user : myuser Database username. ovs is generally used here password : mypassword Password for the user in the previous field webLogic: install : [Yes|No] Whether to install Oracle WebLogic user : myuser WebLogic username. weblogic is generally used here password : mypassword Password for the user in the previous field java: install : [Yes|No] Whether to install Oracle Java ADF: install : [Yes|No] Whether to install Oracle ADF OVMCore: install : [Yes|No] Whether to install Oracle VM Manager core user : myuser Username password : mypassword Password for the user in the previous field OVMConsole: install : [Yes|No] Whether to install Oracle VM Manager console OVMShell: install : [Yes|No] Whether to install Oracle VM Manager command line OVMUpgrade: install : [Yes|No] Whether to upgrade Oracle VM Manager onFailure: cleanup : [Yes|No] Whether to clean up installation on failure
Example A.1 Oracle VM Manager install configuration file example
db: install : No host : localhost sys_password : mypassword port : 49500 sid : ovs mgmt_port : 8080 user : ovs password : mypassword webLogic: install : Yes user : weblogic password : mypassword java: install : Yes ADF: install : Yes OVMCore: install : Yes user : myuser

Installer Configuration File
86
password : mypassword OVMConsole: install : Yes OVMShell: install : Yes OVMUpgrade: install : Yes onFailure: cleanup : No

87
Appendix B Oracle VM Manager MySQL Backup and Restore
Table of ContentsB.1 Oracle VM Manager MySQL Backup ........................................................................................... 87
B.1.1 Backup Directories and Logs ........................................................................................... 87B.1.2 Performing a Backup Manually ......................................................................................... 88
B.2 Restoring the MySQL Database for Oracle VM Manager .............................................................. 88
This appendix contains information about the Oracle VM Manager MySQL Backup facility and the includedRestoreDatabase.sh script. These tools are intended to be used for installations of Oracle VM Managerthat make use of a MySQL database backend.
B.1 Oracle VM Manager MySQL Backup
As of Oracle VM Manager Release 3.2 backups of the local MySQL database is performed automaticallyevery 24 hours. Backups are stored within /u01/app/oracle/mysql/dbbackup by default, and arerotated regularly so that only the 21 most recent backups are stored at any point in time. Backups makeuse of the MySQL Enterprise Backup utility.
The MySQL Enterprise Backup package is installed as a dependency when selecting a Simple installduring the installation of Oracle VM Manager. On Oracle Linux systems this is handled by installingmeb-3.8.0-el6.x86_64.rpm.
The default path for the storage of backups is defined in /etc/sysconfig/ovmm on the Oracle VMManager host, specified in the following line:
DBBACKUP=/u01/app/oracle/mysql/dbbackup
Note
This path can be changed to an alternate location if you need to cater to disk spacerequirements.
The default path for the mysqlbackup binary is also defined in /etc/sysconfig/ovmm on the Oracle VMManager host, specified in the following line:
DBBACKUP_CMD=/opt/mysql/meb-3.8/bin/mysqlbackup
Warning
This path is made explicit for the purposes of handling future updates to the MySQLEnterprise Backup package. It should not be changed.
B.1.1 Backup Directories and Logs
Each backup is stored in a directory within the path defined by DBBACKUP. The backup directoryis named AutoFullBackup-MMDDYYYY_hhmmss. Within the backup directory is a log file, namedAutoBackup.log, containing information about the events that took place during the backup process.The backup directory contains a backup of the MySQL configuration file, a datadir directory containingthe binary log for the database, a meta directory containing files specific to the MySQL Enterprise Backupprocess that was run at the time, and the actual MBI image file for the database that is backed up.

Performing a Backup Manually
88
Only the 21 most recent backups are maintained within the DBBACKUP path. Manual backups, where thebackup directory name is not prepended with AutoFullBackup, are ignored by the rotation.
Currently, it is not possible to change the frequency of automatic backups, or the number of automaticbackups that are retained during a rotation.
B.1.2 Performing a Backup Manually
It is possible to initiate a backup manually. This is usually done when performing an upgrade of Oracle VMManager. While it is possible to invoke the mysqlbackup utility directly, it is recommended that you initiatea backup directly from the Oracle VM Manager core. This can be achieved using the provided backupscript at /u01/app/oracle/ovm-manager-3/bin/createBackup.sh script:
# /u01/app/oracle/ovm-manager-3/bin/createBackup.sh
Backing up the Oracle VM Manager MySQL Database...
Please enter the Oracle VM manager user name: admin
Please enter the Oracle VM manager user password:
INFO: Succesfully backed up database as AutoFullBackup-20121112_111840
By default, the backup script will store the backup as an automatic backup, which will be subject to thesame rotation rules as any other automatic backup. This means that your manual backup will be storedfor 21 backup events, before it is removed automatically. It is possible to store a backup with an alternatename to avoid rotation. This can be achieved by using the -n switch along with the a specified backupname:
# /u01/app/oracle/ovm-manager-3/bin/createBackup.sh -n ManualBackup1
For more information on using MySQL Enterprise Backup, please refer to http://dev.mysql.com/doc/mysql-enterprise-backup/en.
B.2 Restoring the MySQL Database for Oracle VM Manager
To restore the database to one of the available backups, the manager and the database need to shutdown,for example as the root user execute the following commands:
# service ovmm stop; service ovmm_mysql stop
To initiate the restore, as the oracle user, use the RestoreDatabase.sh command located in the /u01/app/oracle/ovm-manager-3/ovm_shell/tools, for example:
# su - oracle$ bash /u01/app/oracle/ovm-manager-3/ovm_shell/tools/RestoreDatabase.sh AutoFullBackup-10222012_162543INFO: Expanding the backup image...INFO: Applying logs to the backup snapshot...INFO: Restoring the backup...INFO: Success - Done!INFO: Log of operations performed is available at: /u01/app/oracle/mysql/dbbackup/AutoFullBackup-10172012_122920/Restore.log IMPORTANT: As 'root', please start the OVM Manager database and application using: service ovmm_mysql start; service ovmm start

Restoring the MySQL Database for Oracle VM Manager
89
The RestoreDatabase.sh script expects the name of the directory for a particular backup directory asdescribed in Section B.1.1, “Backup Directories and Logs”. You do not need to specify the full path to thebackup directory as this is already specified in the DBBACKUP variable.
Once you have restored the database, restart the database and manager as the root user:
# service ovmm_mysql start; service ovmm start
It is important to understand that after restoring from a backup, objects such as servers and repositoriesmust be refreshed within Oracle VM Manager in order to be usable. Use the Refresh All option withinOracle VM Manager to achieve this. See Managing Server Pools and Oracle VM Servers in the Oracle VMUser's Guide for more information on these options.

90

91
Index
Bboot loader
configuration, 78
CCA certificate, 60certificate installation, 60console
install, 55control domain, 25
Ddatabase
Enterprise Edition, 38listener port, 43MySQL, 38Standard Edition, 38
DHCP, 3dom0
memory, 20
Ggateway, 3grub boot loader
configuration, 78
Hhardware
requirements, 40hostname, 43HTTP port, 43
Iinstall
JTA2, 55Oracle VM Agent for SPARC, 25, 28TightVNC, 55
Internet ExplorerSSL certificates, 76
JJTA2
install, 55
Kkeystore, 60
Lldmd, 25
ldmons/agents, 25LDoms
factory default configuration, 27ldomsmanager, 25log
install log, 20Oracle VM Manager install, 56Oracle VM Manager upgrade, 74Oracle VM Server upgrade, 80
log fileOracle VM Agent for SPARC, 35
logging inOracle VM Manager, 57
login, 62
MManagement Server URI, 62memory
dom0, 20multipath
upgrade, 80MySQL, 38, 38
NNetwork Time Protocol, 53NTP, 53
OOracle EE, 38Oracle SE, 38Oracle Solaris
control domain, 25Oracle VM Agent for SPARC, 29
install, 25, 28log file, 35network configuration, 29service, 34software, 27uninstall, 35
Oracle VM Managerchecking status, 58install log, 56restarting, 58starting, 58stopping, 58
Oracle VM Servertime synchronization, 53upgrade, 77upgrade from multipath SAN, 80
Ppassword
Oracle VM Agent, 16

92
primary-vds0, 25
Rremote login, 62requirements
hardware, 3, 25, 40software, 3, 25, 40
runUpgrader script, 74
Ssecurity, 60serial console
install, 55service
Oracle VM Agent for SPARC, 34Service name, 43session
timeout, 63SID, 43software
Oracle VM Agent for SPARC, 27requirements, 40
Solariscontrol domain, 25
SPARCconfiguring Oracle VM Agent, 28LDoms configuration requirements, 27network requirements, 26
SSL Certificates, 76SSL encryption, 60
TTCPS, 62TightVNC
install, 55time synchronization, 53timeout
UI session, 63
UUI
timeout, 63uninstall
Oracle VM Agent for SPARC, 35uninstalling
Oracle VM Manager, 67upgrade
multipath, 80Oracle VM Manager upgrade log, 74Oracle VM Server, 77Oracle VM Server upgrade log, 80
Upgrade, 76upgrade Oracle VM Manager, 74
VVirtual Console Concentrator, 25Virtual Disk Service, 25virtual machine
console, 55serial console, 55
vntsd, 25
YYum repository, 77


