Embed Size (px)
Citation preview

Version Date: 03/01/2018
714 Ashley Ridge Loop Shreveport, Louisiana 71106
(318) 868-8000 (800) 509-7070
[email protected] www.edgear.com
2
Contents Student Counts for the New Year ..................................................................................................................................3 Master Schedule Editor ..................................................................................................................................................3
Add a Section to the Master Schedule .......................................................................................................................5 Change an Existing Section ........................................................................................................................................5 Delete an Existing Section ..........................................................................................................................................5 Init Button: Update Class Counts in the Master Schedule ........................................................................................5 Print an Easy to Read Master Schedule: Teacher Schedule w/ Squares ....................................................................6
Student Schedule Maintenance .....................................................................................................................................6 Schedule Students by Homeroom (Blocks) for Elementary Grades ...............................................................................8
Roll over Blocks to the New Year: ..............................................................................................................................8 Option 1: ....................................................................................................................................................................8 Option 2: ....................................................................................................................................................................9 Creating a New Block .................................................................................................................................................9 Change Block ..............................................................................................................................................................9 Delete Block ...............................................................................................................................................................9 Schedule Students....................................................................................................................................................10 Capability Student Scheduling: Auto Balance classes by Gender, Race, and GPA. .................................................10 Block Changes: Updating Student Schedules to Match ..........................................................................................10 Adding a Single Course to Selected Students ..........................................................................................................10
Print Student Schedules ...............................................................................................................................................11 Making Sure All Students Were Rolled to New Year ...................................................................................................11 Making Sure All Students Have a Schedule ..................................................................................................................12
3
Student Counts for the New Year Often in New Year scheduling, the user needs a count of students for the upcoming year to plan classes for the master schedule. The steps below explain how to get counts for the first day of school by using the MFP/Ethnic Gender/Lunch report. Getting Started
1. On the left navigation panel, go to Student Master, then open the Count group of programs.
2. Under Count, select MFP/Ethnic-Gender/Lunch. How-to
1. At the setup box, set the following:
Year: Set to the next year.
Grades: Set to the desired grade levels for next year.
As of Date: Set to the first day of school.
Click the OK button.
2. A count by grade level for the school will appear. Some of the column headings are explained below:
? - number of students for which the grade cannot determined
MFP - number of students counted towards State Funding purposes
Enroll - number of students enrolled in the school
Adj - number of students adjusted (counted as both pre kind and preschool)
22+ - number of student at age 22 or older
NR – number of students identified as not reported in SIS to state
Total – number of active students
3. Note: If you click on any count cell, the list of students will be displayed. Click the Print button to print the list of students.
4. The tabs at the bottom will break down the totals by Regular Ed, Special Ed, Ethnic and Gender by School, Ethnic and Gender by Grade, Special Codes, and Lunch codes.
5. Click Print to print or save the report
6. Use the count information to identify how many homerooms may be needed for each grade, as well as how many seats are needed for each class period.
Master Schedule Editor The Master Schedule Editor is a program to insert, edit, and remove classes in a master schedule. Getting Started
1. On the left, click on Scheduling
2. Under Entry, select Master Schedule Editor. Setup Options
1. Select the desired "Year", then click OK.
2. Filters button: Click to filter the master schedule by course, course type, specific teacher, etc… Master Schedule Columns and Their Meanings
1. STAFF – Staff Name
2. ID/DEL – Staff Identification Number. Deletion of a course with zero students scheduled and no assignments or assignment grades associated with the section.
3. PD – Class Period
4. COURSE NAME – Course Name
5. GRP – Transcript group from the courses file
6. COMMENTS – Used to Make Comments about the section
4
7. SECT – The section number for the current record. This is a unique number identifying each record in the master schedule.
8. C1,C2,C3,C4 – Class Counts for Semester 1,2,3,4
9. ST CODE – State assigned Code for Courses
10. HONR – Honor codes from the Course Catalog
11. CRED – Credit given to a course in Course Catalog
12. S1,S2,S3,S4 – Semester a course is being taught
13. RM - Room Number/Name or a combination
14. NP – Number of periods a class is taught
15. GD – Grade level of a course
16. DS – Distance learning flag
17. Max – Maximum number of students allowed in a class
18. LKS – Allows you to schedule two or more classes together by assigning the same combination of letters or numbers for all
19. DOW – Days of the week the class taught
20. LUNCH – Lunch break time that occurs during a section
21. SCH – Local school number
22. DIST – Local district number
23. RSCH – School number of the school where class is taught if not the enrolled school
24. RDIS - District number of the school where class is taught if not the enrolled school
25. MREM – Maximum number of students that can be scheduled to a remote class
26. REM – Section is offered to other schools as a Remote section.
27. REC – Record number
28. SE SPC – Special Ed Placement Setting Code – will popup when a sped class is created
29. 12Hr – 12 HR Employee – Denotes the instructor is teaching out of content area but has 12 credit hours in the area of the course.
30. TEAM – Team assignment
31. DOWTITLE – Day of week assigned, if any
32. C HRS – College hours for a Dual Enrollment course.
33. PSEC SITE – Post Secondary site for a Dual Enrollment course.
34. ADD STAFF – Allows you add additional staff and percent of time teaching. Teaching time must add up to be less than 100%
35. CR – Category Required – Select if section assignments must have a category.
36. DP – Difficulty Points – This is a number adjustment to the final grade to enhance the overall section average.
37. GD TYPE – Grade Type override of Sponsor or Course Catalog PPP settings.
38. RSec – Reported Section Number – Send this section number for state reporting.
39. WEIGHT – Course Weight override of Sponsor or Course Catalog PPP settings.
40. FEES – Section’s fee amount Action Button
1. Delete Scheduled Students by Section - allows you to delete a group of students at one time
2. Print Selected Teachers - allows you to print or Save one teacher's sections in a list format Buttons at the Bottom of the Page
1. Setup - returns you to the Set up Box; see instructions above
2. Help – Display help information.
3. Courses - takes you to the Course Catalog
4. Refresh - refreshes the page to show new counts
5. Save New - use only when making a new section using the top blank line
5
6. Print - allows you to print or save the current screen of all teacher's sections in a list format
7. Init: Click for directions. Re-index class counts if needed.
8. Remote: Click for directions on setting up "hosted" and "remote" classes.
9. Delete – Delete selected section(s).
Add a Section to the Master Schedule 1. Click in the top blank cell below the heading "STAFF" above the first teacher
The list will default to TCH. If the employee is a TCH, make your selection. Other choices include ADM, SCH, DIST, VACANT and VOCATIONAL.
VOCATIONAL will provide a list of post-secondary persons whose sites are other than a school in the district.
2. Click in the top blank cell below the heading "PD". Select the period the course will be taught from the pick list then "OK"
3. Click in the top blank cell below the heading "COURSE NAME". Select the Course Name from the Course Selection by scrolling down the list or using the keyboard and clicking
4. Section numbers are automatically generated upon saving the record
5. Click “Save New” at the bottom of the screen
6. “Copy Saved Record” will appear upon clicking save. Change the number of copies to save for that teacher if the class is being taught more than the class period initially being created. Click "OK"
Change an Existing Section Most items in the Master Schedule Editor can be changed simply by clicking on the existing item and clicking on the desired replacement
Note: When changing items in the Master Schedule Editor, warning/verification boxes will appear. Read each box carefully and answer appropriately
Note2: When changing a teacher's name, one of the questions is "Do you wish to replace all of Teacher A's records with Teacher B?". If Teacher B is taking over all of Teacher A's classes, then click "Yes". If only one or some of the classes are being taken over by Teacher B, then click "No"
Delete an Existing Section Note: If there are students in the class, move them to another prior to deletion. The system will not allow deletion of a class if there are students still scheduled to the section.
1. Browse to the row containing the section to be deleted.
2. Next to the staff member's (teacher) name is a column labeled "ID/DEL". Click on the cell with the staff member's ID or you can select the section and click the Delete button at the bottom of the screen.
3. A dialog box asking "Are you sure you wish to delete this record?" will appear.
4. Click "Yes" to delete the class. Click "No" to cancel the deletion.
Init Button: Update Class Counts in the Master Schedule If the counts in the master schedule are off, please do the following to recalculate the seats.
1. In the Master Schedule Editor, click the Init button at the bottom center of the screen.
2. Set the Date to the current date, or the first day of school if school has not started yet.
3. Check the “Realign student schedules to the master schedule”.
4. Click Start Initialization.
5. The process will take about 2 minutes. Afterwards, the class seats will be up to date.
6
Print an Easy to Read Master Schedule: Teacher Schedule w/ Squares To create an easy to read cross tab report of the master schedule, follow the following steps:
1. In the Schedule module, click Lists, then Teacher Schedule w/ Squares.
2. At the setup box, set the current year, grade level(s), and choose semester 1, or any other desired semester.
a. Master Schedule Course Diplay: Typically Course Name is selected.
b. Select Campus Location Taught:
i. On/Off: If selected, courses on and off campus are shown.
ii. On Campus: If selected, only courses on campus are shown.
iii. Off Campus: If selected, only courses off campus are shown.
c. Select Core Groups: Click to select each course type, or click to select only desired course types.
d. Click the OK button.
3. When results are on screen, click the Print button to send the report to the printer.
Student Schedule Maintenance 1. In Student Master, Find a student who needs a schedule change.
2. Click the Gear icon, then Schedule, then Schedule Maintenance or you can go to Scheduling, Entry, Student Schedule Maintenance.
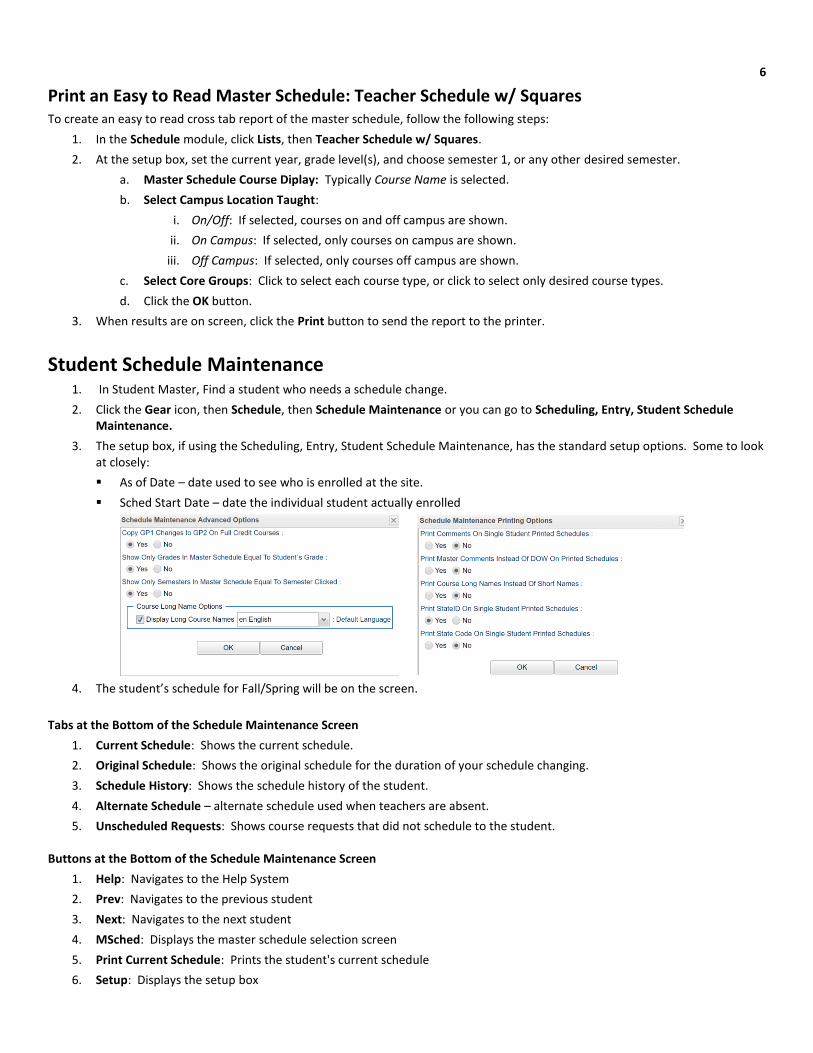
3. The setup box, if using the Scheduling, Entry, Student Schedule Maintenance, has the standard setup options. Some to look at closely:
As of Date – date used to see who is enrolled at the site.
Sched Start Date – date the individual student actually enrolled
4. The student’s schedule for Fall/Spring will be on the screen.
Tabs at the Bottom of the Schedule Maintenance Screen
1. Current Schedule: Shows the current schedule.
2. Original Schedule: Shows the original schedule for the duration of your schedule changing.
3. Schedule History: Shows the schedule history of the student.
4. Alternate Schedule – alternate schedule used when teachers are absent.
5. Unscheduled Requests: Shows course requests that did not schedule to the student. Buttons at the Bottom of the Schedule Maintenance Screen
1. Help: Navigates to the Help System
2. Prev: Navigates to the previous student
3. Next: Navigates to the next student
4. MSched: Displays the master schedule selection screen
5. Print Current Schedule: Prints the student's current schedule
6. Setup: Displays the setup box
7
7. Find: Displays a list of students for selection To Add a Course to a Student's Schedule
1. To add a course, click under the header (SEMESTER) and the Master Schedule will appear on the screen.
2. To find the new course, sort the Master Schedule based on either the course name, teacher name or period by clicking the column header.
3. Click on the new course and the information will be entered into the semester(s) based on setup options.
4. Continue adding new courses to the student's schedule as needed. To Add or Replace a Course at an Existing Period
1. Click in cell under Semester to add a new item or change the current scheduled item. This opens a screen with the Master Schedule.
2. Choose the course from the master schedule sections by clicking on the line. This will bring the subject into the student’s schedule.
3. If a section is already scheduled for semester, and class period, you will see a screen requesting if you want to (1) add it as a same class period course (allows for multiple courses to be scheduled during the same class period), OR (2) replace existing course which would remove this existing section from the schedule, and replace it with the one you just selected.
To Delete a Student's Course
1. Click the section number in the appropriate semester.
2. A delete confirmation will appear on the screen.
3. Respond Yes to delete or No to cancel the delete request. To View the Original Schedule
1. The original schedule can be recalled only if you have not 'left' this particular student's schedule screen.
2. Click the Original Schedule tab at the bottom of the window to recall the schedule.
3. The student's original schedule will appear on the screen.
4. Print the original schedule for the student to use when correcting the current schedule.
5. After deleting all schedule records either one at a time or the whole schedule, enter the new schedule on the current schedule screen.
6. You will need to re-enter each course from the original schedule screen on the current schedule screen. Use the add a course steps above.

8
Schedule Students by Homeroom (Blocks) for Elementary Grades
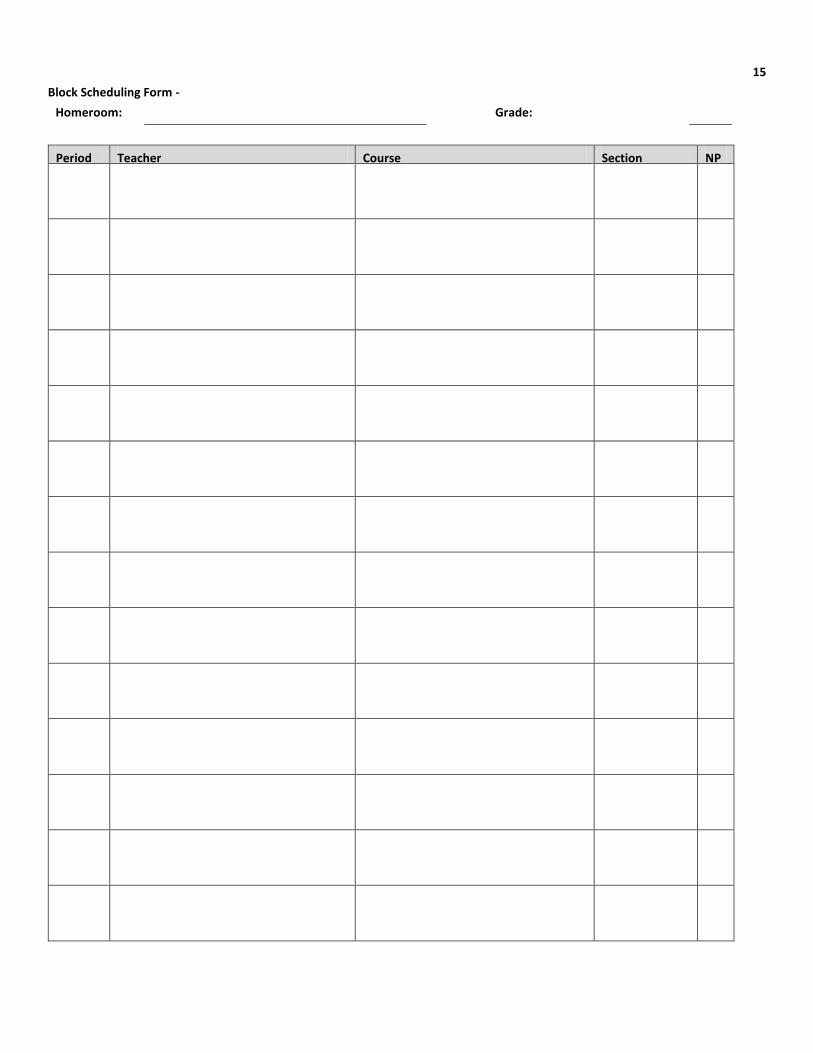
Note: Before starting Block scheduling, be sure the master schedule is correct, then be sure that there is a clear idea of the classes each homeroom will take. A sample form to help with this process is located at the end of this guide.
Note2: Block scheduling will give the student a schedule, as well as assign the student to a homeroom.
Roll over Blocks to the New Year:
If blocks were previously created, they can be rolled over to the new year. Go to Scheduling, Loaders, Block Fast Loader. Click on Roll Current Year Blocks to New Year.
COPY BLOCKS TO NEW YEAR This process will copy the selected school(s) blocks to a new year. The process will then automatically align the copied blocks to the new year`s master schedule records for each block copied. ALIGN BLOCKS TO MASTER SCHEDULE This function will update all blocks in the blocks database to match the master schedule. All information will be changed in ALL blocks where the section number of the block matches a section number in the master schedule for the year, district, and school selected on the setup of the block program. This process is used to update the blocks to match the master schedule when a new year starts, or master schedule records change. The alignment function will update the following in the block detail records: class period, class room, teacher name, DOW (day of week). Please verify that your master schedule is setup correctly BEFORE running this function. Also note that the student schedules scheduled by this block program will NOT be updated using this procedure they will probably need to be scheduled to the blocks after the alignment process is complete. If a section is missing from the master schedule, the section for the block will either have to be deleted from the block detail records, or create the section number in the master schedule editor, and rerun the alignment process.
Then complete the From Year, the New Year, School. Click Start Copying button to copy the block from previous year to new year.
Option 1: 1. Find the student in Student Master. Click the Gear icon, then choose
Schedule, then Block Schedule
2. Select the student on the left.
3. Review the homeroom blocks on the right with load counts.
4. Select the homeroom block to schedule the student to.
5. Click the Schedule button.
6. The student will be assigned to this homeroom and will have the homeroom block schedule. You will be asked which option you want to follow:
9
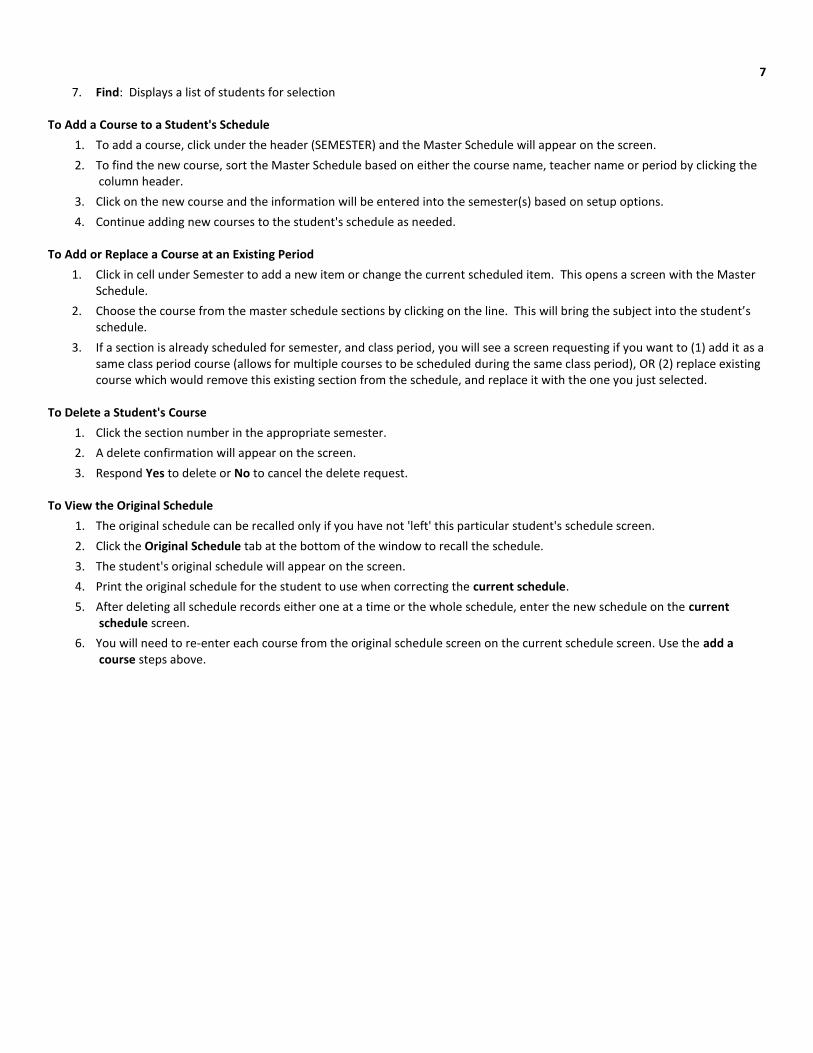
Option 2: 1. Go to Scheduling module, go to Loaders and click on Block Fast Loader.
2. When the setup box appears, enter the Year, District, and School to block schedule.
3. Enter the student grade(s) range to schedule.
4. Enter an active “as of date”.
5. Enter a Sched Start Date. Normally you are placing the schedule in on the date of enrollment, otherwise set this date to the day the schedules should have started.
6. You can Save Schedules As Manually Scheduled.
7. When done click OK.
8. You will see student names for that grade(s) on the left, and any existing blocks on the right. You can create a block, change a block or delete a block, if needed.
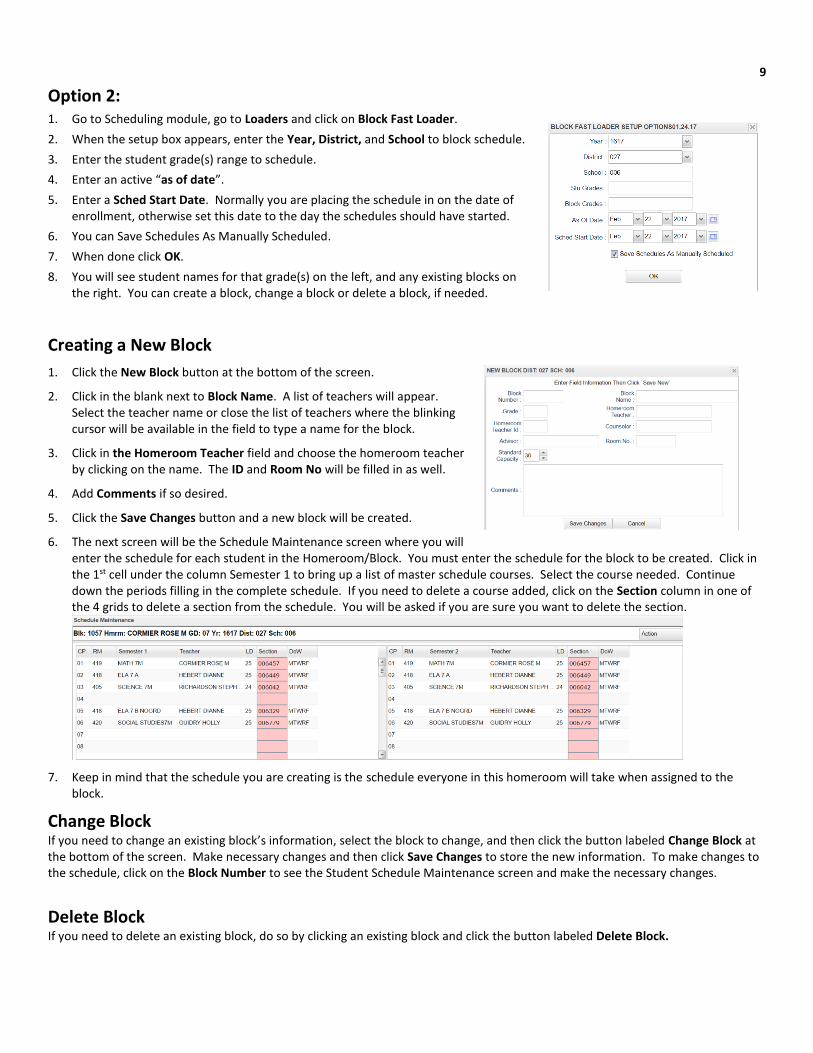
Creating a New Block
1. Click the New Block button at the bottom of the screen.
2. Click in the blank next to Block Name. A list of teachers will appear. Select the teacher name or close the list of teachers where the blinking cursor will be available in the field to type a name for the block.
3. Click in the Homeroom Teacher field and choose the homeroom teacher by clicking on the name. The ID and Room No will be filled in as well.
4. Add Comments if so desired.
5. Click the Save Changes button and a new block will be created.
6. The next screen will be the Schedule Maintenance screen where you will enter the schedule for each student in the Homeroom/Block. You must enter the schedule for the block to be created. Click in the 1st cell under the column Semester 1 to bring up a list of master schedule courses. Select the course needed. Continue down the periods filling in the complete schedule. If you need to delete a course added, click on the Section column in one of the 4 grids to delete a section from the schedule. You will be asked if you are sure you want to delete the section.
7. Keep in mind that the schedule you are creating is the schedule everyone in this homeroom will take when assigned to the block.
Change Block If you need to change an existing block’s information, select the block to change, and then click the button labeled Change Block at the bottom of the screen. Make necessary changes and then click Save Changes to store the new information. To make changes to the schedule, click on the Block Number to see the Student Schedule Maintenance screen and make the necessary changes.
Delete Block If you need to delete an existing block, do so by clicking an existing block and click the button labeled Delete Block.
10
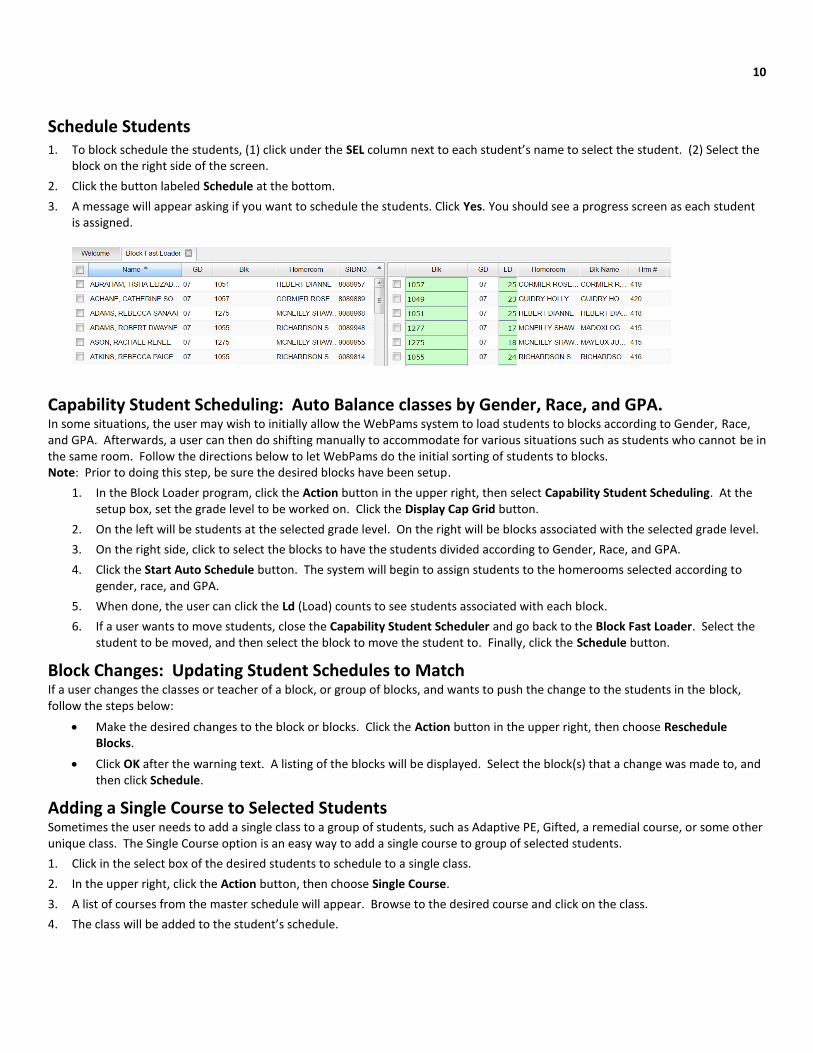
Schedule Students 1. To block schedule the students, (1) click under the SEL column next to each student’s name to select the student. (2) Select the
block on the right side of the screen.
2. Click the button labeled Schedule at the bottom.
3. A message will appear asking if you want to schedule the students. Click Yes. You should see a progress screen as each student is assigned.
Capability Student Scheduling: Auto Balance classes by Gender, Race, and GPA. In some situations, the user may wish to initially allow the WebPams system to load students to blocks according to Gender, Race, and GPA. Afterwards, a user can then do shifting manually to accommodate for various situations such as students who cannot be in the same room. Follow the directions below to let WebPams do the initial sorting of students to blocks. Note: Prior to doing this step, be sure the desired blocks have been setup.
1. In the Block Loader program, click the Action button in the upper right, then select Capability Student Scheduling. At the setup box, set the grade level to be worked on. Click the Display Cap Grid button.
2. On the left will be students at the selected grade level. On the right will be blocks associated with the selected grade level.
3. On the right side, click to select the blocks to have the students divided according to Gender, Race, and GPA.
4. Click the Start Auto Schedule button. The system will begin to assign students to the homerooms selected according to gender, race, and GPA.
5. When done, the user can click the Ld (Load) counts to see students associated with each block.
6. If a user wants to move students, close the Capability Student Scheduler and go back to the Block Fast Loader. Select the student to be moved, and then select the block to move the student to. Finally, click the Schedule button.
Block Changes: Updating Student Schedules to Match If a user changes the classes or teacher of a block, or group of blocks, and wants to push the change to the students in the block, follow the steps below:
Make the desired changes to the block or blocks. Click the Action button in the upper right, then choose Reschedule Blocks.
Click OK after the warning text. A listing of the blocks will be displayed. Select the block(s) that a change was made to, and then click Schedule.
Adding a Single Course to Selected Students Sometimes the user needs to add a single class to a group of students, such as Adaptive PE, Gifted, a remedial course, or some other unique class. The Single Course option is an easy way to add a single course to group of selected students.
1. Click in the select box of the desired students to schedule to a single class.
2. In the upper right, click the Action button, then choose Single Course.
3. A list of courses from the master schedule will appear. Browse to the desired course and click on the class.
4. The class will be added to the student’s schedule.
11
Print Student Schedules 1. On the left navigation panel, click the Schedule button, then Lists, then Print Student Schedules
2. At the setup box, set for the desired year, grade level(s).
3. Narrow the criteria using the items: Gender, Ethnicity, Special Codes, Team, Homeroom, Counselor, Advisor, Clubs, and Sports
4. Select All Students or Sped Only or Non Sped
5. Set the “as of date”.
6. Select the Order to List: Alpha Order, Grade Order, Homeroom Order, Team Order, Advisor Order, or Counselor Order
7. Select the number of student schedules per page: 1, 2, 3, 4, 5, 6, 7, or 8.
8. Additional Printing Options include: Print locker information, Include blank student schedules, Print unscheduled requests, Print Comments, Print AB DOW Titles.
Making Sure All Students Were Rolled to New Year This report compares enrollments of the previous year to the current year. The report will lists students who were enrolled at the end of the previous year, but are not enrolled anywhere in the district for the current year.
Getting Started
1. In the left navigation panel of WebPams, click Student Master.
2. Expand the Lists section.
3. Browse down the listing, then click on Student End of Year / Current Year Missing Report.
Setup Box Options
1. Year: Set to the desired “current year”.
2. District: Should be set to your district number.
3. School(s): Set to the desired school site, or sites.
4. Click Ok to begin the report.
Report Features
1. The report will list students who were enrolled at the site at the end of the previous year, but are not found in the current year for any district location.
2. Column Descriptions
District: District number of previous year enrollment.
School: School number of previous year enrollment.
Student ID: ID number of student in previous year enrollment.
Student Name: Name of student in previous year enrollment.
Grade: Grade level of student in previous year enrollment.
Entry Code: Entry code of previous year enrollment.
Entry Date: Entry code of previous year enrollment.
3. To investigate students on the list further, open up the previous year’s Student Master, then browse to the student’s information for further details.

12
Making Sure All Students Have a Schedule
Getting Started
1. In the left navigation panel of WebPams, click Student Master.
2. Expand the Lists section.
3. Browse down the listing, then click on Student End of Year / Current Year Missing Report.
Setup Options:
1. Year--Defaults to the current year. A prior year may be accessed by clicking in the field and making the appropriate selection from the drop down list.
2. District--Default value is based on your security settings. You will be limited to your district only.
3. School--Default value is based on your security settings. If you are assigned to a school, the school default value will be your school site code. You will not be able to change this value. If you are a supervisor or other district office employee with access to the Student Information System, you will be able to run programs for one school, a small group of schools, or all schools in your district.
4. Grades—Choose grade level(s) needed.
5. As Of Date-- Limits the list to those students who are active as of the date selected.
6. Report Type: Detail/Summary-- Detail view lists of the students while the Summary provides a count and percentage of students by grade level.
7. Click OK to move to the next screen.

13
Block Scheduling Form -
Homeroom: Grade:
Period Teacher Course Section NP

14
Block Scheduling Form -
Homeroom: Grade:
Period Teacher Course Section NP
15
Block Scheduling Form -
Homeroom: Grade:
Period Teacher Course Section NP