Embed Size (px)
Citation preview

XFS® Administrator Guide
007–4273–007

COPYRIGHT© 2003-2004, 2012–2015 Silicon Graphics International Corp. All rights reserved; provided portions may be copyright in third parties,as indicated elsewhere herein. No permission is granted to copy, distribute, or create derivative works from the contents of thiselectronic documentation in any manner, in whole or in part, without the prior written permission of SGI.
LIMITED RIGHTS LEGENDThe software described in this document is "commercial computer software" provided with restricted rights (except as to includedopen/free source) as specified in the FAR 52.227-19 and/or the DFAR 227.7202, or successive sections. Use beyond license provisions isa violation of worldwide intellectual property laws, treaties and conventions. This document is provided with limited rights as definedin 52.227-14.
TRADEMARKS AND ATTRIBUTIONSIRIX, Silicon Graphics, SGI, the SGI logo, and XFS are trademarks or registered trademarks of Silicon Graphics International Corp. orits subsidiaries in the United States and other countries.
Linux is a registered trademark of Linus Torvalds in the U.S. and other countries. All other trademarks mentioned herein are theproperty of their respective owners.

New Features in This Guide
This revision contains the following:
• Changes related to the behavior of the ibound mount option for enhanced XFS:
– ibound now allocates additional data, such as extended attributes anddirectory entries, as well as inodes in the bound area, known as the metadataregion. The remainder of the filesystem is known as the user-extent region.
– There must be at least as many allocation groups (AGs) in the user-extentregion as in the metadata region; for practical purposes, you will normallywant more AGs in the user-extent region.
– A new allocation strategy employed by ibound, which may be adjusted byusing agskip mount option.
– The rotorstep system-tunable parameter no longer applies if you are usingibound.
– The ibound and inode64 mount options are mutually exclusive; specifyingboth will now result in an error.
See:
– "ibound Mount Option for SSD Media" on page 70
– "agskip Mount Option for Allocation Group Specification" on page 69
• Clarifications to:
– "Choosing the Log Type and Size" on page 4
– "Remounting an XFS Filesystem" on page 26
007–4273–007 iii


Record of Revision
Version Description
001 January 2003First printing, incorporating information for the SGITM ProPackTM v2.1 for Linux® release
002 May 2003Incorporates information for the SGI ProPack v 2.2 for Linux release
003 January 2004Incorporates information for the SGI ProPack v 2.4 for Linux release
004 January 2011Incorporates information for the SGI InfiniteStorage SoftwarePlatform (ISSP) 2.3 release and XFS & XVM media kit 2.3 for RedHat® Enterprise Linux® (RHEL) 6
005 April 2013Incorporates information for the ISSP 3.0 release
006 October 2014Incorporates information for the ISSP 3.3 release
007 November 2015Incorporates information for the ISSP 3.5 release
007–4273–007 v


Contents
About This Guide . . . . . . . . . . . . . . . . . . . . . xiii
Related Publications . . . . . . . . . . . . . . . . . . . . . . xiii
Obtaining Publications . . . . . . . . . . . . . . . . . . . . . . xiv
Conventions . . . . . . . . . . . . . . . . . . . . . . . . . xv
Reader Comments . . . . . . . . . . . . . . . . . . . . . . . xv
1. The XFS® Filesystem . . . . . . . . . . . . . . . . . . . 1
2. Planning an XFS Filesystem . . . . . . . . . . . . . . . . 3
Choosing the Filesystem Block Size . . . . . . . . . . . . . . . . . . 3
Choosing the Filesystem Directory Block Size . . . . . . . . . . . . . . . 4
Choosing the Log Type and Size . . . . . . . . . . . . . . . . . . . 4
Log Type: Internal vs External . . . . . . . . . . . . . . . . . . 5
Log Size . . . . . . . . . . . . . . . . . . . . . . . . . 5
mkfs.xfs Command-Line Options for Logs . . . . . . . . . . . . . . 7
Choosing Allocation Groups and Stripe Units . . . . . . . . . . . . . . . 7
Repartitioning the Disks . . . . . . . . . . . . . . . . . . . . . 8
3. Creating XFS Filesystems . . . . . . . . . . . . . . . . . 11
Making a Filesystem . . . . . . . . . . . . . . . . . . . . . . 11
Procedure to Make a Filesystem . . . . . . . . . . . . . . . . . . 11
mkfs.xfs Using the Defaults . . . . . . . . . . . . . . . . . . . 13
mkfs.xfs Specifying Block and Log Size of Internal Log . . . . . . . . . . 13
mkfs.xfs for a Logical Volume with a Log Subvolume . . . . . . . . . . 14
007–4273–007 vii

Contents
mkfs.xfs for a Directory Block Size Larger than Filesystem Block Size . . . . . . 15
Growing a Filesystem . . . . . . . . . . . . . . . . . . . . . . 15
4. Filesystem Maintenance . . . . . . . . . . . . . . . . . . 17
Filesystem Reorganization . . . . . . . . . . . . . . . . . . . . . 17
Filesystem Corruption . . . . . . . . . . . . . . . . . . . . . . 17
Checking Filesystem Consistency . . . . . . . . . . . . . . . . . . 18
Overview of the Commands to Check Filesystem Consistency . . . . . . . . . 18
xfs_repair -n Command Line . . . . . . . . . . . . . . . . . 19
xfs_check Command Line . . . . . . . . . . . . . . . . . . . 20
Repairing XFS Filesystem Problems . . . . . . . . . . . . . . . . . . 21
Repairing Inconsistent Filesystems with xfs_repair . . . . . . . . . . . 21
Common xfs_repair Error Messages . . . . . . . . . . . . . . . . 23
xfs_repair Error Messages When Files Are in lost+found . . . . . . . . 24
What to Do If xfs_repair Cannot Repair a Filesystem . . . . . . . . . . 25
Mounting a Filesystem Without Log Recovery . . . . . . . . . . . . . . 25
Remounting an XFS Filesystem . . . . . . . . . . . . . . . . . . . 26
5. Disk Quotas . . . . . . . . . . . . . . . . . . . . . . 27
Overview of Disk Quotas . . . . . . . . . . . . . . . . . . . . . 27
Enabling Quotas . . . . . . . . . . . . . . . . . . . . . . . . 29
Enabling Quotas for Users . . . . . . . . . . . . . . . . . . . . 29
Enabling Quotas for Groups . . . . . . . . . . . . . . . . . . . 29
Enabling Quotas for Projects . . . . . . . . . . . . . . . . . . . 30
Setting Quota Limits . . . . . . . . . . . . . . . . . . . . . . 31
Setting Quota Limits for Users . . . . . . . . . . . . . . . . . . 31
Setting Quota Limits for Groups . . . . . . . . . . . . . . . . . . 31
viii 007–4273–007

XFS®
Administrator Guide
Setting Quota Limits for Projects . . . . . . . . . . . . . . . . . . 32
Displaying Quota Information . . . . . . . . . . . . . . . . . . . 33
Administering Quotas . . . . . . . . . . . . . . . . . . . . . . 33
Monitoring Disk Space Usage with Quota Accounting . . . . . . . . . . . . 34
Checking Disk Space Usage . . . . . . . . . . . . . . . . . . . . 35
6. Backup and Recovery Procedures . . . . . . . . . . . . . . 37
Features of xfsdump and xfsrestore . . . . . . . . . . . . . . . . 37
Media Layout for xfsdump . . . . . . . . . . . . . . . . . . . . 38
Possible xfsdump Layouts . . . . . . . . . . . . . . . . . . . . 39
Saving Data with xfsdump . . . . . . . . . . . . . . . . . . . . 45
xfsdump Syntax . . . . . . . . . . . . . . . . . . . . . . . 45
Specifying Local Media . . . . . . . . . . . . . . . . . . . . . 46
Specifying a Remote Tape Drive . . . . . . . . . . . . . . . . . . 47
Backing Up to a File . . . . . . . . . . . . . . . . . . . . . 49
Reusing Tapes . . . . . . . . . . . . . . . . . . . . . . . 49
Erasing Used Tapes . . . . . . . . . . . . . . . . . . . . . . 50
About Incremental and Resumed Dumps . . . . . . . . . . . . . . . 50
Performing an Incremental Dump . . . . . . . . . . . . . . . . . 51
Performing a Resumed Dump . . . . . . . . . . . . . . . . . . 52
Examining xfsdump Archives . . . . . . . . . . . . . . . . . . . 53
About xfsrestore . . . . . . . . . . . . . . . . . . . . . . 54
xfsrestore Syntax . . . . . . . . . . . . . . . . . . . . . 55
Displaying the Contents of the Dump Media with xfsrestore . . . . . . . . 57
Performing Simple Restores with xfsrestore . . . . . . . . . . . . . 58
Restoring Individual Files with xfsrestore . . . . . . . . . . . . . . 60
Performing Network Restores with xfsrestore . . . . . . . . . . . . . 60
007–4273–007 ix

Contents
Performing Interactive Restores with xfsrestore . . . . . . . . . . . . 61
Performing Cumulative Restores with xfsrestore . . . . . . . . . . . . 62
Interrupting xfsrestore . . . . . . . . . . . . . . . . . . . . 66
About the housekeeping and orphanage Directories . . . . . . . . . . . 67
Using xfsdump and xfsrestore to Copy Filesystems . . . . . . . . . . . 68
7. Enhanced XFS Extensions . . . . . . . . . . . . . . . . . 69
agskip Mount Option for Allocation Group Specification . . . . . . . . . . . 69
ibound Mount Option for SSD Media . . . . . . . . . . . . . . . . . 70
ibound Purpose . . . . . . . . . . . . . . . . . . . . . . . 70
ibound Availability, Requirements, and Recommendations . . . . . . . . . . 70
How ibound Works . . . . . . . . . . . . . . . . . . . . . 71
ibound Extent Allocation Policy . . . . . . . . . . . . . . . . . . 71
Determining the SSD Size Required for a Given Number of Inodes . . . . . . . 74
Overview of the Configuration Procedure Using ibound . . . . . . . . . . 75
When ibound is Ignored . . . . . . . . . . . . . . . . . . . . 75
ibound and Kernel Messages . . . . . . . . . . . . . . . . . . . 76
Message Indicating a Successful Mount with ibound . . . . . . . . . . 76
Message Indicating that the ibound Value is Inappropriate . . . . . . . . . 76
Message Indicating Insufficient User-Extents AGs . . . . . . . . . . . . 77
Message Indicating that the Filesystem Has Grown and ibound is Reinstated . . . 77
Examples of Using ibound . . . . . . . . . . . . . . . . . . . 77
Example of Successfully Maximizing SSD Storage of Inodes for an SSD/HDD Filesystem 77
Example Using a Value for ibound that is Too Small . . . . . . . . . . . 81
Example with Insufficient AGs in the User-Extents Region . . . . . . . . . 82
Appendix A. XFS System-Tunable Kernel Parameters . . . . . . . . 83
Overview of the XFS System-Tunable Kernel Parameters . . . . . . . . . . . 83
x 007–4273–007
XFS®
Administrator Guide
Using Appropriate Parameter Settings . . . . . . . . . . . . . . . . 83
Time Unit of Measure . . . . . . . . . . . . . . . . . . . . . 83
Prefix . . . . . . . . . . . . . . . . . . . . . . . . . . 84
Permanently Changing a Parameter . . . . . . . . . . . . . . . . . 84
Temporarily Changing a Parameter . . . . . . . . . . . . . . . . . 84
Querying a Current Parameter Setting . . . . . . . . . . . . . . . . 85
Parameter Types . . . . . . . . . . . . . . . . . . . . . . . . 85
Parameters to Set at Initial Configuration . . . . . . . . . . . . . . . 86
inherit_noatim . . . . . . . . . . . . . . . . . . . . . 86
inherit_nodfrg . . . . . . . . . . . . . . . . . . . . . 86
inherit_nodump . . . . . . . . . . . . . . . . . . . . . 87
inherit_nosym . . . . . . . . . . . . . . . . . . . . . . 87
inherit_sync . . . . . . . . . . . . . . . . . . . . . . 87
sgid_inherit . . . . . . . . . . . . . . . . . . . . . . 87
stats_clear . . . . . . . . . . . . . . . . . . . . . . 88
symlink_mode . . . . . . . . . . . . . . . . . . . . . . 88
Mount-Time Parameter for Initial Configuration . . . . . . . . . . . . . 88
probe_dmapi . . . . . . . . . . . . . . . . . . . . . . 88
Parameters for Special-Case Performance Tuning . . . . . . . . . . . . . 88
probe_limit . . . . . . . . . . . . . . . . . . . . . . 89
rotorstep . . . . . . . . . . . . . . . . . . . . . . . 89
syncd_timer . . . . . . . . . . . . . . . . . . . . . . 90
xfs_buf_age . . . . . . . . . . . . . . . . . . . . . . 90
xfs_buf_timer . . . . . . . . . . . . . . . . . . . . . . 90
Mount-Time Parameter for Special-Case Performance Tuning . . . . . . . . . 91
fstrm_timer . . . . . . . . . . . . . . . . . . . . . . 91
Debugging Parameters Restricted to SGI Support . . . . . . . . . . . . . 91
error_level . . . . . . . . . . . . . . . . . . . . . . 91
007–4273–007 xi

Contents
panic_mask . . . . . . . . . . . . . . . . . . . . . . . 92
Index . . . . . . . . . . . . . . . . . . . . . . . . . . 93
xii 007–4273–007

About This Guide
This guide tells you how to plan, create, and maintain XFS® filesystems on a systemrunning the Linux operating system.
Related PublicationsFor information about this release, see the following SGI InfiniteStorage SoftwarePlatform (ISSP) README.txt release note.
The following documents contain additional information:
• DMF 6 Administrator Guide
• CXFS 7 Client-Only Guide for SGI InfiniteStorage
• XVM Volume Manager Administrator Guide
• Linux Configuration and Operations Guide
• The user guide and quick start guide for your hardware
• NIS Administrator’s Guide
• Personal System Administration Guide
• Performance Co-Pilot for Linux User’s and Administrator’s Guide
• SGI L1 and L2 Controller Software User’s Guide
007–4273–007 xiii

About This Guide
Obtaining PublicationsYou can obtain SGI documentation as follows:
• Log in to the SGI Customer Portal at http://support.sgi.com. Click the following:
Support by Product> productname
> Documentation
If you do not find what you are looking for, click Search Knowledgebase, enter adocument-title keyword, select the category Documentation, and click Search.
• The /docs directory on the ISSP DVD or in the online download page containsinformation about the release, such as the following:
– The ISSP release note: /docs/README.txt
– Other release notes: /docs/README_NAME.txt
– A complete list of the packages and their location on the media:/docs/RPMS.txt
– The packages and their respective licenses: /docs/PACKAGE_LICENSES.txt
• The /docs directory on the SGI XFS & XVM media kit for RHEL CD or in theonline download page contains information about the release, such as thefollowing :
– The XFS & XVM media kit release note:/docs/xfs_xvm-VERSION-reademe.txt
– A complete list of the packages and their location on the media:/docs/xfs_xvm-VERSION-rpms.txt
– The packages and their respective licenses: /docs/PACKAGE_LICENSES.txt
• The ISSP release notes and manuals are provided in the noarch/sgi-isspdocsRPM and will be installed on the system into the following location:
/usr/share/doc/packages/sgi-issp-VERSION/TITLE
• You can view man pages by typing man title at a command line.
xiv 007–4273–007

XFS®
Administrator Guide
Note: The external websites referred to in this guide were correct at the time ofpublication, but are subject to change.
ConventionsThe following conventions are used throughout this document:
Convention Meaning
command This fixed-space font denotes literal items such ascommands, files, routines, path names, signals,messages, and programming language structures.
variable Italic typeface denotes variable entries and words orconcepts being defined.
user input This bold, fixed-space font denotes literal items that theuser enters in interactive sessions. (Output is shown innonbold, fixed-space font.)
[ ] Brackets enclose optional portions of a command ordirective line.
Reader CommentsIf you have comments about the technical accuracy, content, or organization of thispublication, contact SGI. Be sure to include the title and document number of thepublication with your comments. (Online, the document number is located in thefront matter of the publication. In printed publications, the document number islocated at the bottom of each page.)
You can contact SGI in any of the following ways:
• Send e-mail to the following address:
• Contact your customer service representative and ask that an incident be filed inthe SGI incident tracking system.
007–4273–007 xv

About This Guide
• Send mail to the following address:
SGITechnical Publications46600 Landing ParkwayFremont, CA 94538
SGI values your comments and will respond to them promptly.
xvi 007–4273–007

Chapter 1
The XFS® Filesystem
The XFS® filesystem provides the following major features:
• Full 64-bit file capabilities (files larger than 2 GB)
• Rapid and reliable recovery after system crashes because of journaling technology
• Efficient support of large, sparse files (files with “holes”)
• Integrated, full-function volume manager support
• Extremely high I/O performance that scales well on multiprocessing systems
• User-specified filesystem block sizes ranging from 512 bytes up to a maximum ofthe filesystem page size
At least 64 MB of memory is recommended for systems with XFS filesystems.
The maximum size of an XFS filesystem is 264 bytes. The maximum size of an XFSfile is 263-1 bytes.
XFS uses database journaling technology to provide high reliability and rapidrecovery. Recovery after a system crash is completed within a few seconds, withoutthe use of a filesystem checker such as the fsck command. Recovery time isindependent of filesystem size.
XFS is designed to be a very high performance filesystem. XFS as a filesystem iscapable of delivering near-raw I/O performance. While traditional filesystems sufferfrom reduced performance as they grow in size, with XFS there is no performancepenalty.
You can create filesystems with block sizes ranging from 512 bytes to a maximum ofthe filesystem page size. The filesystem page size is a kernel compile option and maybe set to 4K on x86_64 systems or to 4K, 8K, or 16K on ia64 systems.
Filesystem extents, which provide for contiguous data within a file, are createdautomatically for normal files and may be configured at file creation time using thefcntl() system call. Extents are multiples of a filesystem block.
Inodes are created as needed by XFS filesystems. You can specify the size of inodeswith the -i size= option to the filesystem creation command, mkfs.xfs. You canalso specify the maximum percentage of the space in a filesystem that can beoccupied by inodes with the -i maxpct= option of the mkfs.xfs command.
007–4273–007 1

1: The XFS® Filesystem
XFS implements fully journaled extended attributes. An extended attribute is aname/value pair associated with a file. Attributes can be attached to all types ofinodes: regular files, directories, symbolic links, device nodes, and so forth. Attributevalues can contain up to 64 KB of arbitrary binary data.
XFS implements two attribute namespaces:
• A user namespace available to all users, protected by the normal file permissions
• A system namespace, accessible only to privileged users
The system namespace can be used for protected filesystem metadata such as accesscontrol lists (ACLs) and hierarchical storage manager (HSM) file migration status. Formore information see the, attr(1) man page.
To dump XFS filesystems, you must use the command xfsdump(8) (not the dumpcommand). Restoring from these dumps is done using xfsrestore(8). For moreinformation about the relationships between xfsdump, xfsrestore on XFSfilesystems, see the man pages and Chapter 6, "Backup and Recovery Procedures".
2 007–4273–007

Chapter 2
Planning an XFS Filesystem
This chapter discusses the following:
• "Choosing the Filesystem Block Size" on page 3
• "Choosing the Filesystem Directory Block Size" on page 4
• "Choosing the Log Type and Size" on page 4
• "Choosing Allocation Groups and Stripe Units" on page 7
• "Repartitioning the Disks" on page 8
Choosing the Filesystem Block SizeXFS lets you choose the logical block size for each filesystem by using the -b size=option of the mkfs.xfs command. (Physical disk blocks remain 512 bytes.)
For XFS filesystems on disk partitions and logical volumes and for the datasubvolume of filesystems on logical volumes, the block size guidelines are as follows:
• The minimum block size is 512 bytes. Small block sizes increase allocationoverhead which decreases filesystem performance. In general, the recommendedblock size for filesystems under 100 MB and for filesystems with many small filesis 512 bytes. The filesystem block size must be a power of two.
• The default block size is 4096 bytes (4 KB). This is the recommended block size forfilesystems over 100 MB.
• The maximum block size is the page size of the kernel, which is 4 KB on x86systems (both 32-bit and 64-bit) and is configurable on ia64 systems. Because largeblock sizes can waste space, in general block sizes should not be larger than 4096bytes (4 KB).
Block sizes are specified in bytes as follows:
• Decimal (default)
• Octal (prefixed by 0)
• Hexadecimal (prefixed by 0x or 0X)
007–4273–007 3

2: Planning an XFS Filesystem
If the number has the suffix “K” it is multiplied by 1024.
Choosing the Filesystem Directory Block SizeTo select a logical block size for the filesystem directory that is greater than the logicalblock size of the filesystem, use the -n option of the mkfs.xfs command. This letsyou choose a filesystem block size to match the distribution of data file sizes withoutadversely affecting directory operation performance. Using this option could improveperformance for a filesystem with many small files, such as a news or mail filesystem.In this case, the filesystem logical block size could be small (512 bytes, 1 KB, or 2 KB)and the logical block size for the filesystem directory could be large (4 KB or 8 KB);this can improve the performance of directory lookups because the tree storing theindex information has larger blocks and less depth.
You should consider setting a logical block size for a filesystem directory that isgreater than the logical block size for the filesystem if you are supporting anapplication that reads directories (with the readdir(3C) or getdents(2) systemcalls) many times in relation to how much it creates and removes files. Using a smallfilesystem block size saves on disk space and on I/O throughput for the small files.
The data needed to perform a readdir operation is segregated from the indexinformation. Directory data blocks can be “read-ahead” in a readdir. Performingread-ahead improves the readdir performance dramatically. Because the dataneeded for a readdir operation and index information are separate in a directoryblock, the offset in a directory is limited to 32 bits.
Choosing the Log Type and SizeThis section discusses the following:
• "Log Type: Internal vs External" on page 5
• "Log Size" on page 5
• "mkfs.xfs Command-Line Options for Logs" on page 7
4 007–4273–007
XFS®
Administrator Guide
Log Type: Internal vs External
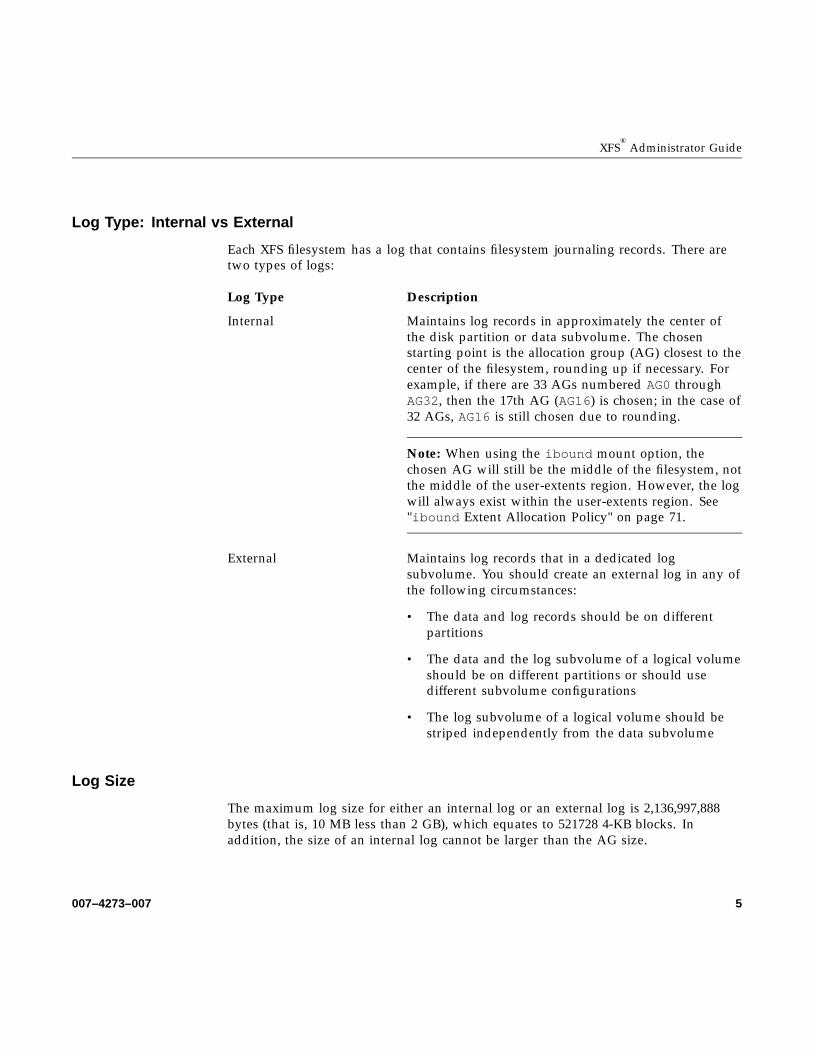
Each XFS filesystem has a log that contains filesystem journaling records. There aretwo types of logs:
Log Type Description
Internal Maintains log records in approximately the center ofthe disk partition or data subvolume. The chosenstarting point is the allocation group (AG) closest to thecenter of the filesystem, rounding up if necessary. Forexample, if there are 33 AGs numbered AG0 throughAG32, then the 17th AG (AG16) is chosen; in the case of32 AGs, AG16 is still chosen due to rounding.
Note: When using the ibound mount option, thechosen AG will still be the middle of the filesystem, notthe middle of the user-extents region. However, the logwill always exist within the user-extents region. See"ibound Extent Allocation Policy" on page 71.
External Maintains log records that in a dedicated logsubvolume. You should create an external log in any ofthe following circumstances:
• The data and log records should be on differentpartitions
• The data and the log subvolume of a logical volumeshould be on different partitions or should usedifferent subvolume configurations
• The log subvolume of a logical volume should bestriped independently from the data subvolume
Log Size
The maximum log size for either an internal log or an external log is 2,136,997,888bytes (that is, 10 MB less than 2 GB), which equates to 521728 4-KB blocks. Inaddition, the size of an internal log cannot be larger than the AG size.
007–4273–007 5

2: Planning an XFS Filesystem
For most filesystems, SGI recommends the default log size:
• For an internal log, the default log size depends on the filesystem size, filesystemblock size, and filesystem directory block size. The default ranges from 512filesystem blocks up to the maximum log size.
• For an external log, the default log size is the entire size of the specified logdevice, up to the maximum log size. You should create a volume or partition ofthe desired size prior to creating the filesystems and then let mkfs determine thesize of the external log.
Note: Although it is possible to explicitly set the size by using by the mkfscommand, it is much less reliable.
For a filesystem with very high transaction activity, SGI recommends using themaximum log size.
Note the following:
• The larger the log, the more outstanding transactions that XFS can support.
• Using the maximum log size can increase the filesystem mount time after a crash.
• The amount of disk space required for log records is proportional to thetransaction rate and the size of transactions on the filesystem, not the size of thefilesystem. Larger block sizes result in larger transactions.
• Transactions from directory updates (for example, the mkdir and rmdircommands and the create() and unlink() system calls) cause more log datato be generated.
• The disk space dedicated to the log does not show up in listings from the dfcommand, nor can you access it with a filename.
6 007–4273–007

XFS®
Administrator Guide
mkfs.xfs Command-Line Options for Logs
At the mkfs.xfs command line, include the following options according to thecircumstances:
• Internal log:
– Default size: no special options are required
– Maximum size:
-l size=521728b
• External log, where device is the location of the external log subvolume:
-l logdev=device
For more details, see the mkfs.xfs(8) man page.
Choosing Allocation Groups and Stripe UnitsIf you are using the ibound mount option available with enhanced XFS, the first setof AGs (determined by the ibound value) are designated as the metadata region andthe remaining AGs are designated as the user-extents region. SGI recommends that themetadata region consists of at least 8 AGs. (See "ibound Mount Option for SSDMedia" on page 70).
You can select the number of AGs when you create an XFS filesystem or, alternatively,you can select the size of an AG. The larger the number of AGs, the more parallelismcan be achieved when allocating blocks and inodes. You should avoid selecting avery large number of AGs or an AG size that will yield a very large number of AGs;a large number of AGs causes an unreasonable amount of CPU time to be used whenthe filesystem is close to full.
The minimum AG size is 16 MB; the maximum size is just under 4 GB.
The default number of AGs is 8, unless the filesystem is smaller than 128 MB orlarger than 8 GB. When the filesystem is smaller than 128 MB, the default number ofAGs is fewer than 8, since the minimum AG size is 16 MB. In this case, the datasection, by default, will be divided into as many AGs as possible that are at least 16MB. When the filesystem is larger than 8 GB, but smaller than 64 GB, the defaultnumber of AGs is greater than 8, with each AG approximately 1 GB in size. When the
007–4273–007 7

2: Planning an XFS Filesystem
filesystem is larger than 64 GB, the default number of AGs is still greater than 8, butthe AG size is 4 GB.
XFS lets you select the stripe unit for a RAID device or stripe volume. This ensuresthat data allocations, inode allocations, and the internal log will be aligned alongstripe units when the end-of-file is extended and the file size is larger than 512 KB.You specify stripe units in 512-byte block units or in bytes. See the mkfs.xfs(1M)man page for information on specifying stripe units.
When you specify a stripe unit, you also specify a stripe width in 512-byte block unitsor in bytes. The stripe width must be a multiple of the stripe unit. The stripe widthwill be the preferred I/O size returned in the stat() system call. See themkfs.xfs(8) man page for information on specifying stripe width.
When used in conjunction with the -b (block size) option of the mkfs.xfscommand, you can use the -d su= and -d sw= options to specify the stripe unit andstripe width, respectively, in filesystem blocks.
For a RAID device, the default stripe unit is 0, indicating that the feature is disabled.You should configure the stripe unit and width sizes of RAID devices in order toavoid unexpected performance anomalies caused by the filesystem doing non-optimalI/O operations to the RAID unit. For example, if a block write is not aligned on aRAID stripe unit boundary and is not a full stripe unit, the RAID will be forced to doa read/modify/write cycle to write the data. This can have a significant performanceimpact. By setting the stripe unit size properly, XFS will avoid unaligned accesses.
For a striped volume, the stripe unit that was specified when the volume was createdis provided by default.
Repartitioning the DisksMany system administrators may find that they want or need to repartition diskswhen they switch to XFS filesystems and/or logical volumes. Some of the reasons toconsider repartitioning are:
• Repartitioning can result in a larger pool of free space for all of the formerlyseparate filesystems
• If you plan to use logical volumes, you may want to put the XFS log into a smallsubvolume. This requires disk repartitioning to create a small partition for the logsubvolume.
8 007–4273–007

XFS®
Administrator Guide
• If you plan to use logical volumes, you may want to repartition to create diskpartitions of equal size that can be striped or plexed.
007–4273–007 9


Chapter 3
Creating XFS Filesystems
This chapter discusses the following:
• "Making a Filesystem" on page 11
• "Growing a Filesystem" on page 15
!Caution: When you create a filesystem, all files already on the disk partition orlogical volume are destroyed.
Making a FilesystemThis section discusses the following:
• "Procedure to Make a Filesystem" on page 11
• "mkfs.xfs Using the Defaults" on page 13
• "mkfs.xfs Specifying Block and Log Size of Internal Log" on page 13
• "mkfs.xfs for a Logical Volume with a Log Subvolume" on page 14
• "mkfs.xfs for a Directory Block Size Larger than Filesystem Block Size" on page15
Procedure to Make a Filesystem
Use the following procedure to make an XFS filesystem:
1. Review Chapter 2, "Planning an XFS Filesystem" to verify that you are ready tobegin this procedure.
2. Identify the device name of the partition or logical volume where you plan tocreate the filesystem. This is the value of partition in the examples below. Forsimplicity, the examples in this chapter use an example partition name of/dev/sdc1. (For more information about partitioning, see the parted(8) manpage.)
007–4273–007 11

3: Creating XFS Filesystems
3. If the disk partition is already mounted, unmount it:
# umount partition
!Caution: Any data that is on the disk partition is destroyed.
For example:
# umount /dev/sdc1
4. Use the mkfs.xfs(8) command to make the filesystem. See the followingexamples:
• "mkfs.xfs Using the Defaults" on page 13
• "mkfs.xfs Specifying Block and Log Size of Internal Log" on page 13
• "mkfs.xfs for a Logical Volume with a Log Subvolume" on page 14
• "mkfs.xfs for a Directory Block Size Larger than Filesystem Block Size" onpage 15
5. Make a mount directory:
# mkdir -p mountdir
mountdir is the directory to be mounted. For example:
# mkdir -p /mnt/scratch_space
6. Mount the filesystem on the mount directory:
# mount partition mountdir
For example:
# mount /dev/sdc1 /mnt/scratch_space
7. To configure the system so that the new filesystem is automatically mountedwhen the system is booted, add the following line to the file /etc/fstab:
partition mountdir xfs defaults 0 0
For example:
/dev/sdc1 /mnt/scratch_space xfs defaults 0 0
12 007–4273–007

XFS®
Administrator Guide
Note: Do not run fsck for XFS filesystems listed in /etc/fstab that use XVMdevices (that is, you should set the fsck flag to 0), because XVM devices are notalways available. If an fsck is run on an XFS filesystem when XVM devices are notavailable, the system may suspend the system boot sequence and require input fromthe administrator. XVM includes a helper service that mounts all filesystems listed in/etc/fstab that use XVM devices at the time XVM is started during the bootsequence.
mkfs.xfs Using the Defaults
If you are making a filesystem on a disk partition or on a logical volume that doesnot have a log subvolume and want to use the default values for block size and logsize, use the following command to create the new XFS filesystem:
# mkfs.xfs partition
The following example shows the command line to create an XFS filesystem using thedefaults and system output:
# mkfs.xfs /dev/sdc1
meta-data=/dev/sdc1 isize=256 agcount=18, agsize=1048576 blks
data = bsize=4096 blocks=17921788, imaxpct=25
= sunit=0 swidth=0 blks, unwritten=0naming =version 2 bsize=4096
log =internal log bsize=4096 blocks=2187, version=1
= sunit=0 blks
realtime =none extsz=65536 blocks=0, rtextents=0
mkfs.xfs Specifying Block and Log Size of Internal Log
If you are making a filesystem on a disk partition or on a logical volume that doesnot have a log subvolume and want to specify the block size and log size, use thefollowing mkfs.xfs command to create the new XFS filesystem:
# mkfs.xfs -b size=blocksize -l size=logsize partition
blocksize is the filesystem block size (see "Choosing the Filesystem Block Size" on page3), logsize is the size of the area dedicated to log records (see "Choosing the Log Type
007–4273–007 13

3: Creating XFS Filesystems
and Size" on page 4), and partition is the device name or logical volume. The defaultvalues are 4-KB blocks and a 1000-block log.
The following example shows the command line used to create an XFS filesystem andthe system output. The filesystem has a 10–MB internal log and a block size of 1 KBand is on the partition /dev/dsk/dks0d4s7.
# mkfs.xfs -b size=1k -l size=10m /dev/sdc1
meta-data=/dev/sdc1 isize=256 agcount=18, agsize=4194304 blks
data = bsize=1024 blocks=71687152, imaxpct=25
= sunit=0 swidth=0 blks, unwritten=0naming =version 2 bsize=4096
log =internal log bsize=1024 blocks=10240, version=1
= sunit=0 blks
realtime =none extsz=65536 blocks=0, rtextents=0
mkfs.xfs for a Logical Volume with a Log Subvolume
If you are making a filesystem on a logical volume that has a log subvolume (for anexternal log), use the following mkfs.xfs command to make the new XFS filesystem:
# mkfs.xfs -l logdev=device,size=blocksize partition
For example, to make a filesystem on partition /dev/sdc1, with an external log onthe entire device /dev/sdh, whose size is 65536 filesystem blocks, enter the following:
# mkfs.xfs -l logdev=/dev/sdh,size=65536b /dev/sdc1meta-data=/dev/sdc1 isize=256 agcount=4, agsize=76433916
blks
= sectsz=512 attr=2
data = bsize=4096 blocks=305735663,
imaxpct=5
= sunit=0 swidth=0 blksnaming =version 2 bsize=4096 ascii-ci=0
log =/dev/sdh bsize=4096 blocks=65536, version=2
= sectsz=512 sunit=0 blks, lazy-count=1
realtime =none extsz=4096 blocks=0, rtextents=0
14 007–4273–007
XFS®
Administrator Guide
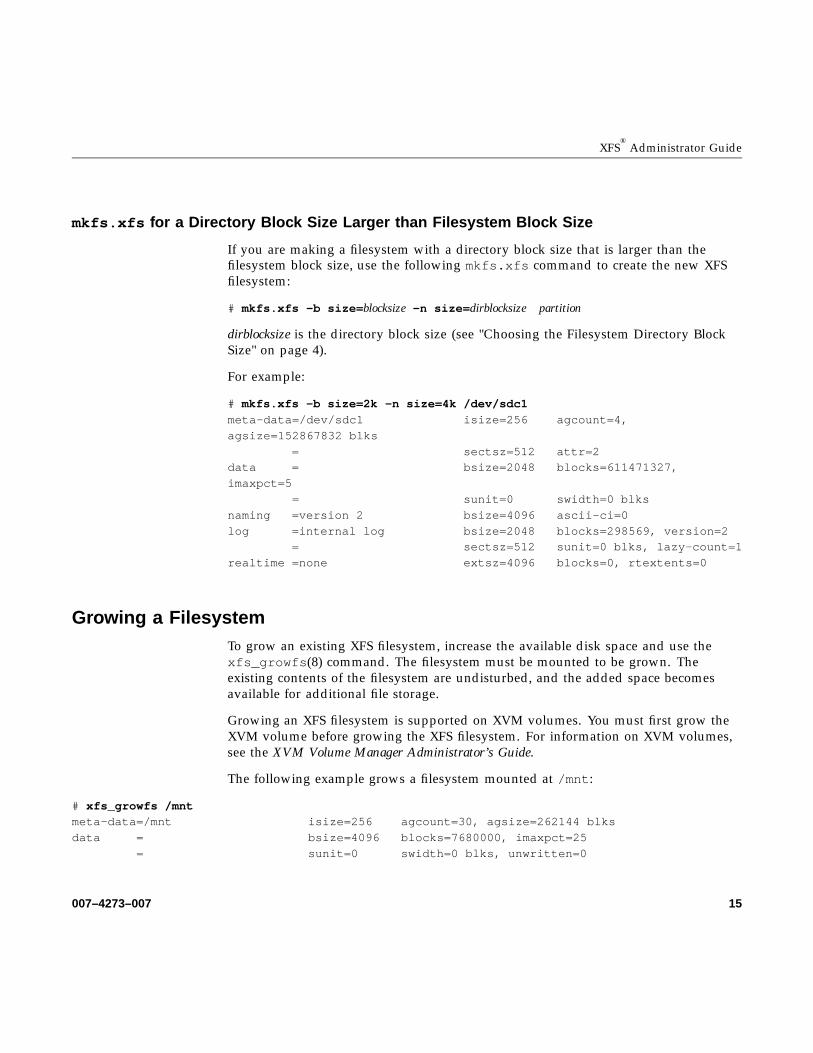
mkfs.xfs for a Directory Block Size Larger than Filesystem Block Size
If you are making a filesystem with a directory block size that is larger than thefilesystem block size, use the following mkfs.xfs command to create the new XFSfilesystem:
# mkfs.xfs -b size=blocksize -n size=dirblocksize partition
dirblocksize is the directory block size (see "Choosing the Filesystem Directory BlockSize" on page 4).
For example:
# mkfs.xfs -b size=2k -n size=4k /dev/sdc1
meta-data=/dev/sdc1 isize=256 agcount=4,
agsize=152867832 blks
= sectsz=512 attr=2data = bsize=2048 blocks=611471327,
imaxpct=5
= sunit=0 swidth=0 blks
naming =version 2 bsize=4096 ascii-ci=0
log =internal log bsize=2048 blocks=298569, version=2= sectsz=512 sunit=0 blks, lazy-count=1
realtime =none extsz=4096 blocks=0, rtextents=0
Growing a FilesystemTo grow an existing XFS filesystem, increase the available disk space and use thexfs_growfs(8) command. The filesystem must be mounted to be grown. Theexisting contents of the filesystem are undisturbed, and the added space becomesavailable for additional file storage.
Growing an XFS filesystem is supported on XVM volumes. You must first grow theXVM volume before growing the XFS filesystem. For information on XVM volumes,see the XVM Volume Manager Administrator’s Guide.
The following example grows a filesystem mounted at /mnt:
# xfs_growfs /mntmeta-data=/mnt isize=256 agcount=30, agsize=262144 blks
data = bsize=4096 blocks=7680000, imaxpct=25
= sunit=0 swidth=0 blks, unwritten=0
007–4273–007 15

3: Creating XFS Filesystems
naming =version 2 bsize=4096log =internal bsize=4096 blocks=1200 version=1
= sunit=0 blks
realtime =none extsz=65536 blocks=0, rtextents=0
data blocks changed from 7680000 to 17921788
16 007–4273–007

Chapter 4
Filesystem Maintenance
The chapter discusses the following:
• "Filesystem Reorganization" on page 17
• "Filesystem Corruption" on page 17
• "Checking Filesystem Consistency" on page 18
• "Repairing XFS Filesystem Problems" on page 21
• "Remounting an XFS Filesystem" on page 26
Filesystem ReorganizationFilesystems can become fragmented over time. When a filesystem is fragmented,blocks of free space are small and files have many extents. The xfs_fsr commandreorganizes filesystems so that the layout of the extents is improved. This improvesoverall performance. See the xfs_fsr(8) man page for more information.
Filesystem CorruptionMost often, a filesystem is corrupted because the system experienced a panic. Thiscan be caused by system software failure, hardware failure, or human error (forexample, pulling the plug). Another possible source of filesystem corruption isoverlapping partitions.
There is no foolproof way to predict hardware failure. The best way to avoidhardware failures is to conscientiously follow recommended diagnostic andmaintenance procedures.
Human error is probably the greatest single cause of filesystem corruption. To avoidproblems, follow these rules closely:
• Always shut down the system properly. Do not simply turn off power to thesystem. Use a standard system shutdown tool, such as the shutdown(8) command.
• Never remove a filesystem physically (never pull out a hard disk) without firstturning off power.
007–4273–007 17

4: Filesystem Maintenance
• Never physically write-protect a mounted filesystem, unless it is mountedread-only.
• Do not mount filesystems on dual-hosted disks on two systems simultaneously.
The best way to ensure against data loss is to make regular, careful backups.
In some cases, XFS filesystem corruption, even on the root filesystem, can be repairedwith the command xfs_repair. For more information about xfs_repair(8) seethe man page and "Checking Filesystem Consistency" on page 18
Checking Filesystem ConsistencyThis section discusses the following:
• "Overview of the Commands to Check Filesystem Consistency" on page 18
• "xfs_repair -n Command Line" on page 19
• "xfs_check Command Line" on page 20
Overview of the Commands to Check Filesystem Consistency
You can use the following commands to check the consistency of a filesystem:
• xfs_repair -n (no-modify mode)
The xfs_repair -n command is optimized to quickly and efficiently check anXFS filesystem. The xfs_repair -n command checks XFS filesystem consistencywithout making any attempt to repair problems, and it performs a more completecheck than xfs_check. However, it performs only limited checking of extendedattributes.
Note: The xfs_repair command without the -n option makes modifications andshould be used with caution; see "Repairing XFS Filesystem Problems" on page 21
• xfs_check
The xfs_check command calls the checking routines of the general-purpose XFSfilesystem debugger xfs_db, which requires more memory and time to check afilesystem than does xfs_repair -n. You can use xfs_check on filesystems
18 007–4273–007

XFS®
Administrator Guide
with extended attributes. (For more information about extended attributes, see theattr(1) man page.)
The filesystem to be checked must have been unmounted cleanly using normal systemadministration procedures (the umount command or system shutdown), not as aresult of a crash or system reset. If the filesystem has not been unmounted cleanly,mount it and unmount it cleanly before running xfs_check or xfs_repair -n.
Unlike fsck, xfs_check and xfs_repair -n are not invoked automatically onsystem startup. You should use these commands if you suspect a filesystemconsistency problem.
xfs_repair -n Command Line
!Caution: If you suspect problems with the root filesystem, you should use a boot diskor an alternate root to run xfs_repair.
The command line for xfs_repair -n is:
# xfs_repair -n device
device is the device file for a disk partition or logical volume that contains an XFSfilesystem, such as /dev/xscsi/pci02.02.0-1/target3/lun0/part1
The following example shows output with no consistency problems found:
# xfs_repair -n /dev/xscsi/pci02.02.0-1/target3/lun0/part1Phase 1 - find and verify superblock...
Phase 2 - using internal log
- scan filesystem freespace and inode maps...
- found root inode chunk
Phase 3 - for each AG...- scan (but don’t clear) agi unlinked lists...
- process known inodes and perform inode discovery...
- agno = 0
- agno = 1
...- process newly discovered inodes...
Phase 4 - check for duplicate blocks...
- setting up duplicate extent list...
- check for inodes claiming duplicate blocks...
007–4273–007 19
4: Filesystem Maintenance
- agno = 0- agno = 1
...
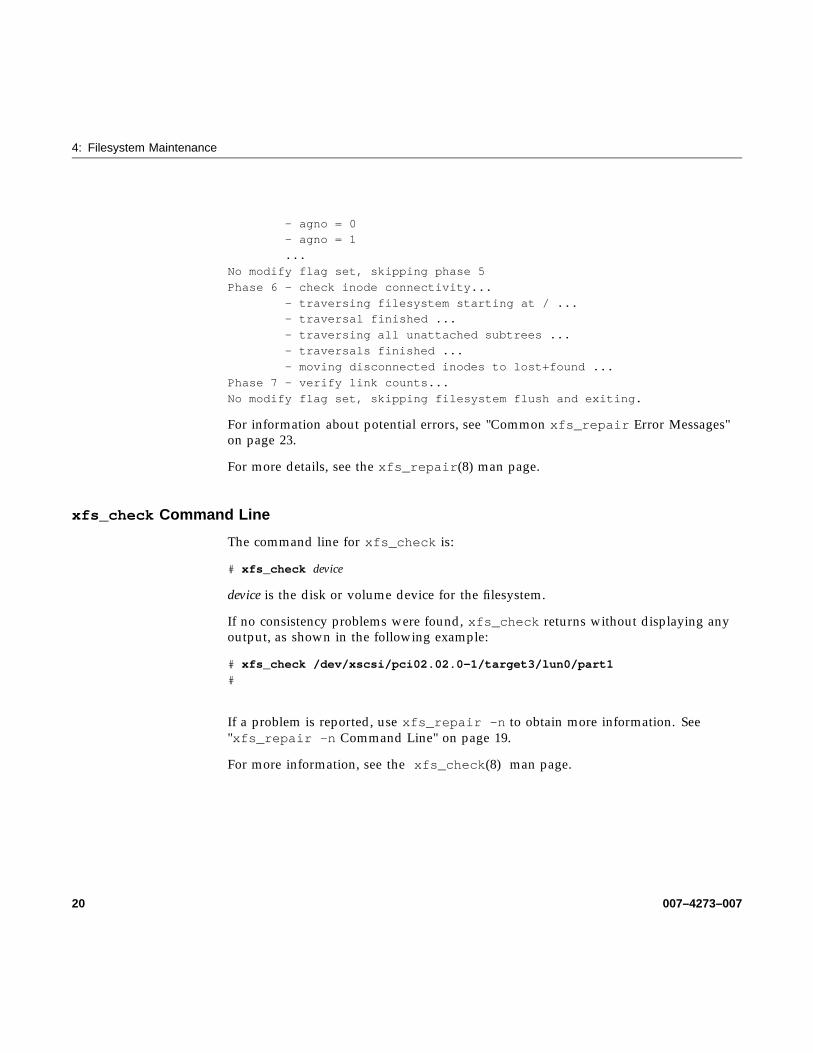
No modify flag set, skipping phase 5
Phase 6 - check inode connectivity...
- traversing filesystem starting at / ...- traversal finished ...
- traversing all unattached subtrees ...
- traversals finished ...
- moving disconnected inodes to lost+found ...
Phase 7 - verify link counts...
No modify flag set, skipping filesystem flush and exiting.
For information about potential errors, see "Common xfs_repair Error Messages"on page 23.
For more details, see the xfs_repair(8) man page.
xfs_check Command Line
The command line for xfs_check is:
# xfs_check device
device is the disk or volume device for the filesystem.
If no consistency problems were found, xfs_check returns without displaying anyoutput, as shown in the following example:
# xfs_check /dev/xscsi/pci02.02.0-1/target3/lun0/part1
#
If a problem is reported, use xfs_repair -n to obtain more information. See"xfs_repair -n Command Line" on page 19.
For more information, see the xfs_check(8) man page.
20 007–4273–007

XFS®
Administrator Guide
Repairing XFS Filesystem ProblemsThe xfs_repair command without the -n option checks XFS filesystem consistencyand sometimes repairs problems that are found. This section discusses the following:
• "Repairing Inconsistent Filesystems with xfs_repair" on page 21
• "Common xfs_repair Error Messages" on page 23
• "xfs_repair Error Messages When Files Are in lost+found" on page 24
• "What to Do If xfs_repair Cannot Repair a Filesystem" on page 25
• "Mounting a Filesystem Without Log Recovery" on page 25
Repairing Inconsistent Filesystems with xfs_repair
!Caution: To avoid filesystem damage when using xfs_repair without the -noption, you must ensure that the storage hardware, including RAID and interconnecthardware, are not experiencing any problems.
If you suspect problems with the root filesystem, you should use a boot disk or analternate boot disk to run xfs_repair.
The xfs_repair (without the -n option) checks XFS filesystem consistency and, ifproblems are detected, also corrects them if possible. The filesystem to be checkedand repaired must have been unmounted cleanly using normal system administrationprocedures (the umount command or system shutdown), not as a result of a crash orsystem reset. If the filesystem has not been unmounted cleanly, mount it andunmount it cleanly before running xfs_repair.
The command line for xfs_repair when you want it to repair any inconsistencies itfinds is:
# xfs_repair device
device is the disk or volume device for the filesystem. It must not be mounted.
007–4273–007 21

4: Filesystem Maintenance
The following example shows the output you see from running xfs_repair on aclean filesystem:
# xfs_repair /dev/xscsi/pci02.02.0-1/target3/lun0/part1
Phase 1 - find and verify superblock...
Phase 2 - using internal log
- zero log...
- scan filesystem freespace and inode maps...
- found root inode chunkPhase 3 - for each AG...
- scan and clear agi unlinked lists...
- process known inodes and perform inode discovery...
- agno = 0
- agno = 1...
- process newly discovered inodes...
Phase 4 - check for duplicate blocks...
- setting up duplicate extent list...
- clear lost+found (if it exists) ...- check for inodes claiming duplicate blocks...
- agno = 0
- agno = 1
...
Phase 5 - rebuild AG headers and trees...
- reset superblock...Phase 6 - check inode connectivity...
- resetting contents of realtime bitmap and summary inodes
- ensuring existence of lost+found directory
- traversing filesystem starting at / ...
- traversal finished ...- traversing all unattached subtrees ...
- traversals finished ...
- moving disconnected inodes to lost+found ...
Phase 7 - verify and correct link counts...
done
22 007–4273–007

XFS®
Administrator Guide
Common xfs_repair Error Messages
Some common error messages from xfs_repair and the repairs that it performs arethe following:
disconnected inode 242002, moving to lost+found
xfs_repair found an inode that is in use, but is not connected tothe filesystem. The inode is moved to the filesystem’s lost+founddirectory. Its name is its inode number (in this example, 242002). Ifthe disconnected inode is a directory, the directory’s subtree ispreserved—all of its child inodes are automatically moved with it, sothe entire directory subtree moves to lost+found.
imap claims in-use inode 2444941 is free, correcting imap
The inode allocation map in the filesystem behaves as if inode2444941(in this example) is free, but the inode itself looks like it isstill in use. xfs_repair corrects the inode map to say that the inodeis in use.
entry references free inode 2444940 in shortform directory2444922 junking entry "fb" in directory inode 2444922
A directory entry points to an inode (in this example, 2444940) thatxfs_repair has determined is actually free. xfs_repair junks thedirectory entry. The term shortform means a small directory. In largerdirectories, the entry deletion is usually a two-pass process. In thiscase, the second part of the message reads something like markingbad entry, marking entry to be deleted, or will clearentry.
resetting inode 241996 nlinks from 5 to 3
xfs_repair detected a mismatch between the number of directoryentries pointing to the inode (in this example, 241996) and thenumber of links recorded in the inode. It corrected the number (from5 to 3 in this case).
cleared inode 2444926
There was something wrong with the inode that was not correctable,so xfs_repair turned it into a zero-length free inode. This usuallyhappens because the inode claims blocks that are used by somethingelse or the inode itself is badly corrupted. Typically, the cleared
007–4273–007 23

4: Filesystem Maintenance
inode message is preceded by one or more messages indicating whythe inode must be cleared.
xfs_repair Error Messages When Files Are in lost+found
If xfs_repair has put files and directories in a filesystem’s lost+found directoryand you do not remove them, the next time you run xfs_repair it temporarilydisconnects the inodes for those files and directories. They are reconnected beforexfs_repair terminates. As a result of the disconnected inodes in lost+found, yousee output like this:
Phase 1 - find and verify superblock...
Phase 2 - zero log...
- scan filesystem freespace and inode maps...
- found root inode chunk
Phase 3 - for each AG...- scan and clear agi unlinked lists...
- process known inodes and perform inode discovery...
- agno = 0
- agno = 1
...- process newly discovered inodes...
Phase 4 - check for duplicate blocks...
- setting up duplicate extent list...
- clear lost+found (if it exists) ...
- clearing existing ‘‘lost+found’’ inode
- deleting existing ‘‘lost+found’’ entry- check for inodes claiming duplicate blocks...
- agno = 0
imap claims in-use inode 242000 is free, correcting imap
- agno = 1
- agno = 2...
Phase 5 - rebuild AG headers and trees...
- reset superblock counters...
Phase 6 - check inode connectivity...
- ensuring existence of lost+found directory
- traversing filesystem starting at / ...- traversal finished ...
- traversing all unattached subtrees ...
24 007–4273–007

XFS®
Administrator Guide
- traversals finished ...- moving disconnected inodes to lost+found ...
disconnected inode 242000, moving to lost+found
Phase 7 - verify and correct link counts...
done
In this example, inode 242000 was an inode that was moved to lost+found duringa previous xfs_repair run. This run of xfs_repair found that the filesystem isconsistent. If the lost+found directory had been empty, in phase 4 only themessages about clearing and deleting the lost+found directory would haveappeared. The imap claims and disconnected inode messages appear (one pairof messages per inode) if there are inodes in the lost+found directory.
What to Do If xfs_repair Cannot Repair a Filesystem
If xfs_repair fails to repair the filesystem successfully, try giving the samexfs_repair command twice more; xfs_repair may be able to make more repairson successive runs. If xfs_repair fails to fix the consistency problems in three tries,your next step depends upon where it failed:
• If xfs_repair failed in phase 1, you must restore lost files from backups.
• If xfs_repair failed in phase 2 or later, you may be able to restore files from thedisk by backing up and restoring the files on the filesystem.
If xfs_repair failed in phase 2 or later, follow these steps:
1. Mount the filesystem read-only using mount -r.
2. Make a filesystem backup with xfsdump.
3. Use mkfs.xfs to a make new filesystem on the same disk partition or logicalvolume.
4. Restore the files from the backup with xfsrestore.
See Chapter 6, "Backup and Recovery Procedures" for information about xfsdumpand xfsrestore.
Mounting a Filesystem Without Log Recovery
If a filesystem is damaged to the extent that you are unable to mount the filesystemsuccessfully in the standard fashion, you may be able to recover some of its data by
007–4273–007 25

4: Filesystem Maintenance
mounting the filesystem with the -o norecover option of the mount command.This option mounts the filesystem without running log recovery. You must mount thefilesystem as read-only when you use this option.
Remounting an XFS FilesystemThe -o remount option to the mount(8) command does not do a full initialization ofall mount options; it ignores some options (such as for quotas) and may implementonly a subset of options. Therefore, the best practice is to first unmount the filesystemwith the umount(8) command and then mount it again with the mount command(without the remount option).
The -o remount option is acceptable only with the following mount options:
Option Description
ro Read only
rw Read-write
barrier Barrier on
nobarrier Barrier off
swalloc Stripe allocation on
noalign Stripe allocation off
For more information, see the mount(8) command.
26 007–4273–007

Chapter 5
Disk Quotas
This chapter discusses the following:
• "Overview of Disk Quotas" on page 27
• "Enabling Quotas" on page 29
• "Setting Quota Limits" on page 31
• "Displaying Quota Information" on page 33
• "Administering Quotas" on page 33
• "Monitoring Disk Space Usage with Quota Accounting" on page 34
• "Checking Disk Space Usage" on page 35
For more information, see the xfs_quota(8) man pages.
Overview of Disk QuotasIf your system is constantly short of disk space and you cannot increase the amountof available space, you an use disk quotas to manage your existing space.
Disk quotas let you limit the amount of space a user can occupy and the number offiles (inodes) each user can own. You can implement hard or soft limits; hard limitsare enforced by the system, soft limits merely remind the user to trim disk usage.Disk usage limits are not enforced for root.
With soft limits, whenever a user logs in with a usage greater than the assigned softlimit, that user is warned (by the login command). When the user exceeds the softlimit, the timer is enabled. Any time the quota drops below the soft limits, the timeris disabled. If the timer is enabled longer than a time period set by the systemadministrator, the particular limit that has been exceeded is treated as if the hard limithas been reached, and no more disk space is allocated to the user. The only way toreset this condition is to reduce usage below the quota. Only root may set the timelimits, and this is done on a per-filesystem basis.
You can impose limits on some users and not others, some filesystems and not others,and on total disk usage per user, or total number of files. There is no limit to thenumber of accounts and there is little performance penalty for large numbers of users.
007–4273–007 27

5: Disk Quotas
You can also impose limits according to user ID, group ID, or project ID. You canassociate a directory in the filesystem hierarchy with a project ID by including it inthe /etc/projects file. (You can use /etc/projid to map each project name toits number.) With project quotas in effect, such a directory and all files and directoriesbelow it can be subjected to a quota, meaning that the aggregate resource usedthereunder is limited. For more information, see the xfs_quota(8) man page.
Note: Group quotas and project quotas are mutually exclusive per filesystem becauseXFS records either the project ID or the group ID of a file in the same physicallocation; how the number is interpreted depends upon whether project or groupquotas are in force.
Disk quotas can be used to do disk usage accounting. Disk usage accountingmonitors disk usage, but does not enforce disk usage limits. See "Monitoring DiskSpace Usage with Quota Accounting" on page 34 for more information.
You must first turn on disk quotas on a filesystem, then you can set quotas on thatfilesystem for individual users and for projects or groups.
For more details about disk quotas, see the quotas(4) man page.
28 007–4273–007

XFS®
Administrator Guide
Enabling QuotasThis section discusses the following:
• "Enabling Quotas for Users" on page 29
• "Enabling Quotas for Groups" on page 29
• "Enabling Quotas for Projects" on page 30
Enabling Quotas for Users
You can enable quotas for users in these ways:
• To turn on disk quotas automatically for users on a non-root filesystem, includethe option quota in the /etc/fstab entry, for example:
/dev/foo / xfs rw,quota 0 0
• To turn on disk quotas manually for users on a non-root filesystem, mount thefilesystem with this command:
# mount -o quota fsname rootdir
fsname is the device name of the filesystem, rootdir is the directory where thefilesystem is mounted.
• To turn on disk quotas for users on the root filesystem, you must pass the quotamount options into the kernel at boot time through the Linux rootflags bootoption. The following example adds the rootflags=quota option to the appendline in elilo.conf:
append="root=/dev/xscsi/pci00.01.0-1/tsrget0/lun0/part3 rootflags=quota"
Enabling Quotas for Groups
You can enable quotas for groups in these ways:
• To turn on disk quotas automatically for groups on a non-root filesystem, includethe option gquota in the /etc/fstab entry, for example:
/dev/foo / xfs rw,gquota 0 0
007–4273–007 29

5: Disk Quotas
• To turn on disk quotas manually for groups on a non-root filesystem, mount thefilesystem with this command:
# mount -o gquota fsname rootdir
fsname is the device name of the filesystem, rootdir is the directory where thefilesystem is mounted.
• To turn on disk quotas for groups on the root filesystem, you must pass the quotamount options into the kernel at boot time through the Linux rootflags bootoption. The following example adds the rootflags=gquota option to theappend line in elilo.conf:
append="root=/dev/xscsi/pci00.01.0-1/tsrget0/lun0/part3 rootflags=gquota"
Enabling Quotas for Projects
Note: Group and project quotas are mutually exclusive per filesystem.
You can enable quotas for projects in these ways:
• To turn on disk quotas automatically for projects on a non-root filesystem, includethe option prjquota in the /etc/fstab entry, for example:
/dev/foo / xfs rw,prjquota 0 0
• To turn on disk quotas manually for projects on a non-root filesystem, mount thefilesystem with this command:
# mount -o prjquota fsname rootdir
fsname is the device name of the filesystem, rootdir is the directory where thefilesystem is mounted.
• To turn on disk quotas for projects on the root filesystem, you must pass the quotamount options into the kernel at boot time through the Linux rootflags bootoption. The following example adds the rootflags=prjquota option to theappend line in elilo.conf:
append="root=/dev/xscsi/pci00.01.0-1/tsrget0/lun0/part3 rootflags=prjquota"
30 007–4273–007
XFS®
Administrator Guide
Setting Quota LimitsAfter enabling quotas, you can set limits for users, groups, or projects:
• "Setting Quota Limits for Users" on page 31
• "Setting Quota Limits for Groups" on page 31
• "Setting Quota Limits for Projects" on page 32
Note: Group and project quotas are mutually exclusive per filesystem.
Setting Quota Limits for Users
After completing "Enabling Quotas for Users" on page 29, do the following to specifyquota limits for a user:
# xfs_quota -x -c ’limit -u bsoft=N bhard=N user’ rootdir
where:
• N is a soft or hard limit for disk usage in blocks of the specified unit: k (kilobytes),m (megabytes), g (gigabytes), or t (terabytes)
• user is a user name or numeric user ID
• rootdir is the mount point of the XFS filesystem.
For example, to set limits for user userA on /mnt/myxfs using a soft limit of 5Mbytes and a hard limit of 6 Mbytes:
# xfs_quota -x -c ’limit -u bsoft=5m bhard=6m userA’ /mnt/myxfs
Setting Quota Limits for Groups
After completing "Enabling Quotas for Groups" on page 29, setting disk quota limitsfor groups is similar to setting limits for users (as described in "Setting Quota Limitsfor Users" on page 31), but uses the -g option and the group name or ID.
To specify quota limits for a group:
# xfs_quota -x -c ’limit -g bsoft=N bhard=N group’ rootdir
007–4273–007 31

5: Disk Quotas
where:
• N is a soft or hard limit for disk usage in blocks of the specified unit: k (kilobytes),m (megabytes), g (gigabytes), or t (terabytes)
• group is a group name or numeric group ID
• rootdir is the mount point of the XFS filesystem.
For example, to set limits for group groupA on /mnt/myxfs using a soft limit of 5Mbytes and a hard limit of 6 Mbytes:
# xfs_quota -x -c ’limit -g bsoft=5m bhard=6m groupA’ /mnt/myxfs
Setting Quota Limits for Projects
After completing "Enabling Quotas for Projects" on page 30, setting limits for projectsis similar to setting limits for groups (as described in "Setting Quota Limits forGroups" on page 31), but uses the -p option and the project name or ID.
Note: Group and project quotas are mutually exclusive per filesystem.
To specify quota limits for a project:
# xfs_quota -x -c ’limit -p bsoft=N bhard=N project’ rootdir
where:
• N is a soft or hard limit for disk usage in blocks of the specified unit: k (kilobytes),m (megabytes), g (gigabytes), or t (terabytes)
• project is a project name or numeric group ID
• rootdir is the mount point of the XFS filesystem.
For example, to set limits for project projectA on /mnt/myxfs using a soft limit of5 Mbytes and a hard limit of 6 Mbytes:
# xfs_quota -x -c ’limit -p bsoft=5m bhard=6m projectA’ /mnt/myxfs
For more information about projects, see the xfs_quota(8) man page.
32 007–4273–007

XFS®
Administrator Guide
Displaying Quota InformationSome commands that display information about disk quotas are as follows:
• To display a report that shows whether disk quotas are on or off for eachfilesystem:
# xfs_quota -x -c state
• To see filesystem quota information for a specific filesystem:
# xfs_quota -x -c report rootdir
For example, to see quota information for the /mnt/myxfs filesystem:
# xfs_quota -x -c report /mnt/myxfs
• To get information about group disk quotas for each filesystem:
# xfs_quota -x -c ’report -g’
Administering QuotasIf the filesystem being dumped contains quotas, xfsdump will use xfs_quota(8) tostore the quotas in the following files in the root of the filesystem to be dumped:
xfsdump_quotas User quotas
xfsdump_quotas_group Group quotas
These files will then be included in the dump. These files will appear only for thosequotas that are enabled on the filesystem being dumped. Upon restoration, you canuse xfs_quota to reactivate the quotas for the filesystem.
Note: The xfsdump_quotas file will probably require modification to change thefilesystem or UIDs if the filesystem has been restored to a different partition or system.
To create quota reports, do the following:
• To create a file that lists the current quota limits of all the filesystems for users,enter this command as superuser:
# xfs_quota -x -c ’report -f quotafile’
007–4273–007 33

5: Disk Quotas
• To create a file that lists the current quota limits of all the filesystems for groups,enter this command as superuser:
# xfs_quota -x -c ’report -g -f quotafile’
Monitoring Disk Space Usage with Quota AccountingThe disk quotas system can be used to monitor disk space usage without enforcingdisk usage limits. Disk quota accounting can be enabled by user or by group.
Use the following commands to turn on disk usage accounting without enforcement,stop disk usage accounting, and report disk space usage:
• To turn on disk usage accounting automatically on a filesystem for user quotas,include the option qnoenforce in the /etc/fstab entry:
/dev/foo / xfs rw,qnoenforce 0 0
• To turn on disk usage accounting automatically on a filesystem for group quotas,include the option gqnoenforce in the /etc/fstab entry:
/dev/foo / xfs rw,
gqnoenforce 0 0
• To turn on disk usage accounting manually for user quotas on a non-rootfilesystem, when mounting the filesystem:
# mount -o qnoenforce fsname rootdir
fsname is the device name of the filesystem, rootdir is the directory where thefilesystem is mounted.
• To turn on disk usage accounting manually on a non-root filesystem for groupquotas when mounting the filesystem:
# mount -o gqnoenforce fsname rootdir
34 007–4273–007

XFS®
Administrator Guide
• To turn on disk usage accounting manually on the root filesystem for user quotas,execute the following commands. The quotaon command turns on diskaccounting with enforcement, and the quotaoff -o command turns off theenforcement:
# quotaon -v /
# quotaoff -v -o enforce /
# reboot
• To turn on disk usage accounting manually on the root filesystem (/) for groupquotas:
# quotaon -v -o gquota /# quotaoff -v -o gqenforce /
# reboot
• To stop disk usage accounting on a filesystem for user quotas:
# quotaoff fsname
• To stop disk usage accounting on a filesystem for group quotas:
# quotaoff -o gquota fsname
• To get information about disk usage, use the commands described in "CheckingDisk Space Usage" on page 35.
Checking Disk Space UsageThe quota command reports the amount of disk usage per user, per group, or perproject on a filesystem, as well as additional information about the disk quotas. Youmust turn on quotas to use this feature, even if you are not going to enforce quotalimits. For instructions on monitoring disk space usage without enforcing disk usagelimits see "Monitoring Disk Space Usage with Quota Accounting" on page 34.
For information on the output of the quota command, see "Displaying QuotaInformation" on page 33.
007–4273–007 35


Chapter 6
Backup and Recovery Procedures
This section discusses the following:
• "Features of xfsdump and xfsrestore" on page 37
• "Media Layout for xfsdump" on page 38
• "Possible xfsdump Layouts" on page 39
• "Saving Data with xfsdump" on page 45
• "Examining xfsdump Archives" on page 53
• "About xfsrestore" on page 54
• "Using xfsdump and xfsrestore to Copy Filesystems" on page 68
For more information, see the xfsdump(8) and xfsrestore(8) man pages.
Features of xfsdump and xfsrestore
The xfsdump and xfsrestore utilities fully support XFS filesystems. Withxfsdump and xfsrestore, you can back up and restore data using local or remotedrives. You can back up filesystems, directories, and individual files, and then restorethem independently of how they were backed up. xfsdump also allows you to backup “live” (mounted, in-use) filesystems.
With xfsdump and xfsrestore, you can recover from intentional or accidentalinterruptions—this means you can interrupt a dump or restore at any time, and thenresume it whenever desired. xfsdump and xfsrestore support incrementaldumps, and multiple dumps can be placed on a single media object.
xfsdump and xfsrestore support the following:
• XFS features including 64-bit inode numbers, file lengths, and holes
• Multiple media types (disk and various kinds of tape )
007–4273–007 37

6: Backup and Recovery Procedures
• File types:
RegularDirectorySymbolic linkBlock and character specialFIFOsocket
xfsdump and xfsrestore retain hard links. xfsdump does not affect the state ofthe filesystem being dumped (for example, access times are retained). xfsrestoredetects and bypasses media errors and recovers rapidly after encountering them.xfsdump does not cross mount points, local or remote.
xfsdump optionally prompts for additional media when the end of the current mediais reached. Operator estimates of media capacity are not required and xfsdump alsosupports automated backups. xfsdump maintains an extensive online inventory of alldumps performed. Inventory contents can be viewed through various filters toquickly locate specific dump information. xfsrestore supports interactiveoperation, allowing selection of individual files or directories for recovery. It alsopermits selection from among backups performed at different times when multipledumps are available. Dump contents may also be viewed noninteractively.
Note: If you are using disk quotas on XFS filesystems, see Chapter 5, "Disk Quotas".
Media Layout for xfsdump
The following section introduces some terminology and then describes the wayxfsdump formats data on the storage media for use by xfsrestore.
While xfsdump and xfsrestore are often used with tape media, the utilitiesactually support multiple kinds of media, so in the following discussions, the termmedia object is used to refer to the media in a generic fashion. The term dump refers tothe result of a single use of the xfsdump command to output data files to the selectedmedia objects. An instance of the use of xfsdump is referred to as a dump session.
The dump session sends a single dump stream to the media objects. The dump streammay contain as little as a single file or as much as an entire filesystem. The dumpstream is composed of dump objects, which are:
• One or more data segments
38 007–4273–007

XFS®
Administrator Guide
• An optional dump inventory
• A stream terminator
The data segment contains the actual data, the dump inventory contains a list of thedump objects in the dump, and the stream terminator marks the end of the dumpstream. When a dump stream is composed of multiple dump objects, each object iscontained in a media file. Some output devices, for example standard output, do notsupport the concept of media files—the dump stream is only the data.
Possible xfsdump LayoutsThe simplest dump, for example the dump of a small amount of data to a single tape,produces a data segment and a stream terminator as the only dump objects. If theoptional inventory object is added, you have a dump like that illustrated in Figure6-1. (In the data layout diagrams in this section, the optional inventory object isalways included.)
Data
Inventory
Terminator
Media files
Figure 6-1 Single Dump on Single Media Object
007–4273–007 39
6: Backup and Recovery Procedures
You can also dump data streams that are larger than a single media object. The datastream can be broken between any two media files including data segment boundaries.(The inventory is never broken into segments.) In addition, if you specify multipledrives, the dump is automatically broken into multiple streams. The xfsdump utilityprompts for a new media object when the end of the current media object is reached.
Figure 6-2 illustrates the data layout of a single dump session that requires two mediaobjects on each of two devices.
40 007–4273–007

XFS®
Administrator Guide
Data segment
Inventory
Terminator
Data segment
Data segment
Data segment
Media object 1
Media object 2
Figure 6-2 Single Dump on Multiple Media Objects
007–4273–007 41

6: Backup and Recovery Procedures
The xfsdump utility also accommodates multiple dumps on a single media object.When dumping to tape, for example, the tape is automatically advanced past theexisting dump sessions and the existing stream terminator is erased. The new dumpdata is then written, followed by the new stream terminator. (For drives that do notpermit termination to operate in this way, other means are used to achieve the sameeffective result.)
Figure 6-3 illustrates the layout of media files for two dumps on a single media object.
Figure 6-4 illustrates a case in which multiple dumps use multiple media objects. Ifmedia files already exist on the additional media objects, the xfsdump utility finds theexisting stream terminator, erases it, and begins writing the new dump data stream.
42 007–4273–007

XFS®
Administrator Guide
Inventory
Terminator
Inventory
Data segment
Data segment
Data segment
Data segment
First dump
Second dum
p
Former
terminator
location
Figure 6-3 Multiple Dumps on Single Media Object
007–4273–007 43

6: Backup and Recovery Procedures
Inventory
Data segment
Data segment
Data segment
Inventory
Terminator
Data segment
Data segment
Data segment
First dump
Media object 1
Media object 2
Second dum
p
Former
terminator
location
Figure 6-4 Multiple Dumps on Multiple Media Objects
44 007–4273–007

XFS®
Administrator Guide
Saving Data with xfsdump
This section discusses the following:
• "xfsdump Syntax" on page 45
• "Specifying Local Media" on page 46
• "Specifying a Remote Tape Drive" on page 47
• "Backing Up to a File" on page 49
• "Reusing Tapes" on page 49
• "Erasing Used Tapes" on page 50
• "About Incremental and Resumed Dumps" on page 50
• "Performing an Incremental Dump" on page 51
• "Performing a Resumed Dump" on page 52
xfsdump Syntax
You must be the superuser to use xfsdump. To display a summary of xfsdumpsyntax, use the -h option:
# xfsdump -hxfsdump: version X.Xxfsdump: usage: xfsdump [ -b <blocksize> (with minimal rmt option) ]
[ -c <media change alert program> ]
[ -f <destination> ... ]
[ -h (help) ][ -l <level> ]
[ -m <force usage of minimal rmt> ]
[ -o <overwrite tape > ]
[ -p <seconds between progress reports> ]
[ -s <subtree> ... ]
[ -v <verbosity {silent, verbose, trace}> ][ -A (don’t dump extended file attributes) ]
[ -B <base dump session id> ]
[ -E (pre-erase media) ]
[ -F (don’t prompt) ]
[ -I (display dump inventory) ]
007–4273–007 45

6: Backup and Recovery Procedures
[ -J (inhibit inventory update) ][ -L <session label> ]
[ -M <media label> ... ]
[ -O <options file> ]
[ -R (resume) ]
[ -T (don’t timeout dialogs) ][ -Y <I/O buffer ring length> ]
[ - (stdout) ]
[ <source (mntpnt|device)> ]
Specifying Local Media
You can use xfsdump to back up data to various media. For example, you can dumpdata to a tape or hard disk. The drive containing the media object may be connectedto the local system or accessible over the network.
Following is an example of a level–0 dump to a local tape drive.
Note: The dump level does not need to be specified for a level–0 dump. For adiscussion of dump levels, see "About Incremental and Resumed Dumps" on page 50.
# xfsdump -f /dev/tape -L testers_11_21_94 -M test_1 /disk2
xfsdump: version 2.0 - type ^C for status and control
xfsdump: level 0 dump of cumulus:/disk2xfsdump: dump date: Wed Oct 25 16:19:13 1995
xfsdump: session id: d2a6123b-b21d-1001-8938-08006906dc5c
xfsdump: session label: ‘‘testers_11_21_94’’
xfsdump: ino map phase 1: skipping (no subtrees specified)
xfsdump: ino map phase 2: constructing initial dump listxfsdump: ino map phase 3: skipping (no pruning necessary)
xfsdump: ino map phase 4: skipping (size estimated in phase 2)
xfsdump: ino map phase 5: skipping (only one dump stream)
xfsdump: ino map construction complete
xfsdump: preparing drivexfsdump: creating dump session media file 0 (media 0, file 0)
xfsdump: dumping ino map
xfsdump: dumping directories
xfsdump: dumping non-directory files
xfsdump: ending media file
xfsdump: media file size 16777216 bytes
46 007–4273–007

XFS®
Administrator Guide
xfsdump: dumping session inventoryxfsdump: beginning inventory media file
xfsdump: media file 1 (media 0, file 1)
xfsdump: ending inventory media file
xfsdump: inventory media file size 4194304 bytes
xfsdump: writing stream terminatorxfsdump: beginning media stream terminator
xfsdump: media file 2 (media 0, file 2)
xfsdump: ending media stream terminator
xfsdump: media stream terminator size 2097152 bytes
xfsdump: I/O metrics: 3 by 2MB ring; 14/22 (64%) records streamed; 145889B/s
xfsdump: dump complete: 141 seconds elapsed
In this case, a session label (-L option) and a media label (-M option) are supplied,and the entire filesystem is dumped. Since no verbosity option is supplied, the defaultof verbose is used, resulting in the detailed screen output. The dump inventory isupdated with the record of this backup because the -J option is not specified.
Following is an example of a backup of a subdirectory of a filesystem. In thefollowing example, the verbosity is set to silent, and the dump inventory is notupdated (-J option):
# xfsdump -f /dev/tape -v silent -J -s people/fred /usr
The subdirectory backed up (/usr/people/fred) was specified relative to thefilesystem, so the specification did not include the name of the filesystem (in this case,/usr). Because /usr may be a very large filesystem and the -v silent option wasused, this could take a long time during which there would be no screen output.
Specifying a Remote Tape Drive
To back up data to a remote tape drive, use the standard remote system syntax,specifying the system (by hostname if supported by a name server or IP address ifnot) followed by a colon (:), then the pathname of the special file.
Note: For remote backups, use the variable block size tape device if the devicesupports variable block size operation; otherwise, use the fixed block size device. Formore information, see intro(7) .
007–4273–007 47

6: Backup and Recovery Procedures
The following example shows a subtree backup to a remote tape device:
# xfsdump -f magnolia:/dev/tape -L mag_10-95 -s engr /disk2xfsdump: version 2.0 - type ^C for status and control
xfsdump: level 0 dump of cumulus:/disk2
xfsdump: dump date: Wed Oct 25 16:27:39 1995
xfsdump: session id: d2a6124b-b21d-1001-8938-08006906dc5c
xfsdump: session label: ‘‘mag_10-95’’
xfsdump: ino map phase 1: parsing subtree selectionsxfsdump: ino map phase 2: constructing initial dump list
xfsdump: ino map phase 3: pruning unneeded subtrees
xfsdump: ino map phase 4: estimating dump size
xfsdump: ino map phase 5: skipping (only one dump stream)
xfsdump: ino map construction completexfsdump: preparing drive
xfsdump: positioned at media file 0: dump 0, stream 0
xfsdump: positioned at media file 1: dump 0, stream 0
xfsdump: positioned at media file 2: dump 0, stream 0
xfsdump: stream terminator foundxfsdump: creating dump session media file 0 (media 0, file 2)
xfsdump: dumping ino map
xfsdump: dumping directories
xfsdump: dumping non-directory files
xfsdump: ending media file
xfsdump: media file size 6291456 bytesxfsdump: dumping session inventory
xfsdump: beginning inventory media file
xfsdump: media file 1 (media 0, file 3)
xfsdump: ending inventory media file
xfsdump: inventory media file size 4194304 bytesxfsdump: writing stream terminator
xfsdump: beginning media stream terminator
xfsdump: media file 2 (media 0, file 4)
xfsdump: ending media stream terminator
xfsdump: media stream terminator size 2097152 bytesxfsdump: I/O metrics: 3 by 2MB ring; 12/22 (55%) records streamed; 99864B/s
xfsdump: dump complete: 149 seconds elapsed
In this case, /disk2/engr is backed up to the variable block size tape device on theremote system magnolia. Existing dumps on the tape mounted on magnolia wereskipped before recording the new data.
48 007–4273–007

XFS®
Administrator Guide
Note: The superuser account on the local system must be able to rsh to the remotesystem without a password. For more information, see hosts.equiv(4) .
Backing Up to a File
You can back up data to a file instead of a device. In the following example, a file(Makefile) and a directory (Source) are backed up to a dump file(monday_backup) in /usr/tmp on the local system:
# xfsdump -f /usr/tmp/monday_backup -v silent -J -s \
people/fred/Makefile -s people/fred/Source /usr
You may also dump to a file on a remote system, but the file must be in the remotesystem’s /dev directory. For example, the following command backs up the/usr/people/fred subdirectory on the local system to the regularfile /dev/fred_mon_12-2 on the remote system theduke:
# xfsdump -f theduke:/dev/fred_mon_12-2 -s people/fred /usr
Alternatively, you could dump to any remote file if that file is on an NFS-mountedfilesystem. In any case, permission settings on the remote system must allow you towrite to the file.
For information on using the standard input and standard output capabilities ofxfsdump and xfsrestore to pipe data between filesystems or across the network,see "Using xfsdump and xfsrestore to Copy Filesystems" on page 68.
Reusing Tapes
When you use a new tape as the media object of a dump session, xfsdump beginswriting dump data at the beginning of the tape without prompting. If the tapealready has dump data on it, xfsdump begins writing data after the last dumpstream, again without prompting.
007–4273–007 49

6: Backup and Recovery Procedures
If, however, the tape contains data that is not from a dump session, xfsdumpprompts you before continuing:
# xfsdump -f /dev/tape /test
xfsdump: version X.X - type ^C for status and control
xfsdump: dump date: Fri Dec 2 11:25:19 1994
xfsdump: level 0 dump
xfsdump: session id: d23cc072-b21d-1001-8f97-080069068eeb
xfsdump: preparing tape drivexfsdump: this tape contains data that is not part of an XFS dump
xfsdump: do you want to overwrite this tape?
type y to overwrite, n to change tapes or abort (y/n):
You must answer y if you want to continue with the dump session, or n to quit. Ifyou answer y, the dump session resumes and the tape is overwritten. If you do notrespond to the prompt, the session eventually times out.
Note: This means that an automatic backup, for example one initiated by a crontabentry, will not succeed unless you specified the -F option with the xfsdumpcommand, which forces it to overwrite the tape rather than prompt for approval.
Erasing Used Tapes
Erase preexisting data on tapes with the mt erase command. Make sure the tape isnot write-protected. For example, to prepare a used tape in the local default tapedrive, enter:
# mt -f /dev/tape erase
!Caution: This erases all data on the tape, including any dump sessions
The tape can now be used by xfsdump without prompting for approval.
About Incremental and Resumed Dumps
Incremental dumps are a way of backing up less data at a time but still preservingcurrent versions of all your backed-up files, directories, and so on. Incrementalbackups are organized numerically by levels from 0 through 9. A level-0 dump
50 007–4273–007

XFS®
Administrator Guide
always backs up the complete filesystem. A dump level of any other number backsup all files that have changed since a dump with a lower dump level number.
For example, if you perform a level–2 backup on a filesystem one day and your nextdump is a level–3 backup, only those files that have changed since the level–2 backupare dumped with the level–3 backup. In this case, the level–2 backup is called the basedump for the level–3 backup. The base dump is the most recent backup of thatfilesystem with a lower dump level number.
Resumed dumps work in much the same way. When a dump is resumed after it hasbeen interrupted, the remaining files that had been scheduled to be backed up duringthe interrupted dump session are backed up, and any files that changed during theinterruption are also backed up.
Note: You must restore an interrupted dump as if it is an incremental dump(see"Performing Cumulative Restores with xfsrestore" on page 62).
Performing an Incremental Dump
In the following example, a level-0 dump is the first backup written to a new tape:
# xfsdump -f /dev/tape -l 0 -M Jun_94 -L week_1 -v silent /usr
A week later, a level–1 dump of the filesystem is performed on the same tape:
# xfsdump -f /dev/tape -l 1 -L week_2 /usr
The tape is forwarded past the existing dump data and the new data from the level 1dump is written after it. (Note that it is not necessary to specify the media label foreach successive dump on a media object.)
A week later, a level 2 dump is taken and so on, for the four weeks of a month in thisexample, the fourth week being a level 3 dump (up to nine dump levels aresupported):
# xfsdump -f /dev/tape -l 2 -L week_3 /usr
For information on the proper procedure for restoring incremental dumps,see"Performing Cumulative Restores with xfsrestore" on page 62.
007–4273–007 51

6: Backup and Recovery Procedures
Performing a Resumed Dump
You can interrupt a dump session and resume it later. To interrupt a dump session,type the interrupt character (typically <CTRL-C>). You receive a list of options thatallow you to interrupt the session, change verbosity level, or resume the session.
In the following example, xfsdump is interrupted after dumping approximately 37%of a filesystem:
# xfsdump -f /dev/tape -M march95 -L week_1 -v silent /disk2
========================= status and control dialog ==========================
status at 16:49:16: 378/910 files dumped, 37.8% complete, 32 seconds elapsed
please select one of the following operations1: interrupt this session
2: change verbosity
3: display metrics
4: other controls
5: continue (default) (timeout in 60 sec)-> 1
please confirm
1: interrupt this session
2: continue (default) (timeout in 60 sec)
-> 1
interrupt request accepted--------------------------------- end dialog ---------------------------------
xfsdump: initiating session interrupt
xfsdump: dump interrupted prior to ino 1053172 offset 0
You can later continue the dump by including the-R option and a different sessionlabel:
# xfsdump -f /dev/tape -R -L week_1.contd -v silent /disk2p
Any files that were not backed up before the interruption, and any file changes thatwere made during the interruption, are backed up after the dump is resumed.
Note: Use of the -R option requires that the dump was made with a dump inventorytaken, that is, the -J option was not used with xfsdump.
52 007–4273–007

XFS®
Administrator Guide
Examining xfsdump ArchivesThis section describes how to use the xfsdump command to view an xfsdumpinventory.
The xfsdump inventory is maintained in the directory /var/xfsdump created byxfsdump. You can view the dump inventory at any time with the xfsdump -Icommand. With no other arguments, xfsdump -I displays the entire dumpinventory. (The xfsdump -I command does not require root privileges.)
The following output presents a section of a dump inventory:
# xfsdump -I | more
file system 0:
fs id: d23cb450-b21d-1001-8f97-080069068eeb
session 0:
mount point: magnolia.abc.xyz.com:/testdevice: magnolia.abc.xyz.com:/dev/rdsk/dks0d3s2
time: Mon Nov 28 11:44:04 1994
session label: ""
session id: d23cbf44-b21d-1001-8f97-080069068eeb
level: 0resumed: NO
subtree: NO
streams: 1
stream 0:
pathname: /dev/tapestart: ino 4121 offset 0
end: ino 0 offset 0
interrupted: YES
media files: 2
media file 0:
mfile index: 0---more---
The dump inventory records are presented sequentially and are indented to illustratethe hierarchical order of the dump information.
You can view a subset of the dump inventory by specifying the level of depth (1, 2, or3) that you want to view. For example, specifying depth=2 filters out a lot of thespecific dump information, as you can see by comparing the previous output with thefollowing:
007–4273–007 53

6: Backup and Recovery Procedures
# xfsdump -I depth=2file system 0:
fs id: d23cb450-b21d-1001-8f97-080069068eeb
session 0:
mount point: magnolia.abc.xyz.com:/test
device: magnolia.abc.xyz.com:/dev/rdsk/dks0d3s2time: Mon Nov 28 11:44:04 1994
session label: ""
session id: d23cbf44-b21d-1001-8f97-080069068eeb
level: 0
resumed: NO
subtree: NOstreams: 1
session 1:
mount point: magnolia.abc.xyz.com:/test
device: magnolia.abc.xyz.com:/dev/rdsk/dks0d3s2
...
You can also view a filesystem-specific inventory by specifying the filesystem mountpoint with the mnt option. The following output shows an example of a dumpinventory display in which the depth is set to 1, and only a single filesystem isdisplayed:
# xfsdump -I depth=1,mnt=magnolia.abc.xyz.com:/test
filesystem 0:
fs id: d23cb450-b21d-1001-8f97-080069068eeb
You can also look at a list of contents on the dump media itself by using the-t optionwith xfsrestore. See "Displaying the Contents of the Dump Media withxfsrestore" on page 57.
About xfsrestore
This section discusses the following:
• "xfsrestore Syntax" on page 55
• "Displaying the Contents of the Dump Media with xfsrestore" on page 57
• "Performing Simple Restores with xfsrestore" on page 58
• "Restoring Individual Files with xfsrestore" on page 60
54 007–4273–007

XFS®
Administrator Guide
• "Performing Network Restores with xfsrestore" on page 60
• "Performing Interactive Restores with xfsrestore" on page 61
• "Performing Cumulative Restores with xfsrestore" on page 62
• "Interrupting xfsrestore" on page 66
• "About the housekeeping and orphanage Directories" on page 67
For more information, see the xfsrestore(8) man page.
xfsrestore Syntax
You can use the xfsrestore command to view and extract data from the dump datacreated by xfsdump.
You can get a summary of xfsrestore syntax with the --h option:
# xfsrestore -h
xfsrestore: version X.Xxfsrestore: usage: xfsrestore [ -a <alt. workspace dir> ... ]
[ -e (don’t overwrite existing files) ]
[ -f <source> ... ]
[ -h (help) ]
[ -i (interactive) ][ -n <file> (restore only if newer than) ]
[ -o (restore owner/group even if not root) ]
[ -p <seconds between progress reports> ]
[ -r (cumulative restore) ]
[ -s <subtree> ... ][ -t (contents only) ]
[ -v <verbosity {silent, verbose, trace}> ]
[ -A (don’t restore extended file attributes) ]
[ -C (check tape record checksums) ]
[ -D (restore DMAPI event settings) ]
[ -E (don’t overwrite if changed) ][ -F (don’t prompt) ]
[ -I (display dump inventory) ]
[ -J (inhibit inventory update) ]
[ -L <session label> ]
[ -N (timestamp messages) ][ -O <options file> ]
007–4273–007 55

6: Backup and Recovery Procedures
[ -P (pin down I/O buffers) ][ -Q (force interrupted session completion) ]
[ -R (resume) ]
[ -S <session id> ]
[ -T (don’t timeout dialogs) ]
[ -U (unload media when change needed) ][ -V (show subsystem in messages) ]
[ -W (show verbosity in messages) ]
[ -X <excluded subtree> ... ]
[ -Y <I/O buffer ring length> ]
[ -Z (miniroot restrictions) ]
[ - (stdin) ][ <destination> ]
Use xfsrestore to restore data backed up with xfsdump. You can restore files,subdirectories, and filesystems regardless of the way they were backed up. Forexample, if you back up an entire filesystem in a single dump, you can selectindividual files and subdirectories from within that filesystem to restore.
You can use xfsrestore interactively or noninteractively. With interactive mode,you can peruse the filesystem or files backed up, selecting those you want to restore.In noninteractive operation, a single command line can restore selected files andsubdirectories, or an entire filesystem. You can restore data to its original filesystemlocation or any other location in an XFS filesystem.
By using successive invocations of xfsrestore, you can restore incremental dumpson a base dump. This restores data in the same sequence it was dumped.
56 007–4273–007

XFS®
Administrator Guide
Displaying the Contents of the Dump Media with xfsrestore
To list the contents of the dump tape currently in the local tape drive, type:
# xfsrestore -f /dev/tape -t -v silent | morexfsrestore: dump session found
xfsrestore: session label: "week_1"
xfsrestore: session id: d23cbcb4-b21d-1001-8f97-080069068eeb
xfsrestore: no media label
xfsrestore: media id: d23cbcb5-b21d-1001-8f97-080069068eeb
do you want to select this dump? (y/n): yselected
one
A/five
people/fred/TOC
people/fred/ch3.docpeople/fred/ch3TOC.doc
people/fred/questions
A/four
people/fred/script_0
people/fred/script_1people/fred/script_2
people/fred/script_3
people/fred/sub1/TOC
people/fred/sub1/ch3.doc
people/fred/sub1/ch3TOC.doc
people/fred/sub1/questionspeople/fred/sub1/script_0
people/fred/sub1/script_1
people/fred/sub1/script_2
people/fred/sub1/script_3
people/fred/sub1/xdump1.docpeople/fred/sub1/xdump1.doc.backup
people/fred/sub1/xfsdump.doc
people/fred/sub1/xfsdump.doc.auto
people/fred/sub1/sub2/TOC
---more---
007–4273–007 57

6: Backup and Recovery Procedures
Performing Simple Restores with xfsrestore
A simple restore is a non-cumulative restore (for information on restoring incrementaldumps, refer to "Performing Cumulative Restores with xfsrestore" on page 62).An example of a simple, noninteractive use of xfsrestore is:
# xfsrestore -f /dev/tape /disk2
xfsrestore: version 2.0 - type ^C for status and control
xfsrestore: searching media for dump
xfsrestore: preparing drive
xfsrestore: examining media file 0
=========================== dump selection dialog ============================
the following dump has been found on drive 0
hostname: cumulus
mount point: /disk2
volume: /dev/rdsk/dks0d2s0
session time: Wed Oct 25 16:59:00 1995
level: 0session label: ‘‘tape1’’
media label: ‘‘media1’’
file system id: d2a602fc-b21d-1001-8938-08006906dc5c
session id: d2a61284-b21d-1001-8938-08006906dc5c
media id: d2a61285-b21d-1001-8938-08006906dc5c
restore this dump?
1: skip
2: restore (default)
-> 2
this dump selected for restoral
--------------------------------- end dialog ---------------------------------
xfsrestore: using online session inventory
xfsrestore: searching media for directory dumpxfsrestore: reading directories
xfsrestore: directory post-processing
xfsrestore: restoring non-directory files
xfsrestore: I/O metrics: 3 by 2MB ring; 9/13 (69%) records streamed; 204600B/s
xfsrestore: restore complete: 104 seconds elapsed
58 007–4273–007

XFS®
Administrator Guide
In this case, xfsrestore went to the first dump on the tape and asked if this wasthe dump to restore. If you had entered 1 for “skip,” xfsrestore would haveproceeded to the next dump on the tape (if there was one) and asked if this was thedump you wanted to restore.
You can request a specific dump if you used xfsdump with a session label. Forexample:
# xfsrestore -f /dev/tape -L Wed_11_23 /usr
xfsrestore: version X.X - type ^C for status and control
xfsrestore: preparing tape drivexfsrestore: dump session found
xfsrestore: advancing tape to next media file
xfsrestore: dump session found
xfsrestore: restore of level 0 dump of magnolia.abc.xyz.com:/usr created Wed Nov 23 11:17:54 1994
xfsrestore: beginning media filexfsrestore: reading ino map
xfsrestore: initializing the map tree
xfsrestore: reading the directory hierarchy
xfsrestore: restoring non-directory files
xfsrestore: ending media filexfsrestore: restoring directory attributes
xfsrestore: restore complete: 200 seconds elapsed
In this way you recover a dump with a single command line and do not have toanswer y or n to the prompts asking you if the dump session found is the correctone. To be even more exact, use the -S option and specify the unique session ID ofthe particular dump session:
# xfsrestore -f /dev/tape -S \ d23cbf47-b21d-1001-8f97-080069068eeb /usr2/tmp
xfsrestore: version X.X - type ^C for status and controlxfsrestore: preparing tape drive
xfsrestore: dump session found
xfsrestore: advancing tape to next media file
xfsrestore: advancing tape to next media file
xfsrestore: dump session foundxfsrestore: restore of level 0 dump of magnolia.abc.xyz.com:/test resumed Mon Nov 28 11:50:41 1994
xfsrestore: beginning media file
xfsrestore: media file 0 (media 0, file 2)
xfsrestore: reading ino map
xfsrestore: initializing the map tree
xfsrestore: reading the directory hierarchy
007–4273–007 59

6: Backup and Recovery Procedures
xfsrestore: restoring non-directory filesxfsrestore: ending media file
xfsrestore: restoring directory attributes
xfsrestore: restore complete: 229 seconds elapsed
You can find the session ID by viewing the dump inventory (see "Examining xfsdumpArchives" on page 53). Session labels might be duplicated, but session IDs never are.
Restoring Individual Files with xfsrestore
On the xfsrestore command line, you can specify an individual file or subdirectoryto restore. In this example, the file people/fred/notes is restored and placed in the/usr/tmp directory (that is, the file is restored in /usr/tmp/people/fred/notes):
# xfsrestore -f /dev/tape -L week_1 -s people/fred/notes /usr/tmp
You can also restore a file “in place” that is, restore it directly to where it came fromin the original backup.
Note: However, if you do not use the -e, -E, or -n option, you will overwrite anyexisting files of the same name.
In the following example, the subdirectory people/fred is restored in thedestination /usr, which overwrites any files and subdirectories in/usr/people/fred with the data on the dump tape:
# xfsrestore -f /dev/tape -L week_1 -s people/fred /usr
Performing Network Restores with xfsrestore
You can use standard network references to specify devices and files on the network.For example, to use the tape drive on a network host named magnolia as the sourcefor a restore, you can use the following command:
# xfsrestore -f magnolia:/dev/tape -L 120694u2 /usr2
xfsrestore: version X.X - type ^C for status and control
xfsrestore: preparing tape drivexfsrestore: dump session found
xfsrestore: advancing tape to next media file
xfsrestore: dump session found
60 007–4273–007

XFS®
Administrator Guide
xfsrestore: restore of level 0 dump of magnolia.abc.xyz.com:/usr2 created Tue Dec 6 10:55:17 1994xfsrestore: beginning media file
xfsrestore: media file 0 (media 0, file 1)
xfsrestore: reading ino map
xfsrestore: initializing the map tree
xfsrestore: reading the directory hierarchyxfsrestore: restoring non-directory files
xfsrestore: ending media file
xfsrestore: restoring directory attributes
xfsrestore: restore complete: 203 seconds elapsed
In this case, the dump data is extracted from the tape on magnolia, and thedestination is the directory /usr2 on the local system. For an example of using thestandard input option of xfsrestore, see "Using xfsdump and xfsrestore toCopy Filesystems" on page 68.
Performing Interactive Restores with xfsrestore
Use the -i option of xfsrestore to perform interactive file restoration. Withinteractive restoration, you can use the commands ls, pwd, and cd to peruse thefilesystem, and the add and delete commands to create a list of files andsubdirectories you want to restore. Then you can enter the extract command torestore the files, or quit to exit the interactive restore session without restoring files.(The use of wildcards is not allowed with these commands.)
Note: Interactive restore is not allowed when the xfsrestore source is standardinput (stdin).
The following screen output shows an example of a simple interactive restoration.
# xfsrestore -f /dev/tape -i -v silent .xfsrestore: dump session found
xfsrestore: no session label
xfsrestore: session id: d23cbeda-b21d-1001-8f97-080069068eeb
xfsrestore: no media label
xfsrestore: media id: d23cbedb-b21d-1001-8f97-080069068eeb
do you want to select this dump? (y/n): yselected
--- interactive subtree selection dialog ---
007–4273–007 61

6: Backup and Recovery Procedures
the following commands are available:
pwd
ls [ { <name>, ".." } ]
cd [ { <name>, ".." } ]
add [ <name> ]delete [ <name> ]
extract
quit
help
-> ls
4122 people/4130 two
4126 A/
4121 one
-> add two
-> cd people-> ls
4124 fred/
-> add fred
-> ls
* 4124 fred/
-> extract
---------------- end dialog ----------------
In the interactive restore session above, the subdirectory people/fred and the filetwo were restored relative to the current working directory (“.”). An asterisk (*) inyour ls output indicates your selections.
Performing Cumulative Restores with xfsrestore
Cumulative restores sequentially restore incremental dumps to re-create filesystemsand are also used to restore interrupted dumps. To perform a cumulative restore of afilesystem, begin with the media object that contains the base-level dump and recoverit first, then recover the incremental dump with the next higher dump level number,then the next, and so on. Use the -r option to inform xfsrestore that you areperforming a cumulative recovery.
62 007–4273–007

XFS®
Administrator Guide
In the following example, the level–0 base dump and succeeding higher-level dumpsare on /dev/tape. First the level-0 dump is restored, then each higher-level dumpin succession:
# /usr/tmp/xfsrestore -f /dev/tape -r -v silent .
=========================== dump selection dialog ============================
the following dump has been found on drive 0
hostname: cumulus
mount point: /disk2
volume: /dev/rdsk/dks0d2s0
session time: Wed Oct 25 14:37:47 1995level: 0
session label: "week_1"
media label: "Jun_94"
file system id: d2a602fc-b21d-1001-8938-08006906dc5c
session id: d2a60b26-b21d-1001-8938-08006906dc5cmedia id: d2a60b27-b21d-1001-8938-08006906dc5c
restore this dump?
1: skip
2: restore (default)
-> Enterthis dump selected for restoral
--------------------------------- end dialog ---------------------------------
#
Next, enter the same command again. The program goes to the next dump and againyou select the default:
# xfsrestore -f /dev/tape -r -v silent .
=========================== dump selection dialog ============================
the following dump has been found on drive 0
hostname: cumulus
mount point: /disk2
007–4273–007 63

6: Backup and Recovery Procedures
volume: /dev/rdsk/dks0d2s0session time: Wed Oct 25 14:40:54 1995
level: 1
session label: "week_2"
media label: "Jun_94"
file system id: d2a602fc-b21d-1001-8938-08006906dc5csession id: d2a60b2b-b21d-1001-8938-08006906dc5c
media id: d2a60b27-b21d-1001-8938-08006906dc5c
restore this dump?
1: skip
2: restore (default)-> Enter
this dump selected for restoral
--------------------------------- end dialog ---------------------------------
#
You then repeat this process until you have recovered the entire sequence ofincremental dumps. The full and latest copy of the filesystem will then have beenrestored. In this case, it is restored relative to “.”, that is, in the directory you are inwhen the sequence of xfsrestore commands is issued.
Restore an interrupted dump just as if it were an incremental dump. Use the -roption to inform xfsrestore that you are performing an incremental restore, andanswer y and n appropriately to select the proper “increments” to restore (see"Performing Cumulative Restores with xfsrestore" on page 62).
Note: If you try to restore an interrupted dump as if it were a non-interrupted,non-incremental dump, the portion of the dump that occurred before the interruptionis restored, but not the remainder of the dump. You can determine if a dump is aninterrupted dump by looking in the online inventory.
64 007–4273–007

XFS®
Administrator Guide
Following is an example of a dump inventory showing an interrupted dump session(the crucial fields are in bold type):
# xfsdump -I depth=3,mobjlabel=AugTape,mnt=indy4.xyz.com:/usr
file system 0:
fs id: d23cb450-b21d-1001-8f97-080069068eeb
session 0:
mount point: indy4.xyz.com.com:/usr
device: indy4.xyz.com.com:/dev/rdsk/dks0d3s2time: Tue Dec 6 15:01:26 1994
session label: "180894usr"
session id: d23cc0c3-b21d-1001-8f97-080069068eeb
level: 0
resumed: NOsubtree: NO
streams: 1
stream 0:
pathname: /dev/tape
start: ino 4121 offset 0end: ino 0 offset 0
interrupted: YES
media files: 2
session 1:
mount point: indy4.xyz.com.com:/usr
device: indy4.xyz.com.com:/dev/rdsk/dks0d3s2time: Tue Dec 6 15:48:37 1994
session label: "Resumed180894usr"
session id: d23cc0cc-b21d-1001-8f97-080069068eeb
level: 0
resumed: YESsubtree: NO
streams: 1
stream 0:
pathname: /dev/tape
start: ino 4121 offset 0end: ino 0 offset 0
interrupted: NO
media files: 2
...
007–4273–007 65

6: Backup and Recovery Procedures
From this it can be determined that session 0 was interrupted and then resumed andcompleted in session 1.
To restore the interrupted dump session in the example above, use the followingsequence of commands:
# xfsrestore -f /dev/tape -r -L 180894usr .
# xfsrestore -f /dev/tape -r -L Resumed180894usr .
This restores the entire /usr backup relative to the current directory. (You shouldremove the housekeeping directory from the destination directory when you arefinished.)
Interrupting xfsrestore
In a manner similar to xfsdump interruptions, you can interrupt an xfsrestoresession. This allows you to interrupt a restore session and then resume it later. Tointerrupt a restore session, type the interrupt character (typically <CTRL-C>). Youreceive a list of options, which include interrupting the session or continuing.
# xfsrestore -f /dev/tape -v silent /disk2
=========================== dump selection dialog ============================
the following dump has been found on drive 0
hostname: cumulus
mount point: /disk2volume: /dev/rdsk/dks0d2s0
session time: Wed Oct 25 17:20:16 1995
level: 0
session label: "week1"
media label: "newtape"file system id: d2a602fc-b21d-1001-8938-08006906dc5c
session id: d2a6129e-b21d-1001-8938-08006906dc5c
media id: d2a6129f-b21d-1001-8938-08006906dc5c
restore this dump?
1: skip2: restore (default)
-> 2
66 007–4273–007

XFS®
Administrator Guide
this dump selected for restoral
--------------------------------- end dialog ---------------------------------
========================= status and control dialog ==========================
status at 17:23:52: 131/910 files restored, 14.4% complete, 42 seconds elapsed
please select one of the following operations
1: interrupt this session
2: change verbosity3: display metrics
4: other controls
5: continue (default) (timeout in 60 sec)
-> 1
please confirm
1: interrupt this session
2: continue (default) (timeout in 60 sec)
-> 1
interrupt request accepted
--------------------------------- end dialog ---------------------------------
xfsrestore: initiating session interrupt
Resume the xfsrestore session with the --R option:
# xfsrestore -f /dev/tape -R -v silent /disk2
Data recovery continues from the point of the interruption.
About the housekeeping and orphanage Directories
The xfsrestore utility can create two subdirectories in the destination calledhousekeeping and orphanage:
• housekeeping is a temporary directory used during cumulative recovery to passinformation from one invocation of xfsrestore to the next. It must not be
007–4273–007 67

6: Backup and Recovery Procedures
removed during the process of performing the cumulative recovery but should beremoved after the cumulative recovery is completed.
• orphanage is created if a file or subdirectory is restored that is not referenced inthe filesystem structure of the dump. For example, if you dump a very activefilesystem, it is possible for new files to be in the non-directory portion of thedump, yet none of the directories dumped reference that file. A warning messageis displayed, and the file is placed in the orphanage directory, named with itsoriginal inode number and generation count (for example, 123479.14).
Using xfsdump and xfsrestore to Copy FilesystemsYou can use xfsdump and xfsrestore to pipe data across filesystems or across thenetwork with a single command line. By piping xfsdump standard output toxfsrestore standard input you create an exact copy of a filesystem.
For example, to make a copy of /usr/people/fred in the /usr2 directory, enter:
# xfsdump -J -s people/fred - /usr | xfsrestore - /usr2
To copy /usr/people/fred to the network host magnolia’s /usr/tmp directory:
# xfsdump -J -s people/fred - /usr | rsh magnolia \
xfsrestore - /usr/tmp
This creates the directory /usr/tmp/people/fred on magnolia.
Note: The superuser account on the local system must be able to rsh to the remotesystem without a password. For more information, see hosts.equiv(4).
68 007–4273–007

Chapter 7
Enhanced XFS Extensions
This chapter discusses the following enhanced XFS extensions:
• "agskip Mount Option for Allocation Group Specification" on page 69
• "ibound Mount Option for SSD Media" on page 70
agskip Mount Option for Allocation Group SpecificationThe agskip mount option influences the allocation group (AG) selected as a startingpoint for the allocation of user data for a file. It has the opposite effect of therotorstep system tunable parameter (see "rotorstep" on page 89).
Using agskip=agskipvalue causes the start of user data for a file to be placed in theAG initialAG+agskipvalue, where initialAG is the AG used for the previously creatednew file; when using the ibound mount option, this AG will always be within theuser-extents region (see "ibound Mount Option for SSD Media" on page 70).
For example, agskip=3 means the start of user data for each new file thereafter willbe allocated three AGs away from the AG used for the most recently created file.
Use the following formula to determine an appropriate agskipvalue:
(number_of AGs / number_of_concats) + 1 = agskipvalue
For example, if you have six AGs and two concats, you would use a value of 4:
(6/2) + 1 = 4
Note: The agskip mount option disables the rotorstep system tunable parameter.
007–4273–007 69

7: Enhanced XFS Extensions
ibound Mount Option for SSD MediaThis section discusses the following:
• "ibound Purpose" on page 70
• "ibound Availability, Requirements, and Recommendations" on page 70
• "How ibound Works" on page 71
• "ibound Extent Allocation Policy" on page 71
• "Determining the SSD Size Required for a Given Number of Inodes" on page 74
• "Overview of the Configuration Procedure Using ibound" on page 75
• "When ibound is Ignored" on page 75
• "ibound and Kernel Messages" on page 76
• "Examples of Using ibound" on page 77
ibound Purpose
The purpose of the ibound mount option is to specify the location of the metadataregion, which contains metadata operations for extended attributes, directory entries,and inodes. The remainder of the filesystem is known as the user-extents region.
If you first create a filesystem on a volume that concatenates a slice of solid-statedrive (SSD) media with rotating hard-disk drive (HDD) media, you can then use theibound mount option to restrict metadata to the SSD media at the beginning of thatfilesystem. The result will be operations that take place on media with theappropriate characteristics:
• Small latency-sensitive metadata operations in the metadata region on fast SSDmedia
• Large bandwidth-demanding and capacity-intensive user data operations in theuser-extents region on HDD media
ibound Availability, Requirements, and Recommendations
The ibound mount option is available for enhanced XFS filesystems of any size.There must be at least as many AGs in the user-extents region as in the metadata
70 007–4273–007

XFS®
Administrator Guide
region (for practical purposes, you will normally want more AGs in the user-extentsregion). If this requirement is not met, the option is ignored. See "When ibound isIgnored" on page 75.
There should be at least 8 AGs in the metadata region on the SSD. For example, tocreate 8 AGs, you would set the AG size using the mkfs.xfs agsize option so thatit is 1/8 the size of the SSD.
Note: The configuration rules for filesystems using ibound may result in an XFSfilesystem with thousands of AGs. With this many AGs, XFS will consume more CPUresources searching for free space in a nearly full filesystem. For best performance,ensure that the filesystem is less than ~90% full as reported by the df(1) command.
To maximize performance of the filesystem with an SSD drive, you should use anexternal log. You can use a partition of the SSD media or separate HDD media.
How ibound Works
The ibound mount option specifies the highest physical disk block address wheremetadata should be stored.
Note: The argument you supply to ibound is the address of the physical disk block,not the filesystem block.
This value is then rounded up to the end of the AG that holds the specified block.Ideally, the address that you specify will be at the end of the AG, and that AG willconsist of SSD disk. The resulting region, from the beginning of the first AG (that is,block 0 of AG0) through end of the AG that contains the specified physical address, isthe metadata region. The remainder of the filesystem is the user-extents region.
ibound Extent Allocation Policy
When using ibound, space allocation is made in separate regions according to datatype:
• Metadata is allocated to an AG within the metadata region
• User data for a file is allocated to AGs within the user-extents region
007–4273–007 71

7: Enhanced XFS Extensions
XFS will use as many AGs within the user-extents region as required to contain theuser data for a file. By default, it will start the user-data allocation at a specific AG, ifthat AG is available. If the desired AG has become too full or fragmented, the nextAG will be used in order, wrapping around to the first AG in the user-extents region.
The specific AG that XFS selects for the beginning of user data for a file is calculatedbased upon the AG used for the corresponding inodes:
• For inodes located in AG0 (the first AG in the metadata region), XFS will attemptto begin to allocate space starting in the first AG of the user-extents region
• For inodes allocated in successive AGs within the metadata region, XFS willattempt to begin to allocate space in proportionally indexed AGs within theuser-extents region
For example, Figure 7-1 shows a conceptual diagram using a value ofibound=15022944, which is located in AG7 (for best performance, the value shouldrepresent the final physical block in the AG). This designates that the metadata regionis AG0 through AG7.
AG8
Metadata region
AG31
User-extents region
AG0 AG7
Block0
Block1
Block15022944
SSD HDD
Figure 7-1 ibound Value Specifying the End of the Metadata Region
Note: The metadata region always consists of complete AGs. If you specify a valuethat is not the final block, the metadata region end-point will be rounded up to thefinal block of the AG.
In this case, the filesystem has 8 AGs in the metadata region (AG0–AG7) and 24 AGsin the user-extents region (AG8–AG31). For each AG within the metadata region,
72 007–4273–007

XFS®
Administrator Guide
Table 7-1 shows the default selection preference for the corresponding user-extentsregion. Figure 7-2 represents this graphically.
Table 7-1 Default Proportional Indexing of AGs in the User-Extents Region
Metadata Region User-Extents Region
AG Containing the InodePreferred AG Where User Data
Allocation Begins
AG0 AG8
AG1 AG11
AG2 AG14
AG3 AG17
AG4 AG20
AG5 AG23
AG6 AG26
AG7 AG29
Metadata region User-extents region
0 20 29289 10 11 12 272625242313 14 15 16 17 18 19 22217654321 8 3130
Figure 7-2 Mapping Metadata-Region AGs to the Beginning User-Extents Region AGs
For example, using the above situation, suppose the inode for file myfile is locatedin AG1. XFS would therefore by default prefer to start allocating user-extents for thefile in AG11; however, if AG11 is busy, XFS will start allocation of space at AG12,allocating space in as many AGs as necessary. When XFS reaches the end of the
007–4273–007 73

7: Enhanced XFS Extensions
user-extent region at AG31, it will wrap around to the beginning of the user-extentregion at AG8.
To override the default ibound extent allocation policy, see "agskip Mount Optionfor Allocation Group Specification" on page 69.
Note: If agskip is specified, its value is used instead of the default proportionalindexing. For example, if you specified agskip=2 for the above situation, the start ofuser data for the first new file written will be in AG8 because it is the first AG in theuser-extents area and the start of user data for the second new file written will be inAG10.
Determining the SSD Size Required for a Given Number of Inodes
To determine the required SSD size, multiply the number of inodes by the inode sizeand add some overhead space for other metadata, such as file names and extendedattributes:
(number_of_inodes X inode_size) + overhead = SSD_size
The size of other metadata is highly variable and depends heavily upon how thefilesystem is used. If there are large extended attributes in the filesystem or if thereare long filenames, more overhead space will be required.
Questions to consider:
• What is the typical size of a filename? Include in the overhead the averagefilename length times the number of inodes.
• What is the typical size of a directory name? Include in the overhead the averagedirectory name length times the number of directories.
• What percentage of the inodes will be directories? Include in the overhead 4096bytes for each directory with a minimum of 32 bytes times the total number ofinodes.
• What is the size and number of extended attributes? Include in the overhead thenumber of extended attributes times the average extended-attribute size.
74 007–4273–007
XFS®
Administrator Guide
Overview of the Configuration Procedure Using ibound
To use ibound, do the following:
1. Configure the filesystem so that the metadata area to be effectively described byibound is on very fast disk that is at the beginning of the volume. SSD media isideal.
2. Use an external XFS log on very fast disk. SSD media is ideal.
3. Set the AG size using the mkfs.xfs agsize option so that it is 1/8 the size ofthe SSD (meaning that 8 AGs can span the SSD).
4. Mount the filesystem using the -o ibound=physicalblock option, wherephysicalblock is the physical disk block at the end of AG7. This will establish themetadata region as the physical disk blocks within AG0 through AG7.
Note: If you specify a block that is not at the end of the AG, the value will berounded up to the end of the AG that contains the specified value.
5. Verify that the mount was successful by examining the XFS kernel messages.
When ibound is Ignored
If there are more AGs in the metadata region than in the user-extents region, then theibound option will be ignored. In this case, one of the following will occur:
• If the filesystem size permits more than 232 inodes, then inode32 behavior will beused. Inodes will be limited to 32 bits of significance. Data and inodes may beseparated, and may be placed anywhere within the filesystem.
• If the filesystem size does not permit 232 inodes, then inode64 behavior will be used.The inode count will be limited by the number of inodes that the filesystem canhold (the default inode size is 256 bytes.) Metadata and user data may beallocated anywhere within the filesystem, without regard to disk type. You canexplicitly impose this behavior with the inode64 mount option if you do notspecify the ibound option.
Note: The ibound and inode64 mount options are mutually exclusive. If youissue both options, an error will be logged.
007–4273–007 75

7: Enhanced XFS Extensions
ibound and Kernel Messages
This section discusses the following:
• "Message Indicating a Successful Mount with ibound" on page 76
• "Message Indicating that the ibound Value is Inappropriate" on page 76
• "Message Indicating Insufficient User-Extents AGs" on page 77
• "Message Indicating that the Filesystem Has Grown and ibound is Reinstated" onpage 77
Message Indicating a Successful Mount with ibound
When the ibound mount option is used successfully, the XFS kernel module will logan INFO message, indicating the maximum possible inode identification number thatresults given the effective metadata region. ().
Note: This number is the inode identification number, not the count of inodes.
For example:
XFS: filesystem filesystem_name maximum new inode number is new_inode_ID_number
The new_inode_ID_number value may be used by SGI Support during troubleshootingto verify that inodes are in the correct area of the filesystem. This new maximuminode identification number is not reflected in the xvm show output and is not thesame as the value that you specify for the ibound mount option.
Message Indicating that the ibound Value is Inappropriate
If the ibound value that you specify points to a block that does not allow for asufficient number of inodes, the XFS kernel module will log a WARN message toindicate that it will instead use an appropriate value. For example:
XFS: filesystem filesystem_name ibound is too small, using new_inode_ID_number
76 007–4273–007

XFS®
Administrator Guide
Message Indicating Insufficient User-Extents AGs
If there are insufficient AGs in the user-extents area, the XFS kernel module will log aWARN message, indicating that it is reverting to either inode32 or inode64 behavior, asappropriate for the filesystem size. For example:
XFS: filesystem filesystem_name ibound is too small, using inode32|inode64
See "When ibound is Ignored" on page 75.
Message Indicating that the Filesystem Has Grown and ibound is Reinstated
If the filesystem grows so that there are sufficient AGs in the user-extents area, thenibound will be reinstated and the following message will be logged:
XFS: filesystem filesystem_name maximum new inode number is new_inode_ID_number
Examples of Using ibound
This section discusses the following:
• "Example of Successfully Maximizing SSD Storage of Inodes for an SSD/HDDFilesystem" on page 77
• "Example Using a Value for ibound that is Too Small" on page 81
• "Example with Insufficient AGs in the User-Extents Region" on page 82
Example of Successfully Maximizing SSD Storage of Inodes for an SSD/HDD Filesystem
This example describes how to create an XVM volume using both SSD and HDD sothat the SSD is used for storing as many inodes as possible. The volume isconstructed so that the first 8 allocation groups (AGs) and external log are placed onthe SSD. The external log is the maximum size of 1 GiB. The remainder of the volumeis a two-disk stripe.
007–4273–007 77

7: Enhanced XFS Extensions
1. Partition the SSD disk and HDD disks similarly, using a GPT label and primarypartition that starts at MB 34:
• SSD disk sdb:
cxfsxe4:~ # parted /dev/sdb
GNU Parted 2.3
Using /dev/sdb
Welcome to GNU Parted! Type ’help’ to view a list of commands.
(parted) mklabel gpt
Warning: The existing disk label on /dev/sdb will be destroyed and all data onthis disk will be lost. Do you want to continue?
Yes/No? yes
(parted) unit s
(parted) mkpart primary xfs 34 -34
Warning: The resulting partition is not properly aligned for best performance.Ignore/Cancel? ignore
(parted) quit
Information: You may need to update /etc/fstab.
• HDD disks sdc and sdd:
cxfsxe4:~ # parted /dev/sdc
GNU Parted 2.3
Using /dev/sdc
Welcome to GNU Parted! Type ’help’ to view a list of commands.(parted) mklabel gpt
Warning: The existing disk label on /dev/sdc will be destroyed and all data on
this disk will be lost. Do you want to continue?
Yes/No? yes
(parted) unit s(parted) mkpart primary xfs 34 -34
Warning: The resulting partition is not properly aligned for best performance.
Ignore/Cancel? ignore
(parted) quit
Information: You may need to update /etc/fstab.
cxfsxe4:~ # parted /dev/sdd
GNU Parted 2.3
Using /dev/sdd
Welcome to GNU Parted! Type ’help’ to view a list of commands.
(parted) mklabel gpt
78 007–4273–007

XFS®
Administrator Guide
Warning: The existing disk label on /dev/sdd will be destroyed and all data onthis disk will be lost. Do you want to continue?
Yes/No? yes
(parted) unit s
(parted) mkpart primary xfs 34 -34
Warning: The resulting partition is not properly aligned for best performance.Ignore/Cancel? ignore
(parted) quit
Information: You may need to update /etc/fstab.
2. Use the xvm command to show the unlabeled devices:
cxfsxe4:~ # xvm
xvm:local> show unlabeled
unlabeled/dev/pm/ATA-HDT722525DLA380---VDS41LT8CAA9RH * *
unlabeled/dev/pm/ATA-INTEL_SSDSA2M080---CVPO006500CD080BGN * *unlabeled/dev/pm/ATA-ST3500631NS---9QG4F29A * *
unlabeled/dev/pm/ATA-ST3500841AS---3PM1TSNN * *
3. Assign the disks to XVM by using the xvm label command:
xvm:local> label -name ssd0 unlabeled/dev/pm/ATA-INTEL_SSDSA2M080---CVPO006500CD080BGN
ssd0
xvm:local> label -name disk0 unlabeled/dev/pm/ATA-ST3500631NS---9QG4F29A
disk0xvm:local> label -name disk1 unlabeled/dev/pm/ATA-ST3500841AS---3PM1TSNN
disk1
4. Construct a volume named hybridvol with a data subvolume that is aconcatenation of SSD and HDD media and an external log subvolume:
xvm:local> slice -length 262144 phys/ssd0
</dev/lxvm/ssd0s0> slice/ssd0s0xvm:local> slice -start 262144 phys/ssd0
</dev/lxvm/ssd0s1> slice/ssd0s1
xvm:local> slice -all phys/disk0
</dev/lxvm/disk0s0> slice/disk0s0
xvm:local> slice -all phys/disk1
</dev/lxvm/disk1s0> slice/disk1s0xvm:local> subvolume -volname ssdlog -type log slice/ssd0s0
</dev/lxvm/ssdlog,log> subvol/ssdlog/log
007–4273–007 79

7: Enhanced XFS Extensions
xvm:local> stripe -volname diskstripe -vename diskstripe slice/disk0s0 slice/disk1s0</dev/lxvm/diskstripe> stripe/diskstripe
xvm:local> concat -volname hybridvol -vename hybridconcat slice/ssd0s1 stripe/diskstripe
</dev/lxvm/hybridvol> concat/hybridconcat
xvm:local> attach subvol/ssdlog/log vol/hybridvol
vol/hybridvolxvm:local> delete -all vol/ssdlog
xvm:local> delete -all vol/diskstripe
xvm:local> show -top vol/hybridvol
vol/hybridvol 0 online,accessible
subvol/hybridvol/data 2109536416 online,accessible
concat/hybridconcat 2109536416 online,accessibleslice/ssd0s1 156022944 online,accessible
stripe/diskstripe 1953513472 online,accessible
slice/disk0s0 976756768 online,accessible
slice/disk0s0 976756768 online,accessible
slice/disk1s0 976756768 online,accessiblesubvol/hybridvol/log 262144 online,accessible
slice/ssd0s0
xvm:local> quit
The above shows that the SSD slice is 156022944 sectors.
For more information about the xvm commands shown, see XVM Volume ManagerAdministrator Guide or the xvm(8) man page.
5. Determine the appropriate AG sector size for the SSD slice to be supplied tothe mkfs.xfs(8) command, which must be a multiple of 8 (because there are
eight sectors in a filesystem block):
a. Divide the size of slice/ssd0s1 (which is 156022944) by the number ofallocation groups (8 in this case) and truncate the result to an integer value(resulting in 19502868).
b. Divide the result of step 5a by 8 (eight sectors per block) and truncate theresult to an integer (resulting in 2437858).
c. Multiply the result of step 5b by 8, resulting in 19502864. This is theagsize value to be used in step 6 and step 7.
80 007–4273–007

XFS®
Administrator Guide
6. Make the filesystem, specifying the largest disk address (sector) allowed to beused for storing an inode (19502864 in this case, as determined in step 5c) forthe agsize value:
cxfsxe4:~ # mkfs.xfs -f -d agsize=19502864s -l logdev=/dev/lxvm/hybridvol_log -l size=128m /dev/lxvm/hybridvol
warning: unable to probe device topology for device /dev/lxvm/hybridvol
meta-data=/dev/lxvm/hybridvol isize=256 agcount=109, agsize=2437858 blks
= sectsz=512 attr=2, projid32bit=0
data = bsize=4096 blocks=263692052, imaxpct=25
= sunit=0 swidth=0 blks
naming =version 2 bsize=4096 ascii-ci=0
log =/dev/lxvm/hybridvol_log bsize=4096 blocks=32768, version=2
= sectsz=512 sunit=0 blks, lazy-count=1
realtime =none extsz=4096 blocks=0, rtextents=0
7. Mount the filesystem, supplying the size of slice/ssd0s1 (which is156022944) for the ibound mount option:
cxfsxe4:~ # mount -o ibound=156022944,logdev=/dev/lxvm/hybridvol_log /dev/lxvm/hybridvol /mnt
8. Display the kernel messages to verify that the filesystem was correctly mountedwith the ibound option, as described in "Message Indicating a Successful Mountwith ibound" on page 76. For example:
cxfsxe4:~ # dmesg | grep XFS
XFS (xvm-46): XFS: filesystem xvm-46 maximum new inode number is 508767775
XFS (xvm-46): Mounting FilesystemXFS (xvm-46): Ending clean mount
(In the case of error messages, see "ibound and Kernel Messages" on page 76.)
Example Using a Value for ibound that is Too Small
If you use a value for ibound that is smaller than the size of the first AG, thefilesystem will determine an appropriate value to use instead. To illustrate this,carrying on from the example in "Example of Successfully Maximizing SSD Storage ofInodes for an SSD/HDD Filesystem":
1. Unmount the filesystem:
cxfsxe4:~ # umount /mnt
007–4273–007 81

7: Enhanced XFS Extensions
2. Mount the filesystem with an ibound value that is obviously too small, such as 1:
cxfsxe4:~ # mount -o ibound=1,logdev=/dev/lxvm/hybridvol_log /dev/lxvm/hybridvol /mnt
3. Display the kernel messages to determine if the filesystem was correctly mountedwith the ibound option. In this case, the output shows that the improper valuespecified in the previous step is overridden with an appropriate value:
cxfsxe4:~ # dmesg | grep XFS
XFS (xvm-46): XFS: filesystem xvm-46 ibound is too small, using 19502856
XFS (xvm-46): XFS: filesystem xvm-46 maximum new inode number is 39005727
XFS (xvm-46): Mounting Filesystem
XFS (xvm-46): Ending clean mount
Example with Insufficient AGs in the User-Extents Region
If there are more AGs in the metadata region than in the user-extents region, theibound option will be ignored. To illustrate this, carrying on from the previousexample that has an AG count of 109:
1. Unmount the filesystem:
cxfsxe4:~ # umount /mnt
2. Mount the filesystem with an ibound value that specifies a block within AG55(which would result in 54 AGs in the metadata region and 55 AGs in theuser-extents region, given a total of 109 AGs):
cxfsxe4:~ # mount -o ibound=1072657520,logdev=/dev/lxvm/hybridvol_log /dev/lxvm/hybridvol /mnt
3. Display the kernel messages to determine if the filesystem was correctly mountedwith the ibound option. In this case, the output shows that the ibound optionhas been ignored, and inode32 behavior will be used instead:
cxfsxe4:~ # dmesg | grep XFS
XFS (xvm-46): filesystem xvm-46 ibound is too small, using inode32
XFS (xvm-46): Mounting Filesystem
XFS (xvm-46): Ending clean mount
82 007–4273–007

Appendix A
XFS System-Tunable Kernel Parameters
This appendix discusses the following:
• "Overview of the XFS System-Tunable Kernel Parameters" on page 83
• "Parameter Types" on page 85
Overview of the XFS System-Tunable Kernel ParametersThis section discusses the following:
• "Using Appropriate Parameter Settings" on page 83
• "Time Unit of Measure" on page 83
• "Prefix" on page 84
• "Permanently Changing a Parameter" on page 84
• "Temporarily Changing a Parameter" on page 84
• "Querying a Current Parameter Setting" on page 85
Using Appropriate Parameter Settings
All XFS parameters are dynamic. Before changing any parameter, you shouldunderstand the ramifications of doing so on your system. You should changedebugging parameters only at the recommendation of SGI Support.
The values of these parameters vary in different releases of the product. Whenupgrading the product, consult SGI Support to determine whether any changes madeto the parameters in this chapter should be carried forward. Setting these parametersincorrectly may render the system unstable or otherwise unusable.
Time Unit of Measure
Times are measured in centisecs (100ths of a second).
007–4273–007 83

A: XFS System-Tunable Kernel Parameters
Prefix
Each of the parameters uses a prefix of fs.xfs. For example, the full name of thestats_clear parameter is fs.xfs.stats_clear.
Permanently Changing a Parameter
To ensure that a parameter is set upon reboot, modify or create a line like thefollowing in the /etc/modprobe.d/sgi-xfs.conf file or equivalent:
install xfs /sbin/modprobe --ignore-install xfs; echo value > /proc/sys/fs/xfs/systune
where:
• value is the value you want to set
• systune is the parameter name
For example, to permanently set the rotorstep parameter to 255:
install xfs /sbin/modprobe --ignore-install xfs; echo 255 >/proc/sys/fs/xfs/rotorstep
The change will take effect upon reboot.
Note: This is the recommended method to permanently set an XFS system tunableparameter. Setting the parameter in the /etc/sysctl.conf file is not recommendedbecause the file may be parsed at boot time before the xfs module is loaded.
Temporarily Changing a Parameter
For a temporary change to a dynamic parameter, use the Linux sysctl(8) commandas follows:
# sysctl -w "fs.xfs.systune=value"
where:
• systune is the parameter name
• value is the value you want to set for the parameter
Note: Do not use spaces around the = character.
84 007–4273–007

XFS®
Administrator Guide
For example, to temporarily set the rotorstep parameter (which has the fs.xfsprefix) to 255, enter the following:
# sysctl fs.xfs.rotorstep=255
fs.xfs.rotorstep = 255
Querying a Current Parameter Setting
To query the current setting of a parameter, use the Linux sysctl(8) command:
# sysctl fs.xfs.systune
where:
• systune is the parameter name
For example, to query the current setting of the rotorstep parameter (which has thefs.xfs prefix):
# sysctl fs.xfs.rotorstep
rotorstep = 255
Parameter TypesThis section discusses the following:
• "Parameters to Set at Initial Configuration" on page 86
• "Mount-Time Parameter for Initial Configuration" on page 88
• "Parameters for Special-Case Performance Tuning" on page 88
• "Mount-Time Parameter for Special-Case Performance Tuning" on page 91
• "Debugging Parameters Restricted to SGI Support" on page 91
007–4273–007 85

A: XFS System-Tunable Kernel Parameters
Parameters to Set at Initial Configuration
Most of the dynamic parameters in this section affect the behavior of all mounted XFSfilesystems, therefore you should set them at initial configuration and you shouldchange them only to follow the desired site policy:
• "inherit_noatim" on page 86
• "inherit_nodfrg" on page 86
• "inherit_nodump" on page 87
• "inherit_nosym" on page 87
• "inherit_sync" on page 87
• "sgid_inherit" on page 87
• "stats_clear" on page 88
• "symlink_mode" on page 88
inherit_noatim
Specifies whether the noatim flag set by the xfs_io(8) chattr command will beinherited by files in a given directory.
Range of values:
• 0 prevents inheritance
• 1 causes the noatim
flag to be inherited
inherit_nodfrg
Specifies whether the nodfrg flag set by the xfs_io(8) chattr command will beinherited by files in a given directory.
Range of values:
• 0 prevents inheritance
• 1 causes the nodfrg flag to be inherited
86 007–4273–007
XFS®
Administrator Guide
inherit_nodump
Specifies whether the nodump flag set by the xfs_io(8) chattr command will beinherited by files in a given directory.
Range of values:
• 0 prevents inheritance
• 1 causes the nodump flag to be inherited
inherit_nosym
Specifies whether the nosymlinks flag set by the xfs_io(8) chattr command willbe inherited by files in a given directory.
Range of values:
• 0 prevents inheritance
• 1 causes the nosymlinks flag to be inherited
inherit_sync
Specifies whether the sync flag set by the xfs_io(8) chattr command will beinherited by files in a given directory.
Range of values:
• 0 prevents inheritance
• 1 causes the sync flag to be inherited
sgid_inherit
Controls the action taken for a file created in a set group ID (SGID) directory if thegroup ID of the new file does not match the effective group ID or one of thesupplementary group IDs of the parent directory.
Range of values:
• 0 does not clear the S_ISGID bit
• 1 clears the S_ISGID bit
007–4273–007 87

A: XFS System-Tunable Kernel Parameters
stats_clear
Specifies whether or not the accumulated XFS statistics in the /proc/fs/xfs/statfile are cleared
Range of values:
• 0 does not change the file
• 1 resets the statistics in the file to 0
symlink_mode
Controls the permissions set for symbolic links.
Range of values:
• 0 creates symbolic links with mode 0777 (default)
• 1 specifies that the umask value is used
Mount-Time Parameter for Initial Configuration
The parameter in this section affects the behavior of all mounted XFS filesystems,therefore you should it at initial configuration and you should change it only tofollow the desired site policy. Changes to this parameter takes effect at mount time.
probe_dmapi
Determines whether or not XFS attempts to load the xfs_dmapi module and enablethe dmi/dmapi/xdsm mount option when mounting a filesystem.
Range of values:
• 0 does not load the module or enable the mount option
• 1 loads the module and enable the mount option
Parameters for Special-Case Performance Tuning
The default values for the following dynamic parameters are optimal for mostworkload, and you should take extra caution when changing them for performancetuning:
88 007–4273–007

XFS®
Administrator Guide
• "probe_limit" on page 89
• "rotorstep" on page 89
• "syncd_timer" on page 90
• "xfs_buf_age" on page 90
• "xfs_buf_timer" on page 90
probe_limit
Note: The probe_limit parameter is part of enhanced XFS.
Specifies the maximum number of pages that XFS will cluster together when probing,in order to optimize the conversion of delayed allocation or unwritten extents intoreal extents.
Range of values:
• Default: 4096 (0x1000)
• Minimum: 0
• Maximum: 2097151 (0x1fffff)
rotorstep
In inode32 allocation mode, determines how many files the allocator attempts toallocate before moving to the next allocation group. The intent is to control the rate atwhich the allocator moves between allocation groups when allocating extents for newfiles.
Range of values:
• Default: 1
• Minimum: 1
• Maximum: 255
See also:
• "agskip Mount Option for Allocation Group Specification" on page 69
007–4273–007 89

A: XFS System-Tunable Kernel Parameters
• "ibound Mount Option for SSD Media" on page 70
syncd_timer
Specifies the interval (in centiseconds) at which the xfssyncd thread flushesmetadata such as log activity out to disk does some processing on unlinked inodes.
Range of values:
• Default: 3000
• Minimum: 100
• Maximum: 720000
xfs_buf_age
Specifies the age (in centiseconds) at which xfsbufd flushes dirty metadata buffersto disk.
Range of values:
• Default: 1500
• Minimum: 100
• Maximum: 720000
xfs_buf_timer
Specifies the interval (in centiseconds) at which xfsbufd scans the dirty metadatabuffers list.
Range of values:
• Default: 100
• Minimum: 50
• Maximum: 3000
90 007–4273–007

XFS®
Administrator Guide
Mount-Time Parameter for Special-Case Performance Tuning
The default value for the following parameter is optimal for most workload, and youshould take extra caution when changing it for performance tuning. Changes to thisparameter takes effect at mount time.
fstrm_timer
Specifies the filestream timer, which is the required time interval (in centiseconds)between file creates in a directory to maintain a stream of files.
Range of values:
• Default: 3000
• Minimum: 1
• Maximum: 360000
Debugging Parameters Restricted to SGI Support
!Caution: Do not change these parameters unless instructed to do so by SGI Support.
This section discusses debugging parameters that should be changed at therecommendation of SGI Support:
• "error_level" on page 91
• "panic_mask" on page 92
error_level
Specifies the reporting volume when internal errors occur, such as the number ofdetailed messages and backtraces for filesystem shutdowns. XFS macros use thefollowing threshold values:
XFS_ERRLEVEL_OFF is 0XFS_ERRLEVEL_LOW is 3XFS_ERRLEVEL_HIGH is 5
Range of values:
007–4273–007 91

A: XFS System-Tunable Kernel Parameters
• Default: 3
• Minimum: 0 (turns off error reporting)
• Maximum: 11
panic_mask
Specifies a bitmask that causes certain error conditions to call BUG(). The value is theAND value of the following tags representing errors that should cause panics:
XFS_NO_PTAG 0
XFS_PTAG_IFLUSH 0x00000001
XFS_PTAG_LOGRES 0x00000002
XFS_PTAG_AILDELETE 0x00000004
XFS_PTAG_ERROR_REPORT 0x00000008XFS_PTAG_SHUTDOWN_CORRUPT 0x00000010
XFS_PTAG_SHUTDOWN_IOERROR 0x00000020
XFS_PTAG_SHUTDOWN_LOGERROR 0x00000040
Range of values:
• Default: 0
• Minimum: 0
• Maximum: 255
92 007–4273–007

Index
64–bit file capabilities, 1
A
access control lists (ACLs), 2accounting, 34agsize, 75, 71agskip, 69allocation group specification, 69allocation groups, 7archives, 53attr, 2attributes, 2
B
backup and restore, 2backup procedures, 37backups, 18bandwidth operations and SSD, 70barrier mount option and remount, 26block size
filesystem directory, 4planning, 3
block sizes, 1
C
capacity-intensive operations and SSD, 70consistency of filesystems, 18copying files with xfsdump and xfsrestore, 68corruption of filesystems, 17crash recovery, 1create(), 6
creating filesystems, 11cumulative restores, 62
D
data segments, 39database journaling, 1disk partitioning, 8disk quotas
See quotas, 27dual-hosted disks, 18dump, 2dump inventory, 39dump layouts, 39dump session, 38dump stream, 38dump, incremental, 50dump, resumed, 50
E
Enhanced XFS extension, 69agskip mount option, 69ibound mount option for SSD media, 70
erasing tape data, 50error_level, 91/etc/fstab, 34/etc/fstab file, 29/etc/modprobe.d/sgi-xfs.conf, 84extended attributes, 2extent allocation policy, 71extents, 1external filesystem log, 5
007–4273–007 93

Index
F
fcntl system call, 1features, 1filestream timer, 91filesystem log, 4filesystem repair, 21fs_quota –p, 32fsck, 1, 19fstab file, 12fstrm_timer, 91
G
gqnoenforce, 34gquota mount option, 29group quotas
See "quotas", 31growing filesystems, 15
H
hard limits, 27hard-disk drive and ibound, 70hardware requirements, 3HDD media and ibound, 70hierarchical storage manager (HSM), 2housekeeping directory, 67
I
I/O performance, 1ibound mount option
examples, 77kernel messages, 76overview, 70
inconsistent filesystems, 21incremental dumps, 50inherit_noatim, 86
inherit_nodfrg, 86inherit_nodump, 87inherit_nosym, 87inherit_sync, 86, 87inode number, 76inode32 vs inode64 behavior, 75inodes, 1, 23internal filesystem log, 5inventory of a dump, 53
J
journaling, 1
L
latency-sensitive operations and SSD, 70log recovery, 25log size, 5log type, 5logdev, 7logs and mkfs.xfs options, 7lost+found, 24lost+found directory, 23
M
maintenance of filesystems, 17making a filesystem, 11maximum filesystem size, 1maximum inode number, 76media file, 39media layout, 38media object, 38memory recommendation, 1metadata region, 70mkdir, 6mkfs.xfs -n, 4
94 007–4273–007

XFS®
Administrator Guide
mkfs.xfs command, 14mkfs.xfs –b, 3, 13, 15mkfs.xfs –l, 14mkfs.xfs –p, 12monitoring disk space usage, 34mount —o norecover, 26mounting a filesystem, 12mounting without log recovery, 25mt erase, 50multiprocessing systems, 1
N
namespaces, 2network restores, 60noalign mount option and remount, 26nobarrier mount option and remount, 26
O
orphanage directory, 67
P
panic, 17panic_mask, 92partitioning, 8performance, 1physical write protection, 18power-off, 18prerequisite hardware, 3prjquota mount option, 30probe_dmapi, 88probe_limit, 89project quotas
See "quotas", 32
Q
qnoenforce, 34quotaoff, 35quotaon, 35quotas, 27
administering, 33disk space usage monitoring and , 34displaying, 33enabling for groups, 29enabling for projects, 30enabling for users, 29hard limits, 27limits for groups, 31limits for projects, 32limits for users, 31mutually exclusive group and project quotas, 31soft limits, 27
R
RAID and stripe unit, 8readdr, 4recovery, 1recovery procedures, 37remote tape drive, 47remount, 26reorganization of filesystems, 17repair problems, 25repartitioning, 8resumed dumps, 50reusing tapes, 49rmdir, 6ro mount option and remount, 26rootflags boot option, 29rotorstep, 69, 89rw mount option and remount, 26
007–4273–007 95

Index
S
sgid_inherit, 87shutdown, 17site-configurable system tunable kernel
parameters, 83size of filesystem, 1soft limits, 27solid-state drive, 70solid-state drive and ibound, 70sparse files, 1SSD media and ibound, 70stats_clear, 88stream terminator, 39stripe units, 7, 8striped volume and stripe unit, 8swalloc mount option and remount, 26symlink_mode, 88syncd_timer, 90sysctl, 84system namespace, 2system panic, 17system tunable kernel parameters
appropriate settings, 83debugging parameters restricted to SGI
Support, 91error_level, 91fstrm_timer, 91inherit_noatim, 86inherit_nodfrg, 86inherit_nodump, 87inherit_nosym, 87inherit_sync, 86, 87mount-time parameter for initial
configuration, 88mount-time parameter for special-case
performance tuning, 91panic_mask, 92parameters for special-case performance
tuning, 88parameters set at initial configuration, 86permanent changes, 84
probe_dmapi, 88probe_limit, 89queries, 85rotorstep, 89sgid_inherit, 87stats_clear, 88symlink_mode, 88syncd_timer, 90temporary changes, 84xfs_buf_timer, 90xfsbufd_centisecs, 90
T
tape data, erasing, 50tapes, reusing, 49transaction activity and log size, 6transaction rate and log size, 6
U
umount, 12unlink(), 6unmounting a disk partition, 12user namespace, 2user quotas
See "quotas", 31user-extents region, 70
V
volume manager, 1
X
xfs_buf_timer, 90xfs_check, 19, 20
96 007–4273–007

XFS®
Administrator Guide
xfs_check command, 18xfs_fsr, 17xfs_growfs, 15xfs_quota, 31xfs_quota command, 33xfs_quota –g, 32xfs_repair, 21xfs_repair –n, 18, 19xfs_repair error messages, 23xfsbufd_centisecs, 90
xfsdump, 2, 37xfsdump archives, 53xfsdump utility
local media, 46xfsdump_quotas file, 33xfsdump_quotas_group file, 33xfsrestore, 2, 37, 54, 70xfsrestore syntax, 55
007–4273–007 97


