Embed Size (px)
Citation preview

2 0 1 3 O W N E R S M A N U A L
Coast Spas® Manufacturing
6315 202 Street, Langley BC Canada
604 514 8111
www.coastspas.com

2013 OWNERS MANUAL2
2
CONTENTS:
Important safety instructions ....................................................... Page 3
Preparation and set-up for your new spa ................................. Page 4
Electrical requirements ................................................................... Page 4
Start-up instructions ........................................................................ Page 4
Fill instructions ................................................................................... Page 4
Draining and winterizing your spa.............................................. Page 5
Filter maintenance ............................................................................ Page 6
Water quality maintenance ........................................................... Page 7
Product and care guide ................................................................... Page 8
Glossary of terms ............................................................................... Page 9
Troubleshooting guide.................................................................... Page 11
Spa control panels ............................................................................ Page 13 - 58
Patio Series.....................................................................................Page 13
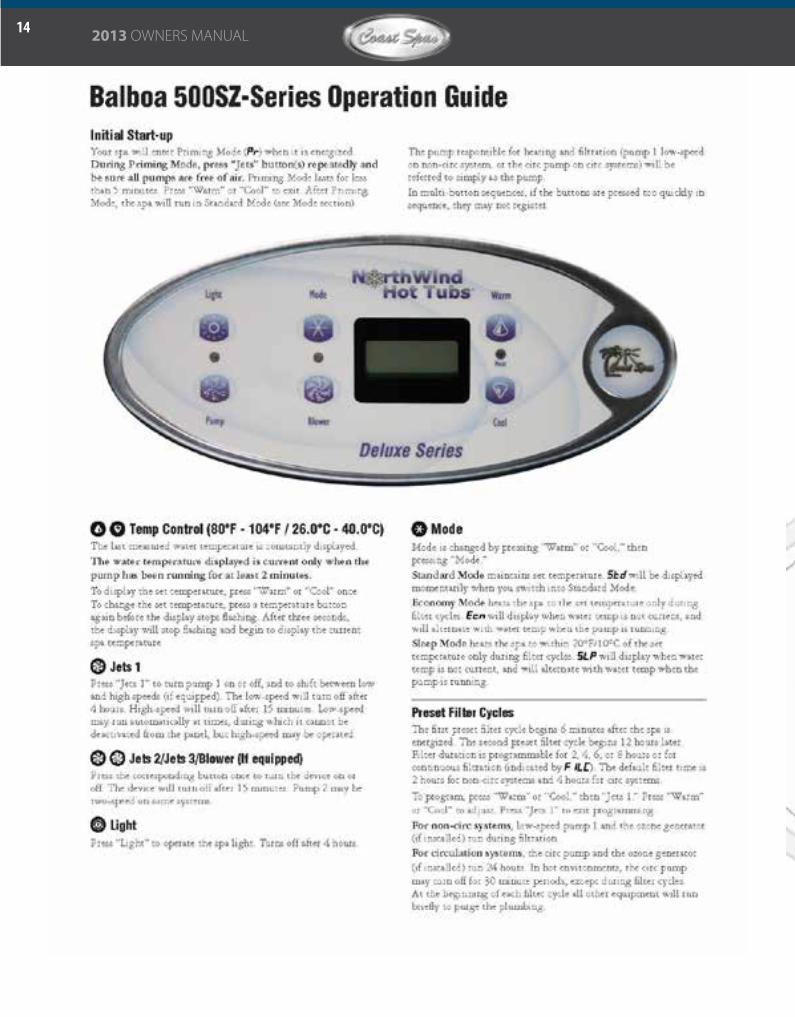
NorthWind™ Series......................................................................Page 14
Coast Classic Series......................................................................Page 15
Coast Elite / Luxury Series...........................................................Page 37
2013 OWNERS MANUAL3
3
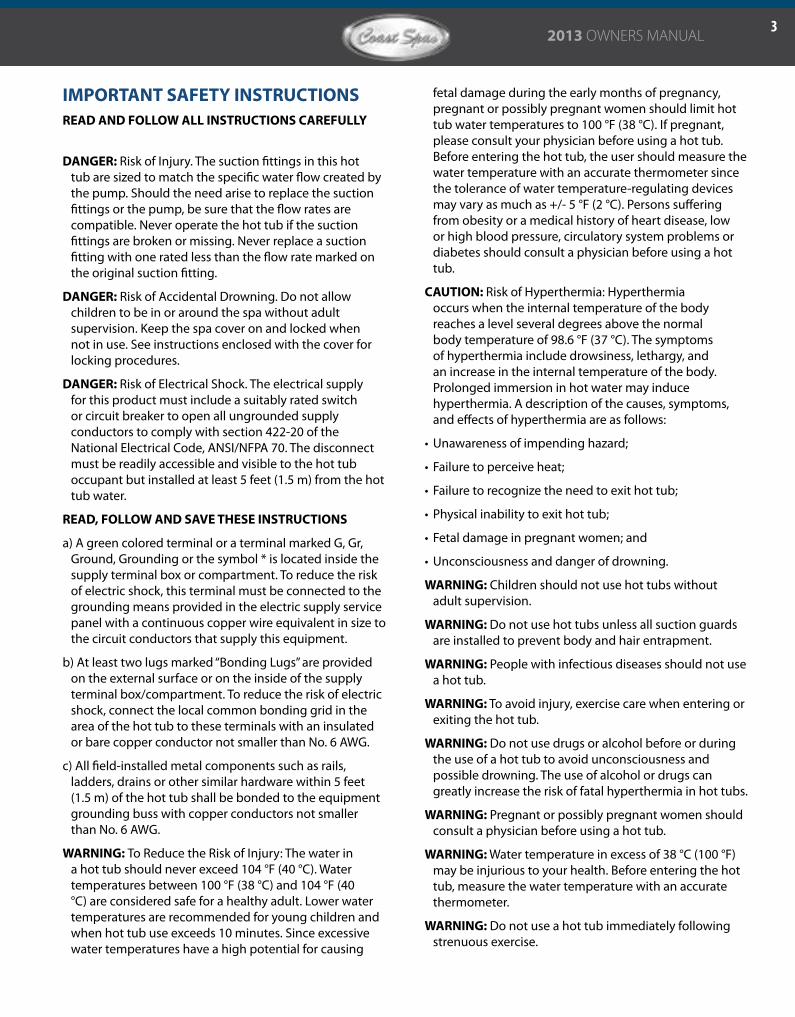
IMPORTANT SAFETY INSTRUCTIONSREAD AND FOLLOW ALL INSTRUCTIONS CAREFULLY
DANGER: Risk of Injury. The suction fittings in this hot tub are sized to match the specific water flow created by the pump. Should the need arise to replace the suction fittings or the pump, be sure that the flow rates are compatible. Never operate the hot tub if the suction fittings are broken or missing. Never replace a suction fitting with one rated less than the flow rate marked on the original suction fitting.
DANGER: Risk of Accidental Drowning. Do not allow children to be in or around the spa without adult supervision. Keep the spa cover on and locked when not in use. See instructions enclosed with the cover for locking procedures.
DANGER: Risk of Electrical Shock. The electrical supply for this product must include a suitably rated switch or circuit breaker to open all ungrounded supply conductors to comply with section 422-20 of the National Electrical Code, ANSI/NFPA 70. The disconnect must be readily accessible and visible to the hot tub occupant but installed at least 5 feet (1.5 m) from the hot tub water.
READ, FOLLOW AND SAVE THESE INSTRUCTIONS
a) A green colored terminal or a terminal marked G, Gr, Ground, Grounding or the symbol * is located inside the supply terminal box or compartment. To reduce the risk of electric shock, this terminal must be connected to the grounding means provided in the electric supply service panel with a continuous copper wire equivalent in size to the circuit conductors that supply this equipment.
b) At least two lugs marked “Bonding Lugs” are provided on the external surface or on the inside of the supply terminal box/compartment. To reduce the risk of electric shock, connect the local common bonding grid in the area of the hot tub to these terminals with an insulated or bare copper conductor not smaller than No. 6 AWG.
c) All field-installed metal components such as rails, ladders, drains or other similar hardware within 5 feet (1.5 m) of the hot tub shall be bonded to the equipment grounding buss with copper conductors not smaller than No. 6 AWG.
WARNING: To Reduce the Risk of Injury: The water in a hot tub should never exceed 104 °F (40 °C). Water temperatures between 100 °F (38 °C) and 104 °F (40 °C) are considered safe for a healthy adult. Lower water temperatures are recommended for young children and when hot tub use exceeds 10 minutes. Since excessive water temperatures have a high potential for causing
fetal damage during the early months of pregnancy, pregnant or possibly pregnant women should limit hot tub water temperatures to 100 °F (38 °C). If pregnant, please consult your physician before using a hot tub. Before entering the hot tub, the user should measure the water temperature with an accurate thermometer since the tolerance of water temperature-regulating devices may vary as much as +/- 5 °F (2 °C). Persons suffering from obesity or a medical history of heart disease, low or high blood pressure, circulatory system problems or diabetes should consult a physician before using a hot tub.
CAUTION: Risk of Hyperthermia: Hyperthermia occurs when the internal temperature of the body reaches a level several degrees above the normal body temperature of 98.6 °F (37 °C). The symptoms of hyperthermia include drowsiness, lethargy, and an increase in the internal temperature of the body. Prolonged immersion in hot water may induce hyperthermia. A description of the causes, symptoms, and effects of hyperthermia are as follows:
• Unawareness of impending hazard;
• Failure to perceive heat;
• Failure to recognize the need to exit hot tub;
• Physical inability to exit hot tub;
• Fetal damage in pregnant women; and
• Unconsciousness and danger of drowning.
WARNING: Children should not use hot tubs without adult supervision.
WARNING: Do not use hot tubs unless all suction guards are installed to prevent body and hair entrapment.
WARNING: People with infectious diseases should not use a hot tub.
WARNING: To avoid injury, exercise care when entering or exiting the hot tub.
WARNING: Do not use drugs or alcohol before or during the use of a hot tub to avoid unconsciousness and possible drowning. The use of alcohol or drugs can greatly increase the risk of fatal hyperthermia in hot tubs.
WARNING: Pregnant or possibly pregnant women should consult a physician before using a hot tub.
WARNING: Water temperature in excess of 38 °C (100 °F) may be injurious to your health. Before entering the hot tub, measure the water temperature with an accurate thermometer.
WARNING: Do not use a hot tub immediately following strenuous exercise.

2013 OWNERS MANUAL4
4
WARNING: Prolonged immersion in a hot tub may be injurious to your health.
WARNING: Do not permit electric appliances (such as lights, telephone, radio, television, etc.) within 5 feet (1.5 m) of this hot tub unless such appliances are built-in by the manufacturer.
WARNING: People using medication and/or having an adverse medical history should consult a physician before using a spa or hot tub.
CAUTION: Observe a reasonable time limit when using the hot tub. Long exposures at higher temperatures can cause high body temperature. Symptoms may include dizziness, nausea, fainting, drowsiness, and reduced awareness. These effects could possibly result in drowning.
CAUTION: Enter and exit the hot tub slowly. Wet surfaces can be very slippery.
CAUTION: Proper chemical maintenance of hot tub water is necessary to maintain safe water and prevent possible damage to hot tub components. Maintain water chemistry in accordance with manufacturer’s instructions.
CAUTION: Use the straps and clip tie downs to secure the cover when not in use. This will help to discourage unsupervised children from entering the hot tub and keep the hot tub cover secure in high-wind conditions. There is no representation that the cover, clip tie-downs, or actual locks will prevent access to the hot tub.
CAUTION: For exercise, the water should not exceed 90 °F (32 °C).
CAUTION: When using this electrical equipment, basic safety precautions should always be followed.
PREPARATION AND SET-UP FOR YOUR NEW SPA
LOCATION FOR YOUR NEW SPA: You want to keep in mind how you intend to use the spa and plan the location accordingly.• How close is the spa from the exit or entrance to your
house? (consider the cold weather)• Is the path to your spa clean of debris, sand, grass? (so as
not to track into the spa)• Is there protection from wind, inclement weather?• Can neighbours or passersby see the spa?
NOTE: Allow for service access: Many spa owners enjoy placing their spa in a decorative enclosure or a deck. Keep in mind that you need to have access to the equipment for maintenance and the spa should be able to be moved or lifted without destroying the special enclosure or its surroundings. You should discuss this with your dealer when designing the location.
ELECTRICAL REQUIREMENTS: All self contained spas use 120VAC or 240VAC electrical spa packs.. These instructions describe the only acceptable electrical wiring procedures. Spas wired in any other way will void your warranty and may result in serious injury. All installations should be completed by a certified electrician. Failure to comply with state and local codes may result in fire or personal injury and will be the sole responsibility of the spa owner.120VAC: This requires an isolated 20 Amp circuit breaker. This needs to be an isolated circuit with no other appliances or lights on this circuit at any time. Extension cords are not to be used in conjunction with the operations of the spa. Low voltage damage could result and this is not covered by warranty.240VAC: Depending on the model of spa, it will require either a 40 Amp or 50 Amp dedicated circuit breaker, GFCI, with the proper wire size based on the length of the run. The electrical circuit must be installed by a certified electrician and approved by a local building or electrical inspector. SURFACE AND PAD REQUIREMENTS:Your new portable spa must be placed on a firm, flat and level surface, so the spa weight is supported uniformly. We recommend no less than a 3” (93 mm) thick concrete slab. Wood decking or balconies must be constructed to support 150 pounds per square foot (730 kg/m²). Refer to local and current building codes in your area. Consult an engineer for live loads in your area. Should your new spa need to go through a gate, the opening should be a minimum of 48 inches and up to 8.5’ overhead clearance depending on the size of the unit.NOTE: Damage caused by alternate decking methods may void the spa warranty. Contact your Coast Spas dealer if you have any questions regarding spa location or placement.
START-UP INSTRUCTIONSYour new spa has left the factory cleaned and polished. You may have to clean out any dirt that has accumulated during shipping. Use warm water and sponge or cloth.
FILLING YOUR COAST SPA (STANDARD MODELS)• Your Coast spa is shipped with the plumbing fittings
disconnected to ensure no damage or freezing occurs during the spa’s route from our factory to your home.
• Be sure that all plumbing fittings are secure (hand tightened) in the equipment area.
• Be sure that all electrical plugs and connections are made as these can come loose during transit.
• Before filling, remove filter from filter housing and remove its plastic bag. Replace filter in housing.
• Open the air bleed valve located in the skimmer cavity as this will allow the air to escape from the pumps while filling the spa. NOTE: the valve only needs to be loosened and not completely removed.
bLEEDER VALVE

2013 OWNERS MANUAL5
5
reach your desired temperature.
WARNING: Do not run the spa with gate valves closed or run pump with no water circulating in spa. This will damage the pumps and pump seals.
DRAINING AND WINTERIZING
DRAINING YOUR COAST SPA
After a period of 3-4 months, detergent residues from bathing suits and soap film will build up in your spa water. Once this happens, your spa water will appear cloudy and should probably be replaced.• Turn power OFF at the breaker. • Locate the drain valve (usually at the front left-hand
corner of the kick plate).• Remove the safety cap and attach garden hose. Pull
outward on the garden hose. This will open the drain valve fully.
• Drain water to a convenient area. (Spa water may harm grass or plants if sanitizer levels are high.)
• When water begins to flow out of the hose, open the air relief valve located on filter lid.
• Your Coast Spa will drain except for a small portion left in the foot well. This can be removed with a sponge and pail.
• Once empty, clean as required.• To finish, push garden hose forward and, remove garden
hose and attach safety cap.• IMPORTANT (Cascade Series Only): There will be an
additional drain valve. This is connected directly to the tank reservoir and you will see the water level go down on the sight tube in the equipment area.
WINTERIZING YOUR COAST SPA
In many areas of the world the temperature may drop below 32°F (0°C). We recommend the spa is always filled with water and running at normal spa temperatures. By doing this you will minimize the risk of freezing within your spa. If it is necessary to leave your spa unattended for long periods of time during cold weather conditions, you should drain your spa to avoid accidental freezing caused by power outages. Your Coast Spas dealer can perform the following winterizing procedures, if you are not completely comfortable with them.• Ensure that you have fully drained the spa (Refer to the
DRAINING YOUR COAST SPA section)• After draining, your Coast Spa may still have water
remaining in the equipment and plumbing fittings. Disconnect the hand-tightened union fittings going to and from the jet pumps. Be careful not to lose the o-rings between the unions and pump housing.
• Leave drain valve in the open position and safety cap off. • To completely drain the plumbing lines, a wet/dry shop
vacuum can be used to draw out any remaining water.
• Fill your Coast Spa with your garden hose. Place the hose in the filter canister and secure the hose in place. Filling through the filter helps to allow most of the trapped air in the pumps and heater to be eliminated.
• Fill the spa between ½ and ¾ of the way up the skimmer opening.
• Re-tighten the air bleeder valve in the skimmer cavity (finger tight only)
• Remove the hose and place filter lid back on canister and tighten in place with the lock ring.(See filter maintenance)
NOTE: Coast Spas recommends you do not fill your spa with hot water. Excessively hot water (over 107 ºF) may cause damage to components in the spa pack as well as all plastic and acrylic components.NOTE: Do not fill your spa with water from a water softener. If your water is extremely hard your Coast Spas dealer can help you to remedy this problem.
FILLING YOUR COAST SPA (CASCADE SERIES)• Your Coast spa is shipped with the plumbing fittings
disconnected to ensure no damage or freezing occurs during the spa’s route from our factory to your home.
• Be sure that all plumbing fittings are secure (hand tightened) in the equipment area.
• Be sure that all electrical plugs and connection are made as these can come loose during transit.
• Before filling, remove filter from filter housing and remove its plastic bag. Replace filter in housing and place filter lid back on canister and tighten in place with the lock ring. (See filter maintenance)
• All Cascade Series Spas have a specific fill line located in the equipment area. This is a clear sight tube that is marked with colored fill lines. Close outlet valve at Pump 1.
• Fill trough until water is half way.• Fill main body until 2” before flow over.• Loosen pump 1, inlet union to release air in line &
retighten.• Start Pump 1, 2 & 3 then open valve.• If it does not start, close valve and loosen pump union
and then retighten and try again.
INITIAL START-UP (STANDARD MODELS)• Turn power off at the breaker.• Make sure all union fittings are tightened and valves
(Gate or Knife) are fully opened.• Turn power on at the main breaker. • When the spa is first powered-up it will run a self
diagnostic test. The spa will enter “Priming Mode” and this will be displayed on your control panel with “PR”. This self diagnostic test can take between 4-6 minutes. Do not press any buttons while this test is running. Once the test is complete you will see a temperature reading on the control panel.
• You can now set the heat to your desired temperature using the buttons on the control panel. Depending on the initial water temperature, it may take 6-12 hours to
2013 OWNERS MANUAL6
6
Place the vacuum hose over the jet fittings in the spa as well as the plumbing lines in the equipment area. You should also disconnect the plug on the crystal clear inspection tube.
• Remove the filter cartridge and store in a warm, dry area.• Clean the spa shell and place spa cover on spa. Be sure
to lock the cover in place in case of high winds or rain.• WARNING: The instructions above should be followed
accordingly when winterizing your spa however they are guidelines and potential freeze damage may still occur. All freeze damage is the sole responsibility of the spa owner and will not be covered by the warranty should it occur.
• EMERGENCY SITUATIONS: To eliminate freezing in the event of equipment failure, use a 100-watt light bulb or small heater via extension cord and place it in the equipment area, keeping it away from plumbing lines. This will help for a short period of time until proper service can be rendered.
FILTER MAINTENANCEThe spa filter is one of the most important parts that a spa owner needs to maintain. The filter is there to remove debris from the water and needs to be cleaned on a regular basis. Failure to do so may result in poor performance, poor water clarity and could prevent the spa from heating. Filtration starts as soon as flow is steady through the filter. As the filter cartridge removes the debris from the spa water, the accumulated debris causes flow resistance.
CLEANING AND REPLACING FILTER CARTRIDGE
Your spa filter has been designed for quick and easy maintenance. The filter cartridge should be rinsed by hose once a week and cleaned with a cartridge cleaner once a month. A second filter cartridge is recommended and will speed up this process. This can be purchased from your Coast Spas dealer.
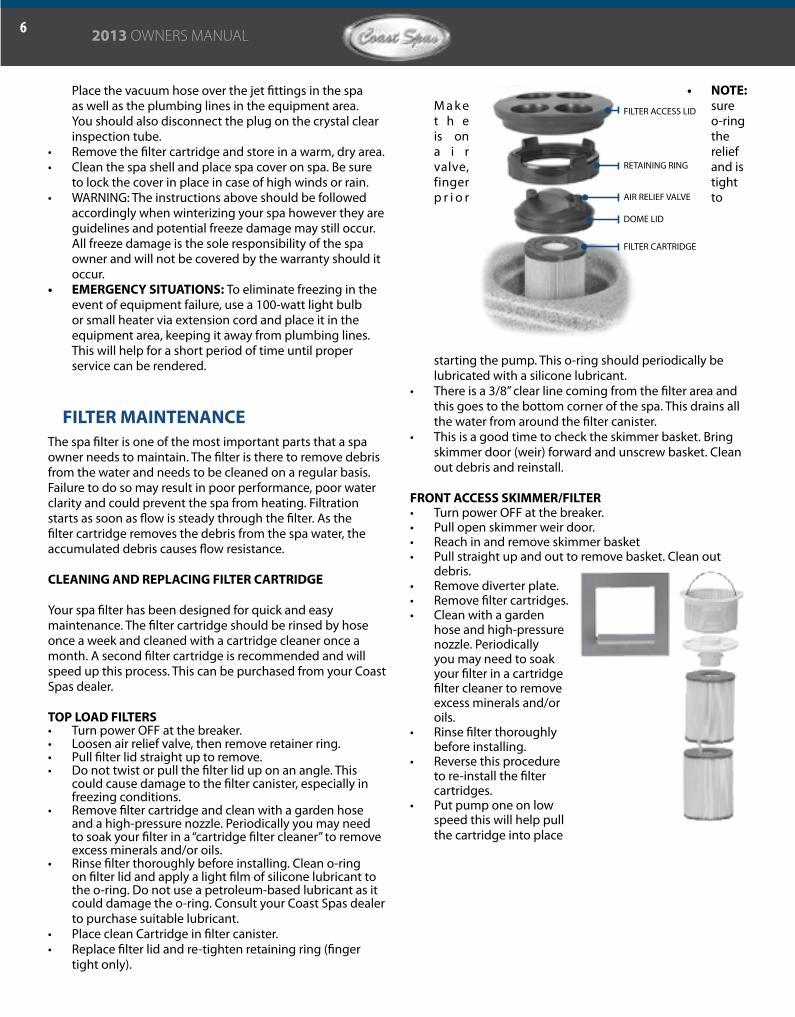
TOP LOAD FILTERS• Turn power OFF at the breaker.• Loosen air relief valve, then remove retainer ring.• Pull filter lid straight up to remove.• Do not twist or pull the filter lid up on an angle. This
could cause damage to the filter canister, especially in freezing conditions.
• Remove filter cartridge and clean with a garden hose and a high-pressure nozzle. Periodically you may need to soak your filter in a “cartridge filter cleaner” to remove excess minerals and/or oils.
• Rinse filter thoroughly before installing. Clean o-ring on filter lid and apply a light film of silicone lubricant to the o-ring. Do not use a petroleum-based lubricant as it could damage the o-ring. Consult your Coast Spas dealer to purchase suitable lubricant.
• Place clean Cartridge in filter canister.• Replace filter lid and re-tighten retaining ring (finger
tight only).
• NOTE: M a k e sure t h e o-ring is on the a i r relief valve, and is finger tight p r i o r to
starting the pump. This o-ring should periodically be lubricated with a silicone lubricant.
• There is a 3/8” clear line coming from the filter area and this goes to the bottom corner of the spa. This drains all the water from around the filter canister.
• This is a good time to check the skimmer basket. Bring skimmer door (weir) forward and unscrew basket. Clean out debris and reinstall.
FRONT ACCESS SKIMMER/FILTER• Turn power OFF at the breaker.• Pull open skimmer weir door.• Reach in and remove skimmer basket • Pull straight up and out to remove basket. Clean out
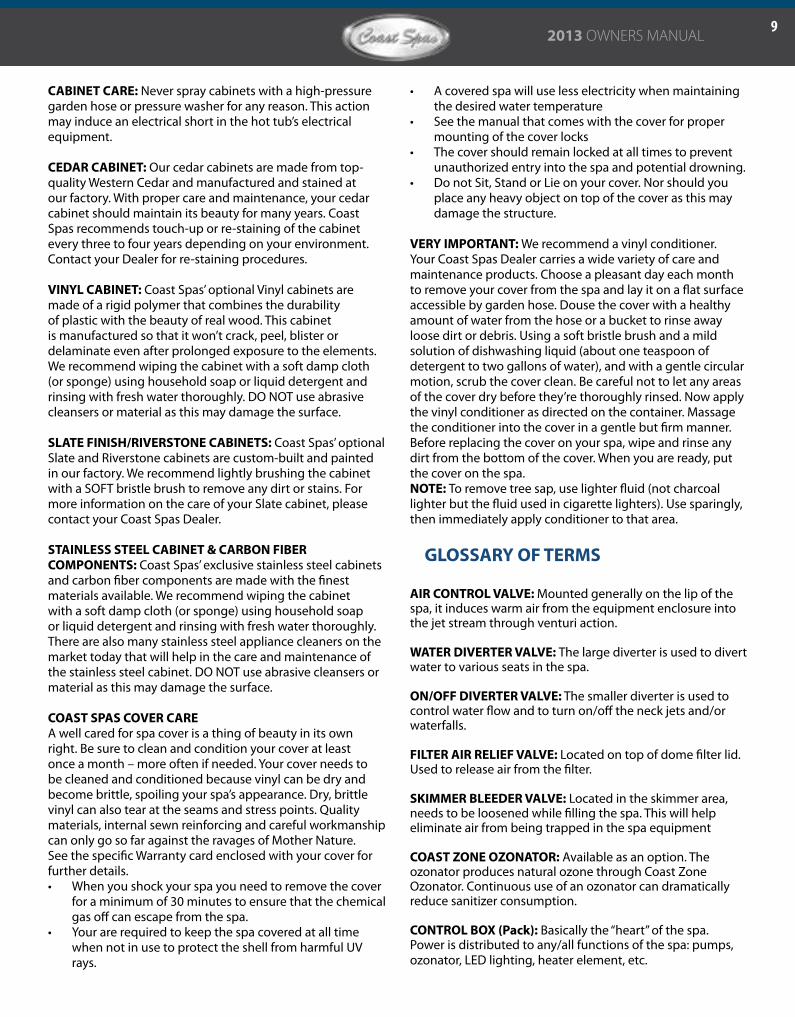
debris.• Remove diverter plate.• Remove filter cartridges.• Clean with a garden
hose and high-pressure nozzle. Periodically you may need to soak your filter in a cartridge filter cleaner to remove excess minerals and/or oils.
• Rinse filter thoroughly before installing.
• Reverse this procedure to re-install the filter cartridges.
• Put pump one on low speed this will help pull the cartridge into place
FILTER ACCESS LID
RETAINING RING
AIR RELIEF VALVE
DOME LID
FILTER CARTRIDGE
2013 OWNERS MANUAL7
7
Calcium Hardness: This is a measurement of dissolved calcium in the water. Calcium will help control the corrosive nature of the spa’s water.
WARNING: Never store chemicals inside the equipment area of your spa.
IMPORTANT: Do not use Hydrogen Peroxide based sanitizers in your spa. When using Trichlor chlorine or Bromine tablets you must use a floating dispenser. These chemicals can have an extremely corrosive effect on certain materials in the spa. Damage caused by use of these chemicals, or improper use of any chemicals, is not covered under the spa’s warranty.
OTHER ADDITIVESMany other additives are available for your spa. Some are necessary to compensate for out-of-balance water, some aid in cosmetic water treatment and others simply alter the feel or smell of the water. Your Authorized Coast Spas Dealer can advise you on the use of these additives.
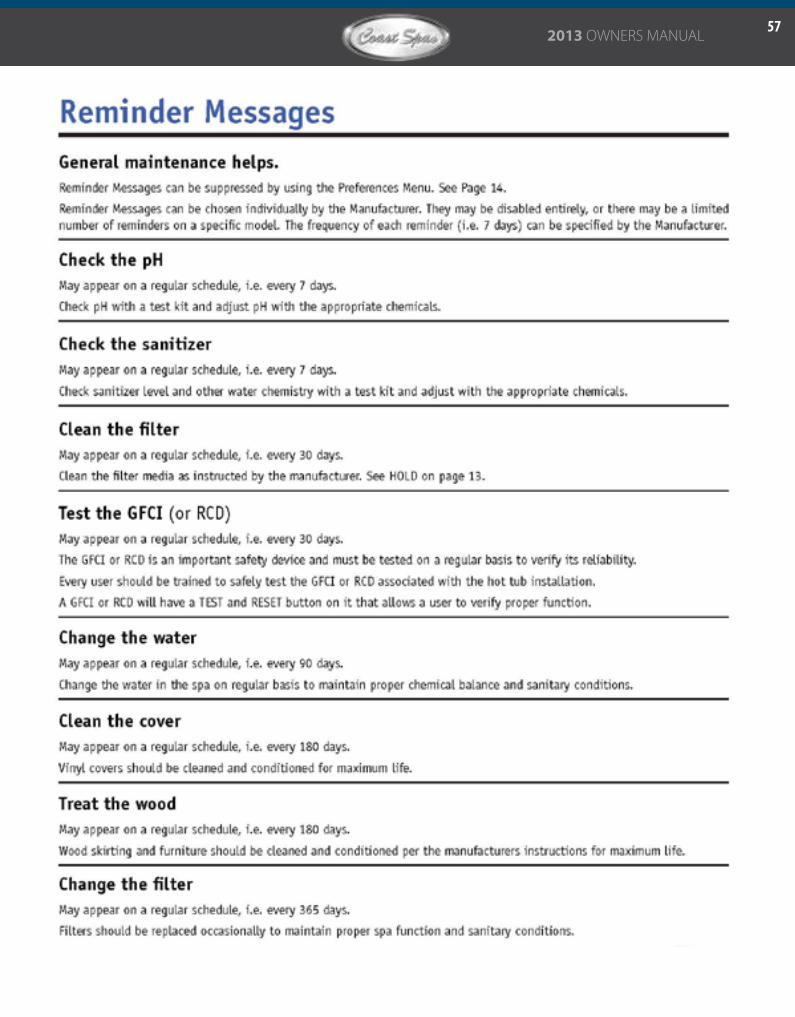
REQUIRED FILTER MAINTENANCEYour new hot tub is equipped with a Microban filter cartridge. To ensure maximum water quality at all times, you should replace the filter cartridge every six months, or earlier as necessary. The filter cartridge is designed to be thrown away! Attempts to re-use the filter cartridge may result in the re-release of unwanted particles back into the hot tub.
REQUIRED WATER REPLACEMENTYou should replace the hot tub’s water every 3-6 months. The frequency will depend on a number of variables including frequency of use, number of bathers and attention paid to the water quality maintenance. You will know it is time for a change when you can no longer get the normal feel or sparkle to the water, even though the key water balance measurements are all within the recommended ranges.
WATER QUALITY MAINTENANCEMaintaining the quality of the water within the specified limits will serve to enhance your enjoyment and prolong the life of the hot tub’s equipment. It is a fairly simple task, but it requires regular attention because the water chemistry involved is a balance of several factors. There is no simple formula, and there is no avoiding it. A careless attitude in regards to water maintenance will result in poor and potentially harmful conditions for soaking and even damage to your hot tub investment. The most important thing to keep in mind is that preventing poor water chemistry is much easier than correcting poor water chemistry. For specific guidance on maintaining water quality, consult your Authorized Coast Spas Dealer who can recommend appropriate chemical products for sanitizing and maintaining your hot tub.
MAINTAIN HEALTHY SPA WATER: Always maintain your hot tub’s water chemistry within the following parameters:
pH 7.2-7.8
Chlorine 1.0-3.0ppm
Bromine 2.0-5.0ppm
Total Alkalinity 100-120ppm
Calcium Hardness 150-250ppm
pH: pH is a measure of relative acidity or alkalinity of water and is measured on a scale of 0 to 14. The midpoint of 7 is said to be neutral, above which is alkaline and below which is acidic. In hot tub water, it is very important to maintain a slightly alkaline condition of 7.2 to 7.8. Problems become proportionately severe the further outside of this range the water gets. A low pH will be corrosive to metals in the hot tub equipment. A high pH will cause minerals to deposit on the interior surface (scaling). In addition, the ability of the sanitation agents to keep the hot tub clean is severely affected as the pH moves beyond the ideal range. That is why almost all hot tub water test kits contain a measure for pH as well as sanitizer.
Sanitizer (Chlorine or bromine): To destroy bacteria and organic compounds in the hot tub water by breaking them down into non-harmful levels which get filtered out. A sanitizer must be used regularly, either chlorine or bromine. Sanitizing your spa water is the most important spa maintenance you can do for yourself.
Total Alkalinity: This refers to the ability of the hot tub water to resist changes in pH. Controlling alkalinity can help keep your pH in the appropriate range thereby lessening the need for pH balancing. If the TA is too low the pH level will fluctuate rapidly from high to low. If the TA is too high the pH will tend to be too high and will be very difficult to bring back down

2013 OWNERS MANUAL8
8
HOT TUb INTERIORYour Coast spa has a fiberglass reinforced acrylic shell. Generally dirt and stains will not adhere to the surface. To properly clean the surface, we recommend wiping it with a soft damp cloth (or sponge) using household soap or liquid detergent and rinsing thoroughly with fresh water. Stubborn dirt or stains may be removed by using Spic & Span adequately dissolved in water.• DO NOT use any cleaning products containing abrasives
or solvents, since these could damage the surface. Harsh chemicals should never be used on acrylic surfaces. Damage to the shell due to the use of harsh chemicals is not covered under the warranty.
• DO NOT leave your hot tub drained and in direct sunlight for extended periods of time. Extreme heat could cause damage to the acrylic surface.
STAINLESS STEEL CONTROLS AND COMPONENTS AbOVE THE WATER LINETo preserve the stainless steel finish of the controls and components above the water line, we recommend they be wiped with a dry soft cloth after each use of your hot tub.
PRODUCT & CARE GUIDEYour Authorized Coast Spas Dealer carries a wide variety of care and maintenance products. For more information please contact your Dealer.
HEADREST / PILLOW CAREThe pillows can be removed for easy cleaning and maintenance. All pillows have plugs within the pillow itself. To remove the pillow, grab the bottom edge firmly and pull outward. This will allow the pillows to pop-out from the receptacle in the spa shell. To reinstall the pillow you will align the pillow plug with the receptacle. Press/hit the front side of the pillow firmly, which will insert the plug back into the receptacle.• Do not sit on the pillows• Do not pull on the pillows• Proper water chemistry must be maintained. Failure to
do so may damage the spa pillows.• Pillows should be cleaned using a soft cloth and mild
soap, then wiped with a conditioner. We recommend that pillows be washed each time you drain you spa.
WATER CLARITY TROUbLESHOOTING
Problem Probable Cause Potential Solutions
Water Odor • Improper sanitization• Excessive organics in water• pH is too low
• Add sanitizer• Shock spa with sanitizer• Adjust pH
Chlorine Odor • Chloramines are too high• pH is too low
• Shock spa with sanitizer• Adjust pH
Musty Odor • Bacteria or Algae growth • Shock spa with sanitizer• Drain and refill spa water
Scale • Total alkalinity is too high• pH is too high• High calcium content in water
• Adjust total alkalinity• Adjust pH• Use stain and scale product
Stains • Total alkalinity is too low• pH is too low• High metal content in water
• Adjust alkalinity• Adjust pH• Use stain and scale product
Cloudy Water • Poor filtration• pH is too high• Hardness is too high• Total alkalinity is too high• Suspended particles
• Clean filter cartridge• Adjust pH• Adjust hardness• Adjust total alkalinity• Drain and refill spa water
Algae Growth • pH is too high• Sanitizer is too low
• Adjust pH• Shock spa with sanitizer• Adjust sanitizer level
Eye Irritation • pH is too low• Sanitizer is too low
• Adjust pH• Shock spa with sanitizer• Adjust sanitizer level
Skin Rash/Irritation • Free chlorine level too high• Unsanitary water
• Adjust chlorine level• Shock spa with sanitizer• Adjust sanitizer level
2013 OWNERS MANUAL9
9
CAbINET CARE: Never spray cabinets with a high-pressure garden hose or pressure washer for any reason. This action may induce an electrical short in the hot tub’s electrical equipment.
CEDAR CAbINET: Our cedar cabinets are made from top-quality Western Cedar and manufactured and stained at our factory. With proper care and maintenance, your cedar cabinet should maintain its beauty for many years. Coast Spas recommends touch-up or re-staining of the cabinet every three to four years depending on your environment. Contact your Dealer for re-staining procedures.
VINYL CAbINET: Coast Spas’ optional Vinyl cabinets are made of a rigid polymer that combines the durability of plastic with the beauty of real wood. This cabinet is manufactured so that it won’t crack, peel, blister or delaminate even after prolonged exposure to the elements. We recommend wiping the cabinet with a soft damp cloth (or sponge) using household soap or liquid detergent and rinsing with fresh water thoroughly. DO NOT use abrasive cleansers or material as this may damage the surface.
SLATE FINISH/RIVERSTONE CAbINETS: Coast Spas’ optional Slate and Riverstone cabinets are custom-built and painted in our factory. We recommend lightly brushing the cabinet with a SOFT bristle brush to remove any dirt or stains. For more information on the care of your Slate cabinet, please contact your Coast Spas Dealer.
STAINLESS STEEL CAbINET & CARbON FIbER COMPONENTS: Coast Spas’ exclusive stainless steel cabinets and carbon fiber components are made with the finest materials available. We recommend wiping the cabinet with a soft damp cloth (or sponge) using household soap or liquid detergent and rinsing with fresh water thoroughly. There are also many stainless steel appliance cleaners on the market today that will help in the care and maintenance of the stainless steel cabinet. DO NOT use abrasive cleansers or material as this may damage the surface.
COAST SPAS COVER CAREA well cared for spa cover is a thing of beauty in its own right. Be sure to clean and condition your cover at least once a month – more often if needed. Your cover needs to be cleaned and conditioned because vinyl can be dry and become brittle, spoiling your spa’s appearance. Dry, brittle vinyl can also tear at the seams and stress points. Quality materials, internal sewn reinforcing and careful workmanship can only go so far against the ravages of Mother Nature. See the specific Warranty card enclosed with your cover for further details.• When you shock your spa you need to remove the cover
for a minimum of 30 minutes to ensure that the chemical gas off can escape from the spa.
• Your are required to keep the spa covered at all time when not in use to protect the shell from harmful UV rays.
• A covered spa will use less electricity when maintaining the desired water temperature
• See the manual that comes with the cover for proper mounting of the cover locks
• The cover should remain locked at all times to prevent unauthorized entry into the spa and potential drowning.
• Do not Sit, Stand or Lie on your cover. Nor should you place any heavy object on top of the cover as this may damage the structure.
VERY IMPORTANT: We recommend a vinyl conditioner. Your Coast Spas Dealer carries a wide variety of care and maintenance products. Choose a pleasant day each month to remove your cover from the spa and lay it on a flat surface accessible by garden hose. Douse the cover with a healthy amount of water from the hose or a bucket to rinse away loose dirt or debris. Using a soft bristle brush and a mild solution of dishwashing liquid (about one teaspoon of detergent to two gallons of water), and with a gentle circular motion, scrub the cover clean. Be careful not to let any areas of the cover dry before they’re thoroughly rinsed. Now apply the vinyl conditioner as directed on the container. Massage the conditioner into the cover in a gentle but firm manner. Before replacing the cover on your spa, wipe and rinse any dirt from the bottom of the cover. When you are ready, put the cover on the spa. NOTE: To remove tree sap, use lighter fluid (not charcoal lighter but the fluid used in cigarette lighters). Use sparingly, then immediately apply conditioner to that area.
GLOSSARY OF TERMS
AIR CONTROL VALVE: Mounted generally on the lip of the spa, it induces warm air from the equipment enclosure into the jet stream through venturi action.
WATER DIVERTER VALVE: The large diverter is used to divert water to various seats in the spa.
ON/OFF DIVERTER VALVE: The smaller diverter is used to control water flow and to turn on/off the neck jets and/or waterfalls.
FILTER AIR RELIEF VALVE: Located on top of dome filter lid. Used to release air from the filter.
SKIMMER bLEEDER VALVE: Located in the skimmer area, needs to be loosened while filling the spa. This will help eliminate air from being trapped in the spa equipment
COAST ZONE OZONATOR: Available as an option. The ozonator produces natural ozone through Coast Zone Ozonator. Continuous use of an ozonator can dramatically reduce sanitizer consumption.
CONTROL bOX (Pack): Basically the “heart” of the spa. Power is distributed to any/all functions of the spa: pumps, ozonator, LED lighting, heater element, etc.
2013 OWNERS MANUAL10
10
CONTROL PANEL: Mounted on the top lip of the spa and controls the functions of the spa.
DRAIN VALVE: Used in draining of the spa. Normally located in the front corner(s) of the spa skirt.
EQUIPMENT ENCLOSURE: An enclosure that houses the control box, pump(s) and other electrical components.
FILTER: The filter cleans the spa by passing water through a filter cartridge where debris and impurities are removed. Top load filter means the filter cartridge is accessible through the top of the spa. Front access skimmer means cartridge is accessed through door of skimmer.
FLOOR DRAIN: The floor drain is covered by a grate-type cover and is utilized when draining the spa. It also acts as the return for the ozonator. You will see bubbles emitted from this drain, which is the result of water mixing with the ozone output.
GATE VALVES: Red with a grey handle is located at the inlet and outlet of the pumping system. Used while servicing the spa equipment, the valves open or close the water flow to the equipment. To remain open for normal use, turn fully counterclockwise.
KNIFE VALVES: A white “T”-handled valve, same functions as Gate valve (see above), except to open them you pull up on handle.
HEATER: The thermostatically controlled heater raises the temperature of the spa to the desired setting. LEDs: LEDs and their special lenses can be used to achieve the desired mood lighting in the spa and spa jets.
SKIMMER: This is the rectangular outlet at the water level. The skimmer removes surface debris to the filter. The water level in the spa should be kept ½ to ¾ up on the skimmer for optimum operation.
SUCTION FITTING: During operation of the equipment, the suction works in conjunction with the skimmer to draw water from the bottom of the spa through the filter, keeping the spa sparkling clean.
JETS:
NECK JET: Direction-controllable jet for soothing neck massage.ADJUSTAbLE CLUSTER JET: Our adjustable, high-intensity hydrotherapy jet. DIRECTIONAL JET: Provides a straight flow for a therapeutic massageROTATIONAL JET: Provides a Uni-directional circular therapeutic massage.MASSAGE JET: Delivers massage in staccato bursts over a narrow, focused area.VOLCANO/WHIRLPOOL JET: high-output jet designed for foot and leg massage. LAMINAR FLOW WATER FEATURE: A thin stream of water that arcs from the spa lip

2013 OWNERS MANUAL11
11
SPA SYSTEM
Symptom Probable Cause Recommended Action
Spa does not work • Power is turned off • Reset GFCI
No Display on the control panel • Power is turned off• Defective Topside
• Reset GFCI• Contact your Dealer
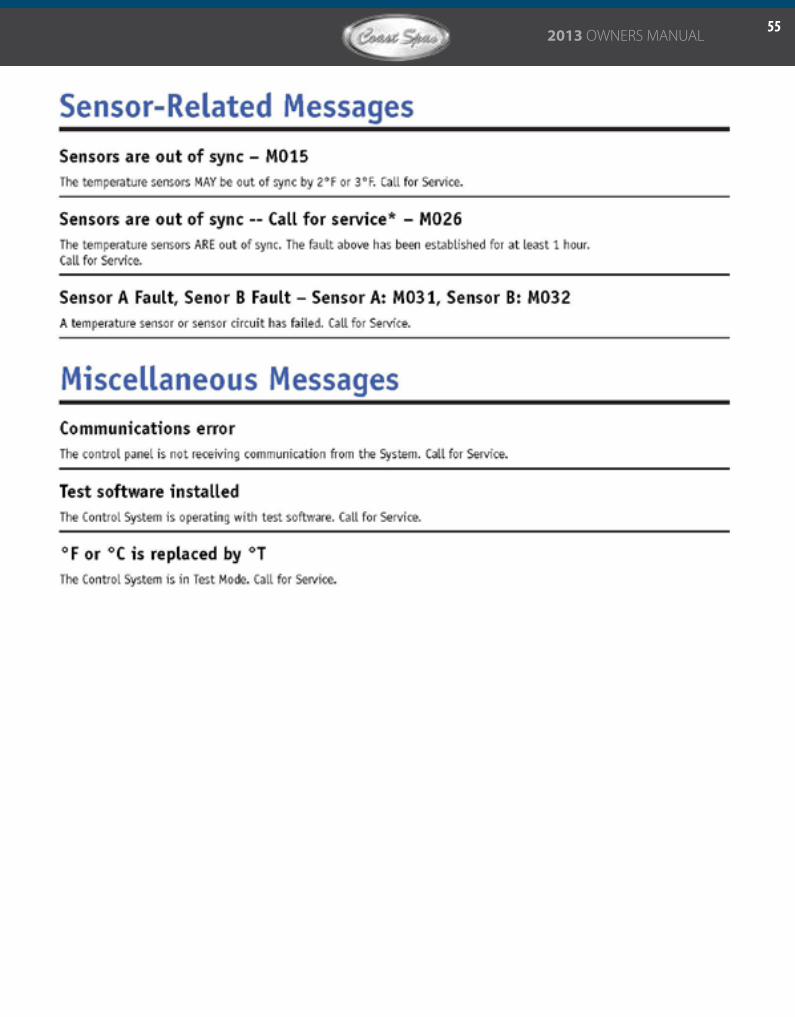
Letters on control Panel • An error has been found • Refer to the Reference Card for your control panel to verify the error. Contact your Dealer for service
PUMP PRObLEMS
Symptom Probable Cause Recommended Action
Noisy/Loud motor • Air trapped in the pump• Low water level• Worn pump seal• Defective pump
• Open bleed valve in the skimmer• Add water to the spa• Contact your Dealer• Contact your Dealer
Pumps power down on their own • Set temperature has been reached
• Filtration cycle has ended• Automatic time out• Overheat safety protection
• No Problem• No Problem• Pumps are set to run for a
predetermined time while the spa is in use (15-20 Mins)
• The pumps have a thermal overload which will prevent them from running for extended periods of time. Wait until pumps have cooled down (1+ hrs). If problem persists, contact your Dealer
Pump running constantly, will not turn off.
• Filter cycle set to 24 hours• Problem with the circuit board
• Turn off 24 hour filtration• Turn power off at GFCI and
contact your Dealer
Pump will not turn on • GFCI tripped• Motor has overheated• Not plugged in• Damaged plug• Seized motor• Blown fuse• Motor vent is blocked
• Reset the GFCI• Let cool for 1+ hour• Plug in to the board• Contact your dealer• Contact your dealer• Check fuse or contact your Dealer• Clear debris from the vent
TROUbLESHOOTING GUIDE

2013 OWNERS MANUAL12
12
HEAT PRObLEMS
Symptom Probable Cause Recommended Action
Water will not heat • Error message on control panel• Spa is in a different Heat Mode• Water level is too low• Poor water flow• Closed valves• Pump 1 is not running
• Refer to the Reference Card for your control panel to verify the error. Contact your Dealer for service.
• Set spa to “Standard Mode”• Add water to the spa• Clean filter & check valves• Open all valves• Contact your Dealer
Water is too hot • Incorrect reading• Filter cycle duration is too long• Pump speeds reversed
• Verify temperature with thermometer
• Reduce duration of the filter cycle• Contact your Dealer
LIGHTING PRObLEMS
Symptom Probable Cause Recommended Action
Standard Light will not come on • Bulb has burnt out • Replace the light bulb.
LED lighting not in sync • Burnt out bulb/connection • Contact your Dealer
LED lighting won’t come on • Incorrect settings • Contact your Dealer
PUMPS WILL NOT PRIME
Symptom Probable Cause Recommended Action
Pump on but no water flow • Air trapped in pump• No water in the pump• Closed valves
• Loosen bleed valve in skimmer.• Check the fill level in the spa• Open all valves
JETS WILL NOT COME ON/POOR WATER FLOW
Symptom Probable Cause Recommended Action
Little to no water flowing from jets • Jets turned off• Pump not primed• Valves are closed• Diverter set to a different seat• Dirty filter
• Open jet by turning the face counter clockwise.
• Reset breaker to allow for the spa to prime the pump. Open bleed valve in the skimmer area.
• Open valves• Switch diverter• Remove and clean filter cartridge
SPA IS LEAKING
Symptom Probable Cause Recommended Action
Water around base of spa • Loose connections• Leak from internal fitting
• Hand tighten all quick disconnects and fittings. Check gaskets and o-rings
• Contact your Dealer

2013 OWNERS MANUAL13
13
2013 OWNERS MANUAL14
14

2013 OWNERS MANUAL15
15

2013 OWNERS MANUAL16
16
2013 OWNERS MANUAL17
17

2013 OWNERS MANUAL18
18
2013 OWNERS MANUAL19
19
2013 OWNERS MANUAL20
20

2013 OWNERS MANUAL21
21
2013 OWNERS MANUAL22
22
2013 OWNERS MANUAL23
23
2013 OWNERS MANUAL24
24

2013 OWNERS MANUAL25
25
2013 OWNERS MANUAL26
26
2013 OWNERS MANUAL27
27

2013 OWNERS MANUAL28
28
2013 OWNERS MANUAL29
29

2013 OWNERS MANUAL30
30
2013 OWNERS MANUAL31
31

2013 OWNERS MANUAL32
32
2013 OWNERS MANUAL33
33

2013 OWNERS MANUAL34
34
2013 OWNERS MANUAL35
35

2013 OWNERS MANUAL36
36

2013 OWNERS MANUAL37
37
2013 OWNERS MANUAL38
38

2013 OWNERS MANUAL39
39

2013 OWNERS MANUAL40
40

2013 OWNERS MANUAL41
41

2013 OWNERS MANUAL42
42

2013 OWNERS MANUAL43
43
2013 OWNERS MANUAL44
44

2013 OWNERS MANUAL45
45

2013 OWNERS MANUAL46
46

2013 OWNERS MANUAL47
47
2013 OWNERS MANUAL48
48

2013 OWNERS MANUAL49
49

2013 OWNERS MANUAL50
50

2013 OWNERS MANUAL51
51

2013 OWNERS MANUAL52
52

2013 OWNERS MANUAL53
53

2013 OWNERS MANUAL54
54
2013 OWNERS MANUAL55
55

2013 OWNERS MANUAL56
56
2013 OWNERS MANUAL57
57

2013 OWNERS MANUAL58
58