Embed Size (px)
Citation preview
20/01/2017
Engineering Student Machine Shop
SAFETY MANUAL

2
Content
1.0 Engineering Student Machine Shop (ESMS) Safety .................................................................. 4
1.1 Guests & Visitors ................................................................................................................... 4
1.2 ESMS Occupancy ................................................................................................................... 4
1.3 WHMIS ................................................................................................................................... 4
1.4 Orientation & Training .......................................................................................................... 4
1.6 Non-injury Accidents ............................................................................................................. 5
2.0 General Safety Rules ................................................................................................................. 6
3.0 Fire Alarm Procedures .............................................................................................................. 7
4.0 Machine Tools ........................................................................................................................... 9
4.1 Milling Machine ..................................................................................................................... 9
4.2 Lathe .................................................................................................................................... 10
4.3 Drill Press ............................................................................................................................. 12
4.4 Band-saw ............................................................................................................................. 13
4.5 Cut-Off Saw ......................................................................................................................... 14
4.6 Scroll Saw ............................................................................................................................ 15
4.7 Electric Tube/Pipe Notcher ................................................................................................. 16
4.8 Bench Grinder ..................................................................................................................... 18
5.0 Sanding .................................................................................................................................... 19
5.1 Vertical Belt/Disk Sander ..................................................................................................... 19
6.0 Sheet Metal Tools ................................................................................................................... 20
6.1 Pan Brake ............................................................................................................................. 20
6.2 Metal Shear ......................................................................................................................... 21
6.3 Sheet Metal Hand Notcher ................................................................................................. 22
6.4 Sheet Metal Hand Punch ..................................................................................................... 24
6.5 Sheet Metal Hand Shear ..................................................................................................... 25
7.0 Hand Tools - Powered ............................................................................................................. 26
7.1 General Safety for Handheld Power Tools (corded, cordless or air powered) ................... 26
7.2 Drill ...................................................................................................................................... 26
7.3 Jig Saw ................................................................................................................................. 27

3
7.4 Angle Grinder: ..................................................................................................................... 28
7.5 Rotary Tool/Die Grinder ...................................................................................................... 29
8.0 Safety Guidelines for Hand Tools ............................................................................................ 30
8.1 Chisels .................................................................................................................................. 30
8.2 Files ...................................................................................................................................... 30
8.3 Wrenches ............................................................................................................................ 30
8.4 Hammers ............................................................................................................................. 30
Appendix A .................................................................................................................................... 31
Acknowledgements ....................................................................................................................... 32
4
1.0 Engineering Student Machine Shop (ESMS) Safety The purpose of this manual is to act as a basic guide to the safe operation of the machinery available in the ESMS and to provide the basic rules for operating that machinery. Most importantly, this guide cannot replace the advice and instructions given by the shop technicians, your most important resource for working safely in the shop. Due to the diverse hazards in the ESMS it is essential that all safety rules and instructions given by the shop technicians be followed. However, it is the student who is ultimately responsible for his or her own safety. If you are ever unsure of anything you want to do in the shop, just ask for help.
1.1 Guests & Visitors No unauthorized person shall use the ESMS. A WatCard must be presented upon entry to exchange for an ID tag. Only persons who have completed the Shop Orientation and signed an ESMS Policy Acknowledgement form are allowed in the shop.
1.2 ESMS Occupancy The primary responsibility of shop technicians is to monitor the safety of shop users. The number of users an individual shop technician can effectively monitor is affected by many factors. It is each shop technician’s responsibility to determine how many users can be effectively monitored under any given circumstances. A maximum occupancy of the ESMS is limited to 28 users at all times. This maximum total includes approximately 10 users on machine tools and the remainder doing bench work. The technician on duty has the right to reduce the maximum occupancy limit if circumstances warrant. Application of this policy is left to the discretion of the technician on duty. Resolution of any disputes regarding the application of this policy is the responsibility of the Engineering Machine Shop (EMS) Manager or Assistant Manager.
1.3 WHMIS All students using the ESMS must have successfully completed Workplace Hazardous Materials Information System (WHMIS) training.
1.4 Orientation & Training All students must receive shop orientation, including the layout of the ESMS, identification of all the machinery, cutting tools, hand tools, First Aid Kit, fire extinguishers, and Eye Wash Station. A brief explanation will be given to describe how each machine is used. The focus is on safety and working safely. Each student will be
5
required to sign the ESMS Policy Acknowledgement form upon completion (attached in Appendix A). Students who have not participated in the orientation or have not submitted a signed acknowledgement form will be prohibited from using the ESMS. Shop users must have a signed and dated copy of the ESMS Policy Acknowledgement form on file with the shop manager. Specific machine tool safety-based training will be provided on a one-on-one basis as required.
1.5 Injury Reporting
In the event of an injury in the ESMS, inform the shop technician immediately. The technician will provide appropriate First Aid treatment and arrange for transportation to the clinic or hospital if required. Students should be prepared to assist if necessary.
Contact local emergency by phoning 911. All injury-causing accidents that require outside medical attention must be followed up with a meeting with the shop technician. This is to determine the cause of the accident and to help prevent against similar accidents in the future. This meeting must take place before shop access may resume.
1.6 Incident Reporting In the event of incident resulting in machine damage, or near misses, the shop technician should be informed immediately. The circumstances will be reviewed and recommendations made for safe operation of the equipment. Failure to follow these rules will result in the following disciplinary action: 1. Verbal warning – will be recorded and kept on file. Corrective action will be required. 2. Formal written warning 3. Loss of ESMS privileges Severity may involve bypassing warnings and going straight to disciplinary action.
First Aid Kit
The First Aid Kit is located outside of the ESMS office to the right of the door. The Eye Wash Station is located beside the sink at the entrance of the shop. NOTE: First Aid equipment and materials are strictly for First Aid emergencies.
6
First Aid Emergency Procedures
Major injury/illness: When a person cannot or should not be moved
Breathing Difficulty or Suspected Heart Attack: CALL AMBULANCE 911 Minor injury/illness: Department/Residence – first aid kit/station location Health Services – first aid services available: 519-888-4096 or Ext. 84096 UW Police: 519-888-4911 or Ext. 22222
More First Aid information can be found here: https://uwaterloo.ca/safety-office/sites/ca.safety-office/files/uploads/files/firstaidjuly2015highlight.pdf
2.0 General Safety Rules 1. Students must co-operate fully with the shop technician and must follow the rules
without exception. Students are expected to report any incident or near miss regardless of how minor. Minor cuts or abrasions are treated on-site. Shop technicians advise students of health and safety on campus.
2. Do not enter shop while tired or under the influence of drugs, alcohol, and any medications that may cause drowsiness.
3. It is the student's responsibility to seek out, receive and understand instruction in the proper use of any and all tools and equipment available in the shop before he or she attempts to use the tools or equipment.
4. All students using the ESMS or hand tools must wear Personal Protective Equipment (PPE) such as safety glasses, goggles, hearing protection, proper footwear, gloves and/or a face shield to protect their eyes when appropriate.
5. When operating milling machines, lathes, and drill presses, never remove chips with your bare hands. The chips can be razor sharp and should be removed with pliers or a brush, only after the machine has been turned off and stopped.
6. Shoes covering the entire foot must be worn at all times when in the shop. Shoes with open heels, toes or sides will not be allowed in the shop. Students will not be allowed access if not appropriately attired.
7. Long hair must be tied back. Dangling jewelry, rings, watches, bracelets, etc. and loose clothing are dangerous and will not be allowed.
8. Hearing protection is required when noise levels are excessive. 9. Dust masks are encouraged when you are cutting plywood, MDF or particleboard. 10. Keep your work area tidy. Clean up after yourself. 11. Floors must be swept and all tools must be put away at the end of each work period. 12. Sawdust, metal chips and scrap material must be swept up and disposed of. 13. Questions regarding safety issues must be referred to the technician. 14. Cell phones, MP3 players, and any devises with head phones are prohibited in the
Student Shop. Your complete attention is necessary in order to work safely. 15. Spray painting is not allowed in the shop.
7
16. Never have a conversation with, or otherwise distract someone, operating machinery.
17. Do not use equipment on which you have not been trained. If you are unfamiliar with a particular operation, seek assistance from the technician.
18. Immediately report any defective equipment or absence of a protective device (guarding) to the shop technician on duty.
19. Do not attempt to repair any broken or malfunctioning equipment. Notify the shop technician.
20. Immediately report all incidents and near misses or existence of any hazards to the shop technician on duty.
21. Any machine in need of repair will be locked out. 22. Never attempt to use a machine that has been locked out. 23. Do not use stationary equipment work surfaces for uses other than their intended
purpose; for example, for sanding, project assembly, layout, applying finishes, etc. 24. All safety guards must be kept in place while operating equipment. 25. Materials should never be fed into a machine faster than it will cut or sand. 26. Personal power tools are prohibited in the ESMS except for hand sanders, drills and
rotary tools. 27. Turn off machines when you are finished. Never leave any machine running
unattended. 28. Never grind or sand toxic or hazardous material such as composites, concrete or
fiberglass. 29. One operator per machine tool.
3.0 Fire Alarm Procedures
When Fire Alarm sounds while working in the ESMS: 1. Stop what you are doing. 2. Shut off all machinery.
Then follow the UW fire alarm procedures below:
In Case of Fire 1. Leave fire area and close doors. 2. Activate wall-mounted fire alarm pull station located at exits. 3. Attempt to extinguish fire only if you can do it safely. 4. Report any information about fire to UW Police and Fire Department.
If You Are On Fire STOP where you are, DROP to the floor or ground and ROLL your body to smother the fire. When Fire Alarm Sounds
1. Calmly evacuate the building. Do NOT use elevator.
8
2. As time allows close windows and doors. Turn off cooking, electrical and laboratory equipment. Put on coat in winter for protection.
3. Use an alternate exit, if you encounter smoke or fire. 4. Follow instructions of emergency response services and fire wardens. 5. Report anyone suspected of remaining in the building. 6. Move away from building at least 30 metres, leaving clear access for emergency
services. 7. Do not re-enter the building until authorized by Fire Department or UW Police. If Unable To Evacuate
1. Call 911 giving your location. 2. A closed door can provide good protection against fire and smoke. Use available
materials to seal door and air ducts. 3. If smoke enters room, stay low as heat and gases tend to rise. 4. Signal your position at a window. Persons with mobility difficulties or who use wheelchairs should move to an area of refuge (stairwell, room with phone). Controlled Evacuation
In non-fire situations threatening safety, such as building services interruption or hazardous material spill, buildings are evacuated under direction of UW Police, fire wardens and emergency response services. The fire alarm should not be used to evacuate a building. UW Police or Hazardous Material Spill 519-888-4911 or x22222
Fire Code Requirements
1. Open flames, including candles, are not permitted in buildings except as part of lab apparatus, approved food services and maintenance/construction approved by Plant Operations.
2. Bicycles are not allowed in buildings, except in approved designated locations. 3. Corridors and stairwells must be free of obstructions and any combustible or
flammable materials. Items located in a corridor or stairwell must be approved by Plant Operations.
4. Self-closing doors must be able to close. Wedges are only permitted, as a temporary measure while attended, to hold doors open.
5. Fire safety equipment including exit signs, fire extinguishers, and fire hose cabinets must be kept unobstructed.
Willful fires, false fire alarms and tampering with fire equipment are offenses under the law. Fire/Evacuation Training and Information:
Refer to Safety Office ext. 33587.
9
Fire Equipment Services:
Plant Operations ext. 33793.
- FIRE DEPT. RESPONDS TO FIRE ANNUNCIATOR LOCATION – North East Corner of E5, adjacent to parking lot B
4.0 Machine Tools
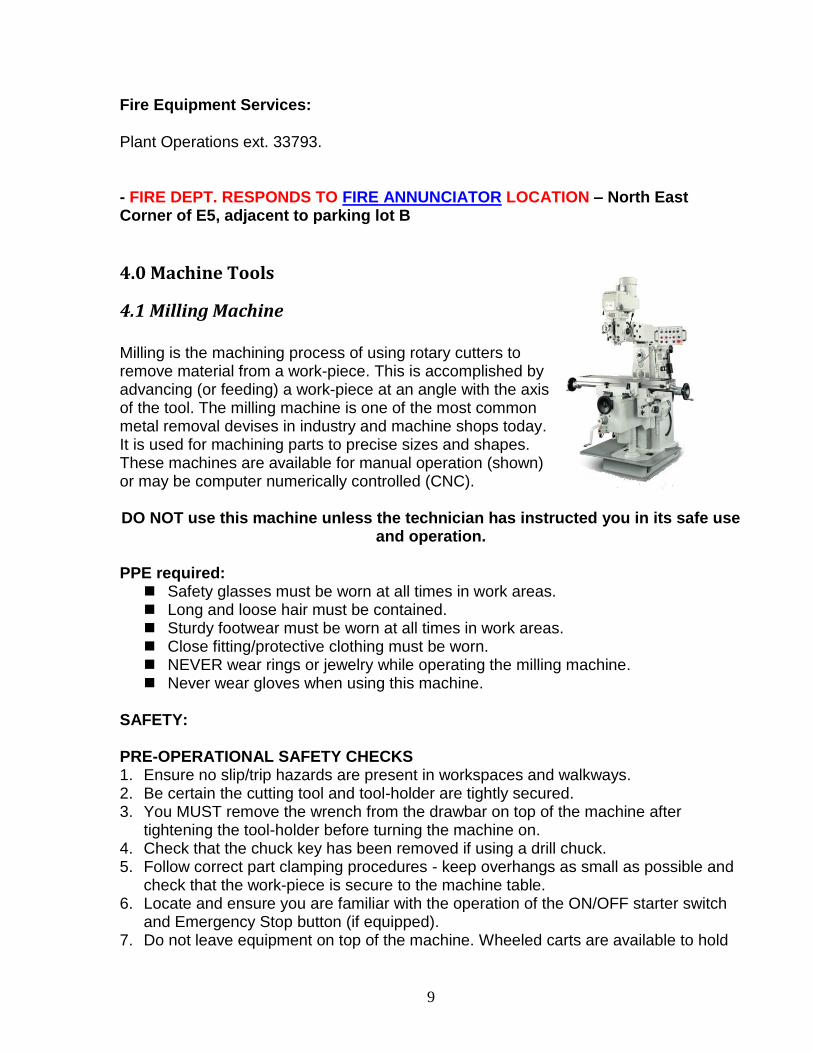
4.1 Milling Machine
Milling is the machining process of using rotary cutters to remove material from a work-piece. This is accomplished by advancing (or feeding) a work-piece at an angle with the axis of the tool. The milling machine is one of the most common metal removal devises in industry and machine shops today. It is used for machining parts to precise sizes and shapes. These machines are available for manual operation (shown) or may be computer numerically controlled (CNC). DO NOT use this machine unless the technician has instructed you in its safe use
and operation.
PPE required: Safety glasses must be worn at all times in work areas. Long and loose hair must be contained. Sturdy footwear must be worn at all times in work areas. Close fitting/protective clothing must be worn. NEVER wear rings or jewelry while operating the milling machine. Never wear gloves when using this machine.
SAFETY: PRE-OPERATIONAL SAFETY CHECKS 1. Ensure no slip/trip hazards are present in workspaces and walkways. 2. Be certain the cutting tool and tool-holder are tightly secured. 3. You MUST remove the wrench from the drawbar on top of the machine after
tightening the tool-holder before turning the machine on. 4. Check that the chuck key has been removed if using a drill chuck. 5. Follow correct part clamping procedures - keep overhangs as small as possible and
check that the work-piece is secure to the machine table. 6. Locate and ensure you are familiar with the operation of the ON/OFF starter switch
and Emergency Stop button (if equipped). 7. Do not leave equipment on top of the machine. Wheeled carts are available to hold
10
tools and projects. 8. Check that all machine guards are in position. 9. Check the coolant delivery system to ensure sufficient flow of coolant when required. 10. Faulty equipment must not be used. Immediately report suspect machinery.
OPERATIONAL SAFETY CHECKS 1. Keep clear of moving machine parts. 2. Set the correct speed to suit the cutter diameter, the depth of cut and the material. 3. Be aware of the direction of flying chips and use an appropriate guard when
necessary. 4. Never leave the machine running unattended. 5. Before making adjustments and measurements or before cleaning cuttings, switch
off the power and bring the machine to a complete standstill.
HOUSEKEEPING 1. Switch off the machine. 2. Remove milling cutters and store them safely. 3. Leave the machine and work area in a safe, clean and tidy state.
POTENTIAL HAZARDS Sharp cutters Moving components - hair/clothing entanglement Eye injury Skin irritation Metal splinters and burrs Flying debris
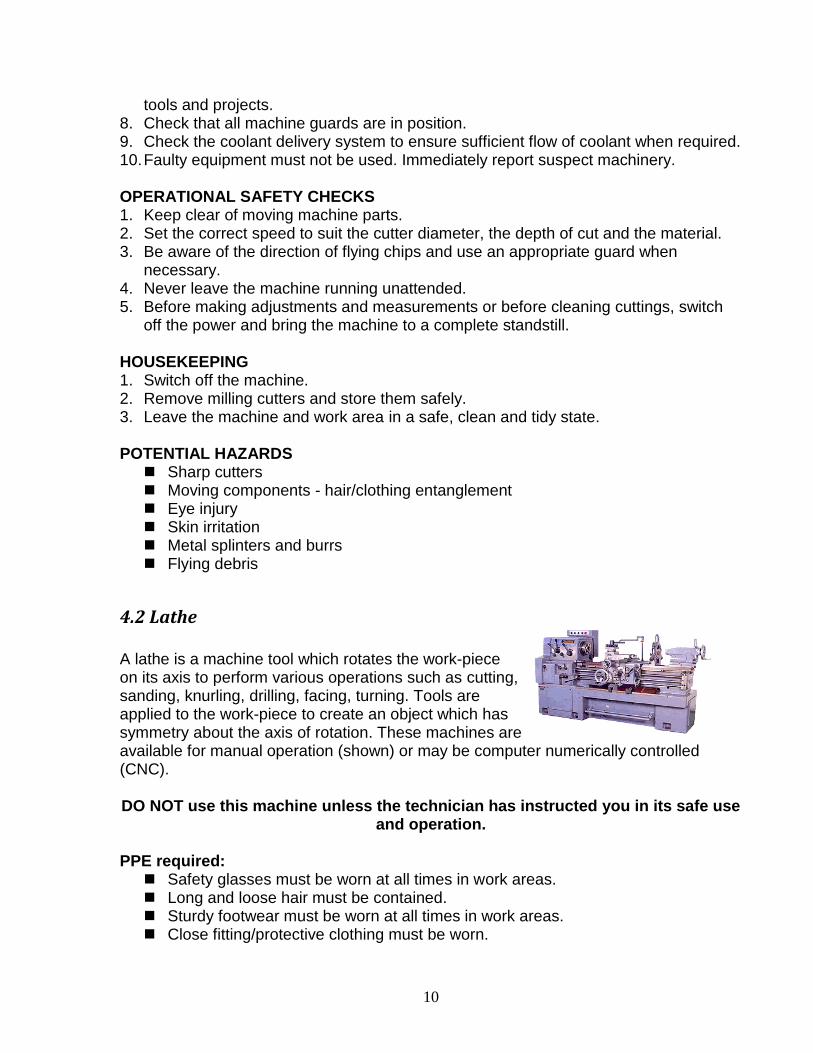
4.2 Lathe
A lathe is a machine tool which rotates the work-piece on its axis to perform various operations such as cutting, sanding, knurling, drilling, facing, turning. Tools are applied to the work-piece to create an object which has symmetry about the axis of rotation. These machines are available for manual operation (shown) or may be computer numerically controlled (CNC).
DO NOT use this machine unless the technician has instructed you in its safe use
and operation. PPE required:
Safety glasses must be worn at all times in work areas. Long and loose hair must be contained. Sturdy footwear must be worn at all times in work areas. Close fitting/protective clothing must be worn.
11
NEVER wear rings or jewelry while operating the lathe. Never wear gloves when using this machine.
SAFETY: PRE-OPERATIONAL SAFETY CHECKS 1. Check workspaces and walkways to ensure no slip/trip hazards are present. 2. Check that the work-piece is clamped tightly in the chuck. 3. You MUST remove the chuck key before starting the lathe. 4. Be certain that the cutting tool and tool-holder are tightly secured. 5. Check for clearance between the chuck and tool-holder before starting (rotate the
chuck by hand to ensure adequate clearance). 6. Locate and ensure you are familiar with the operation of the ON/OFF switch and foot
operated Emergency Stop (if equipped). 7. Ensure all guards are in place. 8. Do not stand in front of the chuck when the lathe is running. 9. Remove all tools from the bed and ways of the machine. 10. Ensure the correct speed for the machining process is selected. 11. Do not try to lift chucks or face plates that are too heavy for you. 12. Faulty equipment must not be used. Immediately report suspect machinery. OPERATIONAL SAFETY CHECKS 1. Never leave the lathe running unattended. 2. Before making adjustments or measurements, switch off the lathe and bring the
machine to a complete standstill. Use the Emergency Stop button if adjusting the chuck.
3. Do not attempt to slow/stop the chuck or turn the work-piece by hand. 4. Avoid letting cuttings build up on the tool or job. Stop the machine and remove it. 5. Always remove the chuck key from the chuck. Never leave the machine with the
chuck key inserted. 6. Do not store tools and parts on top of the machine. 7. Use extreme caution when using a file on the lathe. Never use a file without a
handle.
HOUSEKEEPING 1. Switch off the machine and reset all guards to a fully closed position. 2. Leave the machine in a safe, clean and tidy state.
POTENTIAL HAZARDS Flying objects - chuck key left in chuck Cutting tool injury when cleaning, filing or polishing Rotating machine parts – hair/clothing entanglement Metal splinters/cuttings Eye injuries
12
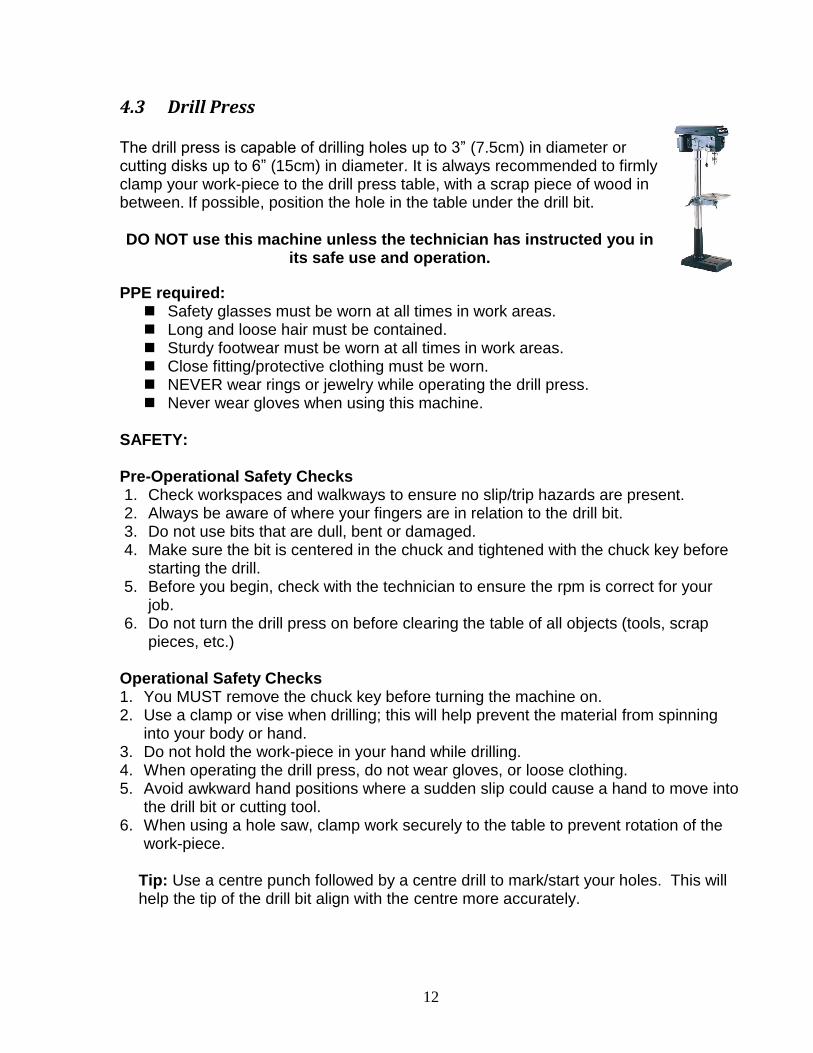
4.3 Drill Press
The drill press is capable of drilling holes up to 3” (7.5cm) in diameter or cutting disks up to 6” (15cm) in diameter. It is always recommended to firmly clamp your work-piece to the drill press table, with a scrap piece of wood in between. If possible, position the hole in the table under the drill bit.
DO NOT use this machine unless the technician has instructed you in
its safe use and operation.
PPE required: Safety glasses must be worn at all times in work areas. Long and loose hair must be contained. Sturdy footwear must be worn at all times in work areas. Close fitting/protective clothing must be worn. NEVER wear rings or jewelry while operating the drill press. Never wear gloves when using this machine.
SAFETY: Pre-Operational Safety Checks 1. Check workspaces and walkways to ensure no slip/trip hazards are present. 2. Always be aware of where your fingers are in relation to the drill bit. 3. Do not use bits that are dull, bent or damaged. 4. Make sure the bit is centered in the chuck and tightened with the chuck key before
starting the drill. 5. Before you begin, check with the technician to ensure the rpm is correct for your
job. 6. Do not turn the drill press on before clearing the table of all objects (tools, scrap
pieces, etc.) Operational Safety Checks 1. You MUST remove the chuck key before turning the machine on. 2. Use a clamp or vise when drilling; this will help prevent the material from spinning
into your body or hand. 3. Do not hold the work-piece in your hand while drilling. 4. When operating the drill press, do not wear gloves, or loose clothing. 5. Avoid awkward hand positions where a sudden slip could cause a hand to move into
the drill bit or cutting tool. 6. When using a hole saw, clamp work securely to the table to prevent rotation of the
work-piece.
Tip: Use a centre punch followed by a centre drill to mark/start your holes. This will help the tip of the drill bit align with the centre more accurately.

13
HOUSEKEEPING 1. Switch off the machine and remove drill from chuck. 2. Leave the machine in a safe, clean and tidy state. POTENTIAL HAZARDS
Flying objects - chuck key left in chuck Rotating machine parts – hair/clothing entanglement Metal splinters/cuttings Eye injuries
4.4 Band-saw
A very versatile machine, the bandsaw can be used for a wide variety of operations. Its main use is for cutting curves or for cutting straight lines on pieces that do not have the straight edge required for any circular saw blade. It does have fences for straight cutting, however the blade cuts straight downwards into the table making freehand cuts possible. The only real drawbacks to the bandsaw are cut accuracy (which depends on the user) and the finish quality of the cuts. DO NOT use this machine unless the technician has instructed you in its safe use
and operation. PPE required:
Safety glasses must be worn at all times in work areas. Long and loose hair must be contained. Sturdy footwear must be worn at all times in work areas. Close fitting/protective clothing must be worn. NEVER wear rings or jewelry while operating the band-saw. Never wear gloves when using this machine.
SAFETY: Pre-Operational Safety Checks
1. Make sure to lower the blade guard (by loosening the T-knob at the upper right and then pulling the guard down by hand,) so that it is about 1/8” (3mm) above your work-piece.
2. Do not adjust the guard until the blade comes to a complete stop. 3. Always be aware of where your fingers are in relation to the cutting blade. Never
have them in line with the blade.
Operational Safety Checks 1. Never start the saw with the work-piece touching the saw blade. 2. If the saw blade breaks, turn machine off and ask the technician to replace the
blade.

14
3. Never cross cut round objects (such as tubes) with the bandsaw. The downward action of the blade will grab the work-piece resulting in loss of control.
4. Push the stock through the blade with your hands on both sides of the line of cut or, preferably, use a push stick designed for this purpose.
5. Do not push with excessive force as this leads to slipping or blade failure. If excessive force is required to cut, either the blade is dull and needs to be replaced or the material is too hard for the saw.
6. Excessive guard clearance can lead to serious accidents. Always lower the guard so that it just clears the work and return it to its lowest position when you have completed your cut.
HOUSEKEEPING 1. Leave the machine in a safe, clean and tidy state. POTENTIAL HAZARDS
Rotating machine parts – hair/clothing entanglement Metal splinters/cuttings Eye injuries
4.5 Cut-Off Saw
This machine is used to cut bar stock to the desired length for later use in lathes, milling machine, etc.
DO NOT use this machine unless the technician has instructed you in its safe use and operation.
PPE required:
Safety glasses must be worn at all times in work areas. Long and loose hair must be contained. Sturdy footwear must be worn at all times in work areas. Close fitting/protective clothing must be worn. NEVER wear rings or jewelry while operating the cut-off saw. Hearing protection may be required for some operations.
SAFETY: PRE-OPERATIONAL SAFETY CHECKS 1. Ensure no slip/trip hazards are present in workspaces and walkways. 2. Check that all guards are in position. 3. Ensure the hydraulic damping mechanism functions properly. 4. Check that the blade is in good condition. 5. Ensure that blade speed, blade tension and blade tracking are properly adjusted. 6. Check the coolant delivery system to ensure sufficient flow of coolant. 7. Locate and ensure you are familiar with the operation of the ON/OFF starter and
Emergency Stop (if fitted).

15
8. Faulty equipment must not be used. Immediately report suspect machinery. OPERATIONAL SAFETY CHECKS 1. Lift the head of unit up and lock it in the upward position. 2. Set the angle of the vise, or check it to ensure its squareness. 3. Clamp work piece firmly into the vise. Long material must be supported. 4. Adjust blade guards to cover the unused portion of the blade. 5. Ensure hands are away from the blade, and then turn the machine on. 6. Allow the upper head assembly to come down slowly until the teeth are cutting the
material. 7. Keep hands away from the point of operation during cutting. 8. Turn off the machine and bring it to a complete standstill if the blade is to be lifted
out of an incomplete or jammed cut. 9. Stop the machine and bring it to a complete standstill before removing scrap pieces
from the vise area or making adjustments. 10. Stop the saw immediately if the blade develops a ‘click’. Report it to the technician. 11. Ensure the cutting head is locked in the upward position before removing work-piece
from vise. 12. Do not push down on the cutting head while it is cutting. 13. Do not leave the machine running unattended.
HOUSEKEEPING 1. Switch off the saw and reset all guards to a fully closed position. 2. Leave the machine in a safe, clean and tidy state.
4.6 Scroll Saw
A scroll saw is an electric saw useful for cutting intricate curves where a jigsaw or coping saw is not appropriate. It is somewhat similar to a band-saw, but the band-saw blade is a continuous loop. Scroll saws use saw blades similar to those used by coping saws and operate through a quick reciprocating up and down motion. DO NOT use this machine unless the technician has instructed you in its safe use
and operation. PPE required:
Safety glasses must be worn at all times in work areas. Long and loose hair must be contained. Sturdy footwear must be worn at all times in work areas. Close fitting/protective clothing must be worn. NEVER wear rings or jewelry while operating the scroll saw. Hearing protection may be required for some operations.

16
SAFETY: PRE-OPERATIONAL SAFETY CHECKS 1. Check that the blade guard is securely fixed in position. 2. Ensure the blade tension is properly adjusted. If "knocking" is heard, readjust the
tension. 3. Locate and ensure you are familiar with the operation of the ON/OFF starter. 4. Make sure the blade is the proper type for the cut you are planning. 5. Never start the machine before clearing the table of everything but your work-piece. 6. Never start the machine until all handles are locked. OPERATIONAL SAFETY CHECKS 1. Never reach under the table while the machine is running. 2. Always keep your hands and fingers away from the blade. 3. Never place your hands or fingers directly in line with the blade where you could cut
them if you slipped. 4. Do not start the machine when the blade is in contact with the work-piece. 5. Allow the blade of the saw to reach full operating speed before starting the cut. 6. Hold the work-piece firmly against the table. 7. Do not attempt to hold pieces so small that your fingers will go under the blade
guard. Always use a jig to hold a small work piece. 8. Ensure there are no nails or foreign objects in the part of the work-piece to be cut. 9. Adjust the hold down foot so that it is pressing lightly on the work-piece. 10. Keep hands and fingers clear of the scroll saw point-of-operation. 11. Do not force the tool. Firmly hold the work piece with both hands and feed it at a
moderate rate of speed into the blade. 12. Keep your face and body to one side of the blade and out of line with a possible
thrown piece if the blade should break. HOUSEKEEPING 1. Switch off the saw and reset all guards to a fully closed position. 2. Leave the machine in a safe, clean and tidy state. POTENTIAL HAZARDS
Reciprocating machine parts – hair/clothing entanglement Metal splinters/cuttings Eye injuries
4.7 Electric Tube/Pipe Notcher
The pipe notcher is an electric powered machine that uses an end mill to notch a variety of tubing materials. The notches created allow two or more tubing pieces to fit closely together for precise weld joints at various angles.
17
DO NOT use this machine unless the technician has instructed you in its safe use and operation.
PPE required:
Safety glasses must be worn at all times in work areas. Long and loose hair must be contained. Sturdy footwear must be worn at all times in work areas. Close fitting/protective clothing must be worn. NEVER wear rings or jewelry while operating the notcher. Never wear gloves when using this machine.
PRE-OPERATIONAL SAFETY CHECKS 1. Ensure no slip/trip hazards are present in workspaces and walkways. 2. Be certain the cutting tool and tool-holder are tightly secured. 3. You MUST remove the wrench from the tool-holder after tightening the tool before
turning the machine on. 4. Follow correct part-clamping procedures and check that the work-piece is secure to
the vise. 5. Locate and ensure you are familiar with the operation of the ON/OFF starter switch. 6. Do not leave equipment on top of the machine. Wheeled carts are available to hold
tools and projects. 7. Check that all machine guards are in position. 8. Faulty equipment must not be used. Immediately report suspect machinery.
OPERATIONAL SAFETY CHECKS 1. Keep clear of moving machine parts. 2. Set the correct speed to suit the cutter diameter, the depth of cut and the material. 3. Never leave the machine running unattended. 4. Before making adjustments and measurements or before clearing accumulated
cuttings, switch off the power and bring the machine to a complete standstill.
HOUSEKEEPING 1. Switch off the machine. 2. Leave the machine and work area in a safe, clean and tidy state.
POTENTIAL HAZARDS Sharp cutters Moving components - hair/clothing entanglement Eye injury Possible skin irritation Metal splinters and burrs Flying debris

18
4.8 Bench Grinder
A bench grinder is a type of bench top grinding machine used to drive abrasive wheels. A pedestal grinder is a larger version of a bench grinder that is mounted on a pedestal, which is bolted to the floor. These types of grinders are commonly used to hand grind cutting tools and perform other rough grinding. DO NOT use this machine unless the technician has instructed you in its safe use
and operation. Only one person may operate this machine at any one time. PPE required:
Safety glasses must be worn at all times in work areas. Long and loose hair must be contained. Appropriate footwear with substantial uppers must be worn. Close fitting/protective clothing must be worn. NEVER wear rings or jewelry while operating the grinder. Hearing protection must be used when using this machine.
SAFETY: PRE-OPERATIONAL SAFETY CHECKS 1. Check workspaces and walkways to ensure no slip/trip hazards are present. 2. Ensure all guards and safety shields are in position before starting the grinder. 3. Ensure that the wheels do not touch the work rest and that the gap between wheel
and rest is no greater than 1.5mm. 4. Check that wheels are running true and are not glazed or loaded. 5. Locate and ensure you are familiar with the operation of the ON/OFF starter. 6. Faulty equipment must not be used. Immediately report any suspect machinery.
OPERATIONAL SAFETY CHECKS 1. Stand to the side of the wheels when starting up. 2. Let the wheels gain maximum speed before starting to grind. 3. Do not grind on the side of the wheel. 4. Small objects must not be held by hand. 5. Never leave the machine running unattended. 6. Do not bend down near the machine whilst it is running. 7. Never force the work-piece against a wheel. 8. Slowly move the work-piece across the face of the wheel in a uniform manner. 9. Coolant spilt on the floor should be immediately absorbed. HOUSEKEEPING 1. Switch off the grinder. 2. Leave the machine in a safe, clean and tidy state.
19
POTENTIAL HAZARDS Hot Metal Sparks Noise Sharp edges and burrs Entanglement Wheels ‘run on’ after switching off Eye injuries Work piece must never be held with gloves, cloth, apron or pliers Do not grind non-ferrous metals
5.0 Sanding
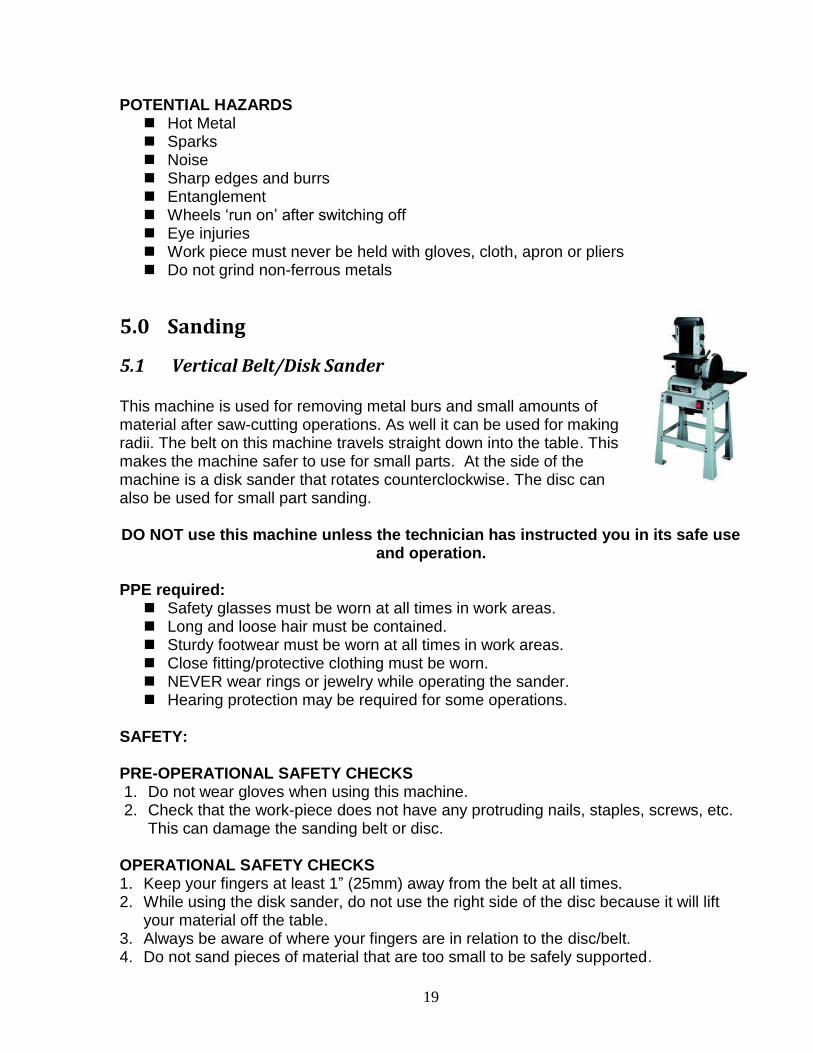
5.1 Vertical Belt/Disk Sander
This machine is used for removing metal burs and small amounts of material after saw-cutting operations. As well it can be used for making radii. The belt on this machine travels straight down into the table. This makes the machine safer to use for small parts. At the side of the machine is a disk sander that rotates counterclockwise. The disc can also be used for small part sanding.
DO NOT use this machine unless the technician has instructed you in its safe use
and operation. PPE required:
Safety glasses must be worn at all times in work areas. Long and loose hair must be contained. Sturdy footwear must be worn at all times in work areas. Close fitting/protective clothing must be worn. NEVER wear rings or jewelry while operating the sander. Hearing protection may be required for some operations.
SAFETY: PRE-OPERATIONAL SAFETY CHECKS 1. Do not wear gloves when using this machine. 2. Check that the work-piece does not have any protruding nails, staples, screws, etc.
This can damage the sanding belt or disc.
OPERATIONAL SAFETY CHECKS 1. Keep your fingers at least 1” (25mm) away from the belt at all times. 2. While using the disk sander, do not use the right side of the disc because it will lift
your material off the table. 3. Always be aware of where your fingers are in relation to the disc/belt. 4. Do not sand pieces of material that are too small to be safely supported.

20
5. Do not remove jammed material while the sander is on. Turn off power, and wait until the machine has stopped.
6. Do not adjust the tables while machine is running. 7. Do not put excessive pressure on the sanding belt or disc. 8. Never leave the machine running while unattended. 9. Do not use sander if the belt or disc is cut or torn. 10. Do not grind non-ferrous metals HOUSKEEPING 1. Leave the machine in a safe, clean and tidy state. POTENTIAL HAZARDS
Hot Metal Sparks Noise Sharp edges and burrs Entanglement Wheels ‘run on’ after switching off Eye injuries Work piece must never be held with gloves, cloth, apron or pliers
6.0 Sheet Metal Tools
6.1 Pan Brake
A brake is a metalworking machine that allows the bending of sheet metal. A cornice brake only allows for simple bends and creases, while a box-and-pan brake also allows one to form box and pan shapes.
DO NOT use this machine unless the technician has instructed you in its safe use
and operation. PPE required:
Safety glasses must be worn at all times in work areas. Long and loose hair must be contained. Sturdy footwear must be worn at all times in work areas. Close fitting/protective clothing must be worn. NEVER wear rings or jewelry while operating the pan brake. Gloves should be worn when handling sheet metal.
SAFETY: PRE-OPERATIONAL SAFETY CHECKS 1. Guards or safety devises must never be removed or adjusted, except by an
authorized person for maintenance purposes.
21
2. Working parts should be well lubricated and the jaws and fingers free of rust and dirt. 3. Ensure no slip/trip hazards are present in workspaces and walkways. 4. Be aware of other personnel in the immediate vicinity and ensure the area is clear
before using equipment. 5. Familiarize yourself with and check all machine operations and controls. 6. Faulty equipment must not be used. Immediately report suspect machinery.
OPERATIONAL SAFETY CHECKS 1. Never use pan brakes for bending metal that is beyond the machine’s capacity with
respect to thickness, shape, or type. 2. Never attempt to bend rod, wire, strap, or spring steel sheets in a pan brake. 3. Remove the pan brake fingers that are in the way - use only the pan brake fingers
required to make the bend. 4. Ensure the pan brake fingers that are not removed for an operation are securely
seated and firmly tightened before the machine is used. 5. Ensure fingers and limbs are clear before operating the pan brake. 6. Lower finger clamps to work - do not drop. 7. Check that the work-piece is secure. 8. Keep clear of moving counterweight (where fitted).
HOUSEKEEPING 1. Lower finger clamps to a safe position. 2. Return all accessories to storage racks. 3. Leave the work area in a safe, clean and tidy state. POTENTIAL HAZARDS
Sharp edges and burrs Squash/crush and pinch points Impact from counterweight
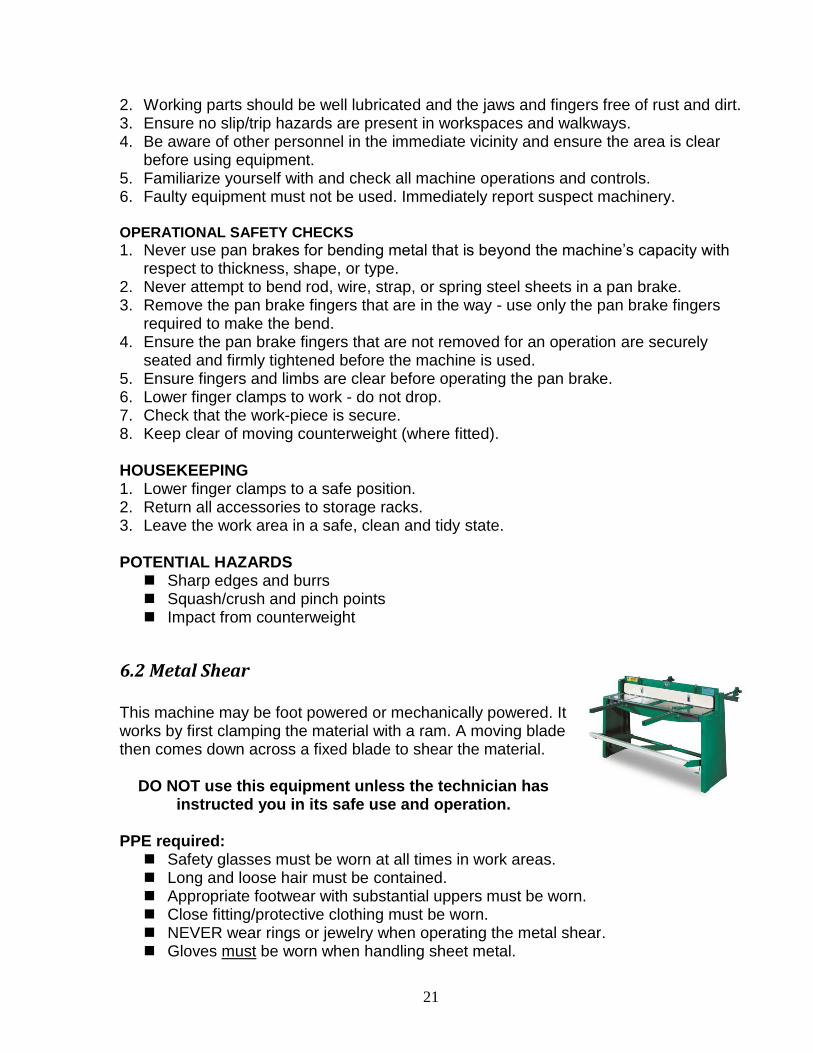
6.2 Metal Shear
This machine may be foot powered or mechanically powered. It works by first clamping the material with a ram. A moving blade then comes down across a fixed blade to shear the material.
DO NOT use this equipment unless the technician has
instructed you in its safe use and operation. PPE required:
Safety glasses must be worn at all times in work areas. Long and loose hair must be contained. Appropriate footwear with substantial uppers must be worn. Close fitting/protective clothing must be worn. NEVER wear rings or jewelry when operating the metal shear. Gloves must be worn when handling sheet metal.

22
SAFETY: PRE-OPERATIONAL SAFETY CHECKS 4. Bench shears must be securely fastened to a bench or purpose designed stand. 5. Guards or safety devises must never be removed or adjusted, except by an
authorized person for maintenance purposes. 6. Shearing edges should be maintained in good condition, should be distortion free
and correctly adjusted. 7. Working parts should be well lubricated and the blades free of rust and dirt. 8. Ensure no slip/trip hazards are present in workspaces and walkways. 9. Sufficient space must exist around the machine to prevent accidental contact with
passersby. 10. Familiarize yourself with and check all machine operations and controls. 11. Faulty equipment must not be used. Immediately report suspect machinery.
OPERATIONAL SAFETY CHECKS 1. Never use bench shears for cutting metal that is beyond the machine’s capacity with
respect to thickness, shape, hardness or type. 2. Material should be properly supported during cutting and industrial type gloves
should be worn to protect the hands. 3. Use supports for long material - signpost if a tripping hazard. 4. Manual handling tasks should be assessed and appropriate procedures put in place. 5. Hold material securely to prevent it from tilting during the cut. 6. Ensure fingers and limbs are clear before operating the bench shears. 7. When handling large sheet metal pieces gloves must be worn.
HOUSEKEEPING 1. Leave the work area in a safe, clean and tidy state. POTENTIAL HAZARDS
Closing movements between shearing surfaces and other parts can result in trapping
Sharp edges on cutters and work-pieces can cause cuts Squash/crush and pinch points Impact from handle
6.3 Sheet Metal Hand Notcher
This piece of equipment is a hand operated corner notcher used in the fabrication of pans and boxes. It cuts 90 degree notches to facilitate bending flat sheets into a box or pan.
DO NOT use this equipment unless the technician has
instructed you in its safe use and operation.
23
PPE required: Safety glasses must be worn at all times in work areas. Long and loose hair must be contained. Appropriate footwear with substantial uppers must be worn. Close fitting/protective clothing must be worn. NEVER wear rings or jewelry when operating the notcher. Gloves must be worn when handling sheet metal.
SAFETY: PRE-OPERATIONAL SAFETY CHECKS 1. The hand notcher must be securely fastened to a bench or purpose designed stand. 2. Guards or safety devises must never be removed or adjusted, except by an
authorized person for maintenance purposes. 3. Shearing edges should be maintained in good condition, should be distortion free
and correctly adjusted. 4. Working parts should be well lubricated and the blades free of rust and dirt. 5. Ensure no slip/trip hazards are present in workspaces and walkways. 6. Sufficient space must exist around the machine to prevent accidental contact with
passersby. 7. Familiarize yourself with and check all machine operations and controls. 8. Faulty equipment must not be used. Immediately report suspect machinery. OPERATIONAL SAFETY CHECKS 1. Never use the hand notcher for cutting metal that is beyond the machine’s capacity
with respect to thickness, shape, hardness or type. 2. Material should be properly supported during cutting and industrial type gloves
should be worn to protect the hands. 3. Use supports for long material - signpost if a tripping hazard. 4. Manual handling tasks should be assessed and appropriate procedures put in place. 5. Hold material securely to prevent it from tilting during the cut. 6. Ensure fingers and limbs are clear before operating the hand notcher. 7. Do not use a chopping motion - pull handle in a smooth & steady fashion HOUSEKEEPING 1. Leave the work area in a safe, clean and tidy state.
POTENTIAL HAZARDS Closing movements between shearing surfaces and other parts can result in
trapping Sharp edges on cutters and work-pieces can cause cuts Squash/crush and pinch points Impact from handle To avoid injury to hands gloves must be worn when handling large pieces of
sheet metal
24
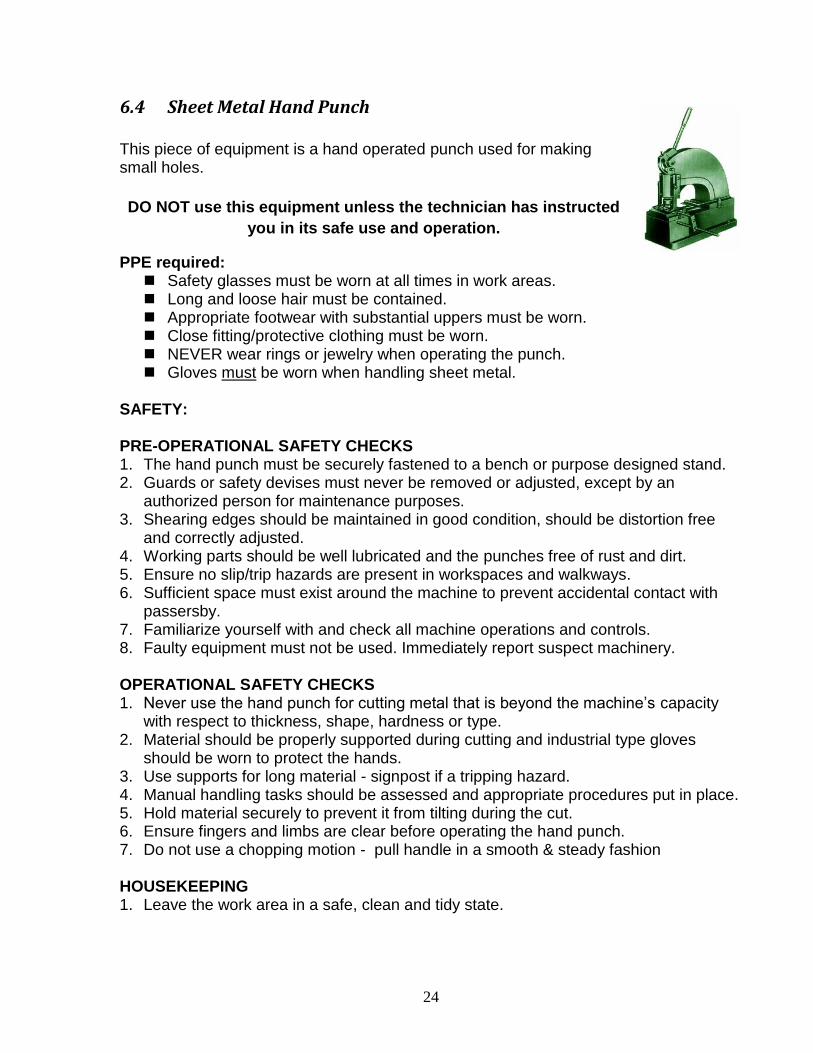
6.4 Sheet Metal Hand Punch
This piece of equipment is a hand operated punch used for making small holes.
DO NOT use this equipment unless the technician has instructed
you in its safe use and operation.
PPE required: Safety glasses must be worn at all times in work areas. Long and loose hair must be contained. Appropriate footwear with substantial uppers must be worn. Close fitting/protective clothing must be worn. NEVER wear rings or jewelry when operating the punch. Gloves must be worn when handling sheet metal.
SAFETY: PRE-OPERATIONAL SAFETY CHECKS 1. The hand punch must be securely fastened to a bench or purpose designed stand. 2. Guards or safety devises must never be removed or adjusted, except by an
authorized person for maintenance purposes. 3. Shearing edges should be maintained in good condition, should be distortion free
and correctly adjusted. 4. Working parts should be well lubricated and the punches free of rust and dirt. 5. Ensure no slip/trip hazards are present in workspaces and walkways. 6. Sufficient space must exist around the machine to prevent accidental contact with
passersby. 7. Familiarize yourself with and check all machine operations and controls. 8. Faulty equipment must not be used. Immediately report suspect machinery. OPERATIONAL SAFETY CHECKS 1. Never use the hand punch for cutting metal that is beyond the machine’s capacity
with respect to thickness, shape, hardness or type. 2. Material should be properly supported during cutting and industrial type gloves
should be worn to protect the hands. 3. Use supports for long material - signpost if a tripping hazard. 4. Manual handling tasks should be assessed and appropriate procedures put in place. 5. Hold material securely to prevent it from tilting during the cut. 6. Ensure fingers and limbs are clear before operating the hand punch. 7. Do not use a chopping motion - pull handle in a smooth & steady fashion HOUSEKEEPING 1. Leave the work area in a safe, clean and tidy state.
25
POTENTIAL HAZARDS Closing movements between shearing surfaces and other parts can result in
trapping Sharp edges on cutters and work-pieces can cause cuts Squash/crush and pinch points Impact from handle To avoid injury to hands gloves must be worn when handling large pieces of
sheet metal
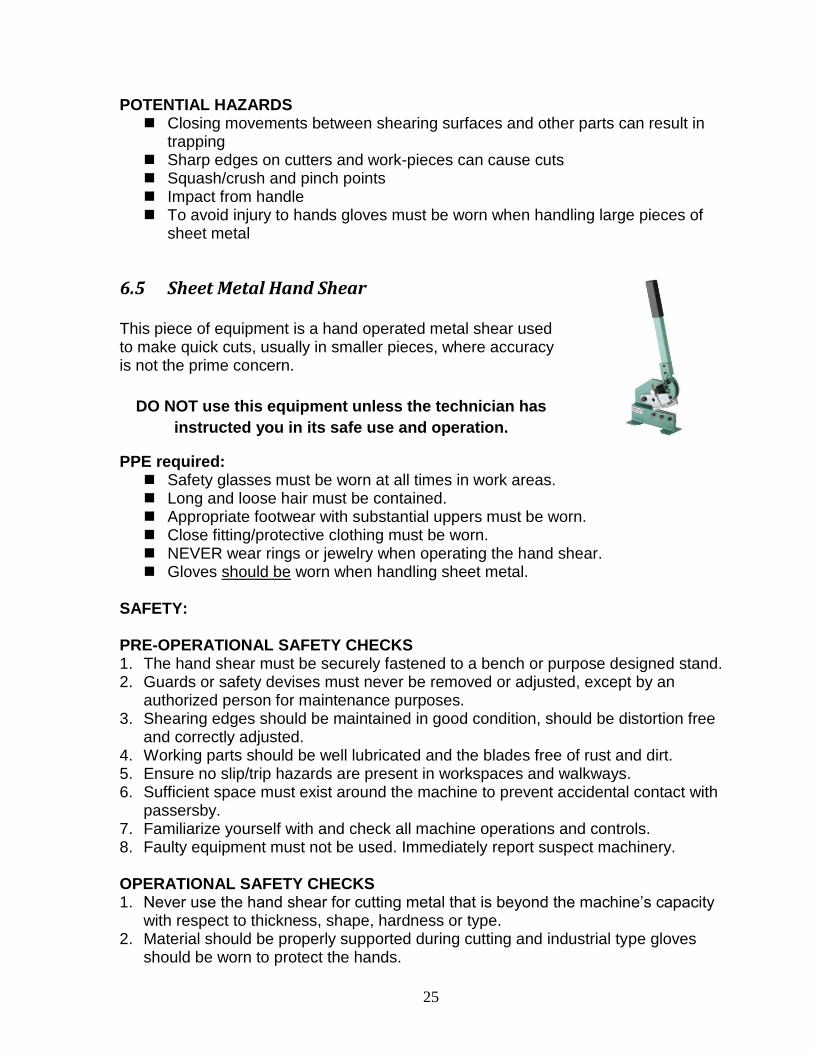
6.5 Sheet Metal Hand Shear
This piece of equipment is a hand operated metal shear used to make quick cuts, usually in smaller pieces, where accuracy is not the prime concern.
DO NOT use this equipment unless the technician has
instructed you in its safe use and operation.
PPE required: Safety glasses must be worn at all times in work areas. Long and loose hair must be contained. Appropriate footwear with substantial uppers must be worn. Close fitting/protective clothing must be worn. NEVER wear rings or jewelry when operating the hand shear. Gloves should be worn when handling sheet metal.
SAFETY: PRE-OPERATIONAL SAFETY CHECKS 1. The hand shear must be securely fastened to a bench or purpose designed stand. 2. Guards or safety devises must never be removed or adjusted, except by an
authorized person for maintenance purposes. 3. Shearing edges should be maintained in good condition, should be distortion free
and correctly adjusted. 4. Working parts should be well lubricated and the blades free of rust and dirt. 5. Ensure no slip/trip hazards are present in workspaces and walkways. 6. Sufficient space must exist around the machine to prevent accidental contact with
passersby. 7. Familiarize yourself with and check all machine operations and controls. 8. Faulty equipment must not be used. Immediately report suspect machinery. OPERATIONAL SAFETY CHECKS 1. Never use the hand shear for cutting metal that is beyond the machine’s capacity
with respect to thickness, shape, hardness or type. 2. Material should be properly supported during cutting and industrial type gloves
should be worn to protect the hands.
26
3. Use supports for long material - signpost if a tripping hazard. 4. Manual handling tasks should be assessed and appropriate procedures put in place. 5. Hold material securely to prevent it from moving during the cut – do not cut pieces
smaller than 6” square. 6. Ensure fingers and limbs are clear before operating the hand shear. 7. Do not use a chopping motion - pull handle in a smooth & steady fashion
HOUSEKEEPING 1. Leave the work area in a safe, clean and tidy state. POTENTIAL HAZARDS
Closing movements between shearing surfaces and other parts can result in trapping
Sharp edges on cutters and work-pieces can cause cuts Squash/crush and pinch points Impact from handle To avoid injury to hands gloves must be worn when handling large pieces of
sheet metal
7.0 Hand Tools - Powered
7.1 General Safety for Handheld Power Tools (corded, cordless or air powered)
1. Eye protection is required when using these tools. 2. Stay focused on the tool and the work being performed. 3. Keep work area clear of other tools and materials. 4. Use the right tool for the job. Seek help if you are unsure of tool operating
procedures. 5. Keep hands and fingers clear of the tools’ blade or bit and cutting path. 6. Secure work to bench when using electric hand tools. 7. Do not over-reach with electric hand tools. 8. Make all adjustments on the tool with the power cord unplugged. 9. Do not carry plugged in tools with finger on power switch. 10. Use only grounded extension cords. 11. Always keep tool guards in place. 12. Let the tools’ bit or blade do the work. Do not force tools into the material. 13. Unplug, clean and put away tools when finished working. 14. Never perform any operation unless you are entirely sure as to how to perform it
properly and safely. Make use of a dry run or practice run.
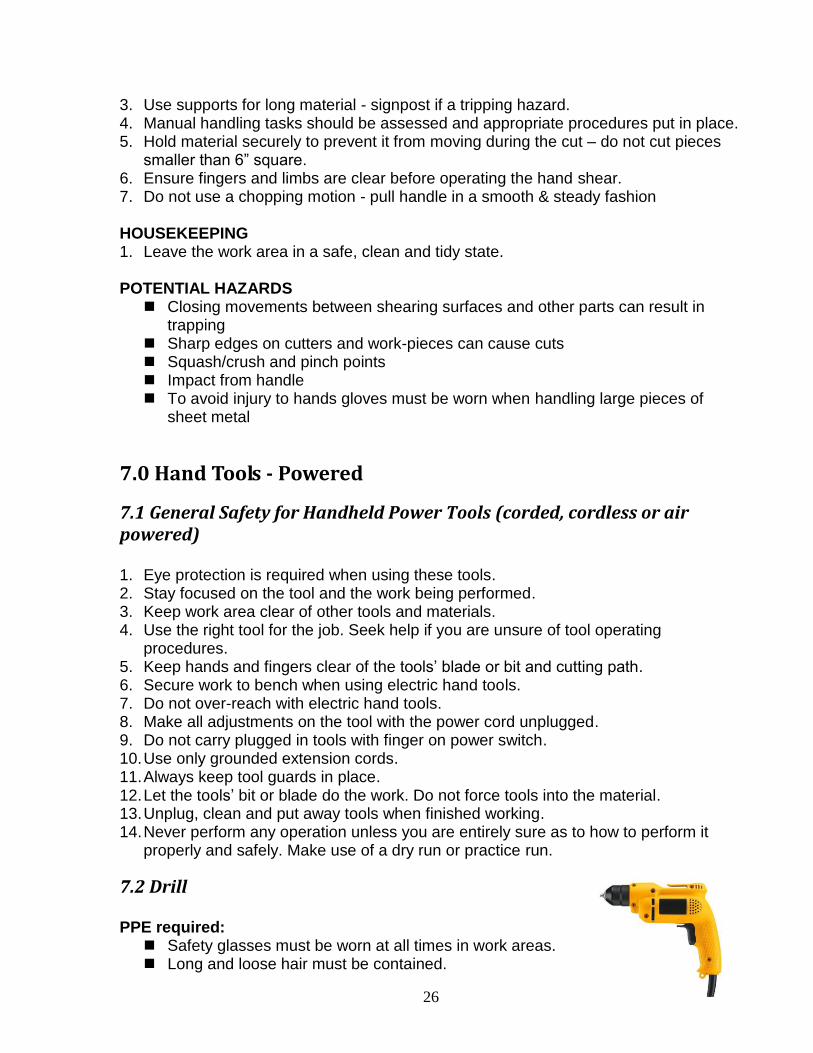
7.2 Drill
PPE required: Safety glasses must be worn at all times in work areas. Long and loose hair must be contained.

27
Appropriate footwear with substantial uppers must be worn. Close fitting/protective clothing must be worn. NEVER wear rings or jewelry when operating the drill.
SAFETY: PRE-OPERATIONAL SAFETY CHECKS 1. Select the proper size and type of bit for the job. Make sure it is sharp and not
damaged. OPERATIONAL SAFETY CHECKS 1. Stay focused on the tool and the work being performed. 2. Do not use excessive force into hard material as the bit might break. 3. Keep hands and fingers clear of tool bits. 4. Always ensure that speed and pressure are correct for the material and drill diameter
being used.
7.3 Jig Saw
PPE required: Safety glasses must be worn at all times in work areas. Long and loose hair must be contained. Appropriate footwear must be worn. Close fitting/protective clothing must be worn. NEVER wear rings or jewelry when operating the jig saw. Hearing protection may be required for some operations.
SAFETY: PRE-OPERATIONAL SAFETY CHECKS 1. Avoid accidental starting. Be sure power switch is off before plugging in. 2. Do not start saw with material touching the saw blade.
OPERATIONAL SAFETY CHECKS 1. Unplug tool when you need to change the blade or adjust the shoe angle. 2. Always be aware of where your fingers and the power cord are in relation to the
cutting blade. 3. Always use the proper blade for the material being cut. The wrong blade type may
cause the blade to seize and/or break. 4. Use clamps to minimize vibration of the work piece. 5. Be aware of sharp burrs on the cut edge on metal pieces. 6. Start cutting only when the blade is moving. 7. Do not force the saw blade into tight curves too quickly. You can break the saw
blade. 8. Cut with adequate clearance for the blade below the cut line. If the tip of the blade
strikes down on a solid surface, it will break.
28
9. Do not attempt to reinsert the blade into the cut line while the saw is running. 10. Never touch the blade or reciprocating parts of the saw while it is in motion. The tip
of the saw may not be visible while the saw is running. 11. Be aware that the blade may be hot after finishing a cut.
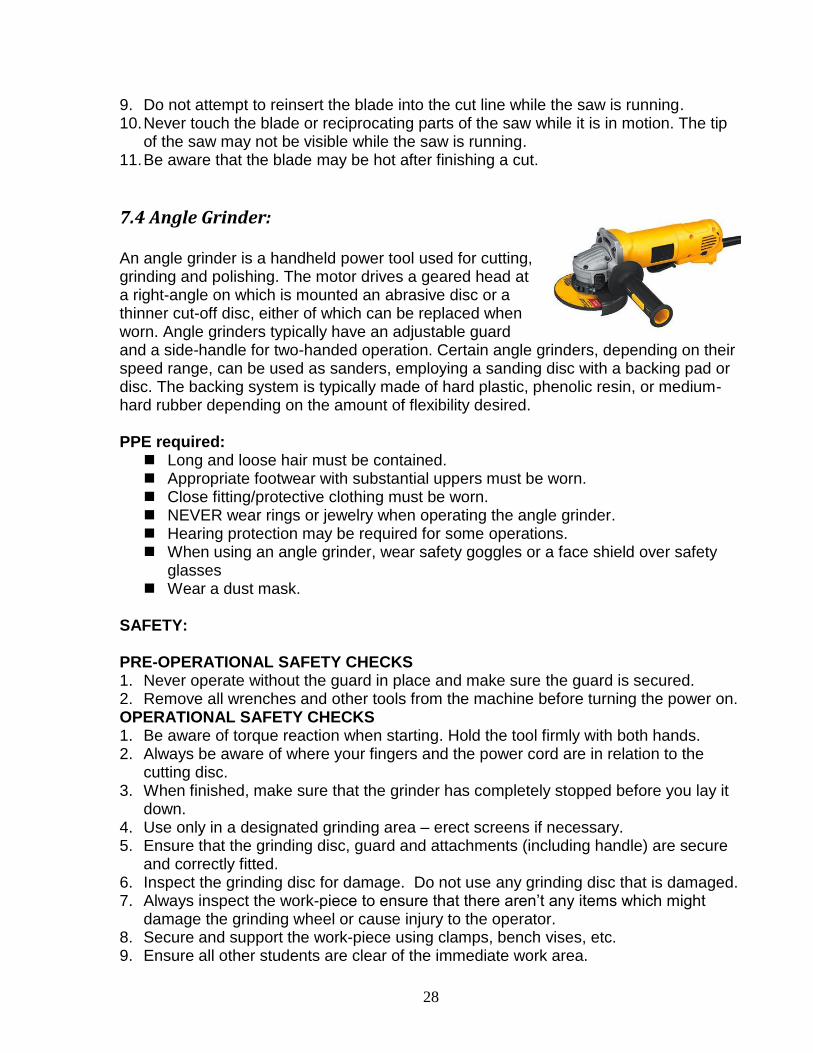
7.4 Angle Grinder:
An angle grinder is a handheld power tool used for cutting, grinding and polishing. The motor drives a geared head at a right-angle on which is mounted an abrasive disc or a thinner cut-off disc, either of which can be replaced when worn. Angle grinders typically have an adjustable guard and a side-handle for two-handed operation. Certain angle grinders, depending on their speed range, can be used as sanders, employing a sanding disc with a backing pad or disc. The backing system is typically made of hard plastic, phenolic resin, or medium-hard rubber depending on the amount of flexibility desired. PPE required:
Long and loose hair must be contained. Appropriate footwear with substantial uppers must be worn. Close fitting/protective clothing must be worn. NEVER wear rings or jewelry when operating the angle grinder. Hearing protection may be required for some operations. When using an angle grinder, wear safety goggles or a face shield over safety
glasses Wear a dust mask.
SAFETY: PRE-OPERATIONAL SAFETY CHECKS 1. Never operate without the guard in place and make sure the guard is secured. 2. Remove all wrenches and other tools from the machine before turning the power on. OPERATIONAL SAFETY CHECKS 1. Be aware of torque reaction when starting. Hold the tool firmly with both hands. 2. Always be aware of where your fingers and the power cord are in relation to the
cutting disc. 3. When finished, make sure that the grinder has completely stopped before you lay it
down. 4. Use only in a designated grinding area – erect screens if necessary. 5. Ensure that the grinding disc, guard and attachments (including handle) are secure
and correctly fitted. 6. Inspect the grinding disc for damage. Do not use any grinding disc that is damaged. 7. Always inspect the work-piece to ensure that there aren’t any items which might
damage the grinding wheel or cause injury to the operator. 8. Secure and support the work-piece using clamps, bench vises, etc. 9. Ensure all other students are clear of the immediate work area.
29
10. Never make adjustments while the angle grinder is running. 11. Allow the angle grinder to reach operating speed before applying it to the work-
piece. Increase the load gradually. 12. Do not lift or drag angle grinders by the cord. 13. Keep flexible electrical cords clear of oil, grease, machines and sources of heat. 14. Be aware of flying sparks. Hold grinder so that sparks fly away from you, other
people and flammable materials. 15. Do not touch the work-piece immediately after grinding operation as it may be
extremely hot. HOUSEKEEPING 1. Avoid trip hazards and prevent damage to electrical cords. 2. Do not walk on, wheel objects over, or drop materials/tools on flexible electrical
cords. 3. Clean bench and work area and place all waste material in bin. 4. Return angle grinder and rolled up extension leads to storage area. POTENTIAL RISKS AND HAZARDS
Moving and rotating parts Movement of work-piece If work-piece is not clamped securely when using a cut-off wheel the wheel may
bind and can shatter. Inhalation of fumes and dust particles Burns from hot materials or friction Electrocution from power faults, faulty equipment or incorrect use
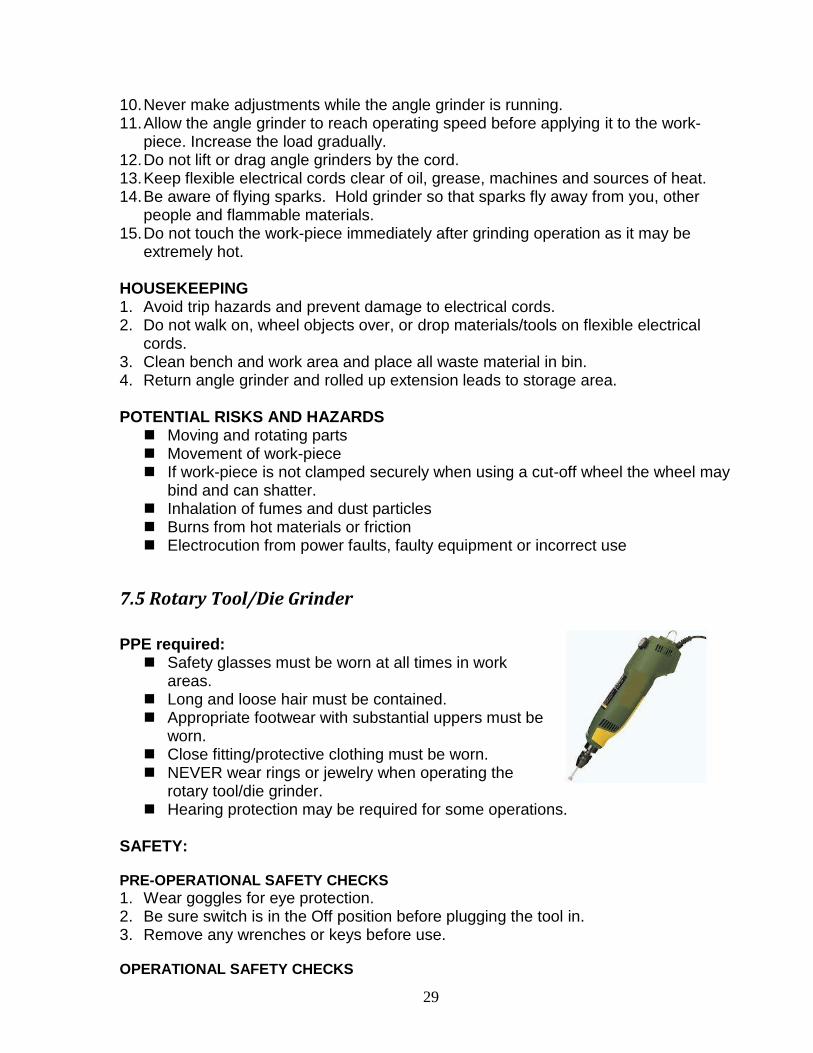
7.5 Rotary Tool/Die Grinder
PPE required:
Safety glasses must be worn at all times in work areas.
Long and loose hair must be contained. Appropriate footwear with substantial uppers must be
worn. Close fitting/protective clothing must be worn. NEVER wear rings or jewelry when operating the
rotary tool/die grinder. Hearing protection may be required for some operations.
SAFETY: PRE-OPERATIONAL SAFETY CHECKS
1. Wear goggles for eye protection. 2. Be sure switch is in the Off position before plugging the tool in. 3. Remove any wrenches or keys before use. OPERATIONAL SAFETY CHECKS
30
1. Use clamps or other means to properly secure work-piece. 2. Do not force the tool. 3. Disconnect the power before making any adjustments or changing accessories.
8.0 Safety Guidelines for Hand Tools
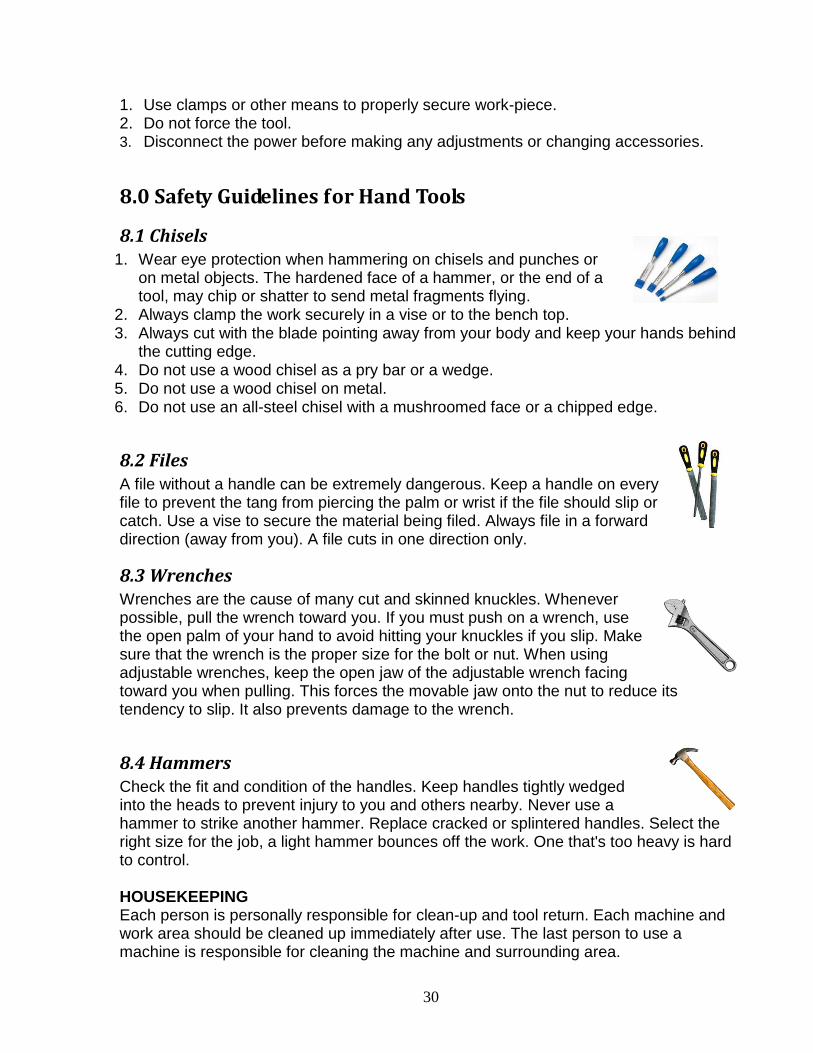
8.1 Chisels
1. Wear eye protection when hammering on chisels and punches or on metal objects. The hardened face of a hammer, or the end of a tool, may chip or shatter to send metal fragments flying.
2. Always clamp the work securely in a vise or to the bench top. 3. Always cut with the blade pointing away from your body and keep your hands behind
the cutting edge. 4. Do not use a wood chisel as a pry bar or a wedge. 5. Do not use a wood chisel on metal. 6. Do not use an all-steel chisel with a mushroomed face or a chipped edge.
8.2 Files
A file without a handle can be extremely dangerous. Keep a handle on every file to prevent the tang from piercing the palm or wrist if the file should slip or catch. Use a vise to secure the material being filed. Always file in a forward direction (away from you). A file cuts in one direction only.
8.3 Wrenches
Wrenches are the cause of many cut and skinned knuckles. Whenever possible, pull the wrench toward you. If you must push on a wrench, use the open palm of your hand to avoid hitting your knuckles if you slip. Make sure that the wrench is the proper size for the bolt or nut. When using adjustable wrenches, keep the open jaw of the adjustable wrench facing toward you when pulling. This forces the movable jaw onto the nut to reduce its tendency to slip. It also prevents damage to the wrench.
8.4 Hammers
Check the fit and condition of the handles. Keep handles tightly wedged into the heads to prevent injury to you and others nearby. Never use a hammer to strike another hammer. Replace cracked or splintered handles. Select the right size for the job, a light hammer bounces off the work. One that's too heavy is hard to control. HOUSEKEEPING Each person is personally responsible for clean-up and tool return. Each machine and work area should be cleaned up immediately after use. The last person to use a machine is responsible for cleaning the machine and surrounding area.

31
Appendix A
Engineering Student Machine Shop POLICY ACKNOWLEDGEMENT FORM The Engineering Student Machine Shop (ESMS) requires all users to meet the following requirements.
Have completed the WHMIS training
Read the ESMS Safety Manual (found on EMS website)
Taken the ESMS Safety Orientation
ACKNOWLEDGEMENT OF REQUIREMENTS: All requirements must be completed and initialed before access will be granted to the ESMS facilities and equipment.
Initials
1. I confirm that I am a current Engineering or Architecture student.
_______
2. I confirm that I have completed WHMIS 2015 training.
_______
3. I confirm that I have read and understand the ESMS Safety Manual.
_______
4. I confirm that I have received the ESMS Safety Orientation and have
been shown First Aid kit and eye wash station locations.
_______
Comments:
_________________________________________
_________________________________________
_______
5. I have reviewed this document and I understand and agree to its
requirements.
_______
Print Name __________________________
Signature __________________________
Date __________________________
UW User ID __________________________
Attendance Confirmed by Student Shop Technician __________________________ https://uwaterloo.ca/engineering-machine-shop/

32
Acknowledgements
Thanks to Heinz Koller for providing the UW Architecture Manual that served as a template for the Engineering Student Shop Manual. Some definitions sourced from Wikipedia. If you have any comments regarding this manual, or you require further information regarding training, please contact:
Rick Forgett, Acting Manager, Engineering Machine Shops [email protected] ext. 32495