Embed Size (px)
Citation preview

1
2nd grade: Pedestrian Safety Unit
4th grade: Three-part Bicycle Safety Unit
6th grade: Advanced Bicycle Safety Unit
Find our curriculum online at : www.saferoutestoschools.org/curriculum.html
4th Grade: THREE-PART BICYCLE SAFETY UNIT
2
BICYCLE SAFETY ................................ page 3
Bicycle Safety begins with an introduction to the health benefits of cycling. Students learn key phrases for safety that help them to avoid solo bike crashes. A safety check and fit is demonstrated for both helmets and bikes. Then students get active to experience proper bike and helmet-fit first hand. Time allowing, a demonstration shows how car trips contribute to air pollution and students role-play tra�c congestion.
TRAFFIC SAFETY ............................. page 14
Tra�c Safety expands on safely riding in tra�c through a focus on tra�c laws. Settling around a realistic model street, the instructor reenacts common car/bike crashes. Finally, students negotiate mock intersections as practice for the Bike Rodeo. With extra time students list tra�c laws, and compete in a pump race or quick-draw showdown.
BICYCLE RODEO ............................. page 24
The Bicycle Rodeo is comprised of four courses which combine to cover key points from the previous lessons and addresses basic biking skills. Stations include starting/stopping, obstacles, negotiating tra�c, and obeying laws on a street course. Our rodeo is designed to accommodate varying skill and confidence levels.
BICYCLE SAFETY UNIT
UNIT OVERVIEW:In fourth grade Safe Routes to Schools teaches bicycle safety in three lessons. The lessons cover benefits of biking, how to check and fit both a bike and helmet, and teaches how to stay safe when riding in tra�c. The unit culminates in a bicycle rodeo giving students the opportunity to practice the skills learned in the classroom.
THREE LESSONS FOR FOURTH GRADE
3
BICYCLE SAFETY UNITLESSON 1 OF 3:
BIKE SAFETY4th Grade. Classroom setting.
Bike Safety begins with an introduction to the health benefits of cycling. A safety check and personal fit are demonstrated for both hel-mets and bikes. The two key phrases for safety “heads-up” and “bubble” are introduced.
Time allowing, a demonstration shows how car trips contribute to air pollution (CA Science Standard 5a) and students role-play the advantage of smaller size in tra�c.
OBJECTIVE
1. Name three of the four major benefits of biking.
2. Identify the steps of an “ABC” check on a bicycle.
3. Determine whether a bicycle fits them.
4. Recognize a properly adjusted helmet.
5. Explain the phrases “heads-up” and “bubble” as they pertain to safe biking.
+/- Contrast bikes and cars with regards to air pollution.
+/- Contrast bike and cars with regards to tra�c congestion.
ACTIVITIES
30 MINUTE BIKE SAFETY
45–60 MINUTE BIKE SAFETY
Transportation Cards (8 min)
Transportation Cards (8 min)
ABC Bike Check (8 min)
ABC Bike Check (8 min)
Helmet Fit (3 min)
Bike Fit (8 min)
+/- Crash Course (5 min)
Helmet Fit (3 min)
Crash Course (5 min)
+/- Air Pollution (6 min)
+/- Tra�c Box (6 min)
MATERIALS
30 – 45 minutes:• white-board with markers• “Transportation Cards” with magnetic backs,
consisting of four biking and four driving images illustrating pollution, tra�c, exercise, and fun
• demonstration bicycle and helmet
60 minute extension Air Pollution Demonstration• clear jar nearly filled with water• brown food dye, unfiltered co�ee, or
similar solute• national air quality/pollution map
LESSON PROCEDURE
• Thank the teacher and class for having you as a guest.
• Briefly introduce yourself and your cycling background.
• These classes are o�ered by Safe Routes to Schools and Transportation Authority of Marin.
• Briefly preview the three upcoming lessons.
a. Today: Basics about the bike.
b. Next: Riding in the road with tra�c.
c. Bike Rodeo: Fun bike event at your school.
BIKE SAFETY
4
ACTIVITY: TRANSPORTATION CARDS
Main Objective: Benefits of biking.
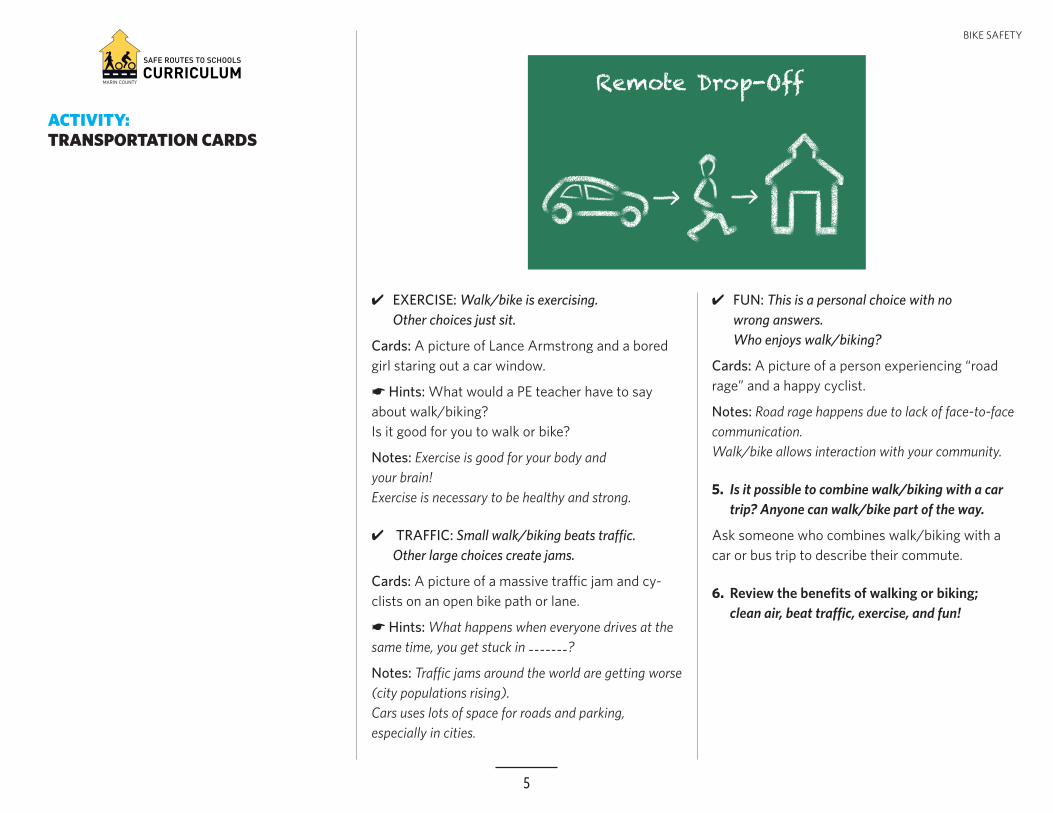
This activity answers the question “why bike?” The advantages of active or self-powered trans-portation are highlighted. Students who drive or carpool can also use active transportation by utilizing “remote drop-o�”, driving only part-way.
Procedure: 5 minutes. 1. People use transportation almost everyday to get to work, the store, friends or family, and school.
2. Call on students to create a list of “ways people get to school.” Sort the answers into three columns.
Ways to School
bike carpool car
walk bus truck
scooter train
skate
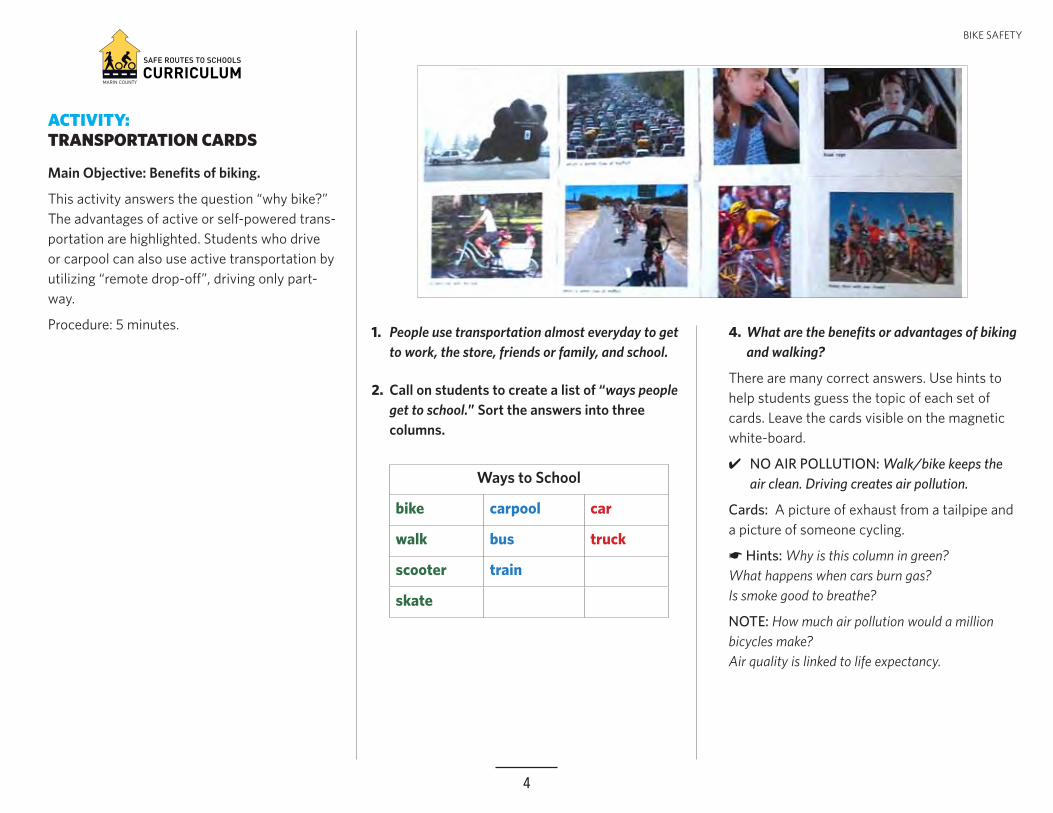
4. What are the benefits or advantages of biking and walking?
There are many correct answers. Use hints to help students guess the topic of each set of cards. Leave the cards visible on the magnetic white-board.
✔ NO AIR POLLUTION: Walk/bike keeps the air clean. Driving creates air pollution.
Cards: A picture of exhaust from a tailpipe and a picture of someone cycling.
☛ Hints: Why is this column in green? What happens when cars burn gas? Is smoke good to breathe?
NOTE: How much air pollution would a million bicycles make? Air quality is linked to life expectancy.
BIKE SAFETY
5
✔ EXERCISE: Walk/bike is exercising. Other choices just sit.
Cards: A picture of Lance Armstrong and a bored girl staring out a car window.
☛ Hints: What would a PE teacher have to say about walk/biking? Is it good for you to walk or bike?
Notes: Exercise is good for your body and your brain! Exercise is necessary to be healthy and strong.
✔ TRAFFIC: Small walk/biking beats tra�c. Other large choices create jams.
Cards: A picture of a massive tra�c jam and cy-clists on an open bike path or lane.
☛ Hints: What happens when everyone drives at the same time, you get stuck in -------?
Notes: Tra�c jams around the world are getting worse (city populations rising). Cars uses lots of space for roads and parking, especially in cities.
✔ FUN: This is a personal choice with no wrong answers. Who enjoys walk/biking?
Cards: A picture of a person experiencing “road rage” and a happy cyclist.
Notes: Road rage happens due to lack of face-to-face communication. Walk/bike allows interaction with your community.
5. Is it possible to combine walk/biking with a car trip? Anyone can walk/bike part of the way.
Ask someone who combines walk/biking with a car or bus trip to describe their commute.
6. Review the benefits of walking or biking; clean air, beat tra�c, exercise, and fun!
ACTIVITY: TRANSPORTATION CARDS
BIKE SAFETY
6
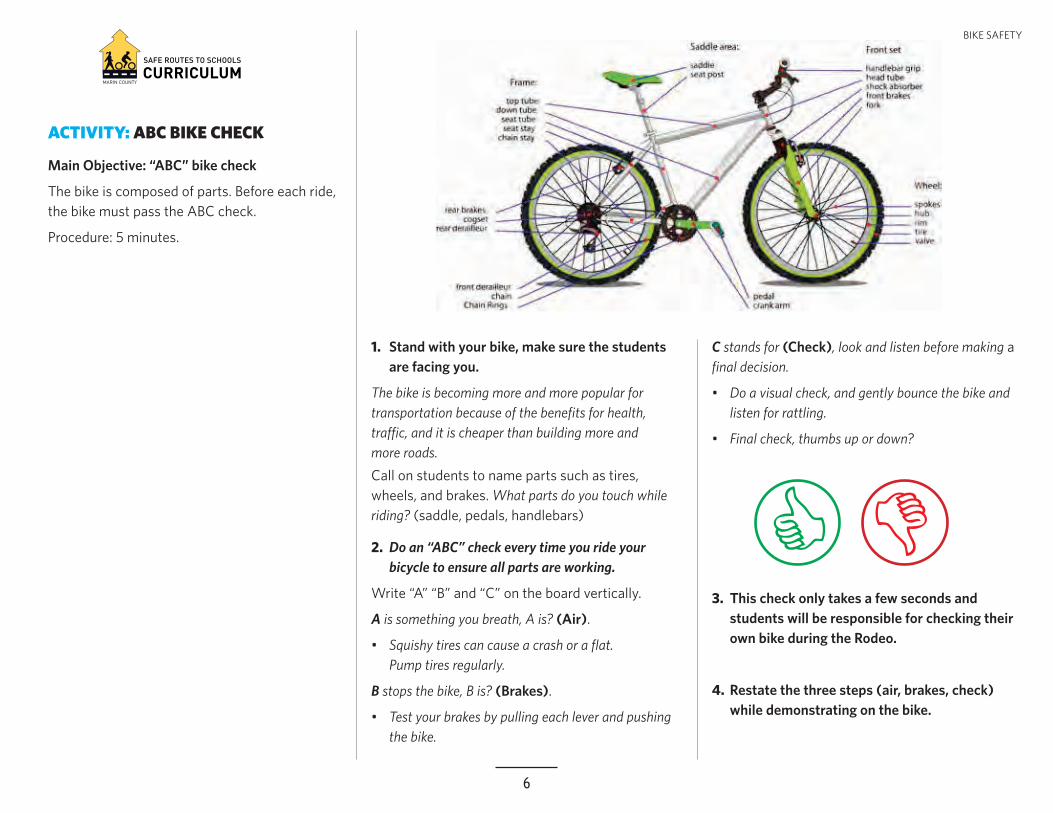
1. Stand with your bike, make sure the students are facing you.
The bike is becoming more and more popular for transportation because of the benefits for health, tra�c, and it is cheaper than building more and more roads.Call on students to name parts such as tires, wheels, and brakes. What parts do you touch while riding? (saddle, pedals, handlebars)
2. Do an “ABC” check every time you ride your bicycle to ensure all parts are working.
Write “A” “B” and “C” on the board vertically.
A is something you breath, A is? (Air).
• Squishy tires can cause a crash or a flat. Pump tires regularly.
B stops the bike, B is? (Brakes).
• Test your brakes by pulling each lever and pushing the bike.
C stands for (Check), look and listen before making a final decision.
• Do a visual check, and gently bounce the bike and listen for rattling.
• Final check, thumbs up or down?
3. This check only takes a few seconds and students will be responsible for checking their own bike during the Rodeo.
4. Restate the three steps (air, brakes, check) while demonstrating on the bike.
ACTIVITY: ABC BIKE CHECK
Main Objective: “ABC” bike check
The bike is composed of parts. Before each ride, the bike must pass the ABC check.
Procedure: 5 minutes.
BIKE SAFETY
7
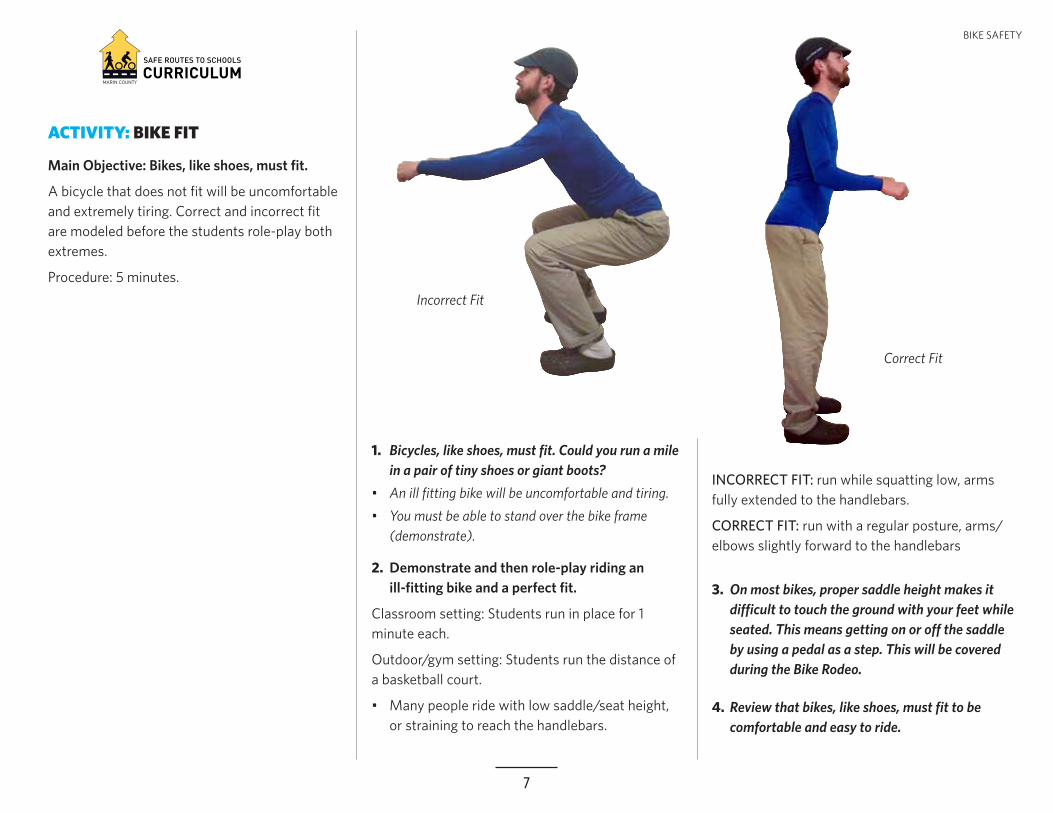
1. Bicycles, like shoes, must fit. Could you run a mile in a pair of tiny shoes or giant boots?
• An ill fitting bike will be uncomfortable and tiring.• You must be able to stand over the bike frame
(demonstrate).
2. Demonstrate and then role-play riding an ill-fitting bike and a perfect fit.
Classroom setting: Students run in place for 1 minute each.
Outdoor/gym setting: Students run the distance of a basketball court.
• Many people ride with low saddle/seat height, or straining to reach the handlebars.
INCORRECT FIT: run while squatting low, arms fully extended to the handlebars.
CORRECT FIT: run with a regular posture, arms/elbows slightly forward to the handlebars
3. On most bikes, proper saddle height makes it di�cult to touch the ground with your feet while seated. This means getting on or o� the saddle by using a pedal as a step. This will be covered during the Bike Rodeo.
4. Review that bikes, like shoes, must fit to be comfortable and easy to ride.
ACTIVITY: BIKE FIT
Main Objective: Bikes, like shoes, must fit.
A bicycle that does not fit will be uncomfortable and extremely tiring. Correct and incorrect fit are modeled before the students role-play both extremes.
Procedure: 5 minutes.Incorrect Fit
Correct Fit
BIKE SAFETY
8
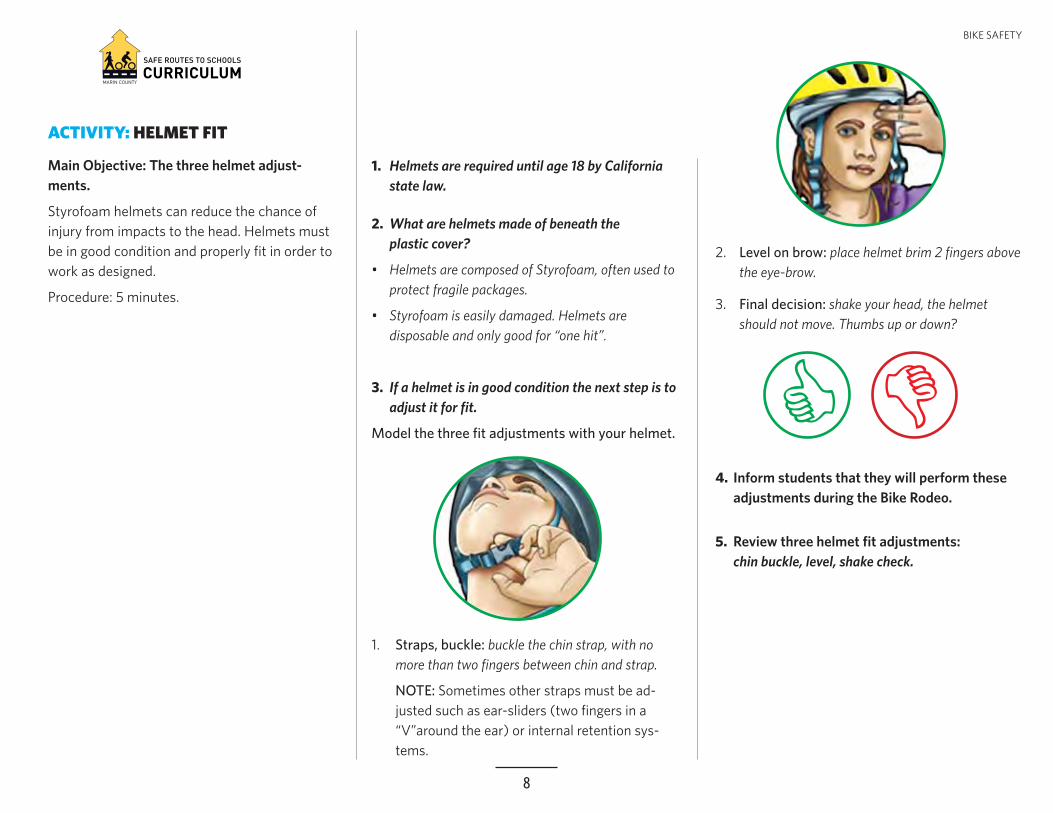
1. Helmets are required until age 18 by California state law.
2. What are helmets made of beneath the plastic cover?
• Helmets are composed of Styrofoam, often used to protect fragile packages.
• Styrofoam is easily damaged. Helmets are disposable and only good for “one hit”.
3. If a helmet is in good condition the next step is to adjust it for fit.
Model the three fit adjustments with your helmet.
1. Straps, buckle: buckle the chin strap, with no more than two fingers between chin and strap.
NOTE: Sometimes other straps must be ad-justed such as ear-sliders (two fingers in a “V”around the ear) or internal retention sys-tems.
2. Level on brow: place helmet brim 2 fingers above the eye-brow.
3. Final decision: shake your head, the helmet should not move. Thumbs up or down?
4. Inform students that they will perform these adjustments during the Bike Rodeo.
5. Review three helmet fit adjustments: chin buckle, level, shake check.
ACTIVITY: HELMET FIT
Main Objective: The three helmet adjust-ments.
Styrofoam helmets can reduce the chance of injury from impacts to the head. Helmets must be in good condition and properly fit in order to work as designed.
Procedure: 5 minutes.
BIKE SAFETY
9
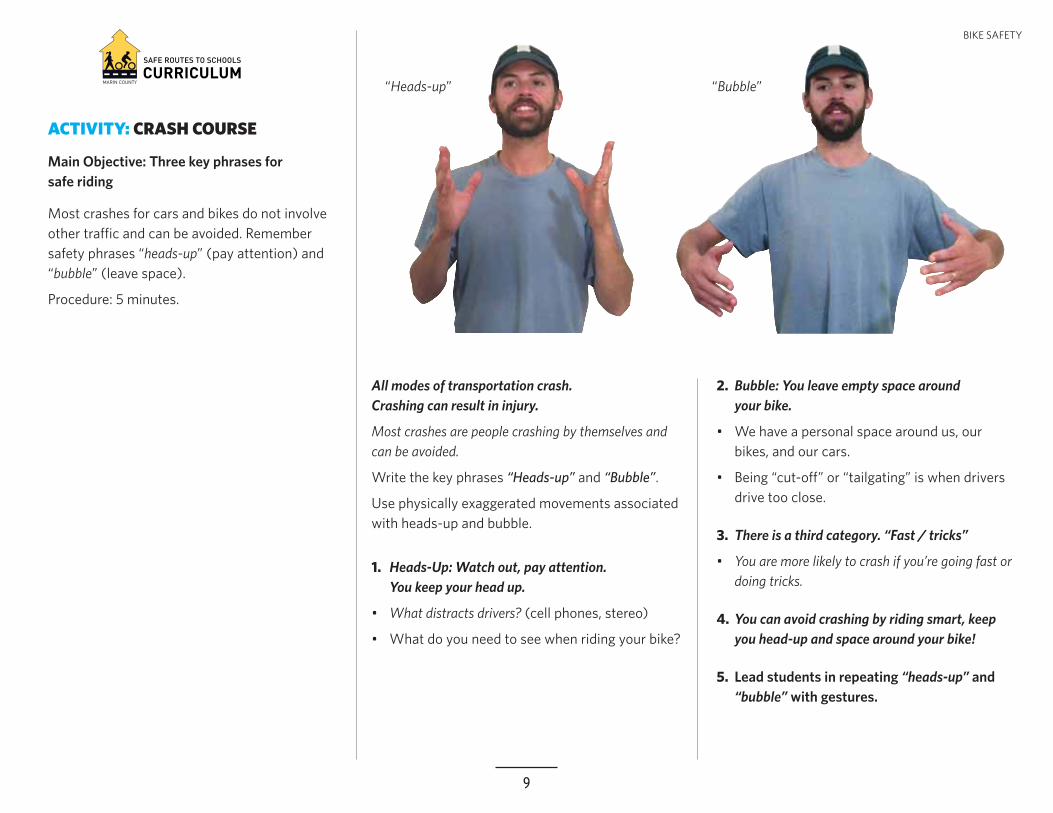
All modes of transportation crash. Crashing can result in injury.
Most crashes are people crashing by themselves and can be avoided.
Write the key phrases “Heads-up” and “Bubble”.
Use physically exaggerated movements associated with heads-up and bubble.
1. Heads-Up: Watch out, pay attention. You keep your head up.
• What distracts drivers? (cell phones, stereo)
• What do you need to see when riding your bike?
ACTIVITY: CRASH COURSE
Main Objective: Three key phrases for safe riding
Most crashes for cars and bikes do not involve other tra�c and can be avoided. Remember safety phrases “heads-up” (pay attention) and “bubble” (leave space).
Procedure: 5 minutes.
“Heads-up” “Bubble”
2. Bubble: You leave empty space around your bike.
• We have a personal space around us, our bikes, and our cars.
• Being “cut-o�” or “tailgating” is when drivers drive too close.
3. There is a third category. “Fast / tricks”
• You are more likely to crash if you’re going fast or doing tricks.
4. You can avoid crashing by riding smart, keep you head-up and space around your bike!
5. Lead students in repeating “heads-up” and “bubble” with gestures.
BIKE SAFETY
10
+/- ACTIVITY: AIR POLLUTION DEMONSTRATION
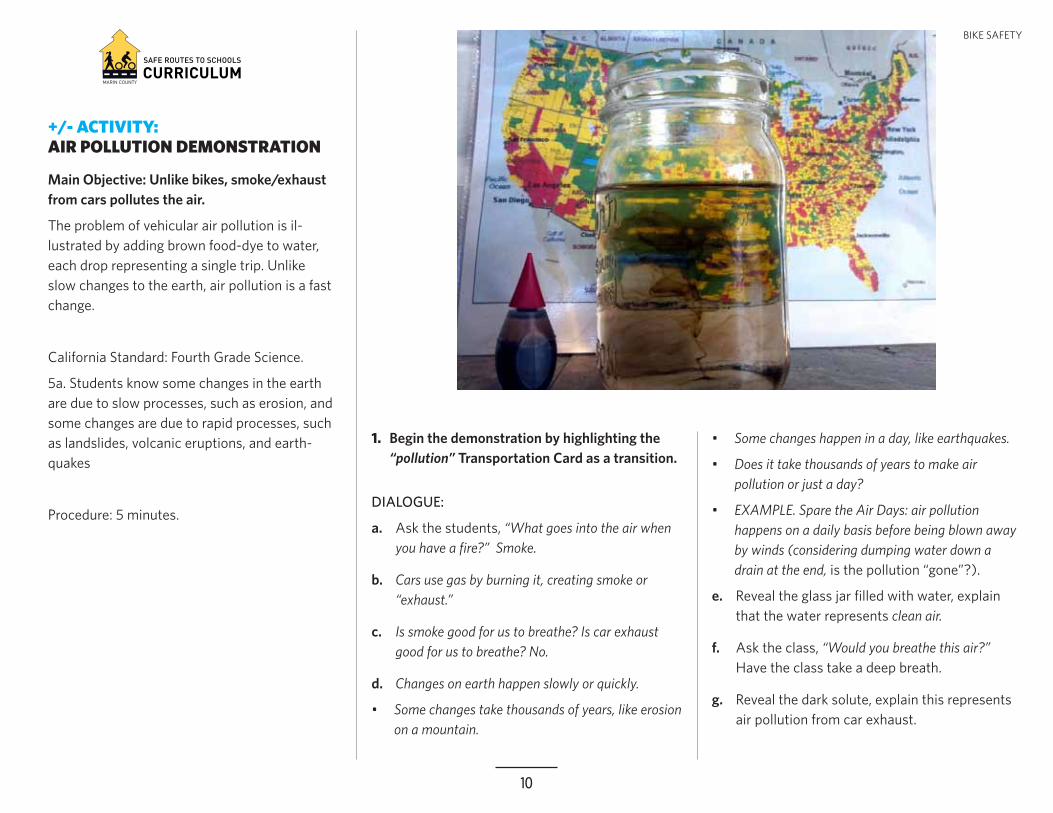
Main Objective: Unlike bikes, smoke/exhaust from cars pollutes the air.
The problem of vehicular air pollution is il-lustrated by adding brown food-dye to water, each drop representing a single trip. Unlike slow changes to the earth, air pollution is a fast change.
California Standard: Fourth Grade Science.
5a. Students know some changes in the earth are due to slow processes, such as erosion, and some changes are due to rapid processes, such as landslides, volcanic eruptions, and earth-quakes
Procedure: 5 minutes.
1. Begin the demonstration by highlighting the “pollution” Transportation Card as a transition.
DIALOGUE:
a. Ask the students, “What goes into the air when you have a fire?” Smoke.
b. Cars use gas by burning it, creating smoke or “exhaust.”
c. Is smoke good for us to breathe? Is car exhaust good for us to breathe? No.
d. Changes on earth happen slowly or quickly.
• Some changes take thousands of years, like erosion on a mountain.
• Some changes happen in a day, like earthquakes.
• Does it take thousands of years to make air pollution or just a day?
• EXAMPLE. Spare the Air Days: air pollution happens on a daily basis before being blown away by winds (considering dumping water down a drain at the end, is the pollution “gone”?).
e. Reveal the glass jar filled with water, explain that the water represents clean air.
f. Ask the class, “Would you breathe this air?” Have the class take a deep breath.
g. Reveal the dark solute, explain this represents air pollution from car exhaust.
BIKE SAFETY
11
h. One at a time, have the students suggest a destination for a driving trip.
i. For each trip add a drop of pollution and ask, “Would you breathe this?”
• NOTE: Add the same amount of pollution for all car trips, cars pollute the most during the first few minutes (catalytic converter warming up). The current air quality is not perfect, after a drop or two state “You are breathing this!”
j. Stop when the “air” becomes very dark. Have the class take another deep breath.
k. Sometimes air becomes unhealthy. Display the national air quality map.
l. Transportation is the leading source of air pollution in Marin County.
m. How much air pollution would a million bikes make?
• EXTENSION: What happens when air is not safe to breathe? (thousands of people get sick every year from polluted air)
• What else produces smoke or air pollution? (fireplaces, airplanes)
2. Review that each car trip adds pollution to the air. Bike/walk creates no air pollution at all.
+/- ACTIVITY: AIR POLLUTION DEMONSTRATION
BIKE SAFETY

12
1. Organize the class into a large square around an area with unobstructed paths to the opposite side.
2. RULES: Students must make it to the opposite side as a car, bike, and walker without bumping anyone. Set behavioral expectations (stay on feet, volume level).
CAR:• arms straight out to the sides (expand the square as necessary)• move straight forward, no turning sideways• armsshouldnotoverlapwhenpassing
BIKE:• elbows tucked to the side with hands forward• bike may turn and move in any direction
WALKER:• walk and move in any appropriate manner
3. Extensions
• mixcars/bikes/walkersatsametime, consider prioritizing walkers
• addobstaclesuchasdesksorchairsto further restrict movement
+/- ACTIVITY: TRAFFIC BOXMain Objective: Bicycles reduce tra�c because they are small.
Role-play tra�c jams as cars, bicycles, and walkers.
Procedure: 5–10 minutes.
4. Review that biking and walking takes up less space and therefore avoids tra�c jams.
BIKE SAFETY
13
BIKE SAFETY: LESSION CONCLUSION
1. Briefly review the main objective of each activity:
• Namethreeofthefourmajorbenefits of biking.
• Identifythestepsofan“ABC”check on a bicycle.
• Determinewhetherabicyclefitsthem.
• Recognizeaproperlyadjustedhelmet.
• Explainthephrases“heads-up” and “bubble” as they pertain to safe biking.
• +/-Contrastbikesandcarswithregards to air pollution.
• +/-Contrastbikeandcarswithregards to tra�c congestion.
2. Ask the audience for questions or comments. What did they find important or interesting?
3. Briefly preview the next lesson, “Tra�c Safety.”
4. Thank the students and teacher for having you as a guest.
BIKE SAFETY
14
BICYCLE SAFETY UNITLESSON 2 OF 3:
TRAFFIC SAFETY4th Grade. Classroom setting.
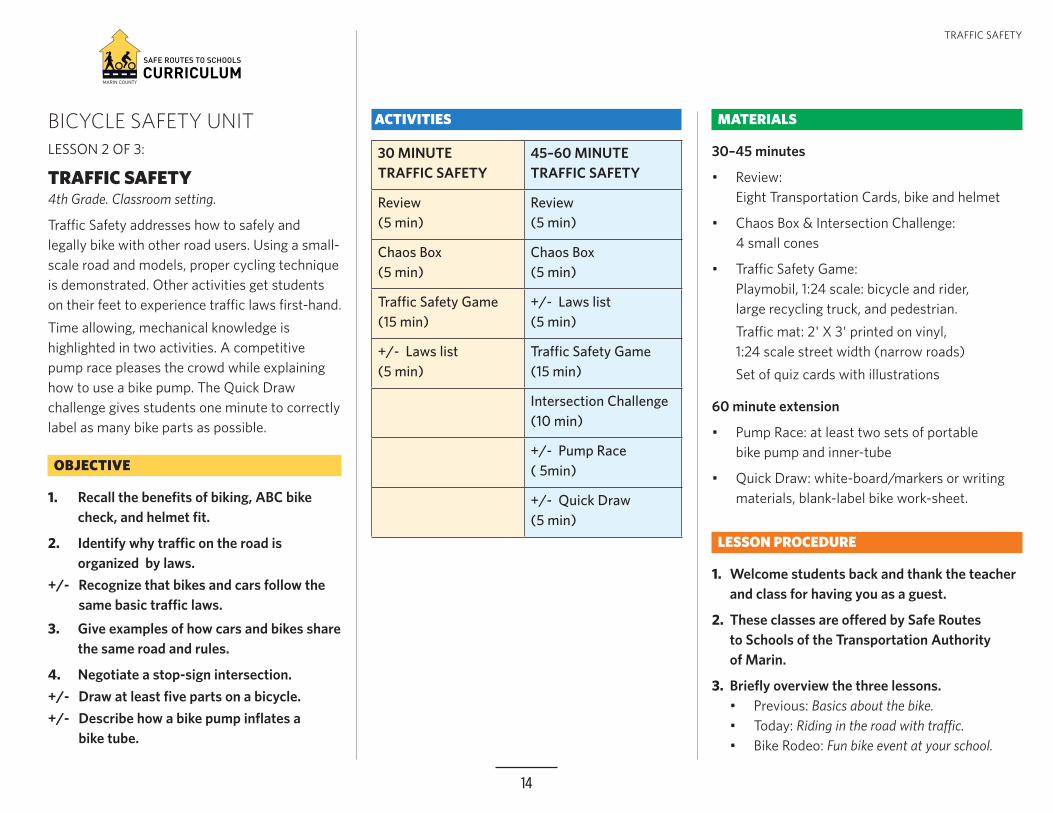
Tra�c Safety addresses how to safely and legally bike with other road users. Using a small-scale road and models, proper cycling technique is demonstrated. Other activities get students on their feet to experience tra�c laws first-hand. Time allowing, mechanical knowledge is highlighted in two activities. A competitive pump race pleases the crowd while explaining how to use a bike pump. The Quick Draw challenge gives students one minute to correctly label as many bike parts as possible.
OBJECTIVE
1. Recall the benefits of biking, ABC bike check, and helmet fit.
2. Identify why tra�c on the road is organized by laws.
+/- Recognize that bikes and cars follow the same basic tra�c laws.
3. Give examples of how cars and bikes share the same road and rules.
4. Negotiate a stop-sign intersection.+/- Draw at least five parts on a bicycle.+/- Describe how a bike pump inflates a bike tube.
ACTIVITIES MATERIALS
30–45 minutes
• Review: Eight Transportation Cards, bike and helmet
• Chaos Box & Intersection Challenge: 4 small cones
• Tra�c Safety Game:Playmobil, 1:24 scale: bicycle and rider, large recycling truck, and pedestrian.Tra�c mat: 2' X 3' printed on vinyl, 1:24 scale street width (narrow roads)Set of quiz cards with illustrations
60 minute extension
• Pump Race: at least two sets of portable bike pump and inner-tube
• Quick Draw: white-board/markers or writing materials, blank-label bike work-sheet.
LESSON PROCEDURE
1. Welcome students back and thank the teacher and class for having you as a guest.
2. These classes are o�ered by Safe Routes to Schools of the Transportation Authority of Marin.
3. Briefly overview the three lessons.• Previous: Basics about the bike.• Today: Riding in the road with tra�c.• Bike Rodeo: Fun bike event at your school.
30 MINUTE TRAFFIC SAFETY
45–60 MINUTE TRAFFIC SAFETY
Review (5 min)
Review (5 min)
Chaos Box (5 min)
Chaos Box (5 min)
Tra�c Safety Game (15 min)
+/- Laws list (5 min)
+/- Laws list (5 min)
Tra�c Safety Game (15 min)
Intersection Challenge (10 min)
+/- Pump Race ( 5min)
+/- Quick Draw (5 min)
TRAFFIC SAFETY
15
ACTIVITY: REVIEWMain Objective: Review three key features from previous lesson..
Students o�er information from the previous lesson (Bike Safety), including the key objectives.
Procedure: 5 minutes.
1. Call on students to remember the benefits of biking.
• No air pollution, exercise, no tra�c jams, and fun. Display the Transportation Cards.
2. Call on students to supply each step of the ABC bike check.
• Air, Brakes, Check. Model ABC check on a bike and write the steps on the board.
3. Call on students to supply the three helmet adjustments.
• Level, chin strap buckled, check. Model helmet adjustments.
4. Now that we have reviewed bike basics, we are going to discuss how to ride on the road.
TRAFFIC SAFETY
16
ACTIVITY: CHAOS BOXMain Objective: Tra�c on the road is organized by laws.
Students experience the need for tra�c laws by role-playing road users in a small space.
Procedure: 5–10 minutes.
1. Gather students in a designated area just large enough to contain all the students.
Use cones to mark a square if the area is too large.
RULES:
i. You must keep moving in this small area, set out-of-bounds.
ii. You must not bump into other tra�c (heads-up and bubble)
iii. Set behavioral expectations: Stay on your feet, keep volume low, etc.
4. Begin activity. Monitor students for excessive bumping or volume.
• After a minute say “Freeze!”
• Now we will have one rule, you must all move in the same direction.
Restart activity: orient students in one direction making a circle
Extension: send one student against the flow of tra�c
• After a minute of rotating in a circle, say “Freeze!” and return to their previous seats.
• Review activity
At first we had no rules, it was chaos. Imagine the roads with no rules.
Then we made one rule, move in same direction. Was that easier?
Tra�c laws make travel easier, safer, and faster.
5. Cars and bikes must follow state laws so that travel is safer and easier.
NOTE: If skipping Laws List, add that cars and bike generally follow the same laws.
TRAFFIC SAFETY
17
+/- ACTIVITY: LAWS LISTMain Objective: Bikes follow the same laws as cars.
Students brainstorm laws for cars to find that the vast majority apply to bikes.
Procedure: 5 minutes.
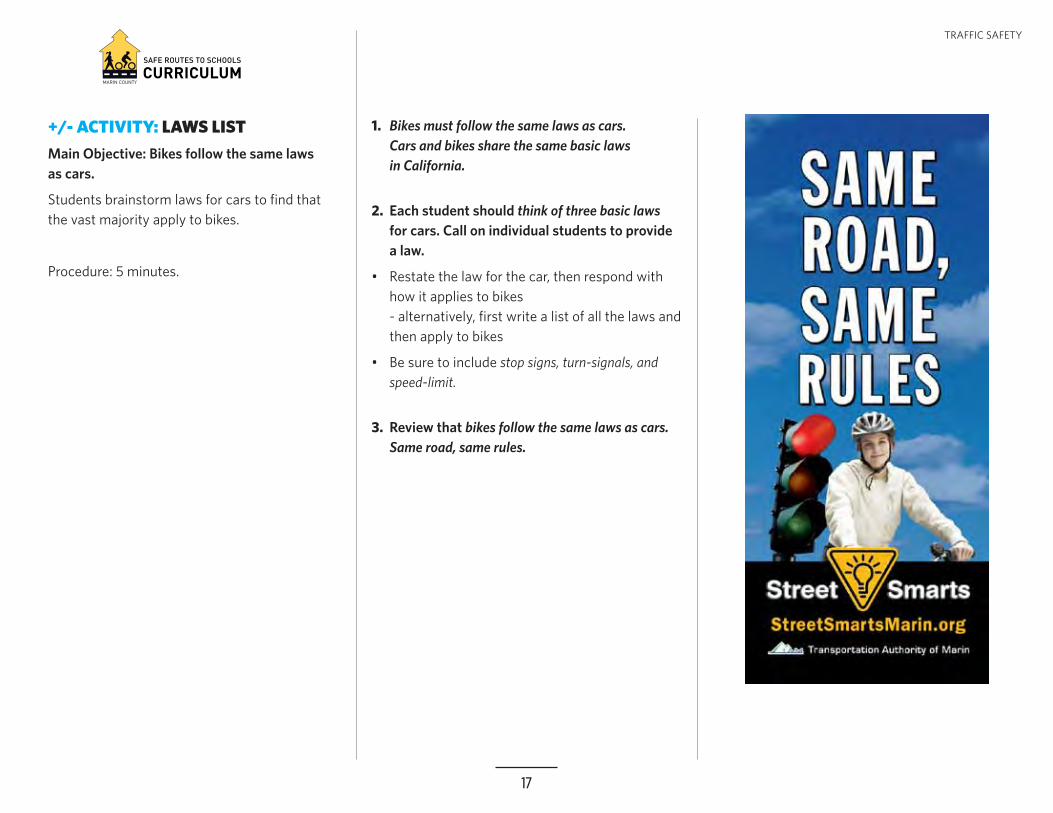
1. Bikes must follow the same laws as cars. Cars and bikes share the same basic laws in California.
2. Each student should think of three basic laws for cars. Call on individual students to provide a law.
• Restate the law for the car, then respond with how it applies to bikes - alternatively, first write a list of all the laws and then apply to bikes
• Be sure to include stop signs, turn-signals, and speed-limit.
3. Review that bikes follow the same laws as cars. Same road, same rules.
TRAFFIC SAFETY
18
ACTIVITY: TRAFFIC SAFETY GAMEMain Objective: Cars and bikes share the same road and rules
Using scale models to demonstrate, quiz ques-tions cover the safe and legal way to bike.
Procedure: 15 minutes.
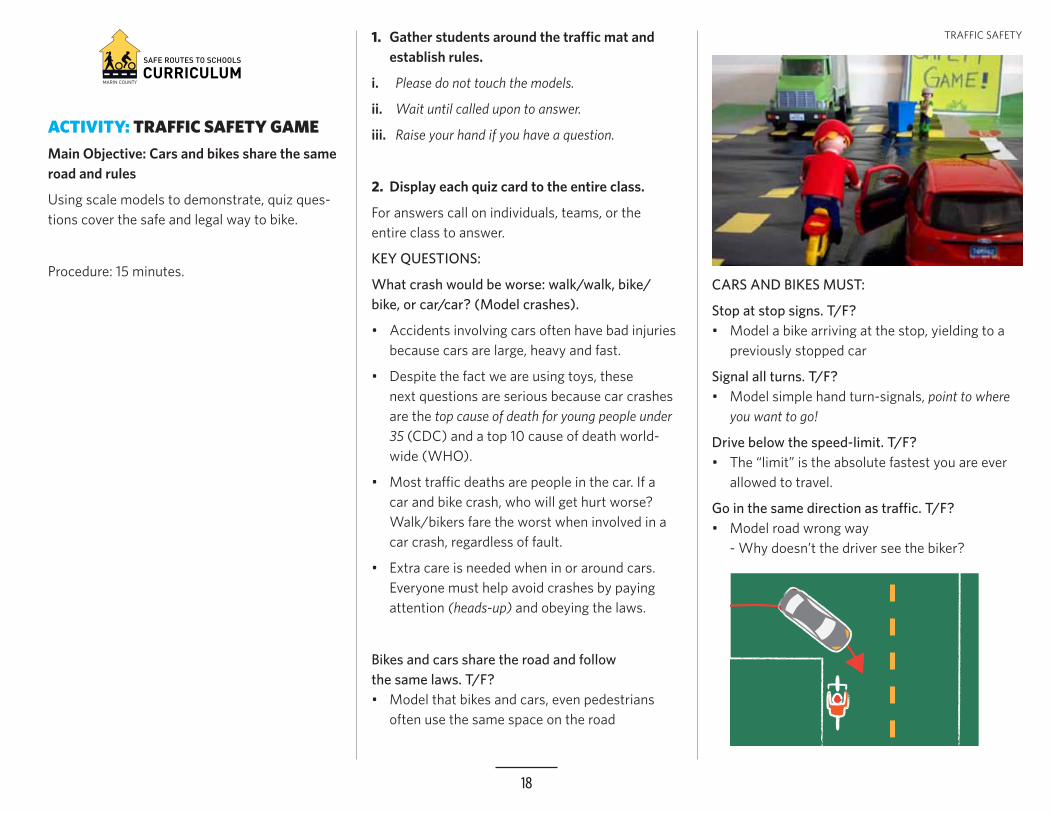
1. Gather students around the tra�c mat and establish rules.
i. Please do not touch the models.
ii. Wait until called upon to answer.
iii. Raise your hand if you have a question.
2. Display each quiz card to the entire class.
For answers call on individuals, teams, or the entire class to answer.
KEY QUESTIONS:
What crash would be worse: walk/walk, bike/bike, or car/car? (Model crashes).
• Accidents involving cars often have bad injuries because cars are large, heavy and fast.
• Despite the fact we are using toys, these next questions are serious because car crashes are the top cause of death for young people under 35 (CDC) and a top 10 cause of death world-wide (WHO).
• Most tra�c deaths are people in the car. If a car and bike crash, who will get hurt worse? Walk/bikers fare the worst when involved in a car crash, regardless of fault.
• Extra care is needed when in or around cars. Everyone must help avoid crashes by paying attention (heads-up) and obeying the laws.
Bikes and cars share the road and follow the same laws. T/F?• Model that bikes and cars, even pedestrians
often use the same space on the road
CARS AND BIKES MUST:
Stop at stop signs. T/F?• Model a bike arriving at the stop, yielding to a
previously stopped car
Signal all turns. T/F?• Model simple hand turn-signals, point to where
you want to go!
Drive below the speed-limit. T/F?• The “limit” is the absolute fastest you are ever
allowed to travel.
Go in the same direction as tra�c. T/F?• Model road wrong way
- Why doesn’t the driver see the biker?
TRAFFIC SAFETY
19
ACTIVITY: TRAFFIC SAFETY GAME
How Far Right is Right?
Slower vehicles should stay right, but how far right is right?
SIDEWALKS:
Sidewalks are designed for people walking. Often it is illegal to ride on a sidewalk, depending on the municipal code.
There is still car tra�c on sidewalks! Where? Driveways and crosswalks.
• Model cross-tra�c at driveway and crosswalk.
Sidewalks and crosswalks must deal with “cross-tra�c” (Hold hands like “+”) much like tra�c in the road. Pay extra attention for cross-tra�c, “heads-up.”
Cars and bikes must stop for anyone walking in the crosswalk, T/F?
• Model car and bike stopping for a pedestrian in a crosswalk.
NOTE: the crosswalk is for walking, not biking.
• Model biker walking in crosswalk.
What should you do before crossing the street?
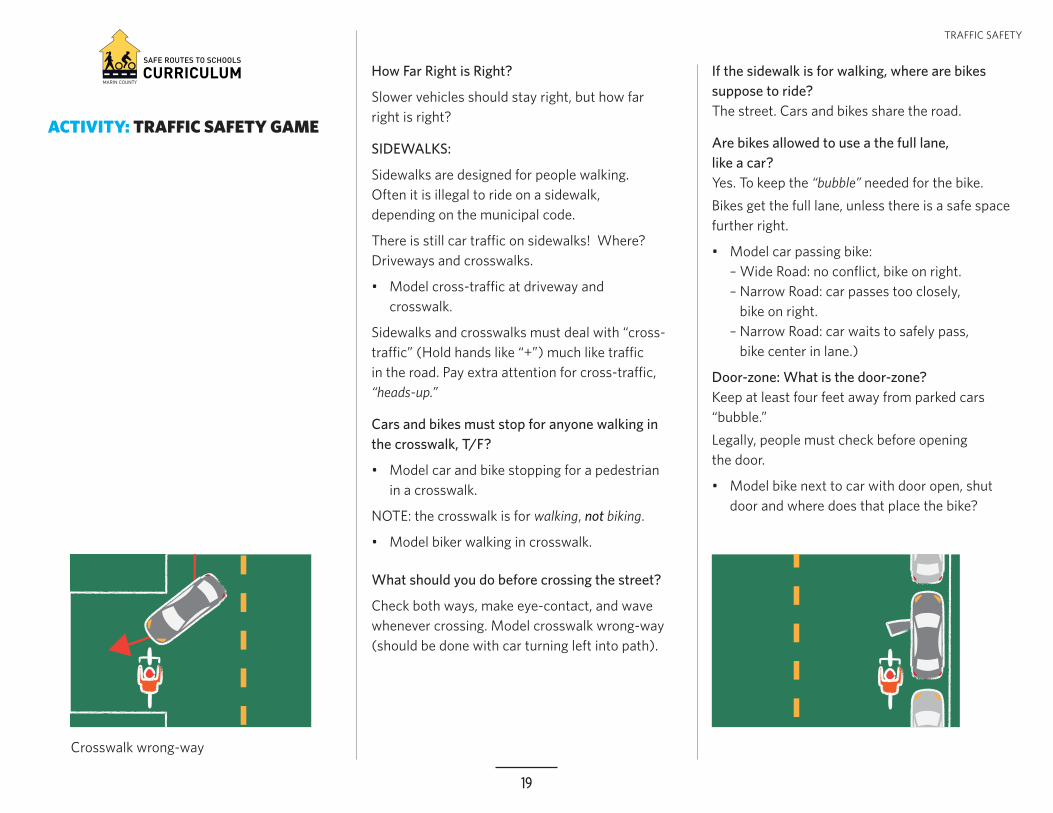
Check both ways, make eye-contact, and wave whenever crossing. Model crosswalk wrong-way (should be done with car turning left into path).
Crosswalk wrong-way
If the sidewalk is for walking, where are bikes suppose to ride?The street. Cars and bikes share the road.
Are bikes allowed to use a the full lane, like a car?Yes. To keep the “bubble” needed for the bike.Bikes get the full lane, unless there is a safe space further right.
• Model car passing bike: – Wide Road: no conflict, bike on right. – Narrow Road: car passes too closely, bike on right. – Narrow Road: car waits to safely pass, bike center in lane.)
Door-zone: What is the door-zone?Keep at least four feet away from parked cars “bubble.” Legally, people must check before opening the door.
• Model bike next to car with door open, shut door and where does that place the bike?
TRAFFIC SAFETY
20
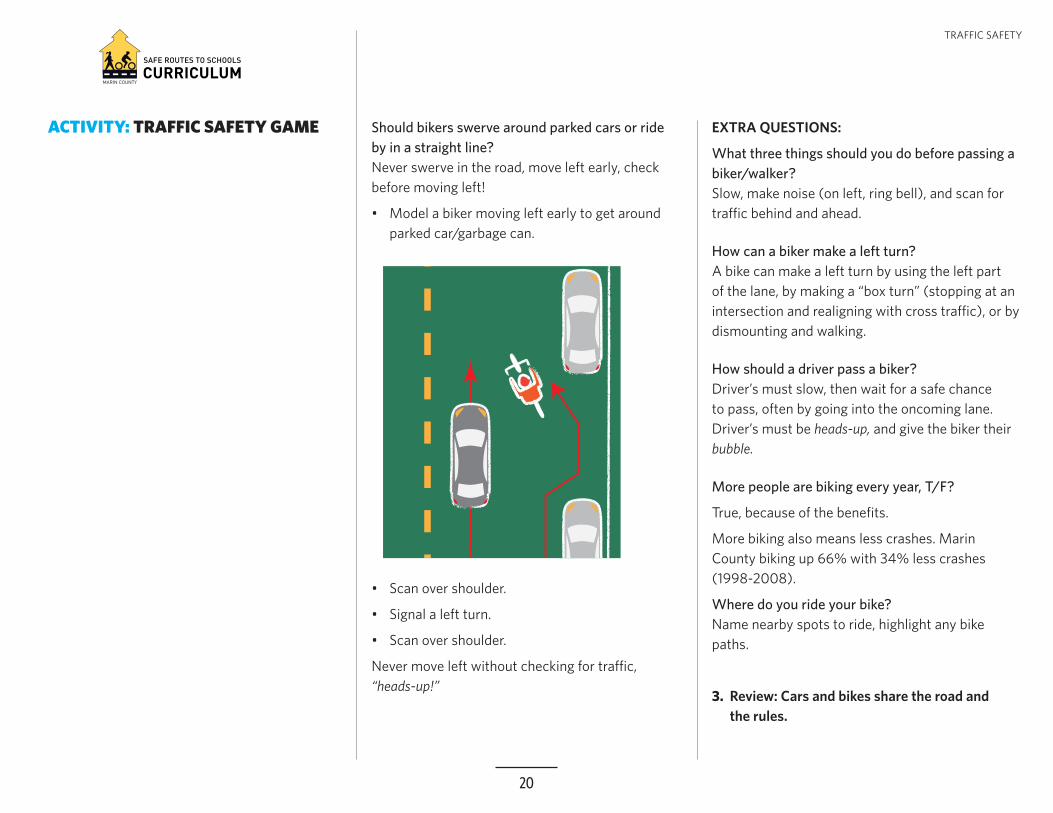
ACTIVITY: TRAFFIC SAFETY GAME Should bikers swerve around parked cars or ride by in a straight line?Never swerve in the road, move left early, check before moving left!
• Model a biker moving left early to get around parked car/garbage can.
• Scan over shoulder.
• Signal a left turn.
• Scan over shoulder.
Never move left without checking for tra�c, “heads-up!”
EXTRA QUESTIONS:
What three things should you do before passing a biker/walker? Slow, make noise (on left, ring bell), and scan for tra�c behind and ahead.
How can a biker make a left turn? A bike can make a left turn by using the left part of the lane, by making a “box turn” (stopping at an intersection and realigning with cross tra�c), or by dismounting and walking.
How should a driver pass a biker? Driver’s must slow, then wait for a safe chance to pass, often by going into the oncoming lane. Driver’s must be heads-up, and give the biker their bubble.
More people are biking every year, T/F?
True, because of the benefits.
More biking also means less crashes. Marin County biking up 66% with 34% less crashes (1998-2008).
Where do you ride your bike? Name nearby spots to ride, highlight any bike paths.
3. Review: Cars and bikes share the road and the rules.
TRAFFIC SAFETY

21
ACTIVITY: INTERSECTION CHALLENGEMain Objective: Negotiate a stop-sign intersection.
Student pass through increasingly complex intersections obeying the STOP sign and yielding to those who arrived first. Encourage communication with turn-signals and waves.
Procedure: 10 minutes.
1. Use cones to make a small square. Orient students into four lines directly behind the cones, facing the opposite side.
2. Rules:
i. Only one person at a time in the intersection. (Bubble)
ii. You must STOP and wait your turn before entering the intersection. (Heads-up)
iii. You may travel in any direction, returning to the end of a di¡erent line.
You will be required to negotiate a similar intersection during the Bike Rodeo.
3. Choose a student to begin the activity. Instruct students to communicate who will go next.
Reinforce communication with turn-signals and waving to indicate who will go.
Time allowing, try the first two scenarios before the 4-way stop.
a. 2-way stop (2 lines)
b. 3-way stop (3 lines)
c. extension: time how quickly the whole class pass the intersection
d. extension: no stops, try a round-about (a much safer and e�cient design)!
4. Review. At a stop-sign intersection: stop, wait your turn and use hand signals.
TRAFFIC SAFETY
22
+/- ACTIVITY: PUMP RACEMain Objective: Bike pumps fill inner-tubes.
After explaining basic pump operation, students face-o� to see who can fill an inner tube faster.
Procedure: 5 minutes.
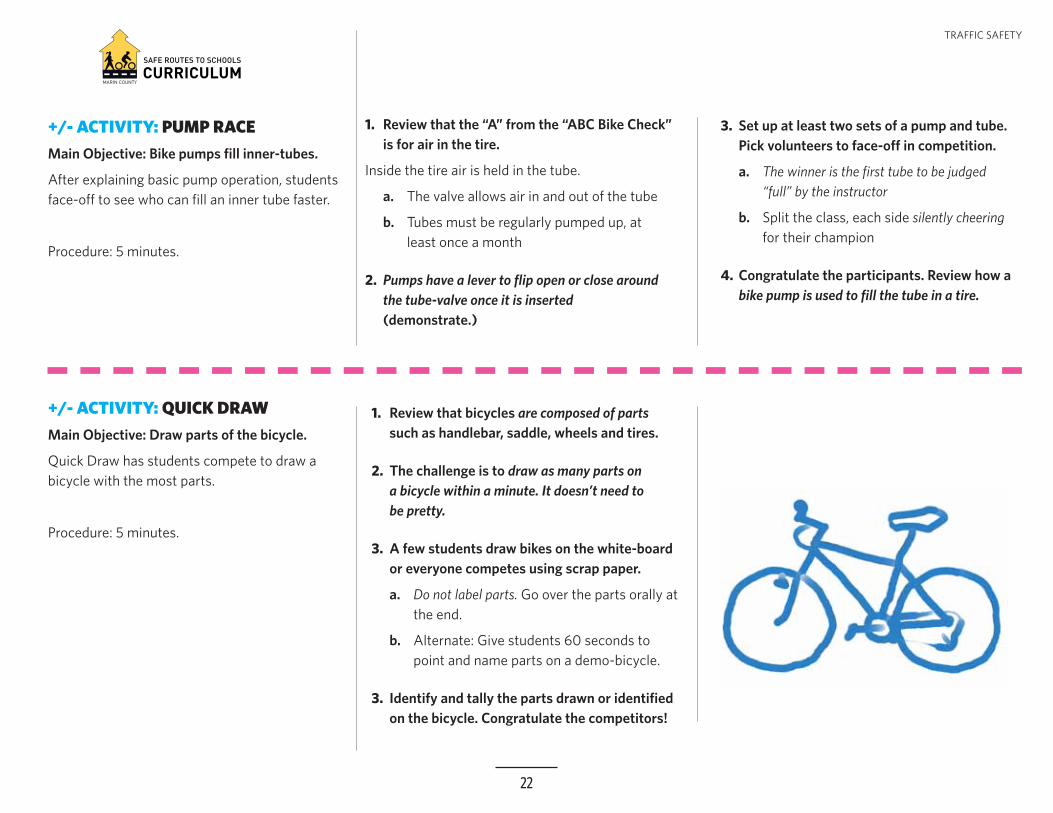
+/- ACTIVITY: QUICK DRAWMain Objective: Draw parts of the bicycle.
Quick Draw has students compete to draw a bicycle with the most parts.
Procedure: 5 minutes.
1. Review that the “A” from the “ABC Bike Check” is for air in the tire.
Inside the tire air is held in the tube.
a. The valve allows air in and out of the tube
b. Tubes must be regularly pumped up, at least once a month
2. Pumps have a lever to flip open or close around the tube-valve once it is inserted (demonstrate.)
3. Set up at least two sets of a pump and tube. Pick volunteers to face-o� in competition.
a. The winner is the first tube to be judged “full” by the instructor
b. Split the class, each side silently cheering for their champion
4. Congratulate the participants. Review how a bike pump is used to fill the tube in a tire.
1. Review that bicycles are composed of parts such as handlebar, saddle, wheels and tires.
2. The challenge is to draw as many parts on a bicycle within a minute. It doesn’t need to be pretty.
3. A few students draw bikes on the white-board or everyone competes using scrap paper.
a. Do not label parts. Go over the parts orally at the end.
b. Alternate: Give students 60 seconds to point and name parts on a demo-bicycle.
3. Identify and tally the parts drawn or identified on the bicycle. Congratulate the competitors!
TRAFFIC SAFETY
23
TRAFFIC SAFETY: LESSION CONCLUSION
1. Briefly review the main objective of each activity:
Students will be able to-
a. Recall the benefits of biking, ABC bike check, and helmet fit.
b. Identify why tra�c on the road is organized by laws.
+/- Recognize that bikes and cars follow the same basic tra�c laws.
c. Give examples of how cars and bikes share the same road and rules.
d. Negotiate a stop-sign intersection.
+/- Draw at least five parts on a bicycle.
+/- Describe how a bike pump inflates a bike tube.
2. Ask the audience for questions or comments on what they thought was important or interesting.
3. Briefly preview the next lesson, “Bike Rodeo.”
4. Thank the students and teacher for having you as a guest.
TRAFFIC SAFETY

24
BICYCLE SAFETY UNITLESSON 3 OF 3:
BIKE RODEO4th Grade. 45-60 minutes, requires four basketball courts of space on the blacktop/playground.
Our Bike Rodeo is designed to accommodate up to 60 students at a time. Before riding, bikes are checked and helmets are adjusted. Small groups rotate through 4-5 stations. Each station emphasizes a di�erent biking skill.
Skill focus at stations by increasing di�culty:
• Red Light Green Light – stopping and starting
• Obstacle Course – riding over obstacles
• Cycling Circles – tra�c awareness
• Rules of the Road – obeying tra�c laws
• +/- Mechanics L.A.B. – using quick-release
OBJECTIVE
1. Red Light Green Light: Correctly start and stop.
2. Obstacle Course: Ride over obstacles with the front wheel aligned perpendicular.
3. Cycling Circles: Ride with “heads-up” and a “bubble” around their bike.
4. Rules of the Road: Obey basic tra�c laws.
ACTIVITIES
BIKE RODEO
Rodeo Rules (2 min)
Bike and Helmet Check (8 min)
Station Rotation (30-45 min)
+/- Mechanic L.A.B. (6 – 8 min)
Conclusion (5 min)
LESSON PROCEDURE
KEY POINTS TO RODEO SETUP:
• Trailer arrives one hour before start, other instructors 30–40 minutes before start.
• Driving onto the playground, gates must be unlocked and route free of students.
• Decide the layout for stations on the playground.
• Use Google-Maps “satellite” view to see the school playground before arriving.
• Separate sign-boards (start points) to minimize distractions from neighboring stations.
• Designate routes between stations to minimize cross-tra�c during rotation.
• Identify site hazards (gravel/grates, poles) and benefits (extra space, painted lines).
• Always leave the teeter-totter upside-down when not in use.
LESSON INTRODUCTION
Gather the students in an open area with their bikes and helmets. Consider using a megaphone.
Please do not ride your bike yet, we will get started momentarily!
Direct students without bikes or helmets to find one of ours that fits. One instructor should be distributing helmets and helping students find bikes. If many students need to borrow a bike, pair two similar sized students per bike.
When almost all the students have gathered, begin the introduction.
1. Welcome students to the 4th grade Safe Routes to Schools Bike Rodeo!
2. Briefly introduce each instructor.
3. Overview the day’s events:
• Check the bikes and helmets.
• Rules for the rodeo.
• Rotate through the stations and return back at the end.
• Gather instructors to review the main objectives at each station.
• Assign instructors to either a station or a group of students (1–4) to rotate with.
• As the students arrive, instructors immediately begin checking helmets and tires.
BIKE RODEO
25
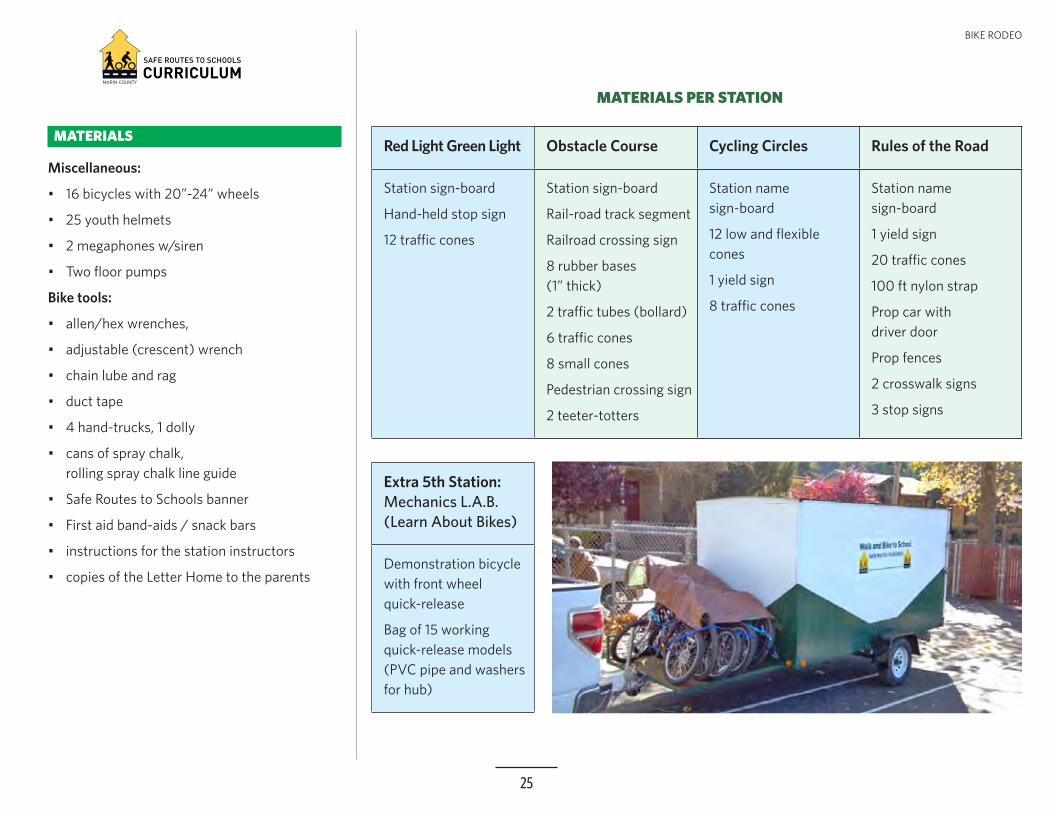
MATERIALS PER STATION
Red Light Green Light Obstacle Course Cycling Circles Rules of the Road
Station sign-board
Hand-held stop sign
12 tra�c cones
Station sign-board
Rail-road track segment
Railroad crossing sign
8 rubber bases (1” thick)
2 tra�c tubes (bollard)
6 tra�c cones
8 small cones
Pedestrian crossing sign
2 teeter-totters
Station name sign-board
12 low and flexible cones
1 yield sign
8 tra�c cones
Station name sign-board
1 yield sign
20 tra�c cones
100 ft nylon strap
Prop car with driver door
Prop fences
2 crosswalk signs
3 stop signs
Extra 5th Station: Mechanics L.A.B. (Learn About Bikes)
Demonstration bicycle with front wheel quick-release
Bag of 15 working quick-release models (PVC pipe and washers for hub)
MATERIALS
Miscellaneous:
• 16 bicycles with 20”-24” wheels
• 25 youth helmets
• 2 megaphones w/siren
• Two floor pumps
Bike tools:
• allen/hex wrenches,
• adjustable (crescent) wrench
• chain lube and rag
• duct tape
• 4 hand-trucks, 1 dolly
• cans of spray chalk, rolling spray chalk line guide
• Safe Routes to Schools banner
• First aid band-aids / snack bars
• instructions for the station instructors
• copies of the Letter Home to the parents
BIKE RODEO
26
ACTIVITY: BIKE AND HELMET CHECKMain Objective: Each student must pass the bike and helmet safety check before riding.
Instructors circulate to help students as they check their bikes and helmets.
Procedure: 5 minutes.
1. Before you ride, you should always check the bike and the helmet.
2. If you need help, raise your hand and an instructor will help you.
3. Let’s start at the top, there are three adjustments to fit a helmet.
i. The chin-strap must be buckled and snug.
No more than 2 fingers should fit between the chin and strap.
Take a few moments to check chin-straps.
Consider demonstrating the adjustment (push, then pull strap through the buckle).
ii. The helmet must be level on your head.
Helmet should start two fingers above your eyebrows.
iii. Final decision. Shake your head to see if the helmet moves. Thumbs up/down?
Any loose helmets must be fixed before riding.
4. Now that the helmet is adjusted. There are three things to check for the “ABC” bike check.
• “A” is for air. Squeeze your tires front and rear.
Raise your hand if you need air from our pump.
• “B” is for brakes. Test brakes by squeezing the levers and pushing your bike.
Raise your hand if you need help with your brakes.
• “C” is for check. Look and listen to the bike. Make a decision, thumbs up/down?
Raise your hand if you have a problem with your bike.
BIKE RODEO
27
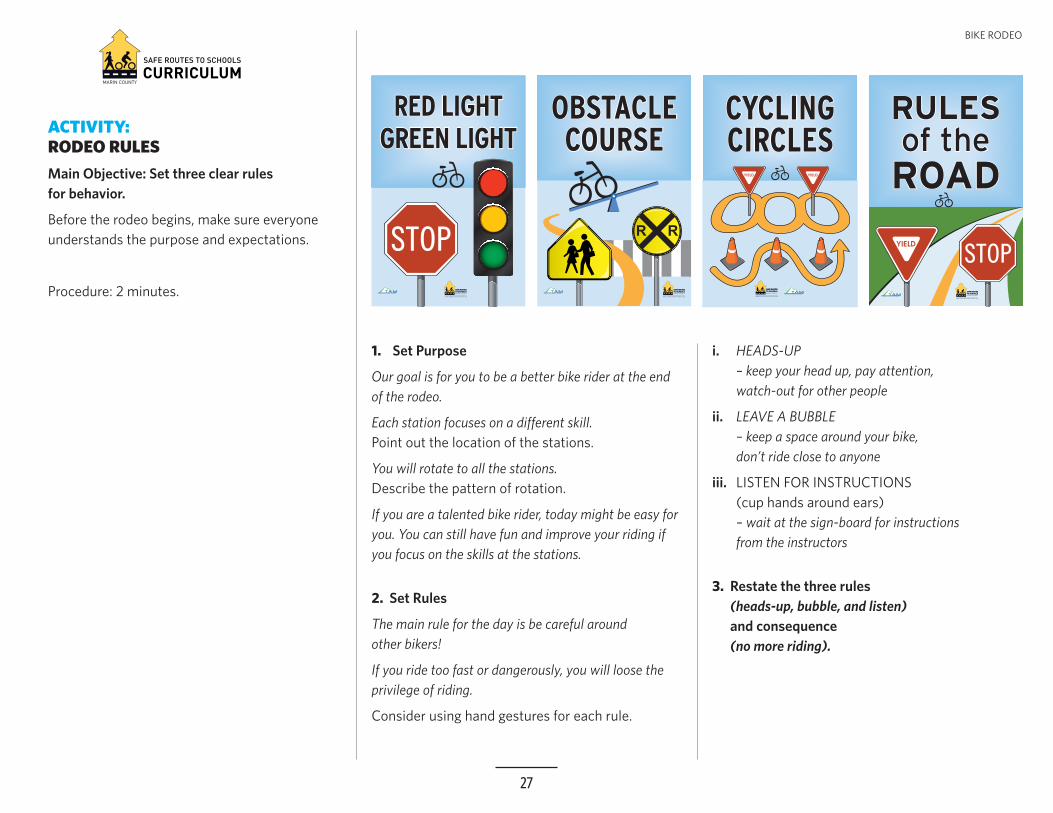
ACTIVITY: RODEO RULESMain Objective: Set three clear rules for behavior.
Before the rodeo begins, make sure everyone understands the purpose and expectations.
Procedure: 2 minutes.
1. Set Purpose
Our goal is for you to be a better bike rider at the end of the rodeo.
Each station focuses on a di¡erent skill. Point out the location of the stations.
You will rotate to all the stations. Describe the pattern of rotation.
If you are a talented bike rider, today might be easy for you. You can still have fun and improve your riding if you focus on the skills at the stations.
2. Set Rules
The main rule for the day is be careful around other bikers!
If you ride too fast or dangerously, you will loose the privilege of riding.
Consider using hand gestures for each rule.
i. HEADS-UP – keep your head up, pay attention, watch-out for other people
ii. LEAVE A BUBBLE – keep a space around your bike, don’t ride close to anyone
iii. LISTEN FOR INSTRUCTIONS (cup hands around ears) – wait at the sign-board for instructions from the instructors
3. Restate the three rules (heads-up, bubble, and listen) and consequence (no more riding).
BIKE RODEO
28
ACTIVITY: ACTIVITY BREAKING INTO GROUPSMain Objective: Create groups with roughly equal numbers.
Instructors check that the students are ready to ride.
Each station accommodates 6-12 students at a time. Usually a 4-station rotation, two to five stations can be run simultaneously. The number of stations we use in rotation depends on the total number of students.
We describe a random grouping and a grouping organized around self-reported ability. Often classes already have assigned numbers or teams that can be used to divide them.
Although grouping by ability takes more time, it works well with smaller groups.
• Instructors can teach to the ability level, assign extra sta� to the novice group.
• Allowing novices to begin at easiest stations.
• Students may be less self conscious with other novice riders.
• The advanced riding group can be challenged, courses modified.
Procedure: 5 minutes.
1. Now that we are ready to ride, you will be split into (two to five) groups.
2. Stand the instructors widely spaced in front of the students. Designate a space for the lead instructor’s group.
3. Divide into groups.
RANDOM:
a. You will now be assigned to an instructor.
b. Go directly to your assigned instructor.
c. Begin directing students to their instructor.
ABILITY:
a. Designate the instructors by skill level.
• I don’t ride very often. Beginners.
• I know how to ride a bike, but I rarely ride. Still shaky.
• I feel confident on my bike and I ride sometimes.
• I am very good at riding a bike and I do it often.
b. Tell the students to go to the instructor that best describes their ability.
3. While the students are staging with their instructor, watch for:
• ill-fitting bikes and loose helmets
• struggling riders that are not ready for the course (they may ride o�-course with their teacher or a volunteer)
4. Once groups are established, wait for the lead instructors to quickly check for equal group size.
5. Lead instructors dismisses each instructor one-at-a-time to go to their station.
BIKE RODEO
29
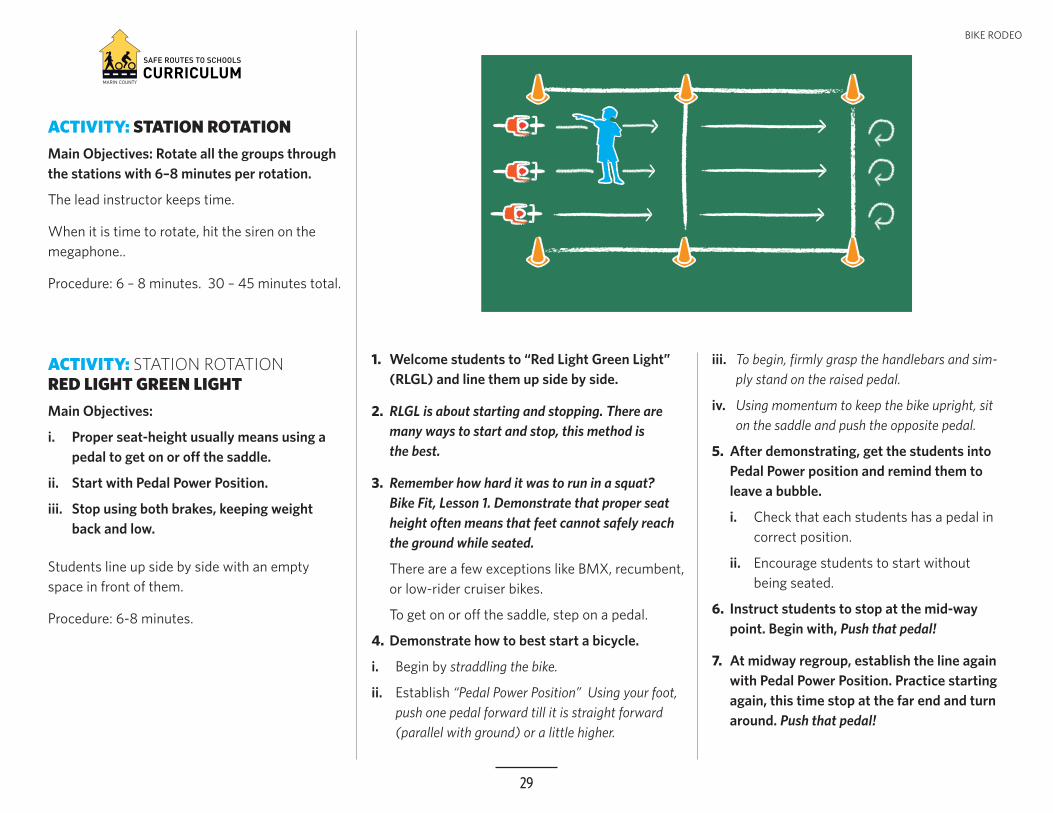
ACTIVITY: STATION ROTATIONMain Objectives: Rotate all the groups through the stations with 6–8 minutes per rotation.
The lead instructor keeps time.
When it is time to rotate, hit the siren on the megaphone..
Procedure: 6 – 8 minutes. 30 – 45 minutes total.
ACTIVITY: STATION ROTATION RED LIGHT GREEN LIGHTMain Objectives:
i. Proper seat-height usually means using a pedal to get on or o� the saddle.
ii. Start with Pedal Power Position.
iii. Stop using both brakes, keeping weight back and low.
Students line up side by side with an empty space in front of them.
Procedure: 6-8 minutes.
1. Welcome students to “Red Light Green Light” (RLGL) and line them up side by side.
2. RLGL is about starting and stopping. There are many ways to start and stop, this method is the best.
3. Remember how hard it was to run in a squat? Bike Fit, Lesson 1. Demonstrate that proper seat height often means that feet cannot safely reach the ground while seated.
There are a few exceptions like BMX, recumbent, or low-rider cruiser bikes.
To get on or o� the saddle, step on a pedal.
4. Demonstrate how to best start a bicycle.
i. Begin by straddling the bike.
ii. Establish “Pedal Power Position” Using your foot, push one pedal forward till it is straight forward (parallel with ground) or a little higher.
iii. To begin, firmly grasp the handlebars and sim-ply stand on the raised pedal.
iv. Using momentum to keep the bike upright, sit on the saddle and push the opposite pedal.
5. After demonstrating, get the students into Pedal Power position and remind them to leave a bubble.
i. Check that each students has a pedal in correct position.
ii. Encourage students to start without being seated.
6. Instruct students to stop at the mid-way point. Begin with, Push that pedal!
7. At midway regroup, establish the line again with Pedal Power Position. Practice starting again, this time stop at the far end and turn around. Push that pedal!
BIKE RODEO

30
8. Demonstrate the proper way to stop a bicycle.
a. Identify the front (left lever) and rear (right lever) brake.
• The front brake is much more powerful than the rear brake.
• Using the front brake is good because it is powerful.
• Using the front brake can be dangerous. If you have a powerful brake and light weight bike, you could flip the bike. To demonstrate straddle a bike and lock the front brake, pushing the bike forward.
b. Model the steps to stopping safely (on or o¤ bike).
• Ease on both brakes, move your weight back and low.
• When the bike is stopped, step down from the saddle by standing on a pedal.
• Bikes are started and stopped by standing on one pedal.
c. Demonstrate a stop using both brakes. Shift weight back and step down on a pedal.
9. Establish Pedal Power position amongst the students.
10. Students stop midway using both brakes and shifting weight back.
• Start with a slow stop the first time!
11. After stopping midway. Establish Pedal Power and try stopping slightly faster at the end.
12. With time remaining play “Red Light Green Light.”
a. Students may only move forward during “green light.”
b. When the instructor says “red light” and displays the stop sign, everyone stops.
c. After each stop establish Pedal Power Posi-tion.
d. If a student does not stop they are sent back to restart.
e. Winner is the first to reach the end of the course. Begin again with everyone at start.
13. When the siren sounds, direct students to the sign-board for next station. “Heads-up” and keep a “Bubble” around your bike.
ACTIVITY: STATION ROTATIONRED LIGHT GREEN LIGHT
BIKE RODEO
31
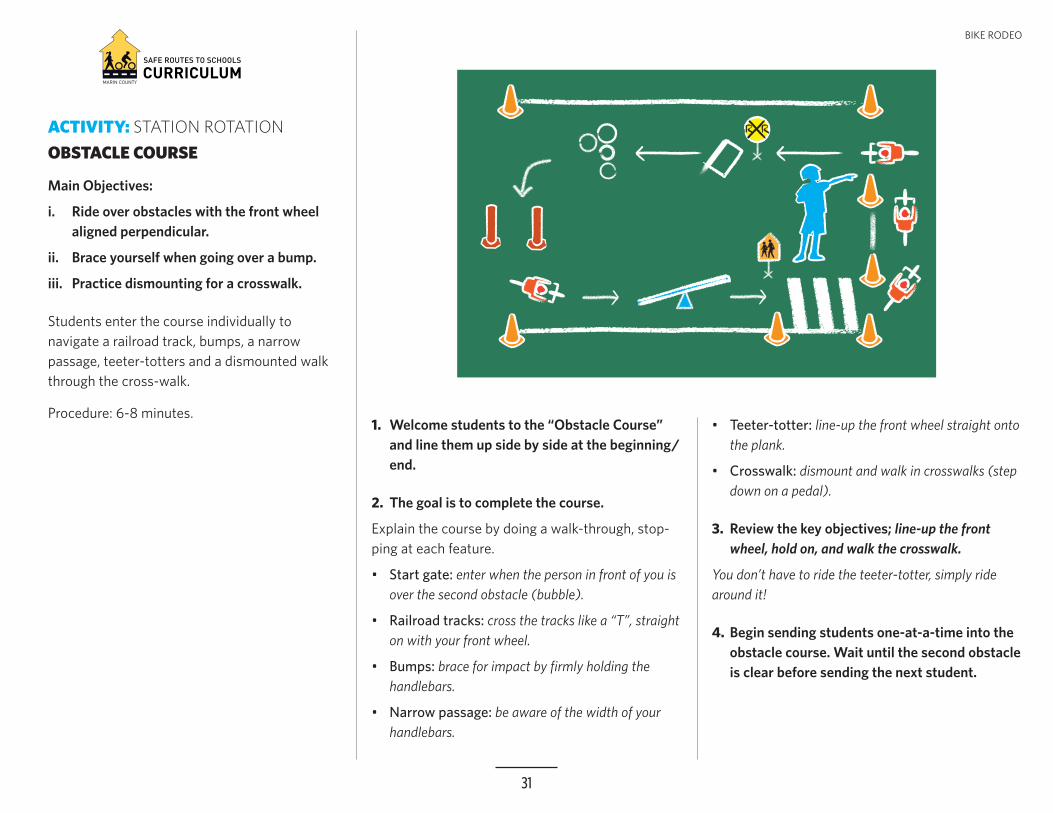
ACTIVITY: STATION ROTATIONOBSTACLE COURSE
Main Objectives:
i. Ride over obstacles with the front wheel aligned perpendicular.
ii. Brace yourself when going over a bump.
iii. Practice dismounting for a crosswalk.
Students enter the course individually to navigate a railroad track, bumps, a narrow passage, teeter-totters and a dismounted walk through the cross-walk.
Procedure: 6-8 minutes.1. Welcome students to the “Obstacle Course”
and line them up side by side at the beginning/end.
2. The goal is to complete the course.
Explain the course by doing a walk-through, stop-ping at each feature.
• Start gate: enter when the person in front of you is over the second obstacle (bubble).
• Railroad tracks: cross the tracks like a “T”, straight on with your front wheel.
• Bumps: brace for impact by firmly holding the handlebars.
• Narrow passage: be aware of the width of your handlebars.
• Teeter-totter: line-up the front wheel straight onto the plank.
• Crosswalk: dismount and walk in crosswalks (step down on a pedal).
3. Review the key objectives; line-up the front wheel, hold on, and walk the crosswalk.
You don’t have to ride the teeter-totter, simply ride around it!
4. Begin sending students one-at-a-time into the obstacle course. Wait until the second obstacle is clear before sending the next student.
BIKE RODEO
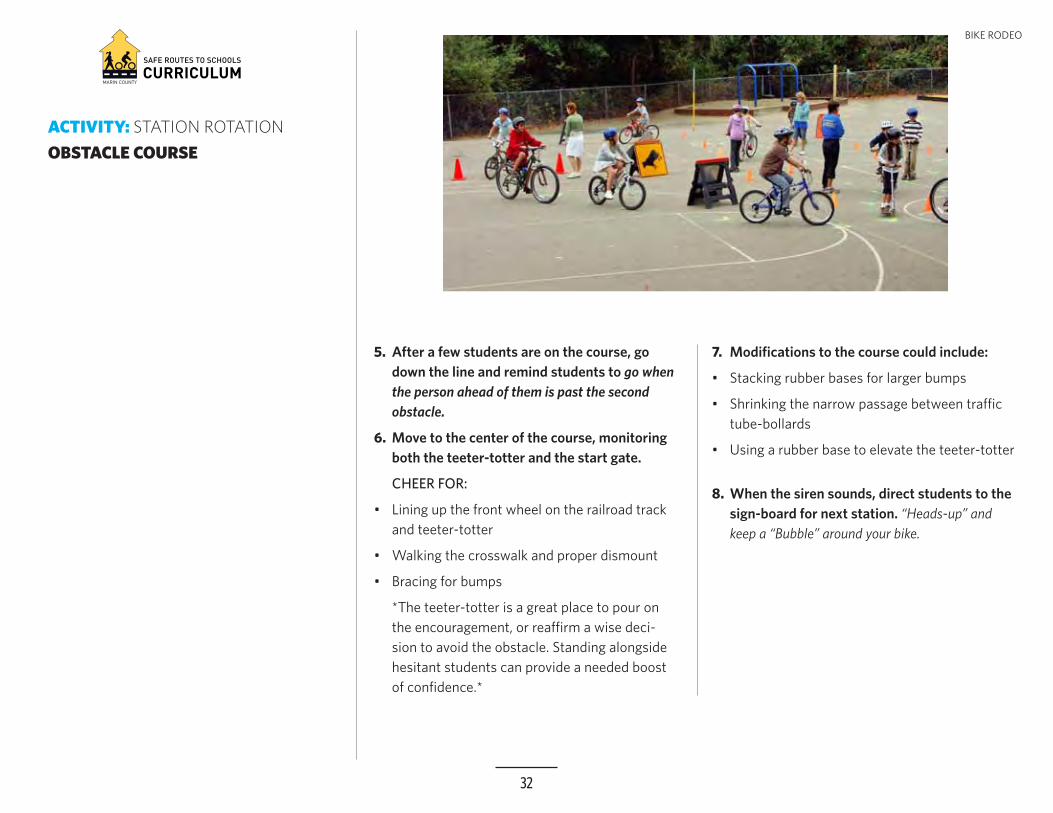
32
5. After a few students are on the course, go down the line and remind students to go when the person ahead of them is past the second obstacle.
6. Move to the center of the course, monitoring both the teeter-totter and the start gate.
CHEER FOR:
• Lining up the front wheel on the railroad track and teeter-totter
• Walking the crosswalk and proper dismount
• Bracing for bumps
*The teeter-totter is a great place to pour on the encouragement, or rea�rm a wise deci-sion to avoid the obstacle. Standing alongside hesitant students can provide a needed boost of confidence.*
7. Modifications to the course could include:
• Stacking rubber bases for larger bumps
• Shrinking the narrow passage between tra�c tube-bollards
• Using a rubber base to elevate the teeter-totter
8. When the siren sounds, direct students to the sign-board for next station. “Heads-up” and keep a “Bubble” around your bike.
ACTIVITY: STATION ROTATIONOBSTACLE COURSE
BIKE RODEO
33
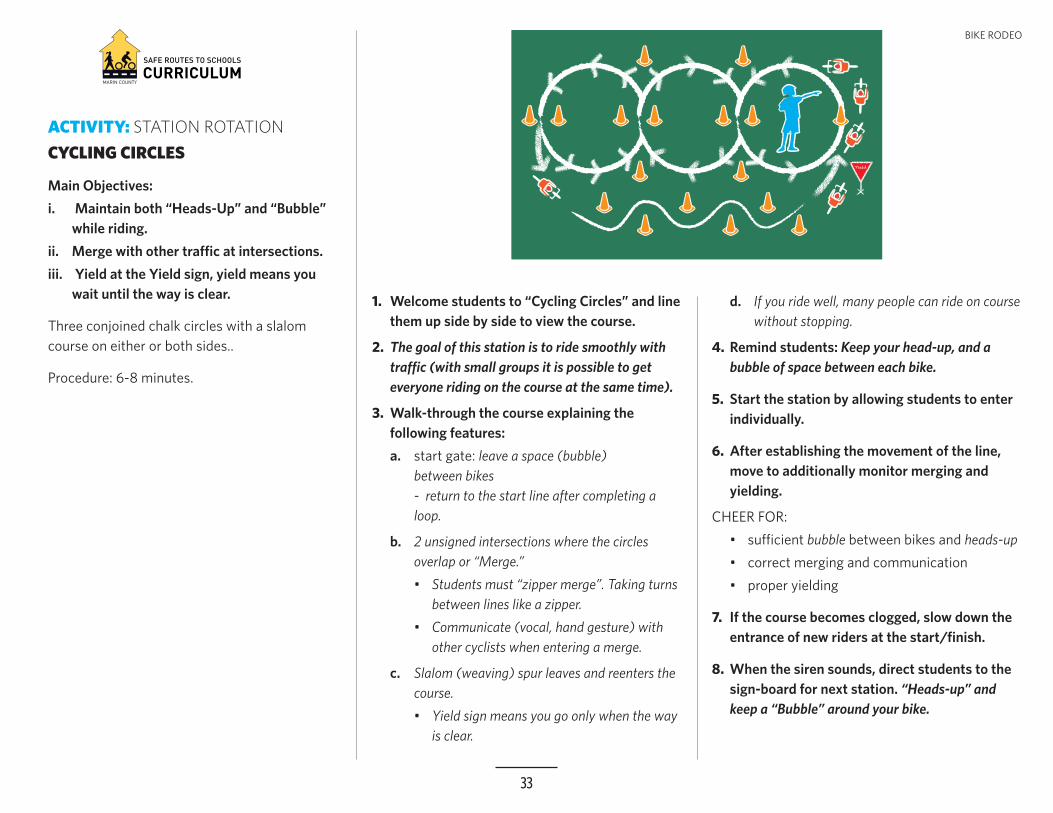
ACTIVITY: STATION ROTATIONCYCLING CIRCLES
Main Objectives: i. Maintain both “Heads-Up” and “Bubble”
while riding.ii. Merge with other tra�c at intersections.iii. Yield at the Yield sign, yield means you
wait until the way is clear.
Three conjoined chalk circles with a slalom course on either or both sides..
Procedure: 6-8 minutes.
1. Welcome students to “Cycling Circles” and line them up side by side to view the course.
2. The goal of this station is to ride smoothly with tra�c (with small groups it is possible to get everyone riding on the course at the same time).
3. Walk-through the course explaining the following features:a. start gate: leave a space (bubble)
between bikes - return to the start line after completing a loop.
b. 2 unsigned intersections where the circles overlap or “Merge.” • Students must “zipper merge”. Taking turns
between lines like a zipper.• Communicate (vocal, hand gesture) with
other cyclists when entering a merge.
c. Slalom (weaving) spur leaves and reenters the course.• Yield sign means you go only when the way
is clear.
d. If you ride well, many people can ride on course without stopping.
4. Remind students: Keep your head-up, and a bubble of space between each bike.
5. Start the station by allowing students to enter individually.
6. After establishing the movement of the line, move to additionally monitor merging and yielding.
CHEER FOR:• su�cient bubble between bikes and heads-up• correct merging and communication• proper yielding
7. If the course becomes clogged, slow down the entrance of new riders at the start/finish.
8. When the siren sounds, direct students to the sign-board for next station. “Heads-up” and keep a “Bubble” around your bike.
BIKE RODEO
34
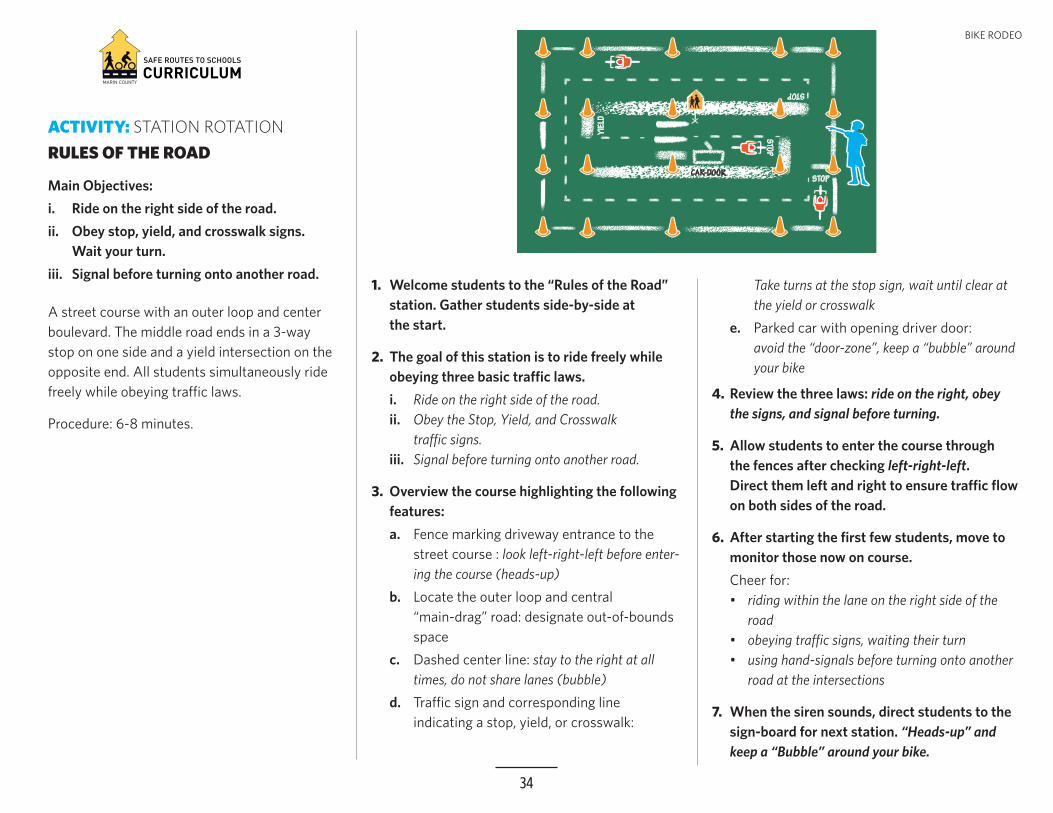
ACTIVITY: STATION ROTATIONRULES OF THE ROAD
Main Objectives: i. Ride on the right side of the road.ii. Obey stop, yield, and crosswalk signs.
Wait your turn.iii. Signal before turning onto another road.
A street course with an outer loop and center boulevard. The middle road ends in a 3-way stop on one side and a yield intersection on the opposite end. All students simultaneously ride freely while obeying tra�c laws.
Procedure: 6-8 minutes.
1. Welcome students to the “Rules of the Road” station. Gather students side-by-side at the start.
2. The goal of this station is to ride freely while obeying three basic tra�c laws.i. Ride on the right side of the road.ii. Obey the Stop, Yield, and Crosswalk
tra�c signs.iii. Signal before turning onto another road.
3. Overview the course highlighting the following features:a. Fence marking driveway entrance to the
street course : look left-right-left before enter-ing the course (heads-up)
b. Locate the outer loop and central “main-drag” road: designate out-of-bounds space
c. Dashed center line: stay to the right at all times, do not share lanes (bubble)
d. Tra�c sign and corresponding line indicating a stop, yield, or crosswalk:
Take turns at the stop sign, wait until clear at the yield or crosswalk
e. Parked car with opening driver door: avoid the “door-zone”, keep a “bubble” around your bike
4. Review the three laws: ride on the right, obey the signs, and signal before turning.
5. Allow students to enter the course through the fences after checking left-right-left. Direct them left and right to ensure tra�c flow on both sides of the road.
6. After starting the first few students, move to monitor those now on course.Cheer for: • riding within the lane on the right side of the
road• obeying tra�c signs, waiting their turn• using hand-signals before turning onto another
road at the intersections
7. When the siren sounds, direct students to the sign-board for next station. “Heads-up” and keep a “Bubble” around your bike.
CAR-DOOR
BIKE RODEO
35
1. Welcome to the “Mechanics LAB”. Gather students with bikes around the demonstration bicycle.
2. At this station we Learn About Bikes (LAB). The topic is removing a wheel with “quick-release.”
3. Why would you remove a wheel from a bicycle? To fix a flat, fit a bike on a rack or in a car, etc.
4. Point to the quick-release. Some wheels attach by quick-release (QR), while others use nuts/bolts.
• Look at your bike, does it use quick-release or nuts and botls?
5. Watch as I remove the front wheel:
• Disable the brakes, each type of brakes has a di¡erent release.
• Open the QR lever. Hold the opposite end, and turn “lefty-loosey.” -Count and remember the number of turns.
• After 5-7 turns, take the wheel straight out of the fork.
6. Like many things in life, it is harder to put things back together once they are apart.
Watch as I replace the front wheel:
• Replace the wheel into the fort “drop-outs”. Make sure it is all the way in.
• Holding the opposite end, turn the QR lever “righty-tighty.” - Count and turn the lever the same amount of rotations
• Close the QR lever, making sure it is “not easy”, adjust tension as needed. -even for most adults, close the lever as tightly as possible.
• Reconnect the brake. Spin the wheel. Squeeze the brake levers to check.
7. Show students the model quick-release levers. Demonstrate open and closing the lever.
Now you will open and close these model quick-release levers.
• Do not turn “lefty-loosey,” the model will fall apart into pieces.
• Practicing opening and closing the lever. “Quick, not easy!”
• If the lever is too tight or loose, raise your hand.
• After a minute, ask students to return the models to the bag.
8. When the siren sounds, direct students to the sign-board for next station. “Heads-up” and keep a “Bubble” around your bike.
ACTIVITY: +/- MECHANICS L.A.B (LEARN ABOUT BIKES)Main Objectives: i. Identify quick-release levers.ii. Explain why and how to remove a wheel.iii. Open and close a quick-release lever
(quick-release, not easy-release).With groups over 50, create a 5th station in order to keep student numbers low at all stations.
Procedure: 6-8 minutes.
BIKE RODEO
36
ACTIVITY: CONCLUSIONMain Objectives: Conclude the bike rodeo on a high note, organize returning bikes and helmets.
Highlight key points of the rodeo and benefits of biking. Instruct students how to leave the borrowed materials and look to their teachers for further instructions.
Procedure: 5 minutes.
1. Gather all groups back at the original meeting point.
2. Ask the students to give a thumbs-up if they accomplished the goal at each station.
• Red Light Green Light: Correctly start and stop.
• Obstacle Course: Line-up the front wheel when riding over an obstacle.
• Cycling Circles: Ride with “heads-up” and a “bubble” around their bike.
• Rules of the Road: Obey basic tra�c laws.
3. Review the benefits of biking:
I think bikes are great because you get exercise, keep the air clean, and avoid tra�c jams. Best of all, they can be fun to ride. Did you have fun today at the Safe Routes to Schools Bike Rodeo?
Consider leading a group cheer.
Examples:
• Three cheers for bikes: I say “hip-hip”, you say “hooray!”
• I say “bike” you say “ride!” Vary the volume, speed and timbre.
4. Thank you and please listen for instructions.
• We are done riding the bikes, please dismount and walk your bike.
• If you borrowed a bike or helmet please return them to the rodeo trailer.
• If you have your own bike and helmet, please walk with your teacher to the bike racks.
5. Distribute copies of the “Letter Home” to each class through the PE teacher or o�ce assistant.
BIKE RODEO