Embed Size (px)
Citation preview
This document will cover the best practices for managing your Product & Customer data in Shopify so that it can be sync’d into RepSpark. Shopify will be the “source of truth” for all of your product and customer data, so all data manipulation will occur in Shopify before attempting to sync that data into RepSpark. To sync your data to RepSpark, we require the use of tags.
Updating Products in Shopify with RepSpark Tags
• By default, ALL products in your Shopify system will be sync’d to your RepSpark site if you do not add Tags to let us know which ones to add and which ones to ignore.
• You may not want every item, or entire groups of items on your B2B site for wholesale purposes, so we have a tagging system that will allow you to select which products to omit from the sync
• There are 3 Tags related to products. See the chart below for format and purpose of each tag.
• Be sure to press SAVE after adding product tags.
This image shows a properly configured Product ready to sync into RepSpark
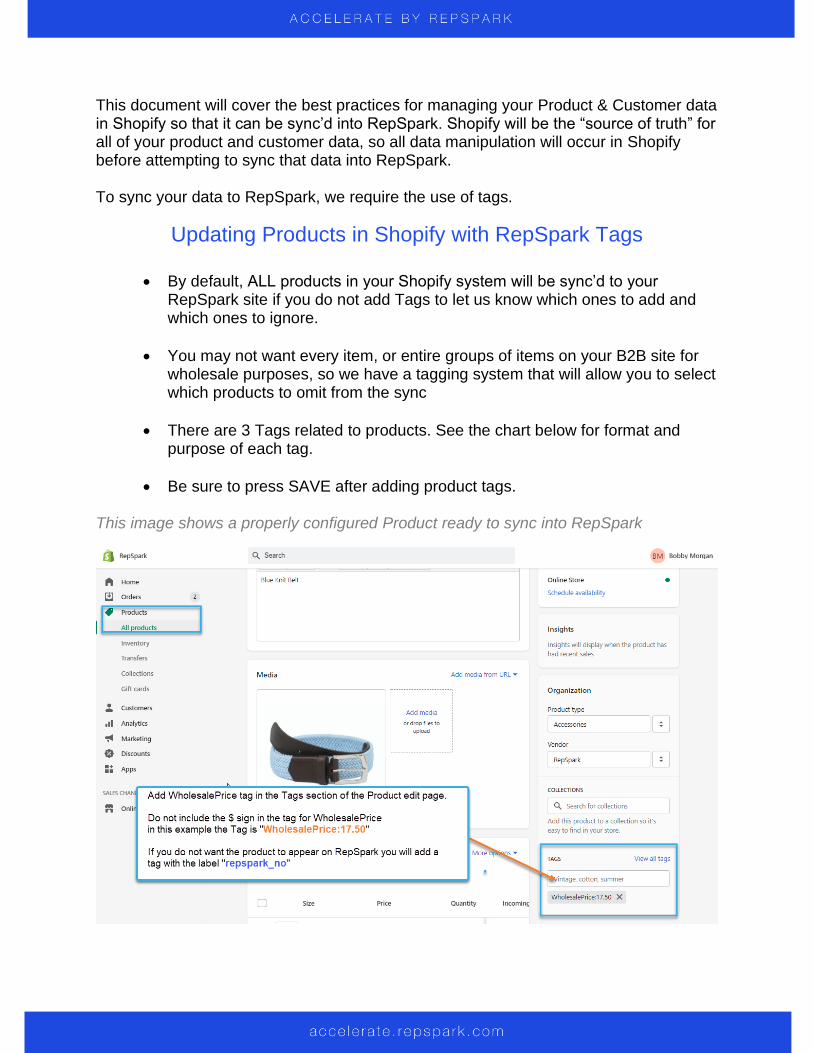
Product Tags Type Format
Tag 1 Omit Product from Sync Input
Tag 2 Wholesale Price Input:Value
Tag 3 Style Number (Optional) Input:Value
1. Tag 1 – Omit Product from Sync
• Tag is simply repspark_no
• Make sure to include the underscore
• This denotes that a product is to be ignored from product sync
• Use this tag to hide items not meant for B2B
2. Tag 2 – Wholesale Price
• This tag has 2 parts, each separated by a colon:
• Format is Input:Value
• A proper example would be WholesalePrice:12
• Input is WholesalePrice
• Value is 12
• Do not include any special characters, like a “$”
3. Tag 3 – Style Number (optional)
• This tag has 2 parts, each separated by a colon:
• Format is Input:Value
• A proper example would be StyleNumber:BW1400
• Input is StyleNumber
• Value is BW1400
• This optional tag can be used to show your actual Product ID number
for each item. If this tag is not used the RepSpark will default to import
the internal product code from Shopify.
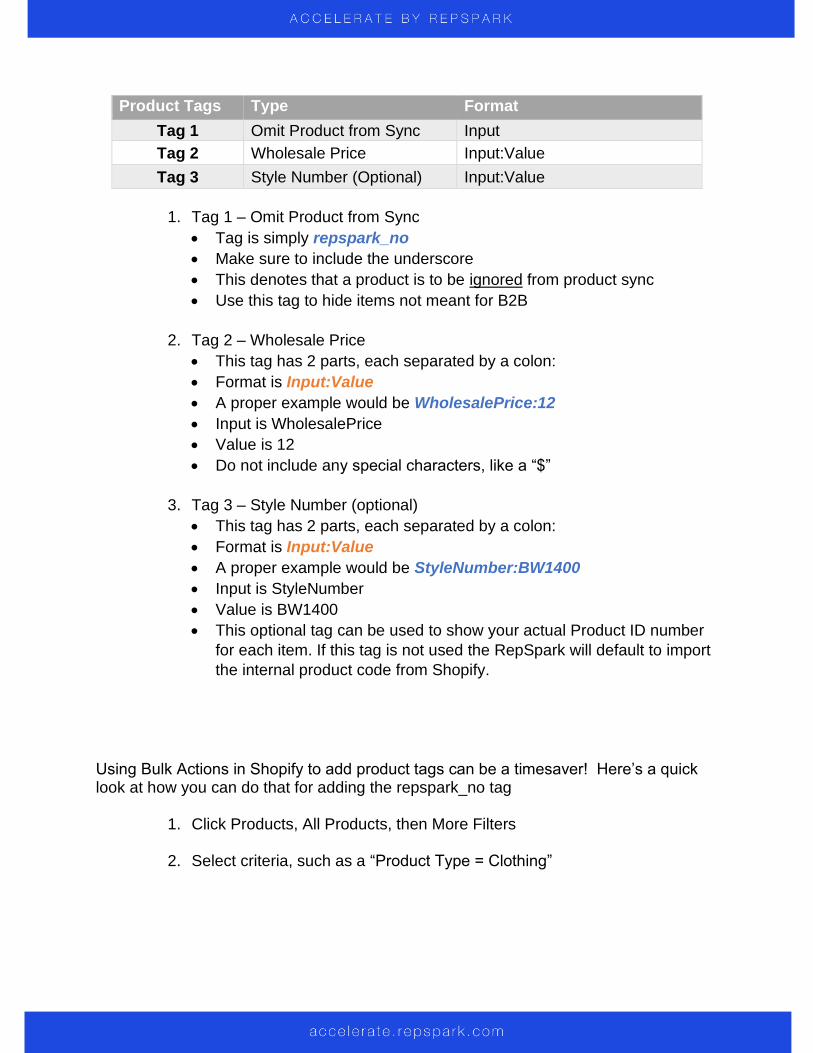
Using Bulk Actions in Shopify to add product tags can be a timesaver! Here’s a quick look at how you can do that for adding the repspark_no tag
1. Click Products, All Products, then More Filters
2. Select criteria, such as a “Product Type = Clothing”
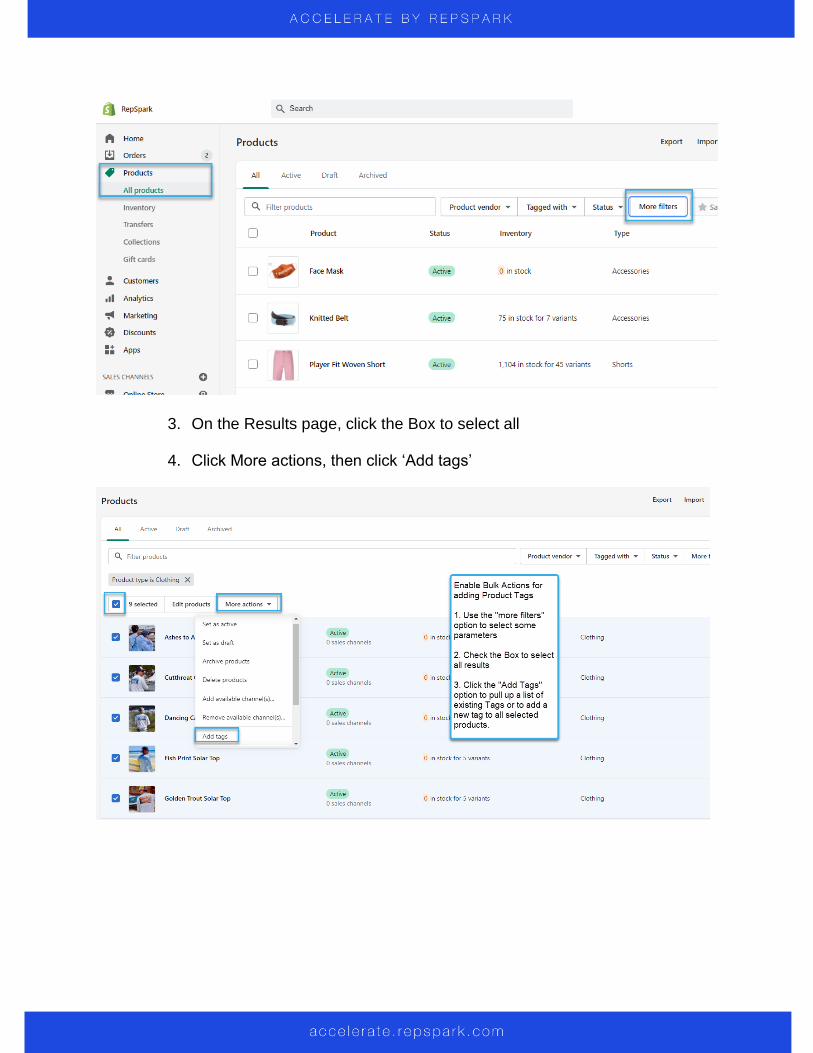
3. On the Results page, click the Box to select all
4. Click More actions, then click ‘Add tags’
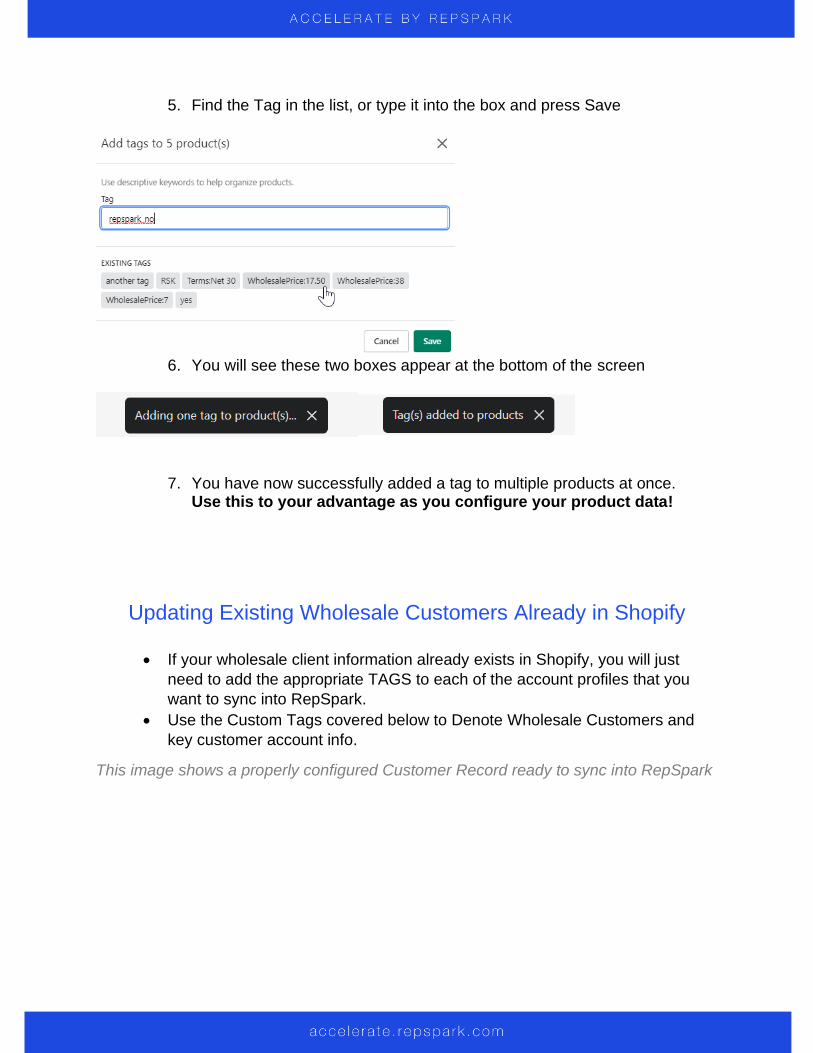
5. Find the Tag in the list, or type it into the box and press Save
6. You will see these two boxes appear at the bottom of the screen
7. You have now successfully added a tag to multiple products at once. Use this to your advantage as you configure your product data!
Updating Existing Wholesale Customers Already in Shopify
• If your wholesale client information already exists in Shopify, you will just
need to add the appropriate TAGS to each of the account profiles that you
want to sync into RepSpark.
• Use the Custom Tags covered below to Denote Wholesale Customers and
key customer account info.
This image shows a properly configured Customer Record ready to sync into RepSpark
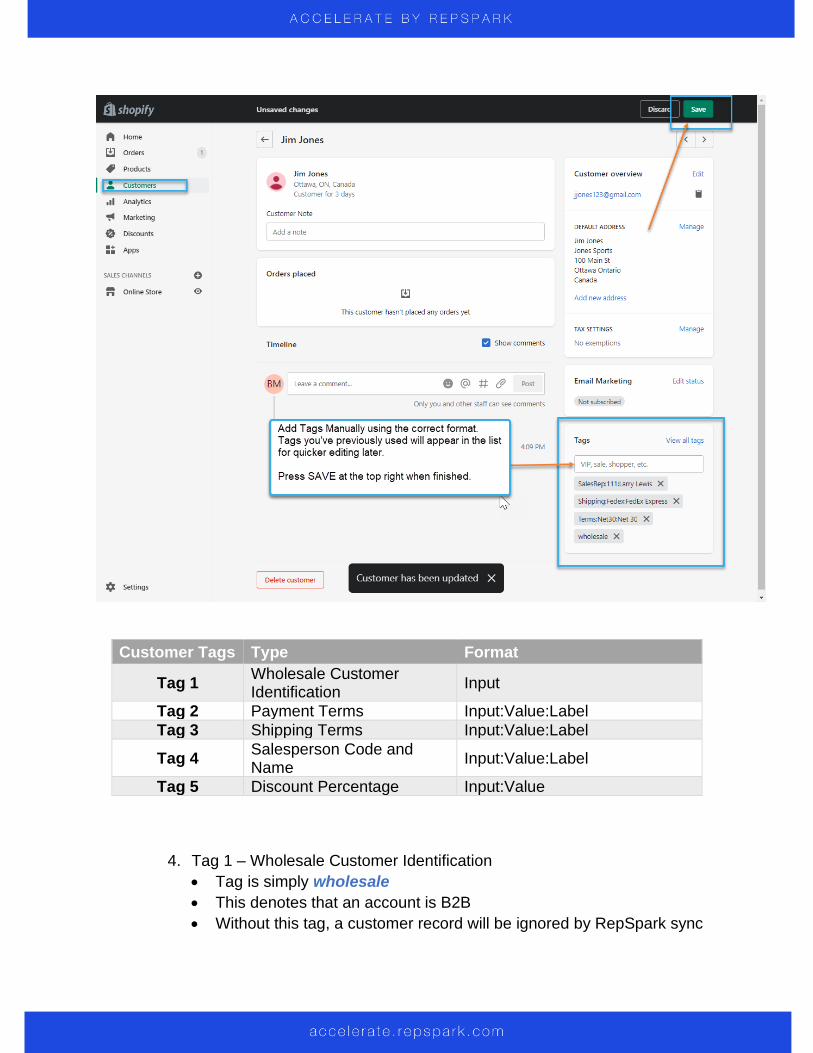
Customer Tags Type Format
Tag 1 Wholesale Customer Identification
Input
Tag 2 Payment Terms Input:Value:Label
Tag 3 Shipping Terms Input:Value:Label
Tag 4 Salesperson Code and Name
Input:Value:Label
Tag 5 Discount Percentage Input:Value
4. Tag 1 – Wholesale Customer Identification
• Tag is simply wholesale
• This denotes that an account is B2B
• Without this tag, a customer record will be ignored by RepSpark sync
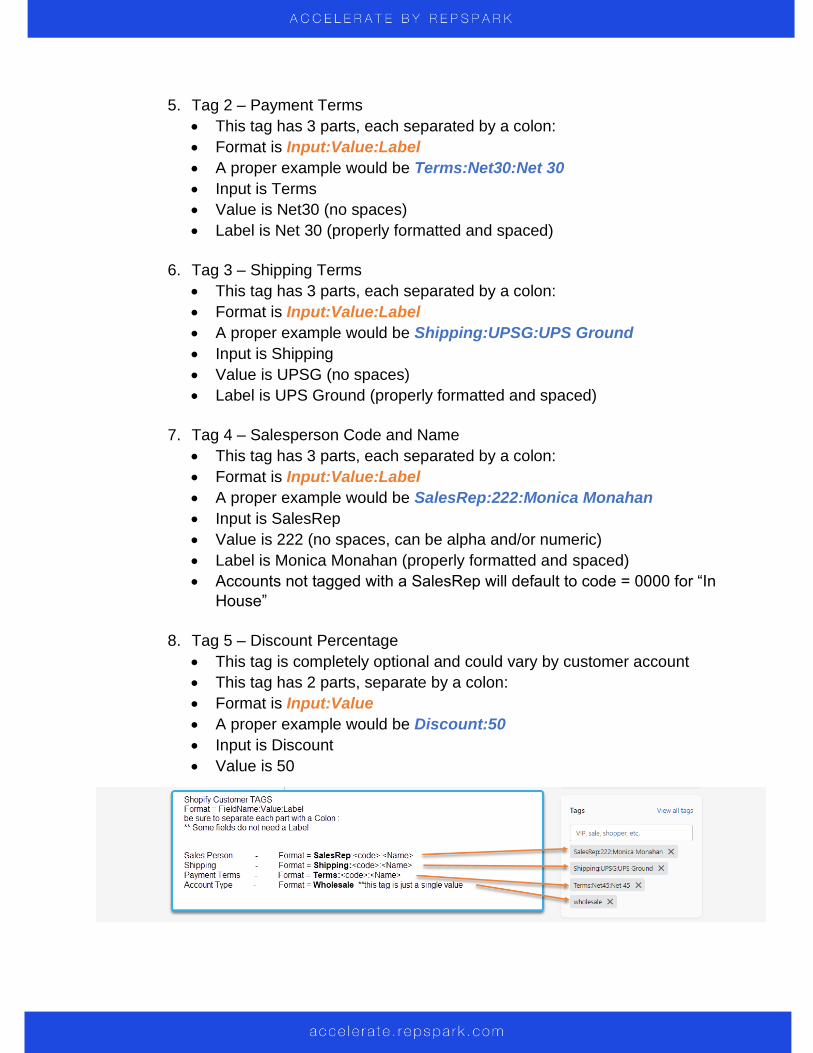
5. Tag 2 – Payment Terms
• This tag has 3 parts, each separated by a colon:
• Format is Input:Value:Label
• A proper example would be Terms:Net30:Net 30
• Input is Terms
• Value is Net30 (no spaces)
• Label is Net 30 (properly formatted and spaced)
6. Tag 3 – Shipping Terms
• This tag has 3 parts, each separated by a colon:
• Format is Input:Value:Label
• A proper example would be Shipping:UPSG:UPS Ground
• Input is Shipping
• Value is UPSG (no spaces)
• Label is UPS Ground (properly formatted and spaced)
7. Tag 4 – Salesperson Code and Name
• This tag has 3 parts, each separated by a colon:
• Format is Input:Value:Label
• A proper example would be SalesRep:222:Monica Monahan
• Input is SalesRep
• Value is 222 (no spaces, can be alpha and/or numeric)
• Label is Monica Monahan (properly formatted and spaced)
• Accounts not tagged with a SalesRep will default to code = 0000 for “In
House”
8. Tag 5 – Discount Percentage
• This tag is completely optional and could vary by customer account
• This tag has 2 parts, separate by a colon:
• Format is Input:Value
• A proper example would be Discount:50
• Input is Discount
• Value is 50
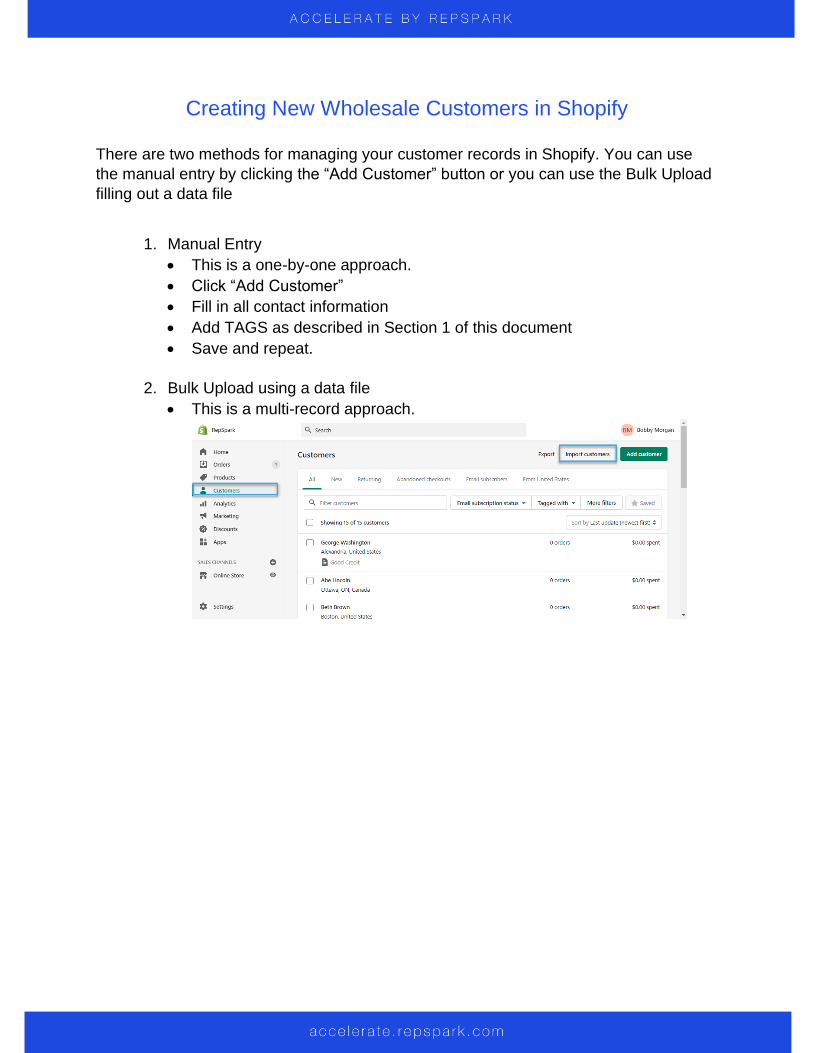
Creating New Wholesale Customers in Shopify
There are two methods for managing your customer records in Shopify. You can use
the manual entry by clicking the “Add Customer” button or you can use the Bulk Upload
filling out a data file
1. Manual Entry
• This is a one-by-one approach.
• Click “Add Customer”
• Fill in all contact information
• Add TAGS as described in Section 1 of this document
• Save and repeat.
2. Bulk Upload using a data file
• This is a multi-record approach.
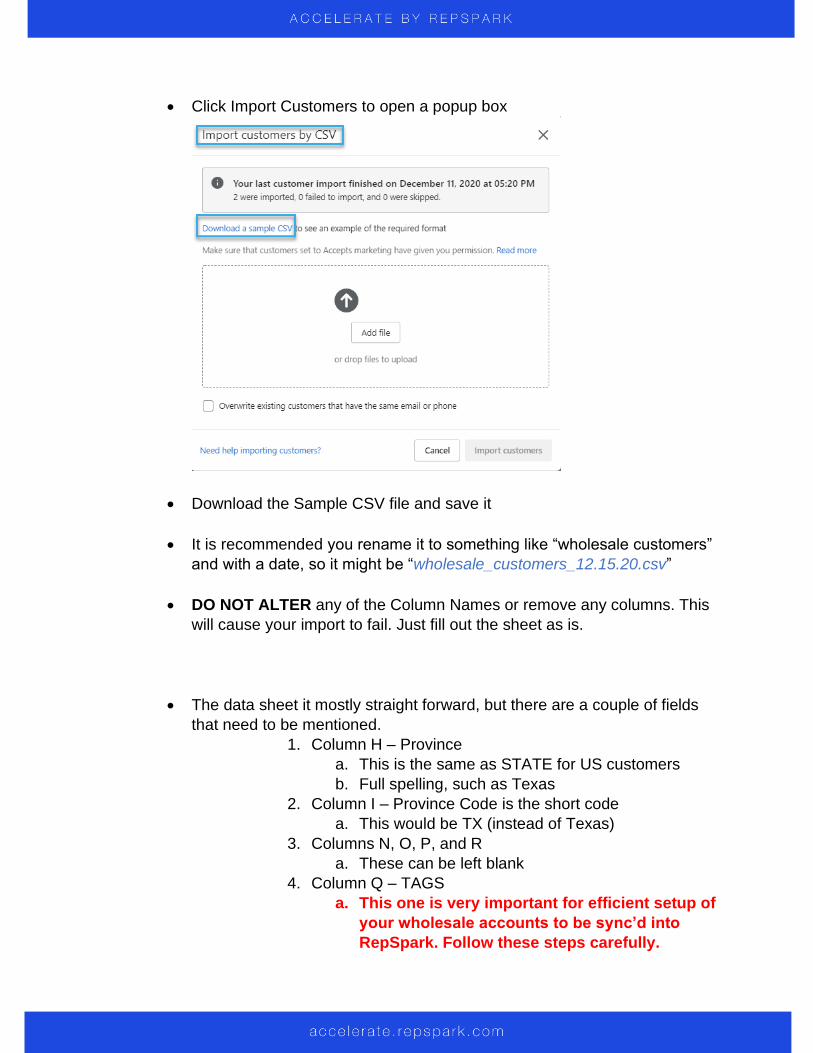
• Click Import Customers to open a popup box
• Download the Sample CSV file and save it
• It is recommended you rename it to something like “wholesale customers”
and with a date, so it might be “wholesale_customers_12.15.20.csv”
• DO NOT ALTER any of the Column Names or remove any columns. This
will cause your import to fail. Just fill out the sheet as is.
• The data sheet it mostly straight forward, but there are a couple of fields
that need to be mentioned.
1. Column H – Province
a. This is the same as STATE for US customers
b. Full spelling, such as Texas
2. Column I – Province Code is the short code
a. This would be TX (instead of Texas)
3. Columns N, O, P, and R
a. These can be left blank
4. Column Q – TAGS
a. This one is very important for efficient setup of
your wholesale accounts to be sync’d into
RepSpark. Follow these steps carefully.
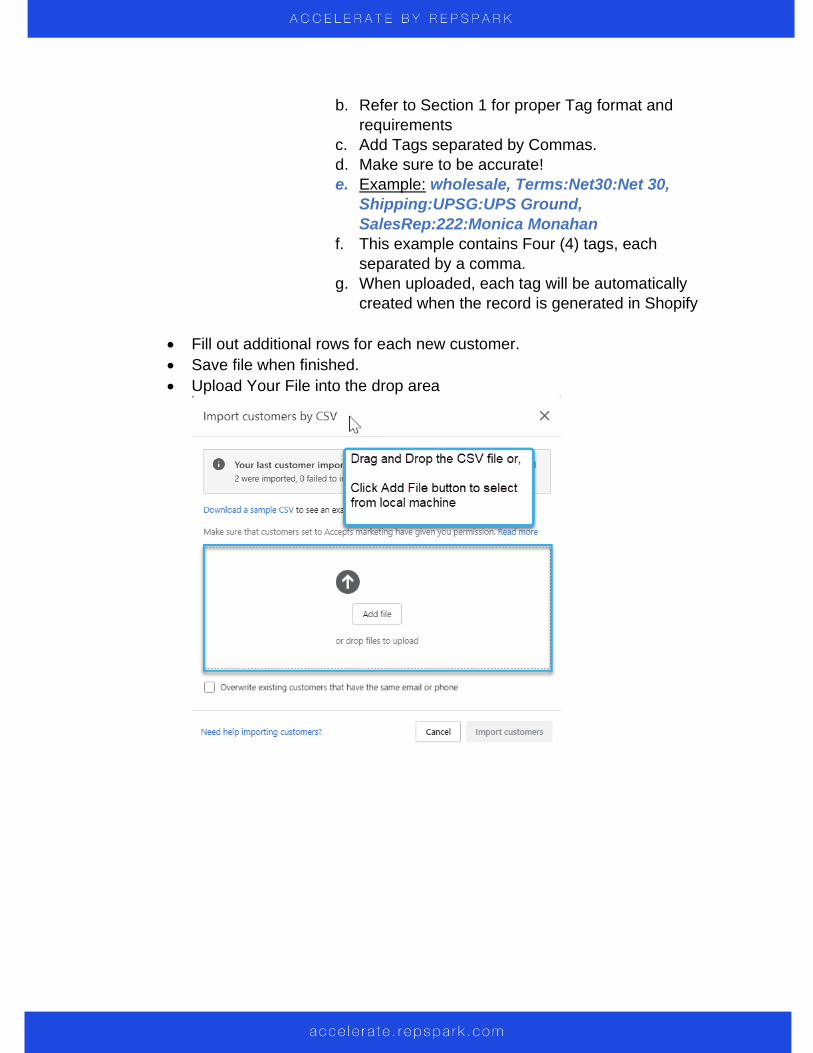
b. Refer to Section 1 for proper Tag format and
requirements
c. Add Tags separated by Commas.
d. Make sure to be accurate!
e. Example: wholesale, Terms:Net30:Net 30,
Shipping:UPSG:UPS Ground,
SalesRep:222:Monica Monahan
f. This example contains Four (4) tags, each
separated by a comma.
g. When uploaded, each tag will be automatically
created when the record is generated in Shopify
• Fill out additional rows for each new customer.
• Save file when finished.
• Upload Your File into the drop area
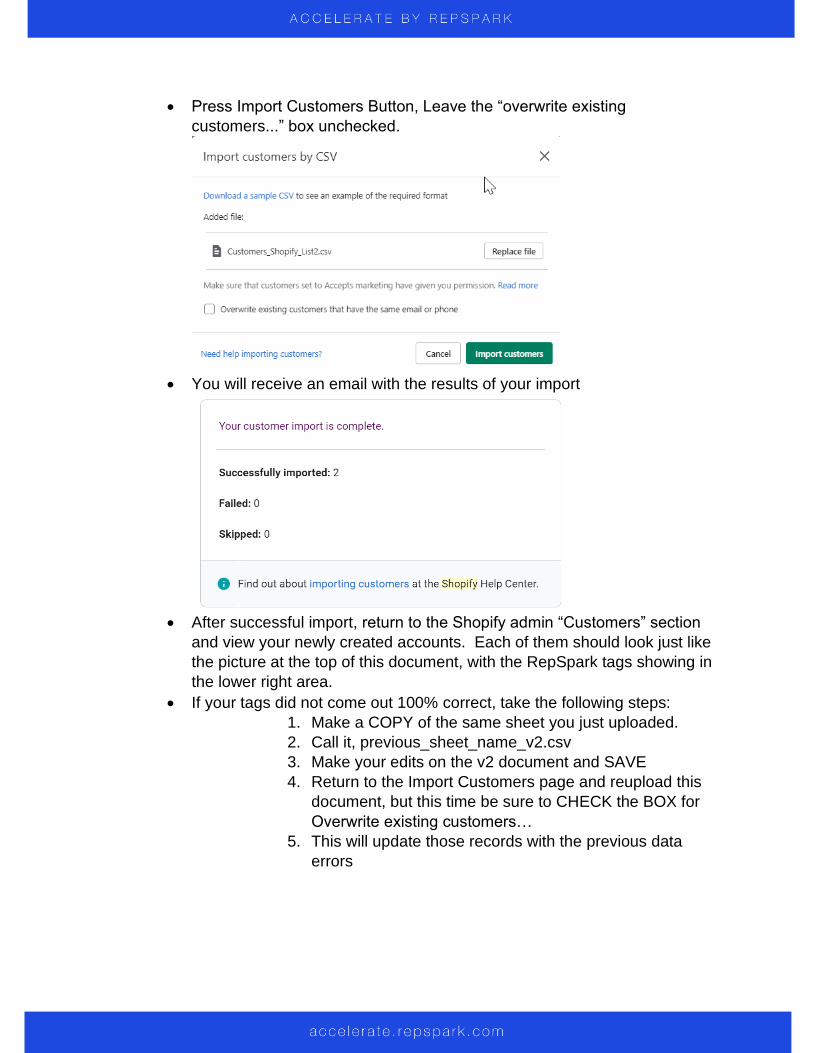
• Press Import Customers Button, Leave the “overwrite existing
customers...” box unchecked.
• You will receive an email with the results of your import
• After successful import, return to the Shopify admin “Customers” section
and view your newly created accounts. Each of them should look just like
the picture at the top of this document, with the RepSpark tags showing in
the lower right area.
• If your tags did not come out 100% correct, take the following steps:
1. Make a COPY of the same sheet you just uploaded.
2. Call it, previous_sheet_name_v2.csv
3. Make your edits on the v2 document and SAVE
4. Return to the Import Customers page and reupload this
document, but this time be sure to CHECK the BOX for
Overwrite existing customers…
5. This will update those records with the previous data
errors
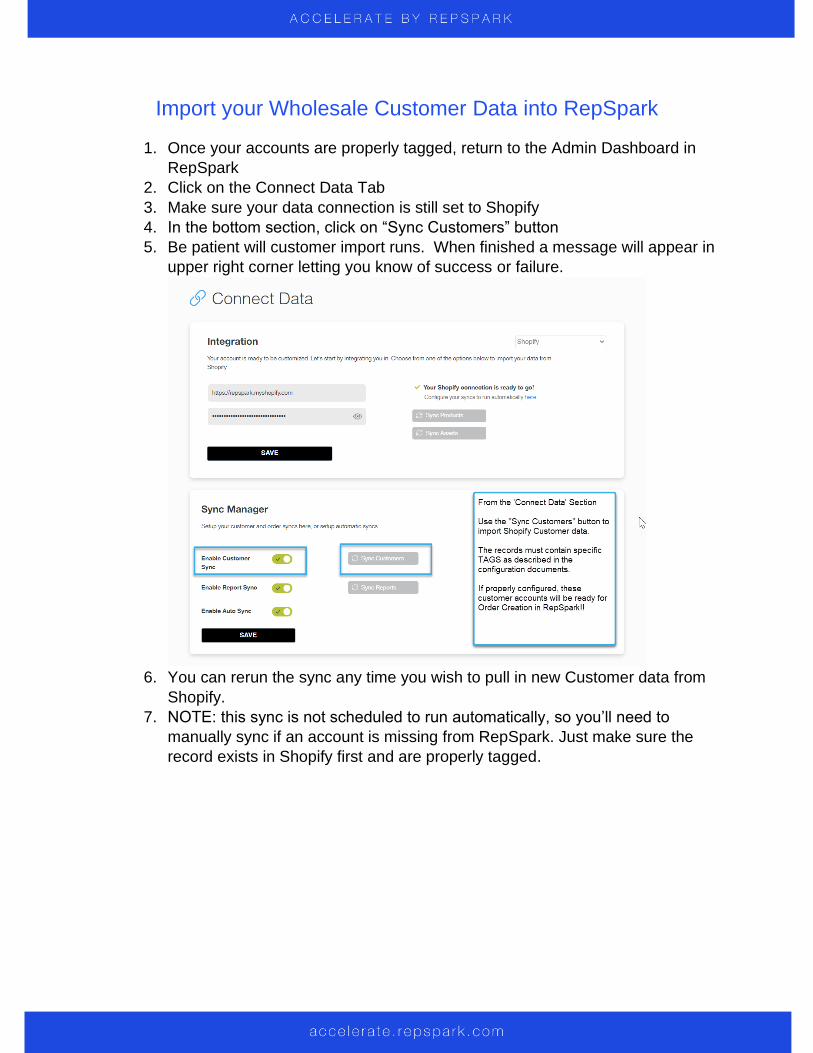
Import your Wholesale Customer Data into RepSpark
1. Once your accounts are properly tagged, return to the Admin Dashboard in
RepSpark
2. Click on the Connect Data Tab
3. Make sure your data connection is still set to Shopify
4. In the bottom section, click on “Sync Customers” button
5. Be patient will customer import runs. When finished a message will appear in
upper right corner letting you know of success or failure.
6. You can rerun the sync any time you wish to pull in new Customer data from
Shopify.
7. NOTE: this sync is not scheduled to run automatically, so you’ll need to
manually sync if an account is missing from RepSpark. Just make sure the
record exists in Shopify first and are properly tagged.