Embed Size (px)
Citation preview
AMRIT INDO CANADIAN ACADEMY
HOLIDAYS HOMEWORK ART & CRAFT
2018-19 VI
th
Let us Make an Apron
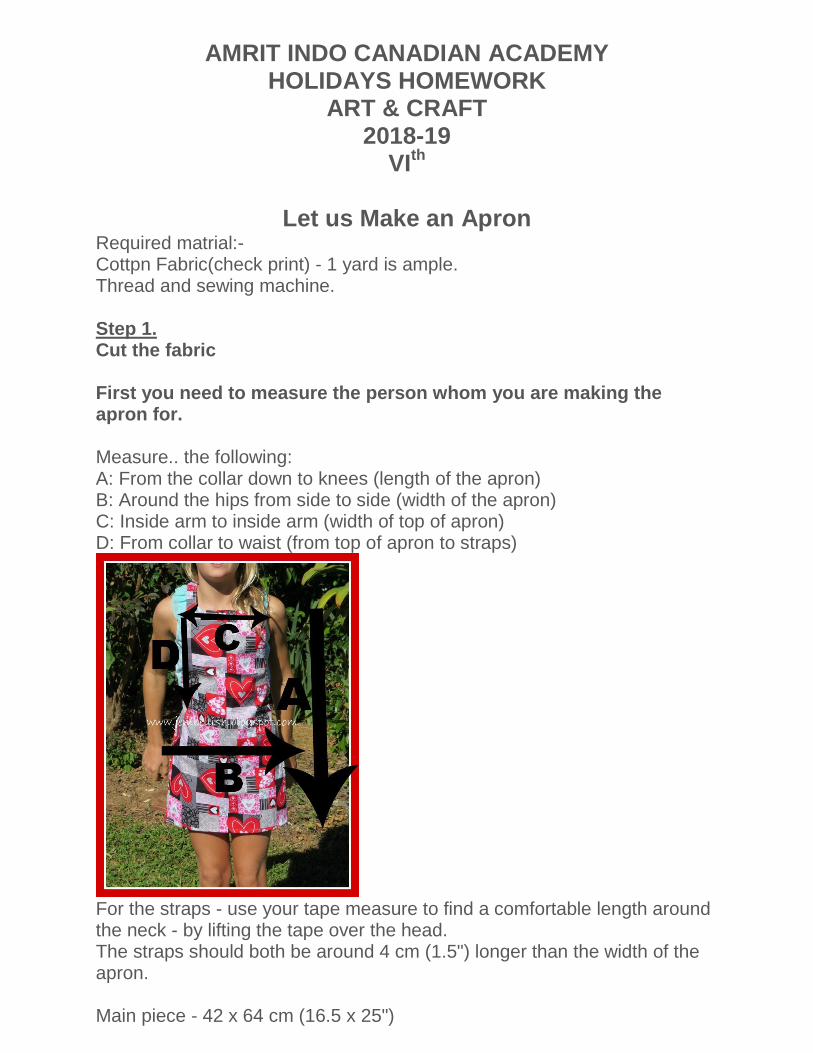
Required matrial:- Cottpn Fabric(check print) - 1 yard is ample. Thread and sewing machine. Step 1. Cut the fabric First you need to measure the person whom you are making the apron for. Measure.. the following: A: From the collar down to knees (length of the apron) B: Around the hips from side to side (width of the apron) C: Inside arm to inside arm (width of top of apron) D: From collar to waist (from top of apron to straps)
For the straps - use your tape measure to find a comfortable length around the neck - by lifting the tape over the head. The straps should both be around 4 cm (1.5") longer than the width of the apron. Main piece - 42 x 64 cm (16.5 x 25")
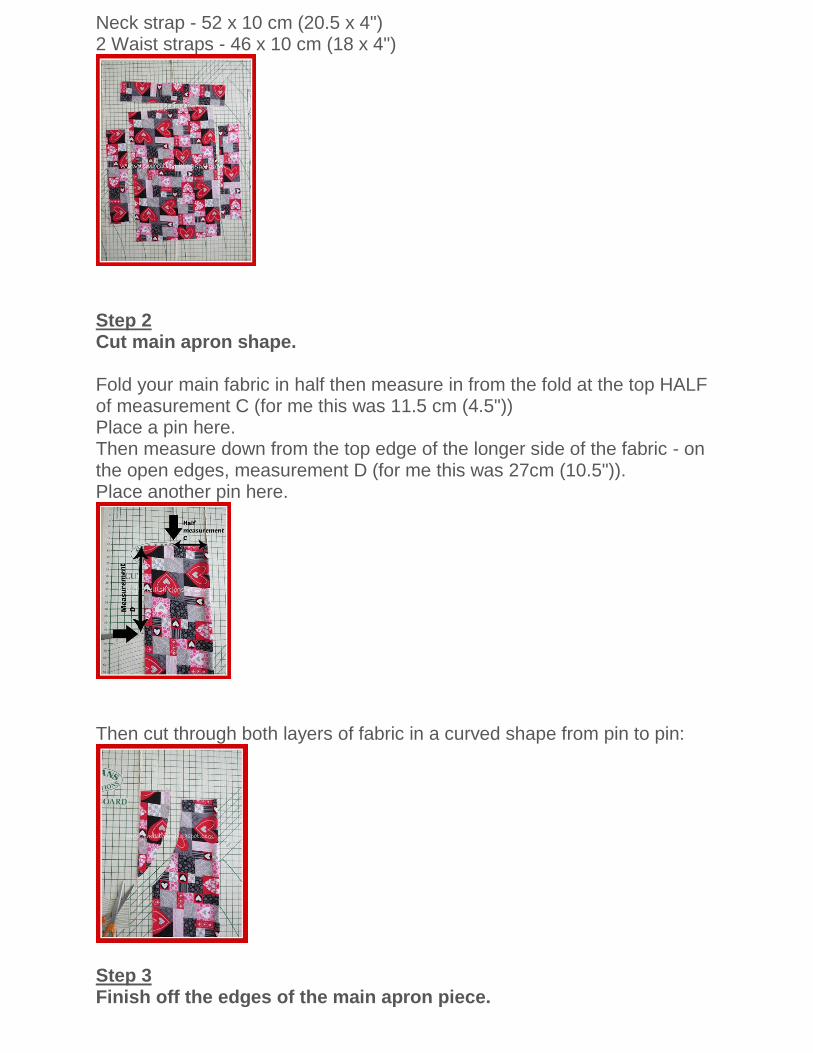
Neck strap - 52 x 10 cm (20.5 x 4") 2 Waist straps - 46 x 10 cm (18 x 4")
Step 2 Cut main apron shape. Fold your main fabric in half then measure in from the fold at the top HALF of measurement C (for me this was 11.5 cm (4.5")) Place a pin here. Then measure down from the top edge of the longer side of the fabric - on the open edges, measurement D (for me this was 27cm (10.5")). Place another pin here.
Then cut through both layers of fabric in a curved shape from pin to pin:
Step 3 Finish off the edges of the main apron piece.
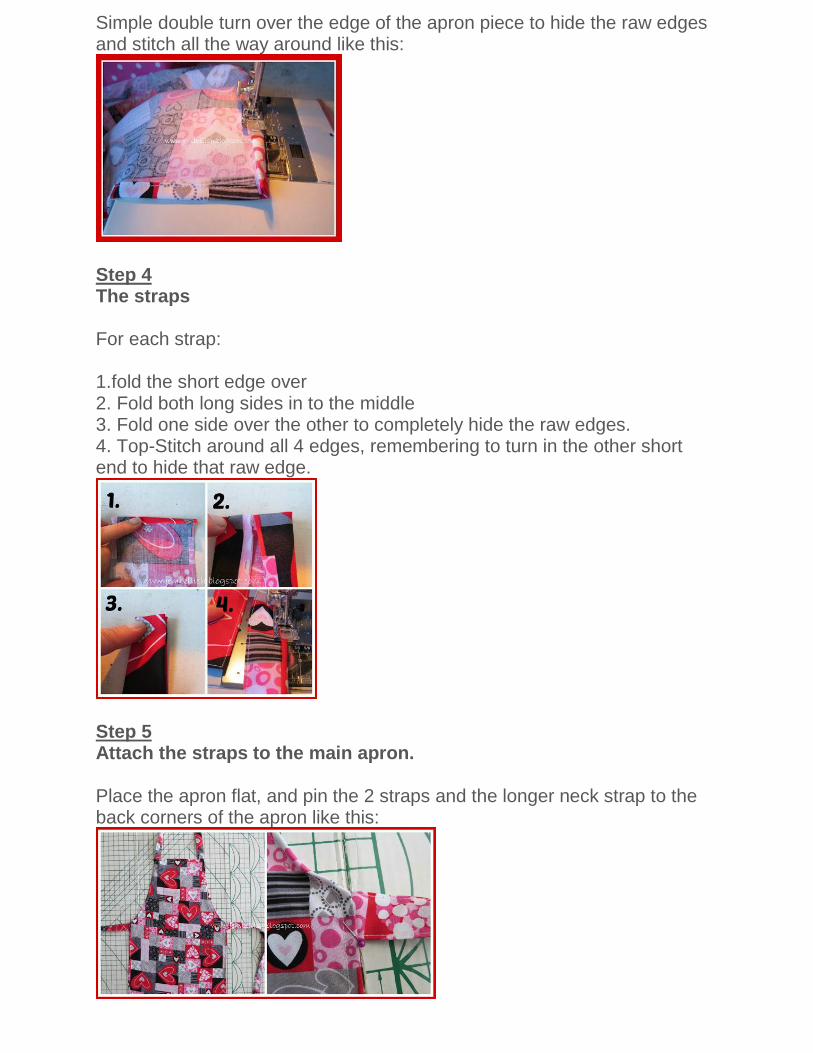
Simple double turn over the edge of the apron piece to hide the raw edges and stitch all the way around like this:
Step 4 The straps For each strap: 1.fold the short edge over 2. Fold both long sides in to the middle 3. Fold one side over the other to completely hide the raw edges. 4. Top-Stitch around all 4 edges, remembering to turn in the other short end to hide that raw edge.
Step 5 Attach the straps to the main apron. Place the apron flat, and pin the 2 straps and the longer neck strap to the back corners of the apron like this:
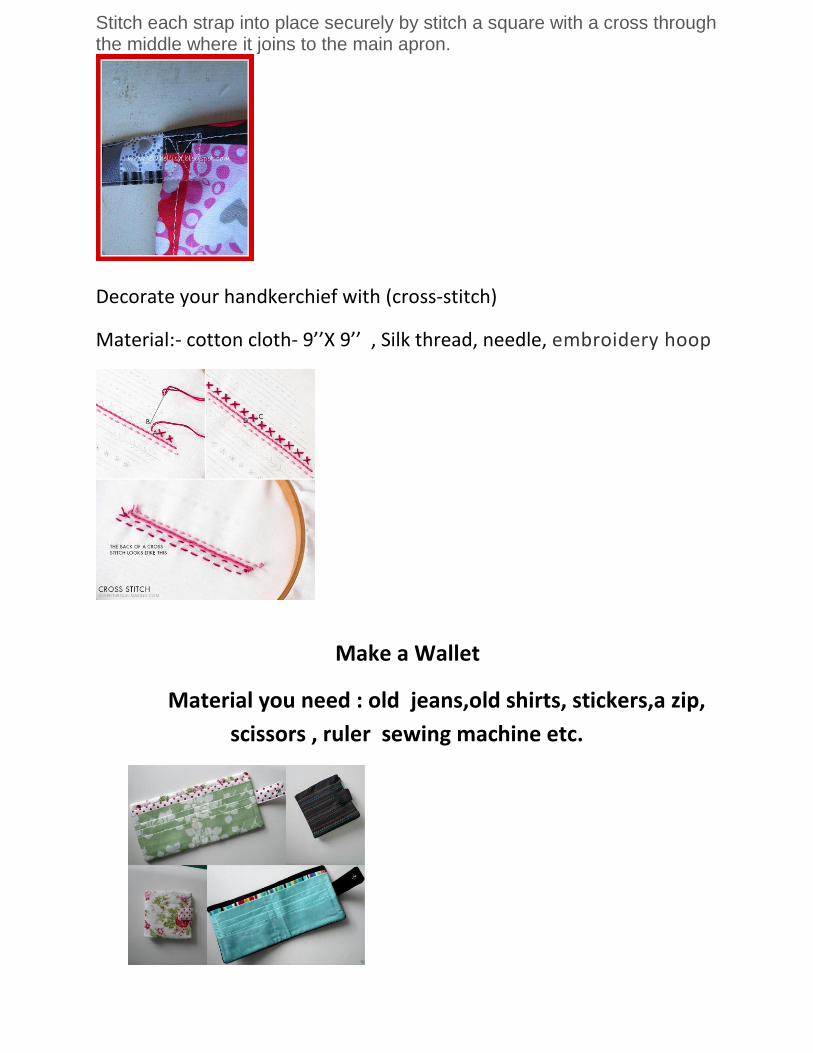
Stitch each strap into place securely by stitch a square with a cross through the middle where it joins to the main apron.
Decorate your handkerchief with (cross-stitch)
Material:- cotton cloth- 9’’X 9’’ , Silk thread, needle, embroidery hoop
Make a Wallet
Material you need : old jeans,old shirts, stickers,a zip,
scissors , ruler sewing machine etc.
AMRIT INDO CANADIAN ACADEMY HOLIDAYS HOMEWORK
ART & CRAFT 2018-19
VIIth
Glass Painting 1. Prepare the Glass. Clean the glass carefully. Use white spirit or
nail polish remover would do the job.
2. Choose the Paints. Glass colors are available to paint on glass. They come as water-based and solvent-based. You can use either one (try experimenting). Acrylic and oil colors can also be used but the oil paint takes a longer time to dry (glass colors are really fun to work with and gives a translucent appearance, so don't miss it). Usually Glass Liners are used to draw the outlines. Be sure to use glass liners if you are going to paint with glass colors.
3. Trace Design (Drawing Outlines). If you're confident enough, you can go ahead and draw freehand. If you've got a printed design, place the design under the glass (so that the design is visible through the glass), secure it with a tape or clip and trace it.
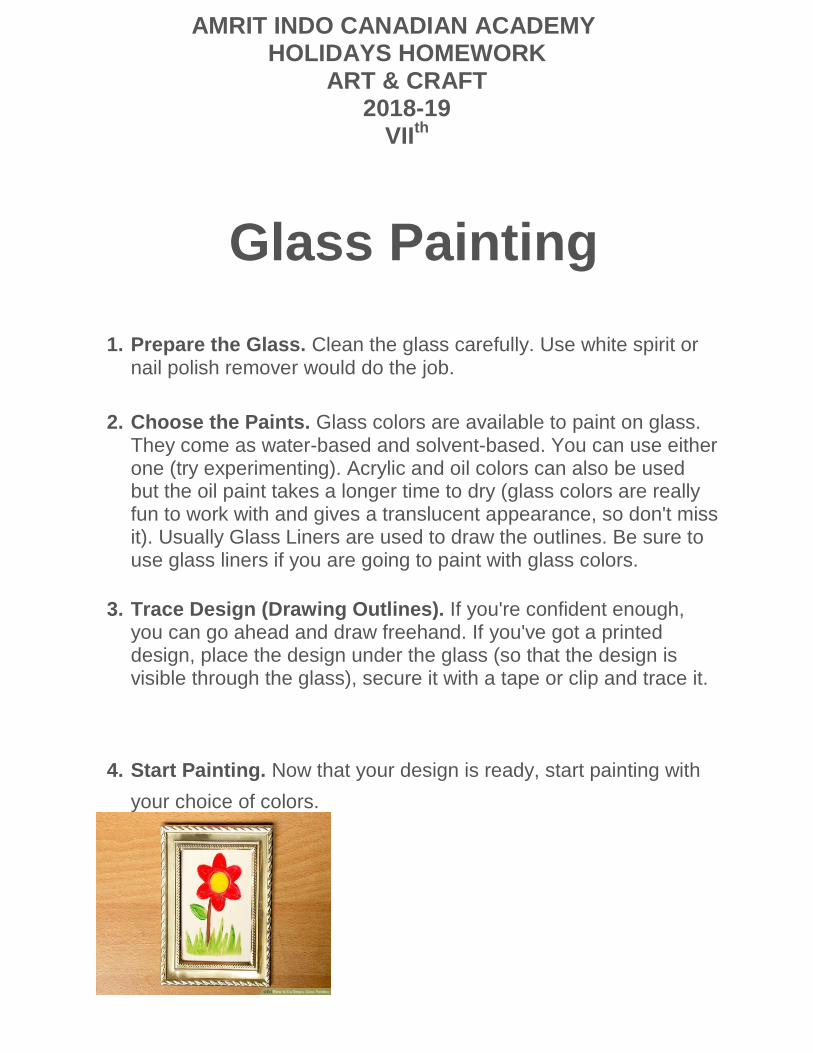
4. Start Painting. Now that your design is ready, start painting with
your choice of colors.

5. Frame. Your artwork is all set to be framed and showcased to earn you all the credits.
Activity : How to sew button on a shirt
Marerial you need:A small sized cotton cloth, a needle , Buttons Two
holes buttuns and four holes buttons, different coloured threads(use
red thread for white button ,yellow thread for blue button) etc.
Step1 . start with a double threaded needle .Bring the needle up
through the wrong side of fabric and one hole of the button .
2.Bring the needle back down through an opposite hole. Repeat six
times with the same two holes.move on to the next pair , forming an
equal sign.(X)
3. Tie a secure knot by passing the needle straight through the stitches
on the wrong side of fabric .Pull thread through but stop short to form
a loop . Insert the needle through the loop and oull tight.
Make a jute letter hanging
To make a jute letter hanging you will need : old jute shopping bag
Colored jute rope, Buttons ,Beads, Seashells etc.Glue and scissors
Method: 1.Take the jute Bag ,cut both side portion of the bag.
2.Take one piece of that and cut into two pieces (which is smaller in
height of the another piece because we put the letter into it )
3.Then paste the two pieces one below one into the long piece with the some
gap.
4. we take the other colour stripe of jute from the bag and paste that piece as a
border of the bag we pasted earlier .
5. Then paste some beads or something into the bag for decorative.
6. Put the coloured jute rope on the top of the holder .now jute letter is ready .

AMRIT INDO CANADIAN ACADEMY HOLIDAYS HOMEWORK
ART & CRAFT 2018-19
VIIIth
Make a beautiful bag at home
Material need for activity:
40 x 50 cm of rich red wool fabric for bag
40 x 50cm (16 x 20 in.) of heavyweight, woven interlining for bag
34 x 40cm (131⁄2 x 16 in.) of chocolate brown velvet for top and facing
35 x 12cm (14 x 43⁄4 in.) of rich red wool fabric for handles
35 x 12cm (14 x 43⁄4 in.) of medium-weight, sew-in interfacing for
handles
34 x 40cm (131⁄2 x 16 in.) of heavyweight, sew-in interfacing for
facing
40 x 50cm (16 x 20 in.) of chocolate brown satin lining
Strong sewing thread in deep red
Sewing threads to match rich red wool fabric, chocolate brown velvet
and lining fabrics
Magnetic clasp
Oversized button in corn yellow
Equipment
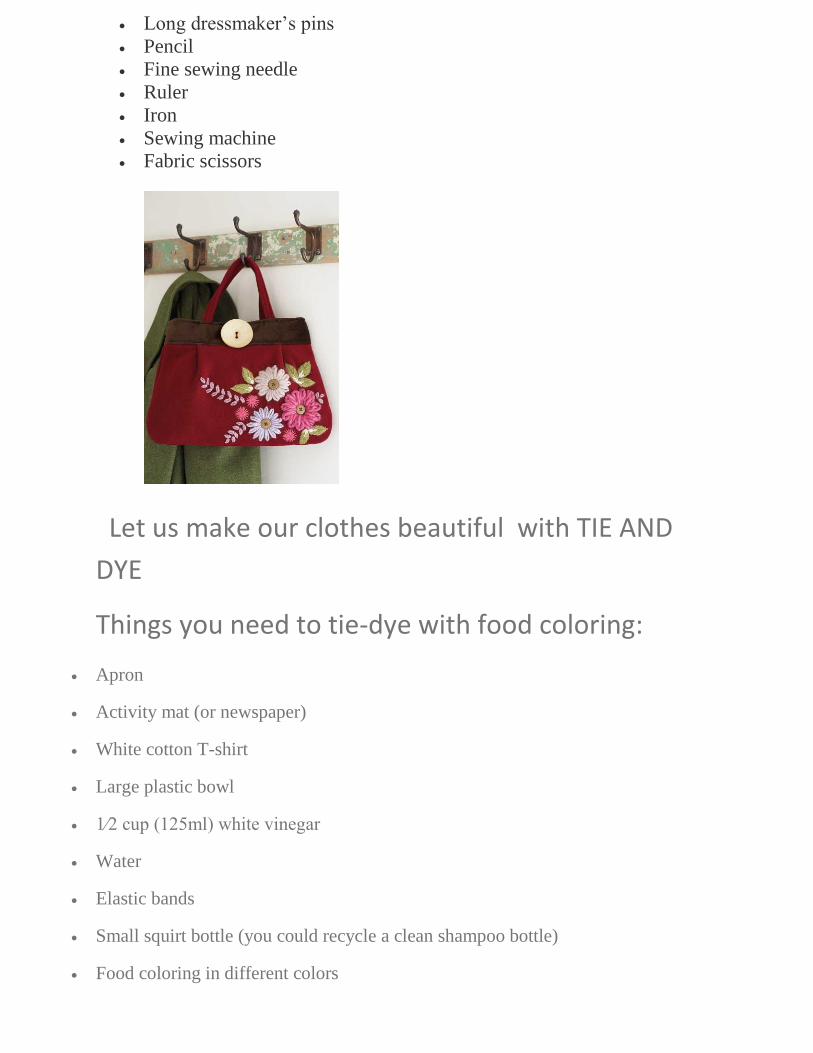
Long dressmaker’s pins
Pencil
Fine sewing needle
Ruler
Iron
Sewing machine
Fabric scissors
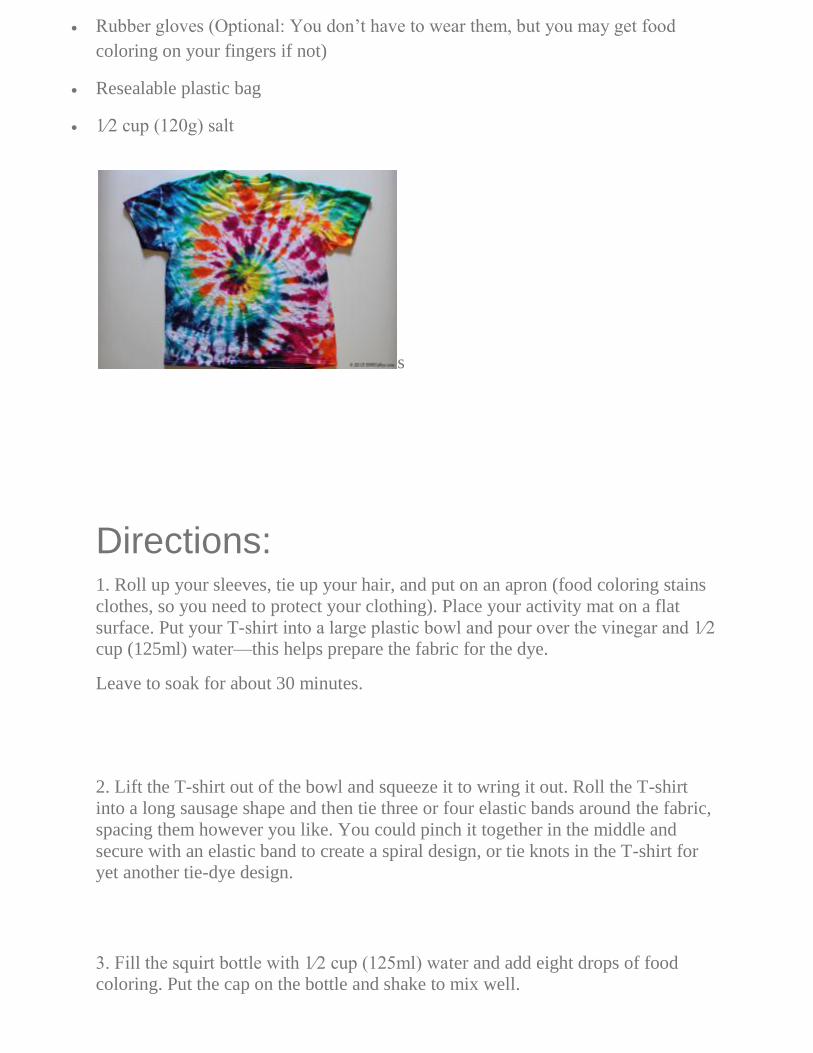
Let us make our clothes beautiful with TIE AND
DYE
Things you need to tie-dye with food coloring:
Apron
Activity mat (or newspaper)
White cotton T-shirt
Large plastic bowl
1⁄2 cup (125ml) white vinegar
Water
Elastic bands
Small squirt bottle (you could recycle a clean shampoo bottle)
Food coloring in different colors
Rubber gloves (Optional: You don’t have to wear them, but you may get food
coloring on your fingers if not)
Resealable plastic bag
1⁄2 cup (120g) salt
s
Directions: 1. Roll up your sleeves, tie up your hair, and put on an apron (food coloring stains
clothes, so you need to protect your clothing). Place your activity mat on a flat
surface. Put your T-shirt into a large plastic bowl and pour over the vinegar and 1⁄2
cup (125ml) water—this helps prepare the fabric for the dye.
Leave to soak for about 30 minutes.
2. Lift the T-shirt out of the bowl and squeeze it to wring it out. Roll the T-shirt
into a long sausage shape and then tie three or four elastic bands around the fabric,
spacing them however you like. You could pinch it together in the middle and
secure with an elastic band to create a spiral design, or tie knots in the T-shirt for
yet another tie-dye design.
3. Fill the squirt bottle with 1⁄2 cup (125ml) water and add eight drops of food
coloring. Put the cap on the bottle and shake to mix well.

4. Place your T-shirt on your activity mat and put on a pair of rubber gloves. Squirt
the food coloring mixture onto one area of the T-shirt, then turn it over and squirt
the rest of the color mixture onto the other side.
5. Repeat steps 3 and 4 with your other food coloring colors, mixing up the colors
in the squirt bottle and staining a different area of the T-shirt each time.
6. When your T-shirt is completely soaked in food coloring and water, place the T-
shirt roll into a reseal able plastic bag and leave to rest in the bag overnight.
7. The next day, take the T-shirt out of the bag and remove the elastic bands. Pour
the salt and 1⁄2 cup (125ml) of water into a large bowl. Plunge the T-shirt into the
salt water to set the dye and then wring the T-shirt out.
8. Rinse your dyed T-shirt in clean water several times until the water runs clear—
take care when you rinse, as splashes of water may stain you and your clothes as
the food coloring rinses off. Wring it out a final time and hang out to dry—
preferably in the sun.
MAKE A TABLE MAT
Material you need: A Cotton Fabric( 12X9”), Fabric colours, Paint brushes
(Round no.2,4,6) ,designer stencil, ribbon etc