Embed Size (px)
Citation preview

An introduction to presentationtools and instructional design
9:00 - 9:15 Introductions
9:15 - 9:45 Slide show
9:45 - 10:00 Discussion
10:00 - 10:30 Introduction to Powerpoint
10:30 - 10:45 Break
10:45 - 12:00 Design/build presentation
12:00 - 1:00 Lunch
1:00 - 3:30 Design/build presentation
3:30 - 4:00 Demonstrate presentations
1


Good instructional design is thepurposeful identification,preparation, delivery and evaluationof effective materials and strategiesfor teaching and learning. Inrelationship to presentation tools,this means:
• There is a clear instructional purpose for thepresentation's content and style
• The needs and capabilities of the targetedlearning audience have been taken intoaccount
• The content of the presentation fits thelearners' needs.
2


The purpose of designing a slidepresentation is to assist the instructor incommunicating ideas, facts or concepts.
The challenge is to package complexinformation in bite-sized, easy tounderstand pieces.
3


• Most importantly, the slide show must notdistract the audience from the message.
• Poor color choices, cluttered visuals, andlack of readability can all sabotage theinstructors message
• What is the learning gap?
• Who is the audience?
• Is this the best approach?
• Is closing the gap important to the audience?
• Are you the subject matter expert?
• What materials will be needed?
• How will the content be modularized?
4


• What are the steps to subject mastery?
• What learning styles will be accommodated?
• Will you need additional clipart, photos,audio, QuickTime or other multimedia?
• How durable is the presentation?
• Access for blind/low vision?
• Will you provide web access, handouts?
5

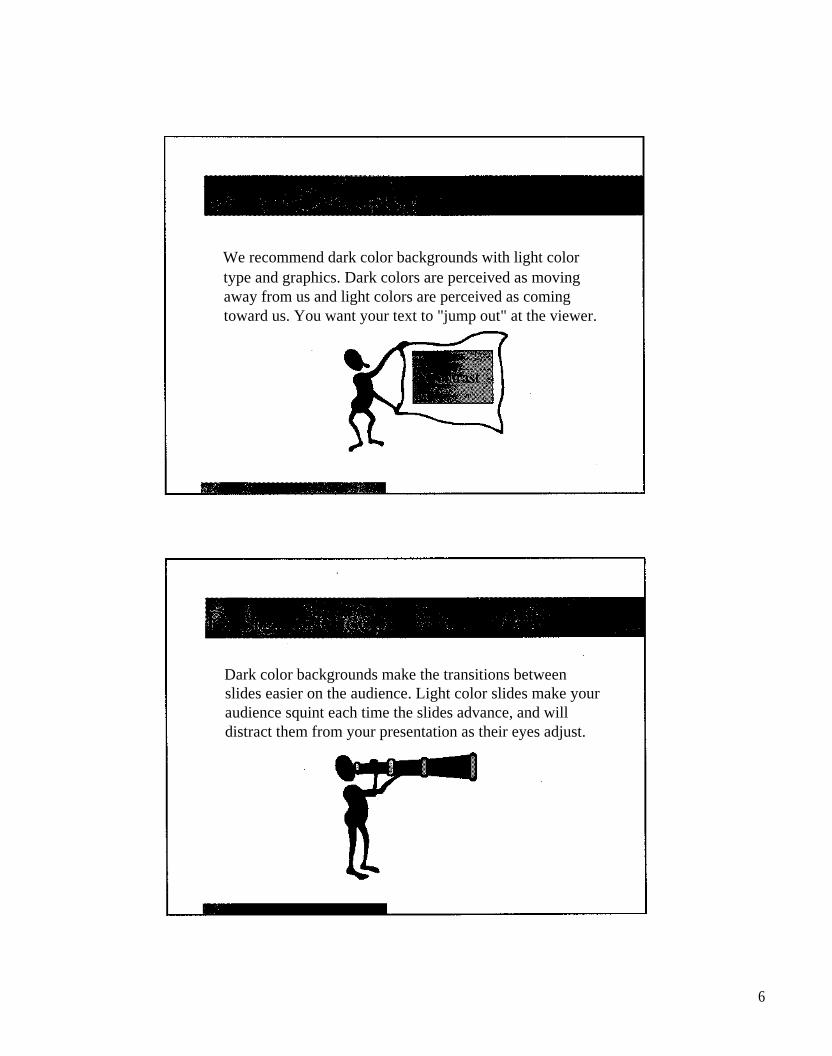
We recommend dark color backgrounds with light colortype and graphics. Dark colors are perceived as movingaway from us and light colors are perceived as comingtoward us. You want your text to "jump out" at the viewer.
Dark color backgrounds make the transitions betweenslides easier on the audience. Light color slides make youraudience squint each time the slides advance, and willdistract them from your presentation as their eyes adjust.
6


Don't mix red and blue or red and green.
These colors "fight" when they are superimposed on top ofeach other, and will distract your audience. For example,red type on a blue background will appear to "squirm" andbe hard to read.
Example of red Text
Don't use red for your background color.
Studies have shown that prolonged exposure to red lightmakes people edgy and restless. The audience will attributetheir discomfort to the speaker and the message.Obviously, this is not a good thing.
7


Too much text on a page will cause your audience to loseinterest in either the speaker or the slide content.
The rule of thumb is 7&7. Seven lines of text on a slidewith seven words per line.
Contrast is key to readability.
Primary colors work better than pastels. Be sure that yourtext color is much brighter than the color it is sitting on.
Example text in various colors
Example text in various colors
8


Familiar fonts are best. Don't "over-design" by using somehard to read or exotic font.
Don't mix too many fonts on a slide. Ono font is fine, andtwo or three should be more than enough. The eyes "shiftgear" each time you read a different font. TooMUCH "SHIFTING" WILL DISTRACT THEAUDIENCE.
9


General rule: if you can read it at arms length; youraudience can read it when projected.
• Keep it horizontal.
• Keep it simple.
• Limit each slide to one main idea.
• Use several slides to communicate a lengthy idea.
• Keep text size large on graphs.
• Use thicker line widths for slides of drawings and graphsthan you would for the paper.
10


Seeing key words, photos or illustrations will greatlyimprove the listener's understanding.
• Repeat main ideas; emphasize 3 or 4 key points.
• Slides should be created for the presentation, not adaptedfrom lecture notes.
• Use action verbs and concise statements.
• Summarize points with key words
11


Limit the amount of time each slide is on the screen.
Use enough slides to provide a visual change every 20-30seconds. Even a minute of narration with one slide canseem long to your audience unless there is a complexvisual to analyze
12


• What is the instructional purpose of using digital media?
• What are the needs and capabilities of the students?
• Does the content of the presentation fit the student'sneeds?
• Access to digital effects (video, animation, sound)provides the ability to address multiple learning styles
• Digital presentations are similar to television, a familiarenvironment for most students
• Ability to rapidly modify content
• Interactive linkages with World Wide Web
13


Used appropriately, digital effects can strengthen thelearning experience of visual and auditory learners.
• Give the presentation "depth"
• Provide opportunities for discussion
• Provide opportunities for exploration
• Keep the content current
• Employ text and/or graphical objects
14


In hospital nurseries, some babies sleep, some stare at theirreflections, some suck their fists, some listen while othersyell to be picked up.
These babies are beginning to prefer one of their senses tolearn by: vision, hearing, sight or touch. They aredeveloping different learning styles.
15


Design presentations that include material which appeals to:
Learning styles develop into preferences that remain withus as adults. Would you rather see a presentation that looksgood, or hear one that sounds fine?
Watch your students. Do they like looking at pictures(visual) or listening to a speaker (auditory)?. Do they
like pattern games (visual), or do they like moving aroundobjects (kinesthetic)? Can they learn by looking
(visual), or do they need to get their hands on things(tactile)?
16


'6!
• • •What are the steps to ••closing the learning gap? •
17


What content/materials will be needed?
Are presentation tools
the appropriate
instructional format?
18


Design slides which
support presentation
Keep graphics and
text uncluttered.
Emphasize contrast
19


Where appropriate, use multimedia tosupport a range of learning styles
Redesign as needed for student success.
20


(Win95)PowerPoint 7.0: Introduction http://www.htctu.fhda.edu/prestools/pp/getdocs.html
Windows 95 PowerPoint 7.0: Introduction• Wha i POWCI7Poinc?
• Starting PowerPoint• Creating a New Presentation• Creating Slides • Adding Text to Slides• Adding Slide Objects• Working in. Different Views• Chan the Slide• Making the. Presentation Yoni eed• no C n-Screen Show• Saving Your Presentation• Opening a Presentation• Printing• Getting Help
What is PowerPoint?
PowerPoint is a tool you can use to communicate your ideas effectively through visual aidsthat look professionally designed yet are easy to make. With PowerPoint, you can create slidesfor your presentation in the output you require: black and white overheads, color overheads,35mm slides or on-screen electronic slide shows. In addition, you can prepare speaker's notes,print an outline, and print audience hand-outs. All these components in one file make up aPowerPoint presentation.
Starting PowerPointerweoreeeeeeeeeeeeeeerveeeeeeeereeeeeeeereereeeeeeeereeeeereeeevererWeeeremercree
PowerPoint
To launch PowerPoint, click the Start button on the Windows 95 taskbar, select Programs,Microsoft Office and then click Microsoft PowerPoint. You might also find the PowerPointicon on your MS Office Toolbar. If you get the Tip of the Day dialog box, read the hint and
1 of 10 11/13/97 2:50 PM

(Win95)PowerPoint 7.0: Introduction http://www.htctmfhda.edu/prestools/pp/getdocs.html
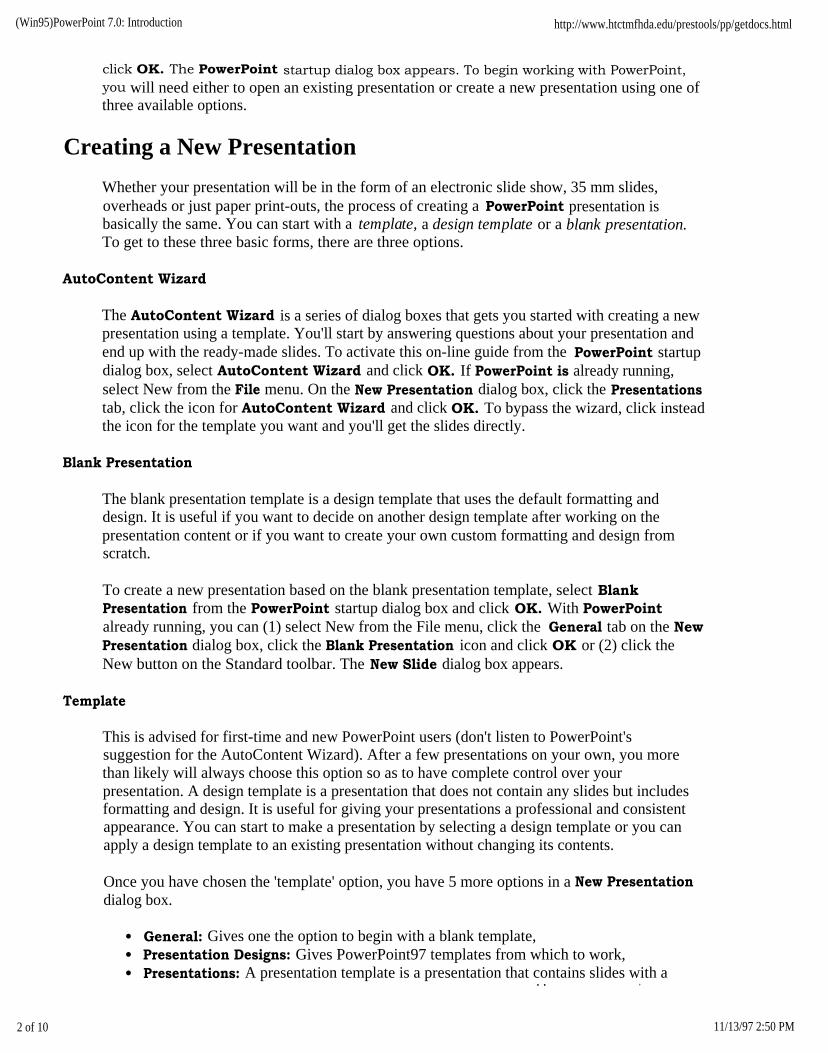
click OK. The PowerPoint startup dialog box appears. To begin working with PowerPoint,you will need either to open an existing presentation or create a new presentation using one ofthree available options.
Creating a New Presentation
Whether your presentation will be in the form of an electronic slide show, 35 mm slides,overheads or just paper print-outs, the process of creating a PowerPoint presentation isbasically the same. You can start with a template, a design template or a blank presentation.To get to these three basic forms, there are three options.
AutoContent Wizard
The AutoContent Wizard is a series of dialog boxes that gets you started with creating a newpresentation using a template. You'll start by answering questions about your presentation andend up with the ready-made slides. To activate this on-line guide from the PowerPoint startupdialog box, select AutoContent Wizard and click OK. If PowerPoint is already running,select New from the File menu. On the New Presentation dialog box, click the Presentationstab, click the icon for AutoContent Wizard and click OK. To bypass the wizard, click insteadthe icon for the template you want and you'll get the slides directly.
Blank Presentation
The blank presentation template is a design template that uses the default formatting anddesign. It is useful if you want to decide on another design template after working on thepresentation content or if you want to create your own custom formatting and design fromscratch.
To create a new presentation based on the blank presentation template, select BlankPresentation from the PowerPoint startup dialog box and click OK. With PowerPointalready running, you can (1) select New from the File menu, click the General tab on the NewPresentation dialog box, click the Blank Presentation icon and click OK or (2) click theNew button on the Standard toolbar. The New Slide dialog box appears.
Template
This is advised for first-time and new PowerPoint users (don't listen to PowerPoint'ssuggestion for the AutoContent Wizard). After a few presentations on your own, you morethan likely will always choose this option so as to have complete control over yourpresentation. A design template is a presentation that does not contain any slides but includesformatting and design. It is useful for giving your presentations a professional and consistentappearance. You can start to make a presentation by selecting a design template or you canapply a design template to an existing presentation without changing its contents.
Once you have chosen the 'template' option, you have 5 more options in a New Presentationdialog box.
• General: Gives one the option to begin with a blank template,• Presentation Designs: Gives PowerPoint97 templates from which to work,• Presentations: A presentation template is a presentation that contains slides with a. . .
2 of 10 11/13/97 2:50 PM


lin nib
4,24444,
dun.
MAMS.M55555
(Win95)PowerPoint 7.0: Introduction http://www.htctuftida.edu/prestools/pp/getdocs.html
suggested outline, as well as formatting and design. It is useful if you need assistancewith content and organization for certain categories of presentations such as: Training;Selling a Product, Service, or an Idea; Communicating Bad News. When you make anew presentation using a template, you'll get a set of ready-made slides. You replacewhat's on the slides with your ideas, and insert additional slides as necessary.
• Web Pages: Allows one to add web presentations and documents from your local ornetwork computer,
• Office 95 Templates: Contains your favorite PowerPoint templates from Office 95.
It is hoped that by the end of our class (or the end of this document), you will feel mostcomfortable choosing the second option, "Presentation Designs," and getting down tobusiness.
Creating Slides
When you create a new presentation using a template (including the Blank Presentationtemplate), you start with the first slide and then continue to build the presentation by insertingnew slides.
Inserting New Slides
To add a new slide after the current slide in Slide View:
• choose New Slide from the Insert menu, or• click the Insert New Slide button on the Standard toolbar
This brings up the New Slide dialog box.
AutoLayouts
New Slide
On the New Slide dialog box PowerPoint gives you a set of available slide layouts, calledAutoLayouts, to choose from. An AutoLayout contains placeholders for titles, text and objectssuch as clip art, graphs or tables that you may want to put on a slide. You are not limited onlyby these options. As you will see later in this handout, anything can be added to any slide. Tocreate a slide, click an AutoLayout icon that matches the layout of the slide you want to make;
3 of 10 11/13/97 2:50 PM


(Win95)PowerPoint 7.0: Introduction http://www.htctu.fhda.edu/prestools/pp/getdocs.html
the name of the selected AutoLayout appears in the lower right side of the dialog box. Thenclick OK and the new slide appears on the screen.
Adding Text to Slides
Using Text Placeholders
You can insert text on slides by selecting an AutoLayout with text placeholders. Textplaceholders are formatted for titles or bulleted lists. The text formatting, which includes thefont, alignment and bullets, depends on the design template you selected.
To add text to a slide in Slide View, simply click on a text placeholder. The directions on theplaceholder will disappear, leaving an empty text box with a flashing insertion point. Begintyping. Text automatically wraps as you reach the right border of the placeholder. When you'redone, click anywhere else on the slide. To edit text, move the mouse pointer over the text(note that it becomes an I-beam), click and edit.
When making a bulleted list, you automatically create the next bulleted item everytime you press Enter. To create sublevels, click the Demote (Indent more) buttonon the Formatting toolbar. To move up a level, click Promote (Indent less). Your bulleted listcan have up to five levels.
Using the Text Tool
You can use the Text Tool on the Drawing toolbar to add text outside of text placeholders.In Slide View, click the Text Tool and move the mouse pointer to the point on the slide whereyou want to insert text. Click to make a label/caption or drag to make a text box that will wrapthe words. Then begin typing and, when you're done, click anywhere else on the slide.
Adding Slide Objects
You can incorporate elements, such as graphics and even sound and video, into your slides inone of two ways:
• Select an AutoLayout containing a placeholder for an object. Some placeholders are forspecific objects such as clip art, graphs, tables, organizational charts or media clips whileother placeholders are for all types of objects.
• Select the desired object (Clip Art, Picture, Movie, Sound, Microsoft Graph,Microsoft Word Table, Object) from the Insert menu. Clicking on Object... from theInsert menu brings up the Insert Object dialog box which lists all the different types ofobjects that can be embedded in PowerPoint slides.
You create embedded objects using another application while you are working in PowerPoint.(This requires that you have the application installed on your machine.) The object's applicationmenu and toolbars appear on the screen and may temporarily replace the PowerPoint menu andtoolbars. When you're finished, click anywhere else on the slide to return to PowerPoint.
To edit embedded objects you created, double-click on the object. Again, the object'sapplication menu and toolbars appear. Make the changes and, when you're done, clickanywhere else on the slide.
4 of 10 11/13/97 2:50 PM


(Win95)PowerPoint 7.0: Introduction http://www.htctu.fhda.edu/prestools/pp/getdocs.html
Tables
To insert a Microsoft Word table on a slide:
• double-click on a Table placeholder,
• click on the Word Table Button shown here, or• under the Insert menu, choose Picture, then Word Table
and specify the number of rows and columns you want. If you click on the Insert MicrosoftWord Table button on the Standard toolbar, drag on the cells to select the number of rowsand columns.
The table appears along with Word's application menu and toolbars. Type the table contentsand, when you're finished, click anywhere else on the slide. To edit the table, double-click on itand edit the table using Word tools and menus.
Clip Art
You can put graphic images from Microsoft ClipArt Gallery on your slides. To add clip art to aslide:
• double-click on a Clip Art placeholder,• under the Insert menu, choose Picture, then Clip Art
• click the Insert Clip Art button on the Standard toolbar shown here.
ClipArt Gallery opens. You can limit your search by choosing a category. Select the pictureyou want and click Insert. ClipArt Gallery closes and the image you selected appears on theslide.
If you want to change the clip art on a slide, double-click on it and ClipArt Gallery opens.Select a different picture and click Insert.
Pictures
You can put scanned images or art created from other programs onyour PowerPoint slides. Select Picture from the Insert menu, chooseFrom Scanner and use the MS Office photo editor after opening thefile from your computer.
WordArt Object
5 of 10 11/13/97 2:50 PM


(Win95)PowerPoint 7.0: Introduction http://www.htctulhda.edu/prestools/pp/getdocs.html
You can add text with special effects in your slides using Microsoft WordArt. There are atleast three ways to put word art in your PowerPoint presentation: You can selectInsert/Picture/Word Art from the menu, choose Object from the Insert menu, ordouble-click on an Object placeholder. In the Insert Object dialog box, select Create Newand choose the latest version of Microsoft WordArt from the Object Type list. The WordArtdialog box and menus appear. Type the text and click on Update Display. Choose the specialeffects you want from the WordArt toolbar. When you're done, click anywhere else on theslide.
Working in Different Views
You can switch between five views of your presentation, each view gives you adifferent way of looking at and working with your presentation. To toggle between views,choose the desired view format from the View menu or click the appropriate button to the leftof the horizontal scrollbar (shown here to the left). From left to right, the views are SlideView, Outline View, Slide Sorter View, Notes Pages View and Slide Show View.
Slide View
In Slide View, you can add graphics to your slides as well as type, edit and format text.PowerPoint displays the Formatting and Drawing toolbars in addition to the Standard toolbar.The presentation appears on the screen one slide at a time. The left side of the Status bardisplays the page number of the current slide. To move to other slides, drag the elevator on thevertical scrollbar or click the Previous Slide or Next Slide button below the scrollbar.
Outline View
Working in Outline View is a good way to organize and develop the content of yourpresentation. To insert text, click where you want to add text and type. Bullet and their editingis very easy in this view. Creating sub-levels along with promoting and demoting text can bedone here as well. You can also print a copy of your outline. In this view, you see only the titleand body text of each slide. The Drawing toolbar closes and the Outlining toolbar opens. Thisworks much like the Microsoft Word Outlining toolbar.
Slide Sorter View
In Slide Sorter View, you can efficiently perform tasks such as reordering slides and addingbuilds, transitions, and slide timings for electronic presentations. You cannot work on text andvisual elements of individual slides in this view. PowerPoint displays miniature versions ofeach slide. In addition to the Standard toolbar, PowerPoint displays the Slide Sorter toolbar.
Notes Pages View
In Notes Pages View, you can create pages that you can print and use as a guide during yourpresentation. Each page contains an image of the corresponding slide and a placeholder foryour notes.
Slide Show View
You 11SP. Slide. Show view to deliver your nre.sentation as an on-sr.reen Ftleftrnnir. slide show nr
6 of 10 11/13/97 2:50 PM


(Win95)PowerPoint 7.0: Introduction http://www.htctu.fhda.edu/prestools/pp/getdocs.html
to look at each slide full-screen. Click the mouse button to advance to the next slide. If you'vereached the last slide or press the Esc key on the keyboard, you return to the previous view.
Changing the Slide Layout
In Slide View, you can change the arrangement of objects on a slide, move and resizeplaceholders or replace the current layout with a different AutoLayout.
Moving and Resizing Objects
To move or resize an object, first click on the object to select it. Eight handles appeararound the object. Click and drag a handle to change the size and/or shape of the object.Click and drag anywhere else on the object to move it.
To resize an object by an exact scale while maintaining its proportions, select the object andthen choose Scale from the Draw menu. Enter the scale on the Scale dialog box and click onOK.
Moving and Resizing Placeholders
To move or resize a placeholder, select the placeholder and click on its dashed border. 01You will get a fuzzy outline around the border with eight resize handles. Click and drag aresize handle to change the size and/or shape of the placeholder. Click and drag anywhere elseon the fuzzy outline to move it.
Changing the AutoLayout
To restore a slide's layout after you've made changes to it or to change the AutoLayoutwithout deleting any text or object you've already put on it, select Slide Layout from theFormat menu or click the Slide Layout button on the Status bar. Select the AutoLayout fromthe Slide Layout dialog box and click Reapply.
Making the Presentation You Need
Slide Setup
Unless you created the presentation using the AutoContent Wizard and specified otherwise,slides are by default set up for an on-screen show. To change this, select Page Setup from theFile menu. On the Slide Setup dialog box, select the output you want from the Slides Sizedfor drop down list. You can also change slide orientation from landscape to portrait, and thephysical size of your print outs.
Arranging the Template
To change the presentation's design template, select Apply Design from the Format menu orclick the Apply Design Template button on the Standard toolbar. In the Apply DesignTemplate dialog box, select the design template and click Apply. On a typical installation ofPowerPoint, the design templates are in the Presentation Designs folder inC:\MSOffice\Templates. You can also use your own design templates or even an existing
7 of 10 11/13/97 2:50 PM

(Win95)PowerPoint 7.0: Introduction http://www.htctu.fhda.edu/prestools/pp/getdocs.html
PowerPoint presentation.
Black & White Slides
To display the presentation in black and white, select Black and White from the View menuor click the B&W View button on the Standard toolbar. In Slide View, you'll see the currentslide in black and white and a color slide miniature on a small Color View window. The B&WView button toggles between the black and white and color views. To hide the Color Viewwindow, select Slide Miniature from the View menu.
Deleting a Slide
To delete a slide in Slide View, select Delete Slide from the Edit menu. In Slide Sorter View,select a slide and hit the delete key from your keyboard.
Reordering Slides
To move a slide, select the slide in Slide Sorter View and click the Cut button on the Standardtoolbar. This copies the slide to the Clipboard. Then click on the position where you want toinsert the slide (note the flashing insertion point) and click the Paste button. You can alsochange the order of your slides in Slide Sorter View by clicking on a slide and dragging it tothe position where you want it to appear.
Delivering an On-Screen Show
To deliver your presentation as an on-screen electronic slide show, open the presentation inPowerPoint, select. Slide Show from the View menu. By choosing Setup Show from the SlideShow menu you can choose which slides you want to show during the presentation.
During the Presentation
To move to the next slide, click the mouse button or press N on the keyboard. To get a menuof available slide show commands, click the right mouse button or this icon that appears on thelower left side of the screen.
• To go directly to a particular slide, select Go To, Slide Navigator from the menu. Onthe Slide Navigator dialog box, select the slide and click Go To.
• To annotate a slide during a show, select Pen from the menu and the mouse pointertoggles to a pen. Click and drag to write or draw on the slide. To return to advancingthe slides, switch back to the arrow by selecting Arrow from the menu.
You can deliver an on-screen show on a computer that doesn't have PowerPoint installedusing the PowerPoint Viewer, freeware that you can distribute with your presentation. Youcan create disks that contain the presentation and PowerPoint Viewer. Select Pack and Gofrom the File menu and the Pack and Go Wizard guides you through the process.
Slide Timings
When delivering an electronic slide show, you have the option of manually advancing theslides or using slide timings. In Slide Sorter view, click the Rehearse Timings button on
8 of 10 11/13/972:50 PM


(Win95)PowerPoint 7.0: Introduction http://www.htctu.fhda.edu/prestools/pp/getdocs.html
the Slide Sorter toolbar and rehearse the delivery of your presentation. The Rehearsal windowthat stays on the screen during the slide show keeps track of the time elapsed since a slideappeared on screen. At the end of the slide show, PowerPoint gives you the total time of thepresentation and the option to record the slide timings. If you record the slide timings, they willappear in Slide Sorter View. To manually revise the timing set for a particular slide, select it inSlide Sorter View and click the Slide Transition button on the Slide Sorter toolbar. Thenenter a number in the Advance Automatically after box. To use the slide timings during a slideshow, choose Use Slide Timings on the Slide Show dialog box.
Transitions
Transitions are special audiovisual effects that occur when moving from slide to slideduring an electronic presentation. To add a transition to a selected slide in Slide SorterView, click the Slide Transition button on the Slide Sorter toolbar. From the Transitiondialog box, you can choose the effect and speed of the transition and a sound to accompanythe visual effect. A transition icon appears below the slide miniature of a slide with transition.You can preview the transition on the miniature by clicking on the icon. If you want the sametransition on all your slides, choose Select All from the Edit menu and then add the transition.
Builds
You create a build slide if you want to show paragraphs on a bulleted list one at a time duringa slide show. To build the body text of a selected slide, choose an option that appears whenyou select Preset Animation from the Slide Show menu. If you select an option other thanOff, during a slide show the list will appear by first level paragraphs with every mouse clickusing the particular effect. For more options, use the drop down menu on the slide sortertoolbar labeled Text Preset Animation. On the Animation Settings dialog box, pick a buildoption, a visual and audio effect, and the text color after a build step. In Slide Sorter View, abuild icon appears below the slide miniature of a slide with build but you cannot preview it Formore options, do the following:
• View your slide in slide view• Right click on your slide• Choose custom animation
Saving Your Presentation
To save your presentation, choose Save As from the File menu. In the File Save dialog box,type the name you wish to give your presentation in the File name edit box, select the folderwhere you want it saved from the Save in drop down list, and click Save. If you're going toopen the presentation in another computer and want to make sure that text displays properly,click the Embed TrueType check box.
Opening a Presentation
To begin working with PowerPoint by opening an existing presentation, select Open anExisting Presentation from the PowerPoint startup dialog box and click OK. If PowerPointis already running, choose Open from the File menu or click the Open button on the Standardtoolbar. From the File Open dialog box, select the folder where the file is located in the Look
9 of 10 11/13/97 2:50 PM


(Win95)PowerPoint 7.0: Introduction http://www.htctunda.edu/prestools/pp/getdocs.html
in drop down list, select the file from the Name box, and click Open.
You can open several presentations at a time. To switch between open presentations, select thefile name from the Window menu.
Printing
To print, choose Print from the File menu. In the Print dialog box, select from thePowerPoint drop down list the output you want (slides, handouts, notes pages or outline) andclick OK. If you're printing a color presentation on a black and white printer, click the Black& White check box to print the Black and White View of the presentation. If your slides aresized differently from the paper you're printing on (for example, 35mm or on-screen), click theScale to Fit Paper check box to make the slide image fill the page.
Getting Help
To access on-line help, select Microsoft PowerPoint Help Topics from the Help menu.You can type in a help request in our won words using the Answer Wizard as well. And 'don't be afraid of the paper clip, star, Einstein look-a-like, or whatever may pop up as yourassistant. To access any of these options, click on the help button on the standard toolbar. It'spicture is shown here to the left.
10 of 10 11/13/97 2:50 PM


CTL Learning Styles http://www.htctu.fhda.edu/prestools/ls/learning.htnil
CTLLearning Styles Site
Using Learning Styles to Adapt Technology for HigherEducation
Terry O'ConnorIndiana State University
Table of Contents
1. I• vin a Person or why there are learning styles.2. Learning Styles in Higher Education3. Types of Learning Styles 4. Using Styles to Teach5. As el'nil Corn•uter Technolo eies
Having a Personal Point of View
Many of the mechanisms by which people learn are still unknown to us. How is it, for example, that arelatively brief talk can change the cognitive and/or emotional orientation of another enough to alterbehavior? What happens that prevents this change? We don't quite know. There are complex physiological,psychological, & social processes involved.
Learning styles research is drawn out of studies about the psychological, social, and physiologicaldimensions of the educational process. It has yet to be precisely (or singularly) defined. Still, the scholarlyliterature provides a range of working models that can help us deal with some of the mysterious terrainbetween teacher & learner.
To understand learning style models, begin with one of the fundamental insights of 20th Centurypsychology: people rely on personally constructed filters to orient their relationships toward the world.These filters are responsive to a variety of factors: age, experience, internal psychodynamics, maturity,cognition, physiology, biochemistry, and so on. Since no one is capable of switching endlessly between allof these filters, it seems obvious that each individual has a unique approach he or she uses to perceive,understand, and plan his or her interactions. Information theory, for example, explains that the world isinformation rich and therefore people are selective in the information they perceive (& believe). Ourpersonal way of selecting can be described as our style. In a very real sense, we create our own personalpoint of view.
At the same time, since the same limits are common to all humans, there are ranges within which we cancharacterize ways of responding to the world. Some people may tend to respond to auditory informationmore sensitively than to other kinds (say, iconic). The aim of learning style research is to find clusters ofpeople who use similar patterns for perceiving and interpreting situations. Based on this information, we
1 1 1 1 1 1 • 1 1 .1 r 1 1
1 of 7 11/13/97 2:50 PM


CTL Learning Styles http://www.htctunda.edu/prestools/ls/learning.htn1
snow° oe ame to august euucauonai environments to maKe tnem more emcient anu successful places.
Return to Table of Contents••-y•y••-•-•.•
Learning Styles in Higher Education
When we look at our subject areas, we realize that different scholars approach our academic fieldsdifferently. It is this difference that make them complex and rich. Scholarship is stronger when it includesintuitive, subjective moments plus creative times plus careful data collection plus systematic analysis as wellas reflective evaluation and well-written presentations. Of course, we will be better in some of these abilitiesand will have colleagues who are better at others. Our work (and our field) will be stronger when we deviseways to bring these multiple orientations to bear on the phenomena we study. The scholarly side of theacademy clearly profits when it recognizes multiple points of view.
Compare this rich community to the typical classroom. Here most teachers tend to rely almost exclusivelyon sequential, verbal presentations, combined with private reading & writing activities. While we mayexpect the student to think in complex ways before completing a project, in fact they are often exposed toonly a narrow approach to our subject matter. The loss of opportunities to engage in our subjects from avariety of orientations becomes an obvious flaw to those who recognize the inevitability of diverse points ofview in the world. Even worse, we can trace lack of motivation, resistance, misperceptions, failure, anduninspired intellectual work to the fact that many students cannot learn well within the limited orientationprovided them in the classroom.
Underlying learning style research is the belief, verified by some studies, that students learn best when theycan address knowledge in ways that they trust. If their orientation to the world draws theory from concreteexperience, then they will learn best through doing rather than reflecting. If their personal style is orientedaround abstraction, then their best learning will be abstract. In fact, an individual may not ultimately confirmknowledge until they have handled it in modalities they strongly trust.
Auditory learners will learn well in lecture settings; private learners will gain knowledge from quiet reading.However, these are only two out of a broad array of preferences found among intellectually capable people.When learning experiences are limited to these modes, students who rely on other styles are bound to beless successful. Limited classrooms are likely to inhibit one or more clusters of students whose preferredstyles are not given the opportunity to be used (a problem that may be wrongly attributed to lower ability ormotivation).
Faculty can engage students in more rich learning opportunities by increasing the range of styles throughwhich students can engage in studying academic fields. Technology provides new capabilities to reconstructlearning environments around specific learning styles. Below is an outline of some possibilities that emergewhen using learning style models to develop technological applications to university classrooms.
Return to Table of Contents
Types of Learning Styles
Because of the variety of models used to characterize Learning Styles, Curry's categorization of theresearch about human learning differences is useful. She categorizes these studies into three levels that,looked at as examinations of different layers of an "onion," can explain our current understanding of human
2 of 7 11/13/97 2:50 PM


CTL Learning Styles http://www.htctunda.edu/prestools/ls/learning.h1m1
variations. More recently, this onion has been divided into the four levels described below.
Instructional & Environmental Preferences are those that describe the outermost layers of the onion, themost observable traits. Dunn & Dunn, for example, identify 5 dimensions that mark various preferences:
1. Environmental preferences regarding sound, light, temperature, & class design;2. Emotional preferences addressing motivation, persistence, responsibility & structure;3. Sociological preferences for private, pair, peer, team, adult or varied learning relations;4. Psychological preference related to perception, intake, time, & mobility; and5. Psychological preferences based on analytic mode, hemesphericity, & action.
While the latter category overlaps with subsequent layers in the onion, each of these preferences can bemapped through tests, observations, and productivity studies that illustrate how different approaches to thesame subject or task can result in very similar gains.
Social Interaction Models consider ways in which actors in specific social contexts will adopt certainstrategies. William Perry's well-known model showed how college students developed through differentintellectual maturation levels as they went through college. Mary Belenky illustrated how women preferreddifferent strategies than those recognized and rewarded in typical universities. More recently Marcia BaxterMagolda has described how epistemological strategies used by students varies by gender and by maturityand is responsive to the teaching context the student finds him/herself in.
Information Processing Models describe the middle layer in the onion, and are an effort to understand theprocesses by which information is obtained, sorted, stored, & utilized. Probably the most recognized ideaabout information processing is the right brain/left brain discussion. More complex approach is Kolb'sapproach to experiential learning which has become a much used model. He maps out four quadrants andshows how they can serve as stages of wholistic learning (individual styles are seen as particular strengths inthe process). Howard Gardner's Theory of Multiple Intelligences is another popular model for educators.
Personality Models describe the innermost layer of the onion, the level at which our deepest personalitytraits shape the orientations we take toward the world. The popular Myers- Briggs Type Indicatorscategorizes people as extroverts/introverts, sensing/intuition, thinking/feeling, and judging/perceiving. Howindividuals rate along these scales indicates tendencies in their attitudes toward engaging the world. Thismodel anchors our preferences in our very make-up. For educators, the question is not simply one oftrainable skills or attitudes but recognizing that people who have fundamentally different instincts are in theclassroom. They are unlikely (or unable) to be successful when limited to activities that are not compatiblewith the attitudes they bring into the learning situation.
Return to Table of Contents
Using Learning Styles to Teach
Learning styles research has given educators new directions for making changes in their classrooms. Thesingle most widespread change has been to open classrooms to more than one approach to intellectualwork. Different social groupings, alternative activities, more complex projects have all been introduced asefforts to create opportunities for students to use their various strengths in dealing with course material.
Despite the wide range of models, the concept of learning styles has gained growing attention fromeducators because it provides a stable-enough characterization to plan pedagogical strategies. These
3 of 7 11/13/97 2:50 PM


CTL Learning Styles http://www.htctulhda.edu/prestools/ls/leaming.html
strategies appear more responsive to students needs. They seem to provide better learning opportunities.They give fresh direction to alternative teaching. And, especially, the describe middle-level models forprogressive educators engaged in student-centered, experiential philosophical positions. Below are listedsome general conclusions for teachers that seem to cut across the various models:
• Students will learn better when using preferences in which they're successful• Students will be better learners when they can expand their preferences• When teaching accommodates various preferences, more students will be successful.• Teachers can construct activities that include specific (& multiple) learning preferences• This can be done by adding alternatives or, completing learning cycles that incorporate all styles or,
by utilizing wholistic, complex tasks.
One consequence of studying learning styles is the recognition that teachers also have their own approachesto the classroom. While these may have become habitual and while the teacher may define the classroomaccording to their not student) preferences, teachers have to acknowledge that their styles will notnecessarily suit clusters of students in their classroom. As teachers attempt to modify their classrooms, theyneed to begin by exploring their own styles. Dunn & Dunn offer a teaching style inventory and suggeststeps teachers might take to make classrooms more responsive to multiple student learning styles. TonyGrasha nicely integrates his teaching style and his learning style models around a faculty development plan.Three levels of instructional strategies that follow offer some overall suggestions of how the curricularplans can be effectively modified through responding to learning styles.
Adding Alternatives
One general strategy that an educator can use to create increased opportunities for students to use differentstyles is to offer additional alternative activities that supplement or replace traditional ones. Having astudent write a poem about or act out a scenario allows students who respond well to global learning stylesto utilize their sensitive, holistic abilities. Creating hands-on materials that can be used outside the lecturehall give active experimenters the chance to confirm abstractions. Learning Centers allow teachers to mixand match various modalities. Lectures that alternate between various styles re-engage students every fewminutes.
The add-on approach encourages teachers to think of multiple ways to approach the subject and to findways to create modules that allow different students to find the one most appropriate. Dunn and Dunnsuggest multisensory packets comprised of a range of activities that give students a set of options thatinclude something for the different learning styles. Extra attention should be given to key concepts orconceptual bottlenecks (those ideas upon which many other ideas depend but where students traditionallyget stuck) rather than whole classrooms.
Learning Cycles
The teacher who wants to not only offer additional opportunities but also wants to challenge students todevelop their learning skills in other learning style preferences can design a systematic set of activities thatutilize all learning styles before completing an assignment. Dunn and Dunn develop Contract ActivityPackages where activities are arranged to include at least some skills from each of their major learningstyle. A model like Kolb's can be taken as a set of iterative stages that must all be addressed to providecomprehensive learning of a subject. A student will be expected to be strong in one quadrant but needassistance in others. The 4MAT model begins by organizing the curriculum around central concepts thatcan be addressed from each of the four learning style quadrants and serves to integrate a varietyexperiences.
4 of 7 11/13/97 2:50 PM


CTL Learning Styles http://www.htctu.fhda.edu/prestools/ls/learning.html
This systematic, program-oriented approach asks the teacher to go beyond content. He or she needs toorganize the course around a model of learning styles that recommends different types of learning activitiesat each stage of the learning process. Course material becomes organized around themes or problems withthe emphasis on how students develop skills using the content. This model allows each student tocontribute using his or her preferred style while experiencing other styles.
Complex Activities
A third approach to creating multiple learning styles in a course is to organize activities around complexprojects. Such projects inevitably demand that students approach a topic with multiple skills. They acceptthat there are many starting points and a number of acceptable avenues for successfully completing theactivity. When the teacher provides adequately broad terms for the work (terms that permit various socialand emotional needs, for example) students can use the approach that best suits them to accomplish thetask. Project-based learning, especially when connectd to community-service initiatives, provide a typicalsemester-long, complex activity for students to bring their different preferences together into a cooperativeeffort.
Return to Table of Contents• • - - • • • •
Applying Computing Technologies
It is a truism in media that people first tend to use new technology the same way they used to using oldertechnology. In this context, the tendency is to use computing technology to deliver the same kinds ofinstruction & testing that are currently offered in the traditional college classroom. We assume that thesame time patterns, the same content-centeredness, the same student-relations, and the same tasks(repeating known-answers) should be electronically replicated. Eventually, applications of computingtechnology will challenge these assumptions and free us from the need to stay trapped in older collegeparadigms.
When the opportunities offered by new advances in electronic information processing technologies arecombined with the new view of the learning process provided by learning style research, the promise torevolutionize the teaching paradigms found in the academy begins to gain some direction. To explore someof the possibilities, we can consider some of the following applications of popular computing programs inways that are friendly to students' learning styles.
Adding Alternatives
Computerized instruction can provide a rich array of experiences for students outside the classroom (or in alearning center). It can be used to supplement traditional instruction or as an alternate approach to a unit.
**********
The easiest way to provide expanded opportunities through computers is to find basic softwareprograms that offer encyclopedic collections, drills, or demonstrations. Student can check theseprograms out or use them in a learning center. While these programs may not be available forcertain subject or may be designed for earlier grade levels, they provide chances for students torefresh background knowledge when they are readily available.
**********
Presentation software, like Powerpoint, can readily add visuals to script and engage both right &
5 of 7 11/13/97 2:50 PM


CTL Learning Styles http://www.htctulhda.edu/prestools/ls/learning.httn1
left brained thinkers during a lecture. These same presentations may provide stand-alone tutorialsfor students who want to go through the material in a self-paced way. By making the conceptualmaterial available in this way, a teacher may be able to use classroom time for small groupdiscussion. These programs can be made available through 'viewer' programs and can even bemade available through the World Wide Web.
**********
Electronic mail can extend discussions beyond the classroom. For students who learn through socialexchanges, teachers can arrange for listservers or hypermail accounts where students may safelyask questions and share ideas. A ready spot for correcting mistakes or confusion, these connectionsalso provide an asychronous gathering place for coopertive learning activities (joint scavengerhunts for additional course material, for example).
**********
For active experiment type learners, data-base programs offers the capacity to conduct tests thatimmediately illustrate various scenarios. In a similar way, simulation games (such as Sim-City) canbe used for concrete learners as hands-on sites
**********
Finally, programmed instruction offers learners who need structure but prefer self- instruction togroup work an opportunity to engage material successfully. While typically we might consider acomprehensive software package like Director to construct such a unit, it is possible to use thehypertext links in either a wordprocessing package (for short units) or a World Wide Web site toorganize less sophisticated programs. Another simple set of software programs to use for branchingprograms (with some creative adaptations are needed to hide murder and mayhem) can be found inadventure game construction programs where adventure "rooms" become re-organized asinstructional steps.
While there is some concern about the time required to develop supplementary materials, faculty shouldseriously consider way to get assistance when significant portions of a class are manifesting learningdifficulties. In other circumstances, students in a course can develop such materials as a way to demonstratemastery of the materials (this in itself generates alternative approaches). With necessary editing (andappropriate credit) these materials can be made available to future students.
Learning Cycles
Computers can be used to organize activities so that students experience the various stages of learning.
**********
Simulations provide excellent opportunities for teachers to create settings where students are ledthrough critical thinking stages. When programs require problem-solving (as many games do)teachers can encourage students to try to use different "cognitive stages." This may be especiallyrelevant if students can work on the program in teams.
**********
Guided Instruction allows for students to submit pieces of a project step at a time, allowing for arich feedback interaction between students and the instructor. A program like Textra Connect orLotusNotes allows draft essays to be submitted & returned. Additionally, they allow the instructor topost assignments at an appropriate rate (while allowing student to dictate their own pace (withinbroad limits).
**********
For classes using cooperative groups, teachers can see that distribution lists or bulletin boards orother software (such as Textra Connect) provide ready sites for discussions. By monitoring thesegroups, the instructor can introduce timely prompts to redirect the conversation. Posing problems
6 of 7 11/13/97 2:50 PM

CTL Learning Styles http://www.htctu.fhda.edu/prestools/ls/learning.html
that challenge the status quo, suggesting additional information or alternative positions, the teacherhelp students use each of the learning stages while working together.
Complex Projects
Computers allow greater connectivity and also better production capabilities. These gains allow teachersthe opportunity to create learning challenges that are sufficiently complex to engage a full range of learningstyles.
********* *
Because electronic communication is readily available, the chance for students to work with othershas been greatly extended. Not only can faculty expect students to find classmates who can shareideas about a project, they can also contact scholars throughout the world. It is possible to visitsites or join groups where advanced scholars share ideas. A student could be expected to post his orher thoughts to one of these individuals or groups and receive advice, support, and suggestionsfrom colleagues. It is not uncommon to encounter requests from graduate students beginning aproject, collecting information, or asking for feedback. Connected to projects like this, electroniccommunication becomes a powerful way to attempt projects that are subject to complex responses.
**********
Because productivity software allows for ease in constructing well-finished products, teachers canset "real-world" expectations for student products that link the activity to settings outside theuniversity. Writers who produce a brochure as a public service can use technology as a tool todemonstrate the benefits of thoughtfully studying a subject.
*********
Surfing the Net is only the beginning of awareness for students engaged in a complex project.Analyzing what is available and constructing additions and alternatives, designing editorializedcenters adds more intellectual skills than simple resource gathering (which in itself is a powerful,but not complete, learning stage). As websites become more interactive, students can designongoing research (where visitors participate in responding) or informational sites. They can providepublic services and moral and intellectual counters to less lofty sites.
Conclusion
These examples illustrate how learning style scholarship can help us rethink our approach to the classroom.The increased capacities provided by information technologies greatly enhances the faculty members abilityto develop educational settings that broaden the chances for more students to succeed.
Return to Table of Contents
Return to Learning Stylt-!,s I-forne Page
Return to the Center for Teaching and Learning's home page.
7 of 7 11/13/97 2:50 PM