Embed Size (px)
Citation preview

ASSESSMENT OF STRENGTH IN CHILDREN WITH JUVENILE DERMATOMYOSITIS CURE JM STANFORD SCHOOL OF MEDICINE OCTOBER 3, 2014
Minal Jain, PT, DSc, PCS Research Coordinator, Physical Therapy Section
Rehabilitation Medicine Dept. Mark O. Hatfield Clinical Research Center National Institutes of Health
Bethesda, MD [email protected]

OBJECTIVES
¢ Assessment of Muscle Strength and Function � MMT
¢ DESCRIBE MMT 8 � CMAS
¢ REVIEW TEST ADMINISTRATION

ASSESSMENT OF MUSCLE STRENGTH
¢ Various methods for assessing strength: � Quantitative muscle assessment � Hand held dynamometry � Manual muscle testing � Functional tasks
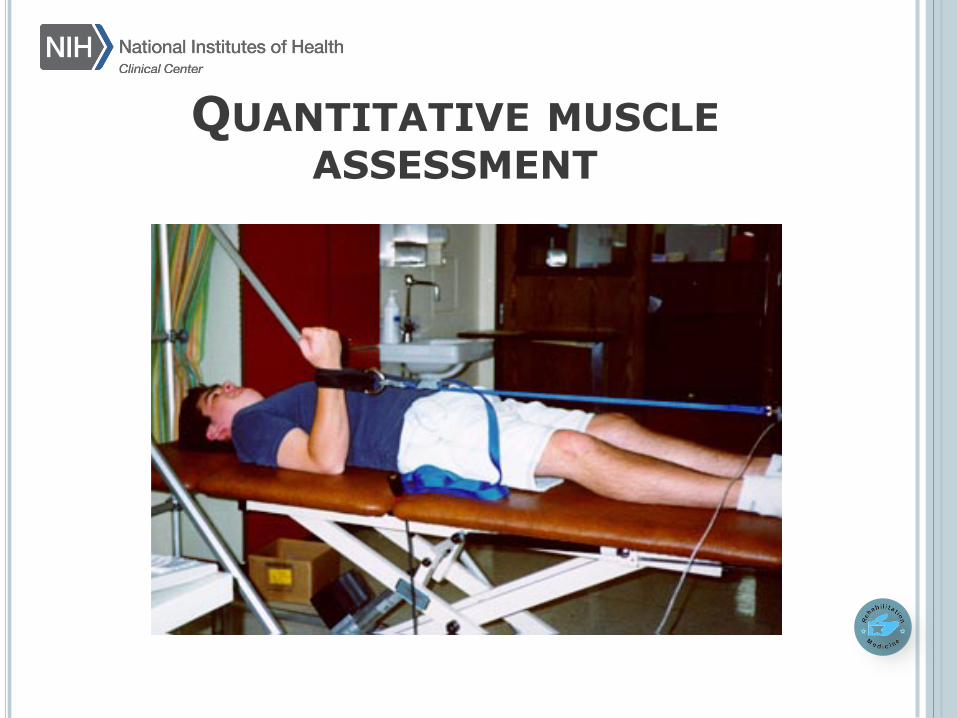
QUANTITATIVE MUSCLE ASSESSMENT

HAND HELD DYNAMOMETRY

MANUAL MUSCLE TESTING

FUNCTIONAL TASKS

ADVANTAGES � Quantitative muscular assessment:
very objective and reproducible � Hand held dynamometry:
objective, easy to use with children � Manual muscle testing: ease of
administration, can be administered at any location with any level of strength
� Functional tasks: no need for specialized equipment

DISADVANTAGES � Quantitative muscular assessment: very
expensive, time consuming, intimidating for children
� Hand held dynamometry: expensive, children have difficulty understanding instructions
� Manual muscle testing: subjective, subjective, moderate to low inter-rater reliability for individual muscles, esp with mild weakness
� Functional tasks: difficult to quantify changes

HISTORY ¢ Medical Research Council’s 5 point scale
� Used by many physicians � Used in previous studies (Florence 1984) � Use of +’s and –’s, between whole numbers � Expansion of the 5 point into 10 points; but not
validated ¢ Kendall’s 10 point scale
� Introduced in 1993 � Utilizes 0-10 scale � Eliminates +’s and –’s � Easier for statistical analysis

WHY MMT?? ¢ Widely used in myositis clinical trials as part of primary
endpoint ¢ Commonly and easily used in clinics to follow patient
progress, responses to therapy ¢ Accepted by rheumatologists and neurologists ¢ Validated tool:
� Excellent internal reliability
� Very good to excellent inter- and intra-rater reliability (total scores, not individual muscles)
� Good construct validity: correlation with other measures of myositis activity
� Excellent sensitivity to change

DEVELOPMENT OF THE CORE GROUP OF 8 MUSCLES:
¢ Neck flexors ¢ Deltoids ¢ Biceps ¢ Wrist extensors ¢ Gluteus maximus ¢ Gluteus medius ¢ Quadriceps ¢ Ankle dorsiflexors

DEVELOPMENT OF THE CORE GROUP OF 8 MUSCLES:
¢ Validation studies in adult and juvenile DM/PM have shown that unilateral MMT8 was comparable to bilateral MMT24
¢ Much shorter time needed for testing (< 5-10 minutes); doctors and physical therapists able to perform in clinic

STANDARDIZATION OF MMT FOR IMACS “DRAPE”
Demonstrate and/or explain MMT position
Request the subject to assume the MMT position
Adjust the subject’s position manually if necessary
Place your hands on the subject to administer the MMT
Execute with verbal cues (“Hold!”) and apply manual pressure

STANDARDIZATION OF MMT FOR IMACS
Muscle Groups Anti-Gravity Position
Gravity-Eliminated Position
Order of testing
Deltoid Sitting Supine 1
Biceps Sitting Sitting/Sidelying 2
Wrist extensors Sitting Neutral 3
Quadriceps Sitting Sidelying 4
Ankle dorsiflexors Sitting Sidelying 5
Neck flexors Supine Sidelying 6
Gluteus medius Sidelying Supine 7
Gluteus maximus Prone Sidelying 8

STANDARDIZATION OF MMT
POSITION ORDER OF TESTING SITTING Deltoid middle (shoulder abductors) 1 Biceps brachii (elbow flexors) 2 Wrist extensors (extensor carpi ulnaris/radialis)
3
Quadriceps femoris (knee extensors) 4 Ankle dorsiflexors (tibialis anterior) 5 SUPINE Neck flexors (scalenes, sternocleidomastoid)
6
Deltoid middle (G.E. test if needed)
Gluteus medius (G.E. test if needed)
SIDELYING (lying on left side-right muscles tested) Gluteus medius (hip abductors) 7 Gluteus maximus (G.E. test if needed)
Biceps brachii (G.E. test if needed)
Neck flexors (G.E. test if needed)
PRONE Gluteus maximus (hip extensors) 8

DELTOID
¢ Position of Patient: With the patient sitting the elbow should be flexed to indicate the neutral position of rotation.
¢ Position of Therapist: The therapist
should stand at test side of patient. Place pressure against the dorsal surface of the distal end of the humerus.
¢ Test: The patient is to maintain the arm in abduction against gravity.
¢ Sample Instructions to Patient: “I am going to push down and I want you to resist me. Keep your arm up as I push down.”

BICEPS
¢ Position of Patient: With the patient
sitting the elbow is flexed at a right angle, with forearm in supination.
¢ Position of Therapist: The therapist should stand in front of and at testing side of patient. The hand giving resistance is contoured over the flexor surface of the forearm just proximal to the wrist. The other hand is applied to the humerus to provide a counterforce.
¢ Test: Patient flexes elbow against your applied force. If the biceps/brachialis are weak the patient will pronate the forearm before flexing the elbow.
¢ Sample Instructions to Patient: “Bend your elbow, hold it. Don’t let me pull it down.”

WRIST EXTENSORS
¢ Position of Patient: With the patient sitting with the elbow and forearm supported and forearm is in full pronation with the fingers flexed.
¢ Position of Therapist: The therapist should stand or sit at a diagonal in front of the patient.
¢ Test: Support the patients forearm under the wrist while the other hand used for resistance is placed over the dorsal surface of the metacarpals. Do not permit full extension of the fingers.
¢ Sample Instructions to Patient: “Bring your wrist up, hold it. Don’t let me push it down.”
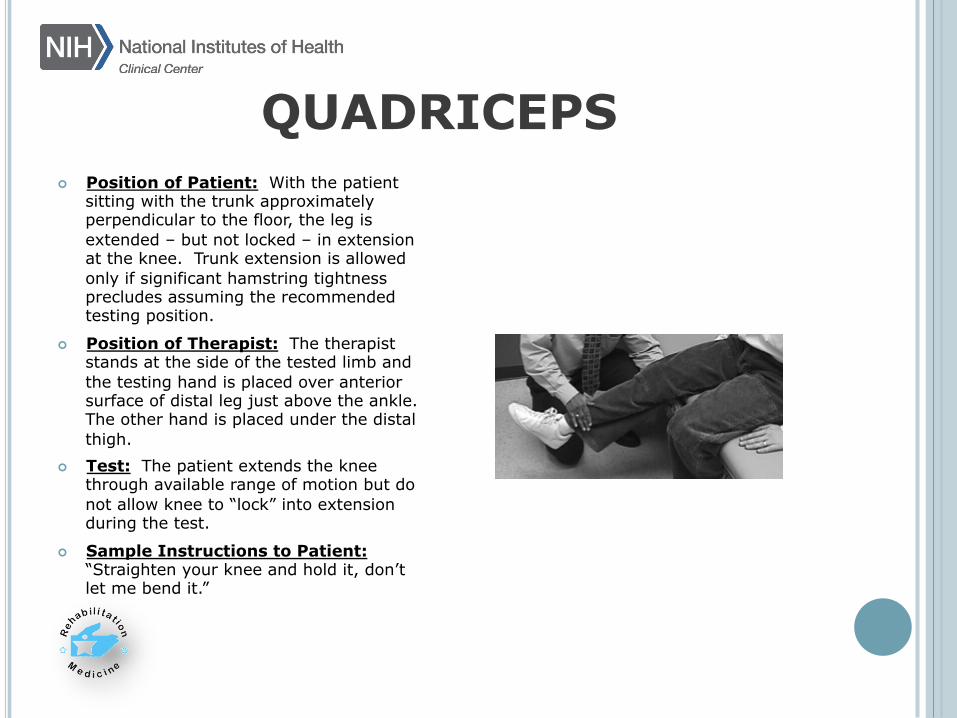
QUADRICEPS
¢ Position of Patient: With the patient sitting with the trunk approximately perpendicular to the floor, the leg is extended – but not locked – in extension at the knee. Trunk extension is allowed only if significant hamstring tightness precludes assuming the recommended testing position.
¢ Position of Therapist: The therapist stands at the side of the tested limb and the testing hand is placed over anterior surface of distal leg just above the ankle. The other hand is placed under the distal thigh.
¢ Test: The patient extends the knee through available range of motion but do not allow knee to “lock” into extension during the test.
¢ Sample Instructions to Patient: “Straighten your knee and hold it, don’t let me bend it.”
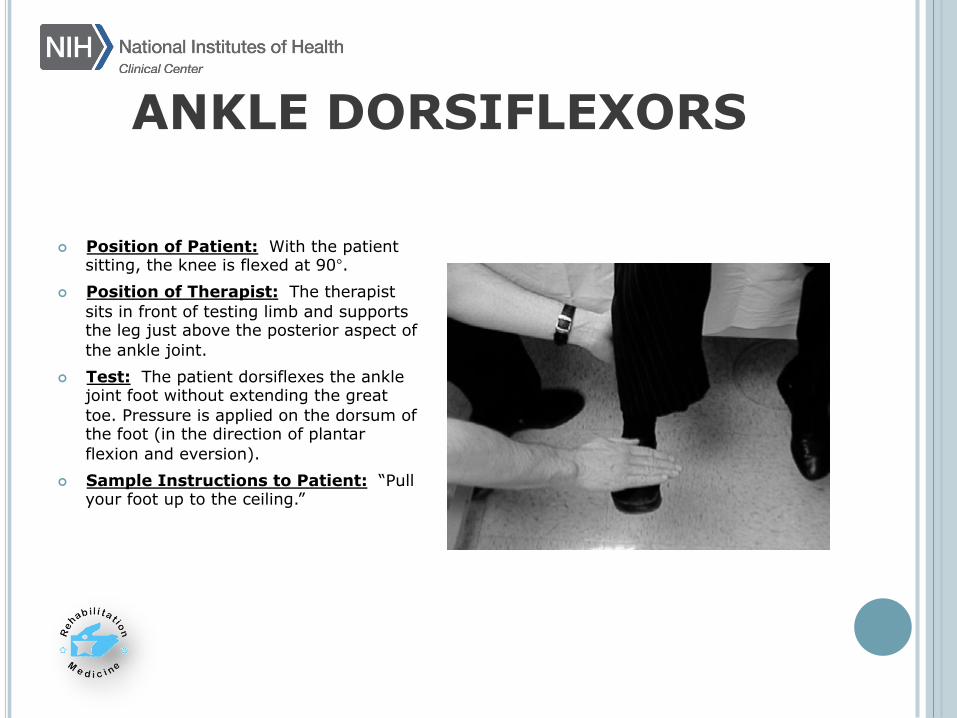
ANKLE DORSIFLEXORS
¢ Position of Patient: With the patient sitting, the knee is flexed at 90°.
¢ Position of Therapist: The therapist sits in front of testing limb and supports the leg just above the posterior aspect of the ankle joint.
¢ Test: The patient dorsiflexes the ankle joint foot without extending the great toe. Pressure is applied on the dorsum of the foot (in the direction of plantar flexion and eversion).
¢ Sample Instructions to Patient: “Pull your foot up to the ceiling.”
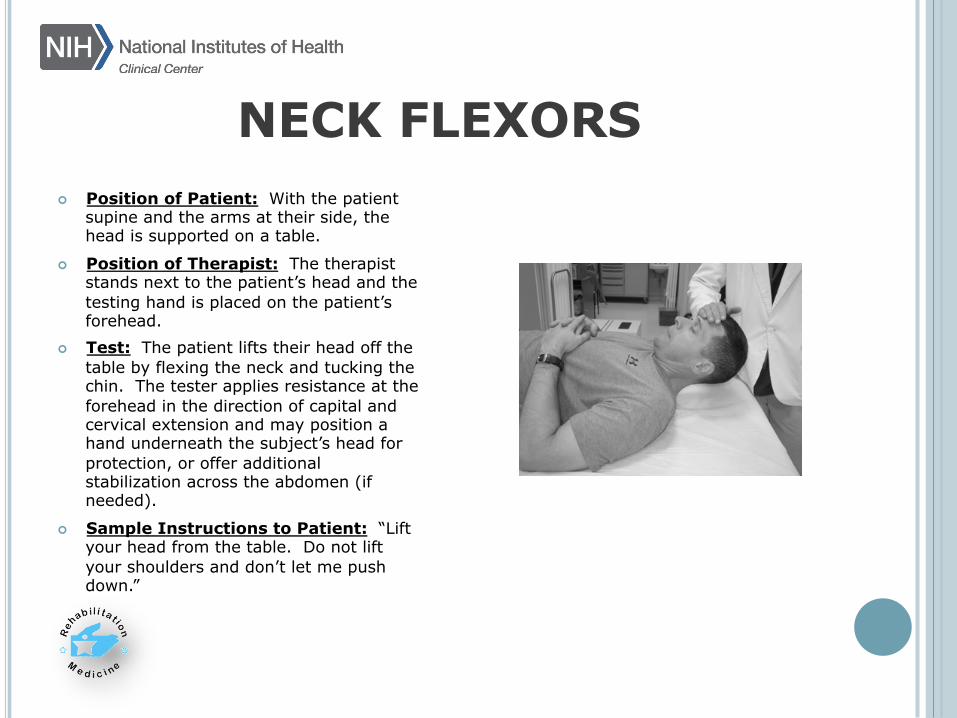
NECK FLEXORS
¢ Position of Patient: With the patient supine and the arms at their side, the head is supported on a table.
¢ Position of Therapist: The therapist stands next to the patient’s head and the testing hand is placed on the patient’s forehead.
¢ Test: The patient lifts their head off the table by flexing the neck and tucking the chin. The tester applies resistance at the forehead in the direction of capital and cervical extension and may position a hand underneath the subject’s head for protection, or offer additional stabilization across the abdomen (if needed).
¢ Sample Instructions to Patient: “Lift your head from the table. Do not lift your shoulders and don’t let me push down.”

GLUTEUS MEDIUS
¢ Position of Patient: With the patient sidelying, the test leg is superior to the supporting leg. The test limb is slightly extended beyond midline and pelvis is rotated slightly forward. The supporting leg is flexed for stability.
¢ Position of Therapist: The therapist stands behind patient and test hand is placed on lateral surface of knee or at the ankle and the other hand is just proximal to greater trochanter of femur.
¢ Test: The patient abducts against the applied resistance without flexing or rotating the hip in either direction. Resistance by examiner is straight and downward.
¢ Sample Instructions to Patient: “I am going to push down on your leg and I want you to resist me.”
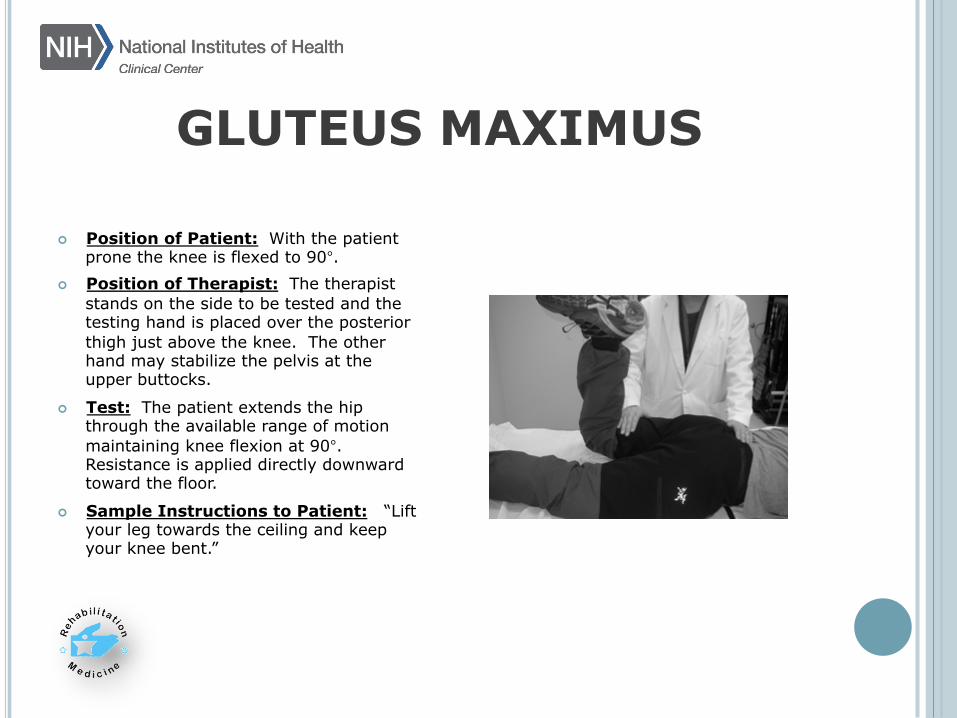
GLUTEUS MAXIMUS
¢ Position of Patient: With the patient prone the knee is flexed to 90°.
¢ Position of Therapist: The therapist stands on the side to be tested and the testing hand is placed over the posterior thigh just above the knee. The other hand may stabilize the pelvis at the upper buttocks.
¢ Test: The patient extends the hip through the available range of motion maintaining knee flexion at 90°. Resistance is applied directly downward toward the floor.
¢ Sample Instructions to Patient: “Lift your leg towards the ceiling and keep your knee bent.”

KEY TO MUSCLE GRADING
Modified from 1993 Florence P. Kendall. Author grants permission to reproduce this chart.

QUESTIONS??
CREDITS: Michael Harris-Love, PT, DSc and Joe Shrader, PT for their assistance with text and photographs

Thank you
CURE JM Drs. Rider and Mellins
All of our patients

CHILDHOOD MYOSITIS
ASSESSMENT SCALE

OBJECTIVES ¢ Provide participants with background and
validity information on the Childhood Myositis Assessment Scale
¢ Participants will be able to perform and score all 14 maneuvers of the Childhood Myositis Assessment Scale

BACKGROUND ¢ Designed to assess proximal muscle
strength, function, and endurance for children with idiopathic inflammatory myopathies from 2 years to adulthood
¢ 14 maneuvers developed from 2 existing tools
¢ Originally published in 1999

VALIDITY ¢ 108 children with juvenile IIM were
evaluated twice using various measures of physical function, strength, and disease activity
¢ Very good interrater reliability
¢ Good construct validity
¢ Moderate to strong responsiveness in large cohort of children with juvenile IIM

BASICS ¢ All 14 maneuvers are to be assessed, one
after the other, in the order listed on the CMAS Scoring Sheet.
¢ Items needed: stop watch, exam table, chair, stepstool
¢ Takes approximately 10-15 minutes to administer
¢ Patients serve as their own control for serial testing

1. HEAD LIFT ¢ Position: Supine, arms at side, shoulders are
to remain stationary
¢ Instruction: Pt is asked to lift his head off the exam table for as long as possible (up to 120 seconds)
¢ Credit is received if examiner can slide fingers under the pt’s occiput
¢ Time starts once head is raised off table,
stopped once head touches the table

2. LEG RAISE ¢ Position: Supine with legs extended ¢ Instruction: Examiner holds hand above the
child’s R foot, 2 lengths of the child’s foot, and asks the child to raise his leg so that the R first toe touches the examiner’s hand
¢ Pelvis must be kept stationary, but pt can
perform kicking motion to touch hand
3. STRAIGHT LEG LIFT/ DURATION ¢ Position: Supine, legs extended ¢ Instruction: Pt is asked to lift straightened R
leg of the table so the heel of R foot is 1 foot length above the table and maintain as long as possible (up to 120 sec)
¢ Pelvis must remain stationary and knee
straight ¢ Timing stops when pt can no longer maintain
the straightened leg off the table and heel touches the table

4. SUPINE TO PRONE ¢ Position: Supine ¢ Instructions: Pt is asked to roll over to the R
into a prone position, keeping the R arm flexed. They must pull the flexed R arm out from under torso and free it as the roll into full prone position
5. SIT-UPS ¢ Position: Supine with hips and knees in full
extension
¢ Instruction: Pt asked to sit up in 6 different ways:
Examiner holds ankles for 1st 3: 1. Place palms on upper thighs 2. Arms folded across chest 3. Hands clasped behind neck/occiput
4,5, 6: Repeat 1-3 without examiner holding ankle

6. SUPINE TO SIT ¢ Position: Supine
¢ Instruction: Pt is asked to go from supine to a sitting position (with legs dangling over the side of the table)
¢ Hands and arms may be used in any way
necessary

7. ARM RAISES ¢ Position: Sitting
¢ Instruction: Pt is asked to raise both arms straight above the head so that wrists are as high as possible above the head
¢ Younger children can reach for objects

8. ARM RAISE/ DURATION ¢ Position: Sitting
¢ Instruction: Raise both hands from lap to position in which the wrists are as far above head as possible and maintain as long as possible (up to 60 seconds)
¢ Timing starts as soon as wrists are above top
of the head, stops as soon as wrists fall below the top of the head

9. FLOOR SIT ¢ Position: Standing alone in the middle of the
room ¢ Instruction: Pt is asked if he thinks he can
safely descend into sitting position on the floor without chair support, if unable or hesitant, pt is provided with a chair for support during descent
10. ALL-FOURS MANEUVER ¢ Prone on floor ¢ Instruction:
� Pt is asked to rise up on all 4s � Pt is asked to keep back straight and raise head
up, looking forward � Pt is asked to creep forward � Pt is asked to maintain balance while raising
head and extending and lifting 1 leg above the body level

11. FLOOR RISE ¢ Position: Sitting on floor, away from support ¢ Instruction:
� Pt is asked to get into kneeling position � Pt is asked to raise L knee so L foot is planted on
floor � Pt is asked to rise from this position to standing � Chair is provided if unable to rise without
support

12. CHAIR RISE ¢ Position: Sitting in arm-less chair, toes
pointing forward ¢ Instruction: Pt is instructed to stand up from
chair

13. STOOL STEP ¢ Position: Standing with “age appropriate
stool” placed next to exam table ¢ Instruction: Pt is asked to step up onto stool ¢ Encourage pt to step up without placing hand
on exam table or on knee/thigh

14. PICK-UP ¢ Position: Standing in the middle of the room ¢ Instruction: Pt is asked to bend over to pick
up a pen or pencil off the floor and return to standing position

Thank you
CURE JM Drs. Rider and Mellins
All of our patients