Embed Size (px)
Citation preview

Basics of
Word Processing
Microsoft Word 2013

Page 2 of 12
Creating a New Blank Word Document Exercise: Entering text, checking for spelling errors, and saving your document
1. On the Standard toolbar click New Blank Document, do not correct any spelling or grammar
errors.
2. Type:
Gardeners, Get Your Garden Tools Ready!
(press enter twice).
3. Type:
With spring just around the corner, let’s start thinking flowers and vegatables. Let’s start
planning for this year’s garden. Let’s start celabrating blue-ribbon zinnias and zucchini. Let’s get
your garden tools ready.
4. On the Standard toolbar click >Save the Save As dialog box appears and displays My Documents
folder as the open folder. Save As Gardeners.
Moving Around in a Word Document Open Existing Document Early Spring
Early Spring 2016
Dear Garden Company Friend:
It is a perfect time to start planning your garden. Here at The Garden Company we realize that not only
do you need the highest quality seeds, but you also need the highest quality tools to cultivate the best
gardens. And with that in mind, we have for you the latest addition to our line of garden tools…The
Garden Map Kit.
The Garden Map Kit is the most essential tool you will need to take your garden from good to great.
Gone are the days of rows of lettuces, rows of tomatoes, rows of cucumbers. Gardens say so much about
who you are and what you feel is important. Gardens not only give you fruits, vegetables, and flowers,
but they decorate your lawn and complement your home. Your gardens will be the envy of the
neighborhood.
This year take the time to plan your garden or to expand your garden or to plant new gardens using The
Garden Map Kit. The Garden Map Kit contains lots of ideas and photos that will help you envision a new
look for your gardens. Designing your gardens with The Garden Map Kit will ensure a plentiful harvest
and a new look for your home and lawn.
Take a moment and dig in with our newest garden tool, The Garden Map Kit.
Happy Gardening!
The Garden Company
1234 Oak Street
Seattle Washington, WA 10101
Page 3 of 12
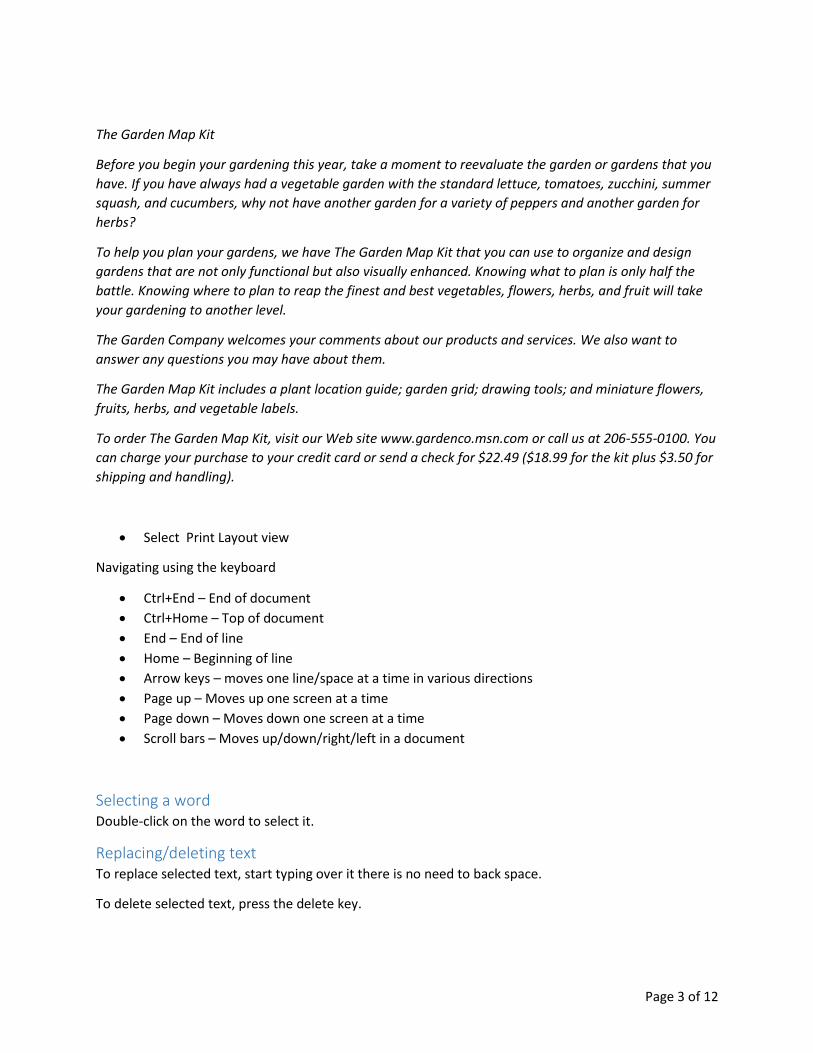
The Garden Map Kit
Before you begin your gardening this year, take a moment to reevaluate the garden or gardens that you
have. If you have always had a vegetable garden with the standard lettuce, tomatoes, zucchini, summer
squash, and cucumbers, why not have another garden for a variety of peppers and another garden for
herbs?
To help you plan your gardens, we have The Garden Map Kit that you can use to organize and design
gardens that are not only functional but also visually enhanced. Knowing what to plan is only half the
battle. Knowing where to plan to reap the finest and best vegetables, flowers, herbs, and fruit will take
your gardening to another level.
The Garden Company welcomes your comments about our products and services. We also want to
answer any questions you may have about them.
The Garden Map Kit includes a plant location guide; garden grid; drawing tools; and miniature flowers,
fruits, herbs, and vegetable labels.
To order The Garden Map Kit, visit our Web site www.gardenco.msn.com or call us at 206-555-0100. You
can charge your purchase to your credit card or send a check for $22.49 ($18.99 for the kit plus $3.50 for
shipping and handling).
Select Print Layout view
Navigating using the keyboard
Ctrl+End – End of document
Ctrl+Home – Top of document
End – End of line
Home – Beginning of line
Arrow keys – moves one line/space at a time in various directions
Page up – Moves up one screen at a time
Page down – Moves down one screen at a time
Scroll bars – Moves up/down/right/left in a document
Selecting a word Double-click on the word to select it.
Replacing/deleting text To replace selected text, start typing over it there is no need to back space.
To delete selected text, press the delete key.
Page 4 of 12
Selecting a line Move to the left margin when the cursor turns into a white arrow (arrow pointing right towards text).
Click the mouse button once Select a line holding down the mouse and dragging. Select adjacent lines
either above or below.
Selecting a sentence Move the cursor into the sentence you want to select, Hold Ctrl key down as you click anywhere in that
sentence. Note: if there is an abbreviation, or other punctuation in the middle of the sentence, you will
have to drag through the entire sentence instead.
Selecting a paragraph Move to the left margin when the cursor turns into a white arrow, Click the mouse button twice. (rapidly
without moving the mouse). Or triple-click on any word in a paragraph.
Selecting entire document Move to the left margin when the cursor turns into a white arrow, Click mouse button three times. Or
Ctrl+A or Home>Select>Select All.
Selecting non-adjacent blocks of text Select the first block of text, hold Ctrl key, select the next block of text.
Page Breaks There are two types of page breaks in Word.
Automatic page breaks inserted into a document automatically when a page is completely filled.
These page breaks appear as a dotted line across the screen in Normal view.
Manual or Hard page breaks are forced page breaks entered by you. Hard page breaks appear
as a dotted line across the screen, with the words Page Break displayed.
Inserting a Hard Page Break
Select Normal View
1. Position the insertion point where the new page will start. Place the Insertion Point before the
text The Garden Map Kit, Press Ctrl+Enter, a new page is created
2. Deleting a Hard Page Break, position the insertion point on the Hard Page Break line, Press
Delete.
3. On the Formatting toolbar click Undo, to put the page break back.
Page 5 of 12
Bullet Points This is a way to single out paragraphs or lists to catch a person’s eye. Take the paragraph:
The Garden Map Kit includes a plant location guide; garden grid; drawing tools; and miniature flowers,
fruits, herbs, and vegetable labels.
Now, instead of having that as a list within the sentence, we can have each item on its own
line. To do this, put a semicolon after includes and hit enter. Now, select the bulleted list
option. Keep hitting the enter button to get a new bullet point. To stop getting bullets, hit
the enter key twice.
Ordered Lists An ordered list is the same as an unordered list – just with numbers. These will
automatically go to the next number for you. If you add a new item in the middle of a list,
the items after will renumber to match the new number. Select our list and hit the ordered
list icon. Add items, remove items. To stop getting new numbers, hit the enter key twice.
Print Preview To view how the document will look when printed out, Go to the File Menu, then Print. On the right
side, you will see all of the pages of the document to be printed out. To view more pages, zoom out
using the zoom slider.
Replacing Text AutoCorrect – Word corrects commonly misspelled words as you type so that you don’t have to correct
them yourself. For example if you type teh, Word changes it to the as soon as the space bar is pressed.
For example, if you type the abbreviation gc to represent the company name, you can AutoCorrect
insert the full phrase The Garden Company.
1. Click the File tab.
2. Click Options.
3. Click Proofing.
4. If you are using Outlook, click Mail, and then click Spelling and AutoCorrect.
5. Click AutoCorrect Options.
6. On the AutoCorrect tab, make sure the Replace text as you type check box is selected.
7. In the Replace box, type a word or phrase that you often mistype or misspell — for example,
type usualy.
8. In the With box, type the correct spelling of the word — for example, type usually.
9. Click Add.
10. Click OK.

Page 6 of 12
Find and Replace is helpful if you wish to substitute one word or phrase for another.
Formatting
Double-space the entire document 1. On the Home tab, in the Styles group, right-click Normal, and then click Modify.
2. Under Formatting, click the Double Space button, and then click OK.
Formatting for the entire document changes to double spacing.
Double-space the selected text
1. Select the text that you want to change.
2. On the Home tab, in the Paragraph group, click Line and
Paragraph Spacing.
3. Click 2.0.
Changing the Appearance of a Paragraph You can enhance the appearance of a paragraph by changing the way text is aligned, modifying the
spacing between paragraphs, and adding borders and shading around text. In Word, a paragraph is any
amount of text that ends when you press the Enter key.
You control the length of a line by setting the left and
right margins and the length of a page by setting the
top and bottom margins. The width of margins
controls the amount of white space that surrounds
your text.
Page 7 of 12
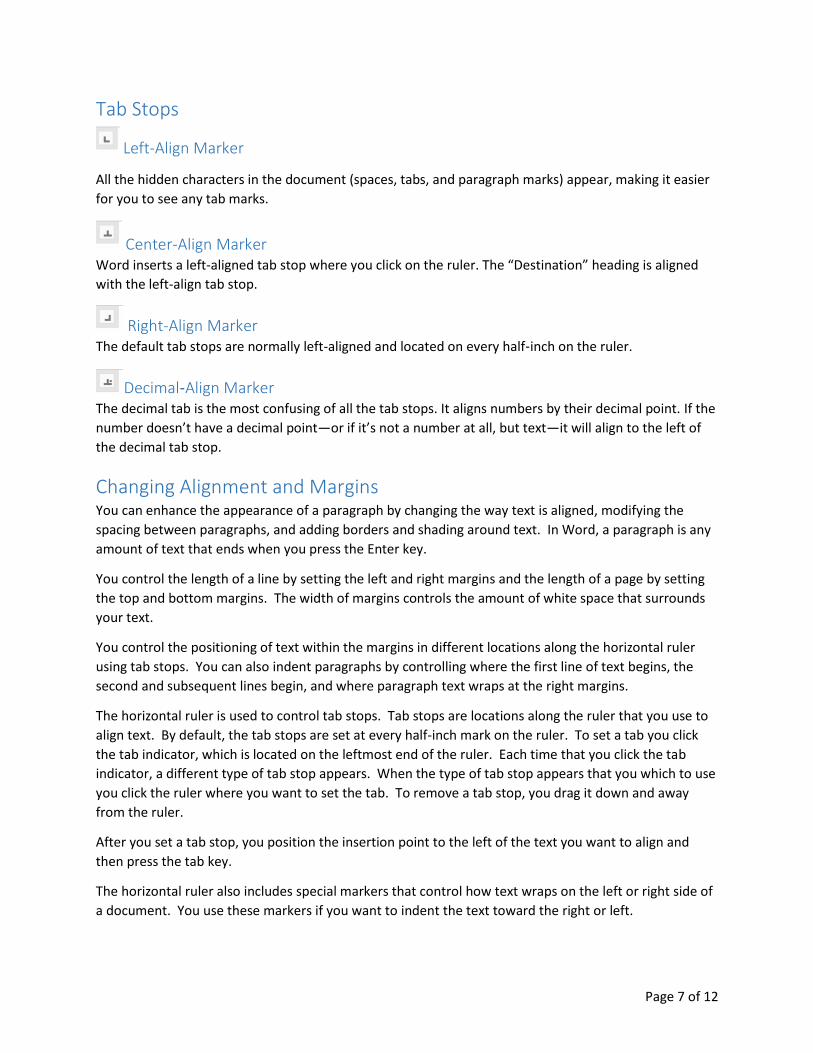
Tab Stops
Left-Align Marker
All the hidden characters in the document (spaces, tabs, and paragraph marks) appear, making it easier
for you to see any tab marks.
Center-Align Marker Word inserts a left-aligned tab stop where you click on the ruler. The “Destination” heading is aligned
with the left-align tab stop.
Right-Align Marker The default tab stops are normally left-aligned and located on every half‑inch on the ruler.
Decimal‑Align Marker The decimal tab is the most confusing of all the tab stops. It aligns numbers by their decimal point. If the
number doesn’t have a decimal point—or if it’s not a number at all, but text—it will align to the left of
the decimal tab stop.
Changing Alignment and Margins You can enhance the appearance of a paragraph by changing the way text is aligned, modifying the
spacing between paragraphs, and adding borders and shading around text. In Word, a paragraph is any
amount of text that ends when you press the Enter key.
You control the length of a line by setting the left and right margins and the length of a page by setting
the top and bottom margins. The width of margins controls the amount of white space that surrounds
your text.
You control the positioning of text within the margins in different locations along the horizontal ruler
using tab stops. You can also indent paragraphs by controlling where the first line of text begins, the
second and subsequent lines begin, and where paragraph text wraps at the right margins.
The horizontal ruler is used to control tab stops. Tab stops are locations along the ruler that you use to
align text. By default, the tab stops are set at every half-inch mark on the ruler. To set a tab you click
the tab indicator, which is located on the leftmost end of the ruler. Each time that you click the tab
indicator, a different type of tab stop appears. When the type of tab stop appears that you which to use
you click the ruler where you want to set the tab. To remove a tab stop, you drag it down and away
from the ruler.
After you set a tab stop, you position the insertion point to the left of the text you want to align and
then press the tab key.
The horizontal ruler also includes special markers that control how text wraps on the left or right side of
a document. You use these markers if you want to indent the text toward the right or left.
Page 8 of 12
Paper Size Click the Page Layout tab on the Ribbon
Click the Size button in the Page Setup group.
Click the Paper Size list arrow to select from a list of common paper sizes.
Section Breaks Some page layout settings, such as margins and page numbering, typically apply to an entire document.
Sometimes, though, you might want to use different layouts in different parts of the document. You can
do this by dividing the document into sections.
A section is a portion of a document in which you can set certain page layout options, such as margins,
headers and footers, page numbering, and page orientation. By default, a document has only one
section. However, you can create additional sections in a document – and even on a single page – and
apply different settings to each one.
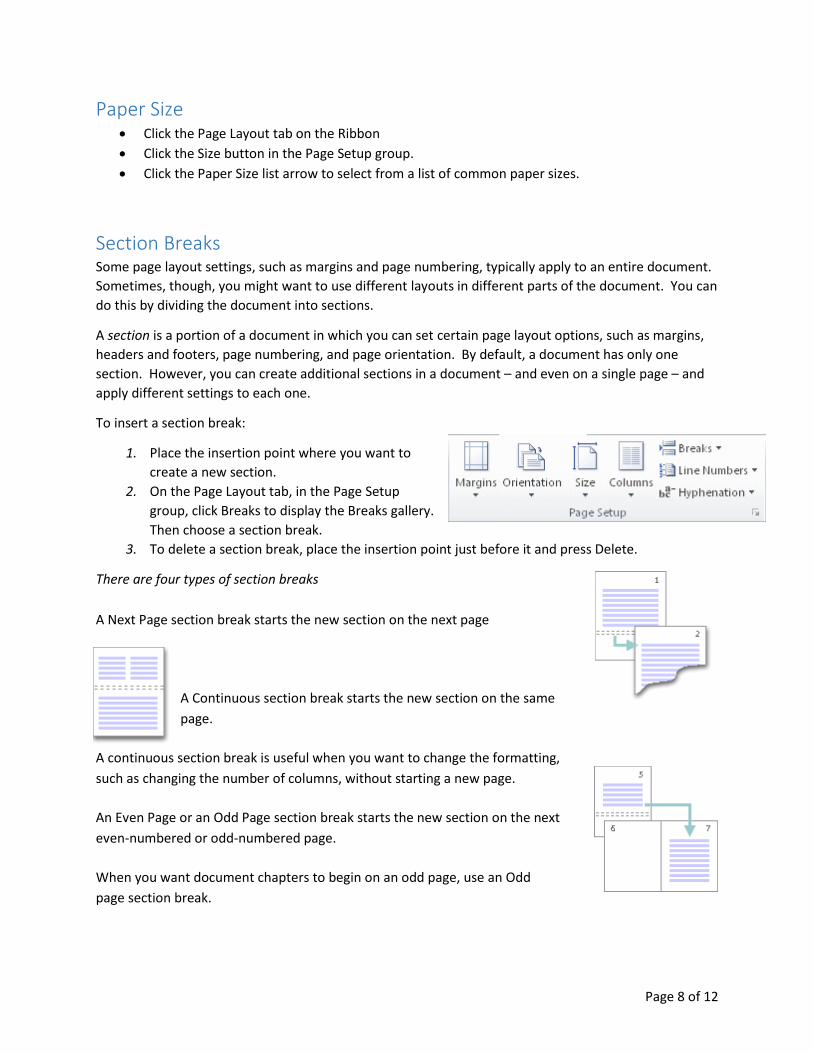
To insert a section break:
1. Place the insertion point where you want to
create a new section.
2. On the Page Layout tab, in the Page Setup
group, click Breaks to display the Breaks gallery.
Then choose a section break.
3. To delete a section break, place the insertion point just before it and press Delete.
There are four types of section breaks
A Next Page section break starts the new section on the next page
A Continuous section break starts the new section on the same
page.
A continuous section break is useful when you want to change the formatting,
such as changing the number of columns, without starting a new page.
An Even Page or an Odd Page section break starts the new section on the next
even-numbered or odd-numbered page.
When you want document chapters to begin on an odd page, use an Odd
page section break.
Page 9 of 12
Exercise – Inserting and deleting section breaks
1. Open Cookbook 4
2. Show the hidden formatting symbols
3. At the bottom of page 1, select the page break. Press [Delete]
4. On the Page Layout tab, in the Page Setup group, click Breaks
Under Section Breaks, choose Next Page
5. At the bottom of page 2, delete the page break
6. In the Page Setup group, click Breaks and choose Next Page
7. On page 6, place the insertion point before “Bay leaf”
Insert a Next Page section break
8. Create a section that starts on page 15
Working with columns Newsletters, brochures, and reports often present content in columns. Using columns can save space by
enabling you to present more information on a page.
To format text into columns:
1. Select the text you want to format as columns.
2. On the Page Layout tab, in the Page Setup group, click Columns and choose More columns to
open the Columns dialog box
3. Under Presets, select a format. If you need more than three columns, enter the value in the
Number of columns box.
4. Adjust the width and spacing of the columns as needed.
Exercise – Formatting the text into columns.
1. Open Cookbook5
2. Place the insertion point in any of the recipes
3. On the Page Layout tab, in the Page Setup group, click Columns
Select Two
4. Scroll through the document
5. Place the insertion point in the last section of the document.
Display the Margins gallery and select Normal
6. Click Columns and choose More Columns…
Check Line Between
Edit the Spacing box for column 1 to read 1
Press [Tab]
7. Click OK
8. In the Page Setup group, click Hyphenation and choose Automatic.
Inserting and deleting column breaks A column break is a mark that indicates the end of a column. When one of the columns is longer than
another, you can insert a column break to balance them. The text after the break will move to the next
Page 10 of 12
column. You might also want to start a paragraph at the beginning of a column or move a heading to
the next column to improve readability.
To insert a column break:
1. Place the insertion point where you want to insert the column break.
2. Click the Page Layout tab.
3. In the Page Setup group, click Breaks and choose Column.
Exercise – Inserting column breaks
1. On page 15, place the insertion point to the left of “Montego Bay Jerk Chicken”
2. On the Page Layout tab, in the Page Setup group, click Breaks and select Column
3. On page 15, insert a column break before “Big D Veggie Chili”
4. Insert column breaks before the Crème Bruelee and Wasabi Pork Tenderloin recipes.
Creating a heading that spans columns 1. Place the insertion point where you want the heading to appear, and type the heading text
2. Insert a Continuous section break after the text.
3. Place the insertion point in the section with the heading
4. Set the number of columns to one.
Exercise – Adding a heading across columns
1. On page 15, place the insertion point to the left of “Spicy Buzzard Wings”
Type Cooking with Outlander Spices
2. From the Breaks gallery, select Continous
3. Press Backspace
4. Set the number of columns to 1
Press [Enter] twice
5. Place the insertion point in the line Cooking with Outlander Spices
Center the text horizontally

Page 11 of 12
Examining formatting You can tell what formatting you’ve applied to text by examining the Font and Paragraph dialog boxes in
the home tab. But a faster way to see the details of all of the formatting applied to a selection is to use
the Reveal Formatting pane. In addition, you can use the Reveal Formatting pane to compare the
formatting of two selections.
To open the Reveal Formatting pane, press Shift+F1
Creating Styles
A style is a named set of formatting options (font, font size, font color, effects, etc) that define the
appearance of recurring text elements, such as headings or body text. By using a style, you can apply
several formats in one step.
Creating styles based on example You might have formatted some text by using a comination of options that you want to apply to other
text. If you plan to use the same combination of formats repeatedly, you can create a style based on the
formatting of selected text.
Page 12 of 12
To create a style based on selected text:
1. Select the text on which you want to base the new style
2. In the Styles group, click the Dialog Box Launcher to open the Styles pane
3. In the Styles pane, click the New Style button to open the Create New Style from Formatting
box.
4. Enter a new name for the new style.
5. Click OK or press Enter to use the selected formats and to create the style, which will now be
available in the Styles gallery and the Styles list.
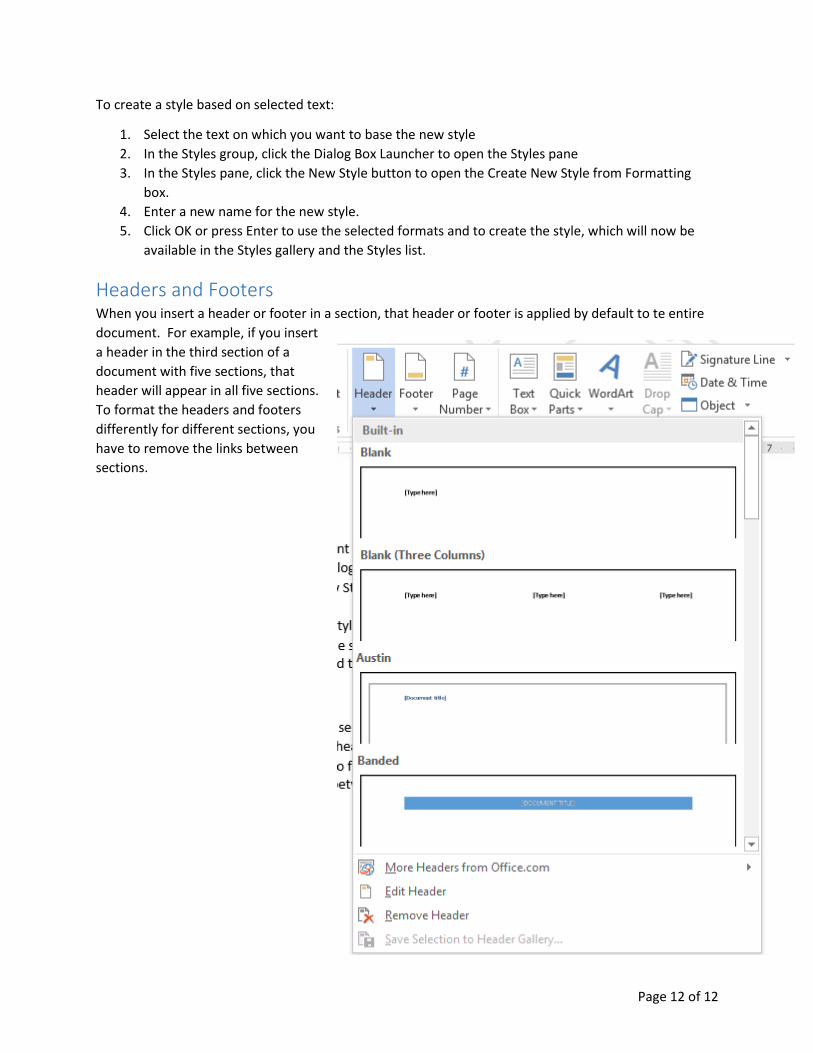
Headers and Footers When you insert a header or footer in a section, that header or footer is applied by default to te entire
document. For example, if you insert
a header in the third section of a
document with five sections, that
header will appear in all five sections.
To format the headers and footers
differently for different sections, you
have to remove the links between
sections.