Embed Size (px)
Citation preview

Sweet Potato Hill
Grow It, Try It, Like It!Preschool Fun With Fruits and Vegetables
Booklet 4

Welcome to…Sweet Potato Hill at Tasty Acres Farm!There is a delicious secret hiding at Sweet Potato Hill. The other plants show off their fruits and vegetables during the growing season. On the hill, the potatoes stay hidden in the ground until harvest time. The children will not be able to hide their delight in learning about this sweet vegetable; it grows in many varieties. Appealing hands-on activities encourage the children to discover how a sweet potato looks, feels, smells, and tastes. The children make a pretend sweet potato hill to learn how this vegetable is grown, harvested, and shipped to farmers’ markets and stores. Children have many opportunities to taste sweet potatoes plain and in salads, side dishes, and cookies. Families share in the sweet rewards through the activities and recipes of the Growing at Home materials. What’s InsideSweet Potato Hill LessonsPlanning Chart for Sweet Potato Hill Activities .............................................................................................................................1A: Sweet Potatoes are Appealing Hands-On Activities. .......................................................................................................... 2
1. “Eye” Wonder What This Is? .........................................................................................................................................................22. Sweet Potato…A Look Inside....................................................................................................................................................43. Mashed Sweet Potatoes ................................................................................................................................................................6
B: Sweet Potato…Where Do You Come From? Planting Activities....................................................................................... 81. Sweet Potatoes Grow from Eyes and Slips ........................................................................................................................82. Start a Sweet Potato Slip ...........................................................................................................................................................103. Make a Pretend Sweet Potato Hill........................................................................................................................................12
C: Sweet Potato Stories and Songs ............................................................................................................................................... 141. Cool Puppy Pup’s Sweet Potato Lunch Party Video ..................................................................................................142. Reading Activity ................................................................................................................................................................................16 3. Old MacDonald Had a Farm, Sweet Potato Style .......................................................................................................18
D: Introducing MyPlate Nutrition Education Activities .......................................................................................................201. You Say Potato and I Say Potáto .............................................................................................................................................202. A Sweet Ending with Sweet Potato .....................................................................................................................................26 a. Sweet Potato-Oatmeal-Chocolate Chip Bars Recipe .........................................................................................28
Growing at Home MaterialsSweet Potato Hill Growing at Home #1
1. Letter to Home #1 .......................................................................................................................................................................30 2. Mashed Sweet Potatoes Recipe .............................................................................................................................................31 3. Sweet Potato Number Match Activity ...............................................................................................................................32
Sweet Potato Hill Growing at Home #2 1. Letter to Home #2 .......................................................................................................................................................................332. Oven Baked Sweet Potato Planks (Wedges) Recipe .................................................................................................34 3. Sweet Potatoes Grow From Eyes Activity .......................................................................................................................35
Sweet Potato Hill Growing at Home #3 1. Letter to Home #3 .......................................................................................................................................................................372. Sweet Potato-Oatmeal-Chocolate Chip Bars Recipe ...............................................................................................383. Make a Sweet Potato Windsock Activity ..........................................................................................................................39
2
A Plan For Organizing Sweet Potato Hill Activities
The Sweet Potato Hill lesson plans are designed to be used in their entirety but if your center does not have the time, space, or resources to do all the activities, select the activities best suited to your center’s environment and available resources from Section A: hands-on activi-ties, Section B: planting activities, Section C: sweet potato stories and songs, and Section D: nutrition education activities. Be sure that the activities you choose help the children meet the objectives listed at the beginning of each lesson plan section.
Here is one way to arrange the activities in your Sweet Potato Hill. Most activities require only 10-15 minutes; pick a few for each day. In this example, all of the activities from the lesson plans are completed, but spaced out over a 5-day period. Additionally, two activities from the Garden Art and Crafts Section in Booklet 1 are added. These activities are fun and useful ways to help reinforce the objectives of each activity. On page 19, it gives tips for creating successful projects and ideas for harvesting fun month after month. The Garden Art and Crafts chart connects the art and crafts to the lesson activities.
Most activities require only 10-15 minutes; pick a few for each day. In this example, all of the activities from the lesson plans are completed, but spaced out over a 5-day period.

2 1Sweet Potato Hill
Planning Chart for Sweet Potato Hill Activities
Day One Day Two Day Three Day Four Day Five
A1 “Eye” Wonder What This Is? Hands-on Activity
A3 Mashed Sweet Potatoes Hands-on Activity
B2 Start a Sweet Potato SlipPlanting Activity
C3 Old MacDonald Had a Farm Song, Sweet Potato Style
D1 You Say Potato, I Say PotátoNutrition EducationActivity
A2 A Look InsideHands-on Activity
C1 Cool Puppy Pup Video
B3Make a Pretend Sweet Potato Hill Planting Activity
Garden Craft Make a Scarecrow
D2 Sweet Endings With Sweet Potato Nutrition Education Activity
Garden Art Stamped Paper
B1 Sweet Potatoes Start From Eyes and Slips Planting Activity
C3 Old MacDonald Had a Farm Song, Sweet Potato Style
C2 Reading Activity
Send Home Growing at Home Materials #1
Send Home Growing at Home Materials #2
Send Home Growing at Home Materials #3
Revisit the Farm: Rainy Day Fun All Year Long When the weather changes your outdoor plans, the activities from Tasty Acres Farm provide a welcome opportunity to revisit and remember all the fun and flavor of Grow It, Try It, Like It! Sing the songs, watch the video segments, and use the Garden Art and Crafts Section in Booklet1 for ideas. Make a rainy day one to reconnect with these fruits and vegetables.
More Ways To Grow – The Sweet Potato Hill unit can be included in other areas of the curriculum. Complementary themes include:Foods – Vegetable Shapes – Oblong Colors – Orange Seasons – Summer, Fall Body – Senses Opposites – Above & Below Plants – Vines, Eyes, Sprouts Alphabet – S and P words

2 Grow It, Try It, Like It!
Growing at Home Introduction Letter and Hand Washing and Polite Tasting Guidelines: Send a copy of these resources home before starting the first unit from Grow It, Try It, Like It! If you have already sent these resources home, you may omit this step. (See Booklet 1, Tool Shed Resources, page 42-44.)
Sweet Potato Growing at Home #1: Send a copy of this resource home with each child at the start of the Section A activities.
A1: “Eye” Wonder What This Is Use the Mystery Box/Bag to create interest by having the children feel the outside of a sweet potato before revealing the “mystery” item to all.
ObjectivesThe children will be able to:
< Identify a sweet potato as a heavy, oblong-shaped, orange-brown vegetable;
< Describe the outward appearance and smell of a sweet potato.
Before the Activity–Hand Washing and Polite Tasting < Explain that we should always wash our hands before preparing and eating food. Have the children wash their hands (see Booklet 1, Tool Shed Resources, page 43, for directions).
< If this is the first activity involving food tasting, talk with the children about polite food tasting habits. (see Booklet 1,Tool Shed Resources, page 44, for details).
A. Sweet Potatoes Are Appealing Hands-On Activities
Materials Needed < 2 sweet potatoes < Container and tongs or serving spoon
< Mystery Box/Bag < Paper and Pencil < Baseball < Napkins, one per child
What To Do Ahead of Time < Wash sweet potatoes. < Prepare raw sweet potato slices (¼ inch thick), one per child.
< Place a clean sweet potato in the Mystery Box/Bag.
< Make copies of Sweet Potato Growing at Home #1–one set per child.
< Review Make a Mystery Box or Bag (see Booklet 1,Tool Shed Resources, page 45).
2 3Sweet Potato Hill
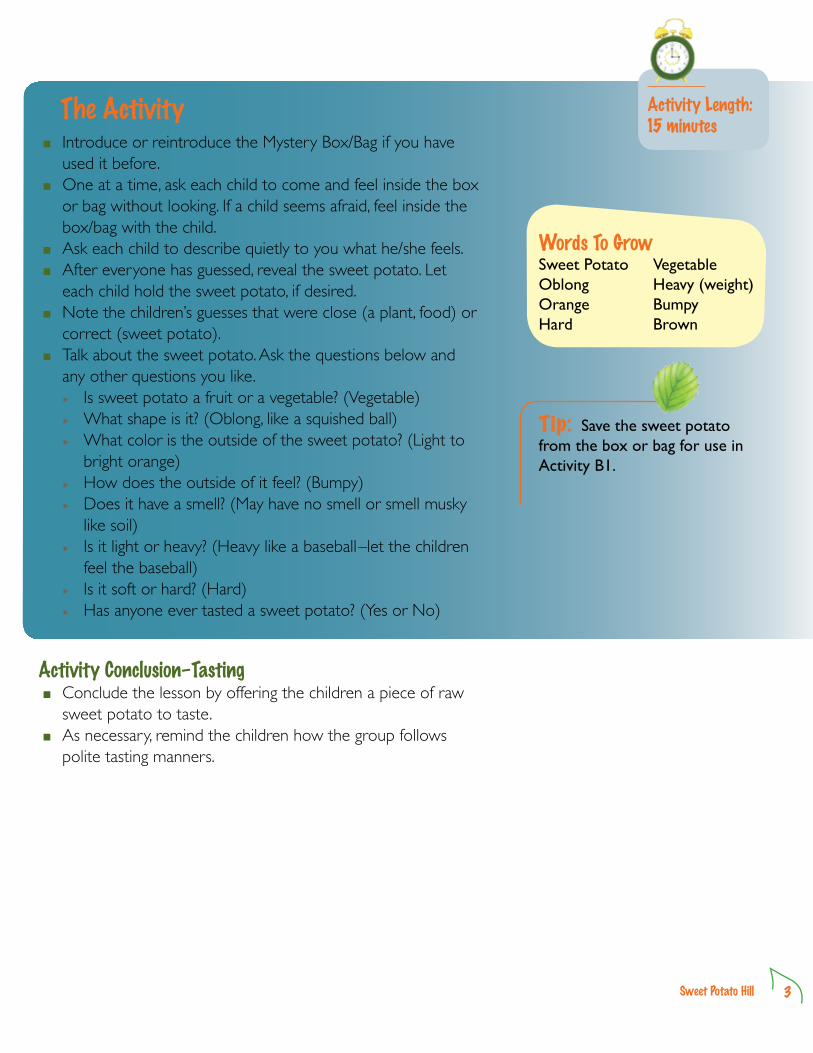
The Activity < Introduce or reintroduce the Mystery Box/Bag if you have used it before.
< One at a time, ask each child to come and feel inside the box or bag without looking. If a child seems afraid, feel inside the box/bag with the child.
< Ask each child to describe quietly to you what he/she feels. < After everyone has guessed, reveal the sweet potato. Let each child hold the sweet potato, if desired.
< Note the children’s guesses that were close (a plant, food) or correct (sweet potato).
< Talk about the sweet potato. Ask the questions below and any other questions you like.
▶ Is sweet potato a fruit or a vegetable? (Vegetable) ▶ What shape is it? (Oblong, like a squished ball) ▶ What color is the outside of the sweet potato? (Light to
bright orange) ▶ How does the outside of it feel? (Bumpy) ▶ Does it have a smell? (May have no smell or smell musky
like soil) ▶ Is it light or heavy? (Heavy like a baseball –let the children
feel the baseball) ▶ Is it soft or hard? (Hard) ▶ Has anyone ever tasted a sweet potato? (Yes or No)
Activity Conclusion–Tasting
< Conclude the lesson by offering the children a piece of raw sweet potato to taste.
< As necessary, remind the children how the group follows polite tasting manners.
Tip: Save the sweet potato from the box or bag for use in Activity B1.
Activity Length: 15 minutes
Words To GrowSweet Potato VegetableOblong Heavy (weight)Orange BumpyHard Brown
4 Grow It, Try It, Like It!
A2: Sweet Potato…A Look InsideEngage all the senses! The children see and feel the inside of a sweet potato, then smell and taste it.
ObjectivesThe children will be able to:
< Describe the appearance, smell, and taste of a sweet potato; < Tell that all of the sweet potato can be eaten including the peel.
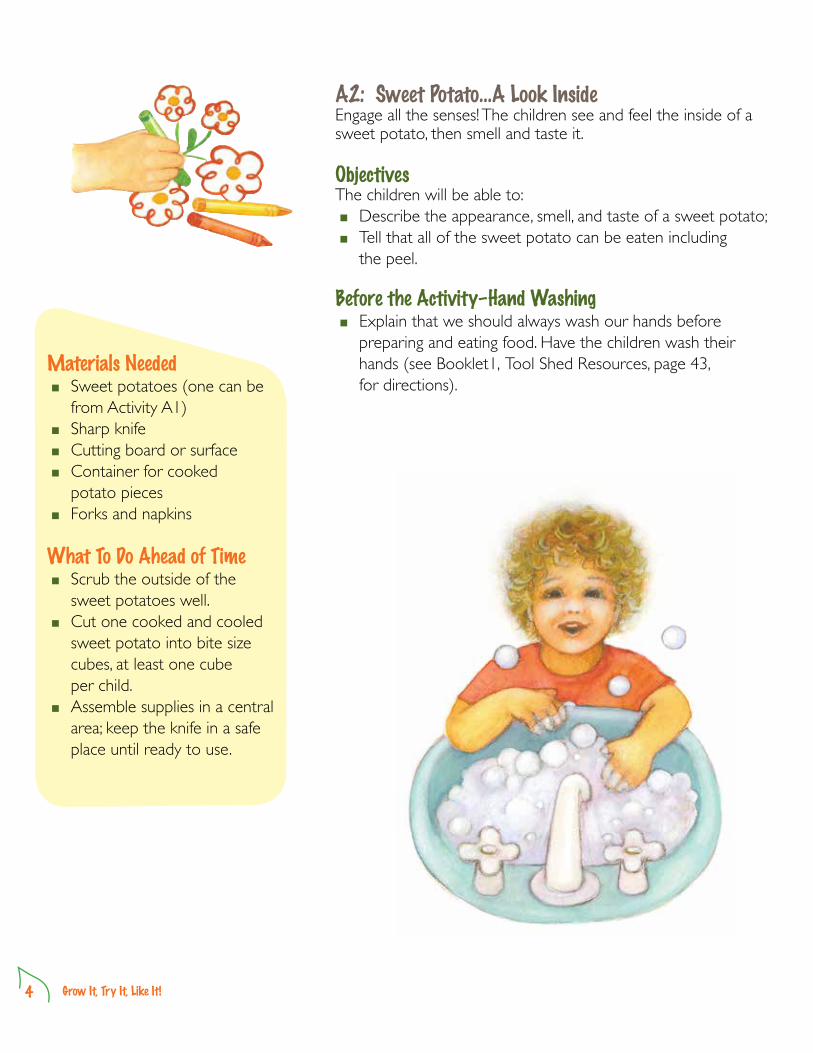
Before the Activity–Hand Washing < Explain that we should always wash our hands before preparing and eating food. Have the children wash their hands (see Booklet 1, Tool Shed Resources, page 43, for directions).
Materials Needed < Sweet potatoes (one can be from Activity A1)
< Sharp knife < Cutting board or surface < Container for cooked potato pieces
< Forks and napkins What To Do Ahead of Time
< Scrub the outside of the sweet potatoes well.
< Cut one cooked and cooled sweet potato into bite size cubes, at least one cube per child.
< Assemble supplies in a central area; keep the knife in a safe place until ready to use.
4 5Sweet Potato Hill
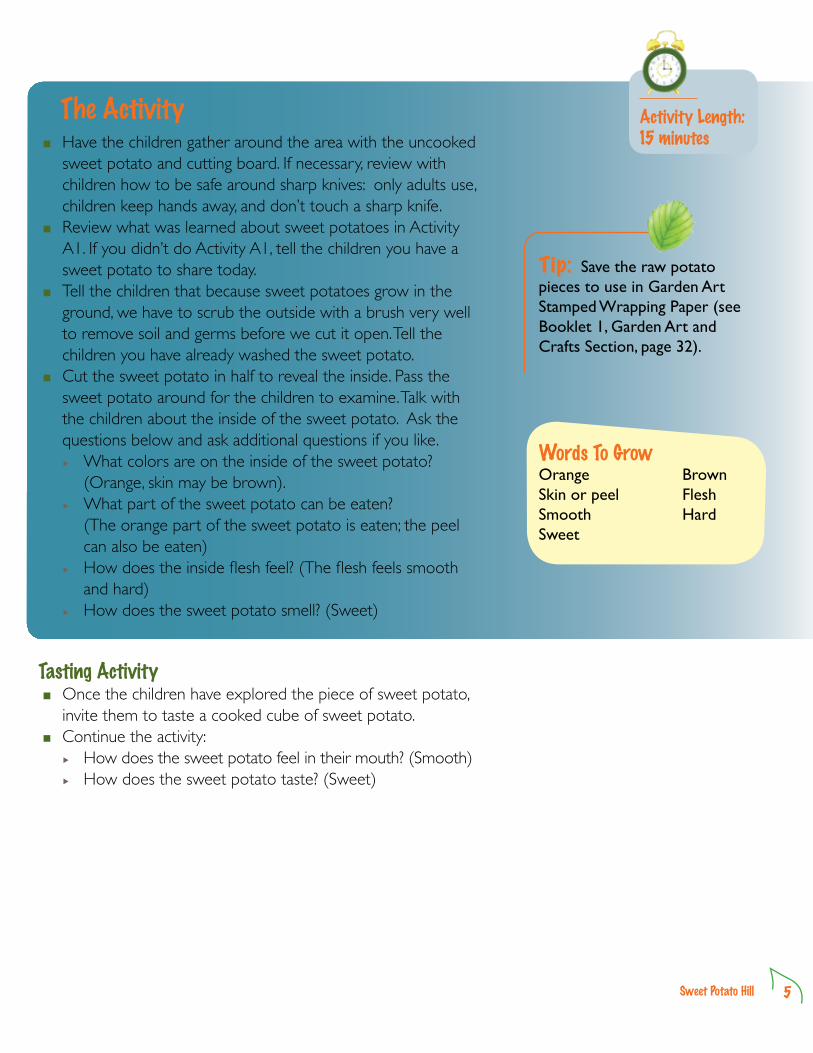
The Activity < Have the children gather around the area with the uncooked sweet potato and cutting board. If necessary, review with children how to be safe around sharp knives: only adults use, children keep hands away, and don’t touch a sharp knife.
< Review what was learned about sweet potatoes in Activity A1. If you didn’t do Activity A1, tell the children you have a sweet potato to share today.
< Tell the children that because sweet potatoes grow in the ground, we have to scrub the outside with a brush very well to remove soil and germs before we cut it open. Tell the children you have already washed the sweet potato.
< Cut the sweet potato in half to reveal the inside. Pass the sweet potato around for the children to examine. Talk with the children about the inside of the sweet potato. Ask the questions below and ask additional questions if you like.
▶ What colors are on the inside of the sweet potato? (Orange, skin may be brown).
▶ What part of the sweet potato can be eaten? (The orange part of the sweet potato is eaten; the peel can also be eaten)
▶ How does the inside flesh feel? (The flesh feels smooth and hard)
▶ How does the sweet potato smell? (Sweet)
Tasting Activity
< Once the children have explored the piece of sweet potato, invite them to taste a cooked cube of sweet potato.
< Continue the activity: ▶ How does the sweet potato feel in their mouth? (Smooth) ▶ How does the sweet potato taste? (Sweet)
Activity Length: 15 minutes
Tip: Save the raw potato pieces to use in Garden Art Stamped Wrapping Paper (see Booklet 1, Garden Art and Crafts Section, page 32).
Words To GrowOrange BrownSkin or peel FleshSmooth HardSweet
6 Grow It, Try It, Like It!
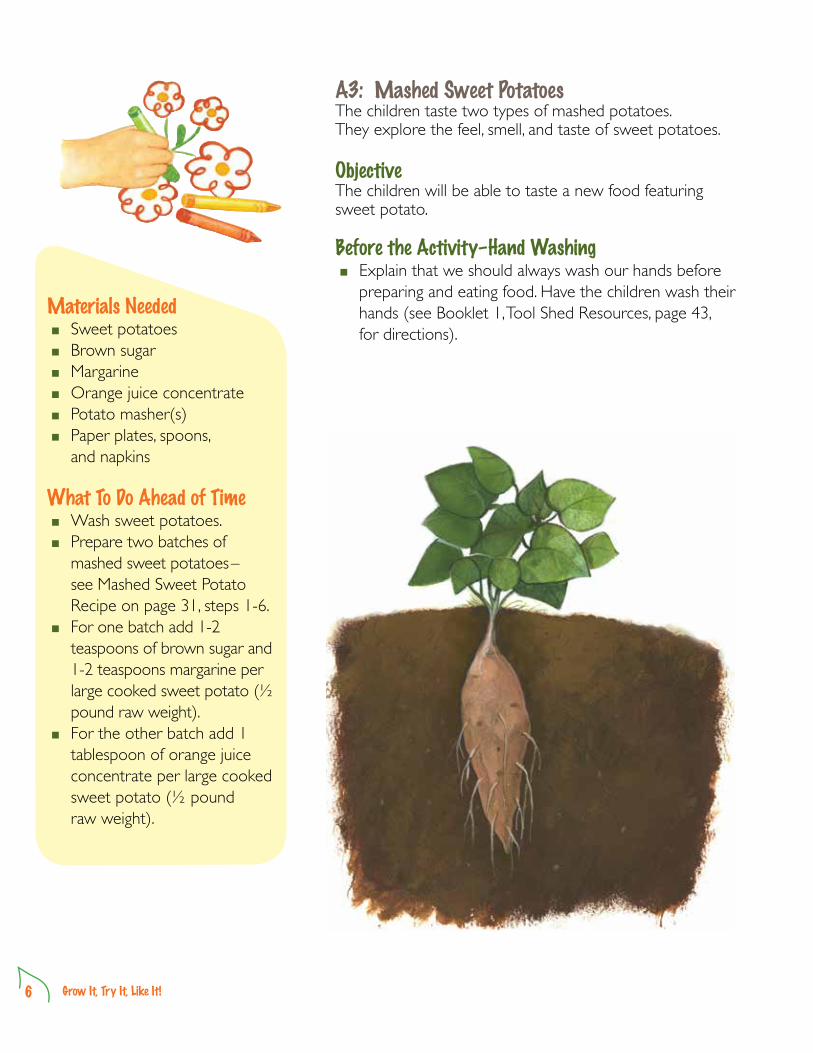
A3: Mashed Sweet PotatoesThe children taste two types of mashed potatoes. They explore the feel, smell, and taste of sweet potatoes.
ObjectiveThe children will be able to taste a new food featuring sweet potato.
Before the Activity–Hand Washing < Explain that we should always wash our hands before preparing and eating food. Have the children wash their hands (see Booklet 1, Tool Shed Resources, page 43, for directions).
Materials Needed < Sweet potatoes < Brown sugar < Margarine < Orange juice concentrate < Potato masher(s) < Paper plates, spoons, and napkins
What To Do Ahead of Time < Wash sweet potatoes. < Prepare two batches of mashed sweet potatoes– see Mashed Sweet Potato Recipe on page 31, steps 1-6.
< For one batch add 1-2 teaspoons of brown sugar and 1-2 teaspoons margarine per large cooked sweet potato (½ pound raw weight).
< For the other batch add 1 tablespoon of orange juice concentrate per large cooked sweet potato (½ pound raw weight).

6 7Sweet Potato Hill
Activity Length: 10-minutes
The Activity < Have each child seated at the table(s). < Explain that we should always wash and scrub potatoes under running water before they are eaten. Let the children know you have already washed the potatoes.
< Ask them if they have had sweet potatoes at their family’s Thanksgiving or other holiday or family meals.
< Make sure potatoes are not too hot. < Let each child take a turn mashing the potatoes. < Tell the children they will taste the sweet potatoes cooked and mashed with two different seasonings added.
< Season the cooked sweet potatoes while the children watch.
Activity Conclusion–Tasting
< Give each child a small serving of each type of mashed sweet potatoes. Make sure the potatoes are warm but not too hot.
< Have the children taste both types of mashed potatoes. As they taste their potatoes, have them notice any differences in the taste of the sweet potatoes.
< As the children are eating, ask them to describe how the mashed sweet potatoes:
▶ smell (sweet, may smell of brown sugar or oranges); ▶ feel in the mouth (smooth, warm); and ▶ taste (sweet, may have orange flavor ).
Words To GrowSweet Potato OrangeMashed PeelSugar
8 Grow It, Try It, Like It!
Sweet Potato Growing at Home #2: Send a copy of this resource home with each child at the start of the Section B activities.
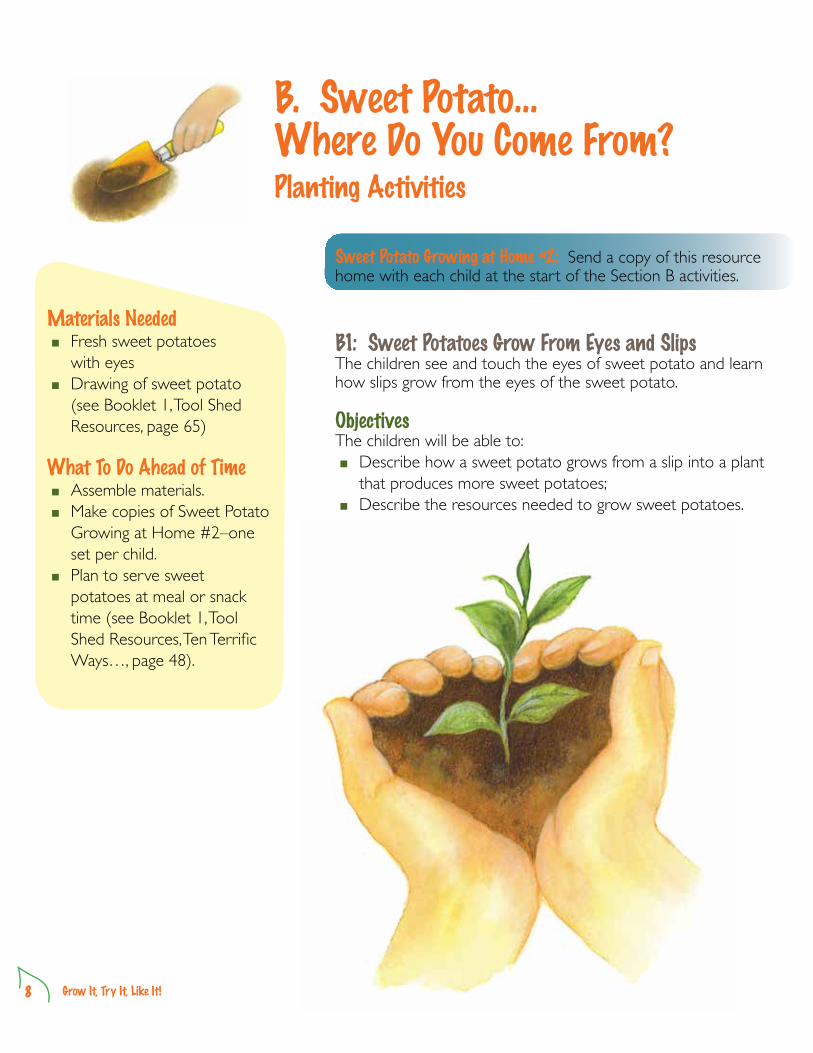
B1: Sweet Potatoes Grow From Eyes and SlipsThe children see and touch the eyes of sweet potato and learn how slips grow from the eyes of the sweet potato.
Objectives The children will be able to:
< Describe how a sweet potato grows from a slip into a plant that produces more sweet potatoes;
< Describe the resources needed to grow sweet potatoes.
B. Sweet Potato… Where Do You Come From?Planting Activities
Materials Needed < Fresh sweet potatoes with eyes
< Drawing of sweet potato (see Booklet 1, Tool Shed Resources, page 65)
What To Do Ahead of Time < Assemble materials. < Make copies of Sweet Potato Growing at Home #2–one set per child.
< Plan to serve sweet potatoes at meal or snack time (see Booklet 1, Tool Shed Resources, Ten Terrific Ways…, page 48).
8 9Sweet Potato Hill
Activity Length: 10 minutes
Words To GrowEye SlipPeel SoilSun Water
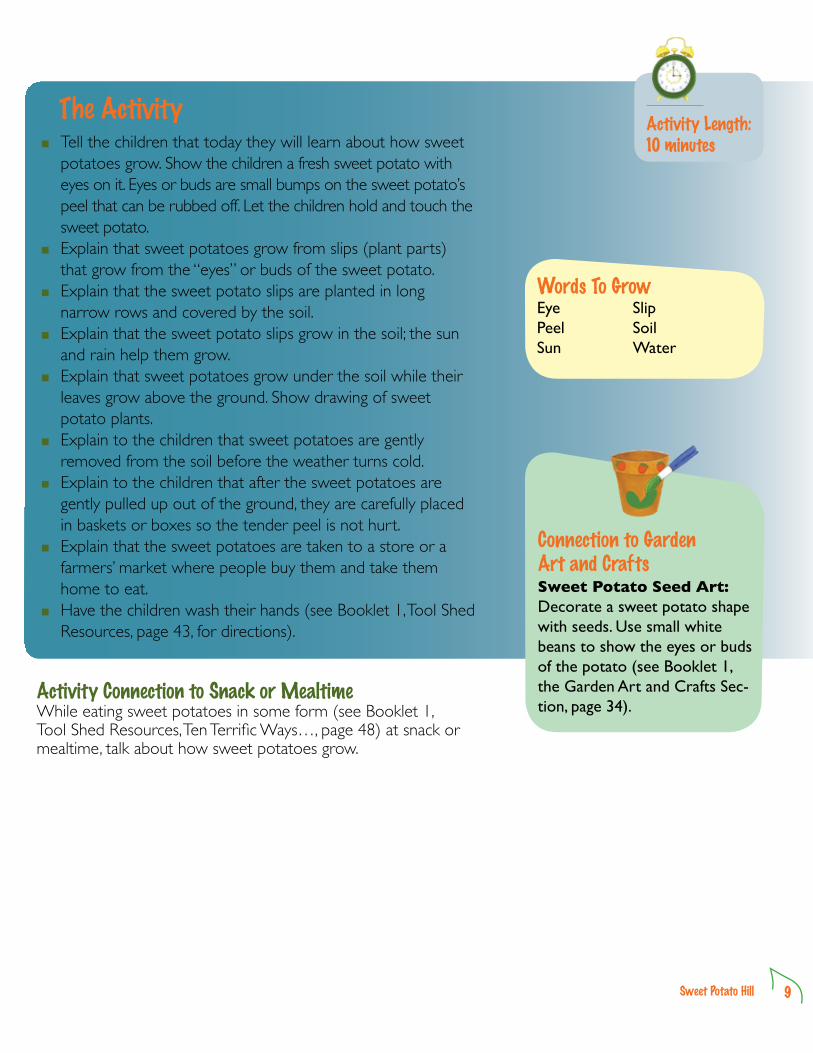
The Activity < Tell the children that today they will learn about how sweet potatoes grow. Show the children a fresh sweet potato with eyes on it. Eyes or buds are small bumps on the sweet potato’s peel that can be rubbed off. Let the children hold and touch the sweet potato.
< Explain that sweet potatoes grow from slips (plant parts) that grow from the “eyes” or buds of the sweet potato.
< Explain that the sweet potato slips are planted in long narrow rows and covered by the soil.
< Explain that the sweet potato slips grow in the soil; the sun and rain help them grow.
< Explain that sweet potatoes grow under the soil while their leaves grow above the ground. Show drawing of sweet potato plants.
< Explain to the children that sweet potatoes are gently removed from the soil before the weather turns cold.
< Explain to the children that after the sweet potatoes are gently pulled up out of the ground, they are carefully placed in baskets or boxes so the tender peel is not hurt.
< Explain that the sweet potatoes are taken to a store or a farmers’ market where people buy them and take them home to eat.
< Have the children wash their hands (see Booklet 1, Tool Shed Resources, page 43, for directions).
Activity Connection to Snack or MealtimeWhile eating sweet potatoes in some form (see Booklet 1, Tool Shed Resources, Ten Terrific Ways…, page 48) at snack or mealtime, talk about how sweet potatoes grow.
Connection to Garden Art and CraftsSweet Potato Seed Art: Decorate a sweet potato shape with seeds. Use small white beans to show the eyes or buds of the potato (see Booklet 1, the Garden Art and Crafts Sec-tion, page 34).
10 Grow It, Try It, Like It!
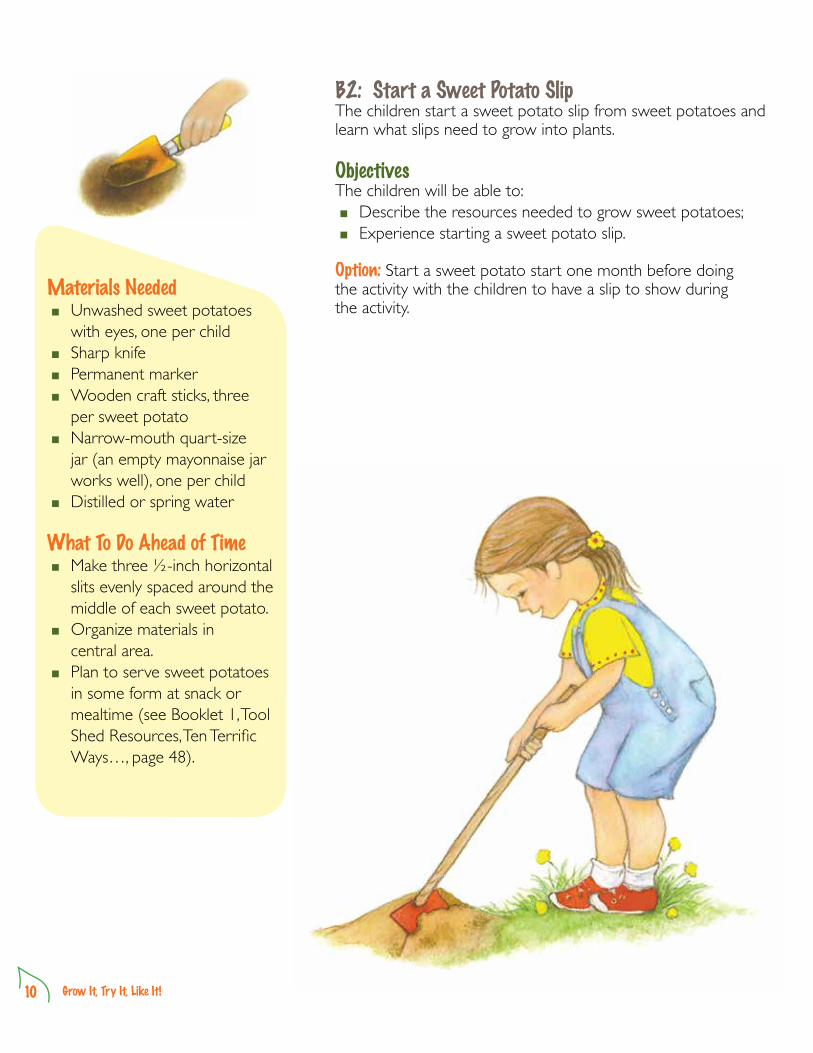
B2: Start a Sweet Potato Slip The children start a sweet potato slip from sweet potatoes and learn what slips need to grow into plants.
Objectives The children will be able to:
< Describe the resources needed to grow sweet potatoes; < Experience starting a sweet potato slip.
Option: Start a sweet potato start one month before doing the activity with the children to have a slip to show during the activity.
Materials Needed < Unwashed sweet potatoes with eyes, one per child
< Sharp knife < Permanent marker < Wooden craft sticks, three per sweet potato
< Narrow-mouth quart-size jar (an empty mayonnaise jar works well), one per child
< Distilled or spring water
What To Do Ahead of Time < Make three ½-inch horizontal slits evenly spaced around the middle of each sweet potato.
< Organize materials in central area.
< Plan to serve sweet potatoes in some form at snack or mealtime (see Booklet 1, Tool Shed Resources, Ten Terrific Ways…, page 48).

10 11Sweet Potato Hill
Activity Length: 10 minutes
The Activity < Have each child seated at the table(s). < Explain to the children that sweet potatoes are different from plants that start from seeds. Sweet potatoes start from slips that grow from the eyes on the sweet potato. Tell the children that after the sweet potato slip grows, it is planted in the soil. Tell the children that today they are going to start a sweet potato slip.
< Help the children fill their jars with water, leaving ½ inch of space between the water and top of the jar.
< Give each child a sweet potato and three wooden craft sticks. Write each child’s name on one of the wooden sticks with permanent marker. Help each child push a wooden craft stick into each slit, at least ½ inch into the sweet potato flesh. The wooden craft sticks create a tripod that supports the sweet potato on the rim of the jar. This allows half of the potato to be below the water level and half above.
< Explain to the children that the sweet potato grows in the jar like plants outside grow in the soil.
< Take the children to the window. Point to the sun. Ask them to think about how the sun feels on their skin. (Warm) Explain that the light and warmth of the sun helps plants to grow.
< Place the jars in a warm location at or above 65 degrees F. In about a month, the slip sprouts will grow 8 to 10 inches, which is the best length for transplanting to the garden.
< Have the children check the jars weekly to see the progress of their slip sprouts.
< NOTE: Place the jars on top of a water heater to speed the growing process.
< Explain to the children that the sweet potato slips are planted in the soil outside. The slips need soil, rain, sun, and time to grow into sweet potato plants. Sweet potatoes will grow from the plants under the ground. The sweet potatoes will be ready to be pulled gently from the soil in the fall.
Activity Connection to Snack or MealtimeWhile eating sweet potatoes at snack or mealtime, talk about starting sweet potato slips and how sweet potatoes grow.
Green Thumb Guide Sweet potatoes require a warm, long growing season. Sweet potato slips started the end of April can be planted at the end of May. The plants will produce sweet potatoes ready to gently pull from the soil and eat in the fall. To grow plants that will produce sweet potatoes, purchase sweet potatoes from a nursery or mail order catalog; follow instructions provided. A sweet potato from the grocery store will sprout leaves and roots, but will not produce sweet potatoes if planted.

12 Grow It, Try It, Like It!
B3: Make a Pretend Sweet Potato HillThe children make a pretend sweet potato hill and learn about the growing stages of sweet potatoes.
Objectives The children will be able to:
< Describe the resources needed to grow sweet potatoes; < Experience making a pretend sweet potato hill.
The Activity < Have each child seated at the table(s), near the supplies. < Review with the children how sweet potatoes grow from slips planted in the ground. The slips need soil, rain, sun, and time to grow into a sweet potato plant. While the plant leaves grow above the ground, the sweet potatoes grow below the ground. The sweet potatoes are grown and ready to be dug up from the ground when the weather turns cool in the fall. The farmer gently pulls the sweet potatoes from the soil and sends them to stores or farmers’ markets. That is where we buy sweet potatoes to take home to eat. Tell the children they are going to make a pretend sweet potato hill.
< Show the children drawings of sweet potatoes. Give each child a copy of the Sweet Potato Blackline Master. Ask the children to color the parts of the sweet potato plant on their sheet just like the drawings. The leaves are green and the potato is orange. Help any children who need assistance.
< Help the children cut out, or cut for them, the colored sweet potato parts.
Materials Needed < Large pieces of brown and blue paper, each 3 to 6 feet long and 18 inches wide
< Sweet Potato Blackline Master (see Booklet 1, Tool Shed Resources, page 76)
< Drawings of sweet potatoes (see Booklet 1, Tool Shed Resources, pages 65-66)
< Crayons, markers, or colored pencils, green and orange
< White yarn cut into sets of 3-, 5-, and 7-inch lengths, one set per child
< Blunt-tip scissors < Paper punch < Double-stick tape
What To Do Ahead of Time < Attach the papers to the wall
with the brown below the blue to represent ground and sky.
< Copy Sweet Potato Blackline Master on white paper, one per child.
< Organize the supplies. < Plan to serve sweet potatoes in
some form at snack or mealtime (see Booklet 1, Tool Shed Resources, Ten Terrific Ways…, page 48).
Optional Activity: Make Individual Pretend Sweet Potato Plants. < Overlap 8½- by 11-inch sheets of brown and blue paper ½ inch along the 11-inch edge and tape together to create a surface approximately 16 by 11-inches.
< Make one set per child; attach the colored potato parts to the lower brown section (below ground) and upper blue section (above ground).
< Write each child’s name on the sheet of paper.
12 13Sweet Potato Hill
Activity Length: 15 minutes
Words To GrowSlip LeavesRoots UndergroundSweet potato
Connection to Garden Art and CraftsProduce Placemat: Use the Pretend Sweet Potato Plant to decorate a placemat. Use the individual plant option and at-tach the finished plant to one side of the placemat. Have the children add drawings of their favorite sweet potato recipes on the reverse side of the placemat. Laminate and use this reversible placemat to review how sweet potatoes grow and the different ways we enjoy sweet potatoes (see Booklet 1, Garden Art and Crafts Section, page 29).
Activity continued… < Take the sweet potato and make a hole with a paper punch through each of the three eyes.
< Give each child a set of cut yarn lengths. Help each child thread yarn through the three holes and tape the tip of the yarn to the backside of the potato to represent the roots of a slip.
< Position the sweet potato on the brown paper so that the end of the potato without the yarn touches where the brown and blue papers meet. Use a piece or two of additional double-stick tape to secure the potato to the paper.
< Position the green leaves on the blue section directly touching the top of the potato. When done, it should represent the leaves growing above the ground.
< When finished, the assembled pieces should look like a sweet potato with slips growing underneath the ground while the green plant leaves grow above the ground.
< Talk about how the plant grows sweet potatoes while attaching each part of the sweet potato plant to the papers.
< Have the children wash their hands for snack or mealtime.
Activity Connection to Snack or MealtimeWhile eating sweet potatoes at snack or mealtime, talk about how sweet potatoes grow.

14 Grow It, Try It, Like It!
C1: Cool Puppy Pup’s Sweet Potato Lunch Party VideoView Cool Puppy Pup’s Sweet Potato Lunch Party segment with the children. Discuss the sweet potato facts covered in this delightful video and have them try Cool Puppy Pup’s favorite way to eat sweet potatoes.
ObjectiveThe children will be able to describe how sweet potatoes are grown, harvested, and eaten.Materials Needed
< Cool Puppy Pup DVD < TV and DVD Player < Sweet potatoes, brown sugar, and butter
< Plates, spoons, and napkins
What To Do Ahead of Time < Cue the DVD to start at the Sweet Potato segment.
< Prepare mashed sweet potatoes with brown sugar and butter.
C. Sweet PotatoStories and Songs

14 15Sweet Potato Hill
The Activity < Gather the children and watch the Sweet Potato segment of the video.
< After viewing the segment, ask the children to name their favorite parts of the video. Use their responses to lead into a discussion about the video. During the discussion, include the questions below to review Cool Puppy Pup’s main points from the video segment.
< In the video, did Cool Puppy Pup say: ▶ A sweet potato was a fruit or a vegetable? (Vegetable) ▶ What shape is a sweet potato? (Oblong like a
squished ball) ▶ What color is a sweet potato? (Orange) ▶ How does the outside the feel? (Bumpy, yet smooth)
< At tasty Acres Farm, the farmer talked about how sweet potoatoes grow.
▶ Do sweet potatoes grow above or below the ground? (Below the ground on a farm)
▶ Where can our families buy sweet potatoes from once they are shipped from the farm? (Grocery stores and farmers’ markets)
< Have the children name some of the ways that sweet potato can be eaten. (In a pie, baked and sprinkled with orange juice and cinnamon, cooked with apples, or mashed with a little butter and brown sugar)
< Have the children wash their hands (see Booklet 1, Tool Shed Resources, page 43, for directions).
< Conclude the activity by telling the children they are going to eat a sweet potato, the way that Cool Puppy Pup likes sweet potatoes best of all.
< Serve the mashed sweet potatoes.
Connection to Garden Art and CraftsTasty Acres Mobile: Create a sweet potato mobile decorating the circles of the mobile with drawings of how sweet pota-toes grow and favorite sweet potato recipes (see Booklet 1, Garden Art and Crafts Section, page 31).
Activity Length: 15 minutes

16 Grow It, Try It, Like It!
C2: Reading ActivityRead story books to the children that are about or include the activities of growing and/or eating fruits and vegetables. Listening to such stories can encourage children to adopt positive behaviors that can last a lifetime, like trying new fruits and vegetables.
ObjectiveChildren will describe the fun and interesting stories about fruits and/or vegetables that were read to them.
Materials Needed < Books from a library or purchased books
< Space for the children to sit
What To Do Ahead of Time < Clear a space for the children to sit around you.
< Choose a book from the Harvest of Books list (see Booklet 1, Tool Shed Resources, page 50).
< Select a book you would like to read and either borrow it from a library or purchase it.
< Use books relevant to fruits and vegetables that may already be available to you.

16 17Sweet Potato Hill
The Activity < Have the children sit around you as you read them the book. < Ask the children to listen for the names of fruits and vegetables as the story is read.
Discussion Questions: < After reading the story, ask the children which fruits and vegetables were named in the story and what happened to them. For example,
▶ Where were the fruits and vegetables grown? ▶ What happened to the fruits and vegetables after they
were picked? ▶ Who ate the fruits and vegetables?
Add other questions that relate to the story.
Activity Length: 10 to 20 minutes depending on the length of the book

18 Grow It, Try It, Like It!
C3: Old MacDonald Had a Farm, Sweet Potato StyleThe children sing about sweet potatoes and act out motions to this familiar tune.
ObjectivesThe children will be able to:
< Sing and act out motions to a familiar tune; < Say that being physically active helps us feel good.
The Activity < Lead the children in singing these new words to the tune “Old MacDonald Had a Farm” and demonstrate the suggested motions or make up new ones.
< Encourage the children to move about as they are singing. < Explain that skipping, wiggling, stretching, running, jumping, and playing actively every day helps us to feel good and stay healthy.
Materials Needed < Sweet potato lyrics to tune “Old MacDonald Had a Farm”
< Large space for the children to move about
What To Do Ahead of Time < Become familiar with the words and motions of the song.
Connection to Garden Art and Crafts Make a Scarecrow: Make a Scarecrow, for a creative connec-tion to this activity (see Booklet1, Garden Art and Crafts Section, page 38).
Activity Length: 10 minutes

18 19Sweet Potato Hill
Old MacDonald Had a Farm, Sweet Potato Style
1st VerseOld MacDonald had a farm, EIEIO! (Skip in place)On this farm he grew some sweet potatoes, EIEIO! (Pretend to carry a basket of sweet potatoes)With plant slips here and plant slips there, (Pretend to hoe ground and plant slips Here a slip, there a slip, everywhere plant slips! using large, vigorous motions)
Old MacDonald had a farm, EIEIO! (Skip in place)
2nd VerseOld MacDonald had a farm, EIEIO! (Skip in place)On this farm he grew some sweet potatoes, EIEIO! (Pretend to carry a basket of sweet potatoes)With a tater vine here and a tater vine there, (Squat, wiggle arms & hands like vines, Here a vine, there a vine, everywhere a tater vine! jump forward in squat & repeat motions )
Old MacDonald had a farm, EIEIO! (Skip in place)
3rd VerseOld MacDonald had a farm, EIEIO! (Skip in place)On this farm he grew some sweet potatoes, EIEIO! (Pretend to carry a basket of sweet potatoes)Sweet tater here, and sweet tater there, (Pretend to dig a sweet potato)Here a tater, there a tater, everywhere a sweet tater. (Pretend to dig a sweet potato)
Old MacDonald had a farm, EIEIO! (Skip in place)
4th VerseOld MacDonald had a farm, EIEIO! (Skip in place)On this farm he grew some sweet potatoes, EIEIO! (Pretend to carry a basket of sweet potatoes)With a bite, bite here, and a bite, bite there, (Pretend to eat a sweet potato)Here a bite, there a bite, everywhere a sweet bite. (Pretend to eat a sweet potato)
Old MacDonald had a farm, EIEIO! (Skip in place)
The children sing about growing and eating sweet potatoes and act out motions to this familiar tune.
20 Grow It, Try It, Like It!
Sweet Potato Growing at Home #3: Send a copy of this resource home with each child at the start of the Section D activities.
D1: You Say Potato and I Say PotátoIntroduce the children to the Eat Smart To Play Hard With MyPlate poster. The children find sweet and white potatoes in the Vegetables group. They taste the difference between sweet potatoes and other potatoes.
ObjectivesThe children will be able to:
< Say that sweet potatoes are found in the Vegetables group. < Say that eating vegetables like sweet potatoes help keep us healthy;
< Compare sweet potatoes to other potatoes; < Say that being physically active every day helps us feel good and is fun;
< Say that eating foods from the different food groups each day helps us grow and be healthy;
< Identify a food from each of the five foods groups. Before the Activity–Hand Washing and Polite Tasting
< Explain that we should always wash our hands before preparing and eating food. Have the children wash their hands (see Booklet 1, Tool Shed Resources, page 43, for directions).
< If necessary, remind the children about polite food tasting habits (see Booklet 1,Tool Shed Resources, page 44, for details).
D. Introducing MyPlate Nutrition Education Activities
Materials Needed < Eat Smart To Play Hard With MyPlate poster (see Booklet 1)
< Sweet potatoes and red and white skin potatoes, two of each to show and at least one of each to cook
< Plates and napkins < Spoons or forks, if needed
What To Do Ahead of Time < Review the foods and activities depicted on the poster.
< Display the poster. < Wash potatoes, leave one of each type whole, and cut one of each type in half.
< Prepare bite-size pieces of baked or cooked sweet, red and white skin potatoes, one each per child.
< Make copies of MyPlate coloring page (new or use copies from a previous D1 activity), one per child.
< Copy Sweet Potato Growing at Home #3–one set per child.

20 21Sweet Potato Hill
Activity Length: 25 minutes; 30 minutes if optional coloring activity conducted
The ActivityLearning the Food Groups
< Seat the children in a semicircle on the floor in view of the Eat Smart To Play Hard With MyPlate poster.
< Tell the children today they are going to learn about ways to be healthy and have fun every day. Tell the children that the best part is they like to do what helps them be healthy: they like to eat a variety of foods and they like to play.
< Point out the Eat Smart To Play Hard With MyPlate poster to the children. Ask the children to tell you what they see on the poster. Accept all correct answers, such as food, specific foods by name, children playing, and specific activities by name, etc.
< Explain that MyPlate shows the five food groups a person should eat from each day. Each food group has its own color. The Fruit Group is red, the Vegetable Group is green, the Grains Group is orange, the Dairy Group is blue, and the Protein Foods Group is purple. Eating foods from each food group helps us to be healthy and grow.”
This activity continues on the following pages.
22 Grow It, Try It, Like It!
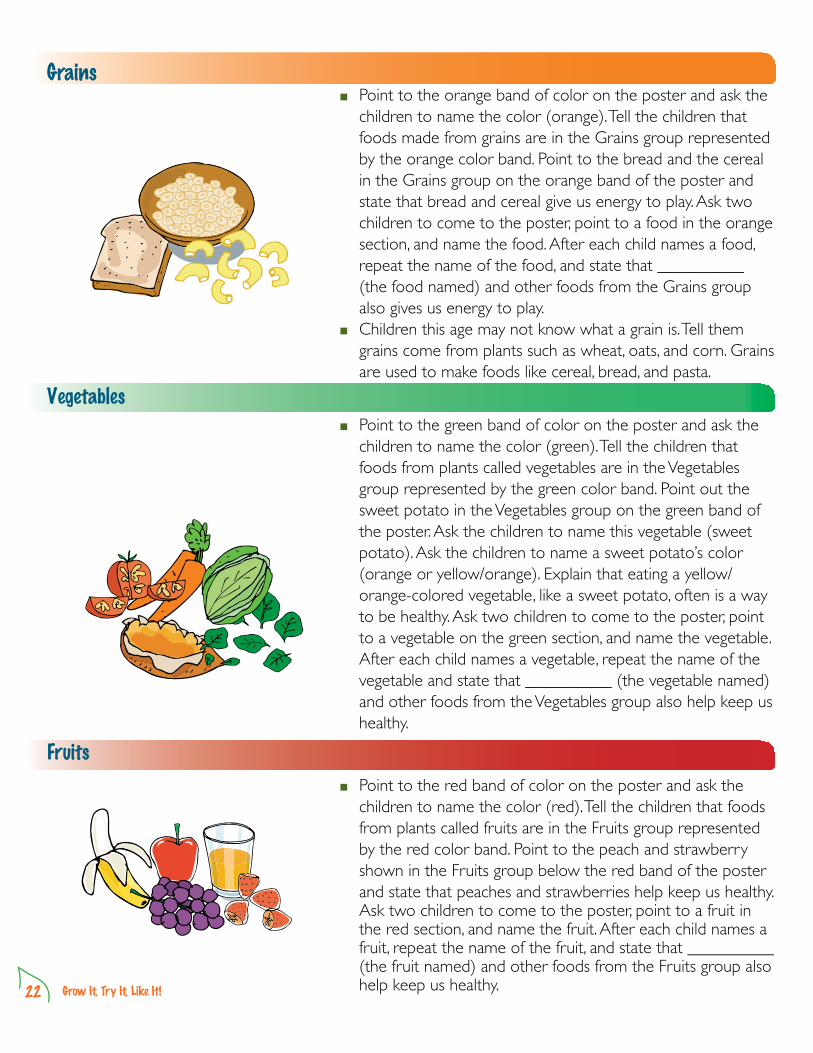
< Point to the orange band of color on the poster and ask the children to name the color (orange). Tell the children that foods made from grains are in the Grains group represented by the orange color band. Point to the bread and the cereal in the Grains group on the orange band of the poster and state that bread and cereal give us energy to play. Ask two children to come to the poster, point to a food in the orange section, and name the food. After each child names a food, repeat the name of the food, and state that __________ (the food named) and other foods from the Grains group also gives us energy to play.
< Children this age may not know what a grain is. Tell them grains come from plants such as wheat, oats, and corn. Grains are used to make foods like cereal, bread, and pasta.
< Point to the green band of color on the poster and ask the children to name the color (green). Tell the children that foods from plants called vegetables are in the Vegetables group represented by the green color band. Point out the sweet potato in the Vegetables group on the green band of the poster. Ask the children to name this vegetable (sweet potato). Ask the children to name a sweet potato’s color (orange or yellow/orange). Explain that eating a yellow/orange-colored vegetable, like a sweet potato, often is a way to be healthy. Ask two children to come to the poster, point to a vegetable on the green section, and name the vegetable. After each child names a vegetable, repeat the name of the vegetable and state that __________ (the vegetable named) and other foods from the Vegetables group also help keep us healthy.
< Point to the red band of color on the poster and ask the children to name the color (red). Tell the children that foods from plants called fruits are in the Fruits group represented by the red color band. Point to the peach and strawberry shown in the Fruits group below the red band of the poster and state that peaches and strawberries help keep us healthy. Ask two children to come to the poster, point to a fruit in the red section, and name the fruit. After each child names a fruit, repeat the name of the fruit, and state that __________ (the fruit named) and other foods from the Fruits group also help keep us healthy.
Grains
Vegetables
Fruits
22 23Sweet Potato Hill
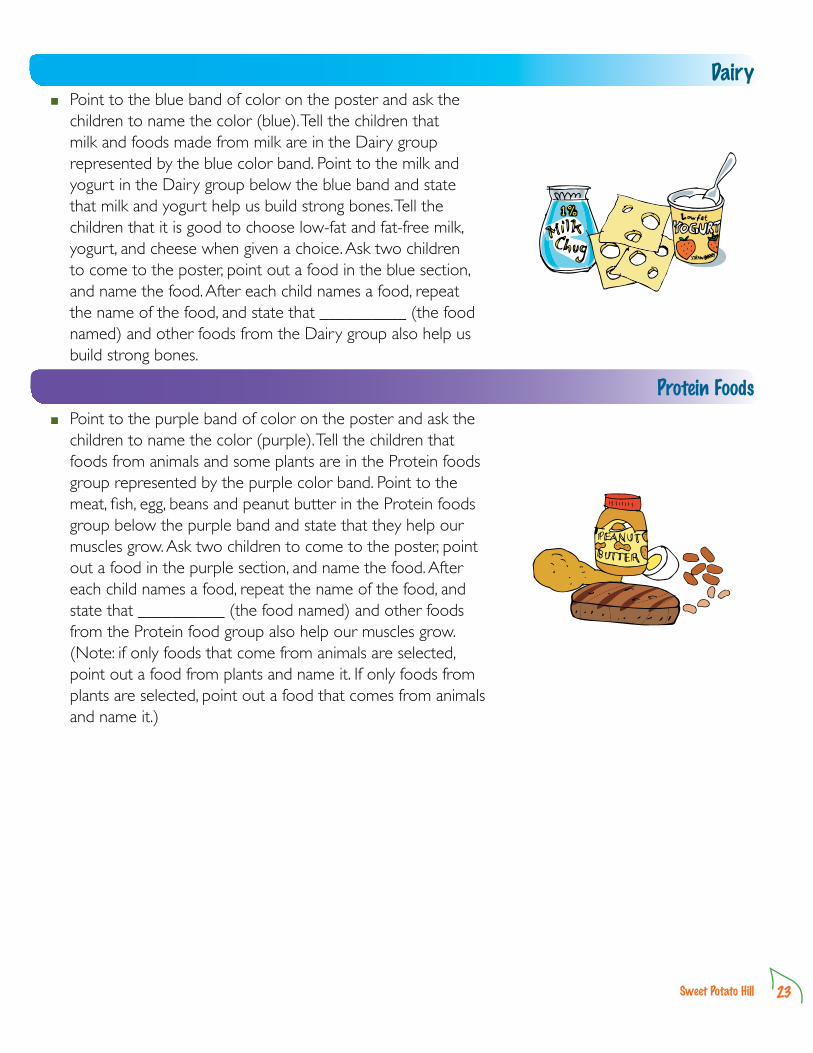
< Point to the blue band of color on the poster and ask the children to name the color (blue). Tell the children that milk and foods made from milk are in the Dairy group represented by the blue color band. Point to the milk and yogurt in the Dairy group below the blue band and state that milk and yogurt help us build strong bones. Tell the children that it is good to choose low-fat and fat-free milk, yogurt, and cheese when given a choice. Ask two children to come to the poster, point out a food in the blue section, and name the food. After each child names a food, repeat the name of the food, and state that __________ (the food named) and other foods from the Dairy group also help us build strong bones.
< Point to the purple band of color on the poster and ask the children to name the color (purple). Tell the children that foods from animals and some plants are in the Protein foods group represented by the purple color band. Point to the meat, fish, egg, beans and peanut butter in the Protein foods group below the purple band and state that they help our muscles grow. Ask two children to come to the poster, point out a food in the purple section, and name the food. After each child names a food, repeat the name of the food, and state that __________ (the food named) and other foods from the Protein food group also help our muscles grow. (Note: if only foods that come from animals are selected, point out a food from plants and name it. If only foods from plants are selected, point out a food that comes from animals and name it.)
Dairy
Protein Foods

24 Grow It, Try It, Like It!
Review Activity < While the children are still seated, point to each food group color band on the Eat Smart To Play Hard With MyPlate poster.
< Ask the children to name the food group each color represents and to name a food from that group.
Tasting Activity < Show the children the sweet potato and red and white skin potatoes.
< Tell the children that these are potatoes similar to the sweet potato, but different in color and taste.
< Give the children samples of each potato to taste and compare to the sweet potato.
< Invite the children to feel and smell the different whole and cut potatoes.
< Ask the children to name different ways to eat vegetables like potatoes at different meals and snacks. Accept all answers such as mashed, in vegetable salads, baked, etc.
Be Active–Potato Sack Hop
Note to Caregiver: Active play and movement are important for every child’s growth and development. Although they may seem to be active and energetic, most children do not get the amount of physical activity they need for good health. Child care programs should provide opportunities for young children (2 to 6 years of age) to engage in 90 to 120 minutes (1 ½ to 2 hours) of moderate to vigorous physical activity each day.
Several short periods of activity (10-20 minutes each) work well for young children and are easy to plan into the day. Examples of moderate to vigorous physical activity that kids this age enjoy include: playing on outdoor play equipment, dancing to music, taking a nature (or garden) walk, relay races, movement games, hopping, skipping, galloping, and riding a tricycle or bicycle. For additional information on physical activity for young children, refer to the Nutrition and Wellness Tips for Young Children: Provider Handbook for the Child and Adult Care Food Program at http://teamnutrition.usda.gov/Resources/nutritionandwellness.html.”
< Orange – Grains group < Green – Vegetables group < Red – Fruits group
< Blue – Dairy group < Purple – Protein Foods group

24 25Sweet Potato Hill
< Point to the various activities depicted on the Eat Smart To Play Hard With MyPlate poster. Ask the children to tell you why it is important to be physically active and play every day, i.e., it helps you to be strong and healthy, and is fun. Tell the children that today they will learn to be physically active in a way that reminds them of the potatoes they just tasted.
< Take the children to a large open space or outdoors. Ask the children to stand in a straight line across one end of the open space. Explain to the children that farmers sometimes ship potatoes in large, sturdy fabric bags. Tell the children that farm children have created a fun game using the empty bags.
< Tell the children they are going to play with imaginary potato sacks today and pretend to give each child a sack. Tell the children the sack is large enough for each child to step into the sack and pull it up to his or her waist. Explain that since both legs are in the sack, the children can only hop to move - they can not run, walk, or skip. Show the children how to step into their imaginary sack and pull it up to the waist.
< Tell the children that when you count to 3, each child should hop in their imaginary potato sack toward the other end of the open space. Tell the children when they reach the end of the space, they should hop around and hop back to where they started.
< Ask the children to pull their imaginary potato sacks securely around their waists, and say, “1, 2, 3, Hop!”
< Conclude the activity by telling the children it is fun to eat potatoes and be physically active by doing a Potato Sack Hop. Option: If available, show a burlap potato sack or picture of a potato sack to the children. If available, give each child a burlap potato sack to use for the activity. If fabric potato sacks (real or made from burlap fabric) are used, omit the references to imaginary sacks in the activity above.
Optional Concluding Activity: Have the children sit at tables with coloring supplies. Distribute a copy of the MyPlate coloring page (see Booklet 1, Tool Shed Resources, page 83) to each child. Ask the children to color the Vegetables group section of MyPlate green and draw and color a sweet potato near the Vegetables group or use the Blackline Master of a sweet potato (see Booklet 1, Tool Shed Resources, page 76) and have the children color the sweet potato. With older children have them copy the dot-to-dot outline of the word “Vegetables”Ask the children to draw a favorite way they like to be physically active on the page. If desired, collect the sheet for use in future fruit and vegetable units in Grow It, Try It, Like It!
26 Grow It, Try It, Like It!
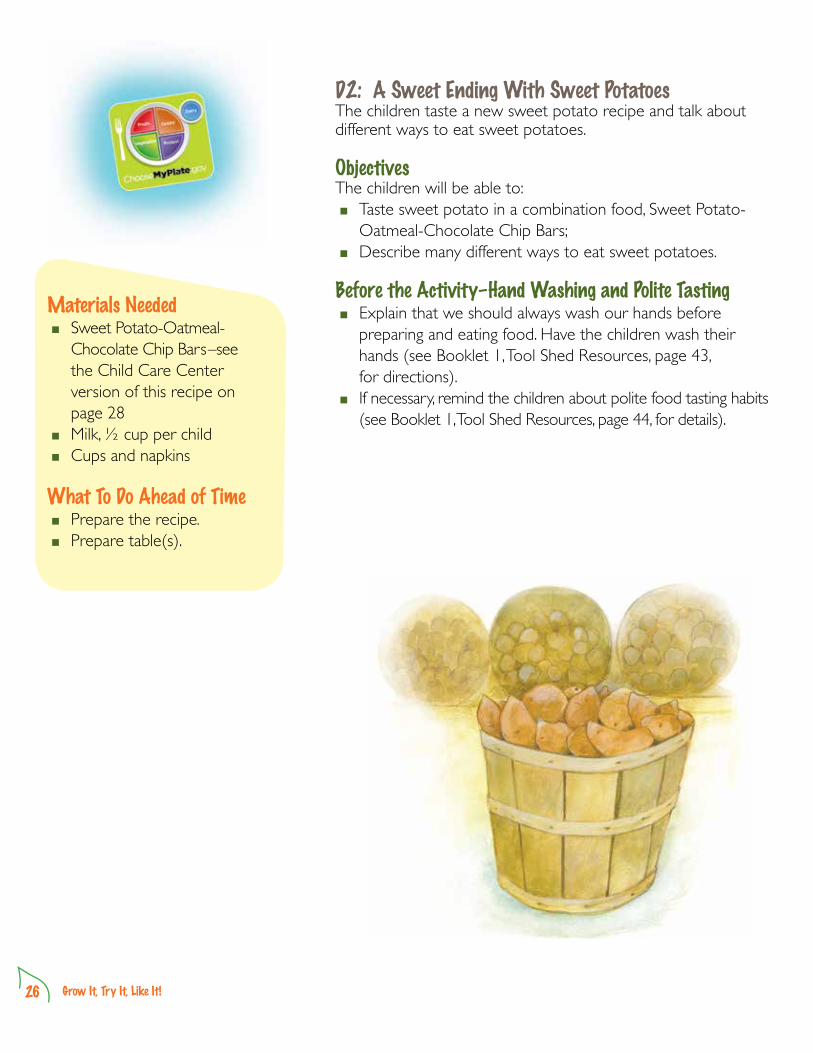
D2: A Sweet Ending With Sweet PotatoesThe children taste a new sweet potato recipe and talk about different ways to eat sweet potatoes.
ObjectivesThe children will be able to:
< Taste sweet potato in a combination food, Sweet Potato-Oatmeal-Chocolate Chip Bars;
< Describe many different ways to eat sweet potatoes.
Before the Activity–Hand Washing and Polite Tasting < Explain that we should always wash our hands before preparing and eating food. Have the children wash their hands (see Booklet 1, Tool Shed Resources, page 43, for directions).
< If necessary, remind the children about polite food tasting habits (see Booklet 1, Tool Shed Resources, page 44, for details).
Materials Needed < Sweet Potato-Oatmeal-Chocolate Chip Bars–see the Child Care Center version of this recipe on page 28
< Milk, ½ cup per child < Cups and napkins
What To Do Ahead of Time < Prepare the recipe. < Prepare table(s).

26 27Sweet Potato Hill
Words To GrowSweet potato OatmealChocolate chip SaladMuffin MashedOven-baked
The Activity < Seat the children at the table(s). < Ask the children to share what they remember learning about a sweet potato.
< Encourage responses such as how and where a sweet potato grows; how it looks, feels, smells, and tastes and other material covered in the unit.
< Tell the children that the unit on sweet potato ends with a celebration of a new way to eat sweet potatoes. Sweet potatoes can be part of baked foods.
< Show the children the Sweet Potato-Oatmeal-Chocolate Chip Bars and talk about the other foods in the bars.
< Serve the children the Sweet Potato-Oatmeal-Chocolate Chip Bars and milk.
< As the children are eating, ask: ▶ What sweet potato recipes have they made with
their parents? ▶ What different ways have they eaten sweet potatoes? ▶ What new ways do they think sweet potatoes could
be eaten? < Give suggestions such as sweet potato fries; in breads, muffins and cookies, and pies; in potato salads; cooked with apples and pork chops; mashed with a bit of brown sugar and butter.
Activity Length: 10-15 minutes

28 Grow It, Try It, Like It!
Cooking with Children Young children can:• Wash hands first• Help scrub sweet potato• Mash cooled sweet potato – do not allow child to mash hot sweet potatoes• Help measure ingredients• Stir dry ingredients with supervision• Stir wet ingredients with some assistance
Adults should prick and cook potatoes, prepare pan, and do all steps involving the use of an oven.
Sweet Potato- Oatmeal-Chocolate Chip Bars
For the Child and Adult Care Food Program
• ¾cupwhole-wheatflour• 1¼ cups quick-cook oatmeal (not instant)• 1tsp baking soda• 1 tsp ground cinnamon• ½ tsp ground nutmeg• 1 cup (6 ounces) of semisweet mini choco-
late chips or regular size chocolate chips
Preparation Time: 30 minutes Cooking Time: 25-30 minutesYield: 64 child-size portions of ½ bar½ bar provides the equivalent of ¼ slice of bread towards CACFP meal pattern
• 2 large, fresh sweet potatoes cooked and mashed (see Tip below)
• ¾ cup sugar• ¼ cup canola oil• ¼ cup low-fat or fat-free plain yogurt• 1 large egg, beaten• ¾cupall-purposeflour
1. Preheat oven to 350 degrees Fahrenheit.2. Place sweet potato and sugar in large mixing bowl; mash until smooth.3. Add oil, yogurt, and egg and mix thoroughly.4. Measure and mix flours, oatmeal, baking soda, and spices in a medium-size bowl.5. Add dry ingredients to sweet potato mixture and stir just enough to combine. 6. Add chocolate chips and stir to mix.7. Spray 13”x 9”x 2” baking pan with nonstick cooking spray.8. Pour batter into pan; smooth out batter evenly in pan and place pan on middle rack in oven.9. Bake for 25-30 minutes or until lightly brown. 10. Remove from oven and let cool in pan for 8-10 minutes. Cut into bars (4 cuts by 8 cuts) and remove from pan.
Cool before serving.
Variation: Substitute drained, canned sweet potatoes (15-ounce can) for fresh sweet potatoes. Do not use canned, candied sweet potatoes.
Tip: Scrub fresh sweet potatoes, prick them with a fork, and cook in the microwave 10-15 minutes until done. Cool sweet potatoes to a temperature comfortable to the touch and remove flesh from skins.
Nutrients per 1 child-size serving of ½ bar: Calories 52.5, Protein 1 g, Carbohydrate 8.6 g, Total Fat 1.9 g, Saturated Fat .6 g, Cholesterol 3.5 mg, Vitamin A 1233 IU, Vitamin C 1.4 mg, Iron 0.4 mg, Calcium 6.7mg, Sodium 22.5 mg, Dietary Fiber .7 g
28 29Sweet Potato Hill
Growing at Home Materials…for Sweet Potato Hill Lessons
30 Grow It, Try It, Like It!
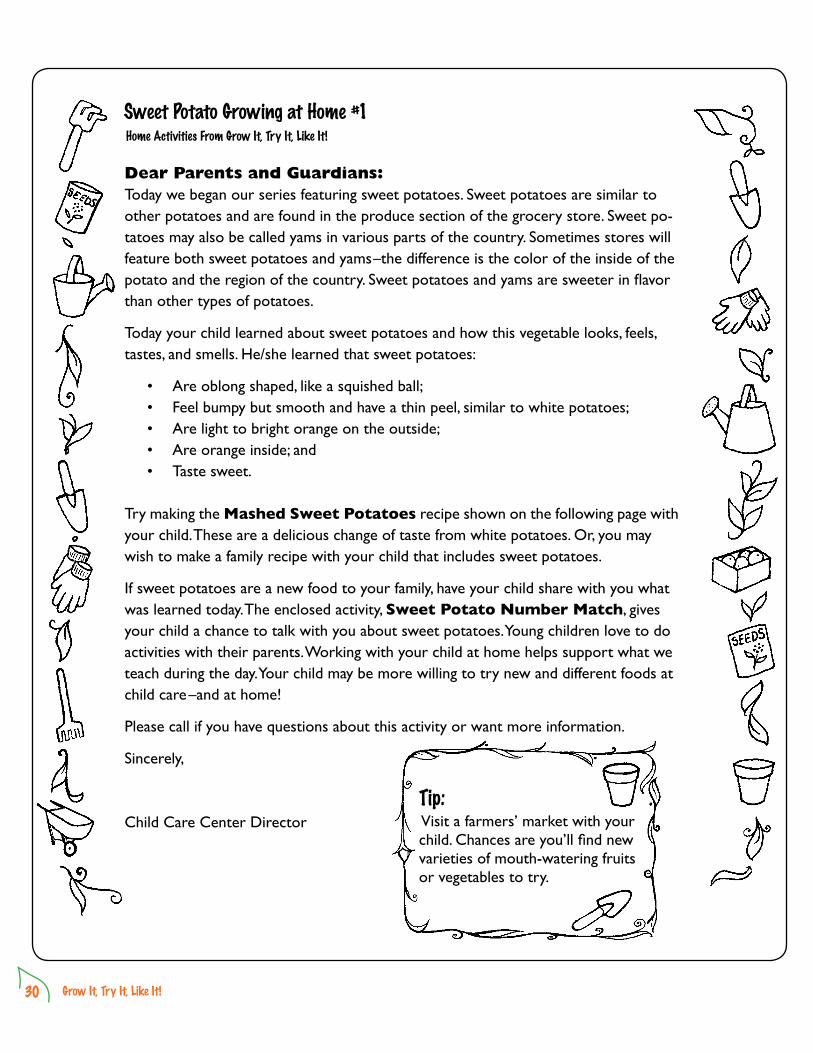
Sweet Potato Growing at Home #1 Home Activities From Grow It, Try It, Like It!
Tip: Visit a farmers’ market with your child. Chances are you’ll find new varieties of mouth-watering fruits or vegetables to try.
Dear Parents and Guardians: Today we began our series featuring sweet potatoes. Sweet potatoes are similar to other potatoes and are found in the produce section of the grocery store. Sweet po-tatoes may also be called yams in various parts of the country. Sometimes stores will feature both sweet potatoes and yams–the difference is the color of the inside of the potato and the region of the country. Sweet potatoes and yams are sweeter in flavor than other types of potatoes.
Today your child learned about sweet potatoes and how this vegetable looks, feels, tastes, and smells. He/she learned that sweet potatoes:
• Are oblong shaped, like a squished ball;• Feel bumpy but smooth and have a thin peel, similar to white potatoes;• Are light to bright orange on the outside;• Are orange inside; and• Taste sweet.
Try making the Mashed Sweet Potatoes recipe shown on the following page with your child. These are a delicious change of taste from white potatoes. Or, you may wish to make a family recipe with your child that includes sweet potatoes.
If sweet potatoes are a new food to your family, have your child share with you what was learned today. The enclosed activity, Sweet Potato Number Match, gives your child a chance to talk with you about sweet potatoes. Young children love to do activities with their parents. Working with your child at home helps support what we teach during the day. Your child may be more willing to try new and different foods at child care–and at home!
Please call if you have questions about this activity or want more information.
Sincerely,
Child Care Center Director
30 31Sweet Potato Hill
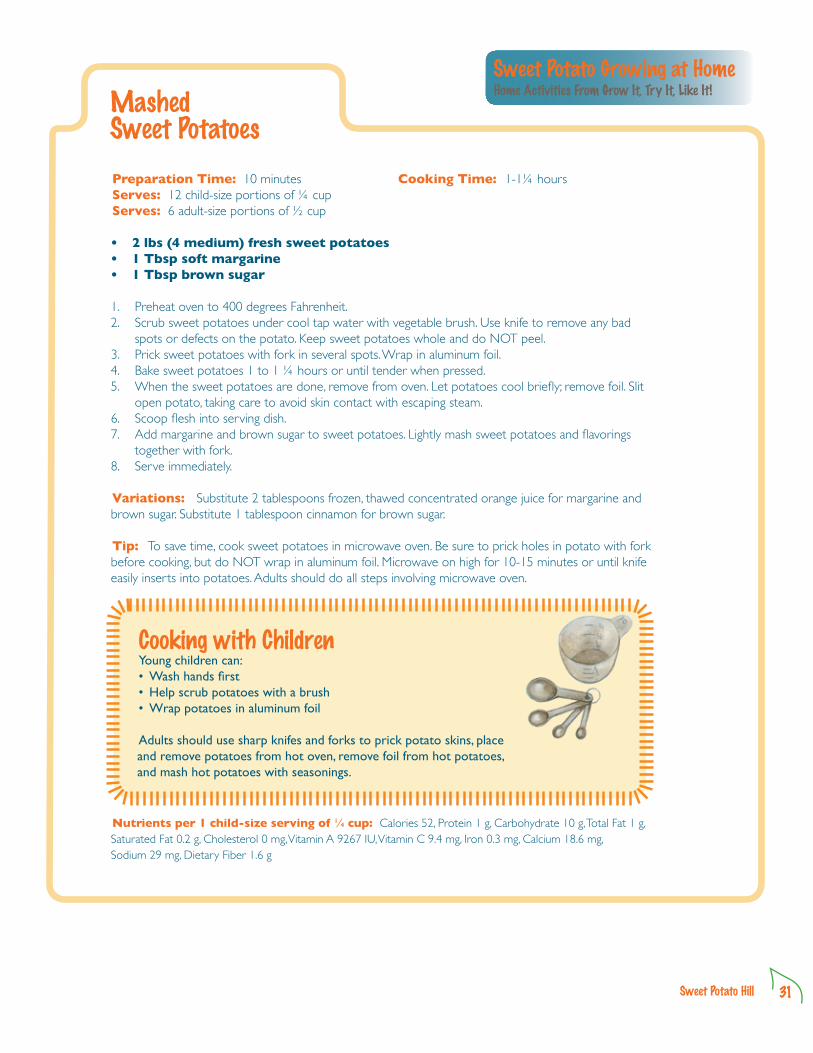
Mashed Sweet Potatoes
Cooking with Children Young children can:• Wash hands first• Help scrub potatoes with a brush• Wrap potatoes in aluminum foil
Adults should use sharp knifes and forks to prick potato skins, place and remove potatoes from hot oven, remove foil from hot potatoes, and mash hot potatoes with seasonings.
Preparation Time: 10 minutes Cooking Time: 1-1¼ hoursServes: 12 child-size portions of ¼ cupServes: 6 adult-size portions of ½ cup
• 2 lbs (4 medium) fresh sweet potatoes• 1 Tbsp soft margarine• 1 Tbsp brown sugar
1. Preheat oven to 400 degrees Fahrenheit.2. Scrub sweet potatoes under cool tap water with vegetable brush. Use knife to remove any bad
spots or defects on the potato. Keep sweet potatoes whole and do NOT peel. 3. Prick sweet potatoes with fork in several spots. Wrap in aluminum foil. 4. Bake sweet potatoes 1 to 1 ¼ hours or until tender when pressed.5. When the sweet potatoes are done, remove from oven. Let potatoes cool briefly; remove foil. Slit
open potato, taking care to avoid skin contact with escaping steam.6. Scoop flesh into serving dish. 7. Add margarine and brown sugar to sweet potatoes. Lightly mash sweet potatoes and flavorings
together with fork.8. Serve immediately.
Variations: Substitute 2 tablespoons frozen, thawed concentrated orange juice for margarine and brown sugar. Substitute 1 tablespoon cinnamon for brown sugar.
Tip: To save time, cook sweet potatoes in microwave oven. Be sure to prick holes in potato with fork before cooking, but do NOT wrap in aluminum foil. Microwave on high for 10-15 minutes or until knife easily inserts into potatoes. Adults should do all steps involving microwave oven.
Nutrients per 1 child-size serving of ¼ cup: Calories 52, Protein 1 g, Carbohydrate 10 g, Total Fat 1 g, Saturated Fat 0.2 g, Cholesterol 0 mg, Vitamin A 9267 IU, Vitamin C 9.4 mg, Iron 0.3 mg, Calcium 18.6 mg, Sodium 29 mg, Dietary Fiber 1.6 g
Home Activities From Grow It, Try It, Like It!
Sweet Potato Growing at Home

32 Grow It, Try It, Like It!
Sweet Potato Number MatchDear Parents and Guardians: Your child has been learning about sweet potatoes. A sweet potato is an oblong shaped, orange vegetable that tastes sweet. Help your child count
the sweet potatoes and draw a line between each sweet potato group to the correct matching number. See if your child can tell you five facts about sweet potatoes.
1 2 3 4 5

32 33Sweet Potato Hill
Sweet Potato Growing at Home #2 Home Activities From Grow It, Try It, Like It!
Dear Parents and Guardians: We continue to learn about sweet potatoes in our daily activities. Sweet potatoes are an interesting food; the way they grow interests children.
Today your child learned about sweet potatoes and how this vegetable grows and is harvested. Your child has learned that sweet potatoes:
• Start from slips that grow from the “eyes” or buds of the potato;• Need sun, soil, water, and time to grow;• Have plants that grow above ground;• Grow in the ground; and• Are dug out of the ground during the early part of fall before the weather turns cold.
Talk with your child about how sweet potatoes grow while the two of you make Oven-Baked Sweet Potato Planks, the recipe is attached. This easy-to-prepare recipe is sure to please the entire family. Make it, or another favorite recipe, featuring sweet potatoes this week with your child.
Take a few minutes to help your child complete the attached activity, Sweet Potatoes Grow From Eyes. Serving colorful vegetables like sweet potatoes often will help your child accept new foods at child care–and at home!
Please call if you have questions about this activity or want more information.
Sincerely,
Child Care Center Director Tip: Somebody’s eyes are watching…you! Children are more likely to follow our actions than our words. Serve different vegetables with dinner and show you eat a wide variety. Your child will follow your lead.
34 Grow It, Try It, Like It!
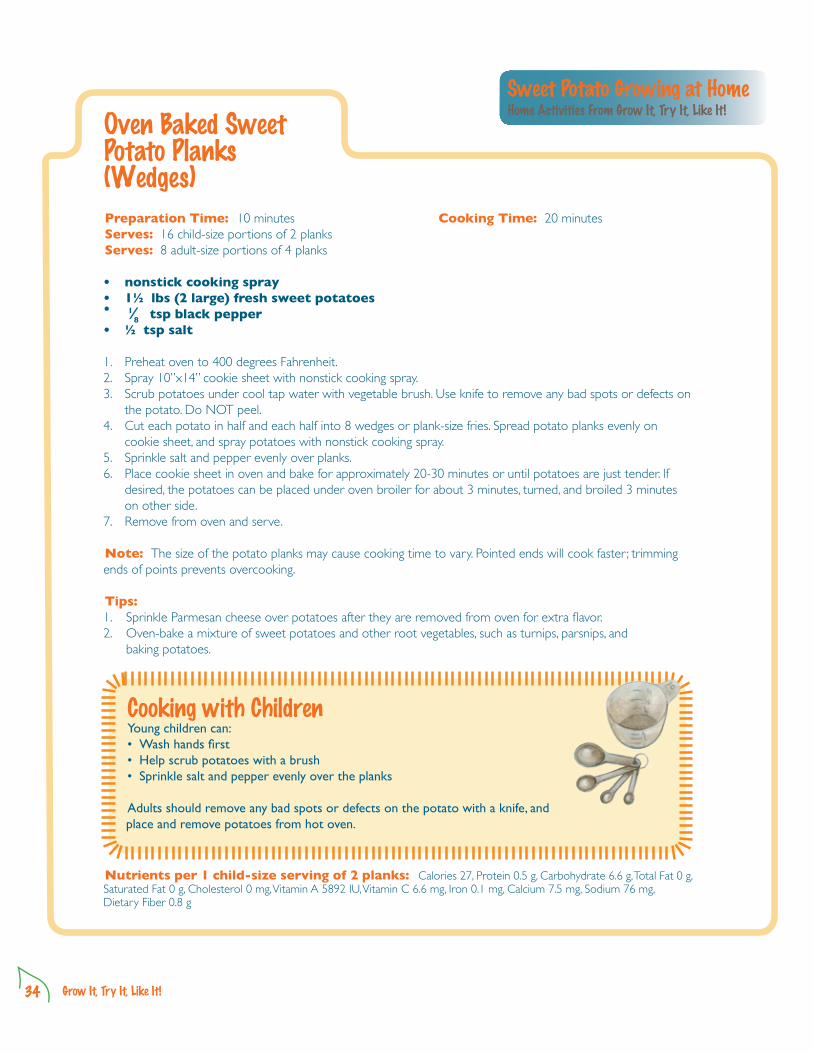
Cooking with Children Young children can:• Wash hands first• Help scrub potatoes with a brush• Sprinkle salt and pepper evenly over the planks
Adults should remove any bad spots or defects on the potato with a knife, and place and remove potatoes from hot oven.
Oven Baked Sweet Potato Planks (Wedges)
Home Activities From Grow It, Try It, Like It!
Sweet Potato Growing at Home
Preparation Time: 10 minutes Cooking Time: 20 minutesServes: 16 child-size portions of 2 planksServes: 8 adult-size portions of 4 planks
• nonstick cooking spray• 1½ lbs (2 large) fresh sweet potatoes• 1⁄8 tsp black pepper• ½ tsp salt
1. Preheat oven to 400 degrees Fahrenheit.2. Spray 10”x14” cookie sheet with nonstick cooking spray.3. Scrub potatoes under cool tap water with vegetable brush. Use knife to remove any bad spots or defects on
the potato. Do NOT peel. 4. Cut each potato in half and each half into 8 wedges or plank-size fries. Spread potato planks evenly on
cookie sheet, and spray potatoes with nonstick cooking spray.5. Sprinkle salt and pepper evenly over planks.6. Place cookie sheet in oven and bake for approximately 20-30 minutes or until potatoes are just tender. If
desired, the potatoes can be placed under oven broiler for about 3 minutes, turned, and broiled 3 minutes on other side.
7. Remove from oven and serve.
Note: The size of the potato planks may cause cooking time to vary. Pointed ends will cook faster ; trimming ends of points prevents overcooking.
Tips:1. Sprinkle Parmesan cheese over potatoes after they are removed from oven for extra flavor.2. Oven-bake a mixture of sweet potatoes and other root vegetables, such as turnips, parsnips, and
baking potatoes.
Nutrients per 1 child-size serving of 2 planks: Calories 27, Protein 0.5 g, Carbohydrate 6.6 g, Total Fat 0 g, Saturated Fat 0 g, Cholesterol 0 mg, Vitamin A 5892 IU, Vitamin C 6.6 mg, Iron 0.1 mg, Calcium 7.5 mg, Sodium 76 mg, Dietary Fiber 0.8 g
• 1 ⁄8
34 35Sweet Potato Hill
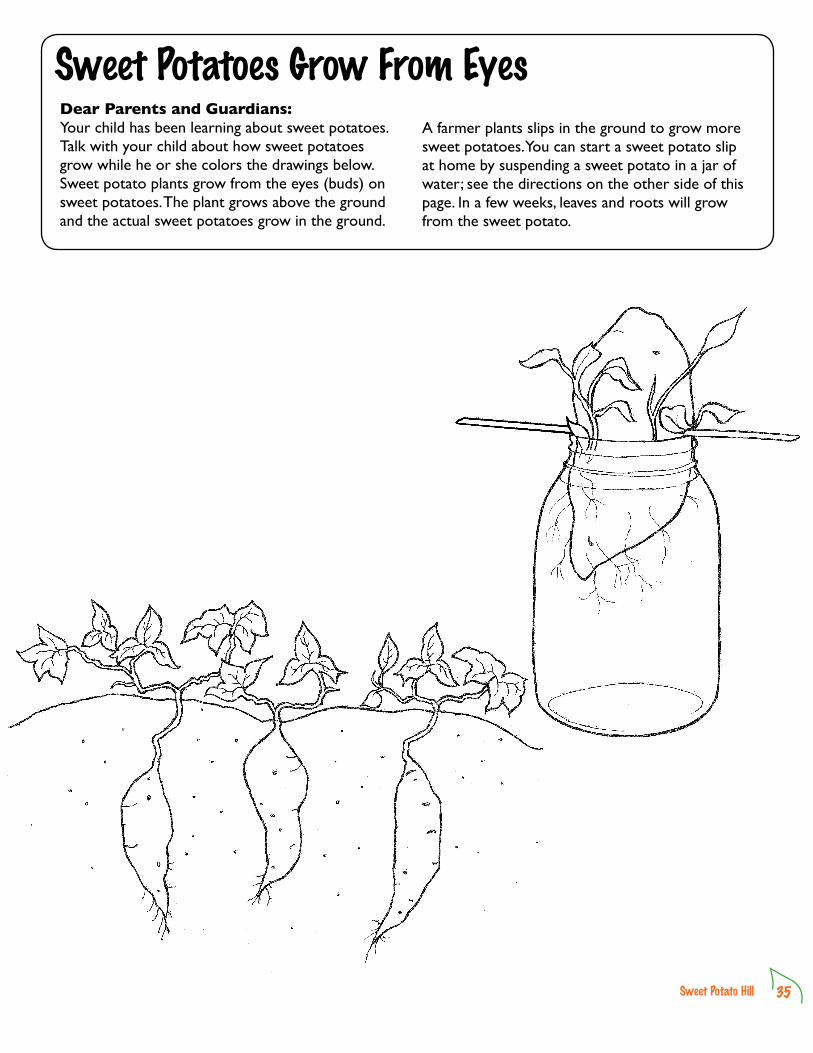
Sweet Potatoes Grow From EyesDear Parents and Guardians: Your child has been learning about sweet potatoes. Talk with your child about how sweet potatoes grow while he or she colors the drawings below. Sweet potato plants grow from the eyes (buds) on sweet potatoes. The plant grows above the ground and the actual sweet potatoes grow in the ground.
A farmer plants slips in the ground to grow more sweet potatoes. You can start a sweet potato slip at home by suspending a sweet potato in a jar of water; see the directions on the other side of this page. In a few weeks, leaves and roots will grow from the sweet potato.

36 Grow It, Try It, Like It!
Start a Sweet Potato SlipThis activity starts a sweet potato slip from sweet potatoes and shows what slips need to grow into plants.
To grow plants that will produce sweet potatoes, purchase sweet potatoes from a nursery or mail order catalog; follow instructions provided. A sweet potato from the grocery store will sprout leaves and roots, but will not produce sweet potatoes if planted.
Materials Needed < Unwashed sweet potato with eyes < Sharp knife < Permanent marker < 3 wooden craft sticks <Narrow mouth quart-size jar (an empty mayonnaise jar works well) < Distilled or spring water
The Activity < Help your child fill the quart-size jar with water, leaving ½ inch of space between the water and top of the jar. <Make three ½-inch horizontal slits evenly spaced around the middle of the sweet potato. < Help your child push a wooden craft stick into each slit, at least ½ inch into the sweet potato flesh. The wooden craft sticks create a tripod that supports the sweet potato on the rim of the jar. This allows half of the potato to be below the water level and half above. < Place the jars in a warm location at or above 65 degrees F. In about a month, the slip sprouts will grow 8 to 10 inches from the top half of the sweet potato, which is the best length for transplanting to the garden. < Have your child check the jar weekly to see the progress of the slip sprouts. <NOTE: Place the jars on top of a water heater to speed the growing process. < Explain to your child that the sweet potato slips are planted in the soil outside. The slips need soil, rain, sun, and time to grow into sweet potato plants. Sweet potatoes will grow on the plants under the ground. The sweet potatoes will be ready to remove gently from the soil in the fall.

36 37Sweet Potato Hill
Sweet Potato Growing at Home #3 Home Activities From Grow It, Try It, Like It!
Dear Parents and Guardians: We are finishing our series of lessons on sweet potatoes. We have had fun completing the many activities featuring this vegetable with your child.
Today your child learned some ways sweet potatoes are prepared and served. Sweet potatoes can be:
• Used in potato salads;• Served as sweet potato fries;• Used in muffins and cookies; and• Cooked with apples and pork chops.
Sweet Potato-Oatmeal-Chocolate Chip Bars (recipe attached) brought a sweet ending to our tasting of foods made with sweet potatoes. Try this recipe at home; your child would love to help! Or have your child help select and prepare a family recipe that includes sweet potatoes.
Your child will enjoy making a Sweet Potato Windsock with you. The activity is included with this packet. With just a little assistance from you, your child will have a cheerful reminder to enjoy sweet potatoes often–whenever the wind blows. We appreciate your time at home helping your child with activities that extend our daytime lessons. Keep reviewing the information and offering the fruits and vegetables we study at child care in your home meals. These are two ways to help your child’s mind and body grow.
Please call if you have questions about this activity or want more information.
Sincerely,
Child Care Center Director
Tip: Involve your child in planning meals and snacks. Let your child choose fruit for a snack and a vegetable for dinner.
38 Grow It, Try It, Like It!
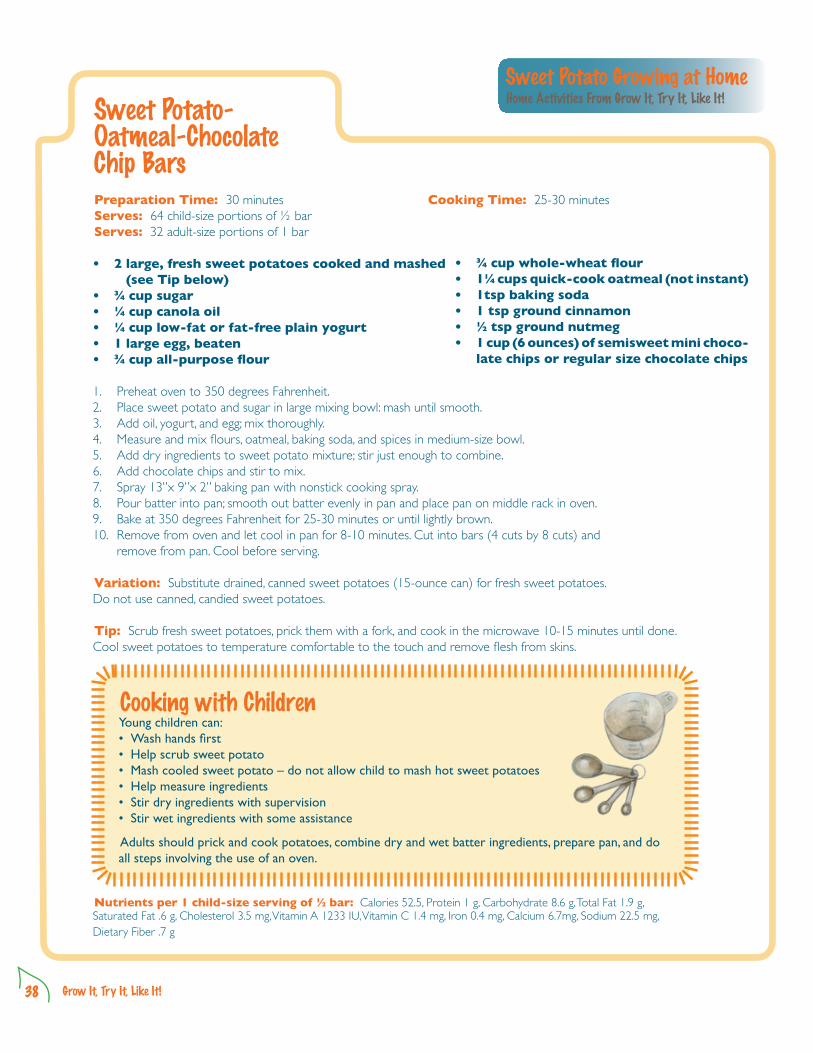
Preparation Time: 30 minutes Cooking Time: 25-30 minutesServes: 64 child-size portions of ½ barServes: 32 adult-size portions of 1 bar
• 2 large, fresh sweet potatoes cooked and mashed (see Tip below)
• ¾ cup sugar• ¼ cup canola oil• ¼ cup low-fat or fat-free plain yogurt• 1 large egg, beaten• ¾cupall-purposeflour
1. Preheat oven to 350 degrees Fahrenheit.2. Place sweet potato and sugar in large mixing bowl: mash until smooth.3. Add oil, yogurt, and egg; mix thoroughly.4. Measure and mix flours, oatmeal, baking soda, and spices in medium-size bowl.5. Add dry ingredients to sweet potato mixture; stir just enough to combine. 6. Add chocolate chips and stir to mix.7. Spray 13”x 9”x 2” baking pan with nonstick cooking spray.8. Pour batter into pan; smooth out batter evenly in pan and place pan on middle rack in oven.9. Bake at 350 degrees Fahrenheit for 25-30 minutes or until lightly brown. 10. Remove from oven and let cool in pan for 8-10 minutes. Cut into bars (4 cuts by 8 cuts) and
remove from pan. Cool before serving.
Variation: Substitute drained, canned sweet potatoes (15-ounce can) for fresh sweet potatoes. Do not use canned, candied sweet potatoes.
Tip: Scrub fresh sweet potatoes, prick them with a fork, and cook in the microwave 10-15 minutes until done. Cool sweet potatoes to temperature comfortable to the touch and remove flesh from skins.
Nutrients per 1 child-size serving of ½ bar: Calories 52.5, Protein 1 g, Carbohydrate 8.6 g, Total Fat 1.9 g, Saturated Fat .6 g, Cholesterol 3.5 mg, Vitamin A 1233 IU, Vitamin C 1.4 mg, Iron 0.4 mg, Calcium 6.7mg, Sodium 22.5 mg, Dietary Fiber .7 g
Sweet Potato- Oatmeal-Chocolate Chip Bars
• ¾cupwhole-wheatflour• 1¼ cups quick-cook oatmeal (not instant)• 1tsp baking soda• 1 tsp ground cinnamon• ½ tsp ground nutmeg• 1 cup (6 ounces) of semisweet mini choco-
late chips or regular size chocolate chips
Home Activities From Grow It, Try It, Like It!
Sweet Potato Growing at Home
Cooking with Children Young children can:• Wash hands first• Help scrub sweet potato• Mash cooled sweet potato – do not allow child to mash hot sweet potatoes• Help measure ingredients• Stir dry ingredients with supervision• Stir wet ingredients with some assistance
Adults should prick and cook potatoes, combine dry and wet batter ingredients, prepare pan, and do all steps involving the use of an oven.

38 39Sweet Potato Hill
Make a Sweet Potato WindsockDear Parents and Guardians: Have your child color the drawing with crayons, paint, or markers. Help your child cut along the dashed lines of the windsock. Make sure to cut each individual vine banner separately so they can move freely. Help tape or staple together the edges of the paper to form a tube with the sweet potato at the
top and the vine banners hanging down. Punch the two holes in the top of the windsock at the dark cir-cles. Thread ribbon, yarn, or string through the holes and tie together. Hang the windsock up and watch the sweet potato and vines dance in the breeze.
40 Grow It, Try It, Like It!
Notes

40 41Sweet Potato Hill
Notes

42 Grow It, Try It, Like It!
Notes
The U.S. Department of Agriculture (USDA) prohibits discrimination against its customers, employees, and applicants for employ-ment on the bases of race, color, national origin, age, disability, sex, gender identity, religion, reprisal and, where applicable, political beliefs, marital status, familial or parental status, sexual orientation, or if all or part of an individual’s income is derived from any public assistance program, or protected genetic information in employment or in any program or activity conducted or funded by the Department. (Not all prohibited bases will apply to all programs and/or employment activities.)
If you wish to file a Civil Rights program complaint of discrimination, complete the USDA Program Discrimination Complaint Form, found online at http://www.ascr.usda.gov/complaint_filing_cust.html, or at any USDA office, or call (866) 632-9992 to request the form. You may also write a letter containing all of the information requested in the form. Send your completed complaint form or letter to us by mail at U.S. Department of Agriculture, Director, Office of Adjudication, 1400 Independence Avenue, S.W., Washing-ton, D.C. 20250-9410, by fax (202) 690-7442 or email at [email protected].
Individuals who are deaf, hard of hearing, or have speech disabilities and wish to file either an EEO or program complaint please con-tact USDA through the Federal Relay Service at (800) 877-8339 or (800) 845-6136 (in Spanish).
Persons with disabilities who wish to file a program complaint, please see information above on how to contact us by mail directly or by email. If you require alternative means of communication for program information (e.g., Braille, large print, audiotape, etc.) please contact USDA’s TARGET Center at (202) 720-2600 (voice and TDD).
USDA is an equal opportunity provider and employer.
Revised June 2013 September 2009FNS-406
United States Department of Agriculture • Food and Nutrition Service
Find more fun resources at these Web sites:
teamnutrition.usda.govchoosemyplate.gov