Embed Size (px)
Citation preview
Cisco Firepower Management Center Getting Started Guide for Models 750, 1500, 2000, 3500, and 4000
Updated: January 19, 2017
This guide is organized as follows:
Package Contents
License Requirements
Installing the Firepower Management Center
Restoring a Firepower Management Center to Factory Defaults
Preconfiguring Firepower Management Centers
Scrubbing the Hard Drive
Related Documentation
Package ContentsThis section lists the items included with each model. Note that contents are subject to change, and your exact contents might contain additional or fewer items.
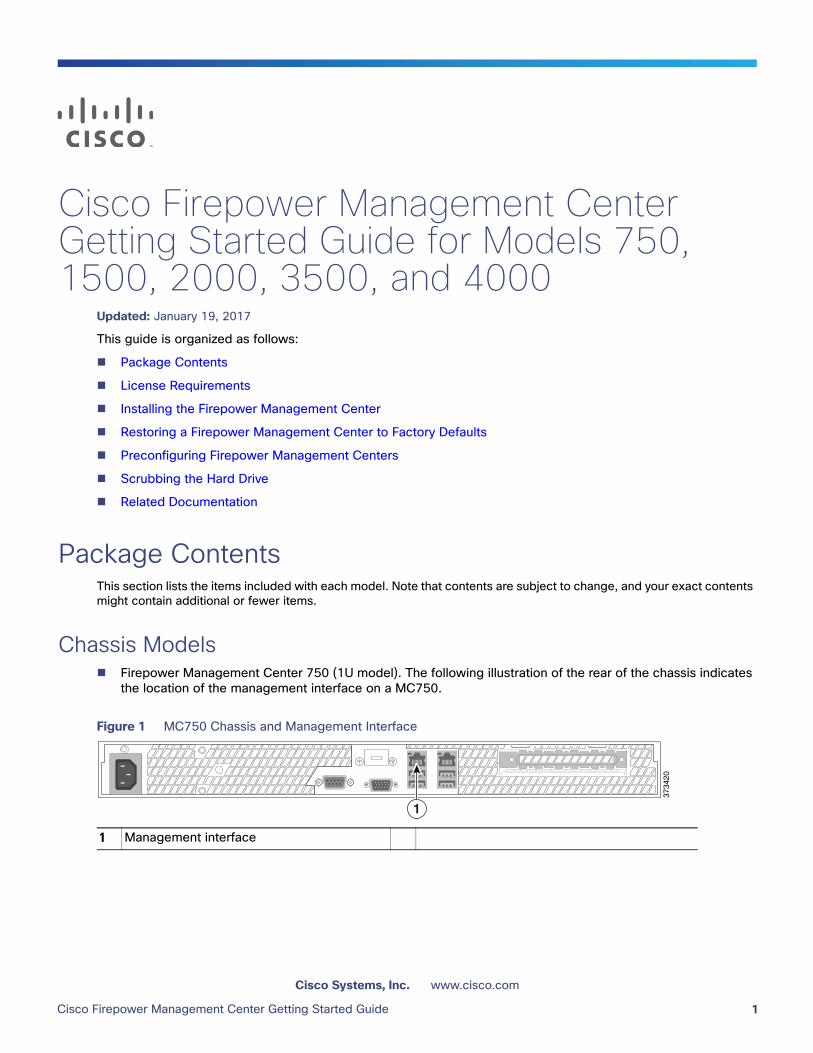
Chassis Models Firepower Management Center 750 (1U model). The following illustration of the rear of the chassis indicates
the location of the management interface on a MC750.
Figure 1 MC750 Chassis and Management Interface
1 Management interface
3734
20
1
Cisco Systems, Inc. www.cisco.com
Cisco Firepower Management Center Getting Started Guide 1
Package Contents
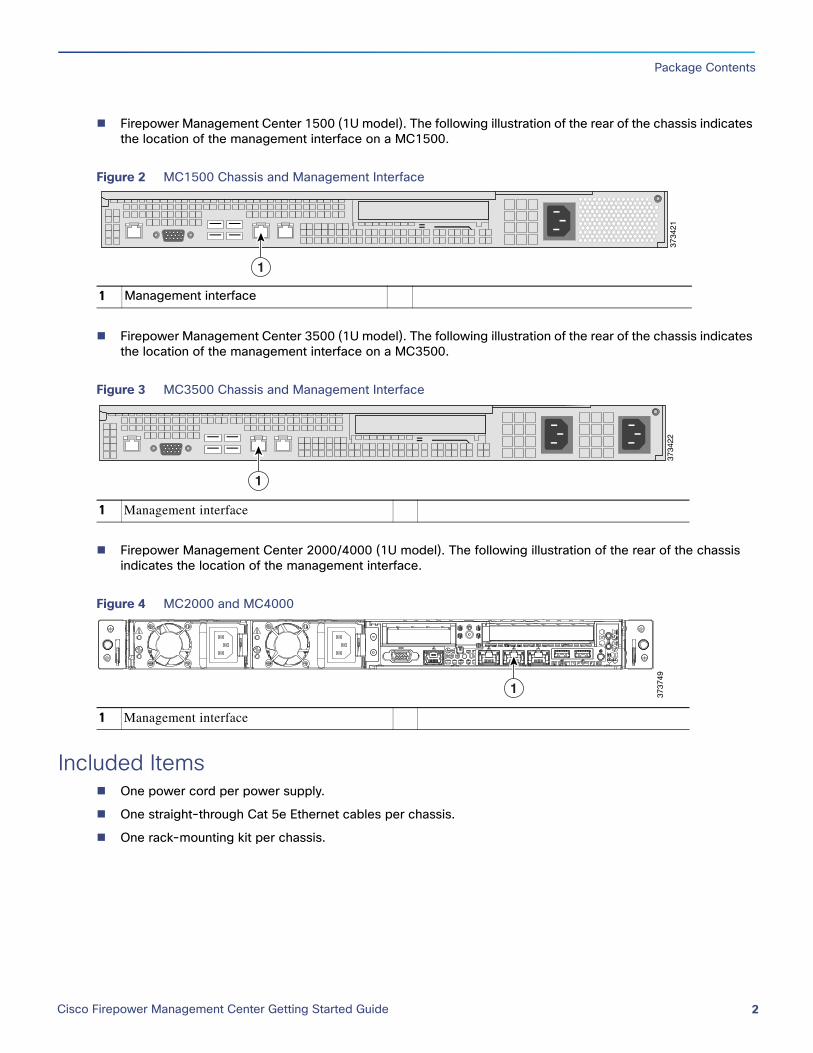
Firepower Management Center 1500 (1U model). The following illustration of the rear of the chassis indicates the location of the management interface on a MC1500.
Figure 2 MC1500 Chassis and Management Interface
Firepower Management Center 3500 (1U model). The following illustration of the rear of the chassis indicates the location of the management interface on a MC3500.
Figure 3 MC3500 Chassis and Management Interface
Firepower Management Center 2000/4000 (1U model). The following illustration of the rear of the chassis indicates the location of the management interface.
Figure 4 MC2000 and MC4000
Included Items One power cord per power supply.
One straight-through Cat 5e Ethernet cables per chassis.
One rack-mounting kit per chassis.
1 Management interface
1 Management interface
1 Management interface
3734
21
1
3734
22
1
PSU1PSU1 PSU2PSU2
3737
49
1
Cisco Firepower Management Center Getting Started Guide 2
License Requirements
License RequirementsYou can license a variety of features to create an optimal Firepower System deployment for your organization. You use the Firepower Management Center to manage licenses for itself and the devices it manages. The license types offered by the Firepower System depend upon the type of device you want to manage:
Classic Licenses
For 7000 and 8000 Series, ASA FirePOWER, and NGIPSv devices, you must use Classic Licenses. Devices that use Classic Licenses are sometimes referred to as Classic devices.
Cisco recommends that you use the initial setup page to add the licenses your organization has purchased; see License Settings, page 8. If you do not add licenses now, any devices you register during initial setup are added to the Management Center as unlicensed; you must license each of them individually after the initial setup process is over. Note that if you are setting up a reimaged appliance and you kept your license settings as part of the restore process, this section may be prepopulated.
Smart Licenses
For Firepower Threat Defense physical and virtual devices, you must use Smart Licenses.
Cisco Smart Licensing lets you purchase and manage a pool of licenses centrally. Unlike product authorization key (PAK) licenses, smart licenses are not tied to a specific serial number or license key. Smart licensing lets you assess your license usage and needs at a glance.
Refer to the Firepower Management Center Configuration Guide for information about Classic Licenses and Smart Licenses, the types of licenses for each class, and how to manage the licenses across your deployment.
Installing the Firepower Management CenterWhen you install an appliance, make sure that you can access the appliance’s console for initial setup. You can access the console for initial setup using a keyboard and monitor with KVM, or using an Ethernet connection to the management interface.
Note: The management interface is preconfigured with a default IPv4 address. However, you can reconfigure the management interface with an IPv6 address as part of the setup process.
Keyboard and Monitor/KVMYou can connect a USB keyboard and VGA monitor to the appliance, which is useful for rack-mounted appliances connected to a keyboard, video, and mouse (KVM) switch.
Ethernet Connection to Management InterfaceConfigure a local computer, which must not be connected to the internet, with the following network settings:
IP address: 192.168.45.2
netmask: 255.255.255.0
default gateway: 192.168.45.1
Using an Ethernet cable, connect the network interface on the local computer to the management interface on the appliance. Note that the management interface is preconfigured with a default IPv4 address. However, you can reconfigure the management interface with an IPv6 address as part of the setup process.
Cisco Firepower Management Center Getting Started Guide 3
Installing the Firepower Management Center
Management Center Initial SetupAfter you deploy and install a Firepower Management Center, you must complete a setup process that allows the new appliance to communicate on your trusted management network. You must also change the administrator password and accept the end user license agreement (EULA).
The setup process also allows you to perform many initial administrative-level tasks, such as setting the time, registering and licensing devices, and scheduling updates. The options you choose during setup and registration determine the default interfaces, inline sets, zones, and policies that the system creates and applies to managed devices.
Before you begin the setup, make sure that you can meet the following conditions:
Access
To set up a new appliance, you must connect using either keyboard and monitor/KVM (keyboard, video, and mouse) or a direct Ethernet connection to the appliance’s management interface. After initial setup, you can configure the appliance for serial access. For more information, see the Cisco Firepower Management Center 750, 1500, 2000, 3500, and 4000 Hardware Installation Guide.
Note: Do not use a KVM console with USB mass storage to access the appliance for the initial setup because the appliance may attempt to use the mass storage device as a boot device.
Network and Deployment Information
You have, at minimum, the information needed to allow the appliance to communicate on your management network: an IPv4 or IPv6 management IP address, a netmask or prefix length, and a default gateway.
If you know how the appliance is deployed, the setup process is also a good time to perform many initial administrative-level tasks, including registration and licensing.
Note: If you are deploying multiple appliances, set up your devices first, then their managing Firepower Management Center. The initial setup process for a device allows you to preregister it to a Management Center; the setup process for a Management Center allows you to add and license preregistered managed devices.
After you complete setup, you will use the Firepower Management Center‘s web interface to perform most management and analysis tasks for your deployment. Note that Firepower devices have a restricted web interface that you can use only to perform basic administration. For more information, see Next Steps, page 10.
Note: If you are setting up an appliance after restoring it to factory defaults (see Restoring a Firepower Management Center to Factory Defaults, page 12) and you did not delete the appliance’s license and network settings, you can use a computer on your management network to browse directly to the appliance’s web interface to perform the setup. Skip to Initial Setup Page: Management Centers, page 6.
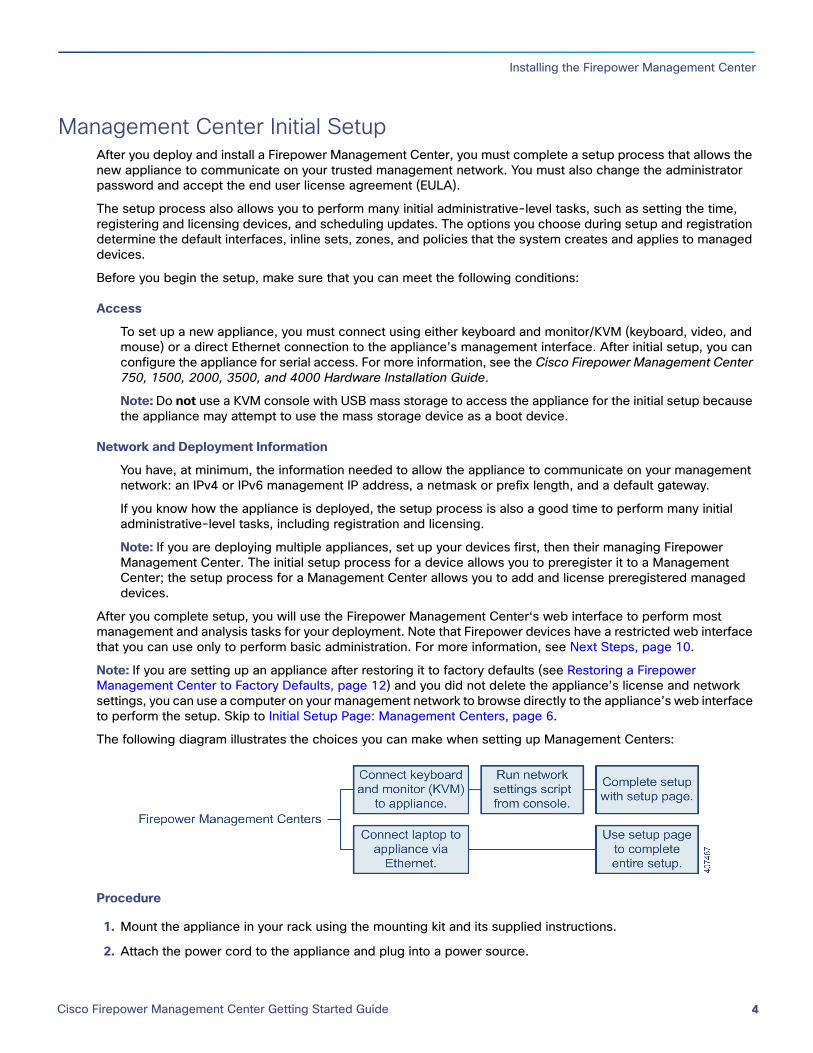
The following diagram illustrates the choices you can make when setting up Management Centers:
Procedure
1. Mount the appliance in your rack using the mounting kit and its supplied instructions.
2. Attach the power cord to the appliance and plug into a power source.
Cisco Firepower Management Center Getting Started Guide 4
Installing the Firepower Management Center
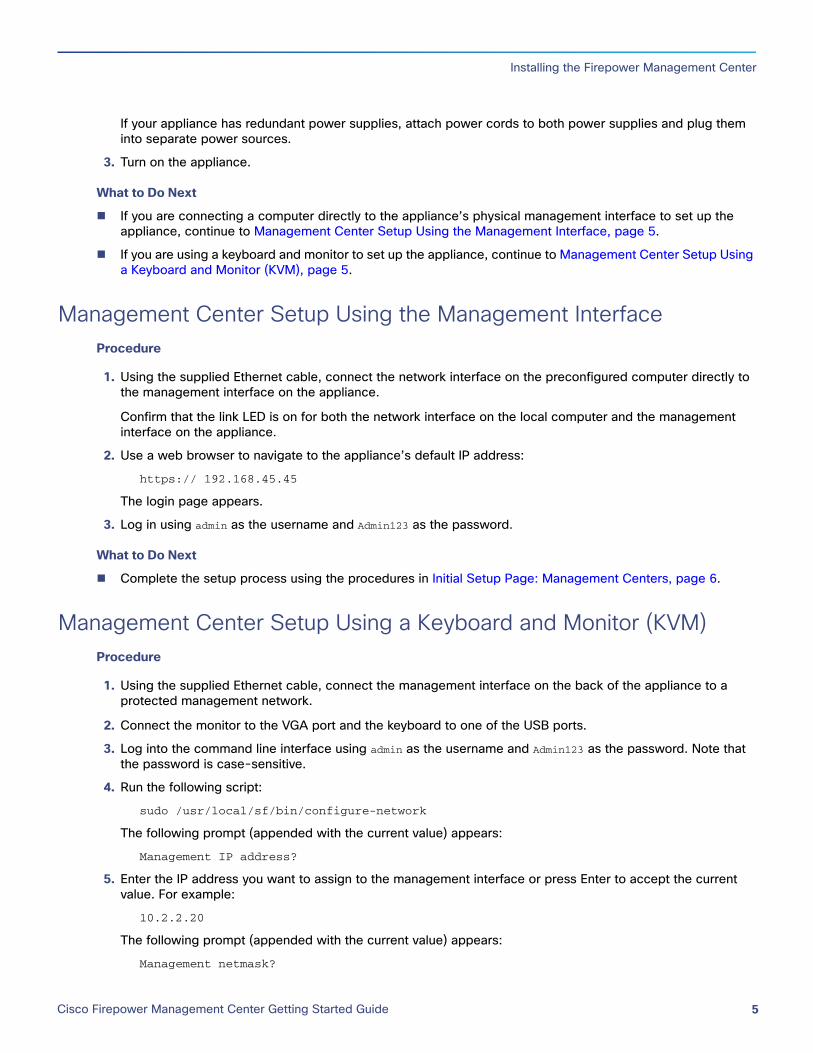
If your appliance has redundant power supplies, attach power cords to both power supplies and plug them into separate power sources.
3. Turn on the appliance.
What to Do Next
If you are connecting a computer directly to the appliance’s physical management interface to set up the appliance, continue to Management Center Setup Using the Management Interface, page 5.
If you are using a keyboard and monitor to set up the appliance, continue to Management Center Setup Using a Keyboard and Monitor (KVM), page 5.
Management Center Setup Using the Management InterfaceProcedure
1. Using the supplied Ethernet cable, connect the network interface on the preconfigured computer directly to the management interface on the appliance.
Confirm that the link LED is on for both the network interface on the local computer and the management interface on the appliance.
2. Use a web browser to navigate to the appliance’s default IP address:
https:// 192.168.45.45
The login page appears.
3. Log in using admin as the username and Admin123 as the password.
What to Do Next
Complete the setup process using the procedures in Initial Setup Page: Management Centers, page 6.
Management Center Setup Using a Keyboard and Monitor (KVM)Procedure
1. Using the supplied Ethernet cable, connect the management interface on the back of the appliance to a protected management network.
2. Connect the monitor to the VGA port and the keyboard to one of the USB ports.
3. Log into the command line interface using admin as the username and Admin123 as the password. Note that the password is case-sensitive.
4. Run the following script:
sudo /usr/local/sf/bin/configure-network
The following prompt (appended with the current value) appears:
Management IP address?
5. Enter the IP address you want to assign to the management interface or press Enter to accept the current value. For example:
10.2.2.20
The following prompt (appended with the current value) appears:
Management netmask?
Cisco Firepower Management Center Getting Started Guide 5
Installing the Firepower Management Center
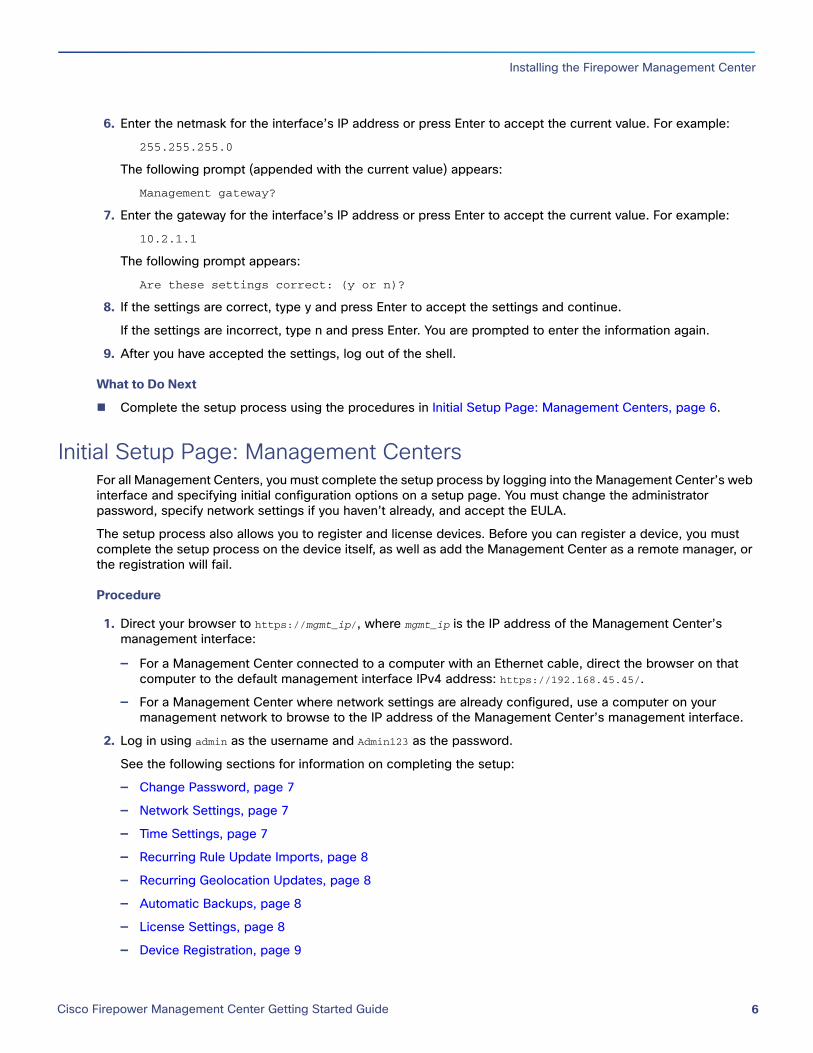
6. Enter the netmask for the interface’s IP address or press Enter to accept the current value. For example:
255.255.255.0
The following prompt (appended with the current value) appears:
Management gateway?
7. Enter the gateway for the interface’s IP address or press Enter to accept the current value. For example:
10.2.1.1
The following prompt appears:
Are these settings correct: (y or n)?
8. If the settings are correct, type y and press Enter to accept the settings and continue.
If the settings are incorrect, type n and press Enter. You are prompted to enter the information again.
9. After you have accepted the settings, log out of the shell.
What to Do Next
Complete the setup process using the procedures in Initial Setup Page: Management Centers, page 6.
Initial Setup Page: Management CentersFor all Management Centers, you must complete the setup process by logging into the Management Center’s web interface and specifying initial configuration options on a setup page. You must change the administrator password, specify network settings if you haven’t already, and accept the EULA.
The setup process also allows you to register and license devices. Before you can register a device, you must complete the setup process on the device itself, as well as add the Management Center as a remote manager, or the registration will fail.
Procedure
1. Direct your browser to https://mgmt_ip/, where mgmt_ip is the IP address of the Management Center’s management interface:
— For a Management Center connected to a computer with an Ethernet cable, direct the browser on that computer to the default management interface IPv4 address: https://192.168.45.45/.
— For a Management Center where network settings are already configured, use a computer on your management network to browse to the IP address of the Management Center’s management interface.
2. Log in using admin as the username and Admin123 as the password.
See the following sections for information on completing the setup:
— Change Password, page 7
— Network Settings, page 7
— Time Settings, page 7
— Recurring Rule Update Imports, page 8
— Recurring Geolocation Updates, page 8
— Automatic Backups, page 8
— License Settings, page 8
— Device Registration, page 9
Cisco Firepower Management Center Getting Started Guide 6
Installing the Firepower Management Center
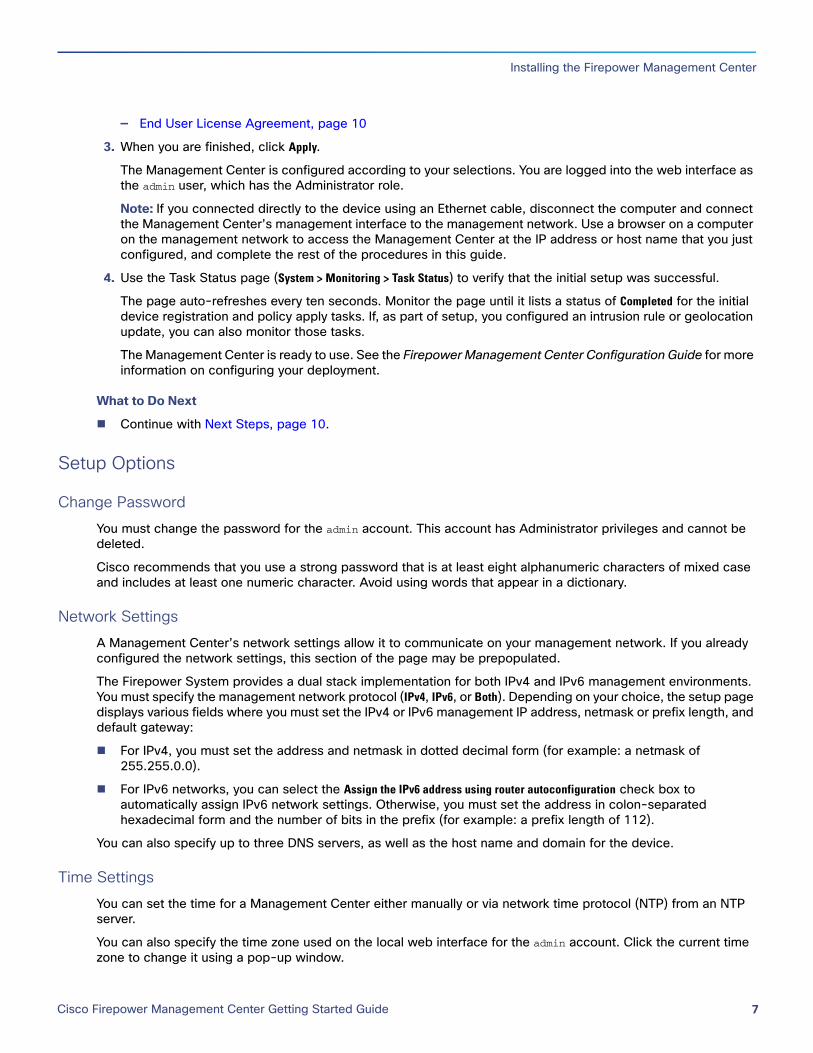
— End User License Agreement, page 10
3. When you are finished, click Apply.
The Management Center is configured according to your selections. You are logged into the web interface as the admin user, which has the Administrator role.
Note: If you connected directly to the device using an Ethernet cable, disconnect the computer and connect the Management Center’s management interface to the management network. Use a browser on a computer on the management network to access the Management Center at the IP address or host name that you just configured, and complete the rest of the procedures in this guide.
4. Use the Task Status page (System > Monitoring > Task Status) to verify that the initial setup was successful.
The page auto-refreshes every ten seconds. Monitor the page until it lists a status of Completed for the initial device registration and policy apply tasks. If, as part of setup, you configured an intrusion rule or geolocation update, you can also monitor those tasks.
The Management Center is ready to use. See the Firepower Management Center Configuration Guide for more information on configuring your deployment.
What to Do Next
Continue with Next Steps, page 10.
Setup Options
Change PasswordYou must change the password for the admin account. This account has Administrator privileges and cannot be deleted.
Cisco recommends that you use a strong password that is at least eight alphanumeric characters of mixed case and includes at least one numeric character. Avoid using words that appear in a dictionary.
Network SettingsA Management Center’s network settings allow it to communicate on your management network. If you already configured the network settings, this section of the page may be prepopulated.
The Firepower System provides a dual stack implementation for both IPv4 and IPv6 management environments. You must specify the management network protocol (IPv4, IPv6, or Both). Depending on your choice, the setup page displays various fields where you must set the IPv4 or IPv6 management IP address, netmask or prefix length, and default gateway:
For IPv4, you must set the address and netmask in dotted decimal form (for example: a netmask of 255.255.0.0).
For IPv6 networks, you can select the Assign the IPv6 address using router autoconfiguration check box to automatically assign IPv6 network settings. Otherwise, you must set the address in colon-separated hexadecimal form and the number of bits in the prefix (for example: a prefix length of 112).
You can also specify up to three DNS servers, as well as the host name and domain for the device.
Time SettingsYou can set the time for a Management Center either manually or via network time protocol (NTP) from an NTP server.
You can also specify the time zone used on the local web interface for the admin account. Click the current time zone to change it using a pop-up window.
Cisco Firepower Management Center Getting Started Guide 7
Installing the Firepower Management Center
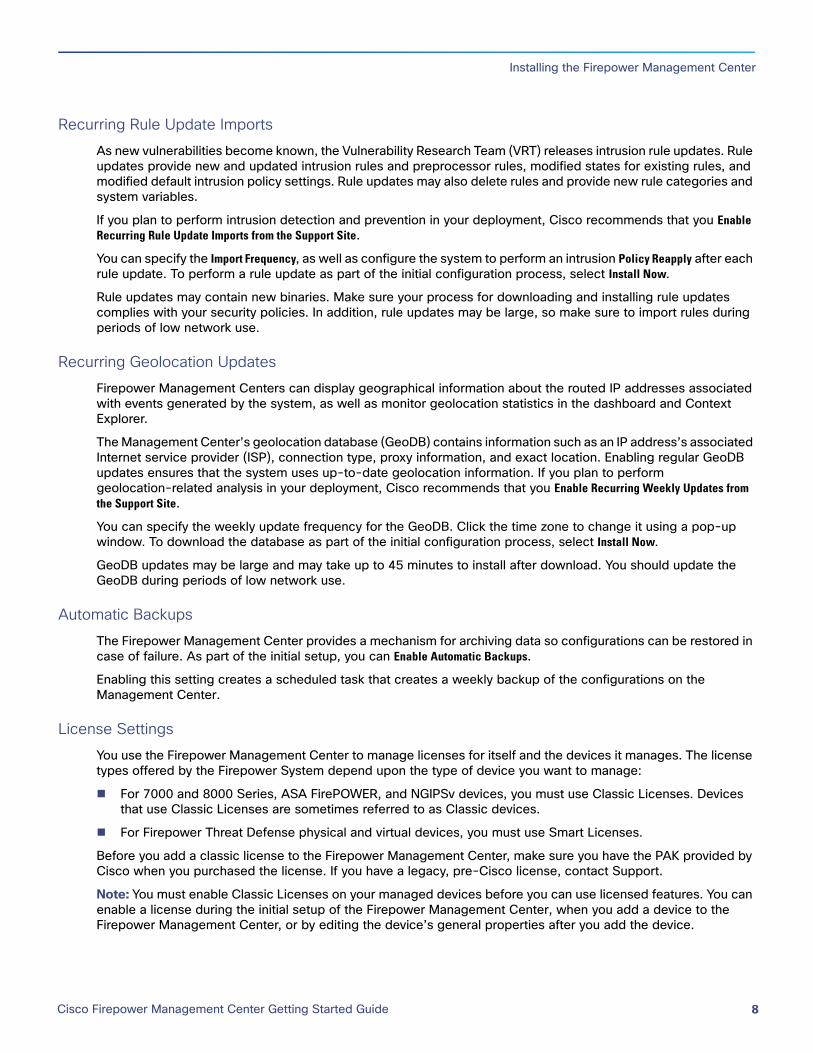
Recurring Rule Update ImportsAs new vulnerabilities become known, the Vulnerability Research Team (VRT) releases intrusion rule updates. Rule updates provide new and updated intrusion rules and preprocessor rules, modified states for existing rules, and modified default intrusion policy settings. Rule updates may also delete rules and provide new rule categories and system variables.
If you plan to perform intrusion detection and prevention in your deployment, Cisco recommends that you Enable Recurring Rule Update Imports from the Support Site.
You can specify the Import Frequency, as well as configure the system to perform an intrusion Policy Reapply after each rule update. To perform a rule update as part of the initial configuration process, select Install Now.
Rule updates may contain new binaries. Make sure your process for downloading and installing rule updates complies with your security policies. In addition, rule updates may be large, so make sure to import rules during periods of low network use.
Recurring Geolocation UpdatesFirepower Management Centers can display geographical information about the routed IP addresses associated with events generated by the system, as well as monitor geolocation statistics in the dashboard and Context Explorer.
The Management Center’s geolocation database (GeoDB) contains information such as an IP address’s associated Internet service provider (ISP), connection type, proxy information, and exact location. Enabling regular GeoDB updates ensures that the system uses up-to-date geolocation information. If you plan to perform geolocation-related analysis in your deployment, Cisco recommends that you Enable Recurring Weekly Updates from the Support Site.
You can specify the weekly update frequency for the GeoDB. Click the time zone to change it using a pop-up window. To download the database as part of the initial configuration process, select Install Now.
GeoDB updates may be large and may take up to 45 minutes to install after download. You should update the GeoDB during periods of low network use.
Automatic BackupsThe Firepower Management Center provides a mechanism for archiving data so configurations can be restored in case of failure. As part of the initial setup, you can Enable Automatic Backups.
Enabling this setting creates a scheduled task that creates a weekly backup of the configurations on the Management Center.
License SettingsYou use the Firepower Management Center to manage licenses for itself and the devices it manages. The license types offered by the Firepower System depend upon the type of device you want to manage:
For 7000 and 8000 Series, ASA FirePOWER, and NGIPSv devices, you must use Classic Licenses. Devices that use Classic Licenses are sometimes referred to as Classic devices.
For Firepower Threat Defense physical and virtual devices, you must use Smart Licenses.
Before you add a classic license to the Firepower Management Center, make sure you have the PAK provided by Cisco when you purchased the license. If you have a legacy, pre-Cisco license, contact Support.
Note: You must enable Classic Licenses on your managed devices before you can use licensed features. You can enable a license during the initial setup of the Firepower Management Center, when you add a device to the Firepower Management Center, or by editing the device’s general properties after you add the device.
Cisco Firepower Management Center Getting Started Guide 8
Installing the Firepower Management Center
Procedure
1. Obtain the License Key for your chassis during the initial setup from the License Settings section of the initial setup page.
The License Key is clearly labeled; for example, 66:18:E7:6E:D9:93:35.
Note: You can find the License Key on a Firepower Management Center at any time when you click the Add New License button from the System>Licenses>Classic Licenses page.
2. To obtain your license, navigate to https://www.cisco.com/go/license/ where you will be prompted for the license key (66:18:E7:6E:D9:93:35) and the Product Authorization Key (PAK).
Note: If you ordered additional licenses, you can enter the PAKs separated commas for those licenses at the same time.
3. Follow the on-screen instructions to generate a license or licenses, which will be emailed to you.
4. Paste the license or licenses in the validation box click Add/Verify.
What to Do Next
Continue with initial setup.
Note: If you have devices that use Cisco Smart Licensing, you use the System>Licenses>Smart Licenses page to add and verify licenses. Refer to the product documentation for those devices for information on how to add Smart Licenses to the Firepower Management Center. The Firepower Management Center Configuration Guide provides more information about Classic Licenses and Smart Licenses, the types of licenses for each class, and how to manage the licenses across your deployment.
Device RegistrationA Firepower Management Center can manage any device, physical or virtual, currently supported by the Firepower System.
You must configure remote management on the device before you can register the device to a Management Center.
If you are using Firepower System Version 6.0 or greater, see the device management information in the Firepower Management Center Configuration Guide for instructions on registering your devices.
If you are using a Firepower System Version previous to 6.0, you can add most pre-registered devices to the Management Center during the initial setup process. However, if a device and the Management Center are separated by a NAT device, you must add it after the setup process completes; see the Firepower 7000 and 8000 Series Installation Guide.
You must configure both traffic channels to use the same management interface when you use a non-default management interface to connect your Management Center and managed device and those appliances are separated by a NAT device. See “Deploying on a Management Network” in the Firepower 7000 and 8000 Series Installation Guide for more information.
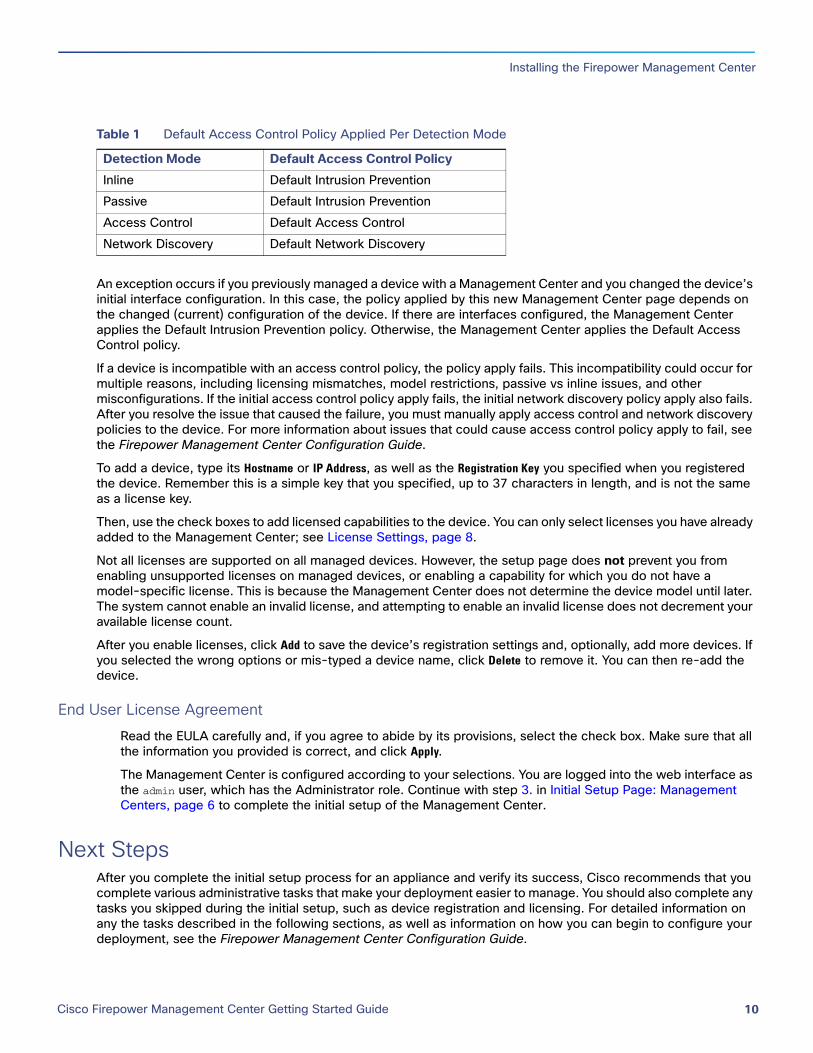
When you register a managed device to a Management Center, leave the Apply Default Access Control Policies check box enabled if you want to automatically apply access control policies to devices upon registration. Note that you cannot choose which policy the Management Center applies to each device, only whether to apply them. The policy that is applied to each device depends on the detection mode (see Setting Up Firepower Managed Devices in the Firepower 7000 and 8000 Series Installation Guide) you chose when configuring the device, as listed in the following table.
Cisco Firepower Management Center Getting Started Guide 9
Installing the Firepower Management Center
An exception occurs if you previously managed a device with a Management Center and you changed the device’s initial interface configuration. In this case, the policy applied by this new Management Center page depends on the changed (current) configuration of the device. If there are interfaces configured, the Management Center applies the Default Intrusion Prevention policy. Otherwise, the Management Center applies the Default Access Control policy.
If a device is incompatible with an access control policy, the policy apply fails. This incompatibility could occur for multiple reasons, including licensing mismatches, model restrictions, passive vs inline issues, and other misconfigurations. If the initial access control policy apply fails, the initial network discovery policy apply also fails. After you resolve the issue that caused the failure, you must manually apply access control and network discovery policies to the device. For more information about issues that could cause access control policy apply to fail, see the Firepower Management Center Configuration Guide.
To add a device, type its Hostname or IP Address, as well as the Registration Key you specified when you registered the device. Remember this is a simple key that you specified, up to 37 characters in length, and is not the same as a license key.
Then, use the check boxes to add licensed capabilities to the device. You can only select licenses you have already added to the Management Center; see License Settings, page 8.
Not all licenses are supported on all managed devices. However, the setup page does not prevent you from enabling unsupported licenses on managed devices, or enabling a capability for which you do not have a model-specific license. This is because the Management Center does not determine the device model until later. The system cannot enable an invalid license, and attempting to enable an invalid license does not decrement your available license count.
After you enable licenses, click Add to save the device’s registration settings and, optionally, add more devices. If you selected the wrong options or mis-typed a device name, click Delete to remove it. You can then re-add the device.
End User License AgreementRead the EULA carefully and, if you agree to abide by its provisions, select the check box. Make sure that all the information you provided is correct, and click Apply.
The Management Center is configured according to your selections. You are logged into the web interface as the admin user, which has the Administrator role. Continue with step 3. in Initial Setup Page: Management Centers, page 6 to complete the initial setup of the Management Center.
Next StepsAfter you complete the initial setup process for an appliance and verify its success, Cisco recommends that you complete various administrative tasks that make your deployment easier to manage. You should also complete any tasks you skipped during the initial setup, such as device registration and licensing. For detailed information on any the tasks described in the following sections, as well as information on how you can begin to configure your deployment, see the Firepower Management Center Configuration Guide.
Table 1 Default Access Control Policy Applied Per Detection Mode
Detection Mode Default Access Control PolicyInline Default Intrusion PreventionPassive Default Intrusion PreventionAccess Control Default Access ControlNetwork Discovery Default Network Discovery
Cisco Firepower Management Center Getting Started Guide 10
Installing the Firepower Management Center
Individual User Accounts
After you complete the initial setup, the only user on the system is the admin user, which has the Administrator role and access. Users with that role have full menu and configuration access to the system, including via the shell or CLI. Cisco recommends that you limit the use of the admin account (and the Administrator role) for security and auditing reasons.
Creating a separate account for each person who will use the system allows your organization not only to audit actions and changes made by each user, but also to limit each person’s associated user access role or roles. This is especially important on the Management Center, where you perform most of your configuration and analysis tasks. For example, an analyst needs access to event data to analyze the security of your network, but may not require access to administrative functions for the deployment.
The system includes ten predefined user roles designed for a variety of administrators and analysts. You can also create custom user roles with specialized access privileges.
Health and System Policies
By default, all appliances have an initial system policy applied. The system policy governs settings that are likely to be similar for multiple appliances in a deployment, such as mail relay host preferences and time synchronization settings. Cisco recommends that you use the Management Center to apply the same system policy to itself and all the devices it manages.
By default, the Management Center also has a health policy applied. A health policy, as part of the health monitoring feature, provides the criteria for the system continuously monitoring the performance of the appliances in your deployment. Cisco recommends that you use the Management Center to apply a health policy to all the devices it manages.
Software and Database Updates
You should update the system software on your appliances before you begin any deployment. Cisco recommends that all the appliances in your deployment run the most recent version of the Firepower System. If you are using them in your deployment, you should also install the latest intrusion rule updates, VDB, and GeoDB.
Caution: Before you update any part of the Firepower System, you must read the release notes or advisory text that accompanies the update. The release notes provide important information, including supported platforms, compatibility, prerequisites, warnings, and specific installation and uninstallation instructions.
Redirecting Console OutputBy default, Management Centers direct initialization status, or init, messages to the VGA port. If you want to use the physical serial port or SOL to access the console, Cisco recommends you redirect console output to the serial port after you complete the initial setup.
To redirect console output using the shell, you run a script from the appliance’s shell.
Using the Shell to Redirect the Console Output
Procedure
1. Using your keyboard/monitor or serial connection, log into the appliance’s shell using an account with Administrator privileges. The password is the same as the password for the appliance’s web interface.
The prompt for the appliance appears.
2. At the prompt, set the console output by typing one of the following commands:
— To access the appliance using the VGA port:
Cisco Firepower Management Center Getting Started Guide 11
Restoring a Firepower Management Center to Factory Defaults
sudo /usr/local/sf/bin/configure_console.sh vga
— To access the appliance using the physical serial port:
sudo /usr/local/sf/bin/configure_console.sh serial
— To access the appliance using LOM via SOL:
sudo /usr/local/sf/bin/configure_console.sh sol
3. To implement your changes, reboot the appliance by typing sudo reboot.
The appliance reboots.
Using the Web Interface to Redirect the Console Output
Procedure
1. Select System > Configuration.
2. Select Console Configuration.
3. Select a remote console access option:
— Select VGA to use the appliance's VGA port. This is the default option.
— Select Physical Serial Port to use the appliance's serial port, or to use LOM/SOL on a Management Center.
If you selected Physical Serial Port, the LOM settings appear.
4. To configure LOM via SOL, enter the appropriate settings:
— DHCP Configuration for the appliance (DHCP or Static).
— IP Address to be used for LOM. The LOM IP address must be different from the management interface IP address of the appliance.
— Netmask for the appliance.
— Default Gateway for the appliance.
5. Click Save.
Remote console configuration for the appliance is saved. If you configured Lights-Out Management, you must enable it for at least one user; see Enabling LOM and LOM Users, page 25.
Restoring a Firepower Management Center to Factory Defaults
Cisco provides ISO images on its Support Site for restoring, or reimaging, Firepower Management Centers to their original factory settings.
For more information, see the following sections:
Before You Begin, page 13
Understanding the Restore Process, page 13
Obtaining the Restore ISO and Update Files, page 14
Beginning the Restore Process, page 15
Using the Interactive Menu to Restore an Appliance, page 17
Next Steps, page 23
Cisco Firepower Management Center Getting Started Guide 12
Restoring a Firepower Management Center to Factory Defaults
Setting Up Lights-Out Management, page 24
Before You BeginBefore you begin restoring your appliances to factory defaults, you should familiarize yourself with the expected behavior of the system during the restore process.
Configuration and Event Backup GuidelinesBefore you begin the restore process, Cisco recommends that you delete or move any backup files that reside on your appliance, then back up current event and configuration data to an external location.
Restoring your appliance to factory defaults results in the loss of almost all configuration and event data on the appliance. Although the restore utility can retain the appliance’s license, network, console, and Lights-Out Management (LOM) settings, you must perform all other setup tasks after the restore process completes.
Traffic Flow During the Restore ProcessTo avoid disruptions in traffic flow on your network, Cisco recommends restoring your appliances during a maintenance window or at a time when the interruption will have the least impact on your deployment.
Restoring a Firepower device that is deployed inline resets the device to a non-bypass (fail closed) configuration, disrupting traffic on your network. Traffic is blocked until you configure bypass-enabled inline sets on the device. For more information about editing your device configuration to configure bypass, see the Managing Devices chapter of the Firepower Management Center Configuration Guide.
Understanding the Restore ProcessTo restore a Firepower device, you boot from the appliance’s internal flash drive and use an interactive menu to download and install the ISO image on the appliance. For your convenience, you can install system software and intrusion rule updates as part of the restore process.
Only reimage your appliances during a maintenance window. Reimaging resets appliances in bypass mode to a non-bypass configuration and disrupts traffic on your network until you reconfigure bypass mode. For more information, see Traffic Flow During the Restore Process, page 13.
Note that you cannot restore an appliance using its web interface. To restore an appliance, you must connect to it in one of the following ways:
Keyboard and Monitor/KVM
You can connect a USB keyboard and VGA monitor to the appliance, which is useful for rack-mounted appliances connected to a KVM (keyboard, video, and mouse) switch. If you have a KVM that is remote-accessible, you can restore appliances without having physical access.
Serial Connection/Laptop
You can use a rollover serial cable (also known as a NULL modem cable or a Cisco console cable) to connect a computer to the appliance. See the hardware specifications for your appliance to locate the serial port. To interact with the appliance, use terminal emulation software such as HyperTerminal or XModem.
Lights-Out Management Using Serial over LAN
You can perform a limited set of actions on Management Centers and Firepower devices using Lights-Out Management (LOM) with a Serial over LAN (SOL) connection. If you do not have physical access to an appliance, you can use LOM to perform the restore process. After you connect to an appliance using LOM, you issue commands to the restore utility as if you were using a physical serial connection. Note that you can
Cisco Firepower Management Center Getting Started Guide 13
Restoring a Firepower Management Center to Factory Defaults
use Lights-Out Management on the default (eth0) management interface only. For more information, see Setting Up Lights-Out Management, page 24.
Before You Begin
Obtain the restore ISO image for the appliance from the Support Site. See Obtaining the Restore ISO and Update Files, page 14.
Reimaging a Firepower Management Center could cause an Out of Compliance (OOC) state with the Cisco License Authority. As a best practice, when reimaging a Firepower Management Center, first deregister the Firepower Management Center from the Cisco Smart Software Manager. Choose System > Licenses > Smart Licenses and click the deregister icon.
To restore a Firepower device:
1. Copy the image to an appropriate storage medium.
2. Connect to the appliance.
3. Reboot the appliance and invoke the restore utility.
What to Do Next
Install the ISO image using the procedure in Beginning the Restore Process, page 15.
Obtaining the Restore ISO and Update FilesCisco provides ISO images for restoring appliances to their original factory settings. Before you restore an appliance, obtain the correct ISO image from the Support Site.
The ISO image you should use to restore an appliance depends on when Cisco introduced support for that appliance model. Unless the ISO image was released with a minor version to accommodate a new appliance model, ISO images are usually associated with major versions of the system software (for example, 5.2 or 5.3). To avoid installing an incompatible version of the system, Cisco recommends that you always use the most recent ISO image available for your appliance.
Firepower devices use an internal flash drive to boot the appliance so you can run the restore utility.
Cisco also recommends that you always run the latest version of the system software supported by your appliance. After you restore an appliance to the latest supported major version, you should update its system software, intrusion rules, and Vulnerability Database (VDB). For more information, see the release notes for the update you want to apply, as well as the Firepower Management Center Configuration Guide.
For your convenience, you can install system software and intrusion rule updates as part of the restore process. For example, you could restore a device to Version 6.0, and also update the device to Version 6.0.0.1 as part of that process. Keep in mind that only Management Centers require rule updates.
To obtain the restore ISO and other update files:
1. Using the user name and password for your support account, log into the Support Site (https://sso.cisco.com/autho/forms/CDClogin.html).
2. Browse to the software download section (https://software.cisco.com/download/navigator.html).
3. Enter a search string in the Find area on the page that appears for the system software you want to download and install.
For example, to find software downloads for Firepower, you would enter Firepower.
4. Find the image (ISO image) that you want to download.
Cisco Firepower Management Center Getting Started Guide 14

Restoring a Firepower Management Center to Factory Defaults
You can click one of the links on the left side of the page to view the appropriate section of the page. For example, you would click 5.4.1 Images to view the images and release notes for Version 5.4.1 of the Firepower System.
5. Click the ISO image you want to download.
The file begins downloading.
6. Copy the files to an HTTP (web) server, FTP server, or SCP-enabled host that the appliance can access on its management network.
Caution: Do not transfer ISO or update files via email; the files can become corrupted. Also, do not change the names of the files; the restore utility requires that they be named as they are on the Support Site.
Beginning the Restore ProcessBegin the restore process by booting the appliance from an internal flash drive.
After you make sure that you have the appropriate level of access and connection to an appliance, as well the correct ISO image, use one of the following procedures to restore your appliance:
Starting the Restore Utility Using KVM or Physical Serial Port, page 15 explains how to start the restore process for an appliance where you do not have LOM access.
Starting the Restore Utility Using Lights-Out Management, page 16 explains how use LOM to start the restore process via an SOL connection.
Caution: The procedures in this chapter explain how to restore an appliance without powering it down. However, if you need to power down for any reason, use the appliance’s web interface, the system shutdown command from the CLI on a Firepower device, or the shutdown -h now command from an appliance’s shell (sometimes called expert mode).
Starting the Restore Utility Using KVM or Physical Serial PortFor Firepower devices, Cisco provides a restore utility on an internal flash drive.
Note: Do not use a KVM console with USB mass storage to access the appliance for the initial setup because the appliance may attempt to use the mass storage device as a boot device.
If you need to restore an appliance to factory defaults and do not have physical access, you can use LOM to perform the restore process; see Starting the Restore Utility Using Lights-Out Management, page 16.
To start the restore utility:
1. Using your keyboard/monitor or serial connection, log into the appliance using an account with Administrator privileges. The password is the same as the password for the appliance’s web interface.
2. Reboot the appliance. On a Firepower device, type system reboot.
The appliance reboots.
3. Monitor the reboot status:
— If the system is performing a database check, you may see the following message: The system is not operational yet. Checking and repairing database are in progress. This may take a long time to
finish.
— For a keyboard and monitor connection, quickly press one of the arrow keys to prevent the appliance from booting the currently installed version of the system.
Cisco Firepower Management Center Getting Started Guide 15
Restoring a Firepower Management Center to Factory Defaults
— For a serial connection, when you see the BIOS boot options, press Tab slowly and repeatedly (to prevent the appliance from booting the currently installed version of the system). The LILO boot prompt appears. For example:
LILO 22.8 boot:System-5.4 System_Restore
4. Indicate that you want to restore the system:
— For a keyboard and monitor connection, use the arrow keys to select System_Restore and press Enter.
— For a serial connection, type System_Restore at the prompt and press Enter.
The boot prompt appears after the following choices:
0. Load with standard console1. Load with serial console
5. Select a display mode for the restore utility’s interactive menu:
— For a keyboard and monitor connection, type 0 and press Enter.
— For a serial connection, type 1 and press Enter.
If you do not select a display mode, the restore utility defaults to the standard console after 30 seconds.
Unless this is the first time you have restored the appliance to this major version, the utility automatically loads the last restore configuration you used. To continue, confirm the settings in a series of pages.
6. Press Enter to confirm the copyright notice.
What to Do Next
Continue with Using the Interactive Menu to Restore an Appliance, page 17.
Starting the Restore Utility Using Lights-Out ManagementIf you need to restore an appliance to factory defaults and do not have physical access to the appliance, you can use LOM to perform the restore process. Note that if you want to use LOM to configure the initial setup, you must preserve the network settings during the initial setup. Note also that you can use Lights-Out Management on the default (eth0) management interface only.
Note: Before you can restore an appliance using LOM, you must enable the feature; see Setting Up Lights-Out Management, page 24.
To start the restore utility using Lights-Out Management:
1. At your computer’s command prompt, enter the IPMI command to start the SOL session:
For IPMItool, type:
sudo ipmitool -I lanplus -H IP_address -U username sol activate
For ipmiutil, type:
sudo ipmiutil sol -a -V4 -J3 -N IP_address -U username -P password
Where IP_address is the IP address of the management interface on the appliance, username is user name of an authorized LOM account, and password is the password for that account. Note that IPMItool prompts you for the password after you issue the sol activate command.
If you are using a Firepower device, type expert to display the shell prompt.
1. Reboot the appliance as root user. For a Firepower device, type system reboot.
The appliance reboots.
Cisco Firepower Management Center Getting Started Guide 16
Restoring a Firepower Management Center to Factory Defaults
2. Monitor the reboot status.
If the system is performing a database check, you may see the following message: The system is not operational yet. Checking and repairing database are in progress. This may take a long time to finish.
When you see the BIOS boot options, press Tab slowly and repeatedly (to prevent the appliance from booting the currently installed version of the system) until the LILO boot prompt appears. For example:
LILO 22.8 boot:System-5.4 System_Restore
3. At the boot prompt, start the restore utility by typing System_Restore.
The boot prompt appears after the following choices:
0. Load with standard console1. Load with serial console
4. Type 1 and press Enter to load the interactive restore menu via the appliance’s serial connection.
Note: If you do not select a display mode, the restore utility defaults to the standard console after 30 seconds.
Unless this is the first time you have restored the appliance to this major version, the utility automatically loads the last restore configuration you used. To continue, confirm the settings in a series of pages.
5. Press Enter to confirm the copyright notice.
What to Do Next
Continue with Using the Interactive Menu to Restore an Appliance, page 17.
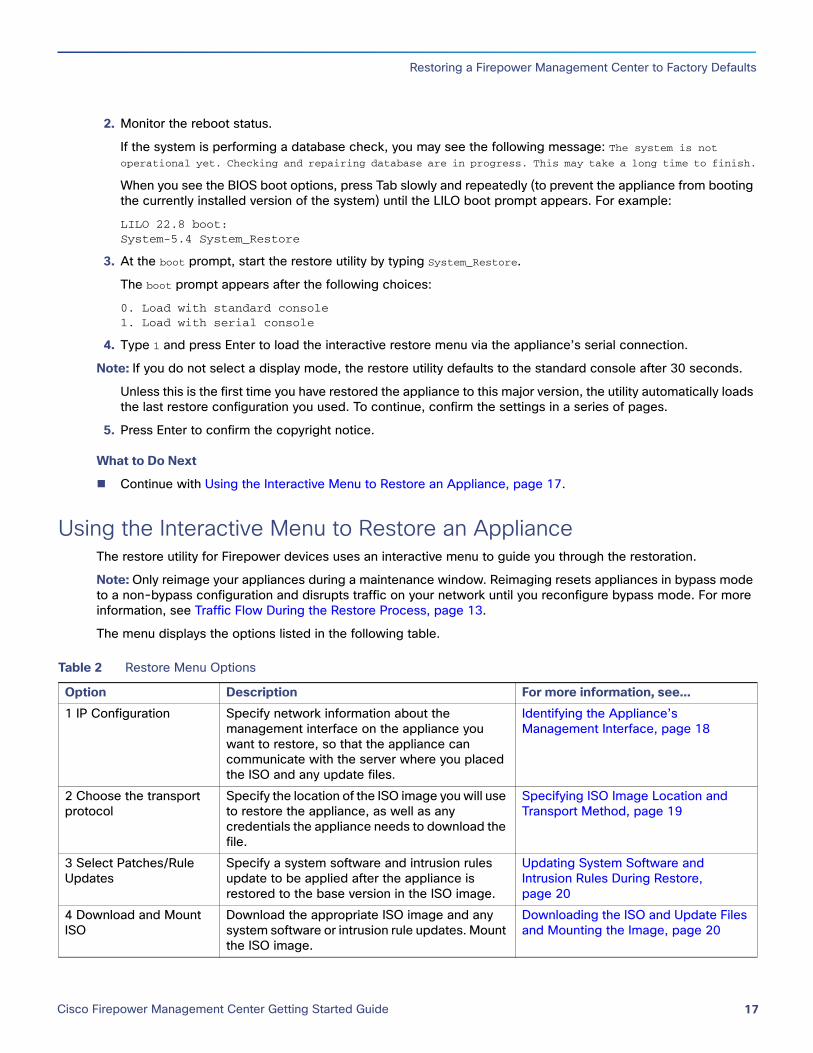
Using the Interactive Menu to Restore an ApplianceThe restore utility for Firepower devices uses an interactive menu to guide you through the restoration.
Note: Only reimage your appliances during a maintenance window. Reimaging resets appliances in bypass mode to a non-bypass configuration and disrupts traffic on your network until you reconfigure bypass mode. For more information, see Traffic Flow During the Restore Process, page 13.
The menu displays the options listed in the following table.
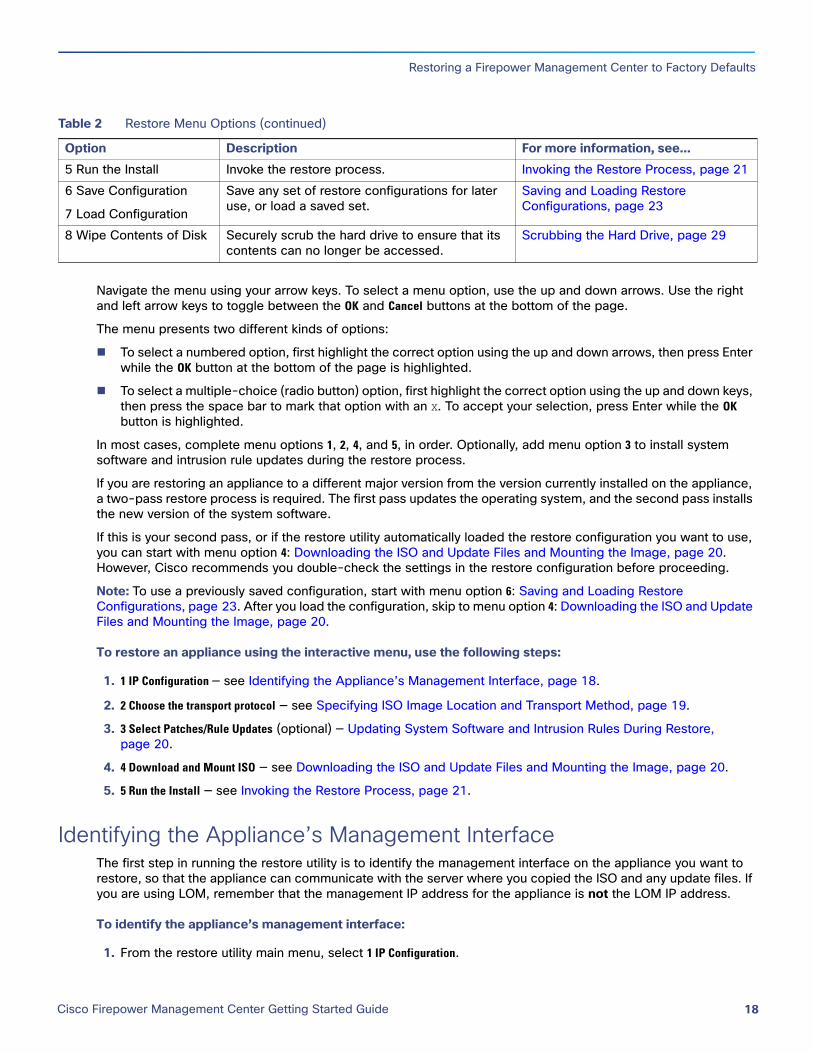
Table 2 Restore Menu Options
Option Description For more information, see...1 IP Configuration Specify network information about the
management interface on the appliance you want to restore, so that the appliance can communicate with the server where you placed the ISO and any update files.
Identifying the Appliance’s Management Interface, page 18
2 Choose the transport protocol
Specify the location of the ISO image you will use to restore the appliance, as well as any credentials the appliance needs to download the file.
Specifying ISO Image Location and Transport Method, page 19
3 Select Patches/Rule Updates
Specify a system software and intrusion rules update to be applied after the appliance is restored to the base version in the ISO image.
Updating System Software and Intrusion Rules During Restore, page 20
4 Download and Mount ISO
Download the appropriate ISO image and any system software or intrusion rule updates. Mount the ISO image.
Downloading the ISO and Update Files and Mounting the Image, page 20
Cisco Firepower Management Center Getting Started Guide 17
Restoring a Firepower Management Center to Factory Defaults
Navigate the menu using your arrow keys. To select a menu option, use the up and down arrows. Use the right and left arrow keys to toggle between the OK and Cancel buttons at the bottom of the page.
The menu presents two different kinds of options:
To select a numbered option, first highlight the correct option using the up and down arrows, then press Enter while the OK button at the bottom of the page is highlighted.
To select a multiple-choice (radio button) option, first highlight the correct option using the up and down keys, then press the space bar to mark that option with an X. To accept your selection, press Enter while the OK button is highlighted.
In most cases, complete menu options 1, 2, 4, and 5, in order. Optionally, add menu option 3 to install system software and intrusion rule updates during the restore process.
If you are restoring an appliance to a different major version from the version currently installed on the appliance, a two-pass restore process is required. The first pass updates the operating system, and the second pass installs the new version of the system software.
If this is your second pass, or if the restore utility automatically loaded the restore configuration you want to use, you can start with menu option 4: Downloading the ISO and Update Files and Mounting the Image, page 20. However, Cisco recommends you double-check the settings in the restore configuration before proceeding.
Note: To use a previously saved configuration, start with menu option 6: Saving and Loading Restore Configurations, page 23. After you load the configuration, skip to menu option 4: Downloading the ISO and Update Files and Mounting the Image, page 20.
To restore an appliance using the interactive menu, use the following steps:
1. 1 IP Configuration — see Identifying the Appliance’s Management Interface, page 18.
2. 2 Choose the transport protocol — see Specifying ISO Image Location and Transport Method, page 19.
3. 3 Select Patches/Rule Updates (optional) — Updating System Software and Intrusion Rules During Restore, page 20.
4. 4 Download and Mount ISO — see Downloading the ISO and Update Files and Mounting the Image, page 20.
5. 5 Run the Install — see Invoking the Restore Process, page 21.
Identifying the Appliance’s Management InterfaceThe first step in running the restore utility is to identify the management interface on the appliance you want to restore, so that the appliance can communicate with the server where you copied the ISO and any update files. If you are using LOM, remember that the management IP address for the appliance is not the LOM IP address.
To identify the appliance’s management interface:
1. From the restore utility main menu, select 1 IP Configuration.
5 Run the Install Invoke the restore process. Invoking the Restore Process, page 216 Save Configuration
7 Load Configuration
Save any set of restore configurations for later use, or load a saved set.
Saving and Loading Restore Configurations, page 23
8 Wipe Contents of Disk Securely scrub the hard drive to ensure that its contents can no longer be accessed.
Scrubbing the Hard Drive, page 29
Table 2 Restore Menu Options (continued)
Option Description For more information, see...
Cisco Firepower Management Center Getting Started Guide 18
Restoring a Firepower Management Center to Factory Defaults
2. Select the appliance’s management interface (generally eth0).
3. Select the protocol you are using for your management network: IPv4 or IPv6.
Options for assigning an IP address to the management interface appear.
4. Select a method to assign an IP address to the management interface: Static or DHCP:
— If you select Static, a series of pages prompts you to manually enter the IP address, network mask or prefix length, and default gateway for the management interface.
— If you select DHCP, the appliance automatically detects the IP address, network mask or prefix length, and default gateway for the management interface, then displays the IP address.
5. When prompted, confirm your settings.
If prompted, confirm the IP address assigned to the appliance’s management interface.
What to Do Next
Continue with the next section, Specifying ISO Image Location and Transport Method.
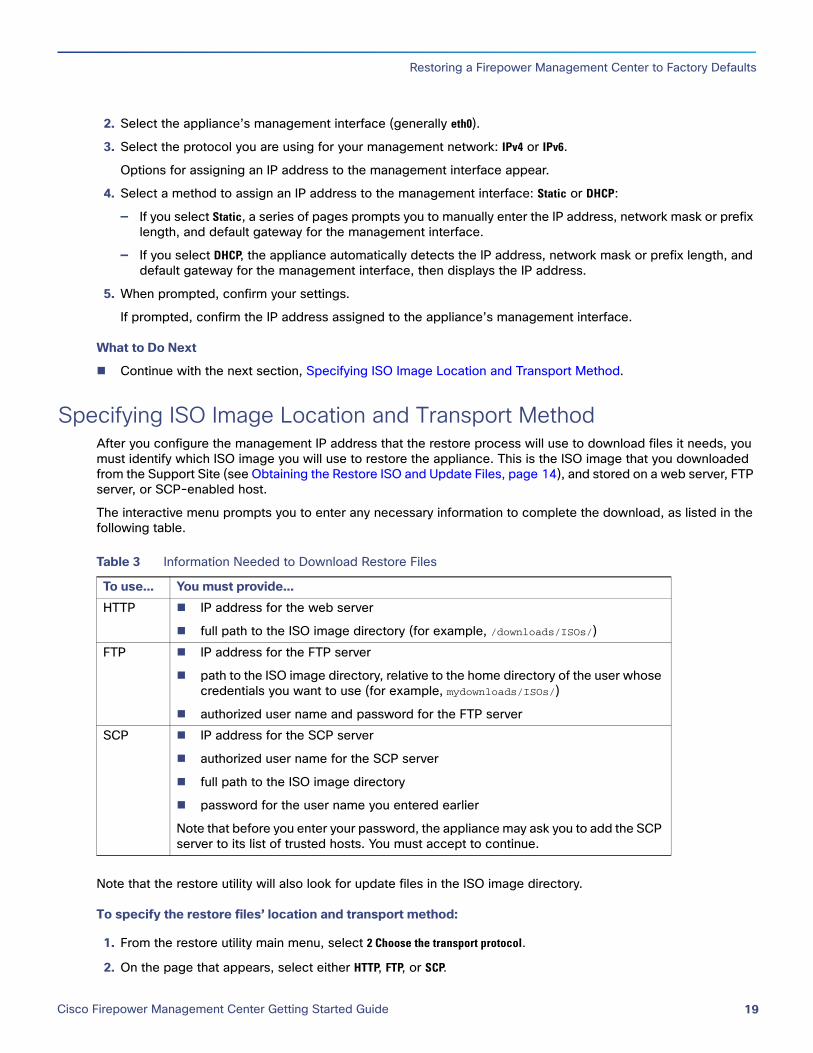
Specifying ISO Image Location and Transport MethodAfter you configure the management IP address that the restore process will use to download files it needs, you must identify which ISO image you will use to restore the appliance. This is the ISO image that you downloaded from the Support Site (see Obtaining the Restore ISO and Update Files, page 14), and stored on a web server, FTP server, or SCP-enabled host.
The interactive menu prompts you to enter any necessary information to complete the download, as listed in the following table.
Note that the restore utility will also look for update files in the ISO image directory.
To specify the restore files’ location and transport method:
1. From the restore utility main menu, select 2 Choose the transport protocol.
2. On the page that appears, select either HTTP, FTP, or SCP.
Table 3 Information Needed to Download Restore Files
To use... You must provide...HTTP IP address for the web server
full path to the ISO image directory (for example, /downloads/ISOs/) FTP IP address for the FTP server
path to the ISO image directory, relative to the home directory of the user whose credentials you want to use (for example, mydownloads/ISOs/)
authorized user name and password for the FTP serverSCP IP address for the SCP server
authorized user name for the SCP server
full path to the ISO image directory
password for the user name you entered earlier
Note that before you enter your password, the appliance may ask you to add the SCP server to its list of trusted hosts. You must accept to continue.
Cisco Firepower Management Center Getting Started Guide 19
Restoring a Firepower Management Center to Factory Defaults
3. Use the series of pages presented by the restore utility to provide the necessary information for the protocol you chose, as described in Table 3 on page -19.
If your information was correct, the appliance connects to the server and displays a list of the Cisco ISO images in the location you specified.
4. Select the ISO image you want to use.
5. When prompted, confirm your settings.
6. Do you want to install a system software or intrusion rule update as a part of the restore process?
— If yes, continue with the next section, Updating System Software and Intrusion Rules During Restore.
— If no, continue with Downloading the ISO and Update Files and Mounting the Image, page 20. Note that you can use the system’s web interface to manually install updates after the restore process completes.
Updating System Software and Intrusion Rules During RestoreOptionally, you can use the restore utility to update the system software and intrusion rules after the appliance is restored to the base version in the ISO image. Note that only Management Centers require rule updates.
The restore utility can only use one system software update and one rule update. However, system updates are cumulative back to the last major version; rule updates are also cumulative. Cisco recommends that you obtain the latest updates available for your appliance; see Obtaining the Restore ISO and Update Files, page 14.
If you choose not to update the appliance during the restore process, you can update later using the system’s web interface. For more information, see the release notes for the update you want to install, as well as the Updating System Software chapter in the Firepower Management Center Configuration Guide.
To install updates as part of the restore process:
1. From the restore utility main menu, select 3 Select Patches/Rule Updates.
The restore utility uses the protocol and location you specified in the previous procedure (see Specifying ISO Image Location and Transport Method, page 19) to retrieve and display a list of any system software update files in that location. If you are using SCP, enter your password when prompted to display the list of update files.
2. Select the system software update, if any, you want to use.
You do not have to select an update; press Enter without selecting an update to continue. If there are no system software updates in the appropriate location, the system prompts you to press Enter to continue.
The restore utility retrieves and displays a list of rule update files. If you are using SCP, enter your password when prompted to display the list.
3. Select the rule update, if any, you want to use.
You do not have to select an update; press Enter without selecting an update to continue. If there are no rule updates in the appropriate location, the system prompts you to press Enter to continue.
What to Do Next
Continue with the next section, Downloading the ISO and Update Files and Mounting the Image.
Downloading the ISO and Update Files and Mounting the ImageThe final step before you invoke the restore process is to download the necessary files and mount the ISO image.
Cisco Firepower Management Center Getting Started Guide 20
Restoring a Firepower Management Center to Factory Defaults
Before You Begin
Before you begin this step, you may want to save your restore configuration for later use. For more information, see Saving and Loading Restore Configurations, page 23.
To download and mount the ISO image:
1. From the restore utility main menu, select 4 Download and Mount ISO.
2. When prompted, confirm your choice. If you are downloading from an SCP server, enter your password when prompted.
The appropriate files are downloaded and mounted.
What to Do Next
Continue with the next section, Invoking the Restore Process.
Invoking the Restore ProcessAfter you download and mount the ISO image, you are ready to invoke the restore process. If you are restoring an appliance to a different major version from the version currently installed on the appliance, a two-pass restore process is required. The first pass updates the operating system, and the second pass installs the new version of the system software.
First Pass of Two (Changing Major Versions Only)
When restoring an appliance to a different major version, a first pass by the restore utility updates the appliance’s operating system, and, if necessary, the restore utility itself.
Note: If you are restoring an appliance to the same major version, or if this is your second pass through the process, skip to the next procedure: Second or Only Pass, page 22.
To perform the first pass of a two-pass restore process:
1. From the restore utility main menu, select 5 Run the Install.
2. When prompted (twice), confirm that you want to reboot the appliance.
3. Monitor the reboot and invoke the restore process again:
If the system is performing a database check, you may see the following message: The system is not operational yet. Checking and repairing database are in progress. This may take a long time to finish.
For a keyboard and monitor connection, quickly press one of the arrow keys to prevent the appliance from booting the currently installed version of the system.
For a serial or SOL/LOM connection, when you see the BIOS boot options, press Tab slowly and repeatedly until the LILO boot prompt appears. For example:
LILO 22.8 boot: System-5.4 System_Restore
4. Indicate that you want to restore the system:
— For a keyboard and monitor connection, use the arrow keys to select System_Restore and press Enter.
— For a serial or SOL/LOM connection, type System_Restore at the prompt and press Enter.
In either case, the boot prompt appears after the following choices:
0. Load with standard console 1. Load with serial console
Cisco Firepower Management Center Getting Started Guide 21
Restoring a Firepower Management Center to Factory Defaults
5. Select a display mode for the restore utility’s interactive menu:
— For a keyboard and monitor connection, type 0 and press Enter.
— For a serial or SOL/LOM connection, type 1 and press Enter.
If you do not select a display mode, the restore utility defaults to the standard console after 30 seconds.
Unless this is the first time you have restored the appliance to this major version, the utility automatically loads the last restore configuration you used. To continue, confirm the settings in a series of pages.
6. Press Enter to confirm the copyright notice.
What to do Next
Begin the second pass of the process, starting with Using the Interactive Menu to Restore an Appliance, page 17.
Second or Only Pass
Use the following procedure to perform the second or only pass through the restore process.
To perform the second or only pass through the restore process:
1. If you are performing the second pass of a two-pass restore process, download and mount the ISO image again, as described in Downloading the ISO and Update Files and Mounting the Image, page 20.
2. From the restore utility main menu, select 5 Run the Install.
3. Confirm that you want to restore the appliance and continue with the next step.
4. Choose whether you want to delete the appliance’s license and network settings. Deleting these settings also resets display (console) and LOM settings.
In most cases, you do not want to delete these settings, because it can make the initial setup process shorter. Changing settings after the restore and subsequent initial setup is often less time consuming than trying to reset them now. For more information, see Next Steps, page 23.
Caution: Do not delete the network settings if you are restoring the appliance using a LOM connection. After you reboot the appliance, you will be unable to reconnect via LOM.
5. Type your final confirmation that you want to restore the appliance.
The final stage of the restore process begins. When it completes, if prompted, confirm that you want to reboot the appliance.
Caution: Make sure you allow sufficient time for the restore process to complete. On appliances with internal flash drives, the utility first updates the flash drive, which is then used to perform other restore tasks. If you quit (by pressing Ctrl + C, for example) during the flash update, you could cause an unrecoverable error. If you think the restore is taking too long or you experience any other issues with the process, do not quit. Instead, contact Support.
Note: Reimaging resets appliances in bypass mode to a non-bypass configuration and disrupts traffic on your network until you reconfigure bypass mode. For more information, see Traffic Flow During the Restore Process, page 13.
What to Do Next
Continue with Next Steps, page 23.
Cisco Firepower Management Center Getting Started Guide 22
Restoring a Firepower Management Center to Factory Defaults
Saving and Loading Restore ConfigurationsYou can use the restore utility to save a restore configuration to use if you need to restore a Firepower device again. Although the restore utility automatically saves the last configuration used, you can save multiple configurations, which include:
network information about the management interface on the appliance; see Identifying the Appliance’s Management Interface, page 18
the location of the restore ISO image, as well as the transport protocol and any credentials the appliance needs to download the file; see Specifying ISO Image Location and Transport Method, page 19
the system software and intrusion rules updates, if any, that you want to apply after the appliance is restored to the base version in the ISO image; see Updating System Software and Intrusion Rules During Restore, page 20
SCP passwords are not saved. If the configuration specifies that the utility must use SCP to transfer ISO and other files to the appliance, you will have to re-authenticate to the server to complete the restore process.
The best time to save a restore configuration is after you provide the information listed above, but before you download and mount the ISO image.
To save a restore configuration:
1. From the restore utility main menu, select 6 Save Configuration.
The utility displays the settings in the configuration you are saving.
2. When prompted, confirm that you want to save the configuration.
3. When prompted, enter a name for the configuration.
What to Do Next
To use the configuration you just saved to restore the appliance, continue with Downloading the ISO and Update Files and Mounting the Image, page 20.
To load a saved restore configuration:
1. From the restore utility main menu, select 7 Load Configuration.
The utility presents a list of saved restore configurations. The first option, default_config, is the configuration you last used to restore the appliance. The other options are restore configurations that you have saved.
2. Select the configuration you want to use.
The utility displays the settings in the configuration you are loading.
3. When prompted, confirm that you want to load the configuration.
The configuration is loaded. If prompted, confirm the IP address assigned to the appliance’s management interface.
What to Do Next
To use the configuration you just loaded to restore the appliance, continue with Downloading the ISO and Update Files and Mounting the Image, page 20.
Next StepsRestoring your appliance to factory default settings results in the loss of almost all configuration and event data on the appliance, including bypass configurations for devices deployed inline. For more information, see Traffic Flow During the Restore Process, page 13.
Cisco Firepower Management Center Getting Started Guide 23
Restoring a Firepower Management Center to Factory Defaults
After you restore an appliance, you must complete an initial setup process:
If you did not delete the appliance’s license and network settings, you can use a computer on your management network to browse directly to the appliance’s web interface to perform the setup. For more information, see Initial Setup Page: Management Centers, page 6.
If you deleted license and network settings, you must configure the appliance as if it were new, beginning with configuring it to communicate on your management network. See Installing the Firepower Management Center, page 3.
If you deregistered the Firepower Management Center from the Cisco Smart Software Manager, register the appliance to the Cisco Smart Software Manager. Choose System > Licenses > Smart Licenses and click the register icon.
Note that deleting license and network settings also resets display (console) and LOM settings. After you complete the initial setup process:
If you want to use a serial or SOL/LOM connection to access your appliance’s console, you should redirect console output; see “Testing an Inline Bypass Interface Installation” in the Firepower 8000 Series Hardware Installation Guide.
If you want to use LOM, you must re-enable the feature as well as enable at least one LOM user; see Enabling LOM and LOM Users, page 25.
Setting Up Lights-Out ManagementIf you need to restore a Firepower device to factory defaults and do not have physical access to the appliance, you can use Lights-Out Management (LOM) to perform the restore process. Note that you can use Lights-Out Management on the default (eth0) management interface only.
The LOM feature allows you to perform a limited set of actions on a Firepower device, using a Serial over LAN (SOL) connection. With LOM, you use a command line interface on an out-of-band management connection to perform tasks such as viewing the chassis serial number, or monitoring conditions such as fan speed and temperature.
Caution: The Firepower Management Center 2000 and 4000 introduced Cisco's Unified Computing System (UCS) platform into the Firepower System. These models do not support Cisco functionality that uses tools on the baseboard management controller (BMC), such as the UCS Manager or the Cisco Integrated Management Controller (CIMC), to make any configuration changes or firmware updates.
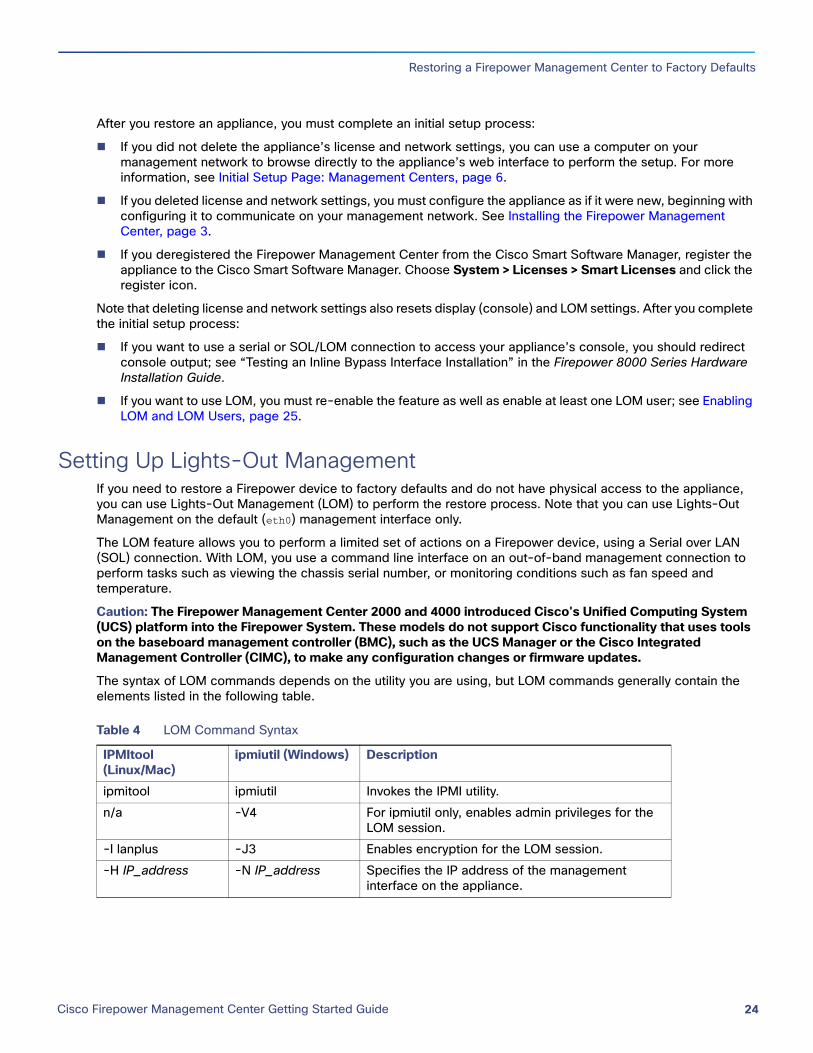
The syntax of LOM commands depends on the utility you are using, but LOM commands generally contain the elements listed in the following table..
Table 4 LOM Command Syntax
IPMItool (Linux/Mac)
ipmiutil (Windows) Description
ipmitool ipmiutil Invokes the IPMI utility.n/a -V4 For ipmiutil only, enables admin privileges for the
LOM session.-I lanplus -J3 Enables encryption for the LOM session.-H IP_address -N IP_address Specifies the IP address of the management
interface on the appliance.
Cisco Firepower Management Center Getting Started Guide 24
Restoring a Firepower Management Center to Factory Defaults
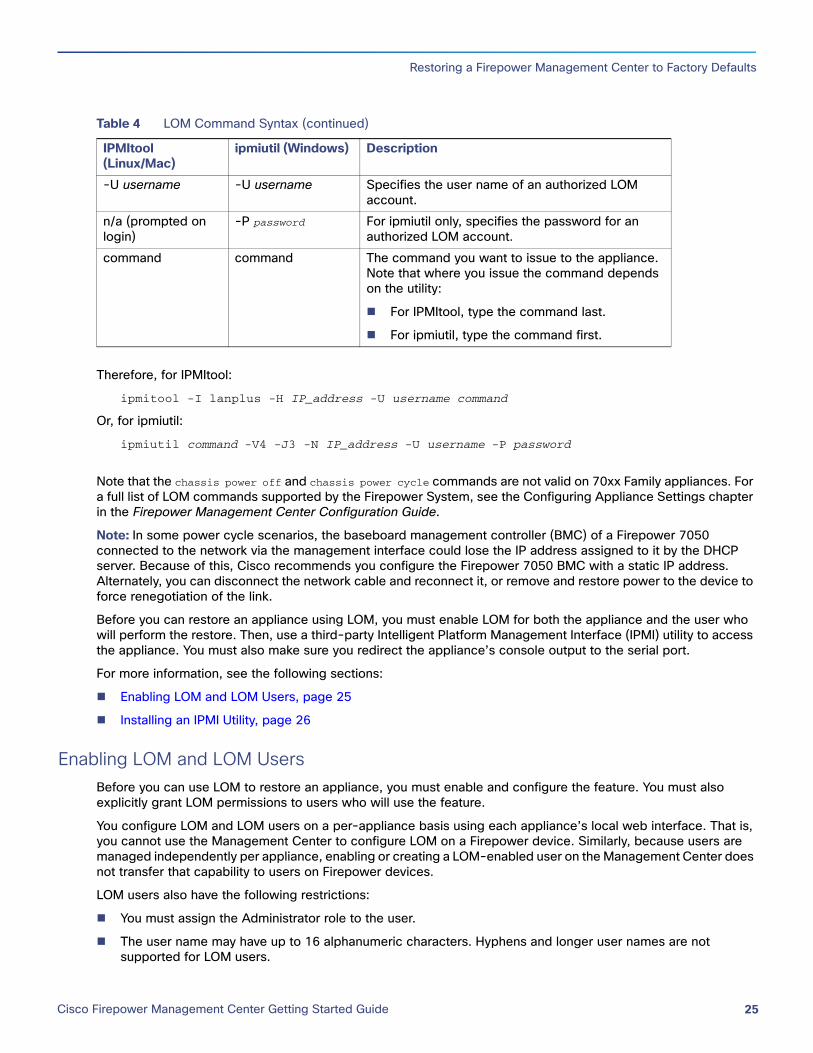
Therefore, for IPMItool:
ipmitool -I lanplus -H IP_address -U username command
Or, for ipmiutil:
ipmiutil command -V4 -J3 -N IP_address -U username -P password
Note that the chassis power off and chassis power cycle commands are not valid on 70xx Family appliances. For a full list of LOM commands supported by the Firepower System, see the Configuring Appliance Settings chapter in the Firepower Management Center Configuration Guide.
Note: In some power cycle scenarios, the baseboard management controller (BMC) of a Firepower 7050 connected to the network via the management interface could lose the IP address assigned to it by the DHCP server. Because of this, Cisco recommends you configure the Firepower 7050 BMC with a static IP address. Alternately, you can disconnect the network cable and reconnect it, or remove and restore power to the device to force renegotiation of the link.
Before you can restore an appliance using LOM, you must enable LOM for both the appliance and the user who will perform the restore. Then, use a third-party Intelligent Platform Management Interface (IPMI) utility to access the appliance. You must also make sure you redirect the appliance’s console output to the serial port.
For more information, see the following sections:
Enabling LOM and LOM Users, page 25
Installing an IPMI Utility, page 26
Enabling LOM and LOM UsersBefore you can use LOM to restore an appliance, you must enable and configure the feature. You must also explicitly grant LOM permissions to users who will use the feature.
You configure LOM and LOM users on a per-appliance basis using each appliance’s local web interface. That is, you cannot use the Management Center to configure LOM on a Firepower device. Similarly, because users are managed independently per appliance, enabling or creating a LOM-enabled user on the Management Center does not transfer that capability to users on Firepower devices.
LOM users also have the following restrictions:
You must assign the Administrator role to the user.
The user name may have up to 16 alphanumeric characters. Hyphens and longer user names are not supported for LOM users.
-U username -U username Specifies the user name of an authorized LOM account.
n/a (prompted on login)
-P password For ipmiutil only, specifies the password for an authorized LOM account.
command command The command you want to issue to the appliance. Note that where you issue the command depends on the utility:
For IPMItool, type the command last.
For ipmiutil, type the command first.
Table 4 LOM Command Syntax (continued)
IPMItool (Linux/Mac)
ipmiutil (Windows) Description
Cisco Firepower Management Center Getting Started Guide 25
Preconfiguring Firepower Management Centers
The password may have up to 20 alphanumeric characters. Longer passwords are not supported for LOM users. A user’s LOM password is the same as that user’s system password.
Management Centers can have up to 13 LOM users.
Note: For detailed instructions on the following tasks, see the Configuring Appliance Settings chapter in the Firepower Management Center Configuration Guide.
To enable LOM:
1. Select System > Configuration, then click Console Configuration.
2. Enable remote access using the Physical Serial Port before you specify the LOM IP address, netmask, and default gateway (or use DHCP to have these values automatically assigned).
Note: The LOM IP address must be different from the management interface IP address of the appliance.
To enable LOM capabilities for a Firepower System user:
1. Select System > User Management, then either edit an existing user to add LOM permissions, or create a new user that you will use for LOM access to the appliance.
2. On the User Configuration page, enable the Administrator role if it is not already enabled.
3. Enable the Allow Lights-Out Management Access check box and save your changes.
Installing an IPMI UtilityYou use a third-party IPMI utility on your computer to create an SOL connection to the appliance.
If your computer is running Linux or Mac OS, use IPMItool. Although IPMItool is standard with many Linux distributions, you must install IPMItool on a Mac. First, confirm that your Mac has Apple's xCode developer tools package installed. Also, make sure the optional components for command line development are installed ("UNIX Development” and "System Tools" in newer versions, or "Command Line Support" in older versions). Finally, install MacPorts and IPMItool. For more information, use your favorite search engine or see these sites:
https://developer.apple.com/technologies/tools/http://www.macports.org/
For Windows environments, use ipmiutil, which you must compile yourself. If you do not have access to a compiler, you can use ipmiutil itself to compile. For more information, use your favorite search engine or see this site:
http://ipmiutil.sourceforge.net/
Preconfiguring Firepower Management CentersYou can preconfigure your Management Center at a staging location (a central location to preconfigure or stage multiple appliances) to be deployed at a target location (any location other than the staging location).
To preconfigure and deploy an appliance to a target location, perform the following steps:
Install the system on the device at the staging location.
Shut down and ship the appliance to the target location.
Deploy the appliances in the target locations.
Note: Save all packing materials and include all reference material and power cords when repackaging the appliance.
Cisco Firepower Management Center Getting Started Guide 26
Preconfiguring Firepower Management Centers
Before You BeginBefore preconfiguring the appliance, collect the network settings, licenses, and other pertinent information for the staging location and the target location.
Note: It can be helpful to create a spreadsheet to manage this information at the staging location and the target location.
During the initial setup, you configure your appliance with enough information to connect the appliance to the network and install the system.
Required Preconfiguration InformationAt a minimum, you need the following information to preconfigure your appliance:
The new password (initial setup requires changing the password)
The hostname of the appliance
The domain name of the appliance
The IP management address of the appliance
The network mask of the appliance at the target location
The default gateway of the appliance at the target location
The IP address of the DNS server at the staging location, or, if accessible, the target location
The IP address of the NTP server at the staging location, or, if accessible, the target location
Optional Preconfiguration InformationYou can change some default configurations, such as:
Set the time zone if you choose to manually set the time for your appliances
Set the remote storage location for automatic backups
Set the Lights-Out Management (LOM) IP address to enable LOM
Note: In some power cycle scenarios, the baseboard management controller (BMC) of a 3D7050 connected to the network via the management interface could lose the IP address assigned to it by the DHCP server. Because of this, Cisco recommends you configure the 3D7050 BMC with a static IP address. Alternately, you can disconnect the network cable and reconnect it, or remove and restore power to the device to force renegotiation of the link.
Preconfiguring Time ManagementKeep in mind the following considerations:
Cisco recommends that you synchronize time to a physical NTP server.
If the network at your staging location can access the DNS and NTP servers at the target location, use the IP addresses for the DNS and NTP servers at the target location. If not, use the staging location information and reset at the target location.
Use the time zone for the target deployment if you set the time on the appliance to the manually instead of using NTP; see the Firepower Management Center Configuration Guide for more information.
Cisco Firepower Management Center Getting Started Guide 27
Preconfiguring Firepower Management Centers
Installing the SystemUse the installation procedures described in Installing the Firepower Management Center, page 3 and Management Center Initial Setup, page 4. For additional information, see the Cisco Firepower Management Center 750, 1500, 2000, 3500, and 4000 Hardware Installation Guide.
When preconfiguring the system, keep the following in mind:
Add licenses for managed devices during the initial setup. If you do not add licenses at that time, any devices you register during initial setup are added to the Management Center as unlicensed; you must license each of them individually after the initial setup process is over. See License Settings, page 8.
Preparing the Appliance for ShipmentTo prepare the appliance for shipment, you must safely power down and repackage the appliance:
To safely power down the appliance, see Powering Down the Appliance, page 28.
To ensure that your appliance is safely prepared for shipping, see Shipping Considerations, page 28.
Deleting a License from a Management CenterUse the following procedure if you need to delete a license for any reason. Keep in mind that, because Cisco generates licenses based on each Management Center’s unique license key, you cannot delete a license from one Management Center and reuse it on a different Management Center. For more information, see See Licensing the Firepower System in the Firepower Management Center Configuration Guide.
To delete a license:
1. Select Systems > Licenses.
2. Next to the license you want to delete, click the delete icon ( ).
Deleting a license removes the licensed capability from all devices using that license. For example, if your Protection license is valid and enabled for 100 managed devices, deleting the license removes protection capabilities from all 100 devices.
3. Confirm that you want to delete the license.
The license is deleted.
Powering Down the ApplianceUse the following procedures to power down the appliance safely before disconnecting the power supply.
To power down a Management Center:
1. On the Management Center, enter the following at the command line:
sudo shutdown -h now
The Management Center shuts down safely.
Shipping ConsiderationsTo prepare the appliance for shipment to the target location, you must safely power down and repackage the appliance. Keep in mind the following considerations:
Cisco Firepower Management Center Getting Started Guide 28
Scrubbing the Hard Drive
Use the original packaging to repack the appliance.
Include all reference material and power cords with the appliance.
Provide all setting and configuration information to the target location, including the new password and the detection mode.
Troubleshooting the Appliance PreconfigurationIf your appliance is correctly preconfigured for target deployment, you can install and deploy the appliance without further configuration.
If you have difficulty logging into the appliance, the preconfiguration may have an error. Try the following troubleshooting procedures:
Confirm that all power cables and communication cables are connected properly to the appliance.
Confirm that you have the current password for your appliance. The initial setup at the staging location prompts you to change your password. See the configuration information provided by the staging location for the new password.
Confirm that the network settings are correct. See Initial Setup Page: Management Centers, page 6.
Confirm that the correct communication ports are functioning properly. See the documentation for your firewall for information on managing firewall ports. See the Firepower Management Center Configuration Guide for required open ports.
If you continue to experience difficulty, contact your IT department.
Scrubbing the Hard DriveYou can securely scrub the hard drive on Management Centers and Firepower devices to ensure that its contents can no longer be accessed. For example, if you need to return a defective appliance that contains sensitive data, you can use this feature to overwrite the data.
This mode of scrubbing the disk meets the following military standard:
STANDARDS
The DoD scrub sequence is compliant with the DoD 5220.22-M procedure for sanitizing removable and non-removable rigid disks which requires overwriting all addressable locations with a character, its complement, then a random character, and verify. Please refer to the DoD document for additional constraints.
Caution: Scrubbing your hard drive results in the loss of all data on the appliance, which is rendered inoperable.
You scrub the hard drive using an option in the interactive menu described in Using the Interactive Menu to Restore an Appliance, page 17.
To scrub the hard drive:
1. Follow the instructions in one of the following sections to display the restore utility’s interactive menu, depending on how you are accessing the appliance:
— Starting the Restore Utility Using KVM or Physical Serial Port, page 15
— Starting the Restore Utility Using Lights-Out Management, page 16
2. From the restore utility main menu, select 8 Wipe Contents of Disk.
3. When prompted, confirm that you want to scrub the hard drive.
Cisco Firepower Management Center Getting Started Guide 29
Related Documentation
The hard drive is scrubbed. The scrub process may take several hours to complete; larger drives take longer.
Related DocumentationFor a complete list of the Cisco Firepower series documentation and where to find it, see the documentation roadmap at the following URL:
http://www.cisco.com/c/en/us/td/docs/security/firepower/roadmap/firepower-roadmap.html
Cisco and the Cisco logo are trademarks or registered trademarks of Cisco and/or its affiliates in the U.S. and other countries. Toview a list of Cisco trademarks, go to this URL: www.cisco.com/go/trademarks. Third-party trademarks mentioned are the propertyof their respective owners. The use of the word partner does not imply a partnership relationship between Cisco and any othercompany. (1110R)
© 2017 Cisco Systems, Inc. All rights reserved.
Cisco Firepower Management Center Getting Started Guide 30


![Skaffold - storage.googleapis.com · [getting-started getting-started] Hello world! [getting-started getting-started] Hello world! [getting-started getting-started] Hello world! 5](https://img.pdfslide.net/doc/110x75/5ec939f2a76a033f091c5ac7/skaffold-getting-started-getting-started-hello-world-getting-started-getting-started.jpg)


