Embed Size (px)
Citation preview
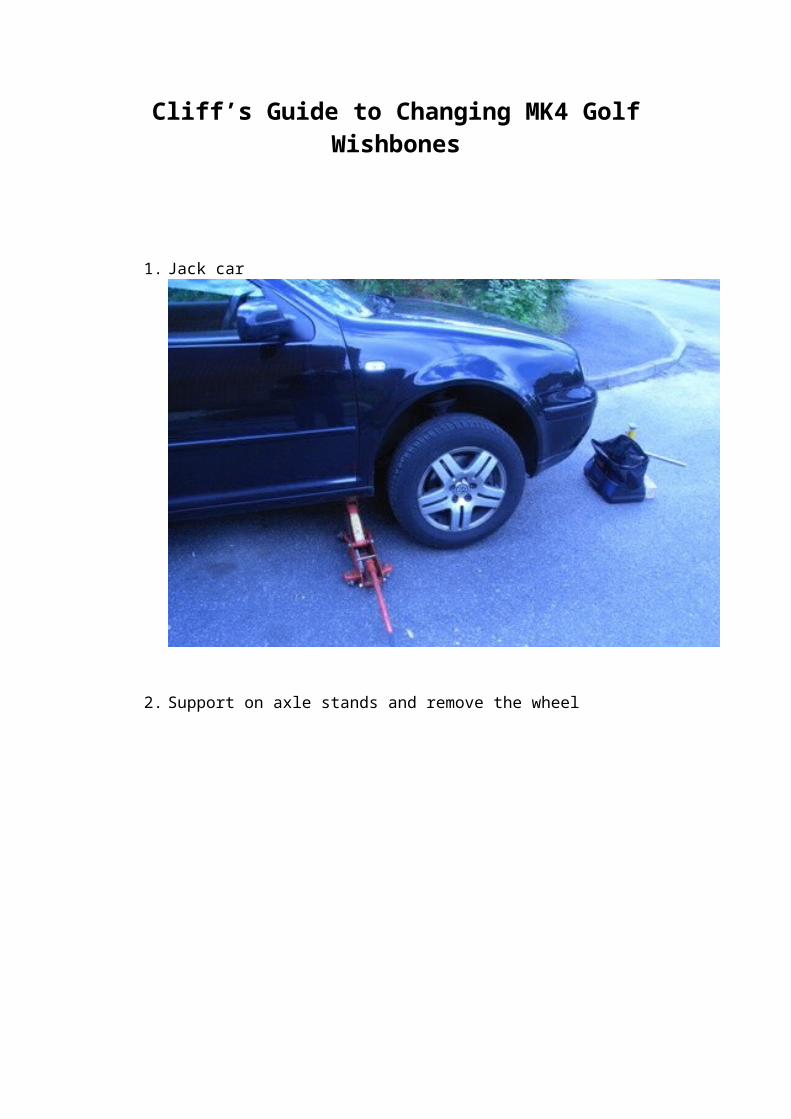
Cliff’s Guide to Changing MK4 Golf Wishbones
1. Jack car
2. Support on axle stands and remove the wheel

3. Jack the wishbone up to take the sprung load off the ARB
4. Undo the ARB drop link (16mm), you may have to jack the wishbone up/down a little to get the bolt out. Once done un-jack the wishbone and remove the jack.

5. Undo the 3 bolts (13mm) that connect the wishbone to the ball joint. The picture is taken from underneath. Apply plenty of WD40 beforehand
6. Here are the ball joint bolts removed after being drenched in WD40.

7. Here are the ball joint bolts and the lock plate
8. Now remove the front wishbone bush bolt (18mm). You’ll have to remove the plastic sump cover and the side cowling otherwise access to the bolt is really tight as shown in this picture.

9. Next remove the rear bush nut and bolt (18mm). Here you can just see the nut.
10. Now its time for some brute force to get the wishbone free. Pull the strut out and forwards towards the front of the car whilst keeping the wishbone stationary. By wigging the ball joint plate around you should be able to free it from the wishbone. Once that’s done the wishbone will now just pull out.

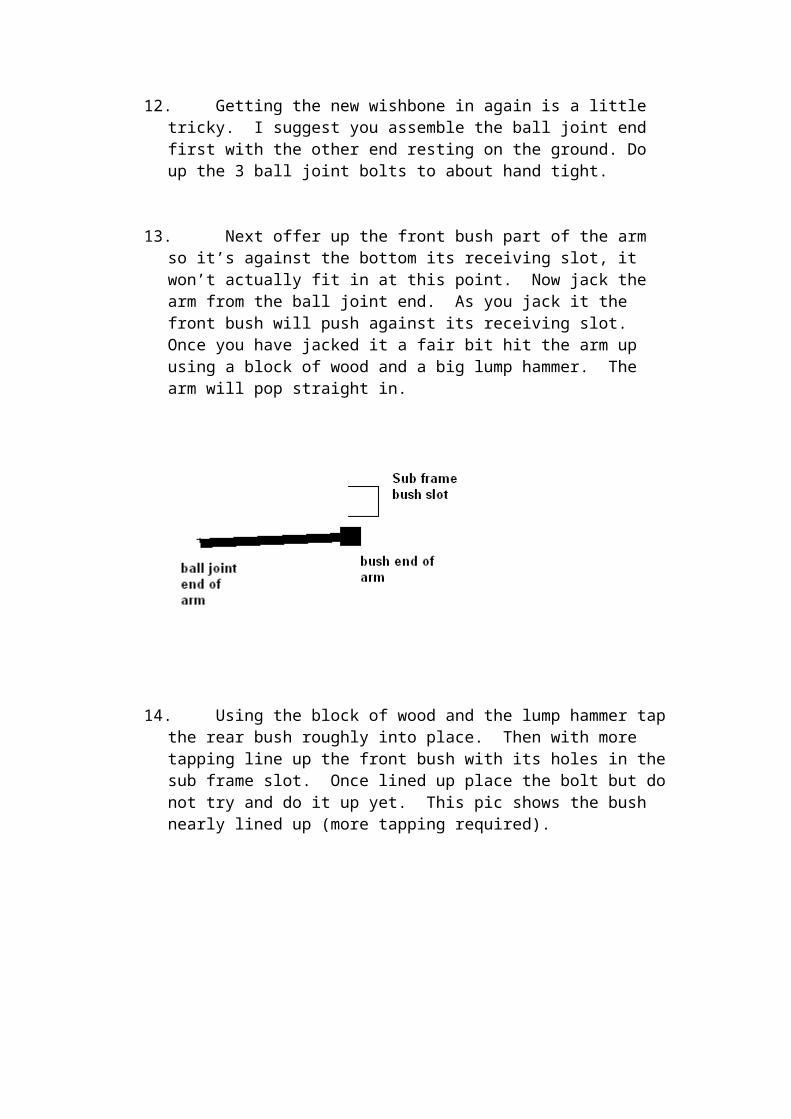
11. If you are re-using the ARB drop link then remove from the old wishbone and bolt into the new wishbone (45Nm torque). Here is the new wishbone ready to go in. I was replacing the drop links and drop link bolts/nuts as they looked a little worn.
12. Getting the new wishbone in again is a little tricky. I suggest you assemble the ball joint end first with the other end resting on the ground. Do up the 3 ball joint bolts to about hand tight.
13. Next offer up the front bush part of the arm so it’s against the bottom its receiving slot, it won’t actually fit in at this point. Now jack the arm from the ball joint end. As you jack it the front bush will push against its receiving slot. Once you have jacked it a fair bit hit the arm up using a block of wood and a big lump hammer. The arm will pop straight in.

14. Using the block of wood and the lump hammer tap the rear bush roughly into place. Then with more tapping line up the front bush with its holes in the sub frame slot. Once lined up place the bolt but do not try and do it up yet. This pic shows the bush nearly lined up (more tapping required).
15. Now tap the rear bush joint into place and put the nut and bolt in and hand tighten.
16. Go back to the front bush and tighten the bolt to the specified torque settings (70Nm + 90degs). You may need to tap the arm a little to get the bolt to line up with the thread in the sub frame.
17. Tighten the rear bush nut and bolt to (70Nm + 90degs). There isn’t much room as you need to get a wrench on the nut else it will just spin. I used a deep socket with a long wrench on the nut and a long torque wrench on the bolt. It was so tight that the wrench got jammed and I had to hit it out after I had finished.
18. Now tighten the ball joint bolts (20Nm + 90degs)
19. Here is the new arm bolted in.
20. Finally jack the arm and connect the ARB drop link back to the ARB (30Nm torque)

Oh and here is a picture of the rear bush of the old arm. Notice the massive split on the left hand side, it was totally shot.