Embed Size (px)
Citation preview
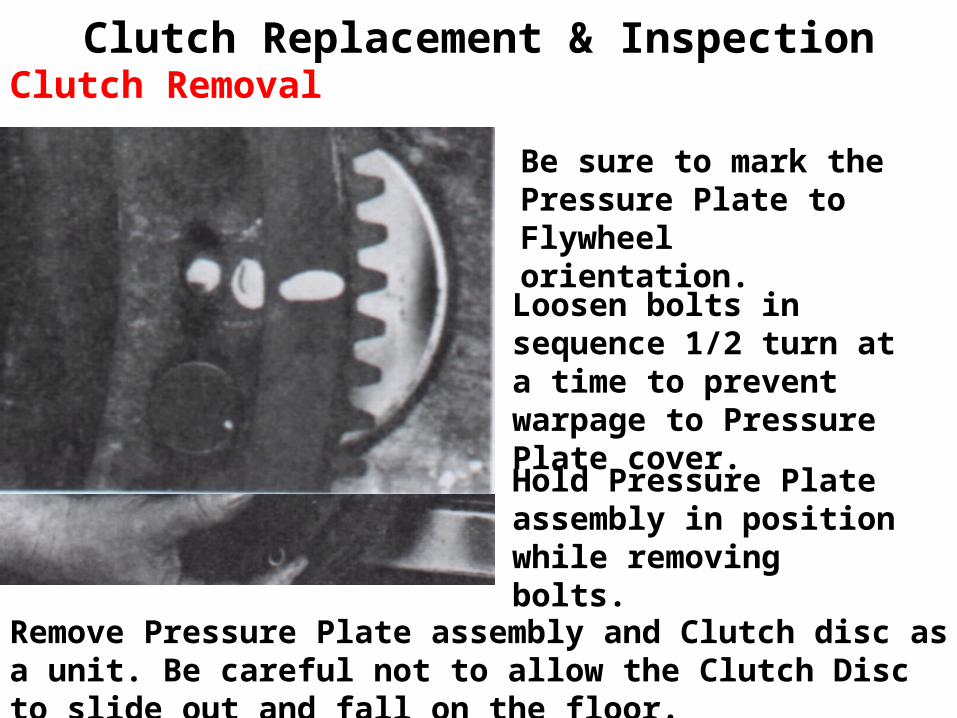
Clutch Replacement & Inspection
Be sure to mark the Pressure Plate to Flywheel orientation.
Loosen bolts in sequence 1/2 turn at a time to prevent warpage to Pressure Plate cover.
Hold Pressure Plate assembly in position while removing bolts.
Remove Pressure Plate assembly and Clutch disc as a unit. Be careful not to allow the Clutch Disc to slide out and fall on the floor.
Clutch Removal

Clutch Replacement & Inspection
Measure lining thickness from lining to the head of a rivet at thinnest point.
Check lining surface for cracks, missing chunks, glazing and oil contamination.
Inspect for loose, broken or missing torsion springs.
Inspect Clutch Disc Spline for wear and distortion. Place on the Input Shaft to check axial freeplay.
Clutch Disc Inspection
Inspect Clutch Disc cushion springs for collapsed, cracked or broken cushion springs.

Clutch Replacement & Inspection
Inspect the Pressure Plate surface for overheating (blueing), heat checks, hot spots. Sand surface to determine depth of the defect.Inspect surface for scoring and warpage with a straight edge & Feeler Blade.Inspect for broken, cracked or warped Pressure Plate springs.
Pressure Plate & Cover Inspection

Clutch Replacement & Inspection
Inspect diaphragm spring fingers for bending, cracks or uneven wear at the Release Bearing contact point.
Measure thickness of release fingers at Release Bearing contact point. Replace if under specification.
Pressure Plate & Cover Inspection

Clutch Replacement & Inspection
Inspect the Clutch Disc contact surface for overheating (blueing), heat checks, hot spots and glazing. Sand surface to determine depth of defect.
Inspect the friction surface for scoring and warpage with a straight edge & Feeler Blade.
Flywheel Inspection
Some Flywheels can be ground to remove all defects except cracks or hot spots.Some Flywheels must be replaced because surface hardening cannot be removed.Inspect ring teeth for worn,
mushroomed or missing teeth.

Clutch Replacement & Inspection
If the friction surface is contaminated with oil or grease, determine the source and correct it before re-assembly.Measure the Flywheel run-out with a Dial Indicator. If no specs. are available, use .0005” per inch of disc diameter.
Flywheel Inspection
If Flywheel run-out is out of spec, measure the Crankshaft Flange run-out. .0005” maximum .Check for Pilot Bushing wear with small hole gauge.

Clutch Replacement & Inspection
Rotate the Release Bearing while applying pressure to the contact surface.
If the Release Bearing has seized, inspect the Clutch Fork and bearing retaining clip.
Release Bearing Inspection
It’s always wise to replace the Release Bearing because of it’s low cost verses the labour cost to removing & installing the Transmission.

Clutch Replacement & Inspection
Clean all friction surfaces of grease and oil with Brake Cleens or equivalent.Install the Clutch Disc in the proper direction. Flywheel side (flat side) is usually marked.
Clutch Re-assembly

Clutch Replacement & Inspection
Install the alignment tool through the Clutch Disc and into Pilot Bearing to align the disc.
Position the Pressure Plate & Cover on the flywheel aligning the marks.
Clutch Re-assembly

Clutch Replacement & Inspection
Install all bolts and finger tighten .
Tighten bolts 1/2 turn at a time in the proper sequence.
Clutch Re-assembly
1
2
3
4
5
6

Clutch Replacement & Inspection
Torque all bolts in the proper sequence .
Check the release lever/finger height after tightening the bolts.
Clutch Re-assembly
If incorrect, the release levers may require adjustment (coil type), require resetting or replacement.
Clutch Replacement & Inspection
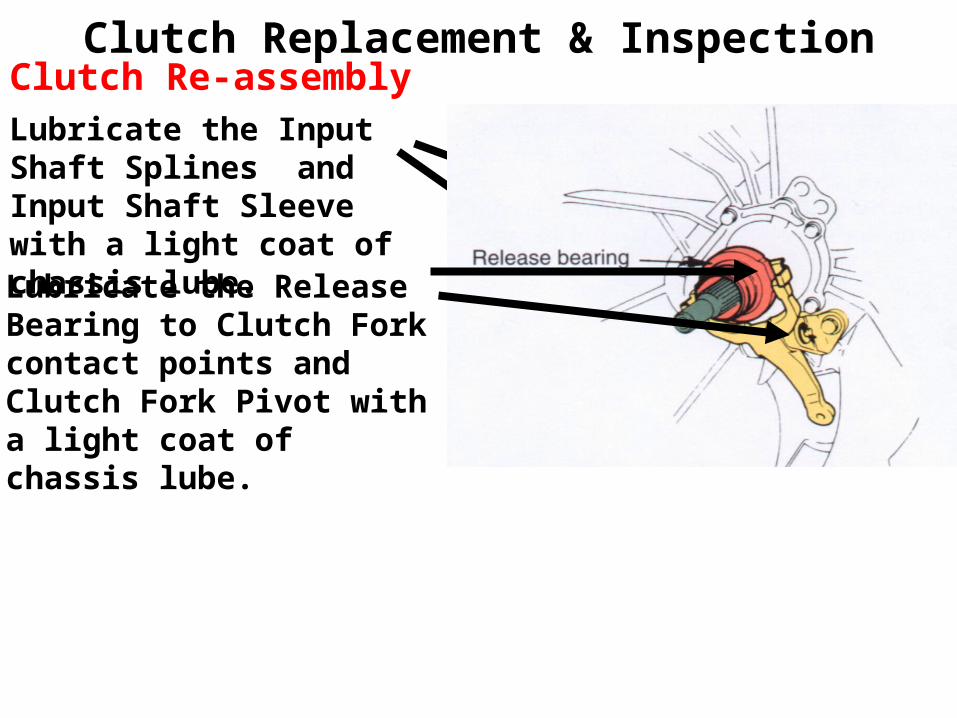
Lubricate the Input Shaft Splines and Input Shaft Sleeve with a light coat of chassis lube.Lubricate the Release Bearing to Clutch Fork contact points and Clutch Fork Pivot with a light coat of chassis lube.
Clutch Re-assembly