Embed Size (px)
Citation preview
THE LAZARUS GROUP
v3.1
Content Management System User’s Manual
Scott Phelps

2Introduction
TABLE OF CONTENTS
INTRODUCTION.................................................................................................................................................. 5
HOW TO USE THIS GUIDE ................................................................................................................................................. 5 WHAT IS A CONTENT MANAGEMENT SYSTEM? .................................................................................................................... 5
BASIC FUNCTIONS .............................................................................................................................................. 6
LOG IN ......................................................................................................................................................................... 6 THE CONTENT MANAGEMENT SYSTEM SECTIONS AND THEIR FUNCTIONS .................................................................................. 6
USER ADMIN ...................................................................................................................................................... 7
CREATE A NEW USER ...................................................................................................................................................... 7 EDIT USER INFORMATION (INCLUDING PASSWORD) ............................................................................................................... 7 DELETE A USER .............................................................................................................................................................. 7 FIND A USER PASSWORD .................................................................................................................................................. 8
WEBSITE CONTENT ............................................................................................................................................. 9
WHAT IS A CATEGORY? WHAT IS AN ARTICLE? .................................................................................................................... 9 HOW TO CREATE A CATEGORY ........................................................................................................................................... 9 EDIT A CATEGORY (ADD MORE ARTICLES, CHANGE CATEGORY LAYOUT) ................................................................................... 10 CREATE A NEW ARTICLE (PUBLISH ARTICLE, ARRANGE ARTICLE ORDER) ................................................................................... 10 Publish the Article ................................................................................................................................................ 11 Arrange the order of Articles ............................................................................................................................... 11
EDIT AN ARTICLE .......................................................................................................................................................... 11 FORMAT AN ARTICLE ..................................................................................................................................................... 11 The Editor Toolbar ............................................................................................................................................... 12 Basic formatting and Styles ................................................................................................................................. 12 Add / Remove a Hyperlink ................................................................................................................................... 12 Add / Remove an Email Hyperlink ....................................................................................................................... 12 Add /Remove an Image ....................................................................................................................................... 12 Add / Remove a Document (PDFs, etc) ................................................................................................................ 13
ADD A CALENDAR ......................................................................................................................................................... 14 ADD A SLIDESHOW ........................................................................................................................................................ 14 MOVE AN ARTICLE FROM ONE CATEGORY TO ANOTHER ....................................................................................................... 14 DELETE AN ARTICLE ....................................................................................................................................................... 14 ARCHIVE AN ARTICLE (OR UNPUBLISH AN ARTICLE) .............................................................................................................. 15
THE MEDIA LIBRARY .......................................................................................................................................... 16
NAMING CONVENTIONS FOR IMAGES AND DOCUMENTS ....................................................................................................... 16 Naming Conventions ............................................................................................................................................ 16
IMAGES AND DOCUMENTS THAT WORK ON THE WEB .......................................................................................................... 16 ADD AN IMAGE / DOCUMENT TO THE MEDIA LIBRARY ........................................................................................................... 16 FIND AN IMAGE / DOCUMENT IN THE MEDIA LIBRARY ......................................................................................................... 17 EDIT AN IMAGE / DOCUMENT IN THE MEDIA LIBRARY .......................................................................................................... 17 INSERT AN IMAGE USING THE MEDIA LIBRARY .................................................................................................................... 17 INSERT A DOCUMENT USING THE MEDIA LIBRARY ............................................................................................................... 18
3Introduction
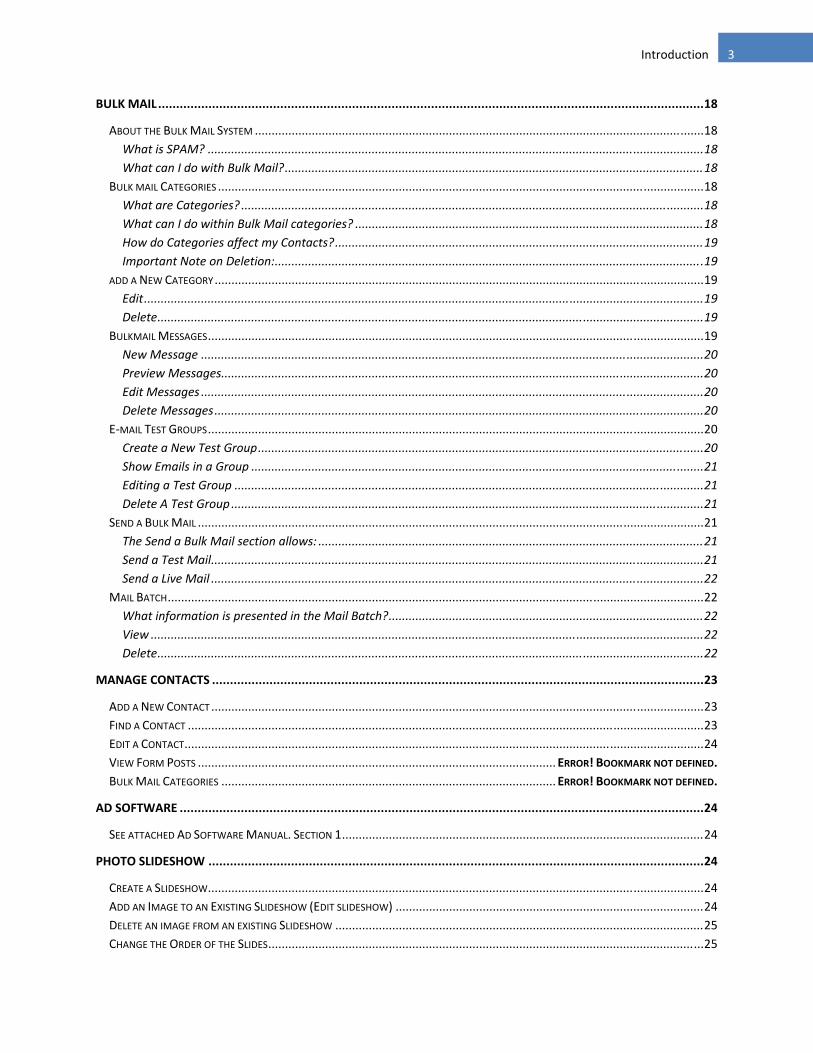
BULK MAIL ........................................................................................................................................................ 18
ABOUT THE BULK MAIL SYSTEM ...................................................................................................................................... 18 What is SPAM? .................................................................................................................................................... 18 What can I do with Bulk Mail? ............................................................................................................................. 18
BULK MAIL CATEGORIES ................................................................................................................................................. 18 What are Categories? .......................................................................................................................................... 18 What can I do within Bulk Mail categories? ........................................................................................................ 18 How do Categories affect my Contacts? .............................................................................................................. 19 Important Note on Deletion: ................................................................................................................................ 19
ADD A NEW CATEGORY .................................................................................................................................................. 19 Edit ....................................................................................................................................................................... 19 Delete ................................................................................................................................................................... 19
BULKMAIL MESSAGES .................................................................................................................................................... 19 New Message ...................................................................................................................................................... 20 Preview Messages................................................................................................................................................ 20 Edit Messages ...................................................................................................................................................... 20 Delete Messages .................................................................................................................................................. 20
E‐MAIL TEST GROUPS .................................................................................................................................................... 20 Create a New Test Group ..................................................................................................................................... 20 Show Emails in a Group ....................................................................................................................................... 21 Editing a Test Group ............................................................................................................................................ 21 Delete A Test Group ............................................................................................................................................. 21
SEND A BULK MAIL ....................................................................................................................................................... 21 The Send a Bulk Mail section allows: ................................................................................................................... 21 Send a Test Mail ................................................................................................................................................... 21 Send a Live Mail ................................................................................................................................................... 22
MAIL BATCH ................................................................................................................................................................ 22 What information is presented in the Mail Batch? .............................................................................................. 22 View ..................................................................................................................................................................... 22 Delete ................................................................................................................................................................... 22
MANAGE CONTACTS ......................................................................................................................................... 23
ADD A NEW CONTACT ................................................................................................................................................... 23 FIND A CONTACT .......................................................................................................................................................... 23 EDIT A CONTACT ........................................................................................................................................................... 24 VIEW FORM POSTS ........................................................................................................... ERROR! BOOKMARK NOT DEFINED. BULK MAIL CATEGORIES .................................................................................................... ERROR! BOOKMARK NOT DEFINED.
AD SOFTWARE .................................................................................................................................................. 24
SEE ATTACHED AD SOFTWARE MANUAL. SECTION 1 ............................................................................................................ 24
PHOTO SLIDESHOW .......................................................................................................................................... 24
CREATE A SLIDESHOW .................................................................................................................................................... 24 ADD AN IMAGE TO AN EXISTING SLIDESHOW (EDIT SLIDESHOW) ............................................................................................ 24 DELETE AN IMAGE FROM AN EXISTING SLIDESHOW .............................................................................................................. 25 CHANGE THE ORDER OF THE SLIDES .................................................................................................................................. 25
4Introduction
EDIT A SLIDESHOW (GROUP) NAME AND DESCRIPTION ........................................................................................................ 25 DELETE A SLIDESHOW .................................................................................................................................................... 25 INSERT SLIDESHOW IN AN ARTICLE ................................................................................................................................... 25
URCHIN WEBSITE STATS .................................................................................................................................... 26
SEE ATTACHED URCHIN MANUAL. SECTION 2 .................................................................................................................... 26
CALENDAR ........................................................................................................................................................ 26
CREATE A NEW CALENDAR .............................................................................................................................................. 26 CHANGE THE CALENDAR NAME ....................................................................................................................................... 26 DELETE A CALENDAR ..................................................................................................................................................... 26 ADD CALENDAR EVENT .................................................................................................................................................. 26 EDIT CALENDAR EVENT .................................................................................................................................................. 27 DELETE CALENDAR EVENT .............................................................................................................................................. 27
LOGOUT ............................................................................................................................................................ 28
TOOLBAR EDITOR IN DETAIL .............................................................................................................................. 28
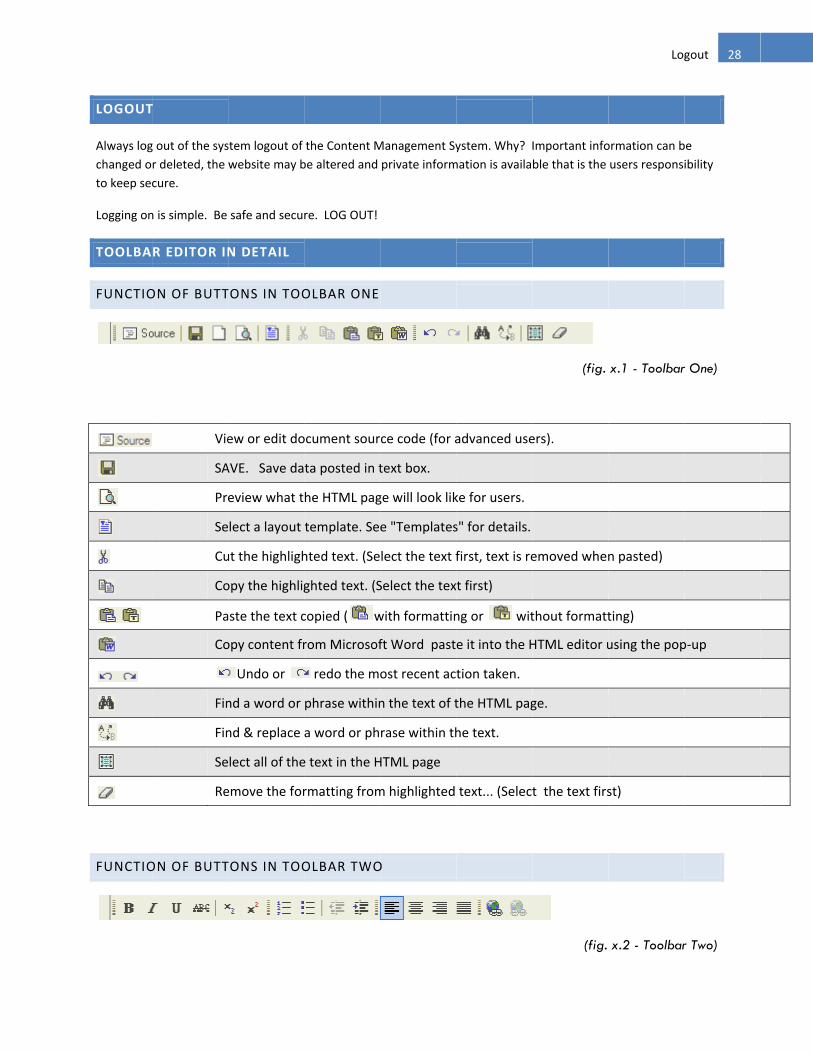
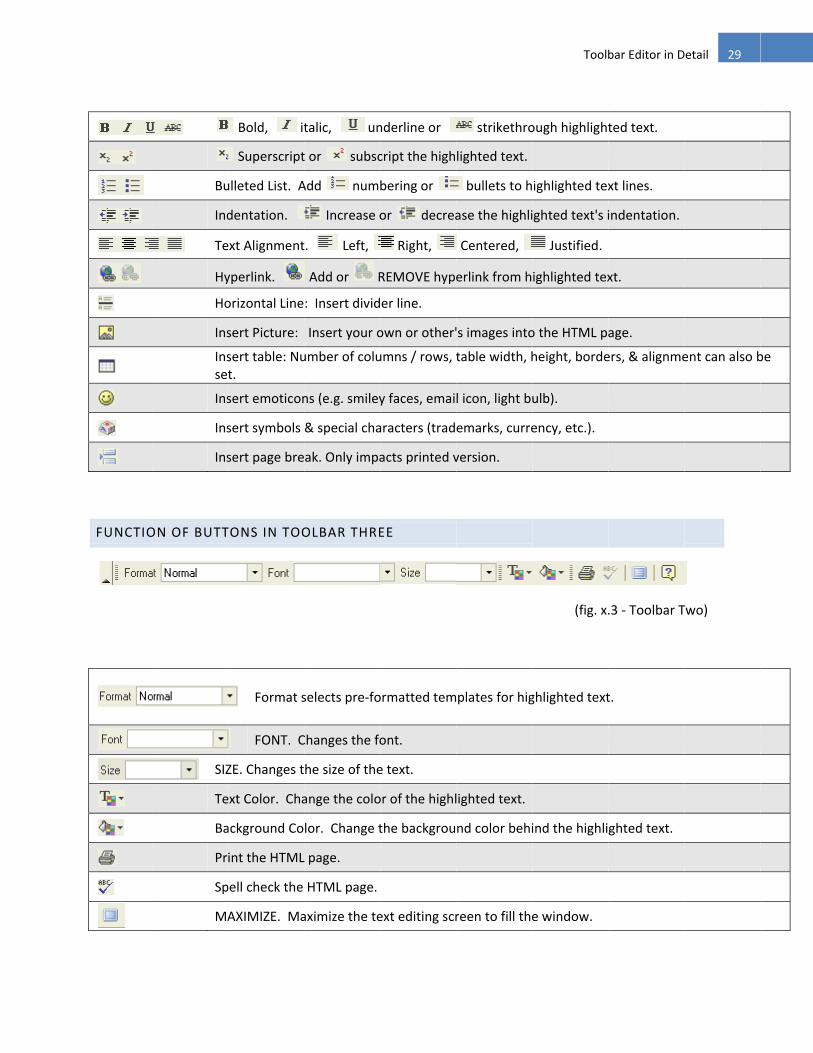
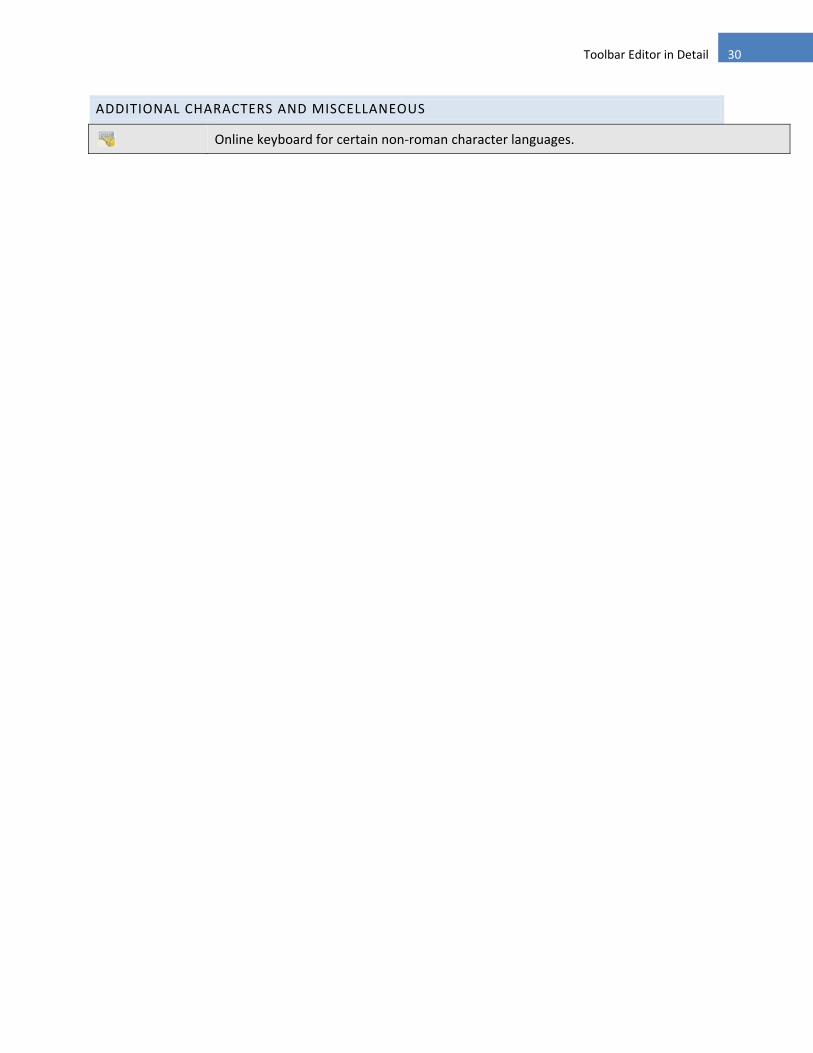
FUNCTION OF BUTTONS IN TOOLBAR ONE .............................................................................................................. 28 FUNCTION OF BUTTONS IN TOOLBAR TWO ............................................................................................................. 28 FUNCTION OF BUTTONS IN TOOLBAR THREE ........................................................................................................... 29 ADDITIONAL CHARACTERS AND MISCELLANEOUS ................................................................................................................ 30
SECTION 1 ......................................................................................................................................................... 31
ATTACHED MANUAL IS FOR PHPADS, AD BANNER MANAGEMENT ............................................................................................ 31
SECTION 2 ......................................................................................................................................................... 32
THE ATTACHED MANUAL IF FOR URCHIN VERSION 5 THE WEBSITE STATISTIC TRACKER ................................................................. 32
5Introduction
INTRODUCTION
HOW TO USE THIS GUIDE
This is a guide for using the Content Management System provided as part of a website package designed by The Lazarus Group. Please utilize the table of contents to locate any information related to the CMS.
WHAT IS A CONTENT MANAGEMENT SYSTEM?
A Content Management System (CMS) is a piece of software that runs on a server. Typically a database application, a CMS makes it easy to publish and administrate content. In other words, a CMS is like a word processor a user can utilize through a web browser to change and control the content of a website.
Easy content production, no programming skills required If a user can operate a computer, one can manage the content for a website. Using a graphical user interface, authors can simply create text, insert images and multimedia files, schedule content (and much more) to build and maintain a dynamic website.
This is especially true if one takes advantage of The Lazarus Group's Gallery system where the user can upload, track and reuse images.
Just imagine: Each time a user adds or changes a page, the menu will automatically update to reflect the change. Having to learn or purchasing photo editing software will not be necessary. A user can upload images straight to the web from computer and into the Gallery System.
Common advantages of a CMS:
1. Decentralized maintenance. Based on a common web browser. Edit anywhere, anytime. Bottlenecks removed.
2. Designed with non‐technical content editors in mind. People with average knowledge of word processing can create the content easily. No HTML skills required.
3. Configurable access restrictions. Users are assigned roles and permissions that prevent them from touching content in which they are not authorized to change.
4. Consistency of design is preserved. Because content is stored separate from design, the content from all authors is presented with the same, consistent design.
5. Navigation is automatically generated. Menus are typically generated automatically based on the database content and links will not point to nonexistent pages.
6. Content is stored in a database. Central storage means that content can be reused in many places on the website.
7. Daily updates. One does not need to involve web designers or programmers for every little modification – the user is in control of the website.
8. Cooperation. Encourages faster updates, enforces accountability for content editors via log files and promotes cooperation between authors.
6Basic Functions
BASIC FUNCTIONS
LOG IN
Log in is located at www.YourDomain.com/admin Initially a user name and password has been set up for a single administrative user. The username is an email address and the password is assigned, but may be changed either after the initial log in as well as add new users. See the User Admin section for this information.
THE CONTENT MANAGEMENT SYSTEM SECTIONS AND THEIR FUNCTIONS
Each section manages a certain aspect of the website from content to bulkmail, contacts to images.
USER ADMIN Create, edit and delete users for the website. Assign different levels of control for each user. Edit user information. Edit and find password information.
WEBSITE CONTENT Create, edit and delete content from the website.
BULK MAIL Send template based mass emails to newsletter subscribers.
MANAGE CONTACTS Manage the contact information of mass email subscribers.
AD SOFTWARE Create, edit and manage any outside advertising displayed in the website.
PHOTO SLIDESHOW Create, edit, manage and insert photo slideshows into the website.
URCHIN WEBSITE STATS Who is coming to visit? Website statistics.
CALENDAR Create, edit and manage a web based calendar of events.
LOGOUT In case of emergency exits are over the wings….and as a link at the bottom of the CMS navigation panel.
7User Admin
USER ADMIN
The User Admin section allows a user to create, edit and delete users for the website content management system. All directions below begin assuming the user is in the User Admin section.
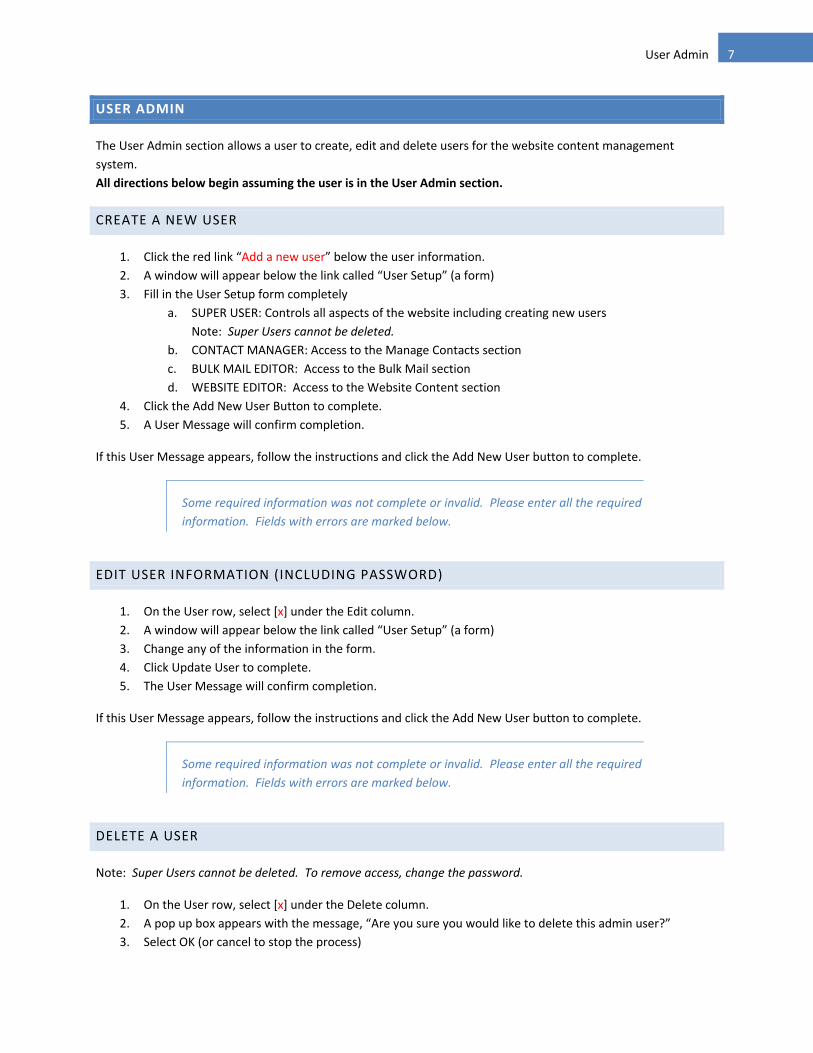
CREATE A NEW USER
1. Click the red link “Add a new user” below the user information. 2. A window will appear below the link called “User Setup” (a form) 3. Fill in the User Setup form completely
a. SUPER USER: Controls all aspects of the website including creating new users Note: Super Users cannot be deleted.
b. CONTACT MANAGER: Access to the Manage Contacts section c. BULK MAIL EDITOR: Access to the Bulk Mail section d. WEBSITE EDITOR: Access to the Website Content section
4. Click the Add New User Button to complete. 5. A User Message will confirm completion.
If this User Message appears, follow the instructions and click the Add New User button to complete.
Some required information was not complete or invalid. Please enter all the required information. Fields with errors are marked below.
EDIT USER INFORMATION (INCLUDING PASSWORD)
1. On the User row, select [x] under the Edit column. 2. A window will appear below the link called “User Setup” (a form) 3. Change any of the information in the form. 4. Click Update User to complete. 5. The User Message will confirm completion.
If this User Message appears, follow the instructions and click the Add New User button to complete.
Some required information was not complete or invalid. Please enter all the required information. Fields with errors are marked below.
DELETE A USER
Note: Super Users cannot be deleted. To remove access, change the password.
1. On the User row, select [x] under the Delete column. 2. A pop up box appears with the message, “Are you sure you would like to delete this admin user?” 3. Select OK (or cancel to stop the process)

8User Admin
4. The User Message will confirm the deletion.
FIND A USER PASSWORD
1. On the User row, select “Show Password” under the Password Column. 2. A pop up box appears with the User’s name and Password. 3. Click OK to close the pop up.
9Website Content
WEBSITE CONTENT
The heart of any website is the content. The most beautiful website means nothing if it lacks valid, and most importantly, continuously UPDATED content. The Website Content section allows a user to add, remove or edit the images and text on the website. The organization of the site is similar to a newspaper. In the next few subsections this manual will explain how the set up works and how to utilize the information to create and maintain a dynamic, content‐rich website. All directions below begin assuming the user is in the User Admin section.
WHAT IS A CATEGORY? WHAT IS AN ARTICLE?
Categories are containers for Articles. Articles are individual bits of content.
A good analogy would be a newspaper. The website is the newspaper. The categories are the sections of the paper such as Local, Sports, Classifieds, etc. The Articles are the individual stories within each section.
Some Categories may require several Articles and others only one.
In the website, Categories will appear as a page with Articles as the content. The user can choose between displaying the entire Article on each page, or an Excerpt with a link to the entire Article.
When a new Category is created, there are several options available that will dictate the appearance of each Article within. These options are Headline, Subhead, Excerpt, Byline, and Dateline. A few other options will determine how the Category is labeled (Name & Description) and how many Articles can be displayed within a Category.
HOW TO CREATE A CATEGORY
1. Click the “Create Content Category” link. 2. Create a short, descriptive name for the Category. 3. Create a more detailed description for the Category.
Hint‐ Imagine a new employee is searching for Category. What information is most important? 4. Headline – Yes or No
This is the main Headline for an Article. It will appear at the top of every Article. 5. Subhead – Yes or No
This is the Subhead for an Article. It will appear under the headline of every Article. 6. Excerpt – Yes or No
Display only a teaser of the content on the main page, followed by a link to a separate page with full content. Yes will automatically create an extra field in the Article edit screen labeled excerpt and full content.
7. Byline – Yes or No Allow the author to enter their name and information. It is then displayed at the bottom of the Article.
8. Dateline – Yes or No Add the date published to each Article. Essential for showing how content ‘freshness’.
9. Number of Articles to Display The number of Articles that may be displayed on the Category page.
10Website Content
10. Click Add new Content Category button to complete.
If this User Message appears, follow the instructions and click the Update Category button to complete.
Some required information was not complete or invalid. Please enter all the required information. Fields with errors are marked below.
All fields must be completed to create a Category.
EDIT A CATEGORY (ADD MORE ARTICLES, CHANGE CATEGORY LAYOUT)
1. In the selected Category row, click the [x] under the Edit column. 2. Revise the selections listed in Create a Category. 3. Click the Update Category button to complete.
If this User Message appears, follow the instructions and click the Update Category button to complete.
Some required information was not complete or invalid. Please enter all the required information. Fields with errors are marked below.
All fields must be completed to create a Category.
CREATE A NEW ARTICLE (PUBLISH ARTICLE, ARRANGE ARTICLE ORDER)
1. In the selected Category row, click the [x] under the Content column. 2. Under the Page Category title at the top of the page, click the “Click here to create a new Article” link. 3. Enter all pertinent information related to each field.
The fields displayed are determined by selections made in the create/edit Category section. a. Headline b. Subhead c. Excerpt – a ‘blurb’ or ‘teaser’ of the full content d. Full Content e. Byline‐Author(s) Name
May be used for alternate means, i.e. listing source for outsourced content. f. Dateline
Button next to field is a ‘pop up’ calendar. Select a date and the field will populate with date. 4. Click the Add Content button to complete.
If this User Message appears, follow the instructions and click the Update Article button to complete.
Some required information was not complete or invalid. Please enter all the required information. Fields with errors are marked below.
All fields must be completed to create an Article.
11Website Content
PUBLISH THE ARTICLE
Although an Article has been created, it is still not visible on the website. In order to be visible, it must be ‘published’.
1. Click the Article Archive tab. 2. In the selected Article row, under the Status column select Live from the drop down menu. 3. The Article will automatically move to the Live Articles tab.
ARRANGE THE ORDER OF ARTICLES
After an Article has been published, it is placed at the BOTTOM of the Category page in the list of Articles. Articles may be rearranged according to need.
1. Click the Live Articles tab. 2. In the selected Article row, under the Order column select the order of the Article in the drop down
menu. 3. The order will automatically shuffle. 4. Repeat the process with any Articles to be reordered
Note: When an Article is reordered, all other Articles will rearrange to the next logical step in order.
EDIT AN ARTICLE
Whether the Article is live, archived or newly created and off it may be edited. The difference is only where the Article is selected.
1. For Live Articles, select the Live Articles tab. For Archived, Off and New Articles (not yet published), select the Article Archive tab.
2. In the selected Article row click the [x] under the Edit column. 3. Edit any content as necessary (headline, subhead, etc.)
See Move an Article from one Category to Another subsection for Change Category 4. Click the Update Article button to complete.
If this User Message appears, follow the instructions and click the Update Article button to complete.
Some required information was not complete or invalid. Please enter all the required information. Fields with errors are marked below.
All fields must be completed to edit an Article.
If an Article is Live the edits will show immediately on the website, the user does not need to ‘republish’.
FORMAT AN ARTICLE
All directions below begin assuming the content editor for an Article is open.

12Website Content
THE EDITOR TOOLBAR
The editor toolbar functions very much like most word processors. Most are familiar with Bolding, Italics, underlining and the like. When creating a site, there are other functions available as well, such as creating hyperlinks, adding images and using styles. The toolbar handles all of these functions to make Articles more appealing, functional and customized.
BASIC FORMATTING AND STYLES
This toolbar allows the user perform common functions such as Bold, Italics, and Underline as well as bullet points, numbered lists, indentions and margin justification (all the text on the left, right, centered or justified). The Format and Style drop‐down menus are preformatted styles created to match and enhance the style of the website.
ADD / REMOVE A HYPERLINK
A hyperlink may refer to a page within the website or to another website altogether.
To ADD a Link 1. Select the image or text to be linked. 2. Click the Insert/Edit link in the toolbar. 3. A Link window will pop up. 4. In the URL (Uniform Resource Locator) field, type or copy/paste the URL of the link. 5. Click the OK button to complete.
To REMOVE a Link 6. Select the linked text or image. 7. Click the Remove Link button in the toolbar.
ADD / REMOVE AN EMAIL HYPERLINK
Instead of connecting to another webpage, an email hyperlink opens the users email software and may insert an email address in the TO: field and even a Subject.
To ADD an Email Link 1. Select the text to be linked. 2. Click the Add/Edit link button in the toolbar. 3. A Link window will pop up. 4. In the Link Type drop down menu choose email. 5. Fill in the rest of the fields as necessary (email address is required). 6. Click the OK button to complete.
To REMOVE an Email Link 7. Select the link to be removed. 8. Click the unlink button in the toolbar.
ADD /REMOVE AN IMAGE
13Website Content
Adding an image can be a tricky endeavor. Most likely it will be necessary to adjust a few settings to arrange the image in the best manner. Be patient! Even skilled web designers dealing directly with the underlying code have to ‘play’ a bit with this one. An image can come from several different locations, either in the website directory or from another location.
{SEE MEDIA LIBRARY SECTION FOR INFORMATION REGARDING THE MORE ROBUST METHOD OF STORING AND USING IMAGES IN THE WEBSITE}
Special Note: See the Media Library section Naming Conventions for Image and Documents before continuing
To ADD an Image 1. Select the placement of the picture in the content window (full content). 2. Click the Image button. 3. An Image Properties window will pop up. 4. If the URL for an image is known, place it in the URL field. 5. If the URL for an image is not known and the image is going to be stored on the web server, click the
Browse Server button. (If it isn’t on another web server, it is being stored on your web server) a. If the image is already in the folder, select it. b. If the image is not in the folder, click the Browse button.
i. A File Upload window will pop up. ii. Find the image on your computer, select the image and click the Open button. iii. Click the Upload button (to the right of Browse).
c. The image is now in the image folder above. Select it. d. The image may be resized by using the Width and Height boxes. As long as the Lock symbol is
‘closed’ when either attribute is changed the image will remain proportioned. To reset the image, click the circular arrow.
e. In the Align drop‐down menu, select the way the text should align to the image. The preview window will demonstrate how the text and images move and align for each selection.
6. Click the OK button to complete. To REMOVE an Image
7. Select the image. 8. Press the Delete key on the keyboard.
ADD / REMOVE A DOCUMENT (PDFS, ETC)
It is better to attach a document with a complex layout (such as a brochure or flier) than attempt to recreate it in an Article.
To add a document to a website is to upload it to the web server and then create a link to the document in an Article.
To Add a Document and Link 1. Select the location of the document link in the Article. 2. Type whatever best describes the document
Do not create a link such as “Click Here for a xxxx.” Try Brochure Download or PDF Download / Brochure, etc. It will be obvious it is a link and web users, know how links work. They click…
3. Highlight the text.
14Website Content
4. Click the Insert/Edit link button. 5. The Link window will pop up. 6. In the Link Info tab, click the Browse Server button. 7. The Resources Browser window will pop up.
a. If a file is not uploaded, click the Browse button at the bottom of the window. b. The File Upload window pops up. c. Select the file to be uploaded. d. Click the Open button. e. Click the Upload button at the bottom of the Resources browser.
8. Select a file from the Resources browser window. 9. In the Link window, click the OK button to complete.
To Remove a Document Link 10. Highlight the document link. 11. Click the Remove Link button to complete.
ADD A CALENDAR
1. Create a Calendar or locate an existing Calendar (see the Calendar section for instructions) 2. Select the location of the Calendar in the Article. 3. Type {CALENDAR #####} where # corresponds to the Calendar Article ID number. 4. Click Update Article to Complete.
ADD A SLIDESHOW
1. Create a Slideshow or locate an existing Slideshow (see the Slideshow section for instructions) 2. Select the location of the Slideshow in the Article. 3. Type {SLIDE #####} where # corresponds to the Slideshow Article ID number. 4. Click Update Article to Complete.
MOVE AN ARTICLE FROM ONE CATEGORY TO ANOTHER
Whether the Article is live, archived or newly created it may be moved to another Category. The difference is only where the Article is selected.
1. For Live Articles, select the Live Articles tab. For Archived, Off and New Articles (not yet published), select the Article Archive tab.
2. In the selected Article row click the [x] under the Edit column 3. In the Change Category drop‐down menu, select a Category. 4. Click the Update Article button to complete.
When an Article is moved to another Category its Published Status is automatically set to OFF and must be republished. See the Create a New Article (Publish Article, Arrange Article Order) section to continue.
DELETE AN ARTICLE
Whether the Article is live, archived or newly created it may deleted. The difference is only where the Article is selected.
15Website Content
1. For Live Articles, select the Live Articles tab. For Archived, Off and New Articles (not yet published), select the Article Archive tab.
2. In the selected Article row click the [x] under the Delete column. 3. The message “Are you sure you would like to delete this Article?” will pop up. 4. Choose OK to delete the Article; cancel to stop the deletion process.
ARCHIVE AN ARTICLE (OR UNPUBLISH AN ARTICLE)
Similar to publishing an article, an article may also be Archived or Unpublished. The instructions are the same as Publishing an article, only OFF or ARCHIVE is selected in the drop‐down menu. {SEE PUBLISH AN ARTICLE ABOVE}
16The Media Library
THE MEDIA LIBRARY
Although the Media Library link is at the bottom of the left hand navigation, it fits into the Website Content section as it is utilized for storage and placement of documents and images.
The Media Library allows the user to create a highly organized image and document repository. Added benefits include the ability to make ‘shortcut references’ media cutting the number of steps to insert images and documents. When images and documents are initially uploaded more data may be attached including a title, description, and captions which may be automatically included upon insertion into an Article.
Ex. {MEDIA 23459} is the simple code to insert an image or document (see Add/Remove Document or Add/Remove Image for comparative ease of use.
All directions below begin assuming the content editor for an Article is open.
NAMING CONVENTIONS FOR IMAGES AND DOCUMENTS
NAMING CONVENTIONS
The CMS specific way of naming all inserted files (images and documents)
ALL documents & images must be in lowercase without spaces and without special characters such as dashes, underscores or periods.
• companylogo.gif CORRECT / Company_logo.gif INCORRECT
• widgetbrochure2007.pdf CORRECT / Widget Brochure_2007.01.gif INCORRECT
IMAGES AND DOCUMENTS THAT WORK ON THE WEB
Image types that work on the Web: .jpg, .jpeg, .gif, png
• JPG or JPEG & PNG images are typically best for photographs
• GIF images are typically best for clipart, logos, non‐photographic images
Document types that work on the Web: .pdf Other document types may be linked but they will download, not open in the browser. i.e. Excel, Word) PDF files require a plug‐in download for the browser. Most web users have this installed.
ADD AN IMAGE / DOCUMENT TO THE MEDIA LIBRARY
1. From the library window click the “Add New Media” link. 2. In the Media Upload form click the Browse button. 3. The File Upload window opens. 4. Select the image/document to be uploaded and click the Open button. 5. In the Name field type the name of the image/document.
See the Naming Convention to assure the correct name is being used. 6. In the Caption field:
17The Media Library
a. Caption Needed ‐ Enter a caption (naming conventions do not need to be followed) b. Caption Not Needed ‐ Leave the field blank
7. In the Description field enter a detailed description. Imagine a new employee is looking for a document/image. What really describes the image/document?
8. Click the Upload Media button to complete.
FIND AN IMAGE / DOCUMENT IN THE MEDIA LIBRARY
1. Click the Images / Documents link. 2. Search By Name:
a. Select the first letter of the image/document name under Search by Name. b. A selection of images / documents beginning with that letter appear below
3. Search by Media Id: a. The Media Id is the set of numbers in the Media tag, .i.e. {MEDIA 12345}. The id is 12345. b. In the Search By Media Id field, type the Media Id. c. Click the Search button. d. The image will appear below.
4. Search by Keyword: a. In the Search By drop down menu, select Keyword. b. In the Search By Keyword field, type the keyword(s) that describe the image.
5. Click the Search button to complete.
EDIT AN IMAGE / DOCUMENT IN THE MEDIA LIBRARY
Perhaps an image was labeled improperly or the wrong document was uploaded. Editing an image or document is easy in a few simple steps.
1. Find the image / document in the Media Library. 2. In the row of the selected image, click the [x] in the Edit column. 3. The Name, Caption, Description and File itself may be edited. 4. Click Update Media to finish.
INSERT AN IMAGE USING THE MEDIA LIBRARY
1. Find the image in the Media Library. 2. In the row of the selected image, click show in the More Info header. 3. Image related image appears in a yellow bar underneath the image. 4. In the Editor Code field, highlight and select the text {MEDIA #####} (# represents numbers) and copy. 5. Follow the instructions to find the Article in which the image is to be placed. 6. In the Article select the area in which the image is to be placed. 7. Paste the {MEDIA #####} tag in the Article. 8. The following may be added to adjust text placement around the image.
a. {MEDIA #####R} Image moves to the left, text wraps around the right of the image. b. {MEDIA #####L} Image moves to the right, text wraps around the left of the image. c. {MEDIA #####} <br clear=all> Image defaults to left, text moves to the bottom of the image.
9. Click the Update Article button to complete.
18Bulk Mail
INSERT A DOCUMENT USING THE MEDIA LIBRARY
1. Find the document in the Media Library. 2. In the row of the selected image, click show in the More Info header. 3. Document related image appears in a yellow bar underneath the image. 4. In the Editor Code field, highlight and select the text {MEDIA #####} (# represents numbers) and copy. 5. Follow the instructions to find the Article in which the document is to be placed. 6. In the Article select the area in which the document is to be placed. 7. Paste the {MEDIA #####} tag in the Article. 8. Click the Update Article button to complete.
BULK MAIL
ABOUT THE BULK MAIL SYSTEM
The bulk mail system create and sends “opt‐in” bulk emails to customers, partners, clients, etc. “Opt‐in” means the people being sent the email have chosen to receive it.
WHAT IS SPAM?
Messages sent to individuals or groups without permission are called “SPAM” and is illegal in most states. Sending SPAM can have dire consequences including cancellation of service, the URL (domain name or www.YourDomain.com) being blocked across the internet and even legal action with fines.
WHAT CAN I DO WITH BULK MAIL?
Without a bulk mail system, a company or individual is limited in sending emails through service providers. This system allows email to be sent to a limitless number of recipients. These emails can be reminders, newsletters, ad campaigns or internal communications…whatever can be conceived!
The bulk mail system also tracks messages so they can easily be tracked for efficiency and impact.
BULK MAIL CATEGORIES
WHAT ARE CATEGORIES?
Categories refer to the different types emails you may send. It is possible to create several different emails that you will send to different people. As an example a political website may send out a newsletter for each district in a state. You do not want to send the newsletter to everyone, just the people of that district. Therefore you set a category for each district so the receiver may get the information desired.
WHAT CAN I DO WITHIN BULK MAIL CATEGORIES?
You can add new categories, edit or delete existing categories.

19Bulk Mail
HOW DO CATEGORIES AFFECT MY CONTACTS?
Your contacts have a category attached to their information. This information tells the bulk mail system who will receive mail when you select that category.
IMPORTANT NOTE ON DELETION:
When a Category is deleted it also deletes all connection to the Contacts for this Category. This does not delete the Contacts. In other words, if you delete the Category all people signed up for this category will no longer receive information from this Category even if you recreate it. This destroys the connection between Contact and Category making it impossible to re‐subscribe members. It is recommended to edit the Category (see above) making the Category inaccessible from the sign up form and keep the linkage between Contact and Category for future reference. To rectify you must sign up every member deleted.
ADD A NEW CATEGORY
1. Click the “Bulk mail Categories” tab 2. Click the “Add a New Category” link 3. Type the name of the Category in the Category Name field 4. Choose Yes or No for Display Category 5. Yes – the category is available in the drop down menu of the sign up form 6. No – the category is not available in the drop down menu of the sign up form 7. Click Add Category to create the new category
The new category now appears in the Bulk Mail Categories display under the Bulk mail Categories tab.
EDIT
1. Click the “Bulk mail Categories” tab 2. Click [ x ] in the Edit Column to the right of the Category to be changed. 3. Edit the Category name by changing the information in the Category Name field 4. Edit the Category Display 5. Yes – the category is available in the drop down menu of the sign up form 6. No – the category is not available in the drop down menu of the sign up form 7. Click Update Category to complete and execute the edit(s)
DELETE
1. Click the “Bulk mail Categories” tab 2. Click [ x] in the Delete Column to the right of the Category to be removed 3. A pop‐up message will ask “Are you sure would like to delete this category. This will remove the Contacts
from this category as well.” 4. To complete the deletion, press OK. 5. To cancel the deletion, press Cancel
BULKMAIL MESSAGES
Create, edit or preview the message before it is sent. Delete messages no longer needed.
20Bulk Mail
NEW MESSAGE
1. Click the “Bulk mail Messages” tab. 2. Click “Create a new mail message” 3. Fill in the message form
a. From Name: Name of Sender b. From Email: Email address to which people may respond c. To Name: Name of group to which mail will be sent d. Subject: Subject of Email e. Message: Body of the message [see TOOLBAR section for more information] f. Attachment 1‐3: Click browse and find file on your system to be attached
4. Click Add Message button to complete.
PREVIEW MESSAGES
1. Click “Bulk mail Messages” tab. 2. Click [x] in the Preview Column to the right of the message to be previewed. 3. Select a template from the drop‐down box labeled “Please select a template” 4. The Template will show in the space below. 5. To exit, click “Return to Bulk mail Messages” in the upper left.
EDIT MESSAGES
1. Click the “Bulk mail Messages” tab. 2. Click [X] in the Edit Column to the right of the messages to be edited. 3. Edit the message form
a. From Name: Name of Sender b. From Email: Email address to which people may respond c. To Name: Name of group to which mail will be sent d. Subject: Subject of Email e. Message: Body of the message [see TOOLBAR section for more information] f. Attachment 1‐3: Click browse and find file on your system to be attached
4. Click Update Message button to complete changes.
DELETE MESSAGES
1. Click “Bulk mail Messages” tab. 2. Click [X] in Delete column to right of subject to be removed. 3. A pop‐up message will ask “Are you sure you would like to delete this message” 4. To complete the deletion click OK. 5. To cancel the deletion, click Cancel.
E‐MAIL TEST GROUPS
Create, edit and delete a test group for use in testing output of bulk emails.
CREATE A NEW TEST GROUP
1. Click “E‐mail Test Groups” tab
21Bulk Mail
2. Click Create a new test group 3. Fill in the Test Group form
a. Group Name: Name of the group b. Emails: Email addresses message to which message will be sent
4. Click Add new test group to complete.
SHOW EMAILS IN A GROUP
1. Click “E‐mail Test Groups” tab 2. Click “show” under the email column to the right of the chosen test group. 3. Pop‐up window will display the emails. 4. Click OK to exit.
EDITING A TEST GROUP
1. Click “E‐mail Test Groups” tab 2. Click [X] under the Edit column to the right of the test group to be edited 3. The test group text windows appears below the test group list 4. Edit the Group Name in the Group Name field 5. Edit the Emails in the Emails field 6. Click the Update test group button when finished.
DELETE A TEST GROUP
1. Click “E‐mail Test Groups” tab 2. Click [X] under the Delete column to the right of the test group to be deleted. 3. A pop‐up window asks “Are you sure would like to delete this test group?” 4. Click OK to delete the test group. 5. Click Cancel to cancel the deletion of the test group.
SEND A BULK MAIL
THE SEND A BULK MAIL SECTION ALLOWS:
• A test message to be sent • An actual “live” message to be scheduled and sent.
WHAT IS A TEMPLATE?
The bulk mail system has at least one built in ‘template’. This template produces a more pleasing appearance to a bulk mail (newsletter, ad, etc.) as opposed to plain text. A colorful and graphically driven email will attract more attention and encourage the receiver to read it.
SEND A TEST MAIL
1. Click the “Send a Bulk Mail” tab 2. Click the Send a test mail link
22Bulk Mail
3. Select a template from the drop‐down menu 4. Select Testing Mail from the Select a Message drop‐down menu 5. Select a test group from the Test E‐Mail group drop‐down menu 6. Click the Send Test Message button 7. A User Message at the top left will affirm the message has been sent. 8. If you are a part of the test group, check your email for sent message
SEND A LIVE MAIL
1. Click the “Send a Bulk Mail” tab 2. Click the Send a live mail link 3. Select the Contact Group from the drop‐down menu 4. Select the template from the Select a template drop‐down menu 5. Select a message from the Select a message drop‐down menu 6. Set a delivery date [format YYYY‐MM‐DD]
a. Click the button labeled “…” to the right of the Delivery Date field b. Select a date using the calendar tool c. Select the Delivery Time from the Delivery Time drop‐down menu
7. Click the Send Message when finished.
MAIL BATCH
• control of bulk mail before it sends • status of send • the ability to delete the email before it sent
WHAT INFORMATION IS PRESENTED IN THE MAIL BATCH? • the Mail Subject • status of mail (waiting, sent) • the Delivery Date and Time • Number of contacts receiving the mail • The view control • The delete control
VIEW
1. Click the Mail Batch tab 2. Click the [x] in the View column to the right of the message to be viewed. 3. Detailed batch information report is displayed
DELETE
1. Click the Mail Batch tab 2. Click the [x] in the Delete column to the right of the message to be deleted. 3. A pop‐up will ask “Are you sure you would like to delete this batch?” 4. Click OK to delete the mail and prevent delivery 5. Click Cancel to cancel the deletion
23Manage Contacts
MANAGE CONTACTS
This section allows management of all contact information in regards to the Bulk Mail system. Any web user that utilizes the opt‐in bulk mail system can be edited and deleted from this section. New members may be added as well.
All directions below begin assuming the user is in the Manage Contacts section.
ADD A NEW CONTACT
1. Click the Add a new contact link. 2. Fill out the New Contact form, all required fields are marked with an asterisk. *
a. Bulkmail Categories: Refer to Bulk mail for adding categories. b. Select the bulkmail category to which the user choose to receive
3. Click the Add button to continue. 4. A secondary information table appears. At this point secondary information may be added or primary
information may be edited. 5. Click Update to complete.
FIND A CONTACT
Two methods for find a contact are available. Alphabetical listing or direct search. Alphabetical is best used for individuals. Direct search offers a multitude of options, including sorting Contacts by area code, zip code, etc.
ALPHABETICAL LISTING
1. Select the letter that corresponds to the first letter of the contact’s Last Name. 2. A listing of all contacts with a Last Name beginning with that letter appear in a table below. 3. Scroll to find the name of the contact.
DIRECT SEARCH
1. In the empty field above the Alphabetical bar, enter the search information based on these choices: a. First Name b. Last Name c. Company Name d. Address e. City f. State g. Zip Code h. Email Address i. Telephone Number
2. Select the search option in the drop down box to the left of this field. 3. Click the Search button to complete.
24Ad Software
EDIT A CONTACT
1. Find the contact utilizing the method above. 2. In the row of the contact selected, click [x] in the Edit column. 3. Change the information as needed. 4. Click the Update button to complete.
AD SOFTWARE
SEE ATTACHED AD SOFTWARE MANUAL. SECTION 1
PHOTO SLIDESHOW
The Photo Slideshow is as it seems…a web based slideshow. In place of a gallery where valuable screen space is taken and user activity is high, a slideshow creates an automated image‐at‐a‐time presentation. It works in conjunction with the Media Library to make the construction easy and convenient with the added simplicity of insertion into a website.
All directions below begin assuming the Photo Slideshow window is open.
CREATE A SLIDESHOW
A slideshow is a grouping of images and therefore the slideshow is referred to as a group.
1. Click the Add a new group link. 2. A window appears below the link labeled Photo Slideshow Groups. 3. In the Slideshow Group Name field, create a memorable name for the slideshow content. 4. In the Description field give a detailed description of the imagery. I.e. Election Fundraiser July 20 2007 5. Click the Add New Slideshow Group button. 6. The group is now available in the Slideshow table. 7. Locate the slideshow in the table and click the [X] in the Edit Slideshow column. 8. Use the Media Library to locate the Image Tag number and type (or paste) that number in the Media ID
field. 9. Click the Add to Slideshow button. 10. Continue steps 8 & 9 until the slideshow is complete. 11. Click Photo Slideshow in the navigation on the left to return to the Slideshow window.
ADD AN IMAGE TO AN EXISTING SLIDESHOW (EDIT SLIDESHOW)
1. Locate the slide show to be edited in the slideshow table. 2. In that row, click the [X] in the Edit Slideshow column. 3. Use the Media Library to locate the Image Tag number and type (or paste) that number in the Media ID
field. 4. Click the Add to Slideshow button. 5. Repeat steps 3 and 4 for any other images to be added to the slideshow until complete.

25Photo Slideshow
6. Click Photo Slideshow in the navigation on the left to return to the Slideshow window.
DELETE AN IMAGE FROM AN EXISTING SLIDESHOW
1. Locate the slide show to be edited in the slideshow table. 2. In that row, click the [X] in the Edit Slideshow column. 3. Locate the image to be deleted. 4. Click the Remove link next to the image. 5. Repeat steps 3 and 4 until complete. 6. Click Photo Slideshow in the navigation on the left to return to the Slideshow window.
CHANGE THE ORDER OF THE SLIDES
1. Locate the slide show to be edited in the slideshow table. 2. In that row, click the [X] in the Edit Slideshow column. 3. Locate the image to be moved. 4. In the numbered drop‐down box, select the position in which the slide should appear. 5. The slides will auto‐arrange around the change. 6. Repeat steps 3 and 4 until complete.
EDIT A SLIDESHOW (GROUP) NAME AND DESCRIPTION
1. Locate the slide show to be edited in the slideshow table. 2. In that row, click the [X] in the Edit Group column. 3. A window appears below the link labeled Photo Slideshow Groups. 4. In the Slideshow Group Name field, create a memorable name for the slideshow content. 5. In the Description field give a detailed description of the imagery. I.e. Election Fundraiser July 20 2007 6. Click the Update Slideshow Group button to complete.
DELETE A SLIDESHOW
1. Locate the slide show to be deleted in the slideshow table. 2. In that row, click the [X] in the Delete column. 3. A pop‐up window will ask “Are you sure you would like to delete (name of slideshow). 4. To cancel the deletion, click the Cancel button. 5. To delete the Slideshow, click the the OK button. 6. The slideshow is deleted.
INSERT SLIDESHOW IN AN ARTICLE
1. Select the area in the Article in which the slideshow will be placed. 2. Type {SLIDE #####} where # is the Slideshow ID number.
ID Number is located to the right of the Group Name in the Slideshow table. 3. Click Update Article to complete.
26Urchin Website Stats
URCHIN WEBSITE STATS
SEE ATTACHED URCHIN MANUAL. SECTION 2
CALENDAR
Create one or more calendars with ease, plus insert into an Article with simple code.
All directions below begin assuming the Calendar window is open.
CREATE A NEW CALENDAR
1. Click the Add a new calendar link. 2. The Calendar setup box appears below the Current Calendar table. 3. In the Calendar Name field, type a descriptive name for the Calendar. 4. Click the Add Calendar button to complete.
CHANGE THE CALENDAR NAME
1. Locate the Calendar to be edited in the Calendar table. 2. In that row, click the [X] in the Edit Calendar column. 3. The Calendar Setup window appears below the Current Calendar table.. 4. In the Calendar Name field, edit or change the Calendar name. 5. Click the Update Calendar Group button to complete.
DELETE A CALENDAR
1. Locate the Calendar to be deleted in the Calendar table. 2. In that row, click the [X] in the Delete Calendar column. 3. The Calendar Setup window appears below the Current Calendar table.. 4. In the Calendar Name field, edit or change the Calendar name. 5. Click the Update Calendar Group button to complete.
ADD CALENDAR EVENT
1. Locate the Calendar in which to add an Event. 2. In that row, click the [X] in the Edit Content column. 3. Click the Add a new calendar entry link. 4. The Calendar Entry for (calendar name) appears below. 5. Enter the following information as needed (items with an * are required)
a. Calendar Entry Type i. Single Day – One Day ii. Multiple Day – Will add a second Date field, Until Date
b. Date – Click the Calendar icon for a pop‐up calendar
27Calendar
c. Headline – Keep it simple, yet descriptive d. Description – A more complex description e. Venue f. Venue Address – Building number and Street i.e. 3212 Gillham Street g. Venue City h. Venue Zip Code i. Venue Phone j. Venue URL – Website of the Venue k. Other URL – Any other relevant website l. Related Articles – User Article Ids separated by commas i.e. 427, 335, 643 m. Calendar – If a change of Calendar is necessary, select a different calendar
6. Click Add Entry to complete.
EDIT CALENDAR EVENT
1. Locate the Calendar in which to add an Event. 2. In that row, click the [X] in the Edit Content column. 3. Locate the Event to be edited. 4. In that row, click the [x] in the Edit column. 5. Change the information in any field necessary. 6. Click Update Entry to complete.
DELETE CALENDAR EVENT
1. Locate the Calendar an Event is to be deleted. 2. In that row, click the [X] in the Edit Content column. 3. Locate the Event to be deleted. 4. In that row, click the [x] in the Delete column. 5. A pop‐up window will say “Are you sure you would like to delete this entry?” 6. To cancel click the Cancel button. 7. To delete, click OK.
LOGOUT
Always logchanged oto keep sec
Logging on
TOOLBA
FUNCTIO
FUNCTIO
T
g out of the sysr deleted, the cure.
n is simple. Be
R EDITOR IN
ON OF BUTT
Vie
SA
Pre
Se
Cu
Co
Pa
Co
Fin
Fin
Se
Re
ON OF BUTT
stem logout of website may b
safe and secu
N DETAIL
TONS IN TOO
ew or edit do
AVE. Save da
eview what t
lect a layout
ut the highligh
opy the highlig
aste the text c
opy content fr
Undo or
nd a word or
nd & replace
lect all of the
emove the for
TONS IN TOO
the Content Mbe altered and
re. LOG OUT!
OLBAR ONE
ocument sour
ta posted in t
he HTML pag
template. Se
hted text. (Se
ghted text. (S
copied ( w
rom Microsof
redo the m
phrase within
a word or ph
e text in the H
rmatting from
OLBAR TWO
Management Syprivate inform
ce code (for a
text box.
ge will look lik
e "Templates
lect the text f
Select the tex
with formattin
ft Word past
ost recent ac
n the text of t
rase within th
HTML page
m highlighted
O
ystem. Why? mation is availa
advanced use
ke for users.
s" for details.
first, text is re
t first)
ng or wit
e it into the H
tion taken.
the HTML pag
he text.
text... (Select
Important infoble that is the
(fig.
ers).
emoved when
thout formatt
HTML editor u
ge.
t the text firs
(fig.
Log
ormation can busers respons
x.1 - Toolbar
n pasted)
ting)
using the pop
st)
x.2 - Toolbar
28gout
be ibility
r One)
p‐up
r Two)
FUNCTIO
Bu
Ind
Te
Hy
Ho
Ins
Insset
Ins
Ins
Ins
ON OF BUTT
SIZ
Te
Ba
Pr
Sp
MA
Bold, it
Superscript
ulleted List. A
dentation.
ext Alignment
yperlink.
orizontal Line
sert Picture:
sert table: Nut.
sert emoticon
sert symbols &
sert page bre
TONS IN TOO
Format s
FONT. C
ZE. Changes t
ext Color. Cha
ackground Co
int the HTML
pell check the
AXIMIZE. Ma
talic, un
t or subsc
Add num
Increase o
t. Left,
Add or R
: Insert divid
Insert your o
umber of colu
ns (e.g. smiley
& special cha
ak. Only impa
OLBAR THRE
selects pre‐fo
Changes the fo
he size of the
ange the colo
lor. Change t
L page.
HTML page.
aximize the te
nderline or
cript the high
bering or
or decrea
Right,
REMOVE hype
er line.
own or other'
umns / rows, t
y faces, emai
aracters (trad
acts printed v
EE
ormatted tem
ont.
e text.
or of the highl
the backgrou
ext editing scr
strikethro
lighted text.
bullets to h
ase the highli
Centered,
erlink from h
's images into
table width, h
l icon, light b
emarks, curre
version.
plates for hig
lighted text.
nd color behi
reen to fill the
Toolb
ough highlight
ighlighted tex
ighted text's i
Justified.
ighlighted tex
o the HTML pa
height, borde
ulb).
ency, etc.).
(fig. x.
ghlighted text
ind the highli
e window.
bar Editor in D
ted text.
xt lines.
indentation.
xt.
age.
ers, & alignme
.3 ‐ Toolbar T
t.
ghted text.
29Detail
ent can also b
Two)
be
30Toolbar Editor in Detail
ADDITIONAL CHARACTERS AND MISCELLANEOUS
Online keyboard for certain non‐roman character languages.
31SECTION 1
PHP ADS MANUAL
SECTION 1
ATTACHED MANUAL IS FOR PHPADS, AD BANNER MANAGEMENT
32Section 2
Urchin v. 5 Web Statistics Manual
SECTION 2
THE ATTACHED MANUAL IF FOR URCHIN VERSION 5 THE WEBSITE STATISTIC TRACKER