Embed Size (px)
Citation preview
p.19
p.31
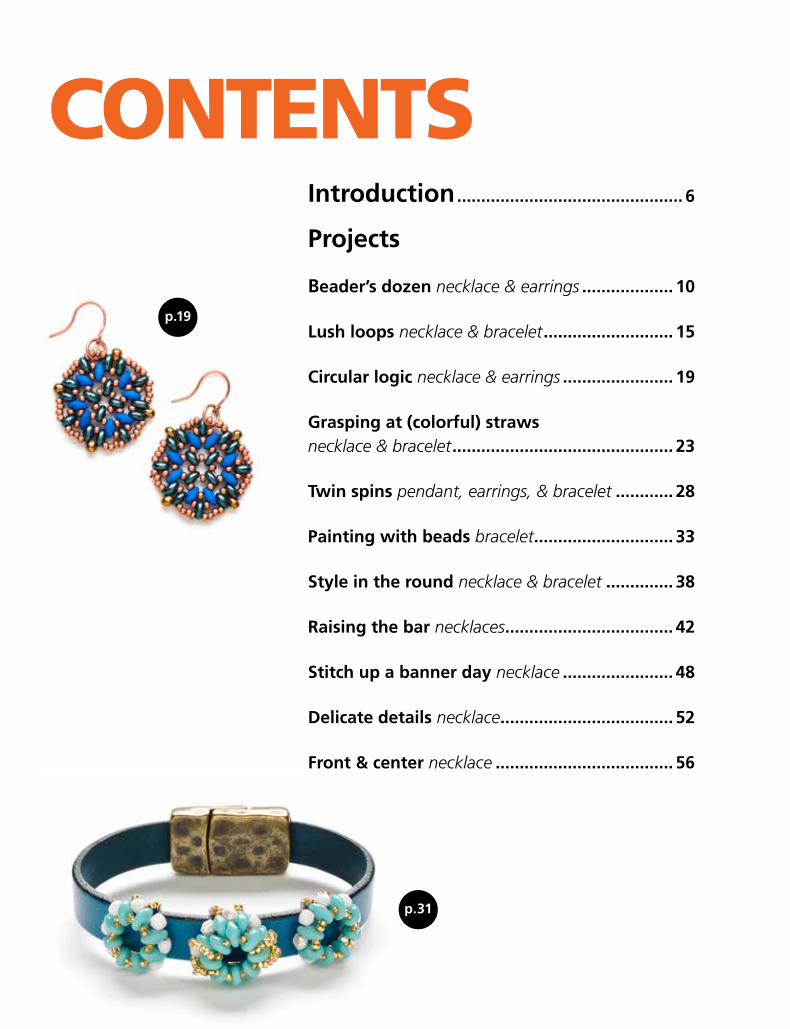
Introduction ............................................... 6
Projects
Beader’s dozen necklace & earrings ................... 10
Lush loops necklace & bracelet ........................... 15
Circular logic necklace & earrings ....................... 19
Grasping at (colorful) straws necklace & bracelet .............................................. 23
Twin spins pendant, earrings, & bracelet ............ 28
Painting with beads bracelet ............................. 33
Style in the round necklace & bracelet .............. 38
Raising the bar necklaces ................................... 42
Stitch up a banner day necklace ....................... 48
Delicate details necklace .................................... 52
Front & center necklace ..................................... 56
CONTENTS
p.10
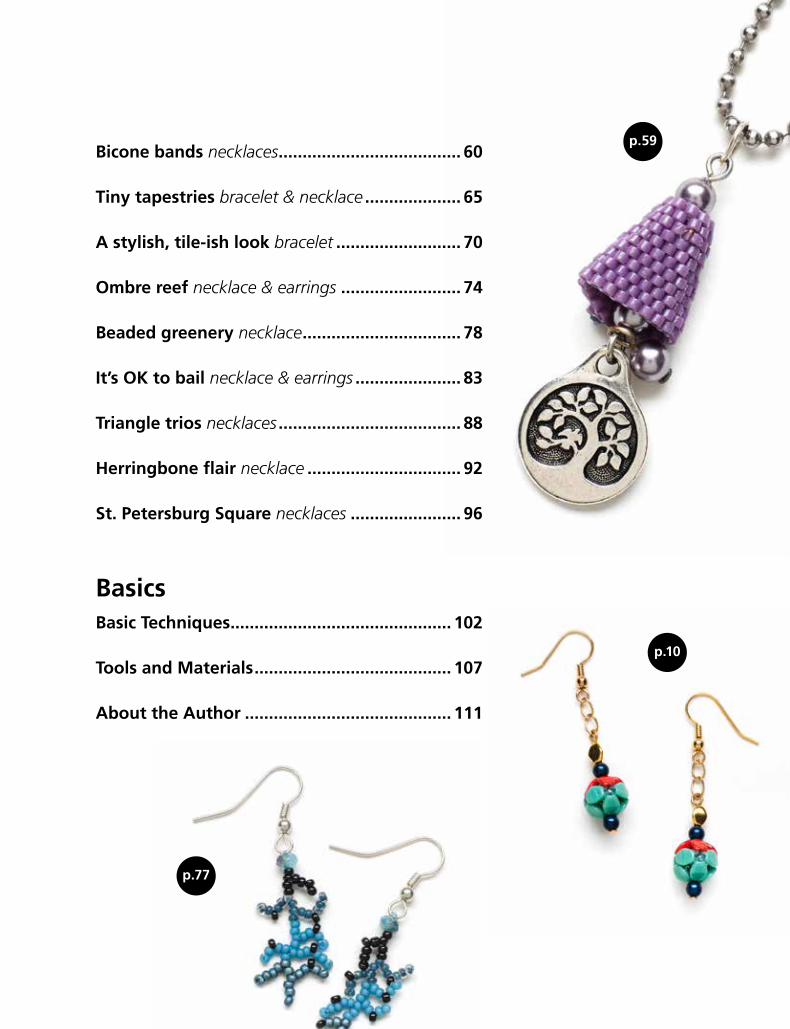
p.59Bicone bands necklaces ...................................... 60
Tiny tapestries bracelet & necklace .................... 65
A stylish, tile-ish look bracelet .......................... 70
Ombre reef necklace & earrings ......................... 74
Beaded greenery necklace ................................. 78
It’s OK to bail necklace & earrings ...................... 83
Triangle trios necklaces ...................................... 88
Herringbone flair necklace ................................ 92
St. Petersburg Square necklaces ....................... 96
BasicsBasic Techniques .............................................. 102
Tools and Materials ......................................... 107
About the Author ........................................... 111
p.77

6
My idea of heaven? A beading class every day, endless time to bead, and a world of art
shows and online sites at which I can share and sell my work for a price that represents
the time and skill it takes to create stitched and woven jewelry. There are also margaritas
involved and I’m wearing yoga pants all the time.
You’re on your own with the cocktails and clothes, but this book tries to bring a little heaven
down to earth on other scores. I created these projects for both the new stitcher who
wants to dip a toe in without committing to a 40-hour necklace, and the more experienced
beader who’s looking for project ideas for an afternoon, evening, or a rare lazy weekend.
Also, for those of you who sell stitched jewelry and want something to tag with a lower price
point that reflects the quick turnaround—here are some great ideas.
And while I would never support teaching or selling someone else’s designs without their
permission—everything in this book is yours. I don’t sell my jewelry or teach very often, so
you’re not threatening my livelihood. These designs were designed for sharing. Enjoy!
INTRODUCTION
10
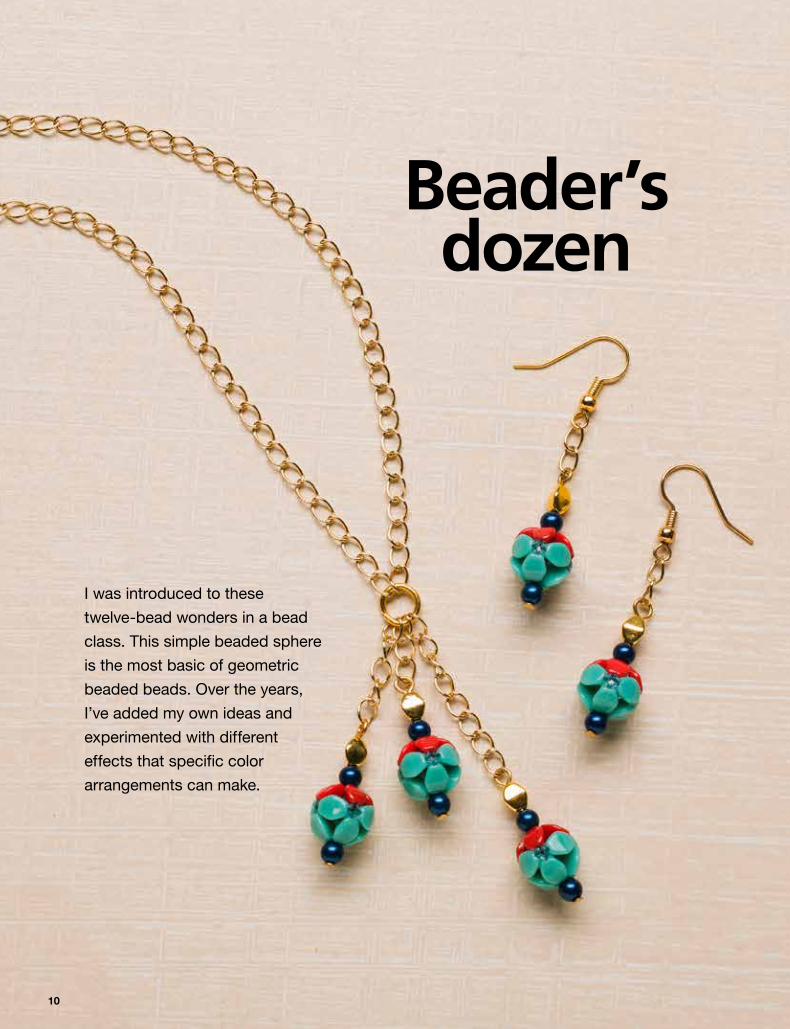
Beader’s dozen
I was introduced to these
twelve-bead wonders in a bead
class. This simple beaded sphere
is the most basic of geometric
beaded beads. Over the years,
I’ve added my own ideas and
experimented with different
effects that specific color
arrangements can make.
1
23
BKS-JWL-67867_01-P01
1
23
5 4
BKS-JWL-67867_01-P02
6
7
1
23
5 4
BKS-JWL-67867_01-P03
8
6
7
1
23
5 4
BKS-JWL-67867_01-P04
11
Beader’s dozen
6
7
1
23
5 4
BKS-JWL-67867_01-P03
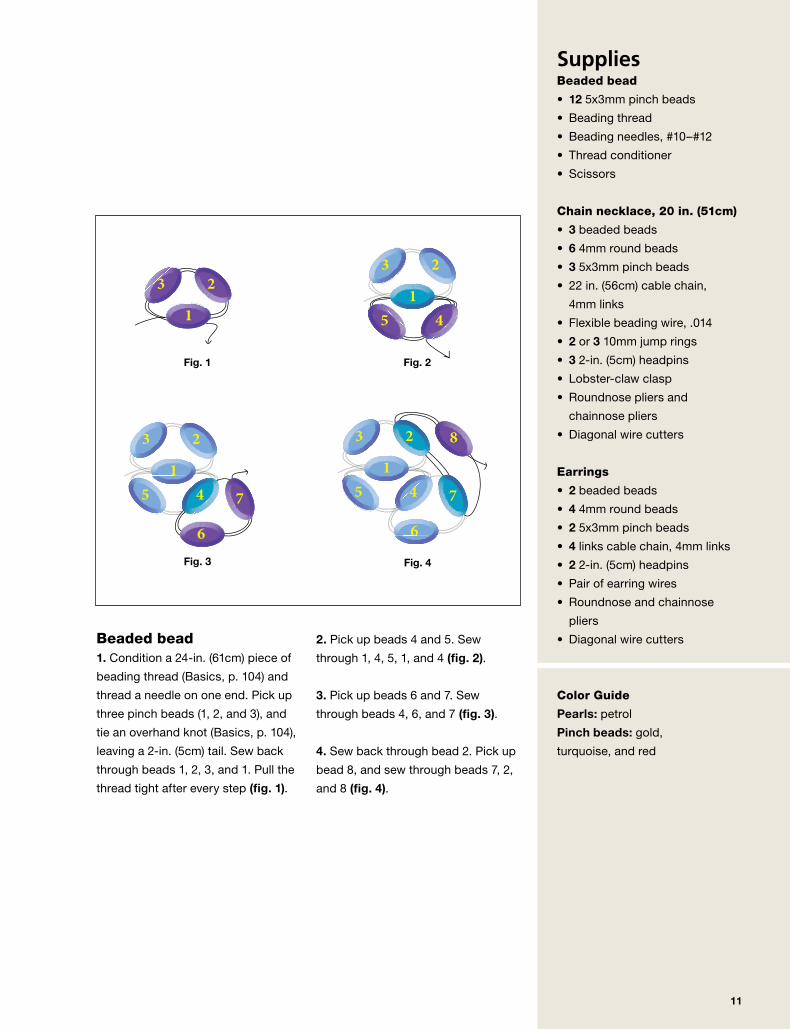
Beaded bead 1. Condition a 24-in. (61cm) piece of
beading thread (Basics, p. 104) and
thread a needle on one end. Pick up
three pinch beads (1, 2, and 3), and
tie an overhand knot (Basics, p. 104),
leaving a 2-in. (5cm) tail. Sew back
through beads 1, 2, 3, and 1. Pull the
thread tight after every step (fig. 1).
Fig. 2
Fig. 3
Fig. 1
Fig. 4
SuppliesBeaded bead
• 12 5x3mm pinch beads
• Beading thread
• Beading needles, #10–#12
• Thread conditioner
• Scissors
Chain necklace, 20 in. (51cm)
• 3 beaded beads
• 6 4mm round beads
• 3 5x3mm pinch beads
• 22 in. (56cm) cable chain,
4mm links
• Flexible beading wire, .014
• 2 or 3 10mm jump rings
• 3 2-in. (5cm) headpins
• Lobster-claw clasp
• Roundnose pliers and
chainnose pliers
• Diagonal wire cutters
Earrings
• 2 beaded beads
• 4 4mm round beads
• 2 5x3mm pinch beads
• 4 links cable chain, 4mm links
• 2 2-in. (5cm) headpins
• Pair of earring wires
• Roundnose and chainnose
pliers
• Diagonal wire cutters
Color Guide
Pearls: petrol
Pinch beads: gold,
turquoise, and red
2. Pick up beads 4 and 5. Sew
through 1, 4, 5, 1, and 4 (fig. 2).
3. Pick up beads 6 and 7. Sew
through beads 4, 6, and 7 (fig. 3).
4. Sew back through bead 2. Pick up
bead 8, and sew through beads 7, 2,
and 8 (fig. 4).
BKS-JWL-67867_05-P03
BKS-JWL-67867_05-P04
BKS-JWL-67867_05-P05
BKS-JWL-67867_05-P06
BKS-JWL-67867_05-P07
30
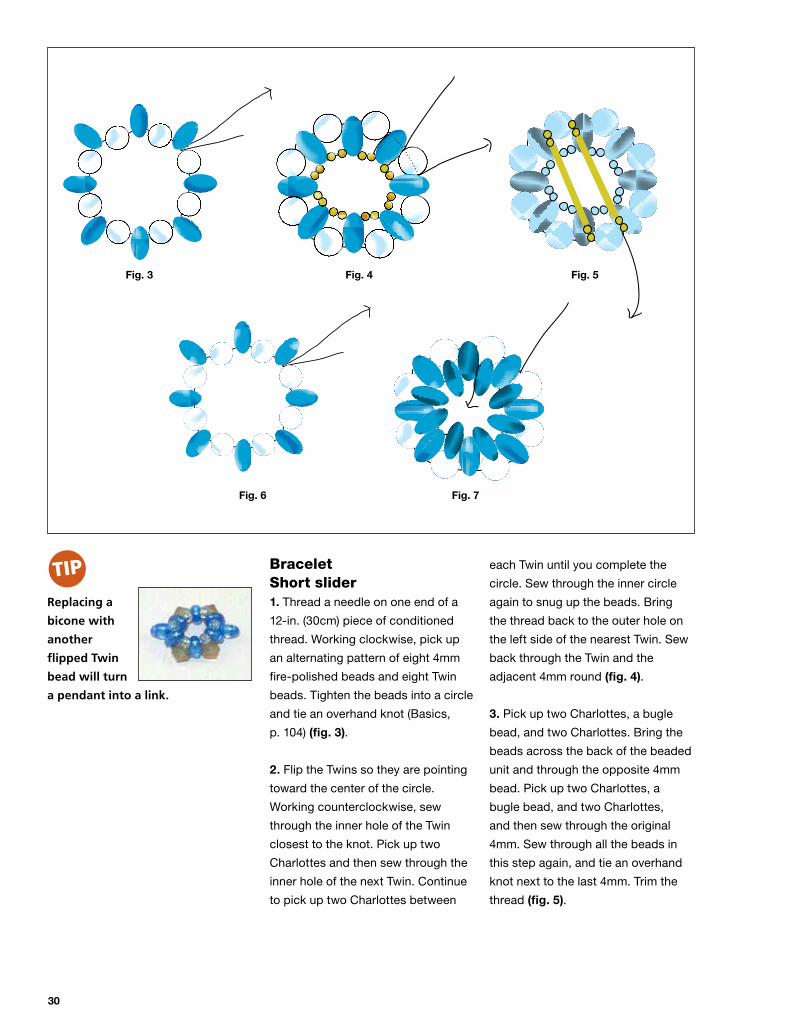
each Twin until you complete the
circle. Sew through the inner circle
again to snug up the beads. Bring
the thread back to the outer hole on
the left side of the nearest Twin. Sew
back through the Twin and the
adjacent 4mm round (fig. 4).
3. Pick up two Charlottes, a bugle
bead, and two Charlottes. Bring the
beads across the back of the beaded
unit and through the opposite 4mm
bead. Pick up two Charlottes, a
bugle bead, and two Charlottes,
and then sew through the original
4mm. Sew through all the beads in
this step again, and tie an overhand
knot next to the last 4mm. Trim the
thread (fig. 5).
BraceletShort slider1. Thread a needle on one end of a
12-in. (30cm) piece of conditioned
thread. Working clockwise, pick up
an alternating pattern of eight 4mm
fire-polished beads and eight Twin
beads. Tighten the beads into a circle
and tie an overhand knot (Basics,
p. 104) (fig. 3).
2. Flip the Twins so they are pointing
toward the center of the circle.
Working counterclockwise, sew
through the inner hole of the Twin
closest to the knot. Pick up two
Charlottes and then sew through the
inner hole of the next Twin. Continue
to pick up two Charlottes between
Replacing a
bicone with
another
flipped Twin
bead will turn
a pendant into a link.
TIP
Fig. 3 Fig. 4 Fig. 5
Fig. 7Fig. 6
BKS-JWL-67867_05-P08
BKS-JWL-67867_05-P09 BKS-JWL-67867_05-P10
31
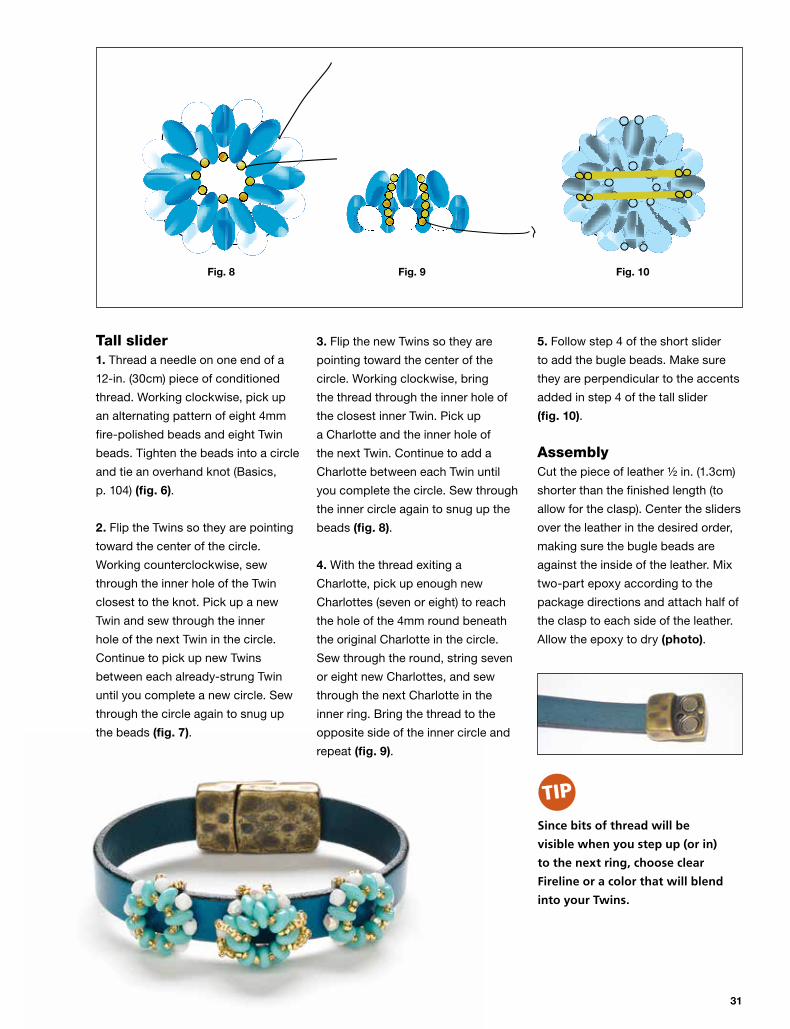
5. Follow step 4 of the short slider
to add the bugle beads. Make sure
they are perpendicular to the accents
added in step 4 of the tall slider
(fig. 10).
AssemblyCut the piece of leather ½ in. (1.3cm)
shorter than the finished length (to
allow for the clasp). Center the sliders
over the leather in the desired order,
making sure the bugle beads are
against the inside of the leather. Mix
two-part epoxy according to the
package directions and attach half of
the clasp to each side of the leather.
Allow the epoxy to dry (photo).
Tall slider1. Thread a needle on one end of a
12-in. (30cm) piece of conditioned
thread. Working clockwise, pick up
an alternating pattern of eight 4mm
fire-polished beads and eight Twin
beads. Tighten the beads into a circle
and tie an overhand knot (Basics,
p. 104) (fig. 6).
2. Flip the Twins so they are pointing
toward the center of the circle.
Working counterclockwise, sew
through the inner hole of the Twin
closest to the knot. Pick up a new
Twin and sew through the inner
hole of the next Twin in the circle.
Continue to pick up new Twins
between each already-strung Twin
until you complete a new circle. Sew
through the circle again to snug up
the beads (fig. 7).
3. Flip the new Twins so they are
pointing toward the center of the
circle. Working clockwise, bring
the thread through the inner hole of
the closest inner Twin. Pick up
a Charlotte and the inner hole of
the next Twin. Continue to add a
Charlotte between each Twin until
you complete the circle. Sew through
the inner circle again to snug up the
beads (fig. 8).
4. With the thread exiting a
Charlotte, pick up enough new
Charlottes (seven or eight) to reach
the hole of the 4mm round beneath
the original Charlotte in the circle.
Sew through the round, string seven
or eight new Charlottes, and sew
through the next Charlotte in the
inner ring. Bring the thread to the
opposite side of the inner circle and
repeat (fig. 9).
TIP
Fig. 10Fig. 9Fig. 8
Since bits of thread will be
visible when you step up (or in)
to the next ring, choose clear
Fireline or a color that will blend
into your Twins.
42
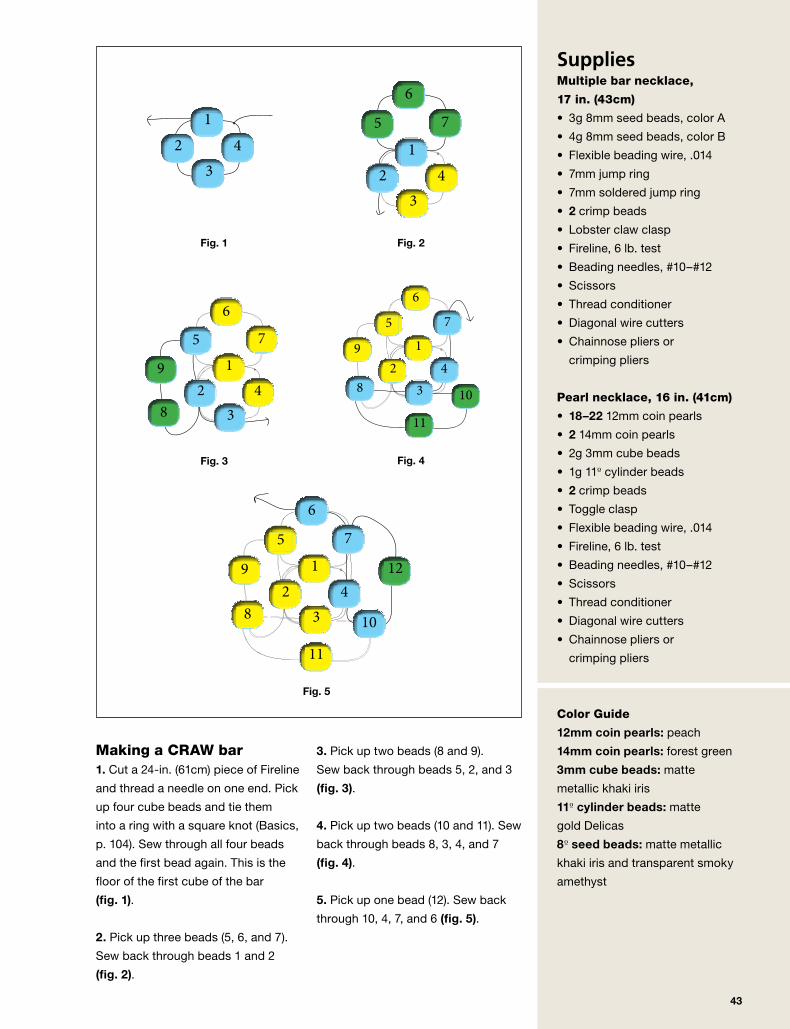
Raising the bar
Cubic right-angle weave (CRAW) can be a bit challenging, but once you find the rhythm
and can picture how the cubes are formed, you may find it addictive. I’ve seen stitchers
use CRAW to form all kinds of interesting shapes, but even the simplest, quickest bars
offer endless design possibilities. Everybody explains it a bit differently. Instead of being
confusing, the more different ways I’ve heard it explained, the clearer it becomes to me.
This is the simplest way for me to explain the process.
21
43 BKS-JWL-67867_08-p01
BKS-JWL-67867_08-p02
21
43
5
6
7
Fig. 1 Fig. 2
21
43
5
6
7
8
9
11
10
12
BKS-JWL-67867_08-P05Fig. 5
BKS-JWL-67867_08-P04
21
43
5
6
7
8
9
11
1021
43
5
6
7
8
9 BKS-JWL-67867_08-p03
43
3. Pick up two beads (8 and 9).
Sew back through beads 5, 2, and 3
(fig. 3).
4. Pick up two beads (10 and 11). Sew
back through beads 8, 3, 4, and 7
(fig. 4).
5. Pick up one bead (12). Sew back
through 10, 4, 7, and 6 (fig. 5).
SuppliesMultiple bar necklace,
17 in. (43cm)
• 3g 8mm seed beads, color A
• 4g 8mm seed beads, color B
• Flexible beading wire, .014
• 7mm jump ring
• 7mm soldered jump ring
• 2 crimp beads
• Lobster claw clasp
• Fireline, 6 lb. test
• Beading needles, #10–#12
• Scissors
• Thread conditioner
• Diagonal wire cutters
• Chainnose pliers or
crimping pliers
Pearl necklace, 16 in. (41cm)
• 18–22 12mm coin pearls
• 2 14mm coin pearls
• 2g 3mm cube beads
• 1g 110 cylinder beads
• 2 crimp beads
• Toggle clasp
• Flexible beading wire, .014
• Fireline, 6 lb. test
• Beading needles, #10–#12
• Scissors
• Thread conditioner
• Diagonal wire cutters
• Chainnose pliers or
crimping pliers
Color Guide
12mm coin pearls: peach
14mm coin pearls: forest green
3mm cube beads: matte
metallic khaki iris
110 cylinder beads: matte
gold Delicas
80 seed beads: matte metallic
khaki iris and transparent smoky
amethyst
Making a CRAW bar 1. Cut a 24-in. (61cm) piece of Fireline
and thread a needle on one end. Pick
up four cube beads and tie them
into a ring with a square knot (Basics,
p. 104). Sew through all four beads
and the first bead again. This is the
floor of the first cube of the bar
(fig. 1).
2. Pick up three beads (5, 6, and 7).
Sew back through beads 1 and 2
(fig. 2).
Fig. 3 Fig. 4
52
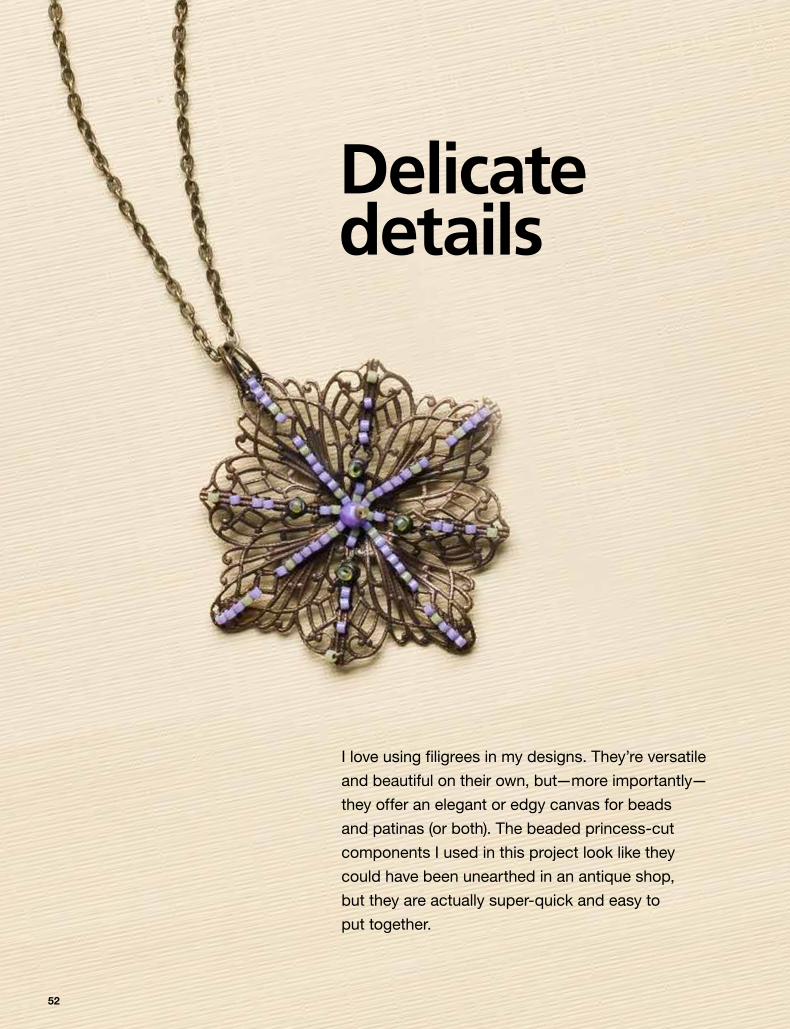
Delicate details
I love using filigrees in my designs. They’re versatile
and beautiful on their own, but—more importantly—
they offer an elegant or edgy canvas for beads
and patinas (or both). The beaded princess-cut
components I used in this project look like they
could have been unearthed in an antique shop,
but they are actually super-quick and easy to
put together.
92
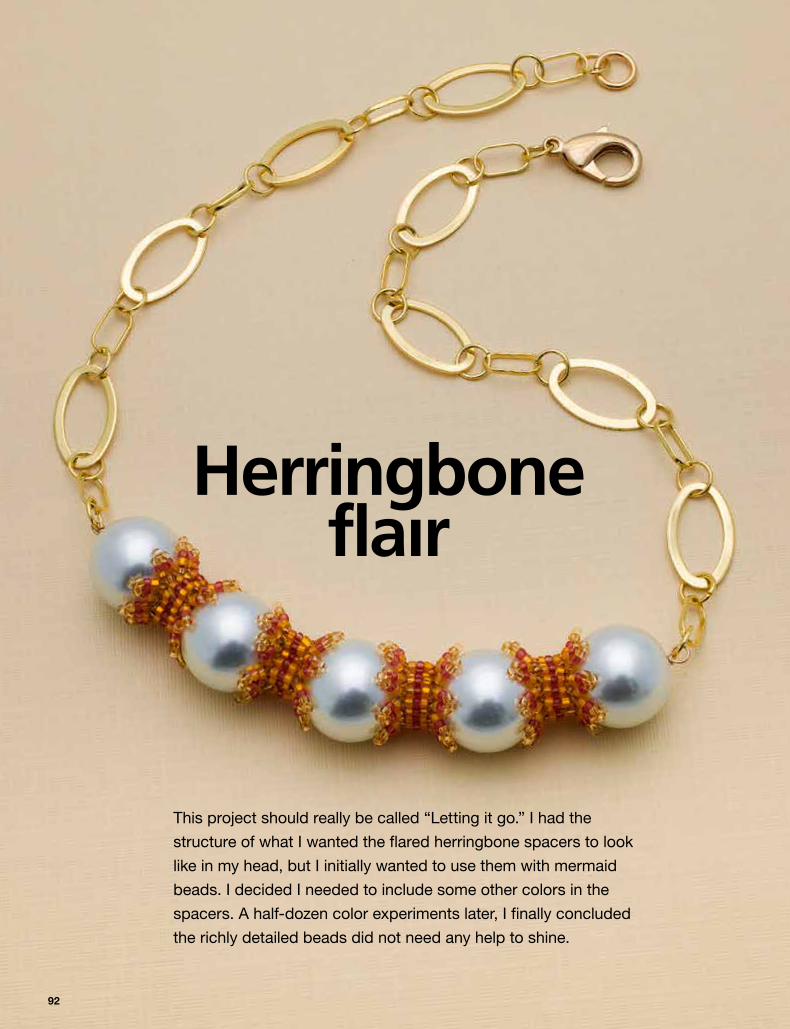
Herringbone flaır
This project should really be called “Letting it go.” I had the
structure of what I wanted the flared herringbone spacers to look
like in my head, but I initially wanted to use them with mermaid
beads. I decided I needed to include some other colors in the
spacers. A half-dozen color experiments later, I finally concluded
the richly detailed beads did not need any help to shine.