Embed Size (px)
Citation preview

Thank you so much for stopping by my blog!
This is a made to share tutorial.
This is not a crochet class. You need to have some basic crochet skills to make this project, at least you
need to know how to make a chain, single and double crochet.
You may use this for personal use or selling online. Don’t forget to let people know where it came from
and please don’t change any part of this document.
Thank you and enjoy!
Suzy.
Any question, you can find me here: www.suzymstudio.blogspot.com
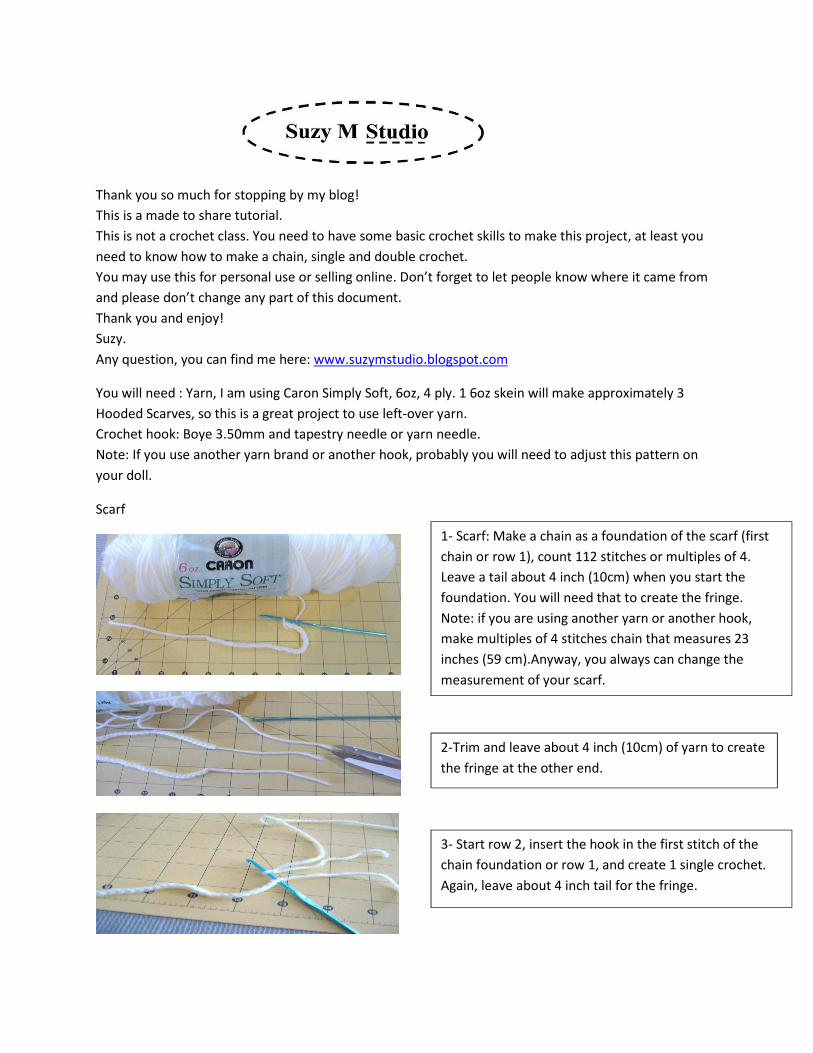
You will need : Yarn, I am using Caron Simply Soft, 6oz, 4 ply. 1 6oz skein will make approximately 3
Hooded Scarves, so this is a great project to use left-over yarn.
Crochet hook: Boye 3.50mm and tapestry needle or yarn needle.
Note: If you use another yarn brand or another hook, probably you will need to adjust this pattern on
your doll.
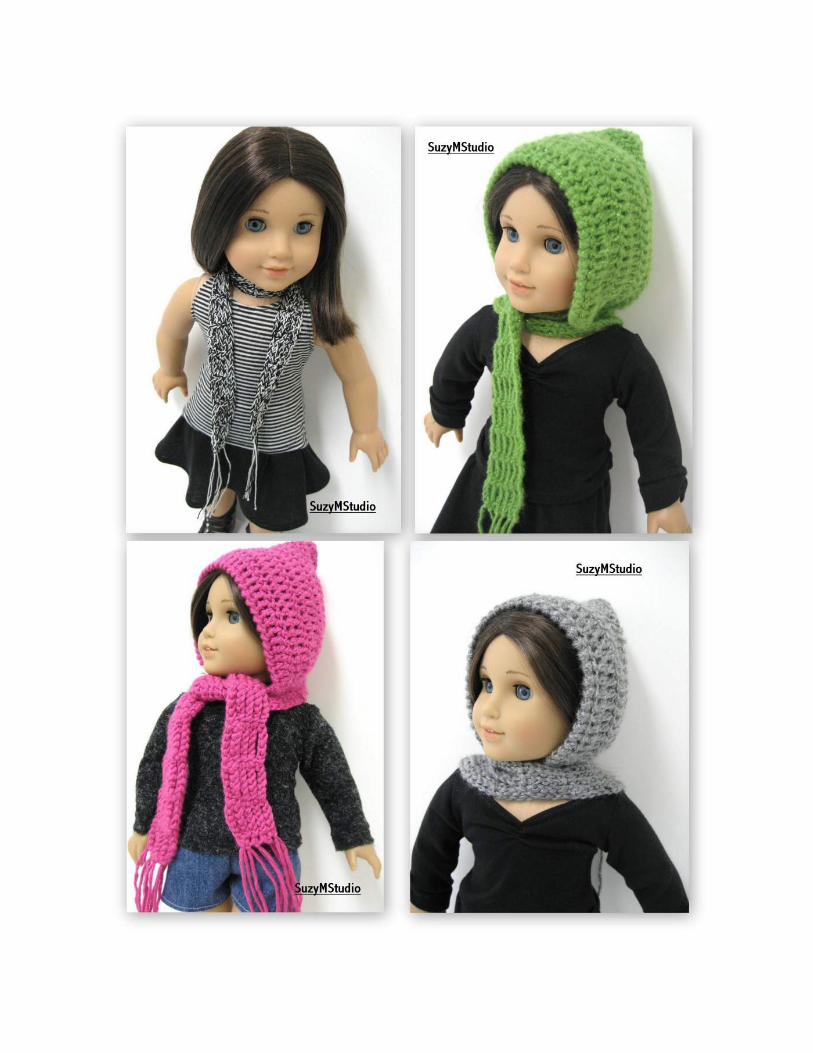
Scarf
1- Scarf: Make a chain as a foundation of the scarf (first
chain or row 1), count 112 stitches or multiples of 4.
Leave a tail about 4 inch (10cm) when you start the
foundation. You will need that to create the fringe.
Note: if you are using another yarn or another hook,
make multiples of 4 stitches chain that measures 23
inches (59 cm).Anyway, you always can change the
measurement of your scarf.
3- Start row 2, insert the hook in the first stitch of the
chain foundation or row 1, and create 1 single crochet.
Again, leave about 4 inch tail for the fringe.
2-Trim and leave about 4 inch (10cm) of yarn to create
the fringe at the other end.
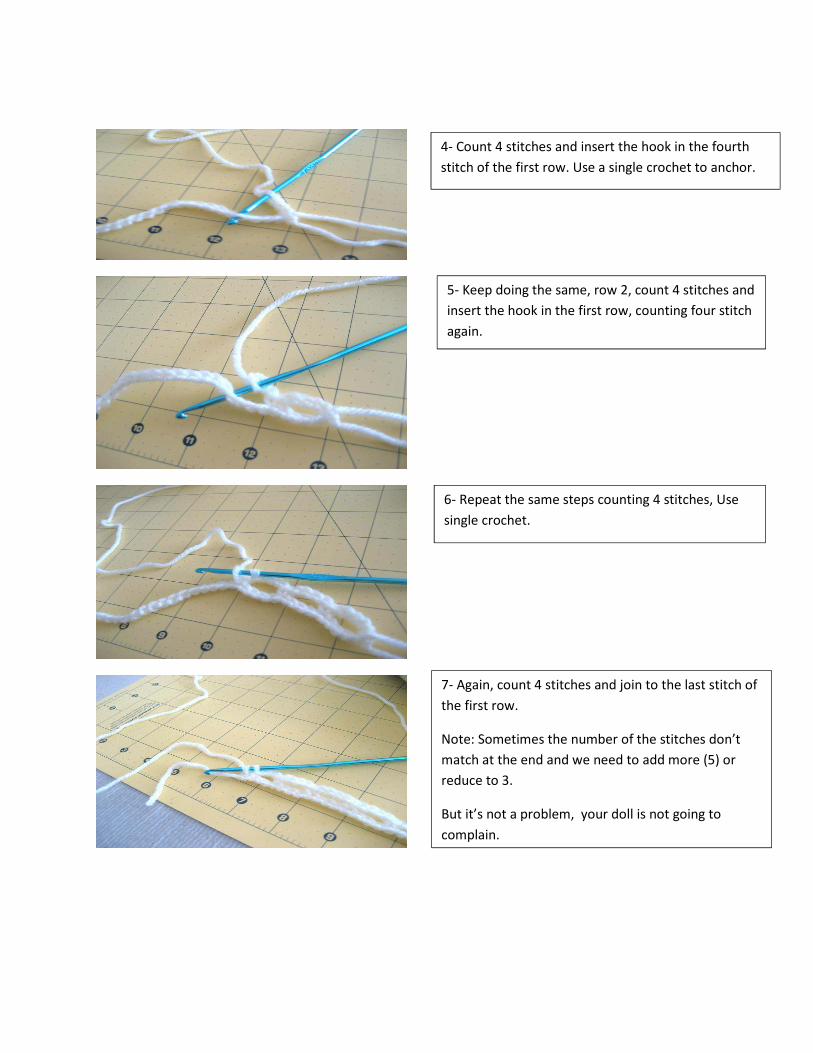
4- Count 4 stitches and insert the hook in the fourth
stitch of the first row. Use a single crochet to anchor.
5- Keep doing the same, row 2, count 4 stitches and
insert the hook in the first row, counting four stitch
again.
6- Repeat the same steps counting 4 stitches, Use
single crochet.
7- Again, count 4 stitches and join to the last stitch of
the first row.
Note: Sometimes the number of the stitches don’t
match at the end and we need to add more (5) or
reduce to 3.
But it’s not a problem, your doll is not going to
complain.
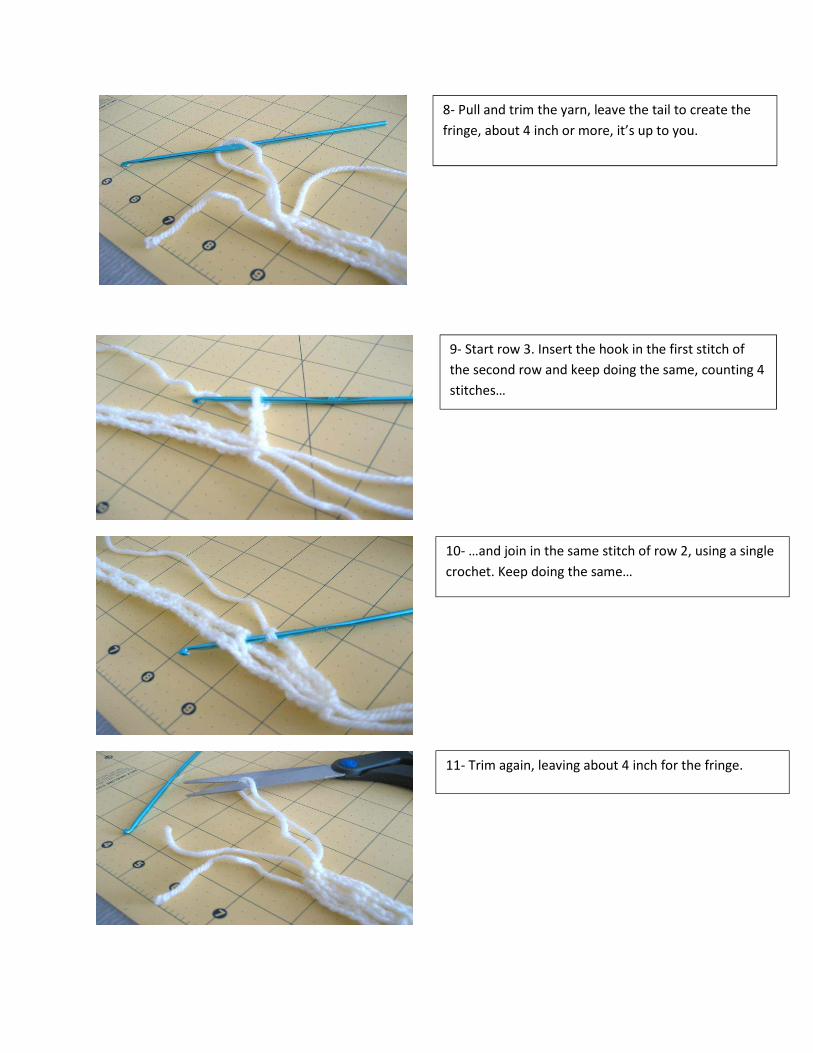
8- Pull and trim the yarn, leave the tail to create the
fringe, about 4 inch or more, it’s up to you.
9- Start row 3. Insert the hook in the first stitch of
the second row and keep doing the same, counting 4
stitches…
10- …and join in the same stitch of row 2, using a single
crochet. Keep doing the same…
11- Trim again, leaving about 4 inch for the fringe.
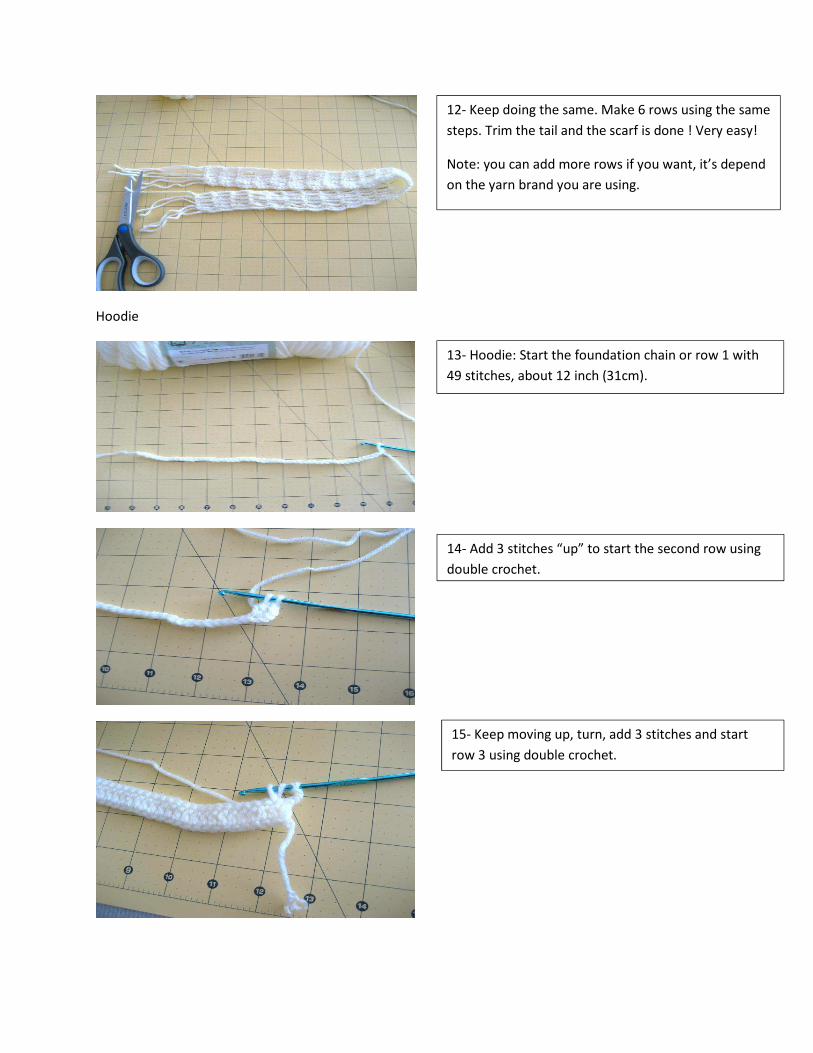
Hoodie
12- Keep doing the same. Make 6 rows using the same
steps. Trim the tail and the scarf is done ! Very easy!
Note: you can add more rows if you want, it’s depend
on the yarn brand you are using.
13- Hoodie: Start the foundation chain or row 1 with
49 stitches, about 12 inch (31cm).
14- Add 3 stitches “up” to start the second row using
double crochet.
15- Keep moving up, turn, add 3 stitches and start
row 3 using double crochet.
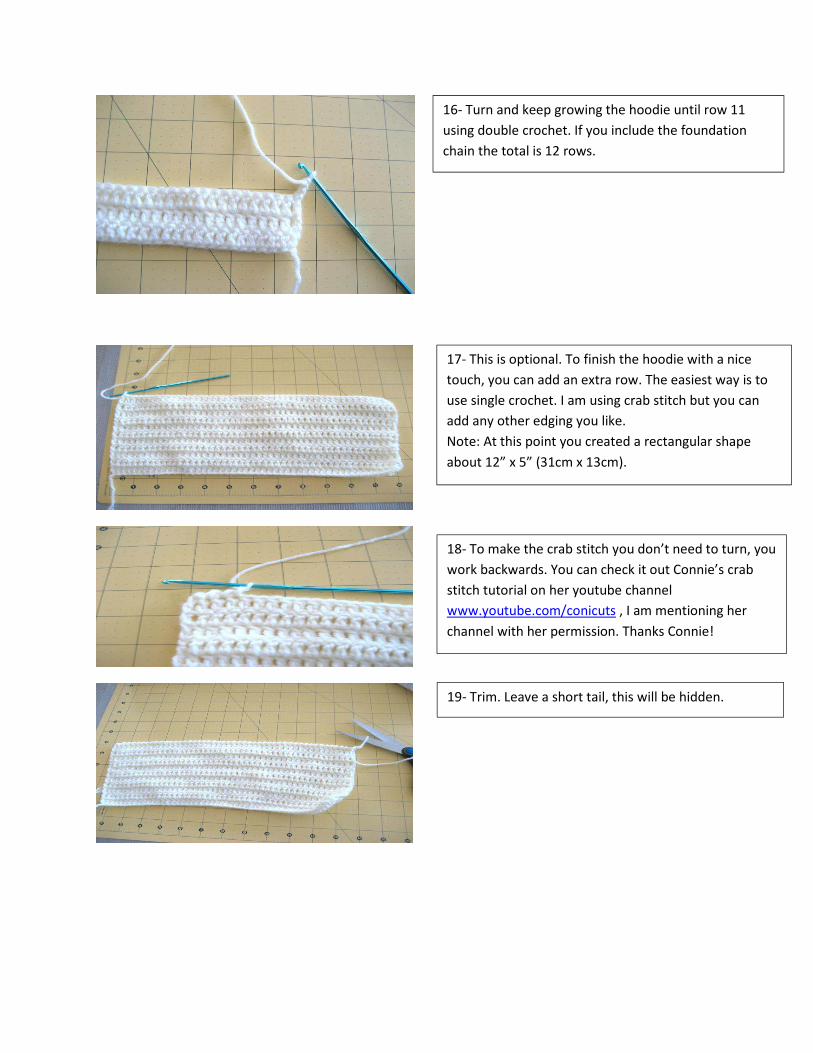
16- Turn and keep growing the hoodie until row 11
using double crochet. If you include the foundation
chain the total is 12 rows.
17- This is optional. To finish the hoodie with a nice
touch, you can add an extra row. The easiest way is to
use single crochet. I am using crab stitch but you can
add any other edging you like.
Note: At this point you created a rectangular shape
about 12” x 5” (31cm x 13cm).
18- To make the crab stitch you don’t need to turn, you
work backwards. You can check it out Connie’s crab
stitch tutorial on her youtube channel
www.youtube.com/conicuts , I am mentioning her
channel with her permission. Thanks Connie!
19- Trim. Leave a short tail, this will be hidden.
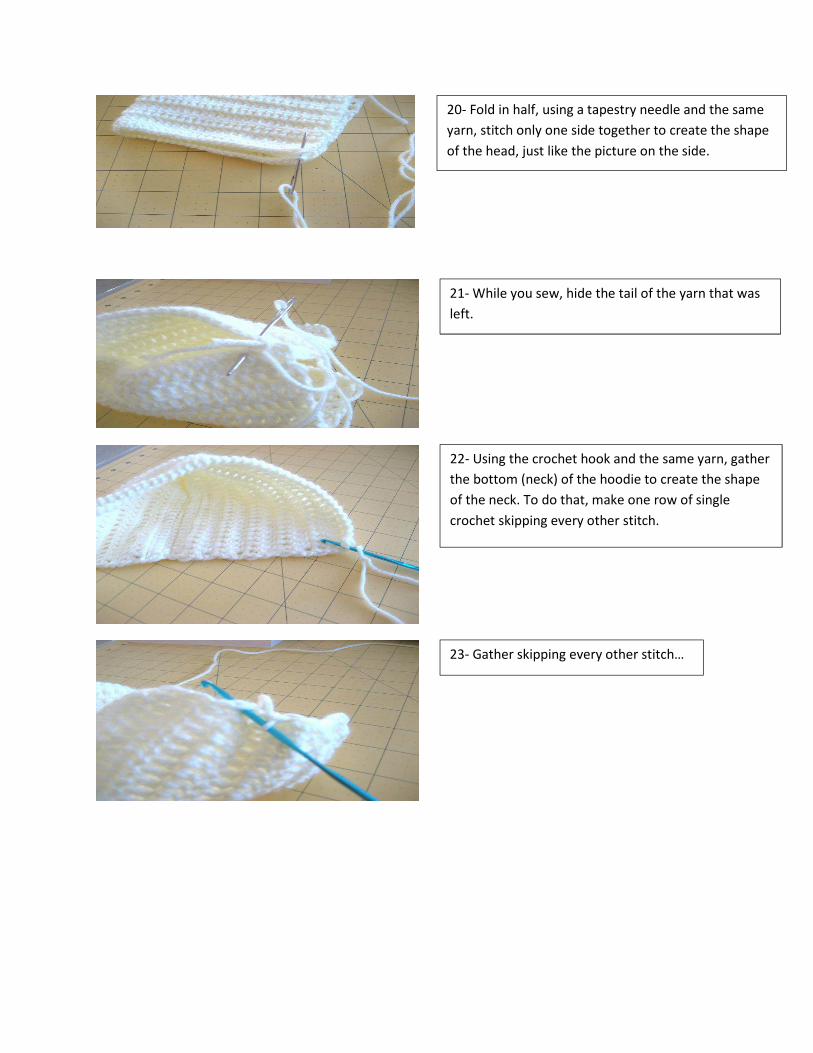
20- Fold in half, using a tapestry needle and the same
yarn, stitch only one side together to create the shape
of the head, just like the picture on the side.
21- While you sew, hide the tail of the yarn that was
left.
22- Using the crochet hook and the same yarn, gather
the bottom (neck) of the hoodie to create the shape
of the neck. To do that, make one row of single
crochet skipping every other stitch.
23- Gather skipping every other stitch…
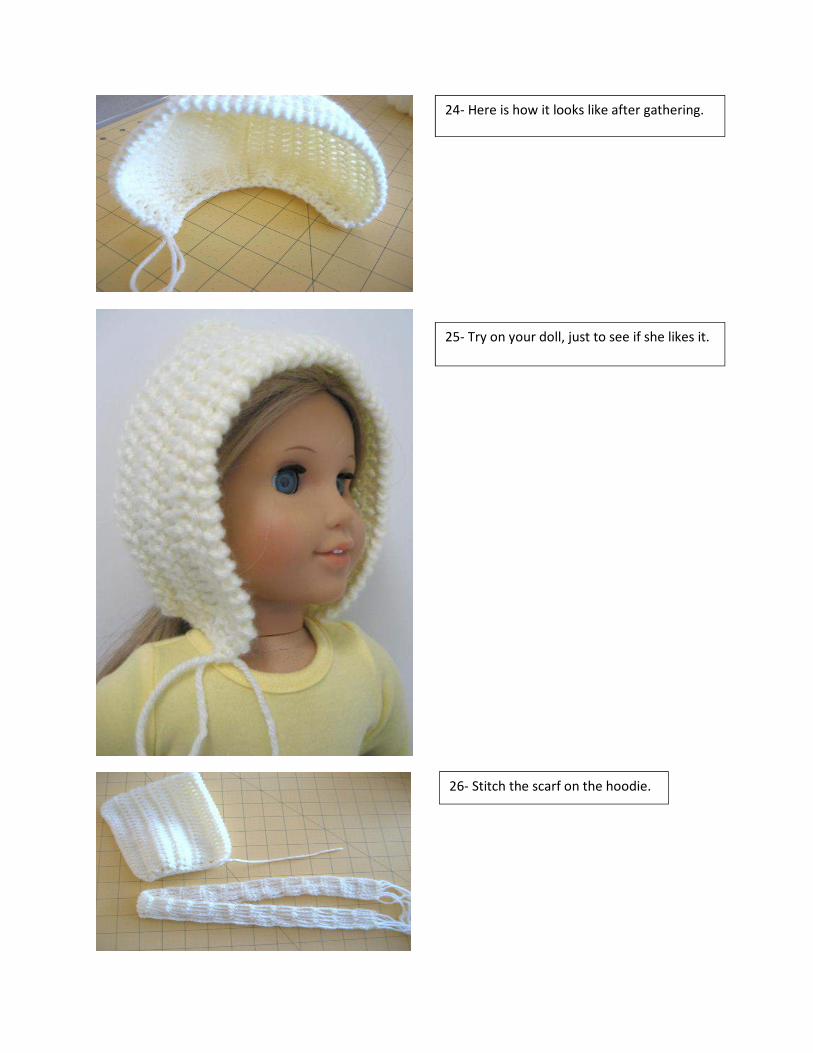
24- Here is how it looks like after gathering.
25- Try on your doll, just to see if she likes it.
26- Stitch the scarf on the hoodie.
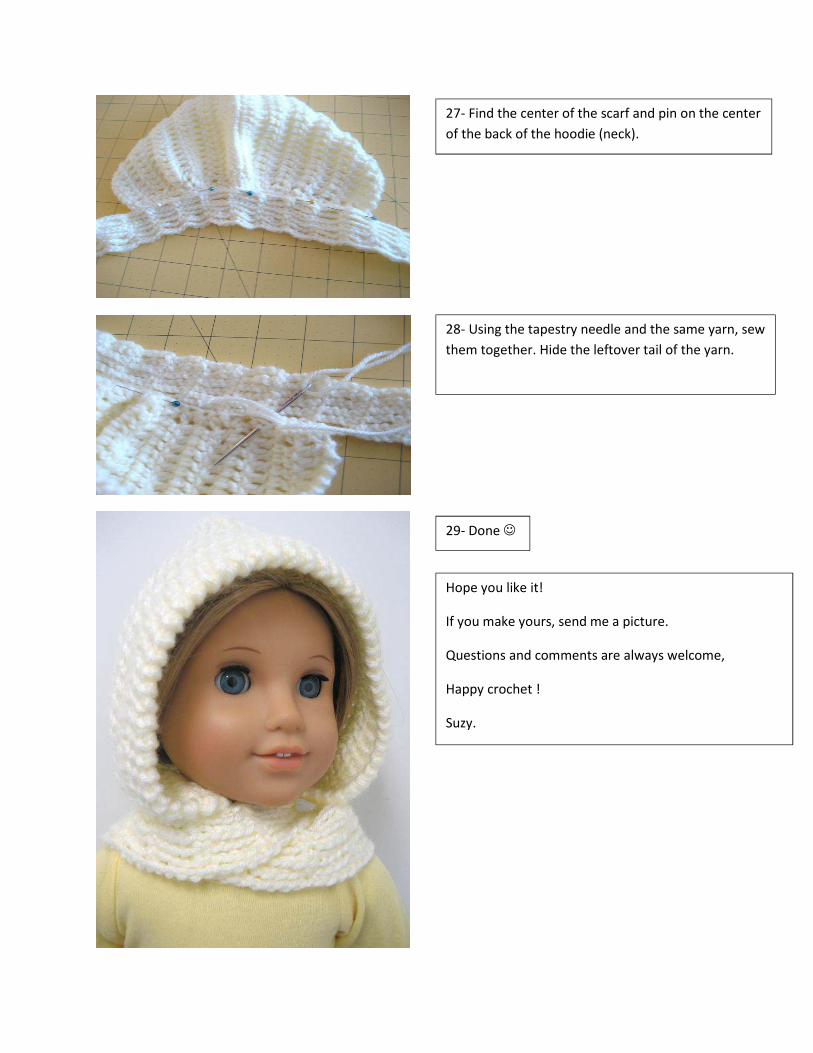
27- Find the center of the scarf and pin on the center
of the back of the hoodie (neck).
28- Using the tapestry needle and the same yarn, sew
them together. Hide the leftover tail of the yarn.
29- Done ☺
Hope you like it!
If you make yours, send me a picture.
Questions and comments are always welcome,
Happy crochet !
Suzy.
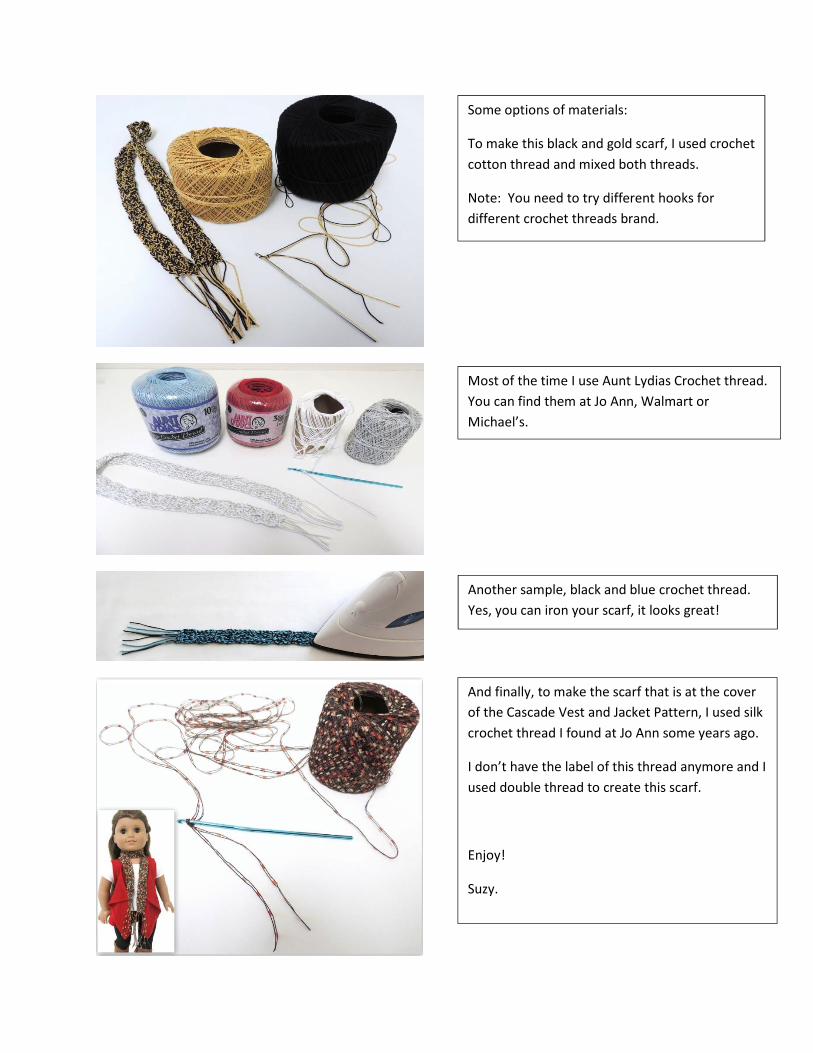
Some options of materials:
To make this black and gold scarf, I used crochet
cotton thread and mixed both threads.
Note: You need to try different hooks for
different crochet threads brand.
Most of the time I use Aunt Lydias Crochet thread.
You can find them at Jo Ann, Walmart or
Michael’s.
Another sample, black and blue crochet thread.
Yes, you can iron your scarf, it looks great!
And finally, to make the scarf that is at the cover
of the Cascade Vest and Jacket Pattern, I used silk
crochet thread I found at Jo Ann some years ago.
I don’t have the label of this thread anymore and I
used double thread to create this scarf.
Enjoy!
Suzy.