Embed Size (px)
Citation preview

EMC WHITE PAPER
D2-BOCS INSTALLATION AND CONFIGURATION
ABSTRACT This whitepaper is intended for anyone who wishes to install and configure D2-BOCS on with D2 4.2. It describes the steps to deploy and configure D2-BOCS on BOCS and ACS servers, configure O2 and C2 Plugins for D2-BOCS, and validate the setup.
October, 2014

To learn more about how EMC products, services, and solutions can help solve your business and IT challenges, contact your local representative or authorized reseller, visit www.emc.com, or explore and compare products in the EMC Store
Copyright © 2014 EMC Corporation. All Rights Reserved.
EMC believes the information in this publication is accurate as of its publication date. The information is subject to change without notice. The information in this publication is provided “as is.” EMC Corporation makes no representations or warranties of any kind with respect to the information in this publication, and specifically disclaims implied warranties of merchantability or fitness for a particular purpose.
Use, copying, and distribution of any EMC software described in this publication requires an applicable software license.
For the most up-to-date listing of EMC product names, see EMC Corporation Trademarks on EMC.com.
VMware and <insert other VMware marks in alphabetical order; remove sentence if no VMware marks needed. Remove highlight and brackets> are registered trademarks or trademarks of VMware, Inc. in the United States and/or other jurisdictions. All other trademarks used herein are the property of their respective owners.
Part Number H13581
2

TABLE OF CONTENTS
EXECUTIVE SUMMARY .............................................................................. 5 AUDIENCE ......................................................................................................... 5
INTRODUCTION TO D2-BOCS .................................................................... 5
INSTALLING D2-BOCS .............................................................................. 6
OVERVIEW ................................................................................................ 7
INSTALLING D2-BOCS.WAR ON A BOCS SERVER FOR DOCUMENTUM 6.7 SP2 AND OLDER ........................................................................................ 7
INSTALLING D2-BOCS.WAR ON A BOCS SERVER FOR DOCUMENTUM 7.0 .. 8
INSTALLING D2-BOCS.WAR ON A BOCS SERVER FOR DOCUMENTUM 7.1 .. 9
INSTALLING D2-BOCS.WAR ON AN ACS SERVER .................................... 10
CONFIGURING D2-CLIENT TO ENABLE D2-BOCS ..................................... 12
CONFIGURING D2 LOCKBOX FOR D2-BOCS ON BOCS AND ACS SERVERS 13
ASSIGNING A NETWORK LOCATION IDENTIFIER FOR EACH BOCS AND ACS SERVERS USING DA ......................................................................... 14
Configuration of ACS: ....................................................................................... 16
Configuration of BOCS: ..................................................................................... 18
Configuration of DMS: ...................................................................................... 19
Configuration of Distributed Transfer: ................................................................. 20
CONFIGURING A D2-BOCS SERVER WITH THE NETWORK LOCATION IDENTIFIER OF ITS ADJACENT BOCS OR ACS SERVER ............................ 20
CONFIGURING D2-BOCS FOR THE O2 PLUG-IN ....................................... 21
CONFIGURING D2-BOCS FOR THE C2 PLUG-IN ....................................... 22
VERIFYING THE INSTALLATION OF D2-BOCS AND THE STATUS OF BOCS AND ACS SERVERS .................................................................................. 23
LOGS: D2-BOCS.LOG ............................................................................... 24 PARK command ............................................................................................... 24
WRITE command ............................................................................................. 24
3

CONCLUSION .......................................................................................... 24
REFERENCES ........................................................................................... 24
4
EXECUTIVE SUMMARY This whitepaper provides an overview of the distributed content transfer and caching services for Documentum D2 using D2-BOCS. It also explains how to install D2-BOCS and validate the deployment.
AUDIENCE The audience for this white paper is anyone who is trying to install and configure D2-BOCS. In addition to deployment expertise with Documentum products, readers are expected to have some familiarity with deploying and configuring the D2 and BOCS products as well.
INTRODUCTION TO D2-BOCS D2-BOCS allows D2 to communicate with one or more Branch Office Caching Services (BOCS) servers or Accelerated Content Services (ACS) servers to improve file transfer performance for users who are remotely located with respect to the content server. This allows D2 users to import new files, check in new versions of existing files, and download existing files using BOCS or ACS.
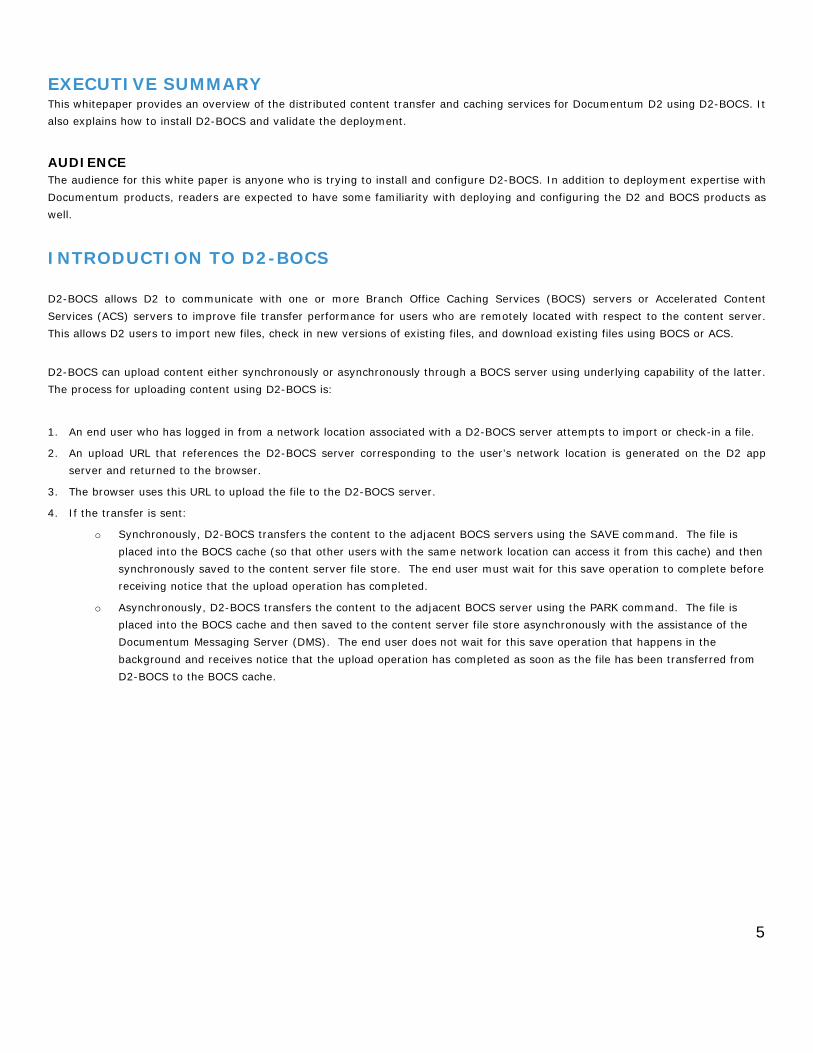
D2-BOCS can upload content either synchronously or asynchronously through a BOCS server using underlying capability of the latter. The process for uploading content using D2-BOCS is:
1. An end user who has logged in from a network location associated with a D2-BOCS server attempts to import or check-in a file.
2. An upload URL that references the D2-BOCS server corresponding to the user’s network location is generated on the D2 app server and returned to the browser.
3. The browser uses this URL to upload the file to the D2-BOCS server.
4. If the transfer is sent:
o Synchronously, D2-BOCS transfers the content to the adjacent BOCS servers using the SAVE command. The file is placed into the BOCS cache (so that other users with the same network location can access it from this cache) and then synchronously saved to the content server file store. The end user must wait for this save operation to complete before receiving notice that the upload operation has completed.
o Asynchronously, D2-BOCS transfers the content to the adjacent BOCS server using the PARK command. The file is placed into the BOCS cache and then saved to the content server file store asynchronously with the assistance of the Documentum Messaging Server (DMS). The end user does not wait for this save operation that happens in the background and receives notice that the upload operation has completed as soon as the file has been transferred from D2-BOCS to the BOCS cache.
5

The following diagram depicts a D2 file import operation via D2-BOCS:
INSTALLING D2-BOCS Before installing D2-BOCS:
1. Make sure Content server /ACS/DA are properly installed. ACS is installed along with Content Server, so there is no need to install ACS separately.
2. DMS and BOCS should be installed on separate hosts from Content Server. In a distributed network, only one DMS server is needed and it should be installed at the primary installation site.
3. Ensure content server binaries are installed in DMS server before installing DMS. To install DMS, go to the location <documentum install location>\product\<platform version>\install\ and open the application file Server_Configuration_Program.exe and select the option Documentum Messaging services and Click next, fill the required details and use internal IP address for host IP address and use content server hostname for database hostname.
4. Ensure Documentum BOCS is installed on a dedicated server; this is dependent on the content server version and download the BOCS setup from plefilesvr.dctmlabs.com and go to the download location and run the application file bocsSetup.exe and fill the necessary fields and complete the installation.
5. Ensure Documentum Foundation Services (DFS) is installed on the BOCS server and that the version matches.
6. Ensure Documentum Foundation Classes (DFC) and D2-Client is installed on the application server.
7. When upgrading or installing your repository, select Global Registry.
8. Time zone settings in all machines should be maintained as same.
9. If any server is configured using the host name unless it is a fully qualified domain name then add the hostname and the corresponding IP address in the host file of the other servers in the setup including the Client machine.
For example, if a BOCS server is configured using hostname instead of IP address then we must have the <BOCSSERVERHOSTNAME> and <BOCSSERVER IP > mapping in the host file of other servers communicating to the BOCS server.
10. Make sure that your BOCS server and ACS server installations are properly configured before installing D2-BOCS. Please go to the section "Verifying the installation of D2-BOCS and the status of BOCS and ACS servers" (see points c and d) to verify that your installation is correct.
6

OVERVIEW Configuration of distributed content transfer services for D2 involves the following steps in general:
1. Installing D2-BOCS.war on a BOCS server
2. Installing D2-BOCS.war on an ACS server(optional)
3. Configuring D2-Client to enable D2-BOCS
4. Configuring D2Lockbox for D2-BOCS on BOCS and ACS servers
5. Assigning a network location identifier for each BOCS or ACS servers using DA
6. Configure each D2-BOCS server with the network location identifier of its adjacent BOCS or ACS server
7. Configuring D2-BOCS for the O2 plug-in(optional)
8. Configuring D2-BOCS for the C2plug-in(optional)
9. Verifying the installation of D2-BOCS and the status of BOCS and ACS server
10. Logs: D2-BOCS.log
INSTALLING D2-BOCS.WAR ON A BOCS SERVER FOR DOCUMENTUM 6.7 SP2 AND OLDER 1. Stop the Documentum Branch Office Caching Services before starting the installation.
2. Download and extract the contents of D2-BOCS.war to <install path of Documentum>/<JBoss version>/server /DctmServer_BOCS/deploy/bocs.ear.
Ensure the extracted folder is named D2-BOCS.war, as shown in the following screenshot:
3. Delete the D2-BOCS.war file.
4. Navigate to <install path of Documentum>/<JBossversion>/server/DctmServer_BOCS/deploy/bocs.ear/META-INF/ and open for editing application.xml
7

5. Add the following lines:
INSTALLING D2-BOCS.WAR ON A BOCS SERVER FOR DOCUMENTUM 7.0 1. Stop the Documentum Branch Office Caching Services before starting the installation.
2. Download and extract the contents of D2-BOCS.war to <install path of Documentum>/<JBoss version>/server/DctmServer_BOCS/ deploy/.
Ensure the extracted folder is named D2–BOCS.war, as shown in the following screenshot:
3. Delete the D2-BOCS.war file.
4. Copy all .jar files from <install path of Documentum>/<JBossversion>/server/DctmServer_BOCS/deploy/bocs.ear/lib/to <install path of Documentum>/<JBoss version>/server/DctmServer_BOCS/deploy/D2-BOCS.war/WEB-INF/lib/ except for the following files:
o commons-collections_<version>.jar
o commons-io-<version>.jar
o commons-lang-<version>.jar
o spring-context-support-<version>.release.jar
5. Delete the following files from <install path of Documentum>/<JBoss version>/server/DctmServer_BOCS/deploy/D2-BOCS.war/WEB-INF/lib/.
o jsr<version>_api.jar
o jaxb-api.jar
o stax-api-<version>.jar
8

INSTALLING D2-BOCS.WAR ON A BOCS SERVER FOR DOCUMENTUM 7.1 1. Stop the Documentum Branch Office Caching Services before starting the installation.
2. Download and extract the contents of D2-BOCS.war to<install path ofDocumentum>/<JBoss version>/server/ DctmServer_BOCS/deployments/
Ensure extracted folder is named D2-BOCS.war, as shown in the following screenshot.
3. Delete the D2-BOCS.war
4. Copy all .jar files from <install path of Documentum >/<JBOSS Version>/<server version>/Dctmserver_BOCS/ deployments/bocs.ear/lib to <installation path of Documentum>/<server version>/DctmServer_BOCS/deployments/D2-BOCS.war/WEB-INF/lib expect for the following files:
o Commons-collections_<versions>.jar
o Commons-io-<version>.jar
o Commons-lang-<version>.jar
o Spring-context-support-<version>.release.jar
5. Delete the following files from <install path of Documentum>/<JBOSS version>/server/Dctmserver_BOCS/deployments/D2-BOCS.war/WEB-INF/lib.
o jsr<version>_api.jar
o jaxb-api.jar
o stax-api-<version>.jar
6. Create a dummy file named D2-BOCS.war.dodeploy in <install path of Documentum>/<JBossversion>/server/ DctmServer_BOCS/deployments/.
7. Copy bocs.ear/lib/configs.jar/anonymous-service-handler-chain.xml to D2-BOCS.war/WEB-INF/lib/bocs-ws.jar/com/ documentum/acs/ws/ws/.
8. Copy bocs.ear/lib/configs.jar/authorized-service-handler-chain.xml to D2-BOCS.war/WEB-INF/lib/D2FS-Generated-4.2.0.jar/com/emc/d2fs/dctm/api/services/ws/.
9. Navigate to <install path of Documentum>/<JBossversion>/server/DctmServer_BOCS/deployments/D2BOCS.war/WEB-INF/classes/, open dfc.properties in a text editor, and add the following line:
dfc.bof.classloader.enable_extension_loader_first=false
10. For D2-BOCS.log on the BOCS server:
o Navigate to <install path of Documentum>\<JBoss version>\server\DctmServer_BOCS\deployments\D2-BOCS.war\WEB-INF\
o Create a file and save it as jboss-deployment-structure.xml. The content of the file should be as follows:
<jboss-deployment-structure>
<deployment>
9

<!-- Exclusions allow you to prevent the server from automatically adding some dependencies -->
<exclusions>
<module name="org.slf4j" />
<module name="org.slf4j.impl" />
<module name="org.hibernate" />
</exclusions>
</deployment>
</jboss-deployment-structure>
NOTE: Currently in CS 7.1, we need to add the above lines to generate D2-BOCS.log on BOCS server. Without them D2-BOCS.log on BOCS server will not get generated. Default path is C:\log\D2-BOCS.log.
11. Go to < documentum install location>\jboss7.1.1\server\DctmServer_BOCS\deployments\D2-BOCS.war\WEB-INF\classes\D2-BOCS.properties and open it for edit and uncomment the parameter networkLocationId and give its value as the value of ‘Network location identifier’ for corresponding network location. This is a new parameter introduced in D2 4.2 release and will only relevant when we face fail over scenarios.
Ex: For D2-BOCS on bocs server it is networkLocationId =BOCS network 1 (Refer the network locations section for more info on of ‘Network location identifier’).
12. Enable tracing on D2-BOCS layer in the logback.xml file:
o Navigate to Documentum>/<JBoss Version>/server/DctmServer_BOCS/deploy/bocs.ear /D2-BOCS.war/WEB-INF/classes/logback.xml.
o Change the <root> tag class as below
<root>
<level value="debug"/>
<appender-ref ref="RootFileAppender"/>
</root>
INSTALLING D2-BOCS.WAR ON AN ACS SERVER By default, D2 does not recognize an ACS server as a BOCS system. Perform the following steps if you want to include an ACS server as a BOCS system.
1. Download and extract the contents of D2-BOCS.war to <install path of Documentum>/<JBOSS version>/server /DctmMethodServer/deploy/acs.ear. Ensure the extracted folder is named D2-BOCS.war, as shown in the following screenshot.
2. Delete the D2-BOCS.war file.
10

3. Copy authorized-service-handler-chain.xml from the configs.jar folder to the services/ws/ folder as described in the following table:
Folders Paths Original location <install path of Documentum>/<JBoss version>/server/Dctm-
Server_MethodServer/deployments/acs.ear/lib/con- figs.jar/ authorized-service-handler-chain.xml Destination <install path of Documentum>/<JBoss version>/server/DctmServer_MethodServer/deploy-
ments/acs.ear/D2-BOCS.war/WEB-INF/lib/D2FS-Generated-4.2.0.jar/com/emc/d2fs/dctm/api/services/ws/ 4. Navigate to <install path of Documentum>/<JBOSSversion>/server /DctmServer_Methodserver/deployments/acs.ear/D2-
BOCS.war/WEB-INF/classes/
open dfc.properties in a text editor, and add the following line:
dfc.bof.classloader.enable_extension_loader_first=false
5. Enable the D2-BOCS module:
o Open application.xml in a text editor from the location described in the following table:
Documentum Content Server Version Path
Documentum Content Server 7.1 <install path of Documentum>/<JBoss version>/server/Dctm-Server_MethodSerer/deploy-ments/acs.ear/META-INF
Documentum Content Server 7.0 <install path of Documentum>/<JBoss version> /server/Dctm- Server_MethodServer/deploy/acs.ear/META-INF/
o Add the following lines:
6. For D2-JMS.log:
o Navigate to <install path of Documentum>\<JBossversion>\server\ DctmServer_MethodServer\deployments \ServerApps.ear\META-INF\
o Open jboss-deployment-structure.xml and add the following lines under the <exclusions> tag:
<module name="org.slf4j" />
<module name="org.slf4j.impl" />
<module name="org.hibernate" />
7. For D2-BOCS.log on the ACS server:
o Navigate to <install path of Documentum>\<JBossversion>\server\DctmServer_MethodServer\deployments
acs.ear\META-INF\
o Open jboss-deployment-structure.xml and add the following lines:
<sub-deployment name="D2-BOCS.war">
<exclusions>
<module name="org.apache.log4j" />
<module name="org.slf4j" />
<module name="org.slf4j.impl" />
<module name="org.hibernate" />
</exclusions>
11

</sub-deployment>
NOTE: Currently in CS 7.1, we need to add the above lines to generate D2-BOCS.log on ACS server. Without them D2-BOCS.log on ACS will not get generated. Default path is C:\log\D2-BOCS.log.
8. Go to < documentum install location>\jboss7.1.1\server\DctmServer_BOCS\deployments\acs.ear\D2-BOCS.war\WEB-INF\classes\D2-BOCS.properties and open it for edit and uncomment the parameter networkLocationId and give its value as the value of 'Network location identifier' for corresponding network location.
This is a new parameter introduced in D2 4.2 release and will only relevant when we face fail over scenarios.
Ex: For D2-BOCS on ACS server it is networkLocationId =ACS if ACS is the value you have mentioned in the network locations. (Refer the section BOCS and ACS Network Locations for more information).
9. D2-BOCS always needs an adjacent ACS Server to communicate and hence we are defining the serverURL in the D2-BOCS.properties on ACS Server only. This ensures that each of the D2-BOCS looks up always to its own ACS server. In instance of a Down situation, once an ACS url cannot be reached, ACS should then automatically try to send the request to the adjacent URL once the transfer request is sent by D2-BOCS to its local ACS server. For multi-Content Server setup, ACS url we would not know where the request could go and hence we always needed D2-BOCS to talk to its adjacent ACS.
serverURL should be defined in the D2-BOCS.properties on each of the Content Servers where D2-BOCS is deployed on the ACS server.
o To update serverUrl in the D2-BOCS.properties, navigate to the path C:\Documentum\jboss7.1.1\server\DctmServer_MethodServer\deployments\acs.ear\D2-BOCS.war\WEB-INF\classes\D2-BOCS.properties
o Uncomment the serverUrl and set serverURL=http://host:port/ACS/servlet/ACS.This specifies the protocol, host, and port number (e.g. http://perh55cs.dctmlabs.com:9080/ACS/servlet/ACS) of the adjacent ACS or BOCS server.
CONFIGURING D2-CLIENT TO ENABLE D2-BOCS Steps to configure D2-Client:
D2FS.properties:
1. Navigate to D2/WEB-INF/classes and open D2FS.properties.
2. If any plug-ins have been installed (e.g. C2 and O2), specify the order in which they should be run. For example, set pluginsOrder=C2,O2. Note that the D2-BOCS plug-in is no longer necessary and should not be used in D2 4.2.
3. Uncomment and set the line: D2-BOCS=true to enable BOCS in D2-Client. Note that this assumes that D2-BOCS has has been deployed to all relevant BOCS servers and, if includeAcsServer below has been set to true, D2-BOCS has been deployed to all relevant ACS servers.
4. Uncomment and set the line: includeAcsServer=true to enable D2-BOCS if it has been deployed to ACS.
5. minFileSizeForBocs=<size in bytes>. Files whose size is less than this threshold will always be uploaded or downloaded through the D2 app server. For example, if minFileSizeForBocs=20480 then all the files whose size is less than 20KB (1024 = 1KB) will be uploaded or downloaded through the D2 app server and not through any D2-BOCS or BOCS or ACS server.
6. allowThinClientDirectBocsDownload. Uncomment this setting once your ACS and/or BOCS servers have been upgraded to a patch level that supports D2 thin client file download directly from ACS or BOCS. When this setting is commented out or set to false, D2 thin client file download will always happen indirectly through D2-BOCS rather than directly through ACS or BOCS.
7. cacheBocsUrl - Set to true to force the Documentum Foundation Classes cache location to load before running any download or upload attempt. This requests a load on startup configuration.
settings. Properties:
8. Navigate to D2/WEB-INF/classes and open settings.properties file in a text editor. To display the network location selector on the D2 login dialog, add the following line:
12

login.networklocation.hide = false When login.networklocation.hide = true, D2 will try to determine a user's network location from their IP address for each content transfer operation. This is the default behavior of D2 and is how D2 has always worked prior to D2 4.2 P07. When login.networklocation.hide = false, D2 will try to determine a user's network location from their IP address at login time, and if the network location cannot be uniquely determined, the user will be able to select a suitable network location on the login dialog before logging in. The list of available network locations is determined in the exactly the same manner as Webtop or other WDK applications.
CONFIGURING D2 LOCKBOX FOR D2-BOCS ON BOCS AND ACS SERVERS 1. On the BOCS server, create a lockbox folder as C:\Documentum\D2\Lockbox.
2. Copy C6-Common-<version>.jar, LB.jar and LBJNI.jar from the web application server to the lockbox folder you created on the BOCS server.
3. Set Environment variables for Lockbox dependency files extracted from the installer:
o C6-Common-<version>.jar,LB.jar and LBJNI.jar to the CLASSPATH environment variable:
- For Microsoft Windows:
set CLASSPATH=<path to the lockbox folder>\C6-Common-<version>.jar ;< path to the lockbox folder>\LB.jar ; < path to the lockbox folder>\LBJNI.jar; %Class Path%.
- For Linux environments:
export CLASSPATH =<path to the lockbox folder>/C6-Common-<version>.jar:<path to the lockbox folder>/LB.jar:/<path to the lockbox folder>/LBJNI.jar:$CLASSPATH
o The architecture for lockbox file must match the Java Virtual Machine. For example, if you are using Linux x64 with a 32-bit Java Virtual Machine, you must reference the linux_ia32 architecture.
- For Microsoft Windows:
set PATH=<path to the Lockbox files>\<platform folder>; %PATH%
- For Linux :
export LD_LIBRARY_PATH=<path to the Lockbox files>:$LD_LIBRARY_PATH
export PATH=<path to the Lockbox files>/<platform folder>:$PATH
4. Generate the Lockbox file and set the D2Method.passphrase using the following command:
java com.emc.common.java.crypto.SetLockboxProperty <path to store D2.lockbox> D2Method.passphrase <D2Method passphrase> <optional lockbox passphrase>
The D2Method.passphrase must be identical across all physical machines.
5. Setup lockbox file:
o Copy the D2.lockbox file generated to the BOCS or ACS classes folder as described in the following table:
BOCS For Content Server 7.1, use <installpath of Documentum>/<JBoss version>/server/DctmServer_BOCS/deployments/D2–BOCS.war /WEBINF/classes/
For Content Server 6.7 SP1 to 7.0, use <installpath of Documentum>/<JBoss version>/server/DctmServer_BOCS/deploy/D2–BOCS.war/WEB-INF/classes/
ACS For Content Server 7.1, use <installpath of Documentum>/<JBossversion>/server/DctmServer_MethodServer/deployments/acs.ear/D2-BOCS.war/WEB-INF/classes/
For Content Server 6.7 SP1 to 7.0, use <install path of Documentum>/<JBossversion>
13

/server/DctmServer_MethodServer/deploy/acs.ear/D2-BOCS.war/WEB-INF/classes/
o Add the D2.lockbox file to the ClassPath environment variable:
- For Microsoft Windows:
set CLASSPATH=<path to the BOCS classesfolder>\D2.lockbox;%ClassPath%
- For Linux environments:
export CLASSPATH=<path to the BOCS classesfolder>/D2.lockbox:$CLASSPATH
6. On the BOCS server, copy LB.jar and LBJNI.jar to the lib folder of each server as described in the following table:
Documentum Content Server Version Location
Content Server 7.1 <install path of Documentum>/< JBoss version>/server /DctmServer_BOCS/deployments/D2–BOCS.war/WEB-INF/lib/
Content Server 6.7 SP1 to 7.0 <install path of Documentum>/< JBoss version>/
server/DctmServer_BOCS/deploy/D2–BOCS.war/WEB-INF/lib/
Content Server 6.7 <install path of Documentum>/< JBoss version>/
server/DctmServer_BOCS/deploy/bocs.ear/D2–BOCS.war/WEB-INF/lib/
7. If you are using Documentum Content Server 7.1, on ACS servers:
o Navigate to <install path of Documentum>/<JBossversion>/server/DctmServer_MethodServer/deployments/acs.ear/META-INF and create or open jboss-deployment-structure.xml in a text editor.
o Create or find the <sub-deployment name=”D2-BOCS.war”> section and add the following lines:
<dependencies>
<module name=”emc.d2.lockbox” />
</dependencies>
ASSIGNING A NETWORK LOCATION IDENTIFIER FOR EACH BOCS AND ACS SERVERS USING DA Network locations are created in the Global Registry using Documentum Administrator. They are logical representations of the geographical locations of the users, and are used by DFC to identify the best location for users to read and write content. Network locations are created in the Global Registry so that they are available to all repositories, and are saved as type “dm_network_location_map”. Fill in the details such as Network Location Identifier, Network location name, IP range and if required, the default location checkbox and see image below.
14

Also create a network location for BOCS. So in the end we have 2 network locations, one for BOCS and another one for ACS.
15

Configuration of ACS: The ACS server configuration object will be already available. The user doesn’t need to create one like for BOCS or for DMS.
Go to the ACS Configuration element, Right Click and select properties. In the properties of ACS configuration object, select “Access all stores” for Content Access on the Info tab.
16

On the Projections & Stores tab, make sure “Settings entered here” is selected. Add the connection broker information as needed. Make sure all network locations are added so that the ACS server is used for transferring content files for all locations. A proximity value can be entered to indicate the relative distance between the ACS server and the network location.
17
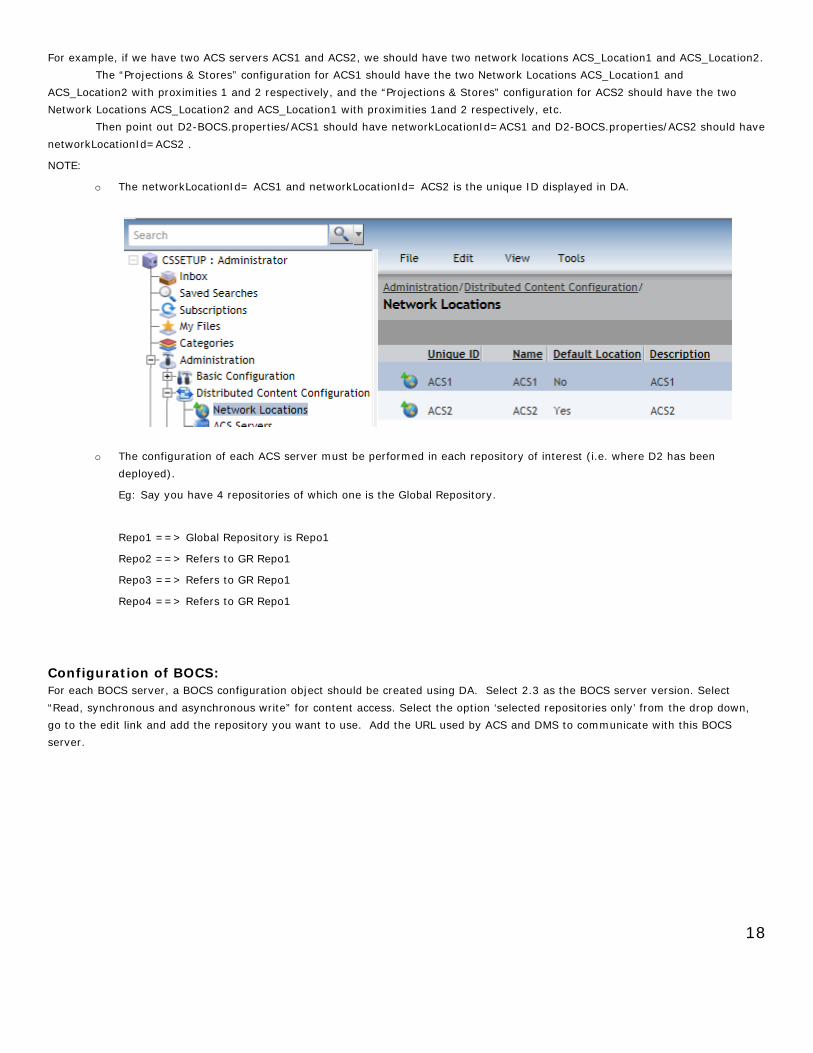
For example, if we have two ACS servers ACS1 and ACS2, we should have two network locations ACS_Location1 and ACS_Location2. The “Projections & Stores” configuration for ACS1 should have the two Network Locations ACS_Location1 and ACS_Location2 with proximities 1 and 2 respectively, and the “Projections & Stores” configuration for ACS2 should have the two Network Locations ACS_Location2 and ACS_Location1 with proximities 1and 2 respectively, etc. Then point out D2-BOCS.properties/ACS1 should have networkLocationId=ACS1 and D2-BOCS.properties/ACS2 should have networkLocationId=ACS2 .
NOTE:
o The networkLocationId= ACS1 and networkLocationId= ACS2 is the unique ID displayed in DA.
o The configuration of each ACS server must be performed in each repository of interest (i.e. where D2 has been deployed).
Eg: Say you have 4 repositories of which one is the Global Repository.
Repo1 ==> Global Repository is Repo1
Repo2 ==> Refers to GR Repo1
Repo3 ==> Refers to GR Repo1
Repo4 ==> Refers to GR Repo1
Configuration of BOCS: For each BOCS server, a BOCS configuration object should be created using DA. Select 2.3 as the BOCS server version. Select “Read, synchronous and asynchronous write” for content access. Select the option ‘selected repositories only’ from the drop down, go to the edit link and add the repository you want to use. Add the URL used by ACS and DMS to communicate with this BOCS server.
18

Configuration of DMS: Note that DMS is required only if asynchronous BOCS write will be used. Use DA to create a DMS configuration object. On the Info tab of the configuration object, select 1.0 as the messaging server version.
19

Configuration of Distributed Transfer: ACS Write is by default turned off. To enable ACS Write for a repository using Documentum Administrator simply login, and modify the Distributed Transfer settings under the Distributed Content Configuration area:
Enable Read, Synchronous and Asynchronous Write for ACS. Enable Pre-caching for BOCS. BOCS Encryption can also be configured in the distributed transfer object.
CONFIGURING A D2-BOCS SERVER WITH THE NETWORK LOCATION IDENTIFIER OF ITS ADJACENT BOCS OR ACS SERVER Steps to configure the network location of a D2-BOCS server:
1. Navigate to D2-BOCS.war/WEB-INF/classes and open D2-BOCS.properties
2. Uncomment and set the line: networkLocationId=<network location id> where the network location id is the one that was assigned to the adjacent BOCS or ACS server using DA.
For a BOCS server, the network location id that is used for the value of the networkLocationId setting in D2-BOCS.properties should not be assigned to any other BOCS server. In other words, it must uniquely identify the adjacent BOCS server.
For an ACS server, the network location id that is used for the value of the networkLocationId setting in D2-BOCS.properties can be assigned to other ACS servers. However, the proximity value assigned to this network location in the configuration of the ACS server as described above must be smaller than the proximity values associated with any other network locations also configured for this ACS server. This effectively identifies the ACS server adjacent to the D2-BOCS server.
If the ACS server is behind a reverse proxy, D2-BOCS will transfer content uploaded to it through this proxy. To avoid this unwanted additional network traffic, one can configure D2-BOCS to transfer content directly to the adjacent ACS server using the serverUrl parameter:
20

3. Uncomment and set the line: serverUrl=<http://host:port/path>
For example, serverUrl=http://localhost:9080/ACS/servlet/ACS
CONFIGURING D2-BOCS FOR THE O2 PLUG-IN 1. Add and set the value of plugin_x= to the path for O2-Plugin.jar in D2-BOCS.properties.
BOCS For Content Server 7.1, use <install path of Documentum>/<JBoss version>/
server/DctmServer_BOCS/deployments/D2-BOCS.war/WEBINF/Classes/
For Content Server 7.0 and older, use <install path of Documentum>/<JBoss version>/
server/DctmServer_BOCS/deploy/D2-BOCS.war/WEB-INF/Classes/
ACS For Content Server 7.1, use <install path of Documentum>/<JBoss version>/
server/DctmServer_BOCS/deployments/acs.ear/D2-BOCS.war/WEBINF/classes/
For Content Server 7.0 and older, use <install path of Documentum>/<JBoss version>/
server/DctmServer_BOCS/deploy/acs.ear/D2-BOCS.war/WEBINF/Classes/
Use forward slashes for the file path. For example:
o To use an absolute path: <install path of Documentum>/<JBossversion>/server/DctmServer_BOCS/deploy/D2–BOCS.war/WEB-INF/classes/plugins/O2–Plugin.jar
o To use a relative path: /plugins/O2–Plugin.jar. x equals the number of previous plug-in plus one. If no other plug-in is installed, use plugin_1.
2. Copy O2–API.jar from the O2 plug-in download or from the install path of your O2 installation to the lib folder of each BOCS server. The following table describes the locations of the lib folders:
BOCS For Content Server 7.1, use <installpath of Documentum>/<JBoss version>/server/DctmServer_BOCS/deployments/D2-BOCS.war/WEB-INF/lib/
For Content Server 7.0 and older, use <install path of Documentum>/<JBoss version>/server/DctmServer_BOCS/deploy/D2-BOCS.war/WEB-INF/lib/
ACS For Content Server 7.1, use <installpath of Documentum>/<JBoss version>/server/
DctmServer_Method-Server/deployments/acs.ear/D2-BOCS.war/WEB-INF/lib/
For Content Server 7.0 and older, use <installpath of Documentum>/<JBoss version>/server/DctmServer_MethodServer/deploy/acs.ear/D2-BOCS.war/WEB-INF/lib/
3. Copy O2–plugin.jar from the O2 plug-in download or from the install path of your O2 installation to the plugins folder of each BOCS server. The following table describes the locations of the plugins folders:
BOCS For Content Server 7.1, use <installpath of Documentum>/<JBoss version>/server/DctmServer_BOCS/deployments/D2-BOCS.war/WEBINF/classes/plugins/
For Content Server 7.0 and older, use <installpath of Documentum>/<JBoss version>/server/DctmServer_BOCS/ deploy/D2-BOCS.war/WEB-INF/classes/plugins/
ACS For Content Server 7.1, use <installpath of Documentum>/<JBoss version>/server/DctmServer_BOCS/deployments/D2-BOCS.war/WEBINF/classes/plugins/
For Content Server 7.0 and older, use <installpath of Documentum>/<JBoss version>/server/DctmServer_BOCS/ deploy/D2-BOCS.war/WEB-INF/classes/plugins/
21
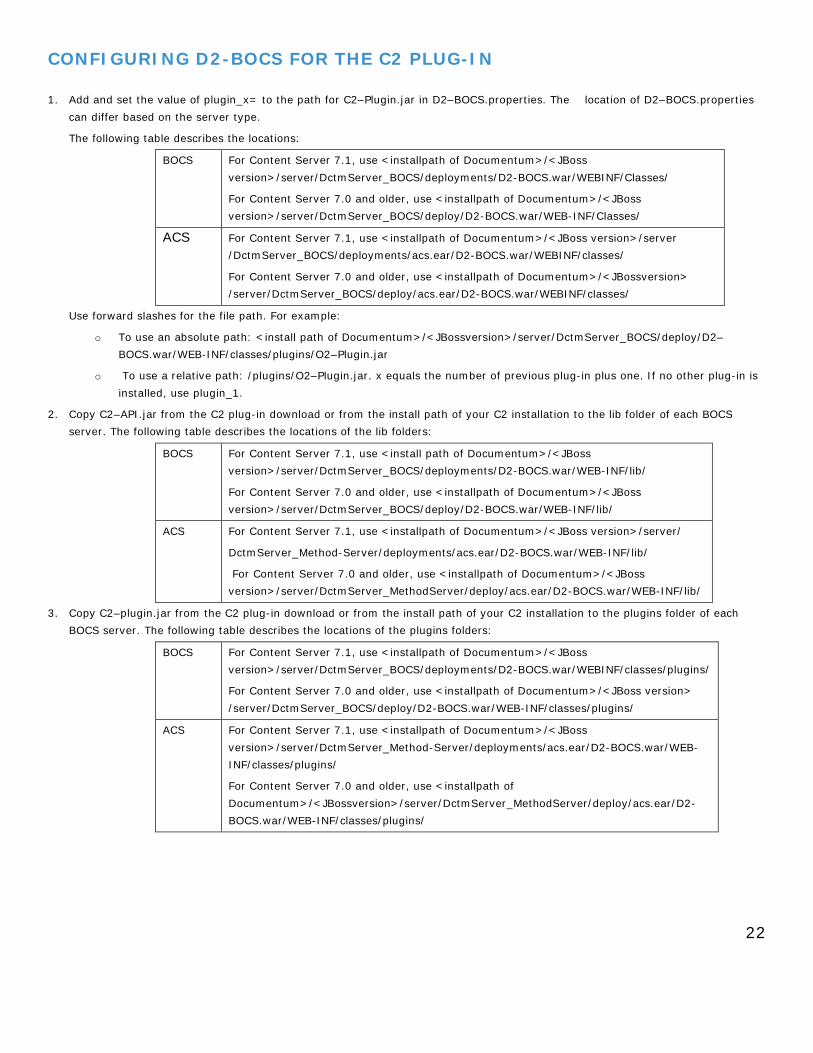
CONFIGURING D2-BOCS FOR THE C2 PLUG-IN 1. Add and set the value of plugin_x= to the path for C2–Plugin.jar in D2–BOCS.properties. The location of D2–BOCS.properties
can differ based on the server type.
The following table describes the locations:
BOCS For Content Server 7.1, use <installpath of Documentum>/<JBoss version>/server/DctmServer_BOCS/deployments/D2-BOCS.war/WEBINF/Classes/
For Content Server 7.0 and older, use <installpath of Documentum>/<JBoss version>/server/DctmServer_BOCS/deploy/D2-BOCS.war/WEB-INF/Classes/
ACS For Content Server 7.1, use <installpath of Documentum>/<JBoss version>/server /DctmServer_BOCS/deployments/acs.ear/D2-BOCS.war/WEBINF/classes/
For Content Server 7.0 and older, use <installpath of Documentum>/<JBossversion> /server/DctmServer_BOCS/deploy/acs.ear/D2-BOCS.war/WEBINF/classes/
Use forward slashes for the file path. For example:
o To use an absolute path: <install path of Documentum>/<JBossversion>/server/DctmServer_BOCS/deploy/D2–BOCS.war/WEB-INF/classes/plugins/O2–Plugin.jar
o To use a relative path: /plugins/O2–Plugin.jar. x equals the number of previous plug-in plus one. If no other plug-in is installed, use plugin_1.
2. Copy C2–API.jar from the C2 plug-in download or from the install path of your C2 installation to the lib folder of each BOCS server. The following table describes the locations of the lib folders:
BOCS For Content Server 7.1, use <install path of Documentum>/<JBoss version>/server/DctmServer_BOCS/deployments/D2-BOCS.war/WEB-INF/lib/
For Content Server 7.0 and older, use <installpath of Documentum>/<JBoss version>/server/DctmServer_BOCS/deploy/D2-BOCS.war/WEB-INF/lib/
ACS For Content Server 7.1, use <installpath of Documentum>/<JBoss version>/server/
DctmServer_Method-Server/deployments/acs.ear/D2-BOCS.war/WEB-INF/lib/
For Content Server 7.0 and older, use <installpath of Documentum>/<JBoss version>/server/DctmServer_MethodServer/deploy/acs.ear/D2-BOCS.war/WEB-INF/lib/
3. Copy C2–plugin.jar from the C2 plug-in download or from the install path of your C2 installation to the plugins folder of each BOCS server. The following table describes the locations of the plugins folders:
BOCS For Content Server 7.1, use <installpath of Documentum>/<JBoss version>/server/DctmServer_BOCS/deployments/D2-BOCS.war/WEBINF/classes/plugins/
For Content Server 7.0 and older, use <installpath of Documentum>/<JBoss version> /server/DctmServer_BOCS/deploy/D2-BOCS.war/WEB-INF/classes/plugins/
ACS For Content Server 7.1, use <installpath of Documentum>/<JBoss version>/server/DctmServer_Method-Server/deployments/acs.ear/D2-BOCS.war/WEB-INF/classes/plugins/
For Content Server 7.0 and older, use <installpath of Documentum>/<JBossversion>/server/DctmServer_MethodServer/deploy/acs.ear/D2-BOCS.war/WEB-INF/classes/plugins/
22

VERIFYING THE INSTALLATION OF D2-BOCS AND THE STATUS OF BOCS AND ACS SERVERS You can perform the following steps to confirm the state of your BOCS installation.
Before verification make sure that you have started the Documentum Branch Office Caching Services and JMS.
1. To check for the correct installation of D2-BOCS on a BOCS server, navigate your browser to http://<bocs_server_name>:8086/D2-BOCS/
If D2-BOCS is installed and running correctly, the browser shows the following message:
<?xml version="1.0" encoding="utf-8">
<bocs version="4.x.x build xxx" server_time="x.xxxs">
<plugins />
</bocs>
2. To check for the correct installation of D2-BOCS on an ACS server, navigate to http://<content_server_name>:9080/D2-BOCS/
If D2-BOCS is installed and running correctly, the browser shows the following message:
<?xml version="1.0" encoding="utf-8">
<bocs version="4.x.x build xxx" server_time="x.xxxs">
<plugins />
</bocs>
If you have plug-ins installed, the browser shows the following message:
<?xml version="1.0" encoding="utf-8">
<bocs version="4.x.x build xxx" server_time="x.xxxs">
<plugins>C2 v4.x.x build xx</plugins>
</bocs>
3. To check the status of a BOCS server, navigate to http://<bocs_server_name>:8086/bocs/servlet/ACS
If the BOCS server is running, the browser shows the answer message ACS Server is running.
You can also check for the status of the BOCS server through D2 Client and D2-Config.
4. To check the status of an ACS server, navigate to http://<content_server_name>:9080/ACS/servlet/ACS
If the ACS server is running, the browser shows the answer message ACS Server is running.
You can also check for the status of the ACS server through D2 Client and D2-Config.
Server URL Expected Result
ACS http://<ACShost>:9080/ACS/servlet/ACS ACS Server is running
DMS http://<DMShost>:8489/dms-ws Available SOAP services
BOCS http://<BOCS host>:8086/bocs/servlet/ACS ACS Server is running
23

LOGS: D2-BOCS.LOG PARK command When a file is being imported using asynchronous BOCS write, one should see the PARK command in D2-BOCS.log:
http://<BOCSSERVERNAME/IP>:8086/bocs/servlet/ACS?command=park&version=2.3&docbaseid=000453&calc_hash=false&store_data=&partition=0&signature=qtVoRGPjUJ7qSzbB0naKsNdvqlmxX%2BbXoTFcpzezMm4KtXKM0kQNV7bERCDPE3XAwHKPyCoAXf7WjFz61zr1Py31SQ4zVyR5s6Db4Xn0sZBSHTq1CzaLX9tmV%2B3LZ5CR9w2tIp9mV%2B9TpmnnZ0Rzvyh47df7TfGTMRFnxfOa5o8%3D&servername=BOCS&mode=3×tamp=1385625607&length=433790¶llel_streaming=true&expire_delta=360&acs_servername=XMSXD41BLRACS1&acs_url=http%3A%2F%2FXMSXD41-BLR%3A9080%2FACS%2Fservlet%2FACS
WRITE command When a file is being imported using synchronous BOCS write, one should see the PARK command in D2-BOCS.log:
http://<BOCSSERVERNAME/IP>:8086/bocs/servlet/ACS?command=write&version=2.3&docbaseid=000453&content_objid=060004538002bff3&formatid=270004538000019f&storeid=2800045380000100&store_data=rO0ABXNyADxjb20uZG9jdW1lbnR1bS5mYy5jbGllbnQuY29udGVudC5pbXBsLkNvbnRlbnRTdG9y%0AZXJFeHRyYURhdGH79InsRDaodAwAAHhwc3IAPGNvbS5kb2N1bWVudHVtLmZjLmNsaWVudC5pbXBs%0ALnR5cGVkZGF0YS5EeW5hbWljYWxseVR5cGVkRGF0YQ2yOjPtw7IzDAAAeHIAMWNvbS5kb2N1bWVu%0AdHVtLmZjLmNsaWVudC5pbXBsLnR5cGVkZGF0YS5UeXBlZERhdGFS%2BJtNFLR32QwAAHhyADljb20u%0AZG9jdW1lbnR1bS5mYy5jbGllbnQuaW1wbC50eXBlZGRhdGEuQWJzdHJhY3RUeXBlZERhdGHPXWpF
CONCLUSION This paper provides information regarding installation and configuration of D2-BOCS for D2, D2 Lockbox for D2-BOCS, caching services of BOCS through D2 and the O2, C2 plugins for D2-BOCS.
REFERENCES The information was collected from various sources including EMC Documentum product documentation, BOCS product documentation, and EMC Documentum internal documents, including:
1. Distributed Content Configuration and Troubleshooting
2. Documentum D2 4.2 Installation Guide
3. Documentum D2 4.2 Release Notes
24