Embed Size (px)
DESCRIPTION
h44whw
Citation preview
http://www.instructables.com/id/Decorative-SwordMachete-for-the-Novice-Metalworker/
Food Living Outside Play Technology Workshop
Decorative Sword/Machete for the Novice Metalworkerby Ikkalebob on July 16, 2014
Table of Contents
Decorative Sword/Machete for the Novice Metalworker . . . . . . . . . . . . . . . . . . . . . . . . . . . . . . . . . . . . . . . . . . . . . . . . . . . . . . . . . . . . . . . . . . . . . . . . . . . . . . . . . 1
Intro: Decorative Sword/Machete for the Novice Metalworker . . . . . . . . . . . . . . . . . . . . . . . . . . . . . . . . . . . . . . . . . . . . . . . . . . . . . . . . . . . . . . . . . . . . . . . . . . 2
Step 1: Visit to the Scrap Metal Yard . . . . . . . . . . . . . . . . . . . . . . . . . . . . . . . . . . . . . . . . . . . . . . . . . . . . . . . . . . . . . . . . . . . . . . . . . . . . . . . . . . . . . . . . . . . . 3
Step 2: Cutting . . . . . . . . . . . . . . . . . . . . . . . . . . . . . . . . . . . . . . . . . . . . . . . . . . . . . . . . . . . . . . . . . . . . . . . . . . . . . . . . . . . . . . . . . . . . . . . . . . . . . . . . . . . . 4
Step 3: De-Rust . . . . . . . . . . . . . . . . . . . . . . . . . . . . . . . . . . . . . . . . . . . . . . . . . . . . . . . . . . . . . . . . . . . . . . . . . . . . . . . . . . . . . . . . . . . . . . . . . . . . . . . . . . . 5
Step 4: Grinding to the Edge . . . . . . . . . . . . . . . . . . . . . . . . . . . . . . . . . . . . . . . . . . . . . . . . . . . . . . . . . . . . . . . . . . . . . . . . . . . . . . . . . . . . . . . . . . . . . . . . . . 6
Step 5: Perfecting the Blade . . . . . . . . . . . . . . . . . . . . . . . . . . . . . . . . . . . . . . . . . . . . . . . . . . . . . . . . . . . . . . . . . . . . . . . . . . . . . . . . . . . . . . . . . . . . . . . . . . 8
Step 6: Heat treatment . . . . . . . . . . . . . . . . . . . . . . . . . . . . . . . . . . . . . . . . . . . . . . . . . . . . . . . . . . . . . . . . . . . . . . . . . . . . . . . . . . . . . . . . . . . . . . . . . . . . . . 8
Step 7: Finishing the Blade (Repeat Step 5) . . . . . . . . . . . . . . . . . . . . . . . . . . . . . . . . . . . . . . . . . . . . . . . . . . . . . . . . . . . . . . . . . . . . . . . . . . . . . . . . . . . . . . . 12
Step 8: Handle . . . . . . . . . . . . . . . . . . . . . . . . . . . . . . . . . . . . . . . . . . . . . . . . . . . . . . . . . . . . . . . . . . . . . . . . . . . . . . . . . . . . . . . . . . . . . . . . . . . . . . . . . . . . 13
Step 9: Prance Around Pretending to be Conan (NOT Optional) . . . . . . . . . . . . . . . . . . . . . . . . . . . . . . . . . . . . . . . . . . . . . . . . . . . . . . . . . . . . . . . . . . . . . . . . 15
Related Instructables . . . . . . . . . . . . . . . . . . . . . . . . . . . . . . . . . . . . . . . . . . . . . . . . . . . . . . . . . . . . . . . . . . . . . . . . . . . . . . . . . . . . . . . . . . . . . . . . . . . . . . . . 17
Advertisements . . . . . . . . . . . . . . . . . . . . . . . . . . . . . . . . . . . . . . . . . . . . . . . . . . . . . . . . . . . . . . . . . . . . . . . . . . . . . . . . . . . . . . . . . . . . . . . . . . . . . . . . . . . . . . . 17
Comments . . . . . . . . . . . . . . . . . . . . . . . . . . . . . . . . . . . . . . . . . . . . . . . . . . . . . . . . . . . . . . . . . . . . . . . . . . . . . . . . . . . . . . . . . . . . . . . . . . . . . . . . . . . . . . . . 17
http://www.instructables.com/id/Decorative-SwordMachete-for-the-Novice-Metalworker/
Author:IkkalebobThe name "Ikkalebob" was invented by my cat when she ran across the keyboard.
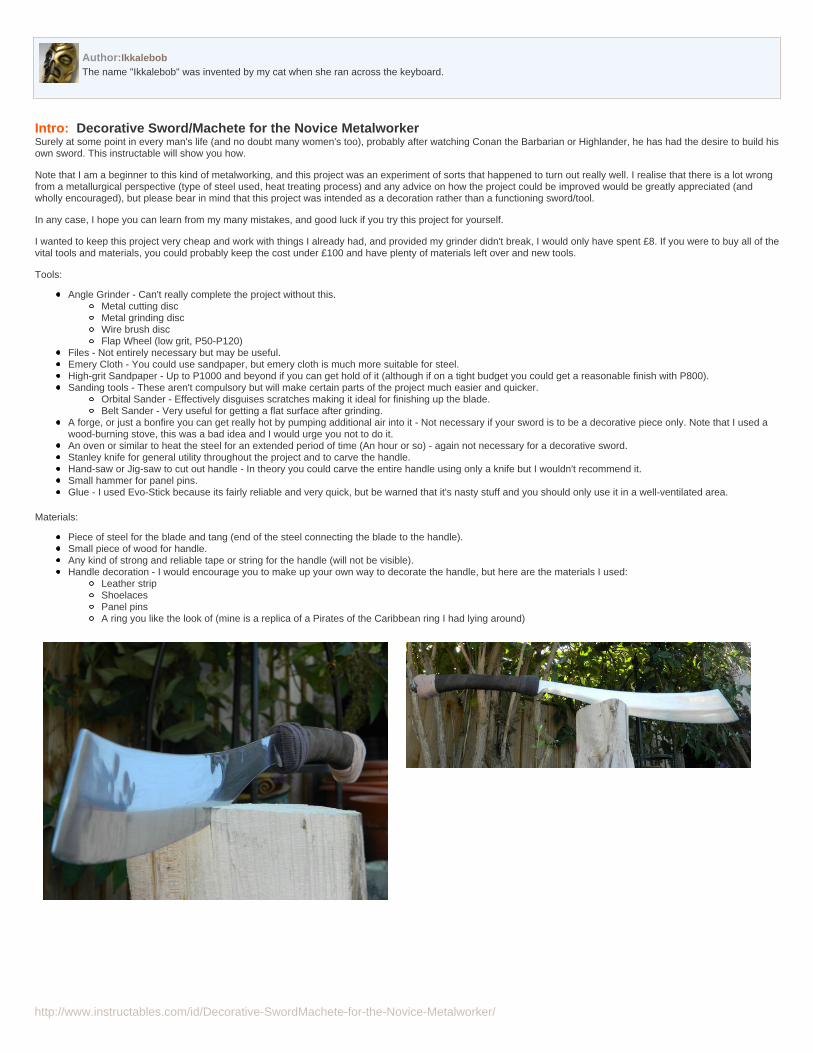
Intro: Decorative Sword/Machete for the Novice MetalworkerSurely at some point in every man's life (and no doubt many women's too), probably after watching Conan the Barbarian or Highlander, he has had the desire to build hisown sword. This instructable will show you how.
Note that I am a beginner to this kind of metalworking, and this project was an experiment of sorts that happened to turn out really well. I realise that there is a lot wrongfrom a metallurgical perspective (type of steel used, heat treating process) and any advice on how the project could be improved would be greatly appreciated (andwholly encouraged), but please bear in mind that this project was intended as a decoration rather than a functioning sword/tool.
In any case, I hope you can learn from my many mistakes, and good luck if you try this project for yourself.
I wanted to keep this project very cheap and work with things I already had, and provided my grinder didn't break, I would only have spent £8. If you were to buy all of thevital tools and materials, you could probably keep the cost under £100 and have plenty of materials left over and new tools.
Tools:
Angle Grinder - Can't really complete the project without this.Metal cutting discMetal grinding discWire brush discFlap Wheel (low grit, P50-P120)
Files - Not entirely necessary but may be useful.Emery Cloth - You could use sandpaper, but emery cloth is much more suitable for steel.High-grit Sandpaper - Up to P1000 and beyond if you can get hold of it (although if on a tight budget you could get a reasonable finish with P800).Sanding tools - These aren't compulsory but will make certain parts of the project much easier and quicker.
Orbital Sander - Effectively disguises scratches making it ideal for finishing up the blade.Belt Sander - Very useful for getting a flat surface after grinding.
A forge, or just a bonfire you can get really hot by pumping additional air into it - Not necessary if your sword is to be a decorative piece only. Note that I used awood-burning stove, this was a bad idea and I would urge you not to do it.An oven or similar to heat the steel for an extended period of time (An hour or so) - again not necessary for a decorative sword.Stanley knife for general utility throughout the project and to carve the handle.Hand-saw or Jig-saw to cut out handle - In theory you could carve the entire handle using only a knife but I wouldn't recommend it.Small hammer for panel pins.Glue - I used Evo-Stick because its fairly reliable and very quick, but be warned that it's nasty stuff and you should only use it in a well-ventilated area.
Materials:
Piece of steel for the blade and tang (end of the steel connecting the blade to the handle).Small piece of wood for handle.Any kind of strong and reliable tape or string for the handle (will not be visible).Handle decoration - I would encourage you to make up your own way to decorate the handle, but here are the materials I used:
Leather stripShoelacesPanel pinsA ring you like the look of (mine is a replica of a Pirates of the Caribbean ring I had lying around)
http://www.instructables.com/id/Decorative-SwordMachete-for-the-Novice-Metalworker/
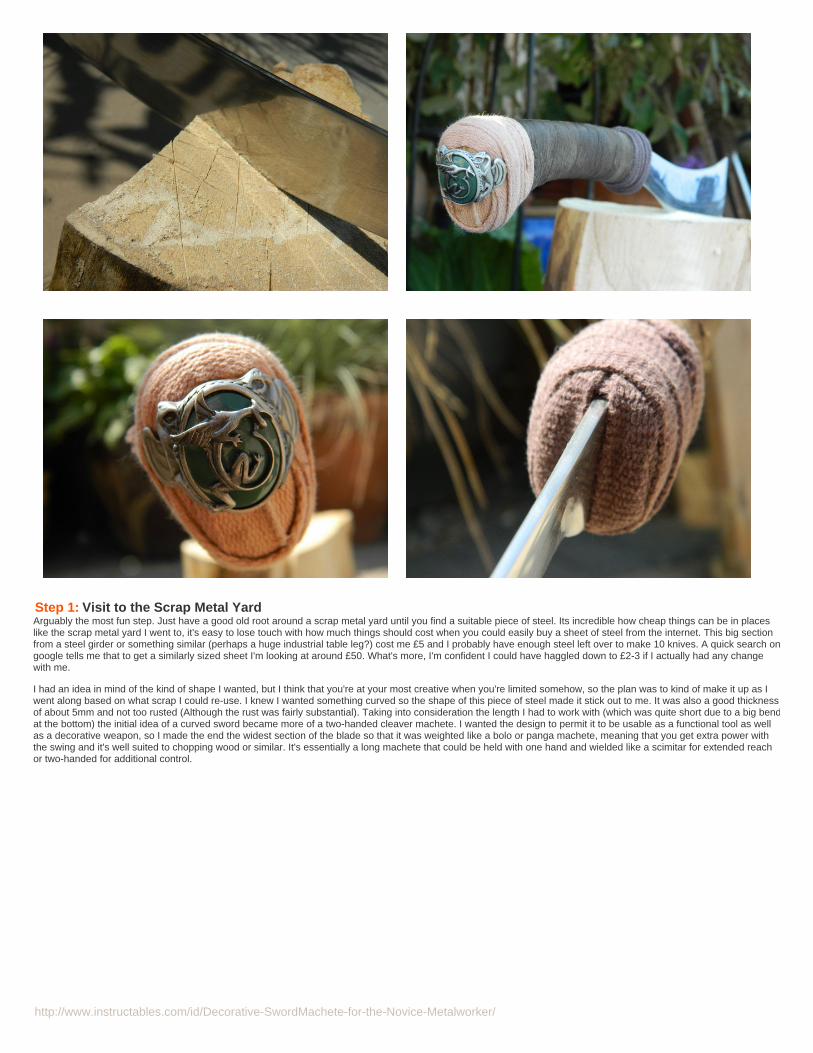
Step 1: Visit to the Scrap Metal YardArguably the most fun step. Just have a good old root around a scrap metal yard until you find a suitable piece of steel. Its incredible how cheap things can be in placeslike the scrap metal yard I went to, it's easy to lose touch with how much things should cost when you could easily buy a sheet of steel from the internet. This big sectionfrom a steel girder or something similar (perhaps a huge industrial table leg?) cost me £5 and I probably have enough steel left over to make 10 knives. A quick search ongoogle tells me that to get a similarly sized sheet I'm looking at around £50. What's more, I'm confident I could have haggled down to £2-3 if I actually had any changewith me.
I had an idea in mind of the kind of shape I wanted, but I think that you're at your most creative when you're limited somehow, so the plan was to kind of make it up as Iwent along based on what scrap I could re-use. I knew I wanted something curved so the shape of this piece of steel made it stick out to me. It was also a good thicknessof about 5mm and not too rusted (Although the rust was fairly substantial). Taking into consideration the length I had to work with (which was quite short due to a big bendat the bottom) the initial idea of a curved sword became more of a two-handed cleaver machete. I wanted the design to permit it to be usable as a functional tool as wellas a decorative weapon, so I made the end the widest section of the blade so that it was weighted like a bolo or panga machete, meaning that you get extra power withthe swing and it's well suited to chopping wood or similar. It's essentially a long machete that could be held with one hand and wielded like a scimitar for extended reachor two-handed for additional control.
http://www.instructables.com/id/Decorative-SwordMachete-for-the-Novice-Metalworker/
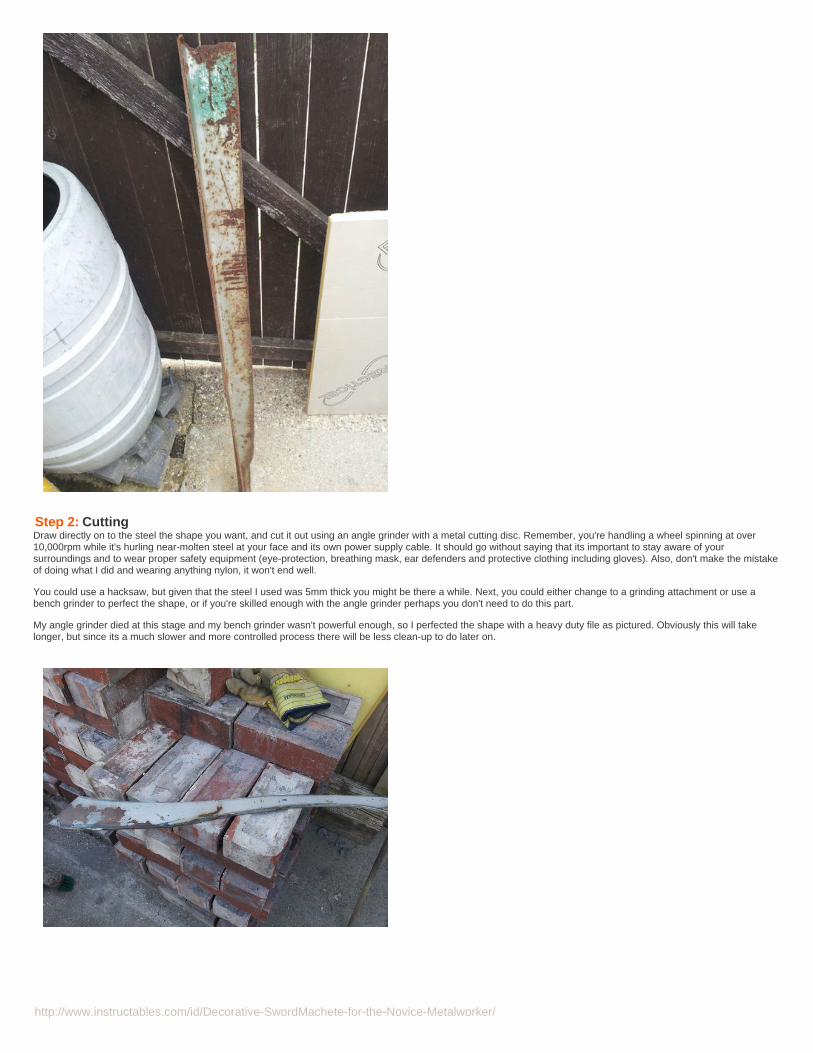
Step 2: CuttingDraw directly on to the steel the shape you want, and cut it out using an angle grinder with a metal cutting disc. Remember, you're handling a wheel spinning at over10,000rpm while it's hurling near-molten steel at your face and its own power supply cable. It should go without saying that its important to stay aware of yoursurroundings and to wear proper safety equipment (eye-protection, breathing mask, ear defenders and protective clothing including gloves). Also, don't make the mistakeof doing what I did and wearing anything nylon, it won't end well.
You could use a hacksaw, but given that the steel I used was 5mm thick you might be there a while. Next, you could either change to a grinding attachment or use abench grinder to perfect the shape, or if you're skilled enough with the angle grinder perhaps you don't need to do this part.
My angle grinder died at this stage and my bench grinder wasn't powerful enough, so I perfected the shape with a heavy duty file as pictured. Obviously this will takelonger, but since its a much slower and more controlled process there will be less clean-up to do later on.
http://www.instructables.com/id/Decorative-SwordMachete-for-the-Novice-Metalworker/
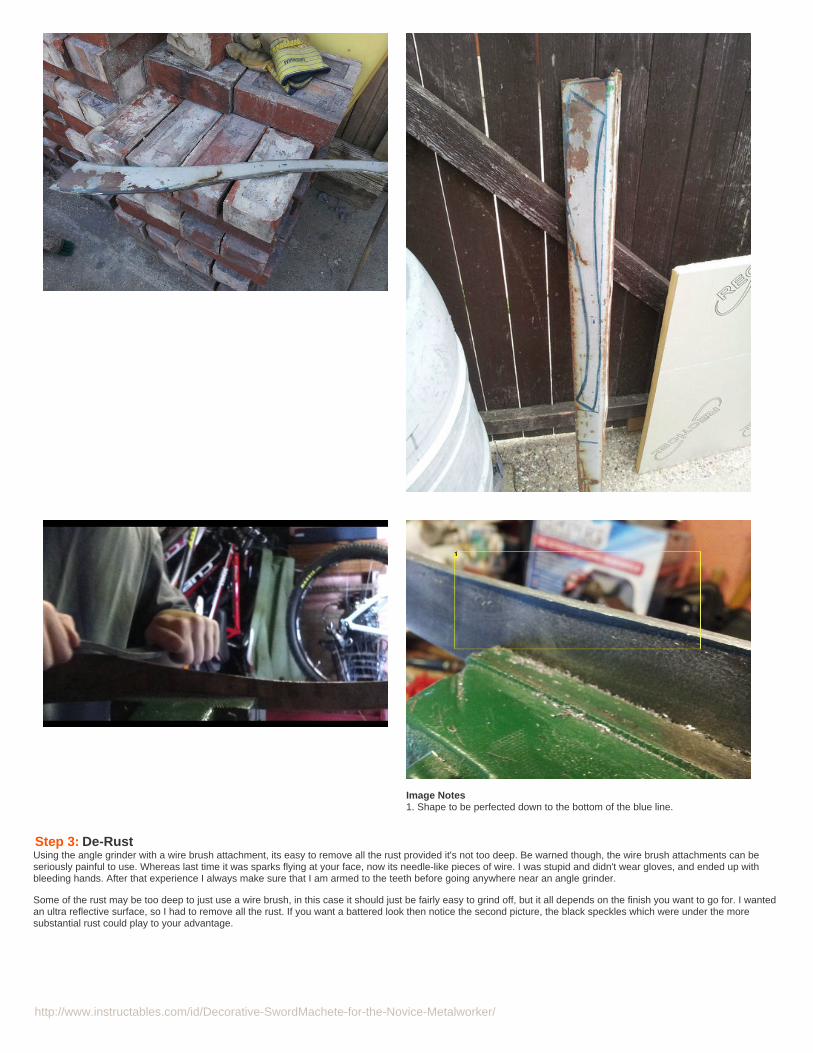
Image Notes1. Shape to be perfected down to the bottom of the blue line.
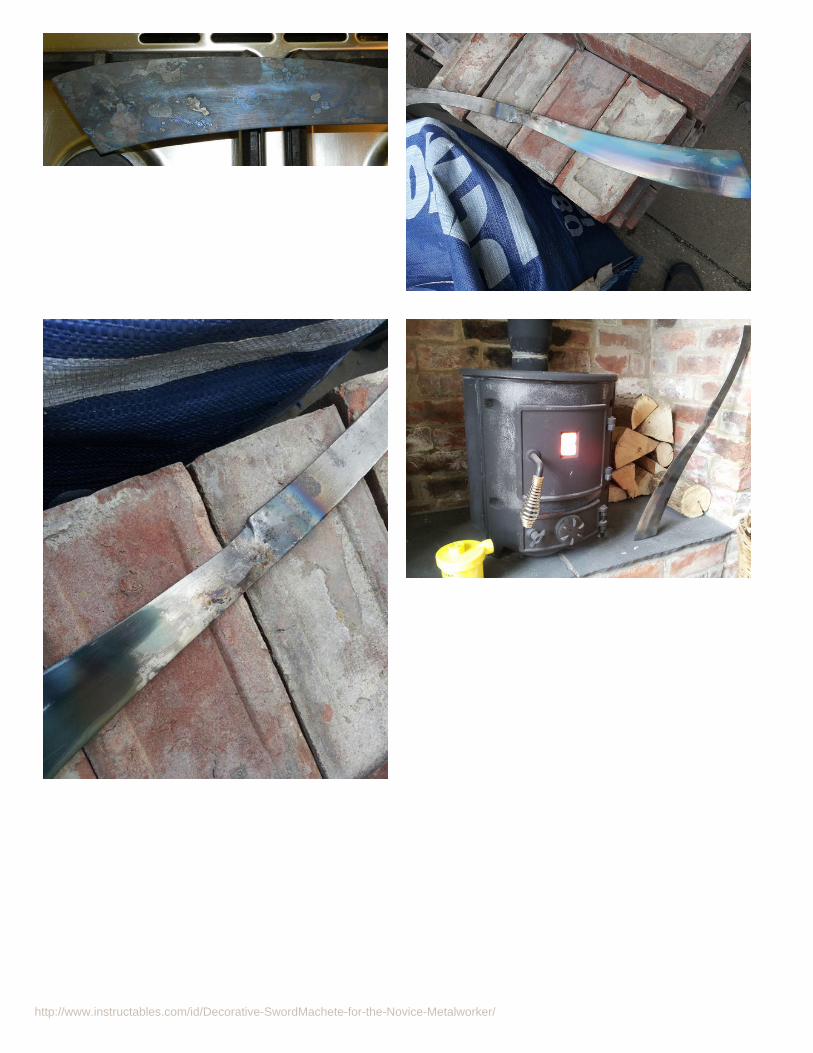
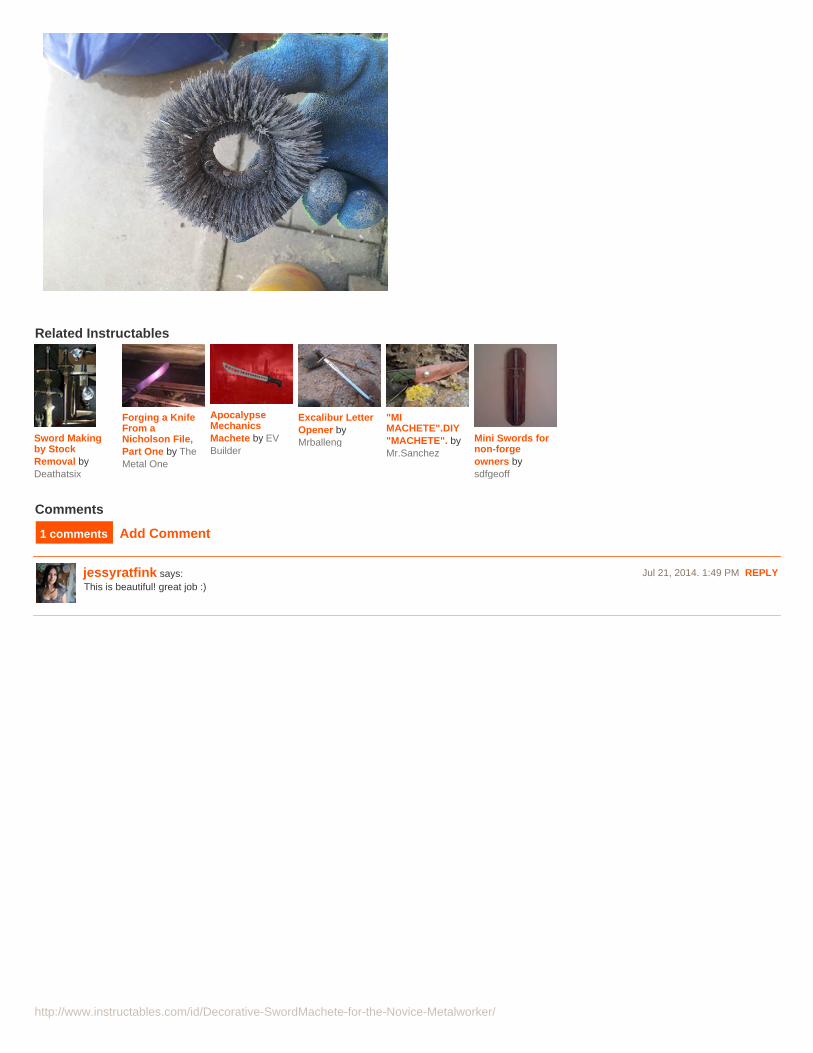
Step 3: De-RustUsing the angle grinder with a wire brush attachment, its easy to remove all the rust provided it's not too deep. Be warned though, the wire brush attachments can beseriously painful to use. Whereas last time it was sparks flying at your face, now its needle-like pieces of wire. I was stupid and didn't wear gloves, and ended up withbleeding hands. After that experience I always make sure that I am armed to the teeth before going anywhere near an angle grinder.
Some of the rust may be too deep to just use a wire brush, in this case it should just be fairly easy to grind off, but it all depends on the finish you want to go for. I wantedan ultra reflective surface, so I had to remove all the rust. If you want a battered look then notice the second picture, the black speckles which were under the moresubstantial rust could play to your advantage.
http://www.instructables.com/id/Decorative-SwordMachete-for-the-Novice-Metalworker/
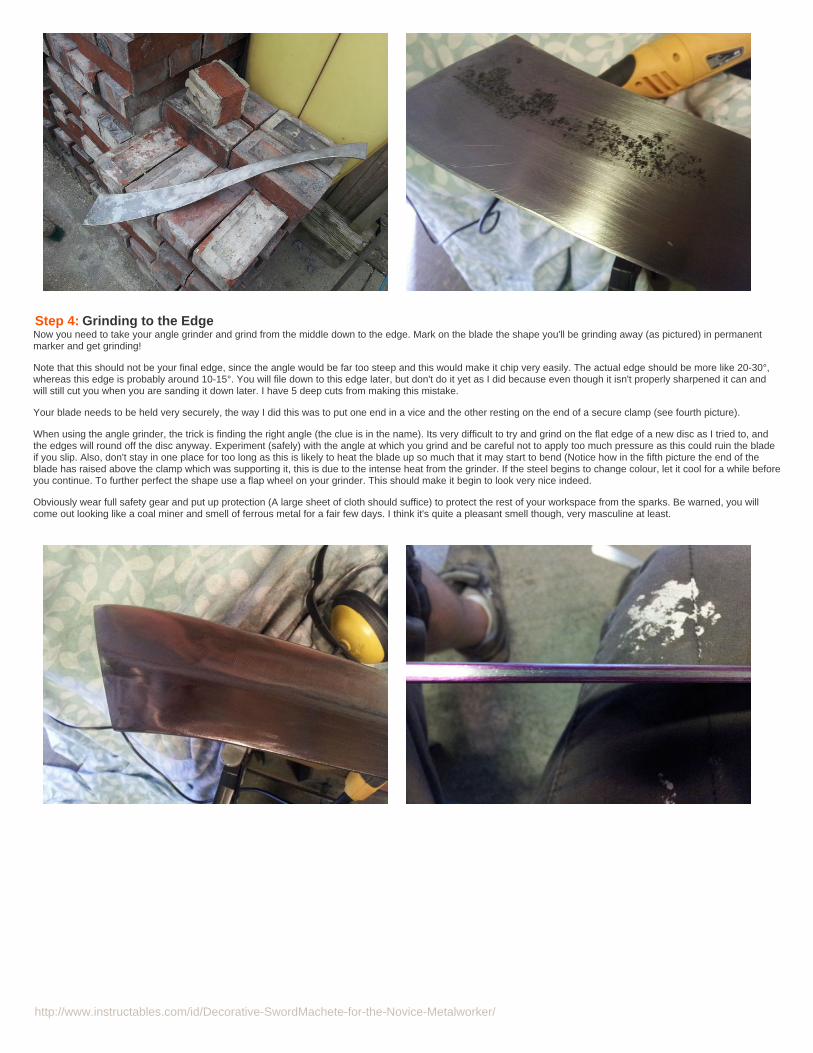
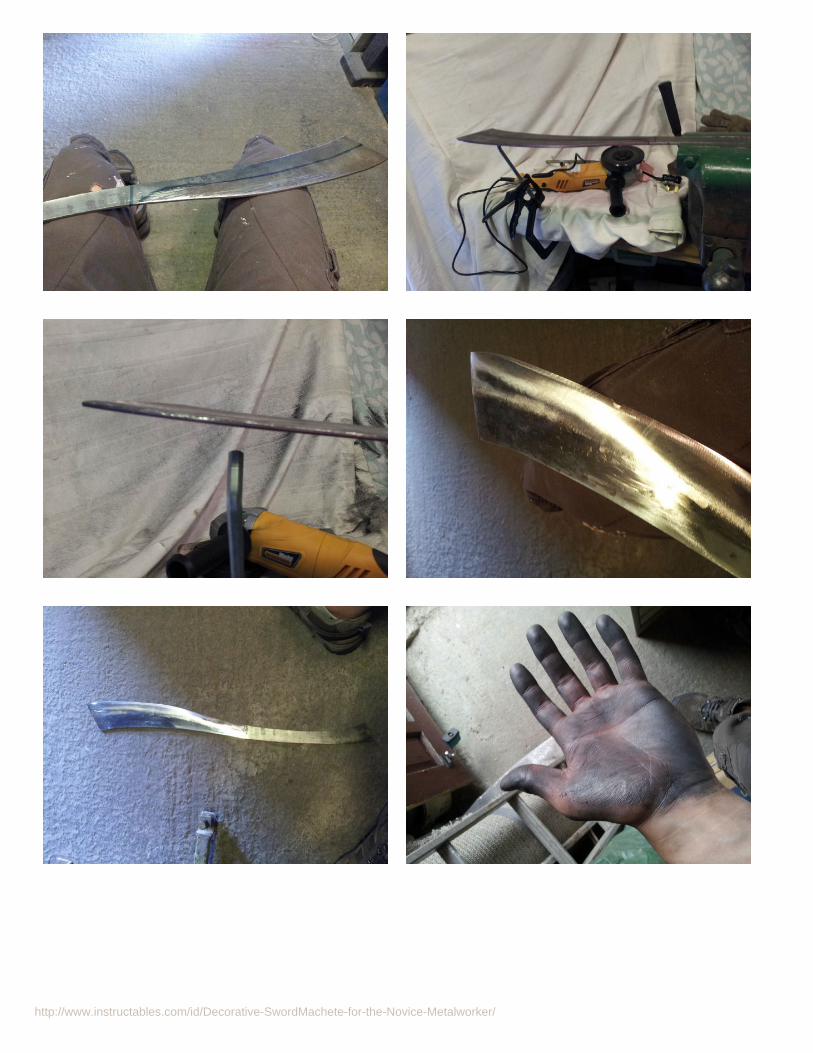
Step 4: Grinding to the EdgeNow you need to take your angle grinder and grind from the middle down to the edge. Mark on the blade the shape you'll be grinding away (as pictured) in permanentmarker and get grinding!
Note that this should not be your final edge, since the angle would be far too steep and this would make it chip very easily. The actual edge should be more like 20-30°,whereas this edge is probably around 10-15°. You will file down to this edge later, but don't do it yet as I did because even though it isn't properly sharpened it can andwill still cut you when you are sanding it down later. I have 5 deep cuts from making this mistake.
Your blade needs to be held very securely, the way I did this was to put one end in a vice and the other resting on the end of a secure clamp (see fourth picture).
When using the angle grinder, the trick is finding the right angle (the clue is in the name). Its very difficult to try and grind on the flat edge of a new disc as I tried to, andthe edges will round off the disc anyway. Experiment (safely) with the angle at which you grind and be careful not to apply too much pressure as this could ruin the bladeif you slip. Also, don't stay in one place for too long as this is likely to heat the blade up so much that it may start to bend (Notice how in the fifth picture the end of theblade has raised above the clamp which was supporting it, this is due to the intense heat from the grinder. If the steel begins to change colour, let it cool for a while beforeyou continue. To further perfect the shape use a flap wheel on your grinder. This should make it begin to look very nice indeed.
Obviously wear full safety gear and put up protection (A large sheet of cloth should suffice) to protect the rest of your workspace from the sparks. Be warned, you willcome out looking like a coal miner and smell of ferrous metal for a fair few days. I think it's quite a pleasant smell though, very masculine at least.
http://www.instructables.com/id/Decorative-SwordMachete-for-the-Novice-Metalworker/
http://www.instructables.com/id/Decorative-SwordMachete-for-the-Novice-Metalworker/
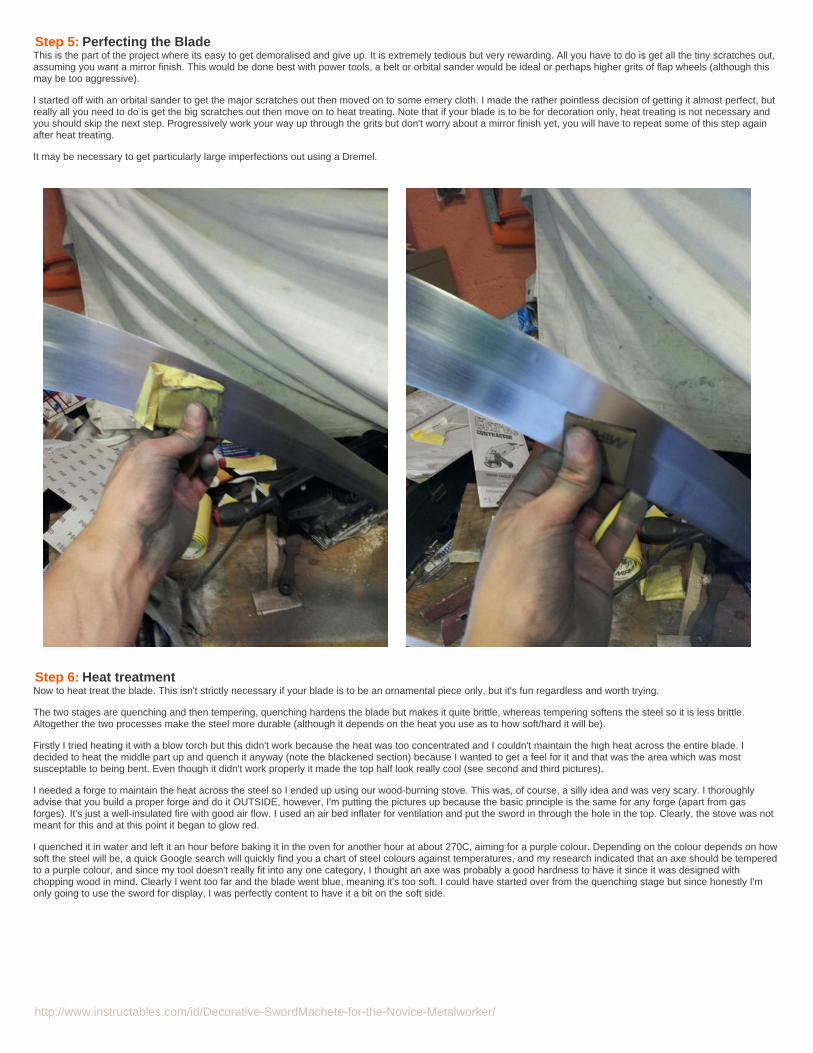
Step 5: Perfecting the BladeThis is the part of the project where its easy to get demoralised and give up. It is extremely tedious but very rewarding. All you have to do is get all the tiny scratches out,assuming you want a mirror finish. This would be done best with power tools, a belt or orbital sander would be ideal or perhaps higher grits of flap wheels (although thismay be too aggressive).
I started off with an orbital sander to get the major scratches out then moved on to some emery cloth. I made the rather pointless decision of getting it almost perfect, butreally all you need to do is get the big scratches out then move on to heat treating. Note that if your blade is to be for decoration only, heat treating is not necessary andyou should skip the next step. Progressively work your way up through the grits but don't worry about a mirror finish yet, you will have to repeat some of this step againafter heat treating.
It may be necessary to get particularly large imperfections out using a Dremel.
Step 6: Heat treatmentNow to heat treat the blade. This isn't strictly necessary if your blade is to be an ornamental piece only, but it's fun regardless and worth trying.
The two stages are quenching and then tempering, quenching hardens the blade but makes it quite brittle, whereas tempering softens the steel so it is less brittle.Altogether the two processes make the steel more durable (although it depends on the heat you use as to how soft/hard it will be).
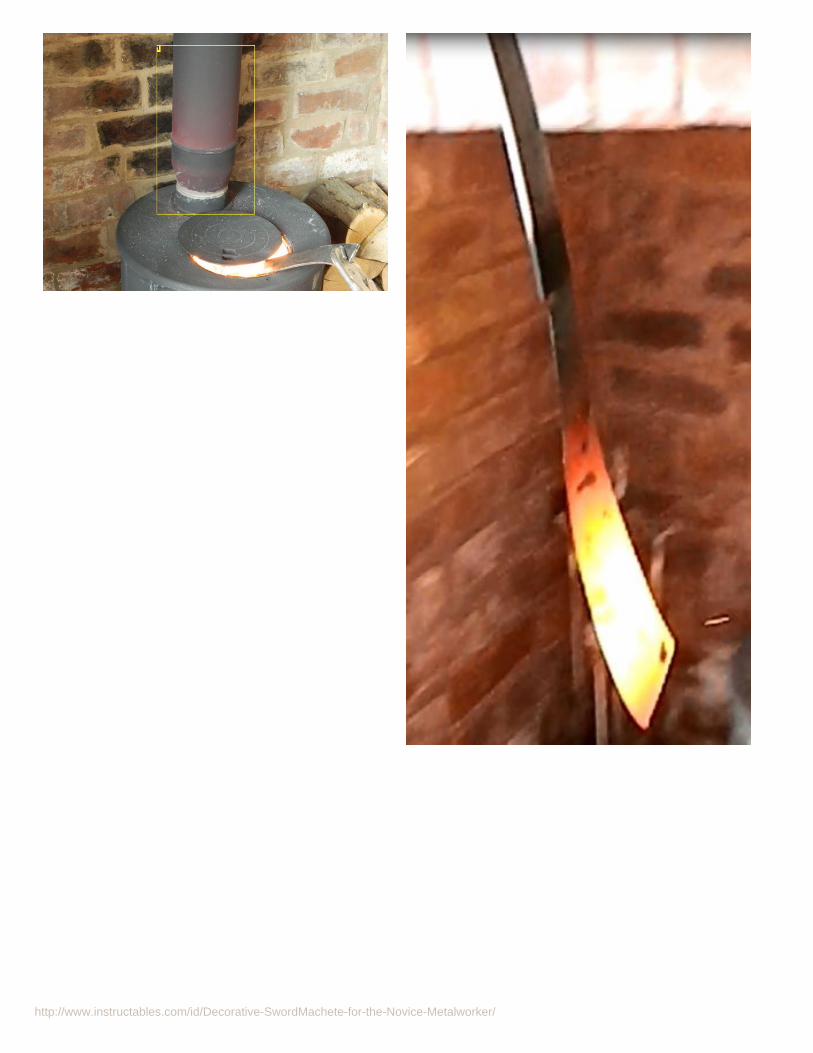
Firstly I tried heating it with a blow torch but this didn't work because the heat was too concentrated and I couldn't maintain the high heat across the entire blade. Idecided to heat the middle part up and quench it anyway (note the blackened section) because I wanted to get a feel for it and that was the area which was mostsusceptable to being bent. Even though it didn't work properly it made the top half look really cool (see second and third pictures).
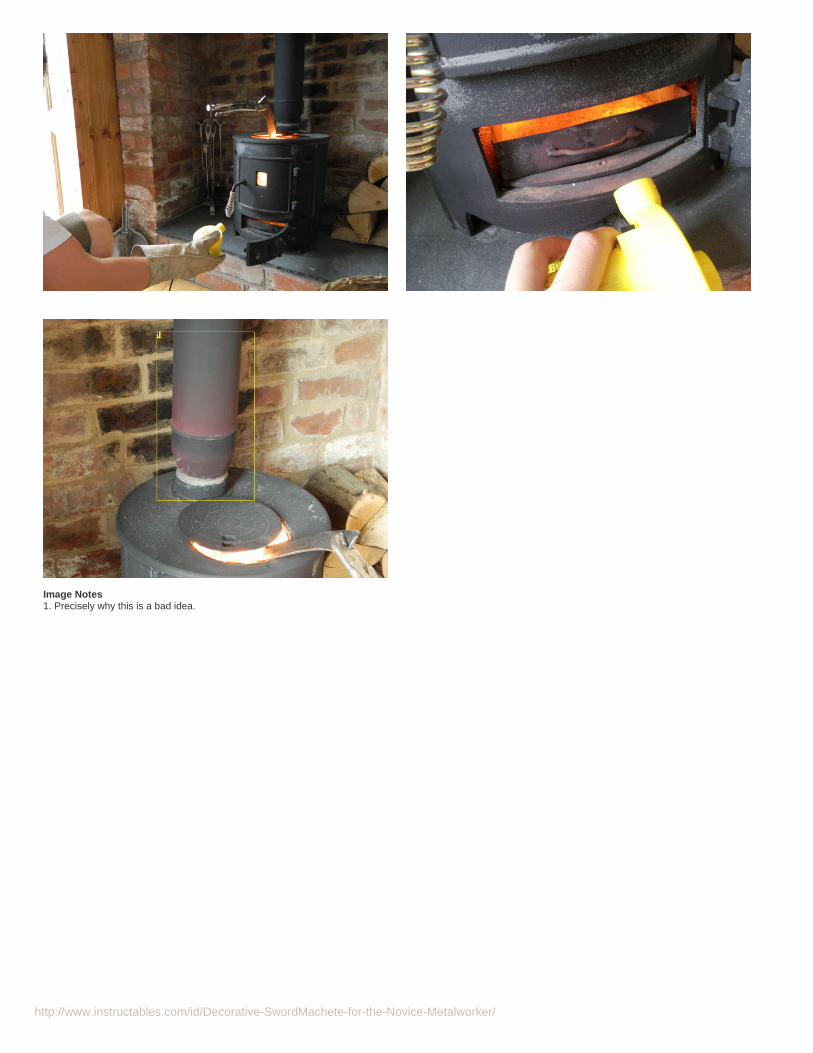
I needed a forge to maintain the heat across the steel so I ended up using our wood-burning stove. This was, of course, a silly idea and was very scary. I thoroughlyadvise that you build a proper forge and do it OUTSIDE, however, I'm putting the pictures up because the basic principle is the same for any forge (apart from gasforges). It's just a well-insulated fire with good air flow. I used an air bed inflater for ventilation and put the sword in through the hole in the top. Clearly, the stove was notmeant for this and at this point it began to glow red.
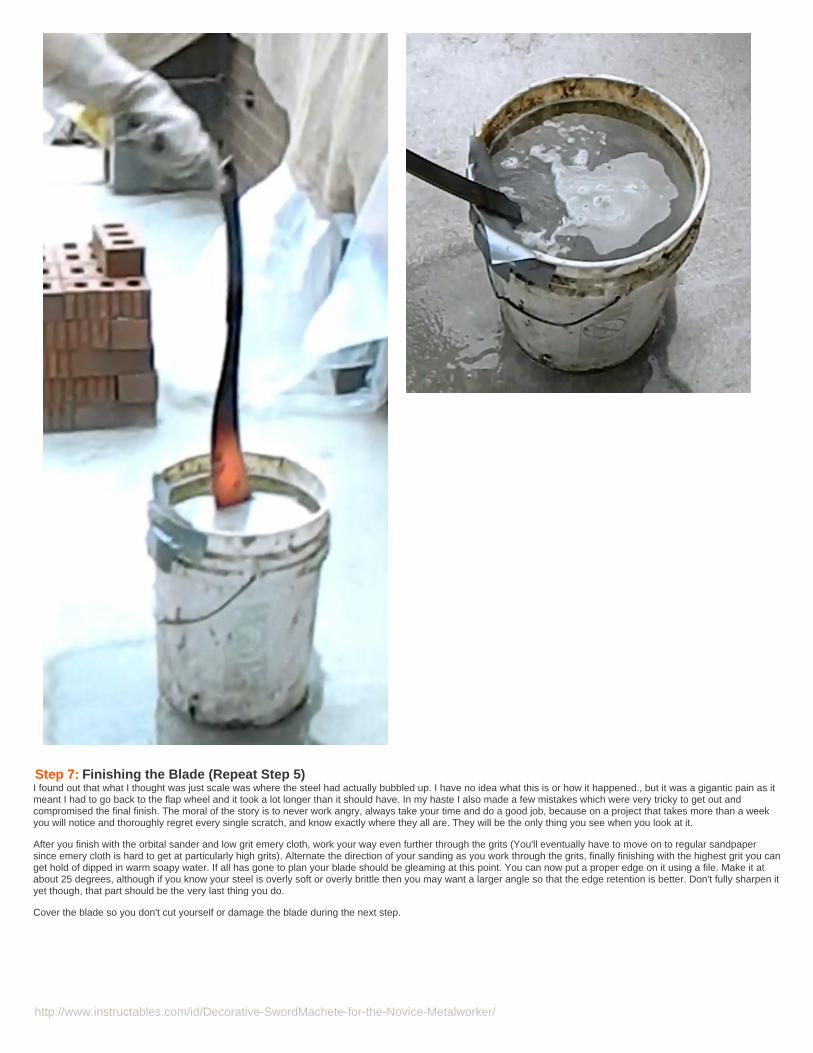
I quenched it in water and left it an hour before baking it in the oven for another hour at about 270C, aiming for a purple colour. Depending on the colour depends on howsoft the steel will be, a quick Google search will quickly find you a chart of steel colours against temperatures, and my research indicated that an axe should be temperedto a purple colour, and since my tool doesn't really fit into any one category, I thought an axe was probably a good hardness to have it since it was designed withchopping wood in mind. Clearly I went too far and the blade went blue, meaning it's too soft. I could have started over from the quenching stage but since honestly I'monly going to use the sword for display, I was perfectly content to have it a bit on the soft side.
http://www.instructables.com/id/Decorative-SwordMachete-for-the-Novice-Metalworker/
http://www.instructables.com/id/Decorative-SwordMachete-for-the-Novice-Metalworker/
Image Notes1. Precisely why this is a bad idea.
http://www.instructables.com/id/Decorative-SwordMachete-for-the-Novice-Metalworker/
http://www.instructables.com/id/Decorative-SwordMachete-for-the-Novice-Metalworker/
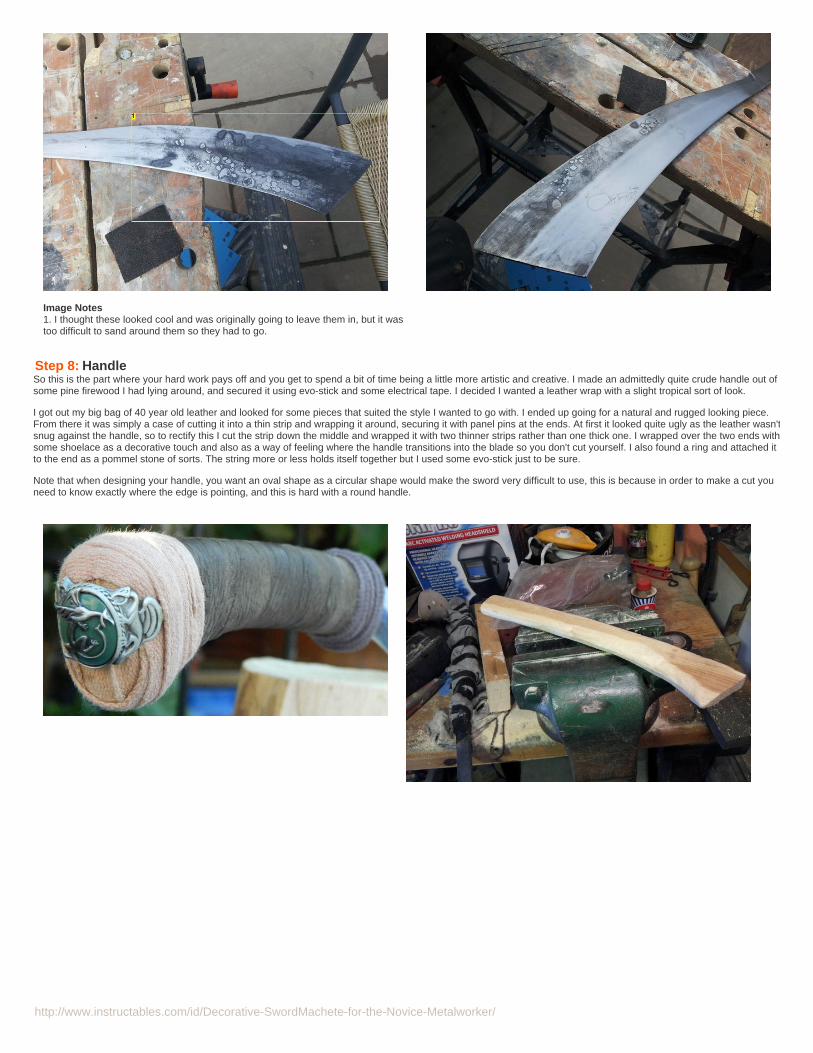
Step 7: Finishing the Blade (Repeat Step 5)I found out that what I thought was just scale was where the steel had actually bubbled up. I have no idea what this is or how it happened., but it was a gigantic pain as itmeant I had to go back to the flap wheel and it took a lot longer than it should have. In my haste I also made a few mistakes which were very tricky to get out andcompromised the final finish. The moral of the story is to never work angry, always take your time and do a good job, because on a project that takes more than a weekyou will notice and thoroughly regret every single scratch, and know exactly where they all are. They will be the only thing you see when you look at it.
After you finish with the orbital sander and low grit emery cloth, work your way even further through the grits (You'll eventually have to move on to regular sandpapersince emery cloth is hard to get at particularly high grits). Alternate the direction of your sanding as you work through the grits, finally finishing with the highest grit you canget hold of dipped in warm soapy water. If all has gone to plan your blade should be gleaming at this point. You can now put a proper edge on it using a file. Make it atabout 25 degrees, although if you know your steel is overly soft or overly brittle then you may want a larger angle so that the edge retention is better. Don't fully sharpen ityet though, that part should be the very last thing you do.
Cover the blade so you don't cut yourself or damage the blade during the next step.
http://www.instructables.com/id/Decorative-SwordMachete-for-the-Novice-Metalworker/
Image Notes1. I thought these looked cool and was originally going to leave them in, but it wastoo difficult to sand around them so they had to go.
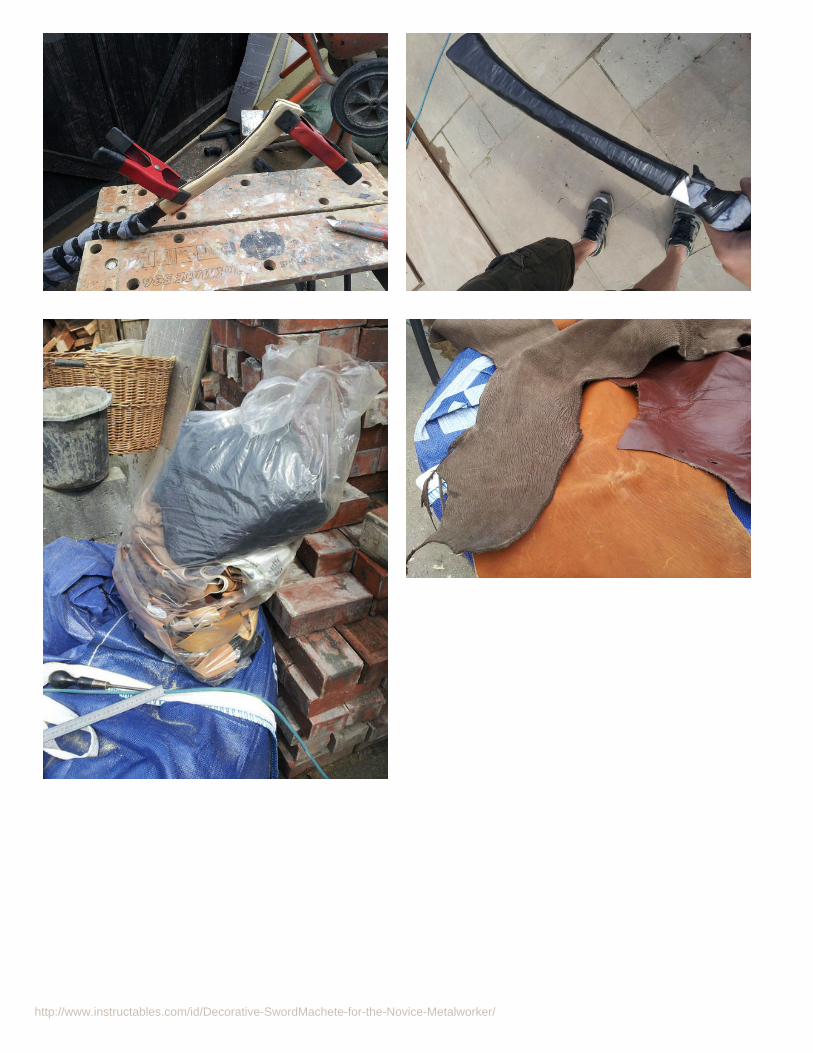
Step 8: HandleSo this is the part where your hard work pays off and you get to spend a bit of time being a little more artistic and creative. I made an admittedly quite crude handle out ofsome pine firewood I had lying around, and secured it using evo-stick and some electrical tape. I decided I wanted a leather wrap with a slight tropical sort of look.
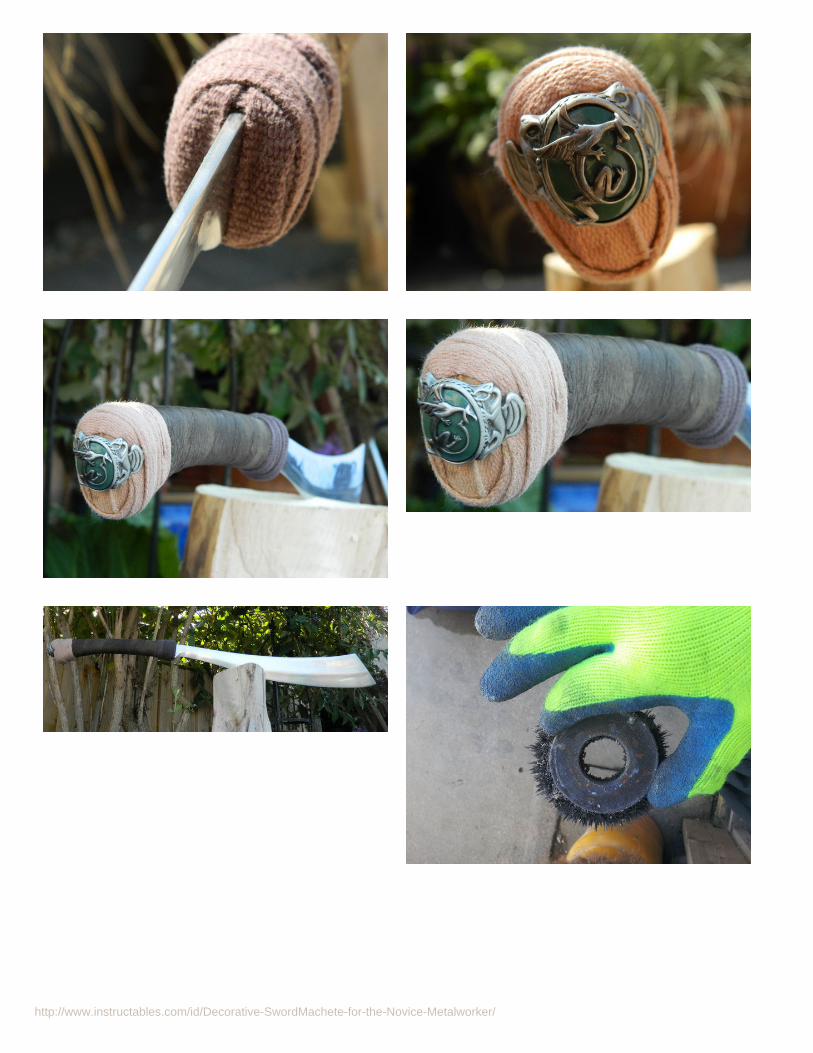
I got out my big bag of 40 year old leather and looked for some pieces that suited the style I wanted to go with. I ended up going for a natural and rugged looking piece.From there it was simply a case of cutting it into a thin strip and wrapping it around, securing it with panel pins at the ends. At first it looked quite ugly as the leather wasn'tsnug against the handle, so to rectify this I cut the strip down the middle and wrapped it with two thinner strips rather than one thick one. I wrapped over the two ends withsome shoelace as a decorative touch and also as a way of feeling where the handle transitions into the blade so you don't cut yourself. I also found a ring and attached itto the end as a pommel stone of sorts. The string more or less holds itself together but I used some evo-stick just to be sure.
Note that when designing your handle, you want an oval shape as a circular shape would make the sword very difficult to use, this is because in order to make a cut youneed to know exactly where the edge is pointing, and this is hard with a round handle.
http://www.instructables.com/id/Decorative-SwordMachete-for-the-Novice-Metalworker/
http://www.instructables.com/id/Decorative-SwordMachete-for-the-Novice-Metalworker/
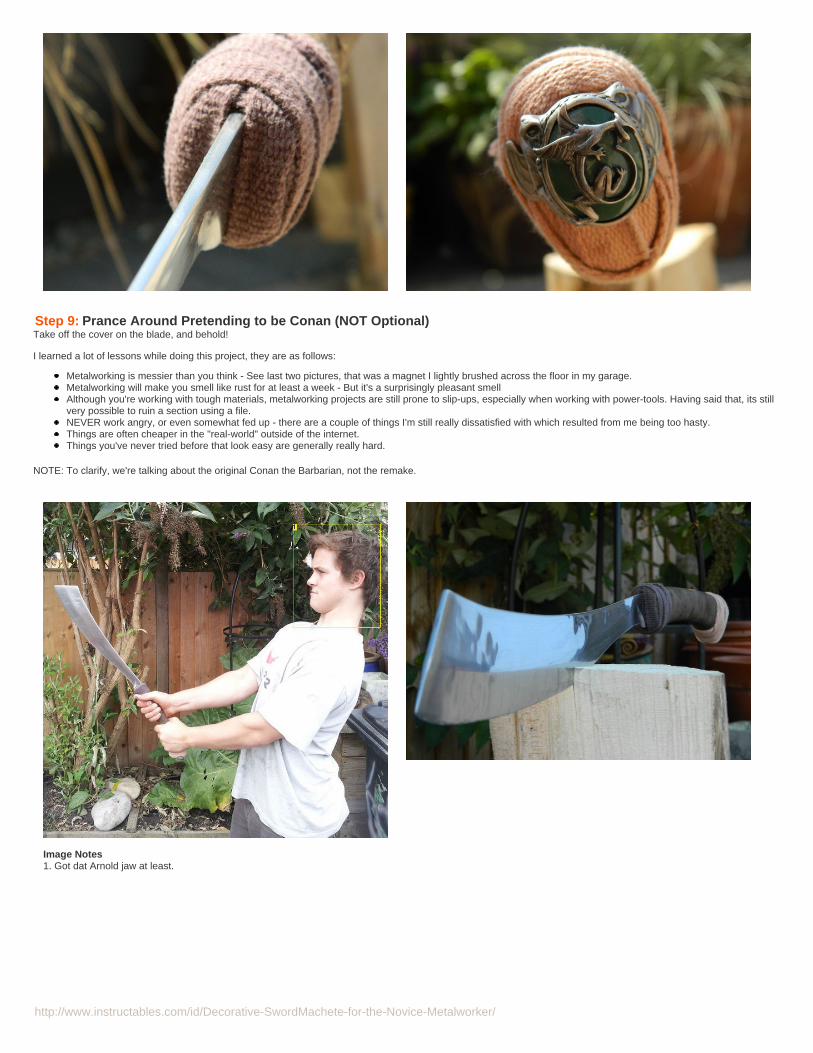
Step 9: Prance Around Pretending to be Conan (NOT Optional)Take off the cover on the blade, and behold!
I learned a lot of lessons while doing this project, they are as follows:
Metalworking is messier than you think - See last two pictures, that was a magnet I lightly brushed across the floor in my garage.Metalworking will make you smell like rust for at least a week - But it's a surprisingly pleasant smellAlthough you're working with tough materials, metalworking projects are still prone to slip-ups, especially when working with power-tools. Having said that, its stillvery possible to ruin a section using a file.NEVER work angry, or even somewhat fed up - there are a couple of things I'm still really dissatisfied with which resulted from me being too hasty.Things are often cheaper in the "real-world" outside of the internet.Things you've never tried before that look easy are generally really hard.
NOTE: To clarify, we're talking about the original Conan the Barbarian, not the remake.
Image Notes1. Got dat Arnold jaw at least.
http://www.instructables.com/id/Decorative-SwordMachete-for-the-Novice-Metalworker/
http://www.instructables.com/id/Decorative-SwordMachete-for-the-Novice-Metalworker/
Related Instructables
Sword Makingby StockRemoval byDeathatsix
Forging a KnifeFrom aNicholson File,Part One by TheMetal One
ApocalypseMechanicsMachete by EVBuilder
Excalibur LetterOpener byMrballeng
"MIMACHETE".DIY"MACHETE". byMr.Sanchez
Mini Swords fornon-forgeowners bysdfgeoff
Advertisements
Comments
1 comments Add Comment
jessyratfink says: Jul 21, 2014. 1:49 PM REPLYThis is beautiful! great job :)