Embed Size (px)
Citation preview
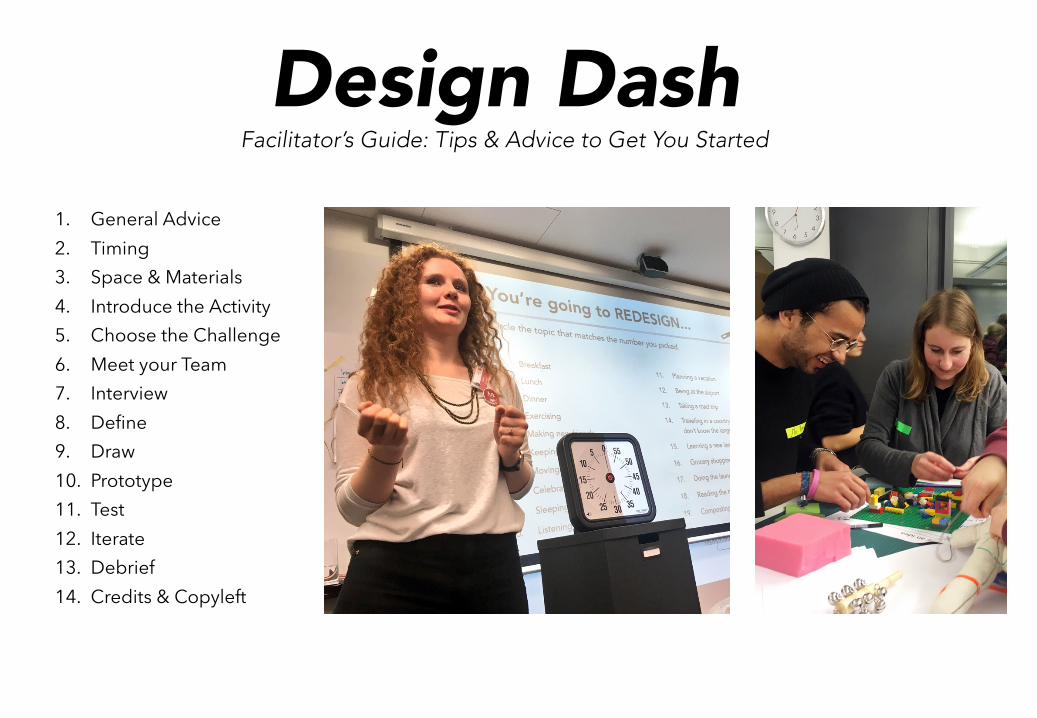
Design DashFacilitator’s Guide: Tips & Advice to Get You Started
1. General Advice2. Timing3. Space & Materials4. Introduce the Activity5. Choose the Challenge6. Meet your Team7. Interview8. Define9. Draw10. Prototype11. Test12. Iterate13. Debrief14. Credits & Copyleft

General Advice• Your goal is to be relaxed and clear, so that people feel
confident and understand what’s going on. If they don’t seem confused, you are doing a great job.
• This is a quick hands-on activity, not a deep, thorough introduction. So, don’t stress about your words. Most of what people will learn will come from what they do themselves, rather than from what they hear you say. If you forget to say something you wanted to say, don’t go back unless you think people will be confused without it.
• One good format for explaining each step is to link it with the previous step, then give the why and the how of the next step. It works like this:
• “What you just did is...”
• “Now you’re going to...”
• “Here’s how that’s going to work, and why...”
• Use your own language! Don’t try to be “official.”
• NO: “Now you’re going to create a POV based on your empathy.”
• YES: “Now you’re going to define a problem to solve, based on what you just learned from your interview.”
1

Timing• This activity is designed to expand and contract
to fill the time slot you have. However, you really need at least 1 hour. If anybody asks you to lead a design thinking workshop in less than one hour, run the other way.
• To find the amount of time for most steps, divide your total time by 12. For example: a 60-minute workshop means most steps will be 5 minutes.
• Create the schedule based on the rules to the right. Round up or down to the nearest minute.
• Always tell participants how long they have to do each step. If possible, have a timer or stopwatch visible to everyone. Do not ask them to time themselves – they have enough to do!
• Use a noisemaker (chime, gong, etc.) to mark the end of each time slot.
• To keep the exercise flexible, we haven’t printed the time on each page. You could add this if you like.
StepRule (X = total time / 12)
Example 60-minute activity
Example 90-minute activity
Introduce the activity
You only need 3 min 3 min 3 min
Introduce each other X * 0.5 3 min 4 min
Interview X 5 min 7 min
Define problem X * 1.5 7.5 min 11 min
Sketch solution X * 0.5 3 min 4 min
Build solution X * 1.5 7 min 11 min
Test solution X 5 min 7 min
Iterate solution X 5 min 7 min
Debrief andshare 2 * X 10 min, or
whatever’s left15 min, or whatever’s left
2
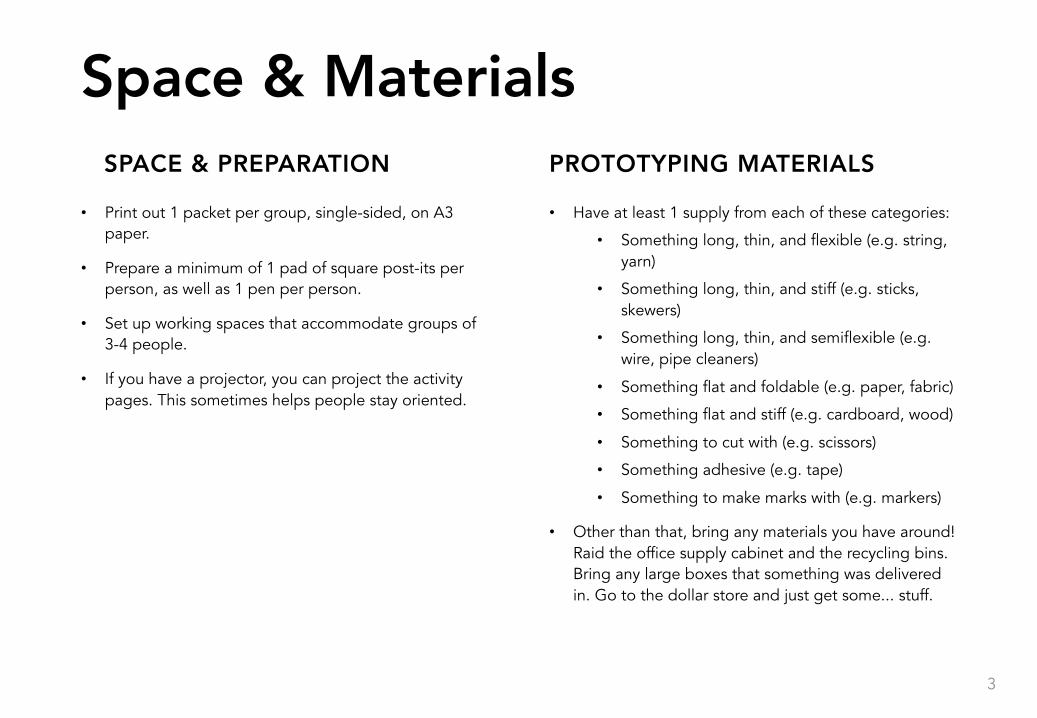
Space & Materials
• Print out 1 packet per group, single-sided, on A3 paper.
• Prepare a minimum of 1 pad of square post-its per person, as well as 1 pen per person.
• Set up working spaces that accommodate groups of 3-4 people.
• If you have a projector, you can project the activity pages. This sometimes helps people stay oriented.
• Have at least 1 supply from each of these categories:
• Something long, thin, and flexible (e.g. string, yarn)
• Something long, thin, and stiff (e.g. sticks, skewers)
• Something long, thin, and semiflexible (e.g. wire, pipe cleaners)
• Something flat and foldable (e.g. paper, fabric)
• Something flat and stiff (e.g. cardboard, wood)
• Something to cut with (e.g. scissors)
• Something adhesive (e.g. tape)
• Something to make marks with (e.g. markers)
• Other than that, bring any materials you have around! Raid the office supply cabinet and the recycling bins. Bring any large boxes that something was delivered in. Go to the dollar store and just get some... stuff.
SPACE & PREPARATION PROTOTYPING MATERIALS
3
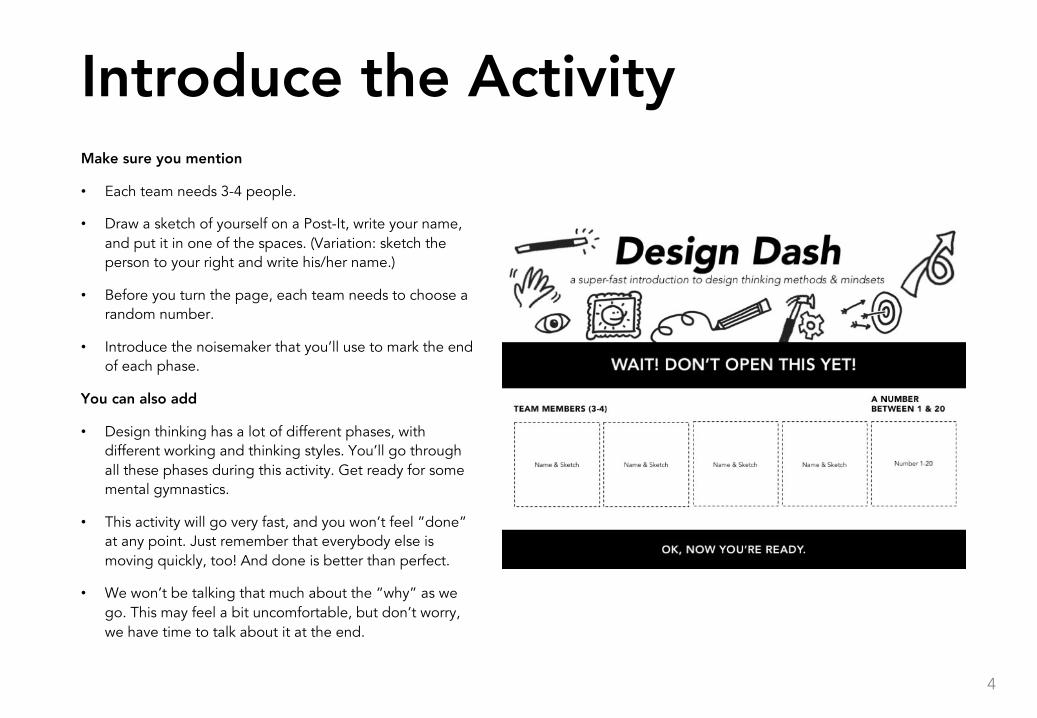
Introduce the ActivityMake sure you mention
• Each team needs 3-4 people.
• Draw a sketch of yourself on a Post-It, write your name, and put it in one of the spaces. (Variation: sketch the person to your right and write his/her name.)
• Before you turn the page, each team needs to choose a random number.
• Introduce the noisemaker that you’ll use to mark the end of each phase.
You can also add
• Design thinking has a lot of different phases, with different working and thinking styles. You’ll go through all these phases during this activity. Get ready for some mental gymnastics.
• This activity will go very fast, and you won’t feel ”done” at any point. Just remember that everybody else is moving quickly, too! And done is better than perfect.
• We won’t be talking that much about the “why” as we go. This may feel a bit uncomfortable, but don’t worry, we have time to talk about it at the end.
4

Choose the Topic• Each group chooses a topic that matches the
random number they picked on the cover page. That means that most group will be focusing on different topic areas from the groups around them.
• Feel free to customize this topic list. The important thing is that the topics aren’t too specific, and that they likely apply to everyone in the room.
• You can add topics specific to your group. For example, if you’re at a conference, you could add “getting to know people at the conference.”
• These are all broad topic areas, not specific challenges. There are many, many possible challenges within each topic.
• These topics all lend themselves to services and experiences as well as products. A product-centered topic like “redesign the wallet” often leads to people, well, building some kind of wallet – no matter how many times you say that the solution doesn’t need to be a wallet.
5

Meet your TeamMake sure you mention
• Take the post-it notes from the cover page and put them on this page.
• Introduce yourselves to each other, and write down 3 associations you have with this topic.
• This helps you get to know each other a little, and also helps you learn about the assumptions you already have in your heads about this topic.
You can also add
• Feel free to share anything else you like – where you’re from, why you came to this event, etc.
6

InterviewMake sure you mention
• One person from each team goes to another team as an interviewee.
• Introduce yourselves to the interviewee, and introduce your topic.
• Talk to them about their experience with the topic. Look for stories and personal experiences. Especially important is to look for needs and pain points: what’s not working for them?
• Take notes on post-its.
You can also add
• A good way to start is “tell me about the last time...” For example, “tell me about your last birthday party.”
• Always ask “why.” Just because someone else is, say, annoyed about traffic doesn’t mean they’re annoyed for the same reasons you would be.
7

DefineMake sure you mention
• Thank your interviewee, and send them back to their team.
• Tell your returning team member about the interview you just had. As you’re telling them, start putting notes on this page.
• Come up with a portrait of the person you just interviewed. Draw a picture of them, and give them a nickname.
• You probably heard some problems or pain points from your interview. But what people tell you may be only part of the real problem. Make an educated guess about what you think might be going on behind the scenes.
You can also add
• Your returning team member doesn’t just have to listen. They can also interview you about the interview, and ask you questions.
• You might not be totally correct about the problem you identified. You’ll have a chance to ask your interviewee about this later.
• There are many problems you could solve within your topic. You’re using the lens of one person’s experience to narrow your focus and define one problem.
8

DrawMake sure you mention
• Now you’re going to solve the problem that you identified.
• Take the post-it from the previous page and put it on this page. That’s your design problem.
• Make a rough drawing of an idea that would solve this problem.
You can also add
• You can draw multiple ideas if you want.
• You can draw on post-its if you want.
• It can be a product or a service. And it doesn’t have to be realistic! Let your imagination go wild.
• Try not to judge the quality of your idea now. You’re going to revise it later anyway.
9
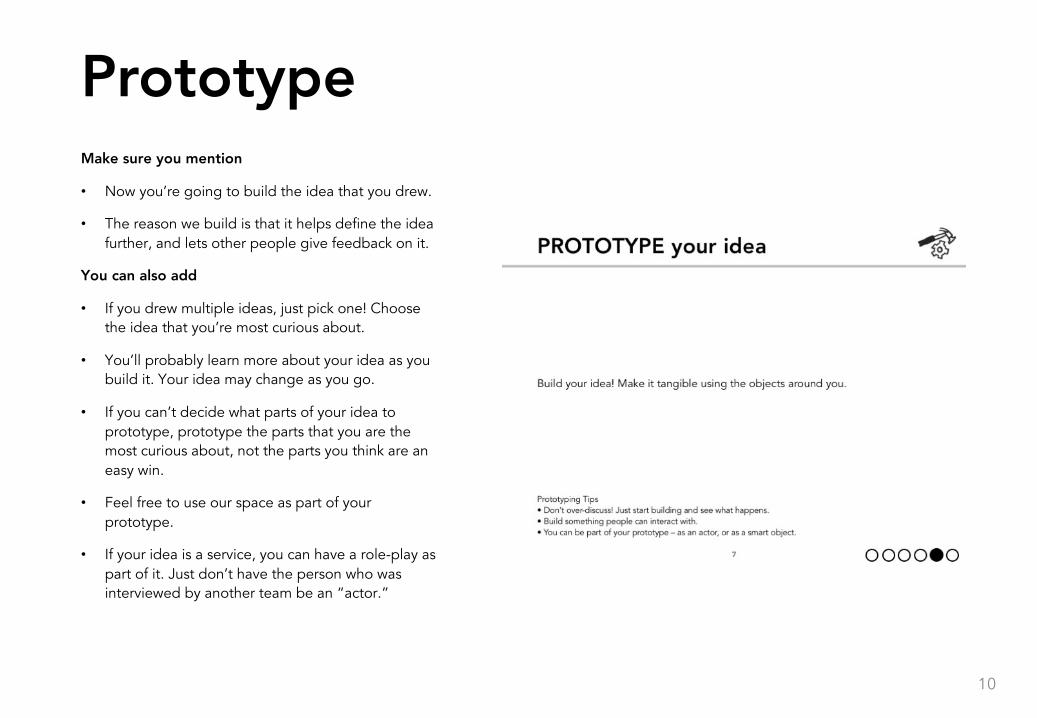
PrototypeMake sure you mention
• Now you’re going to build the idea that you drew.
• The reason we build is that it helps define the idea further, and lets other people give feedback on it.
You can also add
• If you drew multiple ideas, just pick one! Choose the idea that you’re most curious about.
• You’ll probably learn more about your idea as you build it. Your idea may change as you go.
• If you can’t decide what parts of your idea to prototype, prototype the parts that you are the most curious about, not the parts you think are an easy win.
• Feel free to use our space as part of your prototype.
• If your idea is a service, you can have a role-play as part of it. Just don’t have the person who was interviewed by another team be an “actor.”
10
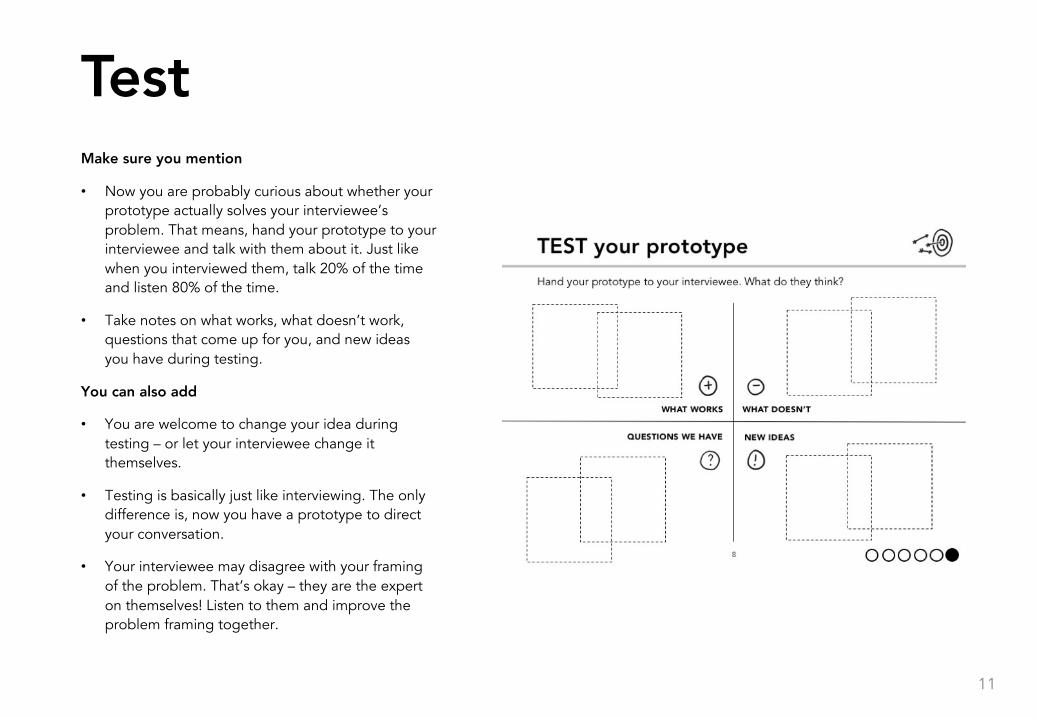
TestMake sure you mention
• Now you are probably curious about whether your prototype actually solves your interviewee’s problem. That means, hand your prototype to your interviewee and talk with them about it. Just like when you interviewed them, talk 20% of the time and listen 80% of the time.
• Take notes on what works, what doesn’t work, questions that come up for you, and new ideas you have during testing.
You can also add
• You are welcome to change your idea during testing – or let your interviewee change it themselves.
• Testing is basically just like interviewing. The only difference is, now you have a prototype to direct your conversation.
• Your interviewee may disagree with your framing of the problem. That’s okay – they are the expert on themselves! Listen to them and improve the problem framing together.
11
IterateMake sure you mention
• Thank your interviewee, and send them back to their team.
• Tell your returning team member about the feedback you received.
You can also add
• This isn’t just about making your prototype better. You might take it in a completely different direction.
• You can build on any part of your prototype.
• Your returning team member doesn’t just have to listen. They can also interview you about the testing and ask questions they’re curious about.
12
Debrief
Part 1: Sharing Prototypes• If you have time, invite entire groups, and
their interviewees, to share their results. You can ask them about their journey, and what changes they made along the way. You can also ask the interviewee what they think of the result.
• If you’re pressed for time, you can just ask everyone to wave their prototypes in the air. Then ask people to summarize their idea in 1 sentence.
Part 2: Process Debrief• Transition to this section by saying that you want to
leave the prototypes behind, and talk about what it was like to work in this way. Here are some questions to get you started.
• What was it like to work so fast?• What was it like to work in a team with others?• What was it like to solve a problem for a specific
person?• What was it like to build your idea and make it
tangible?
A good debrief has two parts. In the first part, you’ll share what everyone just designed. The tone here should be upbeat, pointing out interesting insights and phenomena along the way. This should take no more than half of the overall debrief time.
In the second part, you’ll discuss the process. The tone here can be more analytical and thoughtful.
13

Credits & Copyleft• Designed by Molly Wilson, program lead
at HPI School of Design Thinking
• Prototyped and co-created by Katharina Birg, Emma Callahan, Cheng Yao, Johanna Grefertz, Yani Guo, Deborah Kohn, Jana Mendelski, Laura Plemper, and Katrin Unger, all Advanced students at HPI School of Design Thinking
• Additional thanks to Lisa Carlgren, Christian Smirnow, Jonathan Edelman, Louisa Löwenstein, and Steffi Gerken
• You are encouraged to use, remix, and translate this activity. However, you must credit the original creators, and you must release whatever you create under a Creative Commons license. More info at https://creativecommons.org/licenses/by-sa/2.0/.
14


![[Facilitator’s Name] [Date]](https://img.pdfslide.net/doc/110x75/56815d4a550346895dcb5375/facilitators-name-date.jpg)