Embed Size (px)
Citation preview
Disaster Recovery System Administration Guide for Cisco Unified Contact Center Express Release 8.0(2)
This guide provides an overview of the Disaster Recovery System, describes how to use the Disaster Recovery System, and provides procedures for completing various backup-related tasks and restore-related tasks. This guide serves as a reference and procedural guide that is intended for users of Cisco Unified Contact Center Express 8.0(1) and 8.0(2).
This document includes the following topics:
• What is the Disaster Recovery System?, page 2
• Quick-Reference Tables for Backup and Restore Procedures, page 3
• Supported Features and Components, page 4
• System Requirements, page 4
• How to Access the Disaster Recovery System, page 5
• Master Agent Duties and Activation, page 6
• Local Agents, page 6
• Managing Backup Devices, page 7
• Creating and Editing Backup Schedules, page 8
• Enabling, Disabling, and Deleting Schedules, page 10
• Starting a Manual Backup, page 10
• Checking Backup Status, page 11
• Restore Scenarios, page 11
• Viewing the Restore Status, page 19
• Viewing the Backup and Restore History, page 20
• Trace Files, page 21
• Command Line Interface, page 21
• Error Messages, page 22
© 2011 Cisco Systems, Inc. All rights reserved.
Americas Headquarters:Cisco Systems, Inc., 170 West Tasman Drive, San Jose, CA 95134-1706 USA
What is the Disaster Recovery System?
• Related Documentation, page 24
• Obtain Additional Support and Documentation, page 24
• Documentation Feedback, page 24
What is the Disaster Recovery System?The Disaster Recovery System (DRS), which can be invoked from Cisco Unified Contact Center Express Administration, provides full data backup and restore capabilities for all servers in a Cisco Unified Contact Center Express cluster. The Disaster Recovery System allows you to perform regularly scheduled automatic or user-invoked data backups and to restore data after a failure.
In case of high availability (HA), the Disaster Recovery System performs a cluster-level backup, which means that it collects backups for all servers in a Cisco Unified Contact Center Express cluster to a central location and archives the backup data to physical storage device.
DRS restores its own settings (backup device settings and schedule settings) as part of the platform backup/restore. DRS backs up and restores drfDevice.xml and drfSchedule.xml files. When the server is restored with these files, you do not need to reconfigure DRS backup device and schedule.
Caution Before you restore Cisco Unified Contact Center Express, ensure that the Cisco Unified Contact Center Express version that is installed on the server matches the version of the backup file that you want to restore. The Disaster Recovery System supports only matching versions of Cisco Unified Contact Center Express for restore. For example, the Disaster Recovery System does not allow a restore from version 8.0(1).1000-1 to version 8.0(2).1000-1, or from version 8.0(2).1000-1 to version 8.0(2).1000-2.
The Disaster Recovery System includes the following capabilities:
• A user interface for performing backup and restore tasks.
• A distributed system architecture for performing backup and restore functions.
• Scheduled backups.
• Archive backups to a physical tape drive or remote SFTP server.
The Disaster Recovery System contains two key components, Master Agent (MA) and Local Agent (LA). The Master Agent coordinates backup and restore activity with Local Agents.
The system automatically activates both the Master Agent and the Local Agent immediately after installation on the server and in case of HA setup it is activated on all nodes in the cluster.
Note In Release 8.0(x), the Disaster Recovery System uses an SSL-based communication between the Master Agent and the Local Agent for authentication and encryption of data between the Cisco Unified Contact Center Express publisher and subscriber nodes. DRS makes use of the IPSec certificates for its Public/Private Key encryption. Be aware that if you delete the IPSEC truststore(hostname.pem) file from the Certificate Management pages, then DRS will not work as expected. If you delete the IPSEC-trust file manually, then you must ensure that you upload the IPSEC certificate to the IPSEC-trust. For more details, see the certificate management help pages in the Cisco Unified Communications Manager Security Guide available here:http://www.cisco.com/en/US/products/sw/voicesw/ps556/prod_maintenance_guides_list.html
2Disaster Recovery System Administration Guide for Cisco Unified Contact Center Express Release 8.0(2)
Quick-Reference Tables for Backup and Restore Procedures
Caution Schedule backups during off-peak hours to avoid call-processing interruptions and impact to service.
Quick-Reference Tables for Backup and Restore ProceduresThe following tables provide a quick reference for the backup and restore procedures.
Note DRS backs up and restores the drfDevice.xml and drfSchedule.xml files. These backup device settings and schedule settings get restored as a part of the platform backup/restore. After the server is restored with these files, you do not need to reconfigure DRS backup device and schedule.
Backup Quick ReferenceTable 1 provides a quick, high-level reference to the major steps, in chronological order, that you must perform to do a backup procedure by using the Disaster Recovery System.
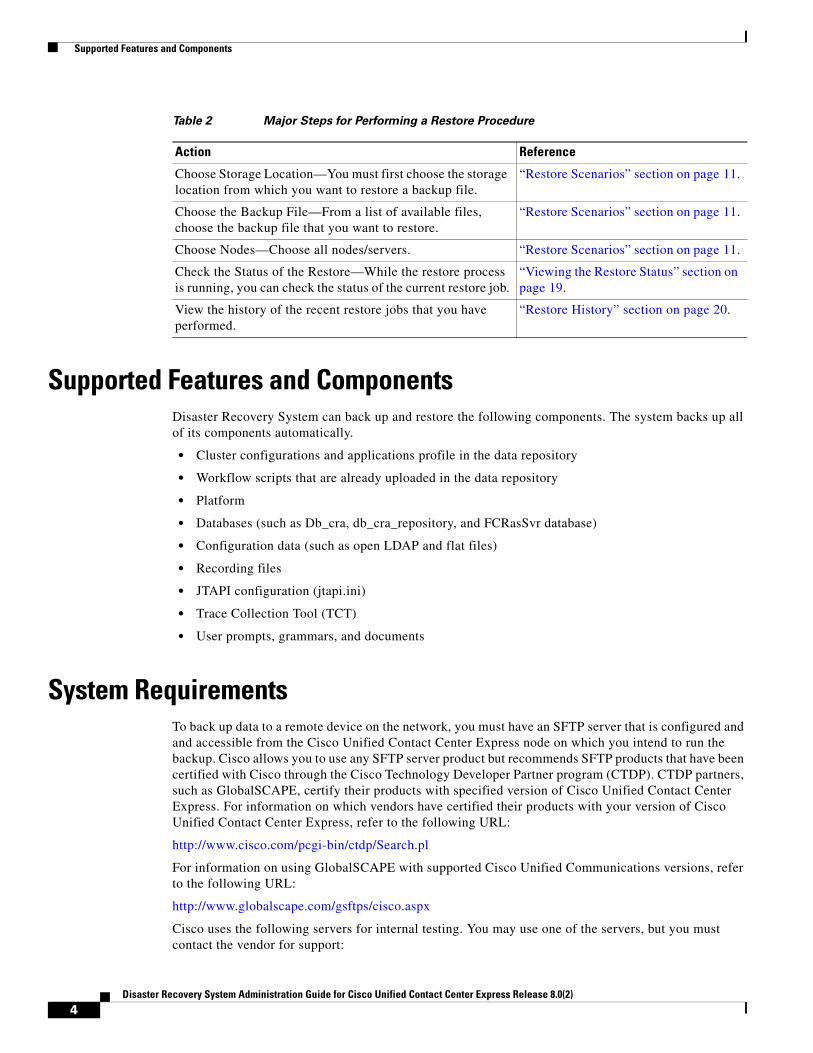
Restore Quick ReferenceTable 2 provides a quick, high-level reference to the major steps, in chronological order, that you must perform to do a restore procedure by using the Disaster Recovery System.
Note The Disaster Recovery System does not migrate data from Windows to Linux or from Linux to Linux. A restore must run on the same product version as the backup. Before you follow the steps in Table 1, for information on data migration from a Windows-based platform to a Linux-based platform, see the Upgrading to Cisco Unified Contact Center Express, Release 8.0(1) available here:http://www.cisco.com/en/US/products/sw/custcosw/ps1846/prod_installation_guides_list.html
Table 1 Major Steps for Performing a Backup Procedure
Action Reference
Create backup devices to map to a remote storage location or a locally attached tape drive.
“Managing Backup Devices” section on page 7
Create and edit backup schedules.
Note Either a manual or a scheduled backup backs up one or both the nodes in a cluster.
“Creating and Editing Backup Schedules” section on page 8
Enable and disable backup schedules. “Enabling, Disabling, and Deleting Schedules” section on page 10
Optionally, run a manual backup. “Starting a Manual Backup” section on page 10
Check the Status of the Backup—While a backup is running, you can check the status of the current backup job.
“Checking Backup Status” section on page 11
View the history of the recent backup jobs that you have performed.
“Backup History” section on page 20
3Disaster Recovery System Administration Guide for Cisco Unified Contact Center Express Release 8.0(2)
Supported Features and Components
Supported Features and ComponentsDisaster Recovery System can back up and restore the following components. The system backs up all of its components automatically.
• Cluster configurations and applications profile in the data repository
• Workflow scripts that are already uploaded in the data repository
• Platform
• Databases (such as Db_cra, db_cra_repository, and FCRasSvr database)
• Configuration data (such as open LDAP and flat files)
• Recording files
• JTAPI configuration (jtapi.ini)
• Trace Collection Tool (TCT)
• User prompts, grammars, and documents
System RequirementsTo back up data to a remote device on the network, you must have an SFTP server that is configured and and accessible from the Cisco Unified Contact Center Express node on which you intend to run the backup. Cisco allows you to use any SFTP server product but recommends SFTP products that have been certified with Cisco through the Cisco Technology Developer Partner program (CTDP). CTDP partners, such as GlobalSCAPE, certify their products with specified version of Cisco Unified Contact Center Express. For information on which vendors have certified their products with your version of Cisco Unified Contact Center Express, refer to the following URL:
http://www.cisco.com/pcgi-bin/ctdp/Search.pl
For information on using GlobalSCAPE with supported Cisco Unified Communications versions, refer to the following URL:
http://www.globalscape.com/gsftps/cisco.aspx
Cisco uses the following servers for internal testing. You may use one of the servers, but you must contact the vendor for support:
Table 2 Major Steps for Performing a Restore Procedure
Action Reference
Choose Storage Location—You must first choose the storage location from which you want to restore a backup file.
“Restore Scenarios” section on page 11.
Choose the Backup File—From a list of available files, choose the backup file that you want to restore.
“Restore Scenarios” section on page 11.
Choose Nodes—Choose all nodes/servers. “Restore Scenarios” section on page 11.
Check the Status of the Restore—While the restore process is running, you can check the status of the current restore job.
“Viewing the Restore Status” section on page 19.
View the history of the recent restore jobs that you have performed.
“Restore History” section on page 20.
4Disaster Recovery System Administration Guide for Cisco Unified Contact Center Express Release 8.0(2)
How to Access the Disaster Recovery System
• Open SSH (refer to http://sshwindows.sourceforge.net/)
• Cygwin (refer to http://www.cygwin.com/)
• Titan (refer to http://www.titanftp.com/)
Note For issues with third-party products that have not been certified through the CTDP process, contact the third-party vendor for support.
Note While a backup or restore is running, you cannot perform any Operating System (OS) Administration tasks because Disaster Recovery System blocks all OS Administration requests by locking the platform API. However, this does not block most CLI commands as only the CLI-based upgrade commands use the Platform API locking package.
Tip Schedule backups during periods when you expect less network traffic.
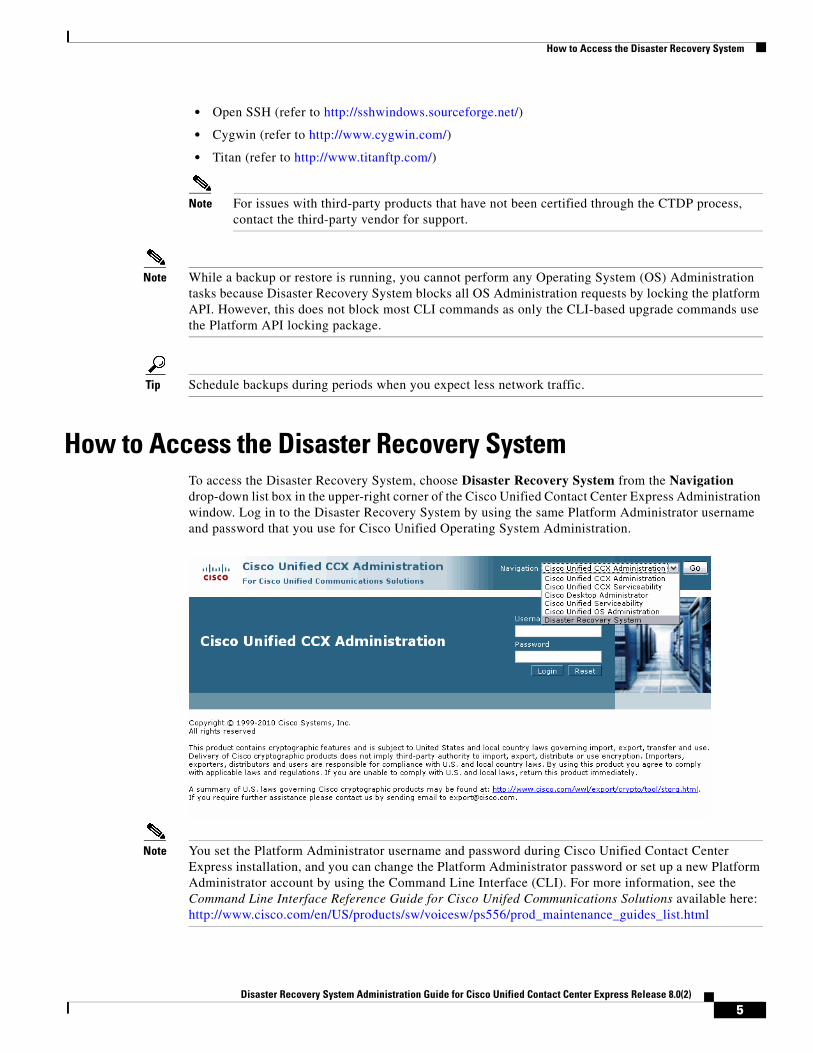
How to Access the Disaster Recovery SystemTo access the Disaster Recovery System, choose Disaster Recovery System from the Navigation drop-down list box in the upper-right corner of the Cisco Unified Contact Center Express Administration window. Log in to the Disaster Recovery System by using the same Platform Administrator username and password that you use for Cisco Unified Operating System Administration.
Note You set the Platform Administrator username and password during Cisco Unified Contact Center Express installation, and you can change the Platform Administrator password or set up a new Platform Administrator account by using the Command Line Interface (CLI). For more information, see the Command Line Interface Reference Guide for Cisco Unifed Communications Solutions available here: http://www.cisco.com/en/US/products/sw/voicesw/ps556/prod_maintenance_guides_list.html
5Disaster Recovery System Administration Guide for Cisco Unified Contact Center Express Release 8.0(2)
Master Agent Duties and Activation
Master Agent Duties and ActivationThe system automatically activates the Master Agent service on each node of the cluster, but the Master Agent is functional only on the first node. However, the Master Agent on the second node remains non-functional.
Duties That the Master Agent PerformsThe Master Agent (MA) performs the following duties:
• The MA stores systemwide component registration information.
• The MA maintains a complete set of scheduled tasks in an XML file. The MA updates this file when it receives updates of schedules from the user interface. The MA sends executable tasks to the applicable Local Agents, as scheduled. (Local Agents execute immediate-backup tasks without delay.)
• You can access the MA through the Disaster Recovery System user interface to perform activities such as configuring backup devices, scheduling backups by adding new backup schedules, viewing or updating an existing schedule, displaying status of executed schedules, and performing system restoration.
• The MA stores backup data on a locally attached tape drive or a remote network location.
Local AgentsEach server in a Cisco Unified Contact Center Express cluster, including the server that contains the Master Agent, must have its own Local Agent to perform the backup and restore functions for its server.
Note By default, a Local Agent automatically gets activated on each node of the cluster.
Duties That Local Agents PerformIn a Cisco Unified Contact Center Express cluster, the Local Agent runs backup and restore scripts on each node in the cluster.
Note In Release 8.0(x), the Disaster Recovery System uses an SSL-based communication between the Master Agent and the Local Agent for authentication and encryption of data between the Cisco Unified Contact Center Express publisher and subscriber nodes. DRS makes use of the IPSec certificates for its Public/Private Key encryption. This certificate exchange gets handled internally; you do not need to make any configuration changes to accommodate this exchange.
6Disaster Recovery System Administration Guide for Cisco Unified Contact Center Express Release 8.0(2)
Managing Backup Devices
Managing Backup DevicesBefore using the Disaster Recovery System, you must configure the locations where you want the backup files to be stored. You can configure up to 10 backup devices. Perform the following steps to configure backup devices.
Procedure
Step 1 Navigate to Cisco Unified Contact Center Express Administration, select Disaster Recovery System from the Navigation menu in the upper- right corner of the Cisco Unified CCX Administration Cisco Unified Contact Center Express Administration window, and click Go.
The Disaster Recovery System Logon window displays.
Step 2 Log in to the Disaster Recovery System with the same Platform Administrator username and password that you use to log in to Cisco Unified Operating System Administration.
Step 3 Navigate to Backup > Backup Device. The Backup Device List window displays.
Step 4 To configure a new backup device, click Add New.
Step 5 To edit a backup device, select it in the Backup Device list. Then, click Edit Selected.
The Backup Device window displays.
Step 6 Enter the backup device name in the Backup device name field.
Note The backup device name may contain only alphanumeric characters, dashes (-) and underscores (_). Do not use any other characters.
Step 7 Choose one of the following backup devices and enter the appropriate field values in the Select Destination area:
• Tape Device—Stores the backup file on a locally attached tape drive. Choose the appropriate tape device from the list. Note the following considerations:
– You cannot use more than one tape for a single backup. If you have more data than will fit on a tape, either you must store backups on a network directory, or you must back up components on one tape and back up mailbox stores on one or more additional tapes.
– You cannot store more than one backup on a tape; each backup overwrites the data from the previous backup, so you only have the data from the most recent backup. If you want to create more than one backup for a server (components in one backup, mailbox stores in another backup, for example), you must use separate tapes. Otherwise, you will only have the portion of the data that you backed up last.
Note You cannot span tapes or store more than one backup per tape.Support for tape devices to store backup files is not available for systems running Unified CCX in a VM environment.
• Network Directory—Stores the backup file on a network drive that is accessed through an SFTP connection. DRS only supports SFTP servers that are configured with an IPv4 address or hostname/Fully Qualified Domain Name (FQDN). Enter the following required information:
– Server name: Name or IP address of the network server
– Path name: Path name for the directory where you want to store the backup file
7Disaster Recovery System Administration Guide for Cisco Unified Contact Center Express Release 8.0(2)
Creating and Editing Backup Schedules
– User name: Valid username for an account on the remote system
– Password: Valid password for the account on the remote system
– Number of backups to store on Network Directory: The number of backups to store on this network directory. This field displays 2 by default.
Note You must have access to an SFTP server to configure a network storage location. The SFTP path must exist prior to the backup. The account that is used to access the SFTP server must have write permission for the selected path.
Step 8 To update these settings, click Save. The Update Successful Status appears.
Note After you click the Save button, the DRS Master Agent validates the selected backup device. If the user name, password, server name, or directory path is invalid, the save will fail.
Step 9 To delete a backup device, select it in the Backup Device list. Then, click Delete Selected.
Note You cannot delete a backup device that is configured as the backup device in a backup schedule.
Creating and Editing Backup SchedulesYou can create up to 10 backup schedules. Each backup schedule has its own set of properties, including a schedule for automatic backups, and a storage location.
Note DRS Scheduler does not automatically adjust after Daylight Saving Time (DST) changes—Neither the change to DST, nor the change back to Standard time. For example, assume that today is the Friday before DST time takes effect. The DST time change takes place at 2 a.m. Sunday, when the time gets advanced from 2 to 3 a.m. If you schedule a backup to occur at 10 a.m. on that Sunday, the upgrade will actually occur at 11 a.m. Sunday.Adjust the backup schedule time after every DST change by updating the scheduled start time as described in the following procedure.
Caution Schedule backups during off-peak hours to avoid call-processing interruptions and impact to service.
Perform the following steps to manage backup schedules:
Procedure
Step 1 Navigate to Cisco Unified Contact Center Express Administration, select Disaster Recovery System from the Navigation menu in the upper-right corner of the Cisco Unified Contact Center Express Administration window, and click Go.
8Disaster Recovery System Administration Guide for Cisco Unified Contact Center Express Release 8.0(2)
Creating and Editing Backup Schedules
The Disaster Recovery System Logon window displays.
Step 2 Log in to the Disaster Recovery System with the same Platform Administrator username and password that you use to log in to Cisco Unified Operating System Administration.
Step 3 Navigate to Backup > Scheduler.
The Schedule List window displays.
Step 4 Do one of the following steps to add a new schedule or edit an existing schedule
a. To create a new schedule, click Add New.
b. To configure an existing schedule, click its name in the Schedule List column. The scheduler window displays.
Step 5 Enter a schedule name in the Schedule Name field.
Step 6 Select the backup device in the Select Backup Device area.
You must back up the database and recorded names. Backing up messages is optional.
Step 7 Select the feature UCCX.
Step 8 Choose the date and time when you want the backup to begin in the Start Backup at area. Note the following:
• Schedule backups during off-peak hours to avoid affecting system performance.
• Do not schedule a backup to run while the Update Database Statistics task is running. By default, this task runs daily at 2:00 am.
Step 9 Choose the frequency at which you want the backup to occur in the Frequency area: Once, Daily, Weekly, or Monthly. If you choose Weekly, you can also choose the days of the week when the backup will occur.
Tip To set the backup frequency to Weekly, occurring Tuesday through Saturday, click Set Default.
Step 10 To update these settings, click Save.
Step 11 To enable the schedule, click Enable Schedule.
The next backup occurs automatically at the time that you set.
Note If you plan to schedule a backup on a two-node deployment, ensure that both the servers in the cluster are running the same version of Cisco Unified Contact Center Express and are reachable through the network. Servers that are not reachable at the time of the scheduled backup will not get backed up.
Step 12 To disable the schedule, click Disable Schedule.
9Disaster Recovery System Administration Guide for Cisco Unified Contact Center Express Release 8.0(2)
Enabling, Disabling, and Deleting Schedules
Enabling, Disabling, and Deleting SchedulesProcedure
Step 1 Navigate to Cisco Unified Contact Center Express Administration, select Disaster Recovery System from the Navigation menu in the upper-right corner of the Cisco Unified Contact Center Express Administration window, and click Go.
The Disaster Recovery System Logon window displays.
Step 2 Log in to the Disaster Recovery System with the same Platform Administrator username and password that you use to log in to Cisco Unified Operating System Administration.
Step 3 Navigate to Backup > Scheduler.
The Schedule List window displays.
Step 4 Check the check boxes next to the schedules that you want to modify.
• To select all schedules, click Select All.
• To clear all check boxes, click Clear All.
Step 5 To enable the selected schedules, click Enable Selected Schedules.
Step 6 To disable the selected schedules, click Disable Selected Schedules.
Step 7 To delete the selected schedules, click Delete Selected.
Starting a Manual BackupFollow this procedure to start a manual backup.
Caution While taking backup manually or using DRS, make sure that both the nodes in the cluster are up and running; otherwise backup will fail.
Procedure
Step 1 Navigate to Cisco Unified Contact Center Express Administration, select Disaster Recovery System from the Navigation menu in the upper-right corner of the window, and click Go.
The Disaster Recovery System Logon window displays.
Step 2 Log in to the Disaster Recovery System with the same Platform Administrator username and password that you use to log in to Cisco Unified Operating System Administration.
Step 3 Navigate to Backup > Manual Backup. The Manual Backup window displays.
Step 4 Select a backup device in the Select Backup Device area.
You must back up the database and recorded names. Backing up messages is optional.
Step 5 Select the feature UCCX.
10Disaster Recovery System Administration Guide for Cisco Unified Contact Center Express Release 8.0(2)
Checking Backup Status
Step 6 To start the manual backup, click Start Backup.
Checking Backup StatusYou can check the status of the current backup job and cancel the current backup job. To view the backup history, see the “Viewing the Backup and Restore History” section on page 20.
Caution Be aware that if the backup to the remote server is not completed within 20 hours, the backup session will time out. You will then need to begin a fresh backup.
Checking the Status of the Current Backup JobPerform the following steps to check the status of the current backup job.
Note Typically, when the backup is complete, the Successful Backup Status displays.
Procedure
Step 1 Navigate to Cisco Unified Contact Center Express Administration, select Disaster Recovery System from the Navigation menu in the upper-right corner of the Cisco Unified Contact Center Express Administration window, and click Go.
The Disaster Recovery System Logon window displays.
Step 2 Log in to the Disaster Recovery System by using the same Platform Administrator username and password that you use to log in to Cisco Unified Operating System Administration.
Step 3 Navigate to Backup > Current Status. The Backup Status window displays.
Note You can also use a CLI command to check the backup status. See the “Command Line Interface” section on page 21 for details.
Step 4 To view the backup log file, click the log filename link.
Step 5 To cancel the current backup, click Cancel Backup.
Note The backup cancels after the current component completes its backup operation.
Restore ScenariosWhen performing a system data restoration, you can choose which node in the cluster you want to restore considering both stand alone (SA) and high availability (HA).
11Disaster Recovery System Administration Guide for Cisco Unified Contact Center Express Release 8.0(2)
Restore Scenarios
Caution Before you restore Cisco Unified Contact Center Express, ensure that the Cisco Unified Contact Center Express version that is installed on the server matches the version of the backup file that you want to restore. The Disaster Recovery System supports only matching versions of Cisco Unified Contact Center Express for restore. For example, the Disaster Recovery System does not allow a restore from version 8.0(1).1000-1 to version 8.0(2).1000-1, or from version 8.0(1).1000-1 to version 8.0(1).1000-2. (The last parts of the version number change when you install a service release or an engineering special.) In essence, the product version needs to match, end-to-end, for the Disaster Recovery System to run a successful Cisco Unified Contact Center Express database restore. Disaster Recovery System adheres to strict version checking and allows restore only between exactly matching versions of Cisco Unified Contact Center Express.
Note If there is no backup available, then you may not be able to run the restore activity on any of the nodes through DRS framework.
Caution After you restore a node using any of the restore scenarios, reboot the node, and then perform the Data Resync manually by logging in to the Web interface of Cisco Unified Contact Center Express Administration.
You can restore an SA or HA setups of Cisco Unified Contact Center Express in the following scenarios:
• Restoring an SA Setup (with Rebuild), page 12
• Restoring an SA or HA Setup to Last Known Good Configuration (without Rebuild), page 13
• Restoring only the Publisher Node in an HA Setup (with Rebuild), page 15
• Restoring only the Subscriber Node in an HA Setup (with Rebuild), page 17
• Restoring Both the Nodes in an HA Setup (with Rebuild), page 18
Restoring an SA Setup (with Rebuild)
Use this procedure if a disaster happens to the server in an SA setup. In such a case, if you have taken a valid backup for the server before it has failed, follow this procedure to restore it.
Procedure
Step 1 Perform a fresh installation of the same version of Cisco Unified Contact Center Express (using the same administrator credentials, network configuration and security password used earlier) on the node prior to restoring it. For more information on installing Cisco Unified Contact Center Express, see the Installing Cisco Unified Contact Center Express available here:http://www.cisco.com/en/US/products/sw/custcosw/ps1846/prod_installation_guides_list.html
Step 2 Navigate to Cisco Unified CCX Administration, select Disaster Recovery System from the Navigation drop-down list box in the upper-right corner of the Cisco Unified CCX Administration window, and click Go.
The Disaster Recovery System Logon window displays.
Step 3 Log in to the Disaster Recovery System with the same Platform Administrator username and password that you use to log in to Cisco Unified Operating System Administration.
12Disaster Recovery System Administration Guide for Cisco Unified Contact Center Express Release 8.0(2)
Restore Scenarios
Step 4 Configure the backup device. For more information, see Managing Backup Devices, page 7.
Step 5 Navigate to Restore > Restore Wizard. The Restore Wizard Step 1 window displays.
Step 6 In the Select Backup Device area, choose the backup device from which to restore.
Step 7 Click Next. The Restore Wizard Step 2 window displays.
Step 8 Choose the backup file that you want to restore.
Note The backup filename indicates the date and time that the system created the backup file.
Step 9 Click Next. The Restore Wizard Step 3 window displays.
Step 10 Select the feature UCCX.
Step 11 Click Next. The Restore Wizard Step 4 window displays,
Step 12 In File Integrity Check field, select the check box if you want to perform the file integrity check using SHA1 Message digest. A warning appears. This step is however optional.
Step 13 Click OK to proceed.
Step 14 In Select the Servers to be restored for each Feature field, select the node that you want to restore.
Step 15 To start restoring the data, click Restore.
Step 16 Your data gets restored on the node. To view the status of the restore, see the “Viewing the Restore Status” section on page 19.
Note During the restore process, do not perform any tasks with Cisco Unified Contact Center Express Administration or User Options.
Step 17 Restart the server when the restore is successful and the status shows 100 per cent. For more information on restarting, see the Cisco Unified Communications Operating System Administration Guide available here:http://www.cisco.com/en/US/products/sw/custcosw/ps1846/prod_maintenance_guides_list.html
Caution If you have done some configuration or hardware changes while performing fresh installation in Step 1 that might impact the License MAC, then rehost your license again using the license rehosting mechanism. For more information on the licensing rehosting mechanism, see the Installing Cisco Unified Contact Center Express available here:http://www.cisco.com/en/US/products/sw/custcosw/ps1846/prod_installation_guides_list.html
Note Restoring the node restores the whole Cisco Unified Contact Center Express database. This may take up to several hours based on the size of database that is being restored.
Restoring an SA or HA Setup to Last Known Good Configuration (without Rebuild)
Use this procedure if you are simply restoring an SA or HA setup of Cisco Unified Contact Center Express to the last known good configuration, without reinstalling Cisco Unified Contact Center Express on any of the nodes. Do not use this after a hard drive failure or other hardware failure. If you intend to rebuild an SA setup, see the “Restoring an SA Setup (with Rebuild)” section on page 12. For an HA setup with rebuild, see the sections following after this.
13Disaster Recovery System Administration Guide for Cisco Unified Contact Center Express Release 8.0(2)
Restore Scenarios
Note Before you restore a cluster, make sure that the second node in the cluster is up and communicating with the first node. Run the CLI command "utils network connectivity" to know if second node is communicating with the first node.You must carry out a fresh installation for the second node that is neither up nor communicating with the first node at the time of the restore.
The Restore Wizard walks you through the steps that are required to restore a backup file.
Caution You should not perform the restore activity of a SA backup in a HA setup; otherwise the cluster will break and the second node will become an orphan.
To perform a restore, use the procedure that follows.
Procedure
Step 1 Navigate to Cisco Unified CCX Administration, select Disaster Recovery System from the Navigation drop-down list box in the upper-right corner of the Cisco Unified CCX Administration window, and click Go.
The Disaster Recovery System Logon window displays.
Step 2 Log in to the Disaster Recovery System with the same Platform Administrator username and password that you use to log in to Cisco Unified Operating System Administration.
Step 3 Navigate to Restore > Restore Wizard. The Restore Wizard Step 1 window displays.
Step 4 In the Select Backup Device area, choose the backup device from which to restore.
Step 5 Click Next. The Restore Wizard Step 2 window displays.
Step 6 Choose the backup file that you want to restore.
Note The backup filename indicates the date and time that the system created the backup file.
Step 7 Click Next. The Restore Wizard Step 3 window displays.
Step 8 Select the feature UCCX.
Step 9 Click Next. The Restore Wizard Step 4 window displays,
Step 10 In File Integrity Check field, select the check box if you want to perform the file integrity check using SHA1 Message digest. A warning appears. This step is however optional.
Note This step is optional.
Step 11 Click OK to proceed.
Step 12 In Select the Servers to be restored for each Feature field, select the node(s) that you want to restore.
Note In Select the Servers to be restored for each Feature field, select both the nodes in case of an HA setup.
14Disaster Recovery System Administration Guide for Cisco Unified Contact Center Express Release 8.0(2)
Restore Scenarios
Step 13 To start restoring the data, click Restore.
Step 14 Your data gets restored on the node. To view the status of the restore, see the “Viewing the Restore Status” section on page 19.
Note During the restore process, do not perform any tasks with Cisco Unified Contact Center Express Administration or User Options.
Step 15 Restart the SA server or the HA cluster when the restore is successful and the status shows 100 per cent. For more information on restarting, see the Cisco Unified Communications Operating System Administration Guide available here:http://www.cisco.com/en/US/products/sw/custcosw/ps1846/prod_maintenance_guides_list.html
Step 16 After you restart the SA server or HA cluster, perform the data resync by choosing Subsystems > Cisco Unified CM Telephony > Data Resync from the Web interface of the Cisco Unified Contact Center Express Administration.
Note Restoring the node restores the whole Cisco Unified Contact Center Express database. This may take up to several hours based on the size of database that is being restored.
Restoring only the Publisher Node in an HA Setup (with Rebuild)
In a high availability (HA) setup , if there is a hard-drive failure or any other critical hardware or Software failure which needs rebuild of the Publisher ( first ) node, then follow the below procedure to recover the publisher node to the last backed up state of the publisher. Run the below procedure if you have a valid backup taken before the failure of the node.
Procedure
Step 1 Perform a fresh installation of the same version of Cisco Unified Contact Center Express (using the same administrator credentials, network configuration and security password used earlier) on the node prior to restoring it. For more information on installing Cisco Unified Contact Center Express, see the Installing Cisco Unified Contact Center Express available here:http://www.cisco.com/en/US/products/sw/custcosw/ps1846/prod_installation_guides_list.html
Step 2 Navigate to Cisco Unified CCX Administration, select Disaster Recovery System from the Navigation drop-down list box in the upper-right corner of the Cisco Unified CCX Administration window, and click Go.
The Disaster Recovery System Logon window displays.
Step 3 Log in to the Disaster Recovery System with the same Platform Administrator username and password that you use to log in to Cisco Unified Operating System Administration.
Step 4 Configure the backup device. For more information, see Managing Backup Devices, page 7.
Step 5 Navigate to Restore > Restore Wizard. The Restore Wizard Step 1 window displays.
Step 6 In the Select Backup Device area, choose the backup device from which to restore.
Step 7 Click Next. The Restore Wizard Step 2 window displays.
Step 8 Choose the backup file that you want to restore.
15Disaster Recovery System Administration Guide for Cisco Unified Contact Center Express Release 8.0(2)
Restore Scenarios
Note The backup filename indicates the date and time that the system created the backup file.
Step 9 Click Next. The Restore Wizard Step 3 window displays.
Step 10 Select the feature UCCX.
Step 11 Click Next. The Restore Wizard Step 4 window displays,
Step 12 When you get prompted to choose the nodes to restore, choose only the first node (the publisher).
Caution Do not select the second (subscriber) node in this condition as this will result in failure of the restore attempt.
Step 13 To start restoring the data, click Restore.
Note During the restore process, do not perform any tasks with Cisco Unified Contact Center Express Administration or User Options.
Restoring the first node may take up to several hours based on the size of database that is being restored. Depending on the size of your database that you choose to restore, the system can require one hour or more to restore.
Note Based on the requirements, you have the option to either retrieve the existing publisher node data from the DRS backup to be available on all the nodes in the cluster or retrieve the more recent data (if available) from the subscriber node to be available in the cluster.
Step 14 Run the following CLI command from the Subscriber node after the restore process is successful (restore status indicates 100 per cent) to inititate restoring the Publisher node only (with rebuild).
utils uccx setuppubrestore
Step 15 Run the following CLI command on the target node; that is if you want to retrieve the publisher node’s data, then run this command on the subscriber node, but if you want to retrieve the subscriber node’s data (which is more up-to-date), then run this command on the publisher node.
utils uccx database forcedatasync
Warning In any case, you must execute this command on either of the nodes after restoring the publisher node.
Step 16 Restart both the nodes and run the following CLI command on the Publisher node to set up replication.
utils uccx dbreplication reset
For more information on restarting, see the Cisco Unified Communications Operating System Administration Guide available here:http://www.cisco.com/en/US/products/sw/custcosw/ps1846/prod_maintenance_guides_list.html.
Caution If you have done some configuration or hardware changes while performing fresh installation in Step 1 that might impact the License MAC, then rehost your license again using the license rehosting mechanism before running the CLI command “utils uccx dbreplication reset”. For more
16Disaster Recovery System Administration Guide for Cisco Unified Contact Center Express Release 8.0(2)
Restore Scenarios
information on the licensing rehosting mechanism, see the Installing Cisco Unified Contact Center Express available here:http://www.cisco.com/en/US/products/sw/custcosw/ps1846/prod_installation_guides_list.html
Step 17 Your data gets restored on the publisher node. To view the status of the restore, see the “Viewing the Restore Status” section on page 19.
Restoring only the Subscriber Node in an HA Setup (with Rebuild)
Caution In case the second node crashes and there is no backup available, you may not be able to restore anything. However, to recover the second node in this case, delete the second node from the first node, add the second node details again, and then rebuild the second node. The recording and monitoring data which was present in the box cannot be recovered since there is no backup.
In a high availability (HA) setup , if there is a hard-drive failure or any other critical hardware or Software failure which needs rebuild of the Subscriber (second) node, then follow the below procedure to recover the subscriber node to the last backed up state of the subscriber. Run the below procedure if you have a valid backup taken before the failure of the node.
Procedure
Step 1 Perform a fresh installation of the same version of Cisco Unified Contact Center Express (using the same administrator credentials, network configuration and security password used earlier) on the node prior to restoring it. For more information on installing Cisco Unified Contact Center Express, see the Installing Cisco Unified Contact Center Express available here:http://www.cisco.com/en/US/products/sw/custcosw/ps1846/prod_installation_guides_list.html
Step 2 Navigate to Cisco Unified CCX Administration, select Disaster Recovery System from the Navigation drop-down list box in the upper-right corner of the Cisco Unified CCX Administration window, and click Go.
The Disaster Recovery System Logon window displays.
Step 3 Log in to the Disaster Recovery System with the same Platform Administrator username and password that you use to log in to Cisco Unified Operating System Administration.
Step 4 Configure the backup device. For more information, see Managing Backup Devices, page 7.
Step 5 Navigate to Restore > Restore Wizard. The Restore Wizard Step 1 window displays.
Step 6 In the Select Backup Device area, choose the backup device from which to restore.
Step 7 Click Next. The Restore Wizard Step 2 window displays.
Step 8 Choose the backup file that you want to restore.
Note The backup filename indicates the date and time that the system created the backup file.
Step 9 Click Next. The Restore Wizard Step 3 window displays.
Step 10 Select the feature UCCX.
17Disaster Recovery System Administration Guide for Cisco Unified Contact Center Express Release 8.0(2)
Restore Scenarios
Step 11 Click Next. The Restore Wizard Step 4 window displays,
Step 12 When you get prompted to choose the nodes to restore, choose only the second node (the subscriber).
Step 13 To start restoring the data, click Restore.
Step 14 Your data gets restored on the second node. To view the status of the restore, see the “Viewing the Restore Status” section on page 19.
Step 15 Restart the server when the restore status is 100 per cent. For more information on restarting, see the Cisco Unified Communications Operating System Administration Guide available here:http://www.cisco.com/en/US/products/sw/custcosw/ps1846/prod_maintenance_guides_list.html.
Restoring Both the Nodes in an HA Setup (with Rebuild)
In a high availability (HA) setup, if a major hard drive failure or upgrade occurs on both the nodes in the cluster, or in the event of a hard drive migration, you may need to rebuild both the nodes. If you have taken a valid backup before the failure, follow this procedure to restore both the nodes, starting with the publisher node.
Tip If you are doing any other types of hardware upgrades, such as replacing a network card or adding memory, you do not need to perform the following procedure.
Caution If you do not have a valid backup for the publisher node, you may not be able to restore anything as all of your data will be lost from both the nodes. In such a case, set up a new cluster.
Procedure
Step 1 Rebuild the first node by performing a fresh installation of the same version of Cisco Unified Contact Center Express (using the same administrator credentials, network configuration and security password being used before the failure). For more information on installing Cisco Unified Contact Center Express, see the Installing Cisco Unified Contact Center Express available here:http://www.cisco.com/en/US/products/sw/custcosw/ps1846/prod_installation_guides_list.html
Step 2 Restore only the first node by following Step 1 through Step 13 of the “Restoring only the Publisher Node in an HA Setup (with Rebuild)” section on page 15.
Step 3 Restart the first node. For more information on restarting, see the Cisco Unified Communications Operating System Administration Guide available here:http://www.cisco.com/en/US/products/sw/custcosw/ps1846/prod_maintenance_guides_list.html
Caution If you have done some configuration or hardware changes during the fresh installation of first node in Step 1 that might impact the License MAC, then rehost your license again using the license rehosting mechanism. For more information on the licensing rehosting mechanism, see the Installing Cisco Unified Contact Center Express available here:http://www.cisco.com/en/US/products/sw/custcosw/ps1846/prod_installation_guides_list.html
18Disaster Recovery System Administration Guide for Cisco Unified Contact Center Express Release 8.0(2)
Viewing the Restore Status
Step 4 Rebuild the second node by performing a fresh installation of the same version of Cisco Unified Contact Center Express (using the same administrator credentials, network configuration and security password being used before the failure). For more information on installing Cisco Unified Contact Center Express, refer to Installing Cisco Unified Contact Center Express.
Step 5 Restore only the second node by following Step 1 through Step 15 of the “Restoring only the Subscriber Node in an HA Setup (with Rebuild)” section on page 17.
Step 6 Restart the second node if not done already. Your data gets restored on both the nodes of the cluster.
For more information on restarting, see the Cisco Unified Communications Operating System Administration Guide available here:http://www.cisco.com/en/US/products/sw/custcosw/ps1846/prod_maintenance_guides_list.html
Note Depending on the size of your database that you choose to restore, the system may require a few hours to restore.
Viewing the Restore StatusTo check the status of the current restore job, perform the following steps:
Procedure
Step 1 Navigate to Cisco Unified Contact Center Express Administration, select Disaster Recovery System from the Navigation menu in the upper-right corner of the Cisco Unified Contact Center Express Administration window, and click Go.
The Disaster Recovery System Logon window displays.
Step 2 Log in to the Disaster Recovery System with the same Platform Administrator username and password that you use to log in to Cisco Unified Operating System Administration.
Step 3 Navigate to Restore > Status. The Restore Status window displays.
The Status column in the Restore Status window shows the status of the restoration in progress, including the percentage of completion of the restore procedure.
Note You can also use a CLI command to check the restore status. See the “Command Line Interface” section on page 21 for details.
Step 4 To view the restore log file, click the log filename link.
19Disaster Recovery System Administration Guide for Cisco Unified Contact Center Express Release 8.0(2)
Viewing the Backup and Restore History
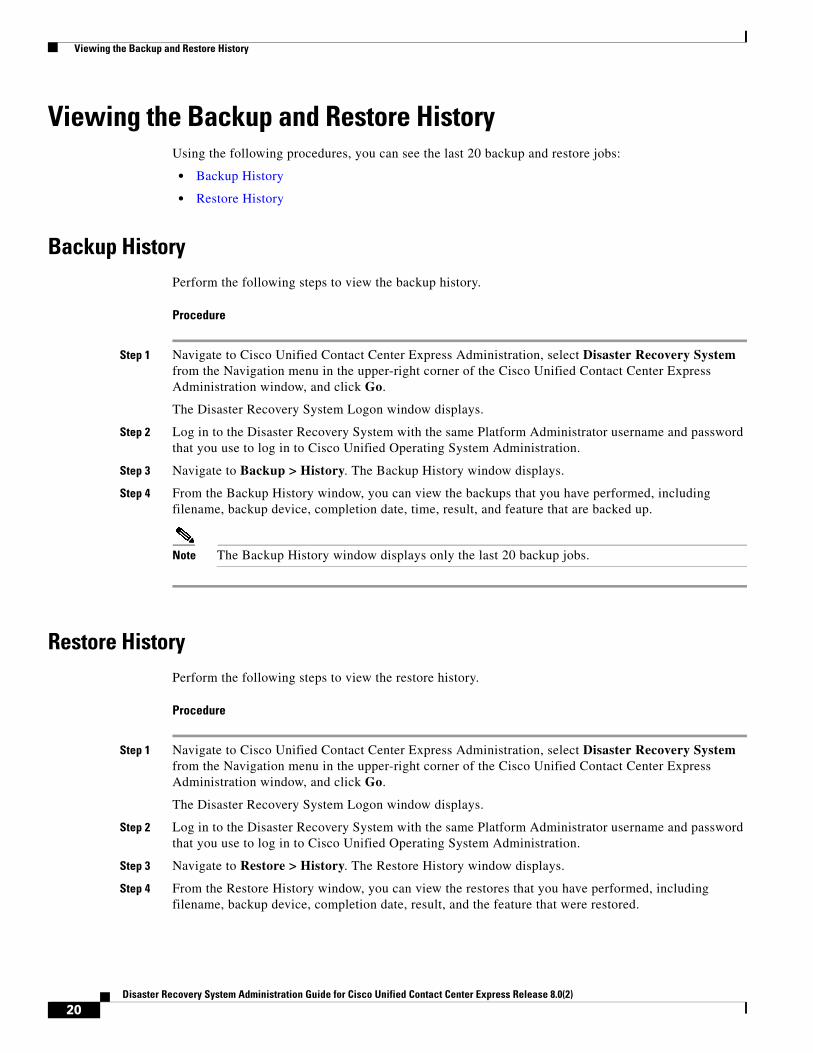
Viewing the Backup and Restore HistoryUsing the following procedures, you can see the last 20 backup and restore jobs:
• Backup History
• Restore History
Backup HistoryPerform the following steps to view the backup history.
Procedure
Step 1 Navigate to Cisco Unified Contact Center Express Administration, select Disaster Recovery System from the Navigation menu in the upper-right corner of the Cisco Unified Contact Center Express Administration window, and click Go.
The Disaster Recovery System Logon window displays.
Step 2 Log in to the Disaster Recovery System with the same Platform Administrator username and password that you use to log in to Cisco Unified Operating System Administration.
Step 3 Navigate to Backup > History. The Backup History window displays.
Step 4 From the Backup History window, you can view the backups that you have performed, including filename, backup device, completion date, time, result, and feature that are backed up.
Note The Backup History window displays only the last 20 backup jobs.
Restore HistoryPerform the following steps to view the restore history.
Procedure
Step 1 Navigate to Cisco Unified Contact Center Express Administration, select Disaster Recovery System from the Navigation menu in the upper-right corner of the Cisco Unified Contact Center Express Administration window, and click Go.
The Disaster Recovery System Logon window displays.
Step 2 Log in to the Disaster Recovery System with the same Platform Administrator username and password that you use to log in to Cisco Unified Operating System Administration.
Step 3 Navigate to Restore > History. The Restore History window displays.
Step 4 From the Restore History window, you can view the restores that you have performed, including filename, backup device, completion date, result, and the feature that were restored.
20Disaster Recovery System Administration Guide for Cisco Unified Contact Center Express Release 8.0(2)
Trace Files
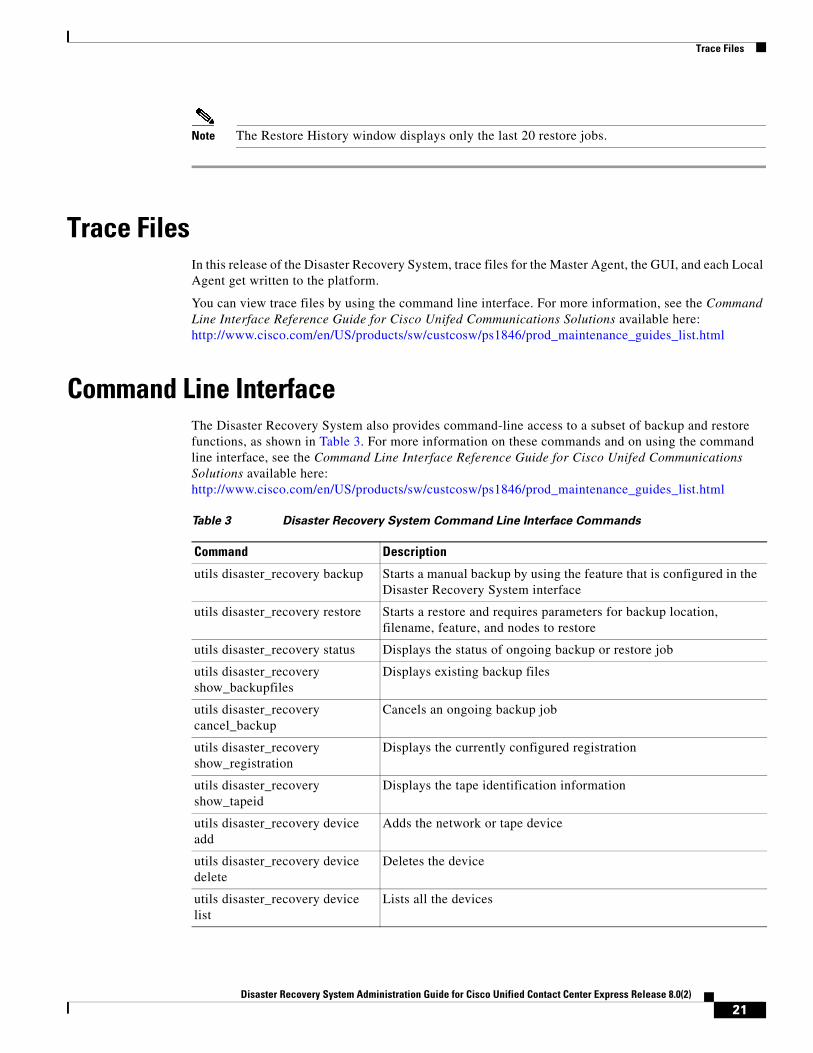
Note The Restore History window displays only the last 20 restore jobs.
Trace FilesIn this release of the Disaster Recovery System, trace files for the Master Agent, the GUI, and each Local Agent get written to the platform.
You can view trace files by using the command line interface. For more information, see the Command Line Interface Reference Guide for Cisco Unifed Communications Solutions available here:http://www.cisco.com/en/US/products/sw/custcosw/ps1846/prod_maintenance_guides_list.html
Command Line InterfaceThe Disaster Recovery System also provides command-line access to a subset of backup and restore functions, as shown in Table 3. For more information on these commands and on using the command line interface, see the Command Line Interface Reference Guide for Cisco Unifed Communications Solutions available here:http://www.cisco.com/en/US/products/sw/custcosw/ps1846/prod_maintenance_guides_list.html
Table 3 Disaster Recovery System Command Line Interface Commands
Command Description
utils disaster_recovery backup Starts a manual backup by using the feature that is configured in the Disaster Recovery System interface
utils disaster_recovery restore Starts a restore and requires parameters for backup location, filename, feature, and nodes to restore
utils disaster_recovery status Displays the status of ongoing backup or restore job
utils disaster_recovery show_backupfiles
Displays existing backup files
utils disaster_recovery cancel_backup
Cancels an ongoing backup job
utils disaster_recovery show_registration
Displays the currently configured registration
utils disaster_recovery show_tapeid
Displays the tape identification information
utils disaster_recovery device add
Adds the network or tape device
utils disaster_recovery device delete
Deletes the device
utils disaster_recovery device list
Lists all the devices
21Disaster Recovery System Administration Guide for Cisco Unified Contact Center Express Release 8.0(2)
Error Messages
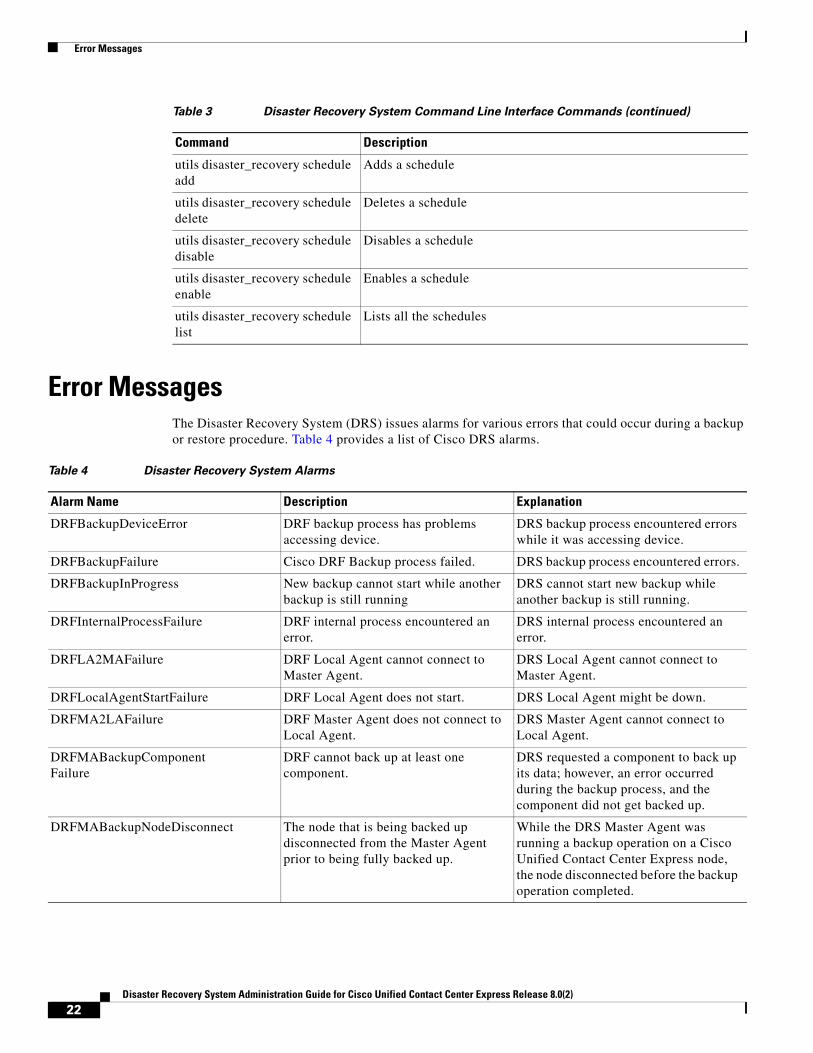
Error MessagesThe Disaster Recovery System (DRS) issues alarms for various errors that could occur during a backup or restore procedure. Table 4 provides a list of Cisco DRS alarms.
utils disaster_recovery schedule add
Adds a schedule
utils disaster_recovery schedule delete
Deletes a schedule
utils disaster_recovery schedule disable
Disables a schedule
utils disaster_recovery schedule enable
Enables a schedule
utils disaster_recovery schedule list
Lists all the schedules
Table 3 Disaster Recovery System Command Line Interface Commands (continued)
Command Description
Table 4 Disaster Recovery System Alarms
Alarm Name Description Explanation
DRFBackupDeviceError DRF backup process has problems accessing device.
DRS backup process encountered errors while it was accessing device.
DRFBackupFailure Cisco DRF Backup process failed. DRS backup process encountered errors.
DRFBackupInProgress New backup cannot start while another backup is still running
DRS cannot start new backup while another backup is still running.
DRFInternalProcessFailure DRF internal process encountered an error.
DRS internal process encountered an error.
DRFLA2MAFailure DRF Local Agent cannot connect to Master Agent.
DRS Local Agent cannot connect to Master Agent.
DRFLocalAgentStartFailure DRF Local Agent does not start. DRS Local Agent might be down.
DRFMA2LAFailure DRF Master Agent does not connect to Local Agent.
DRS Master Agent cannot connect to Local Agent.
DRFMABackupComponentFailure
DRF cannot back up at least one component.
DRS requested a component to back up its data; however, an error occurred during the backup process, and the component did not get backed up.
DRFMABackupNodeDisconnect The node that is being backed up disconnected from the Master Agent prior to being fully backed up.
While the DRS Master Agent was running a backup operation on a Cisco Unified Contact Center Express node, the node disconnected before the backup operation completed.
22Disaster Recovery System Administration Guide for Cisco Unified Contact Center Express Release 8.0(2)
Error Messages
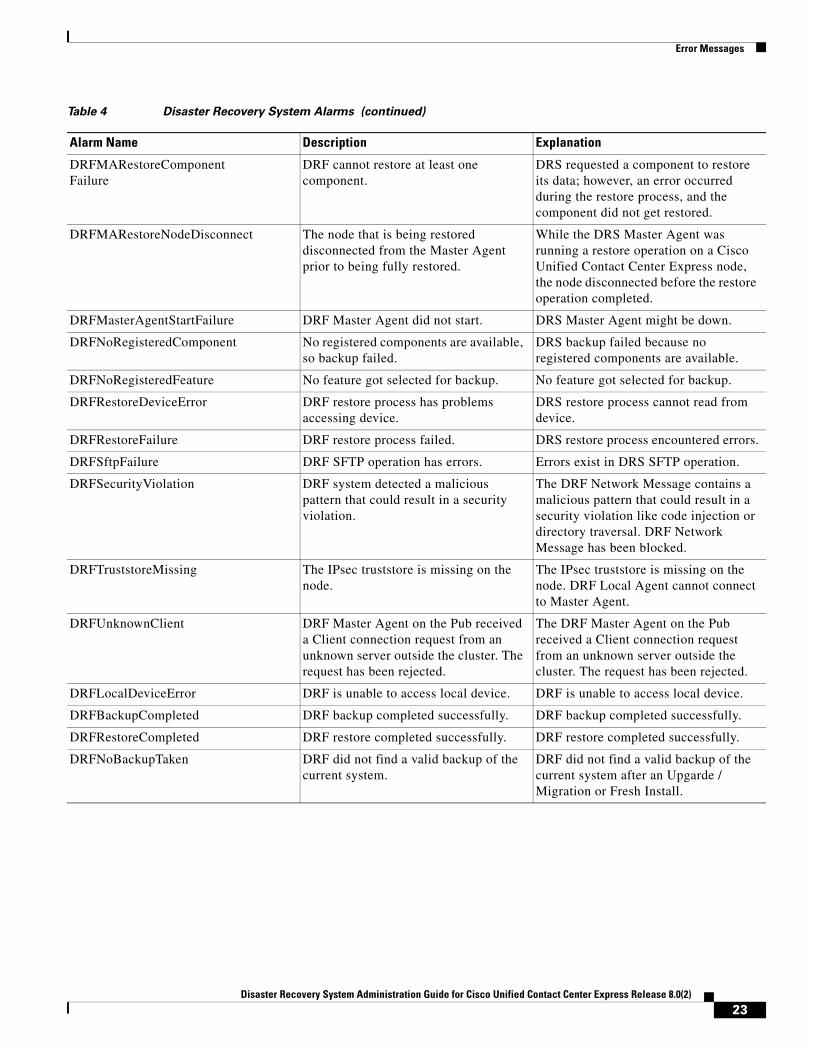
DRFMARestoreComponentFailure
DRF cannot restore at least one component.
DRS requested a component to restore its data; however, an error occurred during the restore process, and the component did not get restored.
DRFMARestoreNodeDisconnect The node that is being restored disconnected from the Master Agent prior to being fully restored.
While the DRS Master Agent was running a restore operation on a Cisco Unified Contact Center Express node, the node disconnected before the restore operation completed.
DRFMasterAgentStartFailure DRF Master Agent did not start. DRS Master Agent might be down.
DRFNoRegisteredComponent No registered components are available, so backup failed.
DRS backup failed because no registered components are available.
DRFNoRegisteredFeature No feature got selected for backup. No feature got selected for backup.
DRFRestoreDeviceError DRF restore process has problems accessing device.
DRS restore process cannot read from device.
DRFRestoreFailure DRF restore process failed. DRS restore process encountered errors.
DRFSftpFailure DRF SFTP operation has errors. Errors exist in DRS SFTP operation.
DRFSecurityViolation DRF system detected a malicious pattern that could result in a security violation.
The DRF Network Message contains a malicious pattern that could result in a security violation like code injection or directory traversal. DRF Network Message has been blocked.
DRFTruststoreMissing The IPsec truststore is missing on the node.
The IPsec truststore is missing on the node. DRF Local Agent cannot connect to Master Agent.
DRFUnknownClient DRF Master Agent on the Pub received a Client connection request from an unknown server outside the cluster. The request has been rejected.
The DRF Master Agent on the Pub received a Client connection request from an unknown server outside the cluster. The request has been rejected.
DRFLocalDeviceError DRF is unable to access local device. DRF is unable to access local device.
DRFBackupCompleted DRF backup completed successfully. DRF backup completed successfully.
DRFRestoreCompleted DRF restore completed successfully. DRF restore completed successfully.
DRFNoBackupTaken DRF did not find a valid backup of the current system.
DRF did not find a valid backup of the current system after an Upgarde / Migration or Fresh Install.
Table 4 Disaster Recovery System Alarms (continued)
Alarm Name Description Explanation
23Disaster Recovery System Administration Guide for Cisco Unified Contact Center Express Release 8.0(2)
Related Documentation
Related Documentation • For learn more about Cisco Unified Contact Center Express documentation, see the following URL:
http://www.cisco.com/en/US/products/sw/custcosw/ps1846/tsd_products_support_series_home.html
• For a complete list of terms used in Cisco Unified CCX and Cisco Unified IP IVR, see the following URL:http://www.cisco.com/en/US/products/sw/custcosw/ps1846/prod_technical_reference_list.html
Obtain Additional Support and DocumentationFor information on obtaining documentation, submitting a service request, and gathering additional information, see the monthly What’s New in Cisco Product Documentation, which also lists all new and revised Cisco technical documentation, at:
http://www.cisco.com/en/US/docs/general/whatsnew/whatsnew.html
Subscribe to the What’s New in Cisco Product Documentation as a Really Simple Syndication (RSS) feed and set content to be delivered directly to your desktop using a reader application. The RSS feeds are a free service and Cisco currently supports RSS version 2.0.
Documentation FeedbackYou can provide comments about this document by sending an email to the following address:
We appreciate your comments.
CCDE, CCENT, CCSI, Cisco Eos, Cisco Explorer, Cisco HealthPresence, Cisco IronPort, the Cisco logo, Cisco Nurse Connect, Cisco Pulse, Cisco SensorBase, Cisco StackPower, Cisco StadiumVision, Cisco TelePresence, Cisco TrustSec, Cisco Unified Computing System, Cisco WebEx, DCE, Flip Channels, Flip for Good, Flip Mino, Flipshare (Design), Flip Ultra, Flip Video, Flip Video (Design), Instant Broadband, and Welcome to the Human Network are trademarks; Changing the Way We Work, Live, Play, and Learn, Cisco Capital, Cisco Capital (Design), Cisco:Financed (Stylized), Cisco Store, Flip Gift Card, and One Million Acts of Green are service marks; and Access Registrar, Aironet, AllTouch, AsyncOS, Bringing the Meeting To You, Catalyst, CCDA, CCDP, CCIE, CCIP, CCNA, CCNP, CCSP, CCVP, Cisco, the Cisco Certified Internetwork Expert logo, Cisco IOS, Cisco Lumin, Cisco Nexus, Cisco Press, Cisco Systems, Cisco Systems Capital, the Cisco Systems logo, Cisco Unity, Collaboration Without Limitation, Continuum, EtherFast, EtherSwitch, Event Center, Explorer, Follow Me Browsing, GainMaker, iLYNX, IOS, iPhone, IronPort, the IronPort logo, Laser Link, LightStream, Linksys, MeetingPlace, MeetingPlace Chime Sound, MGX, Networkers, Networking Academy, PCNow, PIX, PowerKEY, PowerPanels, PowerTV, PowerTV (Design), PowerVu, Prisma, ProConnect, ROSA, SenderBase, SMARTnet, Spectrum Expert, StackWise, WebEx, and the WebEx logo are registered trademarks of Cisco and/or its affiliates in the United States and certain other countries.
All other trademarks mentioned in this document or website are the property of their respective owners. The use of the word partner does not imply a partnership relationship between Cisco and any other company. (1002R)
© 2011 Cisco Systems, Inc. All rights reserved.
24Disaster Recovery System Administration Guide for Cisco Unified Contact Center Express Release 8.0(2)