Embed Size (px)
Citation preview

DIVISION OF LIBRARY SERVICES
EndNote User Manual Part 3 Saving, Syncing and Sharing your EndNote Library
Contents Saving your EndNote Library ............................................................................................. 1
EndNote Library components: .enl + Data folder ............................................................................... 1
Creating an EndNote Library (recommended steps) .......................................................................... 1
Where should I save my working Library? ...................................................................... 2
Syncing your Library with EndNote Online ..................................................................... 2
Syncing with other devices ............................................................................................. 4
Backing up your EndNote Library ..................................................................................... 6
Creating the Backup Library .......................................................................................................................... 6
Where should I save the backup of my EndNote Library ............................................................... 7
S:\ or P:\ Drive (CSU Network Drives) ............................................................................ 7
Cloud storage – Dropbox, SharePoint, Box Sync, Google Drive and iCloud ................... 7
External Hard-drive, USBs & CDs .................................................................................. 7
Sharing your EndNote Library ........................................................................................... 8
Collaboration for research .............................................................................................................................. 8
Sharing your Library ....................................................................................................... 8
Access a Library that is shared with you ........................................................................ 8
Sharing Groups Using EndNote Online ................................................................................................... 8
To Create a New Group to Share ................................................................................... 9
How to Share a Group ................................................................................................... 9
Importing Records from a Colleague’s Shared Group .................................................. 10
Adding Records to a Colleague’s Shared Group .......................................................... 10
Sending a copy of your Library ................................................................................................................ 10
Sending a Compressed Library as an email attachment .............................................. 11
How to open a Compressed Library ............................................................................. 12
Importing a Compressed Library into your existing EndNote Library ............................ 12
1
Saving your EndNote Library When you first start using EndNote, you will need to create an EndNote Library. You can
continue to use the same Library for all of your research and use the Groups function to
organise the records appropriately, i.e., you do not need to create a new EndNote Library for
each new assessment or research project.
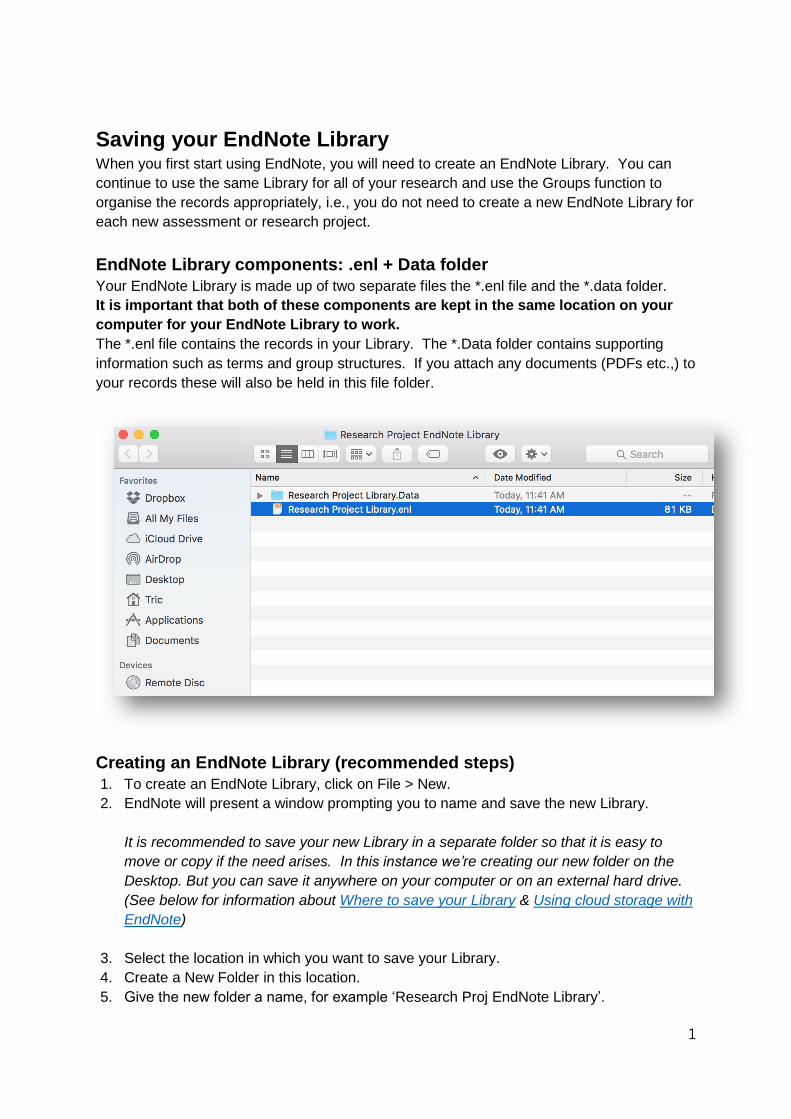
EndNote Library components: .enl + Data folder
Your EndNote Library is made up of two separate files the *.enl file and the *.data folder.
It is important that both of these components are kept in the same location on your
computer for your EndNote Library to work.
The *.enl file contains the records in your Library. The *.Data folder contains supporting
information such as terms and group structures. If you attach any documents (PDFs etc.,) to
your records these will also be held in this file folder.
Creating an EndNote Library (recommended steps)
1. To create an EndNote Library, click on File > New.
2. EndNote will present a window prompting you to name and save the new Library.
It is recommended to save your new Library in a separate folder so that it is easy to
move or copy if the need arises. In this instance we’re creating our new folder on the
Desktop. But you can save it anywhere on your computer or on an external hard drive.
(See below for information about Where to save your Library & Using cloud storage with
EndNote)
3. Select the location in which you want to save your Library.
4. Create a New Folder in this location.
5. Give the new folder a name, for example ‘Research Proj EndNote Library’.
2
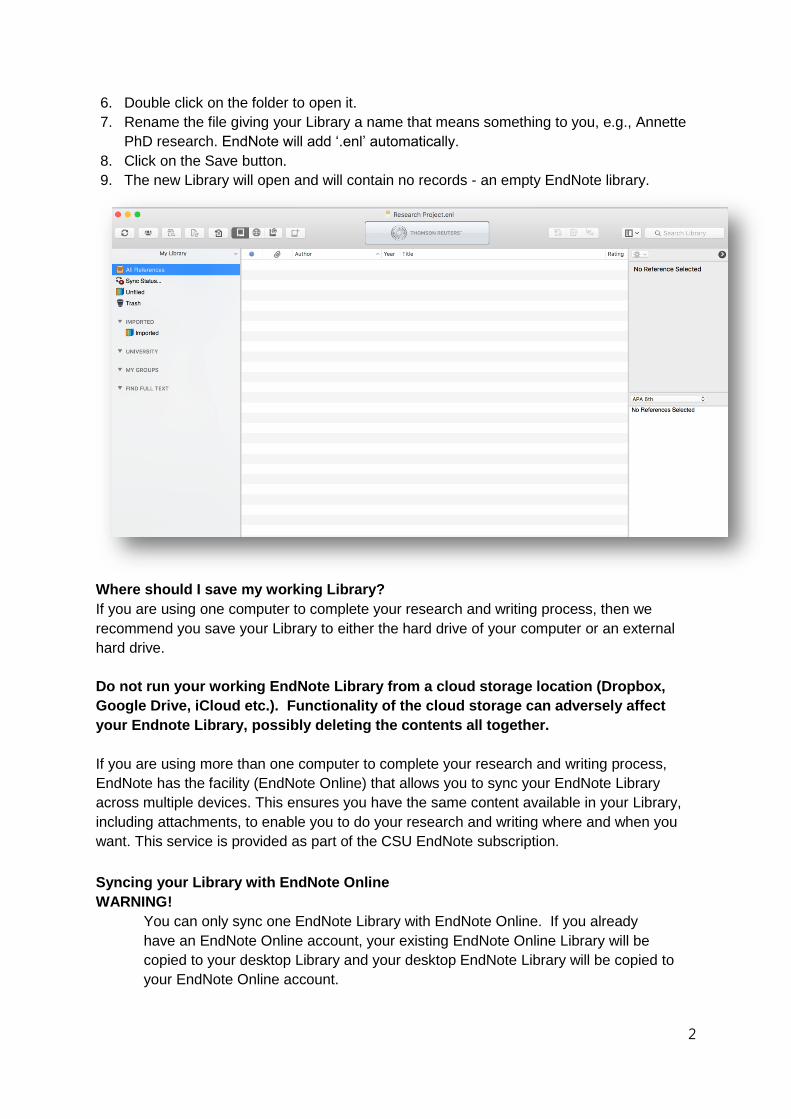
6. Double click on the folder to open it.
7. Rename the file giving your Library a name that means something to you, e.g., Annette
PhD research. EndNote will add ‘.enl’ automatically.
8. Click on the Save button.
9. The new Library will open and will contain no records - an empty EndNote library.
Where should I save my working Library?
If you are using one computer to complete your research and writing process, then we
recommend you save your Library to either the hard drive of your computer or an external
hard drive.
Do not run your working EndNote Library from a cloud storage location (Dropbox,
Google Drive, iCloud etc.). Functionality of the cloud storage can adversely affect
your Endnote Library, possibly deleting the contents all together.
If you are using more than one computer to complete your research and writing process,
EndNote has the facility (EndNote Online) that allows you to sync your EndNote Library
across multiple devices. This ensures you have the same content available in your Library,
including attachments, to enable you to do your research and writing where and when you
want. This service is provided as part of the CSU EndNote subscription.
Syncing your Library with EndNote Online
WARNING!
You can only sync one EndNote Library with EndNote Online. If you already
have an EndNote Online account, your existing EndNote Online Library will be
copied to your desktop Library and your desktop EndNote Library will be copied to
your EndNote Online account.
3
It is strongly recommended that you create a backup of your Endnote Library before
syncing it for the first time.
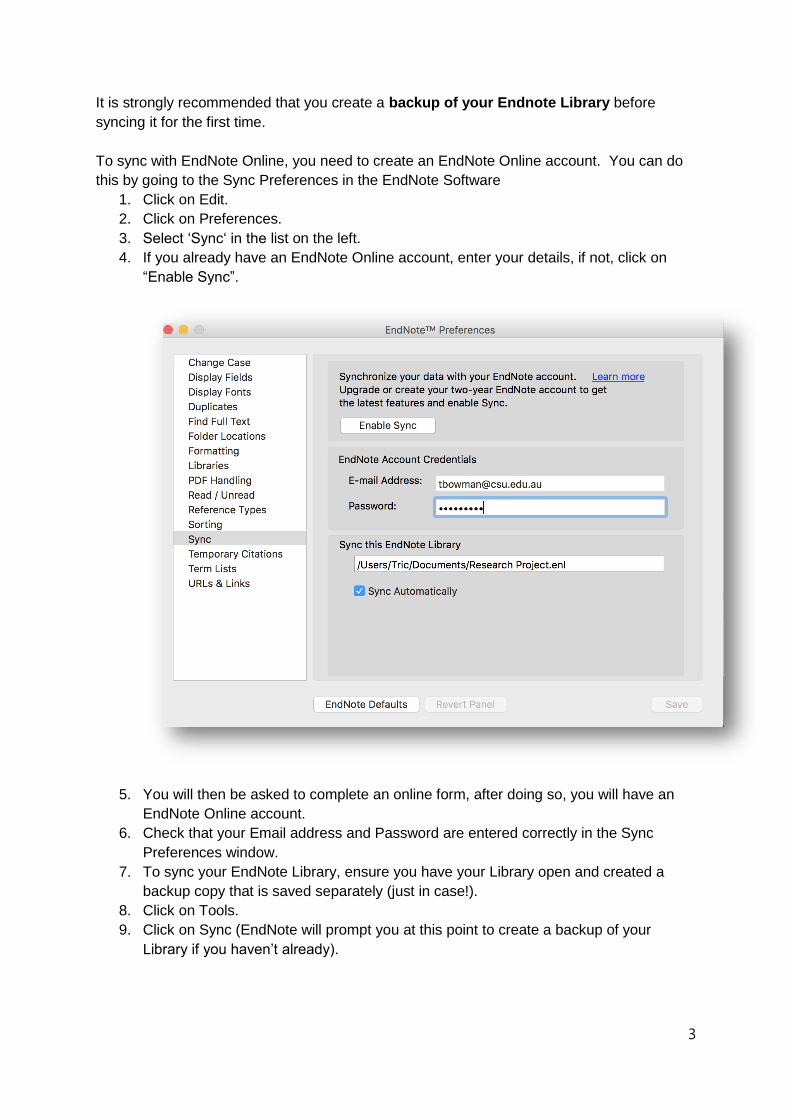
To sync with EndNote Online, you need to create an EndNote Online account. You can do
this by going to the Sync Preferences in the EndNote Software
1. Click on Edit.
2. Click on Preferences.
3. Select ‘Sync‘ in the list on the left.
4. If you already have an EndNote Online account, enter your details, if not, click on
“Enable Sync”.
5. You will then be asked to complete an online form, after doing so, you will have an
EndNote Online account.
6. Check that your Email address and Password are entered correctly in the Sync
Preferences window.
7. To sync your EndNote Library, ensure you have your Library open and created a
backup copy that is saved separately (just in case!).
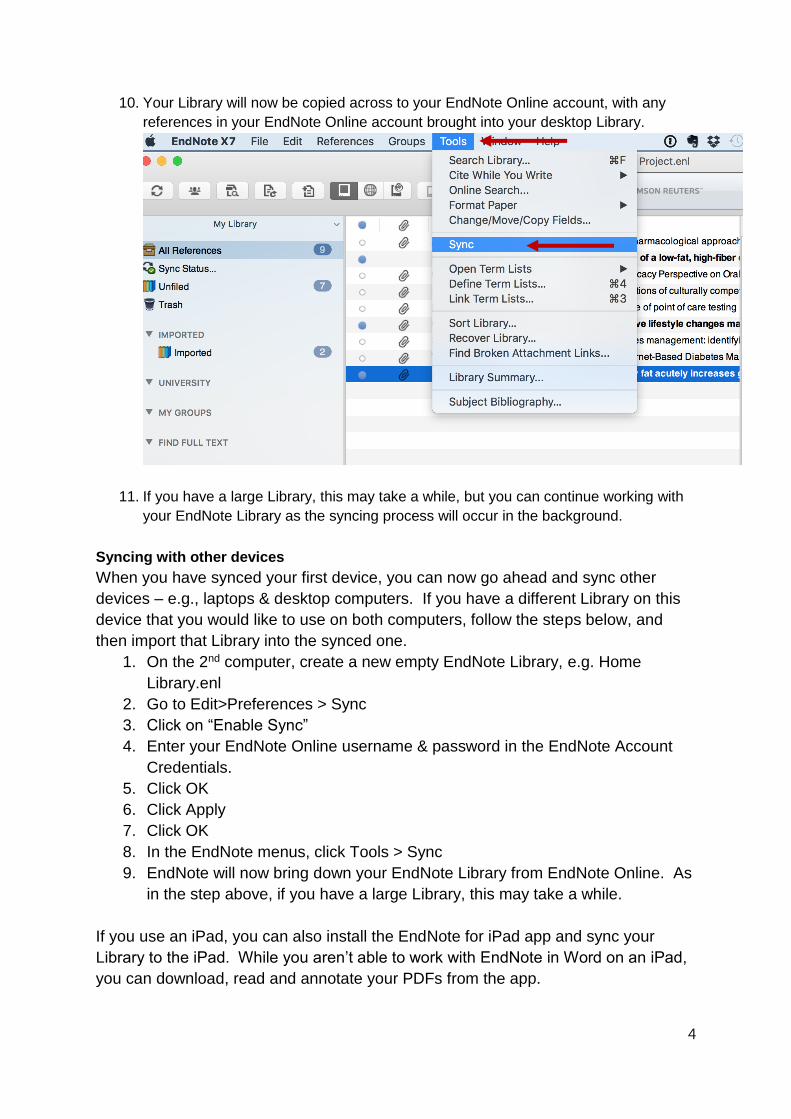
8. Click on Tools.
9. Click on Sync (EndNote will prompt you at this point to create a backup of your
Library if you haven’t already).
4
10. Your Library will now be copied across to your EndNote Online account, with any
references in your EndNote Online account brought into your desktop Library.
11. If you have a large Library, this may take a while, but you can continue working with
your EndNote Library as the syncing process will occur in the background.
Syncing with other devices
When you have synced your first device, you can now go ahead and sync other
devices – e.g., laptops & desktop computers. If you have a different Library on this
device that you would like to use on both computers, follow the steps below, and
then import that Library into the synced one.
1. On the 2nd computer, create a new empty EndNote Library, e.g. Home
Library.enl
2. Go to Edit>Preferences > Sync
3. Click on “Enable Sync”
4. Enter your EndNote Online username & password in the EndNote Account
Credentials.
5. Click OK
6. Click Apply
7. Click OK
8. In the EndNote menus, click Tools > Sync
9. EndNote will now bring down your EndNote Library from EndNote Online. As
in the step above, if you have a large Library, this may take a while.
If you use an iPad, you can also install the EndNote for iPad app and sync your
Library to the iPad. While you aren’t able to work with EndNote in Word on an iPad,
you can download, read and annotate your PDFs from the app.

5
To import an existing EndNote Library into this synced Library.
1. Open the synced Library.
2. Click File > Import > File…
3. In the window that opens, Click on “Choose” to select the *.enl file that you
wish to import.
4. Ensure the Import Option says EndNote Library
5. In the Duplicates field you can choose to Import all records, Identify duplicates
and discard them or Identify duplicates and add them to a separate Library.
The choice you make at this point will depend on what you’re intending to do
with the records.
6. Leave Text Translation as No Translation.
7. Click on Import.
8. EndNote will then import the records.
9. Once complete, the records will show in the Imported References heading on
the left hand column in EndNote.

6
Backing up your EndNote Library Whether you’re using one or multiple devices to complete your research, we recommend
creating a regular backup of your EndNote Library and saving it somewhere independent of
your computer, preferably somewhere that is itself systematically backed up.
Creating the Backup Library
We recommend creating a compressed version of your EndNote Library – this file will
contain all of your records as well as the attachments held within your Library in one file.
1. Open your EndNote Library.
2. Click on File > Compressed Library (.enlx) …
3. You’ll be presented with a window with a number of options to create your
compressed Library.
4. In this instance, select “Create”, “With File Attachments” and “All References in
Library”.
5. Click on Next.
6. You’ll be asked where you want to save your compressed Library. You can save it
directly to the location now or create the file and move it to your desired location
afterwards.
For information on where to save your backup Library read below.
7. When saving the compressed Library, we recommend following a naming convention
that makes it easy to determine which file is which with the date in the name,
e.g., Archive EndNote Library 20160418.enlx
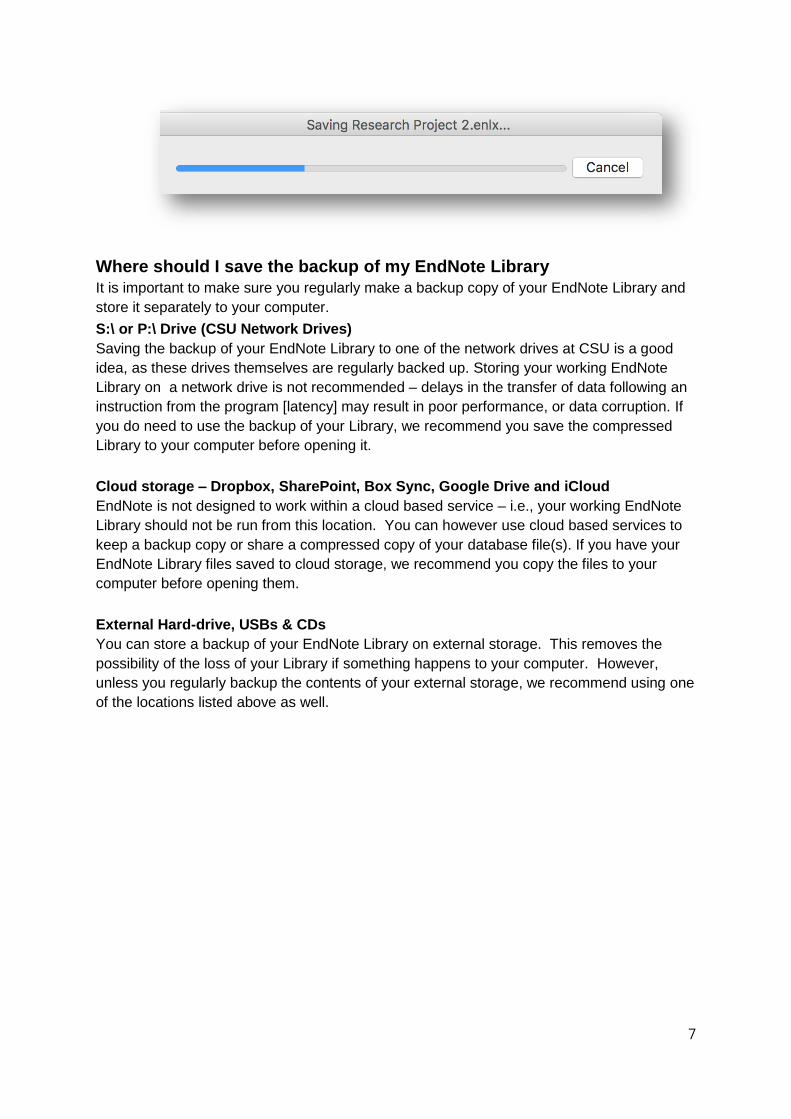
8. Click “Save”. EndNote will then create the compressed Library. This can take a few
minutes, depending on the size of your Library. Just before the process ends, a
dialogue box will open saying “Saving EndNote Library name.enl”. When the
progress bar is complete, the compressed Library will be saved to your desired
location.
7
Where should I save the backup of my EndNote Library
It is important to make sure you regularly make a backup copy of your EndNote Library and
store it separately to your computer.
S:\ or P:\ Drive (CSU Network Drives)
Saving the backup of your EndNote Library to one of the network drives at CSU is a good
idea, as these drives themselves are regularly backed up. Storing your working EndNote
Library on a network drive is not recommended – delays in the transfer of data following an
instruction from the program [latency] may result in poor performance, or data corruption. If
you do need to use the backup of your Library, we recommend you save the compressed
Library to your computer before opening it.
Cloud storage – Dropbox, SharePoint, Box Sync, Google Drive and iCloud
EndNote is not designed to work within a cloud based service – i.e., your working EndNote
Library should not be run from this location. You can however use cloud based services to
keep a backup copy or share a compressed copy of your database file(s). If you have your
EndNote Library files saved to cloud storage, we recommend you copy the files to your
computer before opening them.
External Hard-drive, USBs & CDs
You can store a backup of your EndNote Library on external storage. This removes the
possibility of the loss of your Library if something happens to your computer. However,
unless you regularly backup the contents of your external storage, we recommend using one
of the locations listed above as well.
8
Sharing your EndNote Library
Collaboration for research
There may be times when you need to work with someone else on the same research paper
or project and need access to the same EndNote Library. You can do this by sharing an
EndNote Library via EndNote Online. See Syncing your Library with EndNote Online before
continuing.
NB - Sharing full-text PDFs with others may breach copyright or database license
terms. Users sharing an EndNote Library with non-CSU staff or students, should not
attach full-text copyright content to records in the shared Library.
Sharing your Library
When you have synced your Library, you can then share your Library with other
EndNote Online users. To share your Library…
1. Click on File > Share.
2. Enter the email addresses of the people you want to share with (up to 14
people total), you must enter the email address that was used to create their
EndNote Online account.
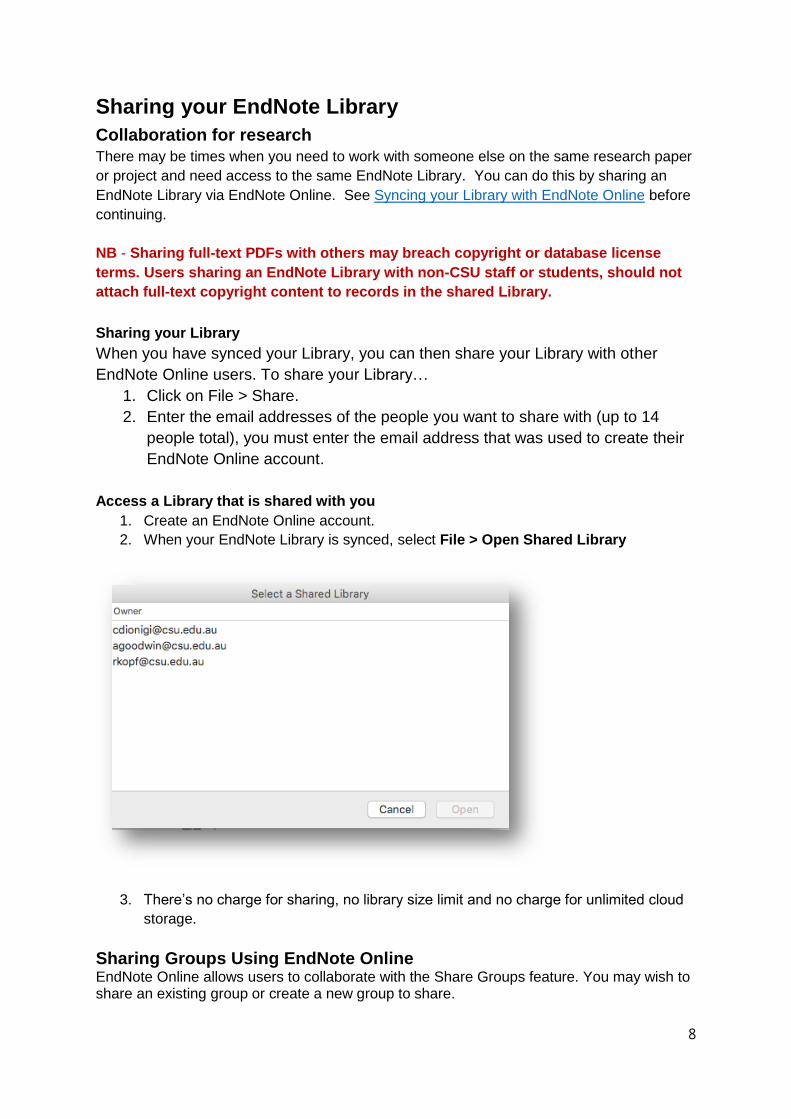
Access a Library that is shared with you
1. Create an EndNote Online account.
2. When your EndNote Library is synced, select File > Open Shared Library
3. There’s no charge for sharing, no library size limit and no charge for unlimited cloud
storage.
Sharing Groups Using EndNote Online EndNote Online allows users to collaborate with the Share Groups feature. You may wish to share an existing group or create a new group to share.
9
To access EndNote Online, go to www.myendnoteweb.com and use the email address and password you used to sync your Library.
To Create a New Group to Share 1. Logon to your EndNote Online library 2. Click on Organize - then Manage My Groups 3. Select New Group and name it 4. Select the citations you would like to add into the New Group 5. Click on the arrow from the drop-down Add To Group menu 6. Add your references to the selected group
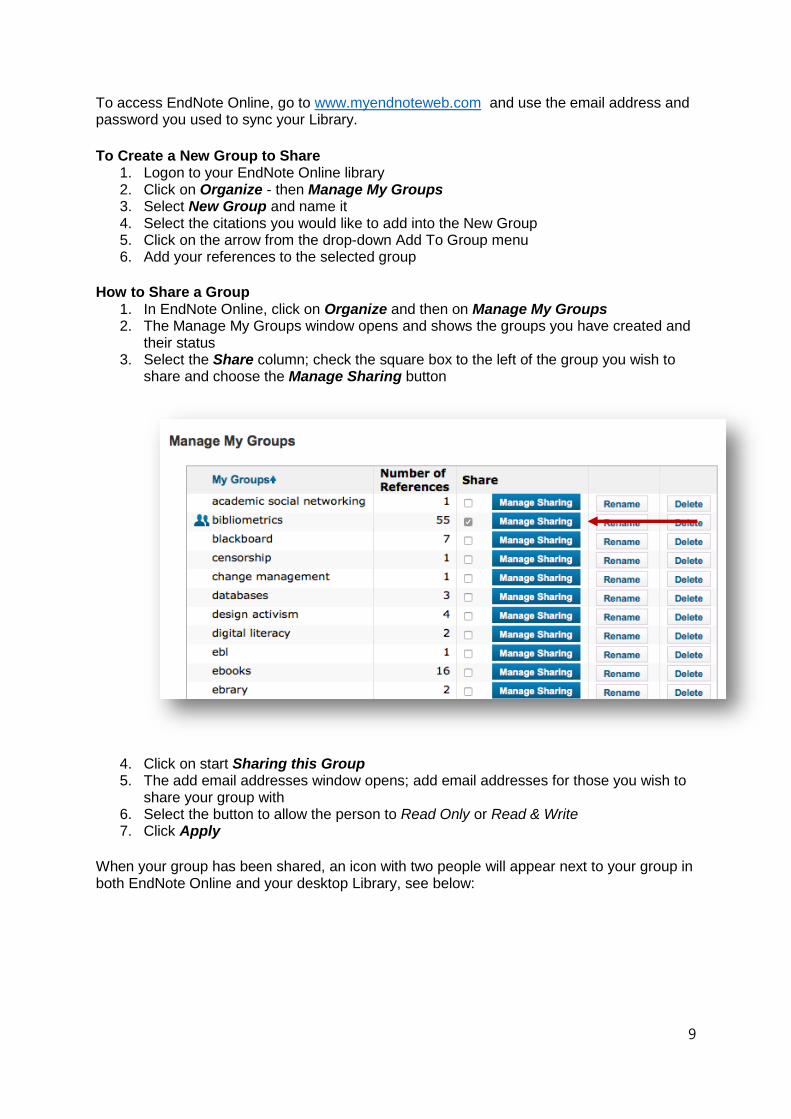
How to Share a Group 1. In EndNote Online, click on Organize and then on Manage My Groups 2. The Manage My Groups window opens and shows the groups you have created and
their status 3. Select the Share column; check the square box to the left of the group you wish to
share and choose the Manage Sharing button
4. Click on start Sharing this Group 5. The add email addresses window opens; add email addresses for those you wish to
share your group with 6. Select the button to allow the person to Read Only or Read & Write 7. Click Apply
When your group has been shared, an icon with two people will appear next to your group in both EndNote Online and your desktop Library, see below:

10
Importing Records from a Colleague’s Shared Group A shared group from a colleague will appear at the bottom of your Library in EndNote Online, but will not be synced with your desktop library.
To move these references into your Library
1. Click on the shared Group 2. Select the references you wish to add to your Library, you can choose All references
or select specific ones 3. At the top of the page, select the group you wish to add the references to, it can be
an existing group or a New Group
The next time your desktop EndNote Library is synced with EndNote Online, these records will be added. You will not see other’s shared groups in your desktop library.
Adding Records to a Colleague’s Shared Group To add records to a shared group from your Library,
1. In EndNote Online, select the records you wish to share 2. At the top of the page, select the shared group you wish to add them to
Sending a copy of your Library
There may be times when you want to send all or part of your EndNote Library to
someone who doesn’t use EndNote Online.
11
Sending a Compressed Library as an email attachment
If you are emailing your EndNote Library it is recommended that you send a
compressed version of your Library.
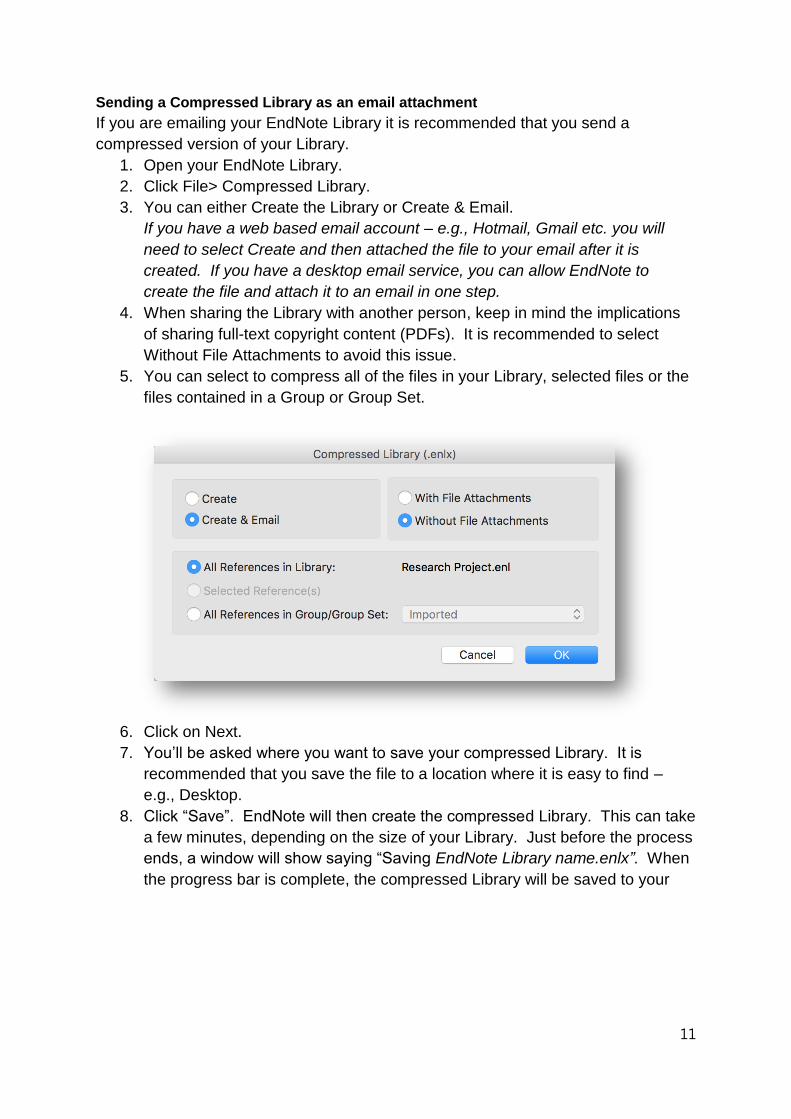
1. Open your EndNote Library.
2. Click File> Compressed Library.
3. You can either Create the Library or Create & Email.
If you have a web based email account – e.g., Hotmail, Gmail etc. you will
need to select Create and then attached the file to your email after it is
created. If you have a desktop email service, you can allow EndNote to
create the file and attach it to an email in one step.
4. When sharing the Library with another person, keep in mind the implications
of sharing full-text copyright content (PDFs). It is recommended to select
Without File Attachments to avoid this issue.
5. You can select to compress all of the files in your Library, selected files or the
files contained in a Group or Group Set.
6. Click on Next.
7. You’ll be asked where you want to save your compressed Library. It is
recommended that you save the file to a location where it is easy to find –
e.g., Desktop.
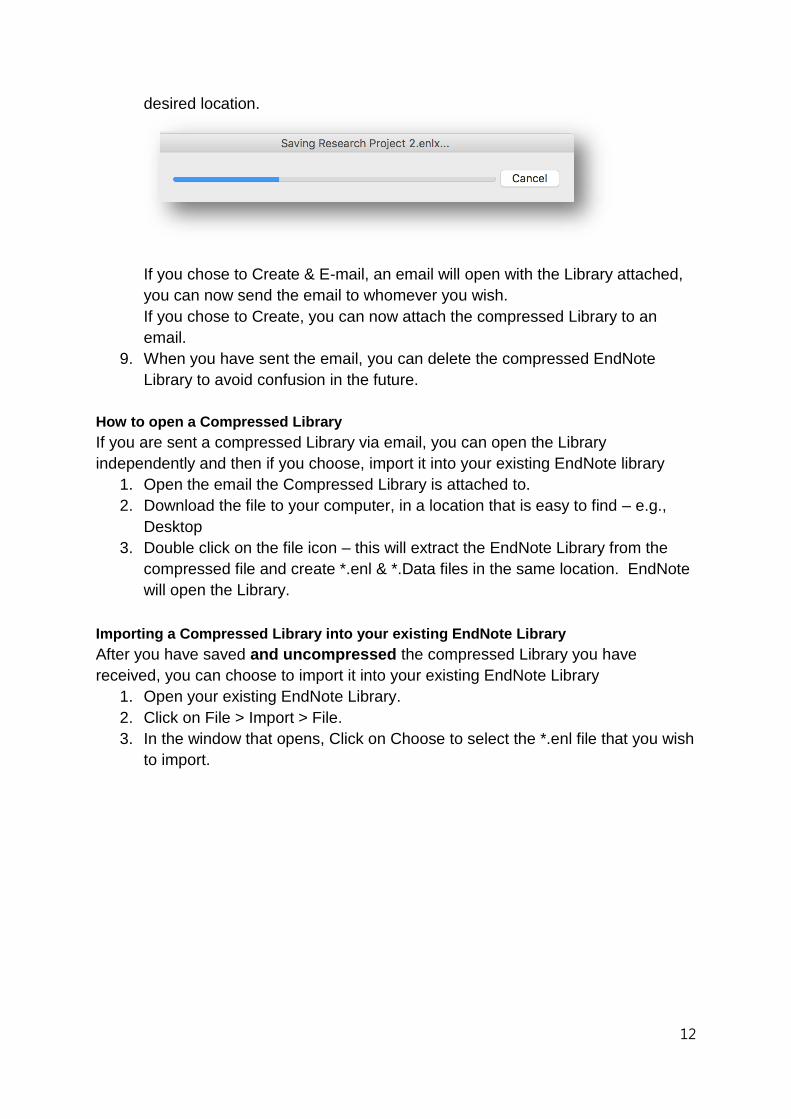
8. Click “Save”. EndNote will then create the compressed Library. This can take
a few minutes, depending on the size of your Library. Just before the process
ends, a window will show saying “Saving EndNote Library name.enlx”. When
the progress bar is complete, the compressed Library will be saved to your
12
desired location.
If you chose to Create & E-mail, an email will open with the Library attached,
you can now send the email to whomever you wish.
If you chose to Create, you can now attach the compressed Library to an
email.
9. When you have sent the email, you can delete the compressed EndNote
Library to avoid confusion in the future.
How to open a Compressed Library
If you are sent a compressed Library via email, you can open the Library
independently and then if you choose, import it into your existing EndNote library
1. Open the email the Compressed Library is attached to.
2. Download the file to your computer, in a location that is easy to find – e.g.,
Desktop
3. Double click on the file icon – this will extract the EndNote Library from the
compressed file and create *.enl & *.Data files in the same location. EndNote
will open the Library.
Importing a Compressed Library into your existing EndNote Library
After you have saved and uncompressed the compressed Library you have
received, you can choose to import it into your existing EndNote Library
1. Open your existing EndNote Library.
2. Click on File > Import > File.
3. In the window that opens, Click on Choose to select the *.enl file that you wish
to import.

13
4. Ensure the Import Option says EndNote Library.
5. In the Duplicates field you can choose to Import all records, Identify duplicates
and discard them or Identify duplicates and add them to a separate Library.
The choice you make at this point will depend on what you’re intending to do
with the records.
6. Leave Text Translation as No Translation.
7. Click on Import.
8. EndNote will then import the records.
9. Once complete, they records will show in the Imported References heading
on the left hand column in EndNote. You can now add these to a new Group
if you wish to identify them separately from the rest of your Library.