Embed Size (px)
Citation preview

Australian Curriculum Earth Science activities
with links to other subjects.
YEAR 4 EARTH’S SURFACE

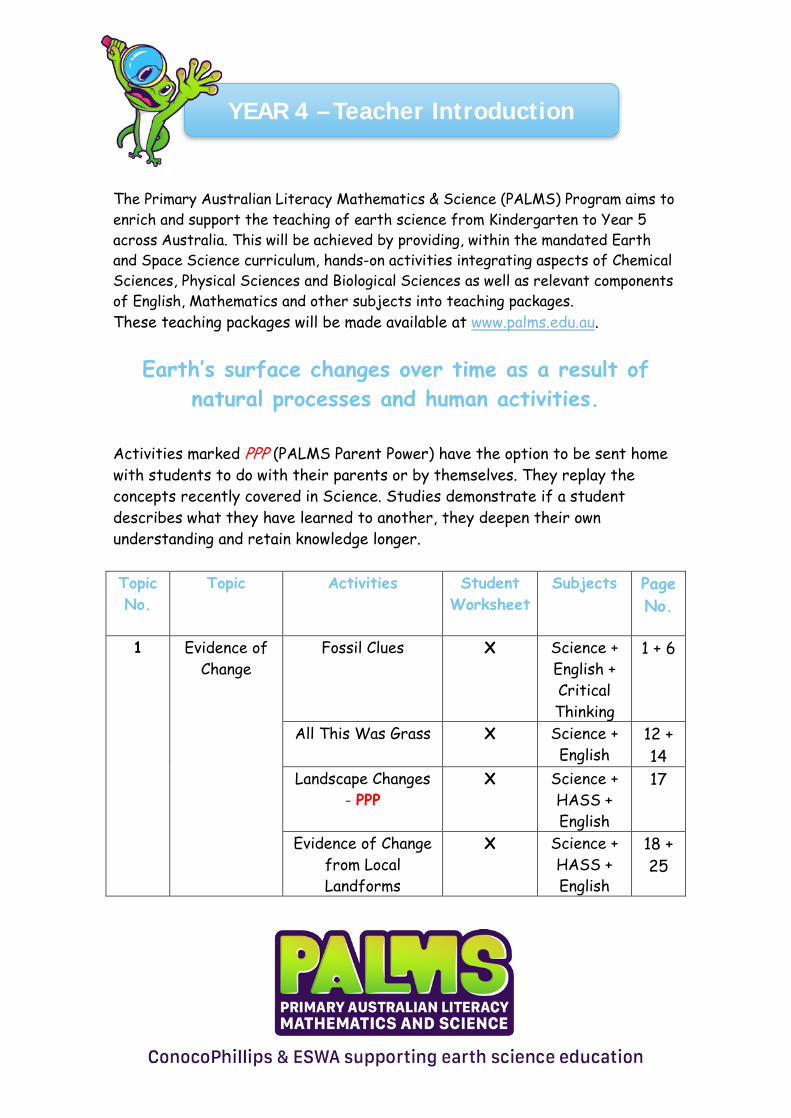
YEAR 4 – Teacher Introduction
The Primary Australian Literacy Mathematics & Science (PALMS) Program aims to enrich and support the teaching of earth science from Kindergarten to Year 5 across Australia. This will be achieved by providing, within the mandated Earth and Space Science curriculum, hands-on activities integrating aspects of Chemical Sciences, Physical Sciences and Biological Sciences as well as relevant components of English, Mathematics and other subjects into teaching packages. These teaching packages will be made available at www.palms.edu.au.
Earth’s surface changes over time as a result of natural processes and human activities.
Activities marked PPP (PALMS Parent Power) have the option to be sent home with students to do with their parents or by themselves. They replay the concepts recently covered in Science. Studies demonstrate if a student describes what they have learned to another, they deepen their own understanding and retain knowledge longer. Topic No.
Topic Activities Student Worksheet
Subjects Page No.
1 Evidence of Change
Fossil Clues X Science + English + Critical Thinking
1 + 6
All This Was Grass X Science + English
12 + 14
Landscape Changes - PPP
X Science + HASS + English
17
Evidence of Change from Local Landforms
X Science + HASS + English
18 + 25

YEAR 4 – Teacher Introduction
Topic No
Topic Activities Student Worksheet
Subjects Page No
1 Evidence of Change
Peteroglyphs X Science + HASS
35 + 41
Timeline
X Science + HASS + Maths
45 + 46
2 Weathering Physical weathering (possible PPP)
X Science + English + Critical Thinking
47 + 51
Chemical Weathering
X Science + English
55 + 58
Oxidation
X Science + HASS
61 + 65
Biological Weathering
Science + HASS +
Art
69
3 Erosion Erosion by Wind and Water
X Science + English + HASS
71 + 74
Rainwater at Home X Science 77 + 82
Dirt Roads X Science + Technology
86 + 88
City lanes X Science + Technology
91 + 93
Erosion by Humans Science + HASS
95 +
4 Investigation of Local Area
Investigation Report
X Science + HASS
96 + 99

YEAR 4 – Teacher Introduction
Topic
No
Topic Activities Student Worksheet
Subjects Page No
5 Soils Soil, Dirt & Dust
X Science + Health + Maths
102 +
106 Soil Profiles X Science 110
+ 114
Soil & Parent Rock
X Science + Critical thinking
116 +
121 Soil
Components X Science +
Maths 123
+ 130
Living things in Soil
X Science 134 +
139 Soil Compaction X Science +
HASS 142
+ 145
6 STEAM Rain Chain X Science + Technology
+ Art
148 +
154

YEAR 4 – Teacher Introduction
Australian Curriculum (WA)
Earth & Space Science Earth’s surface changes over time as a result of natural processes and human activity. Elaborations
• Collecting information of change from local landforms, rocks or fossils.
• Exploring a local area that has changed as a result of natural • processes, such as an eroded river gully or river banks. • Investigating the characteristics of soils. • Considering how different human activities can cause erosion of
the Earth’s surface. English Speaking, writing & creating. Creating procedures, reports and poetry. Learning in a familiar context. How social interaction influences the way people engage with ideas. Summarising and reporting own view. Use of tone, pace and pitch. Word play. Maths Problem solving & reasoning. Using scaled instruments to measure accurately. Collecting and recording data. Comparing time durations. Construct suitable data displays (tables & column graphs). Make connections between fractions and decimal places.

YEAR 4 – Teacher Introduction
HASS Place, space & environment. Place information in chronological order. Identify different points of view in information. Change data into a graph or table. Present findings and conclusions in a range of communication forms. Art Experiment with a selection of appropriate materials to create artworks. Respond to artworks. Experiment with shape and colour. Technology (Design Technology) Create a design solution. Forces and the properties of materials affect the behavior of a product. Identify and choose appropriate resources. Develop and communicate design ideas using annotated drawings. Select and safely use equipment.
Fossil Clues – Teacher’s Notes
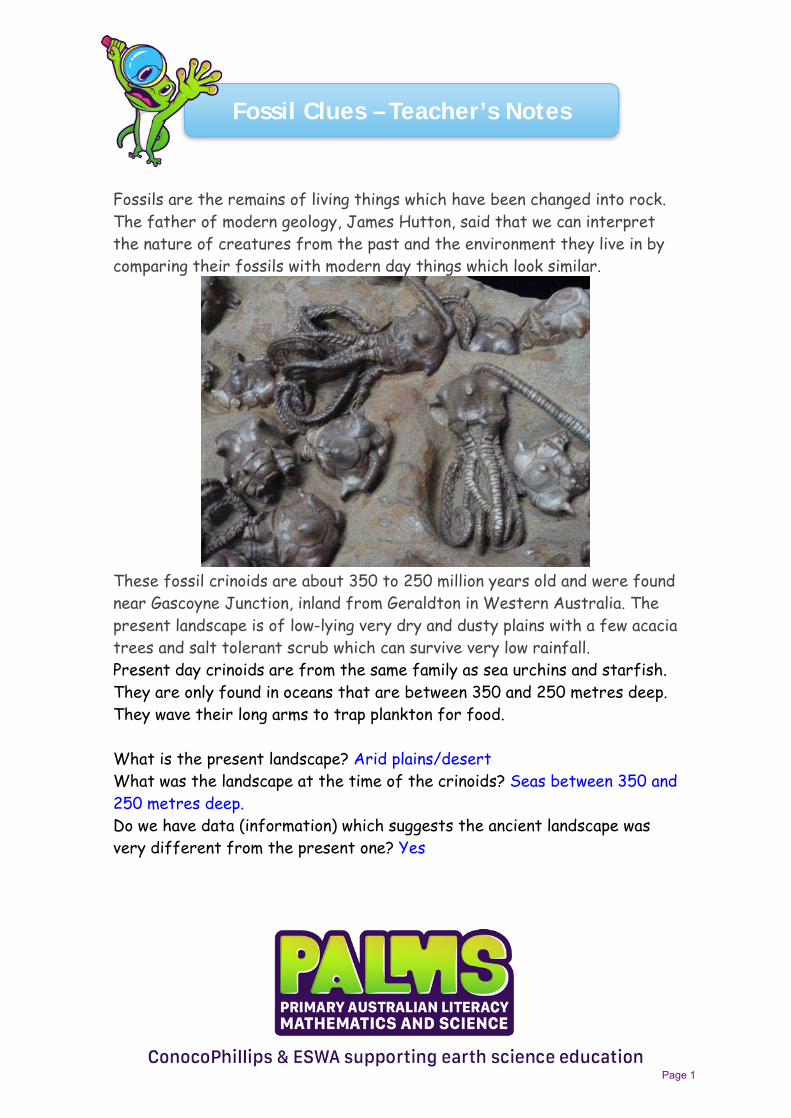
Fossils are the remains of living things which have been changed into rock. The father of modern geology, James Hutton, said that we can interpret the nature of creatures from the past and the environment they live in by comparing their fossils with modern day things which look similar.
These fossil crinoids are about 350 to 250 million years old and were found near Gascoyne Junction, inland from Geraldton in Western Australia. The present landscape is of low-lying very dry and dusty plains with a few acacia trees and salt tolerant scrub which can survive very low rainfall. Present day crinoids are from the same family as sea urchins and starfish. They are only found in oceans that are between 350 and 250 metres deep. They wave their long arms to trap plankton for food.
What is the present landscape? Arid plains/desert What was the landscape at the time of the crinoids? Seas between 350 and 250 metres deep. Do we have data (information) which suggests the ancient landscape was very different from the present one? Yes
Page 1

Fossil Clues – Teacher’s Notes
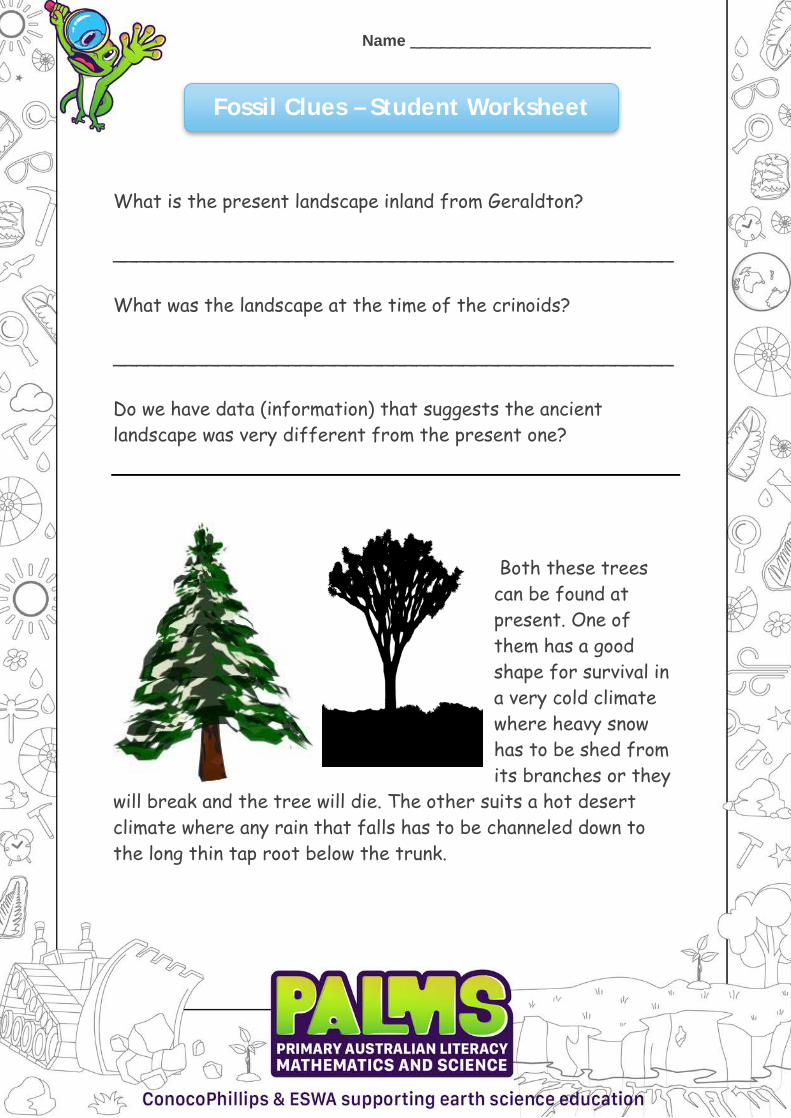
Both these trees can be found at present. One of them has a good shape for survival in a very cold climate where heavy snow has to be shed from its branches or they will break and the tree will die. The other suits a hot desert climate where any rain that falls has to be channeled down to the long thin tap root below the trunk.
Which tree do you think suits the hot dry climate? The tree on the right. The branches channel any rain towards the trunk and down into the ground near the tap root.
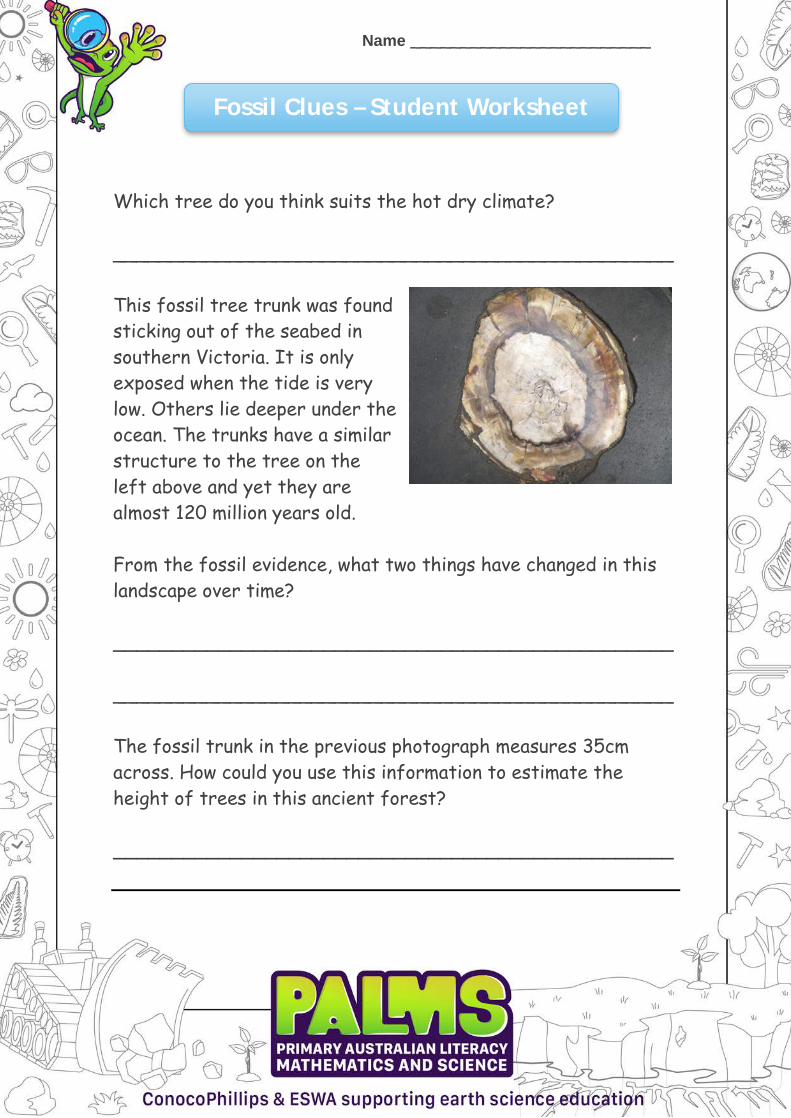
This fossil tree trunk was found sticking out of the seabed in southern Victoria. It is only exposed when the tide is very low. Others lie deeper under the ocean. The trunks have a similar structure to the tree on the left above and yet they are almost 120 million years old. From the fossil evidence, what two things have changed in this landscape over time?
Page 2

Fossil Clues – Teacher’s Notes
The forest that grew on land in the past is now under the sea. Sea level has changed and the climate has warmed. Actually, the Australian continental plate was located much closer to the South Pole at this time. Our continent is still drifting northwards at the same rate as your fingernails grow.
The fossil trunk in the previous photograph measures 35cm across. How could you use this information to estimate the height of trees in this ancient forest? You could find similar modern trees with trunks of the same width. Their height will indicate how high these trees might have grown.
Fossilised leaves of glossopteris Fossil leaves and trunks of a long extinct tree called Glossopteris can be found in Western Australia, India, South Africa, South America and Antarctica. These trees grew in coastal tropical swamps between 300 and 200 million years ago. They are the source of many of Australia’s coal deposits. How could a land tree be in so many different places separated by thousands of kilometers of ocean? Trees cannot swim and their seeds could
Page 3
Fossil Clues – Teacher’s Notes
not survive soaking in salt water? All of these places, Australia, South Africa, India and South America must have been joined together as one land mass or supercontinent. Our continents very slowly move around on the surface of the Earth. Long ago all these continents came together to form the supercontinent Gondwanaland. They later separated roughly 67 million years ago. Australia is presently heading northwards at the same rate as your fingernails grow. This has been confirmed by modern GPS satellite measurement. Why are no Glossopteris fossils found in Europe? The tree did not grow there and Europe was part of a different supercontinent.
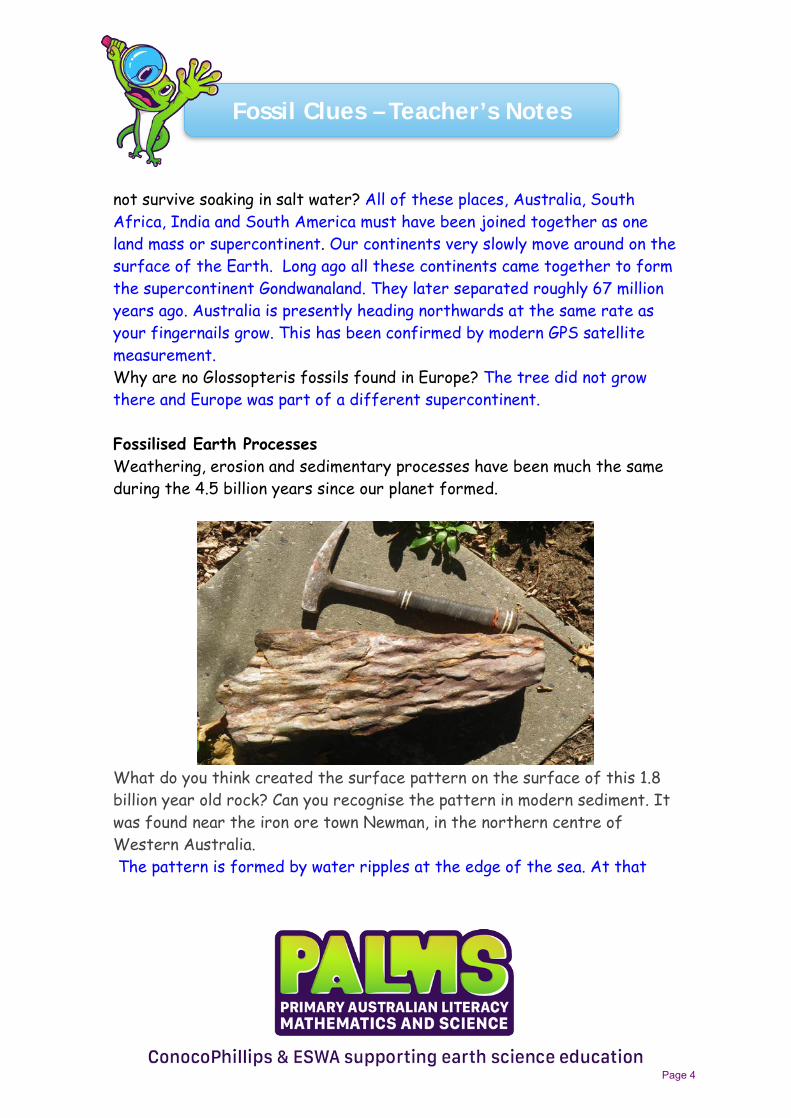
Fossilised Earth Processes Weathering, erosion and sedimentary processes have been much the same during the 4.5 billion years since our planet formed.
What do you think created the surface pattern on the surface of this 1.8 billion year old rock? Can you recognise the pattern in modern sediment. It was found near the iron ore town Newman, in the northern centre of Western Australia. The pattern is formed by water ripples at the edge of the sea. At that
Page 4
Fossil Clues – Teacher’s Notes
time the centre of Western Australia must have been the edge of a shallow sea.
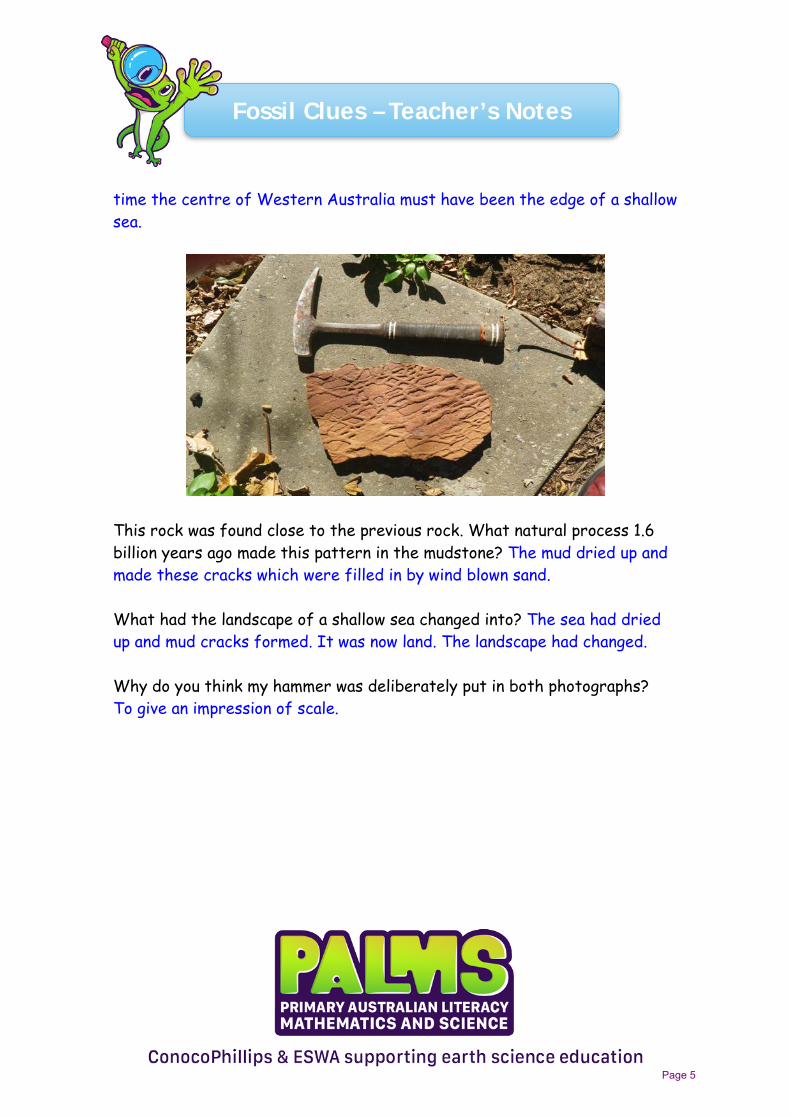
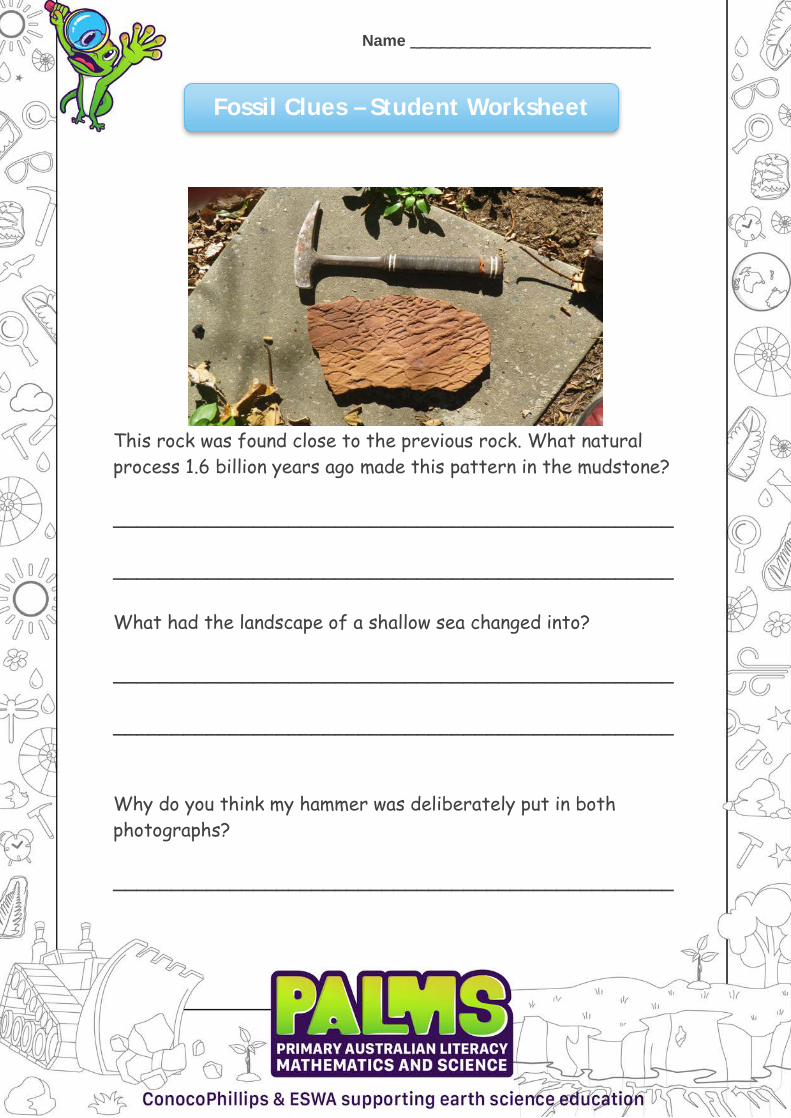
This rock was found close to the previous rock. What natural process 1.6 billion years ago made this pattern in the mudstone? The mud dried up and made these cracks which were filled in by wind blown sand.
What had the landscape of a shallow sea changed into? The sea had dried up and mud cracks formed. It was now land. The landscape had changed.
Why do you think my hammer was deliberately put in both photographs? To give an impression of scale.
Page 5
Name ________________________
Fossil Clues – Student Worksheet
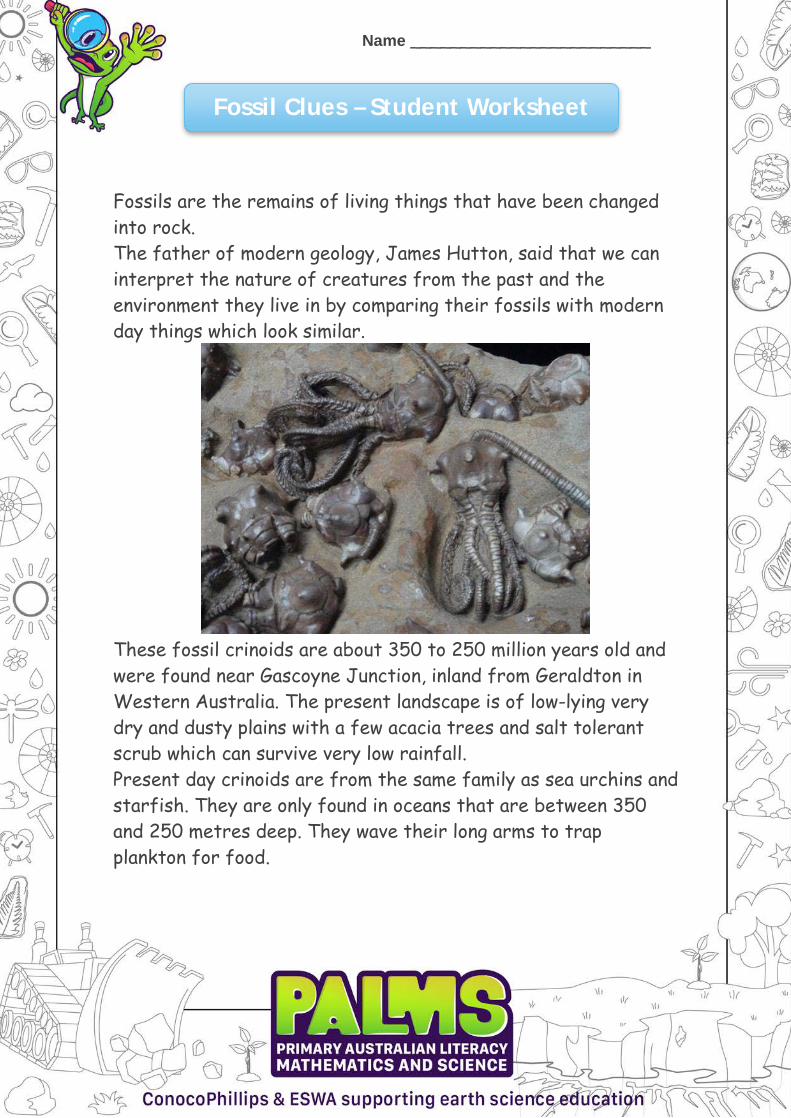
Fossils are the remains of living things that have been changed into rock. The father of modern geology, James Hutton, said that we can interpret the nature of creatures from the past and the environment they live in by comparing their fossils with modern day things which look similar.
These fossil crinoids are about 350 to 250 million years old and were found near Gascoyne Junction, inland from Geraldton in Western Australia. The present landscape is of low-lying very dry and dusty plains with a few acacia trees and salt tolerant scrub which can survive very low rainfall. Present day crinoids are from the same family as sea urchins and starfish. They are only found in oceans that are between 350 and 250 metres deep. They wave their long arms to trap plankton for food.
Name ________________________
Fossil Clues – Student Worksheet
What is the present landscape inland from Geraldton?
________________________________________________
What was the landscape at the time of the crinoids?
________________________________________________
Do we have data (information) that suggests the ancient landscape was very different from the present one?
Both these trees can be found at present. One of them has a good shape for survival in a very cold climate where heavy snow has to be shed from its branches or they
will break and the tree will die. The other suits a hot desert climate where any rain that falls has to be channeled down to the long thin tap root below the trunk.
Name ________________________
Fossil Clues – Student Worksheet
Which tree do you think suits the hot dry climate?
________________________________________________
This fossil tree trunk was found sticking out of the seabed in southern Victoria. It is only exposed when the tide is very low. Others lie deeper under the ocean. The trunks have a similar structure to the tree on the left above and yet they are almost 120 million years old.
From the fossil evidence, what two things have changed in this landscape over time?
________________________________________________
________________________________________________
The fossil trunk in the previous photograph measures 35cm across. How could you use this information to estimate the height of trees in this ancient forest?
________________________________________________

Name ________________________
Fossil Clues – Student Worksheet
Fossilised leaves of glossopteris
Fossil leaves and trunks of a long extinct tree called Glossopteris can be found in Western Australia, India, South Africa, South America and Antarctica. These trees grew in coastal tropical swamps between 300 and 200 million years ago. They are the source of many of Australia’s coal deposits. How could a land tree be in so many different places separated by thousands of kilometers of ocean? Trees cannot swim and their seeds could not survive soaking in salt water?
________________________________________________

Name ________________________
Fossil Clues – Student Worksheet
Why are no Glossopteris fossils found in Europe?
________________________________________________
Fossilised Earth Processes Weathering, erosion and sedimentary processes have been much the same during the 4.5 billion years since our planet formed.
What do you think created the pattern on the surface of this 1.8 billion year old rock? Can you recognise the pattern in modern sediment. It was found near the iron ore town Newman, in the northern centre of Western Australia.
________________________________________________
_______________________________________________
Name ________________________
Fossil Clues – Student Worksheet
This rock was found close to the previous rock. What natural process 1.6 billion years ago made this pattern in the mudstone?
________________________________________________
________________________________________________
What had the landscape of a shallow sea changed into?
________________________________________________
________________________________________________
Why do you think my hammer was deliberately put in both photographs?
________________________________________________

All This Was Grass – Teacher’s Notes
Landscape is all the features you can see in the land. You may wish to ask the students to highlight words which are used to describe landscape in the text.
All This Was Grass My father used to take us on long walks up the hills on a Sunday afternoon after dinner. Often we would sit down somewhere with a good view to eat a sandwich or munch on an apple. Almost always Dad would say, “Of course, when I was a boy …” and the whole family would join in and finish the sentence with “… all this was grass”. Dad was talking about the difference between the farming landscape of his childhood to one forever changed. His small village of about one hundred people had grown to become a suburb of a large town of many thousands of people. Most of the grassy fields he had played in as a boy had been covered by houses, gardens, supermarkets, parks and factories and even by a small gold mine. Only a few spots of natural woodland remain to remind us of how the landscape used to be. Back then, wandering gravel tracks followed the rises and fall of the land. Now wide straight black roads and a railway cut across the countryside to transport workers to and from the city. After major floods forty years ago washed away twenty houses and a church, marshes were drained and streams channeled to stop further erosion. The flattened drained land was used for building more houses.
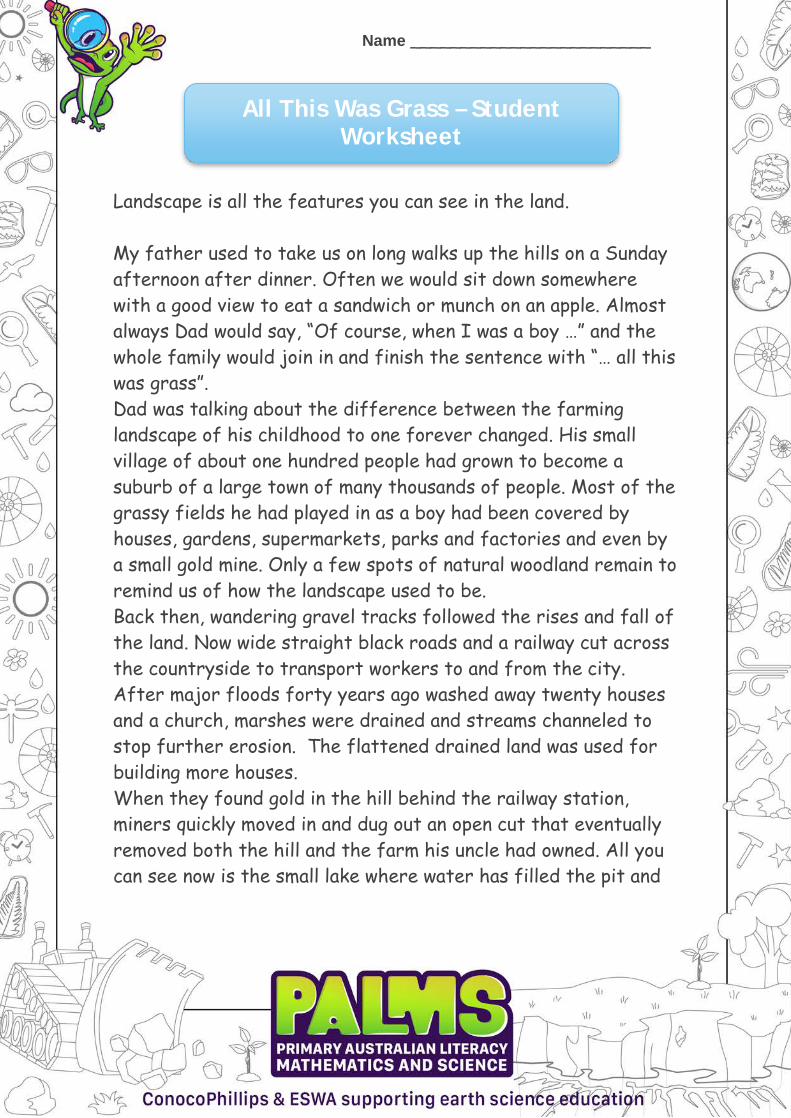
When they found gold in the hill behind the railway station, miners quickly moved in and dug out an open cut that eventually removed both the hill and the farm his uncle had owned. All you can see now is the small lake where water has filled the pit and flat topped piles of tailings left over from the workings.
Page 12
All This Was Grass – Teacher’s Notes
I wonder what my grandchildren will see if they sit where I am sitting and look where dad and I used to look?.
Note: Tailings are what remains of crushed rock after minerals have been removed from them.
What change in the landscape was caused by natural processes such as wind and water? Floods washed away houses and a church
List three changes in landscape caused by humans. Any of: farming to urban, few houses to many, woodland to urban, winding gravel roads to straight black roads, fields to roads and a railway, river and marsh to drained land, channeled streams and flattened land. Hill and farm to open cut mine and tailings
How do you think the father felt when he saw so many changes to the landscape of his childhood? Any reasonable answer.
Use your imagination. Draw four landscape changes you could expect to happen over one hundred years onto the picture below.
Landscape Changes – PPP
Students may ask their parents or their extended family (even neighbours) about what changes in local landforms they have noticed in the local area and whether they were caused by natural or man made forces. These can be boarded and discussed. The PPP worksheet is included as a separate worksheet. This may start a conversation about what is happening in Science this term.
Page 13
Name ________________________
All This Was Grass – Student Worksheet
Landscape is all the features you can see in the land.
My father used to take us on long walks up the hills on a Sunday afternoon after dinner. Often we would sit down somewhere with a good view to eat a sandwich or munch on an apple. Almost always Dad would say, “Of course, when I was a boy …” and the whole family would join in and finish the sentence with “… all this was grass”. Dad was talking about the difference between the farming landscape of his childhood to one forever changed. His small village of about one hundred people had grown to become a suburb of a large town of many thousands of people. Most of the grassy fields he had played in as a boy had been covered by houses, gardens, supermarkets, parks and factories and even by a small gold mine. Only a few spots of natural woodland remain to remind us of how the landscape used to be. Back then, wandering gravel tracks followed the rises and fall of the land. Now wide straight black roads and a railway cut across the countryside to transport workers to and from the city. After major floods forty years ago washed away twenty houses and a church, marshes were drained and streams channeled to stop further erosion. The flattened drained land was used for building more houses. When they found gold in the hill behind the railway station, miners quickly moved in and dug out an open cut that eventually removed both the hill and the farm his uncle had owned. All you can see now is the small lake where water has filled the pit and

Name ________________________
All This Was Grass – Student Worksheet
flat topped piles of tailings left over from the workings. I wonder what my grandchildren will see if they sit where I am sitting and look where dad and I used to look?
What change in the landscape was caused by natural processes such as wind and water?
________________________________________________
________________________________________________
List three changes caused by humans. Before After
Name ________________________
All This Was Grass – Student Worksheet
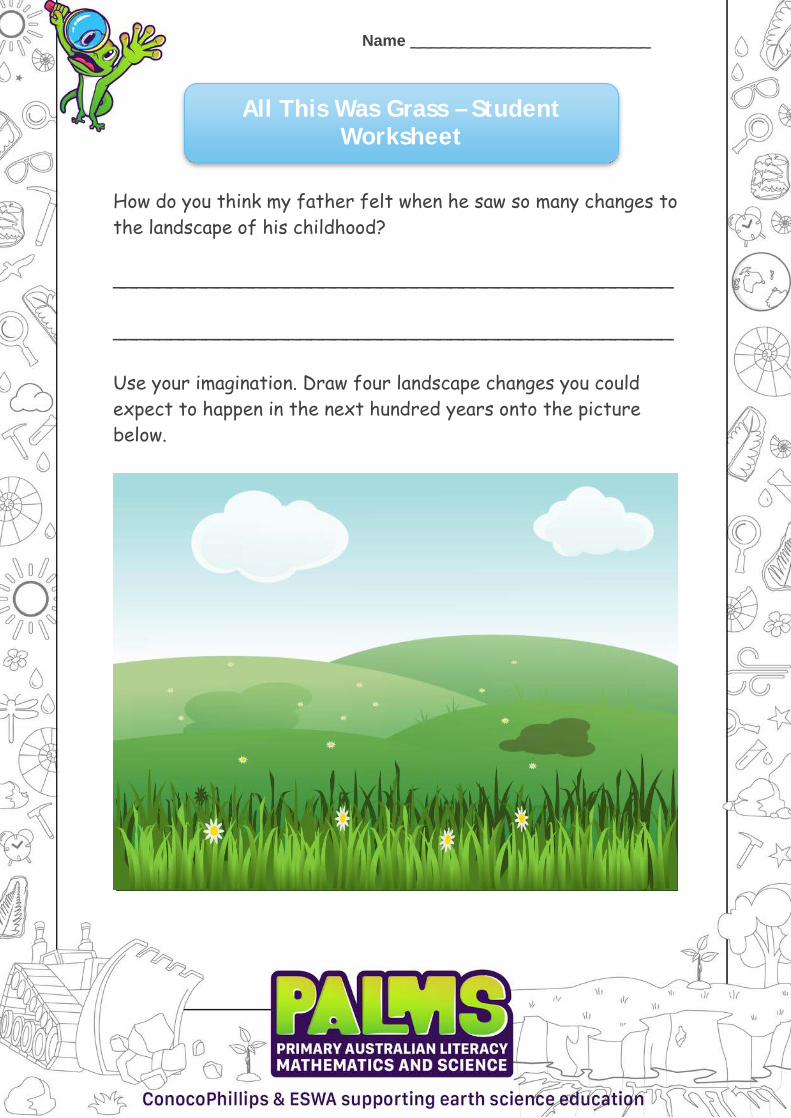
How do you think my father felt when he saw so many changes to the landscape of his childhood?
________________________________________________
________________________________________________
Use your imagination. Draw four landscape changes you could expect to happen in the next hundred years onto the picture below.

Name ________________________
Landscape Changes - PPP
In class we have been talking about how wind, water and human activity can affect local landforms. Floods, droughts and major road works can change the shape of the countryside very quickly.
Can you think of FOUR landform changes anyone in your family has noticed and approximately when they happened?
Change Caused by Date (approx.)
We will share this information in our next Science class.

Evidence of Change from Local Landforms – Teacher’s Notes
Note: This activity requires students to have internet access or a print out from these sites listed below.
Measuring change Scientists only accept evidence of change if:
1. We can sense a change (see, hear, smell, feeland sometimes taste it).
2. We can measure the change usinginternational measurements such as metres,degrees Celcius and litres.
3. The two steps above are repeated manytimes to improve accuracy and the sameresult is obtained by any scientist anywhere in the world.
A. Change due to movements within the Earth - Earthquakes
The April 2010 Boulder Earthquake occurred near the town of Kalgoorlie-Boulder in WA. Shaking lasted over 10-15 seconds and could be felt 1,007 km away. Visit http://www.abc.net.au/local/stories/2010/04/20/2877871.htm View the page and the pictures and answer the following questions.
When and where did the earthquake take place? Boulder April 2010
What changes did the residents see? They saw buildings shake and some fall down.
What changes did the residents hear? None reported here but they must have heard the sound of damaged building parts fall. Many later reported hearing the earth growl as rocks moved against each other.
Page 18
Evidence of Change from Local Landforms – Teacher’s Notes
What changes did the residents feel? They felt the earth shake.
Was anybody hurt when this earthquake hit? There were no reports of serious injury however an ambulance took two people to hospital with minor injuries.
How would you know if a similar earthquake hit your school? See buildings shake, parts fall down, feel the earth shake, hear the sound of falling buildings and perhaps the growl of rocks grating past each other.
What possible landscape changes could an earthquake cause to the Superpit, the enormous open cut gold mine near Boulder? The sides could fall in and collapse killing miners. Tailings dams could collapse causing local landslides and releasing contaminated water. (Most of these structures are engineered to withstand small earthquakes).
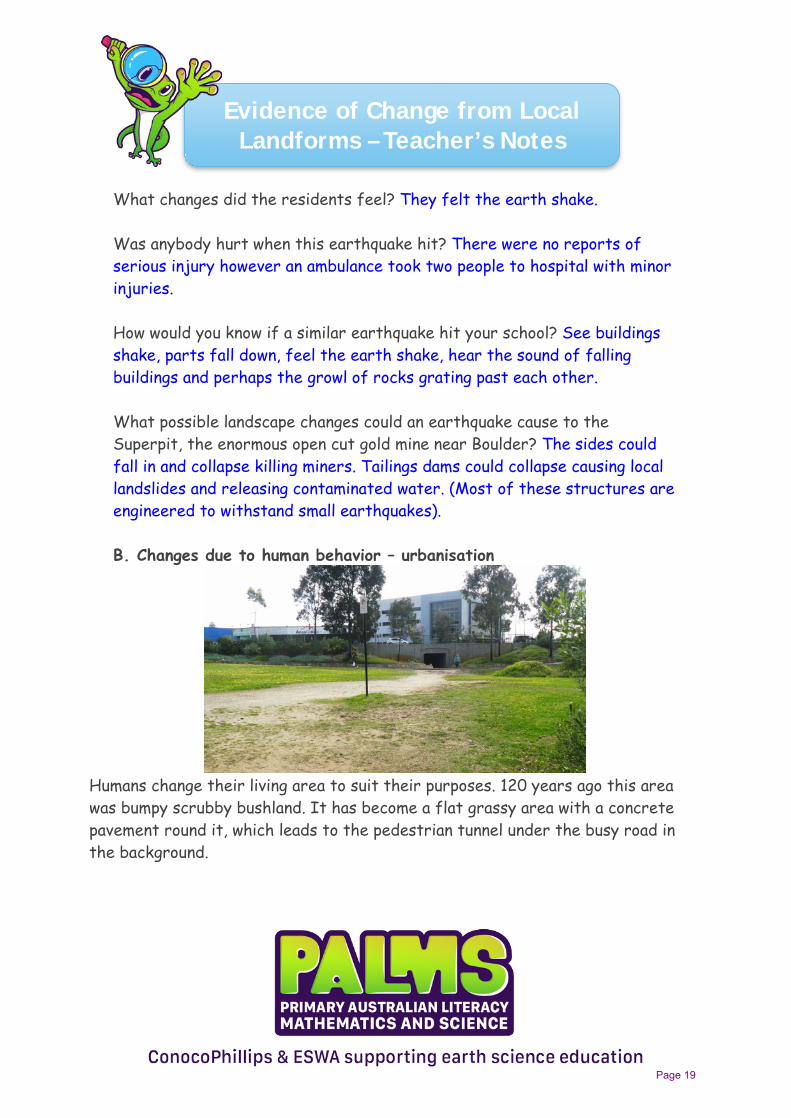
B. Changes due to human behavior – urbanisation
Humans change their living area to suit their purposes. 120 years ago this area was bumpy scrubby bushland. It has become a flat grassy area with a concrete pavement round it, which leads to the pedestrian tunnel under the busy road in the background.
Page 19
Evidence of Change from Local Landforms – Teacher’s Notes
Why was the land flattened? To make the construction of roads, factories and housing easier and to control drainage.
Why is there no longer any scrubby bush? It was cleared away to make room for housing, roads etc.
Why is there now grass and a few non-native trees? Europeans prefer this style of controlled green open landscape.
Why is there not any grass in the strips cutting across the central area? People have taken a short cut across the park to get to the tunnel faster. Their passage has killed the grass.
Why is the ground and grass higher round the trees? Peoples feet have compacted the soil elsewhere.
List 5 things that humans have done to change this landscape. Leveled and sealed roads, made footpaths, dug the underpass, erected buildings, built walls, planted gardens and planted grass etc.
C. Changes due to the introduction of non-native animalsCloven-footed animals such as goats, pigs, sheep and cows compact the soilunder their feet much more than native Australian macopods (big-footedanimals like the kangaroo. Pressure is the result of weight (or mass) per unitarea or P = M X A. The larger the foot, the less pressure. This is welldemonstrated by watching people wearing high heels try to walk across sandyor grassy areas. Their heels sink well into the sand or mud.
Page 20

Evidence of Change from Local Landforms – Teacher’s Notes
Oh the Pressure! – Student Activity of Teacher Demonstration Materials
• A pencil or pen• A brick or similarly heavy object• Sandpit or tray with about 4cm depth of sand• Ruler
Method 1. Place the heavy object on the sand.2. Measure the depth of the indentation3. Lift the heavy object and hold the pencil under it.4. Lower the heavy object on to it and allow it to sink into the sand5. Measure the depth of this indentation.
Observations
Depth of indentation of heavy object alone – as measured on the day
Depth of the same object with a much smaller base – as measured on the day
Which shoe will squash the ground under it more? The one on the right.
Page 21

Evidence of Change from Local Landforms – Teacher’s Notes
Native Australian animals such as kangaroos and wallabies have proportionally large feet compared to European grass eaters such as sheep, goats, cows and pigs.
Compare the size of the feet of the goat and the kangaroo. What is different? The goat has tiny hard feet. The kangaroo’s foot base is about half its height. The goat’s foot base however is about 1/25 of its height.
What will happen if the goat regularly walks a pathway? It will compact the underlying soil stopping water and air penetration and killing plants
On pastoral stations farmers have to put in bores or water tanks for cows’ drinking water. How could you tell where a bore or water tank is from an aeroplane? You could see pathways to it of worn soil with little to no vegetation
D. Changes due to flooding or storm damage.Strong winds and moving water can cause rapid changes to local landformsthrough both erosion and deposition.In May 2016, Perth residents were warned of a major storm approaching. Visithttp://www.perthnow.com.au/news/western-australia/wild-weather-wind-gusts-heavy-rain-belt-perth-causing-power-outages/news-story/5c4168fdca29aa93c00f62a0eba82284
What damage to the surface of the Earth is expected to happen because of this storm? Floods and high tides may erode riverbanks and beaches. Roads
Page 22
Evidence of Change from Local Landforms – Teacher’s Notes
may be washed away. Rainwater can cut new creeks and gutters.
What will the sandbags be used for? They will be used to raise and reinforce riverbanks.
Why did this report mostly describe changes to the human landscape? Humans are mostly interested in things that affect them directly.
If you view the pictures can you find three landscape changes also? List them. Any of, floodwater washing onto the riverbank. Rocks being thrown onto the breakwater. Beaches being flooded, roofs being blown off, power lines being brought down.
E. Changes due to different cultural and social expectations.It has been noticed that when early European artists made sketches of ourlandscape they were scrupulous in copying them exactly as they were. Theycopied the peeling bark, thin leaf cover and strange grass trees as they are.When they used these sketches later to make paintings the changed them tobe more Europeanised with a thick leaf canopy, smooth barked treessurrounded by grassy parklands. This made the landscape more comfortableto possible settlers. Of course Europeans brought many of their own plantsand animals with them for the same reason. It made somewhere on the otherside of the Earth feel “a little bit of home”.
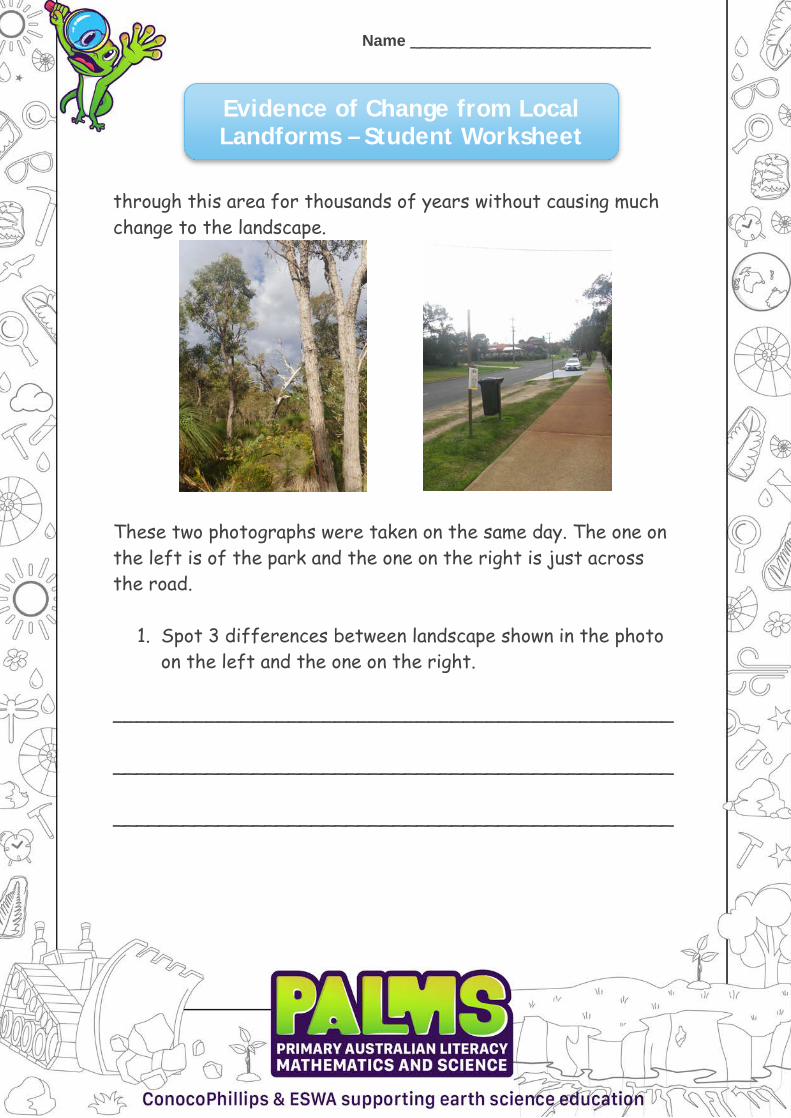
Frederick Samson Park Samson Park is reputed to be the last piece of natural vegetation in metropolitan Perth. Aboriginal people have moved through this area for thousands of years without causing much change to the landscape.
Page 23

Evidence of Change from Local Landforms – Teacher’s Notes
These two photographs were taken on the same day. The left was taken in the park and demonstrates the variety of vegetation in the overstorey (Marri, Jarrah and Bull Banksia and in the understory grass trees (Xanthorhea), banksias, grevillias, mulga and many grasses, flowers including orchids. The photograph on the right is from just across the road from the park. Here the land has been leveled for roads and building houses, vegetation is mostly not native, grass is trimmed, fertilised and watered to create lawns.
1. Spot 3 differences between the photo on the left and the one on therightThe picture on the left has a range of trees and shrubs, on the rightthere are a few trees and grass visibleThe picture on the right features paths and roadwaysThe landscape is very flat on the right
2. What caused these changes? People3. Why do you think that they wanted a different landscape? People
held different cultural and social expectations for the landscape.
Page 24
Name ________________________
Evidence of Change from Local Landforms – Student Worksheet
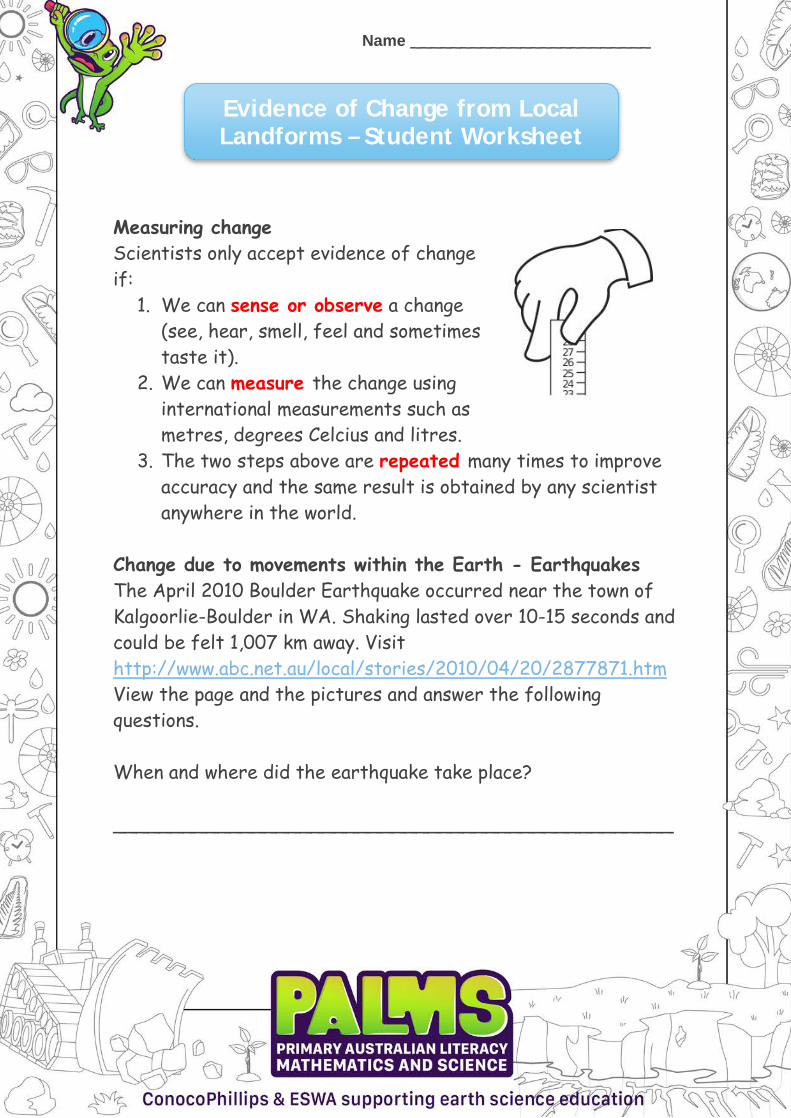
Measuring change Scientists only accept evidence of change if:
1. We can sense or observe a change(see, hear, smell, feel and sometimestaste it).
2. We can measure the change usinginternational measurements such asmetres, degrees Celcius and litres.
3. The two steps above are repeated many times to improveaccuracy and the same result is obtained by any scientistanywhere in the world.
Change due to movements within the Earth - Earthquakes The April 2010 Boulder Earthquake occurred near the town of Kalgoorlie-Boulder in WA. Shaking lasted over 10-15 seconds and could be felt 1,007 km away. Visit http://www.abc.net.au/local/stories/2010/04/20/2877871.htm View the page and the pictures and answer the following questions.
When and where did the earthquake take place?
________________________________________________
Name ________________________
Evidence of Change from Local Landforms – Student Worksheet
What changes did the residents see?
________________________________________________
________________________________________________
What changes did the residents hear?
________________________________________________
________________________________________________
What changes did the residents feel? ________________________________________________
________________________________________________
Was anybody hurt when this earthquake hit?
________________________________________________
How would you know if a similar earthquake hit your school? ________________________________________________
________________________________________________
________________________________________________
Name ________________________
Evidence of Change from Local Landforms – Student Worksheet
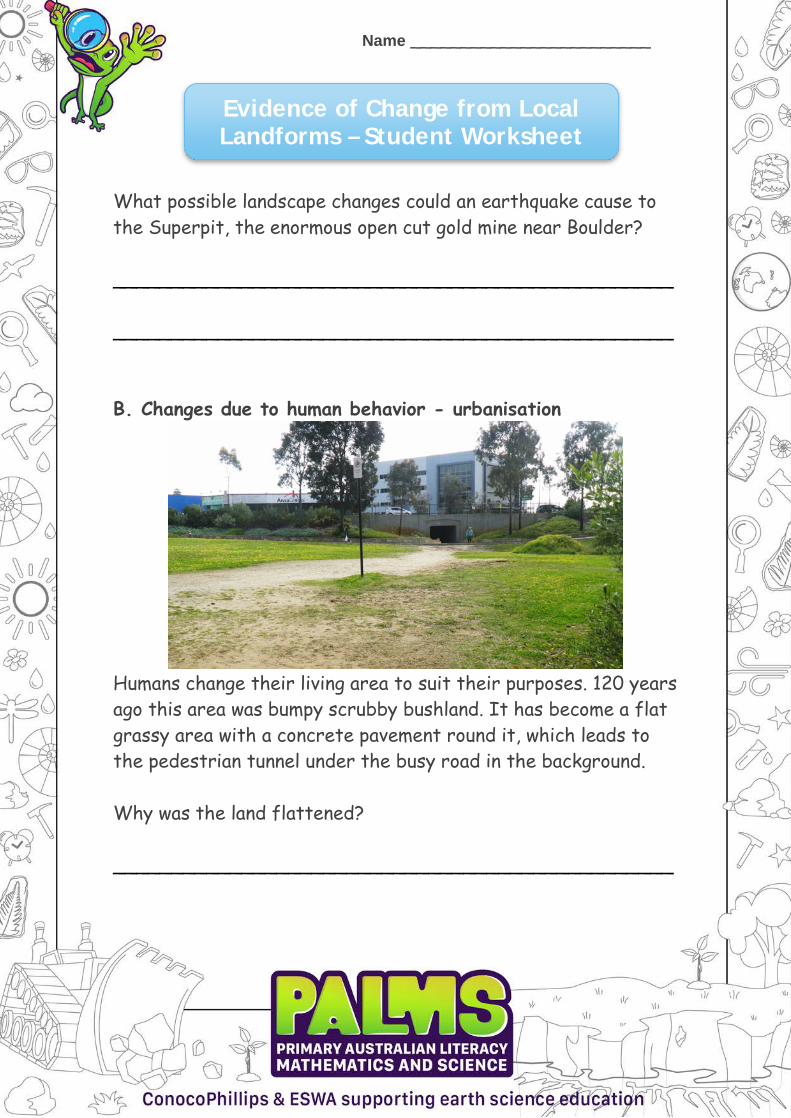
What possible landscape changes could an earthquake cause to the Superpit, the enormous open cut gold mine near Boulder?
________________________________________________
________________________________________________
B. Changes due to human behavior - urbanisation
Humans change their living area to suit their purposes. 120 years ago this area was bumpy scrubby bushland. It has become a flat grassy area with a concrete pavement round it, which leads to the pedestrian tunnel under the busy road in the background.
Why was the land flattened?
________________________________________________

Name ________________________
Evidence of Change from Local Landforms – Student Worksheet
Why is there no longer any scrubby bush?
________________________________________________
________________________________________________
Why is there now grass and a few non-native trees?
________________________________________________
________________________________________________
Why is there not any grass in the strips cutting across the central area?
________________________________________________
________________________________________________
Why is the ground and grass higher round the trees?
________________________________________________
________________________________________________

Name ________________________
Evidence of Change from Local Landforms – Student Worksheet
List 5 things that humans have done to change this landscape.
________________________________________________
________________________________________________
C. Changes due to the introduction of non-native animalsCloven-footed animals such as goats, pigs, sheep and cowscompact the soil under their feet much more than nativeAustralian macopods (big-footed animals like the kangaroo).
Oh the Pressure! – Student Activity Materials • A pencil or pen• A brick or similarly heavy object• Sandpit or tray with about 4cm depth of sand• Ruler
Method 1. Place the heavy object on the sand.2. Measure the depth of the indentation3. Lift the heavy object and hold the pencil under it.4. Lower the heavy object on to it and allow it to sink into the
sand5. Measure the depth of this indentation.

Name ________________________
Evidence of Change from Local Landforms – Student Worksheet
Observations
Depth of indentation of heavy object alone ___________
Depth of the same object with a much smaller base (with the pencil under it.
____________
Which shoe will squash the ground under it more? __________
Compare the size of the feet of the goat and the kangaroo. What is different?
________________________________________________
Name ________________________
Evidence of Change from Local Landforms – Student Worksheet
What will happen if the goat regularly walks a pathway?
________________________________________________
On pastoral stations farmers have to put in bores or water tanks for cows’ drinking water. How could you tell where a bore or water tank is from an aeroplane?
________________________________________________
D. Changes due to flooding or storm damage.Strong winds and moving water can cause rapid changes to locallandforms through both erosion and deposition.In May 2016, Perth residents were warned of a major stormapproaching. Visit http://www.perthnow.com.au/news/western-australia/wild-weather-wind-gusts-heavy-rain-belt-perth-causing-power-outages/news-story/5c4168fdca29aa93c00f62a0eba82284
What damage to the surface of the Earth is expected to happen because of this storm?
________________________________________________
What will the sandbags be used for?
________________________________________________

Name ________________________
Evidence of Change from Local Landforms – Student Worksheet
Why did this report mostly describe changes to the human landscape?
________________________________________________
________________________________________________
If you can view the pictures can you find three landscape changes also? List them.
________________________________________________
________________________________________________
________________________________________________
E. Changes due to different cultural and social expectations.It has been noticed that when early European artists madesketches of our landscape they were scrupulous in copying themexactly as they were. They copied the peeling bark, thin leaf coverand strange grass trees as they are. When they used thesesketches later to make paintings the changed them to be moreEuropeanised.
Frederick Samson Park Samson Park is reputed to be the last piece of natural vegetation in metropolitan Perth. Aboriginal people have moved
Name ________________________
Evidence of Change from Local Landforms – Student Worksheet
through this area for thousands of years without causing much change to the landscape.
These two photographs were taken on the same day. The one on the left is of the park and the one on the right is just across the road.
1. Spot 3 differences between landscape shown in the photoon the left and the one on the right.
________________________________________________
________________________________________________
________________________________________________
Name ________________________
Evidence of Change from Local Landforms – Student Worksheet
2. What caused these changes?
______________________________________________
______________________________________________
3. Why do you think that people wanted a differentlandscape?
______________________________________________
______________________________________________

Petroglyphs – Teacher’s Notes
Petroglyphs (petra=rock, glyph=drawing) are engravings cut through weathered rock to create pictures. Petroglyphs at Murujuga, also known as the Burrup Peninsula, in the northwest of Western Australia describe over forty thousand years of landform and landscape change. They demonstrate changes in climate, sea level, flora and fauna through Aboriginal art.
Petraglyph of the fat tailed kangaroo which has been extinct for 20,000 years
The weathered rock surface was knocked off or ground to expose lighter fresh rock below. Creating these rock carvings is difficult, time consuming and must have been very hard work in a hot climate. Their creation must have been an important part of peoples’ culture.
Drying out of the Australian continent after the last Ice Age and the consequent rise of sea levels has changed both the shape of the landmass and the plants and animals which live there. When Aboriginal people first arrived in Australia about 40,000 to 50,000 years ago, there were still megafauna roaming the land. They would have seen echidnas the size of sheep, wombats the size of cows, 3 metre kangaroos and even marsupial lion, in what was then soft rainforest. As the climate progressively dried and through hunting, the images change to become those of smaller animals
Page 35

Petroglyphs – Teacher’s Notes
more suited to the grassland savannas of the modern Pilbara coast. Images of emu feet stopped when sea levels rose to be replaced by images of water bird feet. Images of fish appeared about the same time. This has not been emu country for a very long time. Much younger pictures represent thylacines (Tasmanian tigers), which became extinct on the mainland around the same time as the dingo was introduced, about 3,500 years ago. The Yaburara people who inhabited this spot were systematically wiped out in the Flying Foam massacre in 1868 in retaliation for the spearing of a policeman, his native servant, and two sailors. Accounts of what happened vary. The European settlers’ story is quite different to that of Aboriginal people. The present custodians are the Murujuga Aboriginal Corporation.
This area is also the site of a major oil and gas refinery, a solar salt works and a fertiliser plant. Negotiation between interested groups is essential to preserve this rich cultural resource, which predates the building of Stonehenge in the UK and the pyramids in Egypt by well over twenty thousand years. Evidence is being gathered to support putting Murujuga on the World Heritage List. It is important that any supporting materials should contain scientific data that has a strong evidence base.
Students may wish to research more about petroglyphs and Murujuga on the Internet. There is an excellent description of this area by Sarah Dingle at: www.abc.net.au/radionational/.../burrup...rock-art...megafauna/6561788 The film takes just over 3 minutes and has pictures which can be used for the following activity. If you are unable to access this in the classroom the accompanying article is excellent and can be printed. This can also provide an opportunity to discuss how different people can have different opinions and support different agendas. Science can provide useful data on which to base good decision making.
Page 36

Petroglyphs – Teacher’s Notes
At Murujuga we can interpret changes to the landscape over 40,000 years by noting changes in the animal images over time. Over 20,000 years ago an Aboriginal artist chipped away at the rocks to make this image. What is it? It is a kangaroo.
Why do you think the artist chose this animal? Food, their totem animal, important to the artist
Why are there no pictures of cows? They arrive more recently (~200 years ago)
Simple images These signs can be seen alongside many roads in WA. What is their message?
Kangaroos crossing
Children (people) crossing
Page 37

Petroglyphs – Teacher’s Notes
These replica petroglyphs of present day Australian native animals have been made by students. What do they represent
Top Emu walking toward a waterhole Bottom left Kangaroo Bottom right Turtle
Copying Aboriginal art may be interpreted as cultural insensitivity. We are therefore asking students to use non-native animals introduced to Australia less than 200 years ago.
The arrival of European settlers and their farming methods have affected the landforms of Australia. Native vegetation has been cleared, land has been leveled, waterways have been changed and mountains leveled to release mineral ores. If people still used petroglyphs to describe animals that were important to them then the animals depicted would change also.
Page 38
Petroglyphs – Teacher’s Notes
1. Select an animal which has been introduced into Australia in the last200 years.
2. Roughly draw your pattern for the petroglyph in the box on the leftbelow.
3. Ask your group what they think it represents.4. Ask them to suggest improvements to make the image clearer and
list the best two suggestions below5. Redraw your image incorporating these suggestions on the right.6. Present your petroglyph to the class and find if they recognize the
animal depicted.
Rough image Improved image
Suggestions Comments
It would have taken both skill and many days to make the Burrup petroglyphs. The outer darker layer would have to have been “pecked” off or scraped away carefully. This is in itself a skill as rock which has been mistakenly broken off could not be replaced. To make things faster and easier we will be using two colours of plasticine. Any mistakes can be smoothed over.
Materials • 2 balls of different coloured plasticine. One should be about half
the size of the other (Approximately 10mm and 20mm indiameter).
• A sharp pencil, toothpick or nail.• Old newspaper to protect the desktop
Warning - Plasticine contains heavy oil and will mark tables. Students should fold the newspaper double and only work the plasticine on this surface.
Page 39
Petroglyphs – Teacher’s Notes
I used half Petri dishes to create a controlled medallion shape. Yoghurt tub lids can also work well.
Method 1. Flatten the smaller ball of plasticine between fingers and thumb to
make an even thin disc. This should be as thin as possible.2. Repeat using the larger ball to make a disc the same size but about
twice as thick.3. Place the thinner disc on top of the thicker one and gently press
them down onto the newspaper.The thin upper layer of plasticine represents the outer weathered layer of the rock and the thicker layer is the unweathered underlying rock. 4. Cut through the upper layer to expose your image
Page 40

Name ________________________
Petroglyphs – Student Worksheet
At Murujuga (also know as the Burrup Pennisula) we can interpret changes to the landscape over 40,000 years by noting changes in the animal images over time. Over 20,000 years ago an Aboriginal artist chipped away at the rocks to make this image.
What is it? _______________________
Why do you think the artist chose this animal?
________________________________________________
Why are there no pictures of cows?
________________________________________________
Simple images These signs can be seen alongside many roads in WA. What is their message?

Name ________________________
Petroglyphs – Student Worksheet
These replica petroglyphs of present day Australian native animals have been made by students. What do they represent?
Top ____________________________________________
Bottom left _______________________________________
Bottom right ______________________________________
Name ________________________
Petroglyphs – Student Worksheet
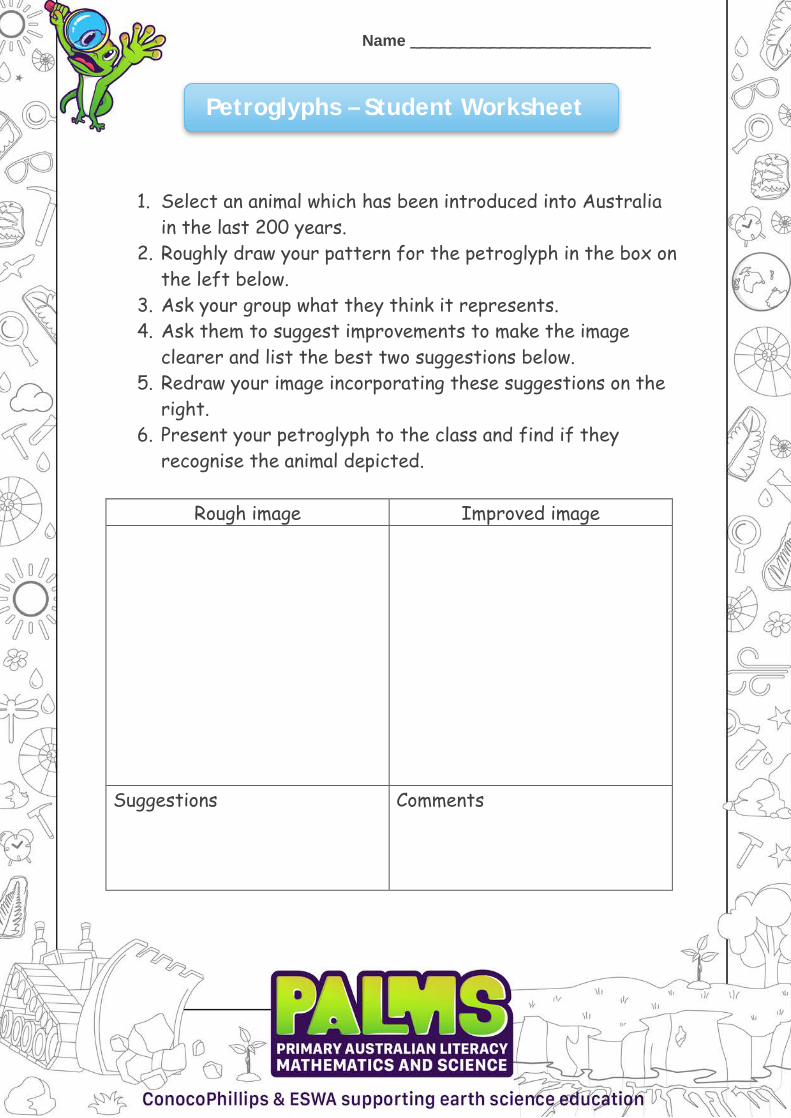
1. Select an animal which has been introduced into Australiain the last 200 years.
2. Roughly draw your pattern for the petroglyph in the box onthe left below.
3. Ask your group what they think it represents.4. Ask them to suggest improvements to make the image
clearer and list the best two suggestions below.5. Redraw your image incorporating these suggestions on the
right.6. Present your petroglyph to the class and find if they
recognise the animal depicted.
Rough image Improved image
Suggestions Comments

Name ________________________
Petroglyphs – Student Worksheet
Materials • 2 balls of different coloured plasticine. One should be
about half the size of the other (Approximately 10mmand 20mm in diameter).
• A sharp pencil, toothpick or nail.• Old newspaper to protect the desktop
Method 1. Flatten the smaller ball of plasticine between fingers and
thumb to make an even, thin disc. This should be as thin aspossible.
2. Repeat using the larger ball to make a disc the same sizebut about twice as thick.
3. Place the thinner disc on top of the thicker one and gentlypress them down onto the newspaper.
The thin upper layer of plasticine represents the outer weathered layer of the rock and the thicker layer is the unweathered underlying rock. 4. Cut through the upper layer to expose your image

Timeline – Teacher’s notes
Many of our students do not realise the length of time that Aboriginal people and their culture have been in Australia. We can interpret changes in their life and culture through what is depicted in their art and how it is depicted. Olary rock art in the Pilbara dates from about 40,000 years. Aboriginal culture is the oldest consistent culture on Earth. It has been suggested that the “dawn” of European culture is represented by the Lascaux cave paintings dated at about 20,000 years before present or by Saharan rock art at 6 to 8,000 years.
Cultural timeline Events (ybp = years before present) Aboriginal people arrive in Australia 50,000ybp European cave paintings at Lascaux 20,000ybp European people arrive in Australia 200ybp Start of petroglyph art at Murujuga 40,000bp The great pyramids in Ancient Egypt were built 5,000ybp Start of formal writing 3,500ybp Start of formal agriculture in Golden Triangle 5,000ybp End of the last Ice Age 17,000ybp
Method 1. Draw a timeline outline covering all these time periods. It might be
easiest to lay the page landscape.
50,0
00yb
p
40,0
00yb
p
30,0
00yb
p
20,0
00yb
p
10,0
00y
bp
2. Organise these events in time sequence from oldest to most recent.Dates have been rounded to make location on the timeline easier.
3. Place the events on the timeline
Page 45

Name ________________________
Timeline – Student Worksheet
Below is a list of important events through human history from which you will create a timeline.
Events (ybp = years before present)
Aboriginal people arrive in Australia 50,000ybp European cave paintings at Lascaux 20,000ybp European people arrive in Australia 200ybp Start of petroglyph art at Murujuga 40,000bp The great pyramids in Ancient Egypt were built 5,000ybp Start of formal writing 3,500ybp Start of formal agriculture in Golden Triangle 5,000ybp End of the last Ice Age 17,000ybp
Method 1. Draw a timeline outline covering all these time periods. It
might be easiest to lay the page landscape.
50,0
00yb
p
40,0
00yb
p
30,0
00yb
p
20,0
00yb
p
10,0
00yb
p
2. Organise these events in time sequence from oldest tomost recent. Dates have been rounded to make location onthe timeline easier.
3. Place the events on the timeline

Physical Weathering – Teacher’s Notes
This activity can be performed in class or sent home as a Palms Parent Power project, so that parents can follow what is happening in Science this term.
It is very common for students to confuse weathering and erosion. Weathering is the destructive process by which rocks are broken into smaller pieces whereas erosion occurs when these small pieces are moved away from the parent rock. Weathering can be due to:
1. Physical processes E.g. heat from the sun in summer or cold in winterThis type of weathering only changes the size of the rock pieces. Frostcan shatter damp rocks when the ice expands in cracks within the rockforcing it apart. Physical impact from other rocks or even meteoritescan also break down, shatter into dust and even melt rocks.2. Chemical processes E.g. when acid groundwater passing through
limestone makes caverns underground.3. Biological processes E.g. when tree roots growing into cracks in
rocks force them farther and farther apart until the rock is brokeninto pieces.
Physical processes do not change the chemistry of the rocks.
Physical weathering due to cold temperatures. Rock itself is not much affected by cold temperatures but any water trapped in cracks or pores in the rock will expand and force the pores and cracks apart. This is called “frost wedging”
ASIDE: Scientists were fascinated to discover that water actually expands when cooled. When most substances become cooler the kinetic energy of their molecules decreases reducing their volume. Ice crystals take up more room than water molecules resulting in what is known as “The anomalous
Page 47

Physical Weathering – Teacher’s Notes
expansion of water”. This explains why wine placed in the freezer to cool should never be left there. The expansion of water in the freezing wine forces out the cork or cracks the bottle! This activity requires empty cool drink bottles and a freezer. I have included a PPP (Palms Parent Power) worksheet for those students who can take it home and do the experiment with their parents. However, it can also be done in class or as a teacher demonstration. It is probably a good idea to wash all the bottles in detergent or bleach before using them. Dissolved material in water causes it to freeze at a lower temperature. This is why salt is spread on road surfaces prone to freezing to reduce ice cover.
Good scientific data is observable and measurable.
To ensure this is a “Fair test” we have to ensure that the Cow Moos Softly
Change one thing Measure one thing Everything else Stays the Same
Materials per group • Permanent marker or
masking tape• Ruler• Two empty clean cool drink bottles• Water• Freezer• Option - calculator
MOO?
Page 48
Physical Weathering – Teacher’s Notes
Method 1. Fill both bottles with water to a height of 10 centimetres, and write
your group name on the base of each.2. Place one bottle in the freezer overnight and leave the other in your
classroom. The bottle in the classroom is the CONTROL againstwhich any change due to freezing can be measured. This bottle is thesame as the experimental bottle but will not be frozen. The bottle togo in the freezer is the EXPERIMENTAL bottle.
Predict what you think will happen after the bottle has been in the freezer overnight – answers will vary
3. The next day remove the bottle and measure the height of the ice inthe bottle.
Observations What was the one thing we changed? Temperature of the environment the bottles were in. What was the one thing we measured? The height of water in the bottle. Did everything else stay the same? Yes Is this a “Fair Test?” Yes What happened to the water level in the frozen bottle? It rose about 1cm. What was the original height of water before freezing? 10cm What was the height after freezing? 11cm What fraction of the original height is this increase? 1/10 or one tenth
Extra for experts If we had doubled the amount of the water in the experimental bottle would the fraction of increase be twice as much? No it would still be one tenth of the original volume
Page 49
Physical Weathering – Teacher’s Notes
Discussion Water is the only liquid that expands when it gets cooler. How can trapped water freezing break up rocks?
In areas where cold weather causes frost cold can break up rocks and cause the ground to heave up and collapse on thaw. Water is the only substance that expands when it freezes. Earlier scientists would have called this “The anomalous expansion of water”. When water molecules cool, unlike other chemicals, molecules rearrange so that they take on a new shape, which unusually (or anomalously) takes up more space than the original liquid. This explains “Frost Heave”, when freezing temperatures causes building foundations to rise when the soil expands on freezing and collapses on thaw. Large stones, with water trapped under them slowly migrate upwards to the soil surface. Children on farms used to be sent out into the fields to pick up these stones and leave them at the sides of the fields to make spring ploughing and harrowing easier. Ancient Egyptians poured water into channels they had chiseled into sandstone to let the cold desert nights split blocks for building the pyramids.
Page 50
Name ________________________
Physical Weathering – Student Worksheet
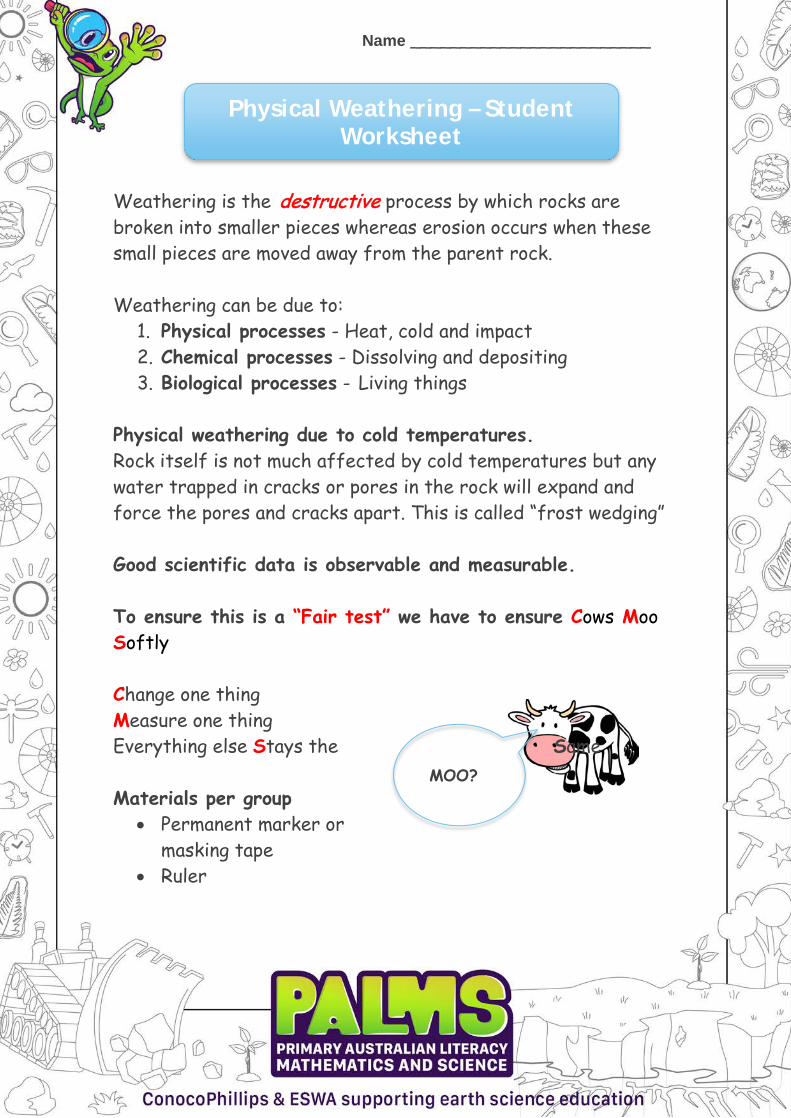
Weathering is the destructive process by which rocks are broken into smaller pieces whereas erosion occurs when these small pieces are moved away from the parent rock.
Weathering can be due to: 1. Physical processes - Heat, cold and impact2. Chemical processes - Dissolving and depositing3. Biological processes - Living things
Physical weathering due to cold temperatures. Rock itself is not much affected by cold temperatures but any water trapped in cracks or pores in the rock will expand and force the pores and cracks apart. This is called “frost wedging”
Good scientific data is observable and measurable.
To ensure this is a “Fair test” we have to ensure Cows Moo Softly
Change one thing Measure one thing Everything else Stays the Same
Materials per group • Permanent marker or
masking tape• Ruler
MOO?

Name ________________________
Physical Weathering – Student Worksheet
• Two empty clean cool drink bottles• Water• Freezer• Option – calculator
Method 1. Fill both bottles with water to a height of 10 centimetres,
and write your group name on the base of each.2. Place one bottle in the freezer overnight and leave the
other in your classroom. The bottle in the classroom is theCONTROL against which any change due to freezing can bemeasured. This bottle is the same as the experimentalbottle but will not be frozen. The bottle to go in thefreezer is the EXPERIMENTAL bottle.
Predict what you think will happen after the bottle has been in the freezer overnight
____________________________________________
______________________________________________
3. The next day remove the bottle and measure the height ofthe ice in the bottle.

Name ________________________
Physical Weathering – Student Worksheet
Observations What was the one thing we changed? ____________________
What was the one thing we measured? ___________________
________________________________________________
Did everything else stay the same?______________________
Is this a “Fair Test?” _______________________________
What happened to the water level in the frozen bottle?
________________________________________________
What was the original height of water before freezing? ______
What was the height after freezing? ____________________
What fraction of the original height is this increase?
Increase in height ______________ Original height
Name ________________________
Physical Weathering – Student Worksheet
Extra for experts If we had doubled the amount of the water in the experimental bottle would the fraction of increase be twice as much?
________________________________________________
________________________________________________
Discussion Water is the only liquid that expands when it gets cooler. How can trapped water freezing break up rocks for building stone?

Chemical Weathering – Teacher’s Notes
Chemical Weathering - Acid RainAlthough our atmosphere is mostly nitrogen and oxygen, it usually also has about 1/100th or 1% water vapour at sea level. Water can dissolve naturally occurring gases such as carbon dioxide, sulphur dioxide and nitrous oxide to create acids, which can eat away lime rich rocks such as limestone and marble. Carbon dioxide + water = carbonic acid Sulphur dioxide + water = sulphuric acid Nitrous oxide + water = nitric acid
When we place limestone in acid two process can be observed. 1. The limestone dissolves in the acid2. A gas evolves. Carbon dioxide gas can be seen to bubble through the
acid. This is also called effervescence.
If we burn fossil fuels we increase levels of these acid forming gases and the acid rain weathering process is sped up. Limestone is commonly used to build walls and houses. Many of Fremantle’s early houses were built of limestone blocks.
The limestone prison, retaining walls and tunnel in Fremantle .
Page 55
Chemical Weathering – Teacher’s Notes
Overseas, in Rome and Athens, very much older cities that were built of marble or limestone, have been extensively damaged due to acid rain. The famous statue of David by Michelangelo has been replaced by a replica to stop the damaging effects of acid rain. Traffic is excluded from some town centres because car exhaust creates acid forming gases. NOTE: most of our coastal limestone is sandy limestone. When the acid dissolves lime the sand falls out. Materials
• Two lumps of limestone (or cement can be used as it is partly made from limestone)
• Two clear drinking glasses, jam jars or Petri dishes • 2 cups of vinegar (acetic acid)
Method
1. Place the first piece of limestone in plain water. This is the CONTROL against which any change is measured
2. Place the second piece of limestone in vinegar to the same height as the first. This is the experiment where we expect change.
3. Leave the experiment for 5 minutes so that the acid can fill any air spaces in the rocks.
4. Observe any changes 5. Leave for a day and repeat your observations
Page 56
Chemical Weathering – Teacher’s Notes
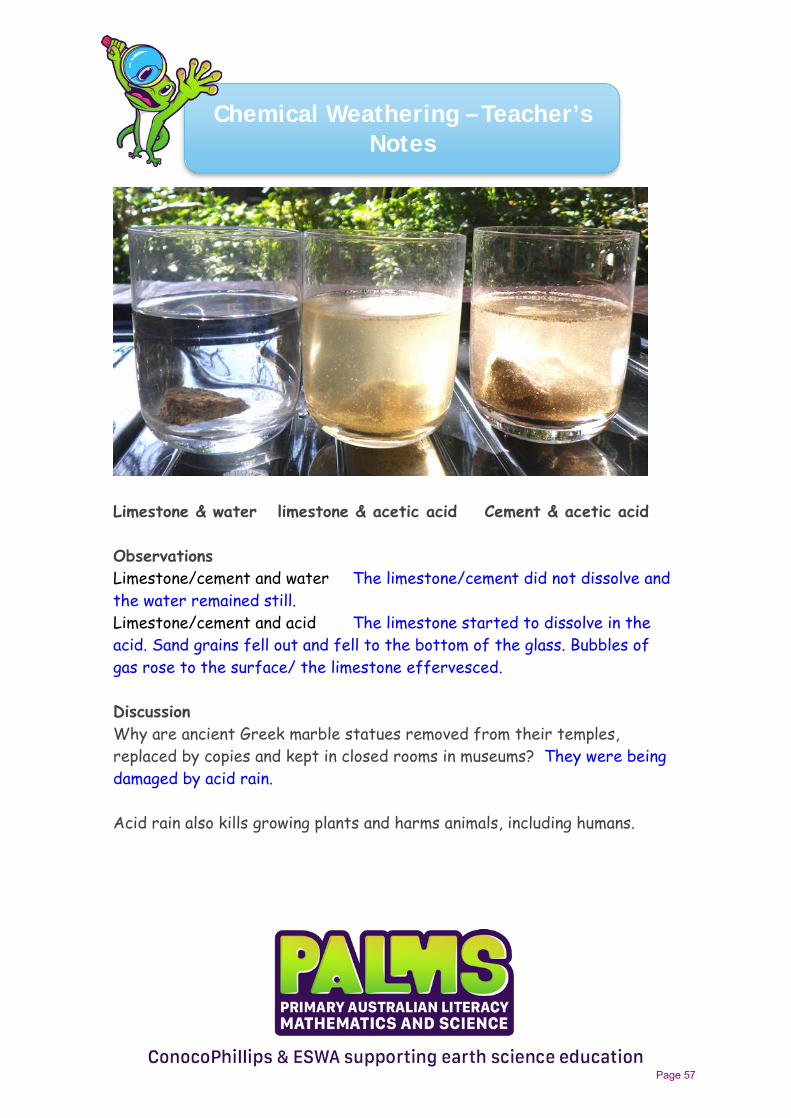
Limestone & water limestone & acetic acid Cement & acetic acid
Observations Limestone/cement and water The limestone/cement did not dissolve and the water remained still. Limestone/cement and acid The limestone started to dissolve in the acid. Sand grains fell out and fell to the bottom of the glass. Bubbles of gas rose to the surface/ the limestone effervesced.
Discussion Why are ancient Greek marble statues removed from their temples, replaced by copies and kept in closed rooms in museums? They were being damaged by acid rain.
Acid rain also kills growing plants and harms animals, including humans.
Page 57
Name ________________________
Chemical Weathering – Student Worksheet
Chemical Weathering - Acid RainWater in the atmosphere can dissolve naturally occurring gases such as carbon dioxide, sulphur dioxide and nitrous oxide to create acid rain, which can eat away lime rich rocks such as limestone and marble. Burning fossil fuels such as petrol, gas and coal releases these gases.
Carbon dioxide + water = carbonic acid Sulfur dioxide + water = sulfuric acid Nitrous oxide + water = nitric acid
When we place limestone or marble in acid two process can be observed.
1. The limestone dissolves in the acid2. A gas evolves. Carbon dioxide gas can be seen to bubble
through the acid. This is also called effervescence.
Many of Fremantle’s early houses were built of limestone blocks.
Name ________________________
Chemical Weathering – Student Worksheet
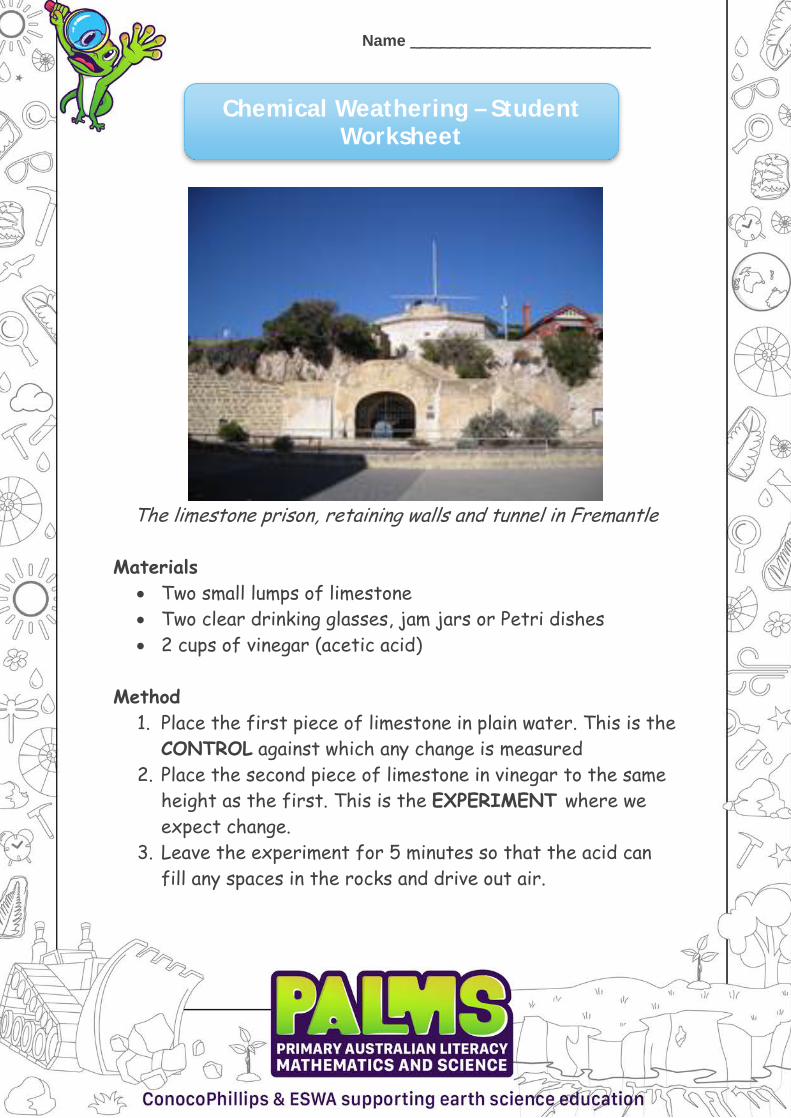
The limestone prison, retaining walls and tunnel in Fremantle
Materials • Two small lumps of limestone• Two clear drinking glasses, jam jars or Petri dishes• 2 cups of vinegar (acetic acid)
Method 1. Place the first piece of limestone in plain water. This is the
CONTROL against which any change is measured2. Place the second piece of limestone in vinegar to the same
height as the first. This is the EXPERIMENT where weexpect change.
3. Leave the experiment for 5 minutes so that the acid canfill any spaces in the rocks and drive out air.

Name ________________________
Chemical Weathering – Student Worksheet
4. Observe any changes5. Leave for a day and repeat your observations
Observations Limestone/cement and water
Limestone/cement and acid
Discussion Why are ancient Greek marble statues removed from their temples, replaced by copies and kept in closed rooms in museums?

Oxidation – Teacher’s Notes
Chemical Weathering - Oxidation Composition of dry air Nitrogen 78.09% Oxygen 20.95% Argon 0.93% Carbon Dioxide 0.93% Others 0.03%
Students often talk about breathing in oxygen but the air we breathe is not all oxygen. Indeed about 4/5 of it is nitrogen and most of the rest is oxygen. If the square on the left was air, mark off and label how much of it would be nitrogen and how much oxygen.
Nitrogen is very important, as it does not easily bond with other elements. Oxygen is mostly released when green plants make food. Earth’s very early atmosphere had only 0.2% oxygen because simple bacterial mats similar to the stromatolites we can see now at Shark Bay, produced oxygen through photosynthesis. This restricted the development of complex life forms, which would have needed more oxygen. When volcanoes erupted during those times their iron rich lava flows would not have been oxidised (rusted) away. This created the conditions, which made our wonderful Banded Iron Formations in this state’s north, which are the source of rich iron ore for export.
Page 61

Oxidation – Teacher’s Notes
As plants increased in numbers populating the oceans our atmospheric oxygen levels rose first to 2% about 540 million years ago, then higher. This corresponds to the appearance of complex creatures with hard skeletons in our oceans. With the increase of oxygen, iron rich deposits could no longer be made. Half of the oxygen in our present atmosphere is still produced by tiny marine plankton and algae. The level of oxygen in the atmosphere is critical to the survival of living organisms. At 15% oxygen fires will not burn whereas at 25% organics (living things including ourselves) would spontaneously combust!
Curious coins Metal mixes (alloys) for coins are chosen because they are fairly resistant to oxidation. However they weather faster than most rocks!
Draw an arrow indicating the direction of oldest to youngest.
Older
to
Youn
ger
Page 62

Oxidation – Teacher’s Notes
What clues did you use to guide you? Change in reflection/shininess, damage to rim, change in colour. What other clues could you have used? Coins have their date stamped on them.
EXTRA for EXPERTS - (This has not been included in the student worksheet – could be a good discussion point) What does painting houses have to do with weathering? Painting protects wood and iron by isolating it from weathering due to oxidation, fungal and bacterial attack, which can rot wood. If your classroom has aluminium windows, rub your finger on the surface and the white dust that rubs off is aluminium oxide. This layer of dust actually protects the underlying aluminium from oxygenation.
Oxygen in our atmosphere bonds with our rocks and helps break them down. The process may take several thousand years or more. If you break open a weathered rock you can see its unweathered core. Note the light weathered crust on this mudstone from behind Geraldton.
The student worksheets show some amazingly coloured Banded Iron formation rocks from the Hamersley Range.
Page 63

Oxidation – Teacher’s Notes
Label the weathered and un-weathered parts of the following rocks. Picture Comment
Dolerite (an igneous rock) from near Northam
Weathered outer edge is orangey brown caused by the iron in the rock rusting (oxidising).
Unweathered dark core.
Yellow coastal Tamala Limestone from Fremantle
The white weathered fine grained outer weathered rim has been colonised by green moss. The inner unweathered rock is yellowish.
Chert from the Pilbara.
The white outer crust is weathered. The silica and iron rich core is darker and un-weathered
Page 64

Name ________________________
Oxidation – Student Worksheet
Chemical Weathering - Oxidation
The air we breathe is not all oxygen. Indeed about 4/5 of it is the gas nitrogen. The rest is oxygen and small amounts of other gases, such as argon and carbon dioxide. If the square on the left was air, mark off and label how much of it would be
nitrogen and how much oxygen.
A major source of oxygen is green plants. Oxygen finds it easy to bond with other chemicals. You have probably noticed how easily unpainted iron rusts in the open air. Many rocks contain iron. Metal coins can also age (weather) due to oxygen in the atmosphere.
Curious coins Draw an arrow beside the picture below indicating the direction of oldest to youngest coins.

Name ________________________
Oxidation – Student Worksheet
What clues in the picture did you use to guide you?
________________________________________________
________________________________________________
What other clues could you have used? ________________________________________________
________________________________________________
Rocks are made up of minerals, which contain metal elements. These can be oxidised when exposed to the air. This process can take thousands or even millions

Name ________________________
Oxidation – Student Worksheet
of years. The lighter rusty, crusty rind on the outside of part of the rock pictured above is due to oxidation weathering.
These amazing bands of purple, red and orange colour in rock from the Hammersley Ranges are due to oxidation of beds rich in iron and manganese.
Name ________________________
Oxidation – Student Worksheet
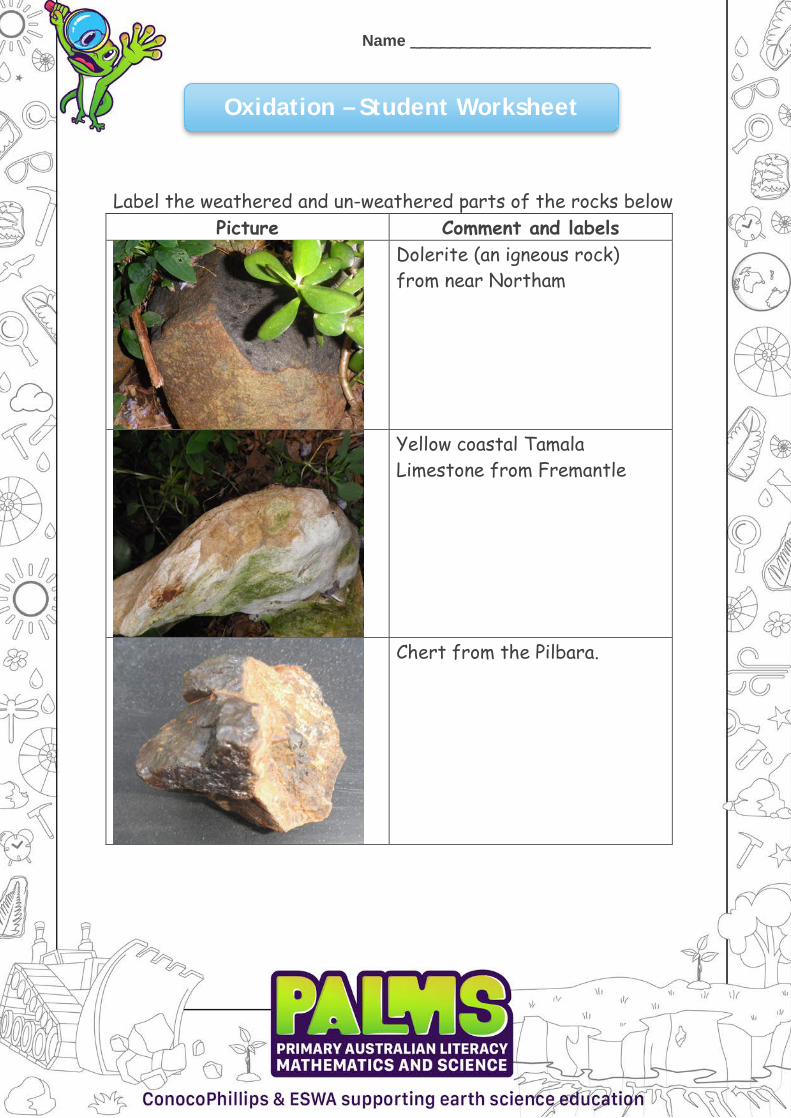
Label the weathered and un-weathered parts of the rocks below Picture Comment and labels
Dolerite (an igneous rock) from near Northam
Yellow coastal Tamala Limestone from Fremantle
Chert from the Pilbara.
Biological Weathering – Teacher’s Notes
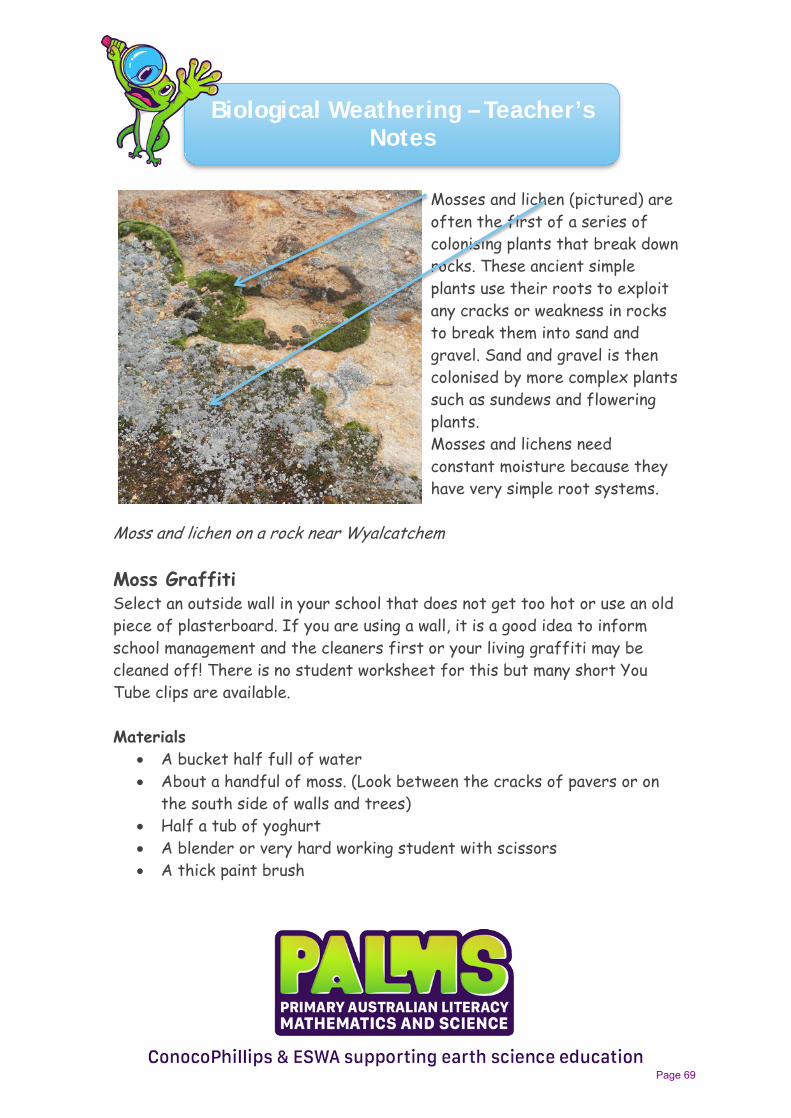
Mosses and lichen (pictured) are often the first of a series of colonising plants that break down rocks. These ancient simple plants use their roots to exploit any cracks or weakness in rocks to break them into sand and gravel. Sand and gravel is then colonised by more complex plants such as sundews and flowering plants. Mosses and lichens need constant moisture because they have very simple root systems.
Moss and lichen on a rock near Wyalcatchem
Moss Graffiti Select an outside wall in your school that does not get too hot or use an old piece of plasterboard. If you are using a wall, it is a good idea to inform school management and the cleaners first or your living graffiti may be cleaned off! There is no student worksheet for this but many short You Tube clips are available.
Materials • A bucket half full of water• About a handful of moss. (Look between the cracks of pavers or on
the south side of walls and trees)• Half a tub of yoghurt• A blender or very hard working student with scissors• A thick paint brush
Page 69
Biological Weathering – Teacher’s Notes
• A water spray bottle
Method 1. Wash all the soil and grit out of the moss by sloshing it about in a
bucket of water.2. Blend the yoghurt and moss together.3. You may need to add a little water to mix the green sludge to a
paint-like consistency4. Thickly paint a message in sludge on the wall or plasterboard. (Earth
Science ROCKS!)5. Spray with water to keep damp6. Your success depends on local climate. Moss likes cool damp air.
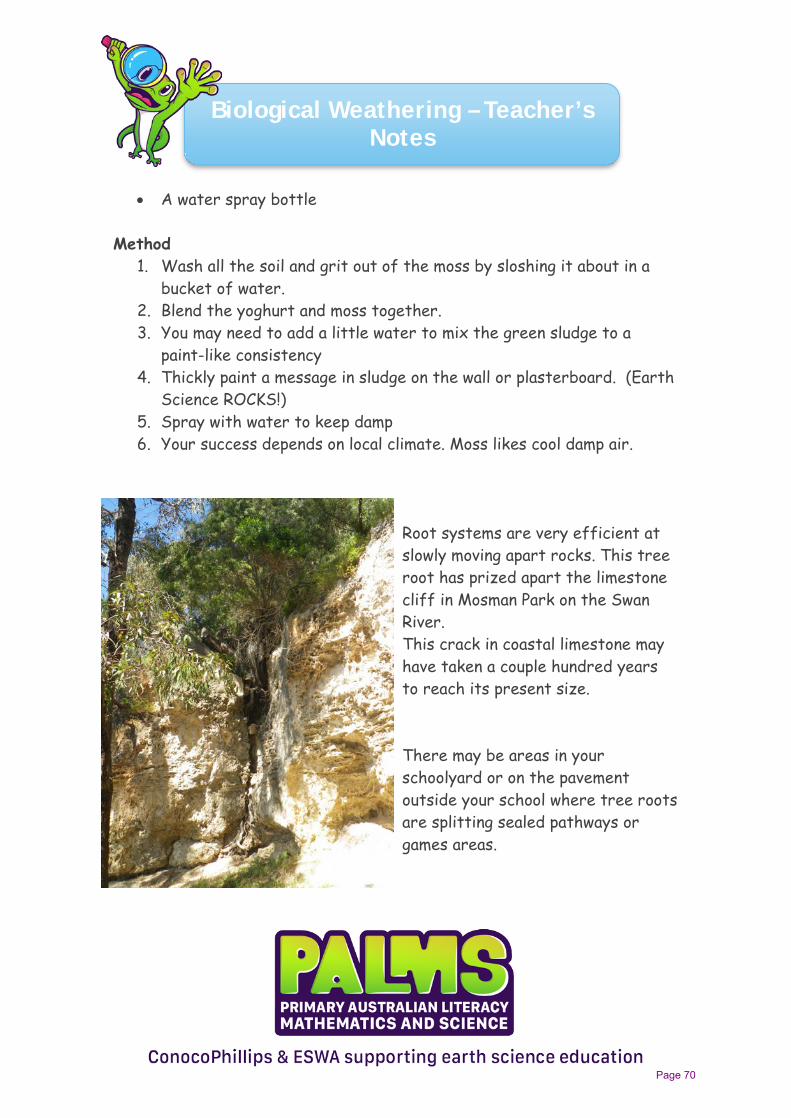
Root systems are very efficient at slowly moving apart rocks. This tree root has prized apart the limestone cliff in Mosman Park on the Swan River. This crack in coastal limestone may have taken a couple hundred years to reach its present size.
There may be areas in your schoolyard or on the pavement outside your school where tree roots are splitting sealed pathways or games areas.
Page 70
Erosion by Wind and Water – Teacher’s Notes
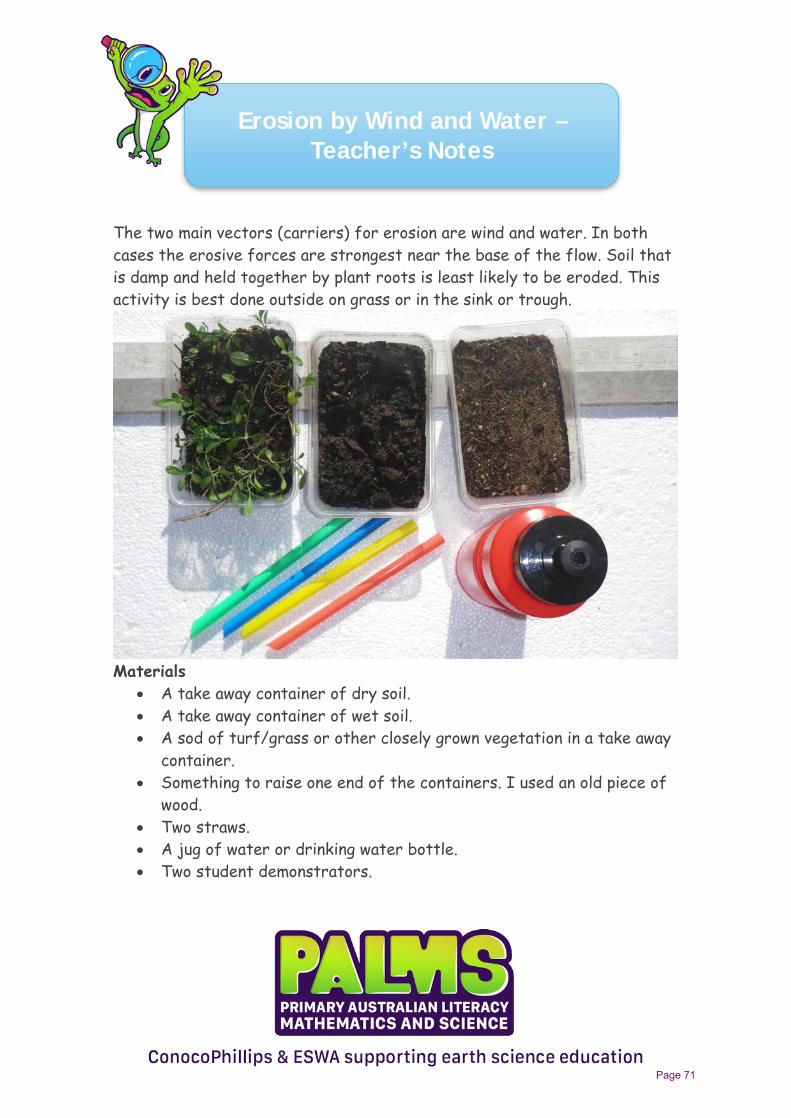
The two main vectors (carriers) for erosion are wind and water. In both cases the erosive forces are strongest near the base of the flow. Soil that is damp and held together by plant roots is least likely to be eroded. This activity is best done outside on grass or in the sink or trough.
Materials • A take away container of dry soil.• A take away container of wet soil.• A sod of turf/grass or other closely grown vegetation in a take away
container.• Something to raise one end of the containers. I used an old piece of
wood.• Two straws.• A jug of water or drinking water bottle.• Two student demonstrators.
Page 71
Erosion by Wind and Water – Teacher’s Notes
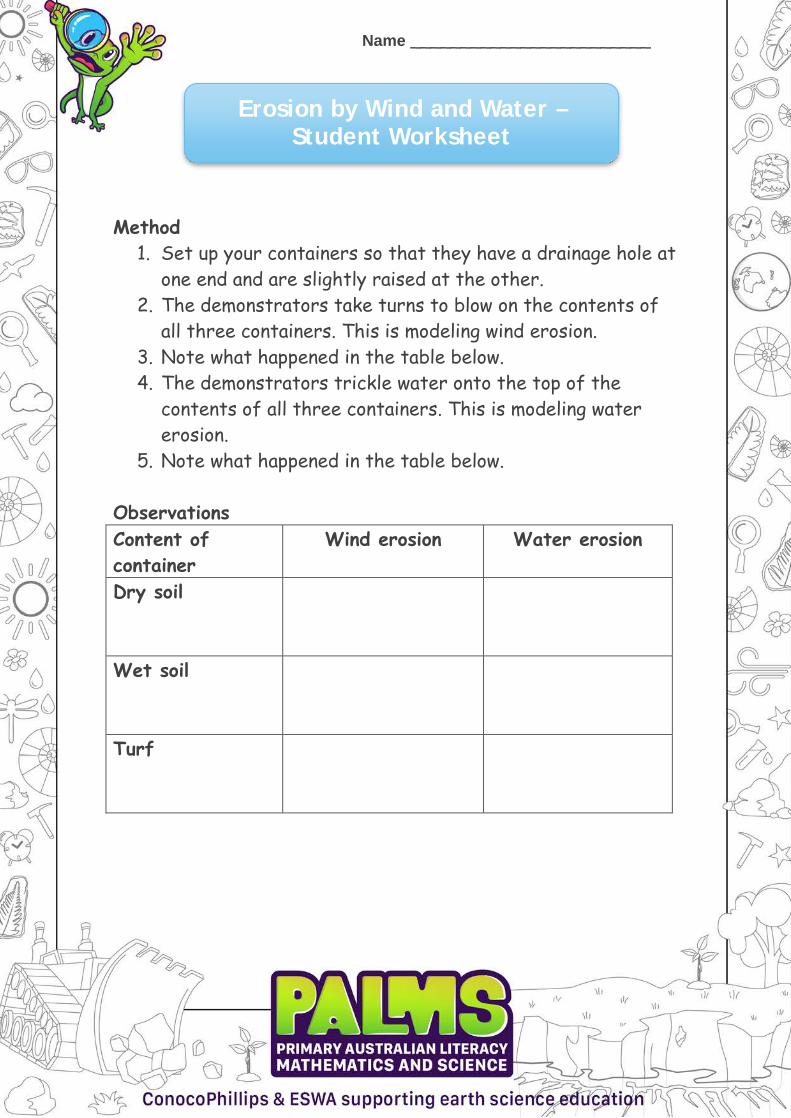
Method 1. Set up your containers so that they have a drainage hole at one end
and are slightly raised at the other.2. The demonstrators take turns to blow on the contents of all three
containers. This is modeling wind erosion.3. Note what happened in the table below.4. The demonstrators trickle water onto the top of the contents of all
three containers. This is modeling water erosion.5. Note what happened in the table below.
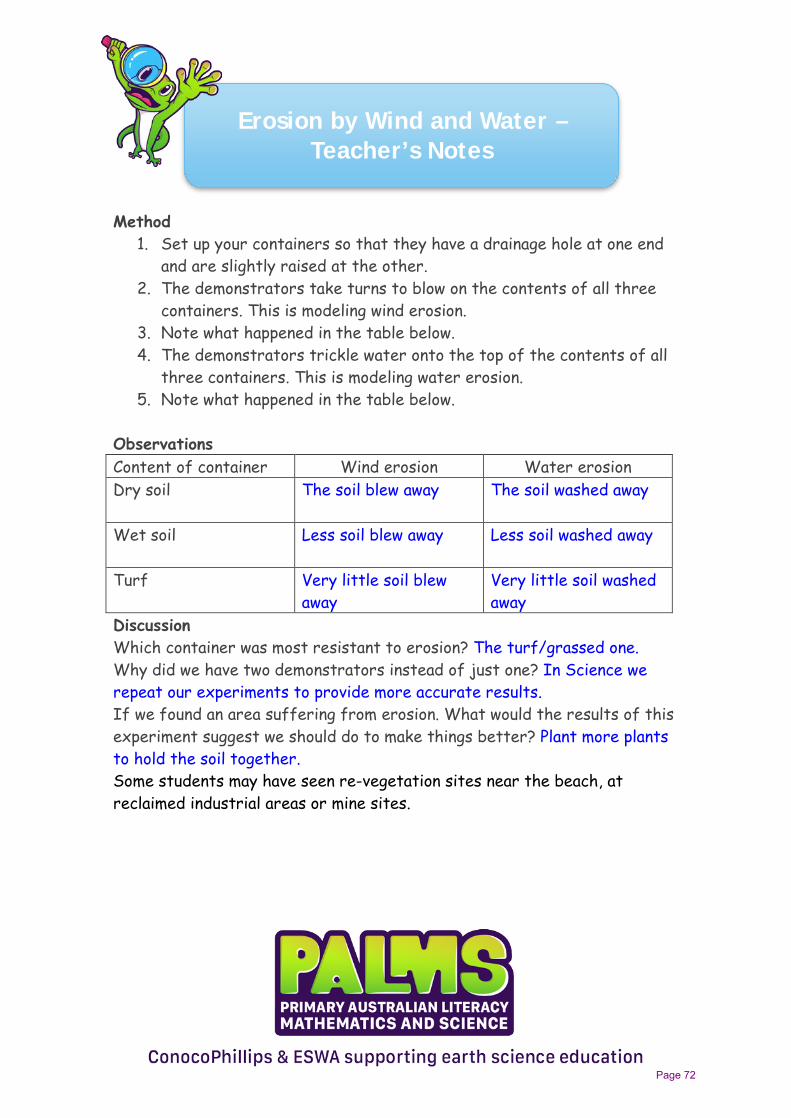
Observations Content of container Wind erosion Water erosion Dry soil The soil blew away The soil washed away
Wet soil Less soil blew away Less soil washed away
Turf Very little soil blew away
Very little soil washed away
Discussion Which container was most resistant to erosion? The turf/grassed one. Why did we have two demonstrators instead of just one? In Science we repeat our experiments to provide more accurate results. If we found an area suffering from erosion. What would the results of this experiment suggest we should do to make things better? Plant more plants to hold the soil together. Some students may have seen re-vegetation sites near the beach, at reclaimed industrial areas or mine sites.
Page 72
Erosion by Wind and Water – Teacher’s Notes
Extra for experts
You can extend this activity by examining the colour of water draining from the containers.
Dry soil Lots of dusty coloured water quickly drains away. Dry soil has little water retention.
Wet soil Less but more strongly coloured water drains away. Wet soil already has some water which has absorbed material and been coloured by it.
Turf Mostly clear water drains away but less than either than the other two containers.
Banks of vegetation are used for initially purifying industrial waste water.
Page 73

Name ________________________
Erosion by Wind and Water – Student Worksheet
The two main vectors (carriers) for erosion are wind and water. In both cases the erosive forces are strongest near the base of the flow.
Materials • A take away container of dry soil.• A take away container of wet soil.• A sod of turf/grass in a take away container.• Something to raise one end of the containers.• Two straws.• A jug of water or drinking water bottle.• Two student demonstrators.
Name ________________________
Erosion by Wind and Water – Student Worksheet
Method 1. Set up your containers so that they have a drainage hole at
one end and are slightly raised at the other.2. The demonstrators take turns to blow on the contents of
all three containers. This is modeling wind erosion.3. Note what happened in the table below.4. The demonstrators trickle water onto the top of the
contents of all three containers. This is modeling watererosion.
5. Note what happened in the table below.
Observations Content of container
Wind erosion Water erosion
Dry soil
Wet soil
Turf
Name ________________________
Erosion by Wind and Water – Student Worksheet
Discussion Which container was most resistant to erosion?
________________________________________________
Why did we have two demonstrators instead of just one? ________________________________________________
________________________________________________
If we found an area suffering from erosion. What would the results of this experiment suggest we should do to make things better?
________________________________________________
________________________________________________
________________________________________________
________________________________________________
Rainwater at Home – Teacher’s Notes
Rainwater falling on the garden or the bush usually seeps into the soil. Built structures like houses, schools, supermarkets, roads and parking lots can collect rainfall and channel it into a fast flowing stream of water that can cause soil erosion.
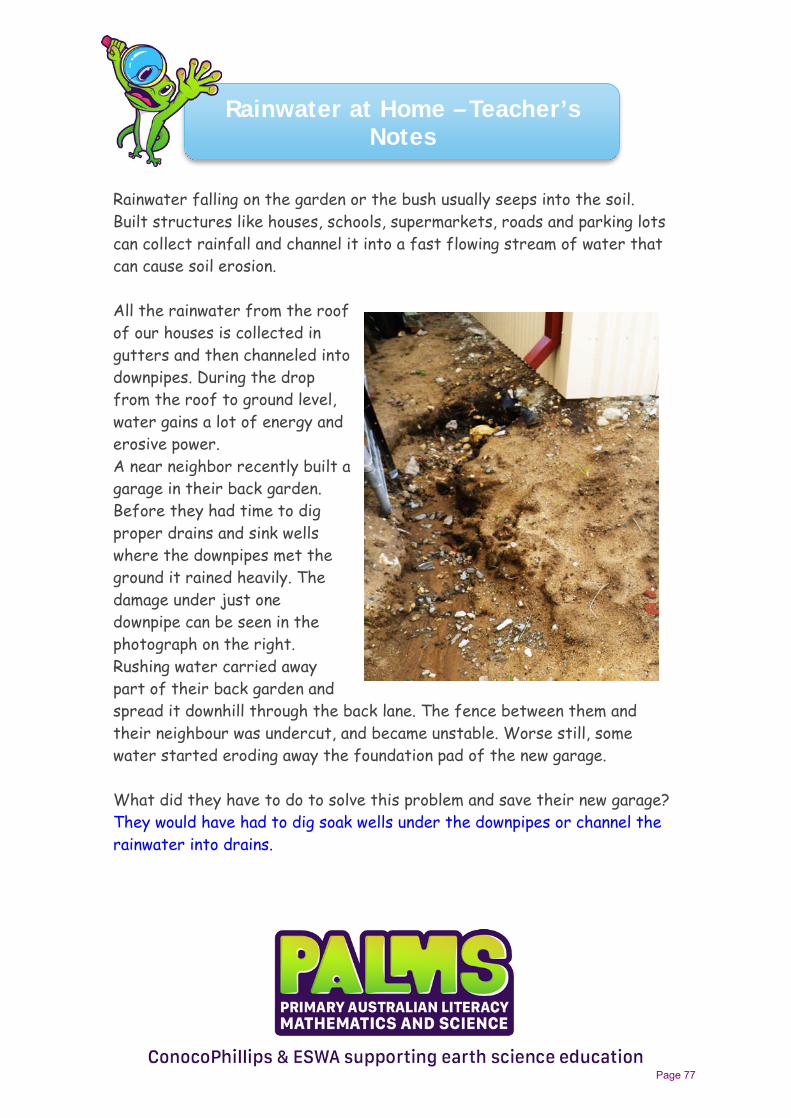
All the rainwater from the roof of our houses is collected in gutters and then channeled into downpipes. During the drop from the roof to ground level, water gains a lot of energy and erosive power. A near neighbor recently built a garage in their back garden. Before they had time to dig proper drains and sink wells where the downpipes met the ground it rained heavily. The damage under just one downpipe can be seen in the photograph on the right. Rushing water carried away part of their back garden and spread it downhill through the back lane. The fence between them and their neighbour was undercut, and became unstable. Worse still, some water started eroding away the foundation pad of the new garage.
What did they have to do to solve this problem and save their new garage? They would have had to dig soak wells under the downpipes or channel the rainwater into drains.
Page 77

Rainwater at Home – Teacher’s Notes
Are there any eroded areas around downpipes in your school? (very likely) Where are they? (list of locations)
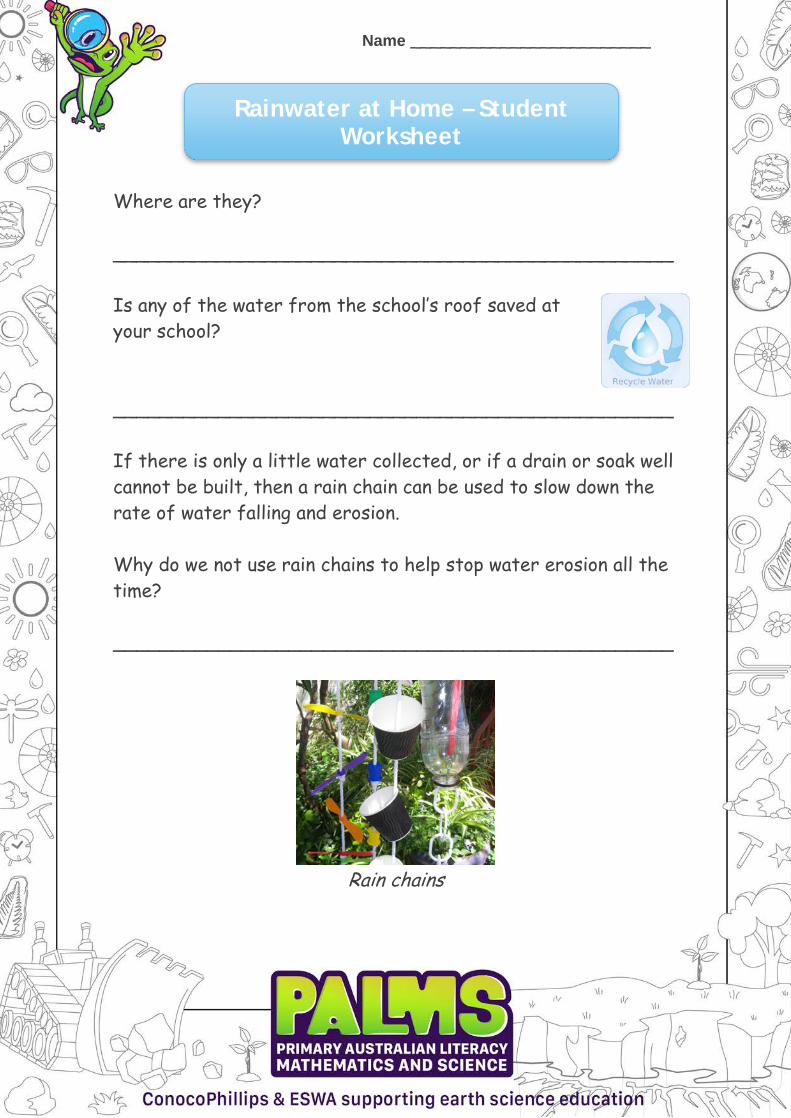
If there is only a little water collected, or if a drain or soak cannot be built, then a rain chain can be used to slow down the falling water and therefore erosion. The photograph on the left shows how a chain to the left of the door diverts water from a small roof over the front door.
Chain Often the bottom of the chain is placed in a plant pot or urn filled with pebbles to further break the impact of the falling water. Link chains are not as effective as cup chains. The sound of splashing water is a feature of Japanese gardens. Some landscape gardeners also hang chains from tree branches because they like the sound of splashing water. There is a short simple STEM activity on making rain chains in this package.
Why do we not use rain chains to help stop water erosion all the time? Rain chains can only carry a little water, much less than downpipes. If there is a lot of water it just cascades down and causes erosion.
Page 78
Rainwater at Home – Teacher’s Notes
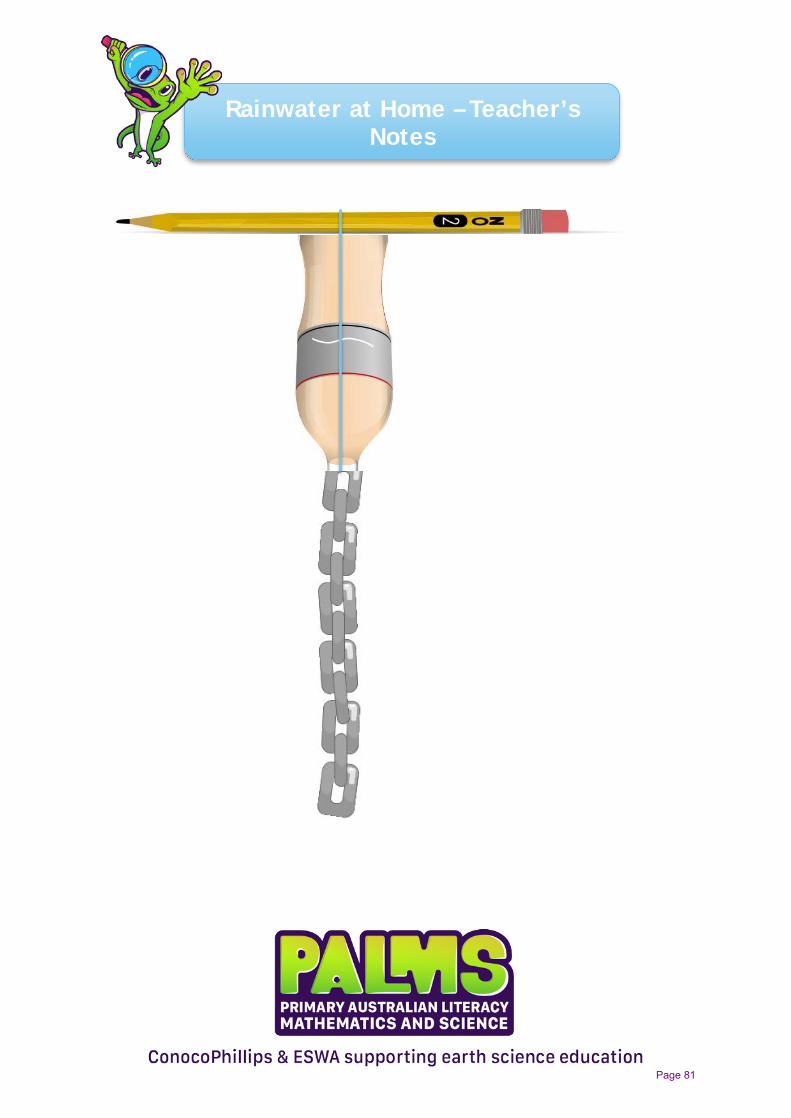
ACTIVITY - To test the effectiveness of a water chain (A diagram is given at the end of this activity)
Materials per group • A small empty cool drink bottle with the cap removed and the bottom
cut off (pre-prepared - a bread knife works well).• A length of chain or knotted rope. A dog’s lead can also be used• A measuring jug• A piece of string• Water• Sandpit or garden bed with level ground• A ruler
Method To make the Control
1. Fill the jug with 250ml of water2. Stand in the sandpit holding the bottle upside down. Extend your arm
so your feet do not get wet.3. Measure so that the bottom of the bottle is half a metre above
ground level.4. Pour the water into the upturned bottle and observe and measure
any changes at ground level. A simple sketch or photograph may helpThis is the measurement and observations against which any changedue to the chain will be measured. This is the CONTROL
To make the experiment 1. Tie the string to the pencil and thread it through the bottle2. Tie the chain to the string3. Refill the jug with 250ml water and hold the bottle and chain above a
new piece of ground4. Empty the water into the bottle and observe the effect of falling
water on the ground when it has passed over a chain.Repeat the experiment for a more accurate result.
Page 79

Rainwater at Home – Teacher’s Notes
Observations Bottle Bottle + chain Measurements
The chain breaks the impact of falling water and makes a much shallower and wider spread depression rather than the deep hole eroded by the bottle (downpipe). The drops have less erosive energy and are splattered over a wider area
There is a short delightful video on YouTube demonstrating 20 creative water chains including ones featuring plastic plant pots and pinecones. https://www.youtube.com/watch?v=F1_RRV1OPjQ Some other suggestions for experiments could be plastic cups along garden twine, knotted and plaited plastic shopping bags, empty tins and yoghurt tubs, The strengths and weaknesses of each trial material could be discovered by groups of students in the short STEM experiment at the end this package.
Page 80
Rainwater at Home – Teacher’s Notes
Page 81

Name ________________________
Rainwater at Home – Student Worksheet
A near neighbour recently built a garage in their back garden. Before they had time to dig proper drains and sink wells where the downpipes met the ground it rained heavily. The damage under just one downpipe can be seen in the photograph on the right. Rushing water carried away part of their back garden and spread it downhill through the back lane. The fence between them and their neighbour was undercut and became unstable. Worse still, some water started eroding away the foundation pad of the new garage. What did they have to do to solve this problem and save their new garage? ________________________________________________
________________________________________________
Are there any eroded areas around downpipes in your school?
________________________________________________
Name ________________________
Rainwater at Home – Student Worksheet
Where are they?
________________________________________________
Is any of the water from the school’s roof saved at your school?
________________________________________________
If there is only a little water collected, or if a drain or soak well cannot be built, then a rain chain can be used to slow down the rate of water falling and erosion.
Why do we not use rain chains to help stop water erosion all the time?
________________________________________________
Rain chains
Name ________________________
Rainwater at Home – Student Worksheet
ACTIVITY - To test the effectiveness of a rain chain
Materials per group • A small empty cool drink bottle with the cap removed and
the bottom cut off• A length of chain or knotted rope.• A piece of string• A jug• Water• Sandpit or garden bed with level ground• A ruler
Method To make the Control
1. Fill the jug with 250ml of water.2. Stand in the sandpit holding the bottle upside down.
Extend your arm so your feet do not get wet.3. Measure so that the bottom of the bottle is half a metre
above ground level.4. Pour the water into the upturned bottle and observe and
measure any changes at ground level. This is theCONTROL.
To make the experiment model 1. Tie the string to the pencil and thread it through the
bottle.2. Tie the chain to the string.

Name ________________________
Rainwater at Home – Student Worksheet
3. Refill the jug with 250ml water and hold the bottle andchain above a new piece of ground.
4. Empty the water into the bottle and observe the effect offalling water on the ground when it has passed over a chain.
Repeat the experiment if you want to get a more accurate result.
Observations Bottle Bottle +chain Measurements
First test
Second test
Conclusion What does the data above suggest about the usefulness of the rain chain?
________________________________________________
________________________________________________
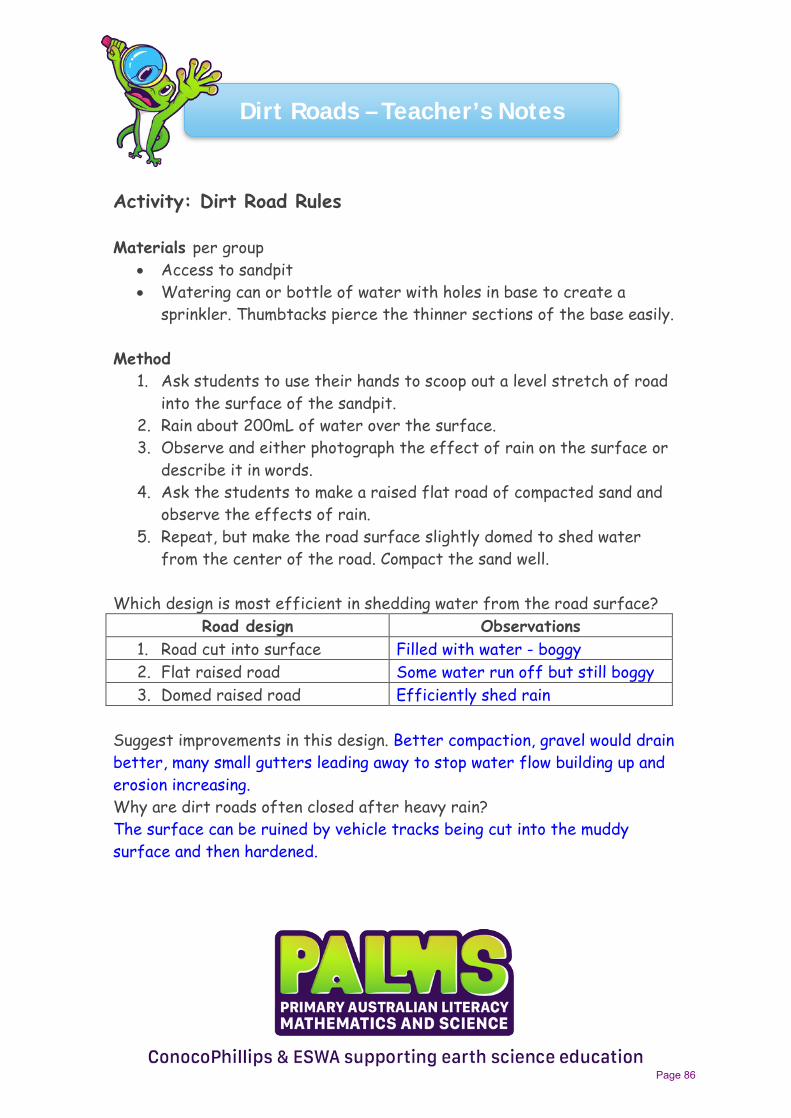
Dirt Roads – Teacher’s Notes
Activity: Dirt Road Rules
Materials per group • Access to sandpit• Watering can or bottle of water with holes in base to create a
sprinkler. Thumbtacks pierce the thinner sections of the base easily.
Method 1. Ask students to use their hands to scoop out a level stretch of road
into the surface of the sandpit.2. Rain about 200mL of water over the surface.3. Observe and either photograph the effect of rain on the surface or
describe it in words.4. Ask the students to make a raised flat road of compacted sand and
observe the effects of rain.5. Repeat, but make the road surface slightly domed to shed water
from the center of the road. Compact the sand well.
Which design is most efficient in shedding water from the road surface? Road design Observations
1. Road cut into surface Filled with water - boggy 2. Flat raised road Some water run off but still boggy 3. Domed raised road Efficiently shed rain
Suggest improvements in this design. Better compaction, gravel would drain better, many small gutters leading away to stop water flow building up and erosion increasing. Why are dirt roads often closed after heavy rain? The surface can be ruined by vehicle tracks being cut into the muddy surface and then hardened.
Page 86

Dirt Roads – Teacher’s Notes
Why is the level of the road above the level of the adjoining countryside? To allow rain water to drain away
Why has gravel been added to the road surface? To make it harder for vehicle tyres and to make it more difficult to erode by wind and rain
Why are there wreaths of wildflowers growing alongside the road in the gutters? Any water from the road drains into these gullies and keeps plants well watered.
Teachers may like to suggest that students research Len Beadell, an Australian hero who built the Gun Barrel Highway to support Australian and Commonwealth rocket development from the mid-1950s. The track is named after his construction party who aimed to build roads straight as a gun barrel. His famous book “Too long in the bush” is a pleasure to read.
Page 87
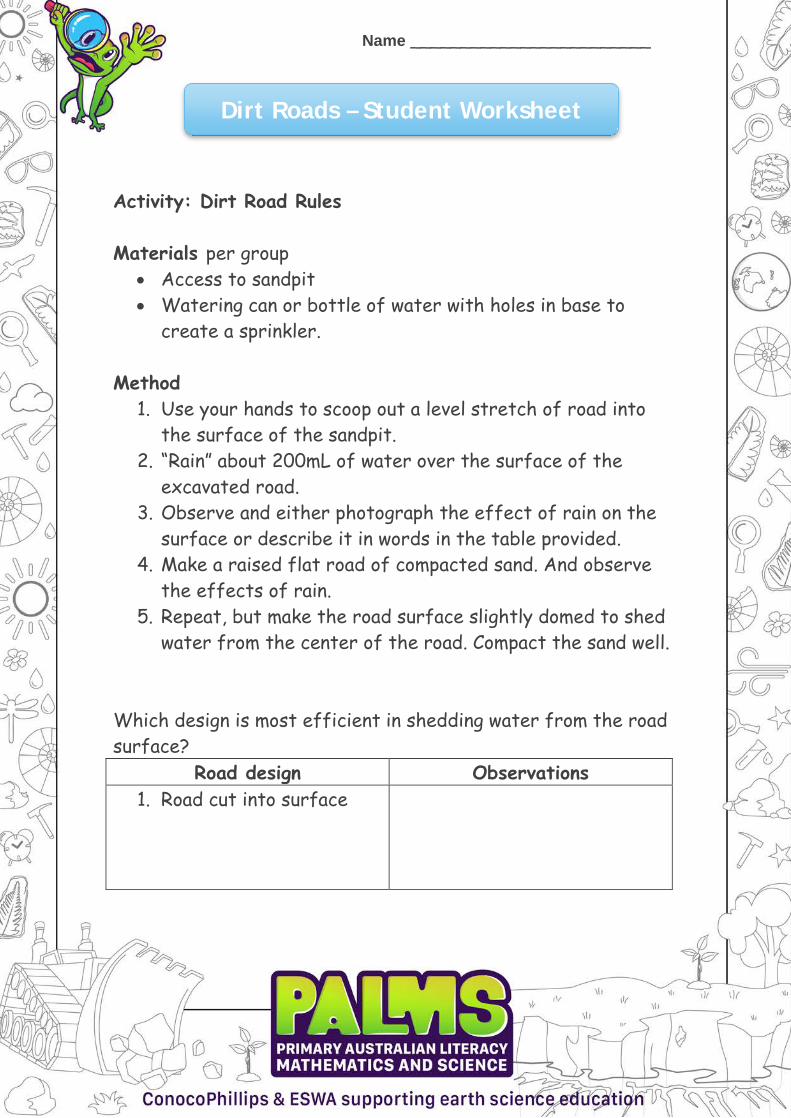
Name ________________________
Dirt Roads – Student Worksheet
Activity: Dirt Road Rules
Materials per group • Access to sandpit• Watering can or bottle of water with holes in base to
create a sprinkler.
Method 1. Use your hands to scoop out a level stretch of road into
the surface of the sandpit.2. “Rain” about 200mL of water over the surface of the
excavated road.3. Observe and either photograph the effect of rain on the
surface or describe it in words in the table provided.4. Make a raised flat road of compacted sand. And observe
the effects of rain.5. Repeat, but make the road surface slightly domed to shed
water from the center of the road. Compact the sand well.
Which design is most efficient in shedding water from the road surface?
Road design Observations 1. Road cut into surface

Name ________________________
Dirt Roads – Student Worksheet
2. Flat raised road
3. Domed raised road
Suggest improvements in this design.
________________________________________________
________________________________________________
________________________________________________
Why are dirt roads often closed after heavy rain?
________________________________________________
________________________________________________
________________________________________________

Name ________________________
Dirt Roads – Student Worksheet
Why is the level of the road above the level of the adjoining countryside?
________________________________________________
________________________________________________
Why has gravel been added to the road surface? ________________________________________________
________________________________________________
Why are there wreaths of wildflowers growing alongside the road in the gutters?
________________________________________________

City Lanes – Teacher’s Notes
These tall warehouse buildings were built about in 1840 in Melbourne. Their huge slate roofs collect lots of rain and channel it into a few downpipes. These pour fast flowing water into little lanes like this one. Eventually the water is channeled into drains under the pavement The lanes were also used to gain access to the back of the buildings for people, horses and carts.
1. What is a warehouse? A warehouse is where things are storedbefore they are sold. These warehouses were used to store thingsfor the original Coles shops before there were “Coles supermarkets”.Things would have been moved about in wheelbarrows and also byhorses and carts.
2. Do you think that rainwater channeled into downpipes would havemore or less power to erode? More because instead of individualraindrops, all the water is channeled together.
Page 91

City Lanes – Teacher’s Notes
3. Why did they have to cover the original dirt lanes with hardcobblestones? Water from the downpipes would have eroded anyloose soil in the lanes and carried it away. The lanes would havebecome waterlogged and carts and wheelbarrows could not havemoved through them easily. These stones are hard and mostlywaterproof and they would have moved the rainwater onwardsdownhill. Gaps between the cobblestones would allow some water toseep into the soil
4. Why is there a low line of cobbles down the middle of the lane? Thisis to collect rainwater and lead it away into major drains.
5. At the end of the lane, just before it meets the main street, thewater is directed through a bed of broken rocks and boulders beforeit enters small patches of garden with grass, flowers and reeds.Why?The rocks slow the water flow and reduce its power to erode awaythe soil in the garden beds.
Storm water sumps and sinkholes You may find some students and their parents are confused between sink holes and storm water drains. In Australia we often have storms which drop more water than our soils can absorb and our drainage systems can handle. Councils fence off and reduce vegetation in deeply excavated hollows near suburban roads and laneways. Storm water running into the road drains is directed into these holding areas to reduce the erosive force of running water. The drains allow water to seep into soil slowly. Sink holes are caused by subsidence due to the collapse of underground caves or mines. In permafrost areas they can be caused by melting of frozen methane gas naturally trapped in soil.
Page 92
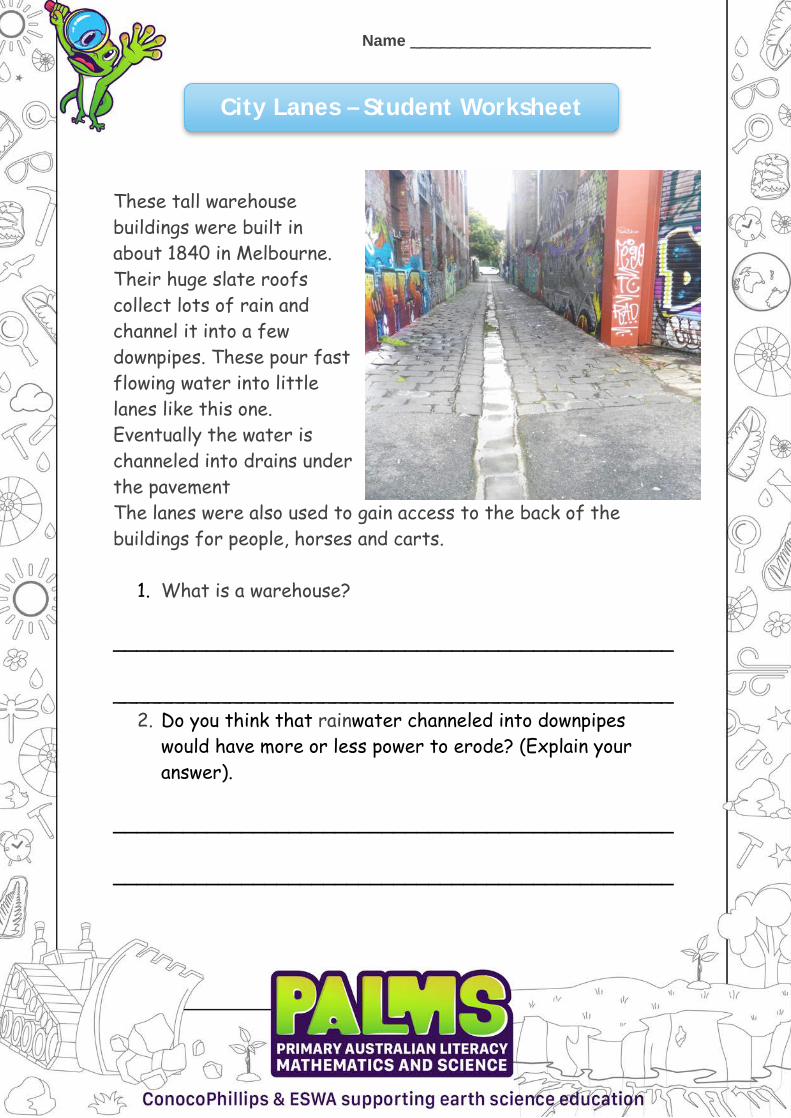
Name ________________________
City Lanes – Student Worksheet
These tall warehouse buildings were built in about 1840 in Melbourne. Their huge slate roofs collect lots of rain and channel it into a few downpipes. These pour fast flowing water into little lanes like this one. Eventually the water is channeled into drains under the pavement The lanes were also used to gain access to the back of the buildings for people, horses and carts.
1. What is a warehouse?
________________________________________________
________________________________________________ 2. Do you think that rainwater channeled into downpipes
would have more or less power to erode? (Explain youranswer).
________________________________________________
________________________________________________
Name ________________________
City Lanes – Student Worksheet
3. Why did they have to cover the original dirt lanes withhard cobblestones?
________________________________________________
________________________________________________
4. Why is there a low line of cobbles down the middle of thelane?
________________________________________________
________________________________________________
5. At the end of the lane, just before it meets the mainstreet, the water is directed through a bed of brokenrocks and boulders before it enters small patches ofgarden with grass, flowers and reeds. Why?
________________________________________________
________________________________________________
________________________________________________
________________________________________________

Erosion by Humans – Teacher’s Notes
Erosion is the transport of rock fragments and soil
Provided groups of three or less students one of the following topics to create a poster about erosion on.
1. Economic removal of material E.g. Quarrying and mining minerals,rock, sand and soil for profit.
2. Smoothing out landscape for construction E.g. Road, rail and portconstruction, building cities, industrial areas and building homes,
3. Agriculture E.g. Removing natural vegetation, large rocks anddraining wetlands results in loss of topsoil and desertification
4. Changing water flow E.g. Dredging rivers and ports changing waterflow patterns, dams for agriculture/drinking water divert riversystems and groynes built out into the sea.
5. Thoughtless recreational activities E.g. 4WD tracks cutting acrossdunes, taking short cuts when visiting parks, riding bicycles acrossgrass and running skateboards along the top of walls.
HINTS - Good posters have: • FEW Words• FEW colours• Your name on the back• Make a rough copy first
Page 95
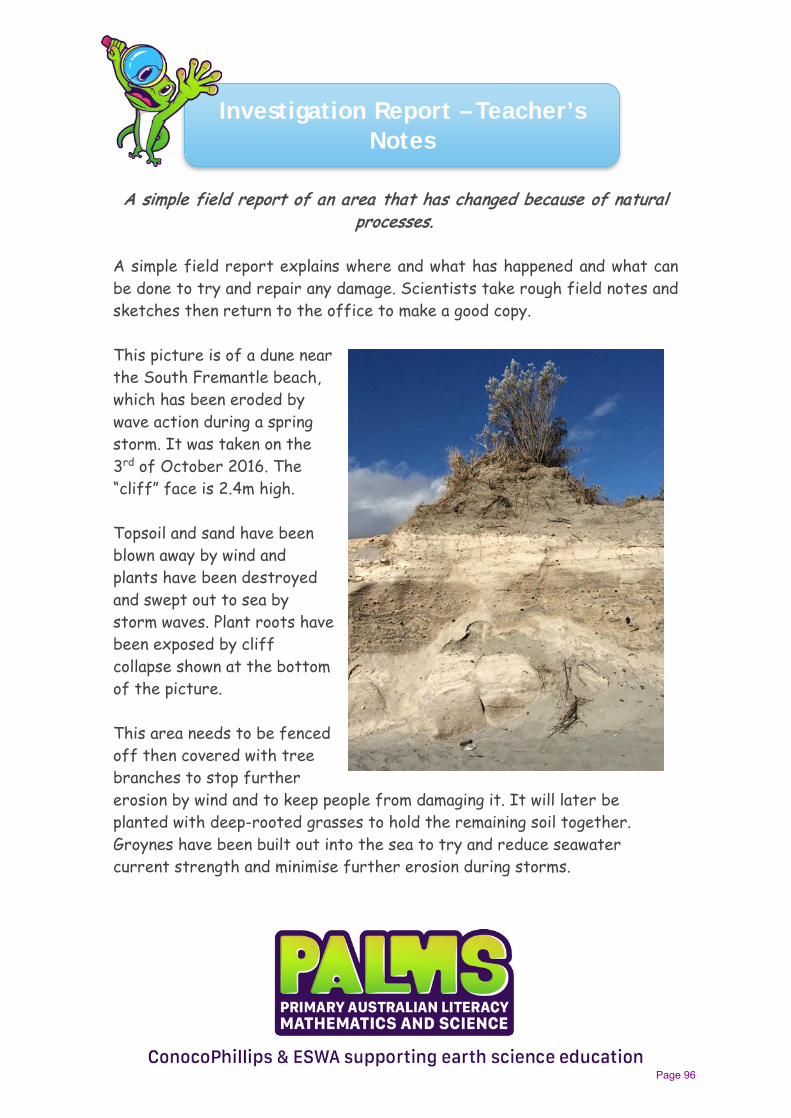
Investigation Report – Teacher’s Notes
A simple field report of an area that has changed because of natural processes.
A simple field report explains where and what has happened and what can be done to try and repair any damage. Scientists take rough field notes and sketches then return to the office to make a good copy.
This picture is of a dune near the South Fremantle beach, which has been eroded by wave action during a spring storm. It was taken on the 3rd of October 2016. The “cliff” face is 2.4m high.
Topsoil and sand have been blown away by wind and plants have been destroyed and swept out to sea by storm waves. Plant roots have been exposed by cliff collapse shown at the bottom of the picture.
This area needs to be fenced off then covered with tree branches to stop further erosion by wind and to keep people from damaging it. It will later be planted with deep-rooted grasses to hold the remaining soil together. Groynes have been built out into the sea to try and reduce seawater current strength and minimise further erosion during storms.
Page 96
Investigation Report – Teacher’s Notes
Suggestions for field study • A local gully, riverbank, beach or roadside eroded by rainwater,• Natural tree-fall causing damage and exposing soil• A landslide due to storm water• Topsoil loss after high winds or a drought• Fire damage• Flooding
Field report on The name of the area
Name of investigator Both first and last names please. (1 mark)
Date of investigation (1 mark)
Where is the area you are investigating? E.g. Bush land at the corner of Grace Street and Main Street in White Gum Valley (2 marks)
What things have changed? E.g. a quarter of the grassy area has been washed away leaving a gully 4m long and 20cm deep. Roots of wattle bushes have been exposed and they are now dying. The washed-away soil has covered and killed button grass downslope. (3 marks)
What natural processes caused the changes? E.g. Heavy rain last week was channeled downhill and cut into the soil. It has eroded the surface and washed soil away. Only some larger stones have been left behind.
(2 marks) How can we measure the changes? E.g. rulers can measure the height and width of gullies. Tape measures can be used for larger areas. (1 mark)
Page 97

Investigation Report – Teacher’s Notes
Sketch or photograph of the changed area. (Label the important parts clearly). (5 Marks) What can be done to stop these changes happening again? Build walls, change the position of the path, fill in the hole, plant more vegetation, put old branches on the top of the dunes to reduce erosion and deter animals tracking across them. (2 marks) Field notes attached (3 marks) Total marks /20
Page 98

Name ________________________
Investigation Report – Student Worksheet
A simple field report explains where and what has happened and what can be done to try and repair any damage. Scientists take rough field notes and sketches then return to the office to make a good copy.
Field report on ____________________________________
Name of investigator ________________________________(1 mark)
Date of investigation ________________________________ (1 mark)
Where is the area you are investigating? _________________
________________________________________________ (2 marks)
What things have changed? ___________________________
________________________________________________
_______________________________________________(3 marks)

Name ________________________
Investigation Report – Student Worksheet
What natural processes could have caused these changes?
________________________________________________
________________________________________________
________________________________________________ (2 marks)
How can we measure the changes? ______________________
________________________________________________(1 mark)

Name ________________________
Investigation Report – Student Worksheet
Sketch or photograph of the changed area. (Label the important parts clearly). (5 marks)
What can be done to stop these changes happening again?
________________________________________________
________________________________________________ (2 marks)
Field notes attached (3 marks)
Total marks /20
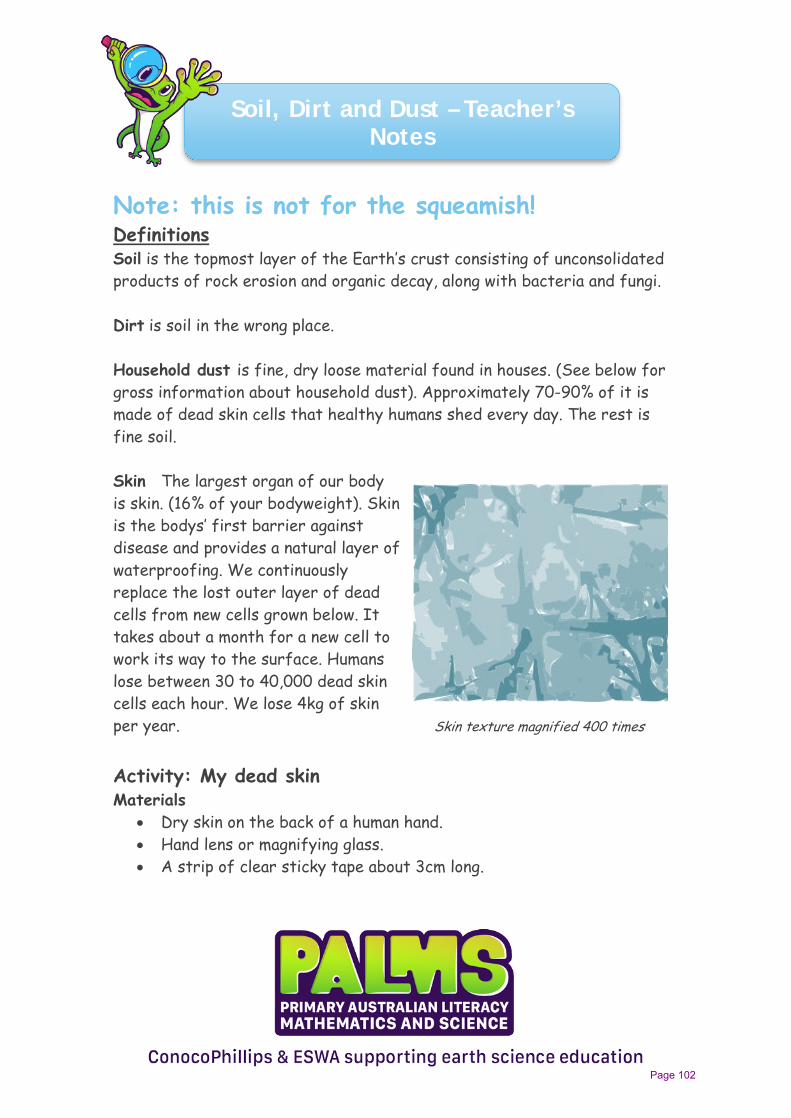
Soil, Dirt and Dust – Teacher’s Notes
Note: this is not for the squeamish! Definitions Soil is the topmost layer of the Earth’s crust consisting of unconsolidated products of rock erosion and organic decay, along with bacteria and fungi.
Dirt is soil in the wrong place.
Household dust is fine, dry loose material found in houses. (See below for gross information about household dust). Approximately 70-90% of it is made of dead skin cells that healthy humans shed every day. The rest is fine soil.
Skin The largest organ of our body is skin. (16% of your bodyweight). Skin is the bodys’ first barrier against disease and provides a natural layer of waterproofing. We continuously replace the lost outer layer of dead cells from new cells grown below. It takes about a month for a new cell to work its way to the surface. Humans lose between 30 to 40,000 dead skin cells each hour. We lose 4kg of skin per year. Skin texture magnified 400 times
Activity: My dead skin Materials
• Dry skin on the back of a human hand.• Hand lens or magnifying glass.• A strip of clear sticky tape about 3cm long.
Page 102

Soil, Dirt and Dust – Teacher’s Notes
Method 1. Ensure students’ hands have been dry for some time, as wet skin
does not provide sufficient information.2. Remind students to hold the glass in front of their eye (resting on
their cheekbone) so that they can look through the eyepiece.3. Then they bring the back of their other hand close to their face
until the skin of the back of their hand comes into clear focus. Thisis usually about 2cm away. The eyepiece has not moved from thecheekbone. Only the object viewed moves.
4. Make sure the skin is well lit and not in shadow. (Usually this meanshaving a light behind you). If classroom illumination is low, movestudents outside.
5. Sketch what the skin surface looks like in the circle below.6. Cut off about 3cm of clear Sellotape or sticky tape and view the
sticky side with the lens.7. Place the tape over the skin at the back of your bent elbow. Rub
gently and remove.8. Look at the tape surface and see if it has changed. The tape will be
covered with a fine dusting of dead skin cells.
Observations
Skin on the back of my hand
Page 103

Soil, Dirt and Dust – Teacher’s Notes
The skin from my hand looked pale, flaky, made up of many cells.
The tape had changed. It was covered with a fine white dusting of dead skin cells. A generous teacher may allow students to study fine the hairs on the back of their hands and view the skin on their knees. Scars and freckles are particularly noteworthy!
If you lose 30,000 skin cells per hour and you sleep for 8 hours per night, how many skin cells would you lose every night? 8 X 30,000 = 240,000 cells
Gross information about household dust: 1. When we shower some of our skin cells are washed off and go down
the drain. Other dead cells are rubbed away by the towel. Regularwashing is important as old dead cells can mix with sweat and createa very attractive meal for bacteria that live on your skin. As thesebacteria digest their food they produce a foul smell that we callbody odour or BO.
2. Some people wash and exfoliate too much and remove theirprotective layer of cells. They open their bodies to infection.
3. House mites are tiny arthropods, which feed on our dead skin cells.4. Mite faeces (poo) and body parts commonly cause asthma and other
allergic reactions.5. Mites thrive in temperatures over 21°C and humidity over 50%, so
our hot sweaty bodies and beds are perfect for them.6. Up to a third of your pillow could be made of bugs, dead skin, house
mites and their faeces. That is why it should be washed regularly andreplaced every two years.
Page 104

Soil, Dirt and Dust – Teacher’s Notes
7. All bed linens, including pillows, should be washed in very hot waterto remove mites and their eggs. Water must be above 50oC. Sheetsshould be washed at least every two weeks. Pillows should be aired insunshine to kill mites and decrease humidity.
8. Bed linen should be aired every day – so that’s a good excuse for notmaking your bed but don’t just crawl out of it, throw back the sheetsto expose the little beasties to drying air.
Quick class survey Enter your results a scale of one to five, one being “not at all” and five being “lots”,
1 2 3 4 5 How much did you learn about dust? How much did you enjoy the activity?
Collect all the students results so they may see how their answers varied from others.
We all did the same experiment. Why do you think our results varied? Everybody started with a different level of prior knowledge. Enjoyment is a very personal experience.
Page 105
Name ________________________
Soil, Dirt and Dust – Student Worksheet
Definitions Soil is the topmost layer of the Earth’s crust consisting of unconsolidated products of rock erosion and organic decay, along with bacteria and fungi.
Dirt is soil in the wrong place.
Household dust is fine, dry loose material found in houses. Approximately 70-90% of it is made of dead skin cells that healthy humans shed every day. The rest is fine soil.
Skin The largest organ of our body is skin. (16% of your bodyweight). Skin is the bodys’ first barrier against disease and provides a natural layer of waterproofing.
Activity: My dead skin Materials
• Dry skin on the back of a human hand.• Hand lens or magnifying glass.• A strip of clear sticky tape about 3cm
long.
Method 1. Ensure hands are dry.2. Hold a hand lens in front of your eye (resting on your
cheekbone) so that you can look through the eyepiece.
SKIN RIP
Name ________________________
Soil, Dirt and Dust – Student Worksheet
3. Bring the back of your other hand close to your face untilthe skin of the back of your hand comes into clear focus.
4. Make sure the skin is well lit and not in shadow. (Usuallythis means having a light behind you). If classroomillumination is low, move students outside.
5. Sketch what the skin surface looks like in the circle below.6. Cut off about 3cm of clear Sellotape or sticky tape and
view the sticky side with the lens.7. Place the tape over the skin at the back of your bent
elbow. Rub gently and remove.8. Look at the tape surface and see if it has changed.
Observations
Skin on the back of my hand
The skin from my hand looked _________________________
________________________________________________
Name ________________________
Soil, Dirt and Dust – Student Worksheet
The tape had changed. It _____________________________
________________________________________________
If you lose 30,000 skin cells per hour and you sleep for 8 hours per night, how many skin cells would you lose every night?
________________________________________________
Gross information about household dust: 1. When we shower some of our skin cells are washed off and
go down the drain. Other dead cells are rubbed away bythe towel. Regular washing is important as old dead cellscan mix with sweat and create a very attractive meal forbacteria that live on your skin. As these bacteria digesttheir food they produce a foul smell that we call bodyodour or BO.
2. Some people wash and exfoliate too much and remove theirprotective layer of cells. They open their bodies toinfection.
3. House mites are tiny arthropods, which feed on our deadskin cells.
4. Mite faeces (poo) and body parts commonly cause asthmaand other allergic reactions.
5. Mites thrive in temperatures over 21°C and humidity over50%, so our hot sweaty bodies and beds are perfect forthem.

Name ________________________
Soil, Dirt and Dust – Student Worksheet
6. Up to a third of your pillow could be made of bugs, deadskin, house mites and their faeces. That is why it should bewashed regularly and replaced everytwo years.
7. All bed linens, including pillows, shouldbe washed in very hot water to removemites and their eggs. Water must beabove 50oC. Sheets should be washed at least every twoweeks. Pillows should be aired in sunshine to kill mites anddecrease humidity.
8. Bed linen should be aired every day – so that’s a goodexcuse for not making your bed but don’t just crawl out ofit, throw back the sheets to expose the little beasties todrying air.
Quick class survey Enter your results on a scale of one to five, one being “not at all” and five being “lots”,
1 2 3 4 5 How much did you learn about dust? How much did you enjoy the activity?
Collate the results. We all did the same experiment. Why do you think our results varied?
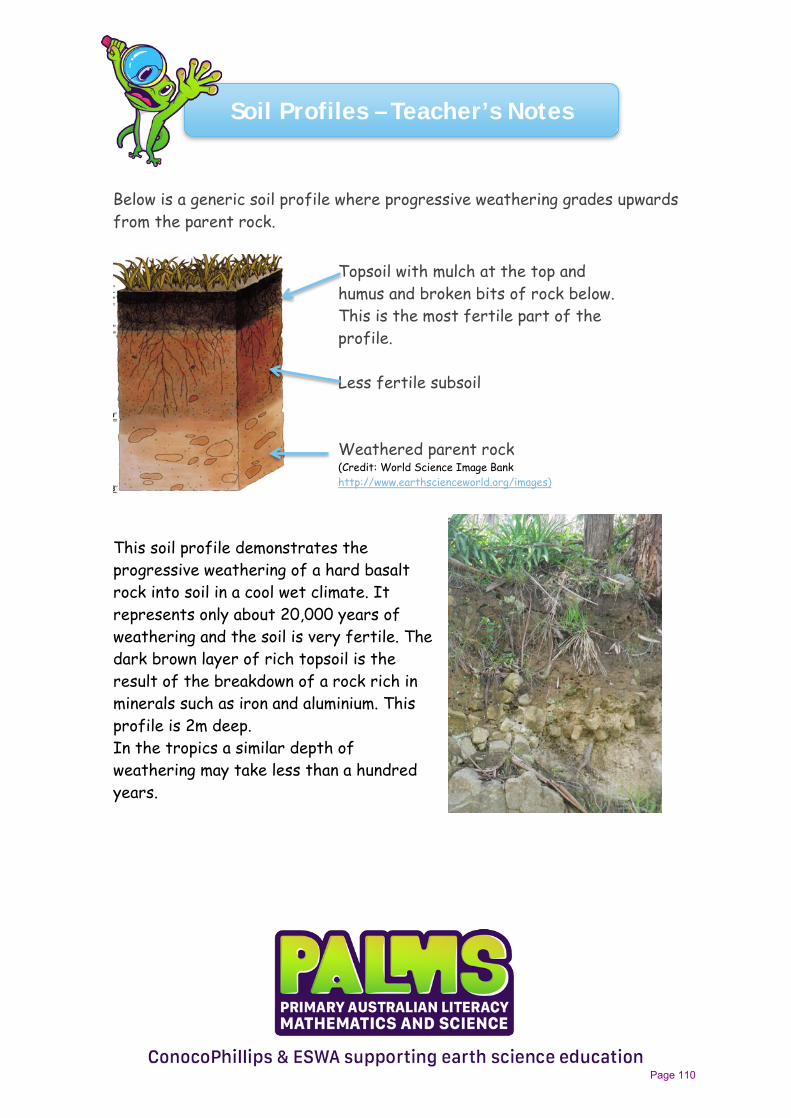
Soil Profiles – Teacher’s Notes
Below is a generic soil profile where progressive weathering grades upwards from the parent rock.
This soil profile demonstrates the progressive weathering of a hard basalt rock into soil in a cool wet climate. It represents only about 20,000 years of weathering and the soil is very fertile. The dark brown layer of rich topsoil is the result of the breakdown of a rock rich in minerals such as iron and aluminium. This profile is 2m deep. In the tropics a similar depth of weathering may take less than a hundred years.
Topsoil with mulch at the top and humus and broken bits of rock below. This is the most fertile part of the profile.
Less fertile subsoil
Weathered parent rock (Credit: World Science Image Bank http://www.earthscienceworld.org/images)
Page 110

Soil Profiles – Teacher’s Notes
This profile is of yellow coastal limestone weathering to poor yellow and grey soils near Fremantle. These soils developed under drier and harsher conditions and only support Australian native plants unless fertilised, watered and mulched. This profile is 2m deep.
Inland Western Australia has soils that have been progressively weathered over millions of years. It can be very difficult to see the classic profile as water has moved minerals such as salt, gypsum and lime into and out of the rock. These regoliths (layers of unconsolidated soil) can be bleached and mottled due to water movement during different climates so that soil colour cannot be used to interpret parent rock. Geologists in Europe can often map geology by looking at aerial photographs. Movement of water between different rock types completely blurs any clues as to what lies beneath in most of inland Australia. Geologists have to rely on deep drilling and geophysical surveys to interpret the geology of this region. Dissolved materials such as salt, gypsum and lime come to the surface and dry out to form hard duricrust. They can provide a capping against later weathering.
If you have a road cutting near your school or are able to dig into the ground to produce a soil profile, students can see the progression from weathered rock through the varying layers from sub-soil to surface humus. Students are asked to create a profile sketch or annotated photograph. If a measuring tape is hung down the profile this will help students select a suitable scale.
Page 111

Soil Profiles – Teacher’s Notes
What scale will you use for your drawing? Consider the size of the original profile and the size of your drawing. If the drawing is the same size as real life the scale is 1:1 or 1 to 1 If the drawing is half the size then the scale is 1:2 or 1 to 2
What words can you use to describe the differences between the layers in the soil profile? Colours such as grey, red brown and shades such as dark and light, textures such as coarse and fine.
Materials • Spade• Measuring tape (optional)• Worksheet• Pen, pencil, ruler, eraser• Folder or book to lean on
Method 1. Write your name, location chosen and date at the top of
your worksheet.2. Observe the soil profile.3. Discuss a reasonable scale to use and enter that at the foot
of the worksheet4. Sketch the profile to scale
Soil profile Location Description and comments
Scale
Page 112

Soil Profiles – Teacher’s Notes
Alternative Activity: If you cannot leave the classroom then use one of the photographs in these notes and either print copies or project it and ask students to draw and describe it.
Soils formed in sedimentary basins such as the Canning and Eucla basins or in present river plains. Soils formed from sediments laid down by wind and water often exhibit layering or horizons. This layering is the result not of weathering but of deposition processes The heaviest materials are deposited first and later, higher deposits decrease in size upwards.
Page 113

Name ________________________
Soil Profiles – Student Worksheet
You will be digging a trench to see how soil changes with depth. This is called a soil profile
Materials • Spade• Measuring tape (optional)• Worksheet• Pen, pencil, ruler, eraser• Folder or book to lean on
Method 1. Write your name, location chosen and date at the
top of your worksheet.2. Observe the soil profile.3. Discuss a reasonable scale to use and enter that at the
foot of the worksheet4. Sketch the profile to scale
Select a suitable scale for your sketch. If the drawing is the same size as real life the scale is 1:1 or 1 to 1. If the drawing is half the size then the scale is 1:2 or 1 to 2
What words can you use to describe the differences between the layers in the soil profile? ______________________________________________
______________________________________________

Name ________________________
Soil Profiles – Student Worksheet
Soil Profile
Location _________________________________________
Date _________________________________________
Profile Description
Scale ___________________________________________ SAFETY! Remember to fill the trench in afterwards

Parent rock – Teacher’s notes
The surface of the Earth is constantly changing due to natural processes such as weathering and erosion and human activity. The results of the changes can be beneficial to humans such as the formation of soils or the building of schools but others, such as storms that erode soil and earthquakes that cause buildings, are damaging to humans. Soils contain soluble minerals that feed plants and animals both on land and, when carried to the sea by rivers and groundwater, feed the plants and animals there too. Early civilisations grew where rivers brought in fresh soil and water was available. Although the planet is over 4.5 billion years old most soil only dates from the end of the last Ice Age, about 1 million to 70,000 years ago when great glaciers scoured away old soils and then as they melted replaced them with new mineral rich soils from freshly exposed rock. Most of these soils are very fertile. In Australia, however, our soils have been exposed to weathering and erosion for about the last 300 million years. Glaciation only affected Tasmania, the Eastern Alps and a very small area south of the Stirling Ranges in WA. There has been no replenishment by significant volcanism or earth movement. Our inland soil has been directly derived from the granite-like rocks below and remained in situ as dry red and grey plains, depleted by many years of weathering. Soil depth can range from a few centimetres to over 100 metres. Where cut by rivers old hard land surfaces form flat-topped mesas. The coastal plains are mostly bleached grey sandy subsoil overlaying organic and ferruginous hardpan. These are one of the least fertile soils in the world.
Minerals are the building blocks of rocks. Weathering breaks rocks into smaller pieces. Erosion sorts these out and some minerals survive these processes better than others. The sediment deposited only contains a fraction of the minerals present in the parent rock.
Page 116
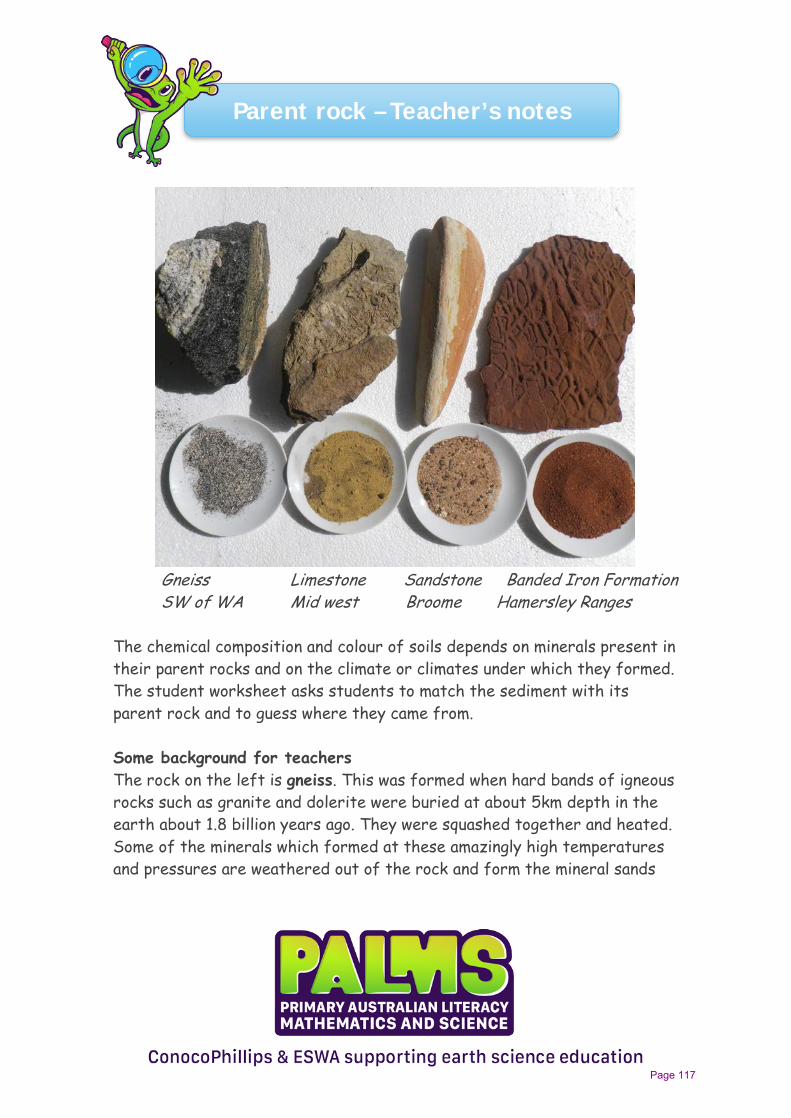
Parent rock – Teacher’s notes
Gneiss Limestone Sandstone Banded Iron Formation SW of WA Mid west Broome Hamersley Ranges
The chemical composition and colour of soils depends on minerals present in their parent rocks and on the climate or climates under which they formed. The student worksheet asks students to match the sediment with its parent rock and to guess where they came from.
Some background for teachers The rock on the left is gneiss. This was formed when hard bands of igneous rocks such as granite and dolerite were buried at about 5km depth in the earth about 1.8 billion years ago. They were squashed together and heated. Some of the minerals which formed at these amazingly high temperatures and pressures are weathered out of the rock and form the mineral sands
Page 117
Parent rock – Teacher’s notes
we now mine as titanium for colouring paint, lithium for modern batteries, garnet for abrasives and zircon for making ceramics.
The rock second from left is fossiliferous limestone laid down just before the time of the dinosaurs about 290 million years ago. It was deposited in warm seas where lime dissolved from weathered rock entered the seas and was used for skeletons and shells by sea creatures. When they died, their hard parts fell to the bottom of the sea making lime rich rocks. Some of the fossils can be found in the soil.
The rock second from right is sedimentary sandstone and was made from layers upon layers of sandy sediments weathered from hard igneous rocks such as granites and swept out to sea by great rivers flowing from the Canning Basin about 5 million years ago.
The rock on the right is part of the world famous Banded Iron Formations of our Pilbara. Great volcanoes threw out iron rich rocks, which did not weather away like they would nowadays. 2.4 billion years ago there was hardly any free oxygen in the atmosphere so when these rocks weathered they did not “rust” and lose their rich iron content. Later weathering removed most of the other minerals so their iron content increased further. This is the source of much of our export iron. Since plants have evolved in the sea and on land we now no longer have the conditions under which they formed.
Page 118
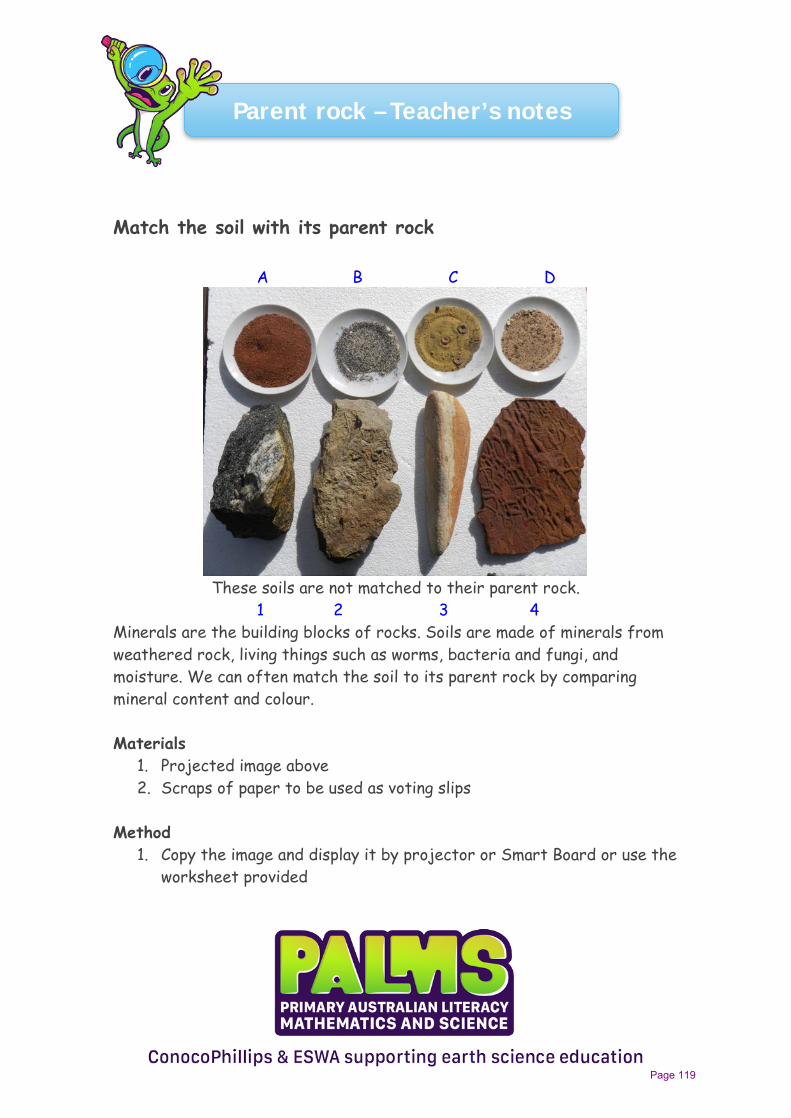
Parent rock – Teacher’s notes
Match the soil with its parent rock
A B C D
These soils are not matched to their parent rock. 1 2 3 4
Minerals are the building blocks of rocks. Soils are made of minerals from weathered rock, living things such as worms, bacteria and fungi, and moisture. We can often match the soil to its parent rock by comparing mineral content and colour.
Materials 1. Projected image above2. Scraps of paper to be used as voting slips
Method 1. Copy the image and display it by projector or Smart Board or use the
worksheet provided
Page 119

Parent rock – Teacher’s notes
2. Label the rocks from left to right A, B, C and D3. Label the soils from left to right 1, 2, 3 and 44. Ask student groups to discuss strategies for deciding which soil
belongs to which rock such as colour for colour or choose the easyones first and “best guess” the ones remaining
5. Ask each group to write down their choice on the voting slip6. Board the class answers
Correct matches are A4 B1 C2 D3
Observations
A B C D 1
2
3
4
What fraction of the class got all the correct answers?
What strategies were used to get the correct answer?
Page 120

Name ________________________
Soil and Parent Rock – Student Worksheet
These soils are not matched to their parent rock.
Minerals are the building blocks of rocks. Soils are made of minerals from weathered rock, living things such as worms, bacteria and fungi, and moisture.
Method 1. Label the rocks from left to right A, B, C and D2. Label the soils from left to right 1, 2, 3 and 43. Discuss strategies for deciding which soil belongs to which
rock4. Each group writes down their choice on a voting slip5. Share your answers with the class and enter them in the
table provided

Name ________________________
Soil and Parent Rock – Student Worksheet
Our choices ______________________________________________
________________________________________________
Class answers
A B C D 1
2
3
4
What fraction of the class has all correct answers? _________
What strategies were used to get the correct answer?
________________________________________________
________________________________________________

Soil Components – Teacher’s Notes
Garden soil is part: 1. Minerals (broken bits of rock. Non-living things)2. Humus (living things and their products)3. Water and air4. Mulch
Please note that in Science we classify as “living things” anything that has ever lived. Things that are alive, are dead or are their products are all classified as “living”.
Minerals are broken pieces of rock, usually the product of weathering and erosion. Humus is mostly dead and decaying plant and animal material, which has been decomposed. It conditions the soil to improve its water holding power and help it gain nitrogen from the atmosphere. (Compost is mulch in the making). Mulch is anything added on top of soil to hold it in place, keep plant roots cool or reduce evaporation. Mulch can be tree bark, black plastic or even rocks. Mulch does not necessarily add anything to the soil.
We can measure the amount of these three components of soil by moving dry soil about in a controlled way. This yandying or dry panning separates things according to size and density. Aboriginal people used to separate edible seeds from sand by “panning” them in a flattened container called a “yandy”. If you can convince a female Aboriginal elder (or auntie) to demonstrate – so much the better.
Teacher demonstration: • A tray. The trays under student’s desks are perfect but take away
containers or flat soup dishes will do• A mixture of dried materials. I have used dry builder’s sand, rice
Page 123

Soil Components – Teacher’s Notes
dried peas, rice, quandong nuts and metal jewelry.
1. Slightly raising one side of the tray make a smooth, circular shakingmovement with the dish for about one minute. (Think – Hula-hoop).The larger and lighter pieces will move to the lower end of the tray(See below).
If you were using soil the larger lighter material would be the mulch. 2. Remove the mulch with your fingers3. Return to panning/yandying the tray as before
Page 124
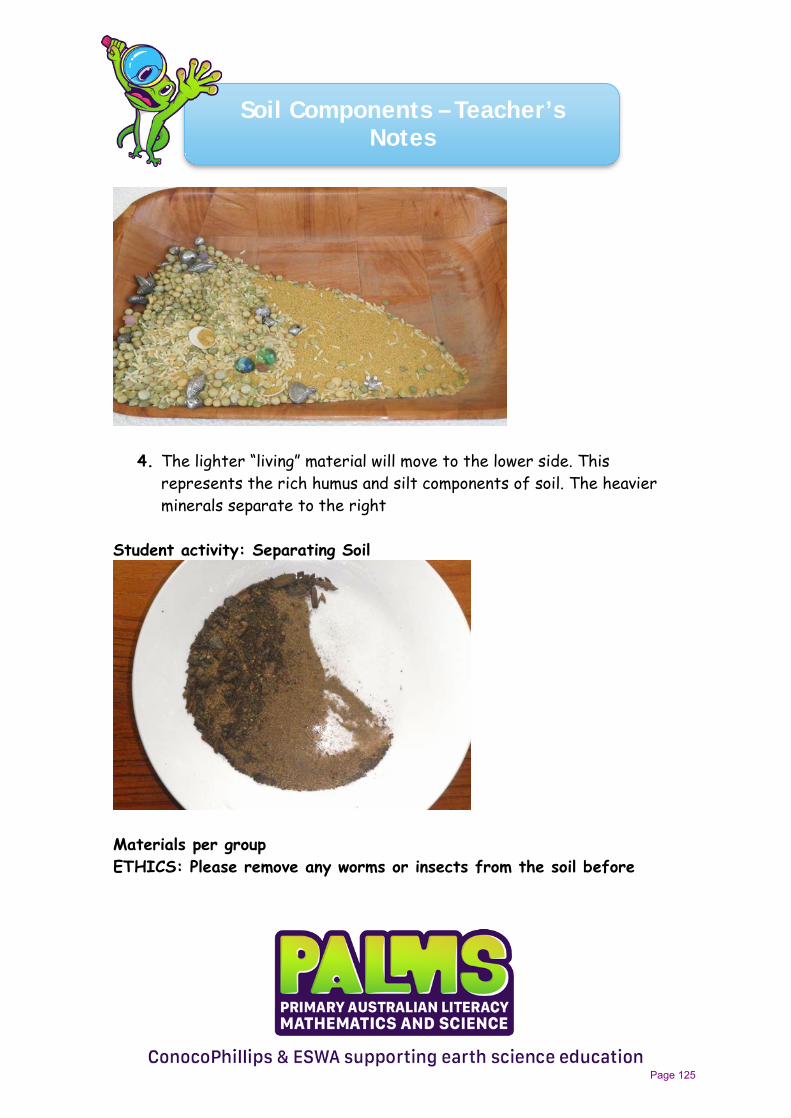
Soil Components – Teacher’s Notes
4. The lighter “living” material will move to the lower side. Thisrepresents the rich humus and silt components of soil. The heavierminerals separate to the right
Student activity: Separating Soil
Materials per group ETHICS: Please remove any worms or insects from the soil before
Page 125

Soil Components – Teacher’s Notes
starting. • White plates (paper, plastic or ceramic)• Dry garden soil• Hand lens or magnifying glass• Old newspaper to collect any accidental overflow
Method 1. Place plate on newspaper on desk2. Add some soil to each student’s plate3. Ask them to gently rotate the plate with one side slightly raised
until the parts or components of the soil start separating.4. They should then observe, using a hand lens or magnifying glass.
Observations Students should be able to see the three components of dry soil, mulch, humus and minerals. They will have different colours and textures.
Activity 3 Using water movement. (An annotated photograph is at the end of this activity)
Materials per student or group • About two tablespoons of garden soil• A piece of scrap paper to make a cone• A test tube or small jar with lid• Water.• A ruler• Newspaper to protect the desk
Method 1. Place the paper cone with the open end downwards leading into the testtube or jar.
Page 126
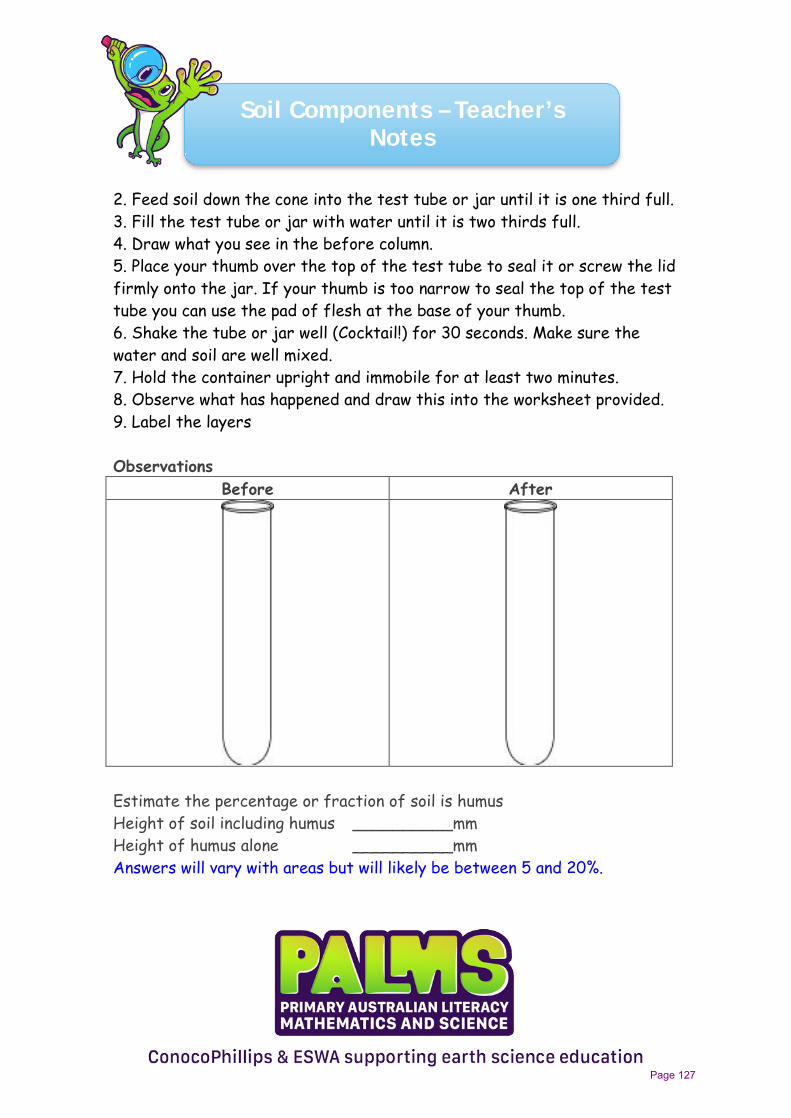
Soil Components – Teacher’s Notes
2. Feed soil down the cone into the test tube or jar until it is one third full.3. Fill the test tube or jar with water until it is two thirds full.4. Draw what you see in the before column.5. Place your thumb over the top of the test tube to seal it or screw the lidfirmly onto the jar. If your thumb is too narrow to seal the top of the testtube you can use the pad of flesh at the base of your thumb.6. Shake the tube or jar well (Cocktail!) for 30 seconds. Make sure thewater and soil are well mixed.7. Hold the container upright and immobile for at least two minutes.8. Observe what has happened and draw this into the worksheet provided.9. Label the layers
Observations Before After
Estimate the percentage or fraction of soil is humus Height of soil including humus __________mm Height of humus alone __________mm Answers will vary with areas but will likely be between 5 and 20%.
Page 127

Soil Components – Teacher’s Notes
Percentage humus = Height of humus alone Height of soil including humus
= __________%
To be able to grow plants, soil should be over 10% humus.
Do you have good garden soil? Yes if over 10% humus
A very poor coastal sandy soil.
You may like to ask students to draw a column graph of the composition of their soil.
X 100
Floating mulch
Water
Very thin layer of humus
Mineral layer
Page 128

Soil Components – Teacher’s Notes
Hints Always give any graph a title. Label the axes clearly. Use a sharp black pencil and a ruler to draw lines. Colour in the different components of the soil and draw a key for the colours.
Page 129
Name ________________________
Soil Components – Student Worksheet
Garden soil is part: 1. Minerals (broken bits of rock. Non-living things)2. Humus (living things and their products)3. Water and air4. Mulch
Please note that in Science we classify as “living things” anything that has ever lived. Things that are alive, are dead or are their products are all classified as “living”.
We can measure the amount of these three components of soil by moving dry soil about in a controlled way. This yandying, or dry panning, separates things according to size and density. Aboriginal people used to separate edible seeds from sand by “panning” them in a flattened container called a “yandy” or “coolomon”. Your teacher may demonstrate this.
Separating Soil Materials per group
• White plates• Dry garden soil• Hand lens or magnifying glass• Old newspaper to collect any accidental overflow

Name ________________________
Soil Components – Student Worksheet
Method 1. Place plate on newspaper on desk.2. Your teacher will add some soil.3. Gently rotate the plate with one side slightly raised until
the parts or components of the soil start separating.4. Observe using a hand lens or magnifying glass.
Observations
Separation using water movement Materials per student or group
• About two tablespoons of garden soil• A piece of scrap paper to make a cone• A test tube or small jar with lid• Water• A ruler• Newspaper to protect the desk.
Name ________________________
Soil Components – Student Worksheet
Method 1. Place the paper cone with the open end downwards leading intothe test tube or jar.2. Feed soil down the cone into the test tube or jar until it is onethird full.3. Fill the test tube or jar with water until it is two thirds full.4. Draw what you see in the before column.5. Place your thumb over the top of the test tube to seal it orscrew the lid firmly onto the jar. If your thumb is too narrow toseal the top of the test tube you can use the pad of flesh at thebase of your thumb.6. Shake the tube or jar well for 30 seconds. Make sure thewater and soil are well mixed.7. Hold the container upright and immobile for at least twominutes.8. Observe what has happened and draw this into the worksheetprovided.9. Label the layers

Name ________________________
Soil Components – Student Worksheet
Observations Before After
Estimate the percentage or fraction of soil is humus
Height of soil including humus __________mm
Height of humus alone __________mm
Percentage humus = Height of humus alone Height of soil including humus
= __________%
To be able to grow plants, soil should be over 10% humus.
Do you have good garden soil? _________________
X 100

Living Things in Soil – Teacher’s Notes
There are more living things in a handful of soil than there are humans on the surface of this Earth. Most of these live in the top 30cm of soil and are too small to see without the aid of a microscope. These microorganisms are mostly bacteria and fungi.
Scientists classify things (or separate them into groups with similar characteristics). The first separation is into “Living” and “Non- living” things. Into the “Living group” goes anything that is alive or has ever been alive. A dog goes into the “Living” group, as does a newspaper because the newspaper was once part of a living tree. Anything “dead” is placed in the “Living” group. Into the “Non-living” group goes little bits of rock, sand and silt.
Classify these things into living or non-living groups
Object Living Non-living Worm X Diamond X Wooden table X Metal fork X Tree X Insect X Plastic bag X Cotton T-shirt X Marble table top X Student X Sand X
Page 134
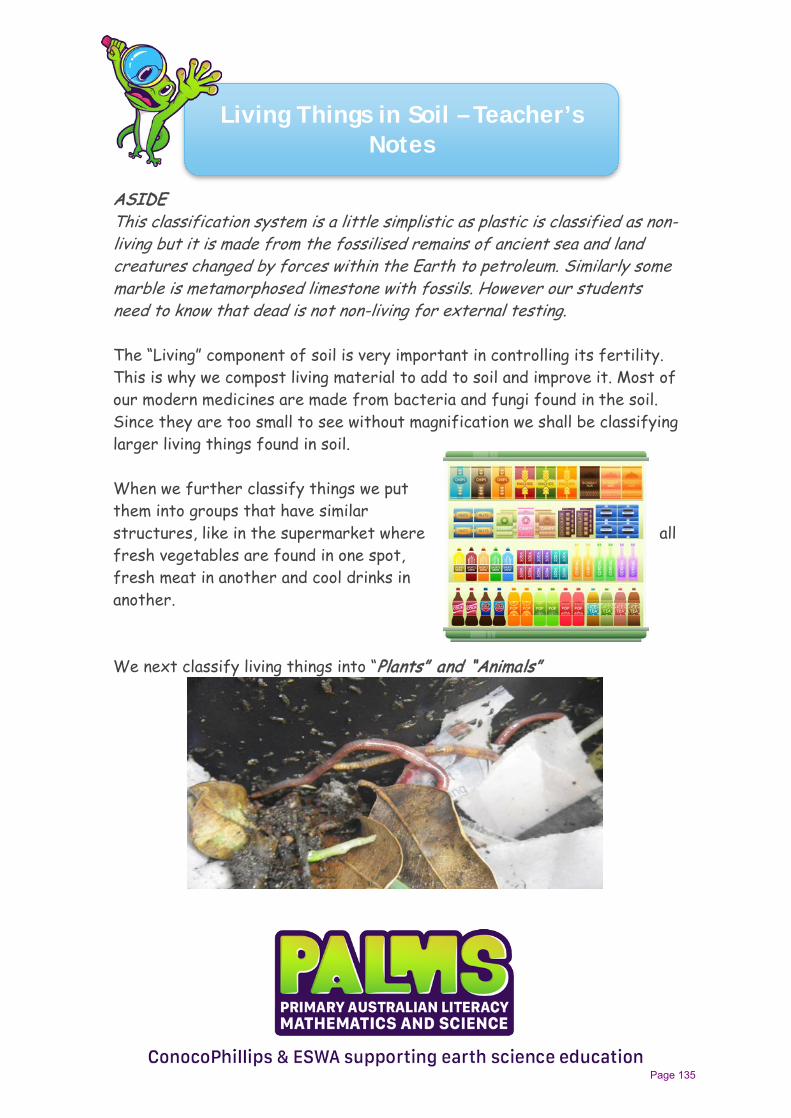
Living Things in Soil – Teacher’s Notes
ASIDE This classification system is a little simplistic as plastic is classified as non-living but it is made from the fossilised remains of ancient sea and land creatures changed by forces within the Earth to petroleum. Similarly some marble is metamorphosed limestone with fossils. However our students need to know that dead is not non-living for external testing.
The “Living” component of soil is very important in controlling its fertility. This is why we compost living material to add to soil and improve it. Most of our modern medicines are made from bacteria and fungi found in the soil. Since they are too small to see without magnification we shall be classifying larger living things found in soil.
When we further classify things we put them into groups that have similar structures, like in the supermarket where all fresh vegetables are found in one spot, fresh meat in another and cool drinks in another.
We next classify living things into “Plants” and “Animals”
Page 135

Living Things in Soil – Teacher’s Notes
In the picture above, the worms, dead leaves and newspaper pieces are all first classified as living, as are the dead roots, stem and pieces of stick.
Which of the larger living things in the photograph are plants? Dead leaves, newspaper, stem and sticks
Which of the larger living things in the photograph are animals? Worms
Activity: Classifying what can be seen in soil
HINT This activity may be difficult in the heat of summer unless your compost bin or worm farm is kept away from extreme heat. Worms burrow deep to escape heat.
Materials • Good garden soil with compost. (Visit the school’s vegie patch and
worm farm or chat up the gardener.) Keep the soil in a dark place orthrow a cloth over the container
• Hand lenses, magnifying glasses or electronic magnifiers such asProscopes. Students with iPhones can use the screen magnifier. A lotcan be seen just using your eyes.
• White plates, trays, Petri dishes or even white paper
Please remind students that their magnifying lens should be hard up against their cheekbone all the time they are viewing the soil. It does not move! The object they are viewing should be well lit and brought close to the face until clearly in focus. Ask the students not to handle the worms as they breathe through their moist sensitive skin and are easily damaged. Students should be able to see at least eight living things and two non-living things.
Page 136
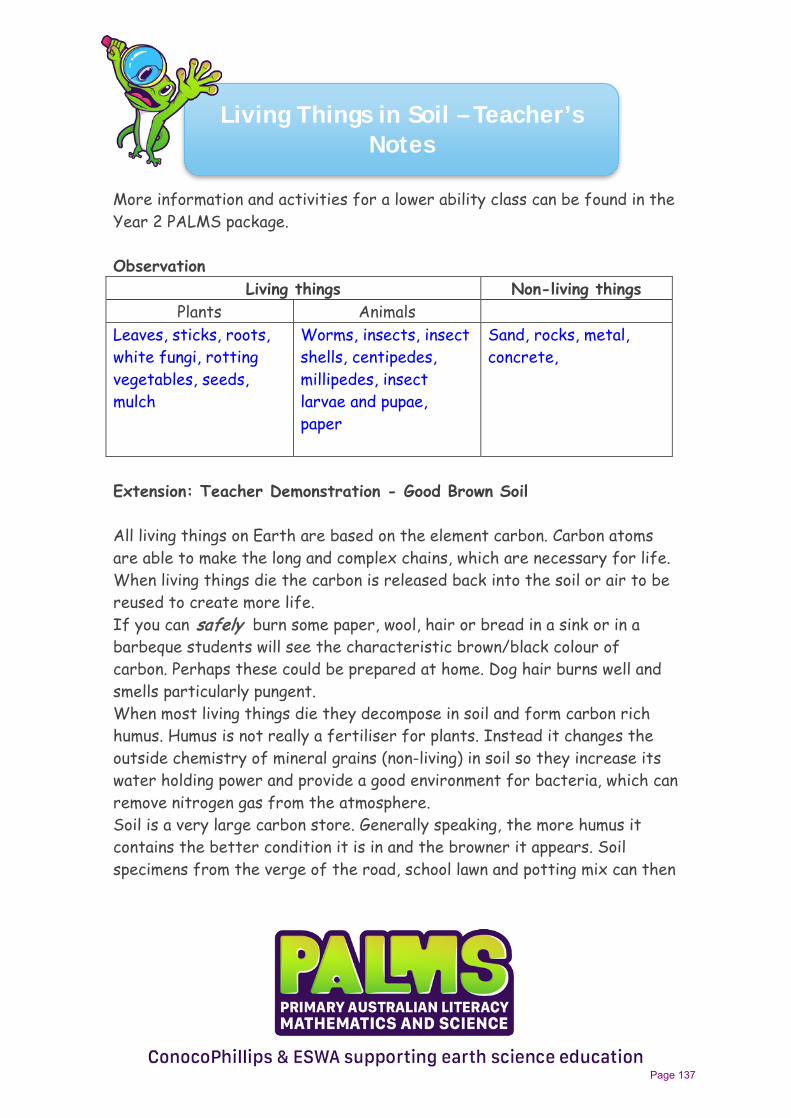
Living Things in Soil – Teacher’s Notes
More information and activities for a lower ability class can be found in the Year 2 PALMS package.
Observation Living things Non-living things
Plants Animals Leaves, sticks, roots, white fungi, rotting vegetables, seeds, mulch
Worms, insects, insect shells, centipedes, millipedes, insect larvae and pupae, paper
Sand, rocks, metal, concrete,
Extension: Teacher Demonstration - Good Brown Soil
All living things on Earth are based on the element carbon. Carbon atoms are able to make the long and complex chains, which are necessary for life. When living things die the carbon is released back into the soil or air to be reused to create more life. If you can safely burn some paper, wool, hair or bread in a sink or in a barbeque students will see the characteristic brown/black colour of carbon. Perhaps these could be prepared at home. Dog hair burns well and smells particularly pungent. When most living things die they decompose in soil and form carbon rich humus. Humus is not really a fertiliser for plants. Instead it changes the outside chemistry of mineral grains (non-living) in soil so they increase its water holding power and provide a good environment for bacteria, which can remove nitrogen gas from the atmosphere. Soil is a very large carbon store. Generally speaking, the more humus it contains the better condition it is in and the browner it appears. Soil specimens from the verge of the road, school lawn and potting mix can then
Page 137
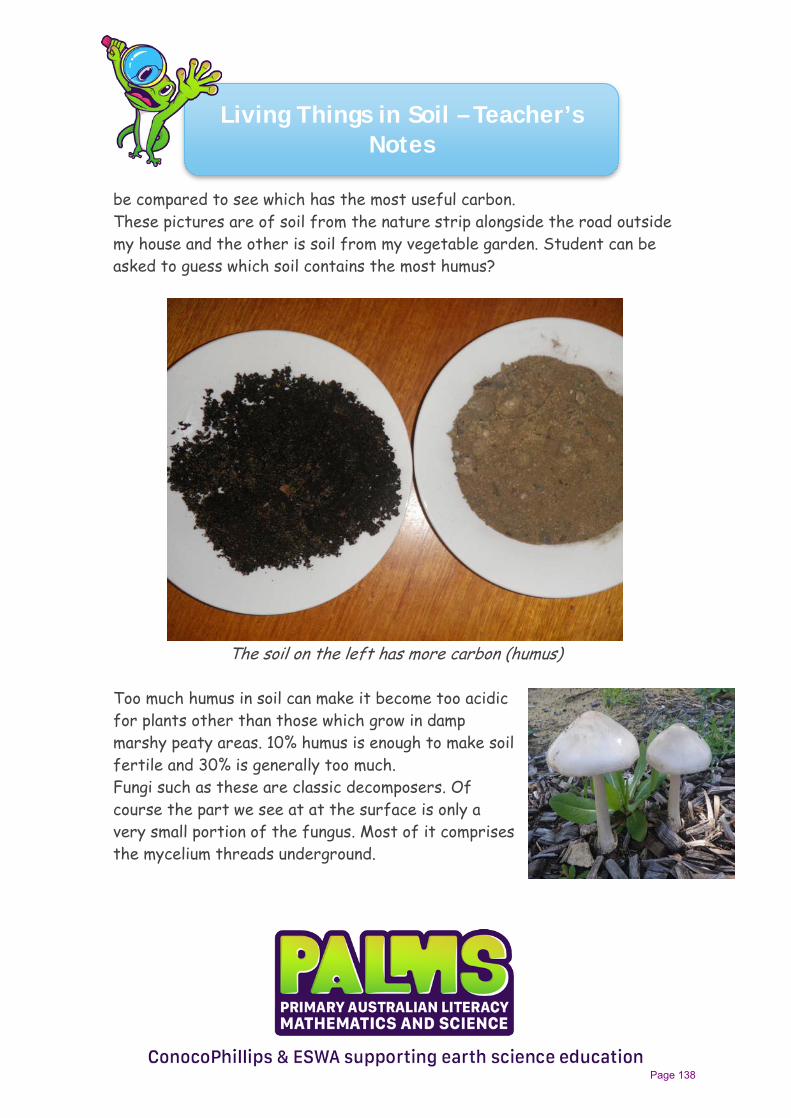
Living Things in Soil – Teacher’s Notes
be compared to see which has the most useful carbon. These pictures are of soil from the nature strip alongside the road outside my house and the other is soil from my vegetable garden. Student can be asked to guess which soil contains the most humus?
The soil on the left has more carbon (humus)
Too much humus in soil can make it become too acidic for plants other than those which grow in damp marshy peaty areas. 10% humus is enough to make soil fertile and 30% is generally too much. Fungi such as these are classic decomposers. Of course the part we see at at the surface is only a very small portion of the fungus. Most of it comprises the mycelium threads underground.
Page 138

Name ________________________
Living Things in Soil – Student Worksheet
There are more living things in a handful of soil than there are humans on the surface of this Earth. Most of these live in the top 30cm of soil and are too small to see without the aid of a microscope. These microorganisms are mostly bacteria and fungi.
Scientists classify things (or separate them into groups with similar characteristics). The first separation is into “Living” and “Non- living” things. Into the “Living group” goes anything that is alive or has ever been alive. A dog goes into the “Living” group, as does a newspaper because the newspaper was once part of a living tree. Anything “dead” is placed in the “Living” group. Into the “Non-living” group goes little bits of rock, sand and silt.
Classify these things into living or non-living groups Living Non-living
Worm Diamond Wooden table Metal fork Tree Insect Plastic bag Cotton T-shirt Marble table top Student Sand

Name ________________________
Living Things in Soil – Student Worksheet
We next classify living things into “Plants” and “Animals”
In the picture above, the worms, dead leaves and newspaper pieces are all first classified as living, as are the dead roots, stem and pieces of stick. Which of the larger living things in the photograph are plants?
________________________________________________
Which of the larger living things in the photograph are animals?
________________________________________________
Activity: Classifying what can be seen in soil
Materials • Hand lenses• White plates, trays, Petri dishes or even white paper
P

Name ________________________
Living Things in Soil – Student Worksheet
• About two tablespoonsful of soil and compost
Observation Living things Non-living things
Plants Animals

Soil Compaction – Teacher’s Notes
These activities compare air spaces in soil before and after compaction. The average composition of dry soil is: About 40% broken bits of rock (weathered fragments) About 10% humus (decaying living things) About 50% water and air, which fills in the spaces between the humus and rock fragments. Airways are necessary because this is how plants in the soil can access carbon dioxide for energy for growth and maintenance and release oxygen. Water is necessary because plants use dissolved nutrients to grow.
Activity 1: Air in Soil
You can estimate how much air is in a particular soil by finding out what volume of water will displace air held in the soil. The water should be seen to soak all the soil and form a thin layer above it.
Materials • 2 or more dry soil specimens (1 garden & 1 roadside)• 2 test tubes• 1 teaspoon (most teaspoons hold 5ml)• Pasteur pipette or transfer pipette• Water• A clock or watch• A pen or pencil
Page 142
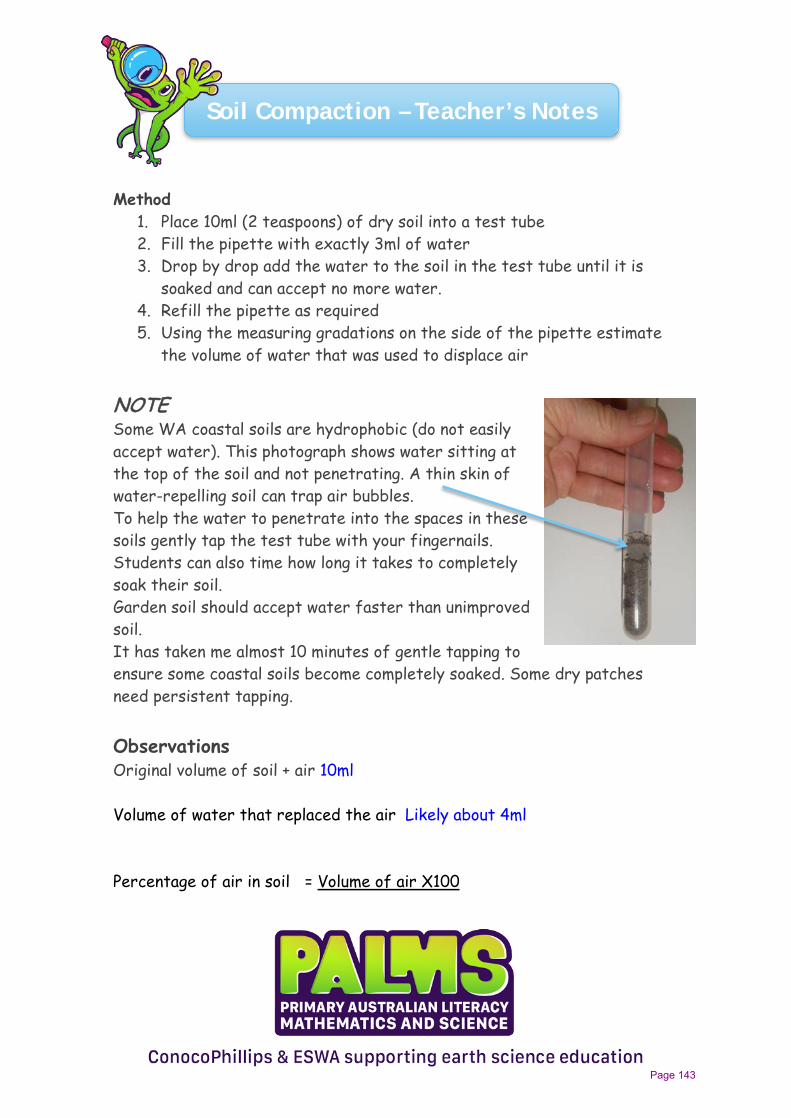
Soil Compaction – Teacher’s Notes
Method 1. Place 10ml (2 teaspoons) of dry soil into a test tube2. Fill the pipette with exactly 3ml of water3. Drop by drop add the water to the soil in the test tube until it is
soaked and can accept no more water.4. Refill the pipette as required5. Using the measuring gradations on the side of the pipette estimate
the volume of water that was used to displace air
NOTE Some WA coastal soils are hydrophobic (do not easily accept water). This photograph shows water sitting at the top of the soil and not penetrating. A thin skin of water-repelling soil can trap air bubbles. To help the water to penetrate into the spaces in these soils gently tap the test tube with your fingernails. Students can also time how long it takes to completely soak their soil. Garden soil should accept water faster than unimproved soil. It has taken me almost 10 minutes of gentle tapping to ensure some coastal soils become completely soaked. Some dry patches need persistent tapping.
Observations Original volume of soil + air 10ml
Volume of water that replaced the air Likely about 4ml
Percentage of air in soil = Volume of air X100
Page 143
Soil Compaction – Teacher’s Notes
Volume of soil = 40%
Students who are still at “fraction level” should estimate the fraction of air in tenths.
4/10ths
Activity 2: Air in Compacted Soil Repeat activity 1 after first “tamping down” or compacting the dry soils with the blunt end of a pencil or pen. Students should note the initial height of the loose soil. After tamping down they should keep adding more soil and tamping it until it regains the initial height of the loose soil.
Predict What do you predict will happen because you have now compacted the soil?
Observations Original volume of soil + air 10ml Volume of water that replaced the air Xml
Percentage of air in soil = Volume of air X100 Volume of soil
= X% Students who are still at “fraction level” should estimate the fraction of air in tenths.
X/10ths Has compaction had a measurable affect on the amount of air and water in the soil? YES
Page 144

Name ________________________
Soil Compaction – Student Worksheet
Spaces between grains in soil are necessary because they permit air and water to enter soil.
Activity 1: Air in Soil
You can estimate how much air is in a particular soil by finding out what volume of water will displace air held in the soil. The water should be seen to soak all the soil and form a thin layer above it.
Materials • 2 or more dry soil specimens• 2 test tubes• 1 teaspoon (most teaspoons hold 5ml)• Pasteur pipette or transfer pipette• Water• A clock or watch• A pen or pencil

Name ________________________
Soil Compaction – Student Worksheet
Method 1. Place 10ml (2 teaspoons) of dry soil into a test tube2. Fill the pipette with exactly 3ml of water3. Drop by drop add the water to the soil in the test tube
until it is soaked and can accept no more water.4. Refill the pipette as required5. Using the measuring gradations on the side of the pipette
estimate the volume of water that was used to displace air
Observations Original volume of soil + air __________________________ml
Volume of water that replaced the air __________________ml
Percentage of air in soil = Volume of air Volume of soil + air
= __________%
Activity 2: Air in Compacted Soil
Method 1. Place 10ml (2 teaspoons) of dry soil into a test tube2. Mark the height of the soil3. Compact the dry soil with the blunt end of a pencil or pen.4. Keep adding more soil and compacting it until it regains the
initial height of the loose soil.
X 100
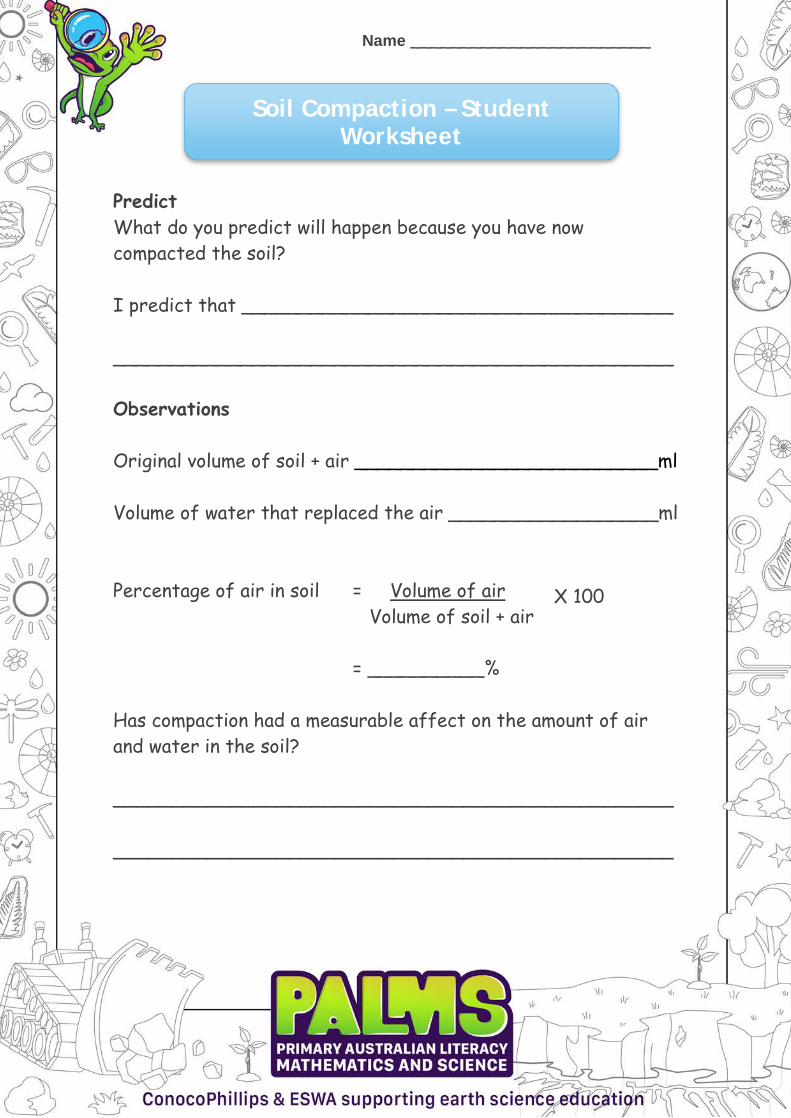
Name ________________________
Soil Compaction – Student Worksheet
Predict What do you predict will happen because you have now compacted the soil?
I predict that _____________________________________
________________________________________________
Observations
Original volume of soil + air __________________________ml
Volume of water that replaced the air __________________ml
Percentage of air in soil = Volume of air Volume of soil + air
= __________%
Has compaction had a measurable affect on the amount of air and water in the soil?
________________________________________________
________________________________________________
X 100

Rain Chain – Teacher’s Notes
Short sharp STEM/STEAM activity This can also be a PPP activity and sent home with students for them and their parents to enjoy. We shall be using our knowledge of Science, Technology, Engineering, English and Mathematics to create a model “rain chain”, test its effectiveness and suggest improvements.
These are some ideas for “rain chains”
At the top of each chain is an inverted cool drink bottle with the base cut off to represent the down pipe from a roof gutter.
Far left Plastic rotor blades $3.99 for a pack of 12 or cut them out of plastic milk containers. To be effective the rotor blades have to be fairly close together. Left of center Thread bobbins. These are not very effective unless almost touching.
Page 148

Rain Chain – Teacher’s Notes
Center right Waxed paper cups strung on knotted string. The shapes are fine but paper collapses after being wet. Plastic cups, planter pots, yoghurt tubs or plastic bottle bottoms may be better. Far right Chain links for shower curtains. $2.00 from supermarket or Reject shop. I used cotton rope because it is easier to cut. Before you cut, bind the spot with sticky tape then cut through the tape and rope. This stops ends unraveling. Strips of empty chaff or seed bags plaited together can also be used. The lower end of rope needs to be weighted or pegged down as it can flash about in wind and rain. The end of the chain should hang into a water-collecting container.
MOST IMPORTANT POINTS The idea of using a prototype (test model) is that it permits you to work out how your model could be improved. This saves money and time. It is as useful to find out what doesn’t work as it is to find out what does.
Method Read everything before you start! 1. Select a design and materialsStudents are asked to quickly brainstorm ideas or consult the Internetto “rough out” a diagram of their chain and to present this along with alist of the materials and tools they will need to their teacher forapproval. (see worksheet). There are many short YouTube ideas.Some classes may need selected groups to be each presented with aprepared idea of design and equipment. This may save time and permityou to “fast-forward” to the hands-on section.What web site did you use? _____________________________What materials and tools will you need to assemble your prototype?(Please give numbers and sizes). Ask another student to see if anythinghas been missed out before handing this list to your teacher for theirapproval.
Page 149

Rain Chain – Teacher’s Notes
2. Assemble the prototype (test model)Before students start, ask them to think about whatthey will need to do. They must write down any safetyconcerns and how you will overcome them on theirworksheet.Students collect their equipment and assemble their prototype notingany changes they made to improve their original design.Good working scientists always note what didn’t work so that laterexperimenters will not try the same wrong approach again.ASIDE for teachers From the times of Ancient Greece to the Middle Ages, before medicine became a science, sick people were treated by opening their veins and bleeding them. They believed that sickness was caused by having too much blood. Many died from loss of blood and sepsis. It was only when scientists found out that losing blood weakened people and that bacteria, viruses and fungi caused illness that this practice has stopped caused diseases! 3. Trial the prototype (Adjust Adapt Improve) Pour 200 ml of water into the inverted cool drink bottle at the top of your chain and observe the effect of water on the ground below. (sandpit or soil). Adjust the equipment until it works well. Note the adjustments you have made and why you made them in the worksheet.
4. Measure against a standard (FAIR TEST)Measure the effectiveness of your chain against the standard downpipe.A plastic cool drink bottle with the base removed, held at the sameheight in the same weather conditions and filled with the same amountof water as your prototype will represent this. What measurable datacan you collect that will show which worked best?What tools can you use to measure this data?A ruler to measure depth and width of the sand or soil eroded away.
Page 150
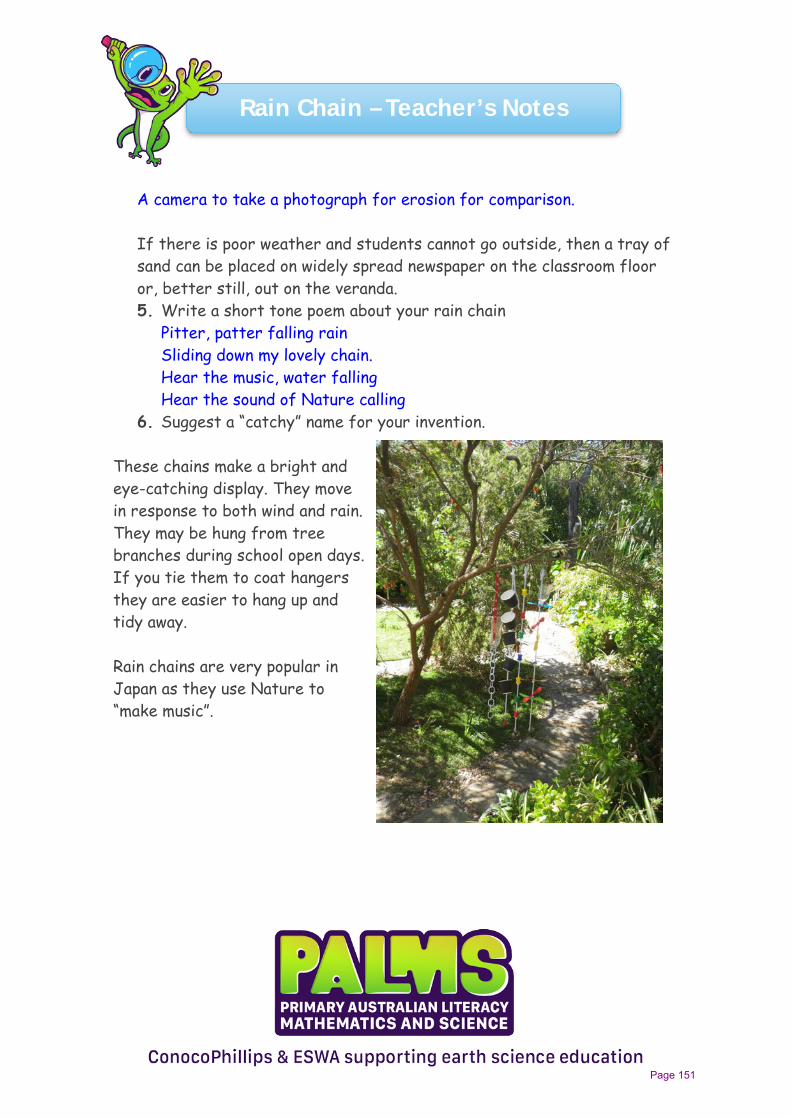
Rain Chain – Teacher’s Notes
A camera to take a photograph for erosion for comparison. If there is poor weather and students cannot go outside, then a tray of sand can be placed on widely spread newspaper on the classroom floor or, better still, out on the veranda. 5. Write a short tone poem about your rain chain
Pitter, patter falling rain Sliding down my lovely chain. Hear the music, water falling Hear the sound of Nature calling
6. Suggest a “catchy” name for your invention.
These chains make a bright and eye-catching display. They move in response to both wind and rain. They may be hung from tree branches during school open days. If you tie them to coat hangers they are easier to hang up and tidy away. Rain chains are very popular in Japan as they use Nature to “make music”.
Page 151

Rain Chain – Teacher’s Notes
STEM or STEAM concepts covered
TECHNOLOGY • Students consult the Internet to find some useful guides on creating
the prototype. (Model for testing) for a rain chain• Students use tools safely• Students assemble the equipment to create a prototype rain chain.• Students list the processes used
ENGINEERING • Students create a labeled sketch of the prototype chain• Students select appropriate materials and tools• Students assemble the chain and adjust to improve performance
MATHEMATICS • Students ensure the equipment ordered is sufficient for their
purpose.• Students provide standard measurements of the materials used for
their prototype• Students report any changes they made to improve their results
SCIENCE • Students compare the down flow from their prototype against the
down flow from a standard downpipe (A bottle with the bottomremoved and held at the same height).
• Students plan to ensure a “Fair Test”.• Students collect data (measured findings) that is observable,
measurable and repeatable.
Page 152

Rain Chain – Teacher’s Notes
ENGLISH • Students create a report on their findings• Students suggest an attractive name for their rain chain• Students write a short poem about their invention
CRITICAL THINKING • Students provide evidence of changes they have made to their
prototype to make it work better and suggest further improvements.
ART • Students experiment with a selection of appropriate materials to
create an artwork• Students respond to artworks• Students present and display artworks.
Page 153
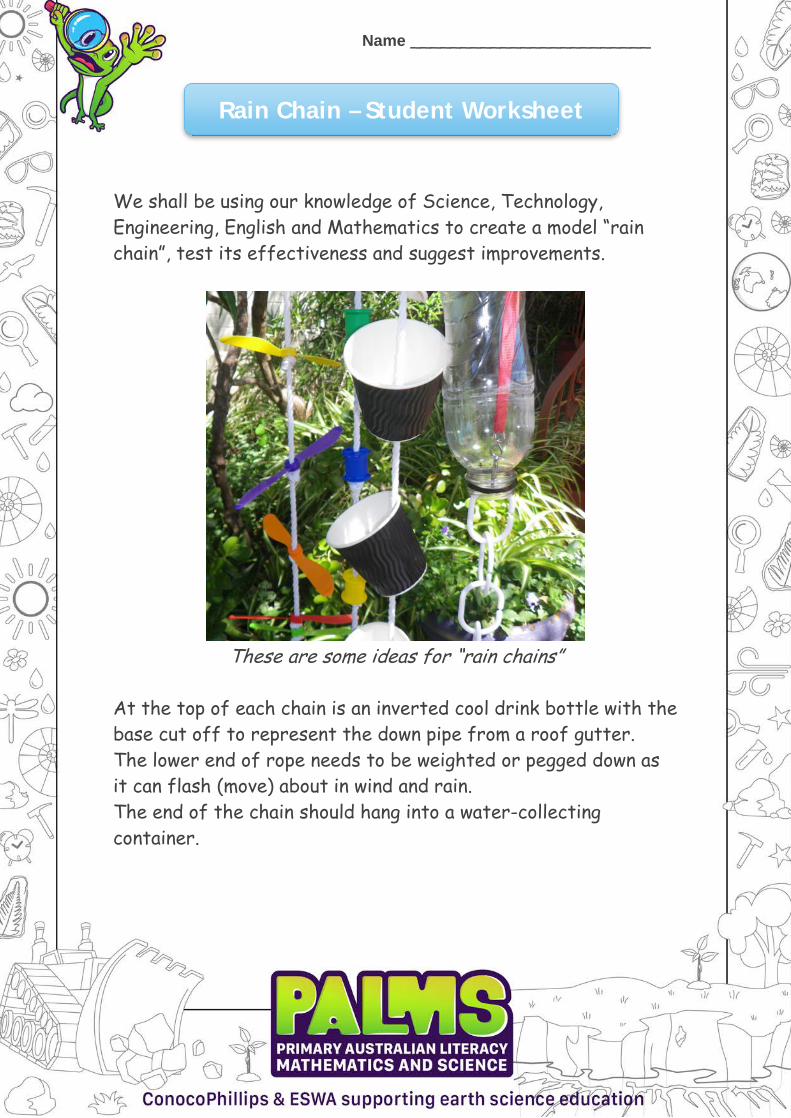
Name ________________________
Rain Chain – Student Worksheet
We shall be using our knowledge of Science, Technology, Engineering, English and Mathematics to create a model “rain chain”, test its effectiveness and suggest improvements.
These are some ideas for “rain chains”
At the top of each chain is an inverted cool drink bottle with the base cut off to represent the down pipe from a roof gutter. The lower end of rope needs to be weighted or pegged down as it can flash (move) about in wind and rain. The end of the chain should hang into a water-collecting container.

Name ________________________
Rain Chain – Student Worksheet
MOST IMPORTANT POINTS The whole idea of using a prototype (test model) is that it permits you to work out how your model could be improved. This saves money and time. It is as useful to find out what doesn’t work as it is to find out what does.
Method Read everything before you start! 1. Select a design and materialsQuickly brainstorm ideas or consult the Internet to “roughout” a diagram of your chain and to present this along with alist of the materials and tools you will need to your teacherfor approval.
Sketch Materials Cool drink bottle with base cut off
Name ________________________
Rain Chain – Student Worksheet
What website did you use? _________________________
Ask another student to see if anything has been missed out before handing this list to your teacher for their approval.
2. Assemble the prototype (test model)Write down any safety concerns you may have and how youwill overcome them on your worksheet below.
Concern This problem will be overcome by:
Collect your equipment and assemble your prototype. Note any changes you have made to improve on your original design.
Name ________________________
Rain Chain – Student Worksheet
Improvements
______________________________________________
______________________________________________
______________________________________________
Good working scientists always note what didn’t work so that later experimenters will not try the same wrong approach again.
3. Trial the prototype (Adjust Adapt Improve)Pour 200 ml of water into the inverted cool drink bottle atthe top of your chain and observe the effect of water on theground below. (sandpit or soil). Adjust the equipment until itworks well.
4. Measure against a standard (FAIR TEST)Measure the effectiveness of your chain against the standarddownpipe. A plastic cool drink bottle with the base removed,held at the same height in the same weather conditions andfilled with the same amount of water as your prototype willrepresent this.
What one thing did we change? ______________________
Name ________________________
Rain Chain – Student Worksheet
What one thing did we measure? _____________________
Did everything else stay the same? ___________________
What tools can you use to measure this data?
______________________________________________
______________________________________________
5. Write a short tone poem about your rain chain
6. Suggest a “catchy” name for your invention.