Embed Size (px)
Citation preview
ECE 4750 Computer Architecture, Fall 2016Tutorial 1: Linux Development Environment
School of Electrical and Computer EngineeringCornell University
revision: 2016-08-31-17-42
1 Introduction 3
2 ECE Computing Resources 3
2.1 The ecelinux Workstations in 314 Phillips Hall . . . . . . . . . . . . . . . . . . . . . . . 3
2.2 The ecelinux Servers . . . . . . . . . . . . . . . . . . . . . . . . . . . . . . . . . . . . . . 3
2.3 Remote Login from CIT Windows Computing Lab in 318 Phillips Hall . . . . . . . . . 4
2.4 Remote Login from Personal Windows Laptop/Workstation . . . . . . . . . . . . . . . 4
2.5 Remote Login from Personal Mac Laptop/Workstation . . . . . . . . . . . . . . . . . . 4
2.6 Remote Login from Personal Linux Laptop/Workstation . . . . . . . . . . . . . . . . . 5
2.7 Remote Login from Off-Campus Using the Cornell VPN . . . . . . . . . . . . . . . . . 5
2.8 Testing X11 After Remote Login . . . . . . . . . . . . . . . . . . . . . . . . . . . . . . . . 5
2.9 Personal Computing Resources . . . . . . . . . . . . . . . . . . . . . . . . . . . . . . . . 6
3 The Linux Command Line 6
3.1 Hello World . . . . . . . . . . . . . . . . . . . . . . . . . . . . . . . . . . . . . . . . . . . 6
3.2 Manual Pages . . . . . . . . . . . . . . . . . . . . . . . . . . . . . . . . . . . . . . . . . . 7
3.3 Create, View, and List Files . . . . . . . . . . . . . . . . . . . . . . . . . . . . . . . . . . . 7
3.4 Create, Change, and List Directories . . . . . . . . . . . . . . . . . . . . . . . . . . . . . 8
3.5 Copy, Move, and Remove Files and Directories . . . . . . . . . . . . . . . . . . . . . . . 11
3.6 Using wget to Download Files . . . . . . . . . . . . . . . . . . . . . . . . . . . . . . . . . 13
3.7 Using grep to Search Files . . . . . . . . . . . . . . . . . . . . . . . . . . . . . . . . . . . 13
3.8 Using find to Find Files . . . . . . . . . . . . . . . . . . . . . . . . . . . . . . . . . . . . 14
3.9 Using tar to Archive Files . . . . . . . . . . . . . . . . . . . . . . . . . . . . . . . . . . . 15
3.10 Using top to View Running Processes . . . . . . . . . . . . . . . . . . . . . . . . . . . . 15
3.11 Environment Variables . . . . . . . . . . . . . . . . . . . . . . . . . . . . . . . . . . . . . 16
3.12 Command Output Redirection . . . . . . . . . . . . . . . . . . . . . . . . . . . . . . . . 16
3.13 Command Chaining . . . . . . . . . . . . . . . . . . . . . . . . . . . . . . . . . . . . . . 17
3.14 Command Pipelining . . . . . . . . . . . . . . . . . . . . . . . . . . . . . . . . . . . . . . 17
3.15 Aliases, Wildcards, Command History, and Tab Completion . . . . . . . . . . . . . . . 18
4 Linux Text Editors 19
4.1 Nano . . . . . . . . . . . . . . . . . . . . . . . . . . . . . . . . . . . . . . . . . . . . . . . 19
1
ECE 4750 Computer Architecture, Fall 2016 Tutorial 1: Linux Development Environment
4.2 Geany . . . . . . . . . . . . . . . . . . . . . . . . . . . . . . . . . . . . . . . . . . . . . . . 20
4.3 Emacs and Vim . . . . . . . . . . . . . . . . . . . . . . . . . . . . . . . . . . . . . . . . . 21
4.4 MobaTextEditor . . . . . . . . . . . . . . . . . . . . . . . . . . . . . . . . . . . . . . . . . 21
5 The Two-Window Linux Workflow 21
6 ECE 4750 Specific Linux Commands 23
6.1 ECE 4750 Setup Script . . . . . . . . . . . . . . . . . . . . . . . . . . . . . . . . . . . . . 23
6.2 Using quota to Check Your Space Usage . . . . . . . . . . . . . . . . . . . . . . . . . . . 23
6.3 Using trash to Safely Remove Files . . . . . . . . . . . . . . . . . . . . . . . . . . . . . 24
7 Conclusion 24
2
ECE 4750 Computer Architecture, Fall 2016 Tutorial 1: Linux Development Environment
1. Introduction
All the lab assignments for this course are designed assuming you will be using a Linux (or UNIX-like) operating system for development. Basic Linux knowledge is essential to successfully completethese lab assignments and a more in-depth understanding enhances productivity. This tutorial cov-ers the computing resources to be used in the course and offers a brisk introduction to the Linuxoperating system for first time users including some details specific to this course.
To follow along with the tutorial, type the commands without the % character. In addition to workingthrough the commands in the tutorial, you should also try the more open-ended tasks marked withthe H symbol.
2. ECE Computing Resources
We will be using ecelinux workstations and servers for all of the laboratory assignments. Theecelinux machines all run the Red Hat Enterprise Linux 7 operating system, and they all use anidentical setup. You do not need to do anything special to create an ecelinux account. You will beusing your NetID and Cornell password to login, and an ecelinux account will be automaticallycreated for you when you first login. Any student enrolled in any ECE class should automaticallybe granted access to the ecelinxu workstations and servers. Having said this, if you cannot login toeither the ecelinux workstations or the ecelinux servers, you should email the COE/CIS sysadminsat [email protected].
There are three ways you can get access to the ecelinux workstations and servers: you can use theecelinux workstations in 314 Phillips, you can remotely login to the ecelinux servers from the CITWindows Computing Lab in 318 Phillips Hall, or you can remotely login to the ecelinux serversfrom your own personal workstation. Since we use open-source tools in this course, it should also bepossible for you to directly work locally on your own workstation without logging into the ecelinuxservers. This would require you to setup your own local development environment, so we cannotreally provide too much support for this option.
2.1. The ecelinux Workstations in 314 Phillips Hall
You can use the 25 brand new ecelinux workstations in 314 Phillips Hall to work on your lab as-signments. The ecelinux workstations are fast and have generous 27” monitors. You should beable to access the lab using your keycard, although you might need to try swiping your card a fewtimes. You can login to the workstations using your NetID and Cornell password. Once you havelogged into an ecelinux workstation, you can open a terminal by choosing Applications > Favorites >Terminal from the menu at the top of the desktop.
2.2. The ecelinux Servers
The department has a cluster of ecelinux servers dedicated for ECE instructional use. These serversare setup in the exact same way as the ecelinux workstations in 314 Phillips Hall. There are twoservers named as follows:
• ecelinux-01.ece.cornell.edu• ecelinux-02.ece.cornell.edu
If one of the two servers seems slow, students may want to try logging into the other server. Notethat there are actually two other servers named ecelinux-03 and ecelinux-04, and there is alsoa load-balancer named ecelinux. We do not recommend students use any of these servers. The
3
ECE 4750 Computer Architecture, Fall 2016 Tutorial 1: Linux Development Environment
ecelinux-01 and ecelinux-02 servers are significantly faster, which can make a big differencewhen running long simulations. Students should always explicitly login to either ecelinux-01 orecelinux-02, unless these two faster servers are down.
2.3. Remote Login from CIT Windows Computing Lab in 318 Phillips Hall
Students can also use the 45 Windows workstations in 318 Phillips Hall to login to an ecelinuxserver remotely. You should be able to access the lab using your keycard, and you can use yourNetID and Cornell password to login to the workstations. You can then use MobaXterm to loginto an ecelinux server. To start MobaXterm choose All Programs > Class Files > MobaXterm PersonalEdition > MobaXterm Personal Edition from the start menu. Once MobaXterm has loaded you will seeit has started a local terminal. Use the following command at the local terminal prompt to login toan ecelinux server:
% ssh -X <netid>@ecelinux-01.ece.cornell.edu
Replace <netid> with your Cornell NetID in the command above, and feel free to use ecelinux-02instead of ecelinux-01. Do not type the % character. We use the % character to indicate what com-mands we should enter on the command line. Executing the command will prompt you to enteryour Cornell password, and then you should be connected to the ecelinux server. The -X commandline option enables X11 forwarding so that we can start a GUI application like geany or gtkwave onthe server yet have the actual GUI displayed on our local machine.
After logging into an ecelinux server you will notice that a sidebar appears on the left that showsyou the files in your home directory. You can drag files to/from the sidebar and the desktop to easilymove files to/from the Windows workstation and an ecelinux server. To hide the sidebar chooseView > Show/hide sidebar from the menu.
2.4. Remote Login from Personal Windows Laptop/Workstation
You can also login to an ecelinux server from your own personal Windows workstation. You willneed to install MobaXterm on your workstation. Download the installer from here:
• http://mobaxterm.mobatek.net/MobaXterm_Setup_9.1.msi
Run the installer, click next to start the installation, agree to the EULA and click next, click next toinstall in the default location, click install to start the installation, and click finish to finish the instal-lation. Then start MobaXterm by choosing All Programs > MobaXterm Personal Edition > MobaXtermPersonal Edition from the start menu. You should agree if Windows asks to grant any additionalsecurity permissions to MobaXterm. Then follow the directions in Section 2.3. Note that if yourconnection to an ecelinux server seems to be dropping, you may need to set the SSH “keep alivesignal”. Choose Settings > Configuration and check the option to send a keep alive signal every 60seconds.
2.5. Remote Login from Personal Mac Laptop/Workstation
To start, you need to open a local terminal by typing “terminal” into Spotlight. By default yourconnection to an ecelinux server will be dropped if you are inactive for a certain amount of time. Toprevent this, you need to add some configuration information to a specific file. We will learn moreabout the echo command and command output redirection later in the tutorial, but for now carefullyenter the following commands in the terminal.
4
ECE 4750 Computer Architecture, Fall 2016 Tutorial 1: Linux Development Environment
% echo "Host *.ece.cornell.edu" >> ~/.ssh/config% echo " ServerAliveInterval 180" >> ~/.ssh/config
Do not type the % character. We use the % character to indicate what commands we should enter onthe command line. You will need to install X11, although some older versions of Mac OS X have X11installed by default, or you may have previously installed X11. To see if you have X11 installed, enterthe following command in the terminal.
% xclock
Again, do not type the % character. If your system cannot find xclock then you need to install X11.The specific X11 window system you will want to use is called XQuartz, and it is available from here:
• http://xquartz.macosforge.org/landing
Use the DMG to install XQuartz and then try running xclock again. Once xclock works locally, thenuse SSH to login to an ecelinux server as follows:
% ssh -X <netid>@ecelinux-01.ece.cornell.edu
Replace <netid> with your Cornell NetID in the command above and do not type the % character.Feel free to use ecelinux-02 instead of ecelinux-01.
2.6. Remote Login from Personal Linux Laptop/Workstation
If you are using Linux you will likely know how to open a local terminal. By default your connectionto the an ecelinux server will be dropped if you are inactive for a certain amount of time. To preventthis, you need to add some configuration information to a specific file. We will learn more about theecho command and command output redirection later in the tutorial, but for now carefully enter thefollowing commands in the terminal.
% echo "Host *.ece.cornell.edu" >> ~/.ssh/config% echo " ServerAliveInterval 180" >> ~/.ssh/config
Then use SSH as follows:
% ssh -X <netid>@ecelinux-01.ece.cornell.edu
As mentioned above, replace <netid> with your Cornell NetID in the command above and do nottype the % character. Feel free to use ecelinux-02 instead of ecelinux-01.
2.7. Remote Login from Off-Campus Using the Cornell VPN
Logging in remotely from your own personal laptop/workstation will work fine if you are connectedto the wired or wireless (e.g., RedRover) campus network. If you are off-campus, then you will needto use the Cornell virtual private network (VPN) to access an ecelinux server. Simply follow theinstructions at the following link to install the Cisco VPN software for your personal laptop/work-station and then to connect to the VPN.
• http://www.it.cornell.edu/services/vpn/howto/index.cfm
After connecting to the VPN, you can follow the above instructions to SSH into an ecelinux server.
5
ECE 4750 Computer Architecture, Fall 2016 Tutorial 1: Linux Development Environment
2.8. Testing X11 After Remote Login
After remotely logging into an ecelinux server remotely using any of the above approaches, you canverify that a GUI application (e.g., geany or gtkwave) will work by running the following command.
% xclock
Just to be very explicit, you want to execute the xclock command remotely after logging into anecelinux server via SSH (i.e., not locally on your Mac/Linux laptop/workstation). If you cannotsee the analog clock, there there is likely an issue with your X11 setup. You can also try the moreinteresting xeyes.
% xeyes
2.9. Personal Computing Resources
While we strongly encourage students to use the ecelinux workstations and servers, more advancedstudents are welcome to work directly on their own workstations without logging into an ecelinuxserver. This is not too much work if your are using a UNIX-like system (e.g., Mac OS X, Linux). It willrequire the student to install iverilog, gtkwave, and the PyMTL hardware modeling framework. Forthe final laboratory assignment, students will have to install the RISC-V cross-compiler as well. Moreinformation about installing these tools is available at the following links:
• http://iverilog.icarus.com• http://gtkwave.sourceforge.net• https://github.com/cornell-brg/pymtl• https://github.com/riscv/riscv-tools (follow instructions for GCC/Newlib toolchain)
The course staff cannot offer too much support for this, and please remember that all lab submissionsmust work on the ecelinux workstations and servers, since that is where the course staff will bedoing the assessment.
3. The Linux Command Line
In this section, we introduce the basics of working at the Linux command line. Please note that thisLinux tutorial is obviously not comprehensive and cannot replace the extensive amount of documen-tation available online or elsewhere. The goal is to get you comfortable with commands required tocomplete the lab assignments. Before trying the commands listed in this section, you will need to getaccess to the ECE computing resources as described in the previous section.
The shell is the original Linux user interface which is a text-based command-line interpreter. Thedefault shell on the ecelinux machines is Bash. While there are other shells such as sh, csh, andtcsh, for this course we will always be assuming you are using Bash. As mentioned above, we usethe % character to indicate commands that should be entered at the Linux command line, but youshould not include the actual % character when typing in the commands on your own. To make iteasier to cut-and-paste commands from this tutorial document onto the command line, you can tellBash to ignore the ’%’ character using the following command:
% alias %=""
Now you can cut-and-paste a sequence of commands from this tutorial document and Bash will notget confused by the ’%’ character which begins each line.
6
ECE 4750 Computer Architecture, Fall 2016 Tutorial 1: Linux Development Environment
3.1. Hello World
We begin with the ubiquitous “Hello, World” example. To display the message “Hello, World” wewill use the echo command. The echo command simply “echos” its input to the console.
% echo "Hello, World"
The string we provide to the echo command is called a command line argument. We use command linearguments to tell commands what they should operate on. Although simple, the echo command canvery useful for creating simple text files, displaying environment variables, and general debugging.
H To-Do On Your Own: Experiment with using the echo command to display different messages.
3.2. Manual Pages
You can learn more about any Linux command by using the man command. Try using this to learnmore about the echo command.
% man echo
You can use the up/down keys to scroll the manual one line at a time, the space bar to scroll downone page at a time, and the q key to quit viewing the manual. You can even learn about the mancommand itself by using man man. As you follow the tutorial, feel free to use the man command tolearn more about the commands we cover.
H To-Do On Your Own: Use the man command to learn more about the cat command.
3.3. Create, View, and List Files
We can use the echo command and a feature called command output redirection to create simple textfiles. We will discuss command output redirection in more detail later in the tutorial. Commandoutput redirection uses the > operator to take the output from one command and “redirect” it to afile. The following commands will create a new file named ece4750-tut1.txt that simply containsthe text “Computer Architecture”.
% echo "Computer Architecture" > ece4750-tut1.txt
We can use the cat command to quickly display the contents of a file.
% cat ece4750-tut1.txt
For larger files, cat will output the entire file to the console so it may be hard to read the file as itstreams past. We can use the less command to show one screen-full of text at a time. You can usethe up/down keys to scroll the file one line at a time, the space bar to scroll down one page at a time,and the q key to quit viewing the file.
% less ece4750-tut1.txt
You can use the ls command to list the filenames of the files you have created.
7
ECE 4750 Computer Architecture, Fall 2016 Tutorial 1: Linux Development Environment
% ls
We can provide command line options to the ls command to modify the command’s behavior. Forexample, we can use the -1 (i.e., a dash followed by the number one) command line option to listone file per line, and we can we can use the -l (i.e., a dash followed by the letter l) command lineoption to provide a longer listing with more information about each file.
% ls -1% ls -l
You should see the newly created ece4750-tut1.txt file along with some additional directories orfolders. We will discuss directories in the next section. Use the following commands to create a fewmore files using the echo command and command output redirection, and then list the files again.
% echo "Application" > ece4750-tut1-layer1.txt% echo "Algorithm" > ece4750-tut1-layer2.txt% ls -1
H To-Do On Your Own: Create a new file named ece4750-tut1-layer3.txt which contains the thirdlayer in the computing systems stack (i.e., programming language). Use cat and less to verifythe file contents.
3.4. Create, Change, and List Directories
Obviously, having all files in a single location would be hard to manage effectively. We can usedirectories (also called folders) to logically organize our files, just like one can use physical folders toorganize physical pieces of paper. The mechanism for organizing files and directories is called thefile system. When you first login to an ecelinux machine, you will be in your home directory. This isyour own private space on the server that you can use to work on the lab assignments and store yourfiles. You can use the pwd command to print the directory in which you are currently working, whichis known as the current working directory.
% pwd/home/<netid>
You should see output similar to what is shown above, but instead of <netid> it should show youractual NetID. The pwd command shows a directory path. A directory path is a list of nested directorynames; it describes a “path” to get to a specific file or directory. So the above path indicates that thereis a toplevel directory named home that contains a directory named <netid>. This is the directorypath to your home directory. As an aside, notice that Linux uses a forward slash (/) to separatedirectories, while Windows uses a back slash (\) for the same purpose.
We can use the mkdir command to make new directories. The following command will make a newdirectory named ece4750 within your home directory.
% mkdir ece4750
We can use the cd command to change our current working directory. The following command willchange the current working directory to be the newly created ece4750 directory, before displayingthe current working directory with the pwd command.
8
ECE 4750 Computer Architecture, Fall 2016 Tutorial 1: Linux Development Environment
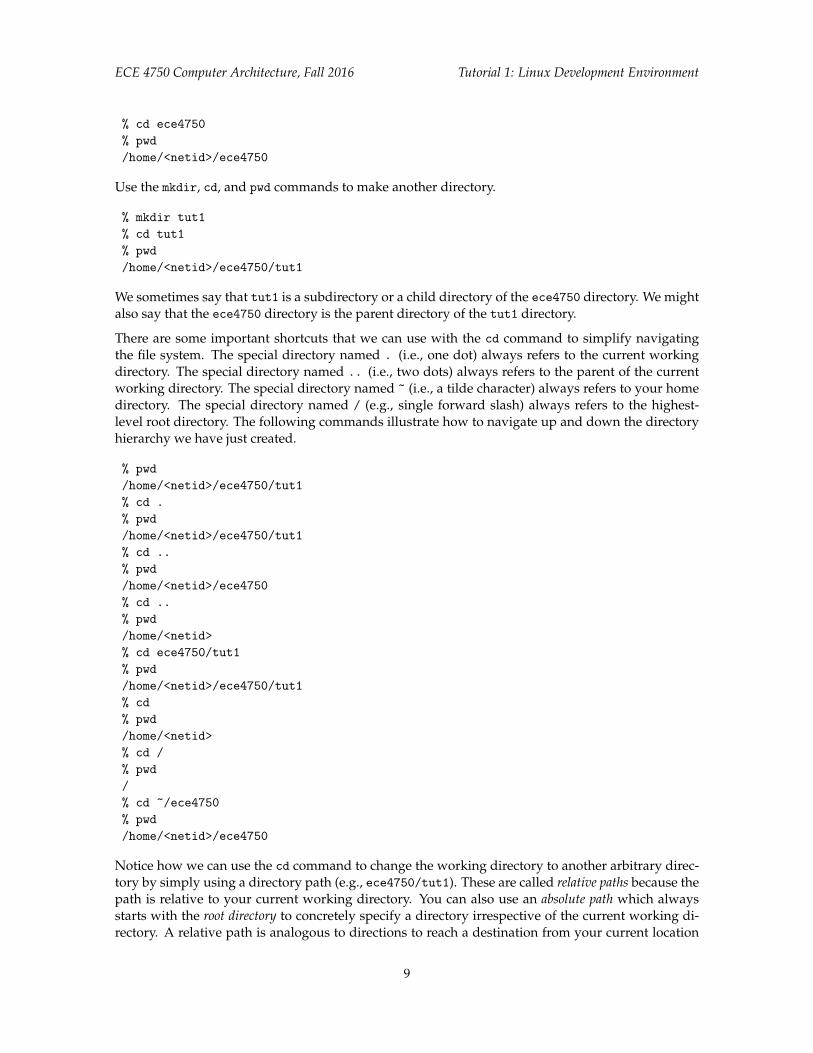
% cd ece4750% pwd/home/<netid>/ece4750
Use the mkdir, cd, and pwd commands to make another directory.
% mkdir tut1% cd tut1% pwd/home/<netid>/ece4750/tut1
We sometimes say that tut1 is a subdirectory or a child directory of the ece4750 directory. We mightalso say that the ece4750 directory is the parent directory of the tut1 directory.
There are some important shortcuts that we can use with the cd command to simplify navigatingthe file system. The special directory named . (i.e., one dot) always refers to the current workingdirectory. The special directory named .. (i.e., two dots) always refers to the parent of the currentworking directory. The special directory named ~ (i.e., a tilde character) always refers to your homedirectory. The special directory named / (e.g., single forward slash) always refers to the highest-level root directory. The following commands illustrate how to navigate up and down the directoryhierarchy we have just created.
% pwd/home/<netid>/ece4750/tut1% cd .% pwd/home/<netid>/ece4750/tut1% cd ..% pwd/home/<netid>/ece4750% cd ..% pwd/home/<netid>% cd ece4750/tut1% pwd/home/<netid>/ece4750/tut1% cd% pwd/home/<netid>% cd /% pwd/% cd ~/ece4750% pwd/home/<netid>/ece4750
Notice how we can use the cd command to change the working directory to another arbitrary direc-tory by simply using a directory path (e.g., ece4750/tut1). These are called relative paths because thepath is relative to your current working directory. You can also use an absolute path which alwaysstarts with the root directory to concretely specify a directory irrespective of the current working di-rectory. A relative path is analogous to directions to reach a destination from your current location
9
ECE 4750 Computer Architecture, Fall 2016 Tutorial 1: Linux Development Environment
(e.g., How do I get to the coffee shop from my current location?), while an absolute path is analogousto directions to reach a destination from a centralized location (e.g., How do I get to the coffee shopfrom the center of town?).
% pwd/home/<netid>/ece4750% cd /home/<netid>/ece4750/tut1% pwd/home/<netid>/ece4750/tut1% cd% pwd/home/<netid>
This example illustrates one more useful shortcut. The cd command with no command line argu-ments always changes the current working directory to your home directory. We can use the lscommand to list files as well as directories. Use the following commands to create a new file anddirectory in the ece4750/tut1 subdirectory, and then list the file and directory.
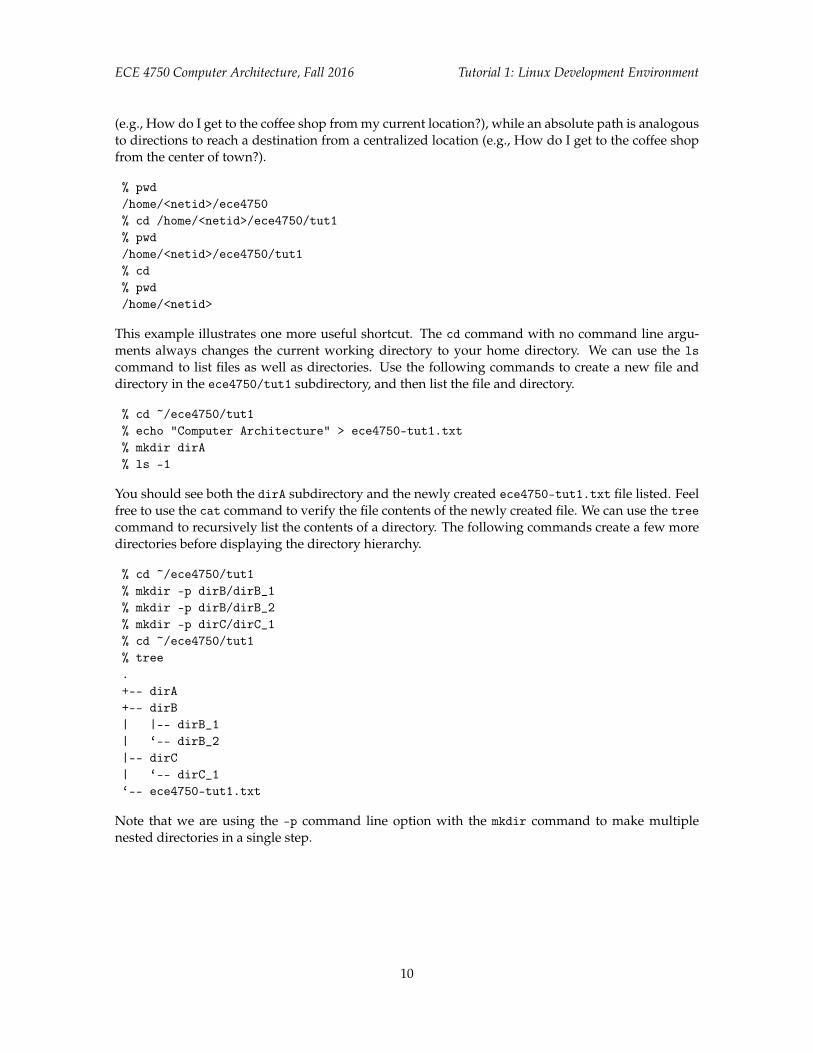
% cd ~/ece4750/tut1% echo "Computer Architecture" > ece4750-tut1.txt% mkdir dirA% ls -1
You should see both the dirA subdirectory and the newly created ece4750-tut1.txt file listed. Feelfree to use the cat command to verify the file contents of the newly created file. We can use the treecommand to recursively list the contents of a directory. The following commands create a few moredirectories before displaying the directory hierarchy.
% cd ~/ece4750/tut1% mkdir -p dirB/dirB_1% mkdir -p dirB/dirB_2% mkdir -p dirC/dirC_1% cd ~/ece4750/tut1% tree.+-- dirA+-- dirB| |-- dirB_1| ‘-- dirB_2|-- dirC| ‘-- dirC_1‘-- ece4750-tut1.txt
Note that we are using the -p command line option with the mkdir command to make multiplenested directories in a single step.
10
ECE 4750 Computer Architecture, Fall 2016 Tutorial 1: Linux Development Environment
H To-Do On Your Own: Experiment with creating additional directories and files within theece4750/tut1 subdirectory. Try creating deeper hierarchies with three or even four levels ofnesting using the -p option to the mkdir command. Experiment with using the . and .. specialdirectories. Use the tree command to display your newly created directory hierarchy.
3.5. Copy, Move, and Remove Files and Directories
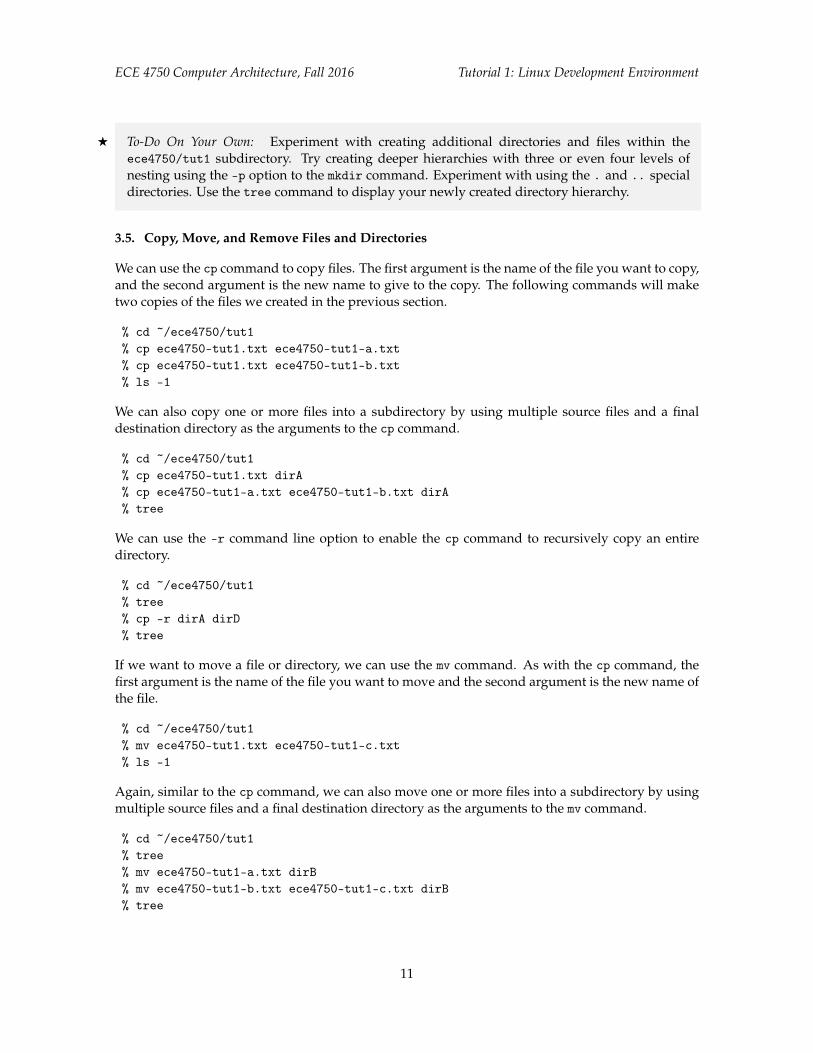
We can use the cp command to copy files. The first argument is the name of the file you want to copy,and the second argument is the new name to give to the copy. The following commands will maketwo copies of the files we created in the previous section.
% cd ~/ece4750/tut1% cp ece4750-tut1.txt ece4750-tut1-a.txt% cp ece4750-tut1.txt ece4750-tut1-b.txt% ls -1
We can also copy one or more files into a subdirectory by using multiple source files and a finaldestination directory as the arguments to the cp command.
% cd ~/ece4750/tut1% cp ece4750-tut1.txt dirA% cp ece4750-tut1-a.txt ece4750-tut1-b.txt dirA% tree
We can use the -r command line option to enable the cp command to recursively copy an entiredirectory.
% cd ~/ece4750/tut1% tree% cp -r dirA dirD% tree
If we want to move a file or directory, we can use the mv command. As with the cp command, thefirst argument is the name of the file you want to move and the second argument is the new name ofthe file.
% cd ~/ece4750/tut1% mv ece4750-tut1.txt ece4750-tut1-c.txt% ls -1
Again, similar to the cp command, we can also move one or more files into a subdirectory by usingmultiple source files and a final destination directory as the arguments to the mv command.
% cd ~/ece4750/tut1% tree% mv ece4750-tut1-a.txt dirB% mv ece4750-tut1-b.txt ece4750-tut1-c.txt dirB% tree
11
ECE 4750 Computer Architecture, Fall 2016 Tutorial 1: Linux Development Environment
We do not need to use the -r command line option to move an entire directory at once.
% cd ~/ece4750/tut1% tree% mv dirD dirE% tree
The following example illustrates how we can use the special . directory to move files from a subdi-rectory into the current working directory.
% cd ~/ece4750/tut1% tree% mv dirE/ece4750-tut1.txt .% tree
We can use the rm command to remove files. The following command removes a file from within theece4750/tut1 subdirectory.
% cd ~/ece4750/tut1% ls -1% rm ece4750-tut1.txt% ls -1
To clean up, we might want to remove the files we created in your home directory earlier in thistutorial.
% cd% rm ece4750-tut1.txt% rm ece4750-tut1-layer1.txt% rm ece4750-tut1-layer2.txt% rm ece4750-tut1-layer3.txt
We can use the -r command line option with the rm command to remove entire directories, but pleasebe careful because it is relatively easy to permanently delete many files at once. See Section 6.3 fora useful command that you might want to use instead of the rm command to avoid accidentallydeleting important work.
% cd ~/ece4750/tut1% ls -1% rm -r dirA dirB dirC dirE% ls -1
H To-Do On Your Own: Creating additional directories and files within the ece4750/tut1 subdirec-tory, and then use the cp, mv, and rm commands to copy, move, and remove the newly createddirectories and files. Use the ls and tree commands to display your file and directory organiza-tion.
12
ECE 4750 Computer Architecture, Fall 2016 Tutorial 1: Linux Development Environment
3.6. Using wget to Download Files
We can use the wget command to download files from the internet. For now, this is a useful way toretrieve a text file that we can use in the following examples.
% cd ~/ece4750/tut1% wget http://www.csl.cornell.edu/courses/ece4750/overview.txt% cat overview.txt
3.7. Using grep to Search Files
We can use the grep command to search and display lines of a file that contain a particular pattern.The grep command can be useful for quickly searching the contents of the source files in your labassignment. The command takes the pattern and the files to search as command line arguments. Thefollowing command searches for the word “memories” in the overview.txt file downloaded in theprevious section.
% cd ~/ece4750/tut1% grep "memories" overview.txt
You should see just the three lines within the overview.txt file that contain the word “memories”.We can use the ––line-number and ––color command line options with the grep command to dis-play the line number of each match and to highlight the matched word.
% cd ~/ece4750/tut1% grep --line-number --color "memories" overview.txt
We can use the -r command line option to recursively search all files within a given directory hier-archy. In the following example, we create a subdirectory, copy the overview.txt file, and illustratehow we can use the grep command to recursively search for the word “memories”.
% cd ~/ece4750/tut1% mkdir dirA% cp overview.txt dirA% grep -r --line-number --color "memories" .
Notice how we specify a directory as a command line argument (in this case the special . direc-tory) to search the current working directory. You should see the three lines from both copies of theoverview.txt file. The grep command also shows which file contains the match.
As another example, we will search two special files named /proc/cpuinfo and proc/meminfo.These files are present on every modern Linux system, and they contain information about theprocessor and memory hardware in that system. The following command first uses the less com-mand so you can browse the file, and then uses the grep command to search for processor in the/proc/cpuinfo file. Recall that with the less command, we use the up/down keys to scroll the fileone line at a time, the space bar to scroll down one page at a time, and the q key to quit viewing thefile.
% cd ~/ece4750/tut1% less /proc/cpuinfo% grep "processor" /proc/cpuinfo
13
ECE 4750 Computer Architecture, Fall 2016 Tutorial 1: Linux Development Environment
It should be pretty clear that you are using a multicore processor! You can also search to find outwhich company makes the processors and what clock frequency they are running at:
% cd ~/ece4750/tut1% grep "vendor_id" /proc/cpuinfo% grep "cpu MHz" /proc/cpuinfo
We can find out how much DRAM is in the system by searching for MemTotal in the /proc/meminfofile.
% cd ~/ece4750/tut1% grep "MemTotal" /proc/meminfo
H To-Do On Your Own: Try using grep to search for the words “processor” and “network” in theoverview.txt file.
3.8. Using find to Find Files
We can use the find command to recursively search a directory hierarchy for files or directories thatmatch a specified criteria. While the grep command is useful for searching file contents, the findcommand is useful for quickly searching the file and directory names in your lab assignments. Thefind command is very powerful, so we will just show a very simple example. First, we create a fewnew files and directories.
% cd ~/ece4750/tut1% mkdir -p dirB/dirB_1% mkdir -p dirB/dirB_2% mkdir -p dirC/dirC_1% echo "test" > dirA/file0.txt% echo "test" > dirA/file1.txt% echo "test" > dirB/dirB_1/file0.txt% echo "test" > dirB/dirB_1/file1.txt% echo "test" > dirB/dirB_2/file0.txt% tree
We will now use the find command to find all files named "file0.txt". The find command takesone command line argument to specify where we should search and a series of command line optionsto describe what files and directories we are trying to find. We can also use command line optionsto describe what action we would like to take when we find the desired files and directories. Inthis example, we use the ––name command line option to specify that we are searching for files witha specific name. We can also use more complicated patterns to search for all files with a specificfilename prefix or extension.
% cd ~/ece4750/tut1% find . -name "file0.txt"
14
ECE 4750 Computer Architecture, Fall 2016 Tutorial 1: Linux Development Environment
Notice that we are using the special . directory to tell the find command to search the currentworking directory and all subdirectories. The find command always searches recursively.
H To-Do On Your Own: Create additional files named "file2.txt" in some of the subdirectories wehave already created. Use the "find" command to search for files named "file2.txt".
3.9. Using tar to Archive Files
We can use the tar command to “pack” files and directories into a simple compressed archive, andalso to “unpack” these files and directories from the archive. This kind of archive is sometimescalled a tarball. Most open-source software is distributed in this compressed form. It makes it easyto distribute code among collaborators and it is also useful to create backups of files. We can usethe following command to create an archive of our tutorial directory and then remove the tutorialdirectory.
% cd ~/ece4750% tar -czvf tut1.tgz tut1% rm -r tut1% ls -l
Several command line options listed together as a single option (-czvf), where c specifies we wantto create an archive, z specifies we should use “gzip” compression, v specifies verbose mode, and fspecifies we will provide filenames to archive. The first command line argument is the name of thearchive to create, and the second command line argument is the directory to archive. We can nowextract the contents of the archive to recreate the tutorial directory. We also remove the archive.
% cd ~/ece4750% tar -xzvf tut1.tgz% rm tut1.tgz% tree tut1
Note that we use the x command line option with the tar command to specify that we intend toextract the archive.
H To-Do On Your Own: Create an example directory within the ece4750/tut1 subdirectory. Copythe overview.txt file and rename it to add example files to your new directory. Use the tarcommand to create and extract an archive of just this one new directory.
3.10. Using top to View Running Processes
You can use the top command to view what commands are currently running on the Linux systemin realtime. This can be useful to see if there are many commands running which are causing thesystem to be sluggish. When finished you can use the q character to quit.
% top
The first line of the top display shows the number of users currently logged into the system, and theload average. The load average indicates how “overloaded” the system was over the last one, five, and
15
ECE 4750 Computer Architecture, Fall 2016 Tutorial 1: Linux Development Environment
15 minutes. If the load average is greater than the number of processors in the system, it means yoursystem will probably be sluggish. You can always try logging into a different server in the cluster.
3.11. Environment Variables
In the previous sections, we have been using the Bash shell to run various commands, but the Bashshell is actually a full-featured programming language. One aspect of the shell that is similar inspirit to popular programming languages, is the ability to write and read environment variables. Thefollowing commands illustrate how to write an environment variable named ece4750_tut1_layer1,and how to read this environment variable using the echo command.
% ece4750_tut1_layer1="application"% echo ${ece4750_tut1_layer1}
Keep in mind that the names of environment variables can only contain letters, numbers, and under-scores. Notice how we use the ${} syntax to read an environment variable. There are a few built-inenvironment variables that might be useful:
% echo ${HOSTNAME}% echo ${HOME}% echo ${PWD}
We often use the HOME environment variable in directory paths like this:
% cd ${HOME}/ece4750
The PWD environment variable always holds the current working directory. We can use environmentvariables as options to commands other than echo. A common example is to use an environmentvariable to “remember” a specific directory location, which we can quickly return to with the cdcommand like this:
% cd ${HOME}/ece4750/tut1% TUT1=${PWD}% cd% pwd/home/<netid>% cd ${TUT1}% pwd/home/<netid>/ece4750/tut1
H To-Do On Your Own: Create a new environment variable named ece4750_tut1_layer2 and writeit with the second layer in the computer systems stack (i.e., algorithm). Use the echo com-mand to display this environment variable. Experiment with creating a new subdirectory withinece4750/tut1 and then using an environment variable to “remember” that location.
3.12. Command Output Redirection
We have already seen using the echo command and command output redirection to create simpletext files. Here is another example:
16
ECE 4750 Computer Architecture, Fall 2016 Tutorial 1: Linux Development Environment
% cd ${HOME}/ece4750/tut1% echo "Application" > computing-stack.txt% cat computing-stack.txt
The > operator tells the Bash shell to take the output from the command on the left and overwrite thefile named on the right. We can use any command on the left. For example, we can save the outputfrom the pwd command or the man command to a file for future reference.
% cd ${HOME}/ece4750/tut1% pwd > cmd-output.txt% cat cmd-output.txt% man pwd > cmd-output.txt% cat cmd-output.txt
We can also use the >> operator which tells the Bash shell to take the output from the command onthe left and append the file named on the right. We can use this to create multiline text files:
% cd ${HOME}/ece4750/tut1% echo "Algorithm" > computing-stack.txt% echo "Programming Language" >> computing-stack.txt% echo "Operating System" >> computing-stack.txt% cat computing-stack.txt
H To-Do On Your Own: Add the remaining levels of the computing stack (i.e., gate-level, circuits,devices, technology) to the computing-stack.txt text file. Use the cat command to verify thatthe file contents.
3.13. Command Chaining
We can use the && operator to specify two commands that we want to chaining together. The secondcommand will only execute if the first command succeeds. Below is an example.
% cd ${HOME}/ece4750/tut1 && cat computing-stack.txt
H To-Do On Your Own: Create a single-line command that combines creating a new directory withthe mkdir command and then immediately changes into the directory using the cd command.
3.14. Command Pipelining
The Bash shell allows you to run multiple commands simultaneously, with the output of one com-mand becoming the input to the next command. We can use this to assemble “pipelines”; we “pipe”the output of one command to another command for further actions using the | operator.
The following example uses the grep command to search the special proc/cpuinfo file for linescontaining the word “processor” and then pipes the result to the wc command. The wc commandcounts the number of characters, words, or lines of its input. We use the -l command line optionwith the wc command to count the number of lines.
17
ECE 4750 Computer Architecture, Fall 2016 Tutorial 1: Linux Development Environment
% grep processor /proc/cpuinfo | wc -l
This is a great example of the Linux philosophy of providing many simple commands that can becombined to create more powerful functionality. Essentially the pipeline we have created is a com-mand that tells us the number of processors in our system.
As another example, we will pipe the output of the last command to the grep command. The lastcommand lists the names of all of the users that have logged into the system since the system wasrebooted. We can use grep to search for your NetID and thus quickly see how when you previouslyhave logged into this system.
% last | grep <netid>
We can create even longer pipelines. The following pipeline will report the number of times youhave logged into the system since it was rebooted.
% last | grep <netid> | wc -l
H To-Do On Your Own: Use the cat command with the overview.txt file and pipe the output to thegrep command to search for the word “memories”. While this is not as fast as using grep directlyon the file, it does illustrate how many commands (e.g., grep) can take their input specified as acommand line argument or through a pipe.
3.15. Aliases, Wildcards, Command History, and Tab Completion
In this section, we describe some miscellaneous features of the Bash shell which can potentially bequite useful in increasing your productivity.
Aliases are a way to create short names for command sequences to make it easier to quickly executethose command sequences in the future. For example, assume that you frequently want to change toa specific directory. We can create an alias to make this process take just two keystrokes.
% alias ct="cd ${HOME}/ece4750/tut1"% ct% pwd/home/academic/<netid>/ece4750/tut1
If you always want this alias to be available whenever you login to the system, you can save it inyour .bashrc file. The .bashrc is a special Bash script that is run on every invocation of a Bash shell.
% echo "alias ct=\"cd ${HOME}/ece4750/tut1\"" >> ${HOME}/.bashrc
The reason we have to use a back slash (\) in front of the double quotes is to make sure the echocommand sees this command line argument as one complete string.
Wildcards make it easy to manipulate many files and directories at once. Whenever we specify a fileor directory on the command line, we can often use a wildcard instead. In a wildcard, the asterisk(*) will match any sequence of characters. The following example illustrates how to list all files thatend in the suffix .txt and then copies all files that match the wildcard from one directory to another.
% cd ${HOME}/ece4750/tut1
18

ECE 4750 Computer Architecture, Fall 2016 Tutorial 1: Linux Development Environment
% ls *.txt% cp dirA/file*.txt dirB% tree
The Bash shell keeps a history of everything you do at the command line. You can display thehistory with the history command. To rerun a previous command, you can use the ! operator andthe corresponding command number shown with the history command.
% history
You can pipe the output of the history command to the grep command to see how you might havedone something in the past.
% history | grep wc
If you press the up arrow key at the command line, the Bash shell will show you the previous com-mand you used. Continuing to press the up/down keys will enable you to step through your history.It is very useful to press the up arrow key once to rerun your last command.
The Bash shell supports tab completion. When you press the tab key twice after entering the be-ginning of a filename or directory name, Bash will try to automatically complete the filename ordirectory name. If there is more than one match, Bash will show you all of these matches so you cancontinue narrowing your search.
4. Linux Text Editors
You will need to use a text editor to edit source files in Linux. There are two kinds of text editors:graphical and non-graphical. The non-graphical text editors work by opening files through the com-mand line and then using the keyboard to navigate files, execute commands, etc. The graphical texteditors work by providing a GUI so that the user can use a mouse to interact with the editor.
4.1. Nano
Nano is a very simple non-graphical text editor installed on the ecelinux machines. The editor iseasy to learn and use. You can start Nano by typing the command nano in the terminal and optionallyspecifying the filename you want to view and edit.
% cd ${HOME}% nano ~/ece4750/tut1/overview.txt
Use the arrow keys to move the cursor position. Notice that the editor specifies most of the usefulcommands at the bottom of the terminal screen. The symbol ˆ indicates the CONTROL key. To typeany text you want, just move the cursor to the required position and use the keyboard. To save yourchanges press CONTROL+O and press the <ENTER> key after specifying the filename you want to saveto. You can exit by pressing CONTROL+X.
H To-Do On Your Own: Use Nano to make some changes to the overview.txt text file and then saveyour edits to your home directory. View the new file using the cat command from the commandline and then delete the file using the rm command.
19
ECE 4750 Computer Architecture, Fall 2016 Tutorial 1: Linux Development Environment
FileBrowser
Tab to display
file browser
Tabs foropened
files
Arrowsto show
moretabs
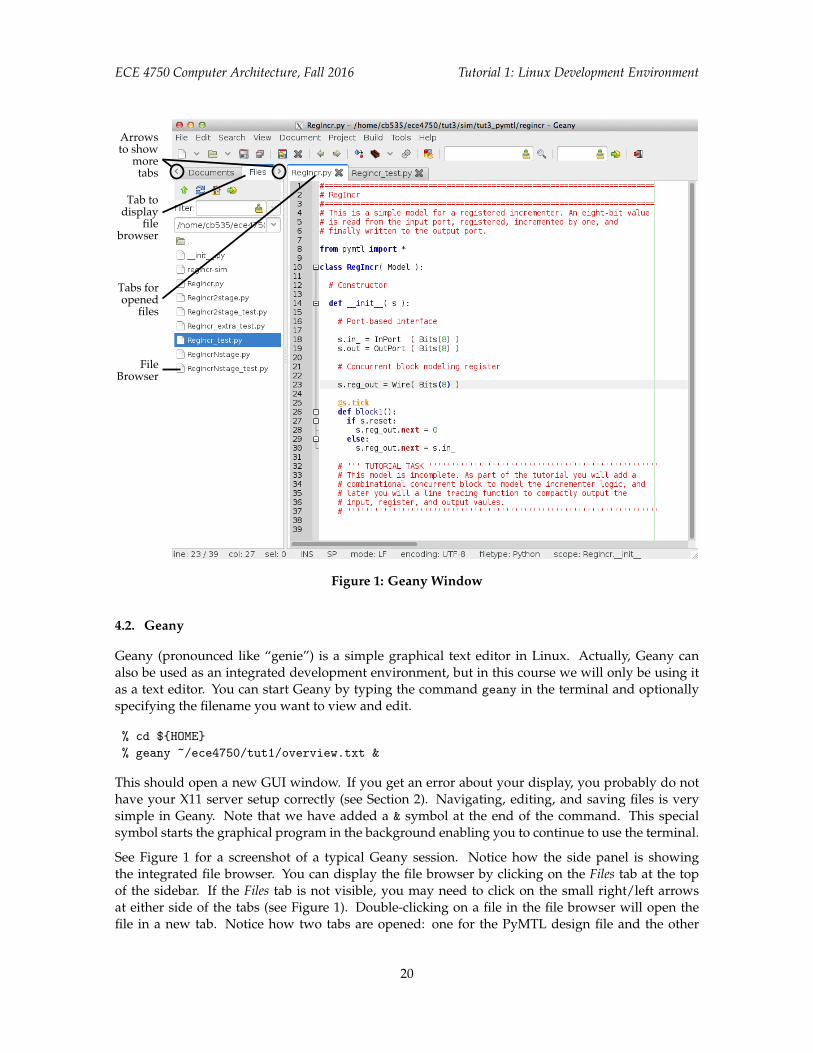
Figure 1: Geany Window
4.2. Geany
Geany (pronounced like “genie”) is a simple graphical text editor in Linux. Actually, Geany canalso be used as an integrated development environment, but in this course we will only be using itas a text editor. You can start Geany by typing the command geany in the terminal and optionallyspecifying the filename you want to view and edit.
% cd ${HOME}% geany ~/ece4750/tut1/overview.txt &
This should open a new GUI window. If you get an error about your display, you probably do nothave your X11 server setup correctly (see Section 2). Navigating, editing, and saving files is verysimple in Geany. Note that we have added a & symbol at the end of the command. This specialsymbol starts the graphical program in the background enabling you to continue to use the terminal.
See Figure 1 for a screenshot of a typical Geany session. Notice how the side panel is showingthe integrated file browser. You can display the file browser by clicking on the Files tab at the topof the sidebar. If the Files tab is not visible, you may need to click on the small right/left arrowsat either side of the tabs (see Figure 1). Double-clicking on a file in the file browser will open thefile in a new tab. Notice how two tabs are opened: one for the PyMTL design file and the other
20
ECE 4750 Computer Architecture, Fall 2016 Tutorial 1: Linux Development Environment
for the PyMTL test harness. Also notice how Geany automatically performs syntax highlighting forvarious programming languages. Feel free to set the font family and size based on your own personalpreference by choosing Edit > Preferences from the menu, clicking the Interface tab, and changing thefont listed next to Fonts: Editor.
Geany has a nice feature where it can enable splitting the window into two side-by-side panels withdifferent files opened in each panel. To turn on split windowing, choose Tools > Split Window > Sideby Side from the menu. Then click on the small downward arrow in the right-hand panel and choosean open file to display in this extra panel. Having both a test harness and the design under test openat the same, side-by-side, can be very powerful.
H To-Do On Your Own: Use Geany to make some changes to the overview.txt text file and then saveyour edits to your home directory. View the new file using the cat command from the commandline and then delete the file using the rm command.
4.3. Emacs and Vim
While nano and geany editors are easy to learn, students that anticipate using Linux in the futurebeyond this course might want to use a more powerful editor such as emacs or vim. Both also haveGUI equivalents. By default emacs will start the GUI, while using the -nw command line option willenable non-graphical mode. vim is purely non-graphical, but gvim is the graphical equivalent. It isbeyond the scope of this tutorial to teach you the usage of these editors, but most advanced Linuxusers use one of these more powerful text editors for development.
4.4. MobaTextEditor
If you are using MobaXterm, you can simply right click on a file in the integrated MobaXterm filebrowser and choose “Open with Default Text Editor” to open the file with the embedded Moba-TextEditor. Unlike the other text editors mentioned in this section, the MobaTextEditor actually runslocally on your Windows workstation. MobaXterm ensures that any changes you make to a filethrough the MobaTextEditor are automatically uploaded to the ecelinux servers. You might need toexperiment to determine the most productive setup.
5. The Two-Window Linux Workflow
Some students use a one-window workflow. They use various commands at the command line andwhenever they want to edit a file they launch a text editor (e.g., geany), edit and save the file, exitthe text editor, and then return to working at the command line. This can be a tedious process andinvolve many keystrokes and/or mouse clicks to simply edit a file and see the corresponding effect.
We strongly encourage students to use a two-window workflow regardless of how they are accessing theECE computing resources and which text editor they are using. A two-window workflow involvesalways having two windows side-by-side. The window on the left will be a terminal at the commandline, while the window on the right will be a text editor. The student should be able to switch back-and-forth between the two windows using the keyboard although this is not strictly necessary. Byusing two windows, the student can work at the command line, quickly switch to edit/save a file,and then quickly switch back to see the corresponding effect.
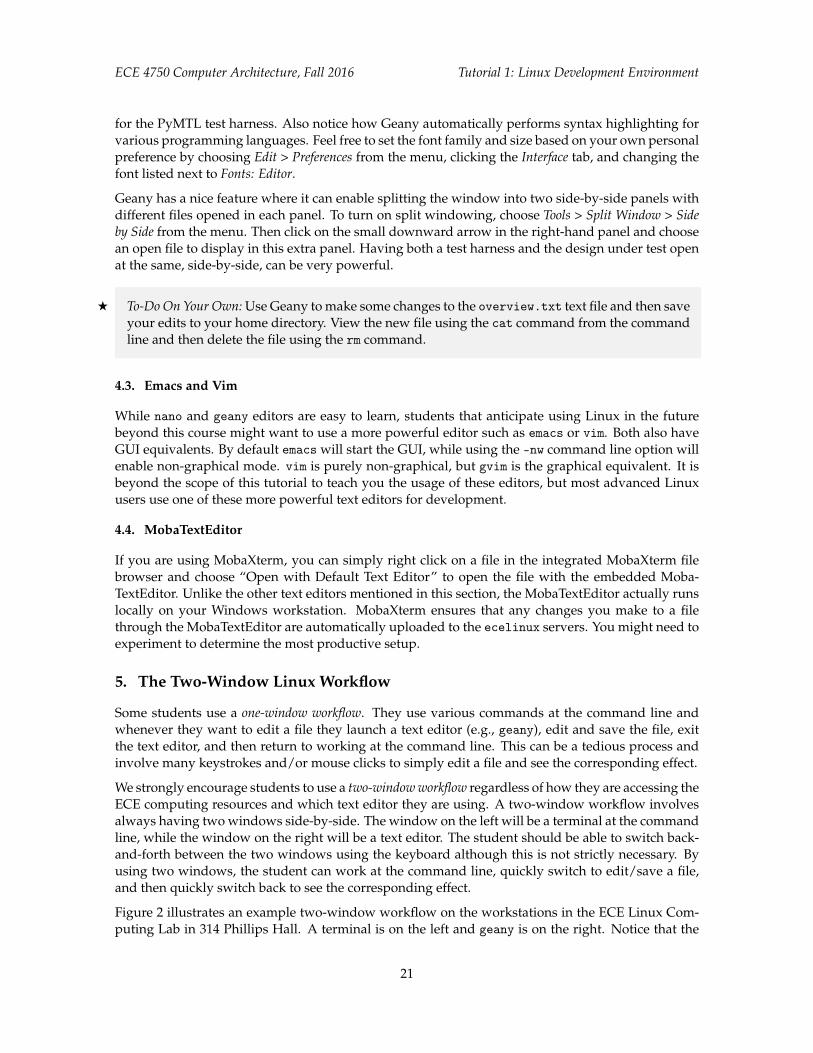
Figure 2 illustrates an example two-window workflow on the workstations in the ECE Linux Com-puting Lab in 314 Phillips Hall. A terminal is on the left and geany is on the right. Notice that the
21
ECE 4750 Computer Architecture, Fall 2016 Tutorial 1: Linux Development Environment
Figure 2: Recommended Two-Window Workflow for Linux
Figure 3: Recommended Two-Window Workflow for Windows
22
ECE 4750 Computer Architecture, Fall 2016 Tutorial 1: Linux Development Environment
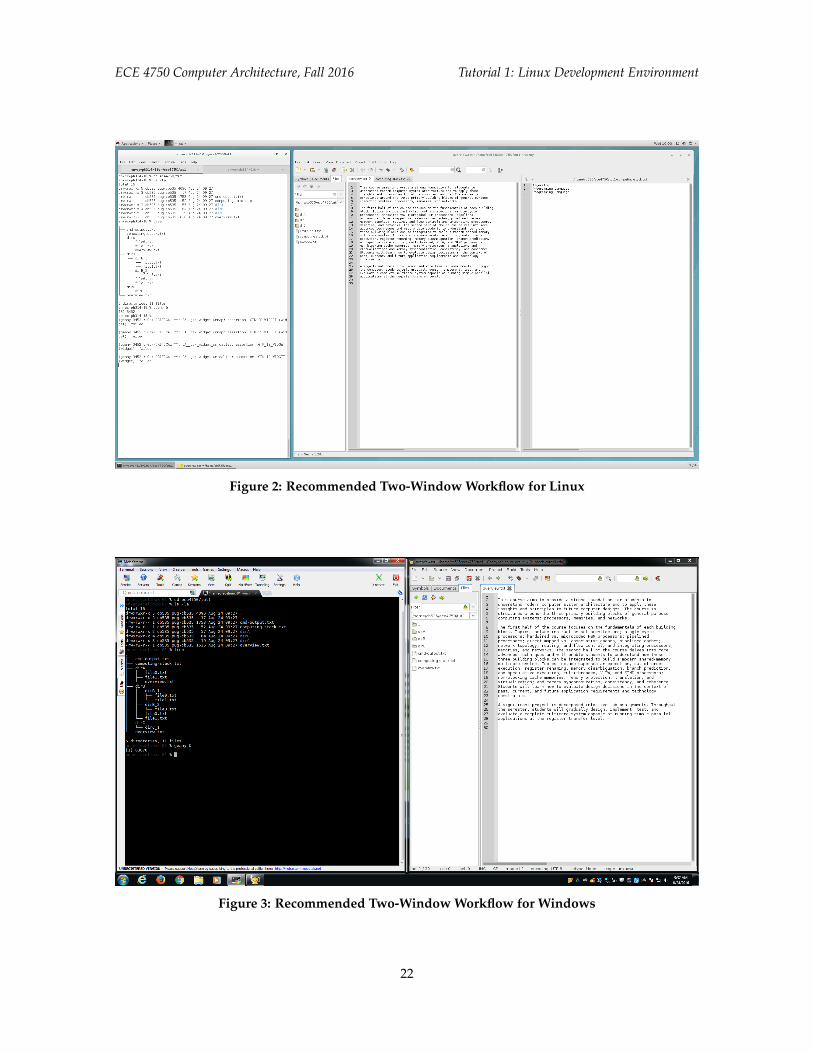
generous 27” monitors in 314 Phillips Hall enable using a side-by-side split within Geany such thata terminal and two files are all visible at the same time. You can use the ALT-TAB keyboard combi-nation to quickly switch back-and-forth between the two windows. Figure 3 illustrates an exampletwo-window workflow on the workstations in the CIT Windows Computing Lab in 318 Phillips Hall.MobaXterm is on the left and geany is on the right. Again, you can use the ALT-TAB keyboard com-bination to quickly switch back-and-forth between the two windows. Both RHEL7 and Windowshas nice features where if you drag a window off the left or right side of the screen it will automat-ically make the window fill just the left or right half of the screen. The key is to be able to be ableto see the command line and your text editor at the same time, and to also be able to quickly switchback-and-forward between the command line and your text editor.
6. ECE 4750 Specific Linux Commands
In this section, we describe various aspects of the development environment that are specific to thesevers used in the course.
6.1. ECE 4750 Setup Script
Once you are logged into an ecelinux machine, as explained in Section 2, you will need to setupthe working environment with the following command in order to work on the ECE 4750 lab assign-ments.
% source setup-ece4750.sh
The source command executes the commands in the given file. Running the command will displaysome information about what the setup script is doing. Since we always need to source the setupscript, we can add this to our .bashrc file as follows.
% echo "source setup-ece4750.sh -q" >> ${HOME}/.bashrc
The extra -q command line option prevents the script from displaying its output every time we loginto an ecelinux machine. With these modifications to our .bashrc, we know that the environmentwill be correctly setup every time we login.
If for any reason running the setup script prevents you from using tools for another course, you willneed to run the setup script manually every time you want to work on an ECE 4750 lab assignment.
6.2. Using quota to Check Your Space Usage
Students are allocated 10GB of storage on the servers. You can use the following command to showmuch space you are using:
% quota
The blocks column is how much data you are using, and the quota column is your quota. If youhave exceed the 10GB quota, you can browse your home directory and list the size of files and thecontents of directories with the du command:
% cd ${HOME}% du -sh *
23
ECE 4750 Computer Architecture, Fall 2016 Tutorial 1: Linux Development Environment
By recursively changing directories and examining the sizes of files and directories you can figureout what you need to delete. We can pipe the output of du to the sort and head commands to findthe top 20 largest files and directories like this:
% cd ${HOME}% du -xak . | sort -nr | head --lines=20
Or just use the following to generate a human readable summary of the size of files/directories in thecurrent working directory. Note that it can take 20–30 seconds for this command to finish, so pleasebe patient.
6.3. Using trash to Safely Remove Files
We have installed a simple program called trash which moves files you wish to delete into a specialsubdirectory of your home directory located at ${HOME}/tmp/trash. The following commands createa file and then deletes it using trash.
% cd ${HOME}% echo "This file will be deleted." > testing.txt% trash testing.txt% echo "This file will also be deleted." > testing.txt% trash testing.txt% ls ${HOME}/tmp/trash
If you look in ${HOME}/tmp/trash you will see subdirectories organized by date. Look in the subdi-rectory with today’s date and you should two files corresponding to the two files you deleted. Wehighly recommend always using the trash command instead of rm since this avoids accidentallydeleting your work.
7. Conclusion
This tutorial hopefully helped you become familiar with Linux and how to use it for working on thelabs. You have gained some experience working at the command line and also working with eithera graphical or non-graphical text editor. We have introduced the two-window Linux workflow andsome Linux commands specific to ECE 4750. There are many more resources online for learningLinux, and keep in mind that learning to work productively using the Linux operating system canpay dividends in many other contexts besides this course.
Acknowledgments
This tutorial was developed for the ECE 4750 Computer Architecture course at Cornell Universityby Shreesha Srinath, Christopher Torng, and Christopher Batten.
24