Embed Size (px)
Citation preview
1Emergency Oxygen Administration Lecture Guide
Ox
yge
n Ad
min
istrA
tiOn
Introduction ....................................................... 2
Respiration and Lung Function ....................... 3
What is Emergency Oxygen? ........................... 4
When to Use Emergency Oxygen .................... 4
Guidelines for Emergency Oxygen Use ........... 4
Patient Assessment*......................................... 5
Section 3: emergency oxygen AdminiStrAtion Lecture guide
Oxygen Equipment*+ ........................................ 6
Oxygen Delivery Devices*+ ............................... 8
Risks of Oxygen Delivery ................................11
Monitor Oxygen Delivery .................................11
Oxygen Safety ................................................ 13
Optional Topics ............................................... 14
tAbLe of contentS
*Practice session
+Required skill
This course may be taught by itself, or taught together with a CPR/AED for Professional Rescuers or Advanced First Aid course. This course will prepare the student to deliver oxygen safely and effectively to an appropriate victim in an emergency.
Course Overview
• Certification: 2 years from course date
• Instructor-to-Student Class Ratio: 1:12
• Course Duration: 1 – 1 ½ hrs
Running a Course
• Complete a Course Roster.
• Provide each student with an Emergency Oxygen Administration handout.
o Located in CPR/AED for Professional Rescuers or Advanced First Aid Student Work-book, or print the Student Handout from the Resource CD
• Use this Lecture Guide or the PowerPoint to teach the course.
• Train students with the actual equipment they will be using at work, whenever possible.
• Skills Practice: Attach a regulator to a cylinder, use a nasal cannula and non-rebreather mask, prepare a bag mask.
• Written Test: Located on the Resource CD. Hand out the exams and answer sheets. Students will write their answers on the Answer Sheets. Passing score is 80% (16 out of 20 correct).
• Certification: Issue to each student a course completion certificate that is valid for 2 years after training (located on the Resource CD).
o If the course was taught together with a CPR/AED for Professional Rescuers or an Ad-vanced First Aid course, mark ‘Yes’ next to Oxygen Administration on the course comple-tion card.
The Lecture Guide is the primary resource to guide the Instructor through the lecture and move the course along smoothly. The layout of the Lecture Guide follows the layout of the student workbook pages. Add statistics or points of interest to the Lecture Guide to customize your presentation. Addition-al information on course administration and the use of emergency oxygen can be found in the Instructor In-Depth Resource located on the Resource CD.
2 © 2012 EMS Safety Services, Inc.
Ox
yge
n A
dm
inis
trA
tiO
n
emergency oxygen
oxygen AdminiStrAtion introduction
Learning Objectives
• Identify when a patient may benefit from emergency oxygen.
• Demonstrate how to set up and deliver emergency oxygen with a nasal cannula and non-re-breather mask.
• Demonstrate how to set up a bag mask with oxygen.
• Understand the risks associated with the storage, handling and use of emergency oxygen.
• Understand how to safely store and handle oxygen cylinders.
• Identify advanced equipment that may be used in conjunction with emergency oxygen (optional topic).
Key Concepts
• Every cell in the body needs oxygen (O2) to live.
• In a medical emergency the body may inspire (inhale) or deliver lower levels of oxygen.
• Hypoxia (inadequate O2) leads to organ and brain damage.
• Providing supplemental oxygen during an emergency may delay damage to vital organs.
To become certified in the administration of Emergency Oxygen you must:
• Participate in entire course
• Complete all practice sessions
• Pass written exam with minimum score of 80%
• Pass skills exam
Additional training is required for:
• First Aid skills such as Patient Assessment
• Use of bag mask and CPR face mask for rescue breathing
• Use of pulse oximeter, suction devices and airway adjuncts
• Bloodborne Pathogens awareness training required by OSHA
You will learn:
• Safe and effective administration of emergency oxygen
• Definition of emergency oxygen
• When and how to use it
• Risks associated with oxygen storage, handling and delivery
• Safe assembly and storage
The air we breathe:
• Not made of 100% oxygen
o Oxygen = 02
o Made of several different gasses

3Emergency Oxygen Administration Lecture Guide
Ox
yge
n Ad
min
istrA
tiOn
o 21% oxygen
o 78% nitrogen
o 1% other elements
• The body uses only about 5% of oxygen inhaled from atmosphere
o 16% oxygen in our exhaled air
o Enough to keep someone alive w/ rescue breaths for a short time
Oxygen perfusion is when cells receive oxygen-rich blood.
• Sometimes the victim may be able to breathe but can’t perfuse oxygen.
• Emergency oxygen:
o Contains higher concentration of oxygen than the air we breathe
o Can increase oxygen concentrations in the lungs
o May allow more oxygen to be absorbed (perfused) into the bloodstream
o May delay damage to vital organs
Respiration and Lung Function (This information is not in the student workbook)
• Respiration: Exchange of carbon dioxide (CO2), the
waste product from breathing, with fresh air
from the atmosphere
• Ventilation: Moving air in and out of the lungs for respiration
• Alveoli
o Where the exchange of O2 and CO
2 is accomplished
o Small air sacs in the lower lobes of right and left lungs
o Shaped like miniature broccoli stems
o Intertwined with capillaries
o Exchange of O2 and CO
2 occurs through tiny holes along the alveoli and capillary beds
Blood Flow for Respiration
• Deoxygenated blood
o Pumped from right ventricle of heart to lungs
o Down into alveoli
o O2/CO
2 exchanged
• Newly-oxygenated blood
o Pumped back to left side of heart
o Out to the rest of the body
Emergency Oxygen
• Primary use:
o Correct mild - moderate hypoxia (insufficient oxygen to organs and tissues)
o Reduce the work of the heart
• How and when emergency oxygen is used varies between Professional and Citizen Rescuers.
• Always follow state and local protocols regarding when and how to use emergency oxygen.
• Use standard or universal precautions to protect yourself from exposure to infectious diseases.
4 © 2012 EMS Safety Services, Inc.
Ox
yge
n A
dm
inis
trA
tiO
n
guideLineS for emergency oxygen uSe
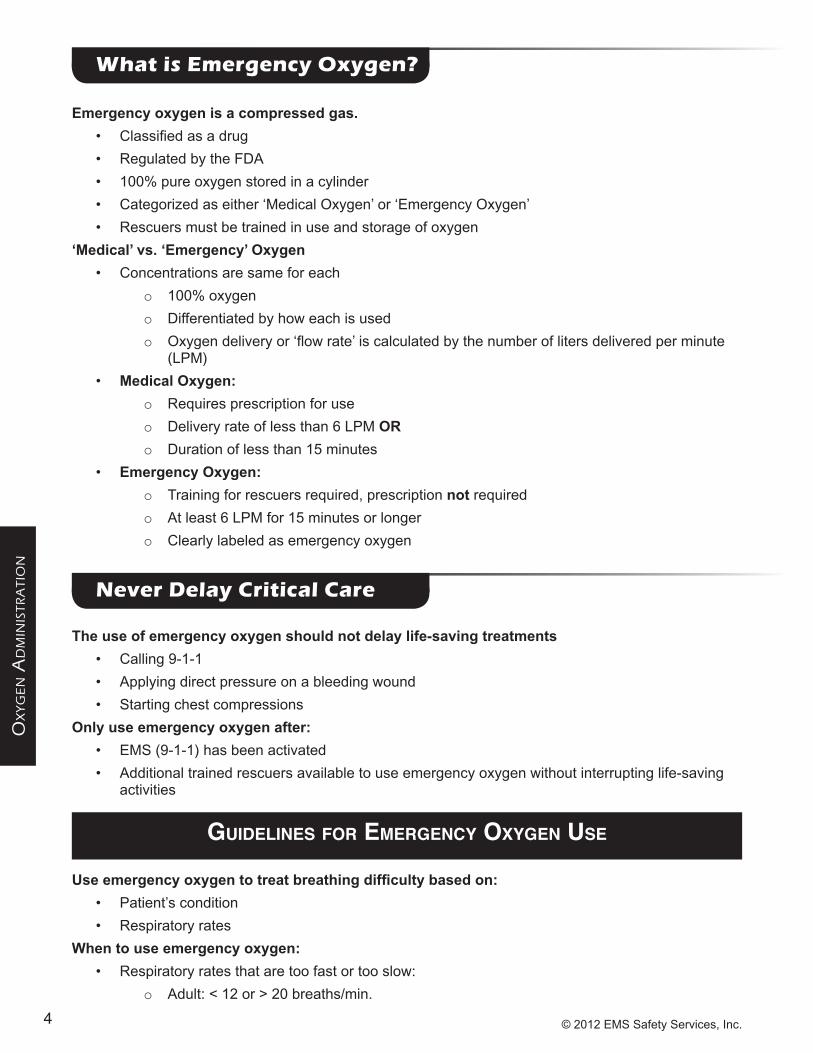
Emergency oxygen is a compressed gas.
• Classified as a drug
• Regulated by the FDA
• 100% pure oxygen stored in a cylinder
• Categorized as either ‘Medical Oxygen’ or ‘Emergency Oxygen’
• Rescuers must be trained in use and storage of oxygen
‘Medical’ vs. ‘Emergency’ Oxygen
• Concentrations are same for each
o 100% oxygen
o Differentiated by how each is used
o Oxygen delivery or ‘flow rate’ is calculated by the number of liters delivered per minute (LPM)
• Medical Oxygen:
o Requires prescription for use
o Delivery rate of less than 6 LPM OR
o Duration of less than 15 minutes
• Emergency Oxygen:
o Training for rescuers required, prescription not required
o At least 6 LPM for 15 minutes or longer
o Clearly labeled as emergency oxygen
The use of emergency oxygen should not delay life-saving treatments
• Calling 9-1-1
• Applying direct pressure on a bleeding wound
• Starting chest compressions
Only use emergency oxygen after:
• EMS (9-1-1) has been activated
• Additional trained rescuers available to use emergency oxygen without interrupting life-saving activities
Use emergency oxygen to treat breathing difficulty based on:
• Patient’s condition
• Respiratory rates
When to use emergency oxygen:
• Respiratory rates that are too fast or too slow:
o Adult: < 12 or > 20 breaths/min.
What is Emergency Oxygen?
Never Delay Critical Care
5Emergency Oxygen Administration Lecture Guide
Ox
yge
n Ad
min
istrA
tiOn
o Child: < 15 or > 30 breaths /min.
o Infant: < 25 or > 50 breaths /min.
• No breathing
• Cyanosis (bluish color in skin, lips and fingernail beds)
• Diving decompression injury
Professional rescuers and healthcare providers may also treat signs/symptoms of certain medical conditions.
• Treat above conditions plus:
o Heart attack/suspected ACS
o Stroke
o Severe asthma
o Pulmonary embolism (clot affecting blood supply to lungs)
o Shock
o Drowning
o Pregnancy-related emergency
o Exacerbated COPD (lung disease)
o Hypothermia
Before using emergency oxygen:
• Assess patient’s effort to breathe.
• Calculate respirations per minute (RPM).
Signs of breathing difficulty:
• Labored breathing
o Using accessory muscles in neck and back
o Speaking in broken sentences
• Noisy breathing
o Coughing
o Wheezing, stridor (noisy inspiration)
• Tripod position (sitting up, supported on arms)
• Cyanosis
To calculate a patient’s RPM:
• Use stopwatch, second hand or other timer
• Watch patient’s chest for 15 seconds
• Multiply number of breaths in 15 sec x 4
o e.g. 5 x 4 = 20 RPM, a normal rate for adults
DEMONSTRATE: PATiENT ASSESSMENT
PRACTiCE: PATiENT ASSESSMENT
Patient Assessment
6 © 2012 EMS Safety Services, Inc.
Ox
yge
n A
dm
inis
trA
tiO
n
oxygen equipment
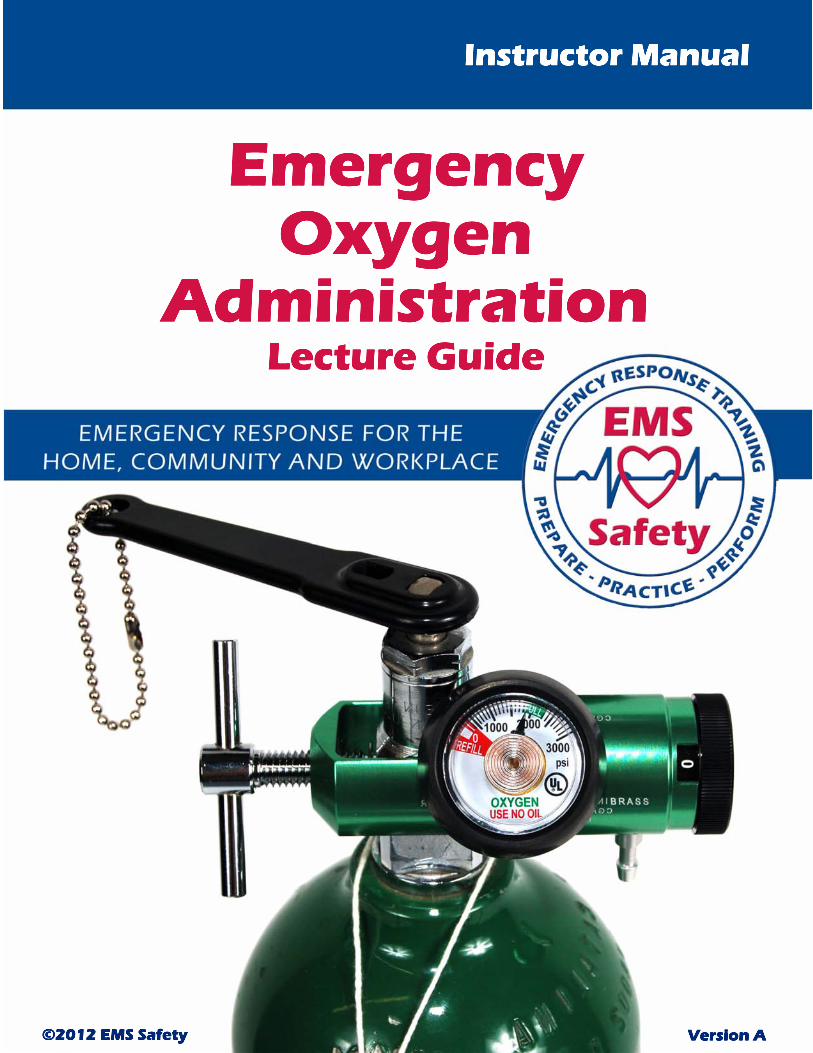
Pressure Regulator:
• Connects cylinder valve to O2 tubing
• Controls rate of flow (measured in LPM)
• Two types:
o Dual flow: high or low
o Full Control: 2 - 25 LPM
• Gauge displays amount of pressure per sq. inch
o 2000 psi = full
o 1000 psi = ½ full
o 500 psi = time to refill
Oxygen Wrench: Opens cylinder valve to begin O2 flow into regulator
O-ring:
• Gasket creates tight seal between cylinder valve and regulator
• Over time may require replacement
• Without it air escapes between cylinder and pressure regulator
• Replacement o-ring usually comes with newly-filled cylinder
• Emergency oxygen is delivered from a cylinder, through a pressure regulator and oxygen tub-ing, and into a delivery device such as a mask, cannula or bag mask.
Oxygen Cylinder:
• Also known as a ‘tank’ or ‘bottle’
• Typically green or with green markings
• Labeled “For emergency use only”
• Made of metal, aluminum or composite
• Highly pressurized
• Vary in size
• Each filled up to about 2015 psi
• Cylinder sizes:
o D: 425 liters
o Jumbo D:640 liters
o E: 680 liters
o M: 3,000 liters
o G: 5,300 liters
o H: 6,900 liters
• D, Jumbo D, & E cylinders
o Small and portable
o Secure to gurney, stretcher or cot w/ patient
Oxygen Equipment
7Emergency Oxygen Administration Lecture Guide
Ox
yge
n Ad
min
istrA
tiOn
SKiLL CHECK: CONNECT A PRESSuRE REguLATOR
DEMONSTRATE: CONNECT A PRESSuRE REguLATOR
PRACTiCE: CONNECT A PRESSuRE REguLATOR
Oxygen Tubing:
• Connects regulator to O2 delivery device
• Comes in different lengths
• Is pre-connected to delivery devices
Delivery Device:
• Used by the patient to breathe in emergency oxygen
• Usually a mask that fits over the mouth and nose
• Connected to the cylinder w/ oxygen tubing
Demand Valve:
• Used by specially-trained professional rescuers
• Triggered by patient inhaling or by push of button/lever
• Delivers 100% oxygen at 40 LPM
• Due to force – adults only!
• Green tube attaches to special outlet on regulator
Oxygen Humidifier:
• Not typically used in emergency settings
• Supplemental O2 can dry out mucous membranes of the nose
• Dryness causes irritation and possible nosebleed
• Humidifier passes O2 through sterile water
• O2 picks up tiny water molecules, reduces dryness & irritation
Pulse Oximeter:
• Small, portable electronic device
• Estimates and monitors blood-oxygen saturation level (how much O2 in blood)
• Uses an infrared probe
• Normal level between 95% and 100%
• Additional training required for use
1. Inspect valve; ensure that it’s dry & clean
2. Slowly open & close valve to expel debris
3. Inspect regulator and o-ring; replace if worn
4. Line up pins on regulator w/ holes on cylinder valve
5. Twist thumbscrew hand tight
6. Turn gauge away from you, open valve
7. Read gauge to determine content
8. Listen for airtight seal
Instructor may choose to practice and check skills at the end of the course.
Connecting a Pressure Regulator
8 © 2012 EMS Safety Services, Inc.
Ox
yge
n A
dm
inis
trA
tiO
n
oxygen deLivery deviceS
Key Concepts:
• The delivery device is connected to oxygen tubing, then attached to the nipple of the pressure regulator.
• There are four basic types of delivery device:
o Non-rebreather mask
o Nasal cannula
o Bag mask
o CPR face mask w/ oxygen inlet
• The non-rebreather and nasal cannula are for victims who are breathing on their own.
• Different sizes of delivery devices are available for adult, child and infant patients.
• The preferred emergency oxygen delivery device
• ‘High-flow’ device
• Consists of mask, O2 reservoir and tubing
• Delivers oxygen concentrations between 90%-100% with each breath
• Use 15 LPM
Using a non-rebreather mask:
1. Connect tubing to regulator.
2. Adjust flow rate to 15 LPM.
3. Listen for flow of O2.
4. Briefly cover one-way valve inside mask to speed up filling reservoir.
5. Place over the patient’s mouth and nose.
6. Instruct patient to breathe as normally as possible.
Tolerating a non-rebreather mask:
• Completely covers the mouth & nose, which can make it intolerable for some.
• May complain that flow of O2 is restricted, even though they are getting more than 90% O
2.
• Ensure flow rate is at least 15 LPM, O2 is flowing and the reservoir is inflated.
• Rescuers may have to ‘coach’ a patient:
o Help get used to mask
o Reassure they are getting more oxygen than normal
Instructor may choose to practice and check skills at the end of the course.
SKiLL CHECK: PREPARE/uSE NON-REbREATHER MASK
DEMONSTRATE: PREPARE/uSE NON-REbREATHER MASK
PRACTiCE: PREPARE/uSE NON-REbREATHER MASK
Non-Rebreather Mask
9Emergency Oxygen Administration Lecture Guide
Ox
yge
n Ad
min
istrA
tiOn
oxygen deLivery deviceS
SKiLL CHECK: PREPARE/uSE NASAL CANNuLA
DEMONSTRATE: PREPARE/uSE NASAL CANNuLA
PRACTiCE: PREPARE/uSE NASAL CANNuLA
• A low-flow device
• Provides between 2 - 6 LPM
• Max concentration delivered: 44% O2
• Consists of loop of oxygen tubing, two prongs for the nostrils and an adjusting band
Using a nasal cannula:
1. Connect tubing to regulator.
2. Adjust flow rate: 6 LPM.
3. Listen for flow of O2.
4. Open cannula loop.
5. Holding loop w/ thumb and forefinger, insert prongs into nose.
6. Wrap each side around patient’s ears.
7. Slide adjusting band up.
8. Instruct the patient to breathe in through nose.
Instructor may choose to practice and check skills at the end of the course.
• Also known as Bag Valve Mask or BVM
• Used for rescue breathing/CPR
• Uses positive pressure to push air into the lungs w/ each squeeze of the bag
• Delivers nearly 100% oxygen
• May reduce exposure to pathogens
• Requires additional training to be used effectively
Using a Bag Mask
• May be used with or without oxygen
• Science does not support or refute the use of oxygen during resuscitation.
• Risks related to over-exposure to oxygen are low; it is reasonable to use oxygen during resusci-tation.
• Never delay resuscitation efforts in order to use emergency oxygen.
• Emergency O2 does not change how rescue breaths are delivered with a bag mask.
Components of a Bag Mask
• Rigid face mask
• Self-inflating bag
Bag Mask
Nasal Cannula
10 © 2012 EMS Safety Services, Inc.
Ox
yge
n A
dm
inis
trA
tiO
n
• Oxygen reservoir
• Oxygen tubing
Using a Bag Mask with Oxygen:
1. Follow guidelines for CPR/AED & activating EMS
2. Assemble mask, bag and tubing
3. Connect tubing to oxygen source
4. O2 flow of 15 LPM
5. Use bag mask to give rescue breaths
6. Reservoir does not need to inflate
• Used for rescue breathing
• Increases oxygen delivery w/ mouth-to-mask rescue breaths
• Can deliver up to 55% oxygen
• Available in adult, child, infant sizes
• Seal tightly to the face to give breaths
Using a CPR Face Mask with Oxygen:
1. Follow guidelines for CPR/AED & activating EMS
2. Assemble mask
3. Insert tubing into oxygen inlet on mask
4. Connect tubing to oxygen source
5. O2 flow of 15 LPM
6. Press mask firmly to the face and open airway
7. Breathe into mask and watch for chest rise
Bag Mask and CPR Face Mask can:
• Be used for resuscitation or
• Provide emergency oxygen to a conscious or semi-conscious victim who is breathing abnor-mally
Bag Mask for Conscious Victim
• Flow rate of 15 LPM
• Have victim hold to his/her face if able
• Assist abnormal rates as needed:
o Less than 10 RPM: Squeeze bag between each breath
o Greater than 30 RPM: Squeeze bag every second breath
Face Mask for Conscious Victim
• Flow rate of 6-15 LPM
• Have patient hold mask to his/her face
Selecting a Delivery Device
• Regulator type impacts delivery device
• Full control regulator: 2-25 LPM
o Any type mask acceptable
CPR Face Mask
11Emergency Oxygen Administration Lecture Guide
Ox
yge
n Ad
min
istrA
tiOn
monitoring oxygen deLivery
o Dial in proper LPM according to device
• Dual flow: high or low
o Low-flow setting
• Nasal cannula
• CPR face mask (patient is breathing)
o High-flow setting
• Non-rebreather mask
• Bag mask
• CPR face mask (breathing or non-breathing patient)
‘Blow By’ Oxygen Delivery
• For infants and small children who can’t tolerate a mask or cannula
• Use an oxygen mask and a high flow rate (at least 15 LPM)
• Keep mask about 2 inches from patient’s face
• Wave mask slowly from side-to-side
• Allows oxygen to pass over patient’s mouth and nose, and be inhaled
Instructor may choose to practice and check skills at the end of the course.
SKiLL CHECK: PREPARE bAg MASK
DEMONSTRATE: PREPARE bAg MASK
PRACTiCE: PREPARE bAg MASK
Guidelines for the Delivery of Emergency O2:
• Monitor delivery
• Understand the use of oxygen in resuscitation
• Train emergency responders
• Follow federal, state and local regulations
Potential risks related to oxygen delivery:
• Oxygen Toxicity
• Retinopathy of Prematurity
• Denitrogenation
• COPD and the Hypoxic Drive
Oxygen Toxicity
• Occurs when there is too much oxygen in the blood
• Caused by prolonged exposure to high concentrations of oxygen
• Usually after 24 hours or more
Risks of Oxygen Delivery
12 © 2012 EMS Safety Services, Inc.
Ox
yge
n A
dm
inis
trA
tiO
n
• Emergency oxygen is usually not administered long enough to cause oxygen toxicity
• Signs/symptoms: change in vision, ringing in ears, twitching, irritability, dizziness, seizure
Retinopathy of Prematurity
• Occurs only in premature infants
• The retinas are immature before 34 weeks gestation, and can be damaged by high concentra-tions of oxygen
• Not typically a problem with normal use of emergency oxygen
Denitrogenation
• Also known as Absorption Atelectasis
• Occurs when naturally-occurring nitrogen in the lungs is replaced with oxygen from over-satura-tion
• Oxygen shares alveolar space with nitrogen
• If the nitrogen is ‘washed out’ by too much O2, the alveoli collapse
• Can severely impair lung function (atelectasis)
• Not typically a problem with short-term emergency oxygen use
COPD and Hypoxic Drive
• ‘Hypoxic drive’ is condition associated w/ COPD
o Normally, body stimulated to breathe when too much carbon dioxide is detected
o COPD patients stimulated to breathe by lower O2 levels and to not breathe with
higher O2 levels
o Concern that emergency oxygen can eliminate the hypoxic drive of a COPD patient, causing person to stop breathing
• Give emergency O2 if indicated, even if history of COPD
o Difficulty breathing may be related to a condition other than COPD
• Hypoxic drive is rare; do not withhold emergency O2
Emergency O2 delivery should be based on target saturation levels, not fixed flow rates.
• Using oxygen to treat ‘breathlessness’ rather than low oxygen saturation has not been shown to help feeling of breathlessness.
• Pulse oximetry is recommended to monitor blood-oxygen levels.
• When a pulse oximeter is available, titrate oxygen delivery to the lowest effective level.
To use a pulse oximeter:
• Turn on, connect probe to finger, earlobe or foot/toe
• Register oxygen saturation level (SpO2) and pulse rate
• Verify pulse rate on monitor w/ patient’s actual pulse
• Monitor and record SpO2
• Follow protocols to titrate based on target O2 levels
o Typically 94% to 99%
A pulse oximeter is less effective when:
• No breathing/heart beat
• Poor perfusion: shock, low blood pressure
• Fingernail polish present
Monitor Oxygen Delivery
13Emergency Oxygen Administration Lecture Guide
Ox
yge
n Ad
min
istrA
tiOn
oxygen SAfety
• Excessive patient motion
• Hypothermia
• Carbon monoxide poisoning/some smokers
• History of sickle cell disease or anemia
• Swelling of monitored extremity
Emergency Oxygen and Resuscitation
• Science is inconclusive about the use of emergency oxygen during resuscitation
• Studies show emergency oxygen during resuscitation:
o Increases amount of oxygen in the blood
o Has little risk of complications
• Do not delay resuscitation efforts in order to use emergency oxygen.
• After a return of spontaneous circulation (ROSC):
o Titrate delivery to limit the risk of oxygen toxicity
o Maintain an SpO2 of 94%-99%
Training for Emergency Oxygen Use
• The Organization’s medical authority should review and approve use and training methods be-fore equipping staff.
• At least 1 staff member trained in use of emergency oxygen should be present at all times dur-ing business hours.
• Training should be ‘certification’ level from a nationally-recognized organization.
• Training should incorporate any local guidelines that may differ from this training.
Key Concepts
• Oxygen is very reactive and can create a dangerous situation by making items more flammable.
• When the oxygen level is increased, it is easier to start a fire and very difficult to put it out.
• Take precautions when:
o Using emergency oxygen w/ defibrillator
o Storing and handling cylinders
• 100% oxygen is combustible
• Good chest-to-pad contact
o Eliminates oxygen pockets between pad and skin
o Reduces risk for AED use w/ oxygen
• Move mask at least 3 feet from victim before shocking
• Loudly state “Oxygen clear”
• Only shock when rescuers and oxygen are clear
Using Oxygen with a Defibrillator
14 © 2012 EMS Safety Services, Inc.
Ox
yge
n A
dm
inis
trA
tiO
n
optionAL topicS: AdvAnced equipment
Cylinder Storage
• Store cylinders:
o Upright
o Secured to prevent falling
• Avoid storing different types of compressed gasses in the same area.
• Store in a well-ventilated area.
• Do not expose cylinders to temperatures greater than 125oF, allow prolonged exposure to direct sunlight, or exposure to other heat sources (e.g. radiator, space heater).
Cylinder Maintenance
• Regularly inspect equipment and document inspections according to national and local guide-lines and manufacturer specifications.
• Ensure labels and signs are in compliance w/ federal OSHA, state and local regulations.
• Do not use a cylinder that appears damaged.
• Keep oxygen equipment clean. Dirt and debris can be a fire hazard.
• Use a pressure gauge to check contents; do not rely solely on a tagging system (Full, In-Use, Empty).
Cylinder Handling
• Do not slide, drag or roll cylinders.
• Do not use oil or grease on oxygen equipment.
• When on scene, lay the oxygen cylinder on the floor so it does not get knocked over acciden-tally.
• If transporting the cylinder with the patient, secure it to the cot, stretcher or gurney so that it does not slip or get knocked off.
Oxygen is Combustible
• 100% oxygen is highly reactive, and can cause other materials to catch on fire.
• Keep away from heat sources and flammable items.
• Avoid alcohol, aerosol sprays, solvents, perfumes and petroleum products.
• Never combine oxygen with an ignition source (e.g. cigarette).
Sum It Up
• Never delay critical care to provide emergency oxygen.
• Follow federal, state and local protocols.
• Only provide oxygen when indicated by patient assessment.
• At the earliest opportunity, titrate oxygen LPM and delivery device to the lowest level possible to maintain SpO
2 94-99%.
Optional topics may have already been discussed during a
CPR/AED for Professional Rescuers certification course.
Learning Objective
• Identify equipment associated w/ the use of emergency oxygen and airway management.
Storage, Handling & Maintenance
15Emergency Oxygen Administration Lecture Guide
Ox
yge
n Ad
min
istrA
tiOn
Key Concepts
• It’s important to be familiar w/ the equipment that may be used by all levels of rescuers
• Oxygen delivery may be associated with:
o Advanced airway adjuncts
o Suction devices
• Remove blood, secretions or vomit from the airway
• Manual, battery operated (portable) and bedside
• Tip (catheter) may be rigid or flexible
Using a Suction Device:
1. Measure distance from corner of mouth to ear lobe (max. distance for suction tip to be inserted).
2. Remove CPR barrier or bag while suctioning.
• Used for patient in severe distress
o Unresponsive or semiconscious
o Rescue breathing
o Cardiac arrest
• Establish and maintain an open airway
• Simple airways: can be used w/ no change to CPR sequence.
Oral Airway
• Most commonly used
• Keeps tongue off back of airway
• For unresponsive victim w/o gag reflex
• Choose correct size
o Measure from front teeth to angle of jaw (or earlobe)
o Too large can block airway
• Place along roof of mouth and rotate into position
• The end rests on the lips
Nasal Airway
• For semiconscious victim w/ gag reflex
• Tolerated more easily than oral airway
o Does not control airway as well as oral airway
• Measure distance from base of nose to base of ear
• Do not use if:
o Severe facial trauma
o Suspected basilar skull fracture
Suction Devices
Airway Adjuncts
16 © 2012 EMS Safety Services, Inc.
Ox
yge
n A
dm
inis
trA
tiO
n
• Inserted by ALS -trained personnel
• Blocks the esophagus
• Keeps vomit out of airway and airway open
Types:
• Endotracheal (ET) tube
• Laryngeal mask airway (LMA)
• Combitube
• Supraglottic airway
Require change in delivery of compressions & ventilations.
• Do not perform “cycles” of compressions and ventilations
o 100 compressions per minute w/o pausing
o 1 breath every 6-8 seconds
o Give compressions and breaths independent of each
Advanced Airways