Embed Size (px)
Citation preview

ERAVE DEATH
MODULE
Creating a New Death Case
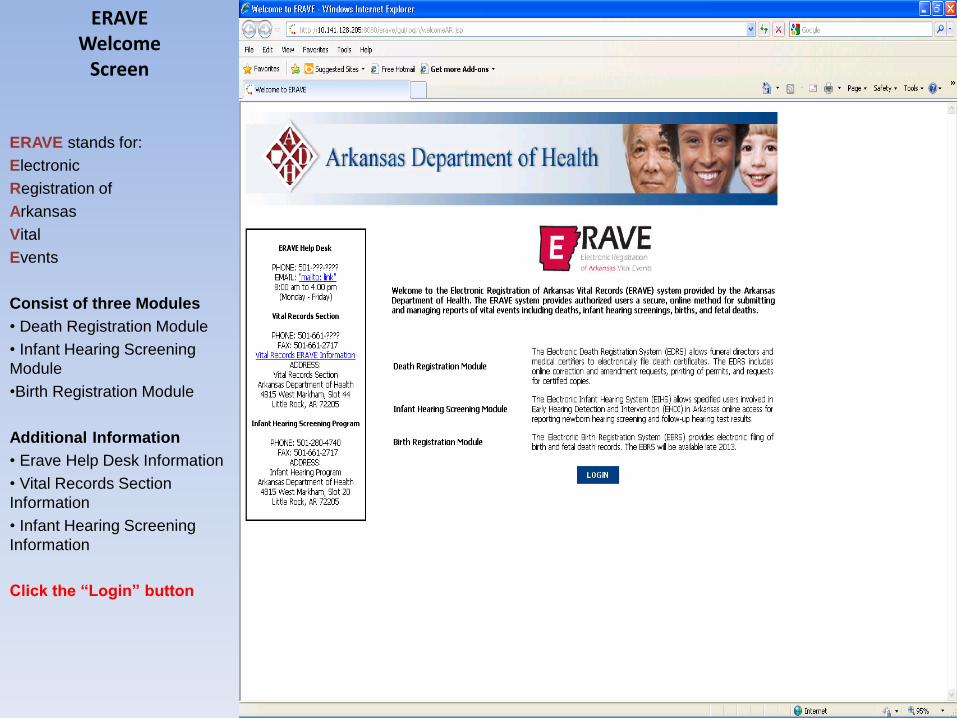
ERAVE Welcome
Screen
ERAVE stands for:
Electronic
Registration of
Arkansas
Vital
Events
Consist of three Modules
• Death Registration Module
• Infant Hearing Screening
Module
•Birth Registration Module
Additional Information
• Erave Help Desk Information
• Vital Records Section
Information
• Infant Hearing Screening
Information
Click the “Login” button

ERAVE Login
Screen
Enter your User Name
Enter your Password
Click the “Log In”
button

ERAVE Location screen
Select the location that your
are going to sign is as.

ERAVE Main Page
Main Menu
New Message
Queues
• Open Cases
•First name
•Last name
•Date of Death
•PI Status
•Med. Status
•Rec. Status
•Details
•Action
Click the word “Death”

Death-Main Menu
Main—Death Menu
Headings
• Create Case
•Update Case
•Modify Record
•Search
Open Cases Queue
Click the words “Create Case” in the upper left-hand corner of the screen to search for and start a record.

Create Case Menu
• Enter the Decedent’s first
and last name
•If unknown click the
box entitled
“Decedent’s name
unknown”.
• Enter Decedent’s Sex
• Enter decedent’s Date of
Death
•Date of Death can be
entered with or without
using forward slashes
• Enter decedent’s Date of
Birth
•If unknown enter all
9’s for date of birth
• Enter decedent’s County of
Death
•If unknown select
unknown from the
drop down menu
• Click the “Search” button

Record List Screen
0 Records found
If a record with a similar
Name had been found the name
would appear here along with the
status of the record and the
number 1 would show above
next to “(Records found)”.
If a group of records appears,
find the record with the
information that matches the
record that you’re entering by
clicking the “Details” button on
the far right of the name listed on
the screen and verify that
information matches the
information you are entering.
If no matching or similar records
are found click the “Create New
Case” button.
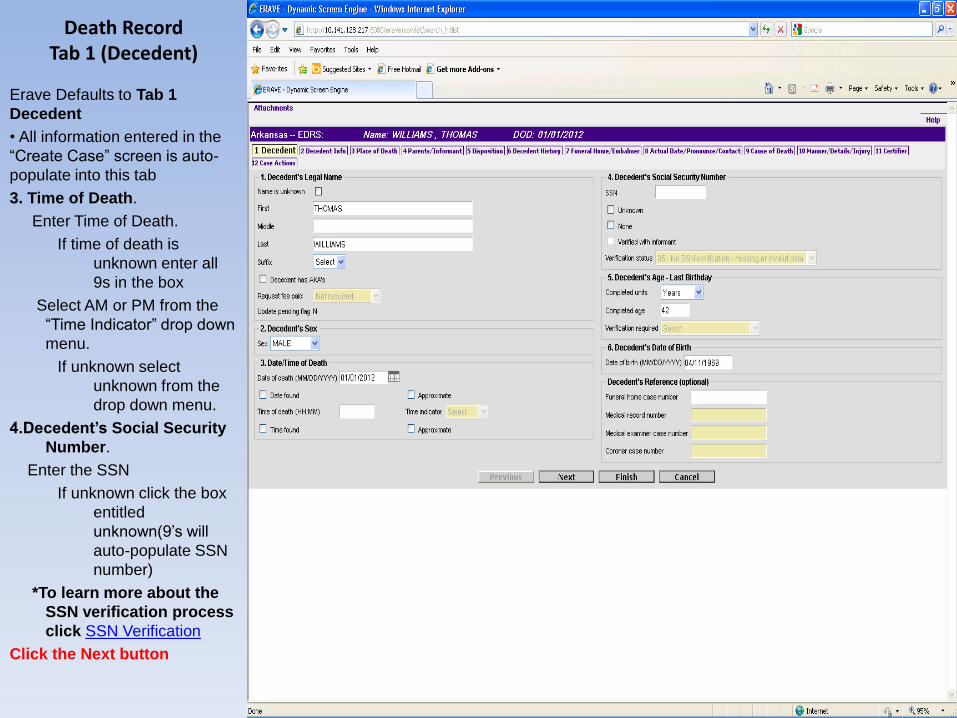
Death Record Tab 1 (Decedent)
Erave Defaults to Tab 1
Decedent
• All information entered in the
“Create Case” screen is auto-
populate into this tab
3. Time of Death.
Enter Time of Death.
If time of death is
unknown enter all
9s in the box
Select AM or PM from the
“Time Indicator” drop down
menu.
If unknown select
unknown from the
drop down menu.
4.Decedent’s Social Security
Number.
Enter the SSN
If unknown click the box
entitled
unknown(9’s will
auto-populate SSN
number)
*To learn more about the
SSN verification process
click SSN Verification
Click the Next button
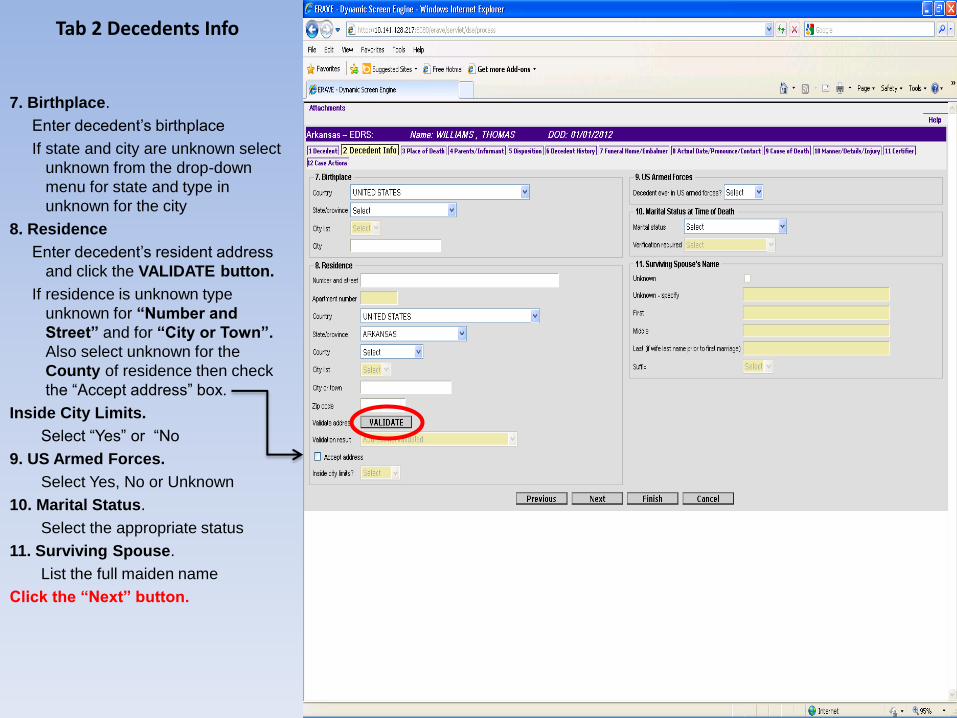
Tab 2 Decedents Info
7. Birthplace.
Enter decedent’s birthplace
If state and city are unknown select
unknown from the drop-down
menu for state and type in
unknown for the city
8. Residence
Enter decedent’s resident address
and click the VALIDATE button.
If residence is unknown type
unknown for “Number and
Street” and for “City or Town”.
Also select unknown for the
County of residence then check
the “Accept address” box.
Inside City Limits.
Select “Yes” or “No
9. US Armed Forces.
Select Yes, No or Unknown
10. Marital Status.
Select the appropriate status
11. Surviving Spouse.
List the full maiden name
Click the “Next” button.

Tab 3 Place of Death
12. Place of Death.
Select the appropriate
(inpatient, ER/outpatient, DOA,
decedent’s home, etc…)
Country, State and County fields
will auto-populate.
Select the appropriate facility
from the drop down menu.
Facilities Address, City and Zip
Code will auto-populate the other
fields
• If Place of Death is “Other”
select “Other” from the drop
down menu, Key in the Facility
Name, Address, City, Zip Code
and click the button entitled
“Validate Address”.
• If a Hospice facility is not listed,
select “Other” from the drop
down menu, check the box
entitled hospice patient and key
in the Facility name, Address,
City , Zip Code and click the
“Validate Address” button
Click the Next Button
Section to be completed by Attending Physician or Hospital

Tab 4 Parents/Informant
13. Father’s Name.
Enter father’s full name
• If unknown check the box
entitled unknown
• Select the appropriate suffix (If
necessary
14. Mother’s Name.
Enter mother’s full name
• If unknown check the box
entitled unknown
• Select the appropriate suffix (if
necessary)
15. Informants Name/Address
• Select the appropriate
relationship to decedent and
key in the name
• If relationship is mother,
spouse, or father the name
field will auto-populate
• Select Yes or No if decedents
address is the same as informants
• If Yes, the information will
auto-populate and validate
in this field .
• Click the Validate button.
• If address doesn’t validate
check the Accept Address
box.
Click the Next button.

Tab 5 Disposition
16a. Method of Disposition
• If Cremation or Removal from
state is selected, you will
prompted to print the permit
before you can submit the record
for registration.
• Select to whom the permission is
given from the drop down menu,
type in their full name and license
number.
16b,c. Place of Disposition
• Country and State fields will
auto-populate.
• Select Cemetery or Mausoleum
and City from drop down menu.
• If Cremation, Removal
from state or Other is
checked, then select the
appropriate Country , State
and type in the Name of the
Cemetery and City.
•Type in the City name only
if it is not listed in the drop
down menu.
Click the Next button

Tab 6 Decedent History
28. Decedent’s Education
• Select the appropriate level of
education completed from the
drop down menu.
• If unknown select Unknown from
the Education drop down menu
and select the appropriate reason
from the “If Unknown” drop down
menu
29. Decedent’s Hispanic origin
• Select the appropriate origin
• Multiple boxes may be
checked for this section
30. Decedent’s Race
• Select the appropriate Race.
• Multiple boxes may be
checked for this section
• If American Indian, Asian, Pacific
Islander or Other Race is checked
you will be prompted to type in the
specific race.
31-32. Decedent’s Occupation
• Type in the Usual Occupation
and Industry
Click the Next button

Tab 7 Funeral Home/Embalmer
17d,e. Funeral Home License No
• All fields for this section will be
auto-populated. In the event of a
Trade call, check the box entitled
“Trade call” and select a funeral
home from the “Trade Call Funeral
Home list” and type in the correct
telephone number.
17c. Funeral Service Licensee or
Agent
• Select the appropriate name from
the drop down menu.
• All other fields will auto-
populated for this section.
• If the name is not listed, type in
the name and license number
17a,b. Embalmer
• Select Yes or No if embalmer is
same as funeral director. If No,
select embalmer from either drop
down menu. If Yes, all other fields
will auto-populate for this section
except the license number. It must
be keyed in.
Click the Next button

Tab 8 Actual Date/Pronounce/
Contact
3. Actual or Presumed Date/Time
of Death
• This information will auto-populate
from Tab 1 for this section.
18a-b. Confirm Date/Time
Complete with date/time
pronounced dead.
18c. Person Pronouncing Death
• Select the “Pronouncer type”
from the drop down menu. (i.e.
physician, coroner, etc…)
• Select the pronouncer’s name
from the appropriate drop down list.
• If pronouncer is not
listed in drop down menu,
manually key in the name.
19. ME or Coroner Contacted
• Select “Yes” or “No” from the
drop down menu.
Click the “Next” button

Tab 9 Cause of Death
Click the Next button.

Tab 10 Manner/Details/Injury
Click the Next button

Tab 11 Certifier
Click the Next button
To be completed by Certifier
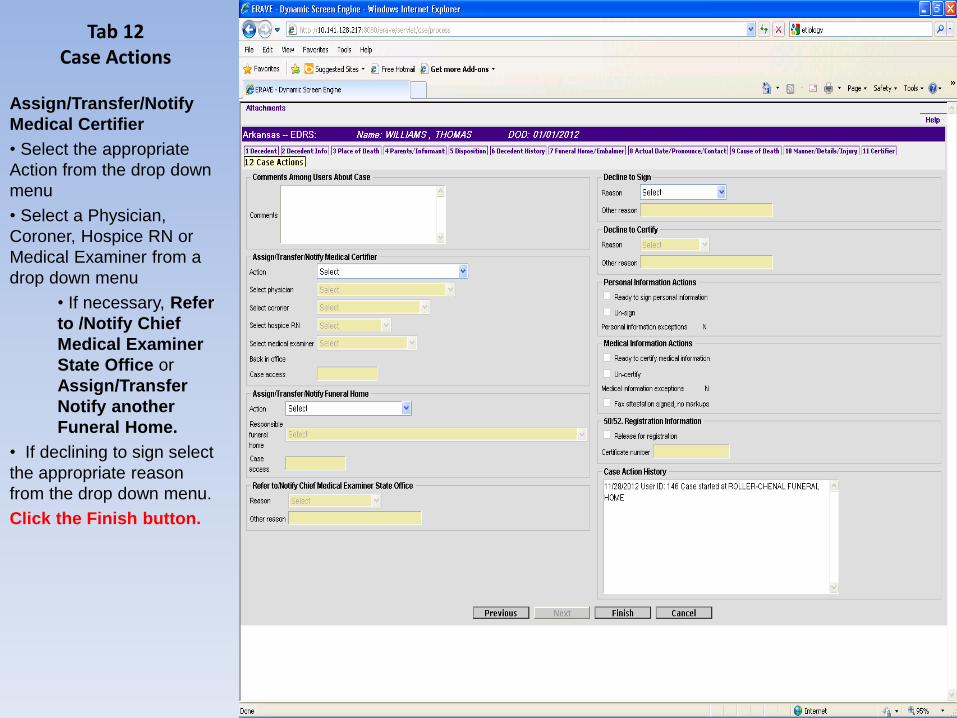
Tab 12 Case Actions
Assign/Transfer/Notify
Medical Certifier
• Select the appropriate
Action from the drop down
menu
• Select a Physician,
Coroner, Hospice RN or
Medical Examiner from a
drop down menu
• If necessary, Refer
to /Notify Chief
Medical Examiner
State Office or
Assign/Transfer
Notify another
Funeral Home.
• If declining to sign select
the appropriate reason
from the drop down menu.
Click the Finish button.
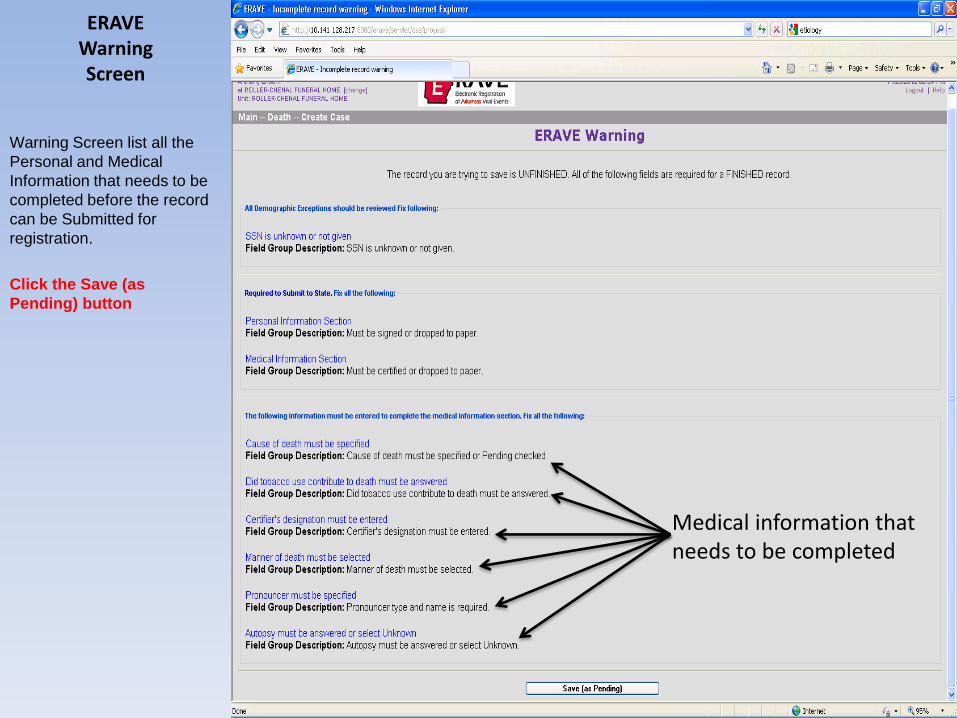
ERAVE Warning Screen
Warning Screen list all the
Personal and Medical
Information that needs to be
completed before the record
can be Submitted for
registration.
Click the Save (as
Pending) button
Medical information that needs to be completed

Successful Transaction
Screen
On this screen there are the
options to: Print Draft, Sign
Now, Return to Record,
Order Fact of Death, Main
Menu and Repeat Task.
• If the disposition had been
Cremation or Removal
From state, the options to
print a Burial/Transit permit
would be shown on this
screen.
* Only a user assigned as
a Funeral Director within
ERAVE can sign the
personal Information
section of a death record.
Click the Sign Now button.
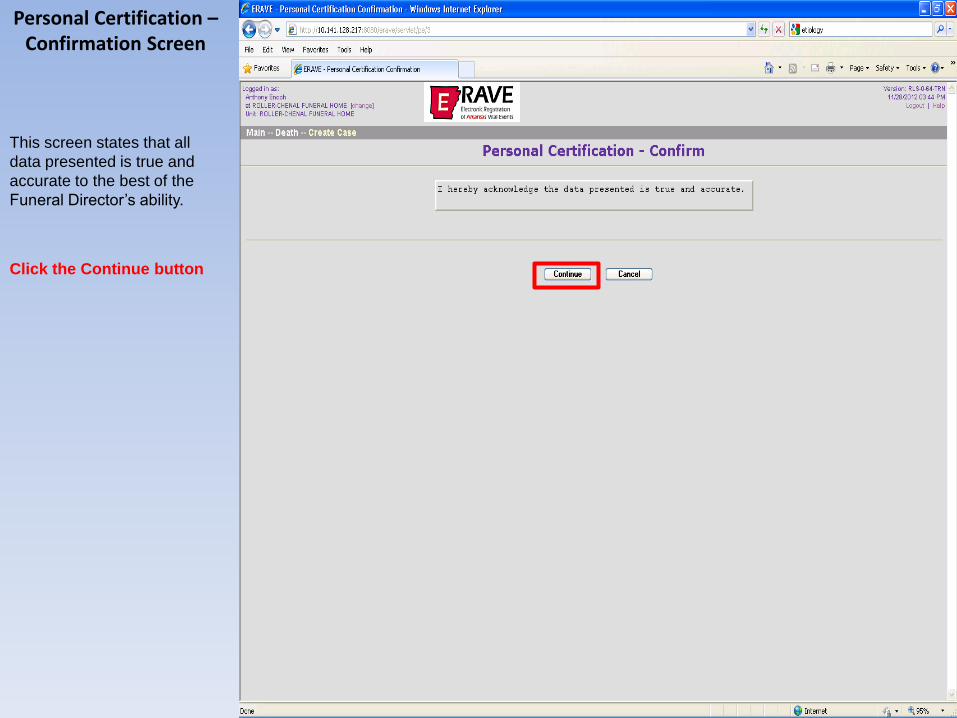
Personal Certification – Confirmation Screen
This screen states that all
data presented is true and
accurate to the best of the
Funeral Director’s ability.
Click the Continue button

Sign Death Case – Confirm
This screen states the case has
been successfully signed
Record Summary
• Registration status: Not
Submitted
• Personal information status:
Signed
• Medical information status: New
• Personal information finished: Y
• Medical information finished: N
Click the Continue button.

Click the Main Menu button to return to the ERAVE Main Page
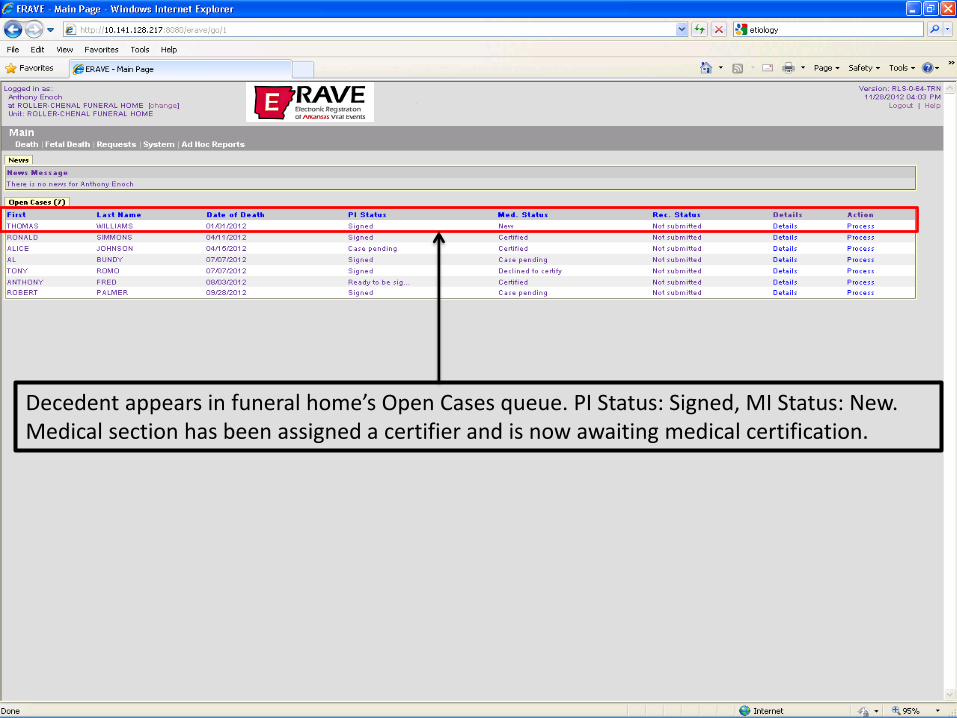
Decedent appears in funeral home’s Open Cases queue. PI Status: Signed, MI Status: New. Medical section has been assigned a certifier and is now awaiting medical certification.

Log out as Funeral Director
LOGOUT CLICK HERE

ERAVE Welcome
Screen
Navigate back to the
ERAVE Welcome Screen to
log back into ERAVE.

ERAVE Login
Screen
Once again enter your
User Name
And Password
Click the “Log In”
button

Main Menu
Once logged in the user will
locate the decedents name in
the “Open Cases” queue.
The user now will then see
that the “Med. Status” has
changed from “New” to
“Certified” So therefore the
record is now ready to be
submitted for registration.
To submit the record for
registration the user will click
the word “Process” located
to the far right of the
decedent’s name under the
heading “Action”
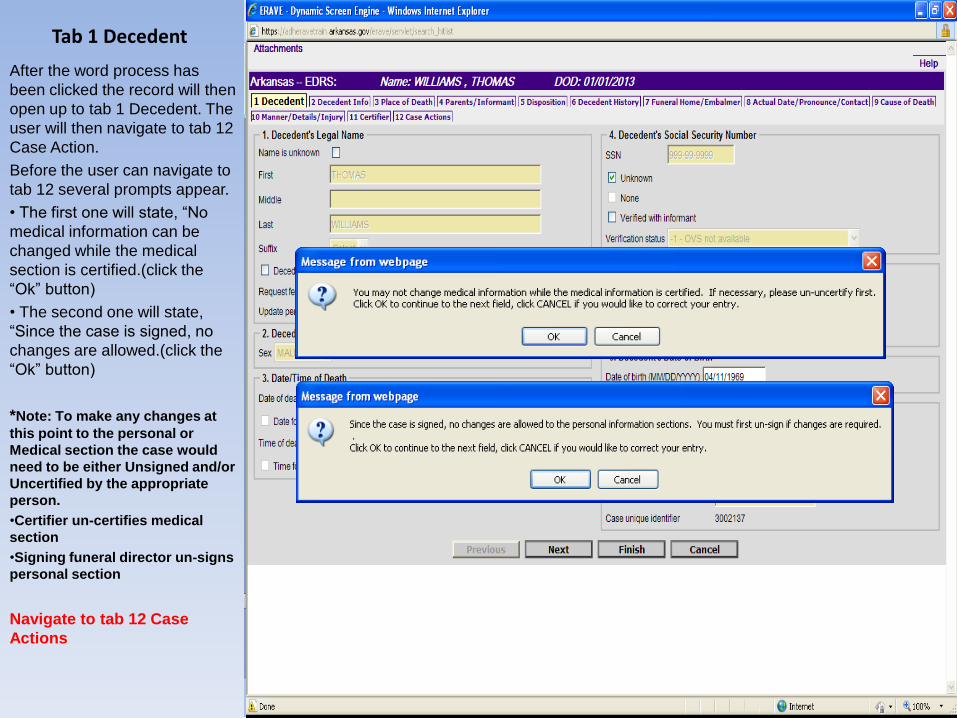
Tab 1 Decedent
After the word process has
been clicked the record will then
open up to tab 1 Decedent. The
user will then navigate to tab 12
Case Action.
Before the user can navigate to
tab 12 several prompts appear.
• The first one will state, “No
medical information can be
changed while the medical
section is certified.(click the
“Ok” button)
• The second one will state,
“Since the case is signed, no
changes are allowed.(click the
“Ok” button)
*Note: To make any changes at
this point to the personal or
Medical section the case would
need to be either Unsigned and/or
Uncertified by the appropriate
person.
•Certifier un-certifies medical
section
•Signing funeral director un-signs
personal section
Navigate to tab 12 Case
Actions
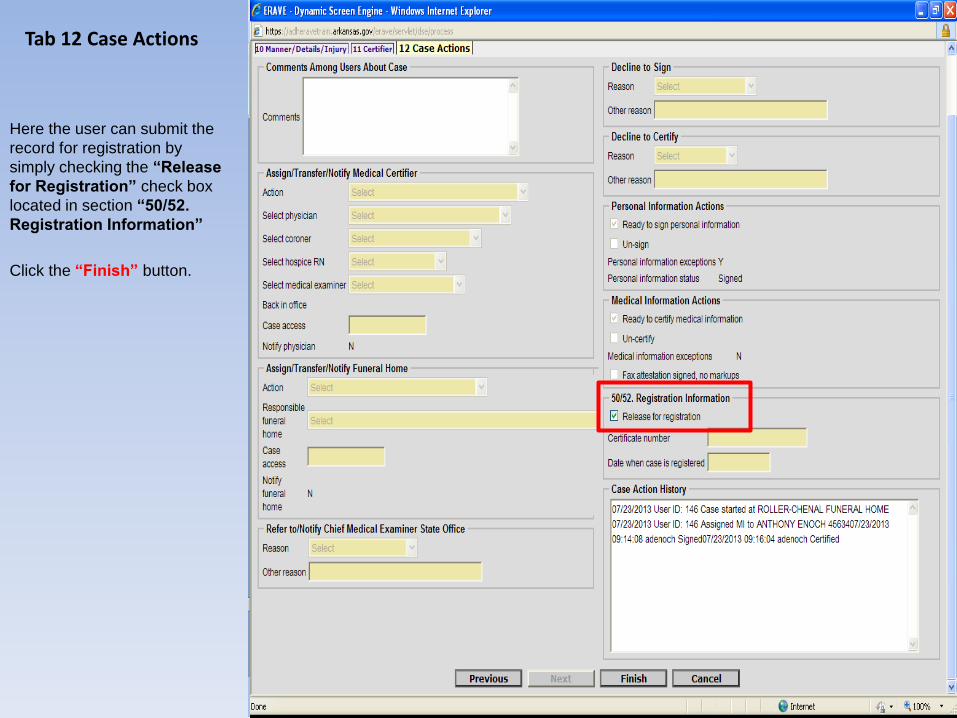
Tab 12 Case Actions
Here the user can submit the
record for registration by
simply checking the “Release
for Registration” check box
located in section “50/52.
Registration Information”
Click the “Finish” button.

ERAVE Warning Screen
Now the record has been
signed, certified and
released for registration.
Click the “Save as
Pending” button

Successful Transaction Screen
Click the “Main Menu” button
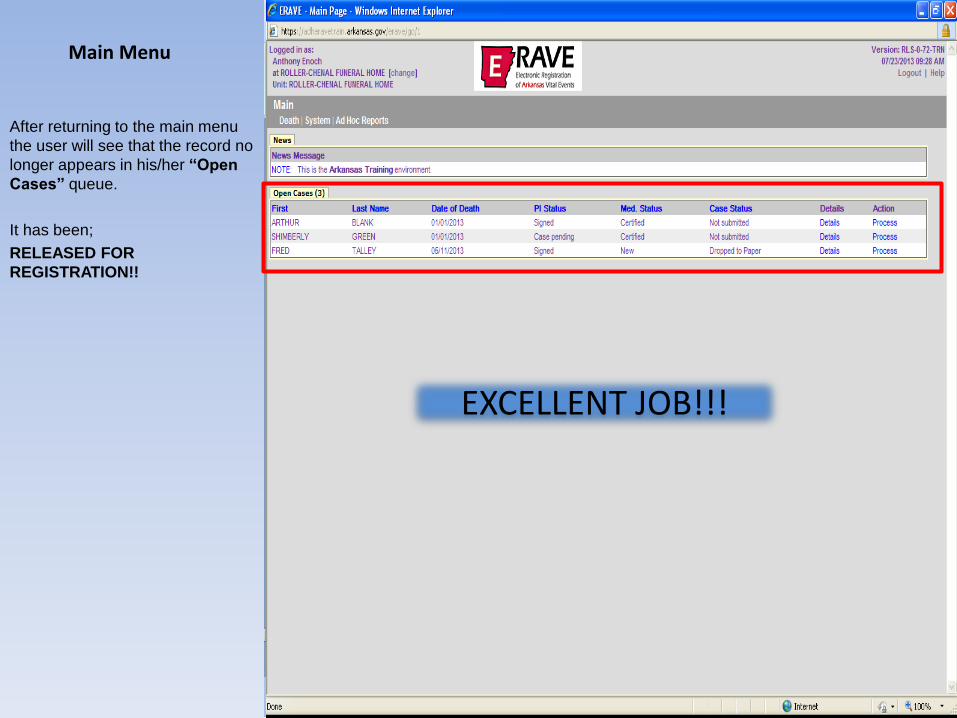
Main Menu
After returning to the main menu
the user will see that the record no
longer appears in his/her “Open
Cases” queue.
It has been;
RELEASED FOR
REGISTRATION!!
EXCELLENT JOB!!!

QUICK REVIEW
• Funeral home starts death case
• Funeral home verifies social security number
through ERAVE (User will be allowed 5 attempts a validating a SSN)
• Funeral home completes personal information
section
• Funeral home then reviews personal information
section and makes corrections if necessary
• After all corrections are made, Funeral home signs
the personal information section

QUICK REVIEW
• Funeral home assigns medical section to
medical certifier
– Case will remain in funeral home’s Open Cases
queue with the Med. Status showing case pending
– Once a case has been certified the Med. Status will
change in the open cases queue from “Pending” to
“Certified”
• Once record is certified funeral director
releases record to state for registration.

THINGS TO REMEMBER
• A funeral director’s assistant or office staff can complete the personal information section of a case for the funeral director.
• Only a funeral director can sign the personal information section
• Once a case is signed only the funeral director that signed the case can un-sign it.
• Only a funeral director can release a record to the state for registration

Overall Benefits
More Efficient
Faster
Fewer mistakes
Faster turn around time
Convenient
Web-based
Work at home or office