Embed Size (px)
Citation preview

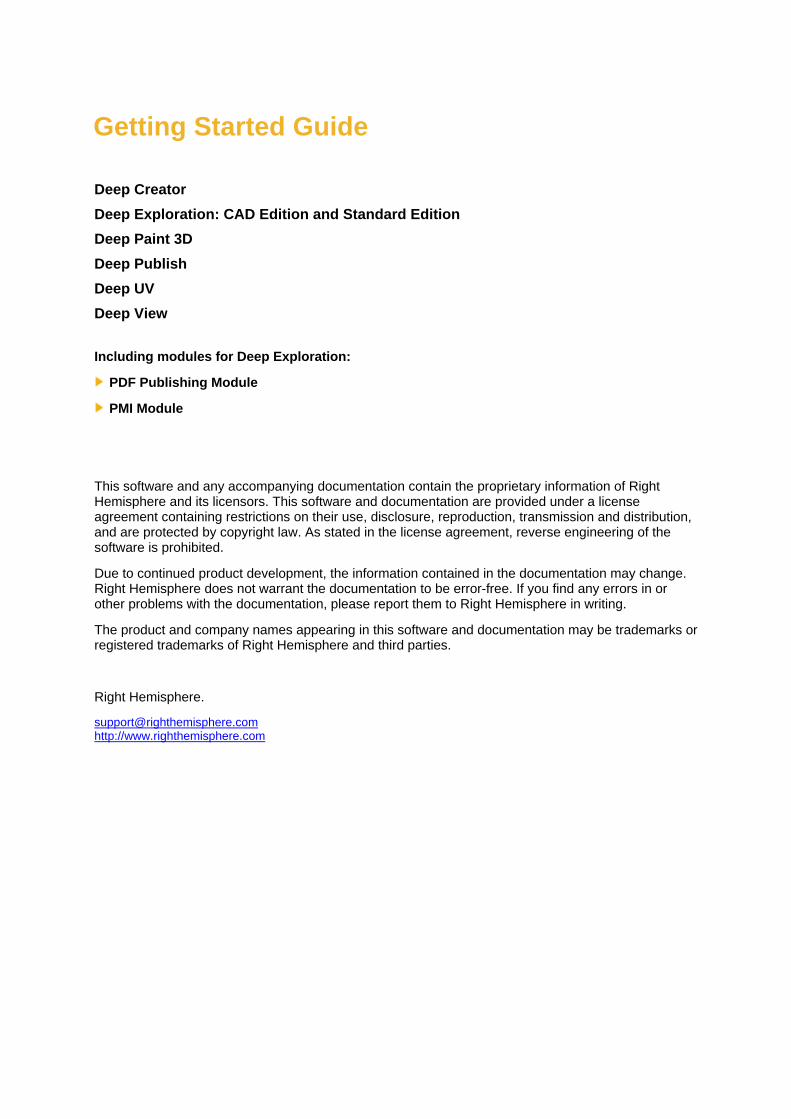
Getting Started Guide Deep Creator Deep Exploration: CAD Edition and Standard Edition Deep Paint 3D Deep Publish Deep UV Deep View
Including modules for Deep Exploration:
PDF Publishing Module
PMI Module
This software and any accompanying documentation contain the proprietary information of Right Hemisphere and its licensors. This software and documentation are provided under a license agreement containing restrictions on their use, disclosure, reproduction, transmission and distribution, and are protected by copyright law. As stated in the license agreement, reverse engineering of the software is prohibited.
Due to continued product development, the information contained in the documentation may change. Right Hemisphere does not warrant the documentation to be error-free. If you find any errors in or other problems with the documentation, please report them to Right Hemisphere in writing.
The product and company names appearing in this software and documentation may be trademarks or registered trademarks of Right Hemisphere and third parties.
Right Hemisphere.
[email protected] http://www.righthemisphere.com
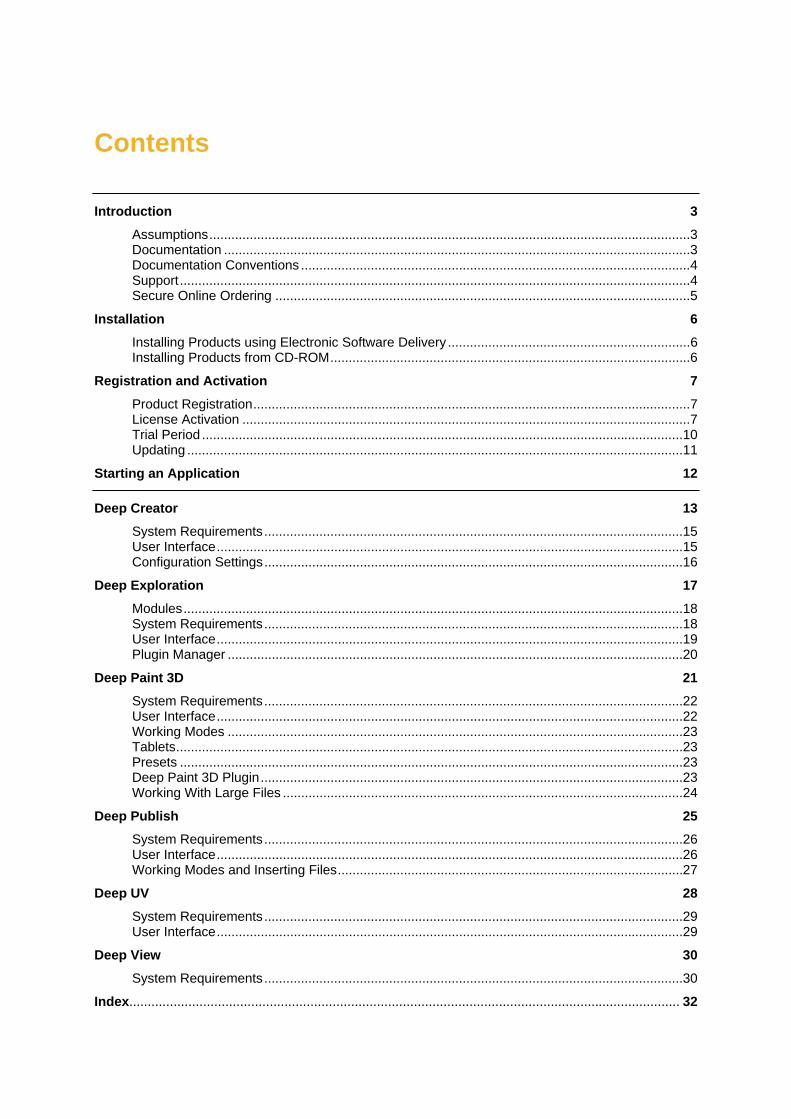
Contents
Introduction 3 Assumptions...................................................................................................................................3 Documentation ...............................................................................................................................3 Documentation Conventions ..........................................................................................................4 Support...........................................................................................................................................4 Secure Online Ordering .................................................................................................................5
Installation 6 Installing Products using Electronic Software Delivery ..................................................................6 Installing Products from CD-ROM..................................................................................................6
Registration and Activation 7 Product Registration.......................................................................................................................7 License Activation ..........................................................................................................................7 Trial Period ...................................................................................................................................10 Updating .......................................................................................................................................11
Starting an Application 12
Deep Creator 13 System Requirements..................................................................................................................15 User Interface...............................................................................................................................15 Configuration Settings..................................................................................................................16
Deep Exploration 17 Modules........................................................................................................................................18 System Requirements..................................................................................................................18 User Interface...............................................................................................................................19 Plugin Manager ............................................................................................................................20
Deep Paint 3D 21 System Requirements..................................................................................................................22 User Interface...............................................................................................................................22 Working Modes ............................................................................................................................23 Tablets..........................................................................................................................................23 Presets .........................................................................................................................................23 Deep Paint 3D Plugin...................................................................................................................23 Working With Large Files .............................................................................................................24
Deep Publish 25 System Requirements..................................................................................................................26 User Interface...............................................................................................................................26 Working Modes and Inserting Files..............................................................................................27
Deep UV 28 System Requirements..................................................................................................................29 User Interface...............................................................................................................................29
Deep View 30 System Requirements..................................................................................................................30
Index..................................................................................................................................................... 32
Getting Started Guide User's Guide Introduction 3
Introduction Welcome to the Right Hemisphere® Getting Started Guide.
This manual is a quick start guide for the Right Hemisphere products Deep Creator™, Deep Exploration™, Deep Paint 3D®, Deep Publish™, Deep UV™ and Deep View™. It contains the information you will need to install and begin using each application.
After installing and starting your product, you can continue to learn about it with the assistance of the application's User Reference, accessed from the product menu or by pressing F1.
Assumptions
Certain assumptions have been made regarding the use of the product:
• You should be familiar in the use of the Microsoft Windows interface. • You should be familiar with 3D concepts. • You should be familiar in the use of your 2D painting applications if you want to use any 2D
application plugins. For example, Adobe Photoshop.
Note: This is for users of 2D software applications only.
• You should be familiar in the use of your 3D modelling applications if you want to use any 3D application plugins. For example, 3ds max or Maya.
Note: This is for users of 3D software applications only.
• You should be familiar in the use of FrameMaker, Excel, PowerPoint, and Word if you want to use these applications with Deep Publish (http://www.righthemisphere.com/deeppublish) or Deep View (http://www.righthemisphere.com/deepview).
Documentation
The following documentation is included with Right Hemisphere products:
Getting Started Guide: A guide to getting started for all Right Hemisphere applications and modules.
User Reference: In the form of online Help, this reference contains detailed information about all the features and capabilities of the application. It is organized mainly by functional areas. Note that there may be more than one reference available depending on the application you are using.
Quick Reference Card: A list of the keyboard shortcuts may be provided depending on the product you have purchased.
Note: Only the online Help is available if you downloaded your product from the Internet.
Copyright © Right Hemisphere 2006. All Rights Reserved
4 Introduction Getting Started Guide User's Guide
Documentation Conventions
Certain conventions are used within the documentation to make it easier to use:
• Commands, tools, and selections are displayed in bold typeface. For example, click OK. • Menu and submenu commands are separated by the greater-than (>) sign. For example, File >
Open. • Specific keystrokes are represented in capitals. For example, DELETE. • Instructions are displayed as numbered steps. • Related section headings are displayed in italic typeface if the section is within the current Help
topic. • Related section headings are linked (colored blue and underlined), to the appropriate section if it is
located in another Help topic. • Where the word 'the application' is mentioned, the content relates to the application that you are
using. • Where the word 'image' is mentioned, the content relates specifically to a 2D representation. • Where the word 'scene', 'model', or 'object' is mentioned, the content relates specifically to a 3D
representation. • Where words are displayed within square brackets [ ], substitute the relevant text for the described
action. • Where the plus (+) and minus (-) keys are mentioned, they relate to the number pad and not the
QWERTY section of the keyboard. • Where modules are mentioned, the term refers to products for which modules may be purchased.
Support
Online Our online support page contains technical support information relating to all of the Right Hemisphere products. It provides access to the latest patch releases, tutorials, links to the registration pages, and the Right Hemisphere Forum including newsletters, FAQs, and tips and tricks.
Please take the time to check the support page (http://www.righthemisphere.com/support/) if you have any queries before sending us an e-mail, in particular, you should check the FAQs. It is most likely that the answer is right there!
Registration and Activation If you require assistance with registration or activation, please contact us using our support form (http://www.righthemisphere.com/support/contact_support.php3).
eLicensing If you are activating a product using eLicensing and require assistance, please e-mail eLicense support (mailto:[email protected]).
Note: eLicensing is applicable for certain Right Hemisphere products only and may not be the licensing method for the application you have installed. See Registration and Activation (on page 7) for further information.
Copyright © Right Hemisphere 2006. All Rights Reserved
Getting Started Guide User's Guide Introduction 5
Help The application User Reference is accessed from the product menu and, depending on the product you are using, by pressing F1. It contains detailed information about all the product features and capabilities and includes guides to the program controls.
Tutorials Product tutorials are continually updated and are available at the Right Hemisphere Web site (http://www.righthemisphere.com/support/tutorials/). Please note that the Deep Creator tutorials are available from within the product itself.
FAQs and Troubleshooting The FAQs (http://www.righthemisphere.com/support/), Frequently Asked Questions are continually updated and you should check these on a regular basis.
Secure Online Ordering
Right Hemisphere products can be purchased through re-sellers or from the Right Hemisphere Store (http://www.righthemisphere.com/store/).
Our Secure Online Ordering services ensure that your confidential information remains confidential. Products delivered via our Web site (see RH Homepage - http://www.righthemisphere.com) are processed as soon as your payment is received, while orders for boxed products are usually processed within one business day.
With your Right Hemisphere product, you receive a Serial Number/Order ID used to register and activate the product. For download sales, this is sent via e-mail.
If you make a payment but do not receive confirmation with your Serial Number/Order ID within a reasonable amount of time (two business days for credit card payments or two weeks for other payments), please contact us (http://www.righthemisphere.com/contact/).
For information on multiple pricing (five or more licenses), purchase orders, wire transfers and educational discounts, please contact us (http://www.righthemisphere.com/contact/).
Copyright © Right Hemisphere 2006. All Rights Reserved
6 Installation Getting Started Guide User's Guide
Installation
Installing Products using Electronic Software Delivery
To install the software:
1. Go to the Right Hemisphere product download page (http://www.righthemisphere.com/support/downloads/download.php).
2. Select the check boxes for the products you want to download.
3. Enter your details, ensure the Evaluation Software Restrictions and Privacy Statement check boxes are selected, and then click Submit. You will receive a support email detailing the product serial numbers.
4. In the support email, click the link located below the product serial number. The product download page is displayed.
5. Click Download.
6. Do one of the following:
Click Save, navigate to and select a location to save the file, and then click OK.
Click Run to install the file automatically once it is downloaded.
7. If you saved the file, double-click the saved file and then click Run. You are then guided through the product's installation.
8. Repeat steps 4 through 7 for each product.
9. Register and activate (see "Registration and Activation" on page 7) the product.
Installing Products from CD-ROM
To install the software:
1. Close all applications and insert the CD-ROM into the CD-ROM drive. The Right Hemisphere Product Suite dialog is displayed.
2. Select the check boxes for the products you want to install.
Note 1: To install a Deep Exploration module, you must have the current version of Deep Exploration installed.
Note 2: Deep Publish and Deep View cannot co-exist on the same computer. To uninstall either application, click the Windows Start button, choose Programs > Right Hemisphere > [application] and click Uninstall.
3. Click Install. The installation begins.
4. Follow the instructions as they appear on your screen, making sure you accept the Right Hemisphere License Agreement, and then click Finish.
5. If you selected to install more than one product, complete step 4 for each installation.
Note: Each product installation begins automatically after the previous installation has completed.
6. Register and activate (see "Registration and Activation" on page 7) the products.
Note 1: If you are installing Deep Paint 3D or Deep UV, ensure the font setting is set to the default size in the Windows Control Panel. This ensures the screen displays correctly.
Note 2: If you choose to begin using the application without registration or activation, the 30-day trial period begins. When the trial period expires, you must register and activate the program to continue using the application.
Copyright © Right Hemisphere 2006. All Rights Reserved
Getting Started Guide User's Guide Registration and Activation 7
Registration and Activation After installation, products should be registered. After registration, all product licenses must then be activated. Registered users receive information about the latest version of the application via e-mail. Any problems that might arise are given the highest priority by our technical team.
Registered users also receive a user name and password with which to access the Registered User area of the Right Hemisphere Web site. This page contains product updates, the latest plugin files and patch downloads.
Note: You are not sent a user name or password for Deep View. This product does not require registration or activation.
This section describes how to register and activate the Right Hemisphere applications and modules described within this guide.
If you require assistance with registration or activation, please contact us using our support form (http://www.righthemisphere.com/support/). For assistance with eLicensing, please e-mail [email protected].
Note: If you have purchased multiple copies/licenses, you will need to repeat registration and activation for each product Serial Number/Order ID you own.
Before registering your product, ensure you have an active Internet connection.
Product Registration
Before registering your product, ensure you have an active Internet connection.
To register the product:
1. Go to the Right Hemisphere registration page (http://www.righthemisphere.com/support/register/).
2. Select the product you want to register.
3. Enter the Serial Number/Order ID, as sent to you with your product purchase, in the Serial Number/Order ID field and click Next.
4. Enter the required information in the appropriate fields ensuring all mandatory fields (*) are complete.
5. Click Next. Registration is now complete.
If you are registering Deep Creator, Deep Exploration, a Deep Exploration module or Deep Publish, a Product Authorization Code, user name and password are sent to you via e-mail.
If you are registering Deep Paint 3D or Deep UV, your user name and password are sent via e-mail.
You can now activate the product license. See the section License Activation below.
License Activation
After product registration, you must activate the product license using one of two methods depending on the product you are activating.
Deep Exploration, Deep Exploration modules, and Deep Publish licenses are activated from within the application itself. Deep Paint 3D and Deep UV are activated via the Internet using eLicense, a Web based license server.
Copyright © Right Hemisphere 2006. All Rights Reserved
8 Registration and Activation Getting Started Guide User's Guide
Deep Creator, Deep Exploration and Modules, Deep Publish To activate Deep Creator, Deep Exploration, a Deep Exploration module or Deep Publish:
1. Do one of the following:
If you are activating Deep Creator, click the Windows Start button, choose Programs > Right Hemisphere > Deep Creator and then click Deep Creator.
If you are activating Deep Exploration or a module, click the Windows Start button, choose Programs > Right Hemisphere > Deep Exploration and then click Deep Exploration.
If you are activating Deep Publish, start PowerPoint, Word, FrameMaker, or Excel,
2. Do one of the following:
If you are activating Deep Creator, choose Help > Register on the menu bar.
If you are activating Deep Exploration, choose Help > Activate Deep Exploration on the menu bar.
If you are activating a Deep Exploration module, choose Help > Activate Modules on the menu bar.
If you are activating Deep Publish in an Office application, on the menu bar either choose Insert > 3D Model > Activate Deep Publish, or choose Insert > 3D Model > About Deep Publish and then click the Activate button.
If you are activating Deep Publish in FrameMaker, open a document containing 2D or 3D content, and then do one of the following:
o Choose File > Import > Object, select the 3D Model object type, click OK, navigate to and select a file, and then click Open. You can then either right-click in the viewport and click Activate Deep Publish, or right-click in the viewport, click About Deep Publish, and the click the Activate button.
o Right-click the content and then click Edit 3D Model Object, then either right-click in the viewport and click Activate Deep Publish, or right-click in the viewport, click About Deep Publish, and the click the Activate button.
o Double-click the content, then either right-click in the viewport and click Activate Deep Publish, or right-click in the viewport, click About Deep Publish, and the click the Activate button.
3. Enter your Serial Number/Order ID and Authorization Code in the relevant fields.
4. Do one of the following:
If you are activating Deep Creator, click OK.
If you are activating Deep Exploration, a Deep Exploration module or Deep Publish, select 'Current user only' to make the product available only to the user activating the product, or select 'All users' to make the product available to all users on the computer.
Note: Administrator rights are required to make the product available to all users on the computer. The default license option is to make the product available only to the user activating the product.
5. Click Activate and restart the computer. Activation is now complete.
Copyright © Right Hemisphere 2006. All Rights Reserved
Getting Started Guide User's Guide Registration and Activation 9
Deep Paint 3D and Deep UV Before activating Deep Paint 3D or Deep UV, ensure you have an active Internet connection.
During eLicense activation, you can choose to end the process by clicking Exit on the activation dialog. You can also choose to trial the application by clicking 'Try It'.
Note: A single seat eLicense can be used on only one computer.
Using the eLicense control, you can view the product and license details and the product receipt. You can also move an eLicense to another computer. See the sections eLicense Control and Moving an eLicense below.
To activate the product:
1. Click the Windows Start button, choose Programs > Right Hemisphere > [application] then click the application name. The activation dialog is displayed.
2. Click License It. The application License Agreement dialog is displayed and displays the Right Hemisphere End User License Agreement.
3. Read the entire agreement and click Accept to agree with the terms and conditions. The Install License dialog is displayed.
Note: You must accept the terms and conditions to be able to use the application. You can also click Start Over to begin the activation process again
4. Enter your Serial Number/Order ID in the Order ID field and click Get License. Your license is downloaded from the eLicense server and a message is displayed confirming the license installation.
5. Click Launch to start the application.
eLicense Control You can view the product and license details and move an eLicense using the eLicense control.
Viewing Details To view the product details, product receipt, or license details:
1. Click the Windows Start button and choose Programs > Right Hemisphere > [application].
2. Right-click the application name, choose eLicense Control and click either Product Details, Product Receipt, or License Details.
Modifying an eLicense You can modify the eLicense options for the respective products.
To modify the eLicense options:
1. From Control Panel, open eLicense Control and then double-click Right Hemisphere Ltd.
2. Edit the licensing details for the product you want to modify.
Copyright © Right Hemisphere 2006. All Rights Reserved
10 Registration and Activation Getting Started Guide User's Guide
Moving an eLicense The eLicense system supports movable licenses, that is, you can move a license from one computer to another.
To move your eLicense to another computer:
1. Ensure you have an active Internet connection.
2. Click the Windows Start button and choose Programs > Right Hemisphere > [application].
3. Right-click the application name, choose eLicense Control and click Unlicense. The Unlicense dialog is displayed.
Note: If your Serial Number/Order ID is not displayed, enter it in the Order ID field before performing the next step.
4. Click Unlicense. Your computer is unlicensed immediately.
5. Click Close to close the dialog.
6. You can now license another computer.
Trial Period
For all applications except Deep View, a 30-day trial period is available during which most functionality enabled. Depending on the application installed, either the trial period begins automatically or you can choose to trial the product during the activation process.
At any time during this trial period, you can register and activate the product license, or you can wait until the trial period is complete. Both your Serial Number/Order ID and Product Authorization Code (see "Registration and Activation" on page 7) establish the license type.
When the trial period expires, certain functionality is disabled, the application cannot be started, or content you create includes watermarks, again depending on the application. You must now complete registration and activation (on page 7) to license the product.
Deep Creator During the trial period, all functionality is available except for publishing to a .rhi or .exe file.
Deep Exploration Deep Exploration is sold in two forms: the CAD Edition and the Standard Edition. After installation of either product, a 30-day trial period begins during which full functionality is available including:
Opening standard and CAD supported file types.
Saving to standard and CAD supported file types.
Full CADTools, Illustration, Realight, and UV Mapping functionality.
Full error reporting.
Standard and CAD Editions
The Standard Edition supports all functionality excluding:
Opening and importing all supported CAD file types.
Saving to supported CAD file types.
CADTools, Illustration, Realight, and UV Mapping functionality.
PDF Publishing Module and PMI Module functionality.
Copyright © Right Hemisphere 2006. All Rights Reserved
Getting Started Guide User's Guide Registration and Activation 11
To obtain the above functionality, you should purchase Deep Exploration CAD Edition (see "Secure Online Ordering" on page 5).
Deep Paint 3D Deep Paint 3D is fully functional during the trial period. However, when you try to start the application after the trial period expires, you are required to complete registration and activation.
Deep Publish All content created with the product during the trial period includes a watermark. After activating the product license, you can re-save content to remove the watermark.
When the trial period expires, 3D content and 3D PDF files can no longer be created. However, 3D content can still be viewed.
Viewing Content
Either Deep Publish or Deep View is required to view 3D content:
Content created with Deep Publish in PowerPoint, Word, or Excel is seen as a 2D image in the absence of either product.
Content created with Deep Publish in FrameMaker is seen as a 'grey box' in the absence of either product.
Deep UV Deep UV is fully functional during the trial period. However, when you try to start the application after the trial period expires, you are required to complete registration and activation.
Updating
The update procedure differs depending on the product you want to update:
Manual and automatic updates via the individual application's Help menu. This method uses Right Hemisphere's Cortex utility (http://www.righthemisphere.com/support/help/cortex/cortex_readme.htm), which is installed by default when the application is installed.
Manual updates from within the Cortex utility.
Manual updates via the Patches section http://www.righthemisphere.com/support/register/all_reg2.php?ara=1 of the Right Hemisphere Web site. This method should be used if you do not have an Internet connection.
Please see the individual product Help references for further information.
Copyright © Right Hemisphere 2006. All Rights Reserved
12 Starting an Application Getting Started Guide User's Guide
Starting an Application Deep Exploration, Deep Paint 3D, and Deep UV can all be started either from the Windows Start menu, your desktop or Windows Explorer. Deep Publish is started from within Excel, PowerPoint or Word.
Deep View (on page 30) is a viewing application only and, if installed, starts automatically when you view content created with Deep Publish.
To start Deep Creator, Deep Exploration, Deep Paint 3D, or Deep UV, do one of the following:
Click the Windows Start button, choose Programs > Right Hemisphere > [application], and then click the application name.
Double-click the application icon on your desktop.
The application interface is displayed and you can begin using the program. See the sections Deep Creator, Deep Exploration, Deep Paint 3D and Deep UV.
Note: You can also start the applications from Windows Explorer by double-clicking the relevant [application].exe file within the default installation folder. For example, C:\Program Files\Right Hemisphere\Deep Exploration.
To start Deep Publish or Deep View:
Open a new or existing PowerPoint presentation, Word document, FrameMaker document, or Excel spreadsheet.
If you installed Deep Publish, the Deep Publish menu is displayed in Office application. If you installed Deep View, you can now view 3D content created with Deep Publish.
Copyright © Right Hemisphere 2006. All Rights Reserved
Getting Started Guide User's Guide Deep Creator 13
Deep Creator
Overview Deep Creator is a powerful authoring application to create interactive 3D environments. It delivers an integrated authoring environment which includes a 3D modeler, a texture creator, and a scripting engine in one package. Deep Creator's toolset and 'game' engine empowers users to create 3D interactive scenes and walkthroughs for training, simulation, support, and sales and marketing applications.
Key Features Full 3D editing environment including a very powerful modeler.
Over 60 primitive 3D objects including lines, spheres, boxes, stairs, gears, and arches.
Over 50 3D object alterations. For example, bend, twist, and taper.
Over 50 3D object animations.
Character animation including key framing.
Skinning and bones.
Procedural image creation for 2D menus or 3D textures.
Texture creation by mixing and blending more than 166 procedures; each one with an infinite number of possible settings.
2D geometry drawing including lines, polylines, arcs, circles, ellipses, splines, rounded rectangles, polygons, stars, and triangles.
Infinite 2D pen adjustment including the adjustment of width, density, skipping, hardness, pen shape, and line type.
Grid, angle snapping, and object snapping.
Extensive 3D object settings including opening and thickness.
Axis transforms for easy object moving, scaling and rotation.
Shape Editor to edit the 'shape' of animation, selections, and objects.
Multiple object selection methods by window, circle, polygon, inside, outside, and crossing.
Antialiasing.
MIP mapping.
Point, spot, directional, and ambient lights.
Cameras.
Gravity objects.
Level of detail.
Shadows.
Light maps.
3D boolean operations.
Real-time physics with rigid body dynamics.
Atmospheric currents including wind and water.
Single or multiple 3D views of the scene.
Lisp scripting language including 349 functions.
Copyright © Right Hemisphere 2006. All Rights Reserved
14 Deep Creator Getting Started Guide User's Guide
Built-in script editor.
C++ interface to 3D scenes and 2D menus via a linkable library.
Particle systems (planer and point).
Explosion animations.
Reference object copies.
3D sounds.
Unlimited undo and redo.
Full clipboard support (cut, copy, paste).
Shapeable object selections.
Bump mapping.
Collision testing for all object types.
Player selectable objects.
Image pushing for fast terrain creation.
Mesh simplification.
Texture blending.
Vertex coloring.
'Pickup-able' objects (inventory).
Scene reports.
Object, face, edge, and vertex editing.
Scenes can be 'played' directly in the Scene Editor without first creating a .rhi file.
VCR-like commands for scene play.
Asset browser.
Easy 3D tree creation (branches and leaves).
Frustum, bounds, tree, and distance culling.
Fog.
Material and object opacity.
Automatic UV wrapping (planar, face, box, sphere, shrink wrap, cylinder, cylinder capped, XYZ to UVW, object defined, and face center).
UV Editor for manual manipulation of UV mapping.
Reflection maps.
Powerful object grouping tools, including drag-and-drop in and out of groups.
Extremely compact user files.
W and Z buffer support.
Object helpers ID and distance.
Convert text to speech.
Copyright © Right Hemisphere 2006. All Rights Reserved
Getting Started Guide User's Guide Deep Creator 15
System Requirements
You must have the following software and hardware installed on the computer for Deep Creator to function correctly.
Minimum • Windows 2000 operating system. • Pentium 166 MHz processor or higher. • 32MB of RAM. • 100 MB of available hard disk space. • Microsoft DirectX, version 9 or greater compliant video card with hardware accelerated 3D
rendering, and at least 4MB RAM. • Microsoft DirectX, version 9 or greater compatible mouse. • Microsoft DirectX, version 9 or greater compatible sound card.
Note: If you experience poor scene performance and you feel that your system meets all of the above requirements, check with your video card manufacturer for updated drivers and confirm that your video card is DirectX 9.0b compliant.
Recommended • Windows XP operating system. • Pentium 500 MHz processor or higher. • Microsoft DirectX, version 9 or greater compliant video card with hardware accelerated 3D
rendering, and at least 128MB RAM.
User Interface
The application interface consists of a number of components including the menu bar and status bar. There are also a number of different toolbars and windows, the Scene Editor, and various right-click menus.
Many of the components can be resized, moved, floated, docked, and closed similar to the functionality in most Windows applications. For example, you can move the Colors and Pen Toolbar by dragging the toolbar's left vertical bar, and you can drag the Scene and Image Makers windows around the application interface.
See the topics referenced below for detailed information on all of the user interface components.
Interface
Application title bar—Displays the current file name, path, and registration status.
Menu bar—Provides access to the main menu commands.
Toolbars—Sets of buttons for commands relating to the standard functionality.
Windows—Displays the selected window in either a docked or floating manner in the application interface. These windows include the Scene Maker, Image Maker, Asset Browser, Animation Track Editor, and Lisp Editor.
Scene Editor—Displays a view of the completed project. It function as the editing area for 3D scenes, and the workspace when editing 2D menus. It is used in conjunction with the Scene Maker.
Copyright © Right Hemisphere 2006. All Rights Reserved
16 Deep Creator Getting Started Guide User's Guide
Status bar—Provides various information including information about the current scene, currently selected objects, X, Y, and Z coordinates for the creation of 3D objects, and the currently active command.
Mouse controls—Provides controls for selection and is the main means of interacting with Deep Creator.
Right-click menus—Sets of commands relating to the standard functionality.
Configuration Settings
Global Configuration Settings
A number of global settings can be established including the number of backup files to keep, and the time Deep Creator takes between automatically saving files.
Search Path Configuration
The search paths required by Deep Creator to load an image, sound, or scene can be set manually; each of the different type assets (bitmaps, sounds, scenes, and plugins) have their own search path.
Default Values
Each object, alteration, animation, and stack item setting has a default value that can be customized.
Limit Device Capabilities
You can 'turn off' certain video card capabilities to check what a scene will look like on lesser cards.
Copyright © Right Hemisphere 2006. All Rights Reserved
Getting Started Guide User's Guide Deep Exploration 17
Deep Exploration
Overview Deep Exploration Standard and CAD Editions are desktop applications used to search, open, view, and manage a comprehensive set of 2D, 3D, animation, video, and audio assets. A variety of tools allow you to translate, optimize, animate, and render files and publish to a wide range of formats.
The Deep Exploration CAD Edition includes support for 3D CAD models, and integration and support for the PDF Publishing and PMI Modules, Deep Server, and publishing to Microsoft Office applications.
Note: To obtain CAD file support, you can purchase (see "Secure Online Ordering" on page 5) Deep Exploration CAD Edition.
Key Features Familiar interface: Windows Explorer and Microsoft Internet Explorer-style interface providing common Windows customization features.
Effortless organization of 3D models.
Rapid import process and built-in export features.
3D objects, materials, and file history browse capability.
3D model and texture Web search.
Show and hide separate objects.
Multiple viewports can display up to four simultaneous views of a model.
Creation of user-defined views based on the current scene view.
Model views store the current camera position, object visibility and render mode.
'Steps' store collections of animation sequences and arbitrary text.
Distance measurements between elements or within a single element.
Layers are utilized to group scene objects into a single hierarchy level.
Creation of primitive objects and applying complex modifiers on any geometry.
Gradient and image background, and shadow display.
Interactive display of an object's position, rotation, and scale.
Object instancing.
Materials: Thumbnail display allowing easy identification; they can be dragged into scenes; associated object selection by material; removal of duplicate or unused materials.
Bill of Materials source selection including from the current scene geometry or an external Bill of Materials (BOM) file.
Highlighting and transparency.
Duplication of objects while moving, rotating, or scaling.
Markup entities; callouts, dimensions, and Teamwork markups.
Easy management of plugins, registration, and licensing.
Full-screen display mode with auto-hide toolbars.
CADTools and Illustration, Realight, and UV Mapping are included in Deep Exploration CAD Edition.
Copyright © Right Hemisphere 2006. All Rights Reserved
18 Deep Exploration Getting Started Guide User's Guide
Modules
Certain modules can be purchased to enhance the functionality of Deep Exploration CAD and Standard Editions.
PDF Publishing Module: Enables you to rapidly design, create, and publish interactive 3D documents without programming, using lightweight 3D product graphics supplied by Deep Server, Deep Exploration CAD Edition, or Adobe Acrobat 3D.
PMI Module: Enables you to easily access and display Product Manufacturing Information (PMI) data within JT and CATIA 5 files, and to display model views.
System Requirements
You must have the following software and hardware installed on the computer for Deep Exploration to function correctly:
Minimum • Windows 2000 SP4 operating system. • Pentium III 266 processor or higher. • 128MB of RAM (more for large model and texture sizes). • Microsoft DirectX, version 8. • Internet Explorer 6.0. • Graphics card capable of displaying 24-bit color. • Pixel and vertex shader support on graphics card. • Shaders located in the Shaders folder. • 3D hardware accelerator video card.
Recommended • Windows XP operating system. • Pentium III 733 processor or higher. • 256MB of RAM (more for large model and texture sizes). • Microsoft DirectX, version 9. • 3D hardware accelerator video card with 128MB of RAM.
Additional • An Internet connection is required for 3D Web searches and Cortex updates. • To view and save 3ds max files, a copy of 3ds max must be installed. • To view and save Maya, files a copy of Maya must be installed. • To load the ngrainview.x3d plugin, .NET must be installed. • To view 3D content in a HTML Document with 3D (.html) file:
o Deep Publish (http://www.righthemisphere.com/deeppublish) or Deep View (http://www.righthemisphere.com/deepview) must be installed.
o The .rh file type must be added to the Microsoft Windows Server 2003 recognize file type set.
• To view 3D content in a Shockwave Web Page (.html) file, Shockwave Player must be installed.
Copyright © Right Hemisphere 2006. All Rights Reserved
Getting Started Guide User's Guide Deep Exploration 19
PDF Publishing Module
The PDF Publishing Module is required to publish to PDF documents. This module requires the following:
• Microsoft DirectX, version 8.1. • Adobe Reader 7.07 (required to 'read' .pdf files). • The Designer Objects Module is required to create new, and edit existing templates in Adobe
Designer. Note that this module is available when installing the PDF Publishing Module. • Adobe Acrobat 3D is required to install the Designer Objects Module. • The PMI Module is required to view PMI data in published PDF documents.
PMI Module
The PMI Module is required to view PMI data. This module requires the following:
• Microsoft DirectX, version 8.1. • The JT Module is required to be able to read PMI data in JT files. Note that this module is
available when installing the PMI Module. • The PDF Publishing Module is required to publish documents containing PMI data to PDF
documents.
User Interface
The software's user interface provides multiple ways to achieve the same goals. It consists of a number of components including the menu bar, the Explorer bar, Information bar, File list, Status bar, and Animation controls. There are also a number of different toolbars, a viewport, and various right-click menus.
Many of the components can be resized, moved, floated, docked, rearranged, and closed similar to the functionality in most Windows applications. For example, you can resize the Explorer bar by dragging the bar's edges, and you can drag files and folders within the Folders panel. Components are displayed as docked by default and have a Windows-type interface.
See the topics referenced below for detailed information on all of the user interface components.
Interface
Application title bar—Displays the current file name, path, and protection status.
Menu bar—Provides access to the main menu commands.
Controls—Tools that give you added functionality for managing and modifying files and file display.
Toolbars—Sets of buttons for commands relating to standard and additional module (see "Modules" on page 19) functionality.
Explorer bar—Used to display the Folders panel, the Favorites and History lists, the Search panel, and the File list tabs.
Information bar—Displays various file, object, and material information relating to the current file depending on the viewport selection.
Scene Components panel—Comprises the Scene tree, Materials list, Parts and Layers panels, and Animation tree. It presents, and is used to control all of the scene’s 3D objects, materials, parts, animation, and layers from within a tree-view hierarchy.
Workspace—Comprises one or more viewports used to view and modify the currently opened file. For example, a 3D scene or 2D image.
Copyright © Right Hemisphere 2006. All Rights Reserved
20 Deep Exploration Getting Started Guide User's Guide
File list—Displays all files and folders contained within the current folder, all files that match the search criteria after performing a search, all files contained within the 'My 3D Models' folder, and all the available material, texture, and shader files. It can be used to perform a number of functions including establishing file properties, refining searches, dragging textures and shaders onto models, and generating thumbnails.
Status bar—Displays various information relating to the current file and display renderer.
Animation controls—Provides controls for animated scenes.
Right-click menus—Sets of commands relating to the standard functionality.
Plugin Manager
The Plugin Manager is a utility that lists plugins, their version, import and export settings where appropriate, and any plugin conflicts. It is used to view current plugins and files, and resolve plugin conflicts.
Plugin Tab The Plugin tab displays the plugin name, version, description, and status, and also the file size.
When Deep Exploration starts for the first time, the status of each plugin is listed as 'loaded' and a system file is created that informs Deep Exploration which plugins are used. Whenever the application is started again, this file is used to reference the plugins that are used so that the application opens without delay, and the status of each existing plugin is listed as 'defer'.
File Format Tab The File Format tab displays the file format name, extension, file format type, whether it is an import and/or export file, and the related plugin.
The tab is used to resolve any plugin or format conflicts, and modify and restore the default import and export properties. You can also move the format rows up and down within the list to view any plugin or format conflicts more easily.
Copyright © Right Hemisphere 2006. All Rights Reserved

Getting Started Guide User's Guide Deep Paint 3D 21
Deep Paint 3D
Overview Deep Paint 3D is a real-time materials-based 3D painting system. While Deep Paint 3D can be used as a stand-alone program to paint pre-existing objects or to create 2½D images from a blank canvas, it is designed to integrate closely with your existing work-flow, passing images back and forth between your 3D application, Photoshop, and Deep UV.
Key Features Brush cursor: Displays an outline of the current brush shape on the object or material.
Stroke preview: Displays an example stroke of the selected brush and paint combination or 'preset'.
Print preview: Only applies to 2½D mode and gives a preview of the image as it would appear printed.
Pressure-sensitive digitizing tablet support: An electronic tablet and a cursor or pen that enables you to enter drawings and sketches into the computer that enable response to changes in pressure, pen angle, direction or speed of movement.
Export to Photoshop: Allows you to save a material and all its layers as a PSD file as a more measured and robust way of communicating with Photoshop.
Splines: Splines (curves) can be used to create selection masks to define the path of a brush stroke with more accuracy than by hand or to repeat the same brushstroke with different settings.
Batch operations: Allows the application of operations across the selected materials such as adding and deleting layers, changing material properties and applying some filters making it easier to manage large numbers of materials.
Lock paint layer: Used to specify the size of the projection for projecting images larger than the screen.
Projection paint: Used to project a layer of paint onto an object so that unsightly scenes are eliminated. Projections can be saved, loaded and restored.
Image stamp: Allows you to define a temporary image stamp by capturing a piece of the current material. The modify feature allows the user to change the image size, rotation, etc., interactively in the viewport.
Save all maps: Used to customize the names of saved maps.
Working with Photoshop Deep Paint 3D includes a companion plugin for Photoshop. Although Deep Paint 3D can be used stand-alone, it is designed to complement Photoshop by adding tools to Photoshop's powerful image processing capabilities.
Materials can be passed between Deep Paint 3D and Photoshop.
Uninterrupted work-flow.
For a complete guide to Photoshop plugins, refer to the Photoshop documentation.
Note: It may be possible to use the Deep Paint 3D plugin with other software that supports Photoshop plugins.
Copyright © Right Hemisphere 2006. All Rights Reserved
22 Deep Paint 3D Getting Started Guide User's Guide
System Requirements
You must have the following software and hardware installed on the computer for Deep Paint 3D to function correctly.
Minimum • Windows 2000 operating system. • Pentium III 450 processor or better. • 64MB of RAM (more for large model and texture sizes). • Internet Explorer 6.0. • Graphics card capable of displaying 16-bit color. • Minimum resolution of 800x600 pixels.
Note: Ensure the font setting is set to the default size in the Windows Control Panel. This ensures the screen displays correctly.
Recommended • Windows XP operating system. • Pentium III 500 processor or better. • 128MB of RAM (more for large model and texture sizes). • Graphics card capable of displaying 24-bit color. • Wacom Intuos or similar pressure-sensitive tablet.
User Interface
The user interface provides multiple ways to achieve the same goals, and comprises a number of components including the menu bar, 2D canvas, 3D workspace, Tools palette, Tools Options palettes, and the Command Panel. There are also a number of additional palettes, different toolbars, and various right-click menus.
The components and menu commands that are displayed depend on the mode in which you are in: 2D, 2½D, or 3D mode.
Many of the components can be resized, moved and closed similar to the functionality in most Windows applications. For example, you can resize the windows by dragging the windows' edges. All palettes, the Command Panel, the Projection Paint toolbar, and the Information toolbar can float in the workspace, and they can be docked, moved, and hidden.
See the topics referenced below for detailed information on all of the user interface components.
Interface
Application title bar—Displays the current file name.
Menu bar—Provides access to the main menu commands.
File toolbar—Provides quick access to many of the tools of some of the most common tasks in Deep Paint 3D.
Canvas—Used to edit all images and models. It is displayed with a white background by default and a black background when editing a 3D object. The background can be modified with another color or with an image.
Copyright © Right Hemisphere 2006. All Rights Reserved

Getting Started Guide User's Guide Deep Paint 3D 23
Workspace—The gray area surrounding your canvas in 2½D and 2D modes or areas of canvas not occupied by objects in 3D mode. It is used to open, and paint 3D files.
Tools palette—Provides access to most common tools.
Tools Options palette—Displays all the buttons and options that are available for the selected tool.
Command Panel—Used to access most of the painting features that are grouped into four sub-panels. Certain sub-panels comprise various rollouts that can be expanded and contracted.
Palettes—Provide access to the Tools, Color, Color Swatches, and Shapes palettes tools and options.
Toolbars—Sets of buttons for commands relating to standard functionality.
Right-click menus—Sets of commands relating to the standard functionality.
Working Modes
Deep Paint 3D operates in three distinct modes, 2D, 2½D, and 3D.
2½D mode: Used to paint two-dimensional images with color, bump and shine rendered in real time.
2D mode: Allows you to view and paint an 'unwrapped' bitmap of a single channel while painting a 3D model.
3D mode: This mode is active whenever a 3D model is loaded into Deep Paint 3D and allows you to paint your model in three-dimensional space with real-time rendering of color, bump, shine, glow, and opacity.
Tablets
Deep Paint 3D is greatly enhanced by pressure-sensitive digitizing tablets used in conjunction with certain features that respond to changes in pressure, pen angle, direction or speed of movement. Deep Paint 3D supports the use of WinTab compatible graphics tablets and styluses, including the Wacom Intuos airbrush and Intuos mouse.
Note: the Wacom Intuos series of tablets has individually numbered pens. Deep Paint 3D remembers and returns to the last preset used with a given pen.
Presets
Presets are combinations of brush and paint settings that are stored for quick retrieval. New presets can be created and edited, default presets can be customized and they can all be saved and organized into defined categories.
Deep Paint 3D Plugin
When used as a plugin, the application with which Deep Paint 3D operates uses a significant amount of RAM. This RAM is not released when running Deep Paint 3D through the Plugin Manager.
You can free-up RAM by running the program in stand-alone mode and loading your image or model file directly using the File > Open command.
Copyright © Right Hemisphere 2006. All Rights Reserved

24 Deep Paint 3D Getting Started Guide User's Guide
Working With Large Files
Unlike traditional digital paint systems, Deep Paint 3D treats painting as a complete material application process. It renders in 3D by modelling the true material characteristics of paint, including viscosity, thickness, opacity and shine, with every stroke.
Deep Paint 3D processes three to five times as much data as a traditional paint system. Consequently, it uses three to five times the RAM, and needs much more processing power than simpler programs; working with large images in Deep Paint 3D requires an appropriate amount of processing power and RAM. We recommend the following amounts of RAM to work effectively with large images.
Image Size (pixels) Recommended RAM
1500 x 1500 64MB
2000 x 2000 128MB
3000 x 3000 256MB
4200 x 4200 512MB
6000 x 6000 1GB
Note 1: Figures are for stand-alone operation of Deep Paint 3D. When operating with another image-processing program, subtract 25% from each pixel value.
Note 2: Pixels equal dots. Therefore, a 10" x 10" image at 150 dpi is 1500 x 1500 pixels and at 300 dpi, it is 3000x3000 pixels.
Due to the random nature of natural paint, it is often not possible to work effectively at pixel resolutions two to three times lower than the target output resolution. The image can be scaled up later to a higher resolution without noticeable loss of quality.
We recommend re-scaling in Photoshop using the Image > Resize command or in Deep Paint 3D using the right-click menu command, Resize Image while in 2½D mode. The same applies to 3D texture maps. For example, a 1000 x 1000 image can be re-scaled to 2000 x 2000 in an acceptable state for final production, reducing the RAM requirements for editing in Deep Paint 3D.
Copyright © Right Hemisphere 2006. All Rights Reserved
Getting Started Guide User's Guide Deep Publish 25
Deep Publish
Overview Deep Publish enables you to easily publish, view, and share 2D and 3D graphics using Microsoft Office PowerPoint, Word, Excel and Adobe Framemaker. Complex engineering and animation data can be used for sales presentations, training material, technical documentation and online catalogues.
Note: Deep Publish and Deep View cannot coexist on the same computer. To uninstall either application, click the Windows Start button, choose Programs > Right Hemisphere > [application] and then click Uninstall.
Key Features Microsoft Office integration: Excel, PowerPoint and Word.
Adobe FrameMaker integration.
Drag and drop: Used to insert files into PowerPoint and Word documents.
Linking and embedding: Files can be linked, embedded or a combination of both in PowerPoint, Word, and FrameMaker.
Rotate, pan and zoom: Available for 3D models.
Animation toolbar: Used to control model animation and includes a frame slider, a locking button and animation options.
Scene settings: Available for 3D model manipulation including outlines, smoothing, lights and graphics display mode.
Transparency: Hide and show parts or add transparency to 3D presentations.
Display Renderer
When you first insert a file into a document, the Default Rendering Mode dialog displays a list of the available display renderers for the graphics card that is installed on your computer. The display renderer determines how scenes are rendered while you work, and the best renderer for your graphics card is automatically detected as the default.
We recommend using the default renderer. However, you can modify it at a later date if required.
Copyright © Right Hemisphere 2006. All Rights Reserved
26 Deep Publish Getting Started Guide User's Guide
System Requirements
You must have the following software and hardware installed on the computer for the application to function correctly.
Note: This application is validated for Office XP (2002) and Office 2003.
Minimum • Windows 2000 SP4 operating system. • Pentium III 266 processor or higher. • 128MB of RAM (more for large model and texture sizes). • Microsoft Office for Windows 2002 if you are using the application with Office applications. • Adobe FrameMaker version 7.1 if you are using the application with FrameMaker. • Graphics card capable of displaying 24-bit color. • 3D hardware accelerator video card. • Microsoft DirectX, version 8. • Adobe Acrobat Professional version 7.0 or Acrobat 3D is required to convert content to PDF.
Recommended • Windows XP SP2 operating system. • Pentium III 733 processor or higher. • 256MB of RAM (more for large model and texture sizes). • Microsoft Office for Windows XP or Office 2003 if you are using the application with Office
applications. • Adobe FrameMaker version 7.1 if you are using the application with FrameMaker. • 3D hardware accelerator video card with 128MB of RAM.
Additional
Real Time Shaders
• Microsoft DirectX, version 9. • Pixel and vertex shader support on graphics card. • Deep Exploration version 3 Real Time shader.
User Interface
The application interface in Office applications consists of the Deep Publish menu. These commands are accessed via the right-click menu in FrameMaker. Certain other interface elements and tools become available once 3D content is created; the 3D viewport, Information bar, Animation toolbar, and various right-click menus.
See the topics referenced below for detailed information on all of the user interface components.
Copyright © Right Hemisphere 2006. All Rights Reserved
Getting Started Guide User's Guide Deep Publish 27
Interface
Deep Publish menu—Provides access to the main Deep Publish menu commands.
Information bar—Displays various file, object, and material information relating to the current file depending on the viewport selection.
Viewports—Comprises one of three viewports that are used to view and modify the currently opened file. For example, a 3D scene or 2D image. The viewport type depends on the current application you are using and the current Deep Publish mode:
• Image mode: Displays the 2D viewport. • Interactive mode in FrameMaker: Displays the FrameMaker 2D viewport or the 3D viewport. • Interactive mode in Office: 3D viewport.
Animation toolbar—Provides controls for animated scenes.
3D PDF toolbar—Used to convert 3D content to 3D PDF.
Right-click menus—Sets of commands relating to the standard Deep Publish functionality.
Working Modes and Inserting Files
Files are inserted into documents in one of two 'working modes'. These modes are used to work with 3D models once a file is inserted into a document:
• Image mode: Presents a 2D representation which can be moved and resized using controls. The Information bar and other toolbars are not displayed in Image mode.
Note: You cannot move images in Word documents.
• Interactive mode: Presents a 3D representation which can be rotated, panned or zoomed. The 3D viewport menu, Information bar, and Animation toolbar, can be used to control scene settings, objects, materials, and animation.
The mode in which files are inserted depend on the application in use; these are called the 'working modes'. When documents are reopened, the files are displayed in a working mode particular to the current application, regardless of how the document was last saved. You can switch between the modes as required. Note that PowerPoint presentations are always displayed in Interactive mode.
Working Modes
Application Inserting Content Opening Files
PowerPoint normal view Image Image
PowerPoint slide show view Interactive Interactive
Word Image Interactive
FrameMaker (2D content) Interactive Image
FrameMaker (3D content) Interactive Image
Excel Interactive Interactive
Copyright © Right Hemisphere 2006. All Rights Reserved
28 Deep UV Getting Started Guide User's Guide
Deep UV
Overview Deep UV is a set of tools for the creation and modification of UV mapping for polygonal models within an interactive 2D and 3D UV mapping environment. It can be used standalone, or with Deep Paint 3D.
UV Mapping describes the relationship or 'projection' between a three-dimensional surface point (described by X, Y and Z values) and a two dimensional surface point described by U and V values. It is useful in describing the relationship between 2D texture maps and their position on a 3D model.
Deep UV provides enhanced mapping productivity and assists in the creation of distortion-free UV mapping. It allows multiple mapping types to be combined on a single material for optimum bitmap usage and minimizing distortions and seams.
Note: The font setting for your graphics card is set to the default size in the Windows Control Panel to ensure the screen displays correctly.
Key Features Interactive texture UVs: Used to manipulate texture UV's interactively on 3D models.
Real-time UV editing: You can easily see real-time UV editing updates in 2D and 3D.
Untangle UVs: Untangle overlapping UV's instantly.
Relax tools: Minimize distortions by selection.
Soft selection and feather tools: Interactive 2D, 3D soft selection and feather tools.
UV packing algorithms: Efficient algorithms pack faster and closer.
Merge materials: You can create a single material without quality loss.
Speed loading: Place all objects from a scene on a single bitmap to speed load.
Plugins: 3ds max, Maya, Softimage® XSI™ and Deep Paint 3D plugins have been added.
Distortion free mapping: V.A.M.P creates distortion free mapping.
Preserve textures: From one UV mapping to another and retain existing texture map information.
Preview: Dynamically preview unwrapped UV coordinates while altering planar, cylindrical, and spherical mapping.
UV map types: Apply UV map types to different object parts or materials.
Soft selection: Move, scale, rotate, shear, and flip UV data with soft selection for precise control.
Selection tools: Select UV points, polygons or groups in 2D or 3D with magic wand, lasso or rectangular selection tools.
Advanced 3D selection: Select surface areas of objects by angle deflection from selected faces.
Automatic mapping: For quick and easy mapping.
Interactive mapping: Tools provide dynamic visual feedback on UV unwrapping of a material to obtain the best mapping for each type of shape.
Auto unwrapping: For complex shapes outside a category.
Copyright © Right Hemisphere 2006. All Rights Reserved
Getting Started Guide User's Guide Deep UV 29
System Requirements
You must have the following software and hardware installed on the computer for Deep UV to function correctly.
Minimum • Windows 2000 operating system. • Pentium 200-MMX processor or higher. • 64MB of RAM (more for large model and texture sizes). • Internet Explorer 6.0. • Graphics card capable of displaying 16-bit color. • Minimum resolution of 1024x768 pixels. • An OpenGL compatible graphics card.
Recommended • Windows XP operating system. • Pentium III 266 processor or higher. • 128MB of RAM (more for large model and texture sizes). • Graphics card capable of displaying 24-bit color.
User Interface
The user interface provides multiple ways to achieve the same goals, and comprises a number of components including the menu bar, main toolbar and the Tools Options shelf, the workspace (windows and viewports), the Command panel, two palettes, a status bar, and various right-click menus.
Many of the components can be resized, moved and closed similar to the functionality in most Windows applications. For example, you can resize the windows by dragging the windows' edges.
See the topics referenced below for detailed information on all of the user interface components.
Interface
Application title bar—Displays the current file name and path.
Menu bar—Provides access to the main menu commands.
Main toolbar—Provides quick access to the tools of some of the most common tasks in Deep UV.
Tools Options shelf—Displays all the commands that are available for the selected tool.
Workspace—Consists of file windows that are displayed in multiple viewports.
Viewports—Displays one 3D viewport, and multiple 2D viewports depending on the selected viewport layout. They are used to view and map the current objects and materials.
Command panel—A floating panel used to access most of the mapping features.
Tools palette—Provides access to most common tools.
Layout palette—Used to select the viewport layout.
Status bar—Displays the progress bar, and information about the selected tool.
Right-click menus—Sets of commands relating to the standard functionality.
Copyright © Right Hemisphere 2006. All Rights Reserved
30 Deep View Getting Started Guide User's Guide
Deep View
Overview Deep View is a viewing tool that enables you to view content created with Deep Publish. It has no interface and if installed on your computer, the application starts automatically whenever you view 3D content created using Deep Publish.
Note: Deep View and Deep Publish cannot coexist on the same computer. To uninstall either application, click the Windows Start button, choose Programs > Right Hemisphere > [application] and then click Uninstall.
Key Features Microsoft Office integration: Excel, PowerPoint and Word integration.
Adobe FrameMaker integration.
Rotate, pan and zoom: Available for 3D models.
Animation toolbar: Used to control model animation and includes a frame slider, a locking button and animation options.
Scene settings: Available for 3D model manipulation including outlines, smoothing, lights and graphics display mode.
Transparency: Hide and show parts or add transparency to 3D presentations.
System Requirements
You must have the following software and hardware installed on the computer for the application to function correctly.
Note: This application is validated for Office XP (2002) and Office 2003.
Minimum • Windows 2000 SP4 operating system. • Pentium III 266 processor or higher. • 128MB of RAM (more for large model and texture sizes). • Microsoft Office for Windows 2002 if you are using the application with Office applications. • Adobe FrameMaker version 7.1 if you are using the application with FrameMaker. • Graphics card capable of displaying 24-bit color. • 3D hardware accelerator video card. • Microsoft DirectX, version 8. • Adobe Acrobat Professional version 7.0 or Acrobat 3D is required to convert content to PDF.
Recommended • Windows XP SP2 operating system. • Pentium III 733 processor or higher. • 256MB of RAM (more for large model and texture sizes). • Microsoft Office for Windows XP or Office 2003 if you are using the application with Office
applications.
Copyright © Right Hemisphere 2006. All Rights Reserved

Getting Started Guide User's Guide Deep View 31
• Adobe FrameMaker version 7.1 if you are using the application with FrameMaker. • 3D hardware accelerator video card with 128MB of RAM.
Additional
Real Time Shaders
• Microsoft DirectX, version 9. • Pixel and vertex shader support on graphics card. • Deep Exploration version 3 Real Time shader.
Copyright © Right Hemisphere 2006. All Rights Reserved
3 3ds max • 3, 18, 28
A animation • 13, 15, 16, 17, 19, 25, 26, 27, 30 Antialiasing • 13 Assumptions • 3 Authorization Code • 7, 10
C Canvas • 21, 22 Command panel • 22, 29 Configuration Settings • 16 conflicts • 17, 20 Copyright • 2
D Deep Creator • 13 Deep Exploration • 17 Deep Paint 3D • 21 Deep Paint 3D Plugin • 23, 28 Deep Publish • 25 Deep UV • 28 Deep View • 12, 30 digitzing tablet • 21, 23 Display Renderer • 19, 25 Documentation • 3 Documentation Conventions • 4
E eLicense • 4, 7 eLicense control • 7 eLicensing • 4, 7 End User License Agreement • 7 Explorer bar • 19
F FAQs • 4 File Format Tab • 20 File list • 19
G Getting Started Guide • 2 Graphics card • 18, 22, 25, 26
H hardware • 15, 18, 22, 26, 29
I Image mode • 26, 27 Inserting Files • 27 Installation • 6 Installing Products from CD-ROM • 6
Installing Products using Electronic Software Delivery • 6
Interactive mode • 26, 27 Interface Components • 15, 19, 22, 26, 29 Internet connection • 7, 18 Introduction • 3 Intuos airbrush • 23 Intuos mouse • 23
L Large files • 24 License Activation • 7 License Agreement • 6, 7 license details • 7 linking and embedding • 25
M Maya • 3, 18, 28 Menu bar • 7, 15, 19, 22, 29 modules • 3, 4, 7, 18 Modules • 18, 19 movable licenses • 7
O Online Help • 3 Order ID • 5, 7, 10
P Palettes • 22, 29 Panels • 19, 22 Photoshop • 3, 21, 24 plugin conflicts • 20 Plugin Manager • 17, 20, 23 Plugin Tab • 20 plugins • 3, 16, 17, 20, 21 Presets • 23 product details • 7 product receipt • 7 Product Registration • 7
R RAM • 15, 18, 22, 26, 29 Real Time Shaders • 26 Registered User • 7 registration • 4, 6, 7, 10, 15 Registration and Activation • 4, 6, 7, 10
S SDK • 17 Secure Online Ordering • 5, 11, 17 Serial Number • 5, 6, 7, 10 software • 3, 6, 15, 18, 22, 26 Starting an Application • 12 Status bar • 15, 19, 29 support • 2, 4, 6, 7
Index
Copyright © Right Hemisphere 2006. All Rights Reserved
Support • 4 support form • 4, 7 System Requirements • 15, 18, 22, 26, 29, 30
T tablet • 21, 22, 23 Tablets • 23 Timeline • 17 toolbar • 15, 17, 19, 22, 25, 26, 27, 29 trial period • 6, 10 Trial Period • 10 Troubleshooting • 4 Tutorials • 4
U update • 4, 7, 11, 15, 18, 28 Updating • 11 User Interface • 15, 19, 22, 26, 29
V Version ID • 7, 19, 21, 26, 27
W Wacom • 22, 23 watermark • 10 Working Modes • 23, 27 Working Modes and Inserting Files • 27 Working With Large Files • 24 Workspace • 15, 19, 22, 29
Copyright © Right Hemisphere 2006. All Rights Reserved