Embed Size (px)
Citation preview

Hair andDynamic
CurvesVersion 6

ALIAS � 210 KING STREET EAST � TORONTO, CANADA M5A 1J7
© Copyright 2004 Alias Systems, a division of Silicon Graphics Limited ("Alias"). All images © Copyright Alias unless otherwise noted.
All rights reserved. Inside cover image created by Duncan Brinsmead. Inside cover model created by Inspeck.
Alias is a registered trademark and the swirl logo, the Maya logo, Conductors, Trax, IPR, Maya Shockwave 3D Exporter and MEL are
trademarks of Alias in the United States and/or other countries worldwide. Maya is a registered trademark of Silicon Graphics, Inc. in
the United States and/or other countries worldwide, used exclusively by Alias. SGI, IRIX, Open GL and Silicon Graphics are
registered trademarks of Silicon Graphics, Inc. in the United States and/or other countries worldwide. mental ray and mental images
are registered trademarks of mental images GmbH & CO. KG. in the United States and/or other countries. Lingo, Macromedia,
Director, Shockwave and Macromedia Flash are trademarks or registered trademarks of Macromedia, Inc. Wacom is a trademark of
Wacom Co., Ltd. NVidia is a registered trademark and Gforce is a trademark of NVidia Corporation. Linux is a registered trademark of
Linus Torvalds. Intel and Pentium are registered trademarks of Intel Corporation. Red Hat is a registered trademark of Red Hat, Inc.
ActiveX, Microsoft and Windows are either registered trademarks or trademarks of Microsoft Corporation in the United States and/or
other countries. Mac, Macintosh and QuickTime are trademarks of Apple Computer, Inc., registered in the United States and other
countries. Adobe, Adobe Illustrator, Photoshop and Acrobat are either registered trademarks or trademarks of Adobe Systems
Incorporated. UNIX is a registered trademark, licensed exclusively through X/Open Company, Ltd. AutoCAD, Discreet Logic, Inferno
and Flame are either registered trademarks or trademarks of Autodesk, Inc. in the USA and/or other countries. OpenFlight is a
registered trademark of MultiGen Inc. Java is a registered trademark of Sun Microsystems, Inc. RenderMan is a registered trademark
of Pixar Corporation. Softimage is either a registered trademark or trademark of Avid Technology, Inc. in the United States and/or
other countries. All other trademarks, trade names, service marks, or product names mentioned herein are property of their
respective owners.
This document contains proprietary and confidential information of Alias, and is protected by Federal copyright law and international
intellectual property conventions and treaties. The contents of this document may not be disclosed to third parties, translated, copied,
or duplicated in any form, in whole or in part, or by any means, electronic, mechanical, photocopying, recording or otherwise, without
the express prior written consent of Alias. The information contained in this document is subject to change without notice. Neither
Alias, nor its affiliates, nor their respective directors, officers, employees, or agents are responsible for any damages of any kind
arising out of or resulting from the use of this material, including, without limitation, any lost profits or any other direct, indirect, special,
incidental, or consequential damages or for technical or editorial omissions made herein.

Table of Contents
Table of Contents . . . . . . . . . . . . . . . . . . . . . . . . . . . . . . . . . . . . . . 3
1 Introducing Hair . . . . . . . . . . . . . . . . . . . . . . . . . . . . . . . . . . . . 9
About Hair and Dynamic Curves . . . . . . . . . . . . . . . . . . . . . . . 9Hair overview . . . . . . . . . . . . . . . . . . . . . . . . . . . . . . . . . . . . . . . . . . . . . . 9
Hair connections. . . . . . . . . . . . . . . . . . . . . . . . . . . . . . . . . . . . . . . . . . 10
Paint Hair Tool . . . . . . . . . . . . . . . . . . . . . . . . . . . . . . . . . . . . . . . . . . . 10
Rendering Hair . . . . . . . . . . . . . . . . . . . . . . . . . . . . . . . . . . . . . . . . . . . 10
Hair Output . . . . . . . . . . . . . . . . . . . . . . . . . . . . . . . . . . . . . . . . . . . . . . 10
Basic workflow for Hair . . . . . . . . . . . . . . . . . . . . . . . . . . . . . . . . . . . . . 12
2 Creating hair . . . . . . . . . . . . . . . . . . . . . . . . . . . . . . . . . . . . . 15
About Hair . . . . . . . . . . . . . . . . . . . . . . . . . . . . . . . . . . . . . . . 15Creating hair . . . . . . . . . . . . . . . . . . . . . . . . . . . . . . . . . . . . . . . . . . . . . . 15
Start, Rest, and Current Position curves . . . . . . . . . . . . . . . . . . . . . . . . 15
Passive hair curves . . . . . . . . . . . . . . . . . . . . . . . . . . . . . . . . . . . . . . . . . 16
Creating other models and effects with hair . . . . . . . . . . . . . . . . . . . . 18
How do I? Simulate hair . . . . . . . . . . . . . . . . . . . . . . . . . . . . . . . 19Create hair . . . . . . . . . . . . . . . . . . . . . . . . . . . . . . . . . . . . . . 19
Create hair . . . . . . . . . . . . . . . . . . . . . . . . . . . . . . . . . . . . . . . . . . . . . . . . 19
Choose which hair curves to display . . . . . . . . . . . . . . . . . . . . . . . . . . 20
Select hair, follicles, curves, and CVs . . . . . . . . . . . . . . . . . . . . . . . . . . 21
Set curve positions . . . . . . . . . . . . . . . . . . . . . . . . . . . . . . . . . . . . . . . . . 22
Assign a selection to a hair system. . . . . . . . . . . . . . . . . . . . . . . . . . . . 23
Select which UV set to use for Hair (polygons only) . . . . . . . . . . . . . . 23
Make curves dynamic. . . . . . . . . . . . . . . . . . . . . . . . . . . . . . . . . . . . . . . 25
Delete hair . . . . . . . . . . . . . . . . . . . . . . . . . . . . . . . . . . . . . . . . . . . . . . . . 26
Reference Menus . . . . . . . . . . . . . . . . . . . . . . . . . . . . . . . . . . . . . 26Dynamics menu set . . . . . . . . . . . . . . . . . . . . . . . . . . . . . . . 26
Hair. . . . . . . . . . . . . . . . . . . . . . . . . . . . . . . . . . . . . . . . . . . . 26
Hair > Create Hair . . . . . . . . . . . . . . . . . . . . . . . . . . . . . . . . . . . . . . . . . . 26
Hair > Create Hair > � . . . . . . . . . . . . . . . . . . . . . . . . . . . . . . . . . . . . . 26
Hair and Dynamic Curves
3

Table of Contents
Hair > Paint Hair Tool . . . . . . . . . . . . . . . . . . . . . . . . . . . . . . . . . . . . . . . 28
Hair > Paint Hair Tool > ❒ . . . . . . . . . . . . . . . . . . . . . . . . . . . . . . . . . . 28
Hair > Display . . . . . . . . . . . . . . . . . . . . . . . . . . . . . . . . . . . . . . . . . . . . . 31
Hair > Set Start Position . . . . . . . . . . . . . . . . . . . . . . . . . . . . . . . . . . . . 31
Hair > Set Rest Position . . . . . . . . . . . . . . . . . . . . . . . . . . . . . . . . . . . . . 31
Hair > Convert Selection . . . . . . . . . . . . . . . . . . . . . . . . . . . . . . . . . . . . 31
Hair > Assign Hair System . . . . . . . . . . . . . . . . . . . . . . . . . . . . . . . . . . 31
Hair > Make Selected Curves Dynamic . . . . . . . . . . . . . . . . . . . . . . . . 31
Hair > Delete Entire Hair System . . . . . . . . . . . . . . . . . . . . . . . . . . . . . 32
Nodes . . . . . . . . . . . . . . . . . . . . . . . . . . . . . . . . . . . . . 32Hair nodes . . . . . . . . . . . . . . . . . . . . . . . . . . . . . . . . . . . . . . 32
pfxHair node . . . . . . . . . . . . . . . . . . . . . . . . . . . . . . . . . . . . . . . . . . . . . . 32
hairSystemShape node . . . . . . . . . . . . . . . . . . . . . . . . . . . . . . . . . . . . . 32
Related topics. . . . . . . . . . . . . . . . . . . . . . . . . . . . . . . . . . . . . . . . . . . . 32
Clump and Hair Shape . . . . . . . . . . . . . . . . . . . . . . . . . . . . . . . . . . . . . 33
Dynamics . . . . . . . . . . . . . . . . . . . . . . . . . . . . . . . . . . . . . . . . . . . . . . . 35
Collisions . . . . . . . . . . . . . . . . . . . . . . . . . . . . . . . . . . . . . . . . . . . . . . . 36
Turbulence . . . . . . . . . . . . . . . . . . . . . . . . . . . . . . . . . . . . . . . . . . . . . . 37
Shading . . . . . . . . . . . . . . . . . . . . . . . . . . . . . . . . . . . . . . . . . . . . . . . . 38
Displacements . . . . . . . . . . . . . . . . . . . . . . . . . . . . . . . . . . . . . . . . . . . 39
Multi Streaks. . . . . . . . . . . . . . . . . . . . . . . . . . . . . . . . . . . . . . . . . . . . . 39
follicleShape node . . . . . . . . . . . . . . . . . . . . . . . . . . . . . . . . . . . . . . . . . 40
Related topics. . . . . . . . . . . . . . . . . . . . . . . . . . . . . . . . . . . . . . . . . . . . 40
Per Follicle Overrides . . . . . . . . . . . . . . . . . . . . . . . . . . . . . . . . . . . . . . 41
3 Simulating hair. . . . . . . . . . . . . . . . . . . . . . . . . . . . . . . . . . . . 45
How do I? Simulate hair . . . . . . . . . . . . . . . . . . . . . . . . . . . . . . . 45Play a hair simulation . . . . . . . . . . . . . . . . . . . . . . . . . . . . . . . . . . . . . . . 45
Use hair caches . . . . . . . . . . . . . . . . . . . . . . . . . . . . . . . . . . . . . . . . . . . . 46
Create a hair cache . . . . . . . . . . . . . . . . . . . . . . . . . . . . . . . . . . . . . . . 46
Append to a hair cache. . . . . . . . . . . . . . . . . . . . . . . . . . . . . . . . . . . . . 47
Truncate a hair cache. . . . . . . . . . . . . . . . . . . . . . . . . . . . . . . . . . . . . . 47
Delete a hair cache. . . . . . . . . . . . . . . . . . . . . . . . . . . . . . . . . . . . . . . . 48
Hair and Dynamic Curves
4

Table of Contents
Reference Menus . . . . . . . . . . . . . . . . . . . . . . . . . . . . . . . . . . . . . 48Dynamics menu set . . . . . . . . . . . . . . . . . . . . . . . . . . . . . . . 48
Hair. . . . . . . . . . . . . . . . . . . . . . . . . . . . . . . . . . . . . . . . . . . . 48
Hair > Create Cache . . . . . . . . . . . . . . . . . . . . . . . . . . . . . . . . . . . . . . . . 48
Hair > Create Cache > ❒ . . . . . . . . . . . . . . . . . . . . . . . . . . . . . . . . . . . 48
Hair > Append to Cache . . . . . . . . . . . . . . . . . . . . . . . . . . . . . . . . . . . . . 49
Hair > Append to Cache > ❒ . . . . . . . . . . . . . . . . . . . . . . . . . . . . . . . . 49
Hair > Truncate Cache . . . . . . . . . . . . . . . . . . . . . . . . . . . . . . . . . . . . . . 49
Hair > Delete Cache . . . . . . . . . . . . . . . . . . . . . . . . . . . . . . . . . . . . . . . . 49
4 Modifying hair . . . . . . . . . . . . . . . . . . . . . . . . . . . . . . . . . . . . 51
About Hair and Dynamic Curves . . . . . . . . . . . . . . . . . . . . . . 51Styling hair and modifying the hair look and behavior . . . . . . . . . . . . 51
Related topics. . . . . . . . . . . . . . . . . . . . . . . . . . . . . . . . . . . . . . . . . . . . 52
How do I? Simulate hair . . . . . . . . . . . . . . . . . . . . . . . . . . . . . . . 52Modify hair. . . . . . . . . . . . . . . . . . . . . . . . . . . . . . . . . . . . . . 52
Style the hair and modify behavior. . . . . . . . . . . . . . . . . . . . . . . . . . . . 52
Change the look of the hair . . . . . . . . . . . . . . . . . . . . . . . . . . . . . . . . . . 53
Paint hair . . . . . . . . . . . . . . . . . . . . . . . . . . . . . . . . . . . . . . . . . . . . . . . . . 53
Modify the hair system. . . . . . . . . . . . . . . . . . . . . . . . . . . . . . . . . . . . . . 54
Modify hair follicles . . . . . . . . . . . . . . . . . . . . . . . . . . . . . . . . . . . . . . . . 55
Adjust the hair length . . . . . . . . . . . . . . . . . . . . . . . . . . . . . . . . . . . . . . . 55
Edit hair curves . . . . . . . . . . . . . . . . . . . . . . . . . . . . . . . . . . . . . . . . . . . . 56
Hair curve editing tools . . . . . . . . . . . . . . . . . . . . . . . . . . . . . . . . . . . . . 56
Braid hair . . . . . . . . . . . . . . . . . . . . . . . . . . . . . . . . . . . . . . . . . . . . . . . . . 58
Make hair collide. . . . . . . . . . . . . . . . . . . . . . . . . . . . . . . . . . . . . . . . . . . 59
Fine tune collisions . . . . . . . . . . . . . . . . . . . . . . . . . . . . . . . . . . . . . . . . 59
Set up hair constraints . . . . . . . . . . . . . . . . . . . . . . . . . . . . . . . . . . . . . . 61
Hair constraint types. . . . . . . . . . . . . . . . . . . . . . . . . . . . . . . . . . . . . . . 63
Work with collision hair constraints. . . . . . . . . . . . . . . . . . . . . . . . . . . . 64
Assign a Paint Effects brush to Hair . . . . . . . . . . . . . . . . . . . . . . . . . . . 65
Tips for Paint Effects brushes assigned to Hair . . . . . . . . . . . . . . . . . . 67
Reference Menus . . . . . . . . . . . . . . . . . . . . . . . . . . . . . . . . . . . . . 69
Hair and Dynamic Curves
5

Table of Contents
Dynamics menu set . . . . . . . . . . . . . . . . . . . . . . . . . . . . . . . 69
Hair. . . . . . . . . . . . . . . . . . . . . . . . . . . . . . . . . . . . . . . . . . . . 69
Hair > Scale Hair Tool . . . . . . . . . . . . . . . . . . . . . . . . . . . . . . . . . . . . . . 69
Hair > Modify Curves . . . . . . . . . . . . . . . . . . . . . . . . . . . . . . . . . . . . . . . 69
Lock Length . . . . . . . . . . . . . . . . . . . . . . . . . . . . . . . . . . . . . . . . . . . . . 69
Unlock Length. . . . . . . . . . . . . . . . . . . . . . . . . . . . . . . . . . . . . . . . . . . . 69
Straighten . . . . . . . . . . . . . . . . . . . . . . . . . . . . . . . . . . . . . . . . . . . . . . . 69
Smooth . . . . . . . . . . . . . . . . . . . . . . . . . . . . . . . . . . . . . . . . . . . . . . . . . 69
Curl . . . . . . . . . . . . . . . . . . . . . . . . . . . . . . . . . . . . . . . . . . . . . . . . . . . . 70
Bend . . . . . . . . . . . . . . . . . . . . . . . . . . . . . . . . . . . . . . . . . . . . . . . . . . . 70
Scale Curvature . . . . . . . . . . . . . . . . . . . . . . . . . . . . . . . . . . . . . . . . . . 70
Hair > Create Constraint . . . . . . . . . . . . . . . . . . . . . . . . . . . . . . . . . . . . 70
Hair > Create Constraint > Rubber Band . . . . . . . . . . . . . . . . . . . . . . . 70
Hair > Create Constraint > Stick . . . . . . . . . . . . . . . . . . . . . . . . . . . . . . 70
Hair > Create Constraint > Transform . . . . . . . . . . . . . . . . . . . . . . . . . 71
Hair > Create Constraint > Hair to Hair . . . . . . . . . . . . . . . . . . . . . . . . . 71
Hair > Create Constraint > Hair Bunch . . . . . . . . . . . . . . . . . . . . . . . . . 71
Hair > Make Collide . . . . . . . . . . . . . . . . . . . . . . . . . . . . . . . . . . . . . . . . 71
Hair > Assign Paint Effects Brush to Hair . . . . . . . . . . . . . . . . . . . . . . . 71
Nodes . . . . . . . . . . . . . . . . . . . . . . . . . . . . . . . . . . . . . 72Hair nodes . . . . . . . . . . . . . . . . . . . . . . . . . . . . . . . . . . . . . . 72
hairConstraintShape node . . . . . . . . . . . . . . . . . . . . . . . . . . . . . . . . . . . 72
5 Rendering Hair . . . . . . . . . . . . . . . . . . . . . . . . . . . . . . . . . . . . 75
How do I? Simulate hair . . . . . . . . . . . . . . . . . . . . . . . . . . . . . . . 75Render scenes with hair. . . . . . . . . . . . . . . . . . . . . . . . . . . . 75
Set up hair shading. . . . . . . . . . . . . . . . . . . . . . . . . . . . . . . . . . . . . . . . . 75
Hair system shading . . . . . . . . . . . . . . . . . . . . . . . . . . . . . . . . . . . . . . . 75
Follicle shading. . . . . . . . . . . . . . . . . . . . . . . . . . . . . . . . . . . . . . . . . . . 76
Tube shading . . . . . . . . . . . . . . . . . . . . . . . . . . . . . . . . . . . . . . . . . . . . 76
Set up hair self-shadowing . . . . . . . . . . . . . . . . . . . . . . . . . . . . . . . . . . 76
Render scenes with hair . . . . . . . . . . . . . . . . . . . . . . . . . . . . . . . . . . . . . 78
Rendering using distributed render . . . . . . . . . . . . . . . . . . . . . . . . . . . 80
Hair and Dynamic Curves
6

Table of Contents
Reference Nodes . . . . . . . . . . . . . . . . . . . . . . . . . . . . . . . . . . . . . 81Hair nodes . . . . . . . . . . . . . . . . . . . . . . . . . . . . . . . . . . . . . . 81
hairTubeShader node. . . . . . . . . . . . . . . . . . . . . . . . . . . . . . . . . . . . . . . 81
6 Samples and techniques for Hair . . . . . . . . . . . . . . . . . . . . . . 83
How do I? Simulate hair . . . . . . . . . . . . . . . . . . . . . . . . . . . . . . . 83Sample hairstyles. . . . . . . . . . . . . . . . . . . . . . . . . . . . . . . . . 83
Create wavy, curly hair . . . . . . . . . . . . . . . . . . . . . . . . . . . . . . . . . . . . . . 83
Create ponytails and braids . . . . . . . . . . . . . . . . . . . . . . . . . . . . . . . . . . 86
Sample dynamic curve scenarios. . . . . . . . . . . . . . . . . . . . . 88
Dynamic spline IK chain illustrated using a butterfly tail . . . . . . . . . . 88
Stiffness Scale along curve and emit particles from curve illustrated
with a fishing rod and line . . . . . . . . . . . . . . . . . . . . . . . . . . . . . . . . . . . 90
Advanced tips for working with Hair. . . . . . . . . . . . . . . . . . . . . . . . . . . 93
Max Hair Density option variable . . . . . . . . . . . . . . . . . . . . . . . . . . . . . 93
Using the pfxstrokes command . . . . . . . . . . . . . . . . . . . . . . . . . . . . . . 94
Using a follicle node as a point on poly constraint . . . . . . . . . . . . . . . . 94
Attaching a skipping rope (dynamic curve) to hands . . . . . . . . . . . . . . 95
Hair as a wire deformer . . . . . . . . . . . . . . . . . . . . . . . . . . . . . . . . . . . . 95
Troubleshoot Hair . . . . . . . . . . . . . . . . . . . . . . . . . . . . . . . . . . . . . . . . . . 95
Hair simulation is slow when using NURBS Curves output . . . . . . . . . 96
Undo doesn’t work with Lock Length on. . . . . . . . . . . . . . . . . . . . . . . . 96
Unruly, jiggy hairs during playback. . . . . . . . . . . . . . . . . . . . . . . . . . . . 96
Index . . . . . . . . . . . . . . . . . . . . . . . . . . . . . . . . . . . . . . . . . . . . . . . 97
Hair and Dynamic Curves
7

Table of Contents
Hair and Dynamic Curves
8

1 Introducing Hair
About
Hair overview
Hair is a component of Maya Unlimited that you use to create a dynamic hair system so you can model realistic hairstyles and hair behavior. Since Hair is a generic dynamic curve simulation, you can also use these curves to create non-hair effects.
With Hair you can simulate:
• natural movement and collisions of long hair
• hair blowing in the wind or being blow dried
• hair when swimming underwater
• various hairstyles, including ponytails, braids, and updos
• other dynamic curve effects such as ropes, chains, cables, wires, a suspension bridge, sea creatures, or even a lofted surface from a curve. For more information, see ”Creating other models and effects with hair” on page 18.
To get started quickly using Maya Hair, see the Hair lessons in the Getting Started with Maya Unlimited tutorials.
Hair connections
A hair system is a collection of hair follicles. A NURBS or polygonal surface can have multiple hair systems on the same surface and one hair system can span multiple surfaces.
Note Hair is available only in Maya Unlimited.
Hair and Dynamic Curves
9

1 | Introducing Hair
About > Paint Hair Tool
A hair follicle in human hair typically hosts one hair, whereas in Maya each hair follicle hosts a hair curve. The hair follicle controls the attributes and curves associated with a particular hair clump, and how the hairs attach to a NURBS or polygonal surface. The input to each follicle is a Start Position NURBS curve, a surface and a UV position to attach to.
When creating hair, the hair system output can be in the form of NURBS curves, Paint Effects strokes, or both. If the specified output when creating hair is NURBS Curves, each follicle will contain one NURBS curve that represents the position of the hair in that follicle. If the specified output is Paint Effects, each follicle has a hair clump, made up of Paint Effects strokes.
There are various attributes on a hair system for modifying the look and behavior of the hair as a whole. There are also follicle level attributes that will override the hair system attributes; the visible result will be affected by both the follicle and hair system attributes.
Paint Hair Tool
With the Paint Hair Tool you can create hair, add and remove follicles, as well as paint follicle attributes, including Hair Scale, Stiffness, and Braid.
Rendering Hair
Paint Effects hair can be rendered using the Maya Software renderer. You can also convert Paint Effects hair to polygons and render in another renderer, such as mental ray. Or you can output just the dynamic NURBS curves to an external renderer, such as RenderMan.
Hair Output
Consider outputting Hair to Paint Effects if you want to:
• render with the Maya Software renderer
• convert the Paint Effects hair to polygons and render in any renderer
Consider outputting Hair to NURBS curves if you want to:
• use the curves for output to another renderer that directly supports curve rendering.
• select a few Current Position curves and loft a surface through them with construction history.
• extrude a circle down the curve to create a tube.
• use the curves as path or control curves for any standard Paint Effects brush, such as feathers or vines. These brushes behave differently than the default built-in Paint Effects as the curves are not the hairs, but controls that interpolate and affect Paint Effects. This scenario is
Hair and Dynamic Curves
10

1 | Introducing Hair
About > Hair Output
slower to update and takes a bit of time to set up. Alternatively, you could just assign a Paint Effects brush to a hair system (you don’t need NURBS Curves output for this).
Consider outputting Hair to both NURBS curves and Paint Effects if you want to:
• use both the curves (for example, as particle emitters to simulate spray flying off wet hair) and render using the integrated Paint Effects either directly or by converting to polygons.
Hair and Dynamic Curves
11

1 | Introducing Hair
About > Basic workflow for Hair
Basic workflow for Hair
This is the general workflow to create and animate hair:
• create hair on models
• style hair curves
• modify hair attributes
• set up hair shading/shadowing
• render the scene
An initial workflow could be:
1 Create a sphere.
2 Create hair. Hair sticks out normal to the surface.
3 Play the simulation. The hair falls due to built-in dynamic forces.
4 Once the hair is relaxed, select the hair curves and set the Start Position from the Current Position. (Hair > Set Start Position > From Current)
5 Animate the sphere as required to see natural motion or move the sphere during interactive playback. (Solvers > Interactive Playback)
6 Render the scene.
For all images above the model was created by Danny Mousses and the hair was created by Duncan Brinsmead.
Hair and Dynamic Curves
12

1 | Introducing Hair
About > Basic workflow for Hair
Hair in Perspective View Hair in Render View
Hair and Dynamic Curves
13

1 | Introducing Hair
About > Basic workflow for Hair
Hair and Dynamic Curves
14

2 Creating hair
About Creating hair
Before creating hair, consider the following:
• How do you want to render hair? The renderer you want to use affects what Output setting you choose when you create hair. For more information, see ”Hair Output” on page 10 and ”Rendering Hair” on page 10.
• Do you want to include passive hair curves in your hair system? See ”Passive hair curves” on page 16.
• Do you want to include Rest curves in your hair system? See ”Start, Rest, and Current Position curves” on page 15 and ”Create Rest Curves” on page 28.
• What kind of hair style to you want to create? If short and simple, you can keep your Points Per Hair (segments) low, but if you’re creating long hair or a short, complex hairstyle you need more segments for flexible, natural looking hair. Also, you can create multiple hair systems on the same surface, which can be helpful if you’re adding bangs (fringe) to a model. See ”Assign a selection to a hair system” on page 23.
• If creating hair on a polygon, which UV set do you want to use? Use UV sets to define where the hair goes and to control its distribution and density. See ”Select which UV set to use for Hair (polygons only)” on page 23.
• Do you want to use dynamic curves for a non-hair simulation? For more information, see “Creating other models and effects with hair” and also ”Make curves dynamic” on page 25.
Start, Rest, and Current Position curves
There are three sets of curves for the hair system.
Start Curves/
PositionThis is the position of the hair at the start frame of the simulation. When first created, the Start curves stick straight out from the surface.
Hair and Dynamic Curves
15

2 | Creating hair
About > Passive hair curves
Passive hair curves
You can specify a ratio of passive curves (Passive Fill) to active curves. Passive curves interpolate the dynamic behavior of active curves, but are less expensive than simulating every curve. See ”Passive Fill” on page 27.
More specifically, passive follicles have their motion defined by interpolating the motion of neighboring dynamic follicles, rather than computing their own motion. They can be used with both Paint Effects and NURBS Curve output.
If a passive hair does not have an input Start position curve then its shape, in addition to its motion, is determined by interpolating the neighboring dynamic hairs. Dynamics, forces or collisions are not computed on passive hairs. (The Simulation Method attribute on the follicleShape node determines whether a hair will be dynamic, passive or static. Static hairs simply keep the Start position and do not animate.) (See ”Start Curves/Position” on page 15.)
Rest Curves/
PositionThis is the position of the hair when no forces (such as gravity) are acting upon it. You can use these curves to influence the shape of the hair.
Working with Rest curves is like styling hair with hairspray. The Rest curves are styled into curls and flips, etc. When the simulation is played back, the hair adheres to the Rest curves position as much as possible depending on dynamic forces and attribute settings in the hair system and follicles. For example, if your hair is not very stiff and you’re simulating a windy day, the hairspray (Rest curves position) is less likely to hold the hair in position.
Tip: The Damp value can be used to relax oscillating curves on non-straight hair.
Current Position These are the output and/or Paint Effects curves generated by the hair system.
This is how the hair behaves when you play the simulation, which includes built-in dynamics. Do not edit the Current Position; just view it.
The Stiffness and Iterations attributes in the Hair system’s Dynamics section are what control the tolerance of the Current Position achieving the Rest Position.
Hair and Dynamic Curves
16

2 | Creating hair
About > Passive hair curves
The Passive Fill attribute determines the proportion of the follicles that are initially set to active versus passive. If the Passive Fill is 1, then every other row and column of follicles will be passive (with the points not in these rows or columns being dynamic). If it is 2 then there will be two rows/columns of passive for each row containing dynamic. The number of dynamic hairs goes down dramatically as the Passive Fill increases. If the motion of the hair is relatively uniform you might not see much difference when a large percentage of the hairs are passive. However the Passive Fill will be uniformly interpolated between the active hairs. This creates a uniform mass of hair, without requiring self collision.
When the follicle is created, a Start position curve is not created for passive follicles, although you can easily set one up by selecting the passive follicle and then selecting Hair > Set Start Position > From Current. You can then edit the shape of the passive hair by editing its Start curve.
Passive follicles can also be used purely for modeling. Use them to sculpt the hair by modifying a small set of Start curves. To do this, first create the hair with an initially small proportion of dynamic hairs. Display both the Current and Start positions and set the Time Slider to the start frame. When you edit the Start hairs for dynamic follicles, the passive hairs that don't have start positions will interpolate. When you’re done shaping the hair you can set the Start position from the Current position for the passive follicle, then make them active. (Select the follicles and in the Channel Box set Simulation Method to Dynamic.)
In terms of optimizing performance, the passive follicles will only help in certain situations currently, as the dynamic computations are typically a small part of the overall computation expense with the hair feature, especially if output curves are used. For large numbers of follicles, Paint Effects output can be 10 times faster than NURBS Curve output. You’ll tend to notice the most performance improvement when using passive follicles if you are colliding with geometry and the iterations value on the hair system is very high and the number of CVs on the simulating curves is high. (The number of points on the simulating curve is the number of CVs on the Start curve times the sample density on the follicle node.) Other factors that affect the dynamics, like collide oversample and fields applied to the hair, will further show up the performance improvement. There is also a Simulation Method option in the hairSystemShape node that lets you only output active follicles, hiding the passive ones.
However the biggest advantage is probably that the passive hairs move as a coherent group. This can be used to fake some of the self collision coherence of large groups of hairs, without the overhead of self collision. The other advantage is that they also do not need to be directly modeled.
Hair and Dynamic Curves
17

2 | Creating hair
About > Creating other models and effects with hair
Creating other models and effects with hair
Any NURBS curve can be made into a dynamic hair, such as a curve deformer or input curves to a lofted surface. In addition to creating long hair and hairstyles you can use hair curves to create:
• ropes and chains (dynamic curves)
• a fish (wire deformer)
• a fishing line (single hair with expressions)
• a tied-back beaded curtain (hairs with a constraint)
• an octopus (select Hair curves and create a lofted surface)
• a suspension bridge
• a wire deformer on particles
For more information, see ”Make curves dynamic” on page 25 and ”Sample dynamic curve scenarios” on page 88.
Each grid from left to right illustrates what the passive to active fill would be like with the given settings
Hair and Dynamic Curves
18

2 | Creating hair
How do I? > Create hair
How do I? Create hair
You can create hair on NURBS and polygonal surfaces. For polygons, UVs should be non-overlapping and fit between 0 and 1. Automatic mapping is a quick way to achieve this. (See Map UVs onto polygons automatically in the Polygonal Modeling guide in Maya Help.) You can also choose which UV set you want to use; see ”Select which UV set to use for Hair (polygons only)” on page 23.
Before creating hair, you should determine which renderer you’ll be using as this will affect what type of hair output you select: NURBS curves or Paint Effects. For more information about the differing outputs and what to consider when selecting output, see ”Hair Output” on page 10 and ”Hair > Create Hair” on page 26.
If you create hair when an existing hair system node is selected along with the surface(s), then the newly created hairs will belong to that hair system.
If you create hair twice on the same surface with the same settings (with Randomization set to 0), no new hairs will be created. If you were to instead double the UV count, new hairs would be inserted on a double resolution grid with the new hairs occurring between the old hairs (every odd new hair would be rejected).
Note See the ”Max Hair Density option variable” on page 93.
Hair and Dynamic Curves
19
2 | Creating hair
How do I? > Choose which hair curves to display
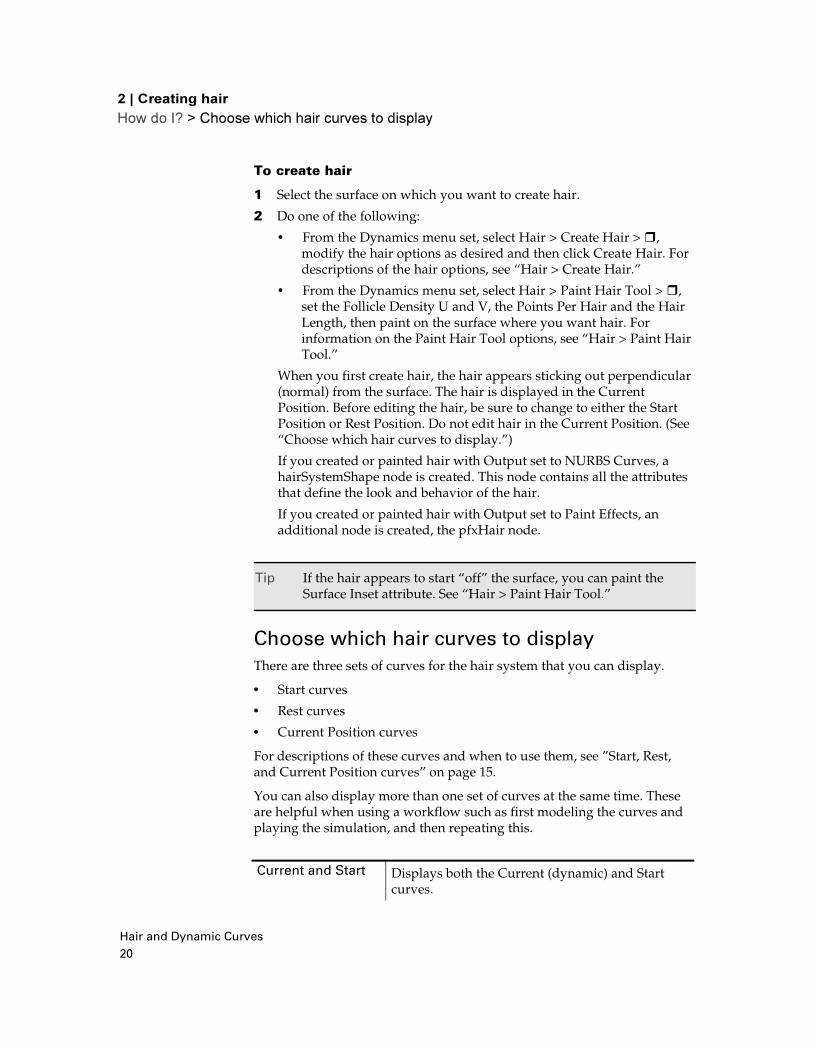
To create hair
1 Select the surface on which you want to create hair.
2 Do one of the following:
• From the Dynamics menu set, select Hair > Create Hair > �, modify the hair options as desired and then click Create Hair. For descriptions of the hair options, see “Hair > Create Hair.”
• From the Dynamics menu set, select Hair > Paint Hair Tool > �, set the Follicle Density U and V, the Points Per Hair and the Hair Length, then paint on the surface where you want hair. For information on the Paint Hair Tool options, see “Hair > Paint Hair Tool.”
When you first create hair, the hair appears sticking out perpendicular (normal) from the surface. The hair is displayed in the Current Position. Before editing the hair, be sure to change to either the Start Position or Rest Position. Do not edit hair in the Current Position. (See “Choose which hair curves to display.”)
If you created or painted hair with Output set to NURBS Curves, a hairSystemShape node is created. This node contains all the attributes that define the look and behavior of the hair.
If you created or painted hair with Output set to Paint Effects, an additional node is created, the pfxHair node.
Choose which hair curves to display
There are three sets of curves for the hair system that you can display.
• Start curves
• Rest curves
• Current Position curves
For descriptions of these curves and when to use them, see ”Start, Rest, and Current Position curves” on page 15.
You can also display more than one set of curves at the same time. These are helpful when using a workflow such as first modeling the curves and playing the simulation, and then repeating this.
Tip If the hair appears to start “off” the surface, you can paint the Surface Inset attribute. See “Hair > Paint Hair Tool.”
Current and Start Displays both the Current (dynamic) and Start curves.
Hair and Dynamic Curves
20
2 | Creating hair
How do I? > Select hair, follicles, curves, and CVs
To change to another hair display position
Select Hair > Display and then selected the desired hair position.
To show or hide Paint Effects strokes
In the panel, select Show > Strokes.
To show or hide NURBS curves
In the panel, select Show > NURBS Curves.
Select hair, follicles, curves, and CVs
For various options you will need to select either the hair system, hair follicles, curves, or CVs.
To make it easier to pick a hair system, curves, or follicles, set the following pick mask:
• Click the Object Selection Mask button on the Status Line and select All Objects Off.
• Click the button on the Status Line to restrict the selection to curves.
• To make it easier to pick CVs on hair curves, do the above and then click the button on the Status Line.
And then you can select Hair > Convert Selection to convert your curve selection to the hair system, follicles, specific curves (Start, Rest), or CVs. See ”Hair > Convert Selection” on page 31.
To select the hair system
Do one of the following:
• Drag to select the hair curves and then select Hair > Convert Selection > to Hair Systems.
• Select hairSystem in the Outliner or Hypergraph. (Window > Outliner, Window > Hypergraph)
Current and Rest Displays both the Current (dynamic) and Rest curves.
All Displays all three types of curves: Start, Rest, and Current (dynamic).
Hair and Dynamic Curves
21

2 | Creating hair
How do I? > Set curve positions
To select follicles
In the Start or Rest Position, select the curve(s) relating to the desired follicle(s) and then select Hair > Convert Selection > to Follicles.
To select curves
You may find it easier to select curves by turning off the Strokes display. (Show > Strokes)
In the Start or Rest Position, click a curve to select it and then shift + click to select additional curves.
To select all curves
1 Do one of the following:
• Drag a box around the surface to select all curves.
• Select hairSystem in the Outliner or Hypergraph. (Window > Outliner, Window > Hypergraph)
2 Optionally, select Hair > Convert Selection and then select either to Start Curves, to Rest Curves, or to Current Positions.
Set curve positions
When hair is created, Start curves are created automatically. If Create Rest Curves was turned on in the Create Hair Options window, then Rest Curves are created as well. If not, then you can create Rest Curves at any time using the Start or Current Position curves. When you play the simulation, the Current Position is what you display to see the hairs react to dynamic forces.
When creating curves for hair, Rest and Current Position curves are initially colored brown and blue, respectively, to help distinguish them from Start Position curves. This is done using the Draw Overrides on these curve nodes. Layers depend on Draw Overrides as well; therefore, if you create the hair in a layer or add it to a layer, then the color of all hair curves is now the same, even if the hair is subsequently removed from the layer.
While modeling hair, you may reset the Start or Rest curve positions several times.
To set Start curve positions
1 Select the curves you want to set.
2 Select Hair > Set Start Position and then select one of the following:
• From Current. This sets the Start Position to the Current Position.
• From Rest. This sets the Start Position to the Rest Position.
Hair and Dynamic Curves
22

2 | Creating hair
How do I? > Assign a selection to a hair system
To set Rest curve positions
1 Select the curves you want to set.
2 Select Hair > Set Rest Position and then select one of the following:
• From Current. This sets the Rest Position to the Current Position.
• From Start. This sets the Rest Position to the Rest Position.
Assign a selection to a hair system
You can assign a selection (curves, follicles, CVs, hair system) to either an existing hair system or a new hair system.
If the selection consists of hairs that are currently part of another hair system and you assign this to a new hair system, the original hair system will be duplicated and the selected hairs attached to that duplicate. Thus this provides a means where one can take a few hairs and adjust hair system settings for just those hairs. Constraints on hairs are also transferred when assigning a hair system. If only a few of the hairs being constrained are reassigned, then the constraint will be duplicated such that each hair system has a constraint. If all the hairs being constrained are reassigned, then the constraint is completely moved to the new hair system and no new constraints are created.
To assign a selection to a hair system
1 Select the curves, follicles, CVs or hair system you want to assign. If your selection is follicles or CVs, convert the selection to curves.
2 Select Hair > Assign Hair System and then select either an existing hair system or a new hair system.
Select which UV set to use for Hair (polygons only)
Use UV sets to define where the hair goes and to control its distribution and density.
By default Hair uses UV set map1, but you can link your hair systems to different UV sets on your polygonal surface. For example, if you have different UV sets defined for different projections, you can link the hair systems to the UV set that gives the best result.
In the Relationship Editor, when you link a hair system to a UV set, all the hair systems attached to the polygon are linked to that UV set. However the UV set is controlled by the mapSetName attribute in the Extra Attributes section in the follicleShape node, so you could define it from there. (Currently you cannot edit the follicle’s mapSetName attribute in the Attribute Spreadsheet.)
Hair and Dynamic Curves
23

2 | Creating hair
How do I? > Select which UV set to use for Hair (polygons only)
Related topics
� UV sets
� Create UV sets
� Edit Polygons > Texture > Automatic Mapping
To link attached hair systems to a different UV set
1 Select the object with the hair system(s) you want to link.
2 Select Window > Relationship Editors > UV Linking > Hair/UV to open the Relationship Editor.
The left panel lists all the hair systems that are attached to the selected polygon.
The right panel lists mesh nodes with UV Sets for the selected polygon. If more than one polygon is selected, only the last selected polygon is listed.
3 In the left panel, click a hair system. In the right panel the UV set the Hair follicle is linked to becomes highlighted.
4 In the right panel, click the UV set you want to link the hair system to.
Tip Currently you need to create a UV set for hair that is between zero and 1. You can use regions outside this range for areas you want to be bald. Or if you simply do not define UVs for a triangle, then it will be bald. You should do this before creating the hairs, as on creation of hair, hairs are rejected that are located at undefined UV locations. If the UV for a follicle becomes undefined after creation, then the follicle will simply move to the center of the object; however, you could then manually select and delete these follicles. See ”Create hair” on page 19.
Hair and Dynamic Curves
24

2 | Creating hair
How do I? > Make curves dynamic
Make curves dynamic
You can make any curve a dynamic (hair) curve. When making curves dynamic keep in mind that hair stiffness is defined per CV and is dependant on the number of CVs in the simulating hair. By default this matches the number of CVs in the start curve. The Sample Density on the follicle can be used to scale this number. If the Sample Density is 2.0 then the simulating (and output curve) will have twice as many CVs and be half as stiff.
When applying Make Selected Curves Dynamic on a curve with only a few CVs (such as 4) the curve tends to be very stiff. You can lower the Stiffness, but if you want more detail in the output you can increase the Sample Density on the follicle. In terms of Stiffness, when there are many CVs on a curve (20 or more) the problem is usually achieving both more Stiffness and less Length Flex. The way you do this is by increasing the Iterations attribute on the hair system. In some cases you might want a floppy rope with many CVs that is not stretchy. For this you need higher Iterations and a Stiffness value that is very low (such as 0.001). In general you should use as few CVs as required, especially when stiffness is desired as this is more efficient.
For sample scenarios using dynamic curves, including images and workflows, see:
• ”Dynamic spline IK chain illustrated using a butterfly tail” on page 88
• ”Stiffness Scale along curve and emit particles from curve illustrated with a fishing rod and line” on page 90
To make a curve dynamic
1 Select the curve(s).
2 Select Hair > Make Selected Curves Dynamic. The selected curves are now dynamic hair curves.
Image created by Danny Mousses
Hair and Dynamic Curves
25
2 | Creating hair
Reference > Delete hair
If a hair system is selected in addition to NURBS curve(s), then the curves will be assigned to that hair system.
3 Modify the curve attributes in the follicleShape node of the Attribute Editor. For descriptions of these attributes, see ”follicleShape node” on page 40.
Delete hair
A hair system is made up of many components and connections. You can delete curves, follicles, and CVs by selecting them and pressing the Delete key. (See ”Select hair, follicles, curves, and CVs” on page 21.) But to remove an entire hair system (including its curves, follicles and CVs) use the following procedure.
To remove a hair system
1 Do one of the following:
• Drag to select the hair curves and then select Hair > Convert Selection > to Hair Systems.
• Select hairSystem in the Outliner. (Window > Outliner)
• Select any curve, follicle, or CV in the hair system.
2 Select Hair > Delete Entire Hair System.
Reference Hair > Create Hair
Use this to create dynamic hair on a NURBS or polygon surface. For more information, see ”Create hair” on page 19.
Hair > Create Hair > �
These are descriptions for the options in the Create Hair Options window.
Output
This is the hair system’s output. For information on what to consider when choosing the output, see ”Hair Output” on page 10. Select from one of the following:
Tip The Damp value can be used to relax oscillating curves on non-straight hair.
Hair and Dynamic Curves
26

2 | Creating hair
Reference > Hair > Create Hair > �
Paint Effects Each follicle has a hair clump (strokes) containing information about the color and shading of the hair, as well as its position.
NURBS Curves Each follicle contains one NURBS curve that represents the position of the hair in that follicle.
Paint Effects and
Curve Each follicle contains one NURBS curve that represents the position of the hair in that follicle. Each follicle also has a hair clump (strokes) containing information about the color and shading of the hair.
U Count
The number of follicles to be created along the U direction.
V Count
The number of follicles to be created along the V direction.
Points Per Hair
This is the number of points/segments per hair. As this value increases the hair curve becomes smoother. Keep in mind for relatively short stiff hair use fewer points (or Sub Segments), but for long flowing hair use more points, especially if you plan to style the hair curves. For stiff hair that has a detailed shape you may need to use more points (or Sub Segments), but you may also need to use higher Iterations to achieve the desired stiffness.
Passive Fill
The number of passive curves to active (hair) curves. Passive curves interpolate the dynamic behavior of active curves, but are less expensive than simulating every curve. For more information, see ”Passive hair curves” on page 16.
Length
The length of the hair in world space units (default grid units in the modeling views).
At a very large scene scale, it might be necessary to type in large values for the length. Gravity is constant, so increasing the length for a large scene scale will result in hair that seems to fall more slowly. If this is the case, then increase gravity on the hairSystemShape node until the hair falls at the desired rate. Currently the gravity field for particle and rigid body simulations seems to be calibrated with the sense that cm are around a meter.
Hair and Dynamic Curves
27

2 | Creating hair
Reference > Hair > Paint Hair Tool > ❒
Randomization
The degree of randomization for the placement of follicles along the U and V directions. With a value of 0 there is no randomization and the follicles are lined up. With a value of 1 the follicles are extremely random.
Create Rest Curves
When turned on, this creates a set of Rest curves that are straight and normal to the surface. If the hair is fairly stiff and you want it to assume a non-straight shape (in the absence of external forces like gravity), then you should create and edit Rest curves. For more information, see ”Rest Curves/Position” on page 16.
Edge Bounded
When turned on, the follicles are created along the edge of the U and V parameters.
Equalize
Turn this on so when hair is created Maya compensates for uneven mapping between UV space and world space, equalizing the distribution of the follicles so they aren’t cluttered at the poles.
Hair > Paint Hair Tool
Use the Paint Hair Tool to add dynamic hair to a NURBS or polygonal surface, to remove hair, or to paint follicle attributes of an existing hair system. For more information, see ”Create hair” on page 19 and ”Paint hair” on page 53. See also “How Artisan brush tools work” in the Paint Effects, Artisan, and 3D Paint guide.
Hair > Paint Hair Tool > ❒
These are descriptions of the options in the Paint Hair Tool Settings window. For descriptions of the attributes in the Tool Settings editor, see “Artisan Brush Tool Settings” and “Common Artisan Brush Tool Settings” in the Paint Effects, Artisan, and 3D Paint guide.
Paint Modes
These are descriptions of the Paint Modes you can select in the Paint Hair Tool Settings window.
Hair and Dynamic Curves
28

2 | Creating hair
Reference > Hair > Paint Hair Tool > ❒
Create Follicles Adds follicles to the surface as you paint. The follicles that are created and their appearance are based on the Density, Points Per hair and Hair Length settings in the Paint Hair Tool Settings window.
To create a new hair system, select Create New from the Hair System drop-down list and then paint on the surface. To paint hair on an existing hair system, select the hair system from the Hair System drop-down list and then paint on the surface.
Create Passive
Follicles Adds passive follicles to the surface as you paint. Passive follicles draw their attributes and behavior from their neighboring active follicles/curves at the start of the simulation. For more information about passive curves, see ”Passive Fill” on page 27.
Delete Follicles Removes follicles from the surface as you paint.
Edit Follicle Attributes Modifies the follicles you paint based on the settings in the Paint Hair Tool Settings window. Specify which hair system you want to paint or all hair systems in the Hair System drop-down list.
Trim Hairs As you paint over the hairs they are trimmed based on the Value you specify for the Replace operation in the Paint Hair Tool Attribute Editor. The length that is trimmed is relative to the existing hair Length value.
Extend Hairs As you paint over the hairs they are lengthened based on the Value you specify for the Replace/Add operation in the Paint Hair Tool Attribute Editor. The length that is extended is relative to the existing hair Length value.
Paint Hair options
These are descriptions of the options you can select once you’ve specified a Paint Mode.
Tips If the hair appears to start “off” the surface, you can paint the Surface Inset attribute.
If you paint Curl Mult, but the hair doesn’t become curly or curlier, then the hair system’s Clump Curl value is set to 0.5, which means no curl.
Hair and Dynamic Curves
29

2 | Creating hair
Reference > Hair > Paint Hair Tool > ❒
Follicle Attribute
Select the follicle attribute to paint using the Edit Follicle Attributes Paint Mode. Specifically, you can paint Clump Width Mult, Density Mult, Curl Mult, Clump Twist Offset, Color Blend, Braid, Hair Scale, Inclination, Roll, Polar, Surface Inset, Stiffness.
Hair System
Select which hair system to paint.
Output
If Paint Mode is Creating Follicles, then select the type of hair output. For descriptions of hair output types, see ”Hair Output” on page 10.
Follicle Density U
If Paint Mode is Creating Follicle, this value represents the number of follicles to create in the U direction.
Follicle Density V
If Paint Mode is Creating Follicle, this value represents the number of follicles to create in the V direction on the surface.
Points Per hair
If Paint Mode is Creating Follicles, this value represents the number of points (segments) each new hair has. As this value increases the hair curve becomes smoother. If the Paint Mode is Trim Hairs or Extend Hairs, this value represents the number of points along the hair affected by the operation.
Hair Length
The length of the hair in world space units (default grid units in the modeling views). See ”Length” on page 27.
Follicle Override Color
You can specify a follicle color override if you select Edit Follicle Attributes as the Paint Mode and then select Color Blend as the attribute. You control the value of the Color Blend by adjusting the Value in the Tool Settings editor. A value of 1 means the follicle color overrides the hair system color; whereas a value 0 results in the follicle color having no effect on the hair system color. A value between 0 and 1 results in a blending between the Follicle Override Color and the hair system color.
Hair and Dynamic Curves
30

2 | Creating hair
Reference > Hair > Paint Hair Tool > ❒
Hair > Display
Select the curves/position you want to display: Start, Rest, or Current (Dynamic). For descriptions of the curves and positions, see ”Choose which hair curves to display” on page 20.
Hair > Set Start Position
Select this to set the position for the Start curves based on the Current Position (dynamic simulation) or the Rest Position. The Start Position represents the position of the hair at the start of the simulation. See ”Set curve positions” on page 22.
Hair > Set Rest Position
Select this to set the position for the Rest curves based on either the Current Position (dynamic simulation) or the Start Position. The Rest Position represents the position of the hair when no forces are acting upon it. You can use these curves to influence the shape of the hair. See ”Set curve positions” on page 22.
Hair > Convert Selection
Converts the current selection to one of the following: Follicles, Start Curves, Rest Curves, Current Positions, Hair Systems, Hair Constraints, or End CVs. See ”Select hair, follicles, curves, and CVs” on page 21.
Hair > Assign Hair System
Assigns the selection to the specified hair system, which can either be a new hair system or an existing hair system. See ”Assign a selection to a hair system” on page 23.
Hair > Make Selected Curves Dynamic
Turns the selected hair curves into dynamic curves. For more information, see ”Creating other models and effects with hair” on page 18 and ”Make curves dynamic” on page 25.
Hair > Delete Entire Hair System
Removes the entire selected hair system and all its components (follicles, curves). For more information, see ”Delete hair” on page 26.
Hair and Dynamic Curves
31

2 | Creating hair
Reference > pfxHair node
pfxHair node
This node is created when hair is created with Output set to Paint Effects. This node contains attributes that are common to all pfx shape nodes. It cannot be used directly, but rather should be derived from. For more information about its attributes, see the strokeShape node (see stroke).
hairSystemShape node
These are descriptions of the attributes in the hairSystemShape node (also hairSystem node). When modifying these attributes they affect the entire hair system.
Related topics
� ”Select hair, follicles, curves, and CVs” on page 21
� ”Styling hair and modifying the hair look and behavior” on page 51
� ”Play a hair simulation” on page 45
� ”Create wavy, curly hair” on page 83
Simulation Method
Controls what is simulated in the hair system. The following are descriptions of the options in the drop down list.
Off The hair system is not displayed or updated during the playback of the simulation.
Static The hair system does not move during the playback of the simulation. But the hair system does update the position of the hairs if the surface is transformed.
Dynamic Follicles
Only The hair system simulates and updates dynamic hairs only during playback of the simulation. Passive hairs are hidden.
All Follicles The hair system simulates and updates all hairs (dynamic and passive) during playback of the simulation.
Display Quality
This value is the percentage of hairs within clumps to display for interactive draw. This display quality corresponds to the display quality of Paint Effects strokes.The default value is 100.
Hair and Dynamic Curves
32

2 | Creating hair
Reference > Clump and Hair Shape
Clump and Hair Shape
This section contains attributes to control the hair clumps and overall hair shape.
Hairs Per Clump
This is the number of hairs rendered for each Current Position hair curve.
Sub Segments
This determines the number of smoothly interpolated segments at render time. The hermite interpolation smooths the shape of the line, in addition to providing more detail for curls and fine features. The added segments affect the rendered look only and do not affect the dynamic simulation.
Thinning
This controls the proportion of shorter length hairs.
Clump Twist
This is the rotation of the clump group about the primary hair axis.
Bend Follow
This determines how much the rotation of the overall clump follows the primary hair axis. Short straight hair may work better with this value near zero, as the end of wide clumps will blend better when they twist. With this value at 1.0 the cross section of the hair clump will always be perpendicular to the tube direction, which can work well for long relatively thin clumps. When this value is zero the cross section is always perpendicular to the surface normal at the start of the hair clump.
Clump Width
This is the base or maximum width for the dynamic hair groups.
Hair Width
This is the global width for hairs.
Clump Width Scale
Using a ramp (graph) you can define a varied width for hair clumps. Clump Width Scale affects the width from root to tip of the hair clump. The left of the graph is the root and the right is the tip. You might want the hairs within the clump to come to a tip at the end of the clump, in which case the right value should be smaller than the left. This attribute multiplies the Clump Width parameter value, so a value of 1.0 will leave the Clump Width unchanged. If the Clump Width attribute is zero then this parameter will have no effect.
Hair and Dynamic Curves
33

2 | Creating hair
Reference > Clump and Hair Shape
Hair Width Scale
Using a ramp (graph) you can define a varied width for the overall hair shape. Hair Width Scale affects the width from root to tip of the hairs. The left of the graph is the root and the right is the tip. This attribute multiplies the Hair Width parameter value, so a value of 1.0 will leave the Hair Width unchanged, but if the Hair Width attribute is zero then this parameter will have no effect.
Clump Curl
Using a ramp (graph) you can define a varied curl for hair clumps. Clump Curl controls the rate of curling about the primary axis of each hair clump. The left of the graph is the root and the right is the tip. The mid value of the ramp (0.5) represents no twist while values greater than that will result in positive twisting and smaller values will cause twisting in the reverse direction.
Clump Flatness
Using a ramp (graph) you can define a varied flatness for hair clumps. Clump Flatness affects the flatness of the clump group from root to tip. The left of the graph is the root and the right is the tip.
Click the handle to edit the entry.
Click-drag the handle to move the entry.
Click in the graph to add a new entry or click-drag to add and interactively position a new entry.
Click to delete the entry.
See Clump Width Scale for a description of how to edit the graph.
See Clump Width Scale for a description of how to edit the graph.
See Clump Width Scale for a description of how to edit the graph.
Hair and Dynamic Curves
34

2 | Creating hair
Reference > Dynamics
Dynamics
This section contains attributes to control the dynamics of the hair curves.
Iterations
This controls the number of iterations per time step of the hair solver. This affects hair Stiffness and Length Flex, as well as the accuracy of collisions. Large values are required for very high stiffness. A large value will also increase the time required by the solver.
Length Flex
The amount the hair can stretch along its length.
Stiffness
The amount the hair can flex with regard to the rest position.
Stiffness Scale
Stiffness Scale affects the stiffness from root to tip of the hair. The left of the graph is the root and the right is the tip. Typically the root of a hair is thicker and therefore stiffer than the tip. This attribute multiplies the Stiffness parameter value, so a value of 1.0 will leave the Stiffness unchanged, but if the Stiffness attribute is zero then this parameter will have no effect.
Drag
This simulates friction with the air, in addition to helping to stabilize the simulation. When the Drag value is 1.0 the hair behaves as if it has no inertial motion or follow through. It will move as if it is in thick fluid.
Damp
This dampens the motion of the hair with respect to itself. When this value is high the hair tends to move with the parent object, but will not inherit much of the momentum due to this motion. This can help both stabilize the simulation and reduce dynamic behavior due to motion of the base surface. This is critical when you have curved Rest Positions in moderately stiff hair. This can also be adjusted per follicle for problem hairs, such as ones that develop oscillations that won’t relax; see ”Damp” on page 42 in the follicleShape node section.
Friction
This simulates friction on contact with other surfaces.
Gravity
A built-in downward force in the y-direction simulating gravity.
Hair and Dynamic Curves
35

2 | Creating hair
Reference > Collisions
Dynamics Weight
This is the scale factor for the effect of attached dynamic fields on the hair motion.
Start Frame
This is the frame after which the simulation will run. Nothing will play back for this object prior to Start Frame.
Current Time
This is the current time used for the hair solution. By default, it is given an incoming connection from the main time node. This can be replaced with some other connection (such as, from an expression or param curve) and then the solving is done based on that time value. There must be some incoming connection in order for the Hair System object to play back.
Collisions
This section contains attributes to control the collision properties of the hair system. For information on how to set up hair collisions, see ”Make hair collide” on page 59.
Collide
If turned on then the hair system collides with the connected objects.
Collide Over Sample
Use this to adjust the quality collision sampling. Larger values will help keep hairs from pushing through surfaces.
Collide Width Offset
This value is added to Clump Width before determining collisions. The amount is relative to the clump width. It can be used to handle situations where there is some interpenetration, or where you have passive hairs that are outside the boundaries of active clumps. In cases where the hairs collide too far off an object, you can use negative values to allow a little interpenetration of clumps.
Self Collide
If this is turned on then the hair system simulates hair to hair interaction.
Repulsion
When Self Collide is turned on, this controls how much or how little the hairs repel each other.
Hair and Dynamic Curves
36

2 | Creating hair
Reference > Turbulence
Static Cling
When Self Collide is turned on, this controls how much or how little the hairs stick together.
Num Collide Neighbors
When Self Collide is turned on, this controls the number of hairs each hair collides with.
Collide Ground
If this is turned on then the hair system collides with an infinite plane at the ground height. This collision does not impact the speed of the solution, unlike geometry collisions.
Ground Height
When Collide Ground is turned on, this determines the height of the ground plane.
Draw Collide Width
If this is turned on then circles are drawn around each line representing its width used for collision.
Width Draw Skip
Use this to adjust the quality of the tube collide width drawing. A value of zero will cause a circle to be drawn for every segment of the tube, which may clutter the display for a tube with many segments.
Turbulence
This section contains attributes to control the turbulence properties of the hair system.
Intensity
Increasing this will increase the amount of force applied by the turbulence.
Frequency
Lowering this will make the turbulence vortices larger. This is a spacial scale factor on the turbulence function and has no effect if the turbulence strength is zero.
Speed
The rate at which turbulence pattern changes over time.
Shading
This section contains attributes to control the hair shading or color.
Hair and Dynamic Curves
37

2 | Creating hair
Reference > Shading
Hair Color
This is the base color for hairs. The final color used is determined after the Hair Color Scale and randomization parameters are applied. Also individual hair clumps may override the Hair Color.
Hair Color Scale
Hair Color defines the global color of the hairs from root to tip. The left of the graph is the root and the right is the tip.
Translucence
This allows light to filter through hair for a softer effect.
Specular Color
This is the input color for specular highlights.
Specular Power
This allows light to filter through hair for a softer effect.
Cast Shadows
This causes the hair to cast shadows (depth map only).
Color Randomization
Use these settings to randomize the hair color.
Diffuse Rand A diffuse brightness randomization between hairs in a clump.
Specular Rand A specular brightness randomization between hairs in a clump.
Hue Rand A random deviation in hue of hairs.
Sat Rand A random deviation in color saturation of hairs.
Val Rand A random deviation in brightness value of hairs.
Click the handle to edit the color entry.
Drag the handle to move the color entry. Click to delete
the entry.
Click in the graph to add a new entry or click-drag to add and interactively position a new entry.
Hair and Dynamic Curves
38

2 | Creating hair
Reference > Displacements
Displacements
This section contains attributes to control the displacement properties of the hair.
Curl
This is the amount of curl displacement applied to each hair. The amount of displacement is relative to the hair width. The Clump Curl creates large scale curls about the clump center, while this attribute creates curls about the direction of individual hairs.
Curl Frequency
This is the rate of curl. Larger values result in more curls. The amount of displacement is relative to the hair width
Noise
This is the amount of perlin noise displacement of the hair. The amount of displacement is relative to the hair width. This can create a knotted, kinky look to the hair.
Noise Frequency
This is the spacial scale of the noise offset along hair. Increasing this value results in finer kinks in the hairs.
Multi Streaks
This section contains attributes to control the Multi Streaks shading for Paint Effects strokes. These attributes only apply if your hair output includes Paint Effects (see ”Create hair” on page 19).
Multi Streaks
Multi Streaks is the number of added sub hairs for each hair in a clump. These hairs will share the same shape and shading as the base hair they are derived from. They are created at render time and are simple duplicates, and therefore do not take up any shape computation. This allows you to have a great number of (Paint Effects) tubes and yet render them in a reasonable amount of time.
Multi Streak Spread1
The maximum offset for added hairs relative to the clump width.
Multi Streak Spread2
The maximum offset for added tubes relative to the clump width at the tube tip.
Hair and Dynamic Curves
39

2 | Creating hair
Reference > follicleShape node
Light Each Hair
Render times can be much faster if you share the same illumination for each hair in a Multi Streak. If the Multi Streak spread is relatively large or self shadowing between hairs within a Multi Streak group is desired then Light Each Hair should be turned on. Also turning this on could avoid popping artifacts in situations with moving hard-edged shadows.
follicleShape node
These are descriptions of the attributes in the Follicle Attributes section of the geometryFollicleShape node, where geometry is the type of geometry the hair is attached to, such as psphere. When modifying these attributes they only affect the selected follicle(s). (Also known as the follicle node.)
The Per Follicle Overrides attributes are modifiers of the related hair system attributes and the visible result will be affected by both attributes (in particular in the case of the Mults).
Related topics
� ”Select hair, follicles, curves, and CVs” on page 21
� ”Modify hair follicles” on page 55
� ”Paint hair” on page 53
� ”Create ponytails and braids” on page 86
Parameter U
This is the U parameter value on the surface.
Parameter V
This is the V parameter value on the surface.
Rest Pose
This specifies how the rest position of the hair used by dynamic computations is determined. It may be straight, based on the start curve position or a separate input curve may be used. When the Start Minus Gravity option is selected, Maya attempts to compute a rest position based on gravity and the hair stiffness such that the hair is in dynamic equilibrium at the start of the simulation. If the Same As Start option is selected then the hair will fall at the beginning if there is any gravity and the hair is not totally stiff.
Hair and Dynamic Curves
40

2 | Creating hair
Reference > Per Follicle Overrides
Simulation Method
This specifies how to apply dynamic motion to the hair. If it’s set to Static then no dynamics are computed for the hair. Dynamic computes the hair position based on forces and collisions. Passive moves it by interpolating the motion of neighboring dynamic hairs, which can be an efficient way of simulating masses of hair in self collision.
Start Direction
This determines the initial direction that hair emits from the follicle. This is used when determining rest deflections, as well as when increasing Sub Segments on the hair system. If the Rest Position is straight and this is set to Start Curve Base, the hair will try to assume a straight line based on the first segment of the Start curve. If Surface Normal is selected then the hair would instead move towards a line coming straight out of the surface. Also if Surface Normal is selected, the Sub Segments in the hair system will refine such that the root of the hair is normal to the surface.
Flip Direction
If this is turned on the hair is emitted from the opposite side of the input surface.
Point Lock
This specifies where the hair is attached relative to the start position. You can constrain the base (like a normal hair), both ends (like a rope attached at either end) or with no attachments (the hair will fall like a loose string that is dropped). You can animate this parameter to detach a hair during a simulation.
Degree
The degree of the final generated output curve.
Braid
When turned on the hairs attached to the selected follicles are braided.
Per Follicle Overrides
These attributes are applied to the selected follicle(s) and may override, multiply by, or blend with a corresponding hair system attribute.
Dynamics Overrides
These are descriptions of the dynamic-related attributes.
Override Dynamics
When turned on Maya uses the local hair settings rather then the global hair system settings. This is off by default.
Hair and Dynamic Curves
41

2 | Creating hair
Reference > Per Follicle Overrides
Collide
When turned on Maya collides the hair with geometry if the global hair system has collisions. This is on by default.
Stiffness
The amount the hair can flex with regard to the rest position.
Length Flex
The amount the simulated hair can stretch along its length.
Damp
This overrides the Damp value on the hair system. It can be used to stabilize problem hairs. See ”Damp” on page 35 in the hairSystemShape node section for a detailed description.
Render Overrides
These are descriptions of the render-related attributes.
Sample Density
This controls the number of points to sample along the input start and rest position curves when generating the output hair date to pass to the simulation node. A value of one will cause the simulation hair to have the same number of poly line segments as the curve has CVs. A value of 2.0 will double the number of segments, while a value of 0.0 will result in a single segment. This can dramatically affect the speed and quality of the simulation.
Clump Width Mult
This multiplies the global Hair Clump Width on the hair system node. If the Hair Clump Width on the hair system is zero, then this has no effect. This will also affect the overall number of hairs within a clump, such that the density per unit remains roughly constant. The default is 1.
Density Mult
This multiplies the number of hairs relative to the global Hair Per Clump on the hair system node. If the Hairs Per Clump on the hair system is zero, then this has no effect. The default is 1.
Curl Mult
This multiplies the curl rate relative to the global hair curl attribute on the hair system node. If the curl on the hair system is zero, then this has no effect. The default is 1.
Hair and Dynamic Curves
42

2 | Creating hair
Reference > Per Follicle Overrides
Clump Twist Offset
This offsets (adds or subtracts) from the global Clump Twist attribute on the hair system node. The default is zero.
Color Blend
This allows you to set a different base color per hair clump. The attribute value determines the proportion the global (hair system) color is blended with the local (follicle) color attribute. If the value is zero then the hair color is determined by the global hair color on the hair system node. If the value is 1.0 then the hair color is entirely the color attribute on this node. Values between 1.0 and 0 blend the two color values. The default is zero.
Color
This is the input color to the hair follicle.
Hair and Dynamic Curves
43

2 | Creating hair
Reference > Per Follicle Overrides
Hair and Dynamic Curves
44

3 Simulating hair
How do I? Play a hair simulation
To see how hair and dynamic curves react when forces are applied to them, play the simulation. To make changes to the hair system or follicle attributes while the simulation is running, use Interactive Playback.
To tweak the hair simulation, adjust the Stiffness, Iterations, and even Gravity attributes in the Dynamics section of the hairSystemShape node. The Damp value can be adjusted to relax oscillating curves on non-straight hair. See ”Dynamics” on page 35.
To play the simulation
1 Increase your frame range, for example, to 1000.
2 Select Hair > Display > Current Position.
3 Click the Play button to play the simulation. Watch the hair react to dynamic forces as the simulation plays.
To play and interact with a hair simulation
1 Increase your frame range, for example, to 10000.
2 Select Solvers > Interactive Playback.
3 Interact with the hair simulation while it’s running, including modifying dynamic hair system and follicle attributes, as well as transforming the surfaces to which the hair or dynamic curves are attached to see how the hair behaves.
4 Click the Stop button to stop the simulation.
Use hair caches
You simulate hair by playing through the time slider (see “Play a hair simulation”). You can create a cache file to store all the positions of the hair curves during the simulation. This cache lets you quickly preview the
Note There may be performance issues with playback if output is set to NURBS curves and the number of curves is high. As a workaround to provide faster interactive feedback, create hair with output set to Paint Effects and NURBS curves, and hide the group containing the output curves. Then in the hairSystemShape node, set the Hairs Per Clump to 1 and the Clump Width to 0.
Hair and Dynamic Curves
45

3 | Simulating hair
How do I? > Create a hair cache
results of the hair simulation without having to render. This offers many benefits, including scrubbing back and forth in the time slider and re-using a cache so you don't have to solve at render time.
The main purpose of the cache is for batch render so:
• you can do distributed rendering and have the simulation match exactly.
• you can do batch rendering without Maya Unlimited licenses (Hair simulation requires Maya Unlimited).
See ”Rendering using distributed render” on page 80.
Specifically you can:
• “Create a hair cache”
• “Append to a hair cache”
• “Truncate a hair cache”
• “Delete a hair cache”
Create a hair cache
To create a hair cache
1 Select the hair system.
2 Do one of the following:
• Select Hair > Create Cache.
• Select Hair > Create Cache > ❒ , set the time range and sampling settings and then click Create.
Cache Time Range Select a time range for the cache. Use the time range as specified in the Render Globals or the Time Slider, or set a new time range with the Start/End option.
Sampling Specify either Over or Under for sampling and then set a Rate value for sampling. The default value for Rate is 1.
Append to a hair cache
You can use Append to Cache to add the specified frames to the existing cache. If the range of frames you specify occurs earlier than the last frame in the cache, the overlapping frames are overwritten. You may want to append to a hair cache if you decide to render more frames than you originally had cache for.
Hair and Dynamic Curves
46
3 | Simulating hair
How do I? > Truncate a hair cache
You might use the “append and truncate a cache” workflow if you're hand-tweaking the behavior of your hair. For example, cache a simulation for a while, truncate it at or before the frame where some hairs do something you don't want, modify some attributes, cache for a while again until you notice some behavior that you want to change. See ”To truncate a hair cache” on page 47.
To append to a hair cache
1 Select the hair system.
2 Select Hair > Append to Cache > ❒ . The Append to Hair Cache Options window appears.
Append Time Range Select a time range to append to the cache. Use the Current Time (applies a single frame), Current Time to Time Slider End, or set a new time range with the Start/End option.
Sampling Specify either Over or Under for sampling and then set a Rate value for sampling. The default value for Rate is 1.
3 Set the append options and then click the Append button.
Maya appends the new cache information to the existing cache file for the hair system according to the options you set.
Truncate a hair cache
You may want to truncate a cache for one of the following reasons:
• If your modifications only start affecting the behavior of your hair dynamics partway through the cache, and you only want to re-cache form the point where it changes.
• If you don't want or need the tail end of your simulation.
To truncate a hair cache
1 Select the hair system with the cache you want to truncate.
2 In the Time Slider move to the frame where you want to truncate the cache.
3 Select Hair > Truncate Cache. Maya deletes the cache from the current frame forward.
Delete a hair cache
You may want to delete your hair cache for one of the following reasons:
Hair and Dynamic Curves
47

3 | Simulating hair
Reference > Hair > Create Cache > ❒
• If you modify a dynamic hair simulation after caching, you must disable or delete the cache so that the modifications appear when you play the hair simulation.
• You must re-create the cache before you (distributed) render your hair.
• You can delete the cache to free up disk space.
To delete a hair cache
Select Hair > Delete Cache. The existing hair cache is removed.
Reference Hair > Create Cache
Creates a cache of the hair simulation. You can modify the cache creation settings in the Create Cache Options window by selecting Hair > Create Cache > ❒ . For more information, see ”Use hair caches” on page 45.
Hair > Create Cache > ❒
These are descriptions of the options in the Create Cache Options window.
Cache Time Range
Select a time range for the cache. Use the time range as specified in the Render Globals or the Time Slider, or set a new time range with the Start/End option.
Sampling
Specify either Over or Under for sampling and then set a Rate value for sampling. The default value for Rate is 1.
Hair > Append to Cache
Adds the specified frames to the existing cache. You can modify the settings in the Append to Hair Cache Options window by selecting Hair > Append to Cache > ❒ . For more information, see ”Append to a hair cache” on page 46.
Hair > Append to Cache > ❒
These are descriptions of the options in the Append to Cache Options window.
Hair and Dynamic Curves
48

3 | Simulating hair
Reference > Hair > Append to Cache > ❒
Append Time Range
Select a time range to append to the cache. Use the Current Time (applies a single frame), Current Time to Time Slider End, or set a new time range with the Start/End option.
Sampling
Specify either Over or Under for sampling and then set a Rate value for sampling. The default value for Rate is 1.
Hair > Truncate Cache
Cuts off the cache at the specified frame in the Time Slider. See ”Truncate a hair cache” on page 47.
Hair > Delete Cache
Clears out the existing hair cache. See ”Delete a hair cache” on page 47.
Hair and Dynamic Curves
49

3 | Simulating hair
Reference > Hair > Append to Cache > ❒
Hair and Dynamic Curves
50

4 Modifying hair
About Styling hair and modifying the hair look and behavior
You can modify the hair system as a whole by adjusting attributes in the hairSystemShape node, such as clump width, color, stiffness, and gravity. You can override hair system attributes at the follicle level in the follicleShape node, such as hair color.
You can use the Paint Hair Tool to paint more hair or paint to delete follicles, or even paint follicle attributes.
You can resize the hair using the Hair Scale Tool.
To style the hair and give it shape, you can modify hair curves, including bending and smoothing curves. You can also use fields to attract hair (acting as the hand of the hair stylist), and constraints to hold hair in place, such as a ponytail or a clasp.
To use a field to style hair, select the hair system first and then create the field. You can also use the dynamic Relationship Editor for the enable forces (and collision objects) for the hairSystemShape node.
To establish hair collisions with surfaces, such as the face, scalp, neck, or shoulders of a model, use collision constraints.
Here are a few short examples of what you can do:
Image created by Duncan Brinsmead. Model created by Inspeck.
Hair and Dynamic Curves
51

4 | Modifying hair
How do I? > Related topics
• for a ponytail, create rest curves and style them with fields (Newtons) and then use constraints to hold the hair in place
• for a beehive updo, style the hair curves using fields (Vortex and Newton) and then apply constraints
• to create bangs/fringe, use the Paint Hair Tool to paint a line of bangs/fringe, and then trim the hair length (CVs) if too long
• to create “streaks” of hair color, change the hair color of selected follicles on the follicleShape node, and be sure to adjust the Color Blend value
• to turn hair clumps into strands of ivy or beads for special effects, assign a Paint Effects brush to a hair system
For detailed workflows and suggestions for creating a variety of hairstyles, including curly, wavy hair, and braids and ponytails, see ”Sample hairstyles” on page 83.
Related topics
� ”Paint hair” on page 53
� ”Modify the hair system” on page 54
� ”Modify hair follicles” on page 55
� ”Adjust the hair length” on page 55
� ”Edit hair curves” on page 56
� ”Braid hair” on page 58
� ”Make hair collide” on page 59
� ”Set up hair constraints” on page 61
� ”Assign a Paint Effects brush to Hair” on page 65
� ”Set up hair shading” on page 75
How do I? Style the hair and modify behavior
Consider the following to create a basic hair shape and style the hair:
• lengthen or shorten hair (Hair > Scale Hair Tool)
• add more follicles or delete follicles, trim or extend hairs using the Paint Hair Tool (see ”Hair > Paint Hair Tool” on page 28 and ”Paint hair” on page 53)
• edit hair curves by bending, smoothing, curling, and straightening (”Edit hair curves” on page 56)
Hair and Dynamic Curves
52

4 | Modifying hair
How do I? > Change the look of the hair
• use fields to style hair (see the Dynamics guide for information about Fields, Newton field, Vortex field, and more)
• use constraints to hold hair in position, such as to the head, or in clasps, ponytails and updos (”Set up hair constraints” on page 61)
• for special effects, assign a Paint Effects brush to hair (”Assign a Paint Effects brush to Hair” on page 65)
To control how the hair style reacts to forces, like gravity, use the following:
• Fields
• hair system Dynamics attribute, such as Stiffness, Iterations, or even Turbulence for simulating blow drying hair
• follicle Dynamics Overrides attributes, such as Stiffness, Length Flex and Damp
• collisions (”Make hair collide” on page 59)
• collision constraints (”Work with collision hair constraints” on page 64)
Change the look of the hair
To modify the look of hair, for example, curly or straight, thick or thin, use the following:
• Paint Hair Tool (see Paint hair)
• Clump and Hair Shape attributes (hairSystemShape node) (”Modify the hair system” on page 54)
• Displacement attributes for curl (hairSystemShape node)
• Shading attributes for hair color (hairSystemShape node) (see also ”Set up hair shading” on page 75
• Multi Streaks attributes for variance in hair color and to add density (Paint Effects hair only) (hairSystemShape node)
• Braid attribute (follicleShape node) (”Braid hair” on page 58)
• Set up hair self-shadowing on lights
Paint hair
You can use the Paint Hair Tool to paint the following:
• add new hair follicles to a new or existing hair system
• remove hair follicles
• modify follicle attributes
• trim hairs
Hair and Dynamic Curves
53

4 | Modifying hair
How do I? > Modify the hair system
• extend hairs
For more information, see ”Hair > Paint Hair Tool” on page 28.
To paint using the Paint Hair Tool
Before painting, be sure to be either in the Start or Rest Position.
1 Select either the surface or the hair system you want to paint.
2 From the Dynamics menu set, select Hair > Paint Hair Tool > �. The Paint Hair Tool Settings window appears. For descriptions of the options in the Paint Hair Tool Settings window, see ”Hair > Paint Hair Tool” on page 28.
Since the Paint Hair Tool is an Artisan paint tool, the Artisan Brush Tool Settings editor appears as well. See ”Artisan Brush Tool Settings” on page 297 in the Paint Effects, Artisan, and 3D Paint guide.
3 Select a Paint Mode from the Paint Hair Tool Settings window.
4 Specify the appropriate settings available with the selected Paint Mode.
5 Paint on the surface.
Modify the hair system
To modify all the hair at once, edit the hair system.
To edit the hair system attributes
Before editing, be sure to be either in the Start or Rest Position.
1 Select the hair system in the Outliner or Hypergraph. (Window > Outliner, Window > Hypergraph)
2 Modify the settings in the hair system’s Attribute Editor. For descriptions of the hair system attributes, see ”hairSystemShape node” on page 32.
3 To see the changes you may have to play the simulation. See ”Play a hair simulation” on page 45.
Modify hair follicles
If you want to edit attributes for a selection of follicles, do one of the following:
Notes If you are painting the Inclination attribute, go to the start frame before painting.
Hair and Dynamic Curves
54

4 | Modifying hair
How do I? > Adjust the hair length
• Edit the value in the Channel Box. All selected nodes of the same type will be affected by the edit. For example, turn on Braid for selected follicles.
• Edit the nodes in the Attribute Spreadsheet. (Window > Attribute Spreadsheet)
Editing in the Attribute Editor only affects a single follicle, the lead selection.
To edit the attributes of selected follicles
Before editing, be sure to be either in the Start or Rest Position.
1 Select the desired follicle(s). See ”Select hair, follicles, curves, and CVs” on page 21.
2 Modify the settings in the Attribute Editor, Channel Box or Attribute Spreadsheet. For descriptions of the follicle attributes, see ”follicleShape node” on page 40.
3 To see the changes you may have to play the simulation. See ”Play a hair simulation” on page 45.
Adjust the hair length
You can make hair longer by either painting (Extend Hairs) or scaling the hair system. For information about painting, see ”Paint hair” on page 53 and ”Hair > Paint Hair Tool” on page 28.
The Scale Hair Tool adjusts the scale value for each follicle's transform. It scales such that scaleX = scaleY = scaleZ. (If you had a non-proportionate scale to start with, using the Scale Hair Tool would make it proportional.) The Start and Rest curves are parented under the follicle transform so they inherit this scale.
Keep in mind the Scale Hair Tool does not vary either the amount of segments or the stiffness. This will make the hair appear stiffer as you increase the length. The relative stiffness of the hair will be the same, although it will fall relatively slower and not as far, due to gravity not appearing the same effect at different scales.
Note While you can paint Hair Scale, Inclination, Roll, Polar, and Surface Inset, you cannot edit them in the follicle’s Attribute Editor. These attributes affect the transform on the Start curve. If you select the Start curve then you can easily edit the transform values. Inclination, Roll, and Polar are rotate XYZ. Surface Inset is the Z translate. Scale is the scale XYZ on the follicle node.
Hair and Dynamic Curves
55

4 | Modifying hair
How do I? > Edit hair curves
To scale hair
1 Select either individual follicles or the hair system. See ”Select hair, follicles, curves, and CVs” on page 21.
2 Do one of the following:
• Select Hair > Scale Hair Tool.
• On the Hair shelf, click the Scale Hair Tool button. (If the Hair shelf is not visible, see Load the default shelves in the Basics guide.)
3 Drag to the right to lengthen the hair or drag to the left to shorten the hair.
Edit hair curves
Styling the hair is usually performed on the Start or Rest Position NURBS curves. The simplest way is to edit the Start Position curves. For example, play the simulation to let the hair fall and when it stabilizes, select Hair > Set Start Position from Current. For more refined editing of the Start Position, switch the display to the Start Position and use the curve editing tools. See “Hair curve editing tools.”
You can display both the Paint Effects “hair clumps” at the same time as the Start Position of the NURBS curves (Hair > Display > Start and Current). If you are at or near the start simulation frame, the Paint Effects display will update as you update the Start Position curves.
If the hair is fairly stiff and you want it to assume a non-straight shape (in the absence of external forces like gravity), then you can create and edit Rest Position curves. To create Rest curves, select the desired hairs and select Hair > Set Rest Position > From Current (or From Start). You can then display the Rest Position and edit those curves. You can only see the effects when you play the simulation.
Hair curve editing tools
You can lock curve length and reshape the curve(s) by selecting and moving the end CV(s). In addition to locking length, you can reshape curves using other items in the Modify Curves menu, including Straighten, Smooth, Curl, Bend, and Scale Curvature.
These same tools are available for editing NURBS curves. For detailed descriptions, see:
� Straighten, smooth, curl or bend a curve
� Edit Curves > Modify Curves > Lock Length
� Edit Curves > Modify Curves > Unlock Length
� Edit Curves > Modify Curves > Straighten
Hair and Dynamic Curves
56

4 | Modifying hair
How do I? > Braid hair
� Edit Curves > Modify Curves > Smooth
� Edit Curves > Modify Curves > Curl
� Edit Curves > Modify Curves > Bend
� Edit Curves > Modify Curves > Scale Curvature
To use Lock Length while editing curves
1 Switch to Start or Rest Position. (Hair > Display >)
2 Select the curve(s) and then convert the selection to end CVs. (See ”Hair > Convert Selection” on page 31.)
3 Press the l (letter) key to turn Lock Length on while editing curves.
4 Release the l (letter) key to turn Lock Length off.
To straighten, smooth, curl or bend hair curves
1 Switch to Start or Rest Position. (Hair > Display >)
2 Select the curve(s) or CV(s).
3 Select Hair > Modify Curves and then select the desired option (Straighten, Smooth, Curl, Bend, Scale Curvature).
4 Repeat step 3 until you’ve achieved the desired look.
Braid hair
You can either braid individual follicles or all of them. Since the Braid attribute is in the follicleShape node, follicles must be selected.
After locking the length of the curve, reshape the curve by selecting and dragging the end CV using the Move Tool.
Hair and Dynamic Curves
57

4 | Modifying hair
How do I? > Braid hair
To braid hair
1 Select the desired follicles. See ”Select hair, follicles, curves, and CVs” on page 21.
2 Do one of the following:
• If you are braiding individual follicles, select the follicle(s) and in the Channel Box, set the Braid attribute to on. Alternatively, paint the Braid attribute on the desired follicles. (See ”Hair > Paint Hair Tool” on page 28.)
• If you are braiding the entire head of hair, then select all the follicles (see ”Select hair, follicles, curves, and CVs” on page 21) and change the Braid setting to “on” in the Channel Box. This affects all the selected follicles. (If you don’t see Braid in the Channel Box, then in Outliner ctrl + click a follicle and then shift + click it.)
3 For realistic looking braids, adjust the settings for the other Render Attributes.
For more detailed information and workflow suggestions for braiding hair, see ”Create ponytails and braids” on page 86.
Image created by Duncan Brinsmead
Hair and Dynamic Curves
58

4 | Modifying hair
How do I? > Make hair collide
Make hair collide
You can make hairs in a hair system collide with themselves and with other objects. As an alternative or in addition to setting objects to collide with hair, you can use hair constraints that act as implicit collision objects. These can be helpful if hairs are getting stuck in surfaces, since these implicit collision objects are volumes, not shells. Also, you can set the collision object constraints to affect specific hair curves, whereas Make Collide and the other collision options affect the entire hair system. The combination of collision constraints and geometry collisions can provide robust collision, while at the same time preserving fidelity of the collide object surface. For more information about the Collide Sphere and Collide Cube implicit collision objects, see ”Set up hair constraints” on page 61.
Fine tune collisions
If hairs are getting stuck in colliding surfaces, consider the following:
• Avoid sharp or open edges. Rounded, closed objects collide better with hair. The collisions are with discreet points (like particles), not lines, so thin edges can slice between vertices. The more CVs there are on the hair the more likely it is to collide with a small edge. The number of hair CVs is determined by the number of CVs on the Start
Note Iterations (Dynamics) increases the number of collision tests. A setting of 8 does twice as many as 4. This can improve the results of collisions in some cases, but will also slow down the simulation calculation. If you increase Iterations you need to lower Stiffness to compensate.
Ball collides with beaded curtain made of hair curves
Hair and Dynamic Curves
59

4 | Modifying hair
How do I? > Fine tune collisions
curve times the Sample Density on the follicle node. Collide Oversample values of 1 and 2 will insert extra midpoint CVs at collide time.
• If the effective collision width is zero then hairs are less likely to fall through surfaces. The effective collision width is:
Clump Width * Clump Width Scale + Hair Width + Collide Width Offset
By making the Collide Width Offset a large negative number, such as -1000, you can force the collision width to always be zero. This will cause hair clumps to penetrate half way into surfaces. However they will be less likely to fall through a surface.
• Increasing the Collide Oversample value can help. Collide Oversample values greater than 2 behave in a different manner. Values of one or two insert new test points between the simulation CVs. This is good when there are not enough CVs on the curve to catch collisions with thin edges. For values greater than this the extra sample points are in a ring about the CV center. This is better for handling wide hair clumps and avoiding sticking. So to avoid zero width hair clumps being sliced by thin edges, use values of 1 or 2; making the Collide Width Offset negative in this case further helps. To better handle wide clumps try Collide Oversamples of 3 or greater.
To make hair collide with the ground
1 In the hair system’s Attribute Editor, turn on Collide Ground in the Collisions section. The “Ground” is the ground plane (or the grid).
2 Optionally, adjust the Ground Height value, which is relative to the ground plane.
To make hair collide with objects
1 Select the hair system. (Window > Outliner)
2 Shift-click to select the object or surface you want the hair to collide with.
3 Select Hair > Make Collide. A geoConnector node is added to your collision object.
If your collisions are not working, make sure Collide is turned on in the hair system Attribute Editor. For more information, see ”Collisions” on page 36.
If your hair is penetrating the collision object, then you can try the following:
• Increase the Tessellation value in the collision object’s geoConnector node.
Hair and Dynamic Curves
60

4 | Modifying hair
How do I? > Set up hair constraints
• Increase the Collide Over Sample value in the Collisions section of the hairSystemShape node.
To make hairs collide with themselves
1 In the hair system’s Attribute Editor, turn on Self Collide in the Collisions section.
2 Adjust collision settings, including the Collide Width Offset.
Set up hair constraints
Use constraints to style hair curves. For example, a constraint could act as a clasp holding hair back or in a ponytail. There are various types of constraints you can create: Rubber Band, Stick, Transform, Hair to Hair, Hair Bunch, Collide Sphere and Collide Cube. For descriptions of the constraint types, see ”Hair constraint types” on page 63. The last two constraint types are implicit collision constraints and work differently than the other constraint types; see ”Work with collision hair constraints” on page 64.
When you create a constraint, the constraint is set to affect the selected hair curves. The identification of these hair curves is stored in the curveIndices attribute in the hairConstraint node. The ID represents the index of the hair (UV grid location) on the hair system.
At the start frame the simulation determines the nearest points on the constrained curves to the constraint node position. If the current frame is less than or equal to this start frame you can move the constraint node and the connection to the nearest points updates. As the simulation runs the constraint works only on this initial set of points, not the entire curve. The constraint type determines how the simulation deals with this set of points.
See the constraint locator and the dotted lines that each represent the locator’s connection to the position on the affected curves
Hair and Dynamic Curves
61

4 | Modifying hair
How do I? > Hair constraint types
This ensures the constraints don’t apply any force to the hairs at the start of the simulation, but instead constrain the simulation as it progresses. In general you should apply constraints after modeling and determining the hair start positions and shapes. If the model’s position at the simulation start frame is to be edited or to be set up for different scenes, you might want to group the constraints under a hair follicle node or under the object transform so that the relative position to the hair at the start frame doesn’t change (since the constraint is always defined relative to the Start Position, with the exception of the Hair Bunch constraint).
The constraint acts by applying forces to the set of points. The amount of force applied is scaled by the constraint’s Stiffness attribute. There is also a Glue Strength attribute that determines a threshold beyond which the attachment of the constraint to a point is broken. The point is glued to the constraint at the start frame. The moment the force being applied by the constraint exceeds the glue strength the constraint breaks and the point becomes unconstrained for the rest of the simulation. A glue strength of 1 is infinitely strong and will never break. The strength required for a constraint to snap in the middle of a simulation is touchy and may require some experimentation with different glue values (between 0 and 1) for the break to occur at a desired point (if desired, you could animate the glue strength from 1 to 0).
Since a constraint only affects one point on each of the selected curves, you may want to apply several constraints located at different positions to the same set of curves in order to constrain multiple points on those curves.
To set up a hair constraint
1 Select the desired hair curves.
2 Select Hair > Constraint and then select the desired constraint type. See “Hair constraint types.”
3 Set the constraint attributes in the hairConstraintShape node. For descriptions of the constraint attributes, see ”hairConstraintShape node” on page 72.
Hair constraint types
These are descriptions of the constraint types.
Rubber Band
This is like attaching rubber bands from the constraint to the point set. The length of each rubber band is the distance from the constraint to the point at the start frame. If the distance between a point and the constraint becomes greater than the rubber band length a force is applied pulling it toward the constraint.
Hair and Dynamic Curves
62

4 | Modifying hair
How do I? > Hair constraint types
Stick
This is like attaching sticks from the constraint to the point set, where the sticks may rotate freely about the constraint center. This is similar to the Rubber Band constraint, except that when the distance between the constraint and points is less than the start distance a repulse force is also applied (in addition to the attractive force when the distance is greater). This tends to keep all the constrained points at a fixed distance (the distance at the start frame) from the constraint center.
Transform
This is like constraining the points to a block of jelly at the start frame. Unlike the Stick constraint, when the constraint node is rotated or scaled it will pull along the constrained points. The transform on the constraint node is effectively the transform for this block of jelly. This is useful when constraining hair to fall along a contact point, like a shoulder. Also this can be used to simulate hair being grabbed and twisted by a hand. If you animate the constraint's scale the hair can be pulled together or pushed apart.
Hair to Hair
This allows you to bind hairs together (like with a ribbon) where the hair group is free to move with respect to the constraint position. This is like a Stick constraint where the actual constraint is free to move with the hair. The constraint position is only referenced at the start frame, after which the internally used constraint is dynamically updated.
Hair Bunch
This can help create body to the hair as it animates in a fashion similar to self collision but with much less computation. The initial set of points nearest the constraint will repel each other where they overlap (according to the clump widths). There is also a slight static cling where the points stick together slightly when they touch. If the hair clumps overlap at the start frame they may suddenly push apart (unlike the other methods, which have no force at the start of a simulation). You could run the simulation until it stabilizes then set the Start Position to handle this problem.
Collide Sphere
Collide Cube
Inserts a sphere or cube that behaves as an implicit collision object. Transform the sphere or cube as needed. For more information, see “Work with collision hair constraints.”
Hair and Dynamic Curves
63

4 | Modifying hair
How do I? > Work with collision hair constraints
Work with collision hair constraints
Unlike the other hair constraints, Collide Sphere and Collide Cube work on the entire hairs, not just a particular hair CV. These objects have several advantages over collision with geometry.
• Collisions are more accurate and stable.
• Clump Width and Collide Width Offset are handled better.
• They’re faster than geometry collisions, particularly if the geometry is complex and near the hair.
• Hairs do not get stuck, as they can with geometry.
• These constraints can be assigned per hair clump, while geometry collisions affect an entire hair system.
• The intensity of collision repulsion can be modulated using the Stiffness attribute. At a value of zero there will be no collisions.
• If the friction is high you can use two collide constraints like tweezers to pick up hair. (Doing this with geometry collisions would tend to push the hair through the surfaces, resulting in the hair CVs getting stuck in the surfaces.)
Note If hair does not settle well or bounces on a Collide Sphere or Collide Cube constraint, make the constraint Stiffness lower. In particular fast moving constraints or hairs may cause hair to shoot out of the constraint at high speed. A low Stiffness value will usually fix this.
Two Collide Sphere collision constraints were used in this model: one for the head and one for the shoulders. The collision constraints are identified by the locators.
Hair and Dynamic Curves
64
4 | Modifying hair
How do I? > Assign a Paint Effects brush to Hair
Typically you would use several of these constraints grouped under the transforming geometry, approximating the shape of the geometry in colliding regions like the head and shoulders. For organic objects you might want to use several spheres, scaling some into ellipsoids. The Collide Cubes are best for walls and flat surfaces, although in some cases the sharp edges can lead to stability problems that don't occur with spheres. However, low Stiffness values for Collide Cube constraints tend to smooth out the cube edges.
On the other hand, highly non-proportionally scaled spheres can have problems with points sliding towards the edges (most curved regions). This is not a problem with the non-proportionally scaled cubes.
Assign a Paint Effects brush to Hair
You can assign a Paint Effects brush to the hair system. This is useful for creating effects, such as vines or feathers for hair. The hair output can be Paint Effects or NURBS curves.
To assign a Paint Effects brush to hair
1 Select a brush from the Visor.
2 In Outliner, select the hairSystem.
3 Select Hair > Assign Paint Effects Brush to Hair.
4 The brush now replaces the hair. Depending on the brush, you may need to tweak the settings in the brush’s Attribute Editor. Try doing the following:
• Change the Global Scale.
• Go to the Tubes section, then Creation and adjust the look and size of tube segments.
• Go to the Tubes section, then go to Behavior and then Forces and set Path Follow to 1 and Length Flex to 1. You can also increase the Path Attract value, which makes the brush stroke cling to the curve.
• For more information, see ”Tips for Paint Effects brushes assigned to Hair” on page 67.
5 If you originally output to Paint Effects, then in the pfxHairShape node you may want increase Display Quality.
6 In the hairSystemShape node you may want to reduce the Hairs Per Clump to 1 and adjust the Clump Width Scale.
Hair and Dynamic Curves
65

4 | Modifying hair
How do I? > Tips for Paint Effects brushes assigned to Hair
Tips for Paint Effects brushes assigned to Hair
Overridden Brush Attributes
Hair system hairs become stroke paths for an assigned brush, so each hair is like a brush stroke. The normal of these strokes is determined by the hair's twist vector (as opposed to the surface normal with the regular Paint Effects stroke). The Brush Width attribute on the brush is overridden by the Hair Width attribute on the hair system. The Color1 attribute on the brush is overridden by the hair system color (Hair Color * Hair Color Scale + HSV Rand). Likewise the Specular Color, Specular Power, Translucence, and Multi Streak attributes on the hair system override
Tip To create your own hair look with polygons, you can create a mesh brush and paint a test stroke, then assign this brush to the hair system following the procedure above. Next, convert the Paint Effects to polygons. You can even texture these with hair images. The width attributes on the hair system still affect the polygons.
For a better looking polygon, before converting, decrease the brush width (0.05) and set flatness to 1.
Image created by Duncan Brinsmead
Hair and Dynamic Curves
66

4 | Modifying hair
How do I? > Tips for Paint Effects brushes assigned to Hair
those on the brush. All other attributes on the hair system, such as Curl and Turbulence, are applied in addition to any similar effects on the brush.
Using Brushes with Tubes turned off
When a brush with Tubes turned off is assigned to a hair system, each hair is like a regular stroke with the width being the Hair Width * Hair Width Scale (the Brush Width on the brush is ignored). This provides a way in which different Brush Types, such as Paint or Mesh can be used to render the hairs. For example you could make the hairs look like ribbons, or strings of pearls.
Generally when doing this you need to set the Hair Width to the desired Brush Width and make the Hair Color attribute the same as the color1 values from the brush. If the brush is textured you will also usually need to increase the u repeat value on the brush (depending on width and length of the hairs).
Using Brushes with Tubes turned on
When assigning a brush with Tubes turned on, you usually want to modify it to better follow the hairs.
Most preset brushes will generate new tubes along the length of each hair. To have the brush instead emit a single tube (or tree) exactly at the base of each hair set the following in the brush’s Attribute Editor:
• Tubes Per Step = 0.0
• Start Tubes = 1
• Randomize = 0.0
Then in the hair system’s Attribute Editor, set:
• Hair Width = 0.0 (This makes the Brush Width zero.)
Now to make the tubes better follow the hair curves, set the following in the brush’s Attribute Editor:
• in the Tubes > Behavior section, set all Forces and Turbulence attributes’ values to zero.
• in the Tubes > Creation section, set both Elevation Min and Max to zero.
• Adjust Global Scale to best approximate the curve length.
• Increase Path Follow and/or Path Attract to follow the hair.
• Increase Length Flex to better follow stretching of the hair.
In doing this the relationship of segments on the brush to CVs on the hairs can affect the results. You may wish to have both values be similar. To adjust segments on the hairs you can either edit the hair system’s Sub
Hair and Dynamic Curves
67

4 | Modifying hair
Reference > Lock Length
Segments or the follicle’s Sample Density (the latter will also affect the dynamic simulation). The segments on the brush can be adjusted through the Segments, Petal and Leaf Segments attributes.
Reference Hair > Scale Hair Tool
Activates the Scale Hair Tool for the selected hair system. Drag right to make the hair larger or longer and drag left to make the hair smaller or shorter. See ”To scale hair” on page 56.
Hair > Modify Curves
Use these menu items to manipulate the hair curves to achieve the hairstyle you want. Modify one curve or multiple curves at the same time, as well as CVs. For information on how to modify hair curves, see ”Edit hair curves” on page 56. These tools are also available in the Edit Curves menu and can be used on NURBS curves.
Lock Length
Locks the length of the hull for the selected curve or CV(s). For more detailed information, see Edit Curves > Modify Curves > Lock Length.
Unlock Length
Unlocks the length of the hull for the selected curve or CV(s). For more detailed information, see Edit Curves > Modify Curves > Unlock Length.
Straighten
Use this to straighten the hair curves. You can set the Straightness (default 1.0) and turn on or off the Preserve Length in the Straighten Curves Options window. For more detailed information, see Edit Curves > Modify Curves > Straighten.
Smooth
Use this to smooth the hair curves. You can set the Smooth Factor (default is 4) in the Smooth Hair Curves Options window. For more detailed information, see Edit Curves > Modify Curves > Smooth.
Hair and Dynamic Curves
68

4 | Modifying hair
Reference > Curl
Curl
Use this to add curl to or adjust the curl of the hair curves. You can set the Curl Amount (default is 0.3) and Curl Frequency (default is 1.0) values in the Curl Curves Options window. For more detailed information, see Edit Curves > Modify Curves > Curl.
Bend
Use this to add bend or adjust the bend in the hair curves. You can set the Bend Amount (default is 0.2) and Twist (default is 0) values in the Bend Curves Options window. For more detailed information, see Edit Curves > Modify Curves > Bend.
Scale Curvature
Use this to adjust how much each segment of the curve(s) will be straightened or have their curvature exaggerated. You can set the Scale Factor (default is 1.1) and Max Curvature (default is 0.8) values in the Scale Curvature Options window. For more detailed information, see Edit Curves > Modify Curves > Scale Curvature.
Hair > Create Constraint
Use these menu items to add constraints to selected hair curves. For information on how to create constraints, See ”Set up hair constraints” on page 61.
Hair > Create Constraint > Rubber Band
Adds a Rubber Band constraint to the selected hair curves. This is like attaching rubber bands from the constraint to the point set. The length of each rubber band is the distance from the constraint to the point at the start frame. If the distance between a point and the constraint becomes greater than the rubber band length a force is applied pulling it toward the constraint. See ”Set up hair constraints” on page 61.
Hair > Create Constraint > Stick
Adds a Stick constraint to the selected hair curves. This is like attaching sticks from the constraint to the point set, where the sticks may rotate freely about the constraint center. This is similar to the Rubber Band constraint, except that when the distance between the constraint and points is less than the start distance a repulse force is also applied (in addition to the attractive force when the distance is greater). This tends to keep all the constrained points at a fixed distance (the distance at the start frame) from the constraint center. See ”Set up hair constraints” on page 61.
Hair and Dynamic Curves
69

4 | Modifying hair
Reference > Scale Curvature
Hair > Create Constraint > Transform
Adds a Transform constraint to the selected hair curves. This is like constraining the points to a block of jelly at the start frame. Unlike the Stick constraint, when the constraint node is rotated or scaled it will pull along the constrained points. The transform on the constraint node is effectively the transform for this block of jelly. This is useful when constraining hair to fall along a contact point, like a shoulder. Also this can be used to simulate hair being grabbed and twisted by a hand. If you animate the constraint's scale the hair can be pulled together or pushed apart. See ”Set up hair constraints” on page 61.
Hair > Create Constraint > Hair to Hair
Adds a Hair to Hair constraint to the selected hair curves. This allows you to bind hairs together (like with a ribbon) where the hair group is free to move with respect to the constraint position. This is like a Stick constraint where the actual constraint is free to move with the hair. The constraint position is only referenced at the start frame, after which the internally used constraint is dynamically updated. See ”Set up hair constraints” on page 61.
Hair > Create Constraint > Hair Bunch
Adds a Hair Bunch constraint to the selected hair curves. This can help create body to the hair as it animates in a fashion similar to self collision, but with much less computation. The initial set of points nearest the constraint will repel each other where they overlap (according to the clump widths). There is also a slight static cling where the points stick together slightly when they touch. If the hair clumps overlap at the start frame they may suddenly push apart (unlike the other methods, which have no force at the start of a simulation). You could run the simulation until it stabilizes then set the Start Position to handle this problem. See ”Set up hair constraints” on page 61.
Hair > Make Collide
Sets the selected object to collide with the selected hair system. For more information, see ”Make hair collide” on page 59.
Hair > Assign Paint Effects Brush to Hair
Takes the selected brush and assigns it to the current Hair system. Some tweaking of the brush settings may be required. For more information, see ”Assign a Paint Effects brush to Hair” on page 65.
Hair and Dynamic Curves
70

4 | Modifying hair
Reference > hairConstraintShape node
hairConstraintShape node
These are descriptions of the attributes in the hairConstraintShape node. For more information, see ”Set up hair constraints” on page 61.
Constraint Method
This is the type of constraint: Rubber Band, Stick, Transform, Hair To Hair, Hair Bunch, Collide Sphere, Collide Cube. For descriptions of these constraint types, see ”Hair constraint types” on page 63.
Stiffness
This is the stiffness of the spring attachments created by the constraint. The higher the Stiffness value, the more the curves tend toward the position of the rest curves. Default rest curves are normal to the object’s surface.
Glue Strength
This is the strength of the glue holding the constraint. A value less than one can allow the constraint to break during the simulation if the tension exceeds the strength. A value of one is infinitely strong and will not break. Rewind to frame 1 in order to re-glue. After a break, a setting of 1 reattaches the glue.
Point Method
These are the methods for calculating what point along the hair curve the constraint uses.
Nearest This is the point along the hair curve nearest to the constraint locator at the start frame.
U Parameter Using the value defined in the U Parameter attribute, constrains the point at that U value along the curve. The end of the curve is 1.0.
U Distance Using the value defined in the U Distance attribute, constrains the point at that distance in worldspace from the start of the curve.
U Parameter
If the Point Method is U Parameter, this is the U value used in determining the point to constrain to along the curve. A value of 1 represents the tip of the hair curve.
U Distance
If the Point Method is U Distance, this is the U distance value, in world space units, used in determining the point to constrain to along the curve.
Hair and Dynamic Curves
71

4 | Modifying hair
Reference > hairConstraintShape node
Local Position
These values represent the X, Y, Z location of the constraint locator in local space.
Curve Indices
These are the IDs of the hair curves affected by the constraint. The ID represents the index of the hair (UV grid location) on the hair system.
Warning Curve Indices IDs should not be edited.
Hair and Dynamic Curves
72

5 Rendering Hair
How do I? Set up hair shading
How you set up hair shading depends on the hair output you selected (see ”Hair Output” on page 10) and what renderer you plan to use. If you output to curves, then you can use the hair color attributes in both the hair system and follicle nodes, but if you output to Paint Effects and are rendering in the Maya Software renderer, you can also use the Multi Streak attributes in the hairSystemShape node. If you converted the Paint Effects strokes to polygons, you can also shade using the default tube shader that’s created upon conversion.
To set up hair shading
1 Select either the hair system or the desired follicles. (See ”Select hair, follicles, curves, and CVs” on page 21.)
2 In the Attribute Editor, set the desired shading attributes, depending on your selection and you hair output.
• To change global hair shading attributes, see ”Hair system shading” on page 75.
• To change shading attributes for selected follicles, see ”Follicle shading” on page 76.
• To change shading attributes after you converted Paint Effects to polygons, see ”Tube shading” on page 76.
Hair system shading
In the hair system’s Attribute Editor, there is a Shading section for the hair with the following attributes: Hair Color, Hair Color Scale, Translucence, Specular Color, Specular Power, Cast Shadows, as well as Color Randomization. Setting these attributes controls how the entire hair system’s shading looks and renders.
If your hair output includes Paint Effects, then you can further shade using Multi Streaks. These shading attributes only appear when the scene is rendered.
Follicle shading
Each follicle has shading attributes that can override or blend with the hair system’s attributes. In the follicle’s Attribute Editor, go to the Per Follicle Overrides section, and then go to the Render Overrides section where the follicle shading attributes are located: Color Blend and Color. The Color Blend value is 0 by default, meaning only the hair system color value is respected. If you set a Color Blend value greater than 0, the
Hair and Dynamic Curves
75

5 | Rendering Hair
How do I? > Tube shading
follicle color will be blended with the hair system’s color as a percentage. For example, a value of 0.1 would mean the follicle color would be blended at 10% with the hair system color.
Tube shading
If you convert your Paint Effects hair system to polygons, then a default Paint Effects tube shader is created. The former color attributes you set in the hair system are converted to the tube shader, but there is no construction history for these attributes. Any shading changes you want to make after you convert Paint Effects to polygons must be done using the tube shader. For descriptions of the attributes in the tube shader, see ”hairTubeShader node” on page 81
Set up hair self-shadowing
Self shadowing is particularly important for natural looking hair. Shadowing for long hair, if using Paint Effects hair, has the same issues as shadowing with regular Paint Effects. Depth map shadows must be used since raytraced shadows are not supported. Also you must turn off Use Mid Dist Dmap. The Dmap Bias generally needs to be adjusted when Mid Dist Dmaps are off; increasing the Dmap Bias will allow more translucent penetration of the light into the hair, as well as avoid noisy grid self shadow artifacts on surfaces. Hair is very thin and you need to use fairly high resolution shadow maps. However, increasing the Dmap Filter Size
Image created by Duncan Brinsmead
Hair and Dynamic Curves
76

5 | Rendering Hair
How do I? > Set up hair self-shadowing
can help smooth the shadows which helps simulate the diffusion of light scattering through the hair. It can also soften chatter and aliasing of the hair shadow. (For more information about light and shadow attributes, see Shadow attributes and Shadow in Maya in the Lighting guide.)
In terms of Dmap Bias you should generally start with a low value, then increase it until surfaces no longer have self shadow artifacts (dark fringes on the surface). You might then further increase this value to allow for more light penetration into the hair. In general the higher the Dmap Filter Size, the larger the Dmap Bias should be. For very soft translucent hair, you should use a relatively high filter size and large Dmap Bias. Sometimes you can get similar effects with lower filter sizes combined with lowering the depth map resolution, although the filter size should not go below 2.
In some cases you might need to turn off Use Dmap Auto Focus and set the Dmap Width Focus value manually, as Paint Effects elements are not considered in the auto focus region determination. For point lights, generally set the focus to 90 degrees. For spotlights, generally set the focus to the spotlight angle. For directional lights, the focus is not an angle, but a width from either the center of the shadowing objects or, if Use Light Position is on, then a distance from the light axis.
You also need to have some shadow casting geometry in the scene in addition to the hair, or no depth map will be created. (This is a limitation of Paint Effects.) The geometry must exist within the region in which the shadow map would be generated. (Paint Effects elements are currently ignored in the determination of whether or not to create a shadow map.)
For best results create ambient illumination on the hair using several dim shadowed lights of the environment color, rather than using an unshadowed ambient light. If desired, specular highlighting can also be turned off for these lights.
To set up self shadows on hair
1 Create a light.
2 In the light’s Attribute Editor, increase the value for Intensity (such as 1.5).
3 In the Shadows section:
• Turn on Use Depth Map Shadows.
• Turn off Use Mid Dist Dmap.
• Optionally, turn off Use Dmap Auto Focus and then set Dmap Width Focus.
• Increase the Dmap Filter Size to blur the light in the hair for realism.
Hair and Dynamic Curves
77

5 | Rendering Hair
How do I? > Render scenes with hair
• Set Dmap Bias to set how far the light filters through the hair, for example, 0.006. The required Dmap Bias may be different for the different light types.
Render scenes with hair
Hair using Paint Effects can be rendered directly using the Maya Software renderer. If you convert the Paint Effects to polygons, then you can render Hair in the mental ray and Maya Hardware renderers. (See Convert Paint Effects to polygons.) Alternatively you can output just curves to another renderer, such as RenderMan.
You can render either a single frame, or render an animation by performing a batch render. For information, see the following:
• ”To render a single frame with hair” on page 78
• ”To render an animation with hair” on page 79
• ”Rendering using distributed render” on page 80
To render a single frame with hair
1 Before rendering be sure to display the hair system’s Current Position {Hair > Display > Current Position) and go to the frame you want to render.
2 Click the Render Globals button in the Status Line and do the following:
• Select a renderer from the Render Using drop-down list.
• If you’re rendering Paint Effects using the Maya Software renderer, then turn on the Oversample and Oversample Post Filter options in the Paint Effects Rendering Options section in the Maya Software tab. This makes the hair even more realistic looking.
• If you’re rendering using mental ray, for information about the options in the mental ray tab, see mental ray tab.
3 Click the Render button in the Status Line. This renders the current frame in the Render View window.
Tip You can render more hairs cheaply using Paint Effects Multi Streaks. These attributes are in the Multi Streaks section of the hairSystemShape node.
Hair and Dynamic Curves
78

5 | Rendering Hair
How do I? > Render scenes with hair
To render an animation with hair
1 Before rendering be sure to display the hair system’s Current Position (Hair > Display > Current Position).
2 Click the Render Globals button in the Status Line. The Render Global Settings window appears.
3 Select a renderer from the Render Using drop-down list.
4 In the Common tab, do the following:
• In the File Name Prefix field, type the prefix you want to use for the rendered images.
• In the Frame/Animation Ext field, select name.ext.#.
• In the Start Frame and End Frame fields, type the first and last frames in the sequence you want to render.
• Optionally, go to the renderer-specific tab and turn on Motion Blur in the Motion Blur section.
Notes The animation will take longer to render with Motion Blur turned on.
Motion blurred scenes would benefit from scene caching to prevent simulation problems during frame sampling. See ”Use hair caches” on page 46.
Images created by Rick Kogucki
Hair and Dynamic Curves
79

5 | Rendering Hair
Reference > Rendering using distributed render
• If you’re rendering Paint Effects using the Maya Software renderer, then turn on the Oversample and Oversample Post Filter options in the Paint Effects Rendering Options section in the Maya Software tab. This makes the hair even more realistic looking.
• If you’re rendering using mental ray, for information about the options in the mental ray tab, see mental ray tab.
5 Do one of the following:
• Select Render > Batch Render.
• Select Render > Batch Render > �. The Batch Render Animation window appears. Change the options if desired and click Batch Render.
To view your rendered animation, launch Fcheck and then open the rendered.iff file. For more information on viewing the animation, see the Rendering guide.
Rendering using distributed render
If you are performing a distributed render (for example, using Dispatcher), or if you are splitting up the render for any reason, you should create a hair cache so:
• you can do distributed rendering and have the simulation match exactly
• you can do distributed rendering without Maya Unlimited licenses (Hair simulation requires Maya Unlimited).
For details, see ”Use hair caches” on page 46.
Reference hairTubeShader node
The hairTubeShader node is created when you convert Paint Effects hair to polygons. (See ”Tube shading” on page 76.) Most of the attributes in the hairTubeShader are common to all Maya shaders. For descriptions of these attributes, see Common surface material attributes in the online Rendering guide.
Hair and Dynamic Curves
80

6 Samples and techniques for Hair
Sample hairstylesThe following are workflow suggestions and examples for two hair styles.• ”Create wavy, curly hair” on page 83
• ”Create ponytails and braids” on page 86
Create wavy, curly hair
You can create waves and curls easily by using either the hair system Clump Curl or Curl attributes in the Displacements section. This is in general preferable to directly shaping the Start and Rest position curves, as you don’t need to simulate nearly as many CVs. (Also, highly curled Rest curves can result in unstable animations.)
As a rule of thumb it is preferable to use low CV count curves for the simulation and then apply detailed shaping to the result of the simulation, increasing Sub Segments on the hair system when more visual detail is required. However large scale shaping of the hair generally must be done by editing the Start and Rest curve positions. Clump Curl determines how much the hair clump curls about the central axis of the clump. For very tight curls you might need to type in values outside the range of the graph.You might also need to increase Sub Segments when doing this. The graph determines the rate of curl along the clump with a value of 0.5
Images created by Duncan Brinsmead. Model created by Inspeck.
Hair and Dynamic Curves
83

6 | Samples and techniques for Hair
> Create wavy, curly hair
being no curl. If desired you can reverse curl direction mid clump. The displacement Curl is relative to the center of each hair, rather than each clump. The amount of this curl displacement is relative to the Hair Width, so if you change the Hair Width you may need to change the Curl displacement.
You can create frizzy or kinky hair by using the Curl displacement combined with a high Curl Frequency and a large Sub Segment count. The high Sub Segments may slow down refresh, so you might want to lower the hair system Display Quality when doing this for faster playback. Curls are the same for all hairs in a clump. If the clump is narrow and the curl displacement is large, this will create corkscrew shapes. For “afro” style curls, or partly ironed kinky hair you might want to have less regular curling. The Noise displacement is different from the curl in that each hair within a clump gets a different displacement. Experiment with typing values outside the slider range for Noise, such as 2 or 3. Also, to see the effect of high frequency values, you will need to increase the Sub Segments.
Curls can have a fairly bouncy motion. In general you should be able to get the desired behavior by running the simulation and playing with different Stiffness settings. For very loose heavy curls, the length of the clump may stretch, like a “Slinky.” This can be handled by increasing the Length Flex attribute. The Iterations attribute affects both the Length Flex and the Stiffness. Often it will be sufficient to leave the Length Flex at zero and simply lower the Iterations when more length flex is required. (The typical reason to increase the iterations is to provide greater stiffness or less length flexing.)
In terms of motion, kinky and wavy hair is frequently very damped and stiff, almost like a block of solid material. It helps to create the hair with a low CV count as this makes it easier to keep it stiff (not as many iterations required). In addition to making the Stiffness 1 and the Iterations relatively high, you can further stiffen the hair by creating Transform constraints for the hair and grouping these constraints under the head. If the Point Method on a constraint is set to use a U Parameter of 0.5, then the CVs at middle point on hairs will be locked to the motion of the head. Lowering the Stiffness on the constraint can allow these locked points to move a little and to look more natural.
It may also be useful to use the Damp attribute to keep the curled elements from being too springy. Self collisions of hair tend to dampen the natural springy motion that would happen with a single hair, especially with kinky hair; however individual heavy curls may still be quite springy.
Hair and Dynamic Curves
84

6 | Samples and techniques for Hair
> Create wavy, curly hair
Note Curls that are not properly self shadowed will look flat. See the description of self shadowing for pony tails and braids in ”Create ponytails and braids” on page 86. For more information about light and shadow attributes, see Shadow attributes and Shadow in Maya in the Lighting guide.
Image created by Duncan Brinsmead
Hair and Dynamic Curves
85
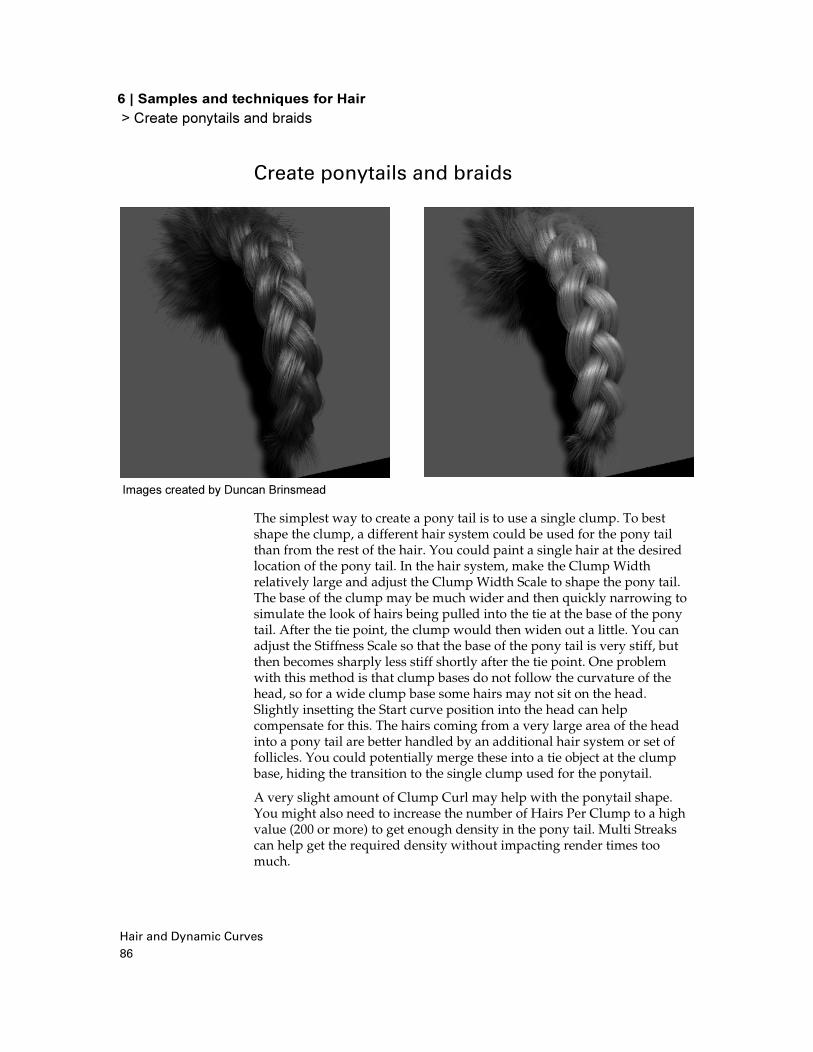
6 | Samples and techniques for Hair
> Create ponytails and braids
Create ponytails and braids
The simplest way to create a pony tail is to use a single clump. To best shape the clump, a different hair system could be used for the pony tail than from the rest of the hair. You could paint a single hair at the desired location of the pony tail. In the hair system, make the Clump Width relatively large and adjust the Clump Width Scale to shape the pony tail. The base of the clump may be much wider and then quickly narrowing to simulate the look of hairs being pulled into the tie at the base of the pony tail. After the tie point, the clump would then widen out a little. You can adjust the Stiffness Scale so that the base of the pony tail is very stiff, but then becomes sharply less stiff shortly after the tie point. One problem with this method is that clump bases do not follow the curvature of the head, so for a wide clump base some hairs may not sit on the head. Slightly insetting the Start curve position into the head can help compensate for this. The hairs coming from a very large area of the head into a pony tail are better handled by an additional hair system or set of follicles. You could potentially merge these into a tie object at the clump base, hiding the transition to the single clump used for the ponytail.
A very slight amount of Clump Curl may help with the ponytail shape. You might also need to increase the number of Hairs Per Clump to a high value (200 or more) to get enough density in the pony tail. Multi Streaks can help get the required density without impacting render times too much.
Images created by Duncan Brinsmead
Hair and Dynamic Curves
86
6 | Samples and techniques for Hair
> Create ponytails and braids
Hair clumps have built in braiding; just turn on the Braid attribute on a follicle and the clump will be internally a single braid composed of three strands. You can paint this attribute, or select the follicles to become braids and turn Braid on in the Channel Box. The shaping of a braid is similar to a single clump ponytail. In general, make the base wide to simulate hair pulling off the scalp into the braid. The Clump Width should taper quickly at first and then generally continue to taper until near the braid end. If desired, the tuft of hair at the end of the braid can then fluff out by increasing the Clump Width slightly at the very end. Unlike ponytails, braids do not have a uniform profile or cross-section - they are flatter. In general, the natural orientation is with the flat side horizontal. You can adjust the Clump Twist on the hair system so that most of the braids have the right orientation. Any odd clumps that still have the wrong twist can then be adjusted using the follicle's Clump Twist Offset. In order to fully resolve the curling in the braid, you might need to increase the hair system Sub Segments value to a large value, especially if the clump is skinny (the number of braids is proportional to the Clump Width).
With both ponytails and braids proper self shadowing of the hair is critical to achieve the tube-shaped look of the clump. Keep in mind that the clump is not like a modeled tube, which uses the angle of the surface with the light to determine shading. Instead, hairs on the side of the clump away from the light will be as bright as those on the light-facing side unless they receive shadows cast from other hairs. For Paint Effects rendering, depth map shadows must be used with Use Mid Dist turned off. The Dmap Bias on the light should be carefully adjusted and it can also help to make the Dmap Filter size high (3 or more). (For more information about light and shadow attributes, see Shadow attributes and Shadow in Maya in the Lighting guide.)
You can also create a pony tail by combining many individual hair clumps. There are a few techniques you can use to pull hairs together:
• Select the Start curve end CVs, then scale down while holding the "l" (Length Lock) key. Be careful when doing this as operations done while Lock Length is on do not undo fully. Also you don’t want to lose the orientation of the curves near the base of the scalp. In general, editing the Start position curves is the most direct way to shape the hair. The Lock Length feature is quite helpful when doing this.
• Create a Transform constraint for the hairs you want to modify. While running Interactive Playback, scale/translate/rotate the Transform constraint to pull the hair together. Stop playback and then set the Start position from the Current position. Once you’re done, delete the constraint.
Hair and Dynamic Curves
87

6 | Samples and techniques for Hair
> Dynamic spline IK chain illustrated using a butterfly tail
• Select the hair system then create a Radial field and give it a negative Magnitude. Run the simulation until the hair comes together. Set the Start position from the Current position and then delete the Radial field.
When you have positioned the hair together you then need to pin it together so it doesn't fall apart during the simulation. To do this, you can create a Hair to Hair constraint near the base of the pony tail. You might want to group this constraint with the head, so you won’t need to reposition the constraint if you later change the Start position of the head. A Hair to Hair constraint is good if you want the attachment point to be able to flop significantly, although the direction of the hairs will not be fully confined by a single Hair to Hair constraint. A Transform constraint that is grouped with the head may function better for a ponytail that is stiffly bound to a point on the head. One or two additional constraints further up the ponytail may also help.
Braids are also possible in this manner, but more difficult. In general hair to hair constraints may not be sufficient to hold a braided shape together. Rest curves can help with this, although in general the follicle Braid attribute should be used instead.
Sample dynamic curve scenariosHere are two examples using dynamic NURBS curves.
• ”Dynamic spline IK chain illustrated using a butterfly tail” on page 88
• ”Stiffness Scale along curve and emit particles from curve illustrated with a fishing rod and line” on page 90
Dynamic spline IK chain illustrated using a butterfly tail
In this scenario a dynamic spline IK chain is created and used on a dragonfly-type bug model. As the dragon bug moves about, its tail wiggles slightly.
Hair and Dynamic Curves
88

6 | Samples and techniques for Hair
> Dynamic spline IK chain illustrated using a butterfly tail
To create a dynamic spline IK chain
1 Create a new scene and switch to the Side orthographic view.
2 In the Animation menu set, select Skeleton > Joint Tool.
3 To draw a tail in a rest position, as shown in the image below, click near the top of the Y-axis and then click to create joints as though they were along the tail. At the last joint press Enter.
4 Select Create > Curve CV Tool and trace a curve over the joints, clicking at each joint to create a CV. Press Enter at the end of the last joint.
2 Dynamic curves used for body, tail and legs of the dragon bug
1 Joints of body, tail and legs of the dragon bug
3 Hardware render of the dragon bug
Hair and Dynamic Curves
89

6 | Samples and techniques for Hair
> Stiffness Scale along curve and emit particles from curve illustrated with a fishing rod
and line
5 With the curve selected, in the Dynamics menu set, select Hair > Make Selected Curves Dynamic.
6 Select Hair > Display > Current Position.
7 To attach the curve into the chain, in the Animation menu set, select Skeleton > IK Spline Handle Tool > ❒ .
8 In the IK Spline Handle Settings editor, turn off Auto Create Curve.
9 Follow the instructions in the Help Line, which are:
• Click the start joint.
• Click the end joint.
• Click the Current Position curve.
10 To select the follicle, do the following:
• Select the curve.
• Select the follicleShape node in the Attribute Editor.
• Click the Select button at the bottom of the Attribute Editor.
11 In the follicleShape node, set Point Lock to Base.
12 To play the simulation, select Solvers > Interactive Playback.
13 To stabilize the dynamic curve’s behavior, adjust the Stiffness value and the number of Iterations in the Dynamics section of the hairSystemShape node of the Attribute Editor.
Stiffness Scale along curve and emit particles from curve illustrated with a fishing rod and line
In this scenario a dynamic curve is created to simulate casting a fishing line. The Stiffness Scale is varied along the curve so it is somewhat stiff at the fishing rod end and very flexible along the fishing line. Particles are set to emit from the dynamic curve to simulate water dripping off the fishing line once it’s been cast and reeled in.
Hair and Dynamic Curves
90

6 | Samples and techniques for Hair
> Stiffness Scale along curve and emit particles from curve illustrated with a fishing rod
and line
To make the fishing rod and line
1 Create a new scene and switch to the Side orthographic view, then dolly out so you can see at least 30 spans.
2 Using Create > CV Curve Tool, create a long curve of about 30 spans straight up the Y-axis. You can use grid snap to help you. This curve will be both the fishing pole and the line.
3 Create a narrow NURBS cylinder for the base of the rod and position it beneath the curve.
4 Select the curve and to make it dynamic, select Hair > Make Selected Curves Dynamic.
5 Select Hair > Display > Current Position.
6 Open Hypergraph (Window > Hypergraph) and middle-drag the follicle under the cylinder. This parents the follicle to the cylinder.
7 Rotate the cylinder 45 degrees to the right, as in the image below. The curve rotates with it.
8 Select the curve, then in the follicleShape node in the Attribute Editor, set Point Lock to Base.
9 In the hairSystemShape node, do the following:
Image created by Duncan Brinsmead
Hair and Dynamic Curves
91

6 | Samples and techniques for Hair
> Stiffness Scale along curve and emit particles from curve illustrated with a fishing rod
and line
• in the Dynamics section, set Stiffness to 0.500 and Drag to 0.005.
• in the Collisions section, turn on Collide Ground and set the Ground Height to -5.0.
• in the Dynamics section, edit Stiffness Scale graph by setting Interpolation to None and then add one point to the graph as shown in the image below. The first part of the graph represents the fishing pole and has stiffness scale value of 1, while the rest is the fishing line with a stiffness scale value of 0.
10 Play the simulation.
11 Once the simulation has settled down, stop the simulation.
12 Select Hair > Set Start Position > from Current.
To add the water
Now you want to add water dripping from just the part of the line which is under water.
1 Select the curve and, in the Modeling menu set, select Edit Curves > Rebuild Curve > ❒ .
2 In the Rebuild Curve Options window, set the following and then click Rebuild:
• Rebuild Type to Uniform
• for Keep, turn on CVs
• turn on Keep Original
3 Select the original curve (curveShape2) in the Outliner and hide it. (Display > Hide > Selection)
4 Using the X-axis as the water line, select a curve point at the point the fishing line is under water.
5 Select Edit Curves > Detach Curves > ❒ , turn off Keep Original and then click Detach.
6 Delete the first half of the curve.
7 Select the remainder of the curve and select Particles > Emit from Object > ❒ .
8 In the Emitter Options (Emitter from Object) window, select Curve as the Emitter Type, set Speed to 0 and then click Create.
9 Play to see the particles.
Hair and Dynamic Curves
92

6 | Samples and techniques for Hair
> Advanced tips for working with Hair
10 Select the particles and in the particleShape tab in the Attribute Editor, set the Inherit Factor to 0.5.
11 To add a gravity field, select Fields > Gravity.
12 Select Display > Show > Show Last Hidden.
13 Play the simulation to see the particles, which should be dripping downwards from the part of the line that is underwater.
To cast the fishing line
1 Select the cylinder.
2 Select Solvers > Interactive Playback. Make sure your playback frame range is high.
3 Move the cylinder up above the water line.
4 Rotate the cylinder backwards and then quickly forwards in the X direction to cast the line.
5 If the line is not whippy enough, increase the Stiffness value. If Stiffness is already at 1, increase the Iterations until you achieve the desired effect.
Advanced tips for working with Hair
The following are suggested tips for working with Hair.
Max Hair Density option variable
It’s helpful to know the following option variable:
createHairMaxDensity
Its default value is 100. To increase this value you could type:
optionVar -intValue createHairMaxDensity 150;
This determines the maximum rows/columns of hair you can create or paint on a surface. The follicles are named based on their position within a grid of this resolution. The reason for this naming is the Paint Hair Tool, which relies on the naming to find the hairs at a given UV position.
Hair and Dynamic Curves
93

6 | Samples and techniques for Hair
> Using the pfxstrokes command
If this variable is greater, then the maximum number of paintable follicles on a surface will be greater; however, painting will be also slower, even if painting low follicle densities. If you change this variable then previously created hair systems will not be paintable (painting in one area may affect follicles that don't lie under the brush).
Decreasing the value of the variable might help if painting hair is slow, although you won't be able to create as high a density of follicles.
The default is a 100x100 grid, which is a max of 10000 follicles per surface.
Using the pfxstrokes command
The basic use of the pfxstrokes command is to dump Paint Effects tube information to a file. This can be useful to generate curves from Paint Effects or to send information to another renderer. The format for the data is different for hairs and brushes with Tubes turned on.
Paint Effects can call a runtime and create MEL scripts. These are defined as a string attribute on the brush node: paint create func, and paint runtime func. You set the string to the name of the function to call. This MEL function has a specific set of arguments that must be passed in and returned. The workflow is to copy one of the provided template MEL files, change the function name and file name and then edit the internals of the function. If you have any runtime or create functions set on the brush they are called as the stroke is drawn. The pfxstrokes command fakes a redraw call of the stroke without drawing anything. Therefore these scripts will also get evaluated when the pfxstrokes command is invoked.
Using a follicle node as a point on poly constraint
The follicle node can be used as a point on poly constraint. One method is to create some hairs, then delete everything except for the follicles. For example, delete the hair system, pfxHair, and Start position curves. You can then parent an object under the follicle. Or you can use the follicle node in scripts.
The following example script constrains a cone to the surface of a poly sphere. The cone will move relative to the normal and tangent at the defined uv point on the poly. (It will appear at the sphere center if the UV is set to a value not defined on the poly uv set.)
// create a cone, poly sphere and a follicle nodestring $sphere[] = `polySphere`;string $cone[] = `cone`;string $fol = `createNode follicle`;
// get the parent transforms of the folliclestring $folTform[] = `listTransforms $fol`;
Hair and Dynamic Curves
94

6 | Samples and techniques for Hair
> Attaching a skipping rope (dynamic curve) to hands
// connect the sphere to the follicleconnectAttr ($sphere[0] + ".outMesh") ($fol + ".inputMesh");connectAttr ($sphere[0] + ".worldMatrix[0]") ($fol + ".inputWorldMatrix");
// apply the follicle output positions to its own transformconnectAttr ($fol + ".outTranslate") ($folTform[0] + ".translate" );connectAttr ($fol + ".outRotate") ($folTform[0] + ".rotate" );
// parent the cone under the follicleparent -r $cone[0] $folTform[0];// the default uv of 0 0 doesn't exist on the poly sphere, so we set itsetAttr ($fol + ".parameterV") 0.5;// rotate the cone to point along the normalsetAttr ($cone[0] + ".rotateY") -90;
Attaching a skipping rope (dynamic curve) to hands
Use a Transform constraint and group or constrain the hairConstraint node to your moving object. This should lock the dynamic curve so it follows twists and rotations of the object and behaves like a spring with an attachment of stiffness. If the dynamic curve is not attaching well, then it is a bug with the constraint. The relative constraint position is determined at the start frame, therefore there will be no force applied at the start frame. The Start curve needs to be modeled through the grasping hand.
The skipping rope case can also be handled by grouping the follicle under the hand near the base, then using a Transform constraint at either end of the rope grouped to the other hand. However, you can’t constrain the start point using the No Attach option for the Point Lock attribute in the follicleShape node node. With No Attach, the start point keeps moving under gravity and is not pulled by the curve tension by constraints.
Hair as a wire deformer
Hair curves can be useful for wiggle effects when parented to the moving object and applied as wire deformers. The hair can be used as a wire deformer to make all or part of a surface dynamic.
Troubleshoot Hair
The following are solutions to problems you may encounter when using Hair.
Hair and Dynamic Curves
95

6 | Samples and techniques for Hair
> Hair simulation is slow when using NURBS Curves output
Hair simulation is slow when using NURBS Curves output
If you set the Output to NURBS Curves when creating hair, and you created a lot of hair, the simulation may be slow to initialize. The workaround is to set the Output to Paint Effects and NURBS Curves and hide the curves when running the simulation.
Undo doesn’t work with Lock Length on
When using Lock Length on NURBS curves, Undo won’t work properly. The workaround is to move CVs slightly and then turn on Lock Length.
Unruly, jiggy hairs during playback
When you’re playing the Hair simulation, if any hairs are unruly or won’t relax, you can do any of the following:
• First, try adjusting the Damp attribute in the Dynamics section of the hairSystemShape node in the Attribute Editor.
• Increase the Stiffness value or number of Iterations in the Dynamics section of the hairSystemShape node in the Attribute Editor.
• Select the hair curve and in its follicleShape node, turn on Dynamics Overrides and increase the Stiffness and/or Length Flex values.
• Select the hair curve and in its follicleShape node, change Simulation Method to Passive. A passive curve interpolates behavior from neighboring active curves.
Hair and Dynamic Curves
96

Index
Aanimation
viewing . . . . . . . . . . . . . . . . . . . . . . . . . . . . . . . . . 80
Append Time Rangeappend to hair cache option. . . . . . . . . . . . . . . . 49
append to a hair cache. . . . . . . . . . . . . . . . . . . . . . . . 46
Append to Cachehair . . . . . . . . . . . . . . . . . . . . . . . . . . . . . . . . . . . . . 49
Append to Cache optionshair . . . . . . . . . . . . . . . . . . . . . . . . . . . . . . . . . . . . . 49
Assign Hair System . . . . . . . . . . . . . . . . . . . . . . . . . . 31
Assign Paint Effects Brush to Hair . . . . . . . . . . . . . 71
BBend
hair, edit curves . . . . . . . . . . . . . . . . . . . . . . . . . . 70
Braidfollicle attribute . . . . . . . . . . . . . . . . . . . . . . . . . . 41
braidhair, how to. . . . . . . . . . . . . . . . . . . . . . . . . . . . . . 58
braidscreating . . . . . . . . . . . . . . . . . . . . . . . . . . . . . . . . . 86
brushPaint Effects and hair . . . . . . . . . . . . . . . . . . . . . 65
CCache Time Range
create hair cache option . . . . . . . . . . . . . . . . . . . 48
cachinghair . . . . . . . . . . . . . . . . . . . . . . . . . . . . . . . . . . . . . 46
Cast Shadowshair system attribute . . . . . . . . . . . . . . . . . . . . . . 38
Clump and Hair Shape attributes . . . . . . . . . . . . . . 33
Clump Curlhair system attribute . . . . . . . . . . . . . . . . . . . . . . 34
Clump Flatnesshair system attribute . . . . . . . . . . . . . . . . . . . . . . 35
Clump Twisthair system attribute . . . . . . . . . . . . . . . . . . . . . . 33
Clump Twist Offsetfollicle attribute . . . . . . . . . . . . . . . . . . . . . . . . . . 43
Clump Widthhair system attribute . . . . . . . . . . . . . . . . . . . . . . 33
Clump Width Multfollicle attribute . . . . . . . . . . . . . . . . . . . . . . . . . . 42
Clump Width Scalehair system attribute . . . . . . . . . . . . . . . . . . . . . . 34
Collidefollicle attribute . . . . . . . . . . . . . . . . . . . . . . . . . . 42
hair system attribute . . . . . . . . . . . . . . . . . . . . . . 36
collidehair. . . . . . . . . . . . . . . . . . . . . . . . . . . . . . . . . . . . . 59
Collide Cubehair constraint type . . . . . . . . . . . . . . . . . . . . . . . 64
Collide Groundhair system attribute . . . . . . . . . . . . . . . . . . . . . . 37
Collide Over Samplehair system attribute . . . . . . . . . . . . . . . . . . . . . . 36
Collide Spherehair constraint type . . . . . . . . . . . . . . . . . . . . . . . 64
Collide Width Offsethair system attribute . . . . . . . . . . . . . . . . . . . . . . 36
collision hair constraints . . . . . . . . . . . . . . . . . . . . . . 64
Collisions hair system attributes . . . . . . . . . . . . . . . 36
Colorfollicle attribute . . . . . . . . . . . . . . . . . . . . . . . . . . 43
Color Blendfollicle attribute . . . . . . . . . . . . . . . . . . . . . . . . . . 43
Color Randomizationhair system attribute . . . . . . . . . . . . . . . . . . . . . . 38
Constraint Method. . . . . . . . . . . . . . . . . . . . . . . . . . . 72
constraint nodehair. . . . . . . . . . . . . . . . . . . . . . . . . . . . . . . . . . . . . 72
constraint typeshair. . . . . . . . . . . . . . . . . . . . . . . . . . . . . . . . . . . . . 63
constraintshair, collision, haircollision constraints64
hair, setting up . . . . . . . . . . . . . . . . . . . . . . . . . . . 61
Convert Selectionhair. . . . . . . . . . . . . . . . . . . . . . . . . . . . . . . . . . . . . 31
Hair and Dynamic Curves
97

Index
createcurly, wavy hair . . . . . . . . . . . . . . . . . . . . . . . . . . 83
ponytails, braids with hair . . . . . . . . . . . . . . . . . 86
Create Cachehair . . . . . . . . . . . . . . . . . . . . . . . . . . . . . . . . . . . . . 48
Create Cache optionshair . . . . . . . . . . . . . . . . . . . . . . . . . . . . . . . . . . . . . 48
Create Constrainthair . . . . . . . . . . . . . . . . . . . . . . . . . . . . . . . . . . . . . 70
Create FolliclesPaint Hair Tool options. . . . . . . . . . . . . . . . . . . . 29
Create Hair . . . . . . . . . . . . . . . . . . . . . . . . . . . . . . . . . 26
create hair cache . . . . . . . . . . . . . . . . . . . . . . . . . . . . . 46
Create Hair options . . . . . . . . . . . . . . . . . . . . . . . . . . 26
Create Passive FolliclesPaint Hair Tool options. . . . . . . . . . . . . . . . . . . . 29
Create Rest Curvescreate hair attribute . . . . . . . . . . . . . . . . . . . . . . . 28
creating . . . . . . . . . . . . . . . . . . . . . . . . . . . . . . . . . 83, 86
Curlhair system attribute . . . . . . . . . . . . . . . . . . . . . . 39
hair, edit curves . . . . . . . . . . . . . . . . . . . . . . . . . . 70
Curl Frequencyhair system attribute . . . . . . . . . . . . . . . . . . . . . . 39
Curl Multfollicle attribute . . . . . . . . . . . . . . . . . . . . . . . . . . 43
curly hair . . . . . . . . . . . . . . . . . . . . . . . . . . . . . . . . . . . 83
Current Position hair curves . . . . . . . . . . . . . . . . . . 15
Current Timehair system attribute . . . . . . . . . . . . . . . . . . . . . . 36
Curve Indices . . . . . . . . . . . . . . . . . . . . . . . . . . . . . . . 73
curve positionssetting for hair . . . . . . . . . . . . . . . . . . . . . . . . . . . 22
curvesCurrent Position hair. . . . . . . . . . . . . . . . . . . . . . 15
displaying hair . . . . . . . . . . . . . . . . . . . . . . . . . . . 20
dynamic, scenarios . . . . . . . . . . . . . . . . . . . . . . . 88
hair, editing, edithair curves56
make dynamic . . . . . . . . . . . . . . . . . . . . . . . . . . . 25
passive hair . . . . . . . . . . . . . . . . . . . . . . . . . . . . . . 16
Rest hair . . . . . . . . . . . . . . . . . . . . . . . . . . . . . . . . 15
selecting, hair . . . . . . . . . . . . . . . . . . . . . . . . . . . . 21
Start hair . . . . . . . . . . . . . . . . . . . . . . . . . . . . . . . . 15
CVsselecting, hair . . . . . . . . . . . . . . . . . . . . . . . . . . . . 21
DDamp
follicle attribute . . . . . . . . . . . . . . . . . . . . . . . . . . 42
hair system attribute . . . . . . . . . . . . . . . . . . . . . . 35
Degreefollicle attribute . . . . . . . . . . . . . . . . . . . . . . . . . . 41
Delete Cachehair. . . . . . . . . . . . . . . . . . . . . . . . . . . . . . . . . . . . . 49
Delete Entire Hair System . . . . . . . . . . . . . . . . . . . . 32
Delete FolliclesPaint Hair Tool options . . . . . . . . . . . . . . . . . . . 29
delete hair . . . . . . . . . . . . . . . . . . . . . . . . . . . . . . . . . . 26
delete hair cache. . . . . . . . . . . . . . . . . . . . . . . . . . . . . 46
Density Multfollicle attribute . . . . . . . . . . . . . . . . . . . . . . . . . . 42
Dispatcher . . . . . . . . . . . . . . . . . . . . . . . . . . . . . . . . . . 80
Displacements hair system attributes . . . . . . . . . . . 39
displayhair curves . . . . . . . . . . . . . . . . . . . . . . . . . . . . . . 20
Display Qualityhair system attribute . . . . . . . . . . . . . . . . . . . . . . 33
distributed render . . . . . . . . . . . . . . . . . . . . . . . . . . . 80
hair. . . . . . . . . . . . . . . . . . . . . . . . . . . . . . . . . . . . . 80
Draghair system attribute . . . . . . . . . . . . . . . . . . . . . . 35
Draw Collide Widthhair system attribute . . . . . . . . . . . . . . . . . . . . . . 37
dynamic curve scenarios. . . . . . . . . . . . . . . . . . . . . . 88
dynamic curves . . . . . . . . . . . . . . . . . . . . . . . . . . . . . . 9
effects. . . . . . . . . . . . . . . . . . . . . . . . . . . . . . . . . . . 18
making . . . . . . . . . . . . . . . . . . . . . . . . . . . . . . . . . 25
Dynamic Overridesfollicle attributes . . . . . . . . . . . . . . . . . . . . . . . . . 41
Dynamics hair system attributes . . . . . . . . . . . . . . . 35
Dynamics Weighthair system attribute . . . . . . . . . . . . . . . . . . . . . . 36
Hair and Dynamic Curves
98

Index
EEdge Bounded
create hair attribute . . . . . . . . . . . . . . . . . . . . . . . 28
Edit Follicle AttributesPaint Hair Tool options. . . . . . . . . . . . . . . . . . . . 29
emit particlesdynamic curve scenario . . . . . . . . . . . . . . . . . . . 90
Equalizecreate hair attribute . . . . . . . . . . . . . . . . . . . . . . . 28
Extend HairsPaint Hair Tool options. . . . . . . . . . . . . . . . . . . . 30
FFlip Direction
follicle attribute . . . . . . . . . . . . . . . . . . . . . . . . . . 41
follicleselecting. . . . . . . . . . . . . . . . . . . . . . . . . . . . . . . . . 21
Follicle AttributePaint Hair Tool options. . . . . . . . . . . . . . . . . . . . 30
Follicle Density UPaint Hair Tool options. . . . . . . . . . . . . . . . . . . . 30
Follicle Density VPaint Hair Tool options. . . . . . . . . . . . . . . . . . . . 30
follicle node attributes . . . . . . . . . . . . . . . . . . . . . . . . 40
Follicle Override ColorPaint Hair Tool options. . . . . . . . . . . . . . . . . . . . 30
follicle shadingshadingfollicle level76
folliclesmodifying . . . . . . . . . . . . . . . . . . . . . . . . . . . . . . . 55
follicleShape node attributes . . . . . . . . . . . . . . . . . . 40
Frequencyhair system attribute . . . . . . . . . . . . . . . . . . . . . . 38
Frictionhair system attribute . . . . . . . . . . . . . . . . . . . . . . 36
GGlue Strength . . . . . . . . . . . . . . . . . . . . . . . . . . . . . . . 72
Gravityhair system attribute . . . . . . . . . . . . . . . . . . . . . . 36
Ground Heighthair system attribute . . . . . . . . . . . . . . . . . . . . . . 37
Hhair . . . . . . . . . . . . . . . . . . . . . . . . . . . . . . . . . . . . . . . . 51
advanced tips . . . . . . . . . . . . . . . . . . . . . . . . . . . . 93
assign Paint Effects brush. . . . . . . . . . . . . . . . . . 65
behavior, concepts . . . . . . . . . . . . . . . . . . . . . . . . 51
behavior, how to modify . . . . . . . . . . . . . . . . . . 52
braiding. . . . . . . . . . . . . . . . . . . . . . . . . . . . . . . . . 58
changing the look of . . . . . . . . . . . . . . . . . . . . . . 53
colliding, how to . . . . . . . . . . . . . . . . . . . . . . . . . 59
connections . . . . . . . . . . . . . . . . . . . . . . . . . . . . . . 10
constraint types . . . . . . . . . . . . . . . . . . . . . . . . . . 63
constraints, setting up . . . . . . . . . . . . . . . . . . . . . 61
create curly, wavy . . . . . . . . . . . . . . . . . . . . . . . . 83
create ponytails, braids . . . . . . . . . . . . . . . . . . . . 86
create, how to . . . . . . . . . . . . . . . . . . . . . . . . . . . . 19
creating, concepts . . . . . . . . . . . . . . . . . . . . . . . . 15
curve positions, setting . . . . . . . . . . . . . . . . . . . . 22
curve types . . . . . . . . . . . . . . . . . . . . . . . . . . . . . . 15
delete . . . . . . . . . . . . . . . . . . . . . . . . . . . . . . . . . . . 26
distributed render . . . . . . . . . . . . . . . . . . . . . . . . 80
dynamic curves . . . . . . . . . . . . . . . . . . . . . . . . . . 88
dynamic effects . . . . . . . . . . . . . . . . . . . . . . . . . . 18
editing curves. . . . . . . . . . . . . . . . . . . . . . . . . . . . 56
hairstyle samples . . . . . . . . . . . . . . . . . . . . . . . . . 83
length, adjusting . . . . . . . . . . . . . . . . . . . . . . . . . 55
make collide . . . . . . . . . . . . . . . . . . . . . . . . . . . . . 59
overview . . . . . . . . . . . . . . . . . . . . . . . . . . . . . . . . . 9
Paint Effects, assign brush . . . . . . . . . . . . . . . . . 65
Paint Hair Tool. . . . . . . . . . . . . . . . . . . . . . . . . . . 10
painting . . . . . . . . . . . . . . . . . . . . . . . . . . . . . . . . . 53
passive curves . . . . . . . . . . . . . . . . . . . . . . . . . . . 16
play back simulation . . . . . . . . . . . . . . . . . . . . . . 45
rendering . . . . . . . . . . . . . . . . . . . . . . . . . 10, 75, 78
scenarios, dynamic curves . . . . . . . . . . . . . . . . . 88
selecting, hair system . . . . . . . . . . . . . . . . . . . . . 21
self-shadowing. . . . . . . . . . . . . . . . . . . . . . . . . . . 76
setting up constraints . . . . . . . . . . . . . . . . . . . . . 61
shading
Hair and Dynamic Curves
99

Index
shading hair75
simulating . . . . . . . . . . . . . . . . . . . . . . . . . . . . . . . 45
style, how to . . . . . . . . . . . . . . . . . . . . . . . . . . . . . 52
styling, concepts. . . . . . . . . . . . . . . . . . . . . . . . . . 51
troubleshooting . . . . . . . . . . . . . . . . . . . . . . . . . . 95
UV set, selecting. . . . . . . . . . . . . . . . . . . . . . . . . . 23
UV sets . . . . . . . . . . . . . . . . . . . . . . . . . . . . . . . . . 19
workflow. . . . . . . . . . . . . . . . . . . . . . . . . . . . . . . . 12
Hair Bunchhair constraint type . . . . . . . . . . . . . . . . . . . . . . . 64
hair caches . . . . . . . . . . . . . . . . . . . . . . . . . . . . . . . . . . 46
Hair Colorhair system attribute . . . . . . . . . . . . . . . . . . . . . . 38
Hair Color Scalehair system attribute . . . . . . . . . . . . . . . . . . . . . . 38
hair constraint attribute. . . . . . . . . . . . . . . . . . . . 72, 73
hair curve . . . . . . . . . . . . . . . . . . . . . . . . . . . . . . . . . . 95
hair curvesdisplay . . . . . . . . . . . . . . . . . . . . . . . . . . . . . . . . . . 20
Hair LengthPaint Hair Tool options. . . . . . . . . . . . . . . . . . . . 30
hair output . . . . . . . . . . . . . . . . . . . . . . . . . . . . . . . . . 10
Hair SystemPaint Hair Tool options. . . . . . . . . . . . . . . . . . . . 30
hair systemassigning . . . . . . . . . . . . . . . . . . . . . . . . . . . . . . . . 23
modifying . . . . . . . . . . . . . . . . . . . . . . . . . . . . . . . 54
hair system shading . . . . . . . . . . . . . . . . . . . . . . . . . . 75
Hair to Hairhair constraint type . . . . . . . . . . . . . . . . . . . . . . . 63
Hair Widthhair system attribute . . . . . . . . . . . . . . . . . . . . . . 33
Hair Width Scalehair system attribute . . . . . . . . . . . . . . . . . . . . . . 34
hairConstraintShape node . . . . . . . . . . . . . . . . . . . . 72
Hairs Per Clumphair system attribute . . . . . . . . . . . . . . . . . . . . . . 33
hairSystem node. . . . . . . . . . . . . . . . . . . . . . . . . . . . . 32
hairSystemShape node . . . . . . . . . . . . . . . . . . . . . . . 32
hairTubeShader node . . . . . . . . . . . . . . . . . . . . . . . . 81
IIntensity
hair system attribute . . . . . . . . . . . . . . . . . . . . . . 37
Interactive Playback . . . . . . . . . . . . . . . . . . . . . . . . . 45
Iterationshair system attribute . . . . . . . . . . . . . . . . . . . . . . 35
LLength
create hair attribute . . . . . . . . . . . . . . . . . . . . . . . 27
lengthhair, adjusting . . . . . . . . . . . . . . . . . . . . . . . . . . . 55
Length Flexfollicle attribute . . . . . . . . . . . . . . . . . . . . . . . . . . 42
hair system attribute . . . . . . . . . . . . . . . . . . . . . . 35
Light Each Hairhair system attribute . . . . . . . . . . . . . . . . . . . . . . 40
Local Position . . . . . . . . . . . . . . . . . . . . . . . . . . . . . . . 73
Lock Length . . . . . . . . . . . . . . . . . . . . . . . . . . . . . . . . 56
hair, edit curves . . . . . . . . . . . . . . . . . . . . . . . . . . 69
Undo issue . . . . . . . . . . . . . . . . . . . . . . . . . . . . . . 96
long hair . . . . . . . . . . . . . . . . . . . . . . . . . . . . . . . . . . . . 9
look. . . . . . . . . . . . . . . . . . . . . . . . . . . . . . . . . . . . . . . . 51
MMake Collide
hair. . . . . . . . . . . . . . . . . . . . . . . . . . . . . . . . . . . . . 71
make curves dynamic . . . . . . . . . . . . . . . . . . . . . . . . 25
Make Hair Collide . . . . . . . . . . . . . . . . . . . . . . . . . . . 59
Make Selected Curves Dynamichair. . . . . . . . . . . . . . . . . . . . . . . . . . . . . . . . . . . . . 31
Max Hair Densityhair option variable . . . . . . . . . . . . . . . . . . . . . . . 93
Modify Curveshair. . . . . . . . . . . . . . . . . . . . . . . . . . . . . . . . . . . . . 69
modifying hair . . . . . . . . . . . . . . . . . . . . . . . . . . . . . . 51
motion blur . . . . . . . . . . . . . . . . . . . . . . . . . . . . . . . . . 80
Multi Streak Spread1hair system attribute . . . . . . . . . . . . . . . . . . . . . . 40
Multi Streak Spread2hair system attribute . . . . . . . . . . . . . . . . . . . . . . 40
Hair and Dynamic Curves
100

Index
Multi Streakshair system attribute . . . . . . . . . . . . . . . . . . . . . . 39
Multi Streaks hair system attributes . . . . . . . . . . . . 39
Nnodes
hair . . . . . . . . . . . . . . . . . . . . . . . . . . . . . . . . . . . . . 32
Noisehair system attribute . . . . . . . . . . . . . . . . . . . . . . 39
Noise Frequencyhair system attribute . . . . . . . . . . . . . . . . . . . . . . 39
Num Collide Neighborshair system attribute . . . . . . . . . . . . . . . . . . . . . . 37
NURBS Curvessimulation issue . . . . . . . . . . . . . . . . . . . . . . . . . . 96
NURBS Curves hair output . . . . . . . . . . . . . . . . . . . 10
OOutput
create hair attribute . . . . . . . . . . . . . . . . . . . . . . . 27
Paint Hair Tool options. . . . . . . . . . . . . . . . . . . . 30
outputhair . . . . . . . . . . . . . . . . . . . . . . . . . . . . . . . . . . . . . 10
Override Dynamicsfollicle attribute . . . . . . . . . . . . . . . . . . . . . . . . . . 42
PPaint Effects
assigning to hair. . . . . . . . . . . . . . . . . . . . . . . . . . 65
Paint Effects hair output . . . . . . . . . . . . . . . . . . . . . . 10
paint hair . . . . . . . . . . . . . . . . . . . . . . . . . . . . . . . . . . . 53
Paint Hair Tool . . . . . . . . . . . . . . . . . . . . . . . . 10, 28, 53
Paint Hair Tool options . . . . . . . . . . . . . . . . . . . . . . . 28
Paint ModesPaint Hair Tool options. . . . . . . . . . . . . . . . . . . . 29
Parameter Ufollicle attribute . . . . . . . . . . . . . . . . . . . . . . . . . . 40
Parameter Vfollicle attribute . . . . . . . . . . . . . . . . . . . . . . . . . . 40
particlesdynamic curve scenario . . . . . . . . . . . . . . . . . . . 90
Passive Fillcreate hair attribute . . . . . . . . . . . . . . . . . . . . . . . 27
passive hair curves . . . . . . . . . . . . . . . . . . . . . . . . . . 16
Per Follicle Overridesfollicle attributes . . . . . . . . . . . . . . . . . . . . . . . . . 41
pfxHair node. . . . . . . . . . . . . . . . . . . . . . . . . . . . . . . . 32
pfxstrokes command . . . . . . . . . . . . . . . . . . . . . . . . . 94
playhair simulation . . . . . . . . . . . . . . . . . . . . . . . . . . . 45
Point Lockfollicle attribute . . . . . . . . . . . . . . . . . . . . . . . . . . 41
Point Method . . . . . . . . . . . . . . . . . . . . . . . . . . . . . . . 72
point on poly constraintuse follicle as . . . . . . . . . . . . . . . . . . . . . . . . . . . . 94
Points Per Haircreate hair attribute . . . . . . . . . . . . . . . . . . . . . . . 27
Paint Hair Tool options . . . . . . . . . . . . . . . . . . . 30
ponytails . . . . . . . . . . . . . . . . . . . . . . . . . . . . . . . . . . . 86
RRandomization
create hair attribute . . . . . . . . . . . . . . . . . . . . . . . 28
renderhair. . . . . . . . . . . . . . . . . . . . . . . . . . . . . . . . . . . . . 78
hair, distributed . . . . . . . . . . . . . . . . . . . . . . . . . . 80
render farm . . . . . . . . . . . . . . . . . . . . . . . . . . . . . . . . . 80
Render Overridesfollicle attributes . . . . . . . . . . . . . . . . . . . . . . . . . 42
rendering hair. . . . . . . . . . . . . . . . . . . . . . . . . . . . 10, 75
Repulsionhair system attribute . . . . . . . . . . . . . . . . . . . . . . 37
Rest hair curves . . . . . . . . . . . . . . . . . . . . . . . . . . . . . 15
Rest Posefollicle attribute . . . . . . . . . . . . . . . . . . . . . . . . . . 40
Rubber Bandhair constraint type . . . . . . . . . . . . . . . . . . . . . . . 63
SSample Density
follicle attribute . . . . . . . . . . . . . . . . . . . . . . . . . . 42
Hair and Dynamic Curves
101

Index
Samplingappend to hair cache option. . . . . . . . . . . . . . . . 49
create hair cache option . . . . . . . . . . . . . . . . . . . 48
Scale Curvaturehair, edit curves . . . . . . . . . . . . . . . . . . . . . . . . . . 70
Scale Hair Tool . . . . . . . . . . . . . . . . . . . . . . . . . . . 55, 69
Self Collidehair system attribute . . . . . . . . . . . . . . . . . . . . . . 37
self-shadowinghair . . . . . . . . . . . . . . . . . . . . . . . . . . . . . . . . . . . . . 76
Set Rest Positionhair . . . . . . . . . . . . . . . . . . . . . . . . . . . . . . . . . . . . . 31
Set Start Positionhair . . . . . . . . . . . . . . . . . . . . . . . . . . . . . . . . . . . . . 31
shadingTube . . . . . . . . . . . . . . . . . . . . . . . . . . . . . . . . . . . . 76
Shading hair system attributes. . . . . . . . . . . . . . . . . 38
simulating hair . . . . . . . . . . . . . . . . . . . . . . . . . . . . . . 45
Simulation Methodfollicle attribute . . . . . . . . . . . . . . . . . . . . . . . . . . 41
hair system attribute . . . . . . . . . . . . . . . . . . . . . . 32
simulation, hairslow . . . . . . . . . . . . . . . . . . . . . . . . . . . . . . . . . . . . 96
skipping rope scenario . . . . . . . . . . . . . . . . . . . . . . . 95
Smoothhair, edit curves . . . . . . . . . . . . . . . . . . . . . . . . . . 69
Specular Colorhair system attribute . . . . . . . . . . . . . . . . . . . . . . 38
Specular Powerhair system attribute . . . . . . . . . . . . . . . . . . . . . . 38
Speedhair system attribute . . . . . . . . . . . . . . . . . . . . . . 38
spline ik chaindynamic curve scenario . . . . . . . . . . . . . . . . . . . 88
Start Directionfollicle attribute . . . . . . . . . . . . . . . . . . . . . . . . . . 41
Start Framehair system attribute . . . . . . . . . . . . . . . . . . . . . . 36
Start hair curves . . . . . . . . . . . . . . . . . . . . . . . . . . . . . 15
Static Clinghair system attribute . . . . . . . . . . . . . . . . . . . . . . 37
Stickhair constraint type . . . . . . . . . . . . . . . . . . . . . . . 63
Stiffness . . . . . . . . . . . . . . . . . . . . . . . . . . . . . . . . . . . . 72
follicle attribute . . . . . . . . . . . . . . . . . . . . . . . . . . 42
hair system attribute . . . . . . . . . . . . . . . . . . . . . . 35
Stiffness Scaledynamic curve scenario . . . . . . . . . . . . . . . . . . . 90
hair system attribute . . . . . . . . . . . . . . . . . . . . . . 35
Straightenhair. . . . . . . . . . . . . . . . . . . . . . . . . . . . . . . . . . . . . 69
styling hair . . . . . . . . . . . . . . . . . . . . . . . . . . . . . . . . . 51
Sub Segmentshair system attribute . . . . . . . . . . . . . . . . . . . . . . 33
system, hairselecting . . . . . . . . . . . . . . . . . . . . . . . . . . . . . . . . 21
TThinning
hair system attribute . . . . . . . . . . . . . . . . . . . . . . 33
Transformhair constraint type . . . . . . . . . . . . . . . . . . . . . . . 63
Translucencehair system attribute . . . . . . . . . . . . . . . . . . . . . . 38
Trim HairsPaint Hair Tool options . . . . . . . . . . . . . . . . . . . 29
troubleshoot hair . . . . . . . . . . . . . . . . . . . . . . . . . . . . 95
Truncate Cachehair. . . . . . . . . . . . . . . . . . . . . . . . . . . . . . . . . . . . . 49
truncate hair cache . . . . . . . . . . . . . . . . . . . . . . . . . . . 46
Tube shading . . . . . . . . . . . . . . . . . . . . . . . . . . . . . . . 76
Turbulence hair system attributes . . . . . . . . . . . . . . 37
types of hair constraints . . . . . . . . . . . . . . . . . . . . . . 63
UU Count
create hair attribute . . . . . . . . . . . . . . . . . . . . . . . 27
U Distance . . . . . . . . . . . . . . . . . . . . . . . . . . . . . . . . . . 73
U Parameter . . . . . . . . . . . . . . . . . . . . . . . . . . . . . . . . 72
Undoissue when using Lock Length . . . . . . . . . . . . . 96
Unlock Lengthhair. . . . . . . . . . . . . . . . . . . . . . . . . . . . . . . . . . . . . 69
using with hair . . . . . . . . . . . . . . . . . . . . . . . . . . . . . . 94
Hair and Dynamic Curves
102

Index
UV setselecting, hair . . . . . . . . . . . . . . . . . . . . . . . . . . . . 23
VV Count
create hair attribute . . . . . . . . . . . . . . . . . . . . . . . 27
Wwavy hair
creating . . . . . . . . . . . . . . . . . . . . . . . . . . . . . . . . . 83
Width Draw Skiphair system attribute . . . . . . . . . . . . . . . . . . . . . . 37
wire deformerhair curve . . . . . . . . . . . . . . . . . . . . . . . . . . . . . . . 95
Hair and Dynamic Curves
103

Index
Hair and Dynamic Curves
104