Embed Size (px)
Citation preview
http://lightexhibit.org 1
Table of Contents Introduction …................................................................................................ page 2 Learning Goals for Exhibit …......................................................................... page 2 The Role of the Interpreter …........................................................................ page 3 Science Interpreter 101: Techniques …........................................................ page 3
Who is an Interpreter ….....…............................................................ page 3 What is an Interpretation ……............................................................ page 4 Basic Guidelines …............…............................................................ page 5 Gauging an Audience …..…............................................................. page 5 Interpreting for Visitors with Special Needs…................................... page 6
Activities
Light That Does Not Pass ….............................................................. page 11 Zap …................…............................................................................ page 16 Atomic Light Show …........................................................................ page 22 Bent Light …...................................................................................... page 24
Articles and resources .................................................................................. page 28 Create Your Own Activity Supply Guide ………………………………………. page 30
http://lightexhibit.org 2
Introduction The glow of a candle, the rise of the Sun, and the illumination of a lamp are things that can bring comfort and warmth to our lives. Humans are, after all, drawn to light. But there is much more to light than meets the eye. Light takes on many forms that are largely invisible and undetectable without modern technology. Light allows us to communicate, entertain, explore, and understand the world we inhabit and the Universe we live in. This exhibition series shows the myriad of things light can do, and how it plays a critical role in our lives every day. The Light: Beyond the Bulb images in the exhibit collection include the topics of shadows, colliding atoms, lensing, electrical discharge and more. Explore some simple hands-on activities related to those themes below. Learning Goals By participating in the exhibit, visitors can: · become intrigued and engaged by the examples of natural phenomena
· understand basic science principles from familiar examples (analogies)
· become observant of natural phenomena and begin to question, test, and make their own observations and comparisons
· perceive the similarities among natural phenomena on Earth and throughout the Universe
· begin to see the value of scientific inquiry
· become comfortable and even excited to think about science in the world around them, and in the greater Universe.
http://lightexhibit.org 3
The Role of Interpreter
In Light: Beyond the bulb, interpreters can engage visitors with tabletop activities to help explore the topics in the surrounding exhibit panels and to excite visitors about the science of light. In conversations with visitors, interpreters can encourage inquiry and help visitors to ask questions even when it is difficult to find explanations. Science Interpreter 101: Techniques
I. Who is an Interpreter?
An interpreter is a host, a catalyst, and an educator. As a host, an interpreter invites people of all ages and levels of understanding and experience to interact with the exhibit and interpretive materials. As a catalyst, an interpreter captures the attention and stimulates the interest of each visitor. Finally—perhaps most importantly—each interpreter acts as a facilitator by satisfying the visitor’s curiosity through the use of interactive educational materials, which makes science an activity. It is very important for an interpreter to be courteous, helpful, and enthusiastic. Visitors vary in age, economic and social background, interests, experiences, values, and viewpoints. Therefore, the interpreter must adapt to each visitor’s needs and concerns. Every effort must be made to clearly understand the reasons behind visitors’ responses to the exhibition, and to see the questions, issues, or situations from their point of view. (This is a challenging job!)
http://lightexhibit.org 4
II. What is an Interpretation?
An interpretation is a non-formal, hands-on interaction between a visitor and interpreter. An interpretation always involves the use of educational materials. The objective of an interpretation is to make science an activity and thereby excite visitors about science, and the role it plays in the world around them. An effective interpretation will have a theme or objective, which is short and concise. There is a great temptation to make an interpretation lengthy and filled with all that you know, however, this will easily lose an audience. It is most effective to repeat your theme often, and develop your interpretation around this theme. A visitor who visits for only one minute should be able to walk away knowing your theme. III. Basic Guidelines
1. Just be yourself: Greet visitors and introduce yourself. Smile and speak up.
2. Body language: Talk directly to the visitor and scan the group with
your eyes. If you are holding a prop, or performing an activity, make sure that the material is visible to your entire audience. If you are not holding a prop, use natural gestures to explain your point.
3. Use appropriate language: Define all terms in as simple language as
possible. Remain flexible and observant, and adjust what you are explaining and how you are explaining it to fit a particular visitor or group. Be sensitive to the attention span of your visitor…do not overwhelm with too much information.
4. Use your natural voice: Talk directly to the visitor and
listen to the visitor.
http://lightexhibit.org 5
5. Remember your intention: Repeat your theme periodically and draw your audience back to a focus. You can change your pace, make a comparison, refer to current interests or topics, ask a question, or give an illustrative story.
6. Build confidence and self-esteem: Let the audience do as much as
possible. Do not do for the visitor what they can do themselves. If possible, learn from the visitor.
7. Get participation: Be positive and enthusiastic, and get visitors
involved. Most people remember what they do more than what they hear. Ask for participation, but remember never put a visitor in an embarrassing situation.
8. Do not be afraid to say, “I do not know.” You are not expected to
know everything. Get the answer if you can, or send the visitor to another source.
9. No one can be instantly fascinating. If a visitor walks away before you
have finished, do not take it personally.
IV. Gauging an Audience
As an interpreter, you will be challenged by the opportunity of speaking with a mixed audience. Therefore, it is extremely important to gauge the interest and mood of your audience. Try to anticipate how a group or individual is going to react. Ask questions to find out what they know and what is important in their lives.
An interpreter also needs to monitor who needs to be encouraged in a group, who needs to be controlled, and what method is best to use to meet interpreting objectives. The ability to gauge an audience—analyze capabilities, skills and interests of special groups—comes with experience. Interpreting for children is a unique challenge. The outline that follows
http://lightexhibit.org 6
should help you to understand the abilities and interests of children of all ages. Pre-school (ages 2-5) Physical development: energetic and active, motor skills not well developed, coordination poor. Mental process: learning through senses, developing vocabulary, short memory, unexplainable fears, action precedes thought, very short attention span. Social process: self-centered, varying degrees of independence. Applications for interpretation: preschoolers require simple action oriented activities, capable of handling only one idea of concept. Elementary school (ages 5-9) Physical development: gross motor skills (big muscles) better developed, fine motor skills just beginning. Mental process: interest span increases, can detect gross absurdities in statements, like to use hands, can classify objects, acquire ability of conversation. Social process: peer relationships, loyalties to friends, first break from home, begins relationships with other adults. Applications for interpretations: play games to illustrate concepts rather than talking about concepts. Incorporate activities using large muscles, and large tools. Avoid activities calling for precise coordination.
http://lightexhibit.org 7
Pre-Adolescent (ages 9-12) Physical development: wide variation in development, coordination varies, gross motor skills good, fine motor skills steadily developing, tires easily. Mental process: concerned with things rather than ideas, ability to verbalize curiosities, has sense of historical time, begins to contrast present with past, can internally manipulate concrete information, capable of inductive reasoning. Social process: learning to cooperate, enjoy group activities, 9-10 year old boys and girls segregate, regard each other as silly, desire to escape from too much adult domination. Application for interpretation: desires activities using fine muscles, enjoys drawing conclusions from concrete things observed, enjoys activities comparing past with present. Adolescent (ages 12-18) Physical development: rapid growth and development, attains fine motor coordination, although awkward at times. Mental process: interest in ideas, attains ability to think abstractly, long attention span, full comprehension of historical time. Social process: needs peer group support, does not necessarily have strong self-concept, easily embarrassed, need to interact with adults as adults. Applications for interpretation: enjoys learning highly coordinated skills, enjoys examining ideas, testing hypotheses and theories. Role of interpreter should be a supportive member of group presenting problem to be solved, rather than acting as group leader.
http://lightexhibit.org 8
V. Interpreting for Visitors with Special Needs
As an educator, you can help turn an everyday visit into an exciting one for visitors with special needs. How? By understanding their needs, and giving them the hands-on props, clear explanations, or simplified themes that help them understand your topic. You’ll find that the interpretation tips that help you work with visitors with special needs are the same tips that promote good education for everyone. Visually Impaired Visitors
Visually impairment ranges from partial vision to total blindness. Many visually impaired people can make out forms, shapes, or colors, especially up close and in the proper light, or using special magnifiers. Here are some interpretive tips for working with visually impaired visitors:
• Use touch, descriptive phrases, and as many senses besides vision as you can.
• Be sure to orient visitors to your location and to what you have on the
table.
• Don’t be afraid to use the word “see” with visitors—it’s part of their vocabulary as well as yours.
• If you use a model, be sure to describe its flaws (inaccurate size or
texture, lack of odor, missing context, etc.)
• Try having sighted visitors describe what they see to unsighted visitors in the group.
http://lightexhibit.org 9
Hearing Impaired Visitors
Hearing impairments are also very common. You may spot some hearing impaired visitors because they wear hearing aids. Others may ask you to repeat yourself, or may lean forward as you speak. Some may lip-read you. You should realize the lip-reading is helpful, but does not solve the problem completely. Only 30% of English sounds are visible on the lips; the rest must be filled in by guessing and context. In addition, while many people are easy to lip-read, others may be very difficult. You will also learn that some hearing impaired visitors may be reluctant to try to communicate with hearing people. Therefore, it is extremely important to be friendly and interested. Also, do not mistake the speech impairments, which often accompany early deafness for low cognitive ability. Remember, hearing impairment is only a communication problem. A few simple steps will allow many hearing impaired visitors to understand and participate in your interpretation:
• Speak slowly and distinctly. Do not shout or exaggerate your lip movements.
• Look directly at the visitor when you are talking.
• Use simple, direct sentences.
• Repeat other visitors’ questions before you answer them.
• Carry a pad and pencil—if you can’t make yourself understood
verbally, then write. Mobility Impaired Visitors
Many people have some degree of mobility impairment. This may mean being confined to a wheelchair for all or part of the day or being unable to negotiate steep stairs or to maneuver through crowded rooms.
http://lightexhibit.org 10
How can you help these visitors?
• Know where wheelchair ramps and elevators are located in the building, and use them when giving directions.
• Make sure your props are visible from wheelchair height. If they’re
not, bring them down off the tabletop when talking about them. Learning Disabled Visitors
Here are a couple general guidelines for working with learning disabled visitors:
• As much as possible, treat people with learning disabilities as if the were any other visitors.
• As for all visitors, encouragement is very important. Be sure to give
positive feedback to individuals or groups for participating, answering, etc.
http://lightexhibit.org 11
Light that Does Not Pass (Shadows)
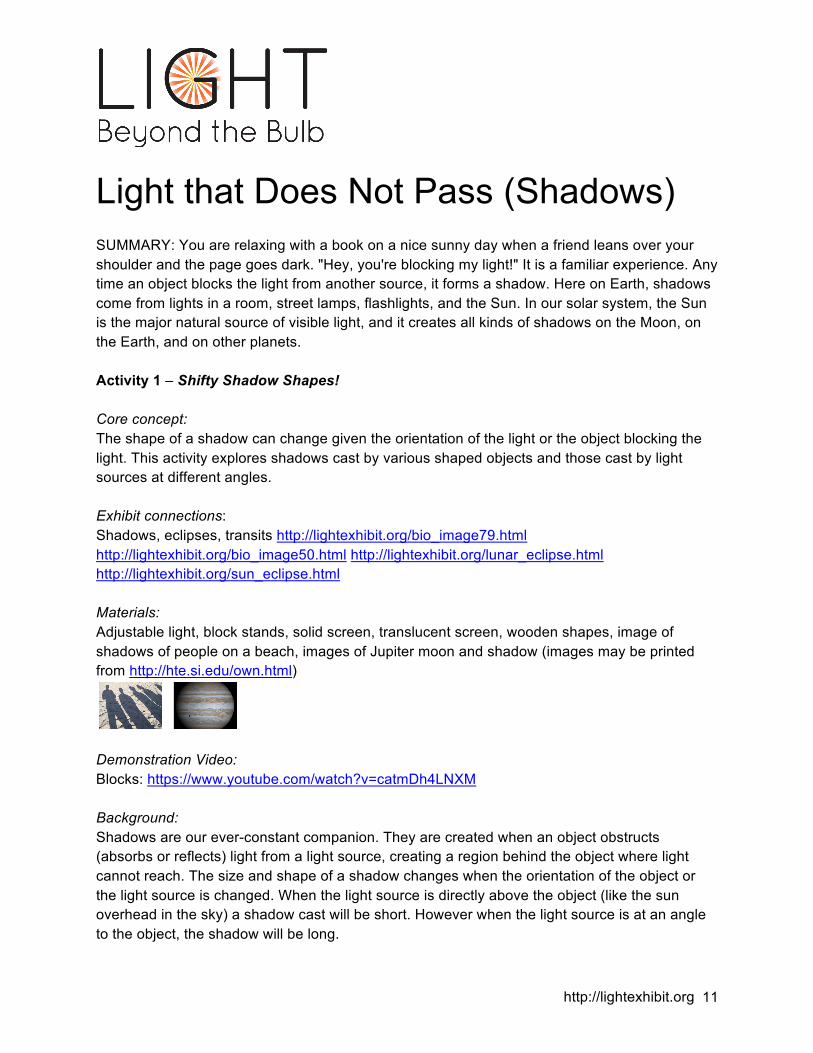
SUMMARY: You are relaxing with a book on a nice sunny day when a friend leans over your shoulder and the page goes dark. "Hey, you're blocking my light!" It is a familiar experience. Any time an object blocks the light from another source, it forms a shadow. Here on Earth, shadows come from lights in a room, street lamps, flashlights, and the Sun. In our solar system, the Sun is the major natural source of visible light, and it creates all kinds of shadows on the Moon, on the Earth, and on other planets. Activity 1 – Shifty Shadow Shapes! Core concept: The shape of a shadow can change given the orientation of the light or the object blocking the light. This activity explores shadows cast by various shaped objects and those cast by light sources at different angles. Exhibit connections: Shadows, eclipses, transits http://lightexhibit.org/bio_image79.html http://lightexhibit.org/bio_image50.html http://lightexhibit.org/lunar_eclipse.html http://lightexhibit.org/sun_eclipse.html Materials: Adjustable light, block stands, solid screen, translucent screen, wooden shapes, image of shadows of people on a beach, images of Jupiter moon and shadow (images may be printed from http://hte.si.edu/own.html)
Demonstration Video: Blocks: https://www.youtube.com/watch?v=catmDh4LNXM Background: Shadows are our ever-constant companion. They are created when an object obstructs (absorbs or reflects) light from a light source, creating a region behind the object where light cannot reach. The size and shape of a shadow changes when the orientation of the object or the light source is changed. When the light source is directly above the object (like the sun overhead in the sky) a shadow cast will be short. However when the light source is at an angle to the object, the shadow will be long.
http://lightexhibit.org 12
Misconception alert: Young children especially have difficulty understanding that light travels in straight lines from a source, and that shadows are the result of an object blocking light from passing straight through. They may think that they can only have one shadow, and when asked to draw a picture showing how shadows form, they rarely include a light source. Adults are often surprised by the idea that shadows can be cast in space. You can use these activities to help visitors identify the relationships between a light source, the path light travels, and objects that may block or reflect light from the source, whether they are on Earth or in space. Suggestions for introducing the activity: Ask visitors to look for their shadows. What in the room is causing the shadow? Are the edges of your shadow crisp or blurry? What would happen if there was just one light in the room, or if you were standing outside? This introduces the concept that shadows occur when an object blocks light, and the number of shadows depends on the number of light sources being blocked! Procedure: Set up the adjustable lamp so the light shines directly on the center of the solid screen (approximately half-way up the shaft). Ask one visitor to choose a wooden shape and use it to make a shadow on the solid screen. Explore the shapes the shadow makes as the orientation of the shape is changed. For example, what happens to the ring if it is held edge on toward the screen? Observe the shadow of the rectangle. Now move the light to the bottom of the shaft. What happens to the shadow? Now slide the light to the top of the shaft. What happens to the shadow? Discussion/Questions for visitors to consider: What happens to other shapes when the light is shone at different angles? Ask visitors to look at the image of the shadows of people on a beach. Where do they think the sun was positioned in the sky when the picture was taken? That is, what time of day was it when this image was created? Now have visitors look at the images of Jupiter’s moon. What is the light source? Where is the light source? Next, change the solid screen to the translucent screen. Ask a visitor to choose another wooden shape, and place it on the lighted side of the translucent screen. Encourage other visitors to stand behind the screen so they cannot see the actual object and to guess the shape that object just by observing the shadows. Are there any shapes that always look the same no matter how they are oriented?
http://lightexhibit.org 13
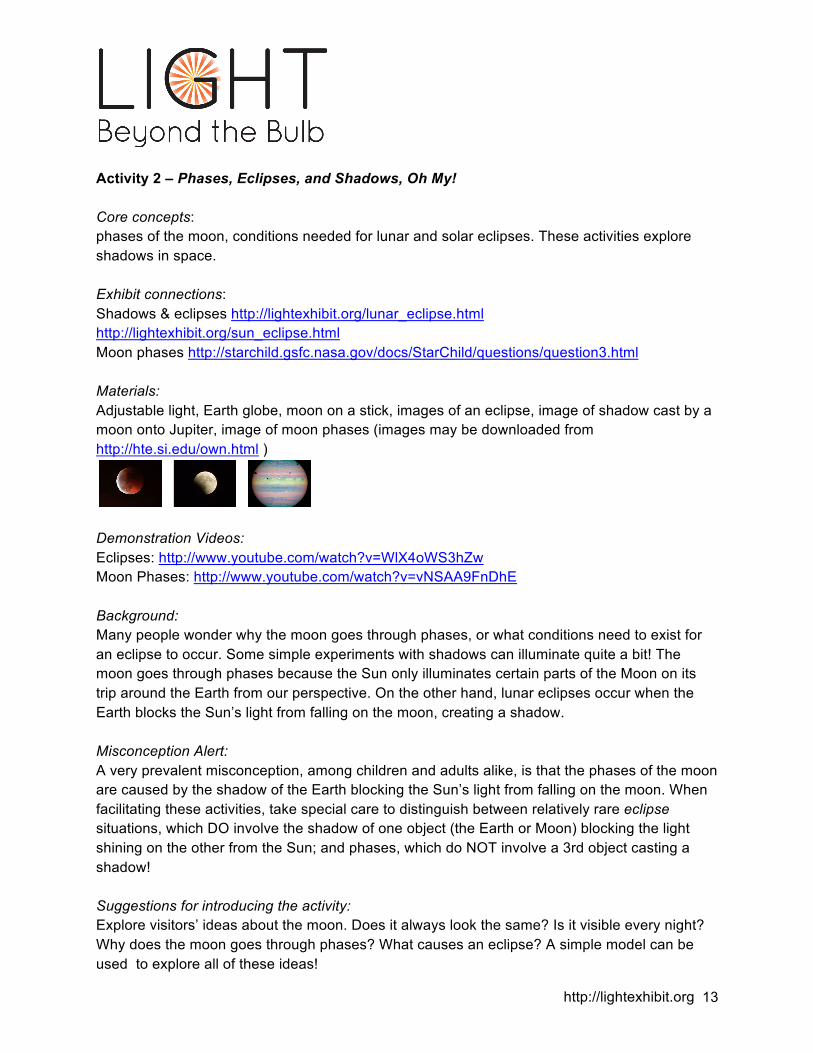
Activity 2 – Phases, Eclipses, and Shadows, Oh My! Core concepts: phases of the moon, conditions needed for lunar and solar eclipses. These activities explore shadows in space. Exhibit connections: Shadows & eclipses http://lightexhibit.org/lunar_eclipse.html http://lightexhibit.org/sun_eclipse.html Moon phases http://starchild.gsfc.nasa.gov/docs/StarChild/questions/question3.html Materials: Adjustable light, Earth globe, moon on a stick, images of an eclipse, image of shadow cast by a moon onto Jupiter, image of moon phases (images may be downloaded from http://hte.si.edu/own.html )
Demonstration Videos: Eclipses: http://www.youtube.com/watch?v=WlX4oWS3hZw Moon Phases: http://www.youtube.com/watch?v=vNSAA9FnDhE Background: Many people wonder why the moon goes through phases, or what conditions need to exist for an eclipse to occur. Some simple experiments with shadows can illuminate quite a bit! The moon goes through phases because the Sun only illuminates certain parts of the Moon on its trip around the Earth from our perspective. On the other hand, lunar eclipses occur when the Earth blocks the Sun’s light from falling on the moon, creating a shadow. Misconception Alert: A very prevalent misconception, among children and adults alike, is that the phases of the moon are caused by the shadow of the Earth blocking the Sun’s light from falling on the moon. When facilitating these activities, take special care to distinguish between relatively rare eclipse situations, which DO involve the shadow of one object (the Earth or Moon) blocking the light shining on the other from the Sun; and phases, which do NOT involve a 3rd object casting a shadow! Suggestions for introducing the activity: Explore visitors’ ideas about the moon. Does it always look the same? Is it visible every night? Why does the moon goes through phases? What causes an eclipse? A simple model can be used to explore all of these ideas!
http://lightexhibit.org 14
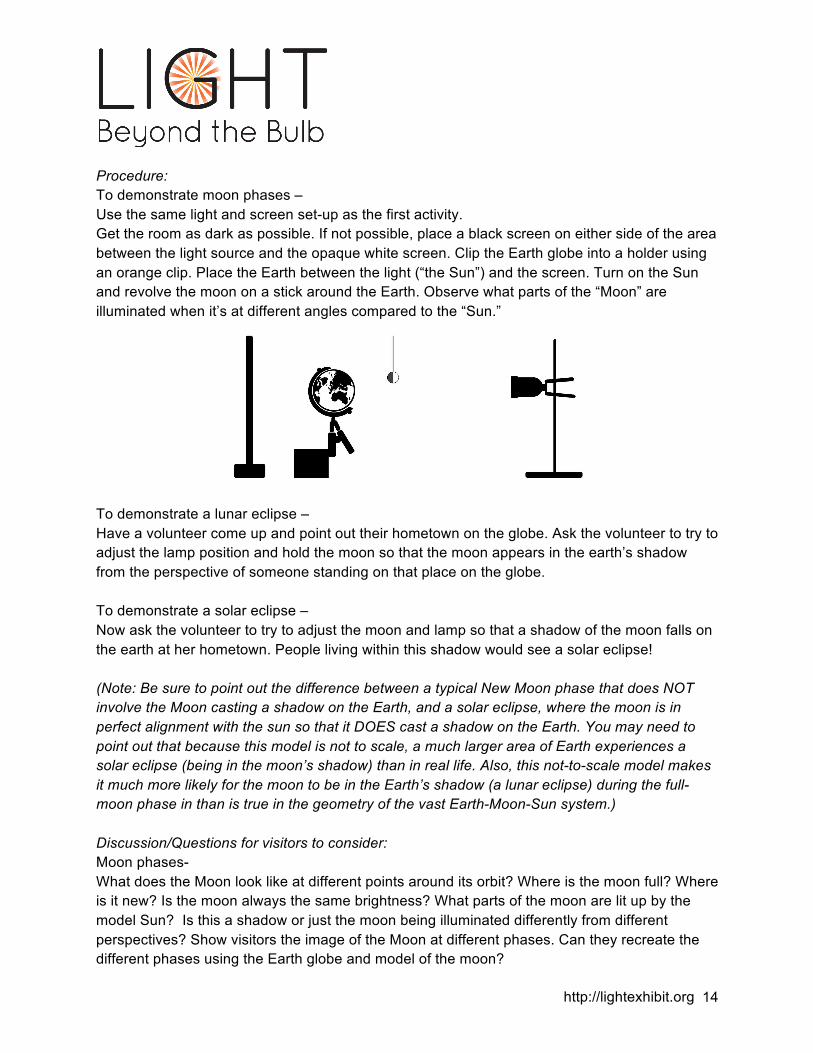
Procedure: To demonstrate moon phases – Use the same light and screen set-up as the first activity. Get the room as dark as possible. If not possible, place a black screen on either side of the area between the light source and the opaque white screen. Clip the Earth globe into a holder using an orange clip. Place the Earth between the light (“the Sun”) and the screen. Turn on the Sun and revolve the moon on a stick around the Earth. Observe what parts of the “Moon” are illuminated when it’s at different angles compared to the “Sun.”
To demonstrate a lunar eclipse – Have a volunteer come up and point out their hometown on the globe. Ask the volunteer to try to adjust the lamp position and hold the moon so that the moon appears in the earth’s shadow from the perspective of someone standing on that place on the globe. To demonstrate a solar eclipse – Now ask the volunteer to try to adjust the moon and lamp so that a shadow of the moon falls on the earth at her hometown. People living within this shadow would see a solar eclipse! (Note: Be sure to point out the difference between a typical New Moon phase that does NOT involve the Moon casting a shadow on the Earth, and a solar eclipse, where the moon is in perfect alignment with the sun so that it DOES cast a shadow on the Earth. You may need to point out that because this model is not to scale, a much larger area of Earth experiences a solar eclipse (being in the moon’s shadow) than in real life. Also, this not-to-scale model makes it much more likely for the moon to be in the Earth’s shadow (a lunar eclipse) during the full-moon phase in than is true in the geometry of the vast Earth-Moon-Sun system.) Discussion/Questions for visitors to consider: Moon phases- What does the Moon look like at different points around its orbit? Where is the moon full? Where is it new? Is the moon always the same brightness? What parts of the moon are lit up by the model Sun? Is this a shadow or just the moon being illuminated differently from different perspectives? Show visitors the image of the Moon at different phases. Can they recreate the different phases using the Earth globe and model of the moon?
http://lightexhibit.org 15
Eclipse - Will all parts of the world see a lunar eclipse at the same time? How about a solar eclipse? Why is seeing a solar eclipse from a particular location such a rare event?
http://lightexhibit.org 16
Zap! (Electric Discharge)
SUMMARY: You are shuffling along a carpet and reach out to touch the doorknob and — zap! — a sudden electric discharge gives you a mild shock. The friction between your feet and the carpet has produced a large build-up of negative electric charge on your finger. This produces an electric potential difference, or voltage, between your finger and the doorknob. If the electric potential difference is large enough, a sudden flow of current, called an electric discharge, will occur. An electric voltage can also be produced by the rotation of a magnet in the presence of an electrical circuit. This is the principle behind a generator. Rapidly spinning, highly magnetic neutron stars can act as generators and produce electric voltages in excess of a trillion volts. Violent electric discharges are responsible for some of the most spectacular displays of sudden energy release on Earth and in space. Q: Where can electric discharges occur? A: Here, there, and everywhere that electric voltages are large enough. For example, in an arc welder, a storm cloud, and around rapidly a spinning neutron star. Activity 1 - Leyden jars and static electricity Core concept: positive and negative electric charges can be separated to build up a high voltage, and this voltage can be discharged when the conditions are right. This activity will use leyden jars to safely explore charge separation and electrical discharge. Exhibit connections: Electric Discharge – lightning http://lightexhibit.org/bio_image70.html http://lightexhibit.org/bio_image21.html http://lightexhibit.org/lightning.html Materials: balloon, leyden jar, pvc pipe, square of animal fur, image of lightning (image may be downloaded from http://hte.si.edu/own.html)
http://lightexhibit.org 17
Demonstration Video: Leyden Jar: http://www.youtube.com/watch?v=SkjTDMhBgmc Background: Electricity is a fascinating subject for many people, though it can sometimes be dangerous to experiment with. These experiments provide a safe environment to closely observe electric discharge. When you shuffle your feet on the carpet or wear a wool sweater, you’re temporarily creating an excess distribution of electrons on your body. When the charge has a convenient place to go with fewer electrons, like a metal doorknob, it leaps at the opportunity, and zap! The static electricity “discharges,” or jumps to the new place, creating a spark. The number of positive and negative charges is neutralized again! The leyden jar is a device made to safely capture this static electricity, and then watch the energy being discharged (without a painful shock!) A leyden jar will shock you if you discharge it onto your fingers, so be careful! When you rub the animal fur over the plastic rod, you create a temporary separation of charges, which can be transferred to the stem of the leyden jar. The base of the leyden jar acquires a positive charge. When you use the discharge rod to create a convenient path for the electrons to travel quickly across, they quickly jump across the gap and produce a spark. Misconception Alert: Understanding electricity concepts can be particularly challenging for adults and children alike. Many people confuse ideas and terms related to voltage, current, and electrical charge. The exhibit images focus on electrical conditions (here, there, and everywhere) that produce high voltage that can lead to sudden discharges of electrical energy across space. These activities can help visitors observe, experiment with, and describe phenomena related to voltage, electrical potential difference, and electrical discharge. Suggestions for introducing the activity: Ask visitors if they have ever gotten a shock from touching a doorknob or other metal object? Blow up a balloon and rub it against your hair (or a visitor with long straight hair). Now try pulling the balloon away from the hair. What happens? By rubbing the balloon on your hair, you’ve charged it by picking up negative electrons from your hair. Your hair now has a positive charge, and the balloon has a negative charge. Objects with different charges are attracted to each other, strands of your hair will stick to the balloon! On the other hand, objects with the same charge repel one another, so each strand of hair tries to get far away for the other strands - usually by standing straight up! Procedure: To use the leyden jar, first generate static electricity by quickly rubbing the fur over the PVC pipe. Now run the pvc pipe along the stem of the leyden jar. The leyden jar will collect the static
http://lightexhibit.org 18
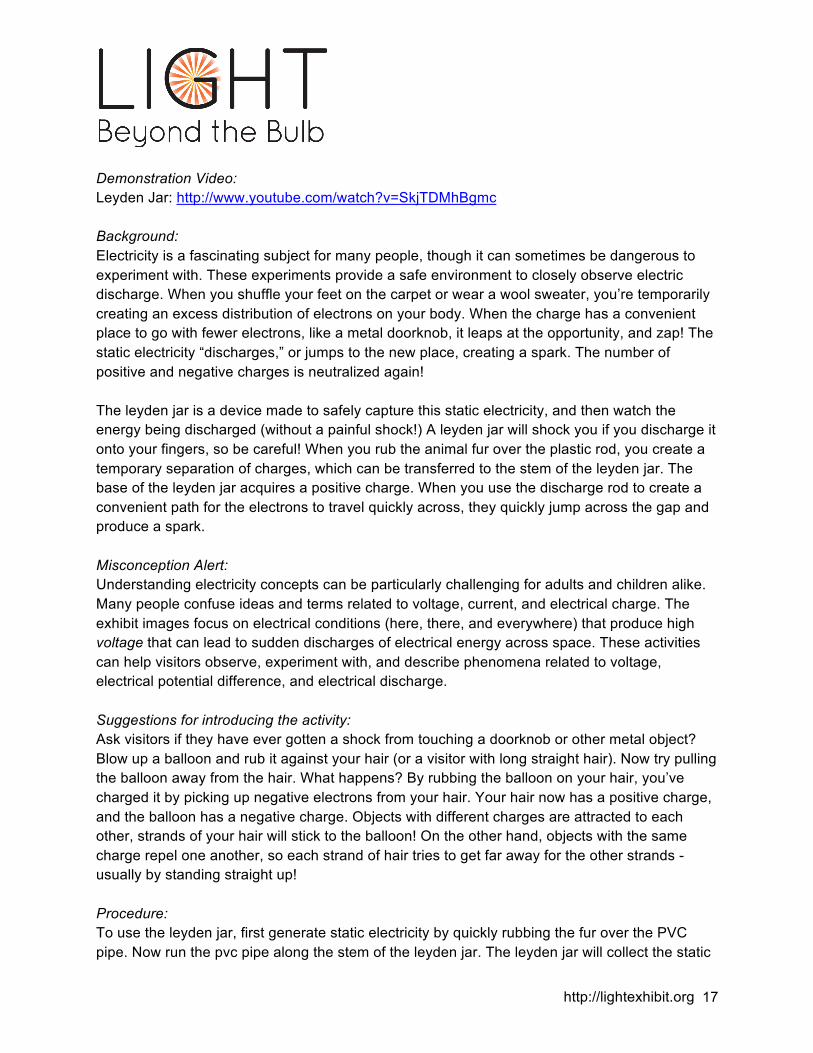
electricity, and store it until it can escape. Repeat this process at least 3 times, building up negative charge on the stem of the leyden jar. Then, touch one end of the discharge wand to the outside of the jar, and slowly bring the other end towards the top ball joint, until, zap! A spark is produced! The more static electricity stored, the higher the electric potential, or voltage, and the longer, brighter and louder the spark will be.
Discussion/Questions for visitors to consider Ask visitors what they think the differences are between the small spark made by the leyden jar and a lightning strike. This tiny spark is really the same as lightning, only on a much smaller scale. Static electric charge builds up in clouds when water and ice particles collide. The negative charge in the cloud is attracted to positively charged objects on the ground. The charge from the cloud is released in the form of lightning, with a much bigger zap! Ask visitors to observe the image of lightning. Do they notice the branches or forks in the lightning? These branches are actually multiple strikes. Can visitors hear a sound when the spark discharges from the leyden jar? Is there an equivalent sound when lightning strikes? You bet, it’s called thunder! Activity 2 - plasma ball Core concept: Electricity flows from high voltage to low voltage via the most convenient path. Exhibit connections: Electric discharge – lightning http://lightexhibit.org/bio_image70.html Materials: Plasma ball, image of sparks produced by welding (image may be downloaded from http://hte.si.edu/own.html)
http://lightexhibit.org 19
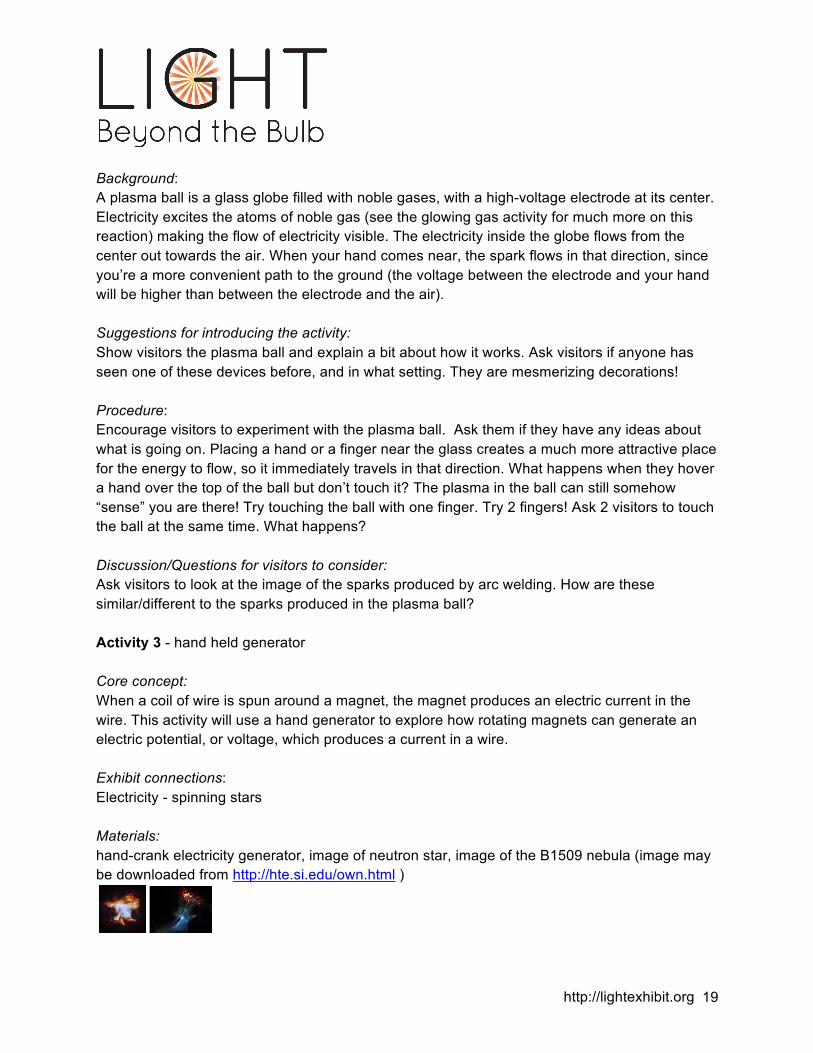
Background: A plasma ball is a glass globe filled with noble gases, with a high-voltage electrode at its center. Electricity excites the atoms of noble gas (see the glowing gas activity for much more on this reaction) making the flow of electricity visible. The electricity inside the globe flows from the center out towards the air. When your hand comes near, the spark flows in that direction, since you’re a more convenient path to the ground (the voltage between the electrode and your hand will be higher than between the electrode and the air). Suggestions for introducing the activity: Show visitors the plasma ball and explain a bit about how it works. Ask visitors if anyone has seen one of these devices before, and in what setting. They are mesmerizing decorations! Procedure: Encourage visitors to experiment with the plasma ball. Ask them if they have any ideas about what is going on. Placing a hand or a finger near the glass creates a much more attractive place for the energy to flow, so it immediately travels in that direction. What happens when they hover a hand over the top of the ball but don’t touch it? The plasma in the ball can still somehow “sense” you are there! Try touching the ball with one finger. Try 2 fingers! Ask 2 visitors to touch the ball at the same time. What happens? Discussion/Questions for visitors to consider: Ask visitors to look at the image of the sparks produced by arc welding. How are these similar/different to the sparks produced in the plasma ball? Activity 3 - hand held generator Core concept: When a coil of wire is spun around a magnet, the magnet produces an electric current in the wire. This activity will use a hand generator to explore how rotating magnets can generate an electric potential, or voltage, which produces a current in a wire. Exhibit connections: Electricity - spinning stars Materials: hand-crank electricity generator, image of neutron star, image of the B1509 nebula (image may be downloaded from http://hte.si.edu/own.html )
http://lightexhibit.org 20
Background: A hand crank generator is an excellent smaller version of what creates much of the electricity that powers our lives. Wind turbines, steam engines, and waterwheels all operate on very similar principles. These generators convert some kind of mechanical energy, such as hot steam rising or water falling, into electrical energy. This small hand generator is made of a few coils of wire around a magnet. When you turn the crank, the wire coils spin around the magnet, which produces an electric current in the wire! This electric current can be used to power a variety of things, including the small light bulb on the end. Rapidly spinning, highly magnetic neutron stars act as generators in much the same way! When magnetic neutron stars spin, they can produce voltages of over 1 trillion volts! Compare that to the tiny 12 volts your hand crank generator can produce. Suggestions for introducing the activity: Ask a volunteer turn the crank on the hand generator, and observe the light bulb on the end. Have them crank slowly, and then more quickly. What happens? The faster you spin the coils of wire around the magnet, the higher the voltage and the more electric current is produced in the circuit that flows through the light bulb, so the brighter the light bulb can glow. Procedure: Ask visitors to look inside the clear generator and try to figure out how it works. Have them turn the crank slowly and peer inside the metal canister to spot the spinning copper coils of wire. Discussion/Questions for visitors to consider: What happens when you crank the coil of wire slowly? How about faster? When do you think the voltage would be higher? Like the hand generator, rapidly spinning, highly magnetic neutron stars can produce high voltages and electric fields. Show visitors an image of a neutron star. If your hand crank generator can produce up to 12 volts, try to think about the size and speed of a magnetic neutron star that can produce over 1 trillion volts! How far do you think this voltage can reach? These neutron star generators can light up gas clouds in space that extend several light years! Two light years is about 12 trillion miles! Show visitors an image of the B1509 nebula. There is a rapidly spinning neutron star at the center of the B1509 nebula, too. By the numbers:
• Voltage between the ends of a AA battery: 1.5 volts • Voltage generated by hand-held generator: up to 12 volts • Arc Voltage of a welder’s spark: 25 volts (very high current) • Voltage discharged in a 1 mm spark between your finger and a doorknob: about 3000
volts (but very little current)
http://lightexhibit.org 21
• Leyden Jar voltage: depends on its charge—but in general you can estimate 3000 volts
per mm-length spark (e.g., if you get a one cm spark, that’s 30,000 volts! • Voltage released from cloud to ground in a lightning bolt: 100 Million volts • Voltage generated by a spinning magnetic pulsar in space: 1 Trillion volts
http://lightexhibit.org 22
Atomic Light Show
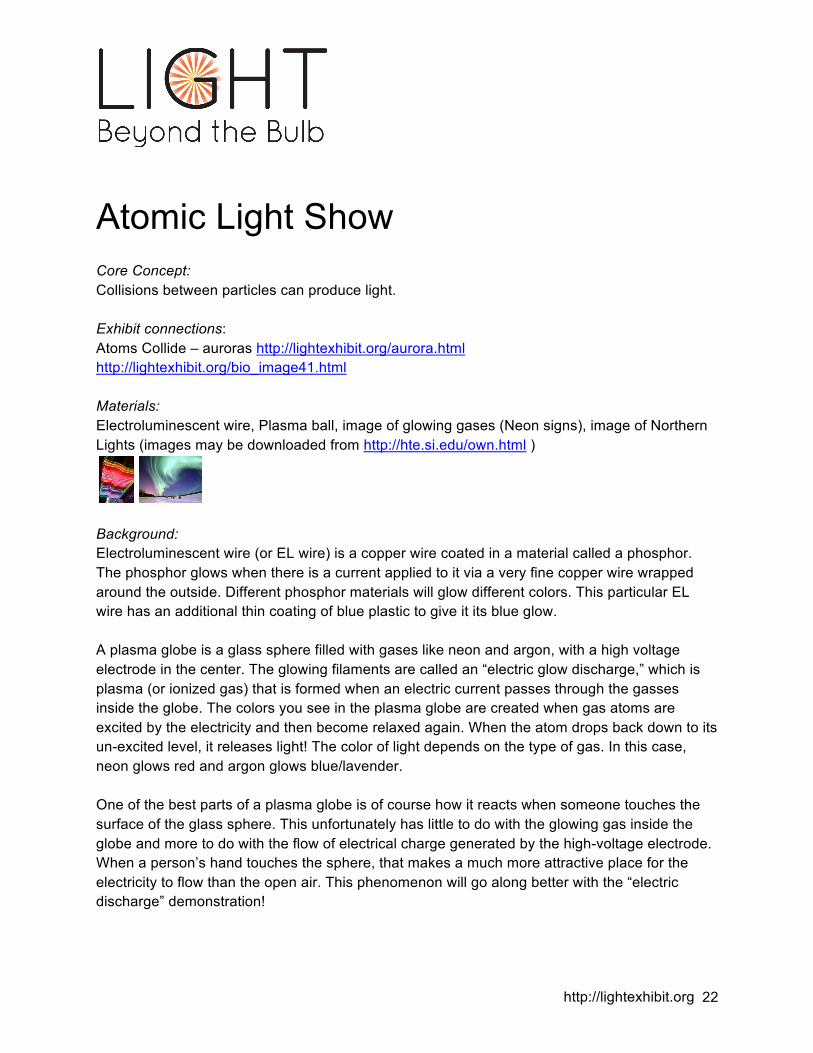
Core Concept: Collisions between particles can produce light. Exhibit connections: Atoms Collide – auroras http://lightexhibit.org/aurora.html http://lightexhibit.org/bio_image41.html Materials: Electroluminescent wire, Plasma ball, image of glowing gases (Neon signs), image of Northern Lights (images may be downloaded from http://hte.si.edu/own.html )
Background: Electroluminescent wire (or EL wire) is a copper wire coated in a material called a phosphor. The phosphor glows when there is a current applied to it via a very fine copper wire wrapped around the outside. Different phosphor materials will glow different colors. This particular EL wire has an additional thin coating of blue plastic to give it its blue glow. A plasma globe is a glass sphere filled with gases like neon and argon, with a high voltage electrode in the center. The glowing filaments are called an “electric glow discharge,” which is plasma (or ionized gas) that is formed when an electric current passes through the gasses inside the globe. The colors you see in the plasma globe are created when gas atoms are excited by the electricity and then become relaxed again. When the atom drops back down to its un-excited level, it releases light! The color of light depends on the type of gas. In this case, neon glows red and argon glows blue/lavender. One of the best parts of a plasma globe is of course how it reacts when someone touches the surface of the glass sphere. This unfortunately has little to do with the glowing gas inside the globe and more to do with the flow of electrical charge generated by the high-voltage electrode. When a person’s hand touches the sphere, that makes a much more attractive place for the electricity to flow than the open air. This phenomenon will go along better with the “electric discharge” demonstration!
http://lightexhibit.org 23
Suggestions for introducing the activity: The EL wire can be used to introduce the concept of an electric current causing a material to glow. While the glowing substance inside the wire is not gas, current causes the atoms in the phosphor to collide, gain extra energy, and then release this energy as light. Ask visitors to examine the glowing wire. Notice that there is a continuous glow over the length of the wire, not many small points of light like in Christmas lights or a “rope light” made of LEDs. Instead, the electric current from the battery pack is causing the material itself to produce light. It might be interesting to note that there needs to be an alternating current, or AC power, to make the phosphor keep glowing. If it was direct current (DC power) that flowed at a constant rate, the phosphor atoms wouldn’t have a chance to relax and release their extra energy in the form of visible light. Instead, the AC power lets the phosphor atoms continuously absorb energy from colliding electrons and then release it at an incredibly fast rate, producing a constant glow. Now, transition to the concept of glowing gases. Ask visitors about glowing signs they’ve seen, and if they’ve heard of the Northern lights. It might come as a surprise that they are caused by many of the same principles! Gases like neon, or gases in the atmosphere, glow when their atoms collide with energized electrons, temporarily absorbing and then re-releasing that energy. This principle can be examined using the plasma globe. Procedure: Ask visitors to gather around the active plasma ball and observe the colors created by the strands of glowing gas. Can they find the red color created by neon? Or the blue/lavender color created by argon? Discussion/ Questions for visitors to consider: What would happen if different gases were inside the glass sphere? All colors of gas glow differently, so the colors would be different. However, not all gases glow as brightly as these, so it would be more difficult to see them so easily. Show visitors images of different glowing gases and of Northern lights. Can they guess what gases in the Earth’s atmosphere are colliding with charged particles from the sun (solar winds) to produce these auroras?
http://lightexhibit.org 24
Bent Light
SUMMARY: When the path of a light ray is bent, the image of the light source becomes distorted. This is what happens when light is bent as it passes from the air into the lenses of eyeglasses, producing a magnified image. Likewise, when sunlight is deflected as it travels through different layers of the atmosphere, the Sun appears flattened. Another way that light paths can be bent is through the warping of space by a massive object such as a galaxy or galaxy cluster. The massive object acts as a gravitational lens that distorts the images of more distant background galaxies. Q: Where can we observe images produced by bent light? A: Here, there, and everywhere that a light wave is deflected by the medium it is traveling through. Activity 1 – Playing with bending light Core Concept: As a light ray passes from one transparent medium (such as air, glass, plexi, or water) into another its direction changes. Exhibit connections: Lensing: http://lightexhibit.org/sunset.html http://lightexhibit.org/bio_image14.html Materials: laser pointers, acrylic block, lenses (including visitor’s eyeglasses), chalk-dust Demonstration Video: http://www.youtube.com/watch?v=fSK6JRy3mtU Background: “Refraction” is the bending of light as it passes from one medium into another. The amount of this bending depends both upon the angle of the incoming light and the nature of the medium. Understanding this idea led to the invention of lenses, eyeglasses, and telescopes! Suggestions for introducing the activity: Ask visitors if any of them wear glasses or contact lenses. They should know how important lenses are to everyday life! Eyeglasses and contact lenses bend light in just the right way to
http://lightexhibit.org 25
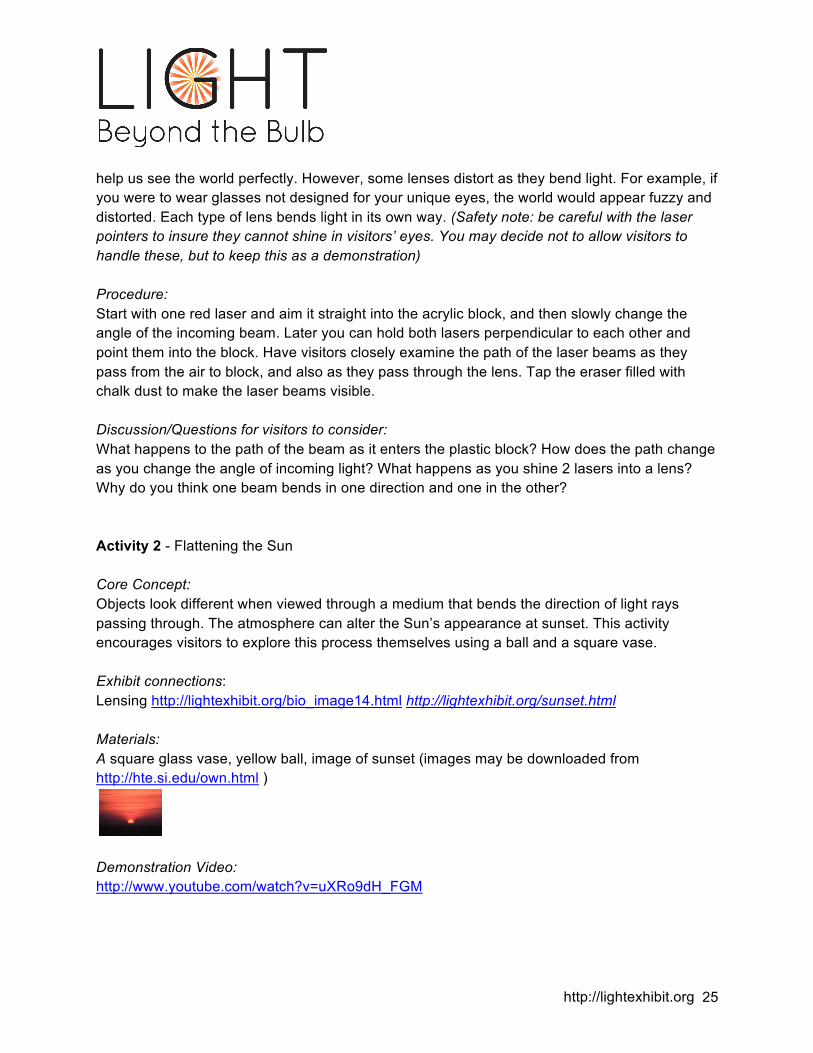
help us see the world perfectly. However, some lenses distort as they bend light. For example, if you were to wear glasses not designed for your unique eyes, the world would appear fuzzy and distorted. Each type of lens bends light in its own way. (Safety note: be careful with the laser pointers to insure they cannot shine in visitors’ eyes. You may decide not to allow visitors to handle these, but to keep this as a demonstration) Procedure: Start with one red laser and aim it straight into the acrylic block, and then slowly change the angle of the incoming beam. Later you can hold both lasers perpendicular to each other and point them into the block. Have visitors closely examine the path of the laser beams as they pass from the air to block, and also as they pass through the lens. Tap the eraser filled with chalk dust to make the laser beams visible. Discussion/Questions for visitors to consider: What happens to the path of the beam as it enters the plastic block? How does the path change as you change the angle of incoming light? What happens as you shine 2 lasers into a lens? Why do you think one beam bends in one direction and one in the other? Activity 2 - Flattening the Sun Core Concept: Objects look different when viewed through a medium that bends the direction of light rays passing through. The atmosphere can alter the Sun’s appearance at sunset. This activity encourages visitors to explore this process themselves using a ball and a square vase. Exhibit connections: Lensing http://lightexhibit.org/bio_image14.html http://lightexhibit.org/sunset.html Materials: A square glass vase, yellow ball, image of sunset (images may be downloaded from http://hte.si.edu/own.html )
Demonstration Video: http://www.youtube.com/watch?v=uXRo9dH_FGM
http://lightexhibit.org 26
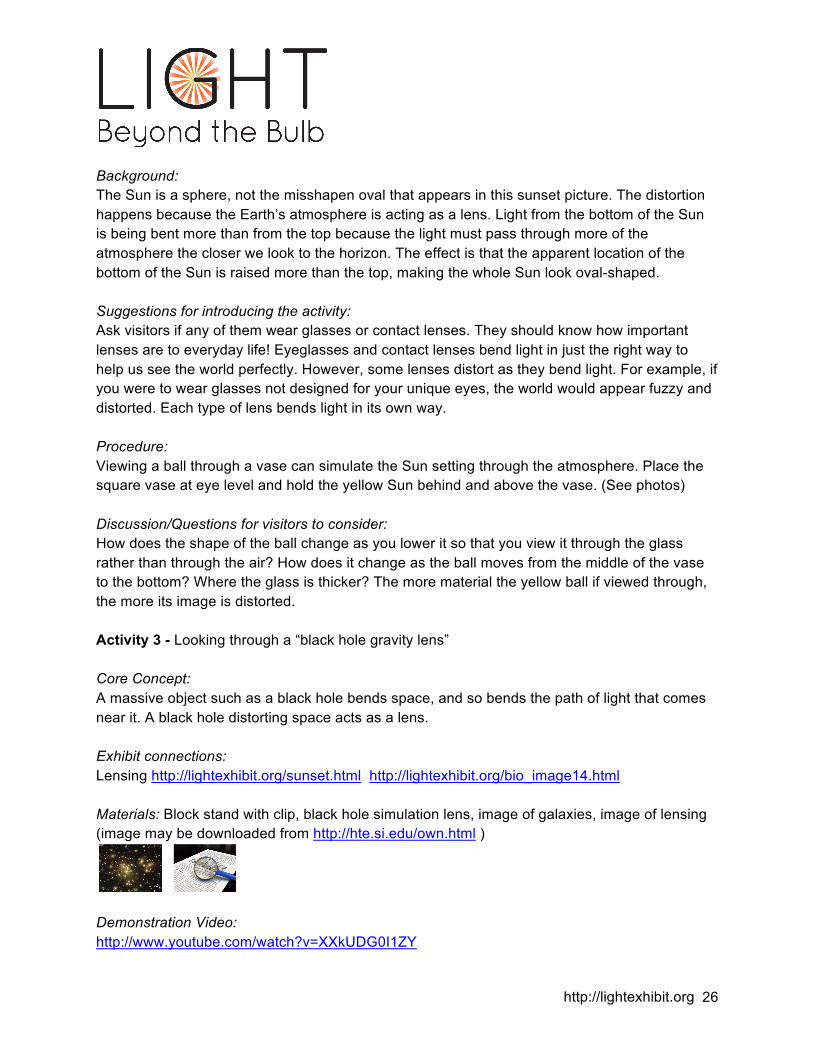
Background: The Sun is a sphere, not the misshapen oval that appears in this sunset picture. The distortion happens because the Earth’s atmosphere is acting as a lens. Light from the bottom of the Sun is being bent more than from the top because the light must pass through more of the atmosphere the closer we look to the horizon. The effect is that the apparent location of the bottom of the Sun is raised more than the top, making the whole Sun look oval-shaped. Suggestions for introducing the activity: Ask visitors if any of them wear glasses or contact lenses. They should know how important lenses are to everyday life! Eyeglasses and contact lenses bend light in just the right way to help us see the world perfectly. However, some lenses distort as they bend light. For example, if you were to wear glasses not designed for your unique eyes, the world would appear fuzzy and distorted. Each type of lens bends light in its own way. Procedure: Viewing a ball through a vase can simulate the Sun setting through the atmosphere. Place the square vase at eye level and hold the yellow Sun behind and above the vase. (See photos) Discussion/Questions for visitors to consider: How does the shape of the ball change as you lower it so that you view it through the glass rather than through the air? How does it change as the ball moves from the middle of the vase to the bottom? Where the glass is thicker? The more material the yellow ball if viewed through, the more its image is distorted. Activity 3 - Looking through a “black hole gravity lens” Core Concept: A massive object such as a black hole bends space, and so bends the path of light that comes near it. A black hole distorting space acts as a lens. Exhibit connections: Lensing http://lightexhibit.org/sunset.html http://lightexhibit.org/bio_image14.html Materials: Block stand with clip, black hole simulation lens, image of galaxies, image of lensing (image may be downloaded from http://hte.si.edu/own.html )
Demonstration Video: http://www.youtube.com/watch?v=XXkUDG0I1ZY
http://lightexhibit.org 27
Background: In the early 20th century, Albert Einstein realized that space can be significantly curved by an extremely massive object. Since light follows the curvature of space, a massive object can act as a gravitational lens. The acrylic lens for this activity was specially crafted to simulate the bending of light and image distortions that an observer might detect when viewing a background object through the warped space around a compact but massive black hole. Suggestions for introducing the activity: Ask visitors what they know about black holes. Most will say that they suck things in, and are incredibly massive and mysterious. Visitors may be surprised that black holes don’t devour everything that comes near to it. One of the more observable qualities of a black hole is how it bends and distorts light that passes by. Procedure: Hold the black hole lens so that visitors can see what it looks like. Then, hold the lens up to an image of many galaxies, and compare it to an image of actual observed gravitational lensing. How does the lens distort light? Does it stretch, make doubles, or both? Try looking at many different things! Discussion/Questions for visitors to consider: Show visitors the image of gravitational lensing. Can they notice any similarities between looking at the image of galaxies through the black hole lens and the actual image of gravitational lensing? In the image, light from a few very distant galaxies passes through a cluster of galaxies in the foreground. The cluster in the foreground is so massive that it bends space, and so affects the light coming from the distant galaxies. Can your visitor use the lens to create an “Einstein ring”—a very thin ring around the center of the lens—by looking at the image through the lens and at just the right angle?
http://lightexhibit.org 28
Articles and Resources Shadows Phases of the Moon
http://starchild.gsfc.nasa.gov/docs/StarChild/questions/question3.html Eclipses
http://eclipse.gsfc.nasa.gov/lunar.html Lunar Eclipses for Beginners
http://www.mreclipse.com/Special/LEprimer.html Solar Eclipses for Beginners
http://www.mreclipse.com/Special/SEprimer.html Glowing Gas Northern Lights
http://www.northernlightscentre.ca/northernlights.html Galactic Gas http://apod.nasa.gov/apod/ap060123.html
http://lightexhibit.org 29
Bent Light Atmospheric refraction of Sunsets
http://www.atoptics.co.uk/atoptics/sunflat.htm Gravitational lensing
http://imagine.gsfc.nasa.gov/docs/features/news/grav_lens.html http://www.time.com/time/health/article/0,8599,2104225,00.html Electric Charge Lightning
http://www.electricalfun.com/lightning.htm Neutron stars
http://www.nasa.gov/centers/marshall/news/background/facts/CrabNebulaFactSheet.html Note: These activities were adapted from the Here, There & Everywhere (HTE: http://hte.si.edu) project for the International Year of Light 2015/Light: Beyond the Bulb. HTE was supported by NASA under grant NNX11AH28G issued through the Science Mission Directorate. HTE was developed by the Chandra X-ray Center, at the Smithsonian Astrophysical Observatory (SAO), in Cambridge, MA. Many thanks to Erin Braswell, (formerly SAO) for her work on this booklet. Contact Kim Arcand, Chandra/SAO for questions: Email [email protected]
http://lightexhibit.org 30
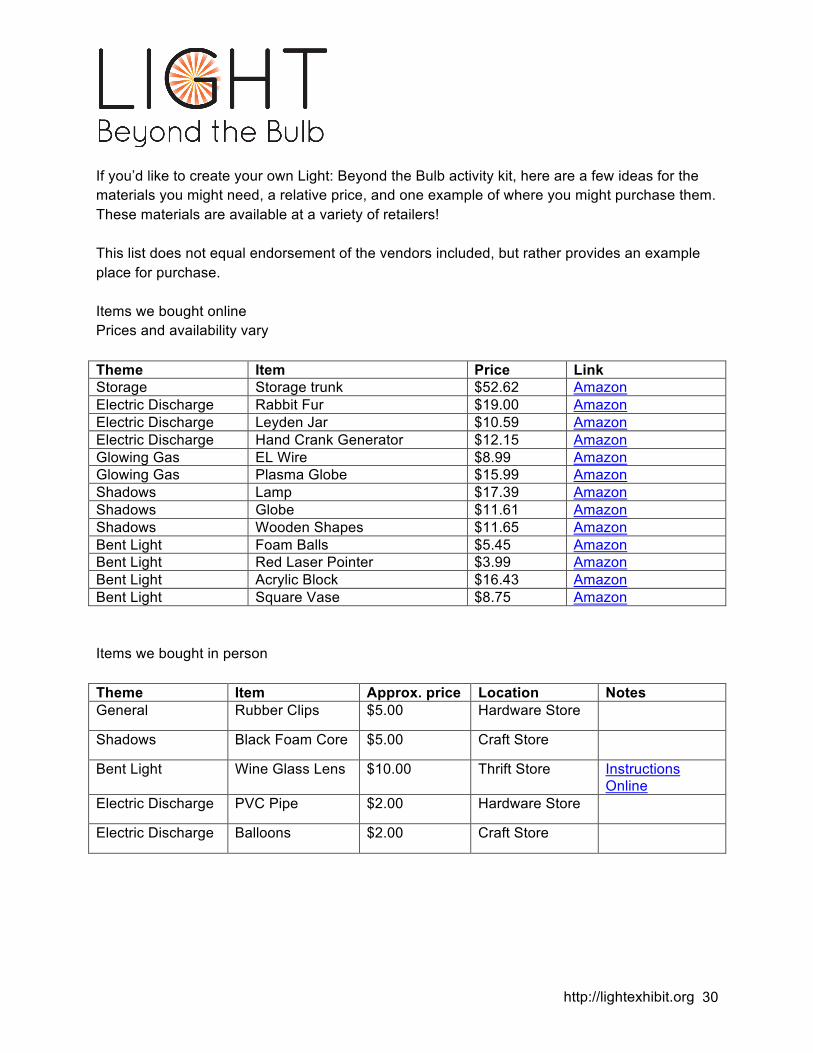
If you’d like to create your own Light: Beyond the Bulb activity kit, here are a few ideas for the materials you might need, a relative price, and one example of where you might purchase them. These materials are available at a variety of retailers! This list does not equal endorsement of the vendors included, but rather provides an example place for purchase. Items we bought online Prices and availability vary Theme Item Price Link Storage Storage trunk $52.62 Amazon Electric Discharge Rabbit Fur $19.00 Amazon Electric Discharge Leyden Jar $10.59 Amazon Electric Discharge Hand Crank Generator $12.15 Amazon Glowing Gas EL Wire $8.99 Amazon Glowing Gas Plasma Globe $15.99 Amazon Shadows Lamp $17.39 Amazon Shadows Globe $11.61 Amazon Shadows Wooden Shapes $11.65 Amazon Bent Light Foam Balls $5.45 Amazon Bent Light Red Laser Pointer $3.99 Amazon Bent Light Acrylic Block $16.43 Amazon Bent Light Square Vase $8.75 Amazon Items we bought in person Theme Item Approx. price Location Notes General Rubber Clips $5.00 Hardware Store
Shadows Black Foam Core $5.00 Craft Store
Bent Light Wine Glass Lens $10.00 Thrift Store Instructions Online
Electric Discharge PVC Pipe $2.00 Hardware Store
Electric Discharge Balloons $2.00 Craft Store
http://lightexhibit.org 31
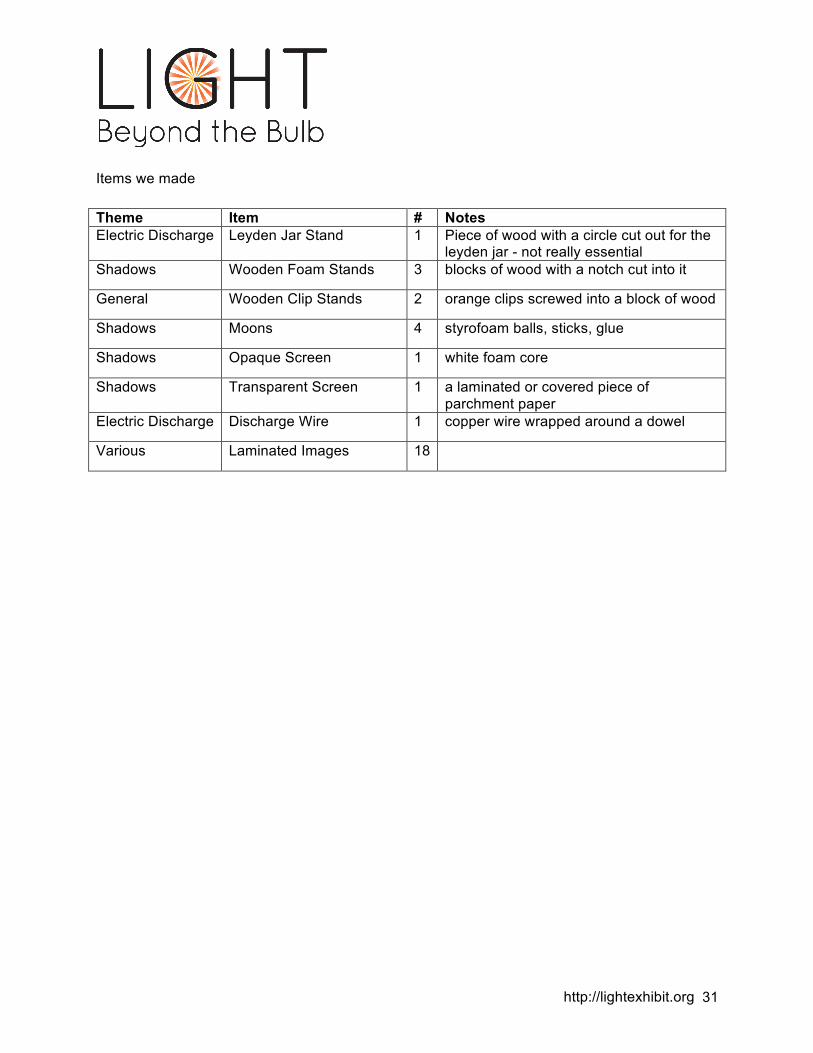
Items we made Theme Item # Notes Electric Discharge Leyden Jar Stand 1 Piece of wood with a circle cut out for the
leyden jar - not really essential Shadows Wooden Foam Stands 3 blocks of wood with a notch cut into it
General Wooden Clip Stands 2 orange clips screwed into a block of wood
Shadows Moons 4 styrofoam balls, sticks, glue
Shadows Opaque Screen 1 white foam core
Shadows Transparent Screen 1 a laminated or covered piece of parchment paper
Electric Discharge Discharge Wire 1 copper wire wrapped around a dowel
Various Laminated Images 18