Embed Size (px)
Citation preview

Clerical Case/Incident Creation Deployment 6/26/2016 Page 1
How Do I – Clerical Case/Incident Creation
Phase II eFiling
In the Phase II of eFiling, clerks will need to create certain case types for self-represented litigants using the left-side menu link, “eFile New.” Those case types are:
Adoptions
Substantiations
Protective Orders
Judicial Bypass (Abortion) These cases cannot be created through the incident screen once we are in Phase II. In order to create any of the above case types, you will select the “eFile New” link on the left-side menu. This opens a small window, select “New Case.”

Clerical Case/Incident Creation Deployment 6/26/2016 Page 2
In the following window, you will need to fill in all required text fields. Once you select the Home District Office, the following county options will be filtered to only show those available for that district office. If race or ethnicity are unknown, you may select, “Cannot determine.”
The Document Types listed will only include document types that would require a new incident.
(Abortion)
Clerical Case/Incident Creation Deployment 6/26/2016 Page 3
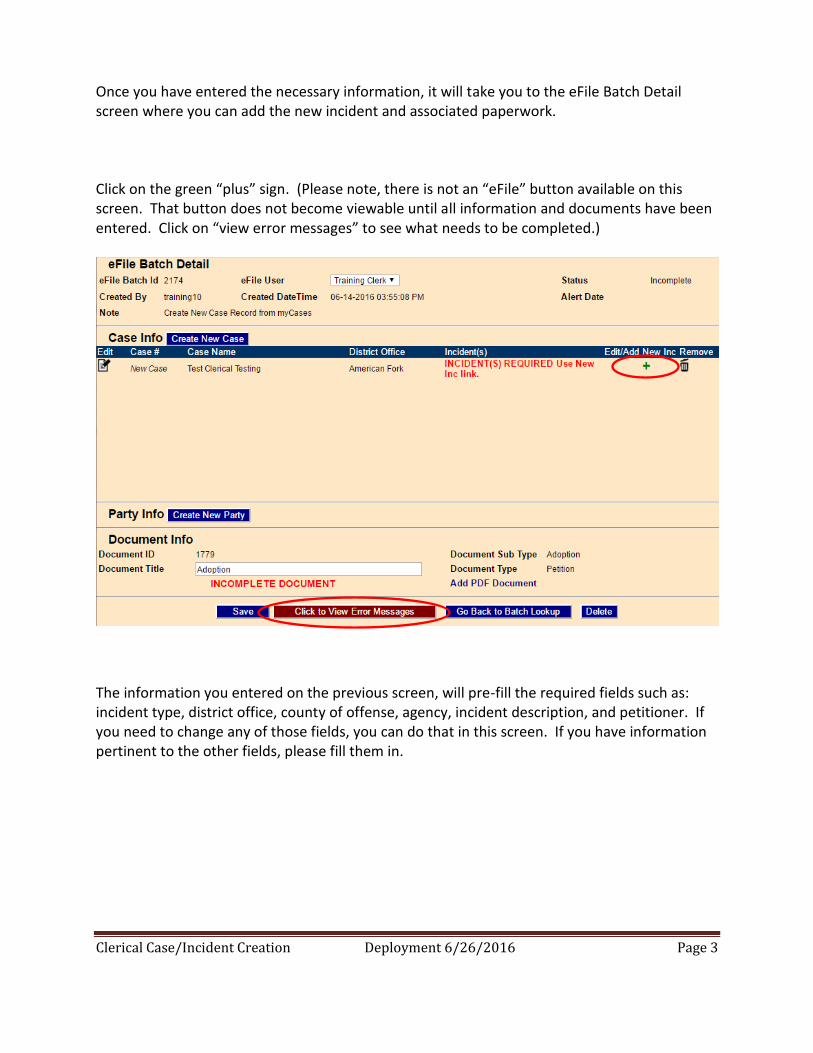
Once you have entered the necessary information, it will take you to the eFile Batch Detail screen where you can add the new incident and associated paperwork. Click on the green “plus” sign. (Please note, there is not an “eFile” button available on this screen. That button does not become viewable until all information and documents have been entered. Click on “view error messages” to see what needs to be completed.)
The information you entered on the previous screen, will pre-fill the required fields such as: incident type, district office, county of offense, agency, incident description, and petitioner. If you need to change any of those fields, you can do that in this screen. If you have information pertinent to the other fields, please fill them in.

Clerical Case/Incident Creation Deployment 6/26/2016 Page 4
If you need to change any of the information you have entered on the case or the incident, click the appropriate “edit” icon.
Now, you will need to add your PDF document.
To edit Case Profile information
To edit incident information

Clerical Case/Incident Creation Deployment 6/26/2016 Page 5
In the next window, you will need to select your file. If the file is larger than 5 MB, you will need to break it up into multiple, smaller files.
Please note, if you have multiple files that need to be uploaded, you will need to attach them prior to completing the eFiling process. You can add additional documents by clicking the icon at the bottom right-hand corner.
Clerical Case/Incident Creation Deployment 6/26/2016 Page 6
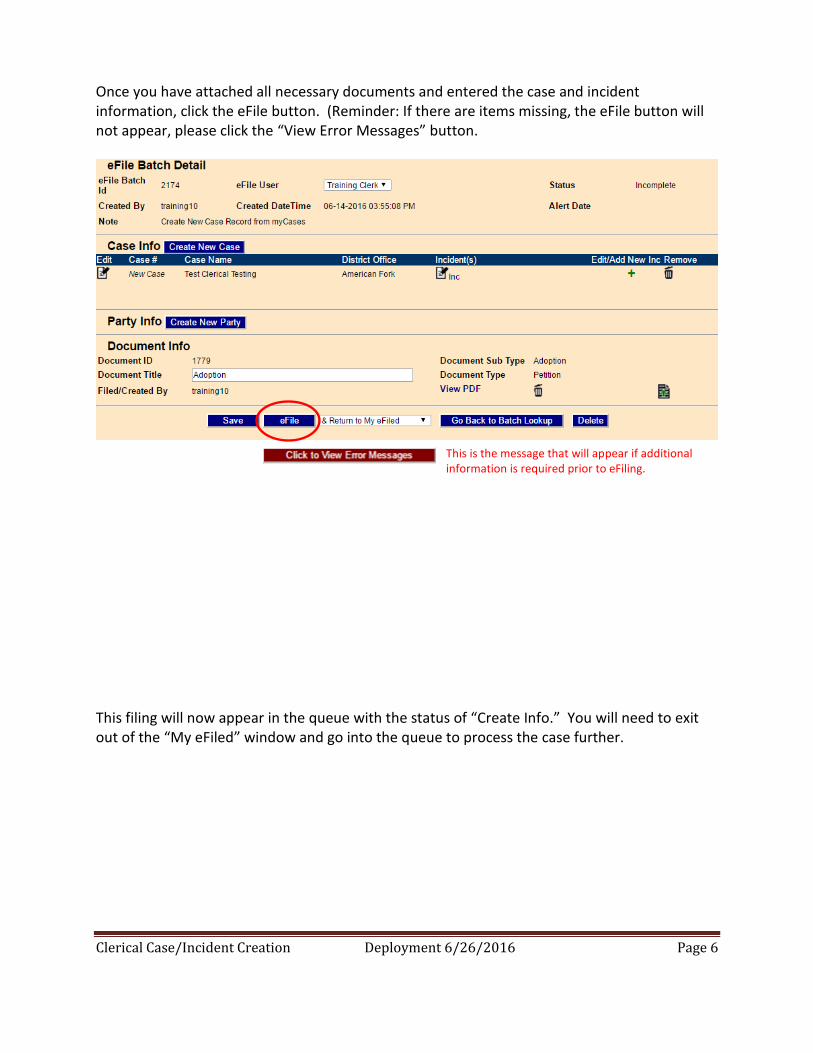
Once you have attached all necessary documents and entered the case and incident information, click the eFile button. (Reminder: If there are items missing, the eFile button will not appear, please click the “View Error Messages” button.
This filing will now appear in the queue with the status of “Create Info.” You will need to exit out of the “My eFiled” window and go into the queue to process the case further.
This is the message that will appear if additional information is required prior to eFiling.

Clerical Case/Incident Creation Deployment 6/26/2016 Page 7
At this point, the case has not been assigned a case number and as it has not officially been created. Once in the eFile Queue, you can use the filter option by selecting “Create Info” from the Routing Queue or Status Queue drop-down options to only view those cases pending case/incident creation. Click on the “edit” icon on the left-hand side to continue processing the case.

Clerical Case/Incident Creation Deployment 6/26/2016 Page 8
Please note, that the case will be automatically assigned to you once you click “Create Info” in order to avoid two people entering information on a new case at the same time. Once the process is complete, you will still be assigned to the case unless you take yourself off of the case. In the next screen, click “Create New Case.”
Once you have verified that the information is correct, click “Create Case & Incidents.”

Clerical Case/Incident Creation Deployment 6/26/2016 Page 9
In the following screen, click on the red gavel to assign the Judicial Officer.
Select the type of Judicial Officer assignment and then select the Judge. If the Judge is not showing up on the list, click on “Find All Avail” to see a list of all Judges in the state.

Clerical Case/Incident Creation Deployment 6/26/2016 Page 10
Now click “Update eFile and Route to Queue.” The case is not created and the documents have not been filed until you click that button.
The case is now available to view in the Review Queue. The case number and case name are now clickable links. If no further action is necessary (calendaring, filing fee, etc.), select Click to Complete.”
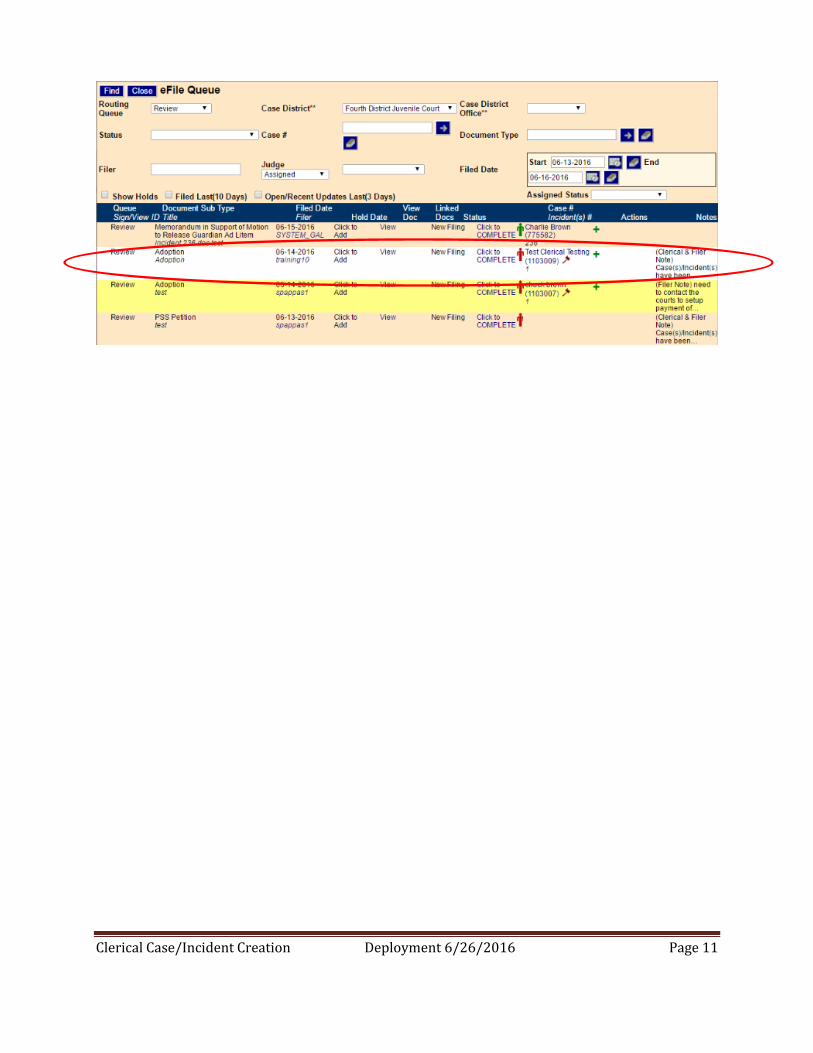
Clerical Case/Incident Creation Deployment 6/26/2016 Page 11