Embed Size (px)
Citation preview
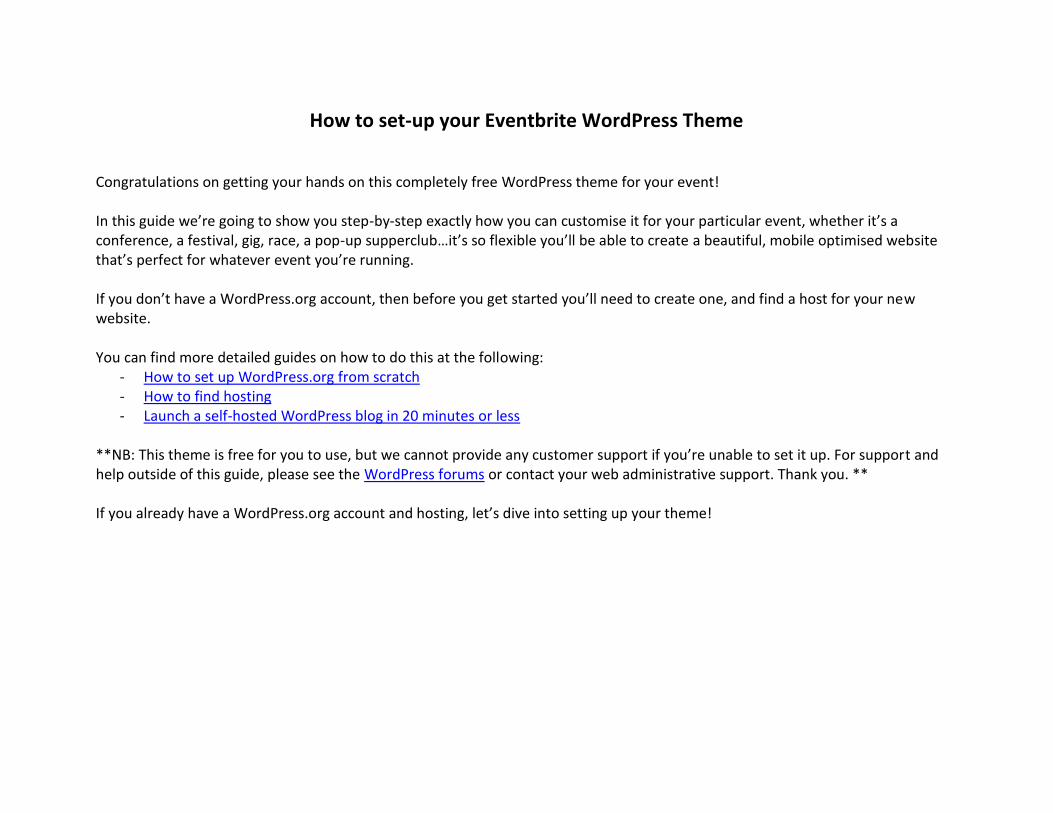
How to set-up your Eventbrite WordPress Theme Congratulations on getting your hands on this completely free WordPress theme for your event! In this guide we’re going to show you step-by-step exactly how you can customise it for your particular event, whether it’s a conference, a festival, gig, race, a pop-up supperclub…it’s so flexible you’ll be able to create a beautiful, mobile optimised website that’s perfect for whatever event you’re running. If you don’t have a WordPress.org account, then before you get started you’ll need to create one, and find a host for your new website. You can find more detailed guides on how to do this at the following:
- How to set up WordPress.org from scratch - How to find hosting - Launch a self-hosted WordPress blog in 20 minutes or less
**NB: This theme is free for you to use, but we cannot provide any customer support if you’re unable to set it up. For support and help outside of this guide, please see the WordPress forums or contact your web administrative support. Thank you. ** If you already have a WordPress.org account and hosting, let’s dive into setting up your theme!
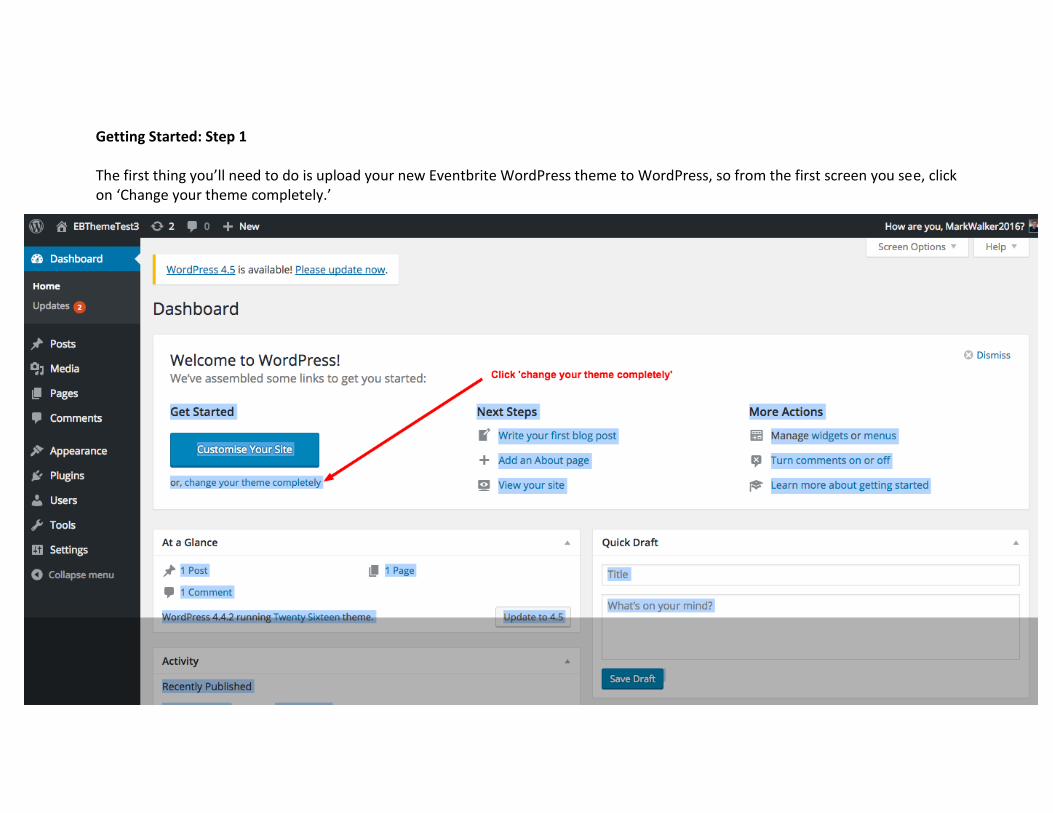
Getting Started: Step 1 The first thing you’ll need to do is upload your new Eventbrite WordPress theme to WordPress, so from the first screen you see, click on ‘Change your theme completely.’
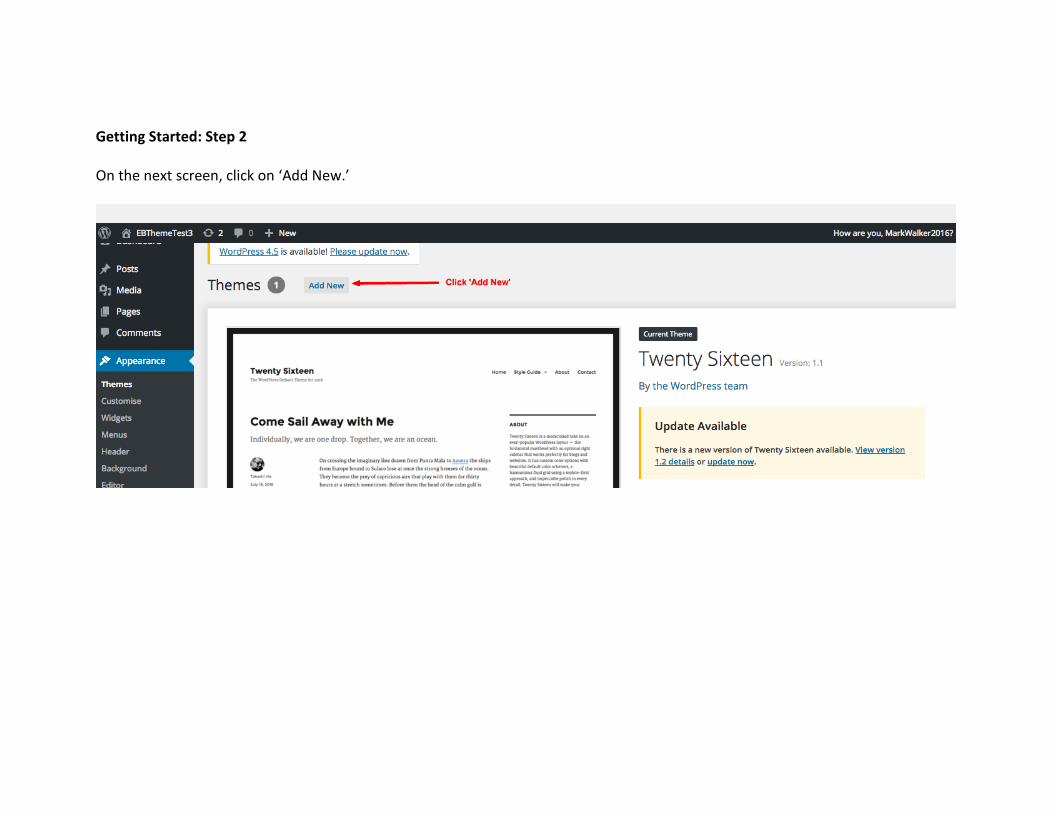
Getting Started: Step 2 On the next screen, click on ‘Add New.’
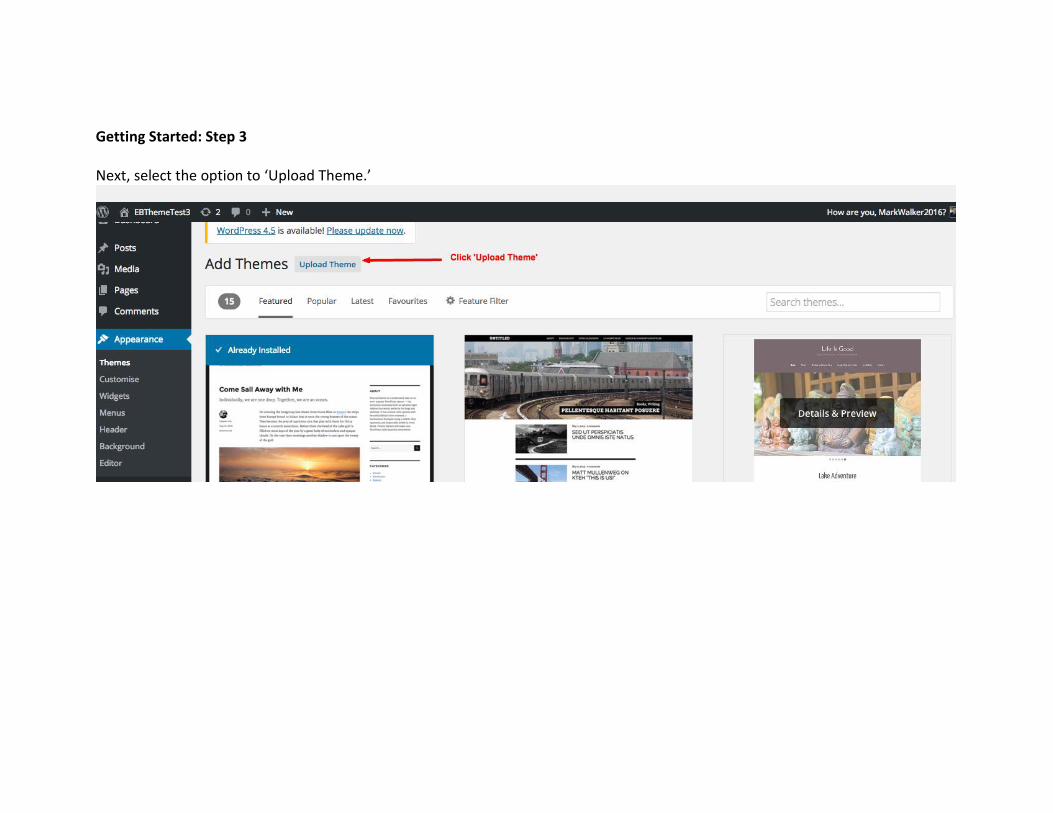
Getting Started: Step 3 Next, select the option to ‘Upload Theme.’
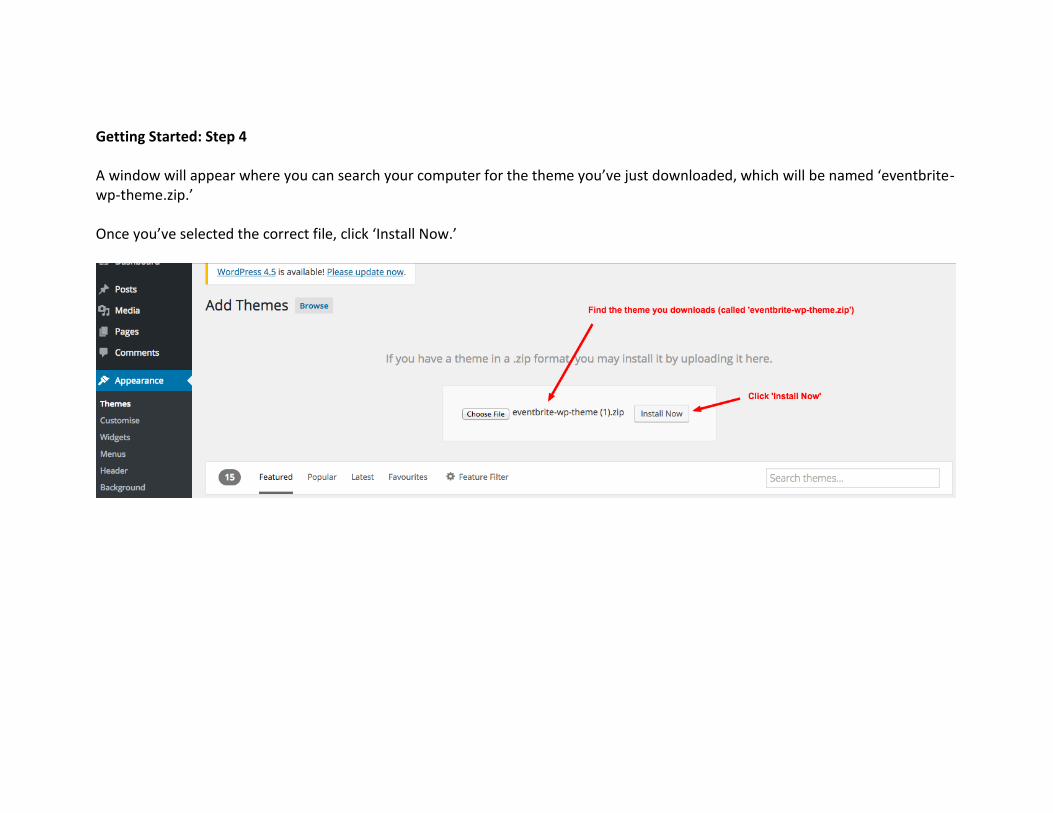
Getting Started: Step 4 A window will appear where you can search your computer for the theme you’ve just downloaded, which will be named ‘eventbrite-wp-theme.zip.’ Once you’ve selected the correct file, click ‘Install Now.’
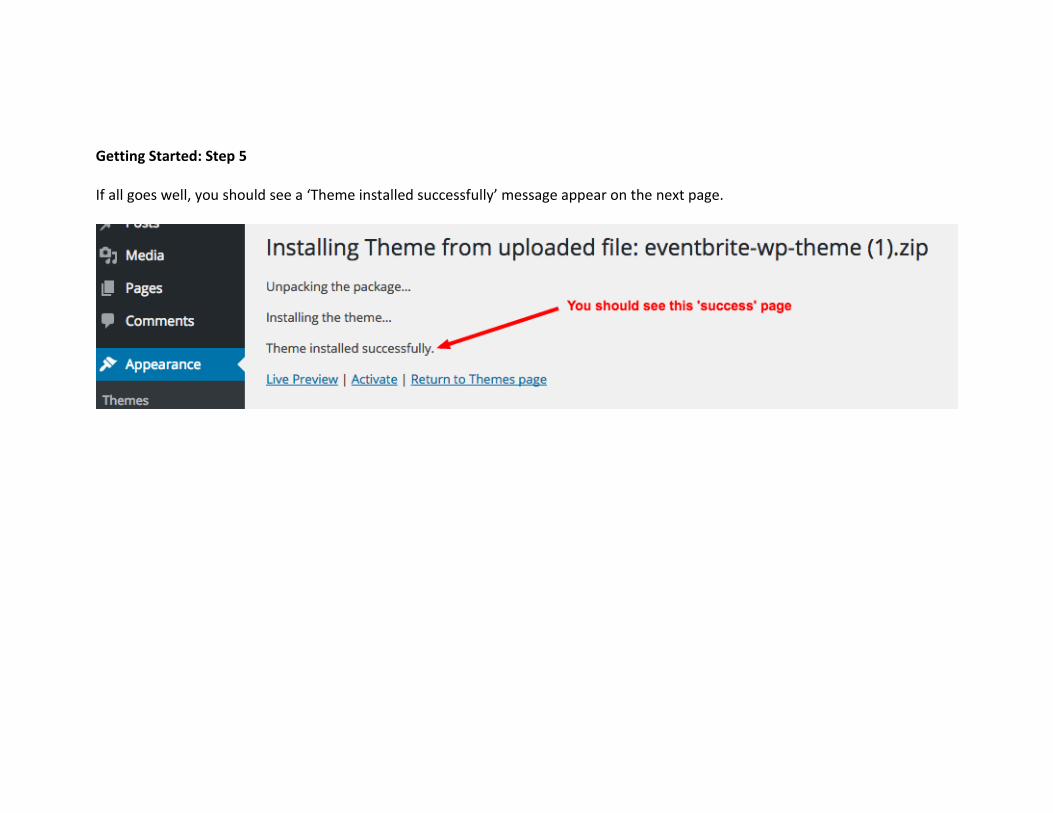
Getting Started: Step 5 If all goes well, you should see a ‘Theme installed successfully’ message appear on the next page.
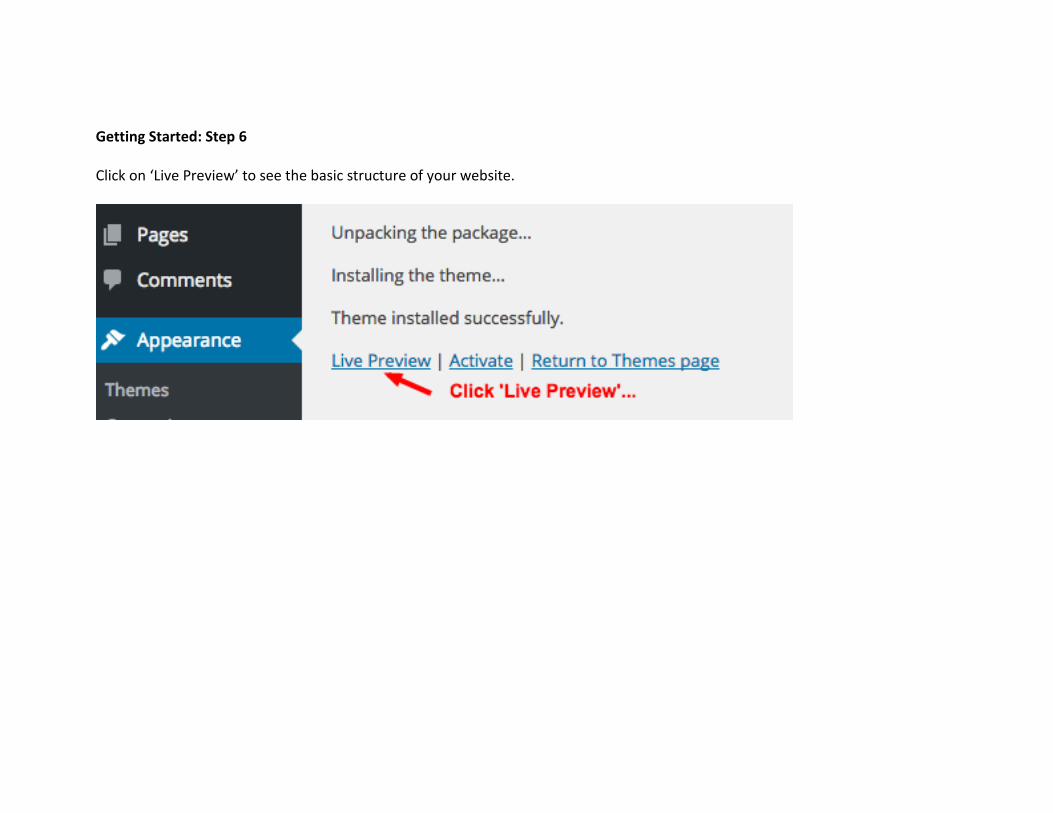
Getting Started: Step 6 Click on ‘Live Preview’ to see the basic structure of your website.
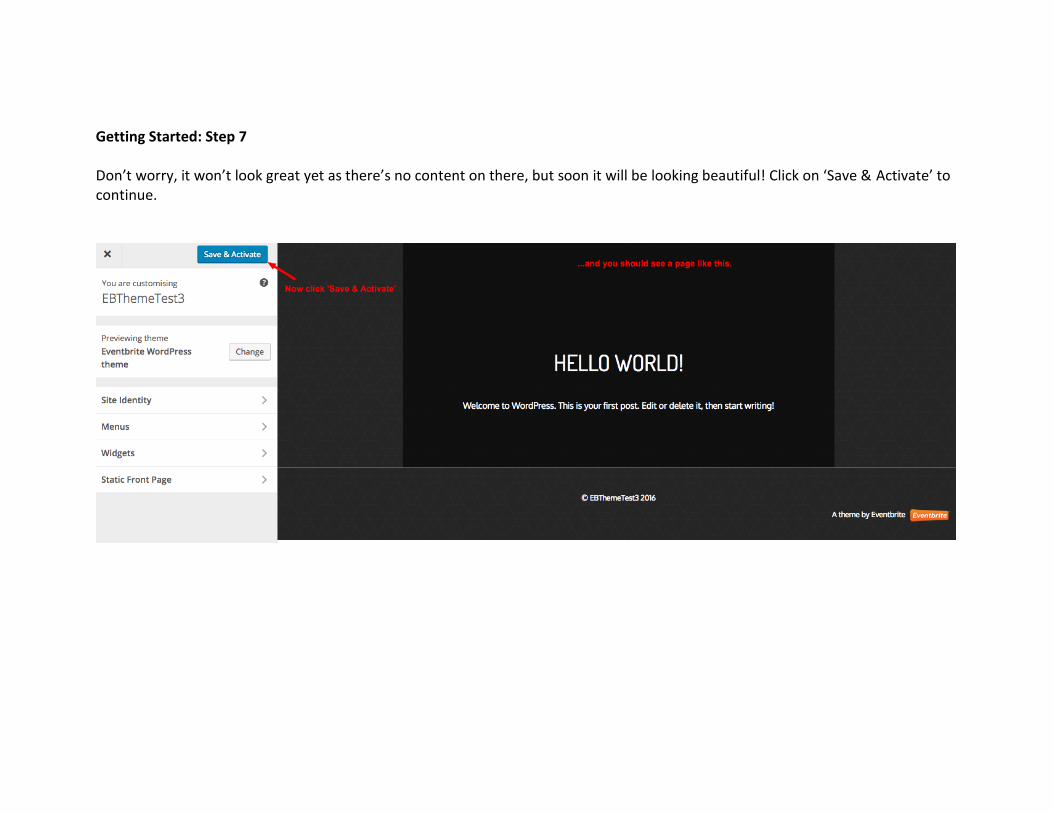
Getting Started: Step 7 Don’t worry, it won’t look great yet as there’s no content on there, but soon it will be looking beautiful! Click on ‘Save & Activate’ to continue.
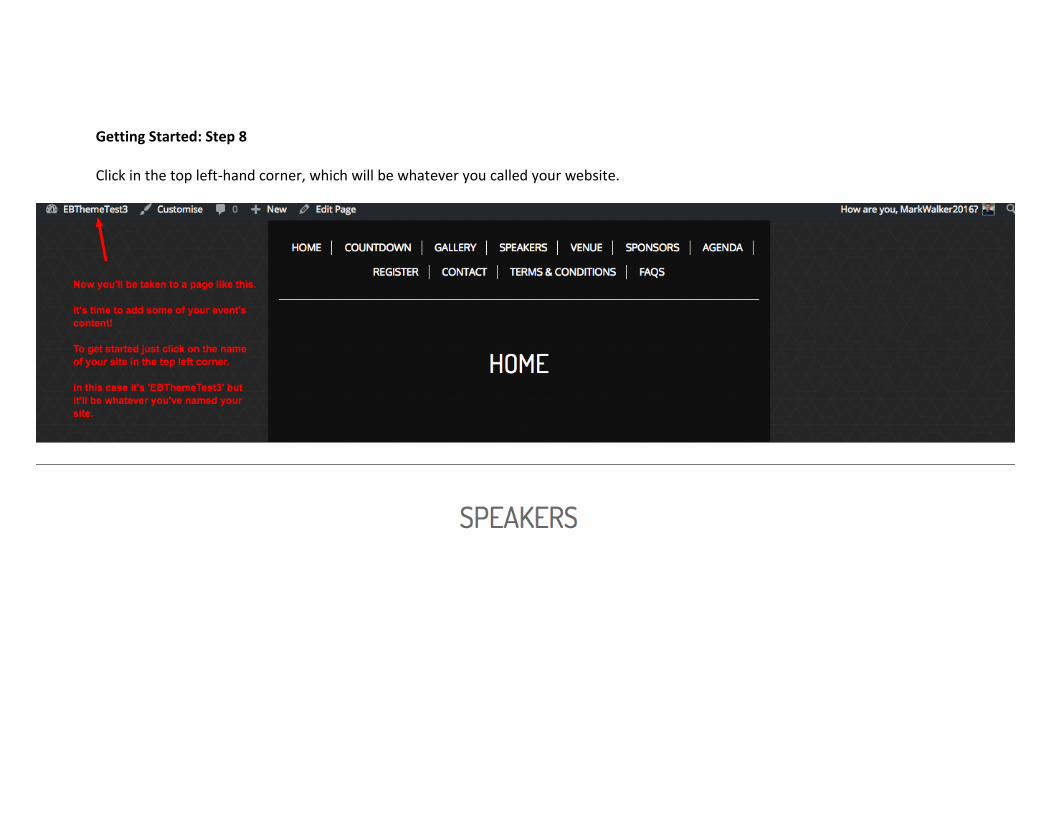
Getting Started: Step 8 Click in the top left-hand corner, which will be whatever you called your website.

Getting Started: Step 9 You can dismiss the welcome message in your dashboard now.

Getting Started: Step 10 You’ve done all the basics, so now it’s time to get to the good stuff and start adding your content! To do this, click on ‘Pages,’ which will be where you keep coming back to in order to see all the main components of your new event website.
Customising your home page
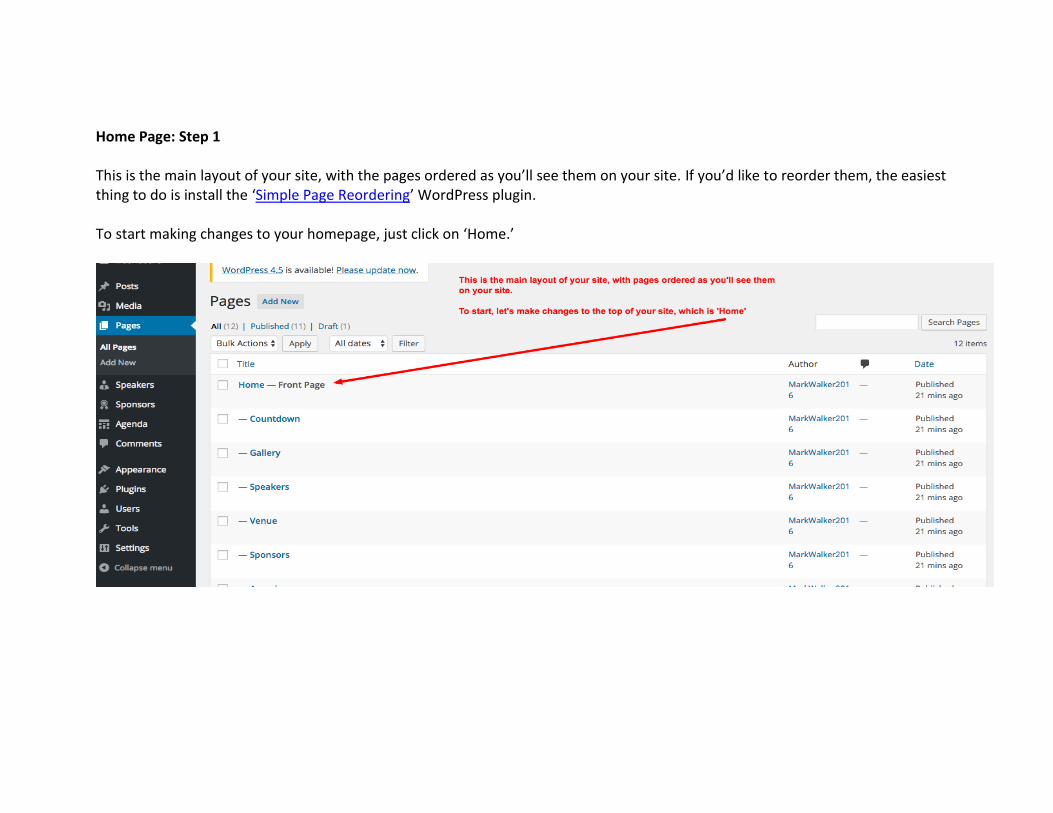
Home Page: Step 1 This is the main layout of your site, with the pages ordered as you’ll see them on your site. If you’d like to reorder them, the easiest thing to do is install the ‘Simple Page Reordering’ WordPress plugin. To start making changes to your homepage, just click on ‘Home.’
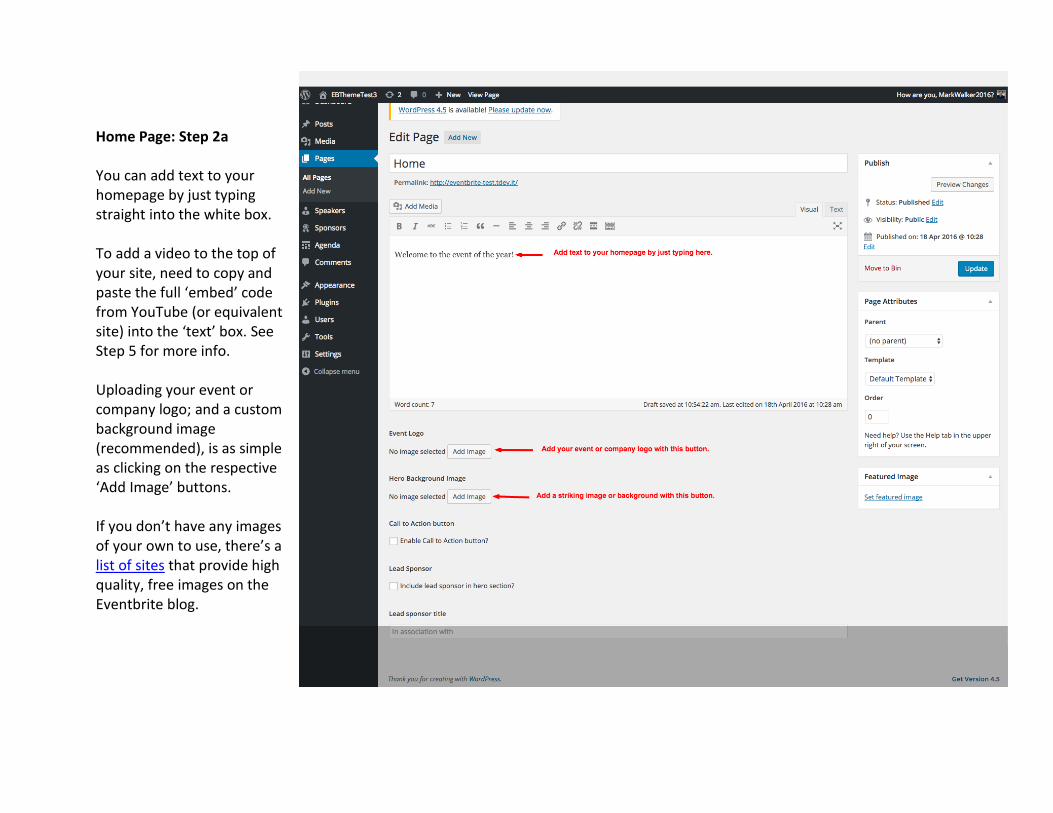
Home Page: Step 2a You can add text to your homepage by just typing straight into the white box. To add a video to the top of your site, need to copy and paste the full ‘embed’ code from YouTube (or equivalent site) into the ‘text’ box. See Step 5 for more info. Uploading your event or company logo; and a custom background image (recommended), is as simple as clicking on the respective ‘Add Image’ buttons. If you don’t have any images of your own to use, there’s a list of sites that provide high quality, free images on the Eventbrite blog.
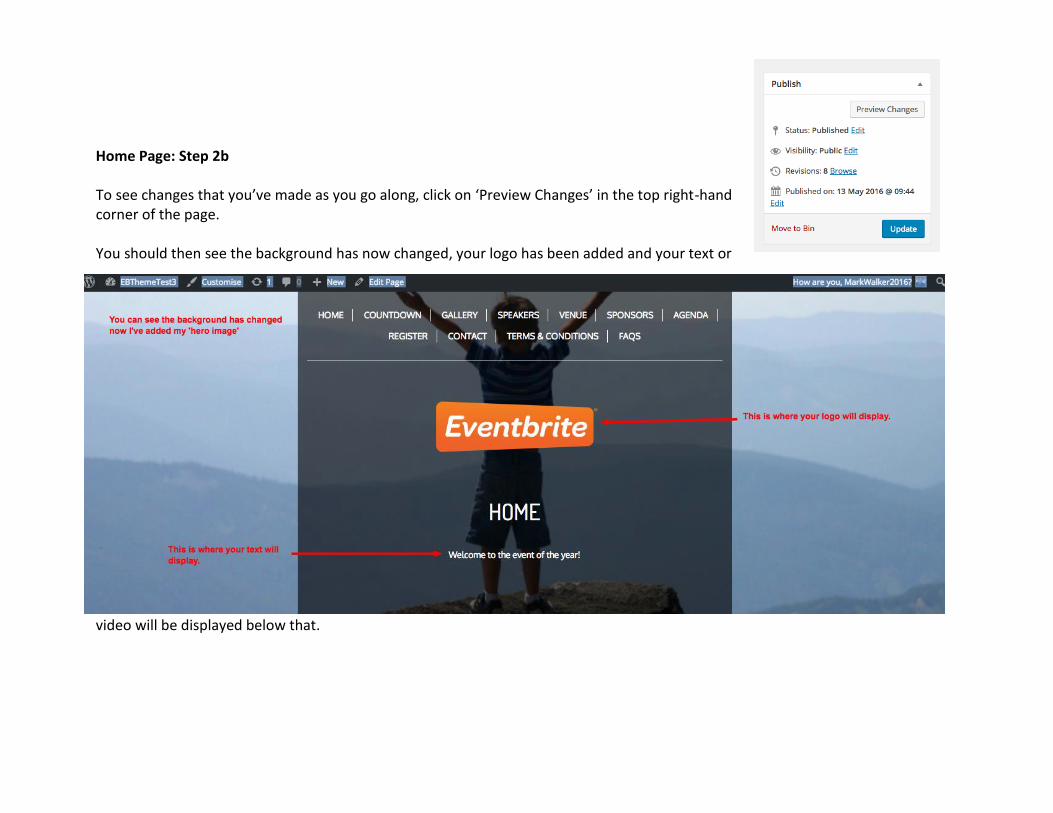
Home Page: Step 2b To see changes that you’ve made as you go along, click on ‘Preview Changes’ in the top right-hand corner of the page. You should then see the background has now changed, your logo has been added and your text or
video will be displayed below that.
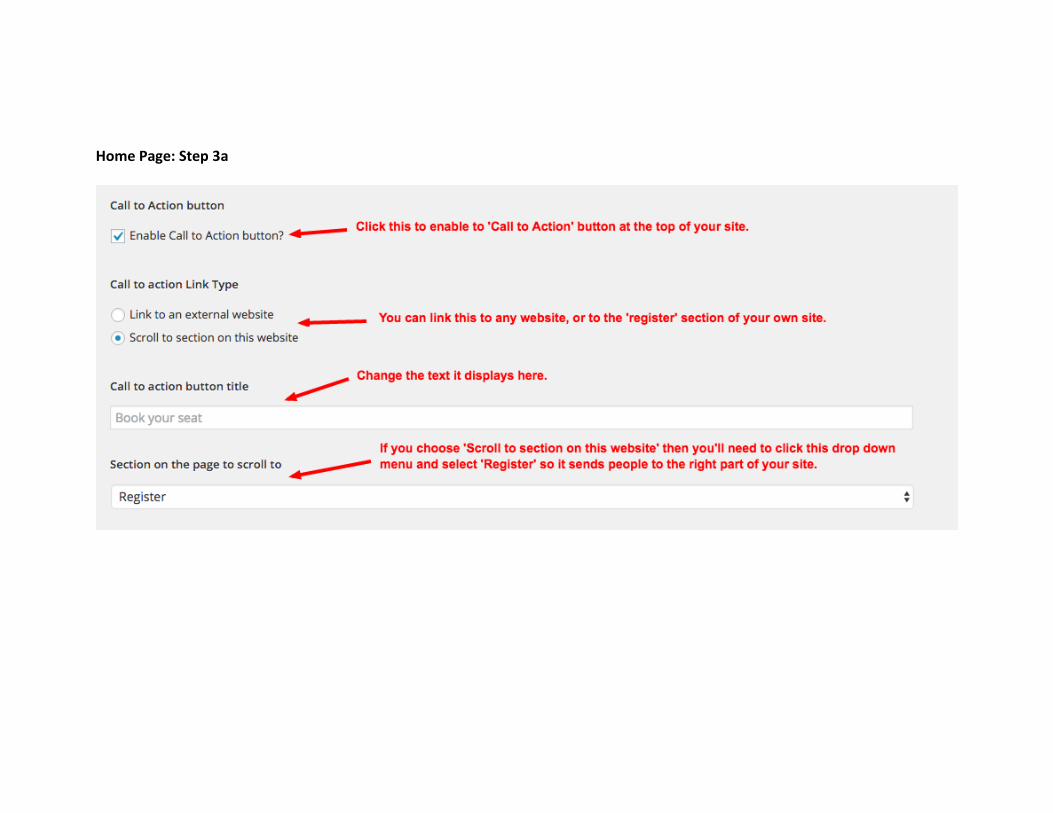
Home Page: Step 3a
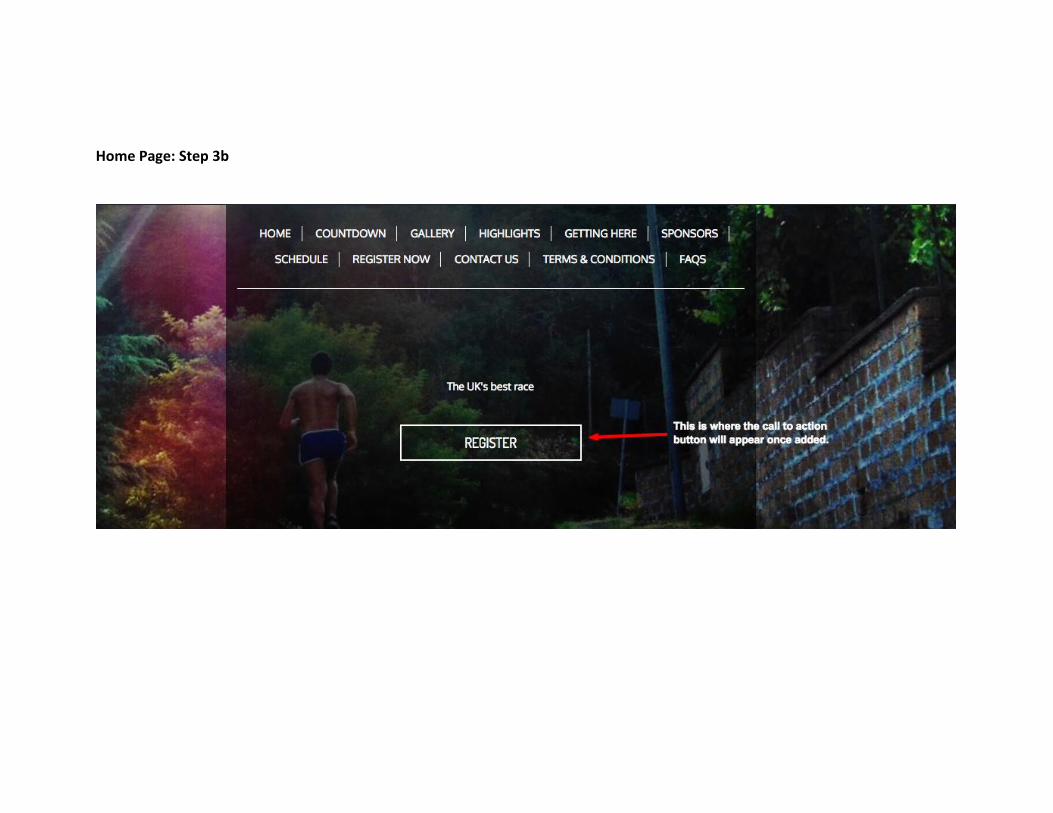
Home Page: Step 3b
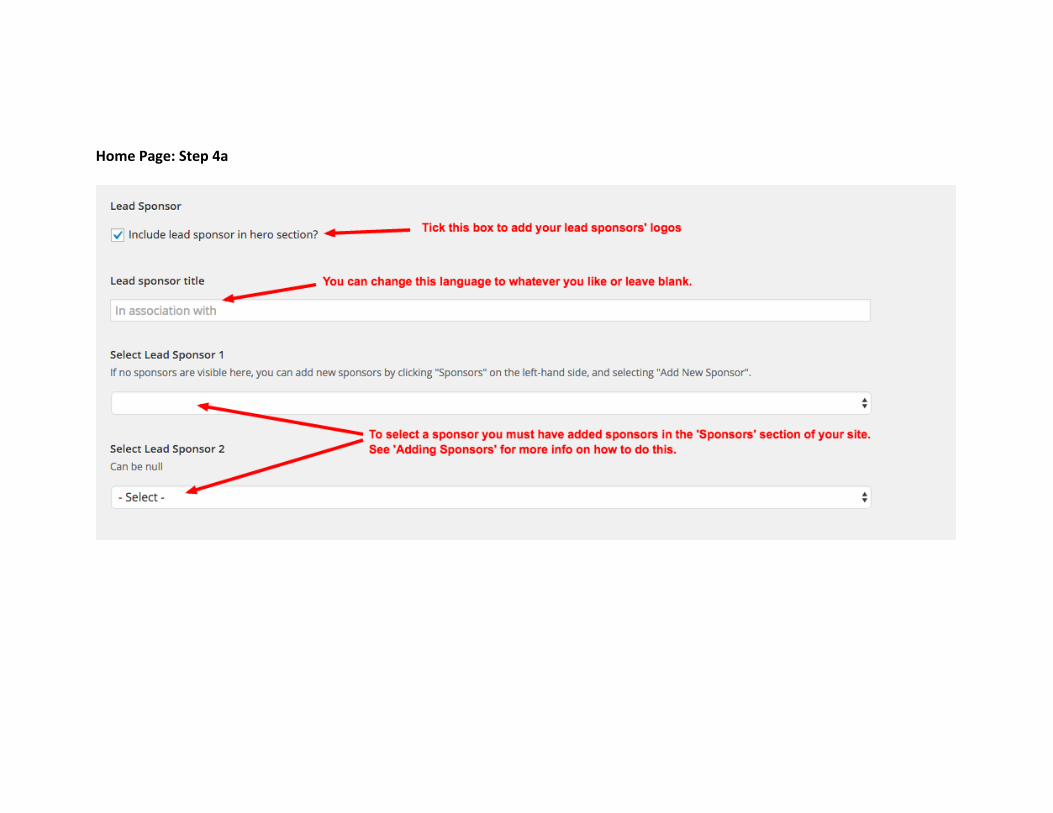
Home Page: Step 4a
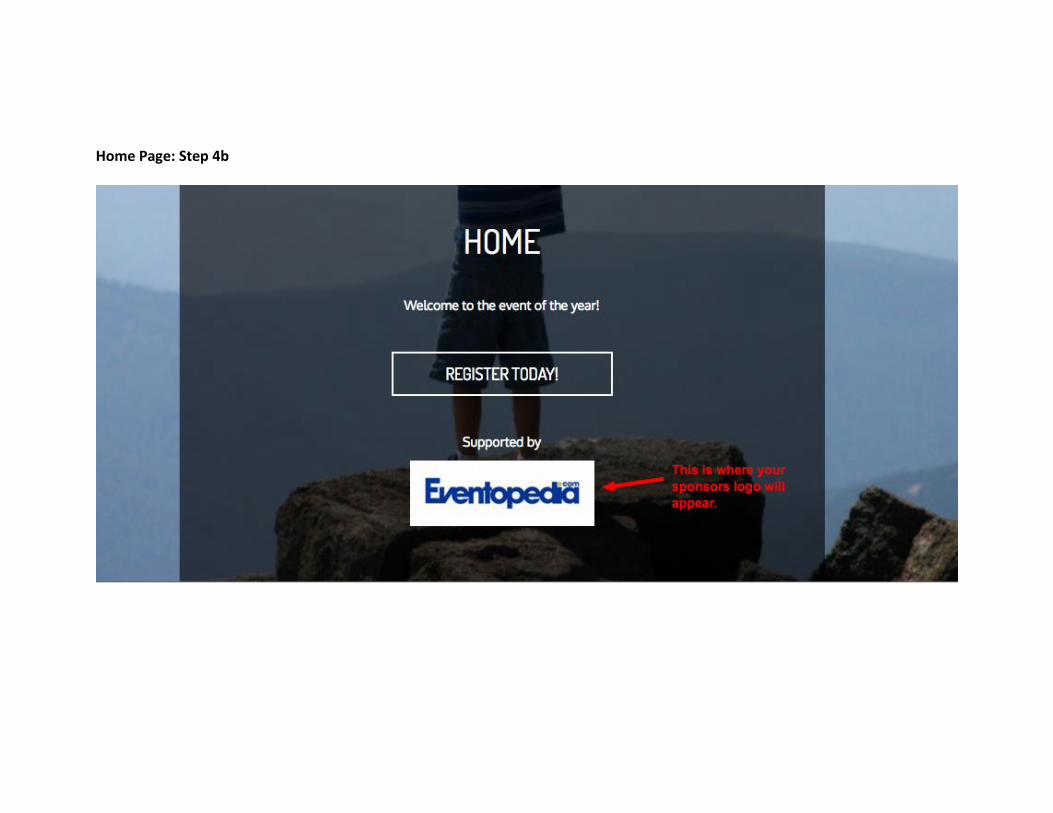
Home Page: Step 4b
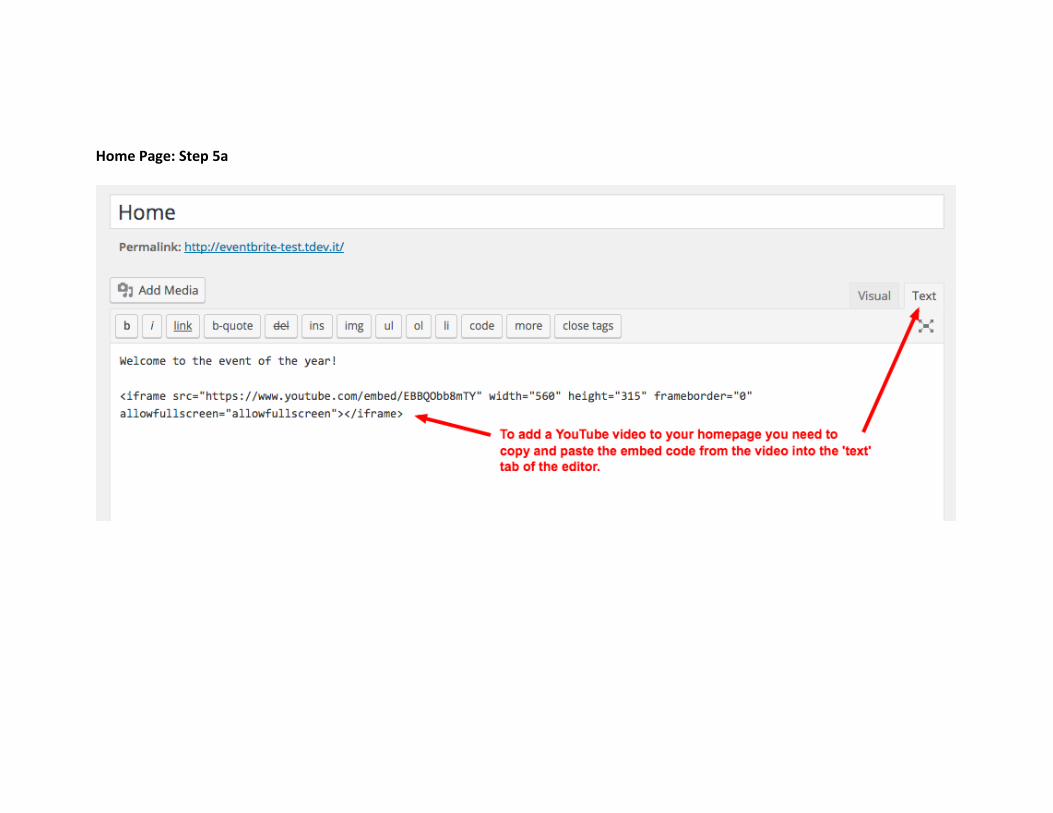
Home Page: Step 5a
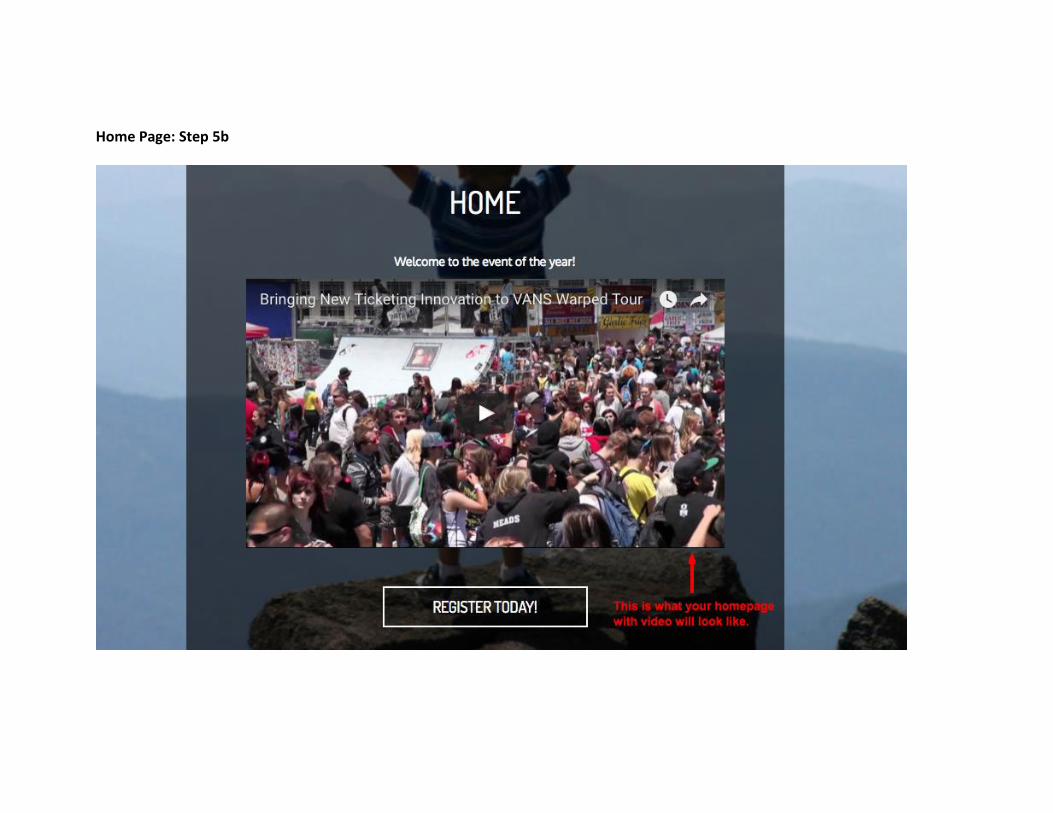
Home Page: Step 5b
Adding the countdown timer

Countdown Timer: Step 1 Go back to ‘Pages’ or ‘All Pages’ and click on ‘Countdown.’
Countdown Timer: Step 2
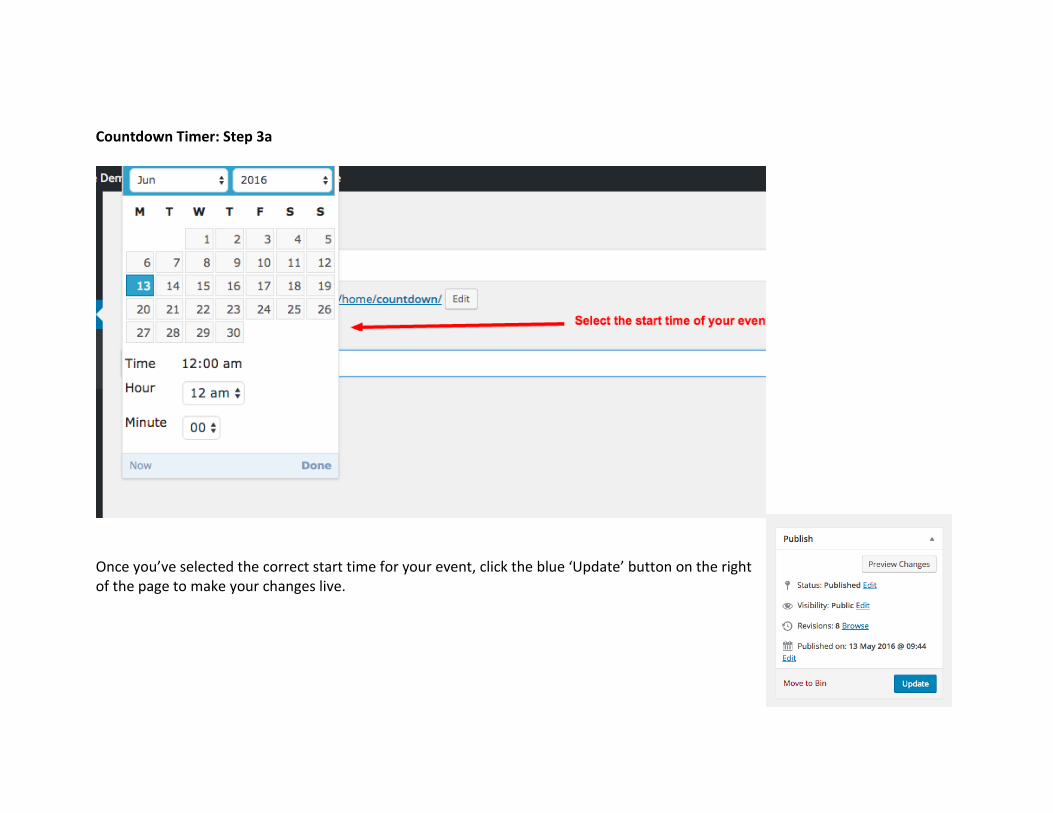
Countdown Timer: Step 3a
Once you’ve selected the correct start time for your event, click the blue ‘Update’ button on the right of the page to make your changes live.
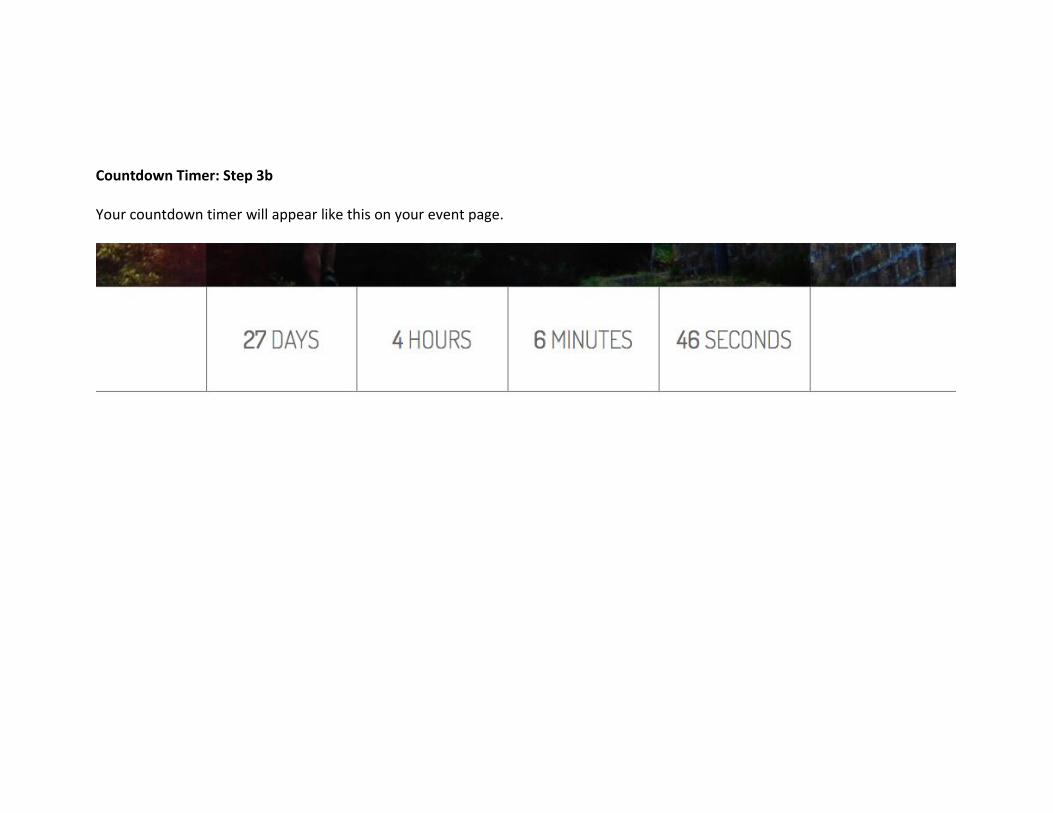
Countdown Timer: Step 3b Your countdown timer will appear like this on your event page.

Gallery
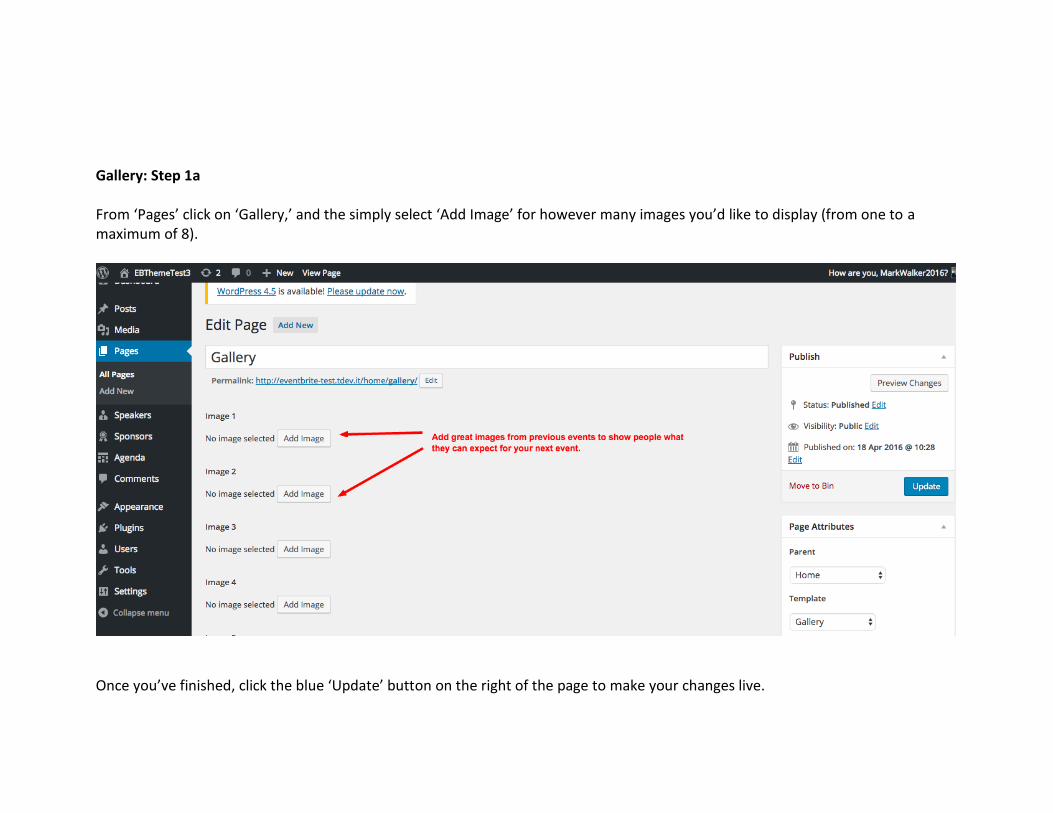
Gallery: Step 1a From ‘Pages’ click on ‘Gallery,’ and the simply select ‘Add Image’ for however many images you’d like to display (from one to a maximum of 8).
Once you’ve finished, click the blue ‘Update’ button on the right of the page to make your changes live.
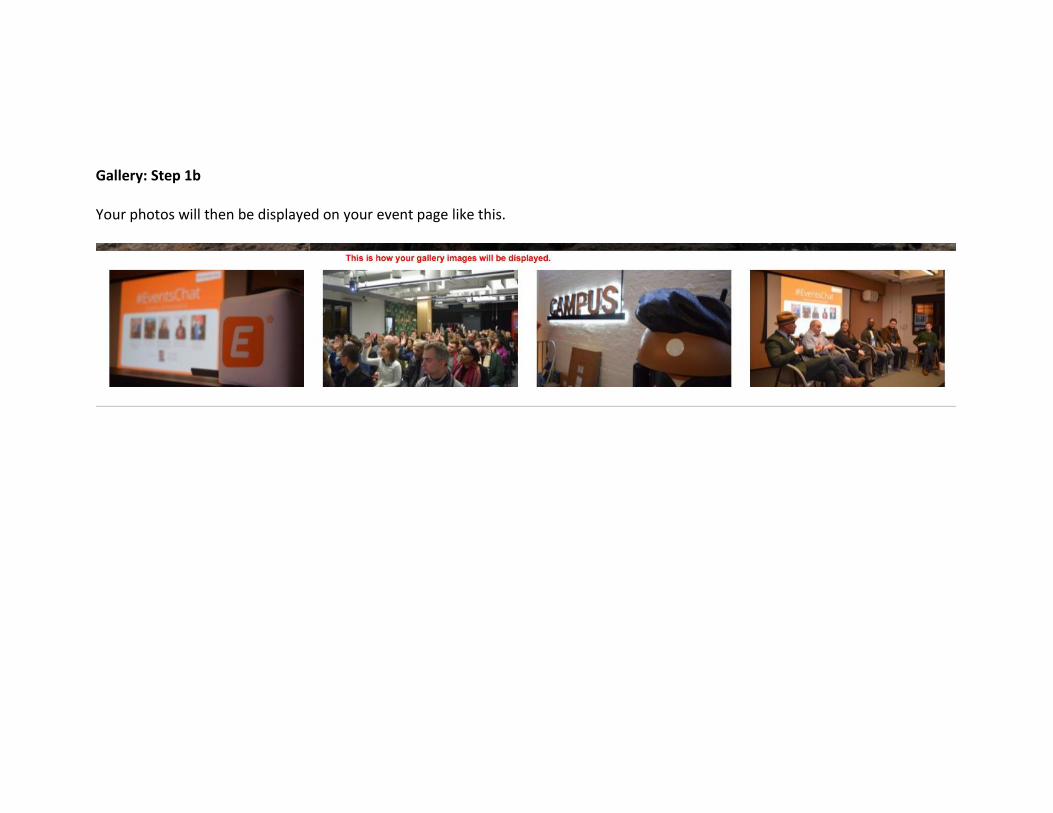
Gallery: Step 1b Your photos will then be displayed on your event page like this.

Adding Speakers / Headliners /
Highlights
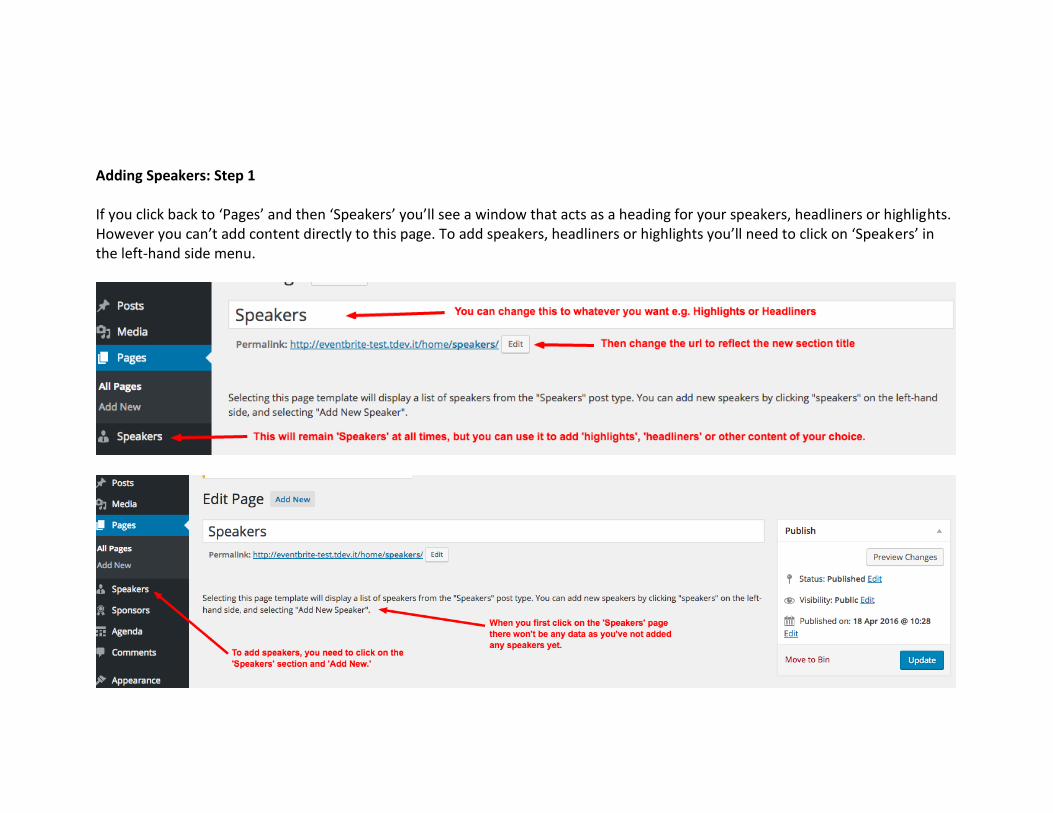
Adding Speakers: Step 1 If you click back to ‘Pages’ and then ‘Speakers’ you’ll see a window that acts as a heading for your speakers, headliners or highlights. However you can’t add content directly to this page. To add speakers, headliners or highlights you’ll need to click on ‘Speakers’ in the left-hand side menu.
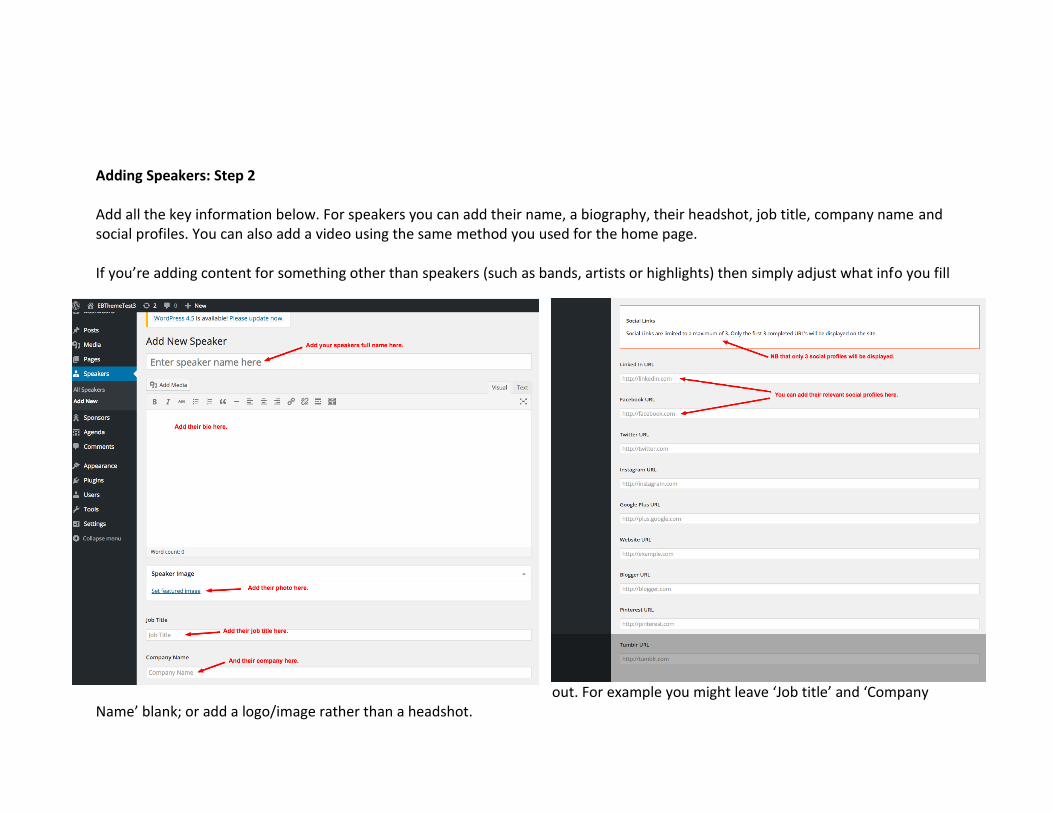
Adding Speakers: Step 2 Add all the key information below. For speakers you can add their name, a biography, their headshot, job title, company name and social profiles. You can also add a video using the same method you used for the home page. If you’re adding content for something other than speakers (such as bands, artists or highlights) then simply adjust what info you fill
out. For example you might leave ‘Job title’ and ‘Company Name’ blank; or add a logo/image rather than a headshot.

Adding Speakers: Step 3a
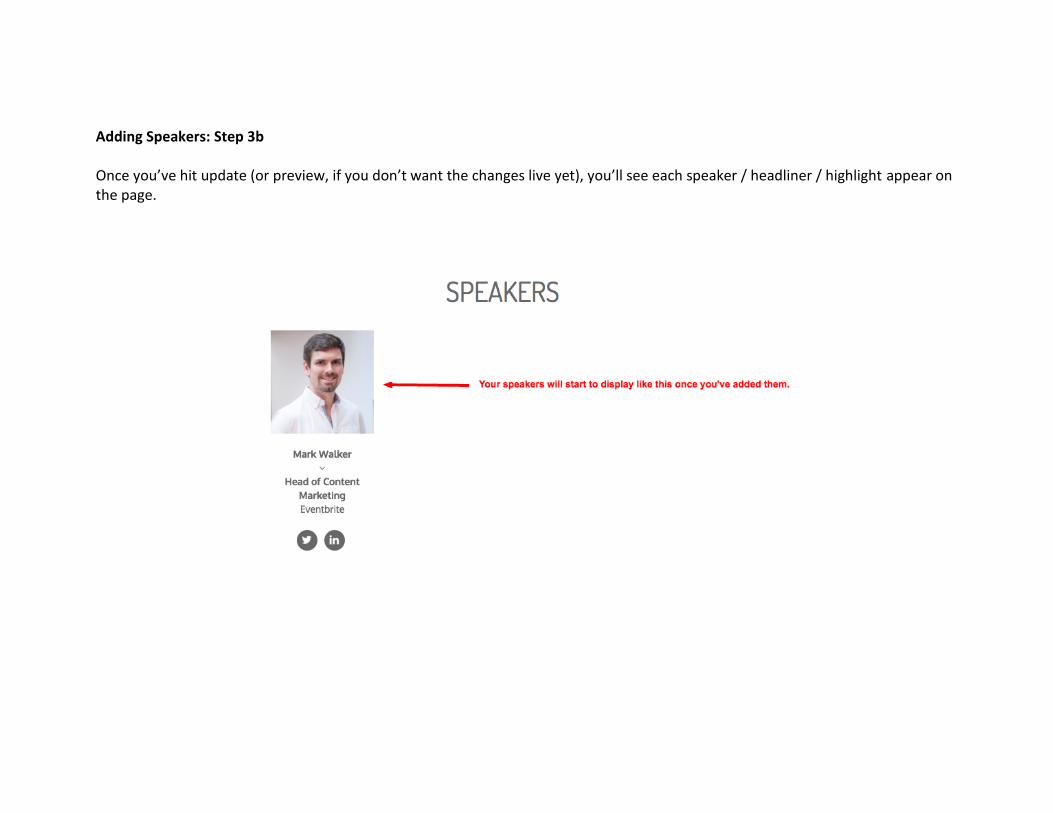
Adding Speakers: Step 3b Once you’ve hit update (or preview, if you don’t want the changes live yet), you’ll see each speaker / headliner / highlight appear on the page.
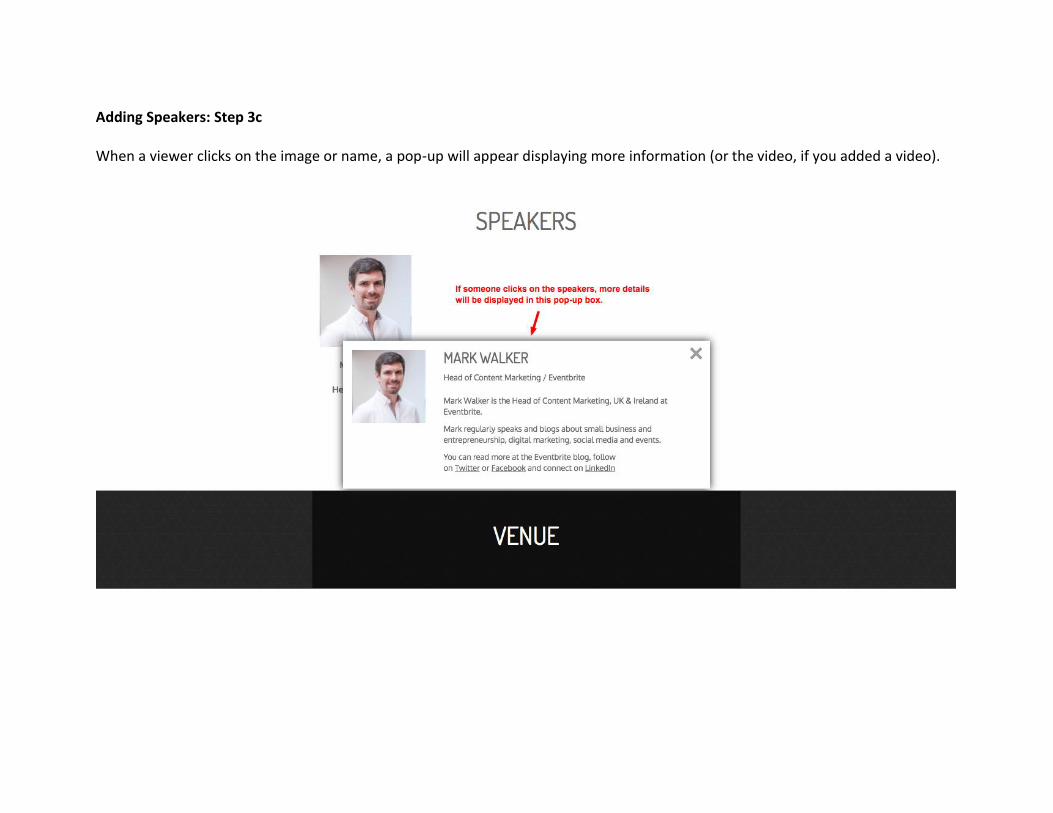
Adding Speakers: Step 3c When a viewer clicks on the image or name, a pop-up will appear displaying more information (or the video, if you added a video).
Adding The Venue
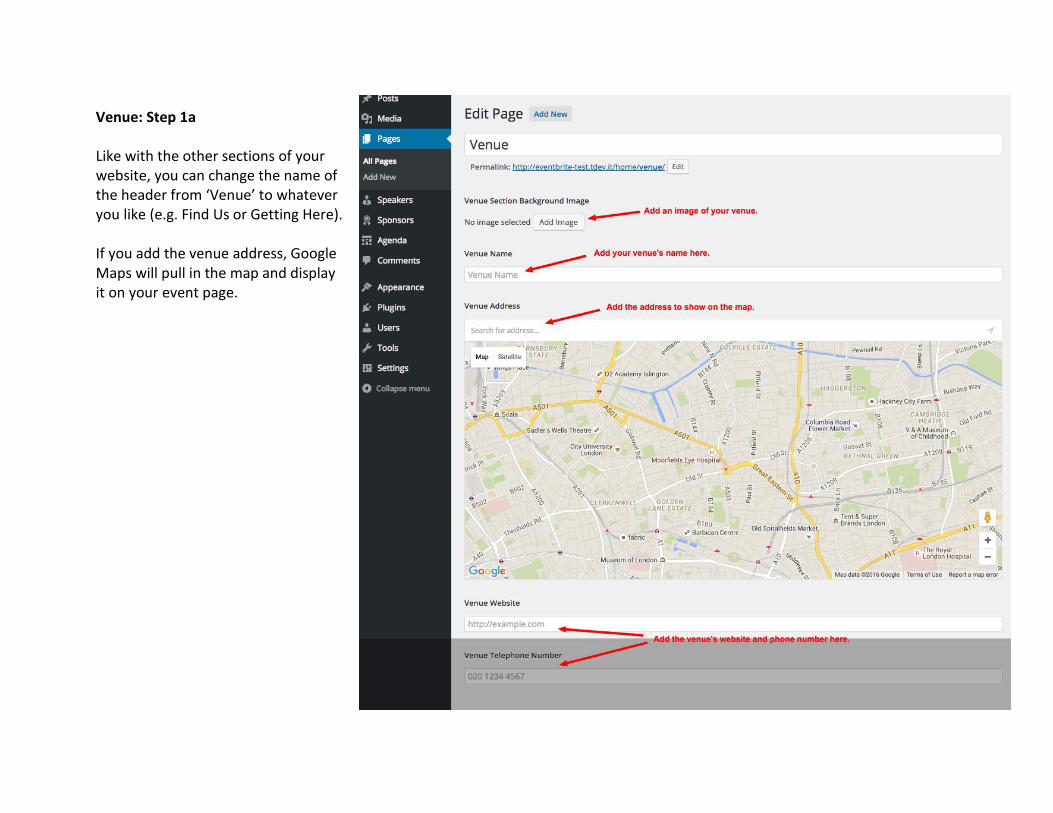
Venue: Step 1a Like with the other sections of your website, you can change the name of the header from ‘Venue’ to whatever you like (e.g. Find Us or Getting Here). If you add the venue address, Google Maps will pull in the map and display it on your event page.
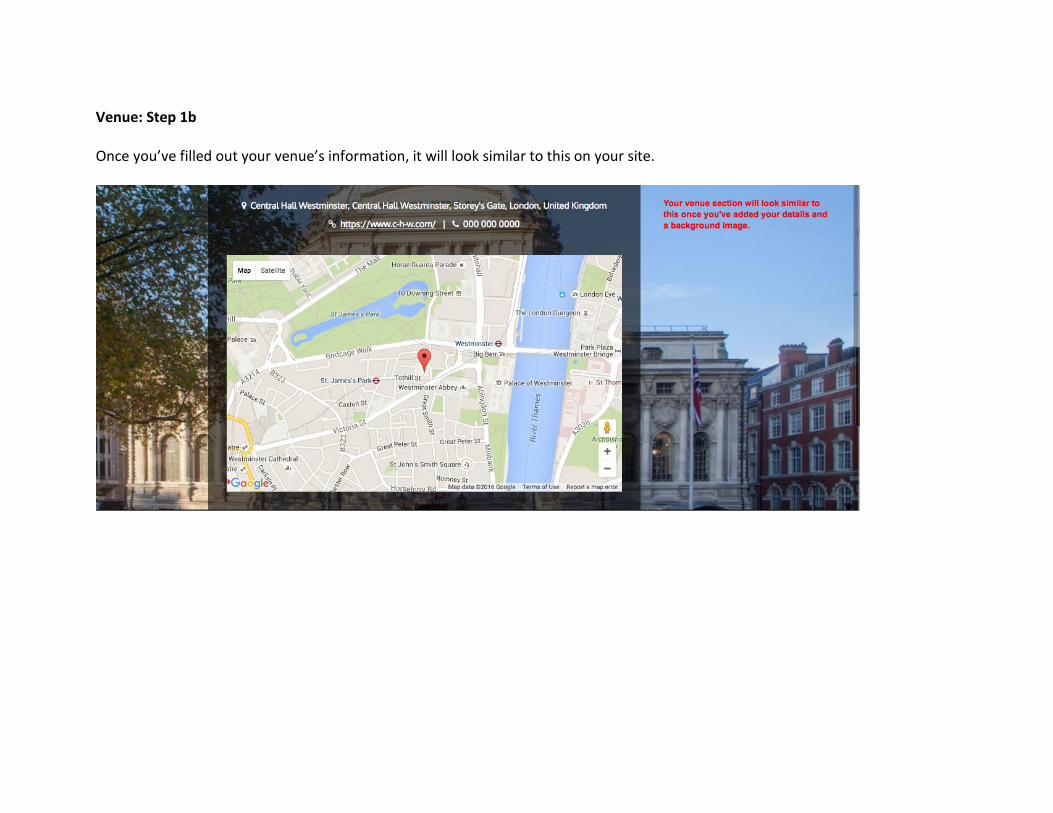
Venue: Step 1b Once you’ve filled out your venue’s information, it will look similar to this on your site.

Adding Sponsors / Media
Partners
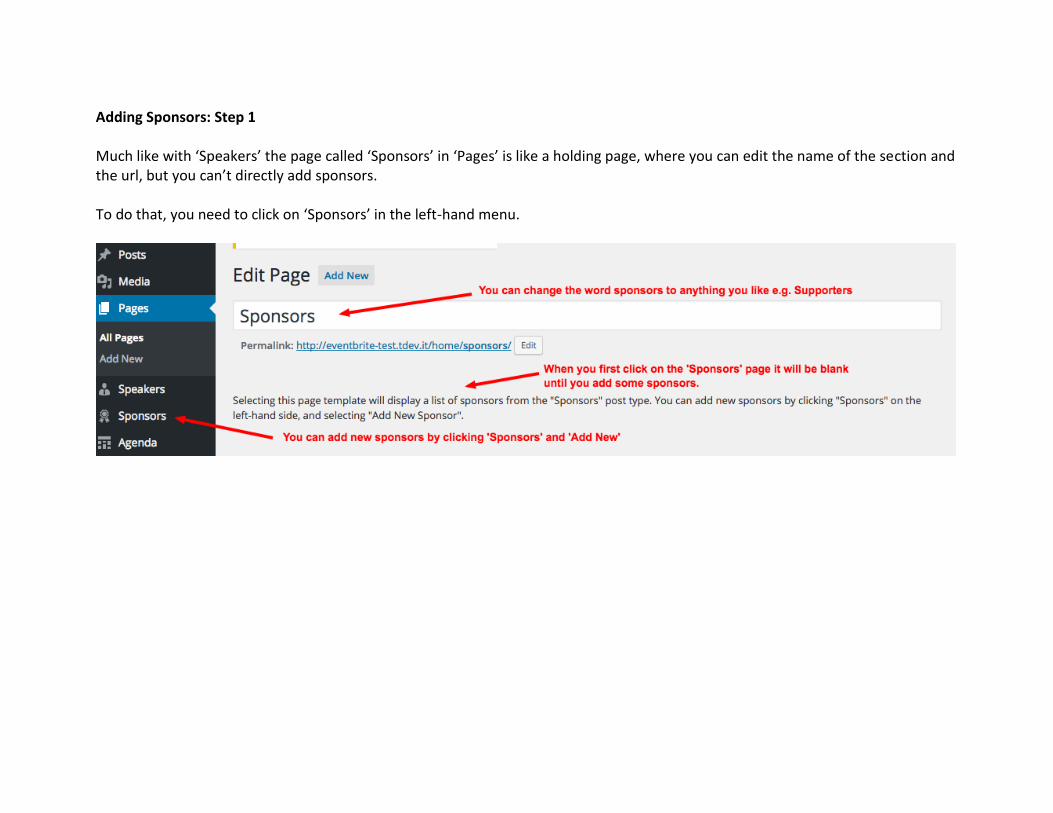
Adding Sponsors: Step 1 Much like with ‘Speakers’ the page called ‘Sponsors’ in ‘Pages’ is like a holding page, where you can edit the name of the section and the url, but you can’t directly add sponsors. To do that, you need to click on ‘Sponsors’ in the left-hand menu.
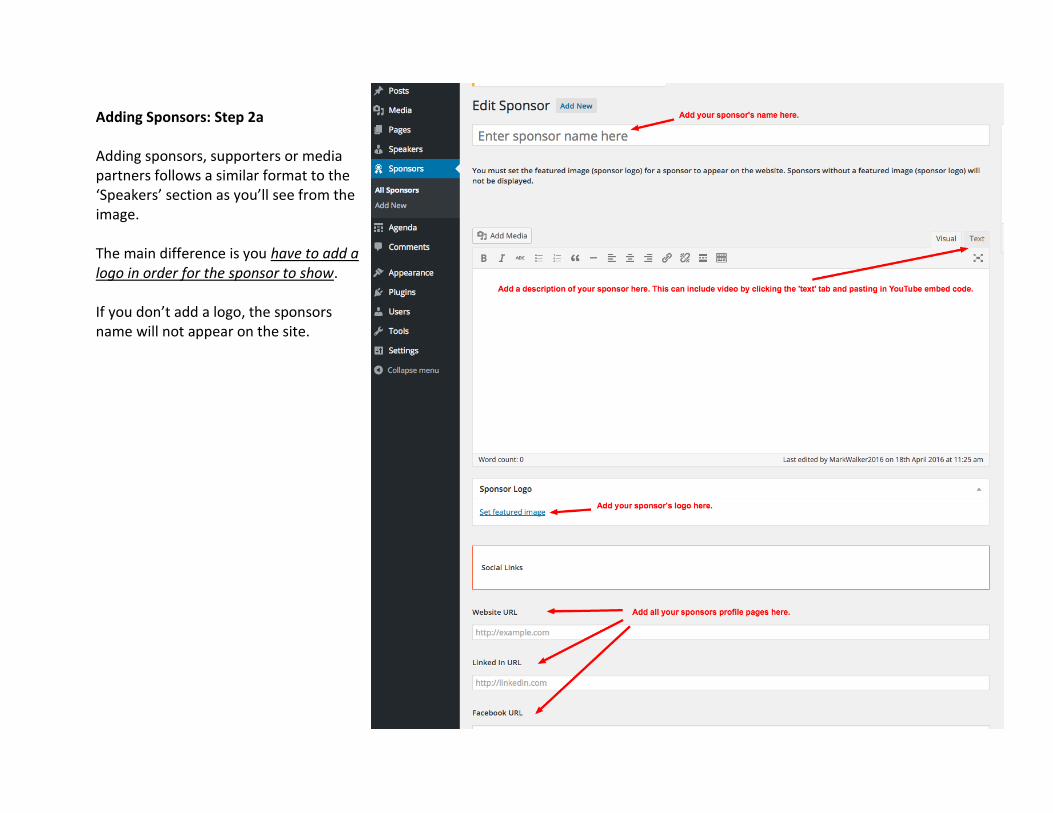
Adding Sponsors: Step 2a Adding sponsors, supporters or media partners follows a similar format to the ‘Speakers’ section as you’ll see from the image. The main difference is you have to add a logo in order for the sponsor to show. If you don’t add a logo, the sponsors name will not appear on the site.
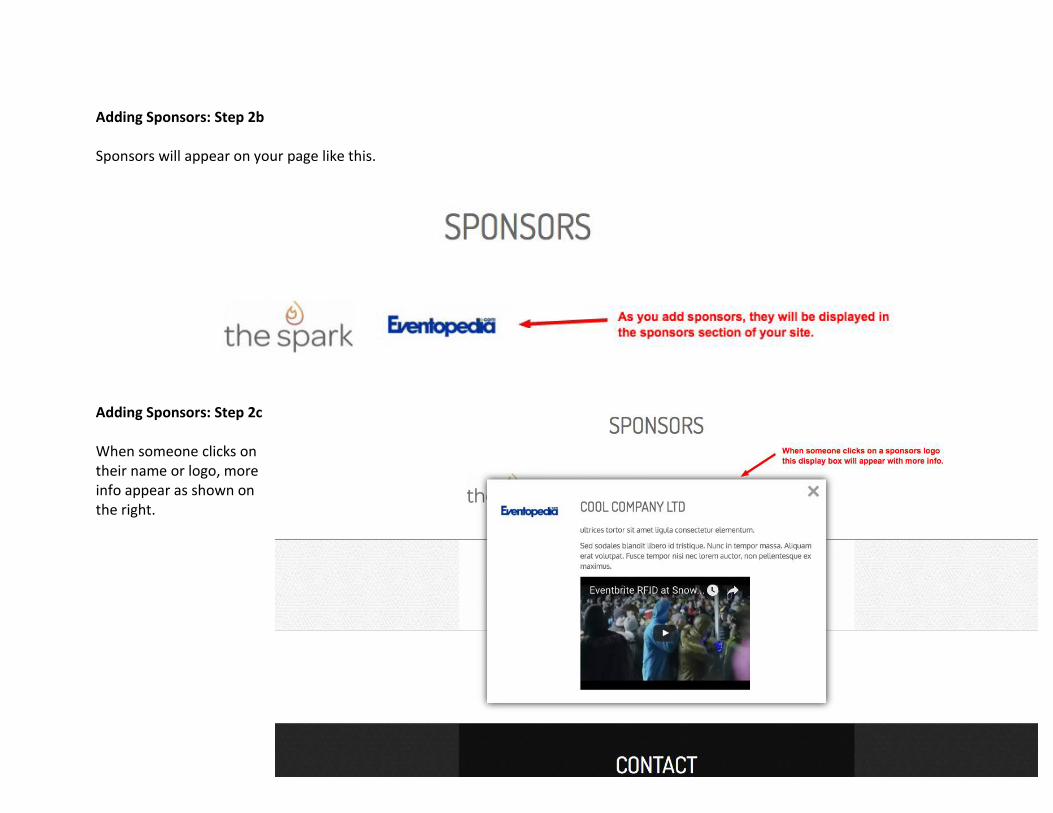
Adding Sponsors: Step 2b Sponsors will appear on your page like this.
Adding Sponsors: Step 2c When someone clicks on their name or logo, more info appear as shown on the right.
Adding an Agenda / Line-up /
Schedule
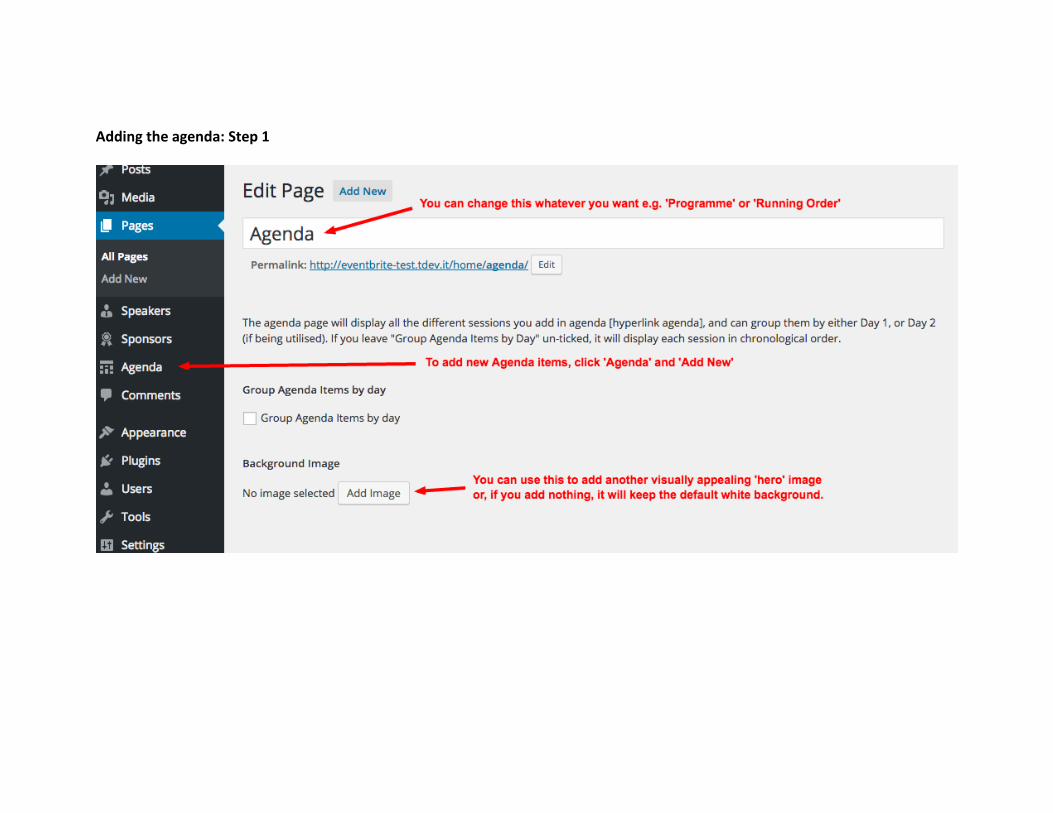
Adding the agenda: Step 1
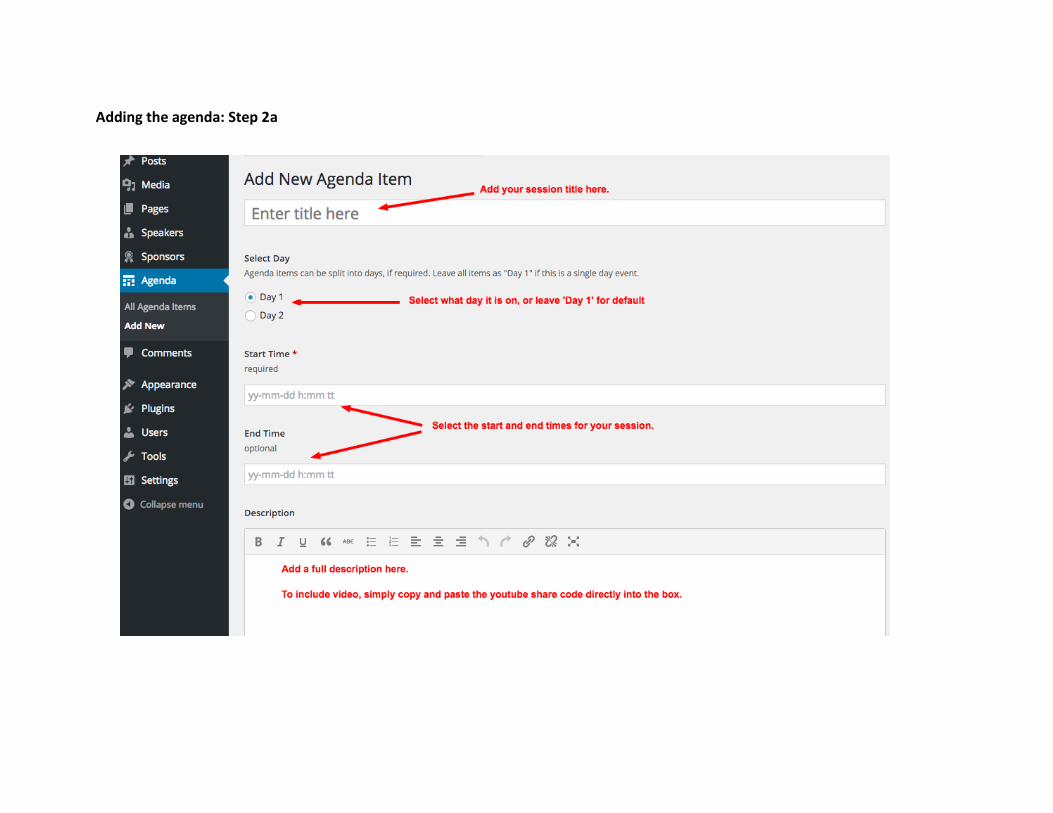
Adding the agenda: Step 2a
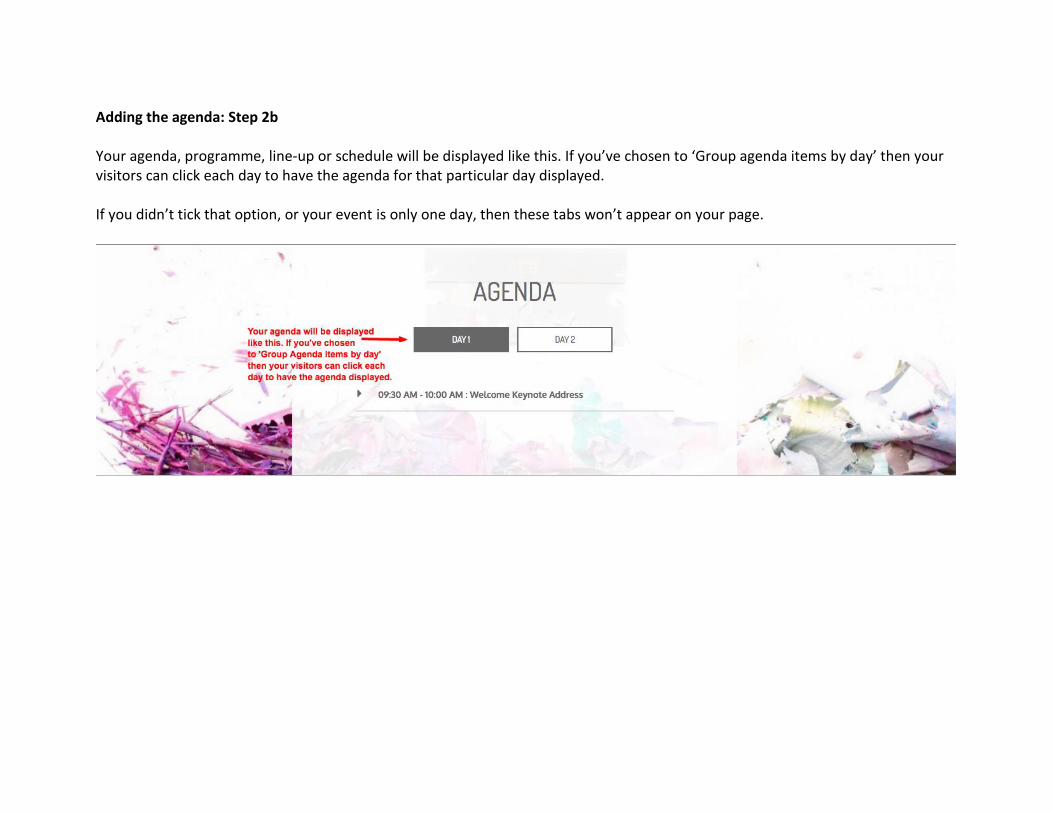
Adding the agenda: Step 2b Your agenda, programme, line-up or schedule will be displayed like this. If you’ve chosen to ‘Group agenda items by day’ then your visitors can click each day to have the agenda for that particular day displayed. If you didn’t tick that option, or your event is only one day, then these tabs won’t appear on your page.
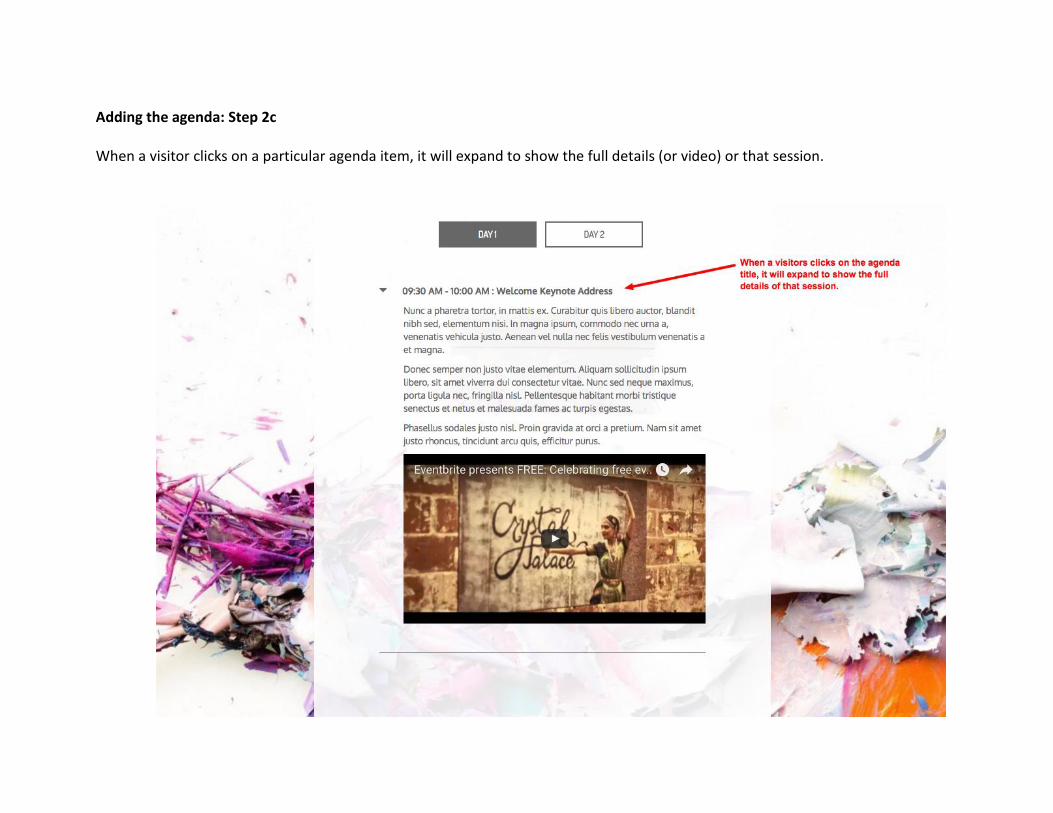
Adding the agenda: Step 2c When a visitor clicks on a particular agenda item, it will expand to show the full details (or video) or that session.

Ticketing and Registration
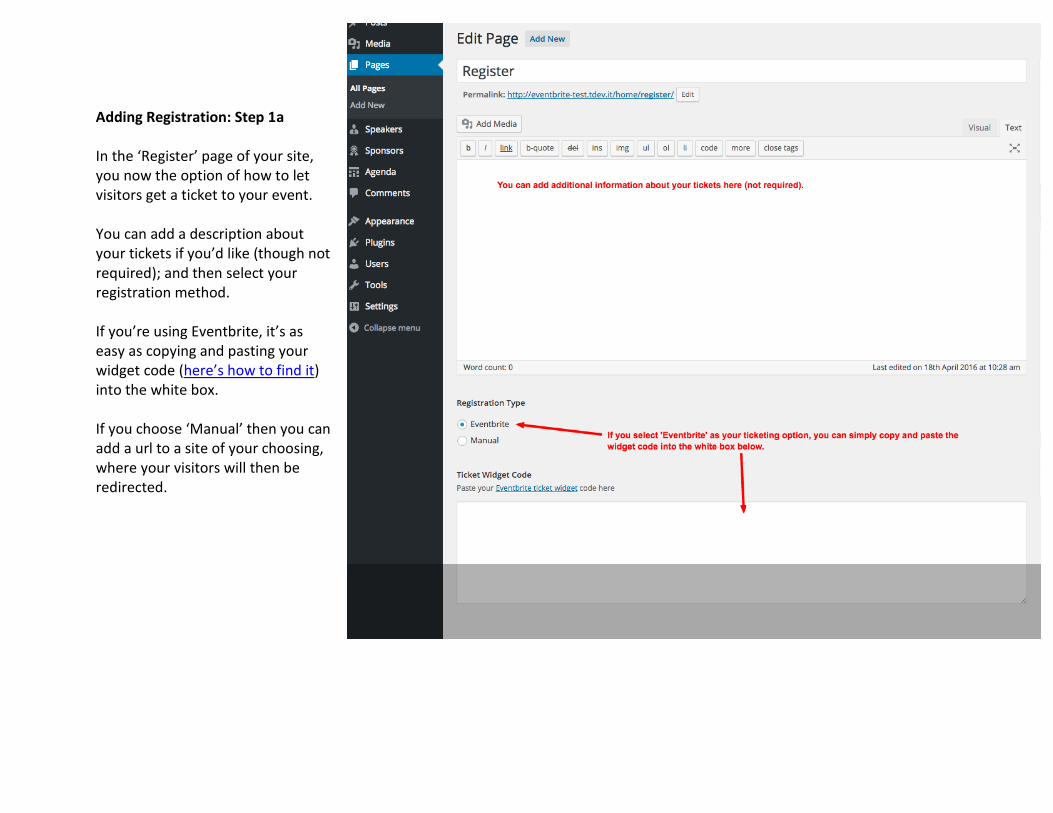
Adding Registration: Step 1a In the ‘Register’ page of your site, you now the option of how to let visitors get a ticket to your event. You can add a description about your tickets if you’d like (though not required); and then select your registration method. If you’re using Eventbrite, it’s as easy as copying and pasting your widget code (here’s how to find it) into the white box. If you choose ‘Manual’ then you can add a url to a site of your choosing, where your visitors will then be redirected.
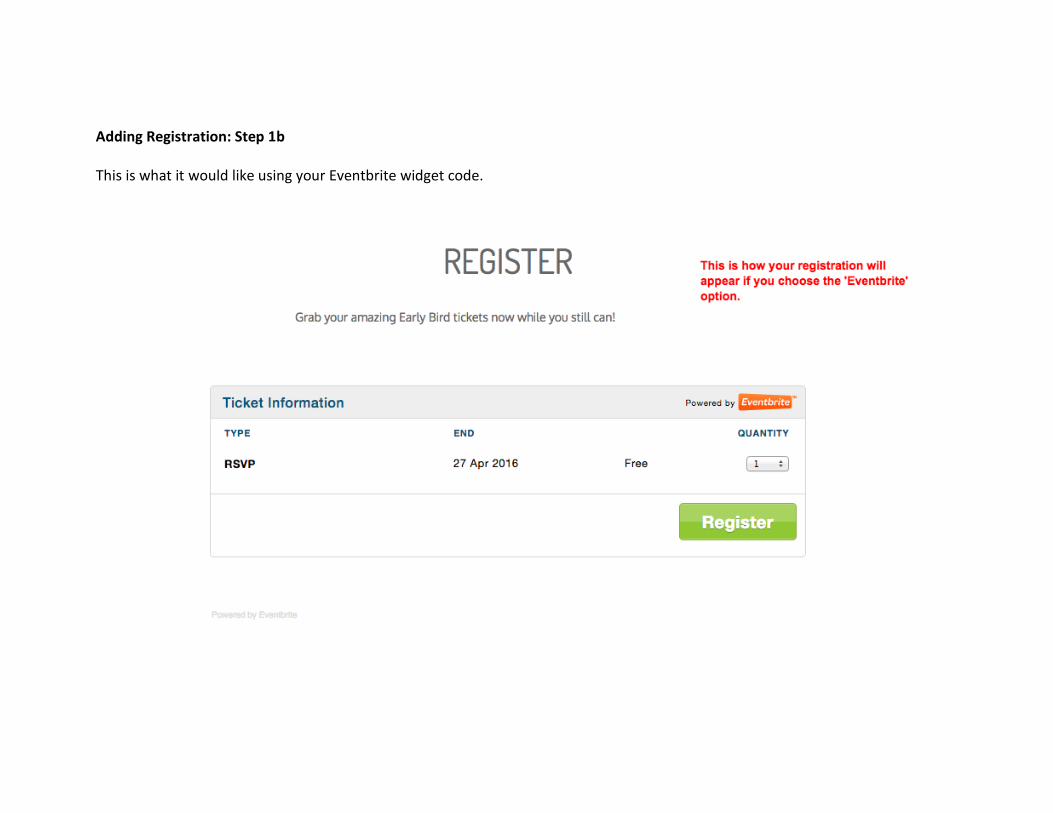
Adding Registration: Step 1b This is what it would like using your Eventbrite widget code.

Contact Us
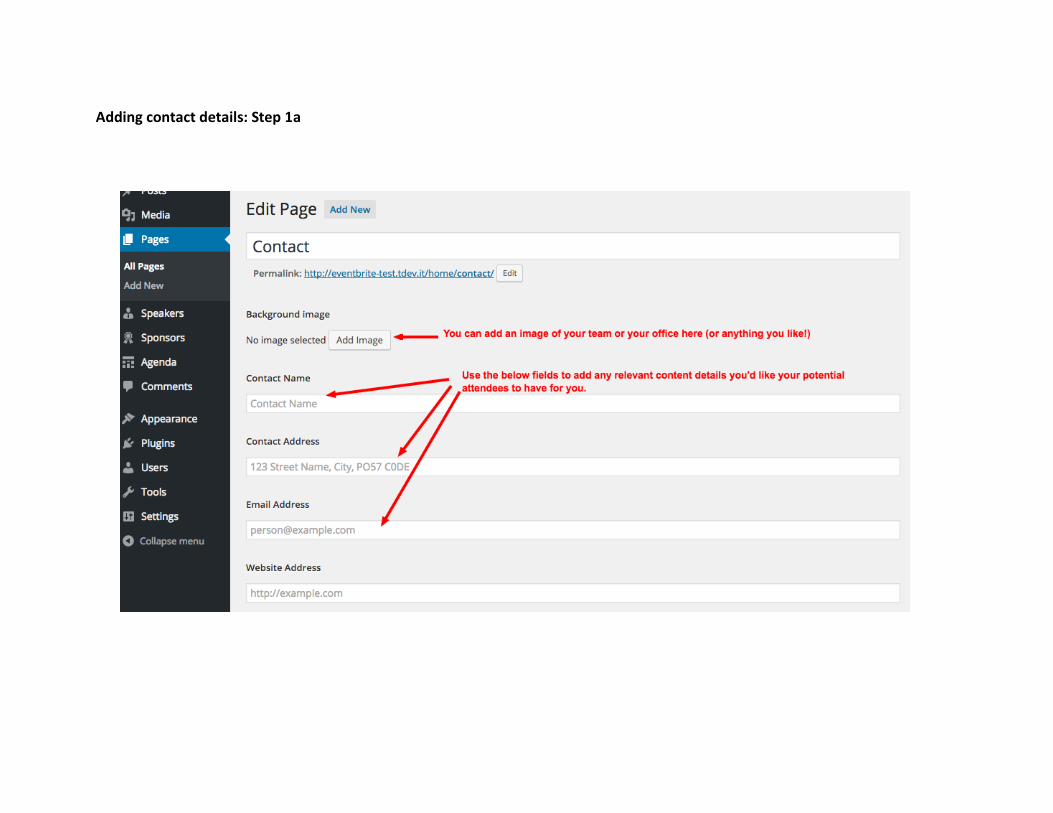
Adding contact details: Step 1a
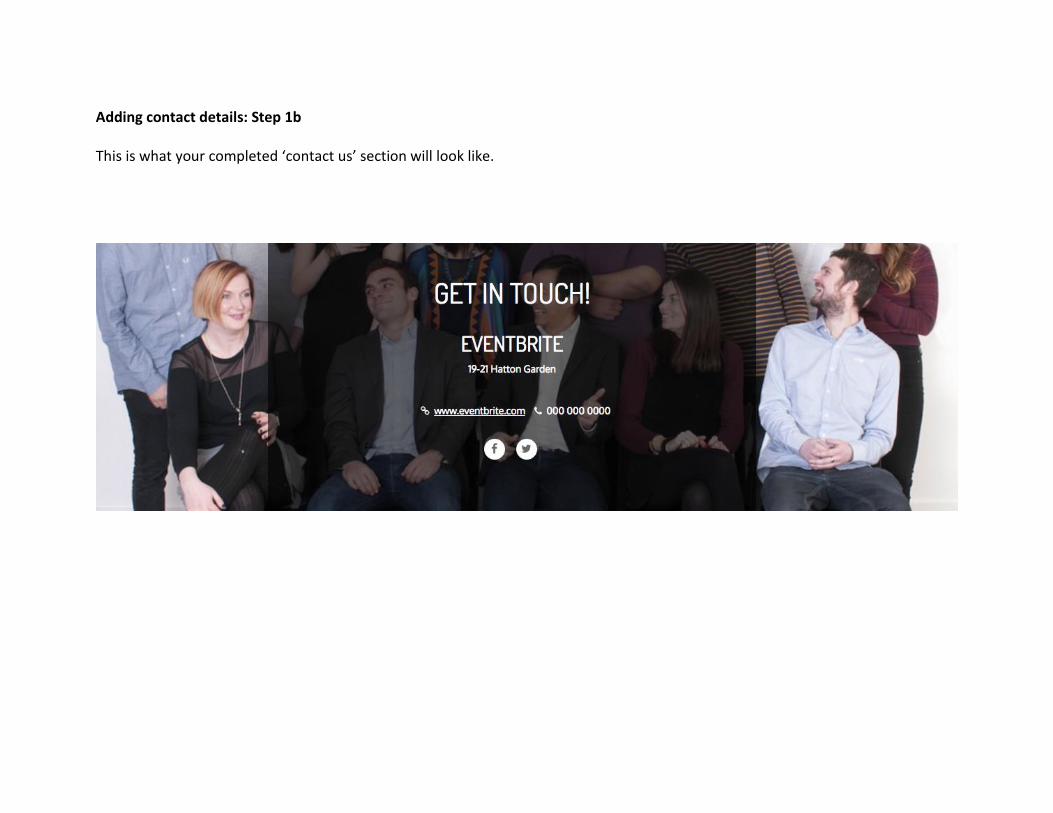
Adding contact details: Step 1b This is what your completed ‘contact us’ section will look like.
T&Cs and FAQs
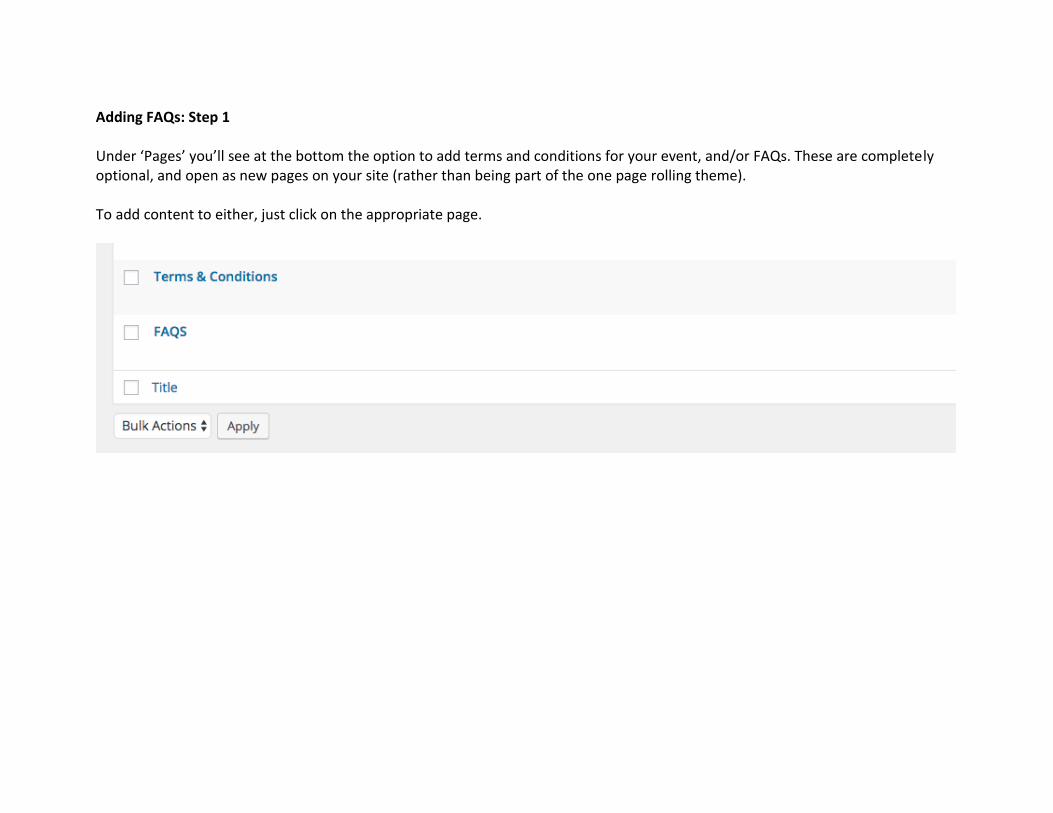
Adding FAQs: Step 1 Under ‘Pages’ you’ll see at the bottom the option to add terms and conditions for your event, and/or FAQs. These are completely optional, and open as new pages on your site (rather than being part of the one page rolling theme). To add content to either, just click on the appropriate page.
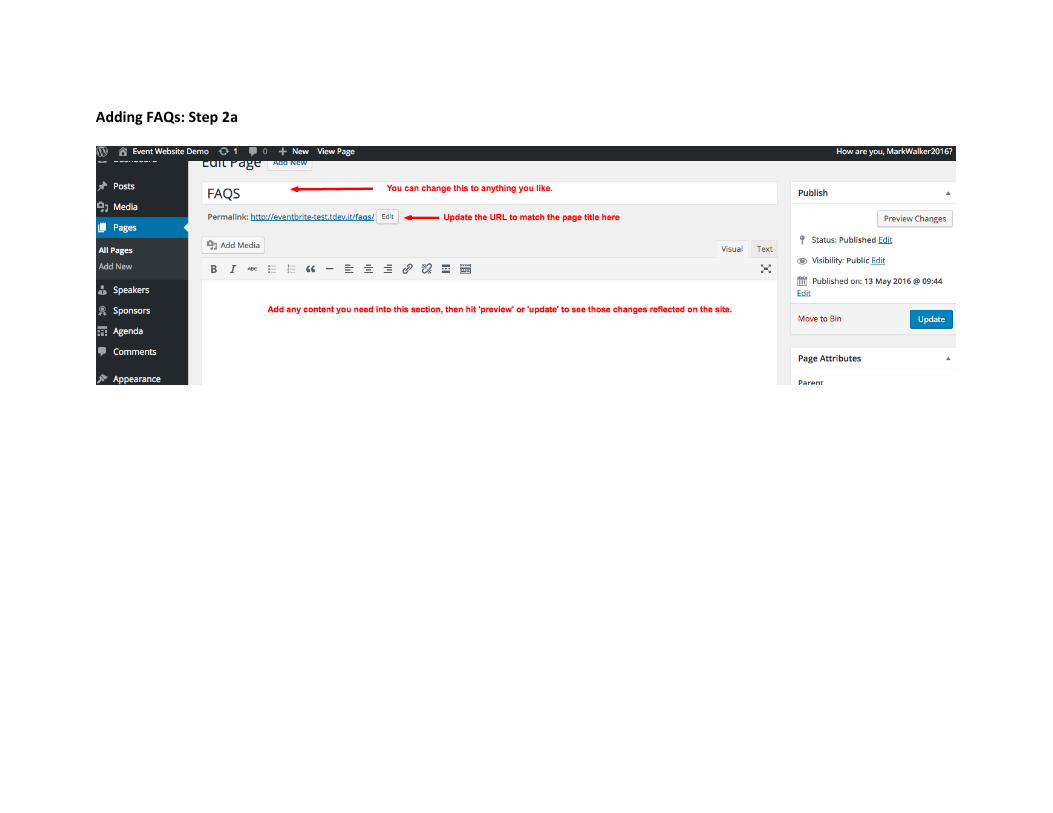
Adding FAQs: Step 2a

Adding FAQs: Step 2b This is how your FAQ or T&C pages will look once content is added.
Congratulations!
You’re all set to go live and tell the world about your great new event
website.